HOLIDAY DONATION DRIVE - SUPPORT MSW - DO YOUR PART TO KEEP THIS GREAT FORUM GOING!
×


James H
-
Posts
6,062 -
Joined
-
Last visited
Content Type
Profiles
Forums
Gallery
Events
Everything posted by James H
-
 Yes, Coureur and also the Amati Victory prototype. My VM Alert will have to stay in its box a while longer yet. 🤣
- 436 replies
-
- 4
-

-
- vanguard models
- alert
- (and 1 more)
-
Excellent work. Makes me want to start mine when Flirt is complete!
- 436 replies
-
- 3
-
-
- vanguard models
- alert
- (and 1 more)
-
That guy, Janos, is a doofus extraordinaire. He decided that he'd boycott everything Chinese because of COVID, yet probably relies on Chinese tech to create and post that message.
-
Without a doubt!
-
Do you supply anything for the black nails I see? Such as black fishing line?
-
Hopefully we'll have something to post very soon.
-
Moved to correct forum area.
-
Moved to correct forum area.
-
Moved to a more appropriate forum area.
-
Vintage unfinished speedboat model, any ideas?
James H replied to LMDAVE's topic in Wood ship model kits
Moved to correct forum area. -
You're going a lovely job on a beautiful ship. Aggy is one of my favourites.
-
Hi Zbigniew Great to have you with us here at MSW. I very much look forward to that build log on a model based on Le Superbe.
-
ancre Coureur by cafmodel - 1/48
James H replied to cafmodel's topic in - Build logs for subjects built 1751 - 1800
Beautiful work and a beautiful subject too. I might get the Coureur drawings from Ancre too. -
Exquisite work and photography!
-
ancre Coureur by cafmodel - 1/48
James H replied to cafmodel's topic in - Build logs for subjects built 1751 - 1800
Outstanding! Can't wait to see this with its clinker hull 🏆 -
I have actually used iron pigment on them since painting too.
- 109 replies
-
- 2
-
-
- Vanguard Models
- Flirt
- (and 1 more)
-
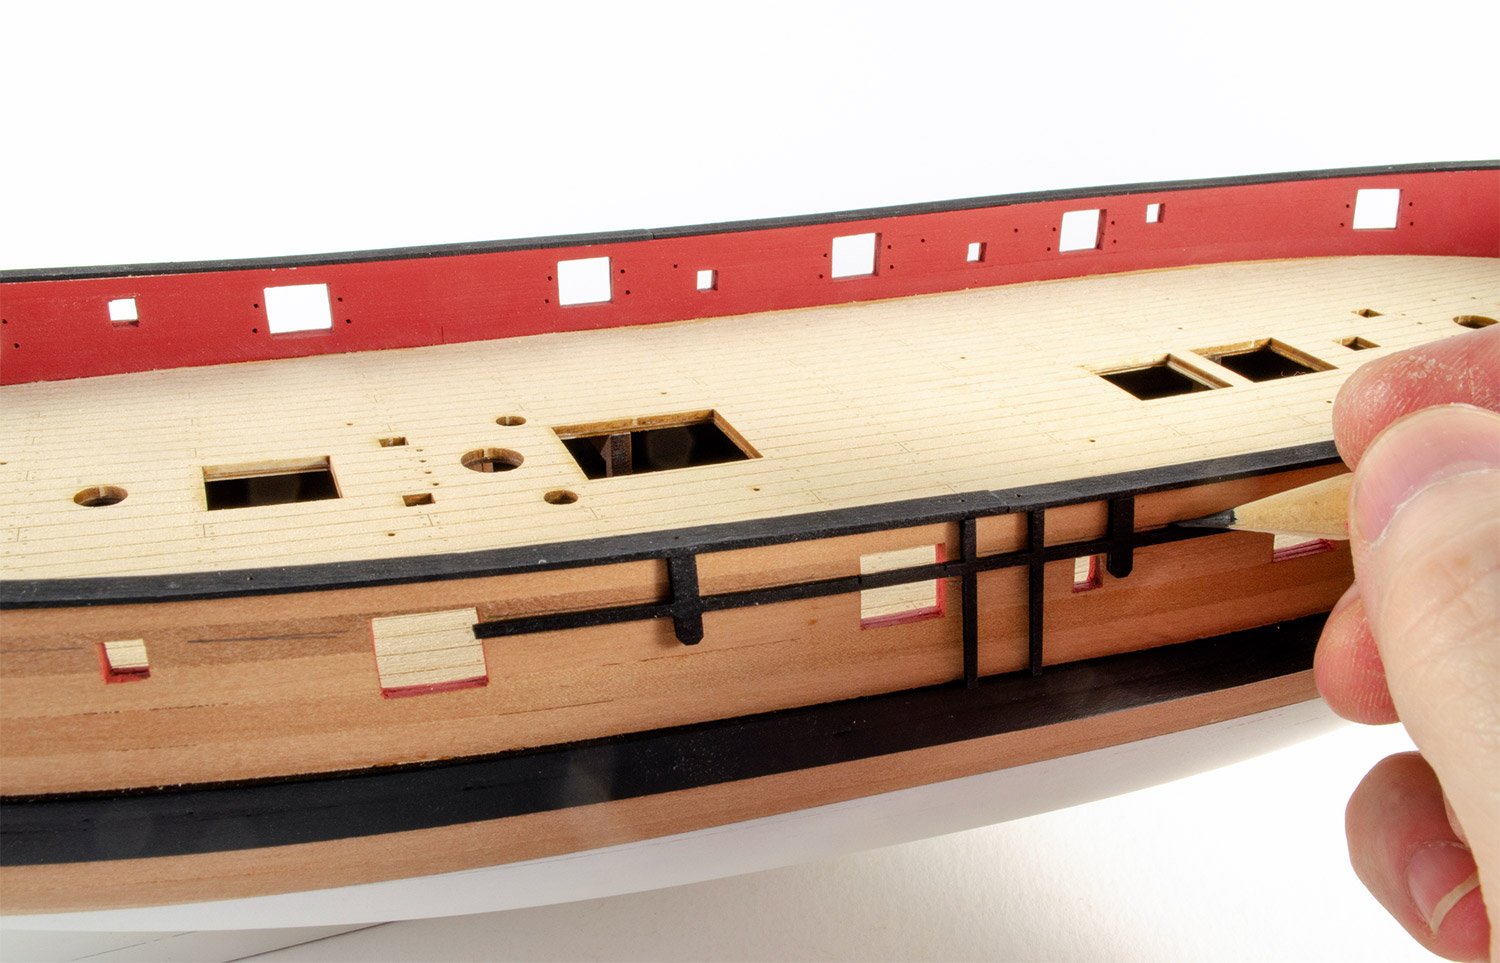
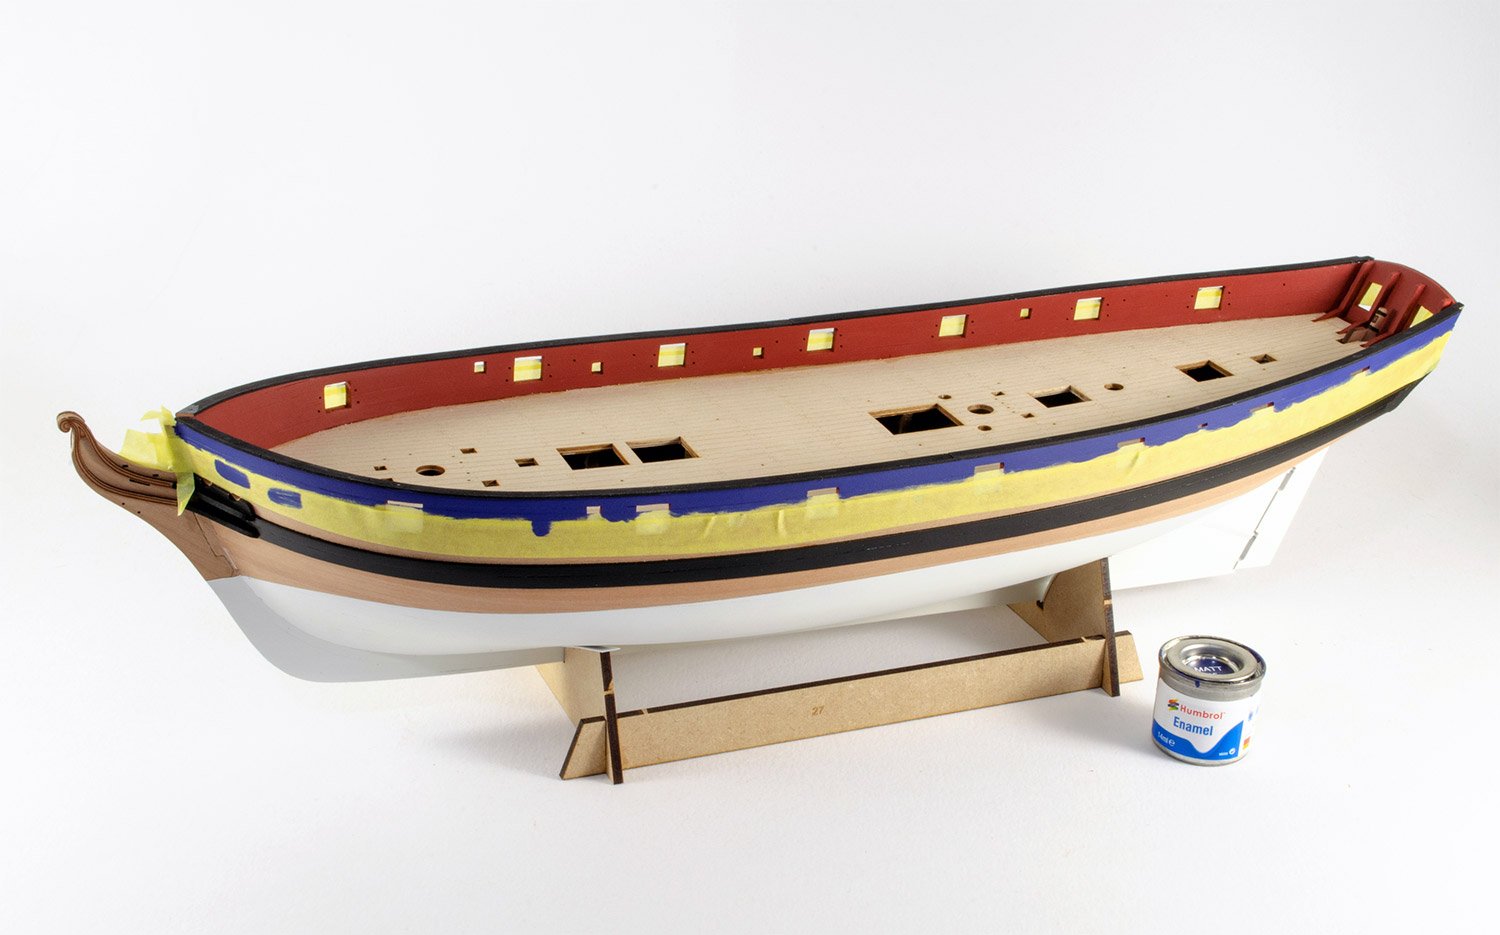
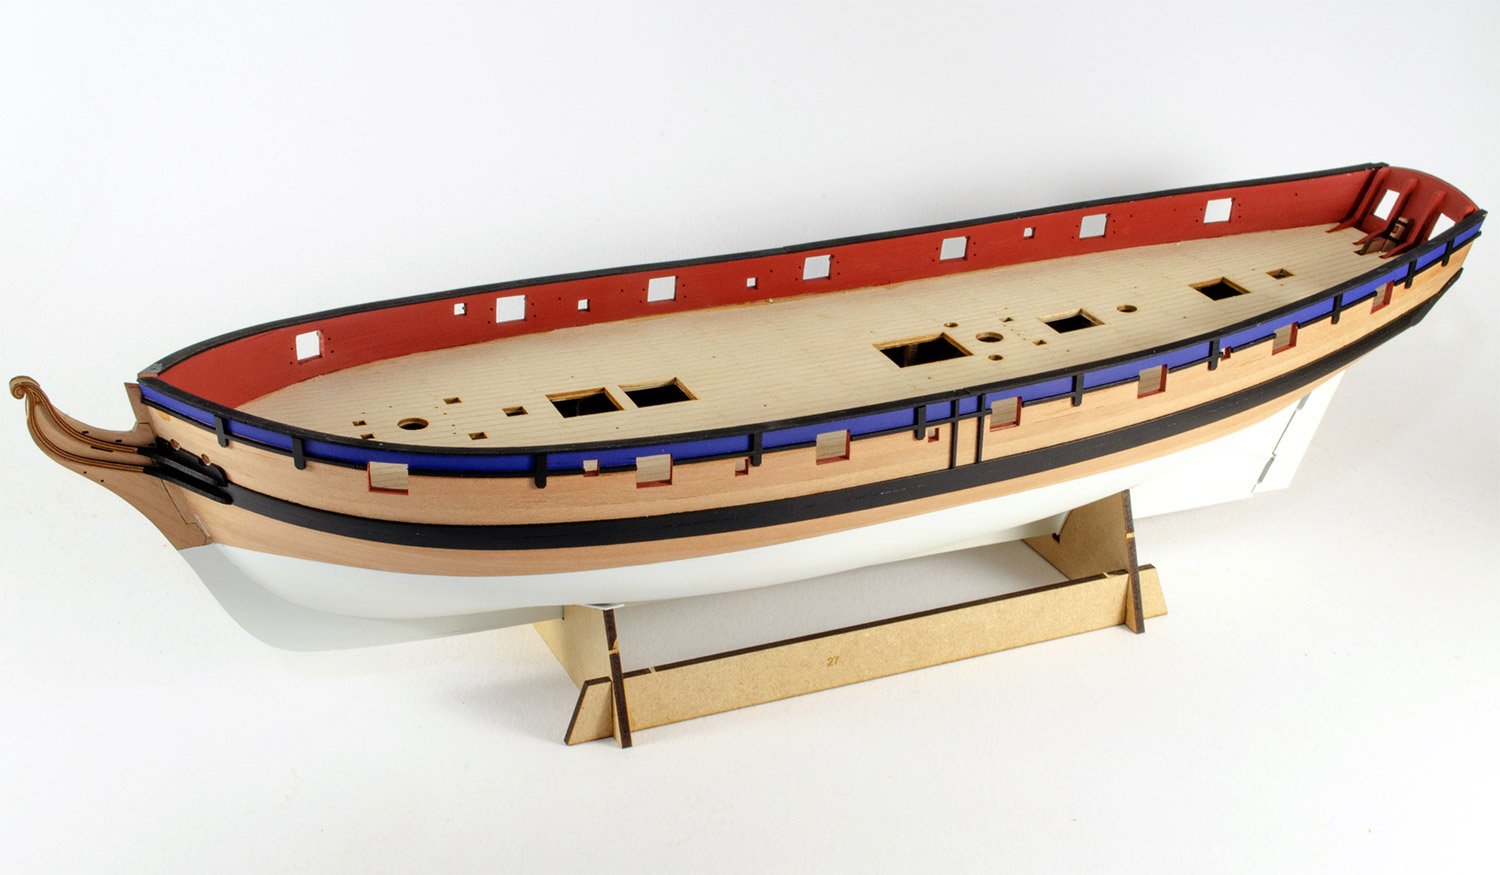
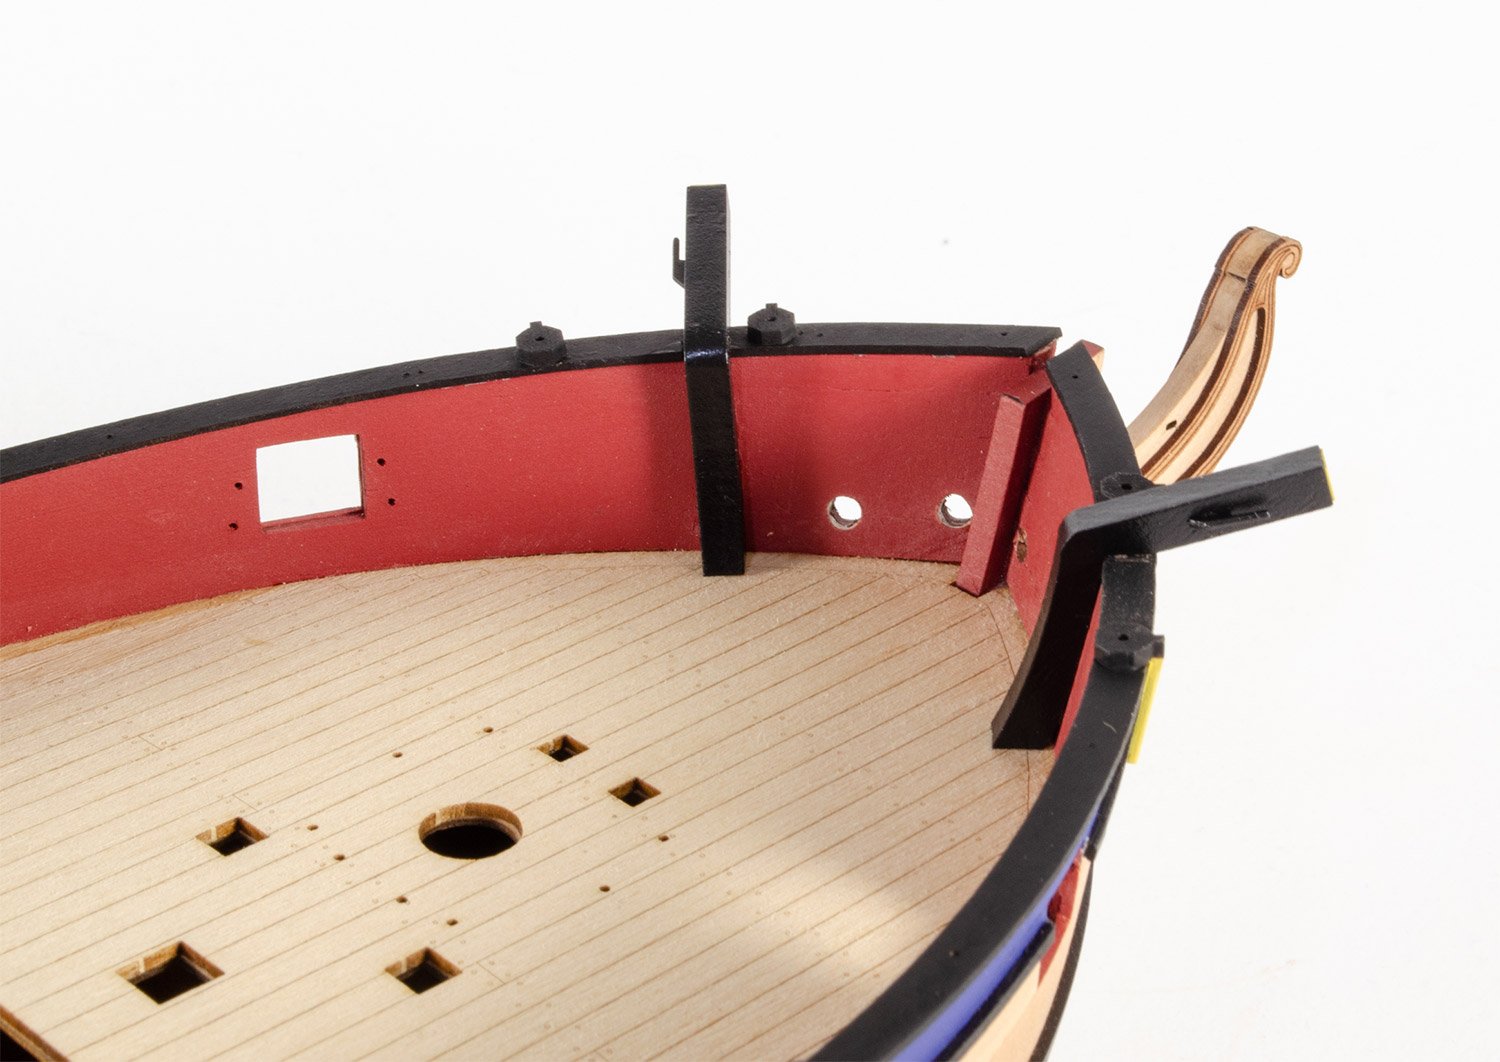
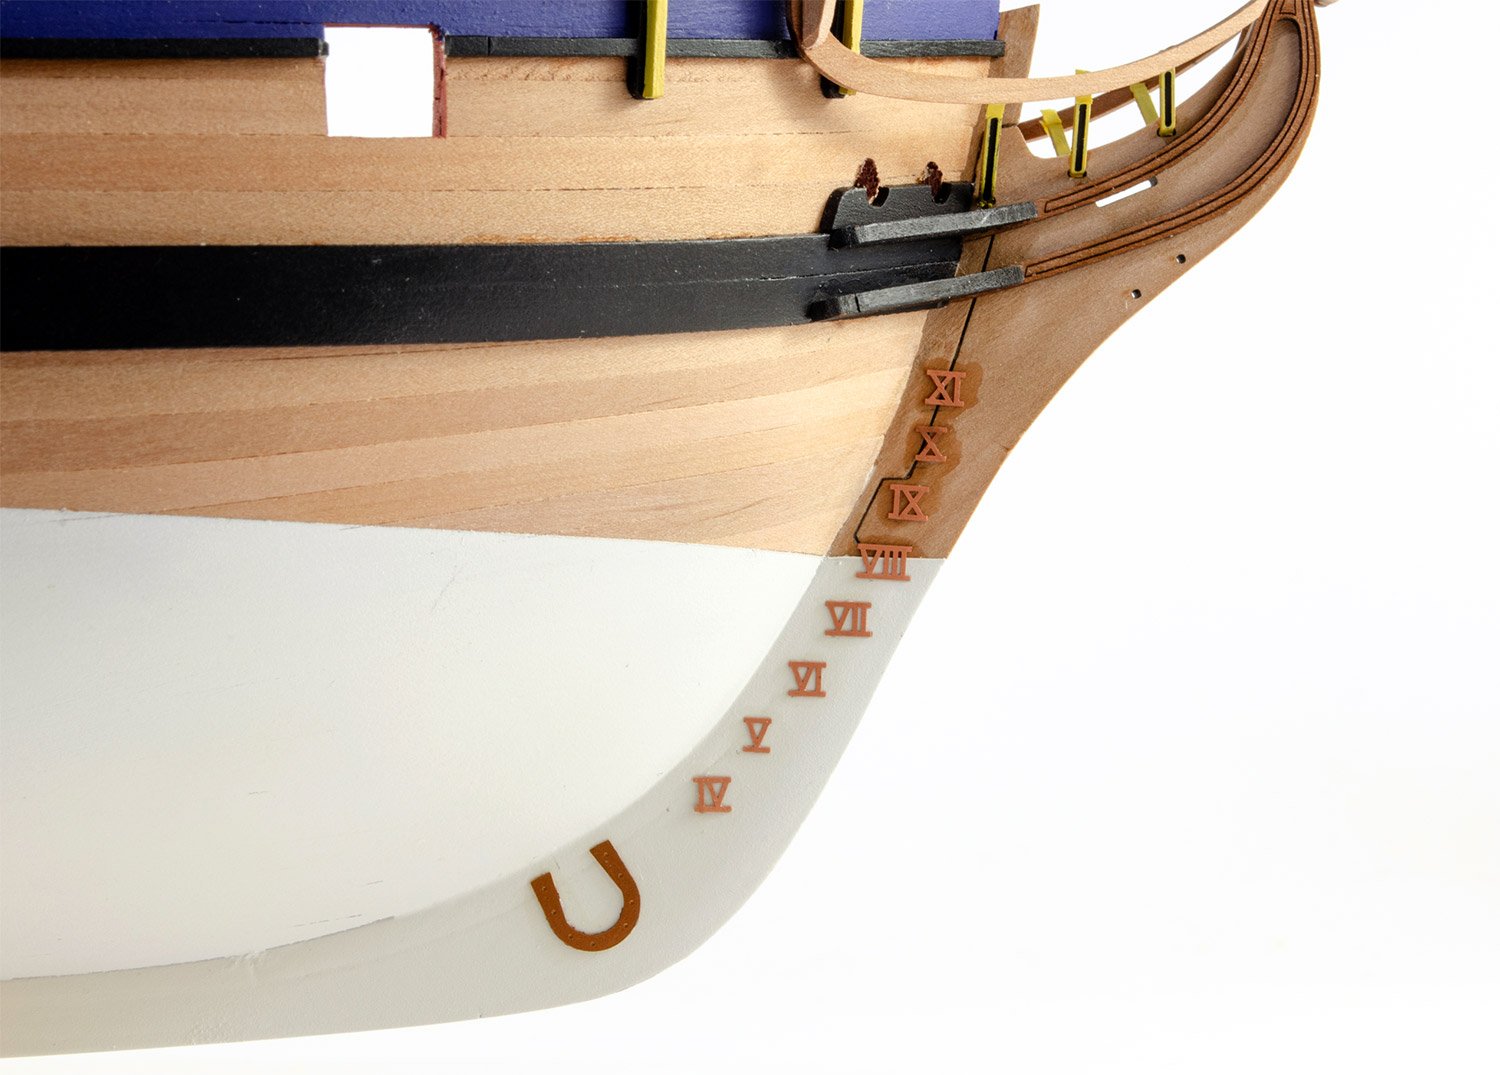
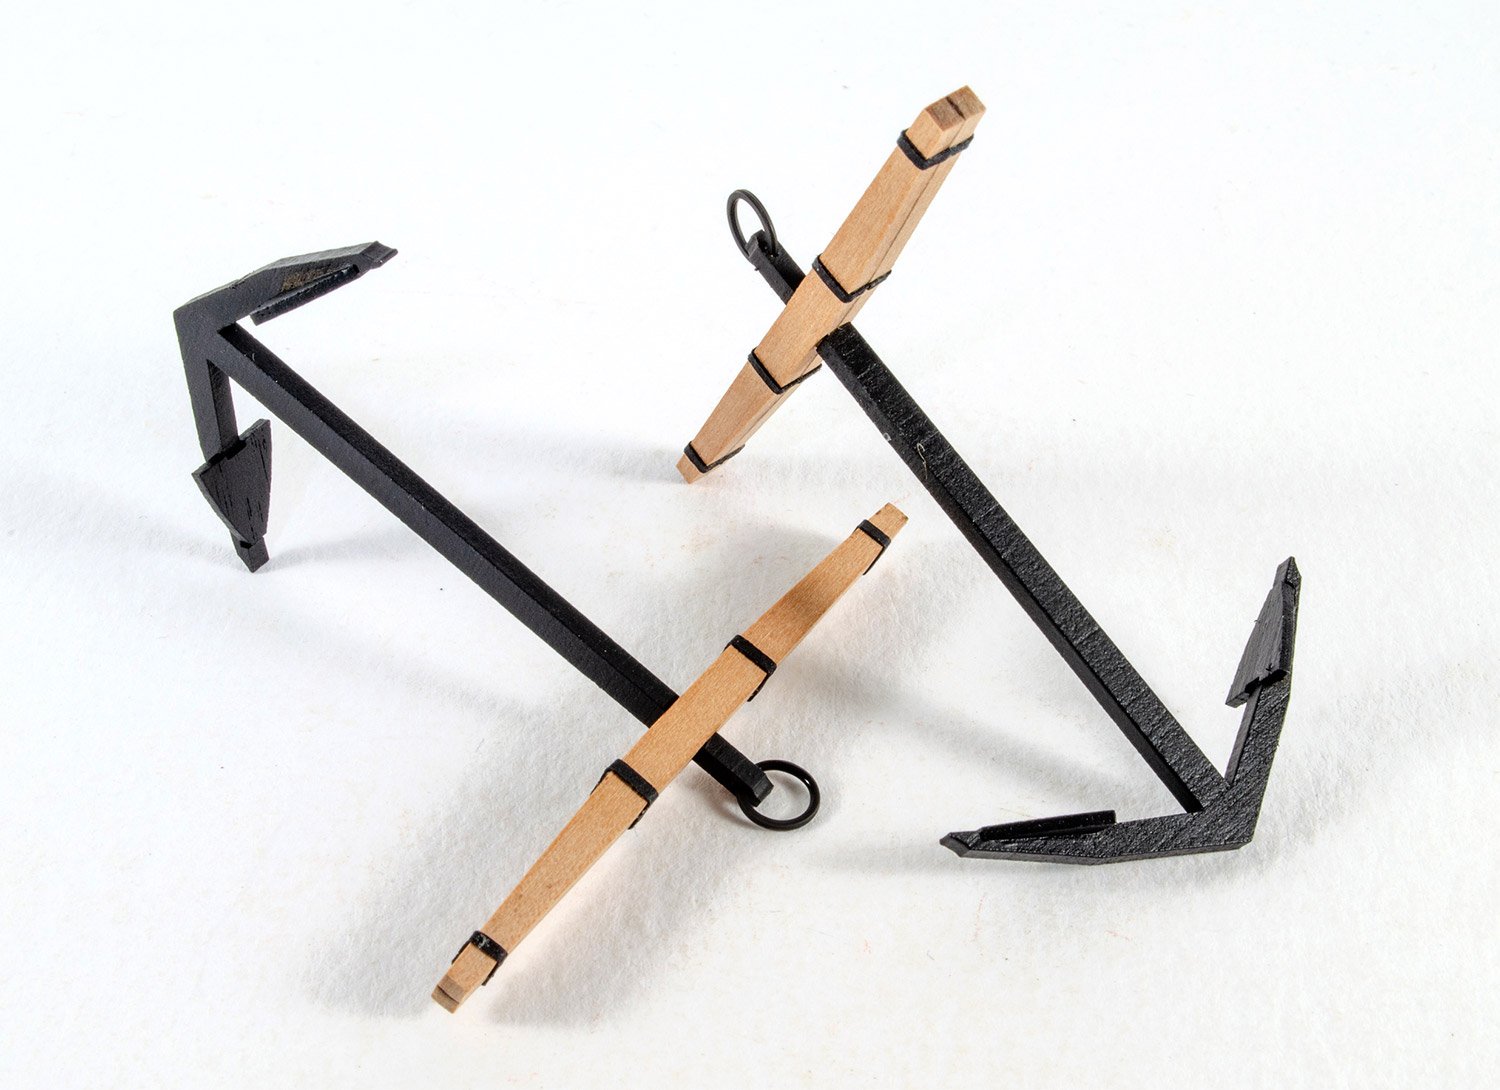
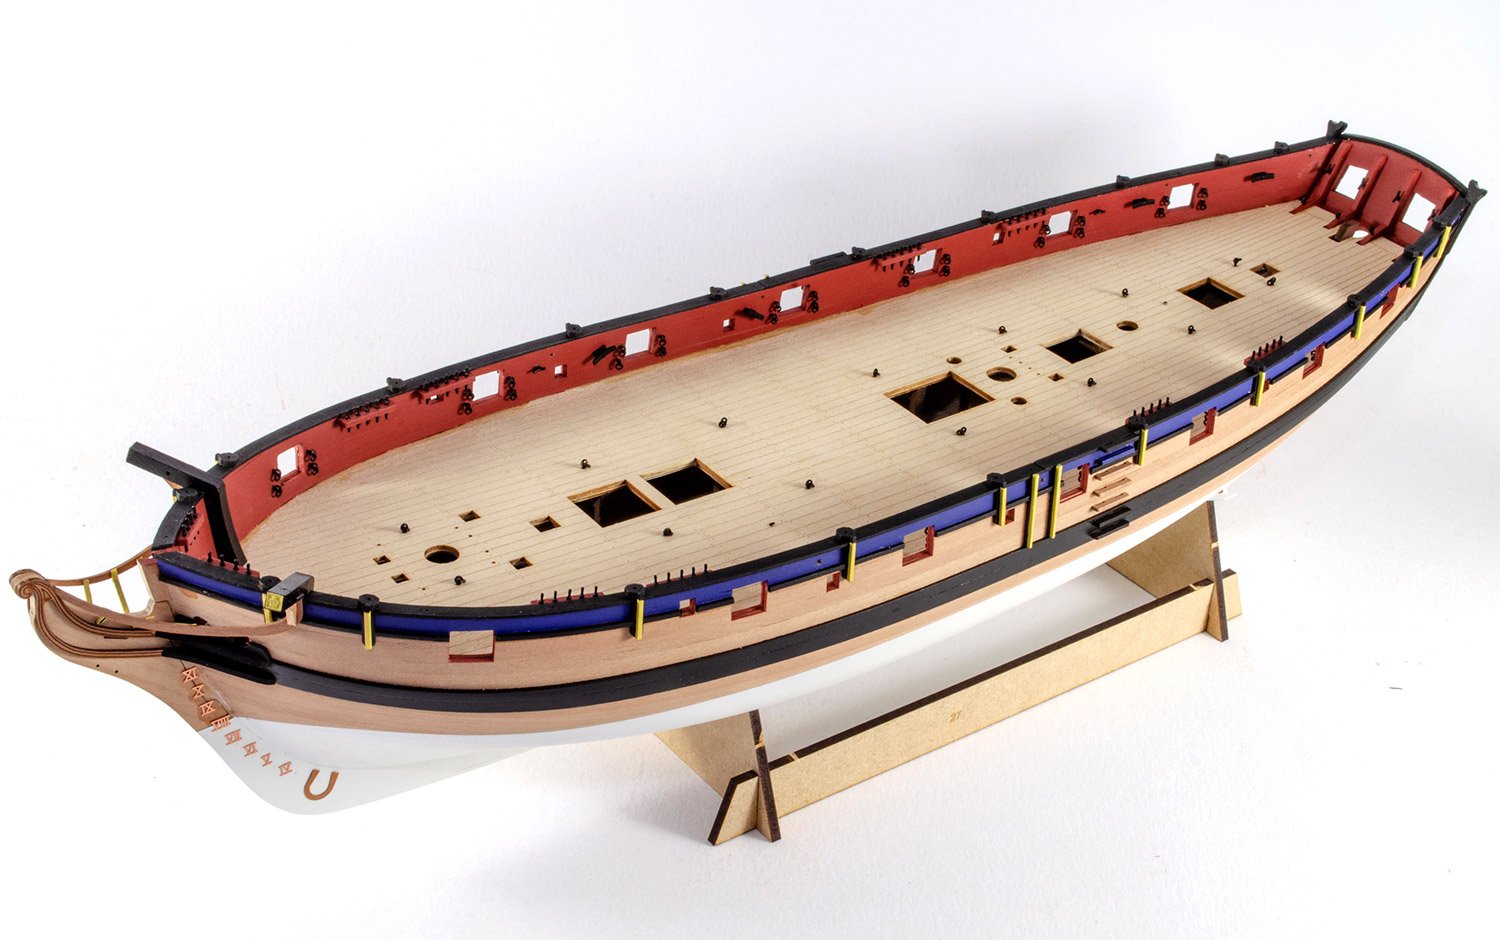
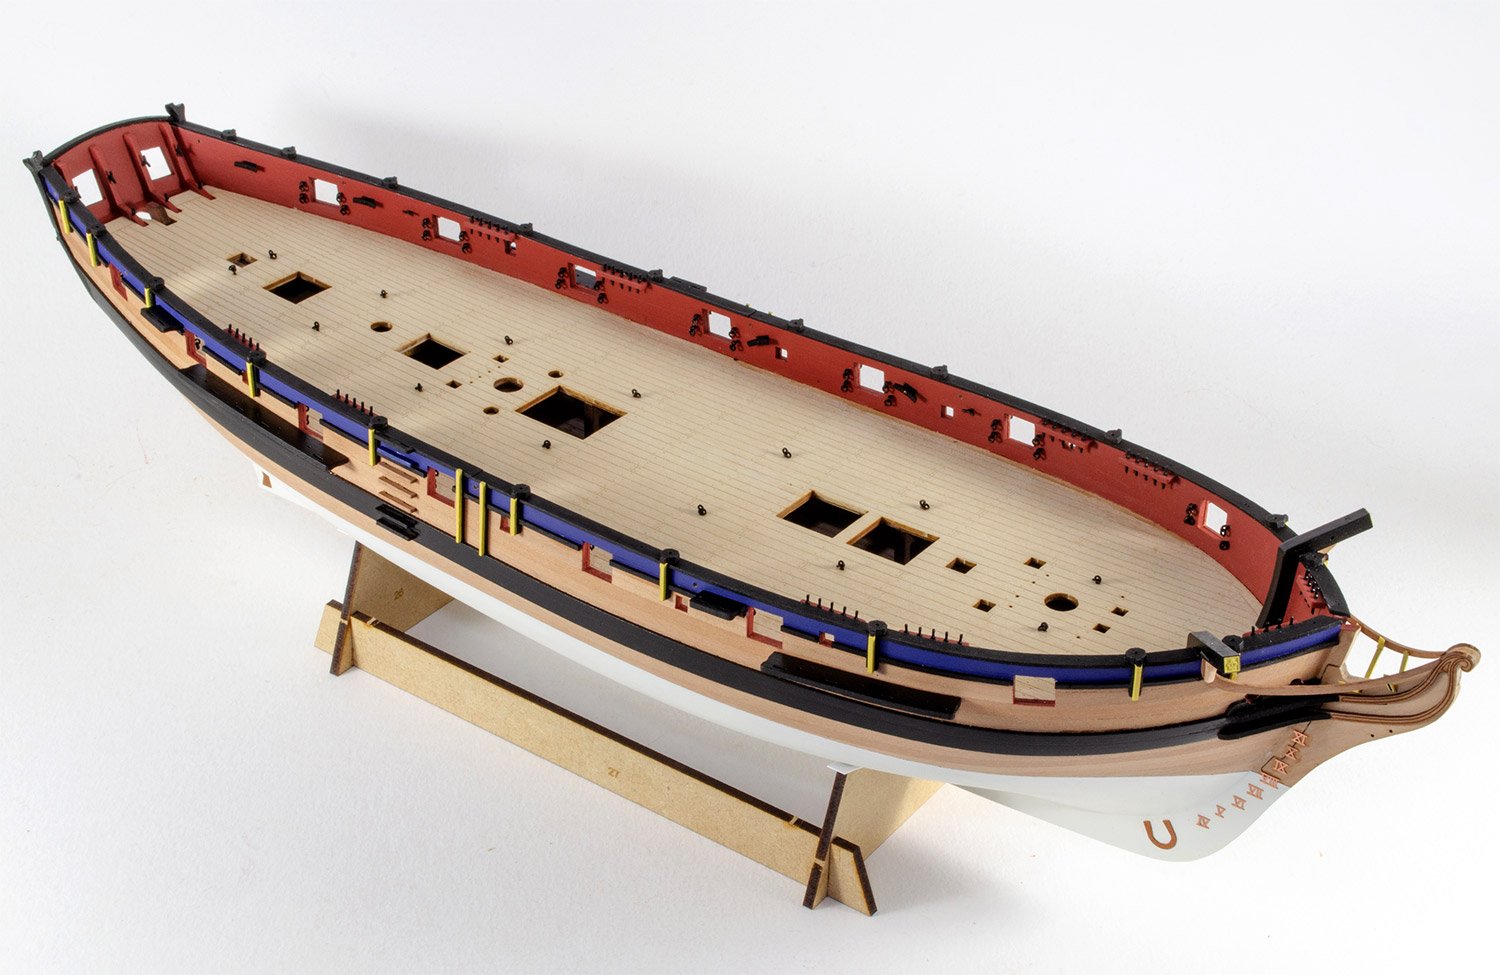
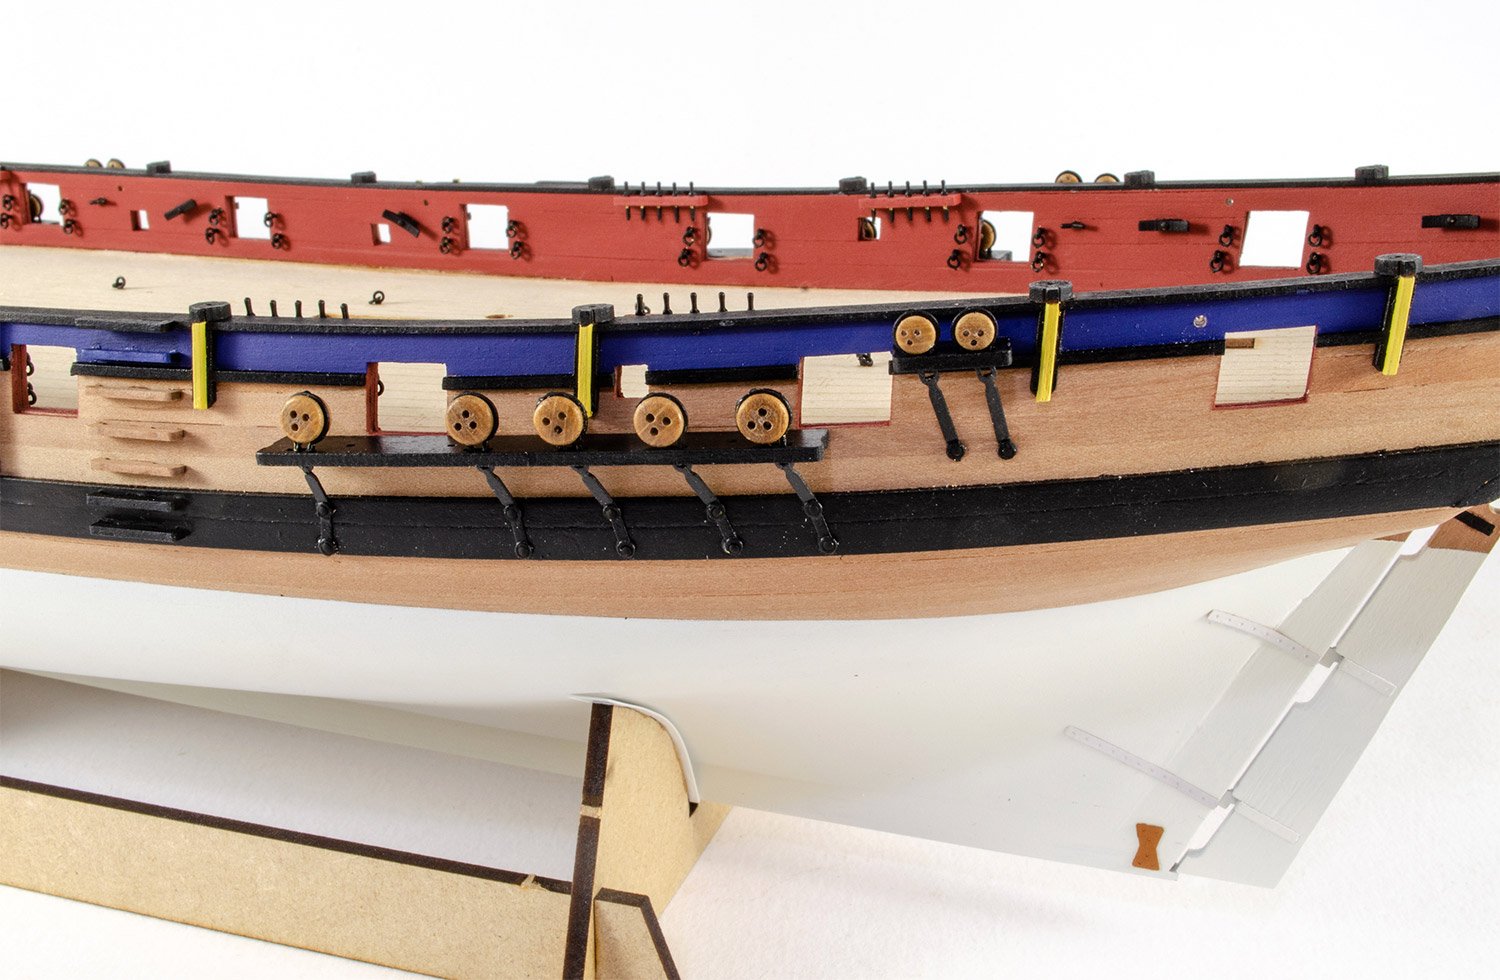
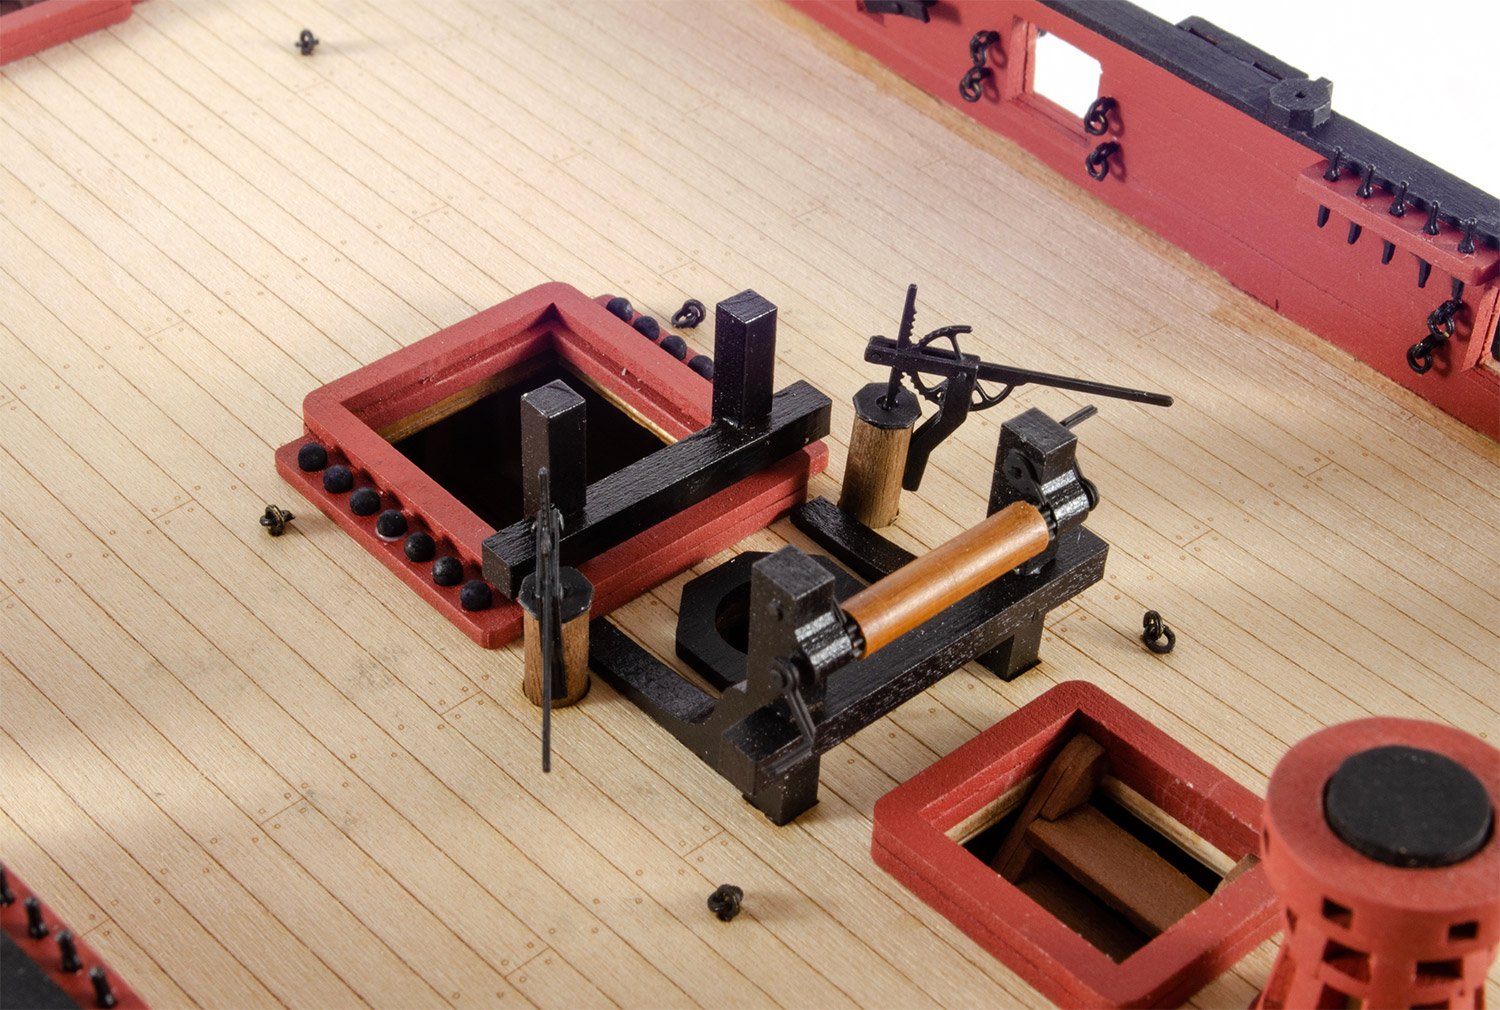
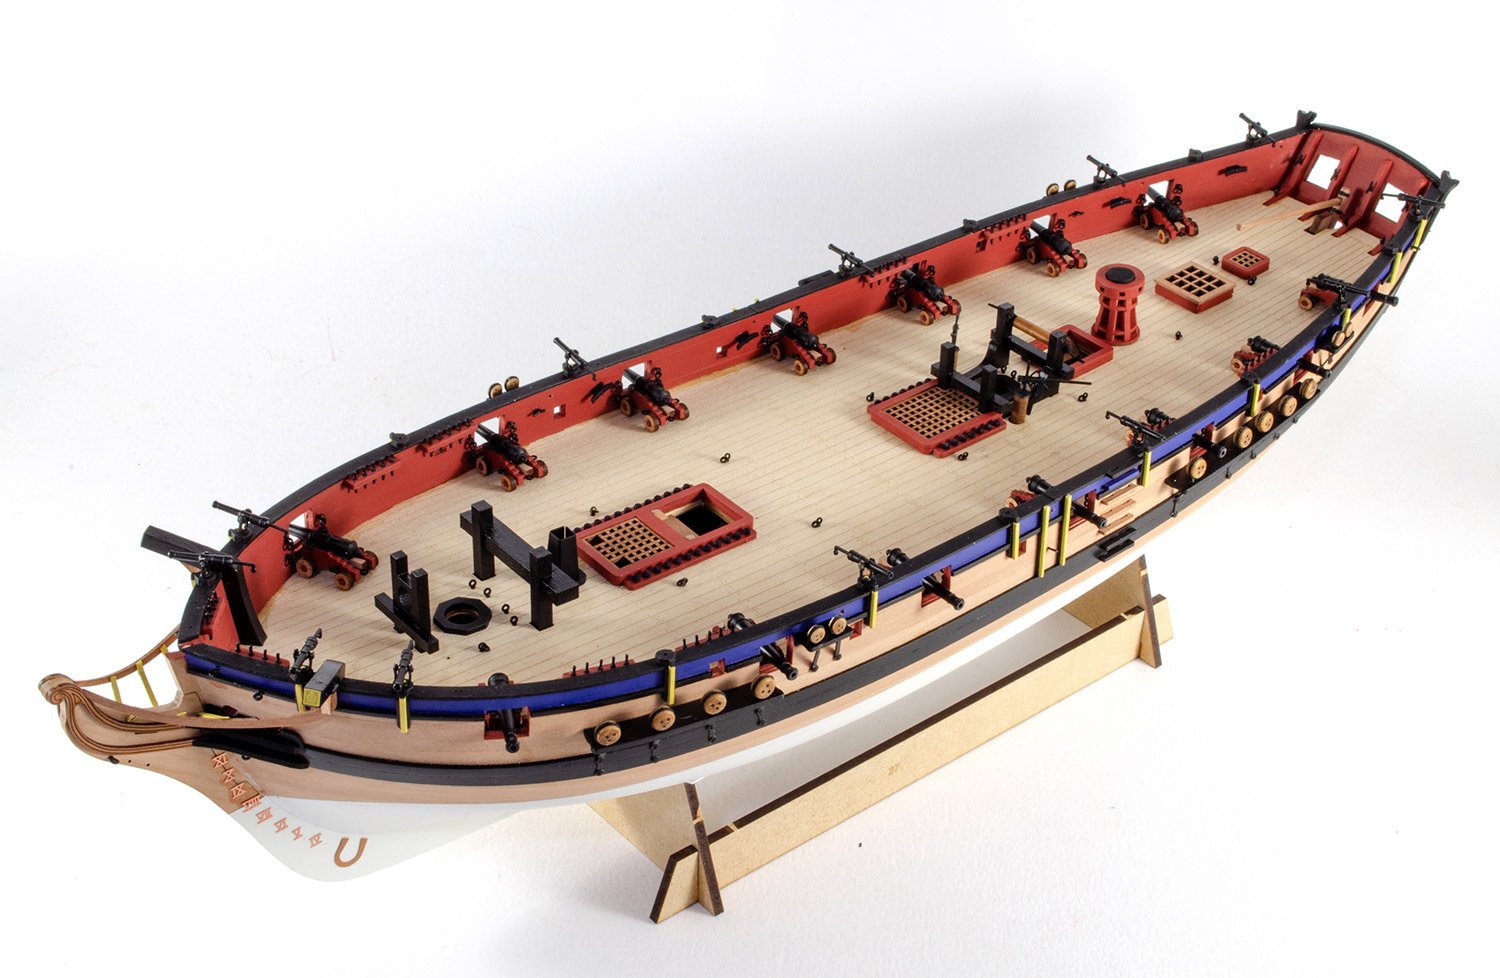
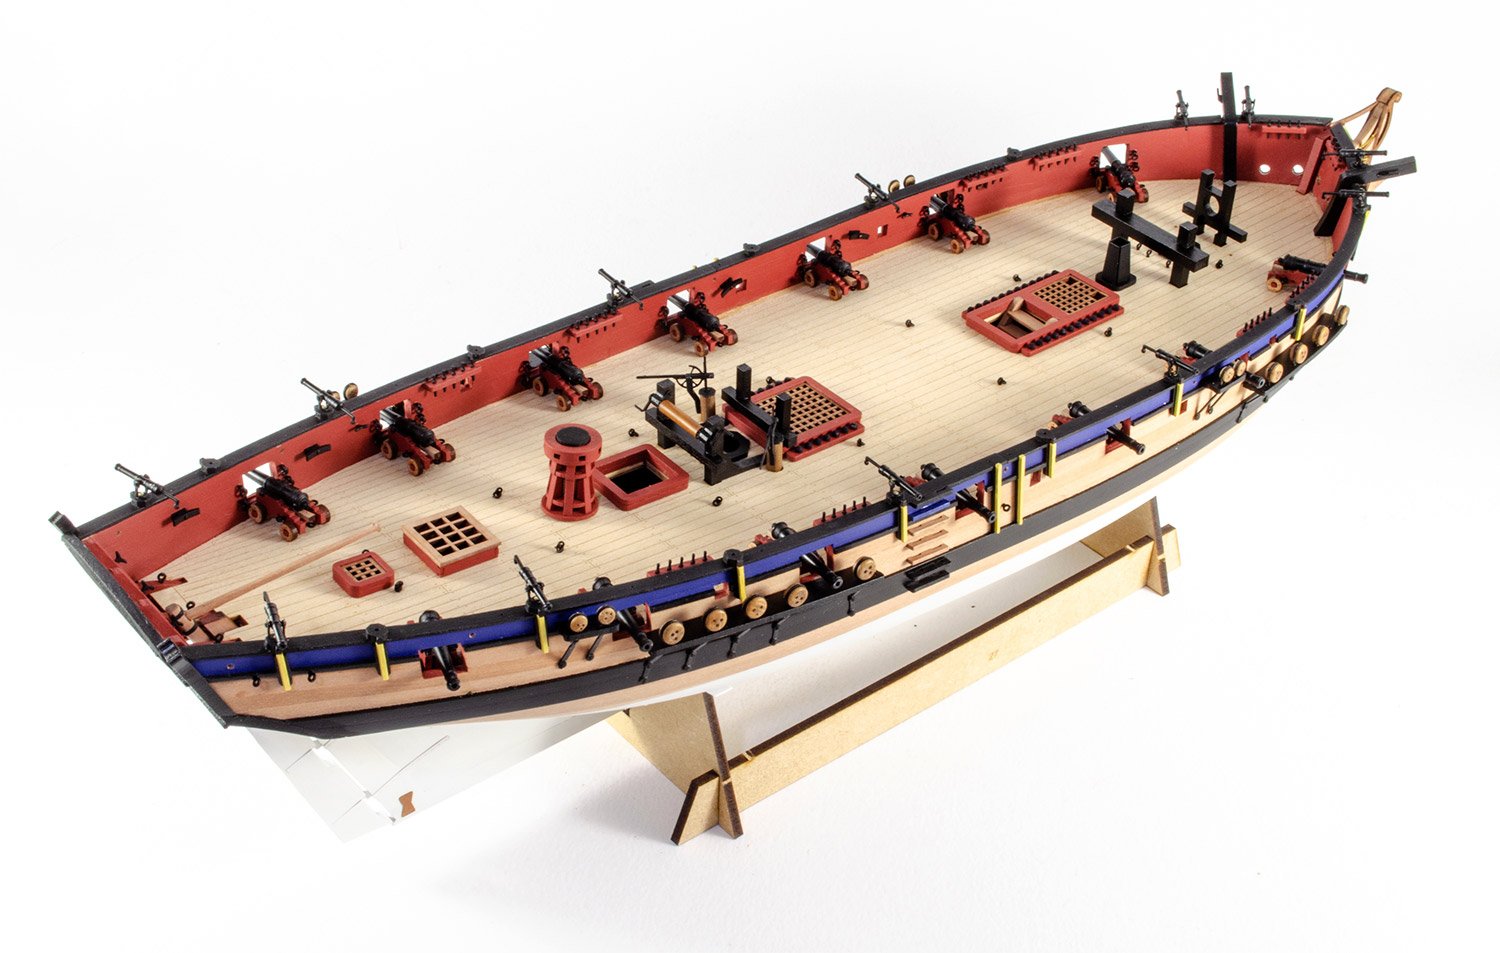
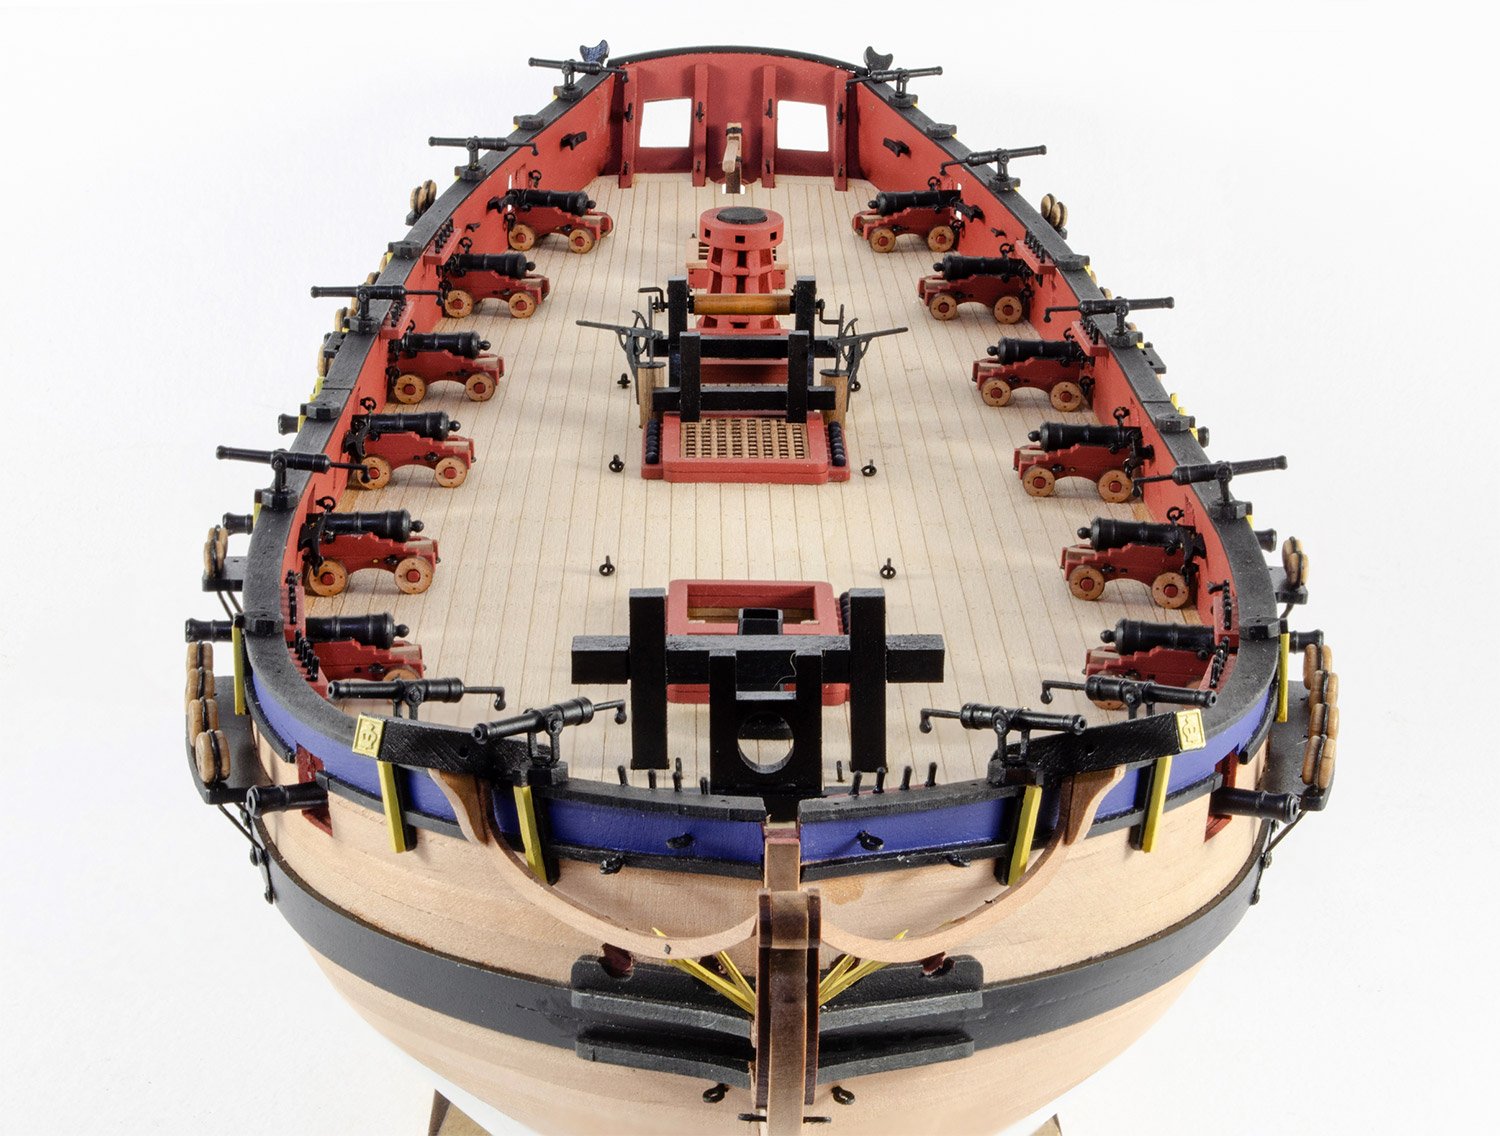
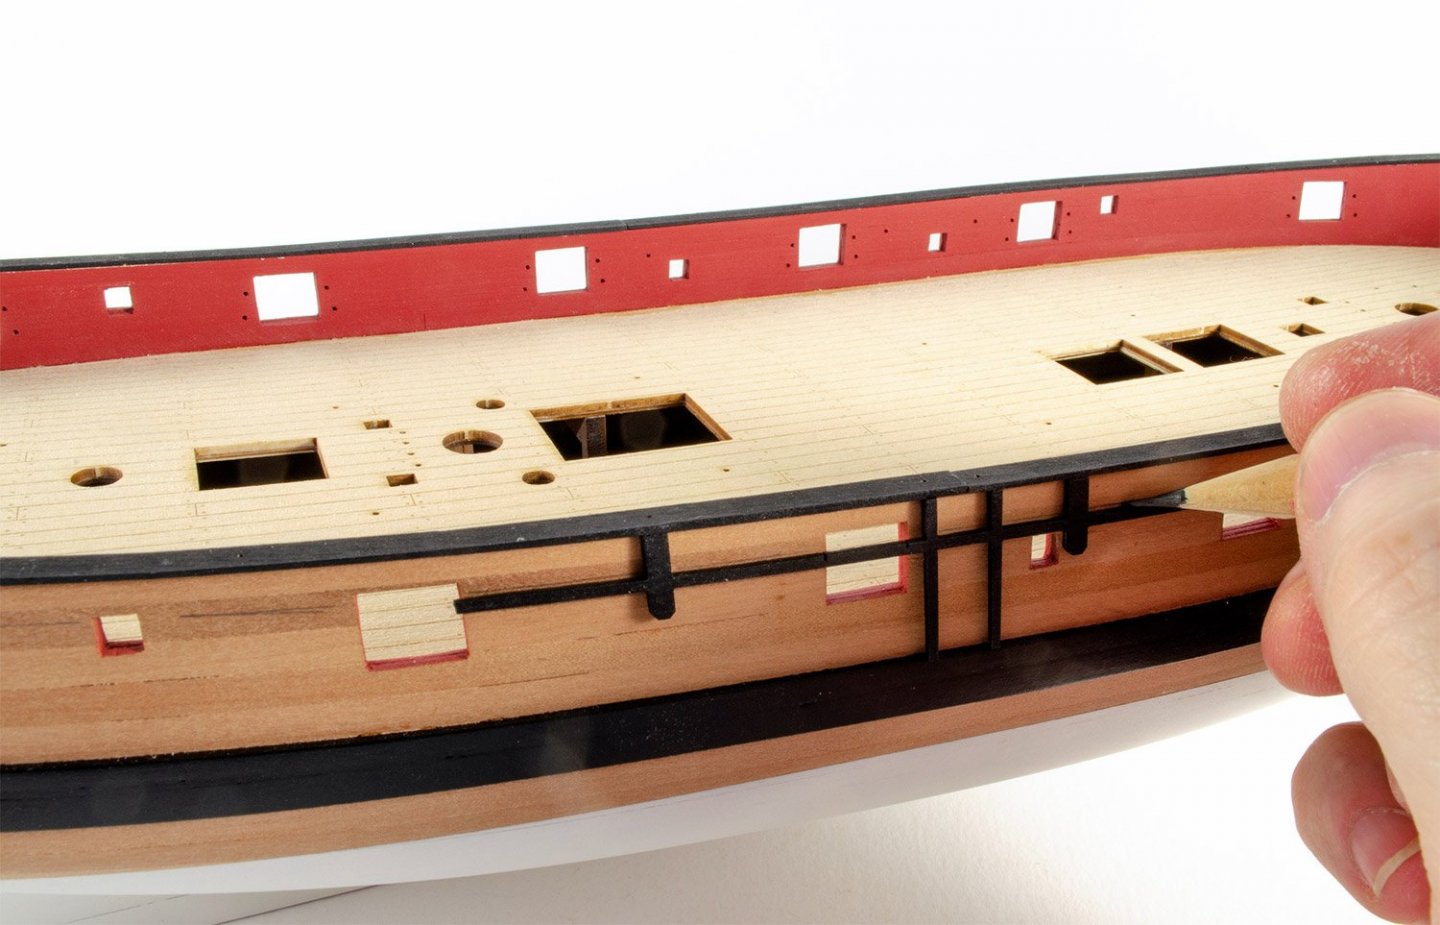
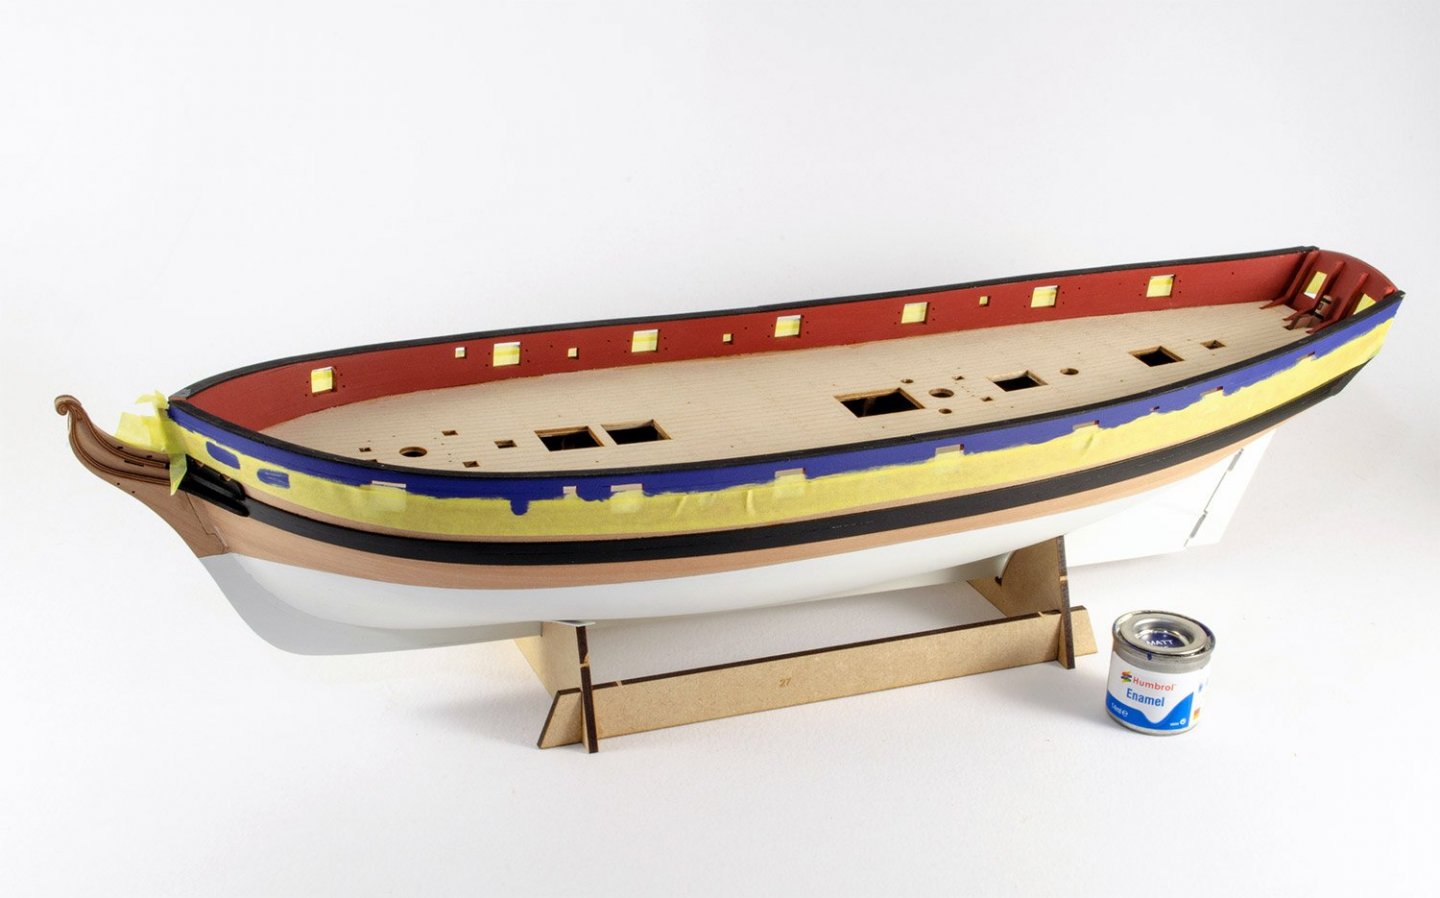
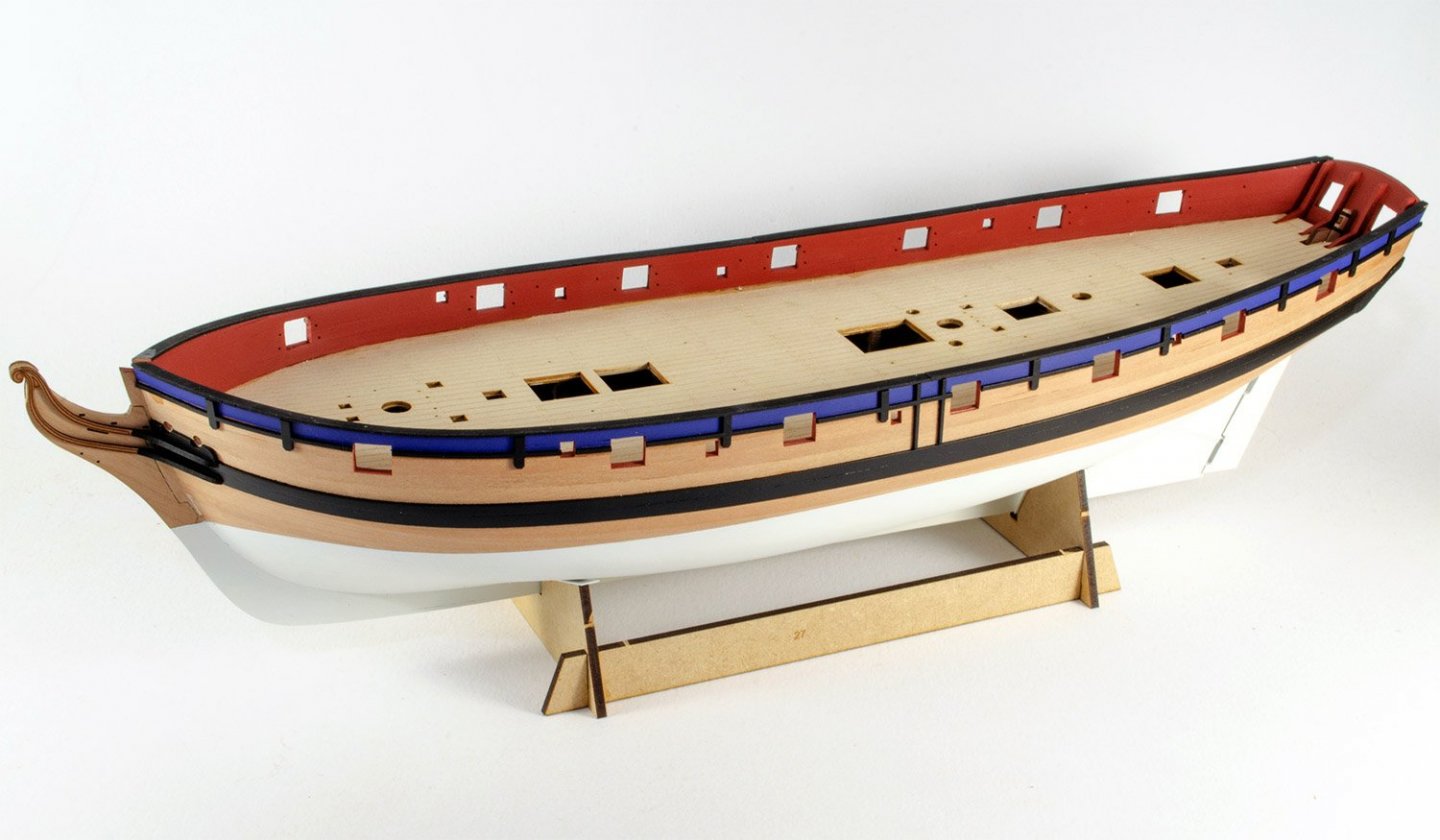
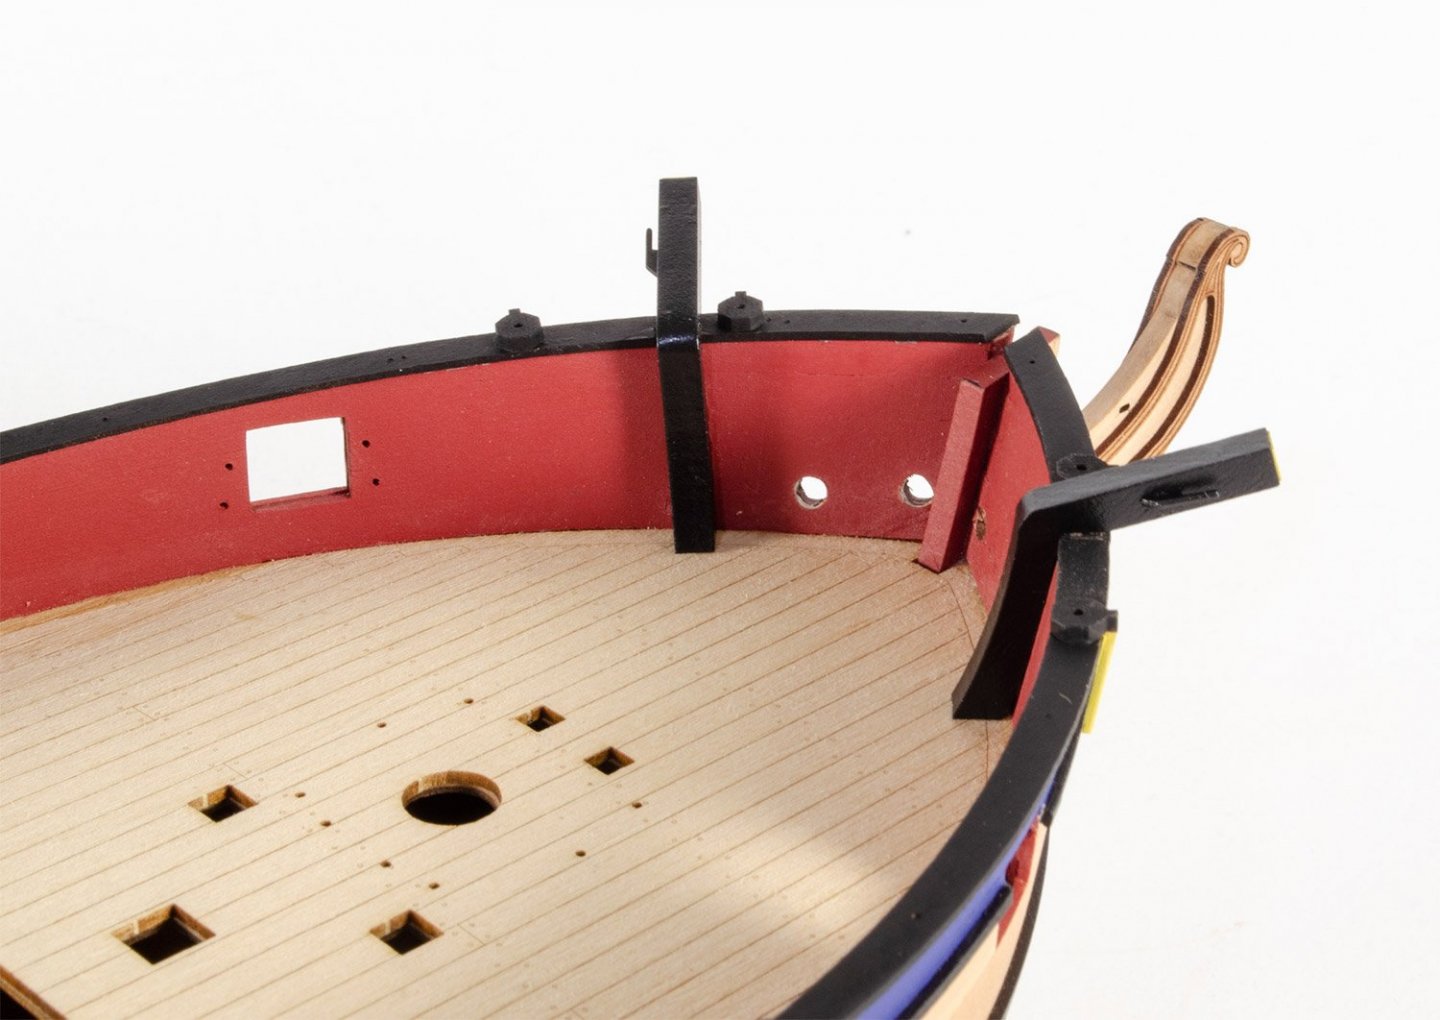
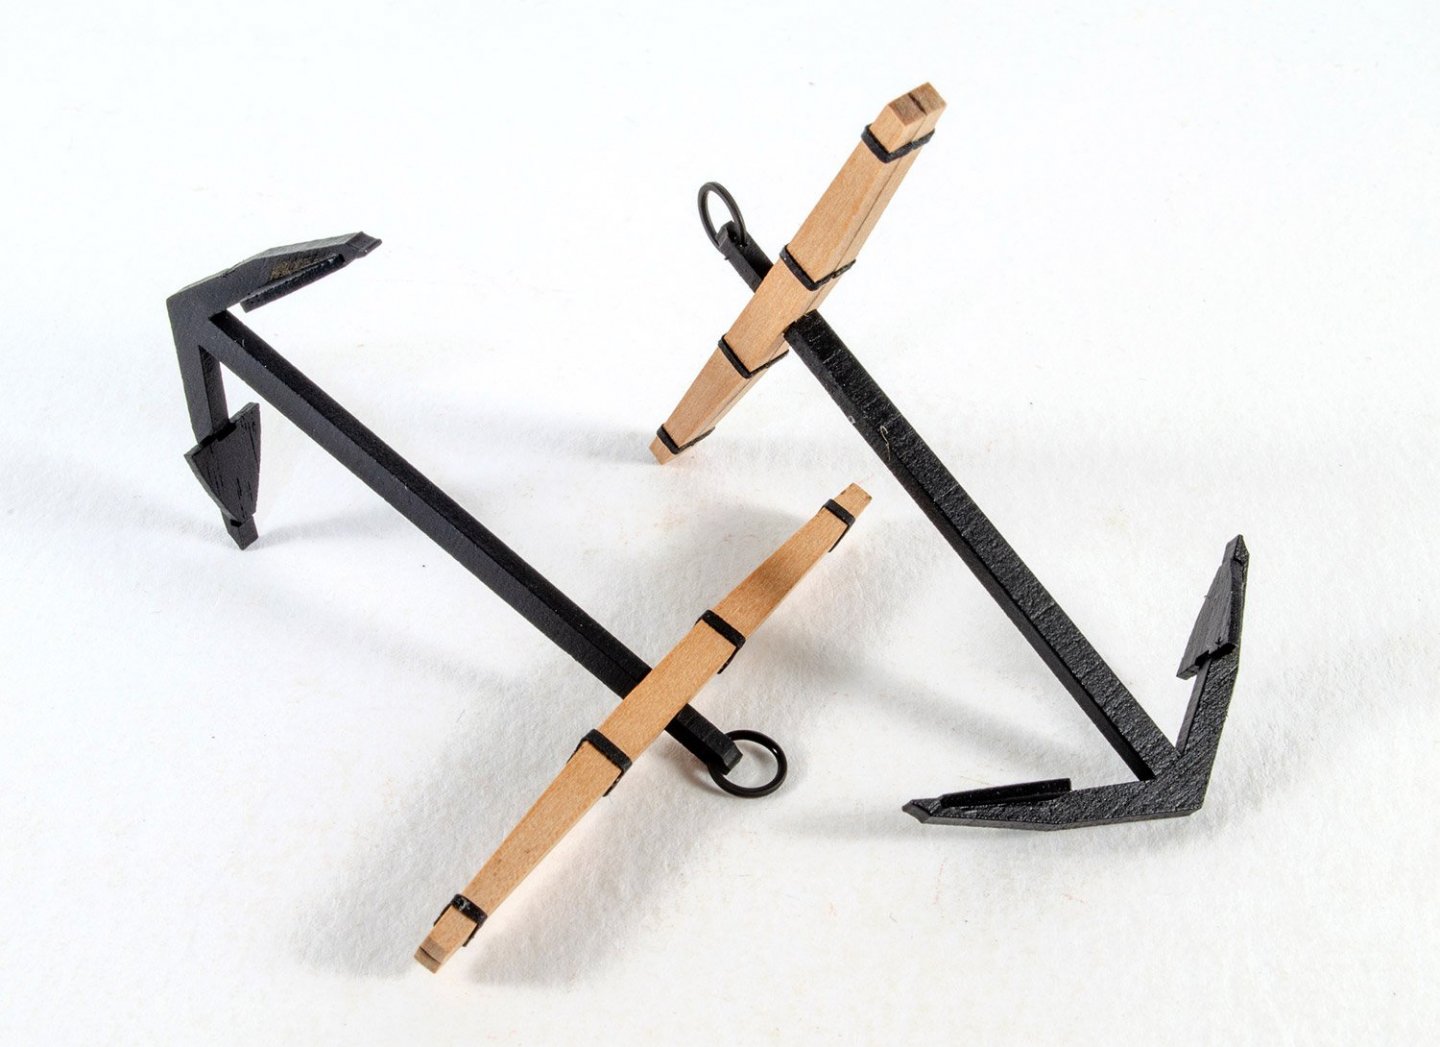
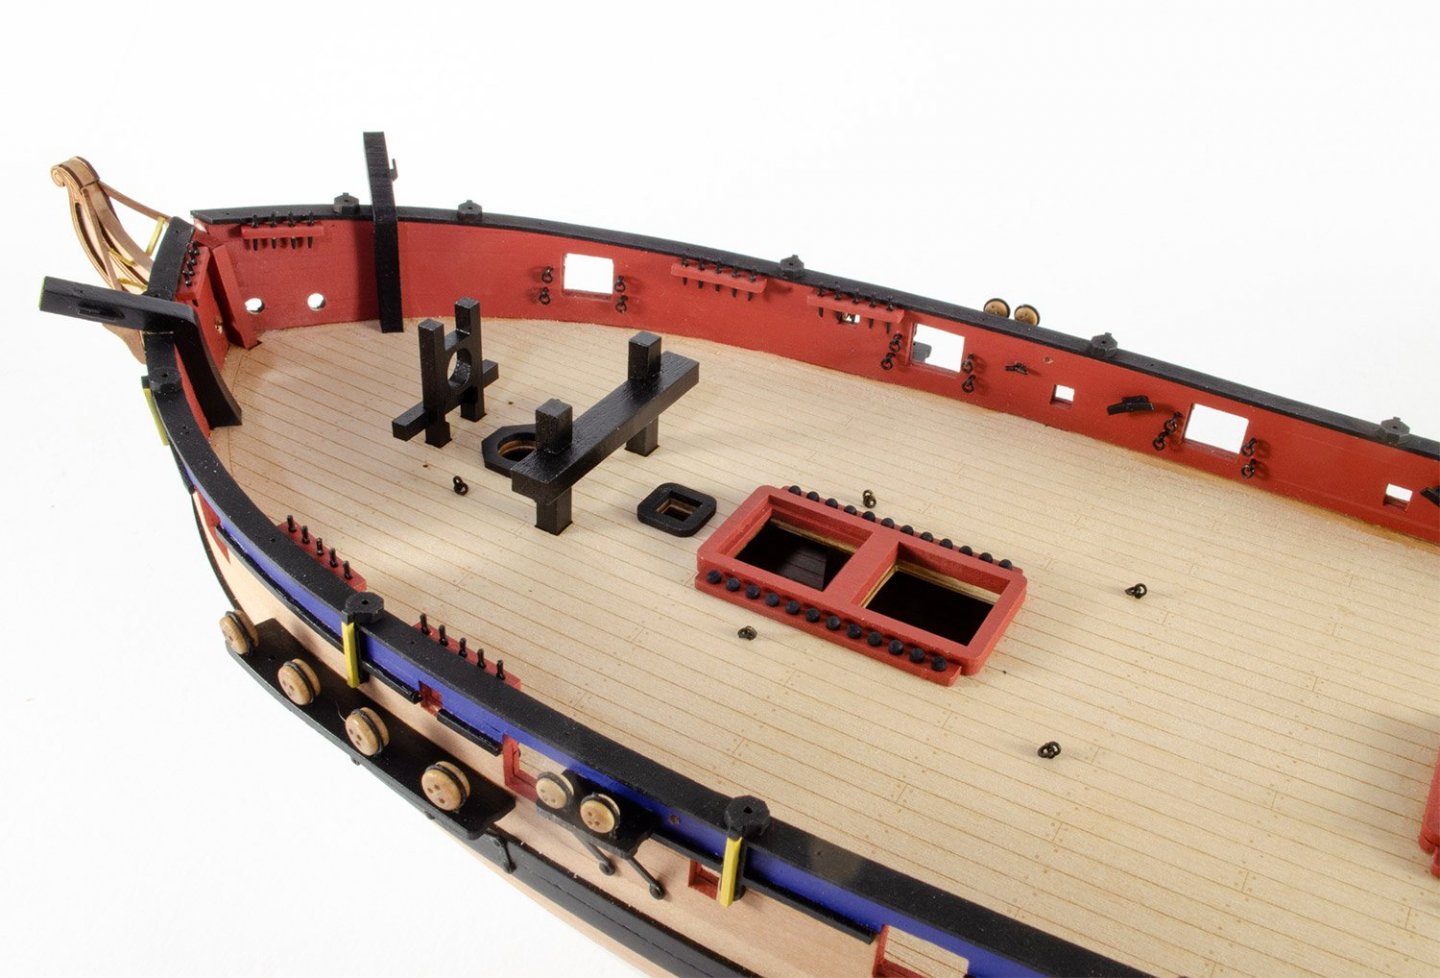
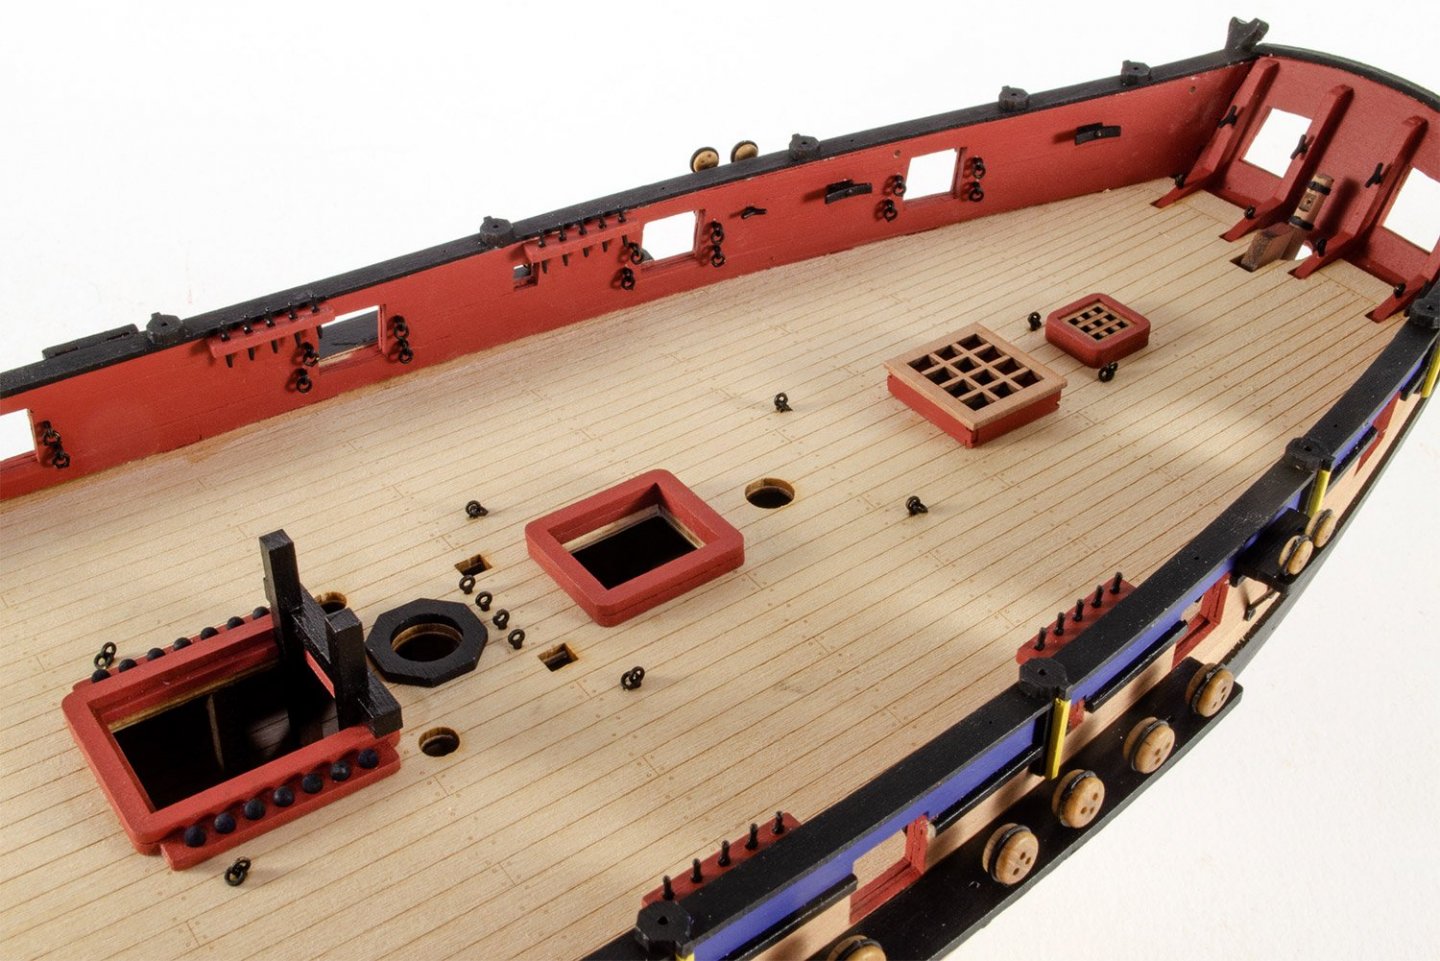
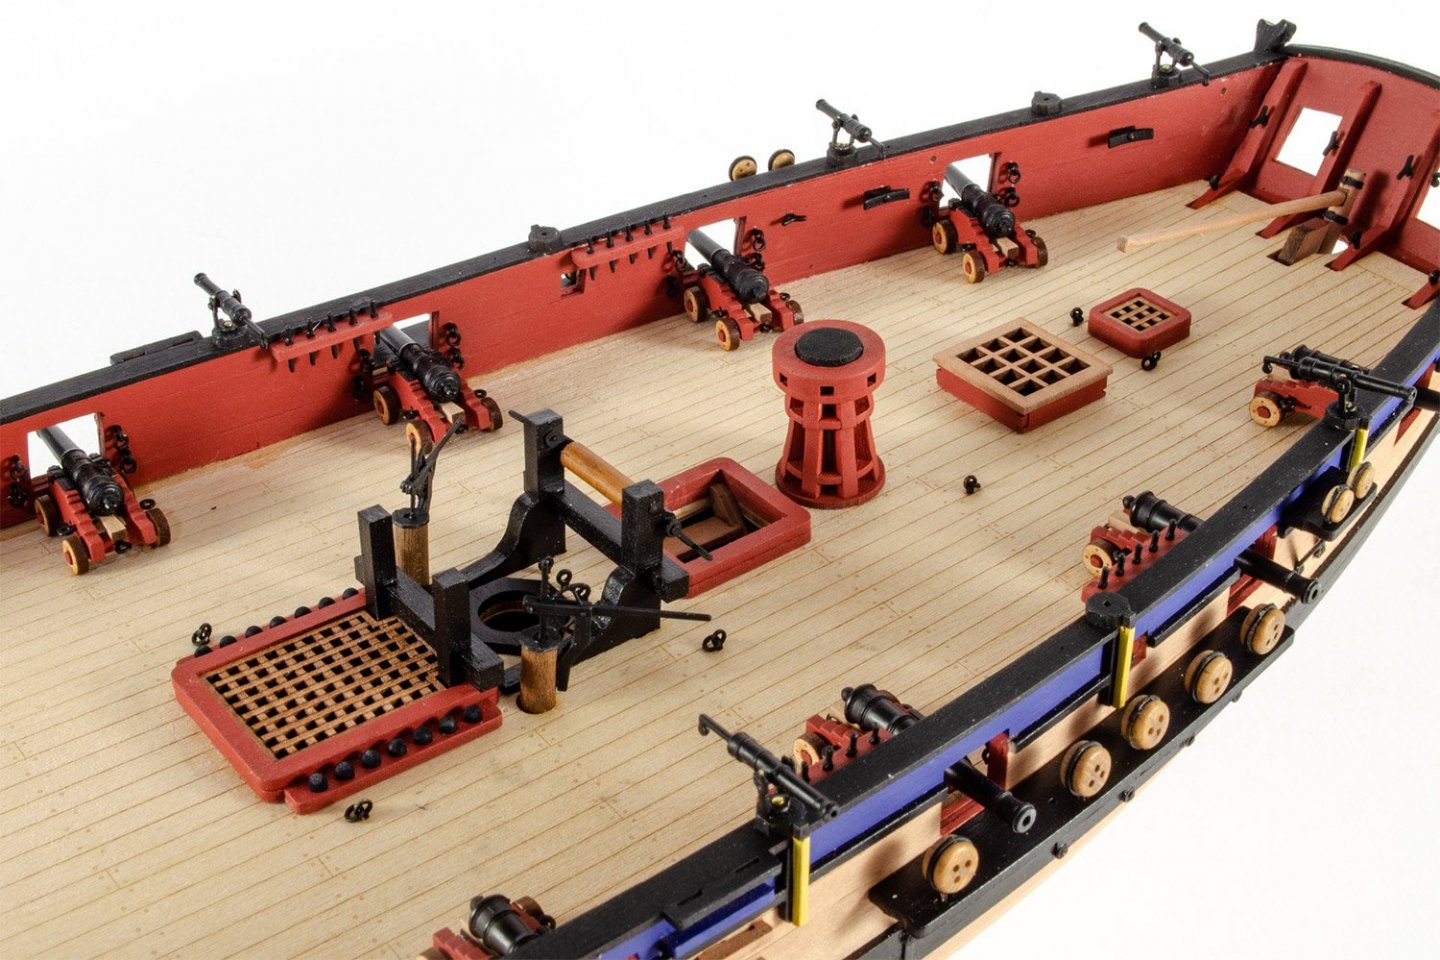
Time for an update. The hull is now pretty much built, down to the various rigging points on the outside hull. Here is another abridged series of photos which will feature in the instruction manual. It had been decided very early on that First was to look very different from Speedy. That wasn't just with the white bottom hull and earlier riggings, but also with selective use of period colours. The kit itself is quite different to Speedy, with different materials used in places, necessitating new laser cut files specifically for this release. Instead of leaving the upper bulwarks in pear, I sat the swivel gun post support patterns against the cap rail and marked the area to be painted blue, with a pencil. The adjoining areas were then masked and several thin coats of Humbrol 25 Blue brush painted into that area. The patterns were then glued into position and the areas they lay over the gun and oar ports, snipped away and trimmed back. The catheads were now assembled and painted before being installed. These were very much a perfect fit, which really pleased me! The bow timbers and head rails were now fitted. This was probably the most fiddly aspect of the model so far, and what I thought would be a 20 minute session turned out to take about 3hrs before I was happy enough with it. I also fitted the depth markings etc. The dark area you see around these is where I've sealed them in polyurethane varnish to give them extra protection. Those areas will blend in to the last full coat of varnish I apply. Note I also added the vertical swivel gun timbers, but in Humbrol 74 Linen (ochre) to give some contrast against the other elements. Thought I'd have a small diversion and make the four anchors. The only metal in these is the ring. The stocks are also made up from two parts as per the real thing, and black cartridge paper used for the bands. All belaying pins and racks are now fitted. These are also pinned as well as being glued with PVA. I prefer this glue for things like this, as CA can fracture if stressed. As with the belaying pin racks, the channels are also pinned and glued with PVA. The chainplates in this kit are provided as single pieces. You need to open them up to sit the deadeye in them, then close back up. Some touching up with black paint is also required. All chainplates are now fitted and pinned to the wales. All my previous work in making the deck fittings and furniture can now be put into play. The small steel balls for the cannon shot, are burnished in metal blacking fluid. And here we are so far! Hope you like it.


- 109 replies
-
- 23
-
-
- Vanguard Models
- Flirt
- (and 1 more)
-
kit review 1:50 Brig Aris by Navarino Models
James H replied to James H's topic in REVIEWS: Model kits
Not an assembled model. Maybe you should try a couple of easier vessels and then the Brig Aris? -
There's nothing wrong with that at all, in fact you've less stepping around the bow than I did. Looking forward to seeing this progress.
-
HMS Terror by Mish - OcCre - 1:65
James H replied to Mish's topic in - Kit build logs for subjects built from 1801 - 1850
Nice to see this coming along again. -
contact adhesive
James H replied to Liad's topic in Building, Framing, Planking and plating a ships hull and deck
Moved to correct forum area. -
Moved to correct forum area...
-
Sure can! It's Plastikote red oxide primer. I generally give all parts a finish with 320 grade paper and then spray. If necessary, I will sand an d reapply. https://smile.amazon.co.uk/Plasti-kote-25002-400ml-Primer-Oxide/dp/B006XBST08/ref=sr_1_1?dchild=1&keywords=plastikote+red+oxide+primer&qid=1590226003&sr=8-1

- 109 replies
-
- 3
-
-
- Vanguard Models
- Flirt
- (and 1 more)
-
They sure are fiddly. I find the stern more difficult than the bow, and this one is planked with 2mm x 1mm strips (narrower than Speedy's 3mm strips). Still, it should look ok when done, fingers crossed.
- 109 replies
-
- 3
-
-
- Vanguard Models
- Flirt
- (and 1 more)