James H
-
Posts
6,136 -
Joined
-
Last visited
Content Type
Profiles
Forums
Gallery
Events
Everything posted by James H
-
 You build in card better than anyone I know and your stuff gives a lot of the top-flight plastic models a run for their money. Absolutely outstanding!
- 29 replies
-
- 6
-

-
- hmw
- Hamburg Harbor
- (and 2 more)
-
She looks beautiful, and you took some great photo angles there too.
- 40 replies
-
- 2
-
-
- finished
- master korabel
- (and 2 more)
-
Can't wait to see those planks hit that hull 😁
-
Both Fifie and Zulu were a delight to build. So much enjoyment 😊
- 195 replies
-
- 2
-
-
- lady eleanor
- vanguard models
- (and 1 more)
-
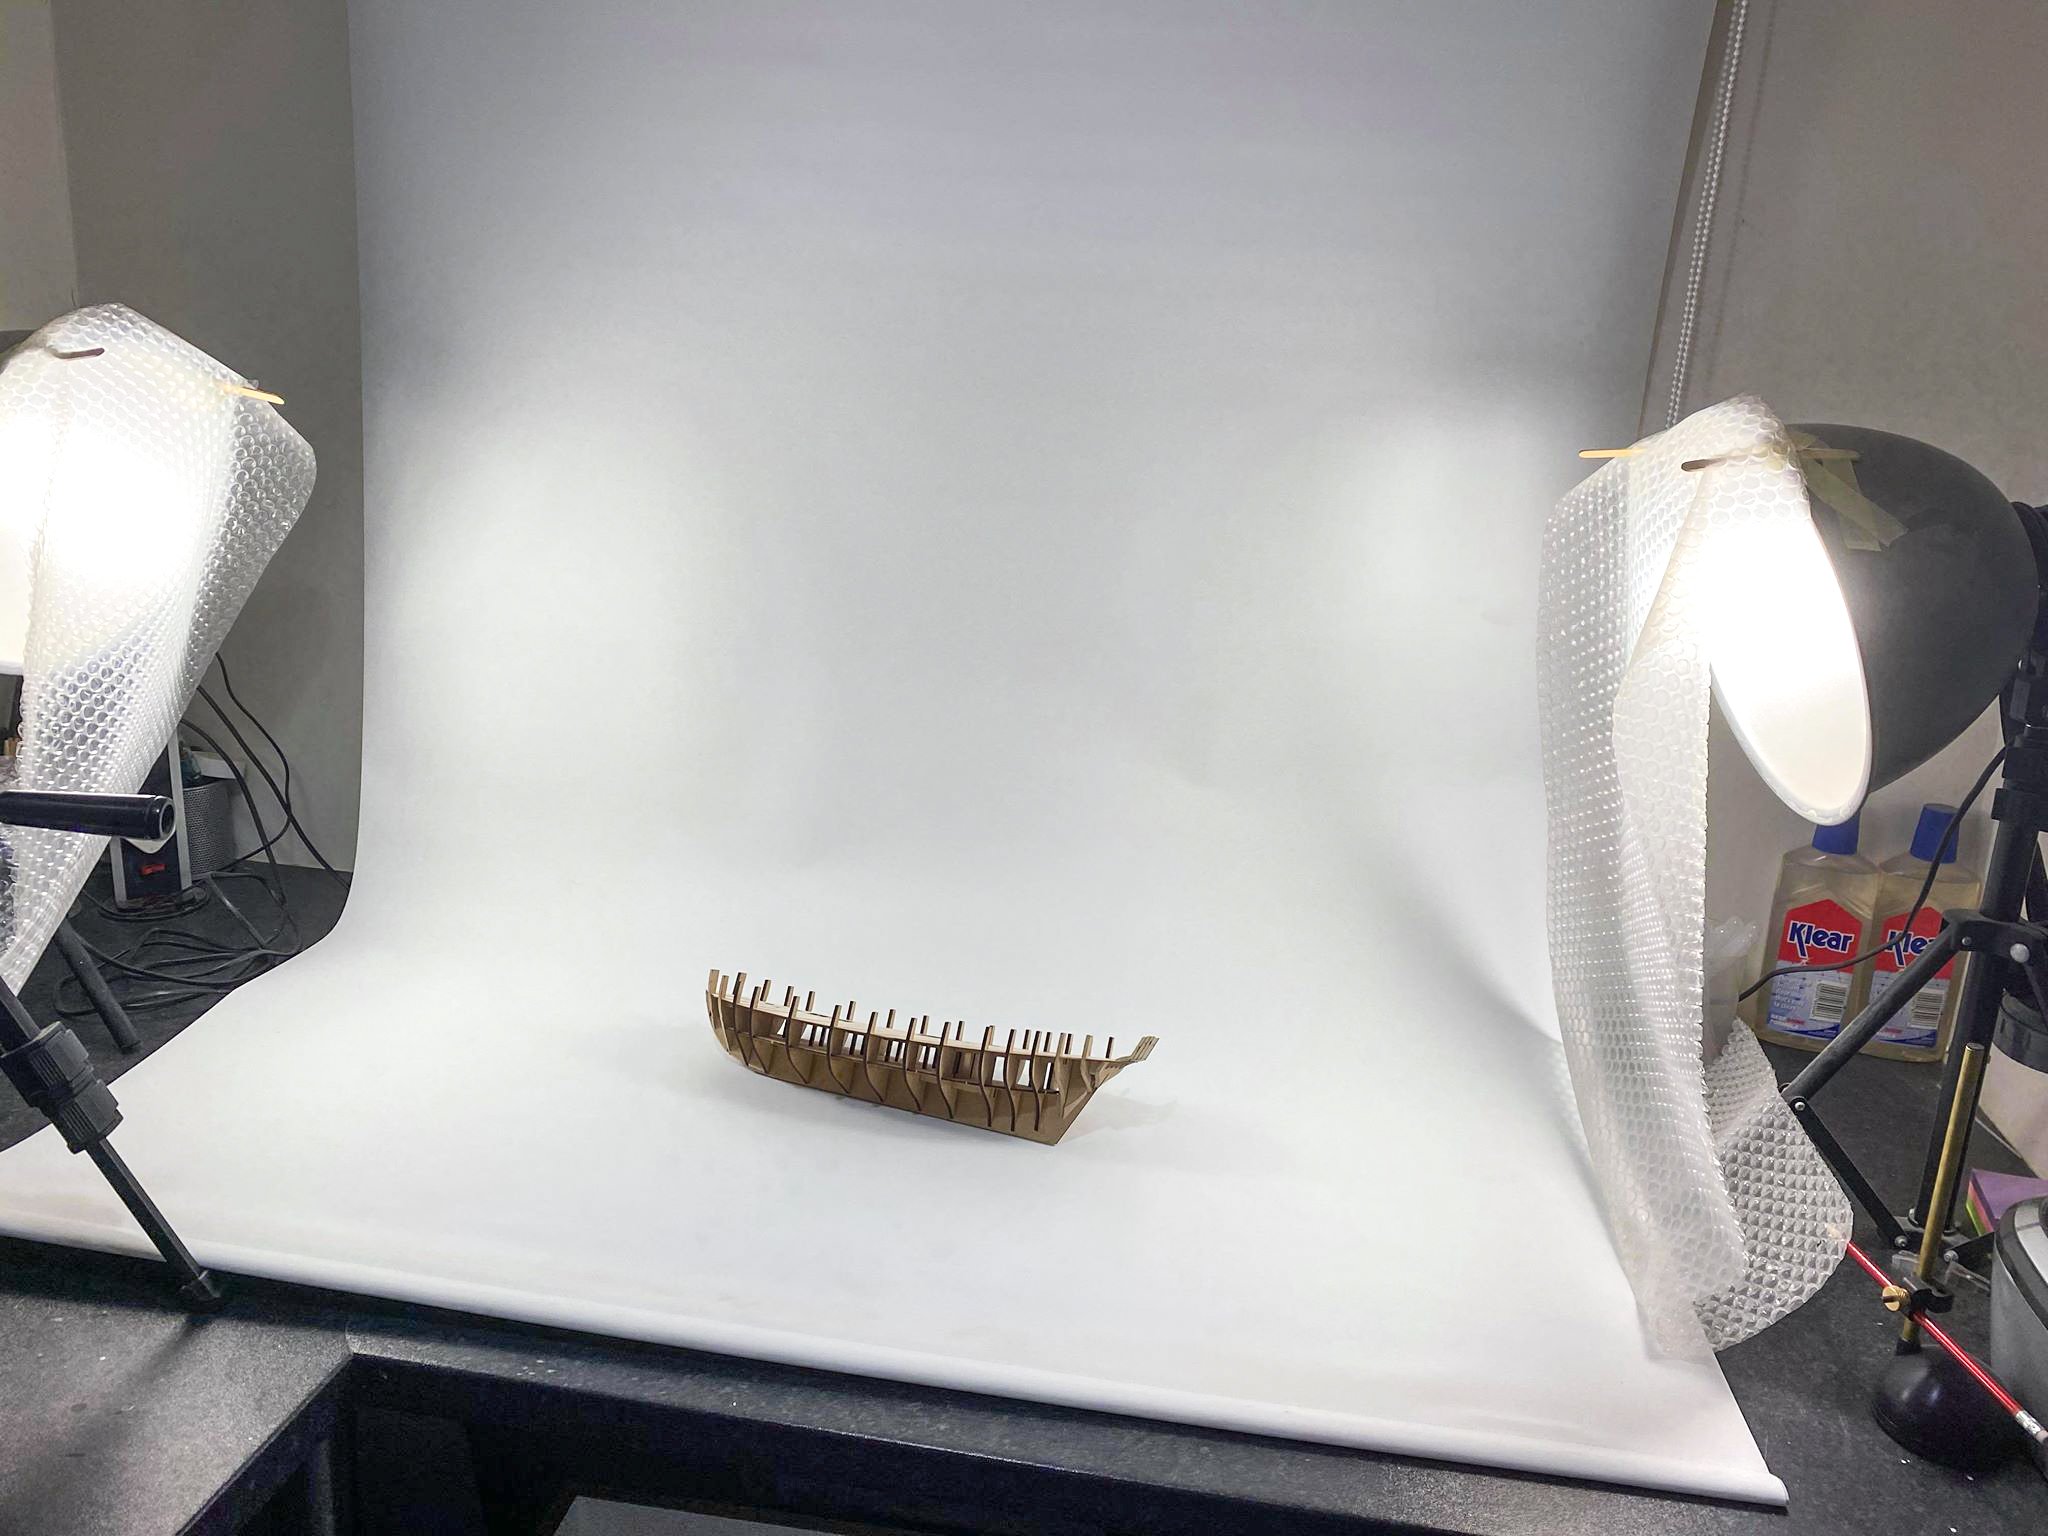
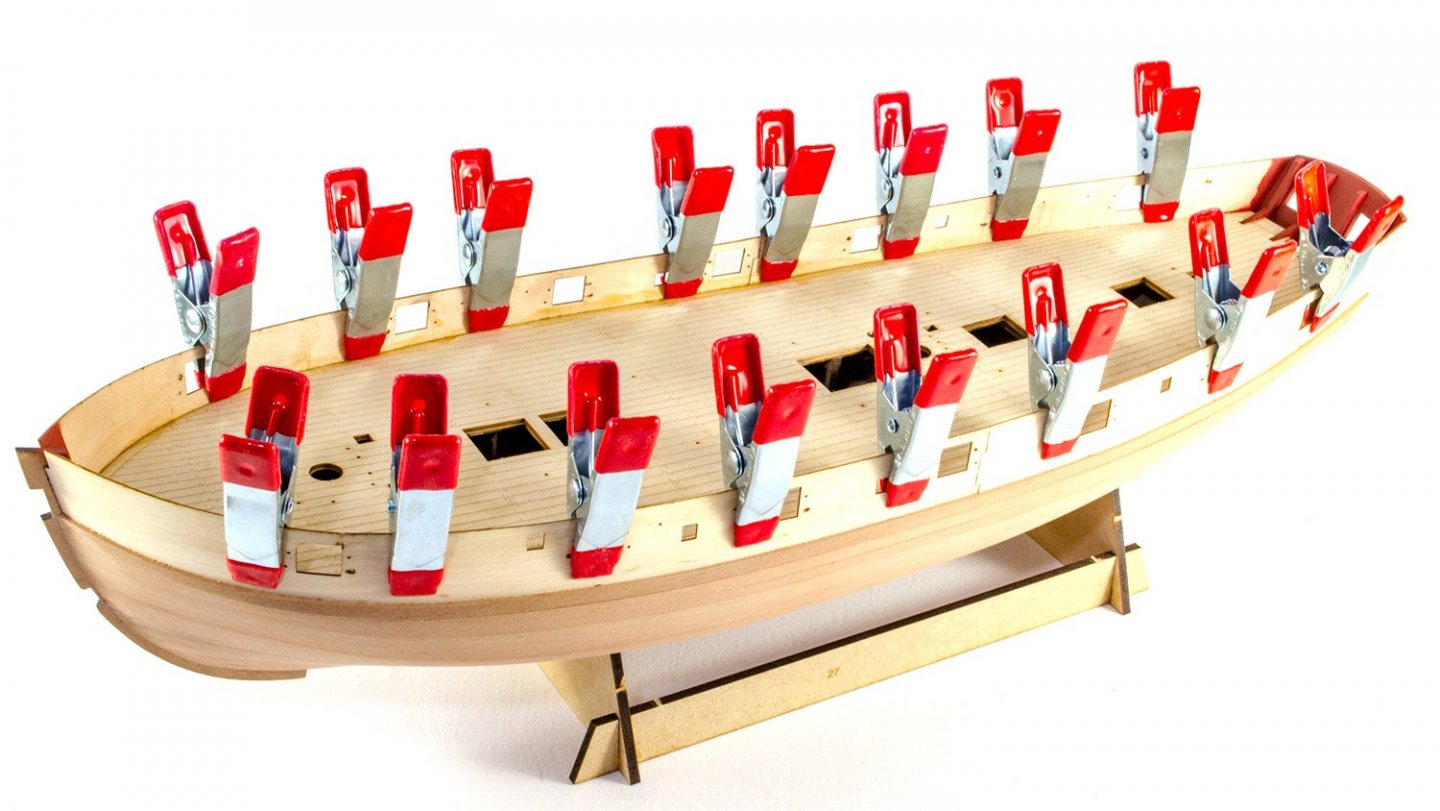
Is is very easy to clamp the outside edges of the deck down onto the false deck below. I use a lot of 2 inch clamps for this, with rubber tips. I just use lengths of bubble-wrap for this, suspended on lollipop sticks taped to the reflectors 🤣
- 109 replies
-
- 13
-
-
- Vanguard Models
- Flirt
- (and 1 more)
-
ancre Coureur by cafmodel - 1/48
James H replied to cafmodel's topic in - Build logs for subjects built 1751 - 1800
Hope the moves goes well. Keep us up to date. -
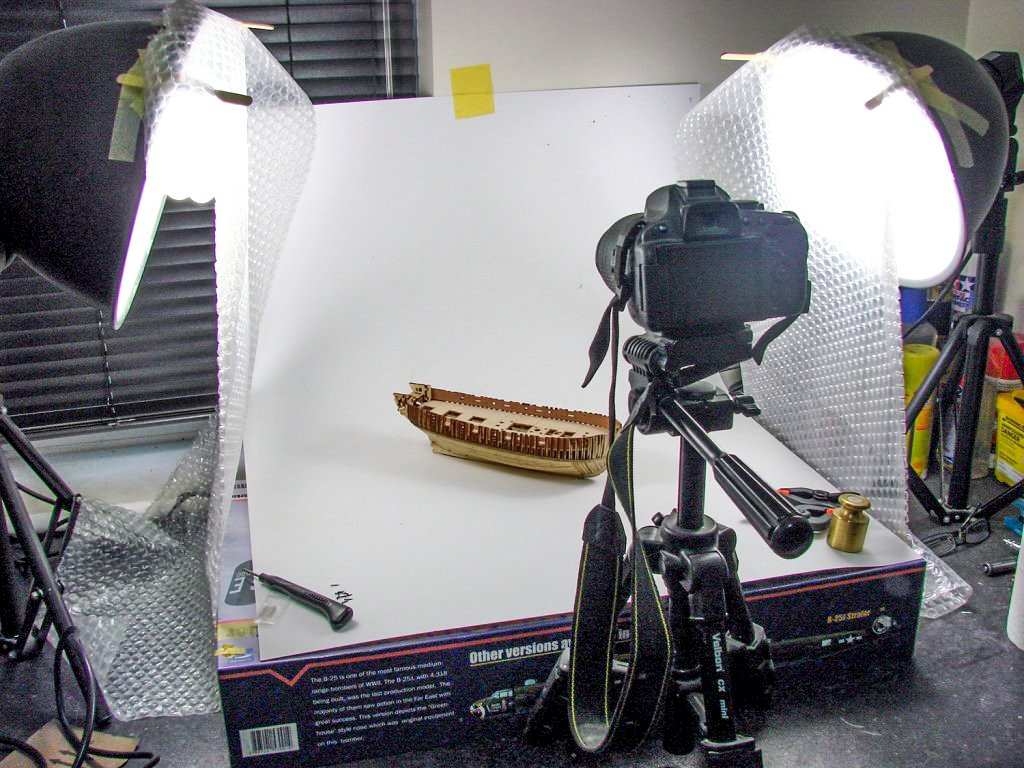
No. Those are generally far too limiting for something like this, especially when comes to having to photograph something the size of Victory. My setup has two formats. I can switch from small scale which is what I've been using in these photos, to large scale which is what I'll use when I start masting this. The screen is a pure white blind that I just draw down from high up on the wall. All images are processed with Adobe Lightroom and Photoshop. Camera is a Nikon D5100 DSLR

- 109 replies
-
- 18
-
-

-
- Vanguard Models
- Flirt
- (and 1 more)
-
Despite any errors you've made, that is a fine model for your first attempt! Don't beat yourself up. There are some great kits out today that even exceed the quality of the one you bought. I really do hope you can share a new build log with us in future. Oh.... and
-
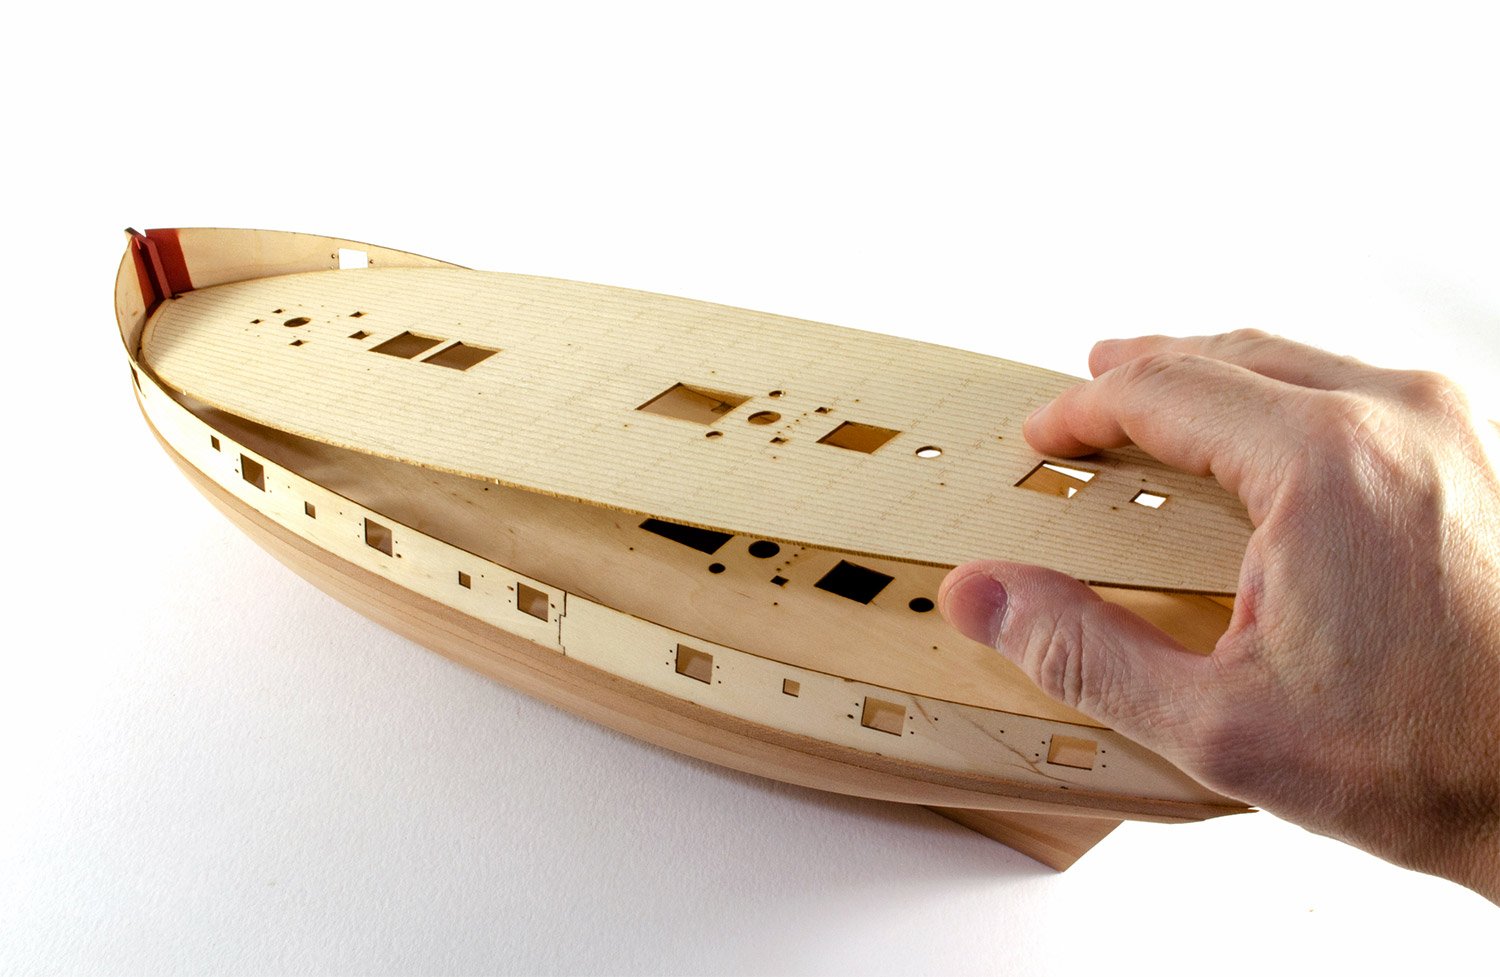
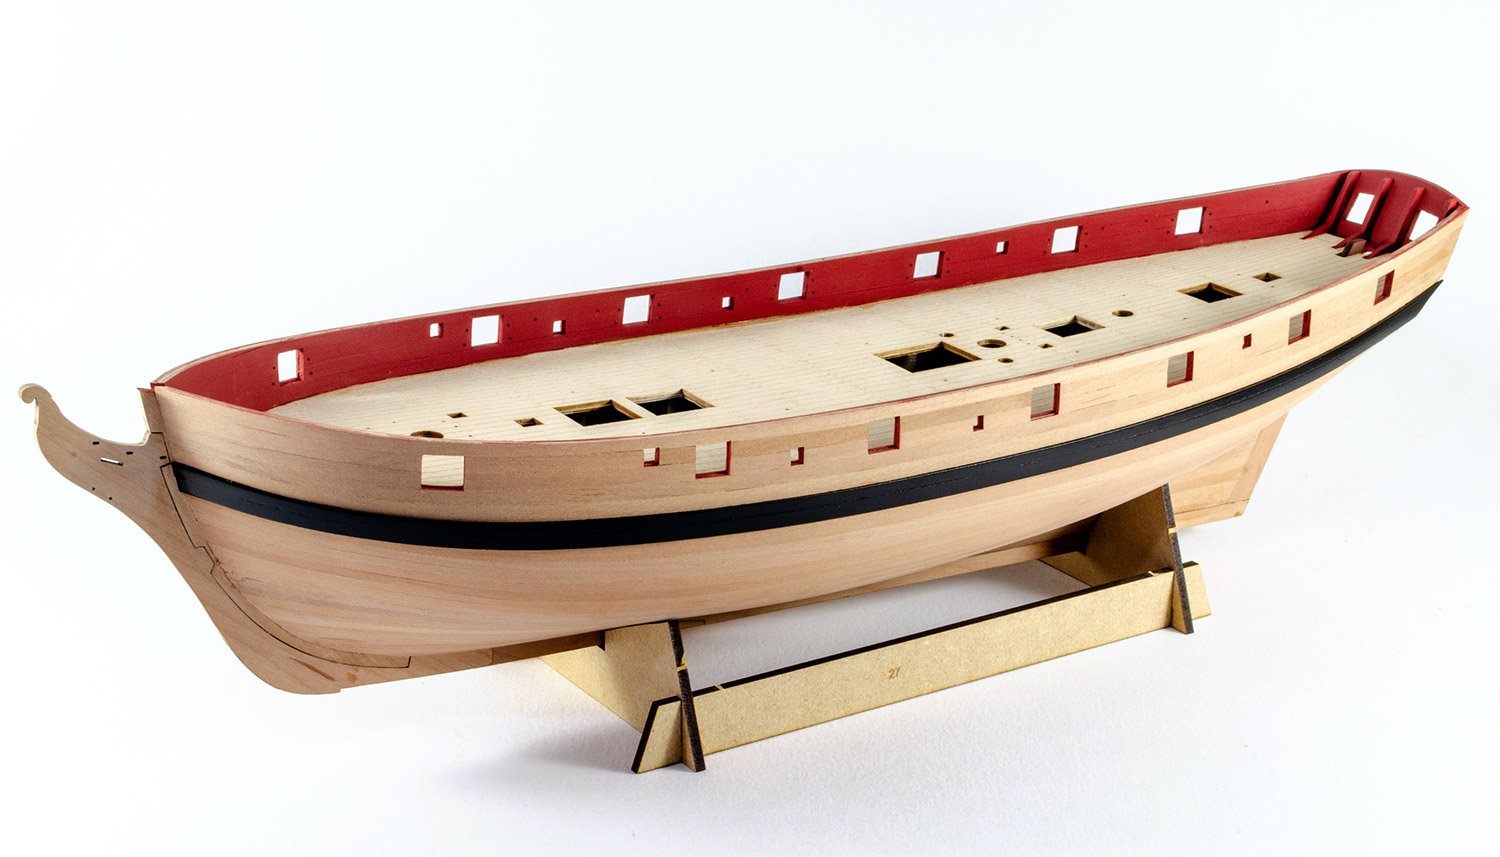
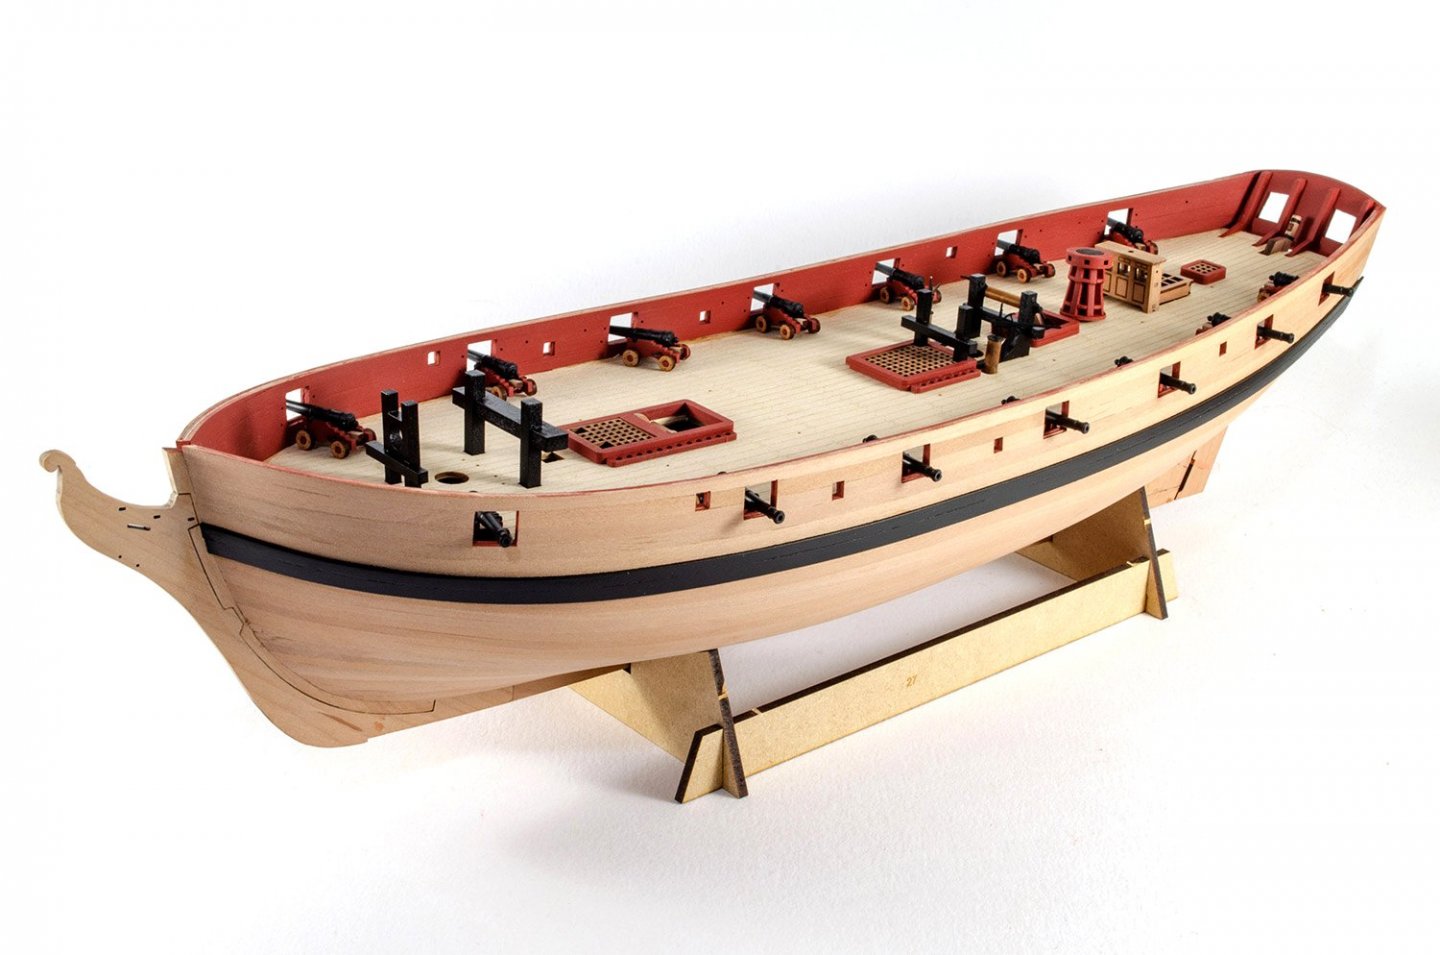
Couldn't resist putting the finished deck stuff on the hull, to see how this will look later. Nothing here is glued on. It's now all removed and work on painting the lower hull in white is now underway.
- 109 replies
-
- 24
-
-
- Vanguard Models
- Flirt
- (and 1 more)
-
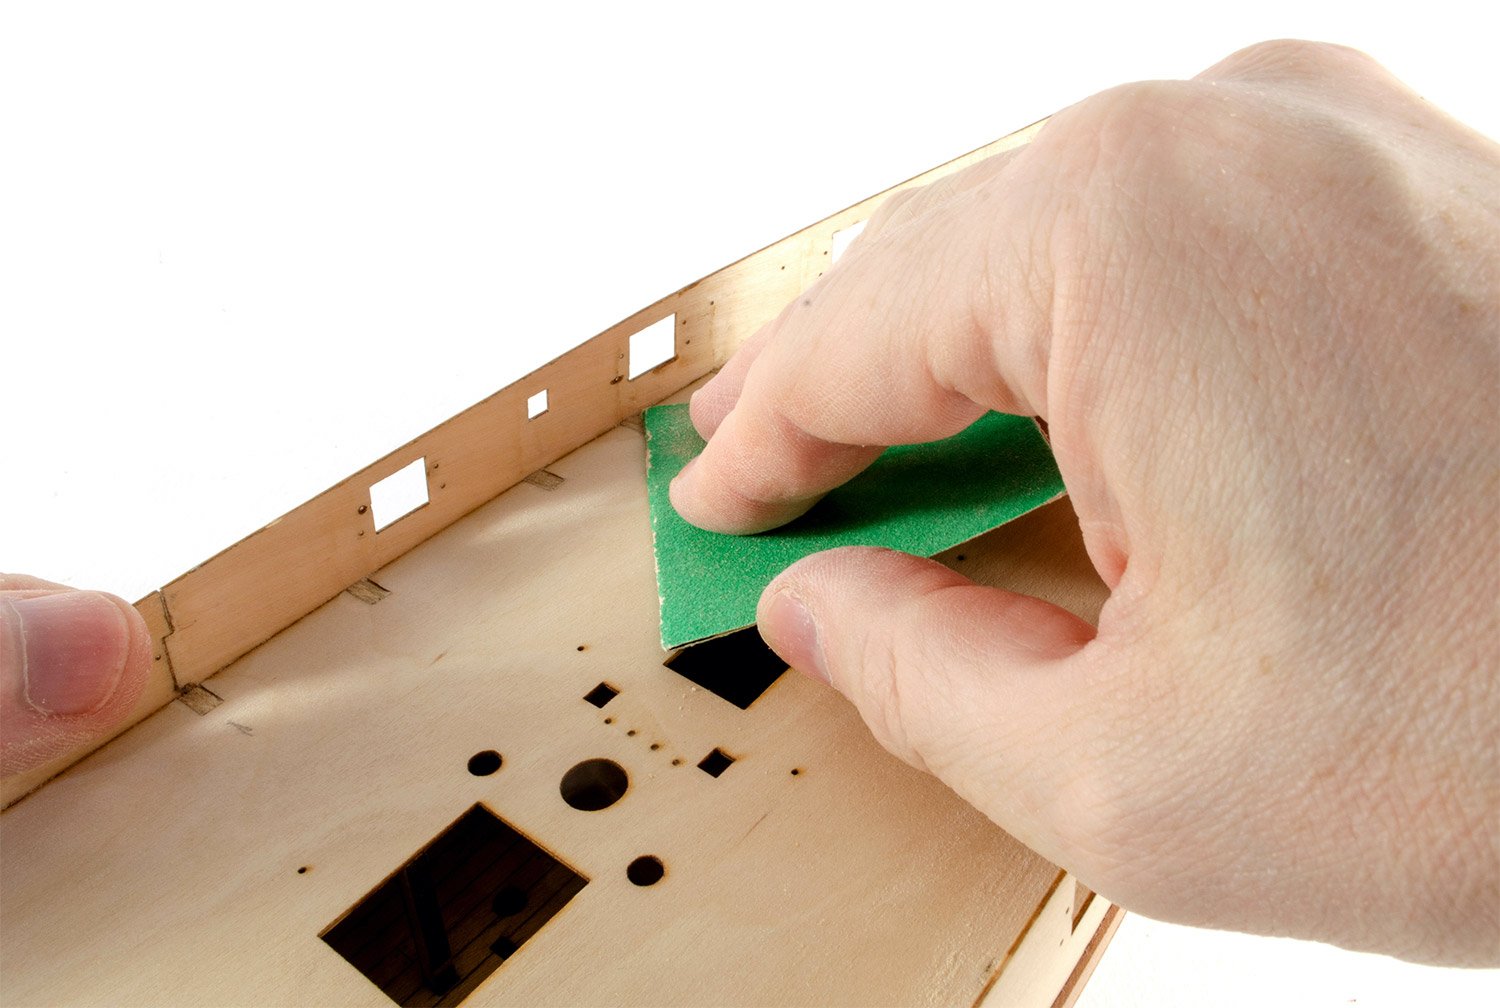
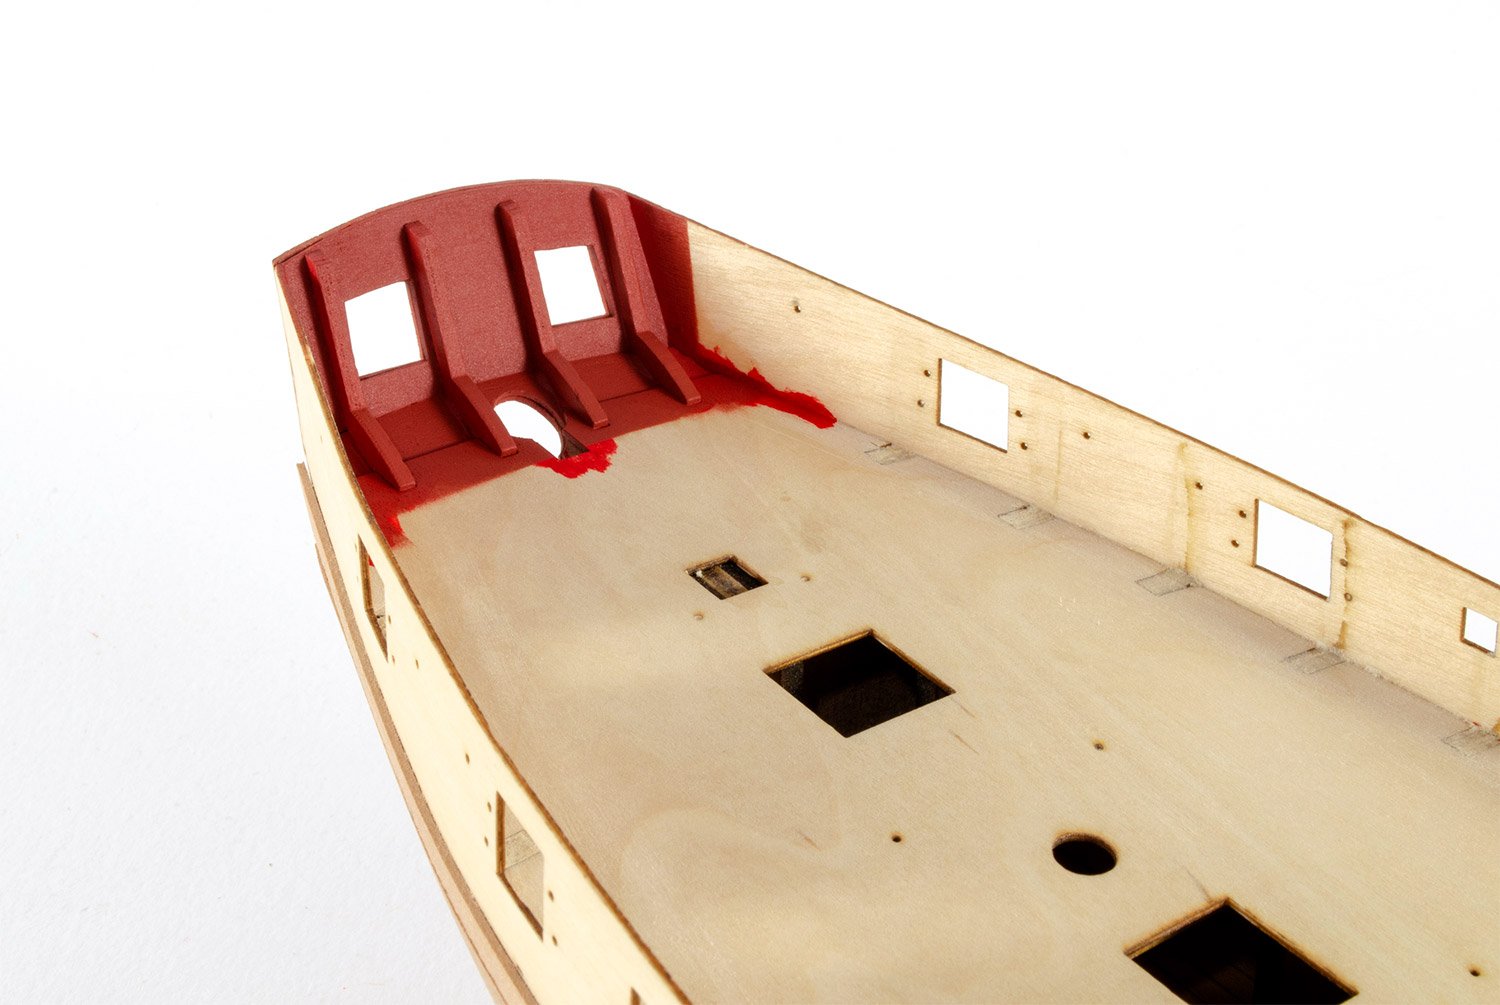
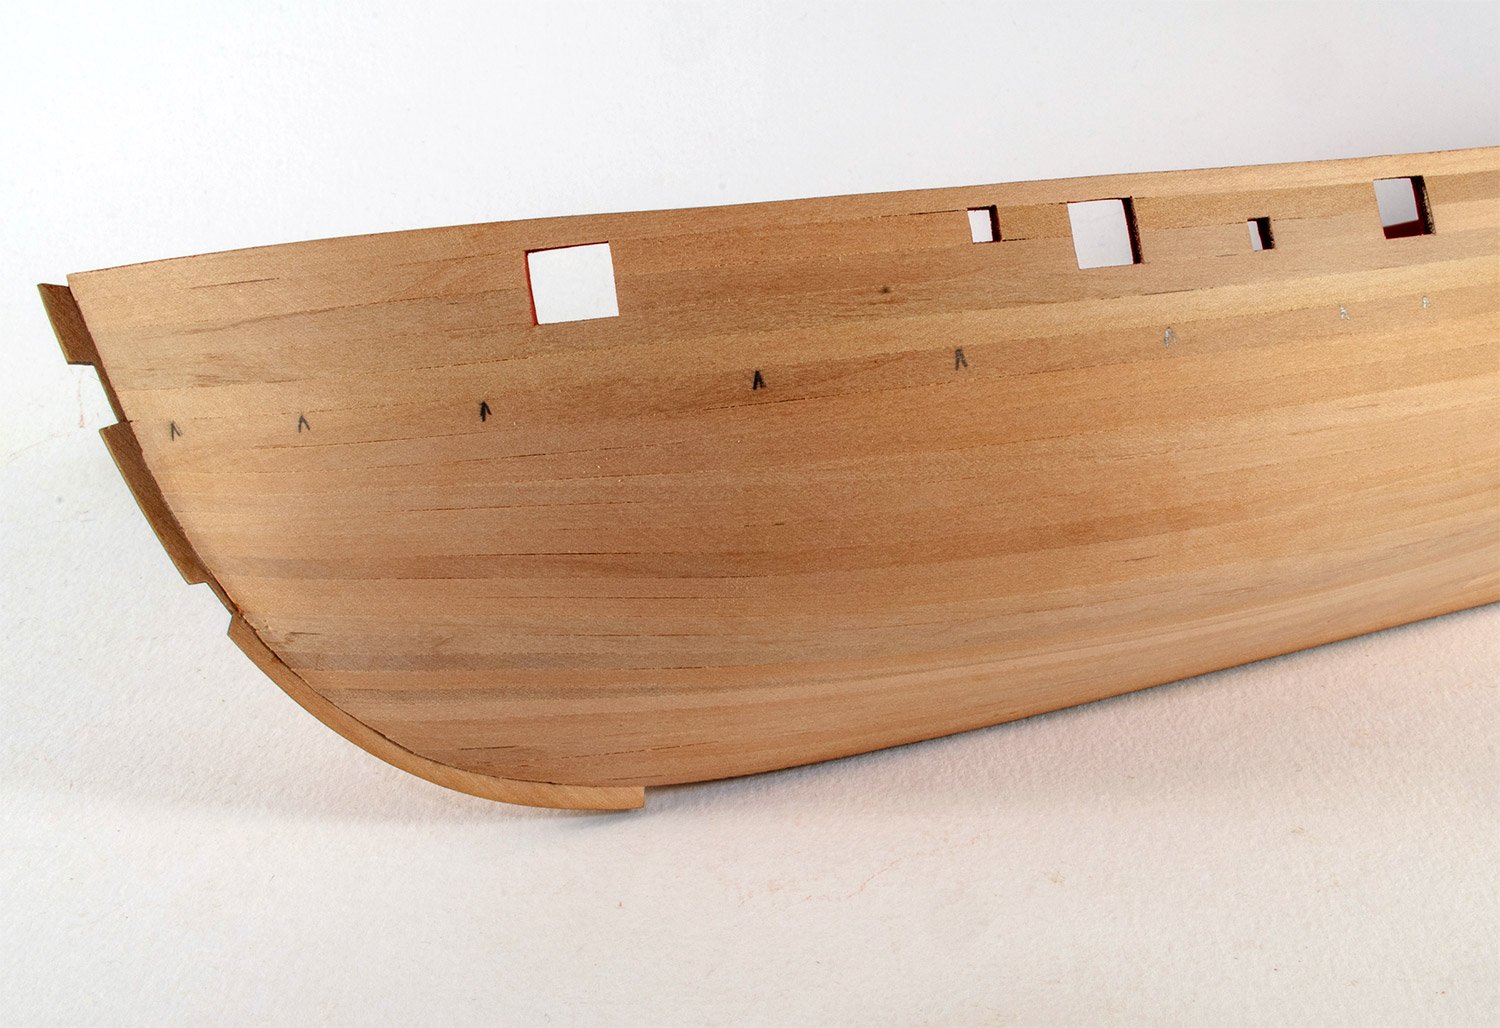
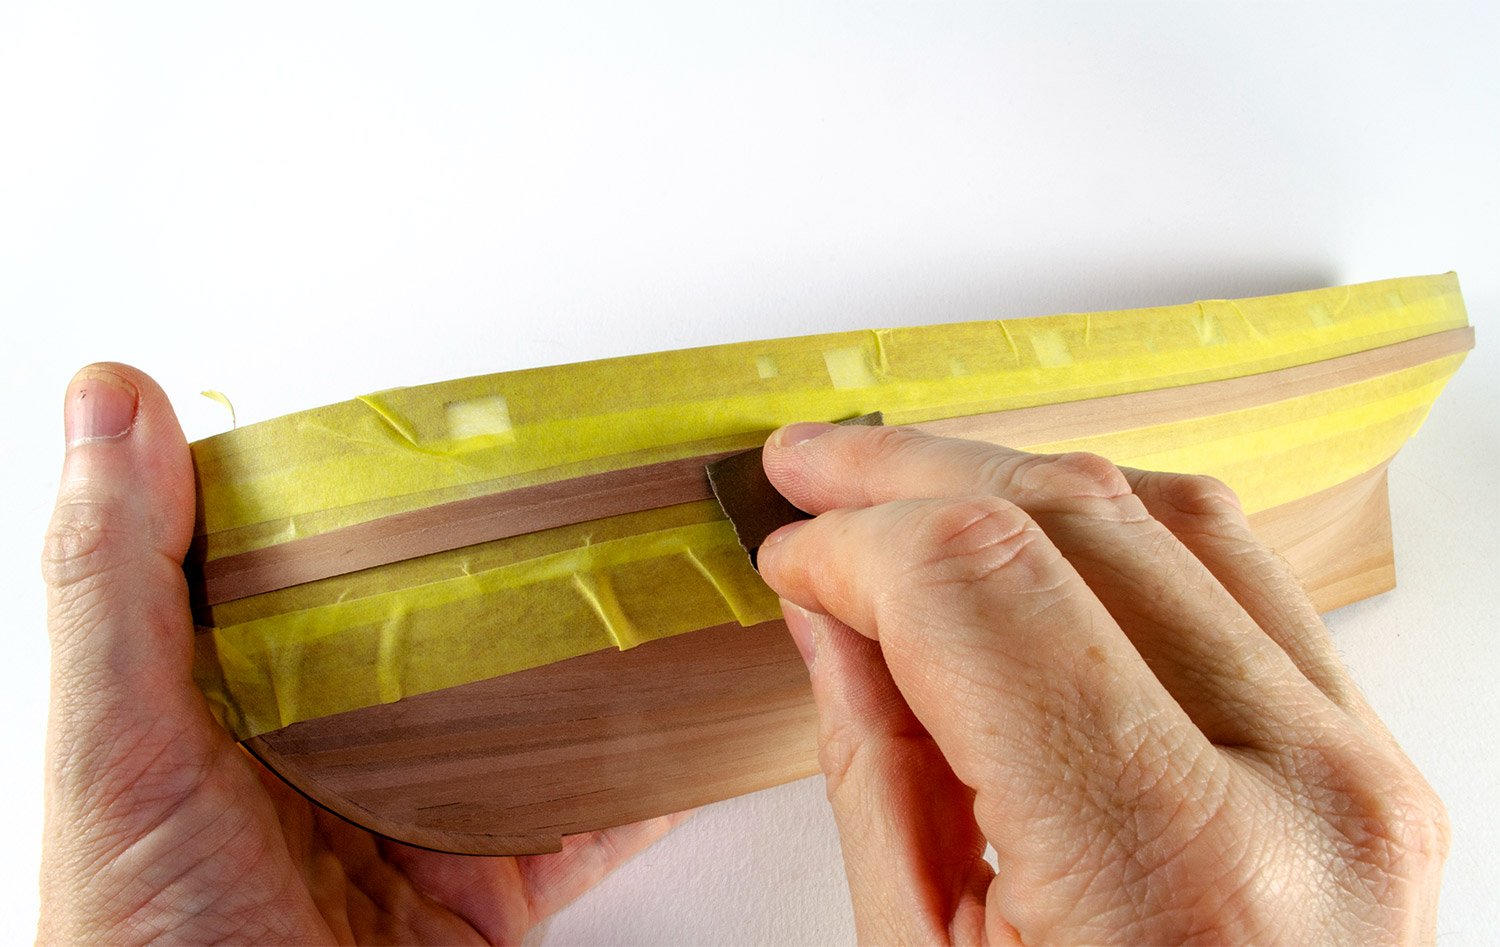
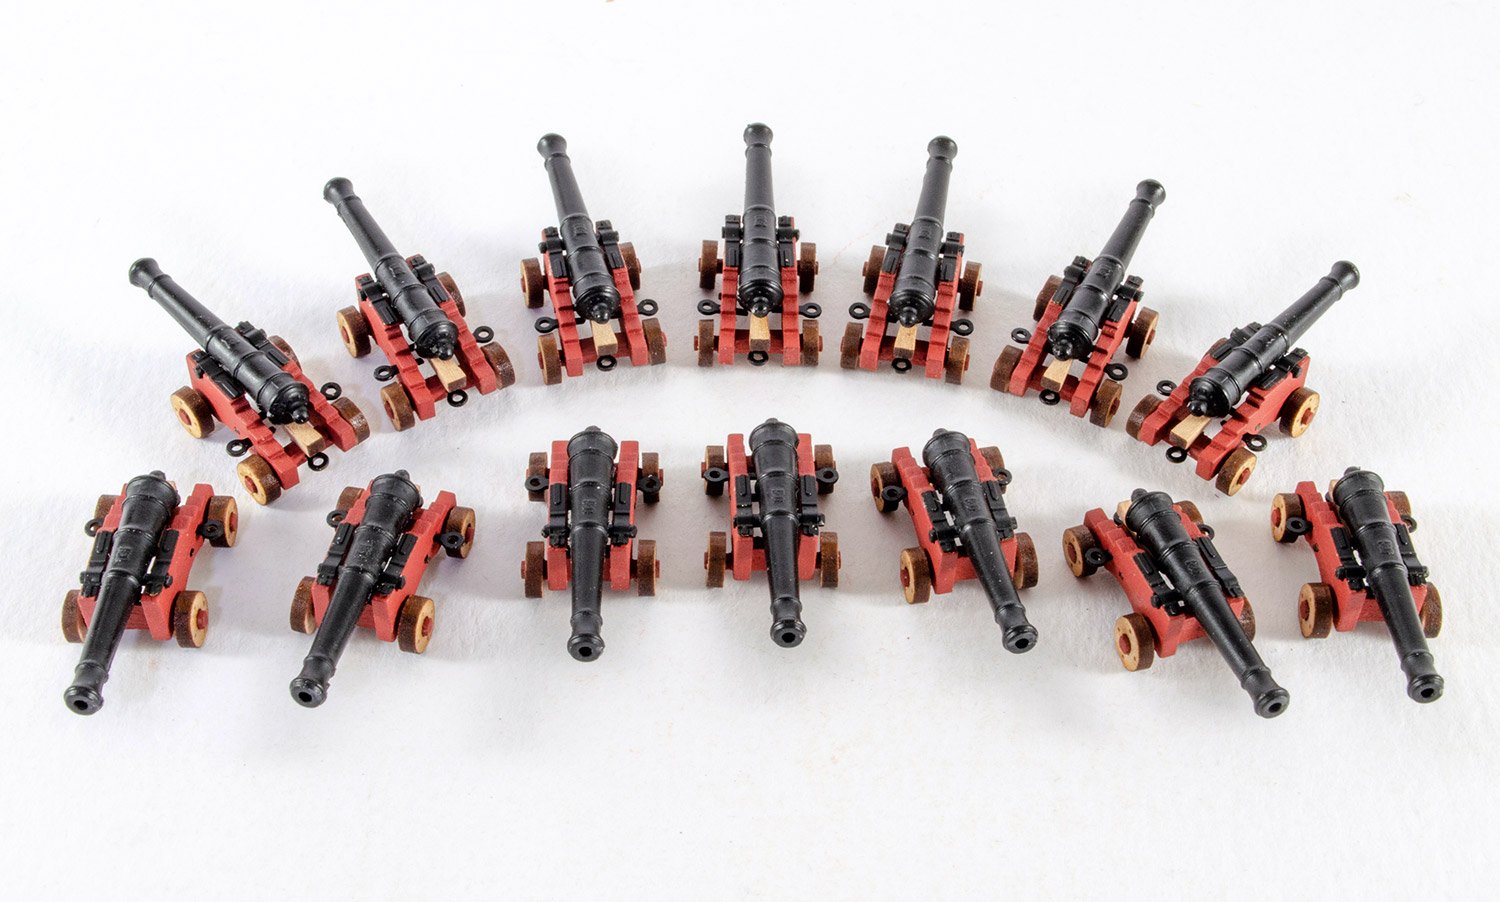
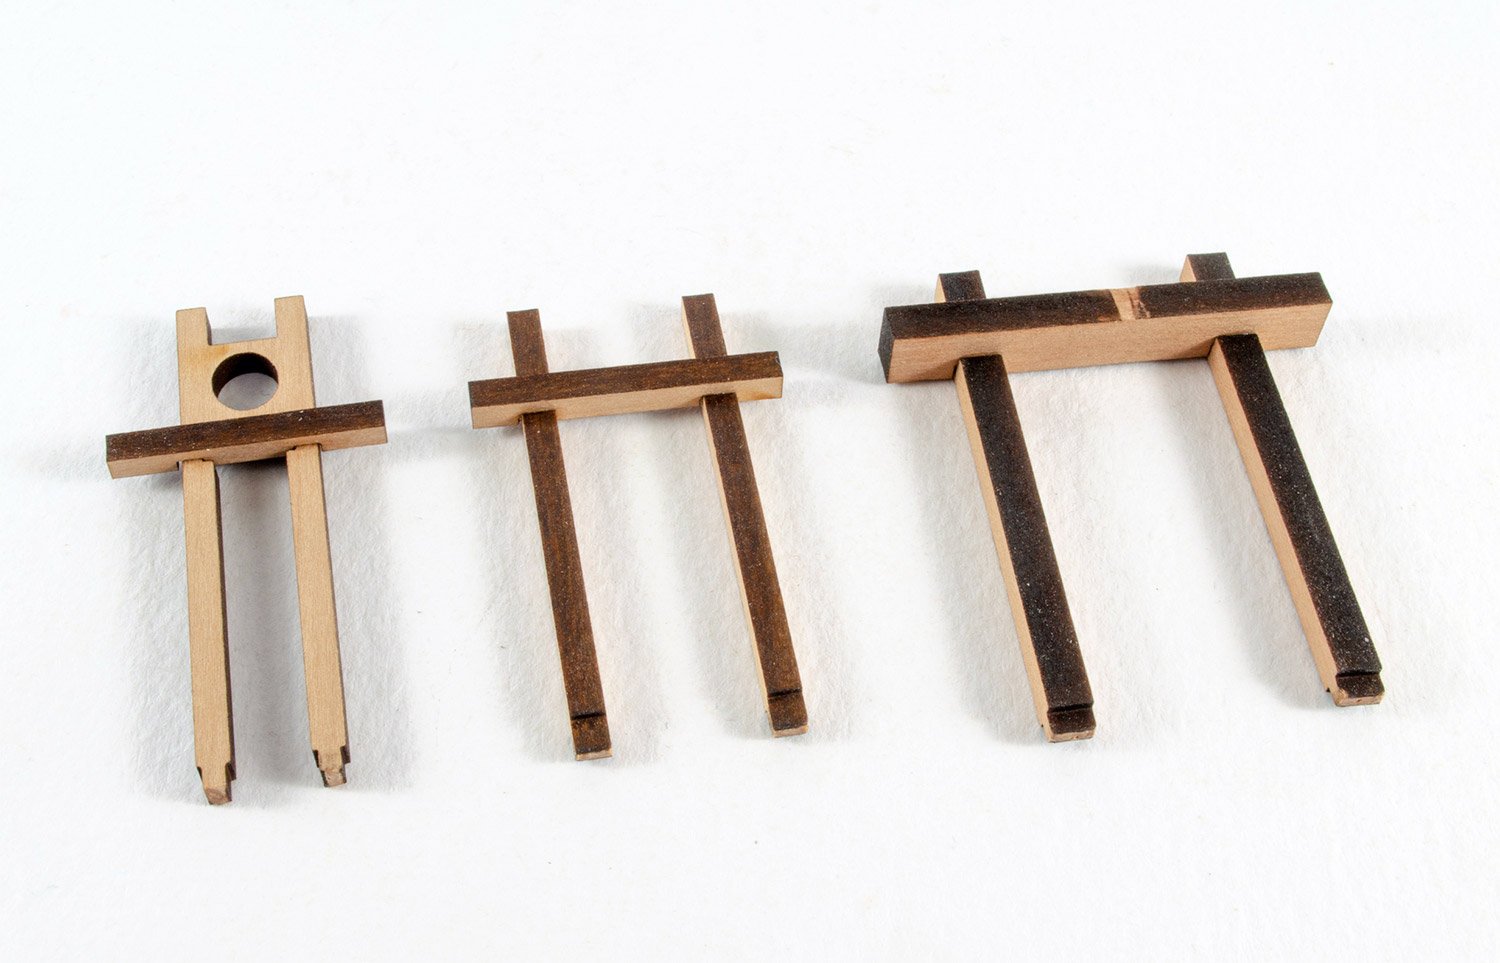
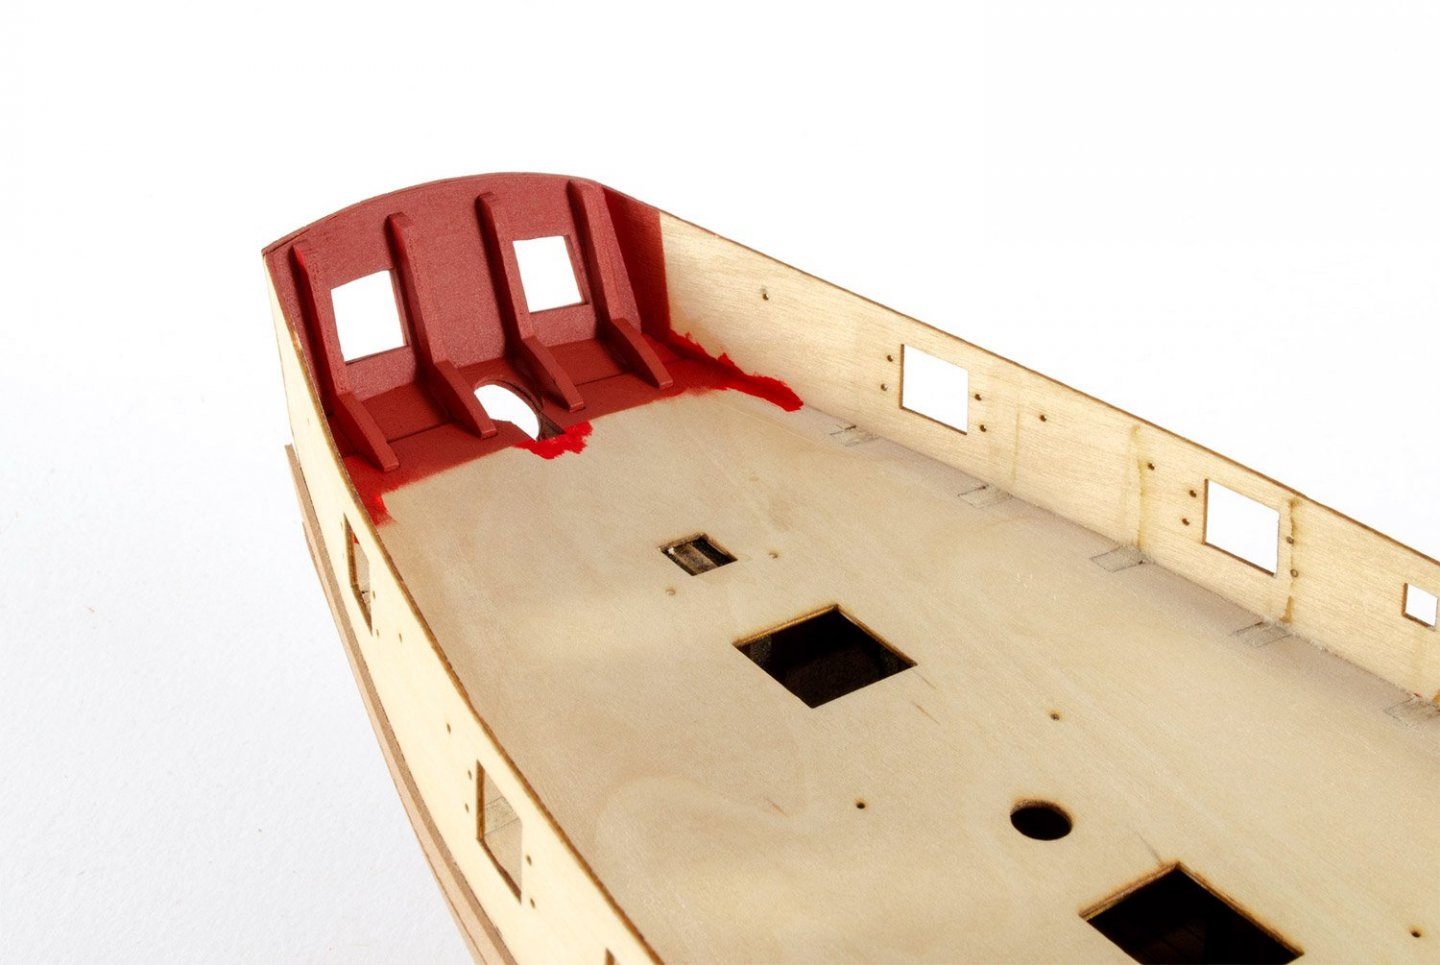
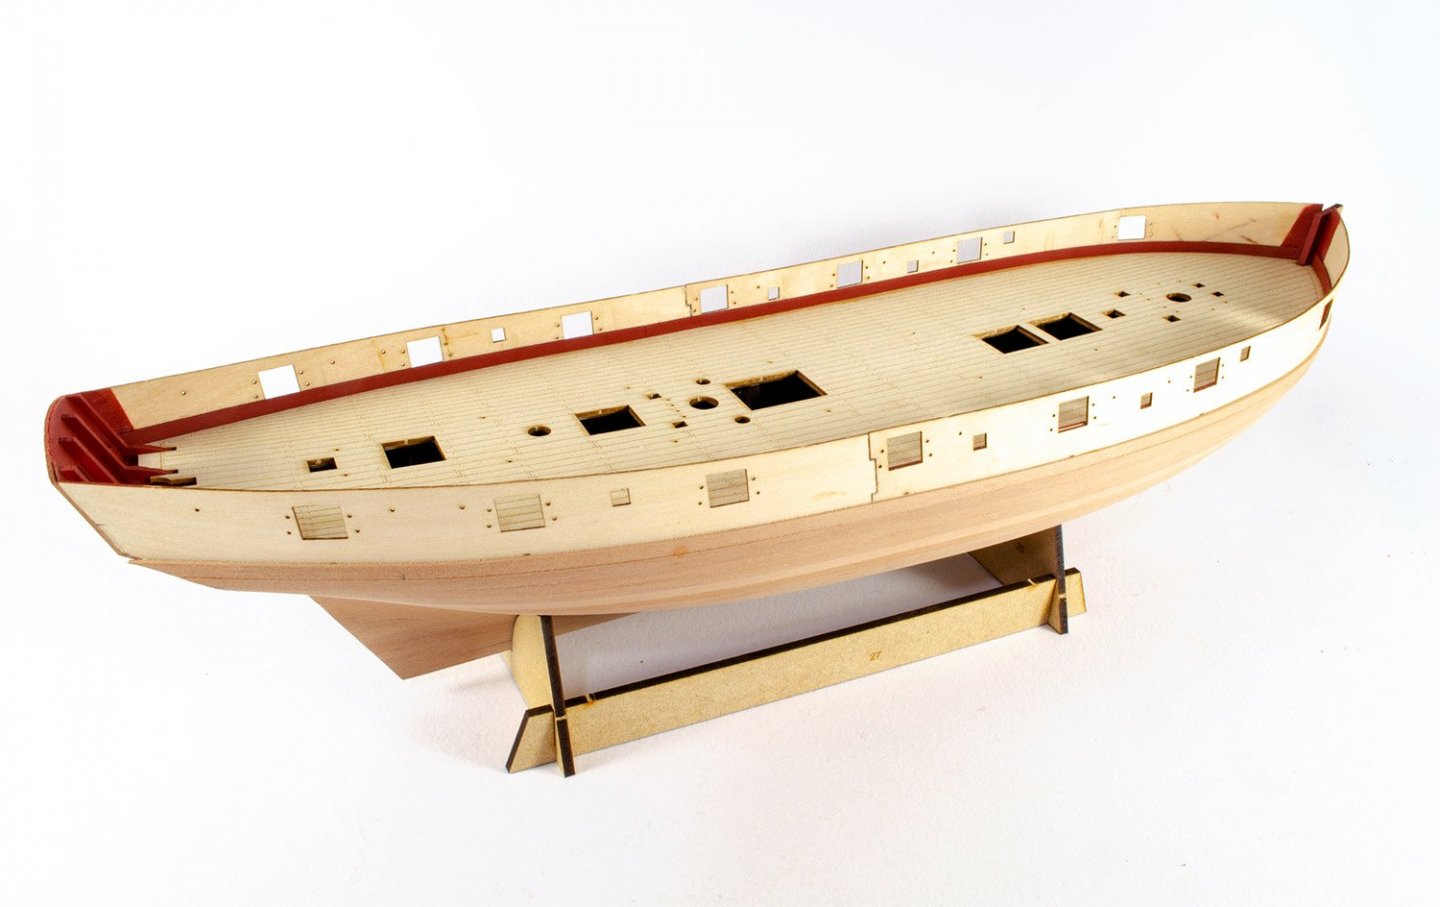
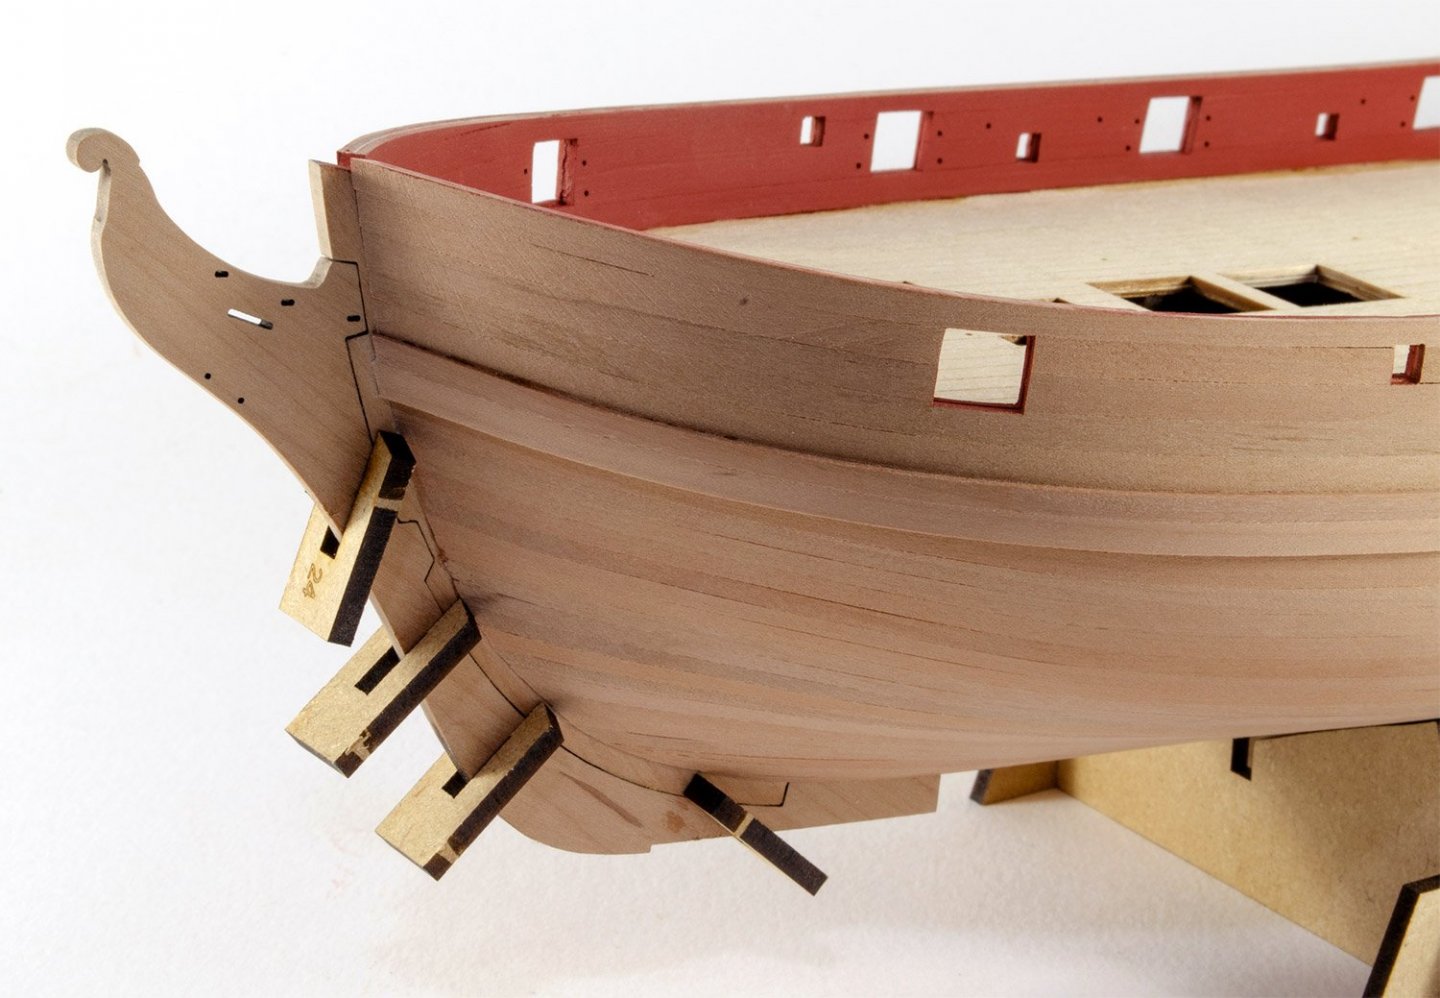
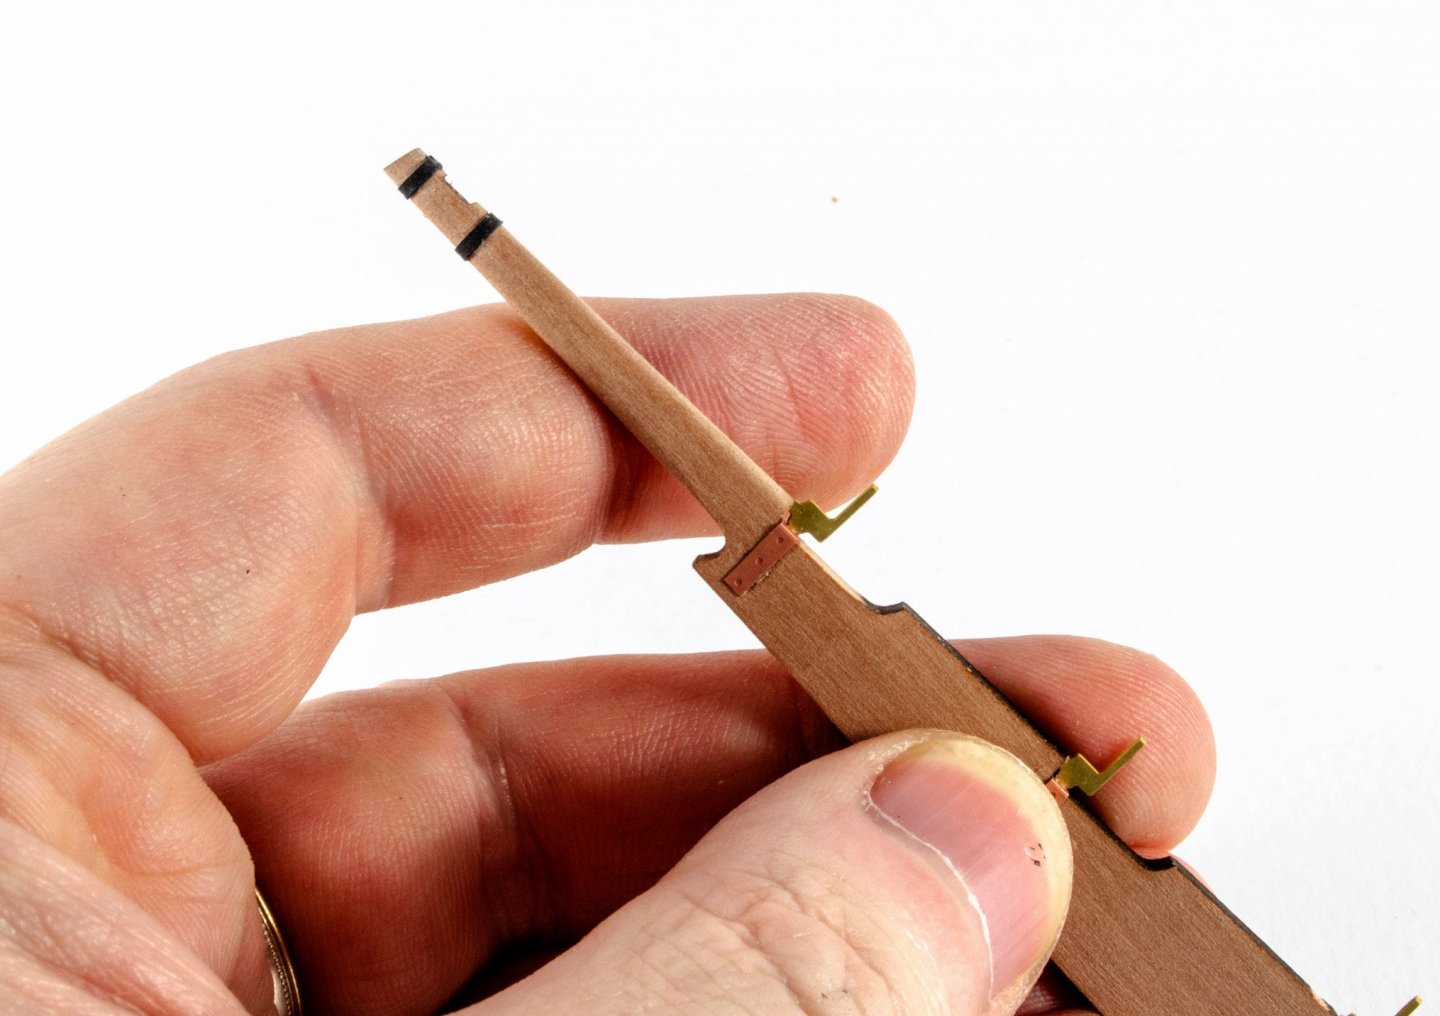
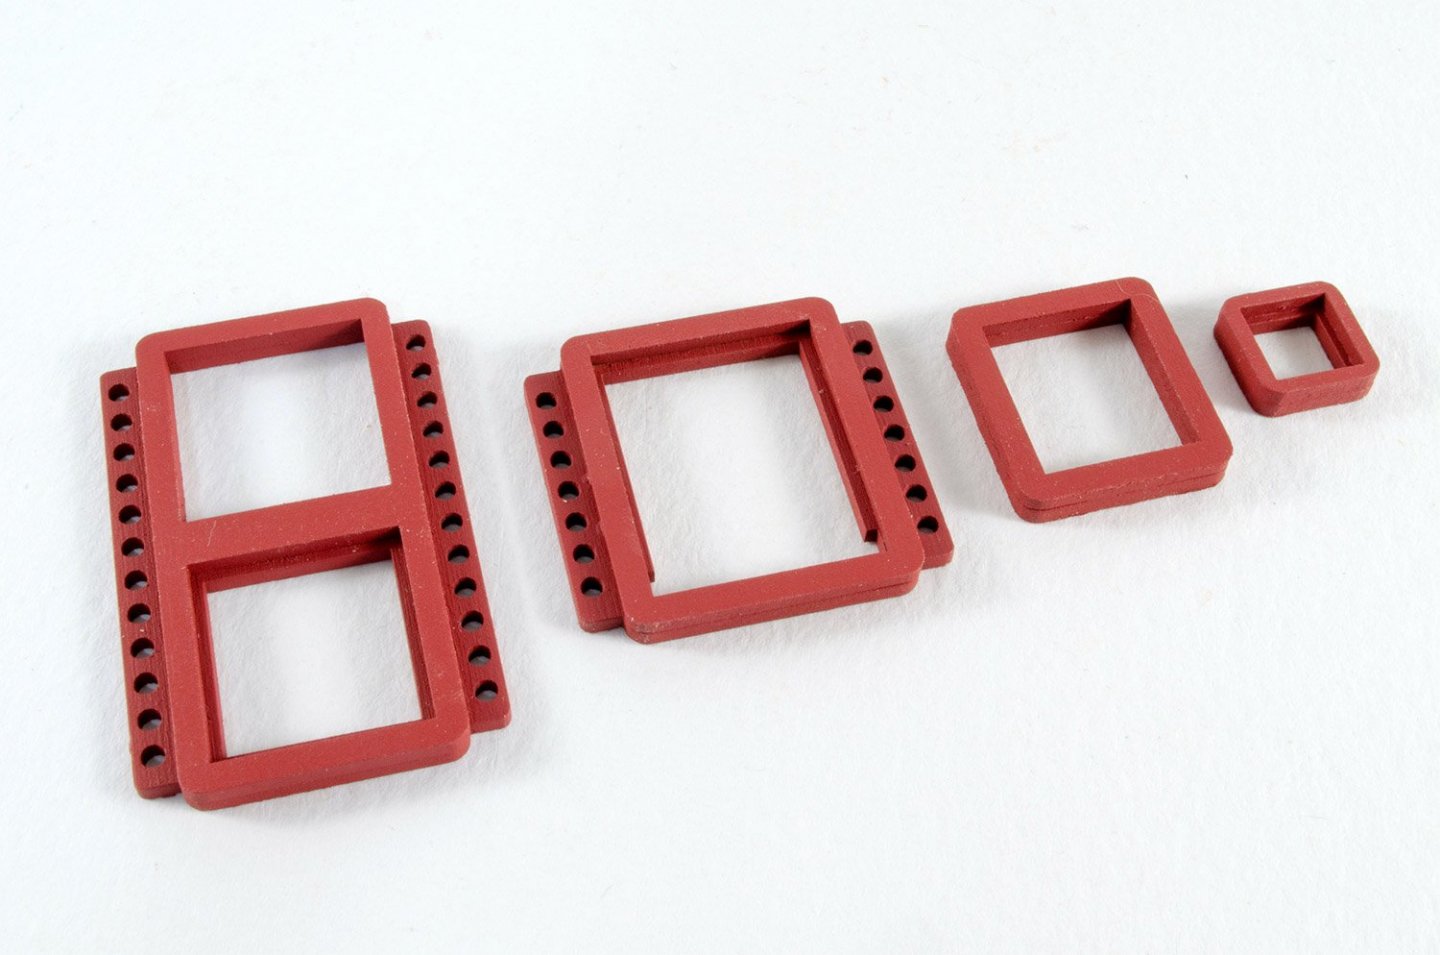
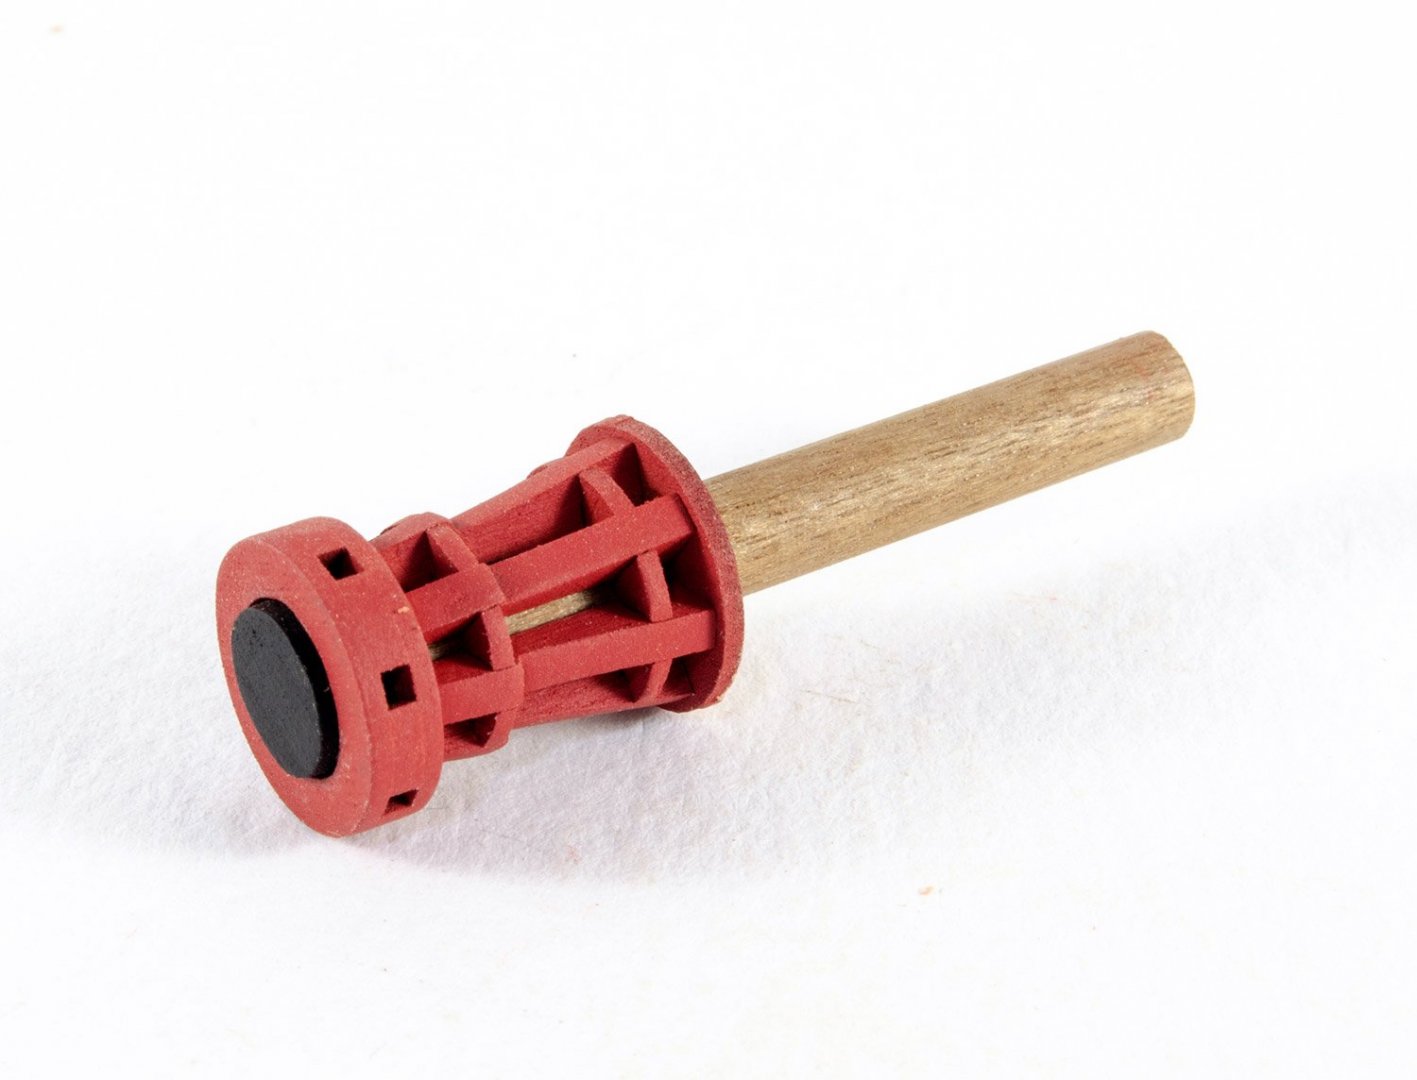
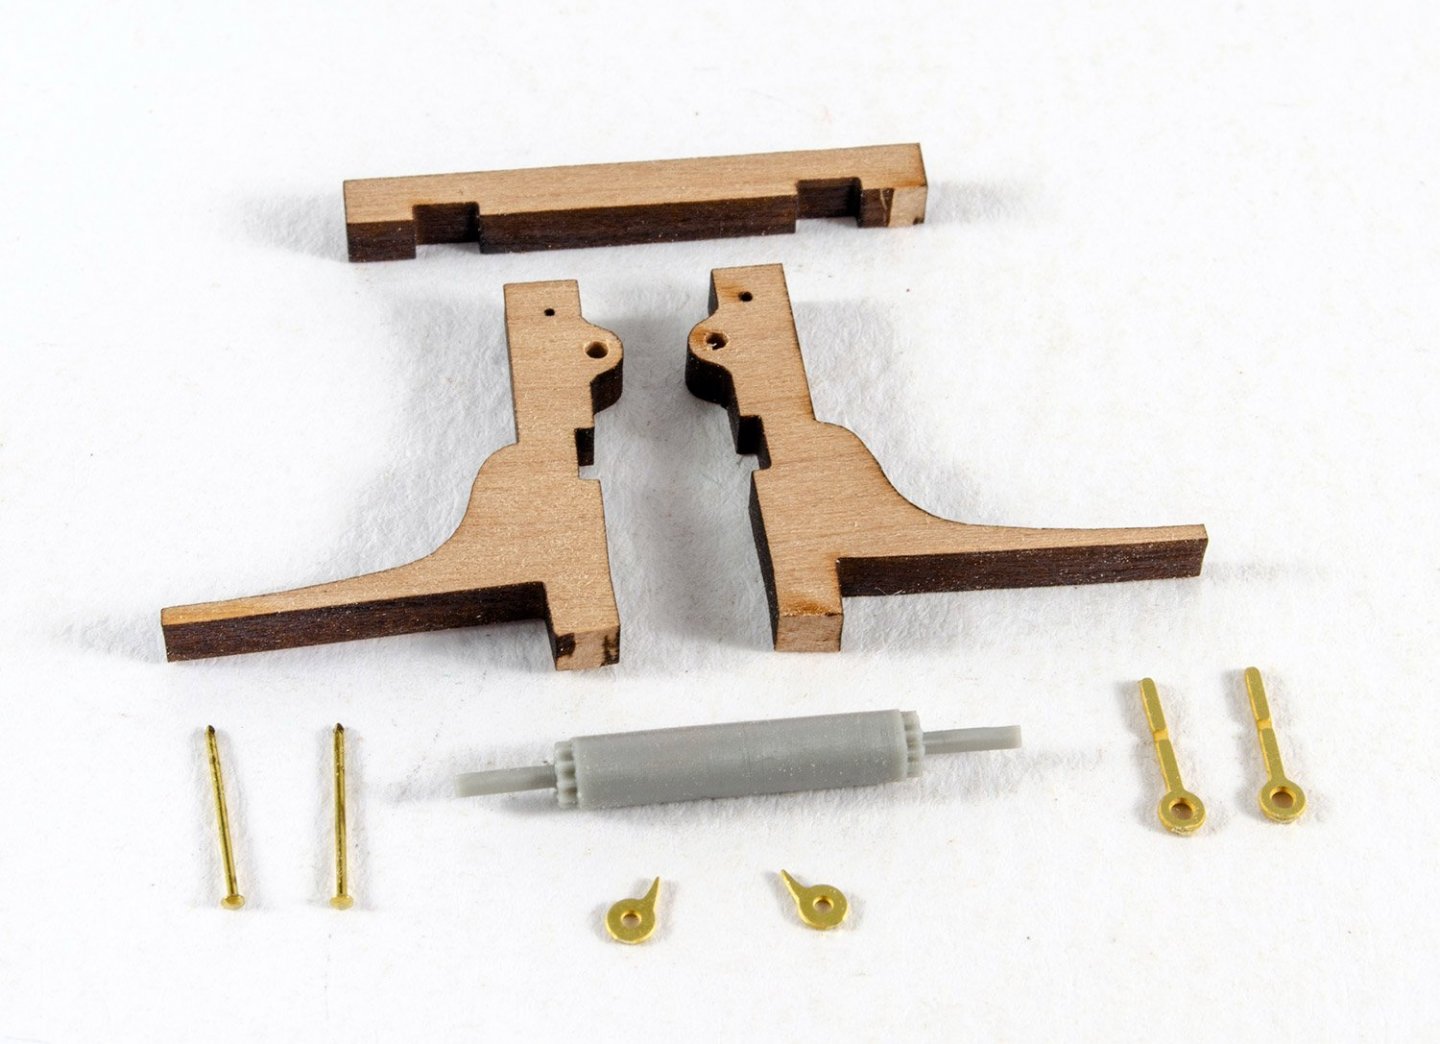
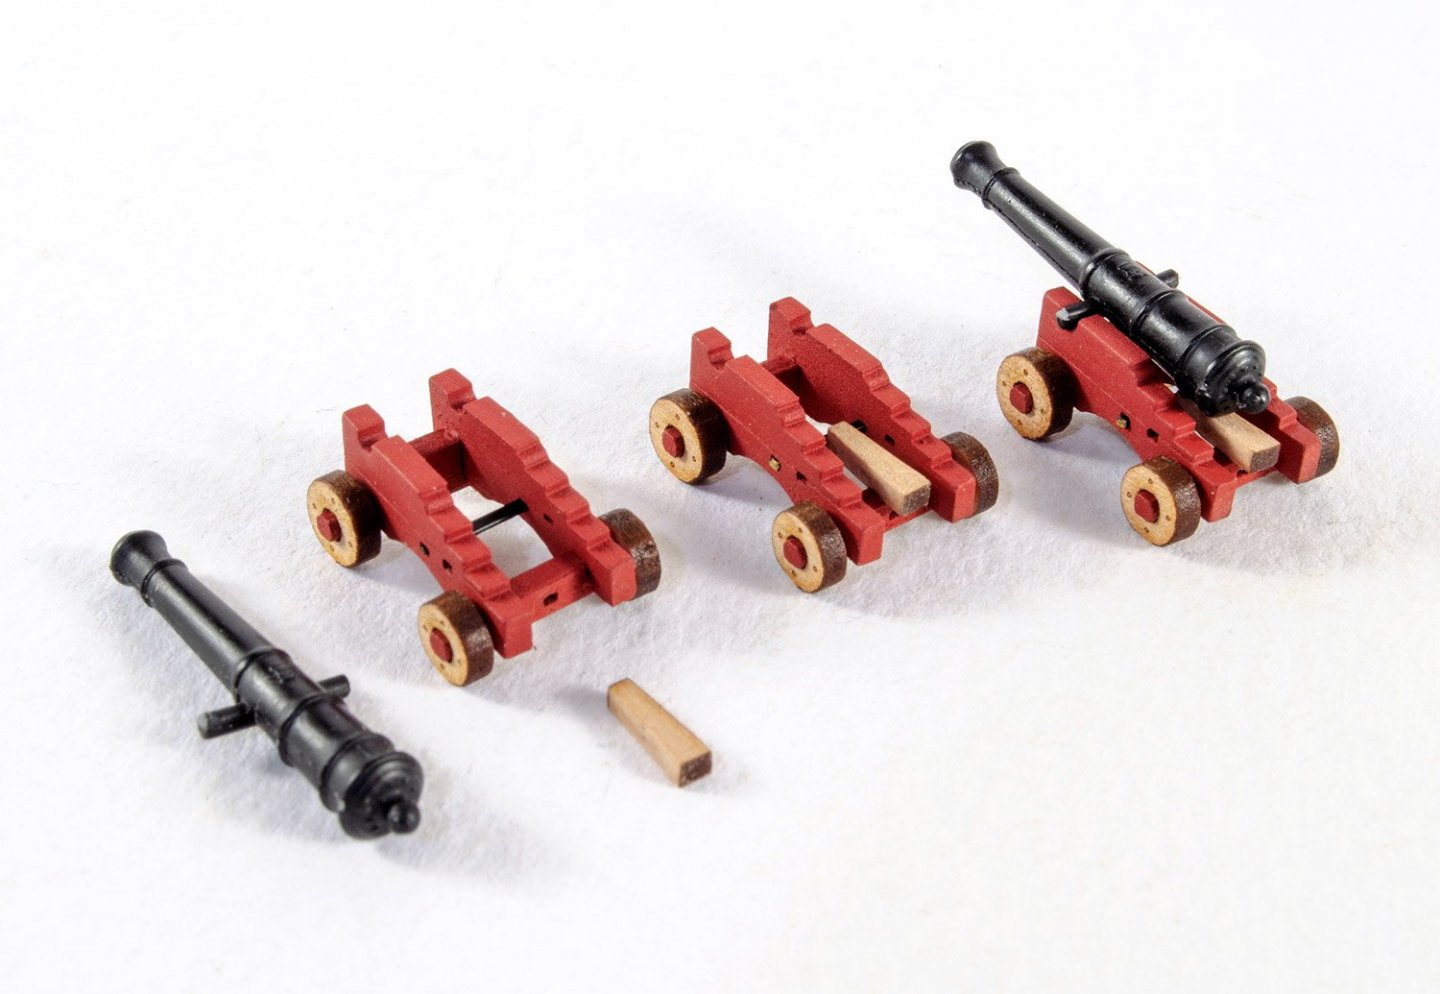
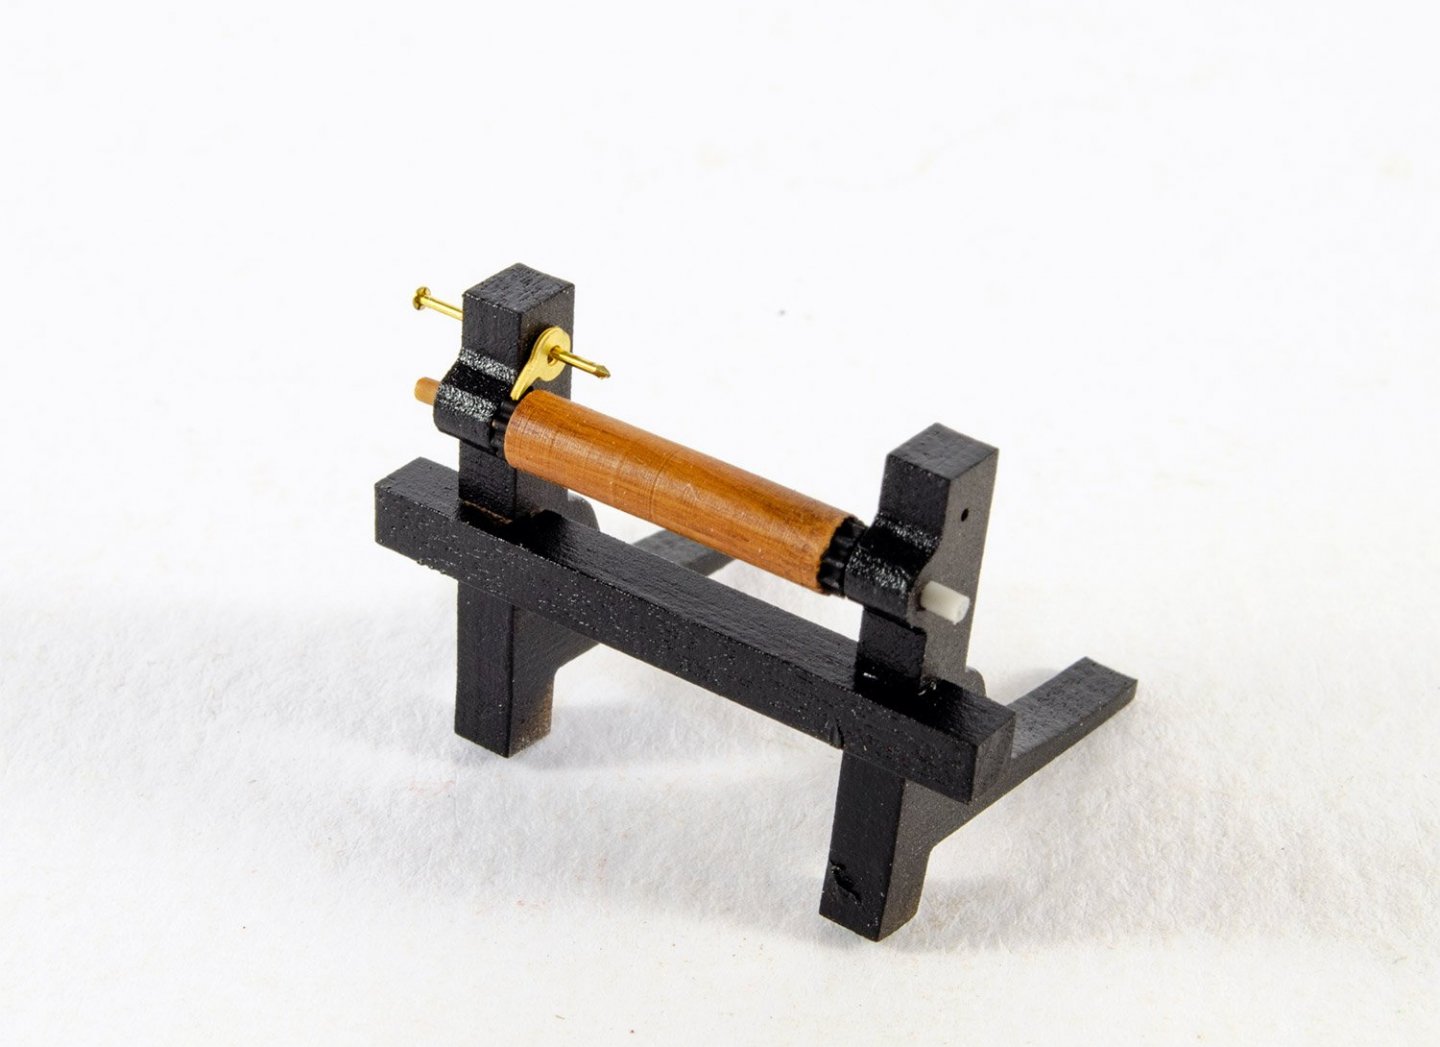
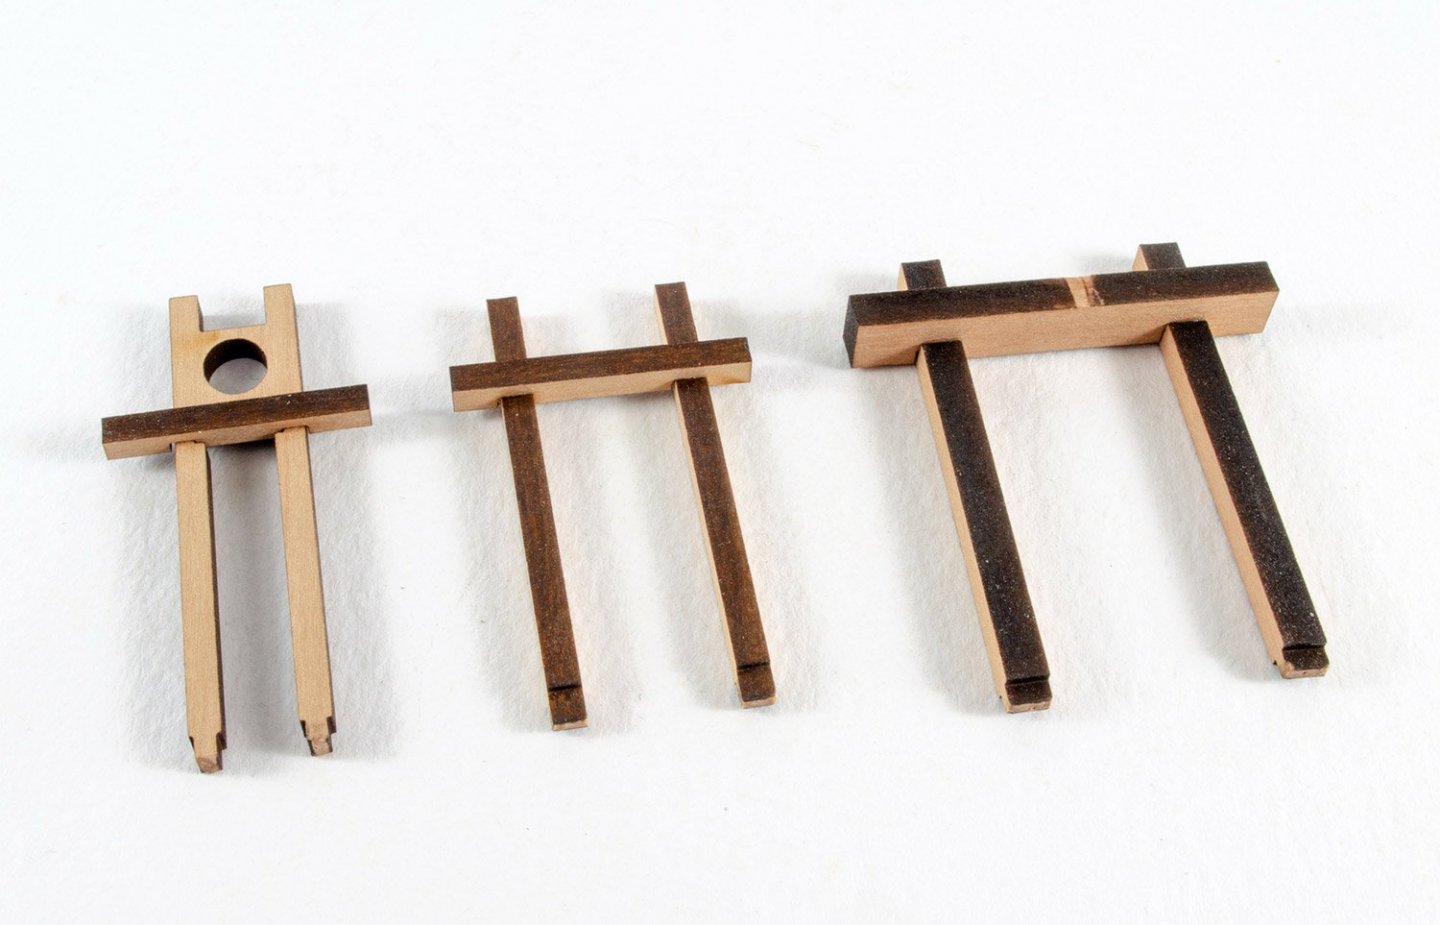
Instead of just posting my work in regular build order, I thought I'd post an idea of exactly what I've been doing, including working on stuff that's further ahead than the regular sequence. As this is for the manual, it doesn't allow me to sit idle and twiddle my thumbs as parts and paints dry. Instead, I go off on a tangent and work on other things. First up, I'll show you where I currently am with the hull. One task I love doing is removing the bulkhead ears from above the deck. At this point, I feel like I'm actually getting somewhere with a build. These are just snapped off with a pair of pliers and the stubs sanded flush with the false deck. Before I can fit the deck, I spray some red oxide primer around the inside bow and stern areas, as these would be difficult to paint later. The standard laser-engraved limewood deck is then installed using Titebond and then clamped down around the edges to make sure it sits perfectly to the false deck. Once the deck is down, the inner bulwarks are planked. All planks are first painted. Painting the lowest plank at least helps to stop paint splashing onto the deck. I was unlucky with my planking as the gaps I needed to fill meant that more or less all paint was stripped back down to the woodwork so I could apply some acrylic wood filler. This was then sanded smooth and the various holes in the ply bulwark drilled through to the inside for the various eyebolts etc. The red oxide paint is now reapplied after completing the exterior pear planks and sanding the whole hull exterior smooth. The only wales I'll be visiting this year with lockdown are the ones I'll be gluing to the exterior of this hull. The top of the first per plank that was laid is now marked with a pencil to identify where the 3mm x 1mm pear strip will fit. This is two planks below the bottom of the newly cut gun ports. After fitting the 3mm wide plank to each side, a 4mm plank was then butt up directly below it. Masking tape was now applied to either side so I didn't damage the surrounding pear. Sandpaper is now used to smooth the exterior. Things start to take further shape as the outer prow is fitted, along with the keel and stern keel post. Some of the supplied clamps are used to keep everything in alignment. Whilst that was setting, I made the rudder. Although you'll see copper gudgeons and pintles on this, they are a leftover from the original Speedy kit I have. There Flirt kit will be supplied with these in brass as there's no copper plates on this kit. Cartridge paper is used for the iron bands at either side of the tiller arm location. The original masking tape for the wales was removed, simply because I didn't want to risk any sanding dust being lodged in there. The outside edges of the wales were again carefully masked, followed by the rest of the model, and Plastikote black spray applied. There will be no black paint on the bow area as this is being left in bear pear, along with some new laser-engraved per parts. I did say I'd been working on some other stuff, and here it is. We have some grate frames, bitts, windlass, ladders, pumps, capstan and cannon. I still have a lot of work to do on the cutter yet, but as you can see, things are moving at a nice pace. More when I have it...


- 109 replies
-
- 24
-
-
- Vanguard Models
- Flirt
- (and 1 more)
-
Hi Richard, There won't be anything different with regards to exposing the lower deck, but it does mean you can now leave a grating over to one side, so you can see the lower area and engraved deck. The pins I use in first planking are the ones that come with the kit.....very fine (and sharp) brass pins.
- 109 replies
-
- 1
-
-
- Vanguard Models
- Flirt
- (and 1 more)
-
I'll update my build log in the next day or so too, to spur you on.
-
Once those are on, progress should be nice and steady.
-
Photos, or it didn't happen.
-
Glad you like the build log and manual. Any questions, fire away.
- 195 replies
-
- 3
-
-
- lady eleanor
- vanguard models
- (and 1 more)
-
Clamps can easily slip off something this shape, and you don't want to put any stress on the MDF bulkhead ears above the decks. I clamped my ply to the ears, and pinned to the lower bulkheads. A little further back, I also used Amati clamps to hold against bulkhead instead of pinning.
-
I never closed that gap on mine. I also got it, but it wasn't a problem. The first planks are almost twice the thickness of the ply, just work your way down and realise that your first planks might not also quite sit on that 2nd bulkhead, and then reduce that error until they do, with subsequent planks.
-
I think I'll be adding one to Flirt.
-
There will be new photos showing this in the Flirt manual.
- 725 replies
-
- 2
-
-
- vanguard models
- speedy
- (and 1 more)
-
ancre Coureur by cafmodel - 1/48
James H replied to cafmodel's topic in - Build logs for subjects built 1751 - 1800
That looks real nice with the boxwood ornamentation. Are these supplied ready to use, or do they need to be removed from their carving block? -
Nice to see you back in the hobby again, and you work looks gorgeous!
-
Looks like it's all faired for planking. This is when you'll start to really see the hull come together.
-
Yes, the packets have an identifying number on them. The lighter, thicker and wider planks (5mm x 1.5mm) are lime for first planking. Pearwood for second layer is 4mm x 1mm, and look pinkish.
-
Planked yet?