HOLIDAY DONATION DRIVE - SUPPORT MSW - DO YOUR PART TO KEEP THIS GREAT FORUM GOING! (Only 13 donations so far - C'mon guys!)
×


James H
-
Posts
6,063 -
Joined
-
Last visited
Content Type
Profiles
Forums
Gallery
Events
Everything posted by James H
-
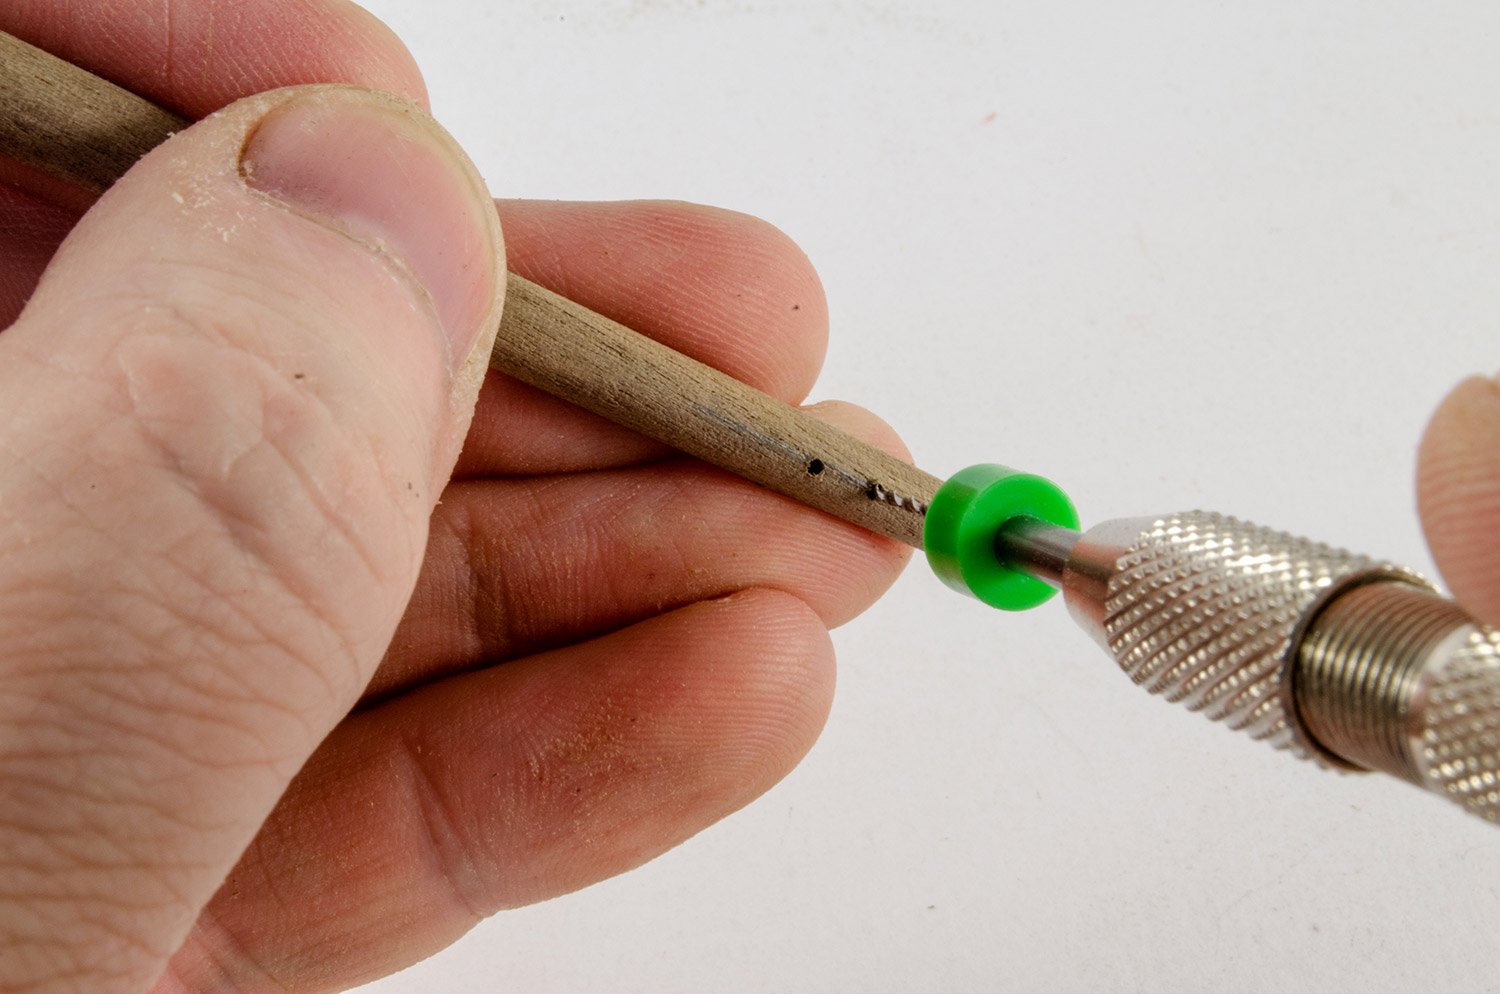
 That's just a regular pin-vice/vise. I have a couple from different manufacturers and they have interchangeable collet sizes. I've had them years so I can't remember where I got them 🤔
- 100 replies
-
- 4
-

-
- zulu
- vanguard models
- (and 2 more)
-
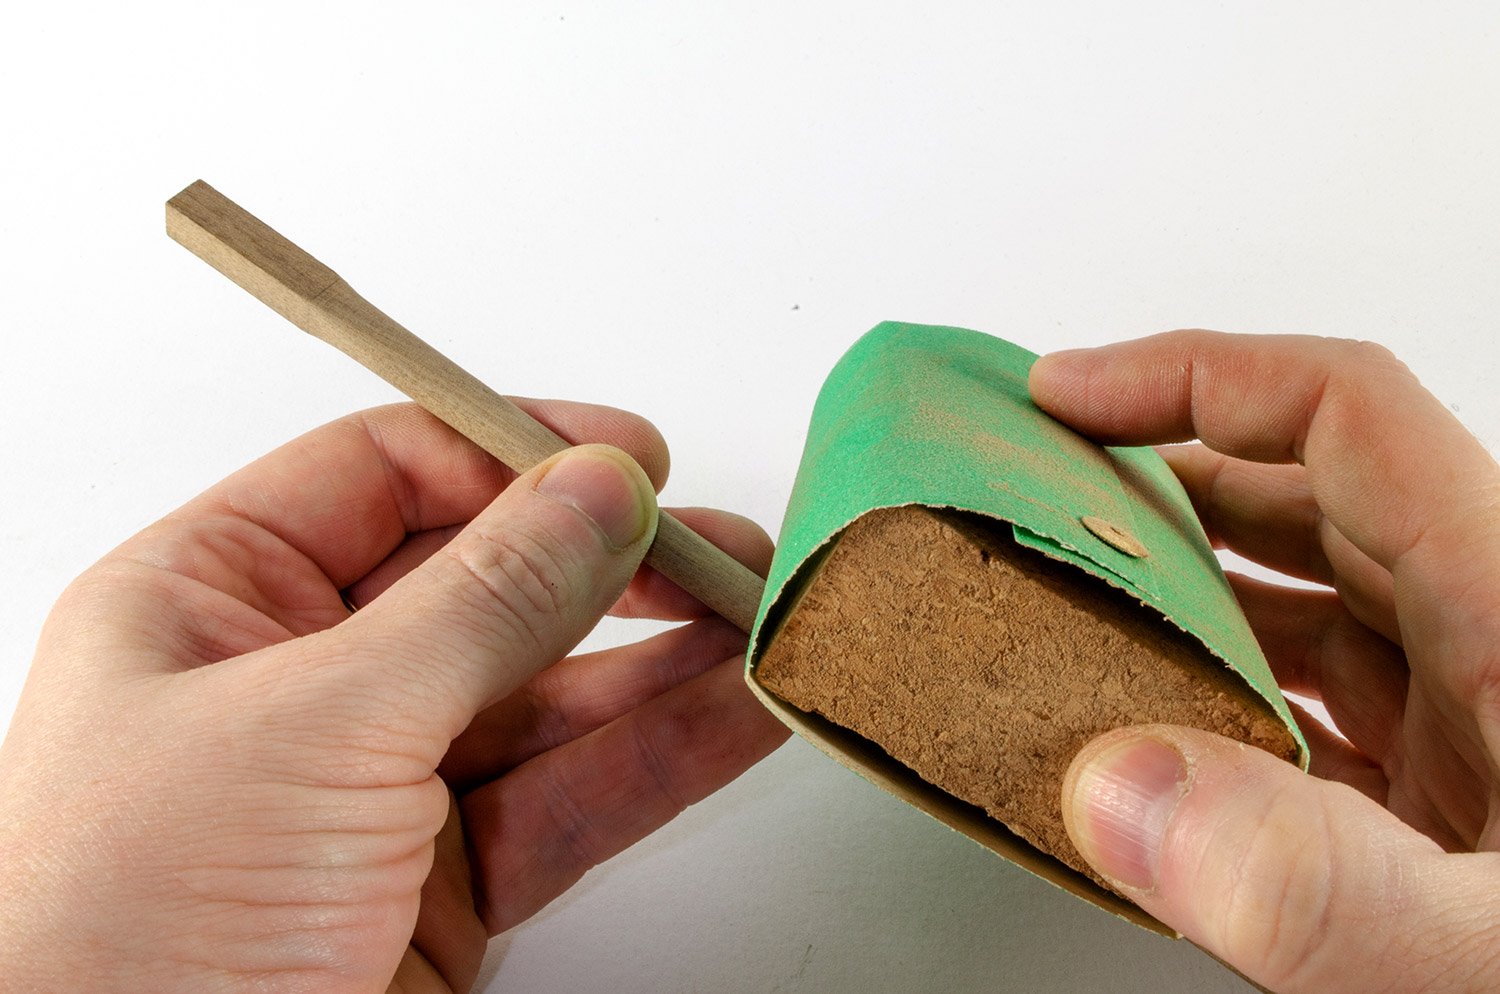
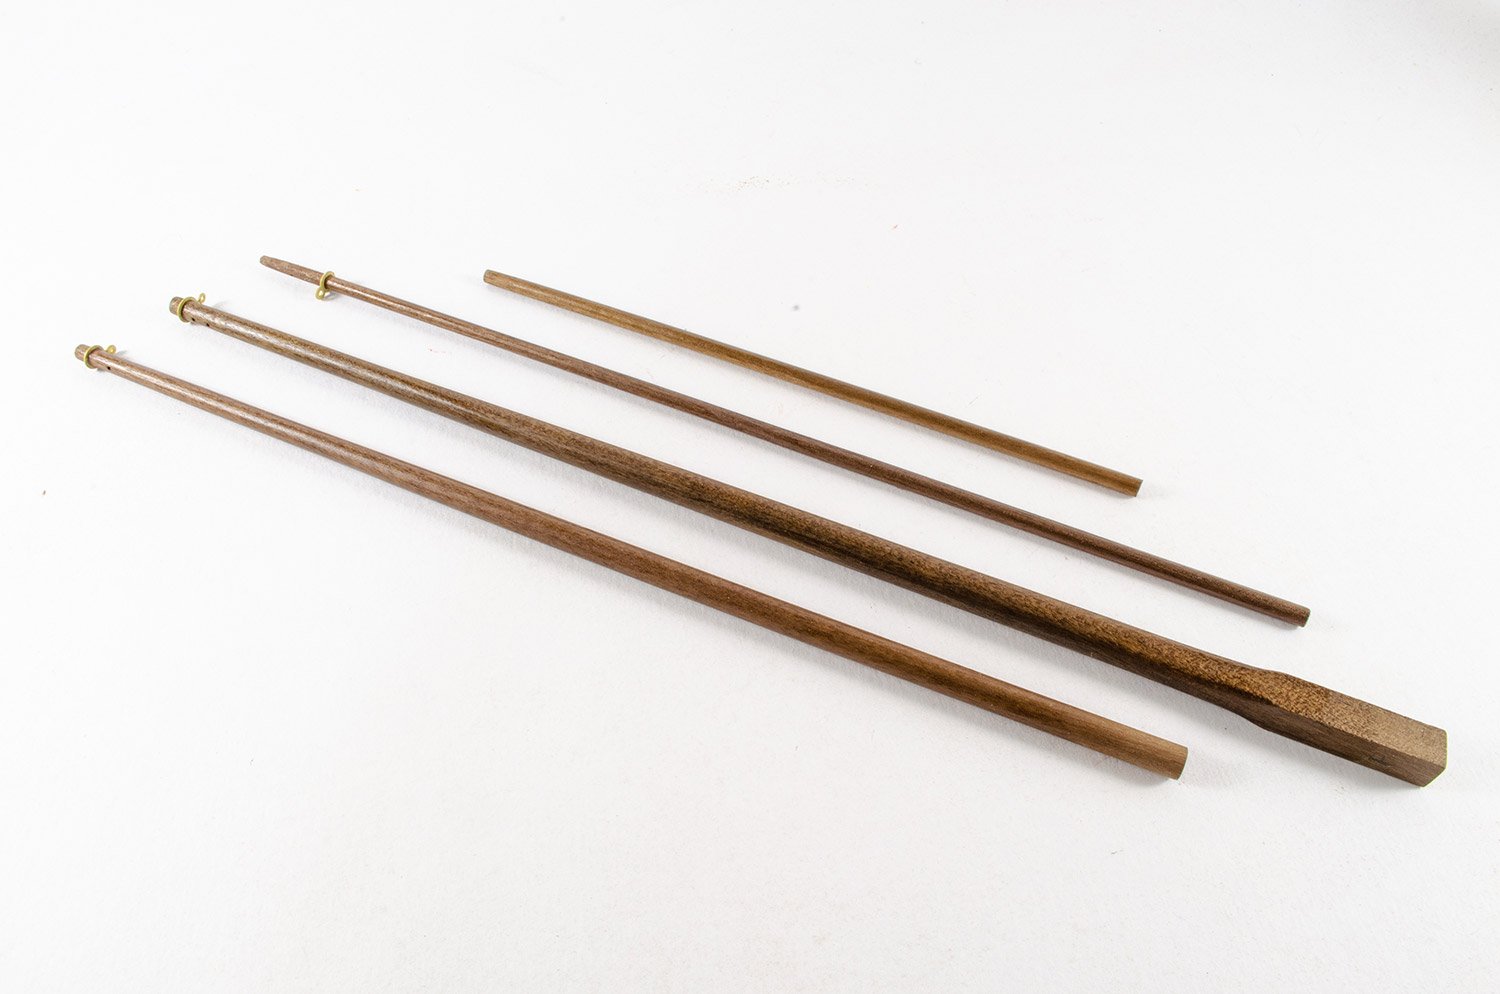
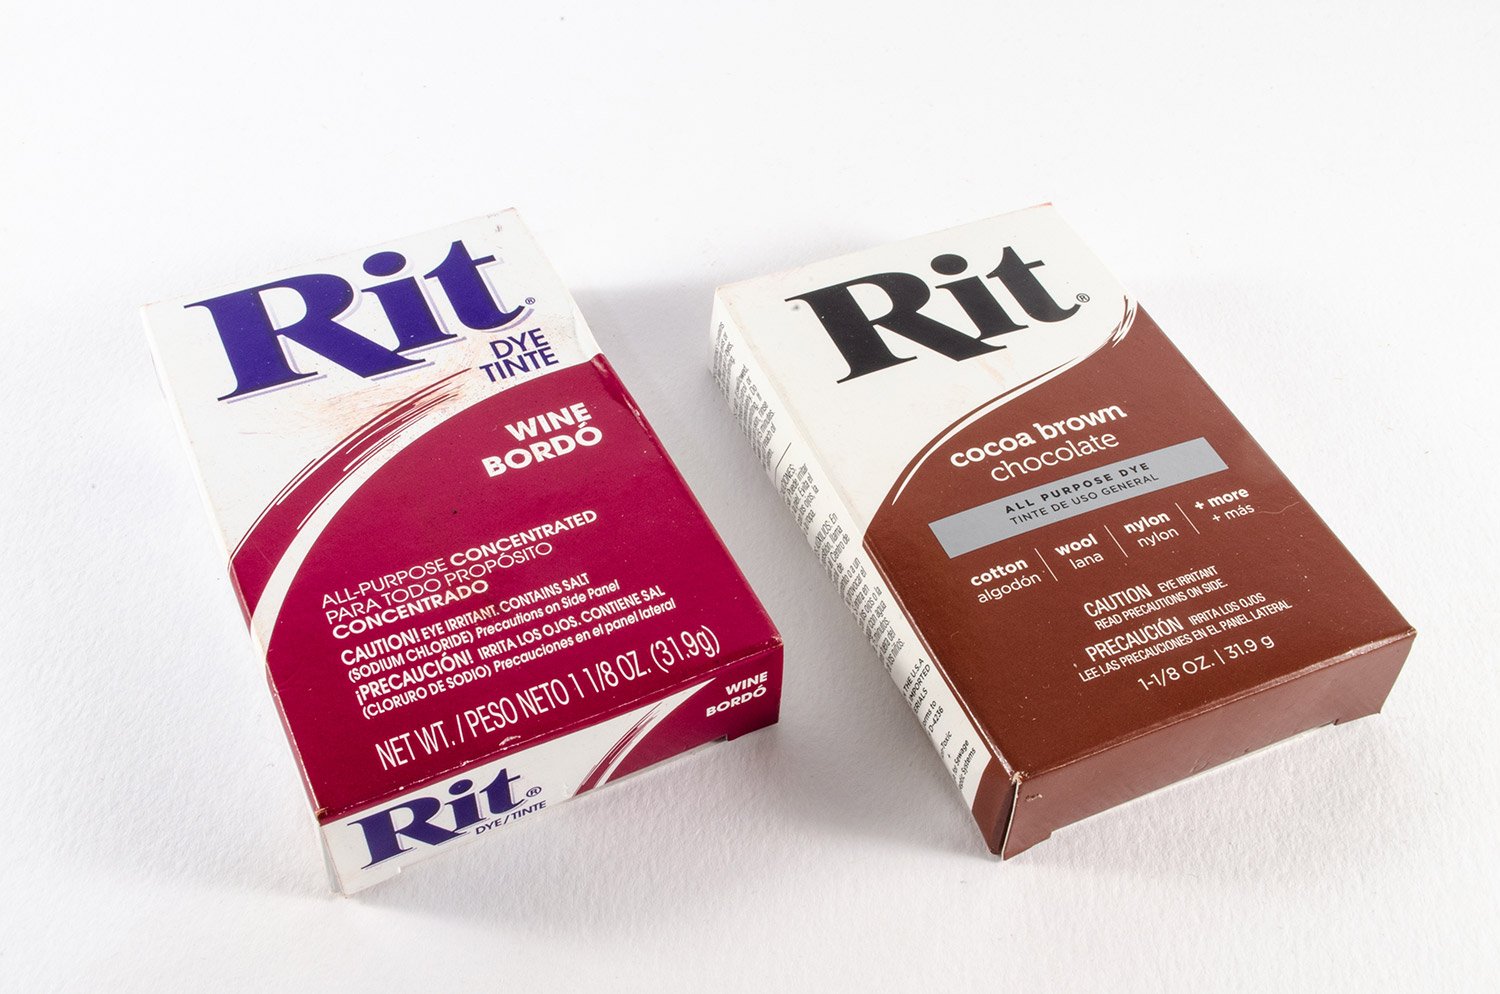
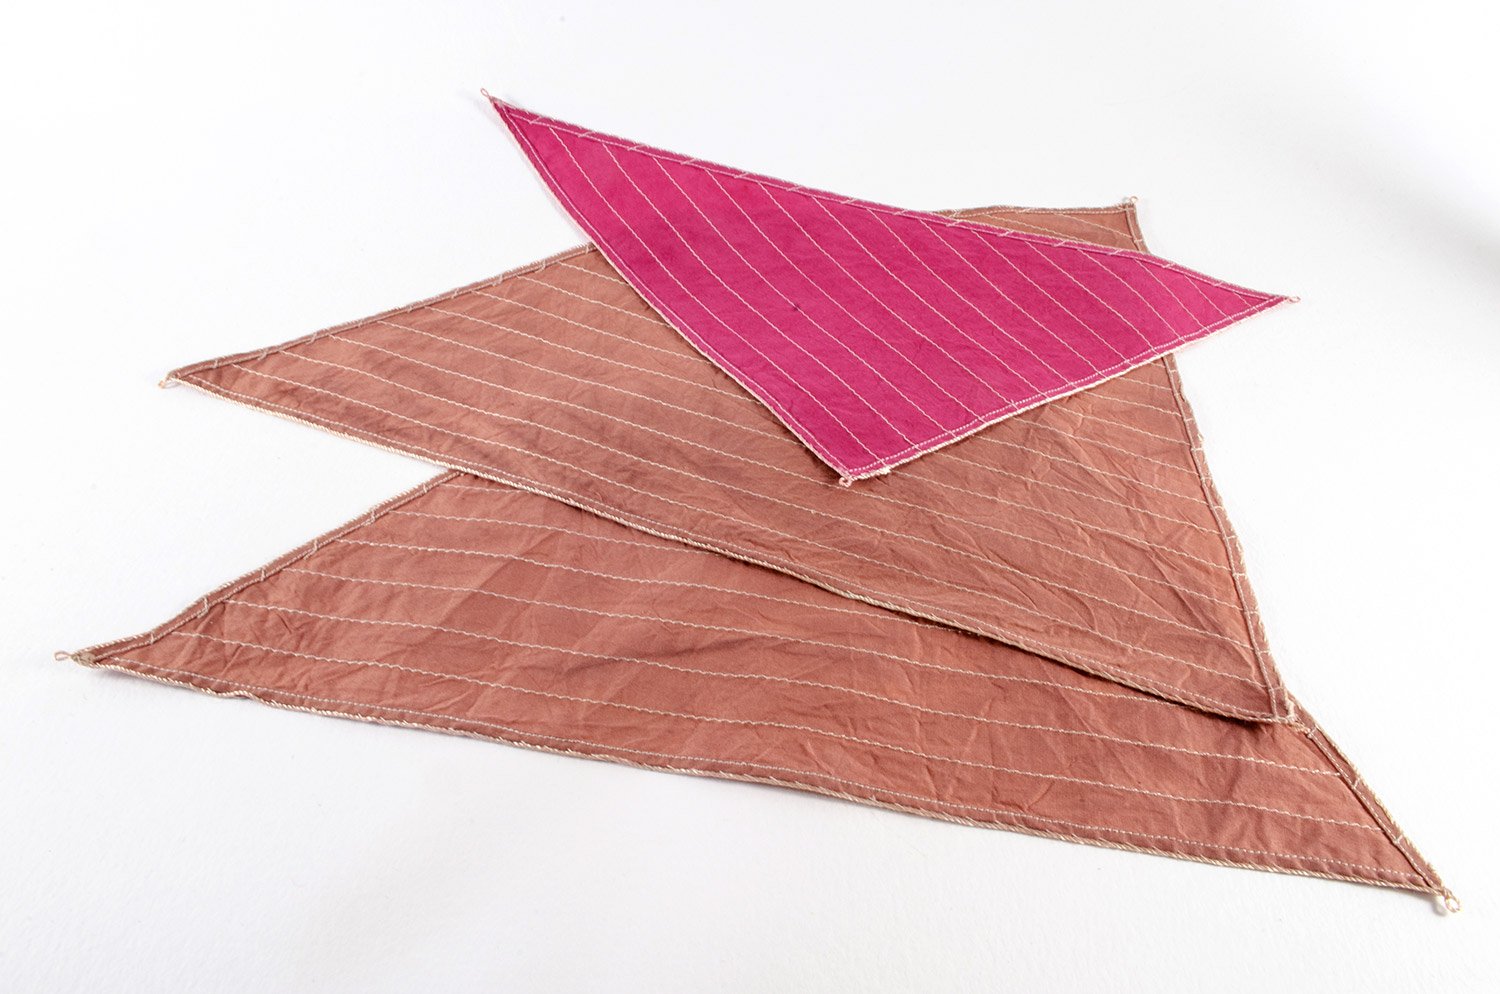
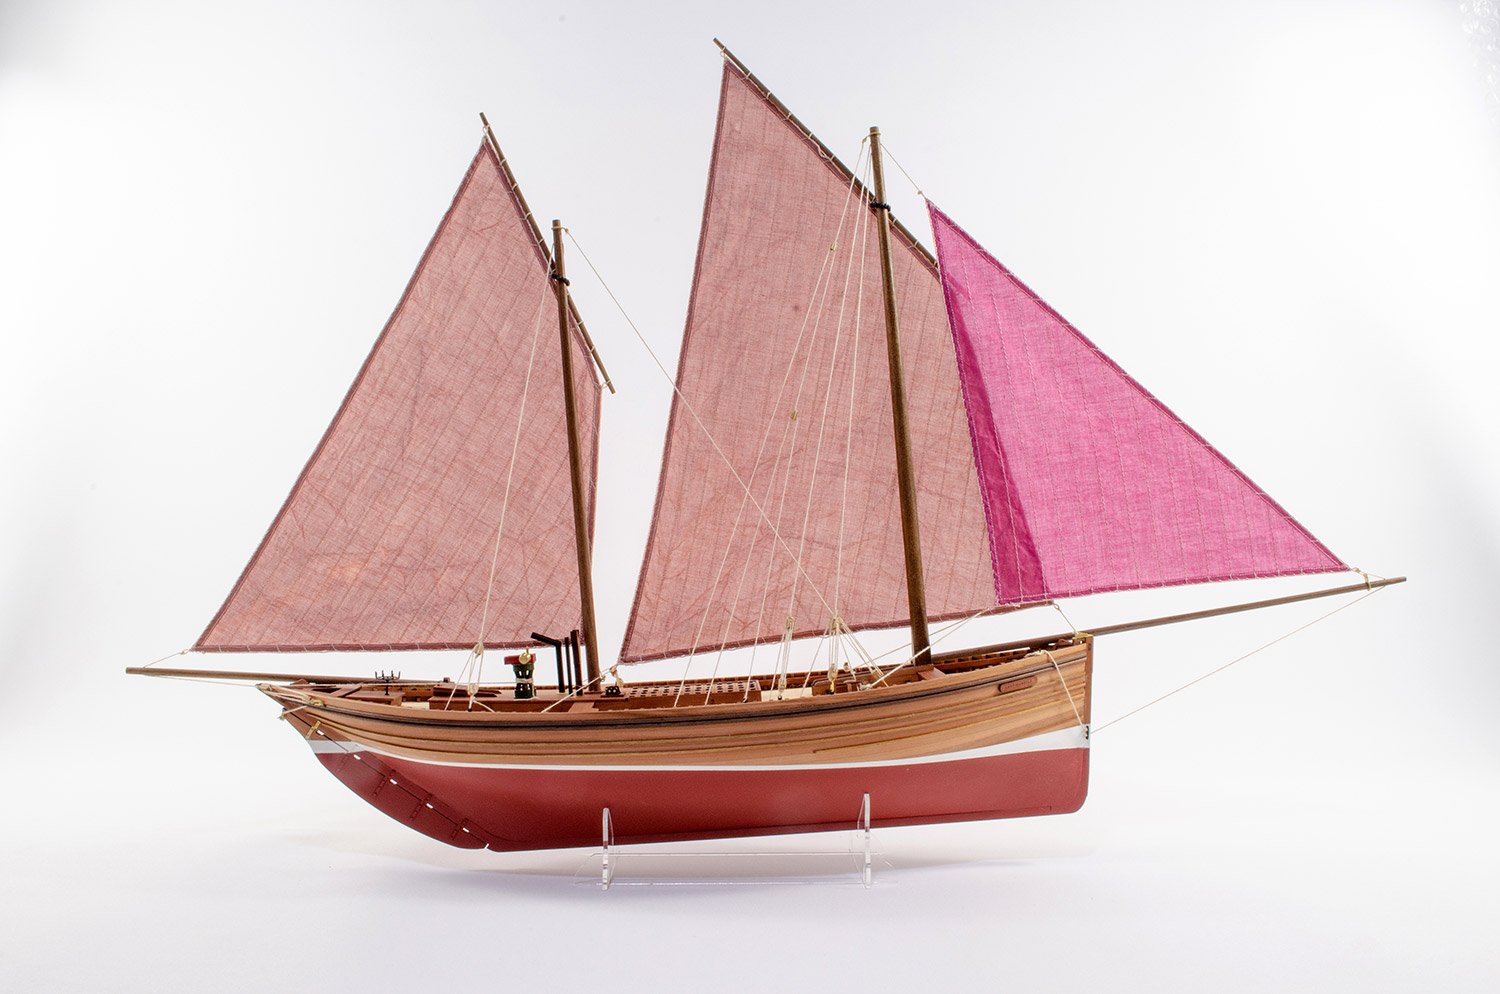
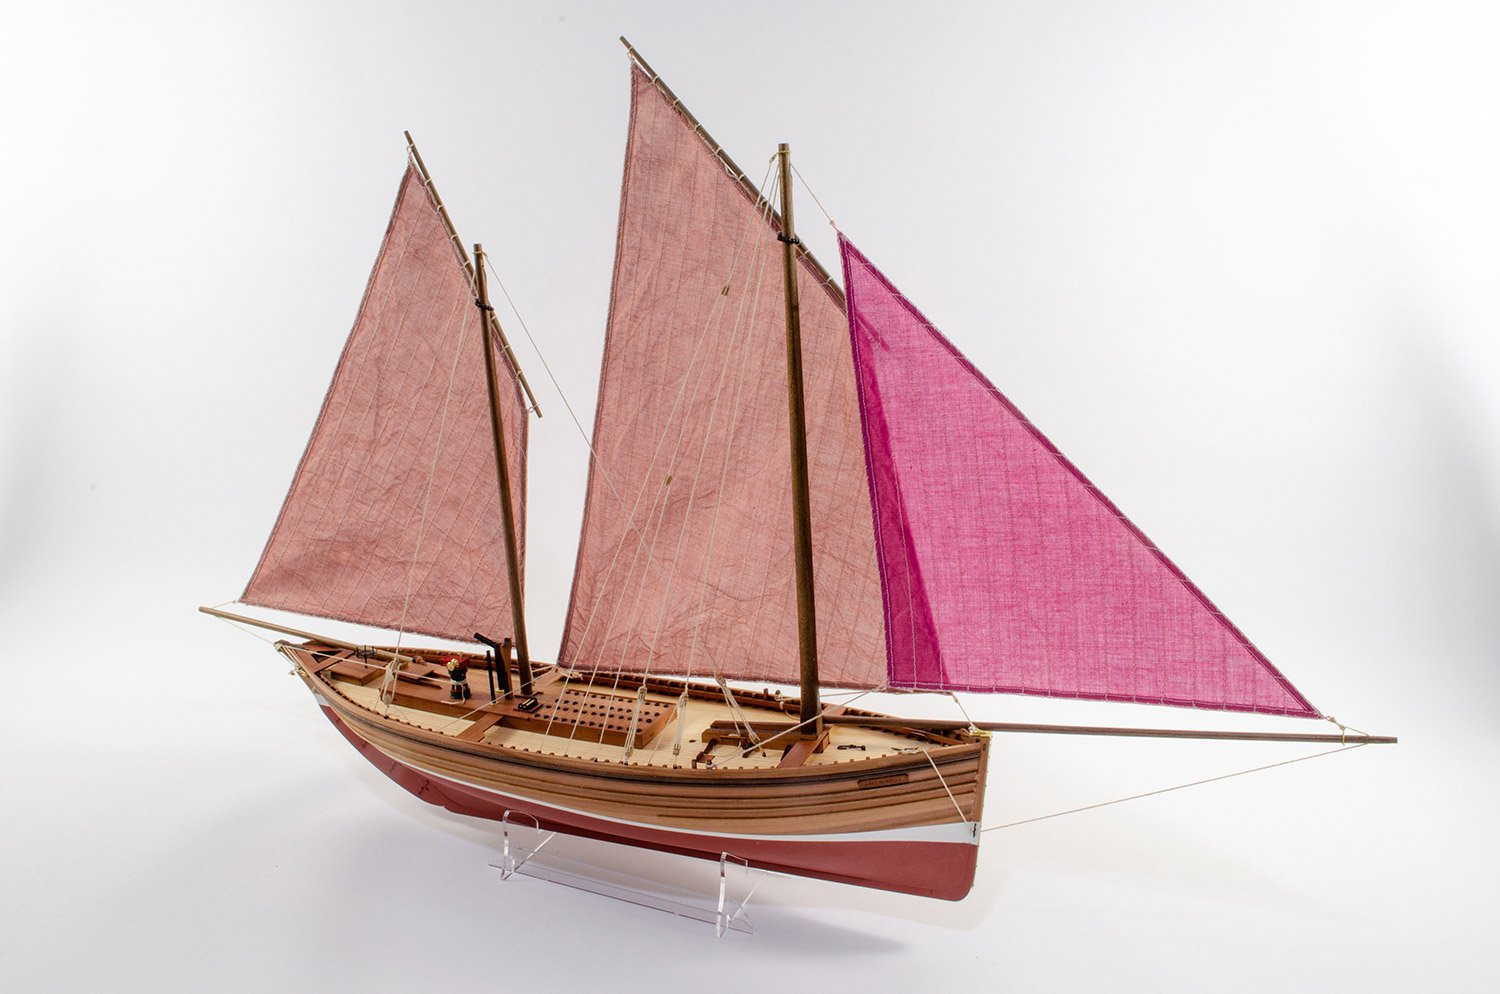
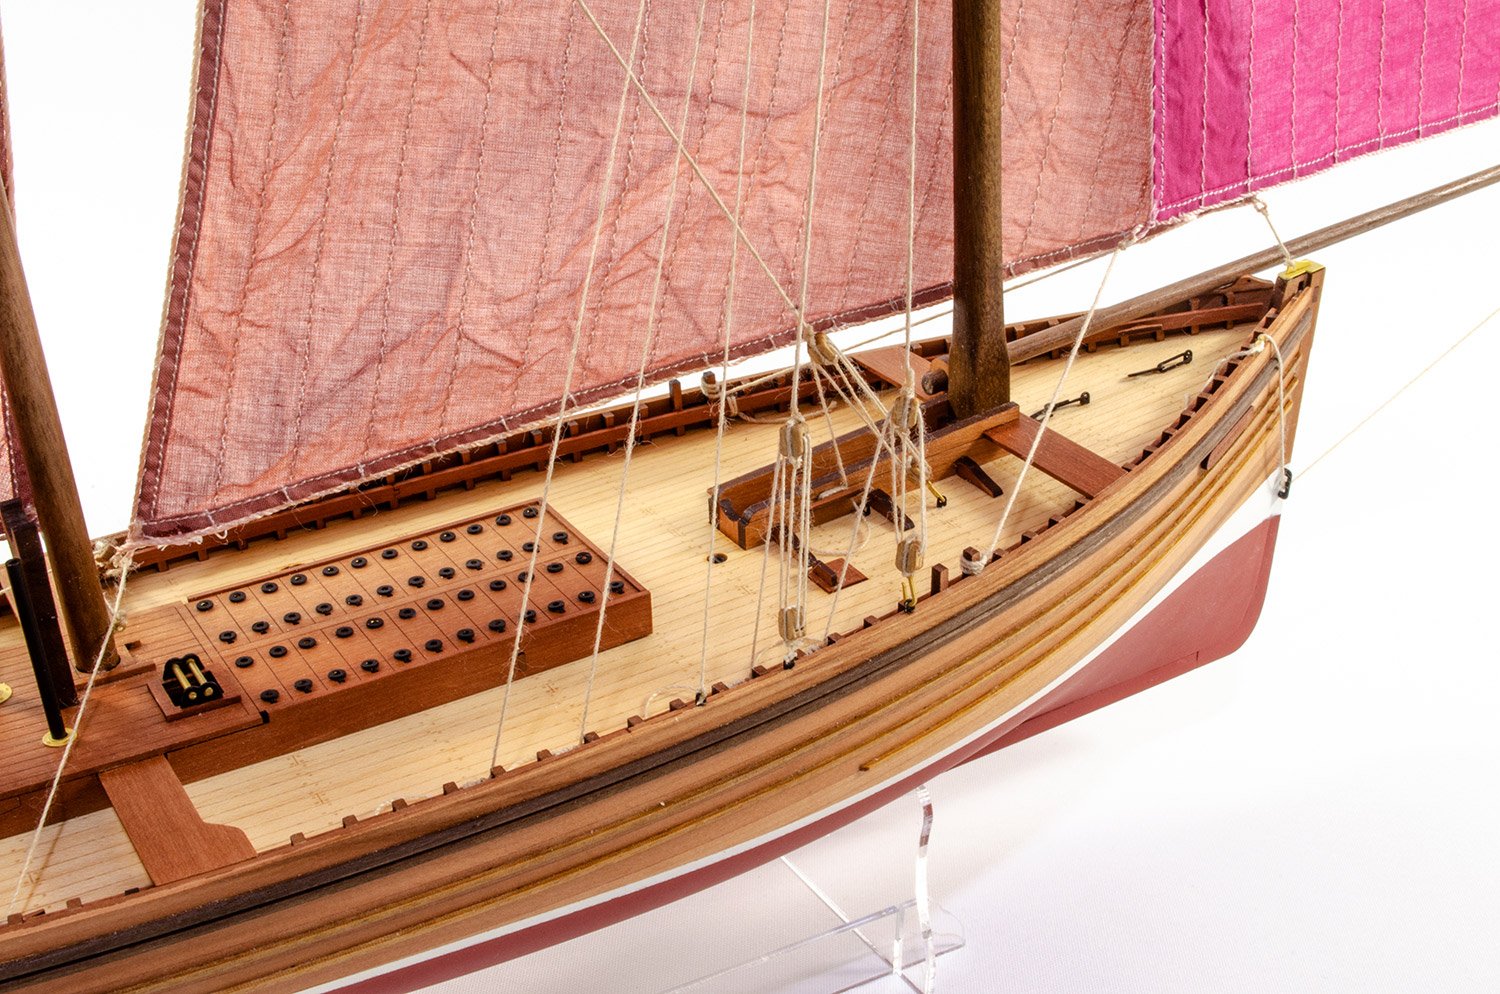
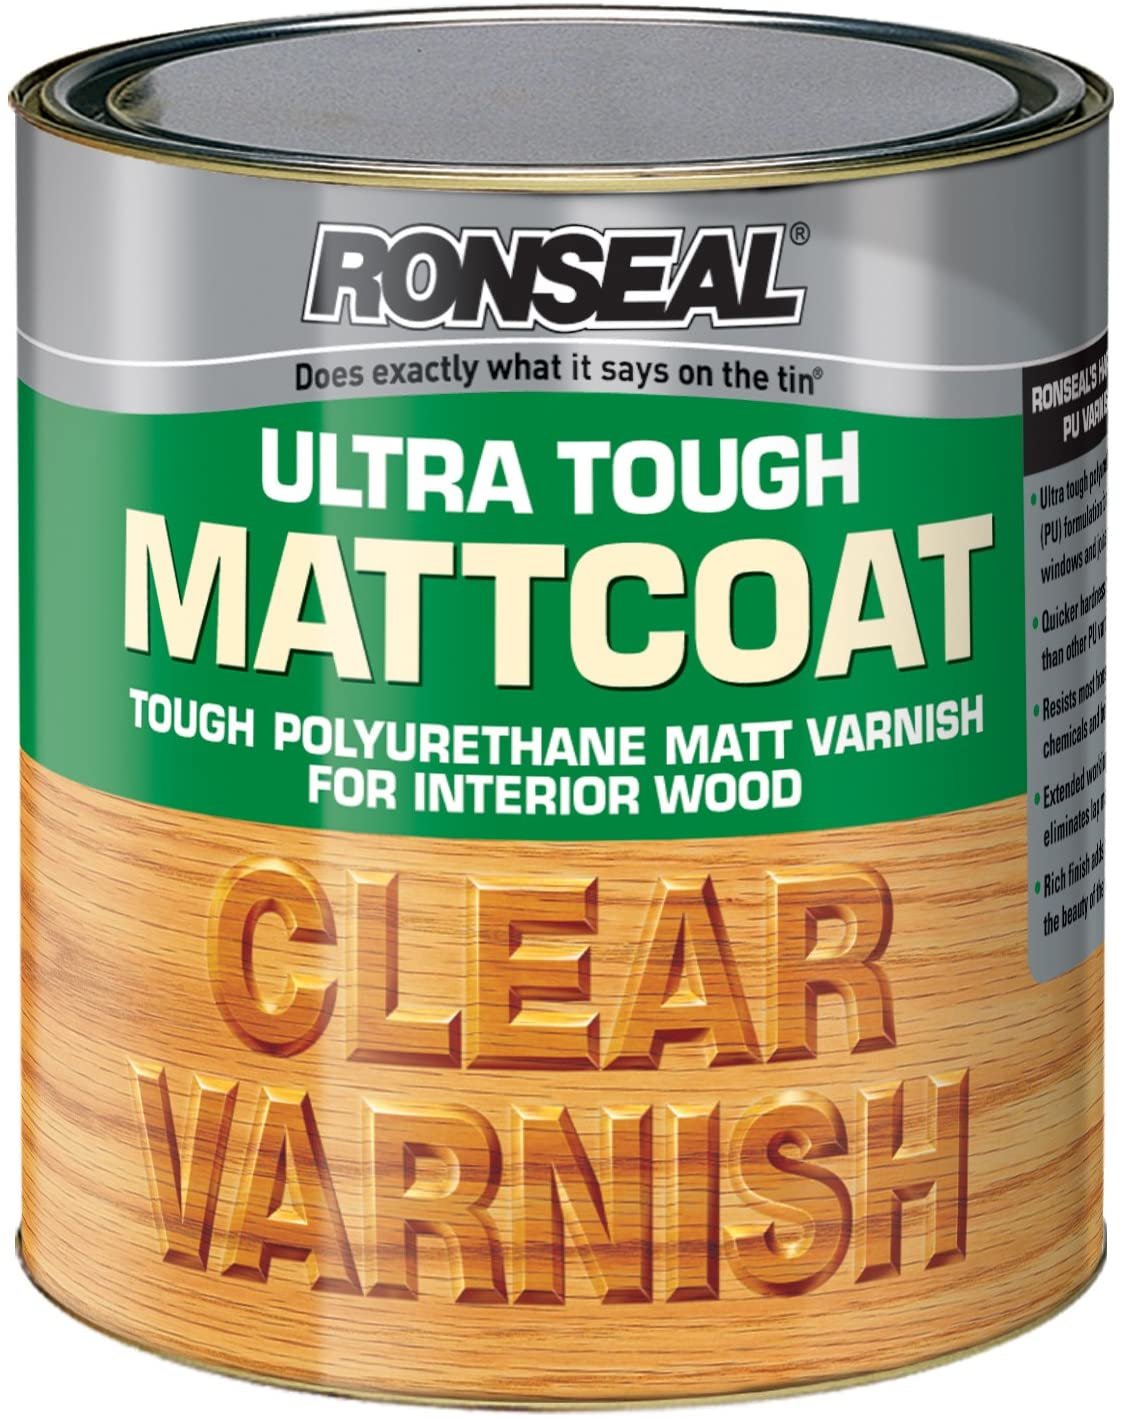
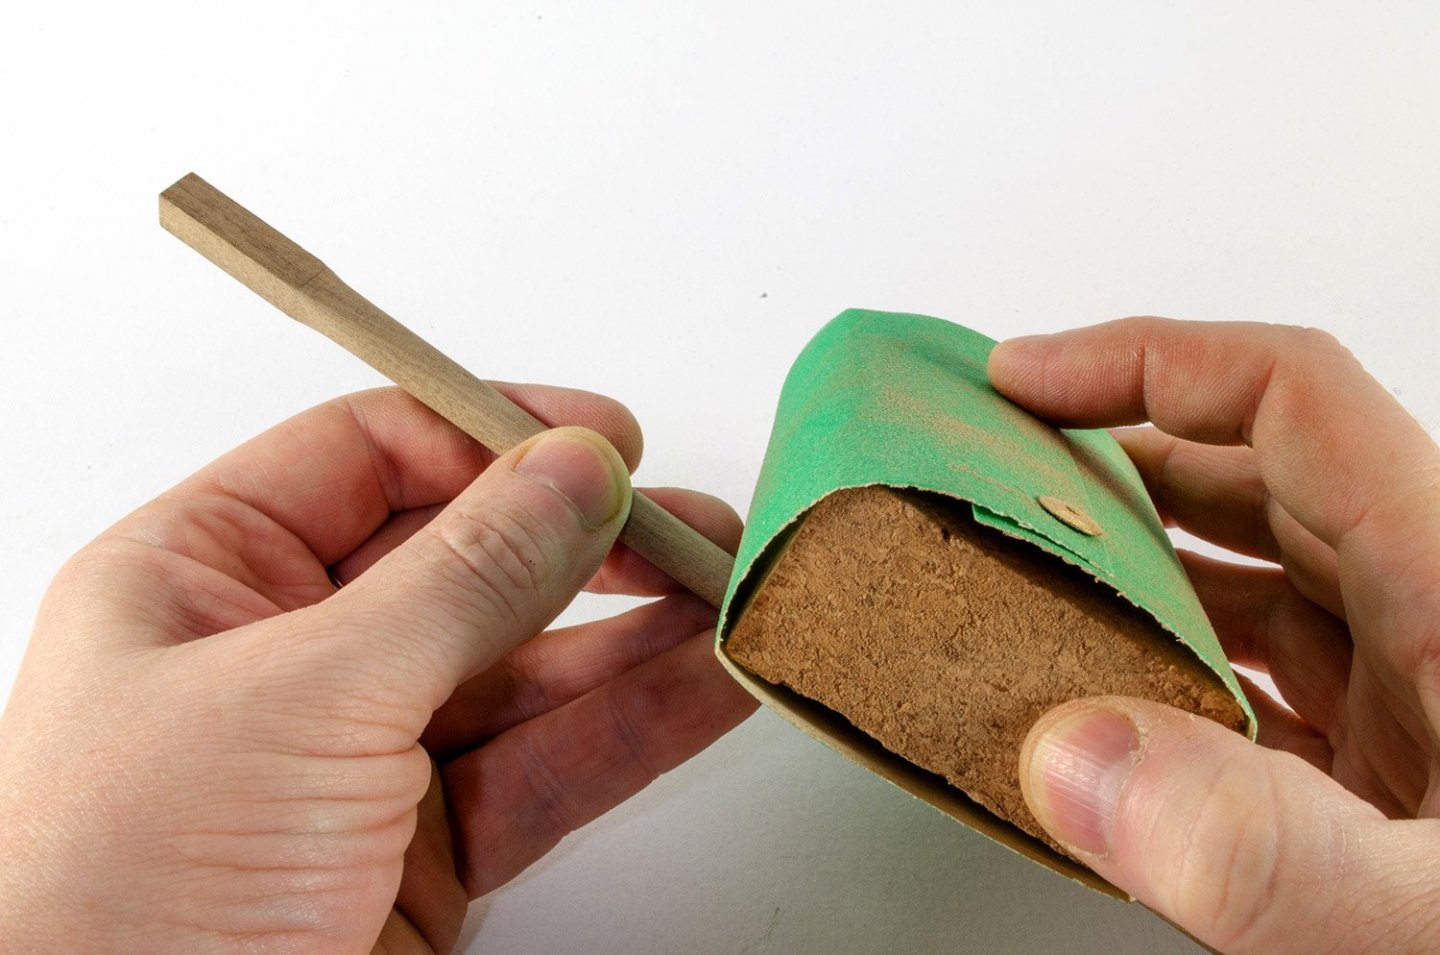
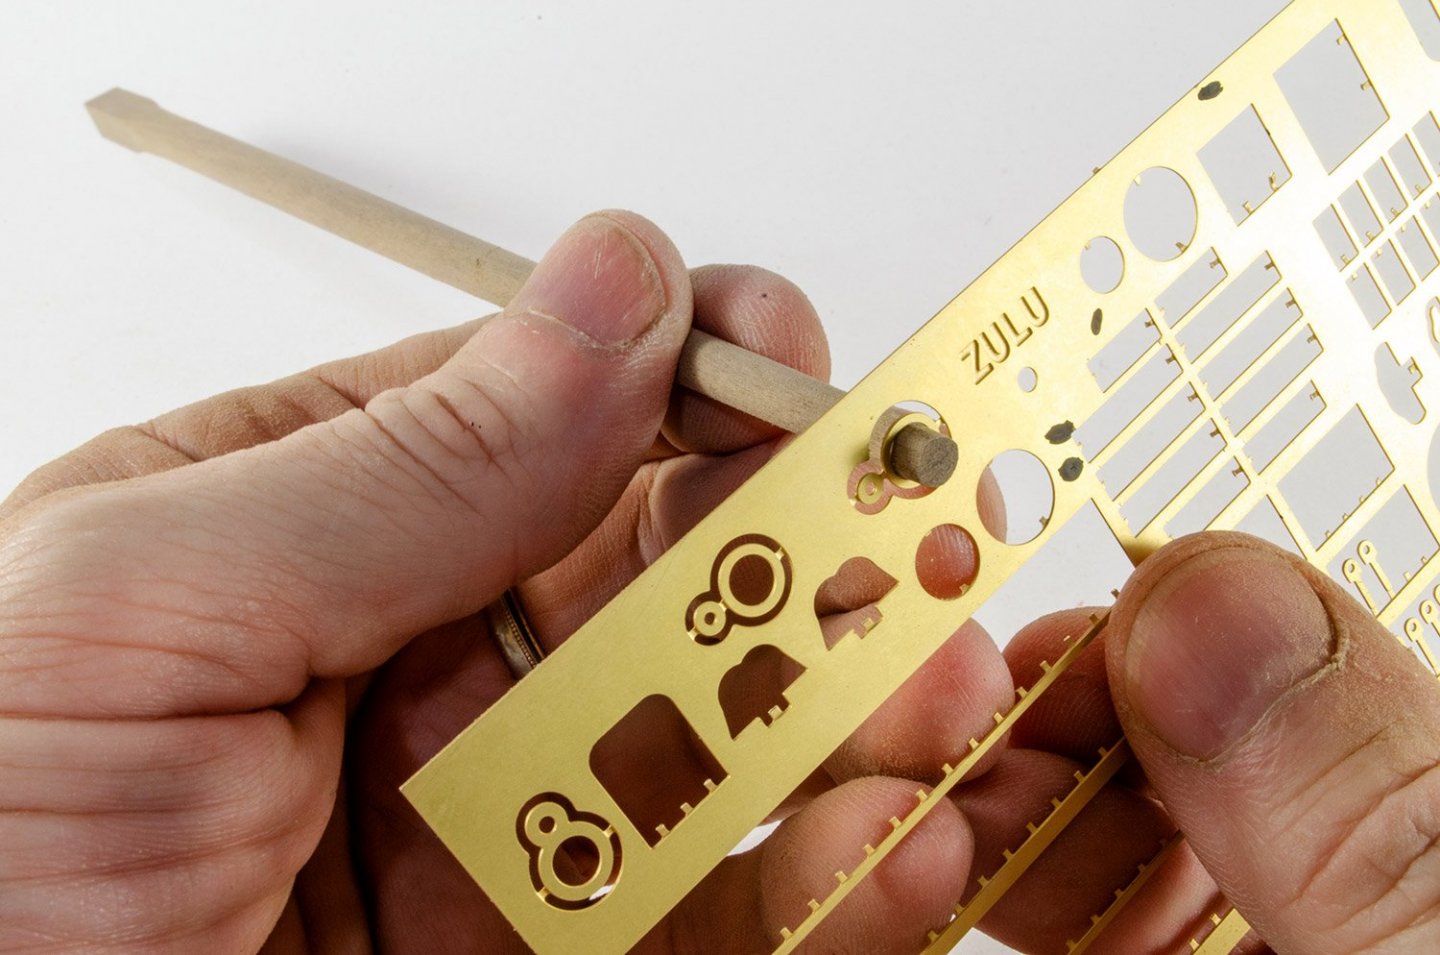
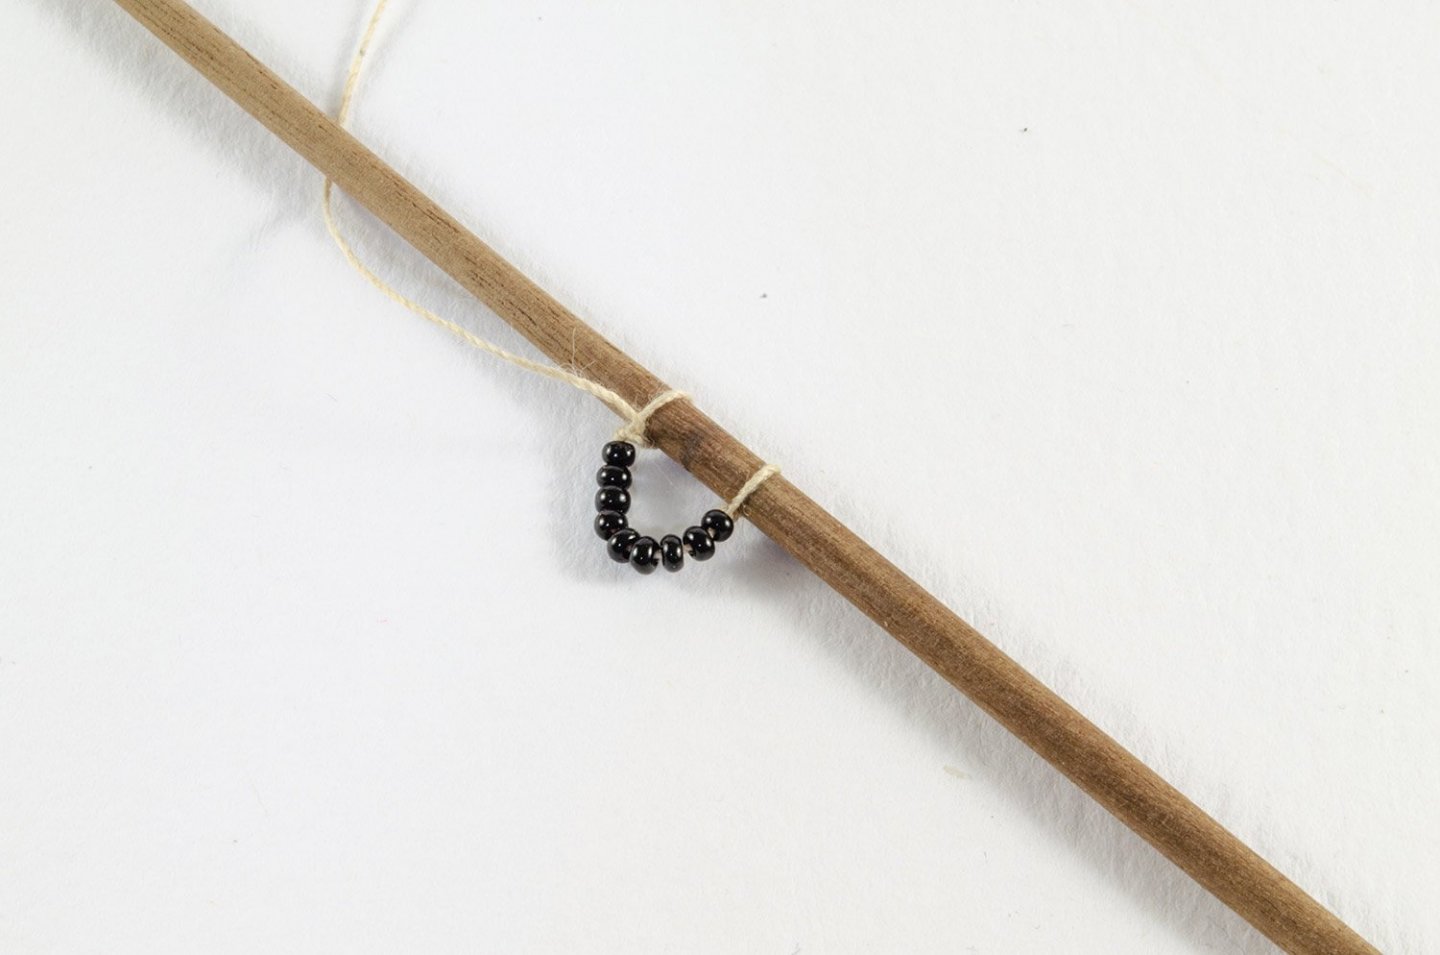
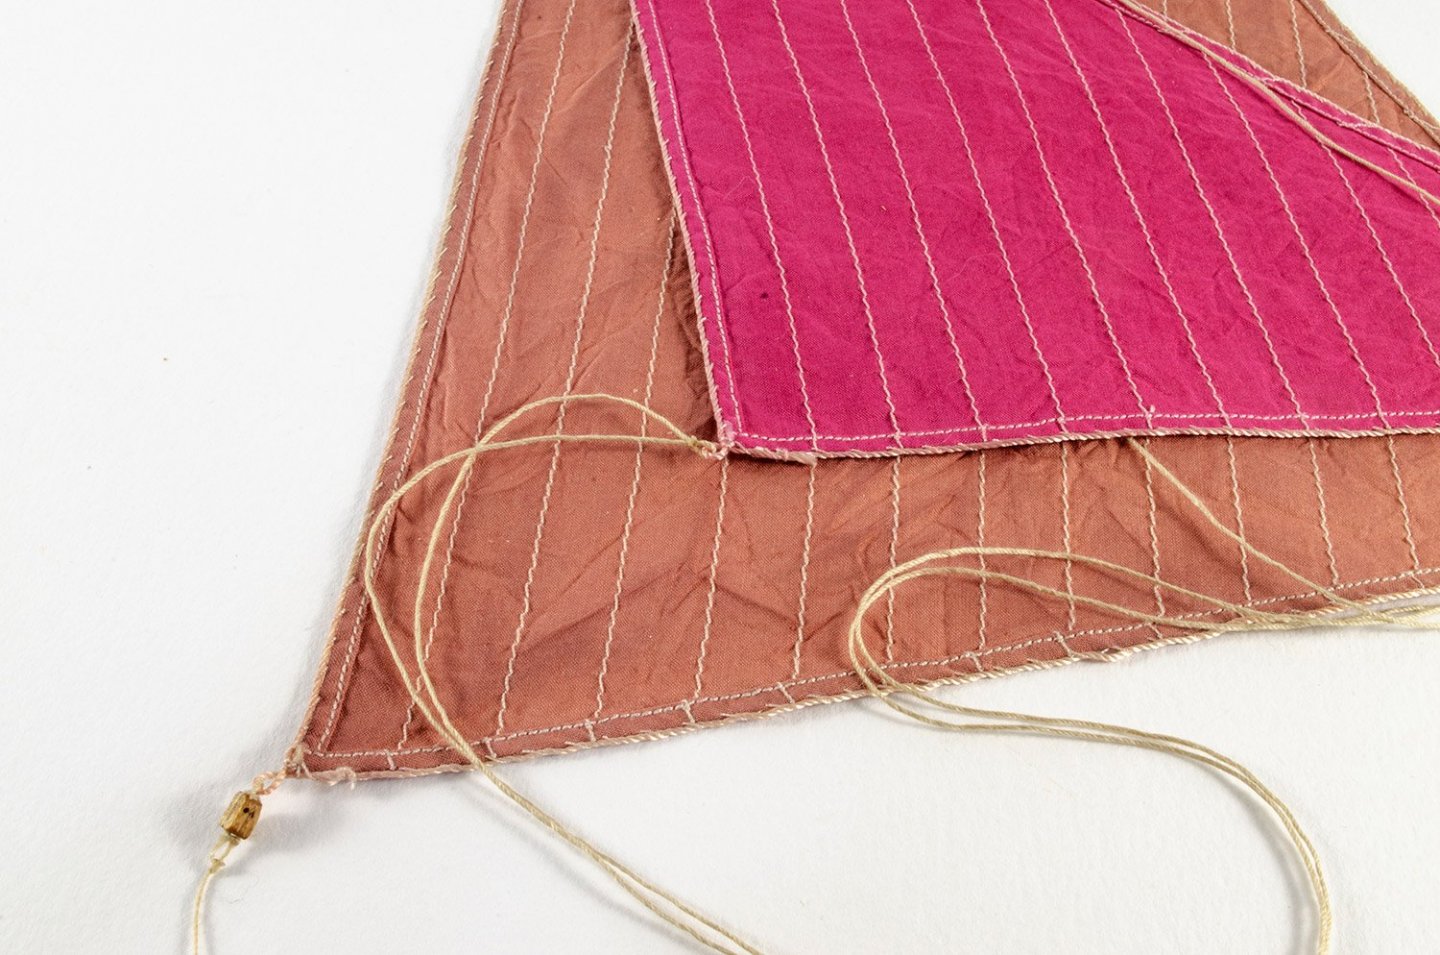
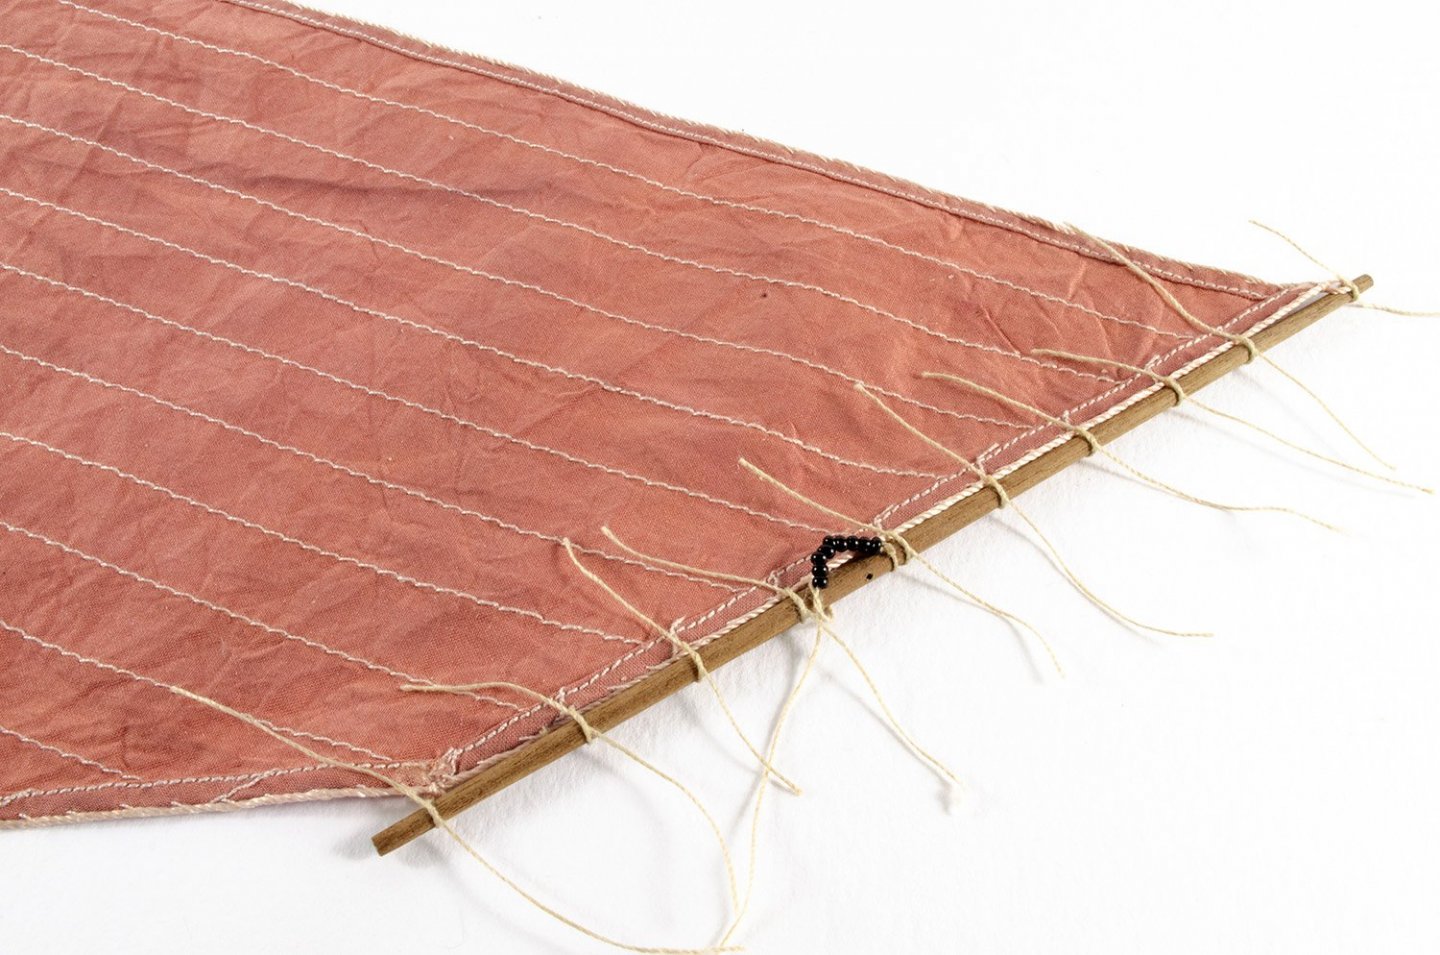
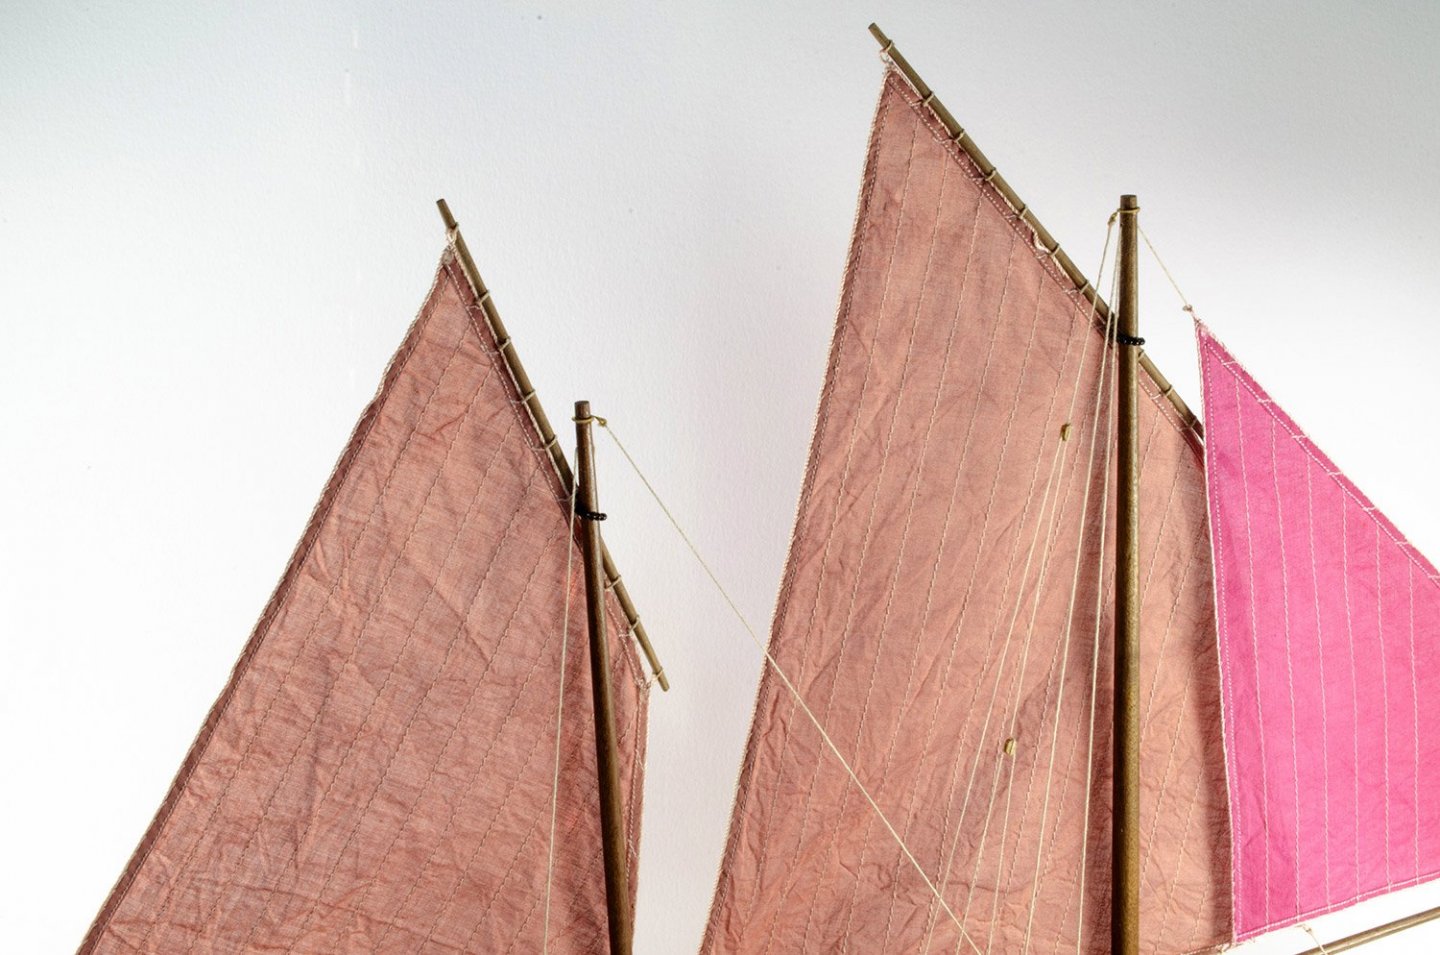
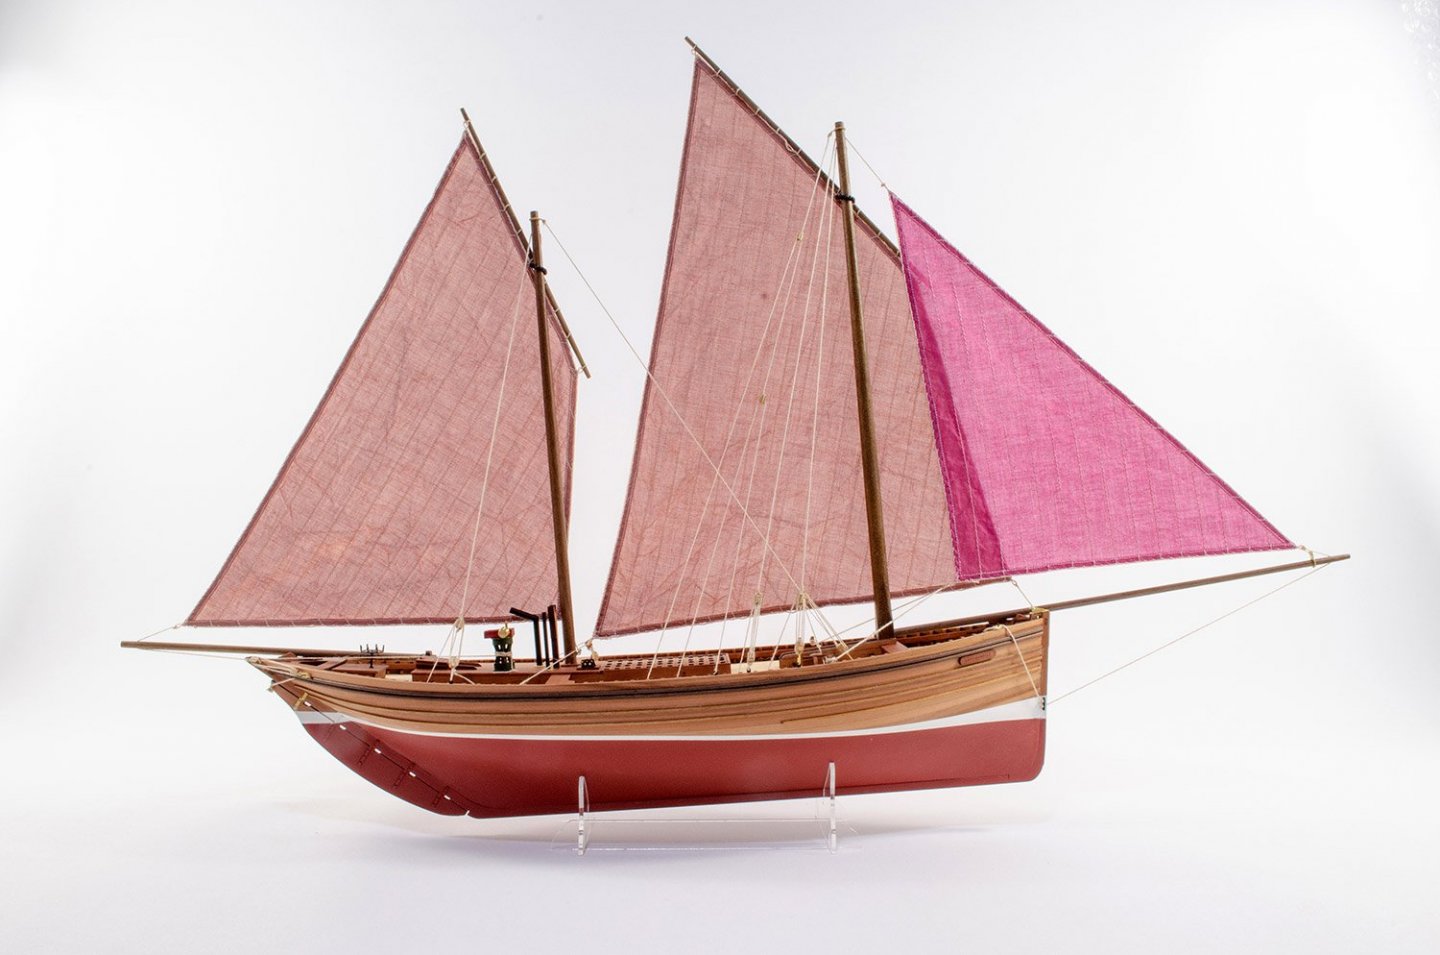
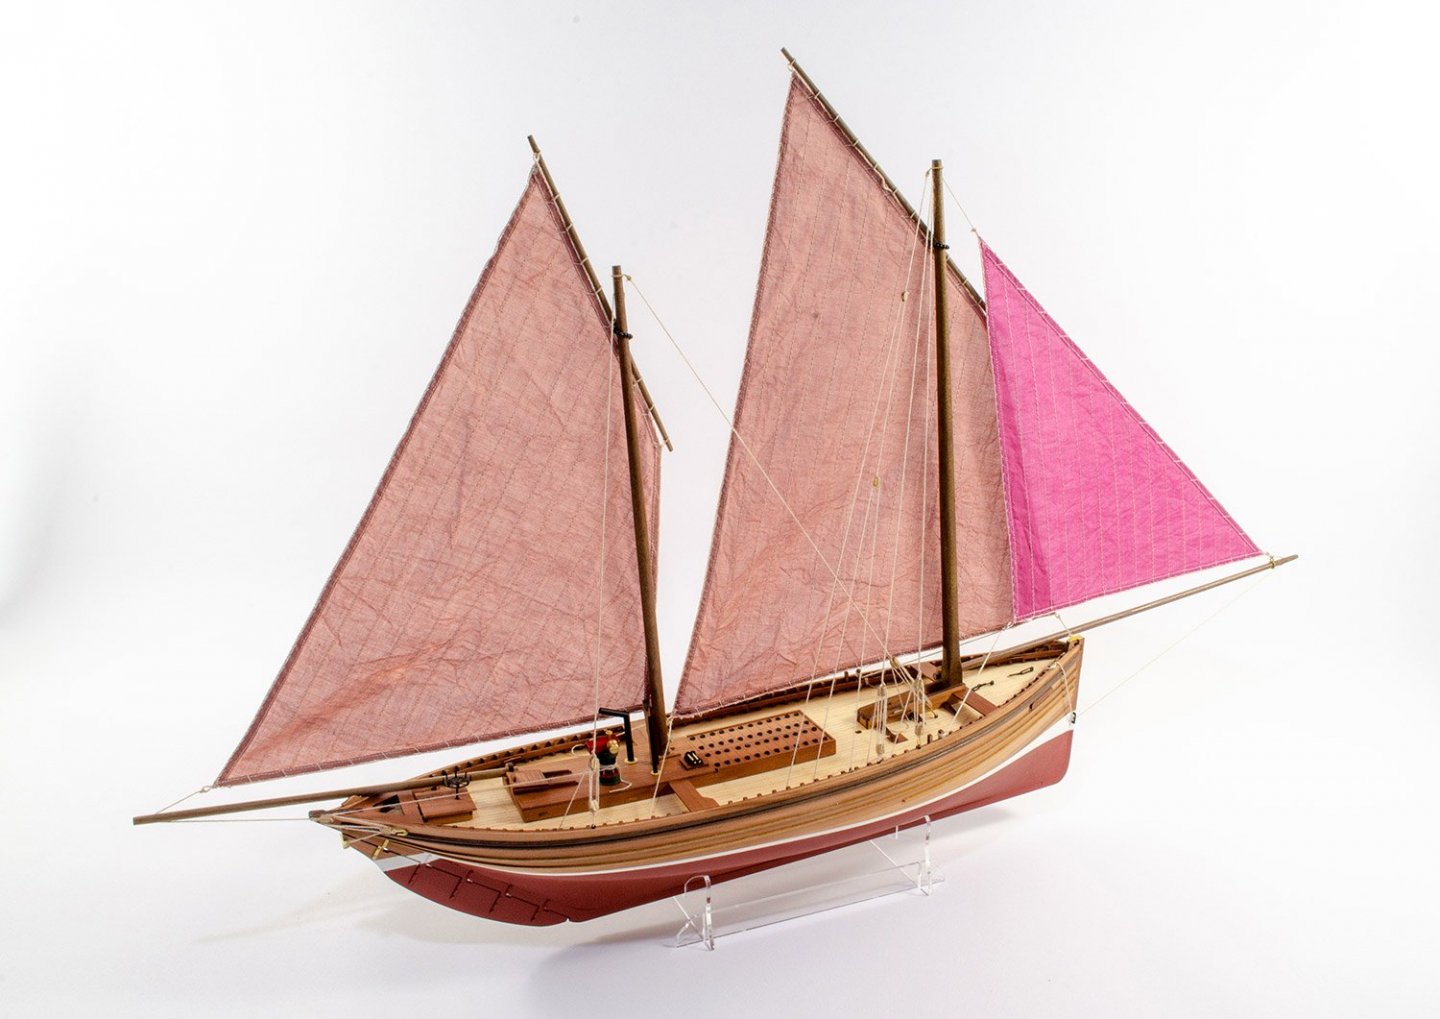
Please forgive me for how I jumped through the rig on this, but I needed to complete quickly, and finished she is! The Zulu is a two-masted vessel, and the forward mast is supplied in square section walnut. This needs to be rounded off a little above deck height and then tapered to the required dimensions. I just use a simple sanding block for this purpose, and good quality 120 grit paper. I also make sure the end dimension is correct by checking against the mast top ring. These aren't glued on until the yards are in place as I just knew I'd struggle getting the parrels over them! Yard lift and Burton stay tackle. All tapered masts and yards etc. are given a couple of coats of polyurethane varnish, lightly sanding between coats. I needed to dye the sails so opted for RIT dye. Several photos of such vessels showed different colour sails, so I opted for the closest I could. Dyeing was straightforward, and they were then rinsed until the water ran clear, and left to dry. The various rig lines were added, and the yards also secured to the mainsail and aft sail. No photos of rig for this, but from fitting the sails, it only took a few hours to fully rig. No standing rig at all, so all was done with natural coloured thread. Watch out for this kit being released soon!


- 100 replies
-
- 27
-
-
- zulu
- vanguard models
- (and 2 more)
-
Nowt wrong with that! 👍
-
Very soon I'm just adding sails and finishing her now.
- 100 replies
-
- 6
-
-
- zulu
- vanguard models
- (and 2 more)
-
HMS Terror by Mish - OcCre - 1:65
James H replied to Mish's topic in - Kit build logs for subjects built from 1801 - 1850
Really looking forward to seeing more of this one! -
HMS Victory by Helli - Caldercraft
James H replied to Helli's topic in - Kit build logs for subjects built from 1751 - 1800
That really is looking beautiful. Every single aspect.... -
When I worked with plastic models for magazine work, I rarely primed.....whether I used lacquer, acrylic or enamel. My only reason for primer was because I was using MDF for some parts, so I just blanket airbrushed all parts in that assembly.
- 100 replies
-
- 4
-
-
- zulu
- vanguard models
- (and 2 more)
-
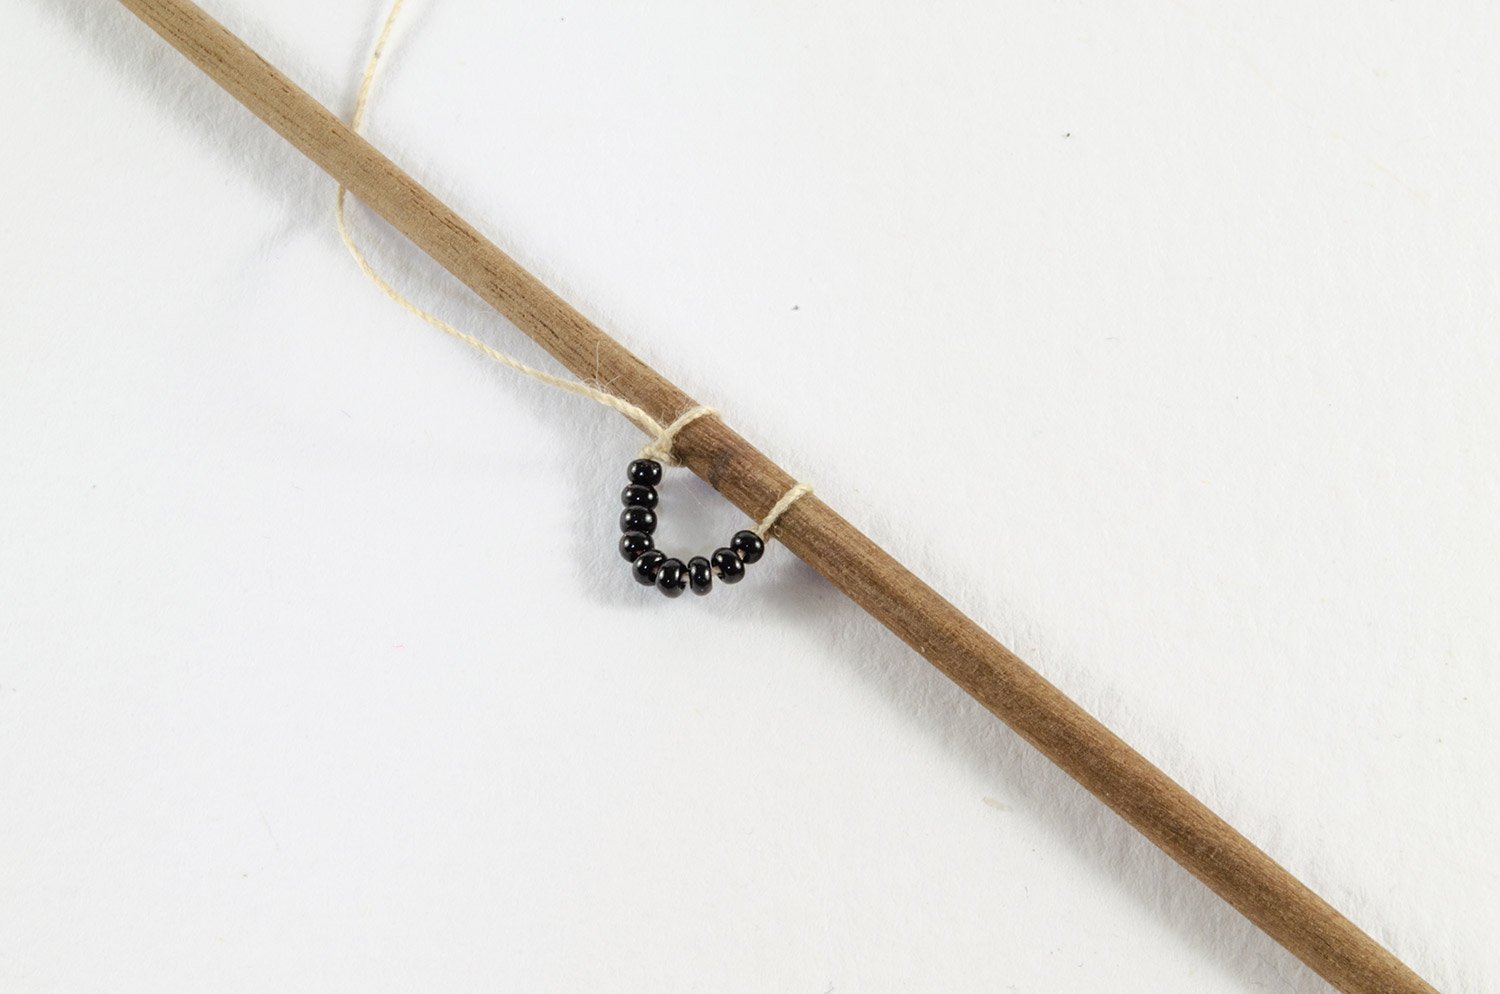
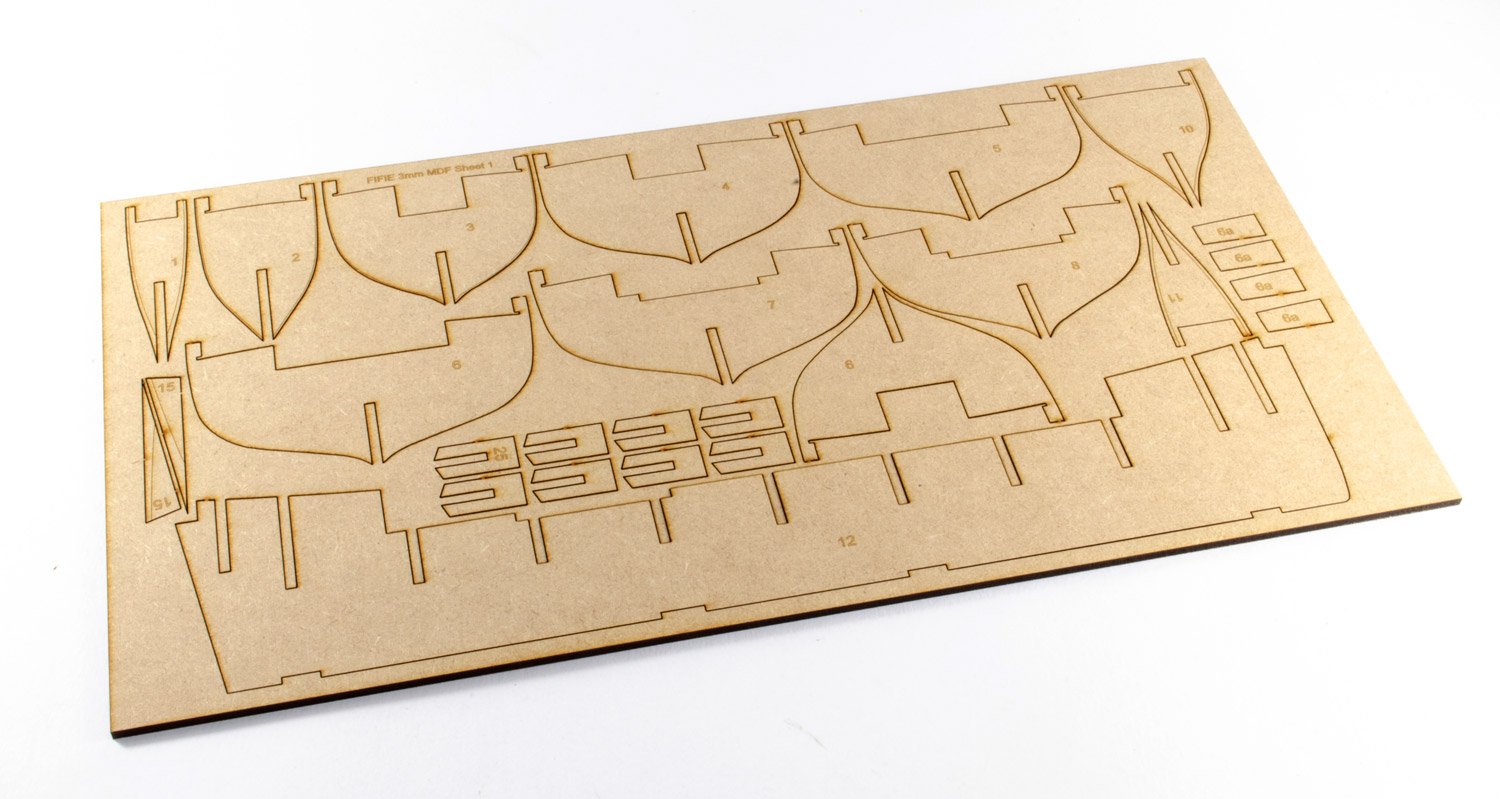
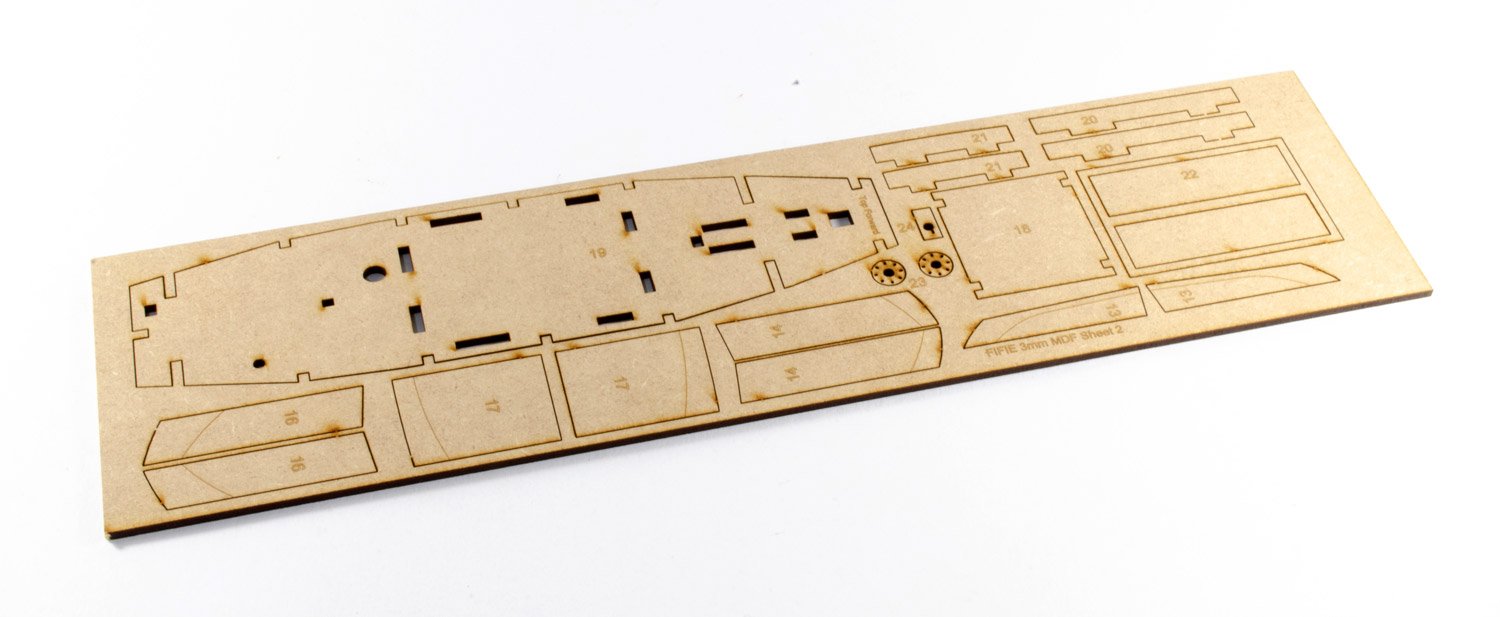
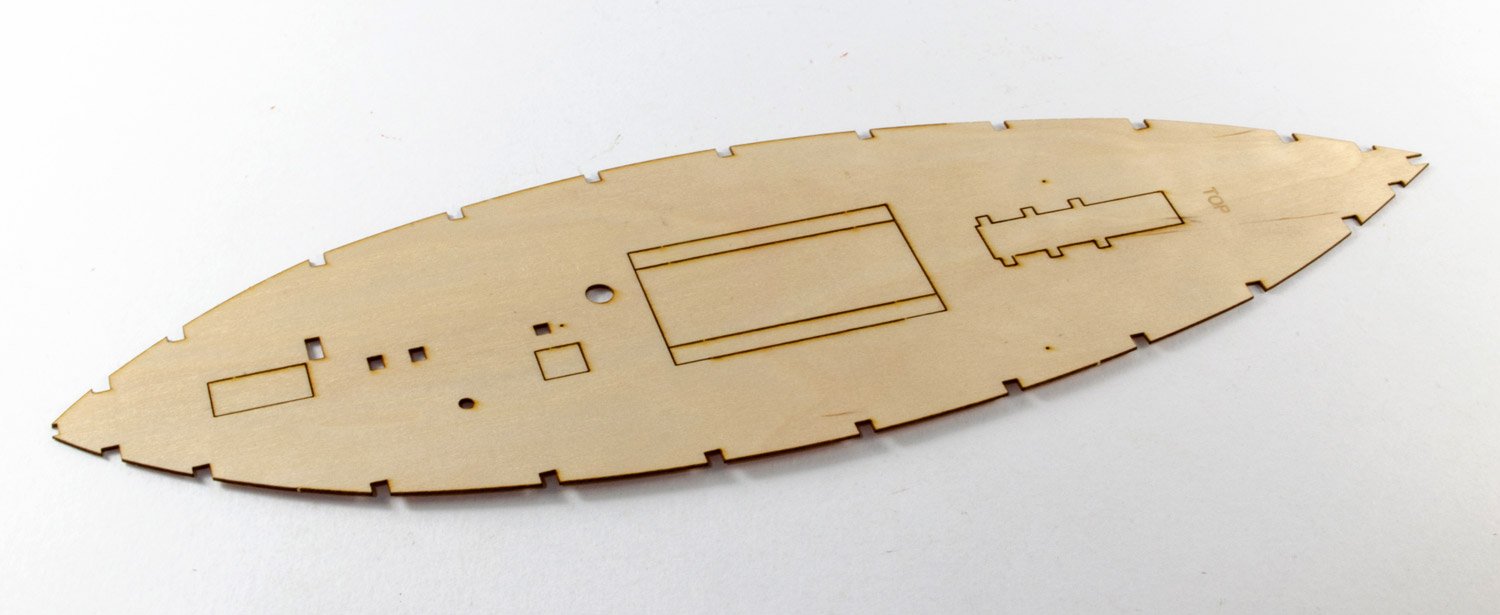
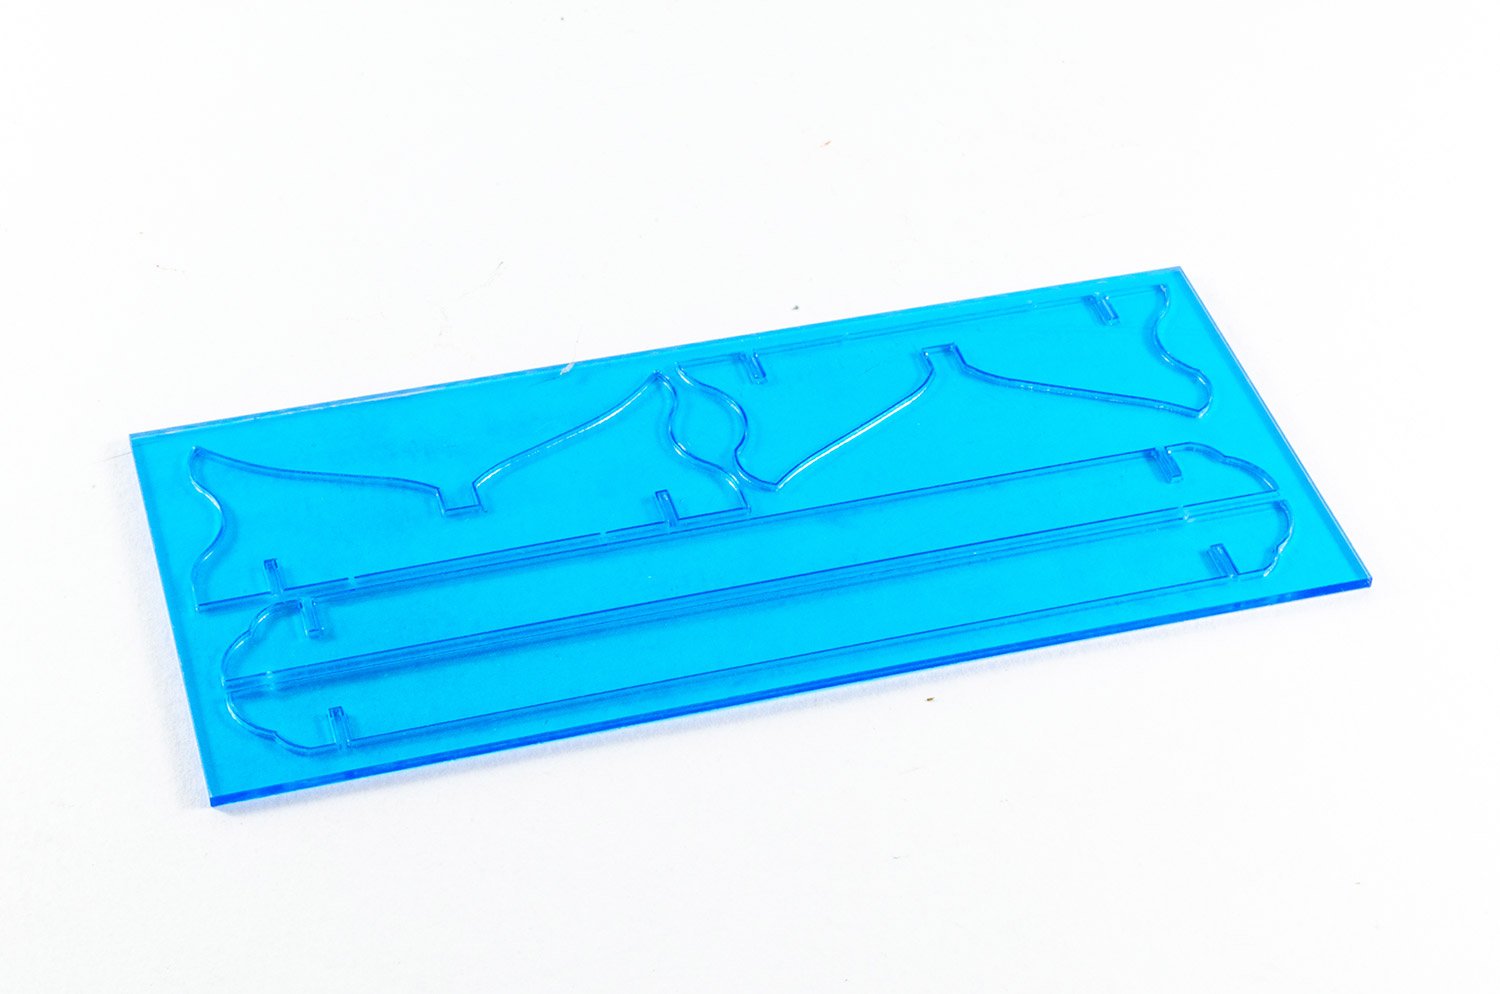
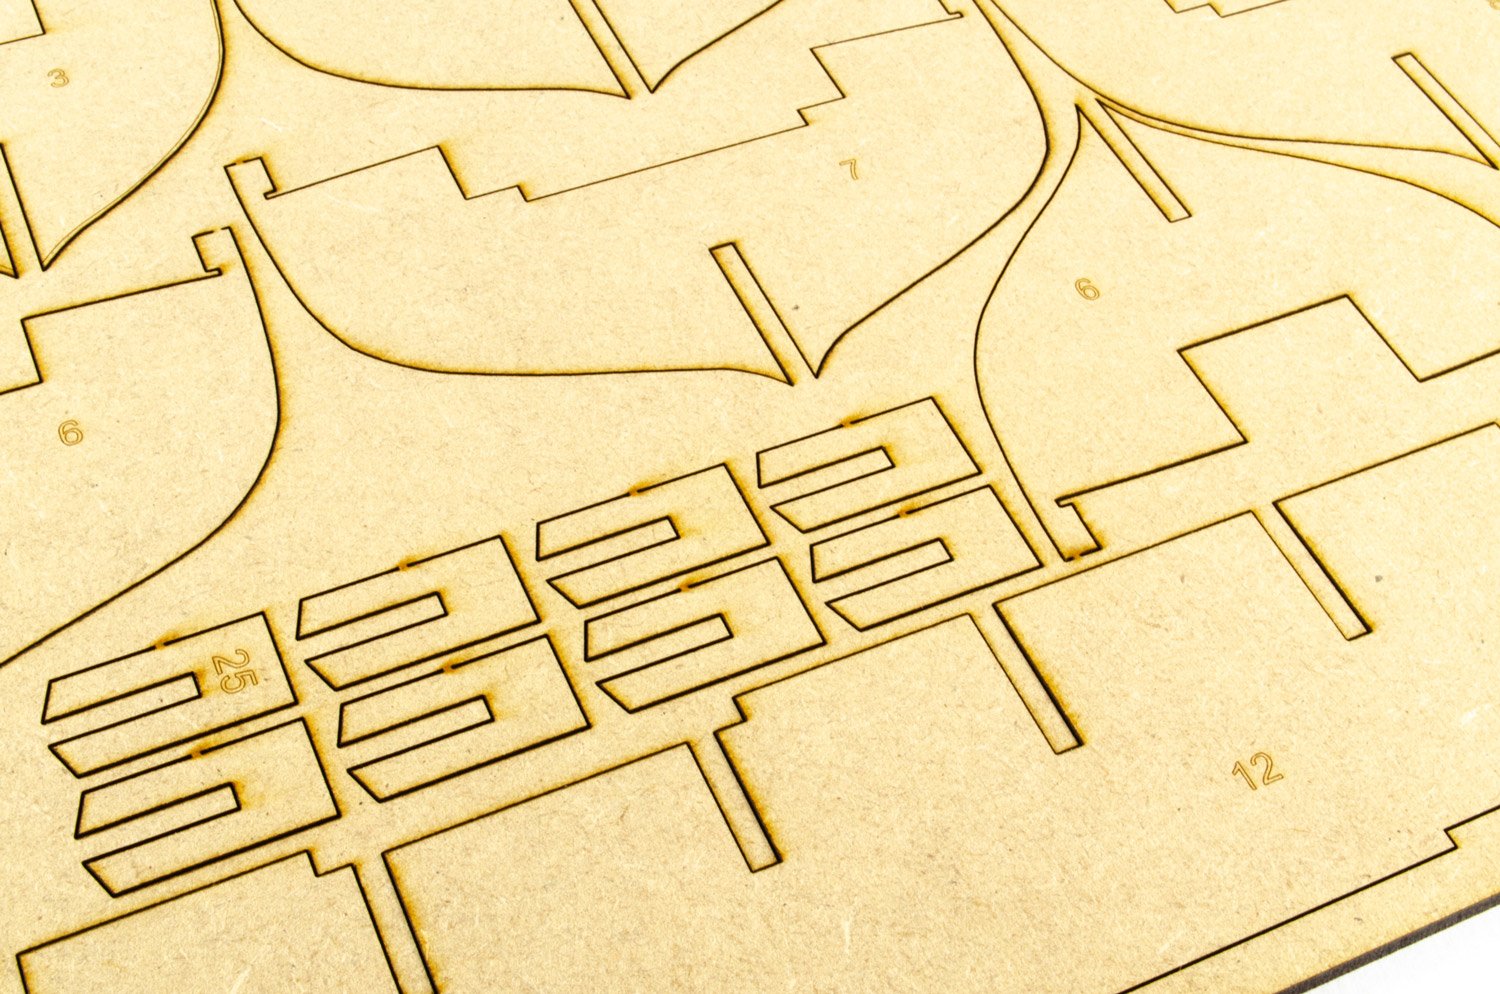
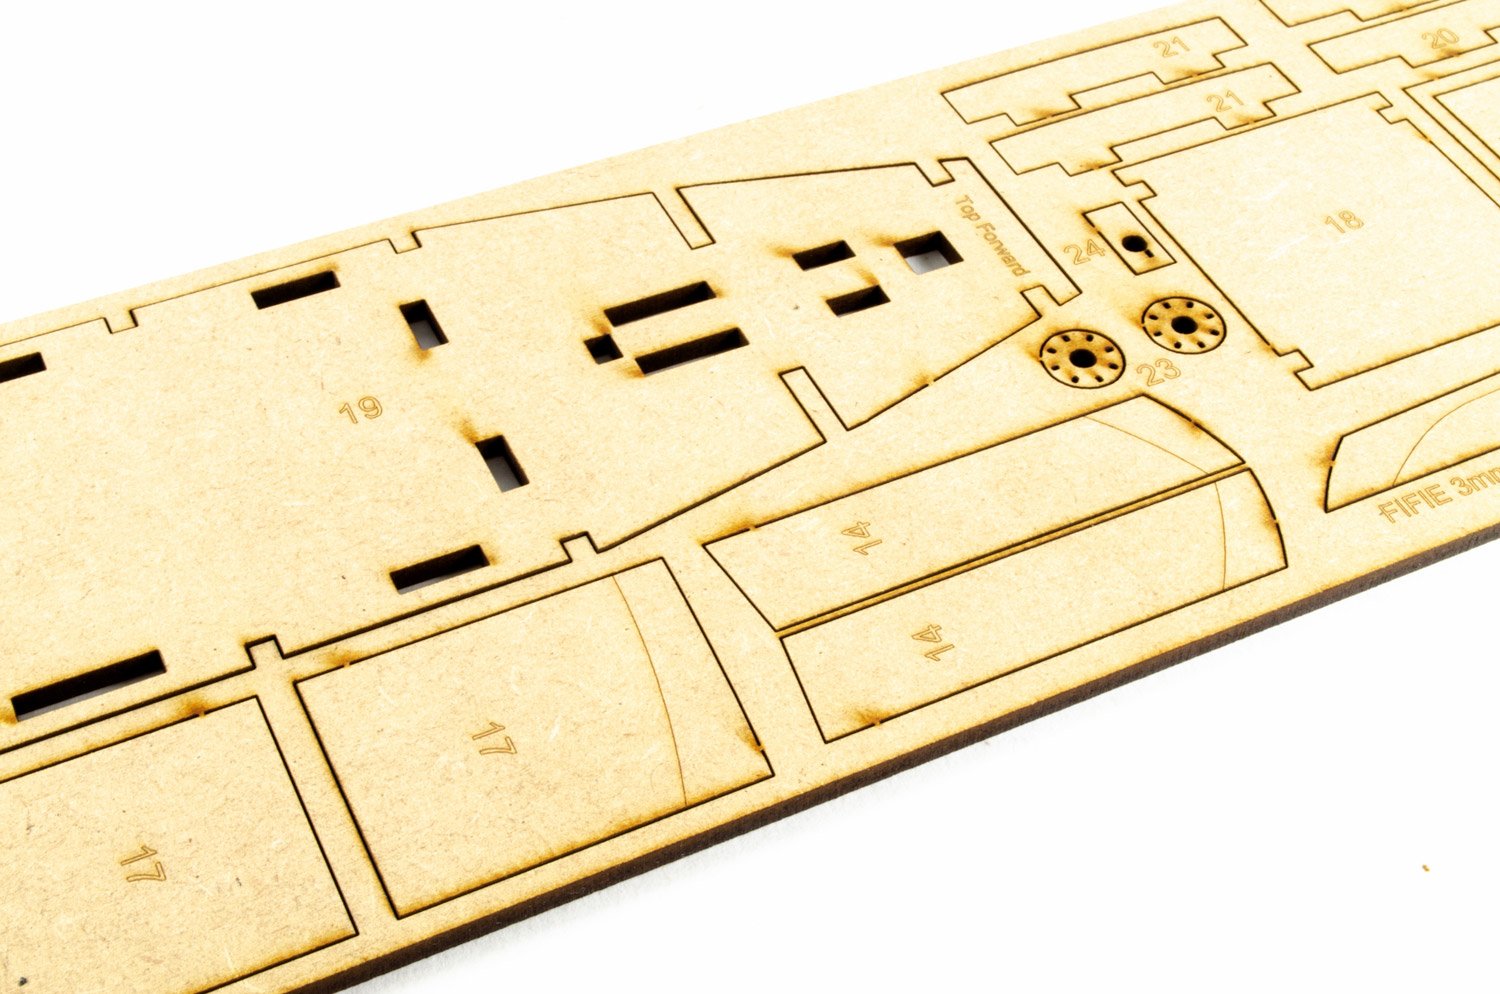
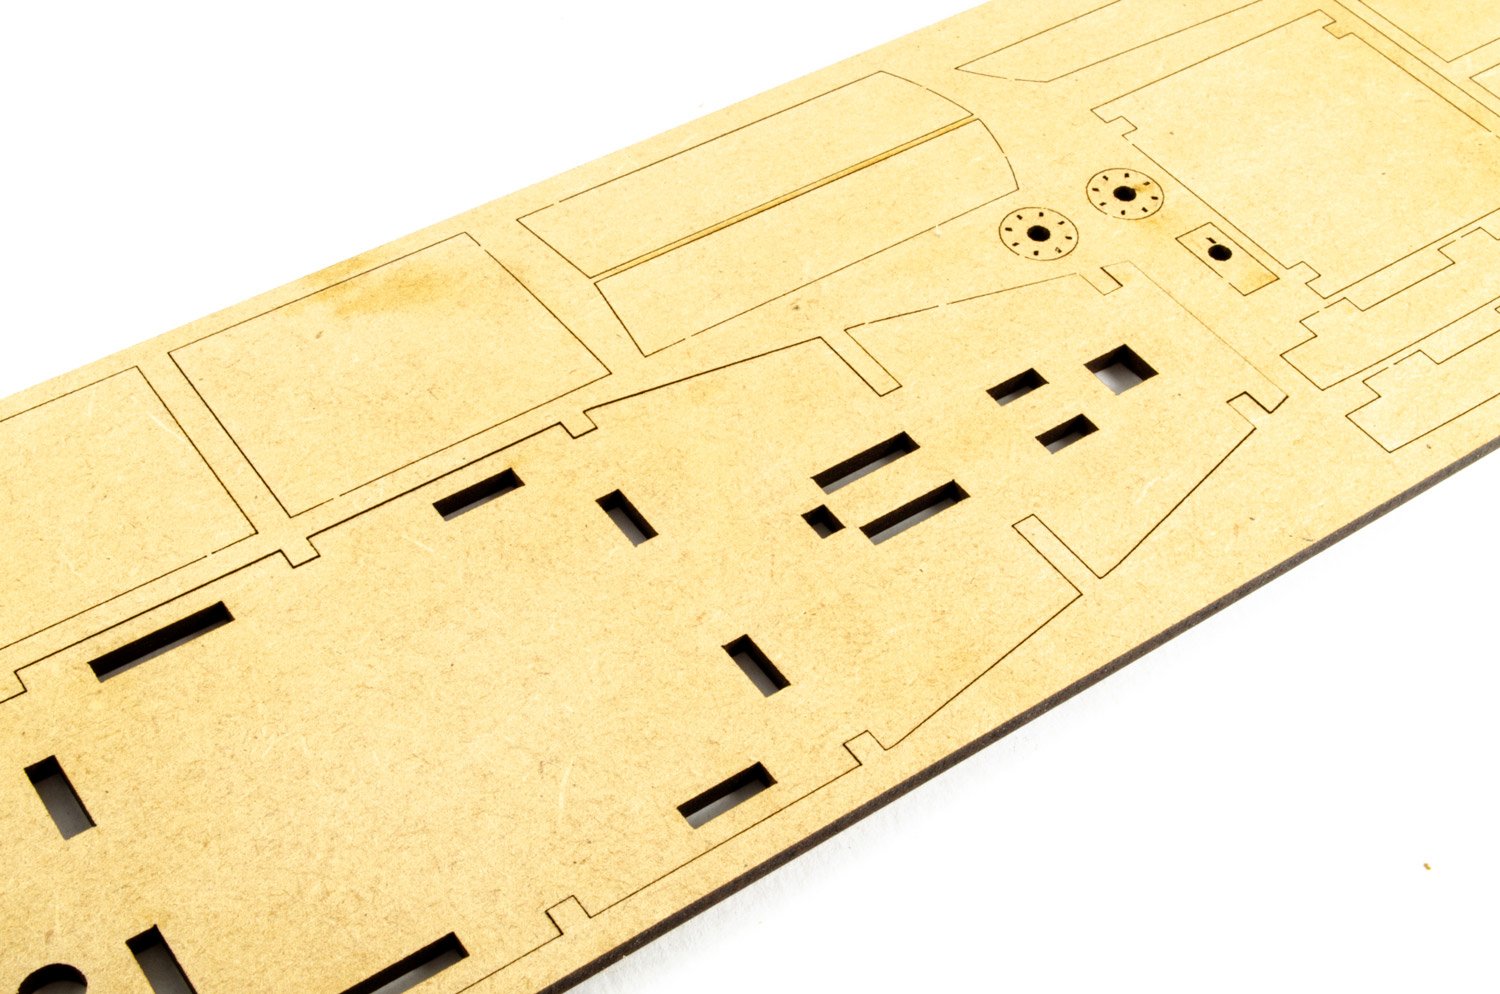
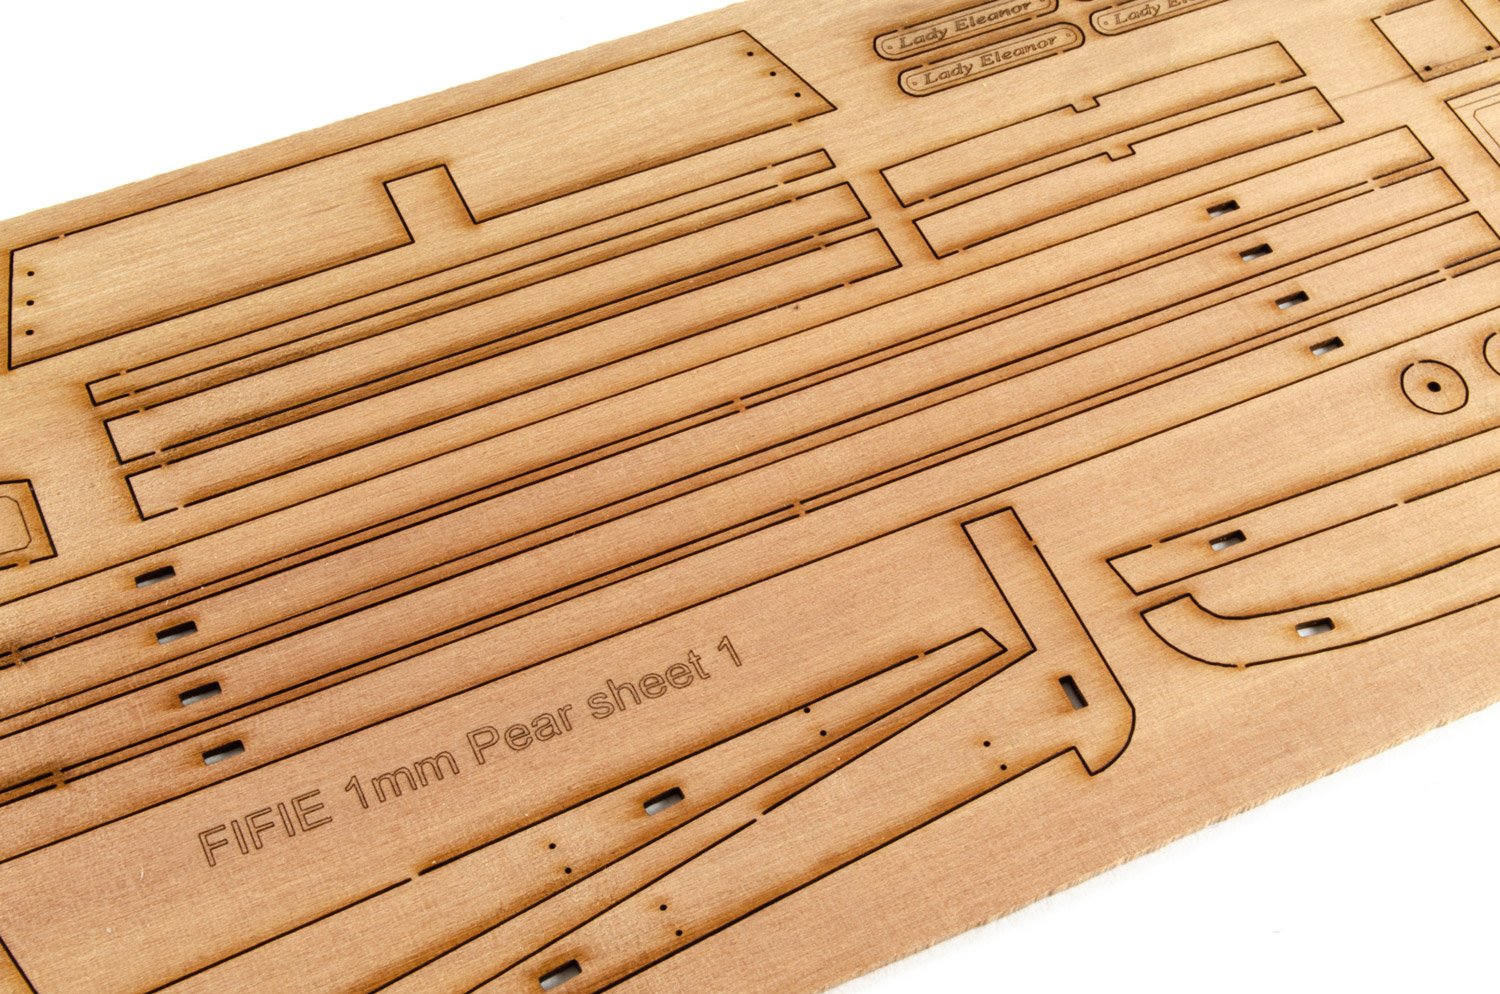
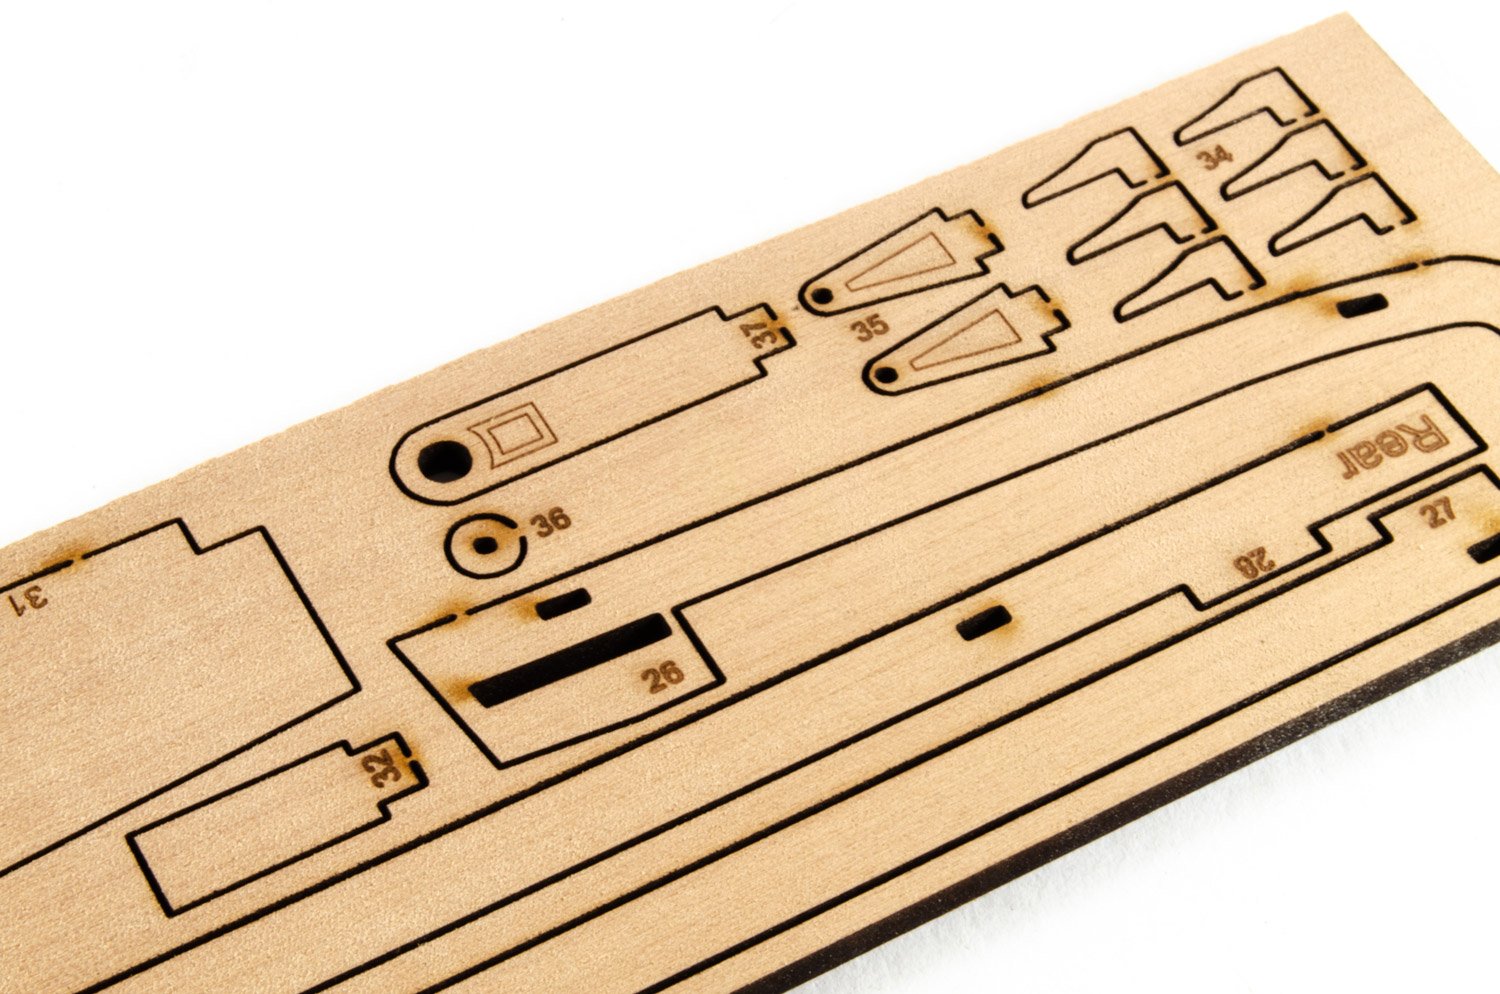
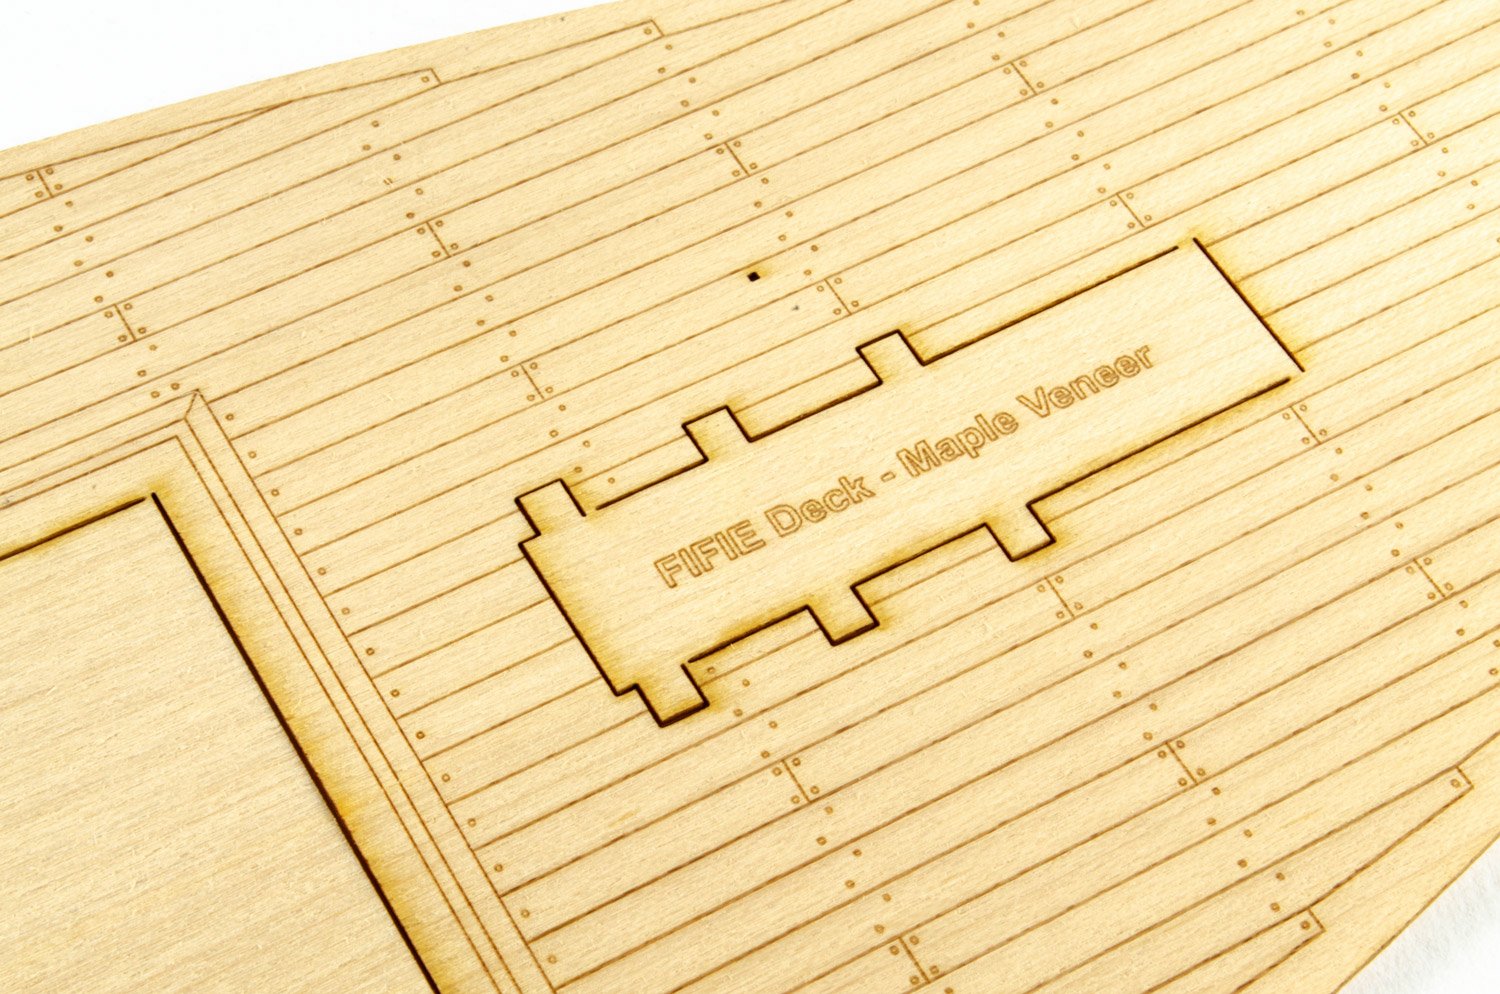
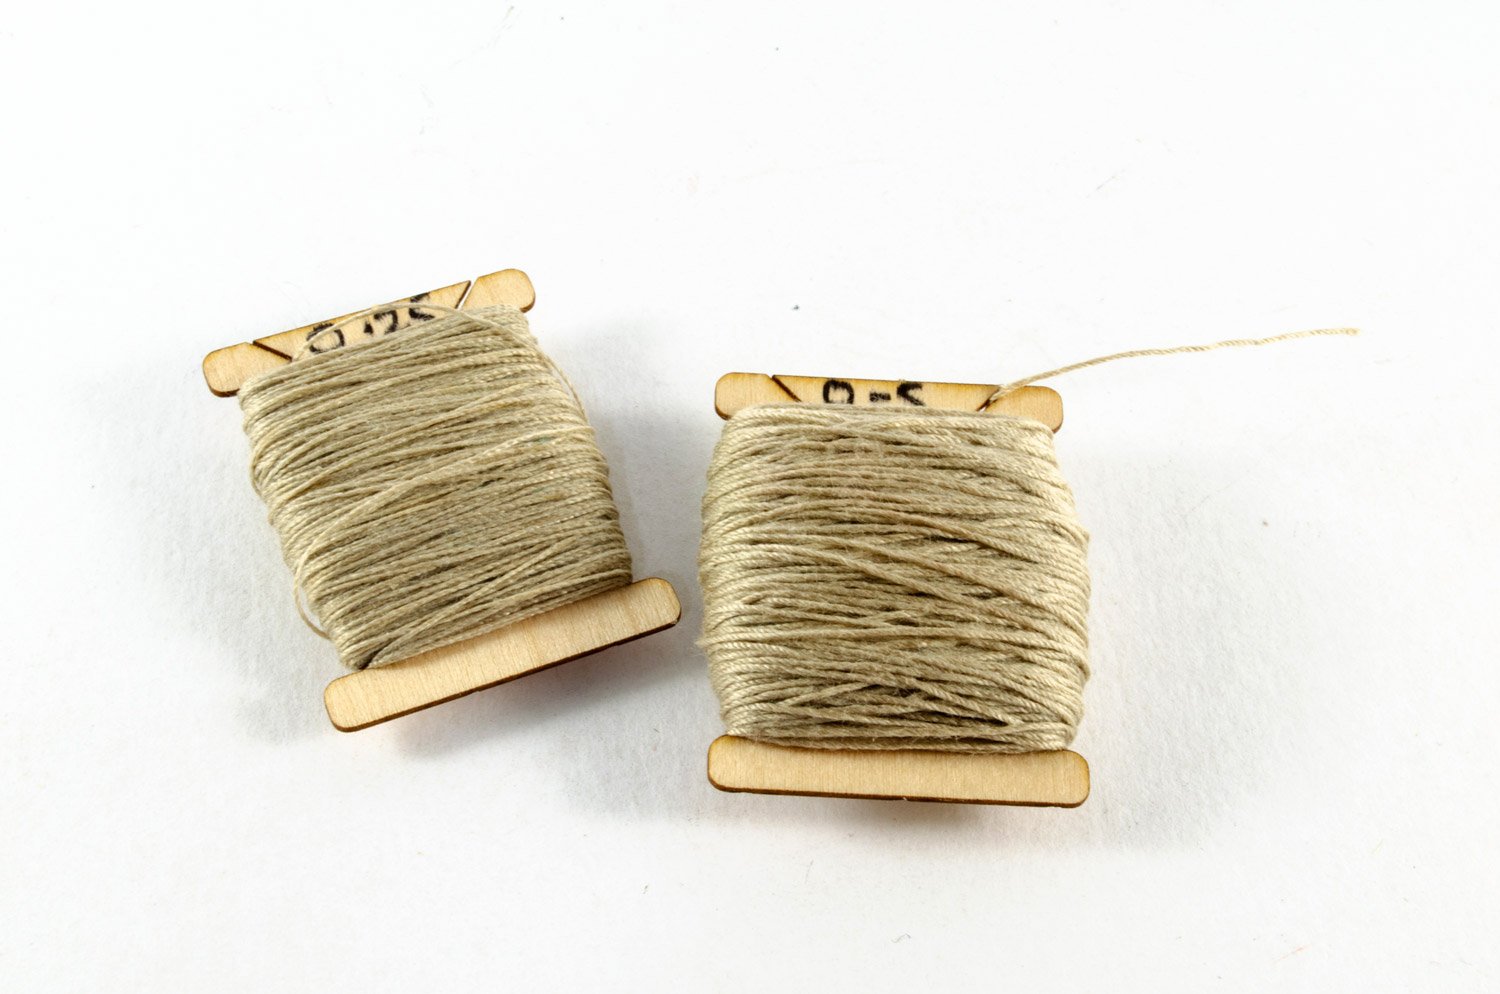
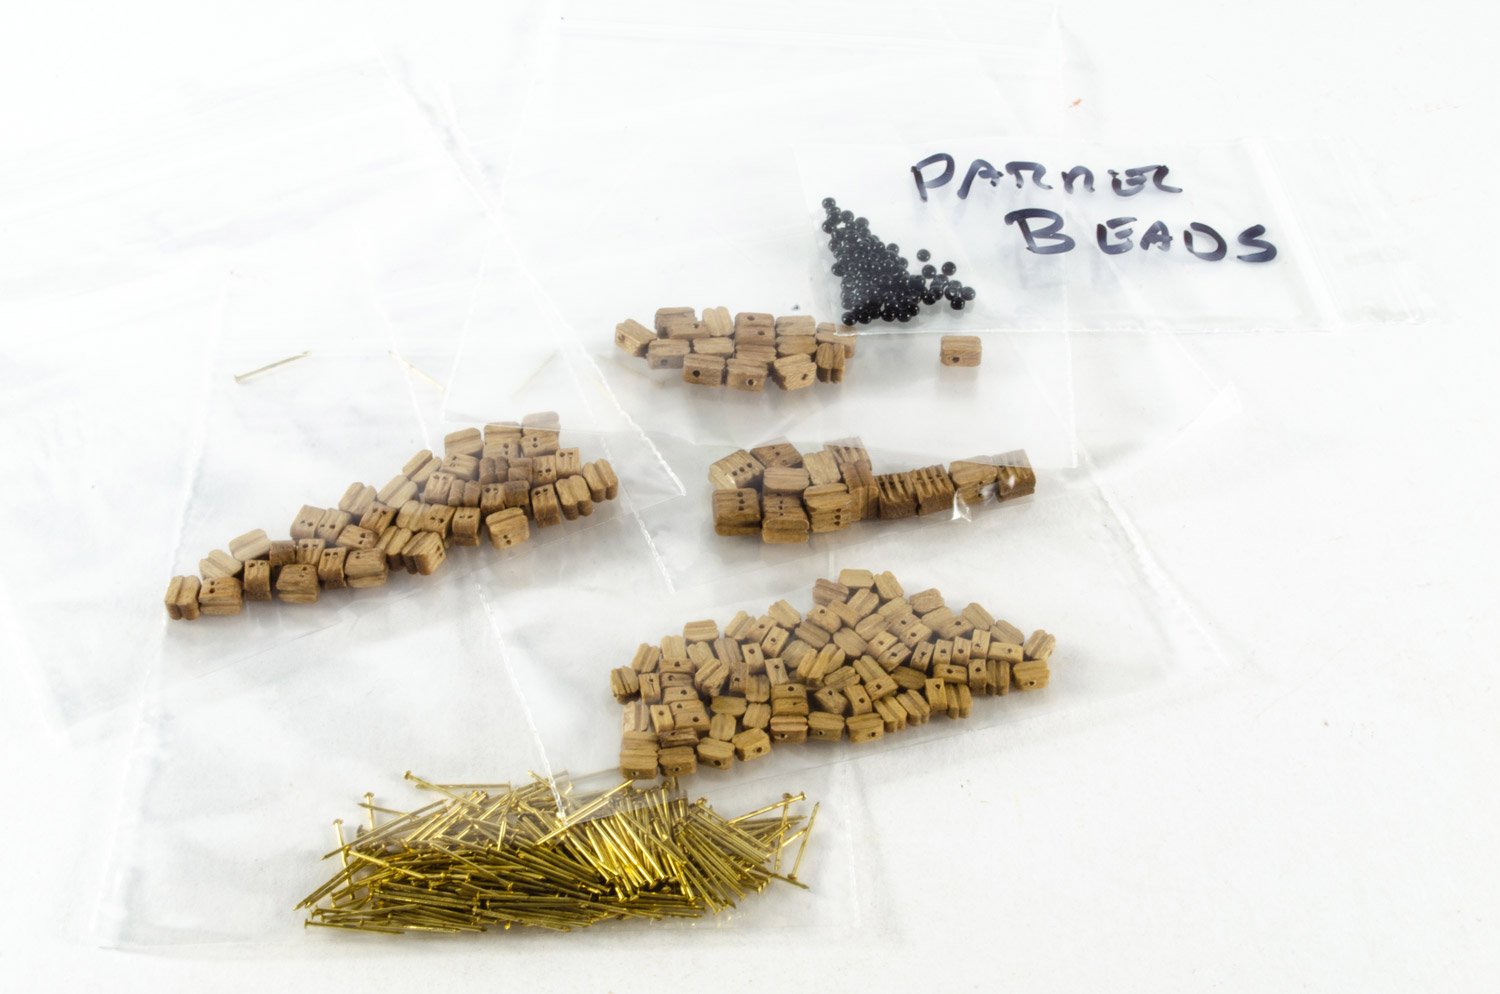
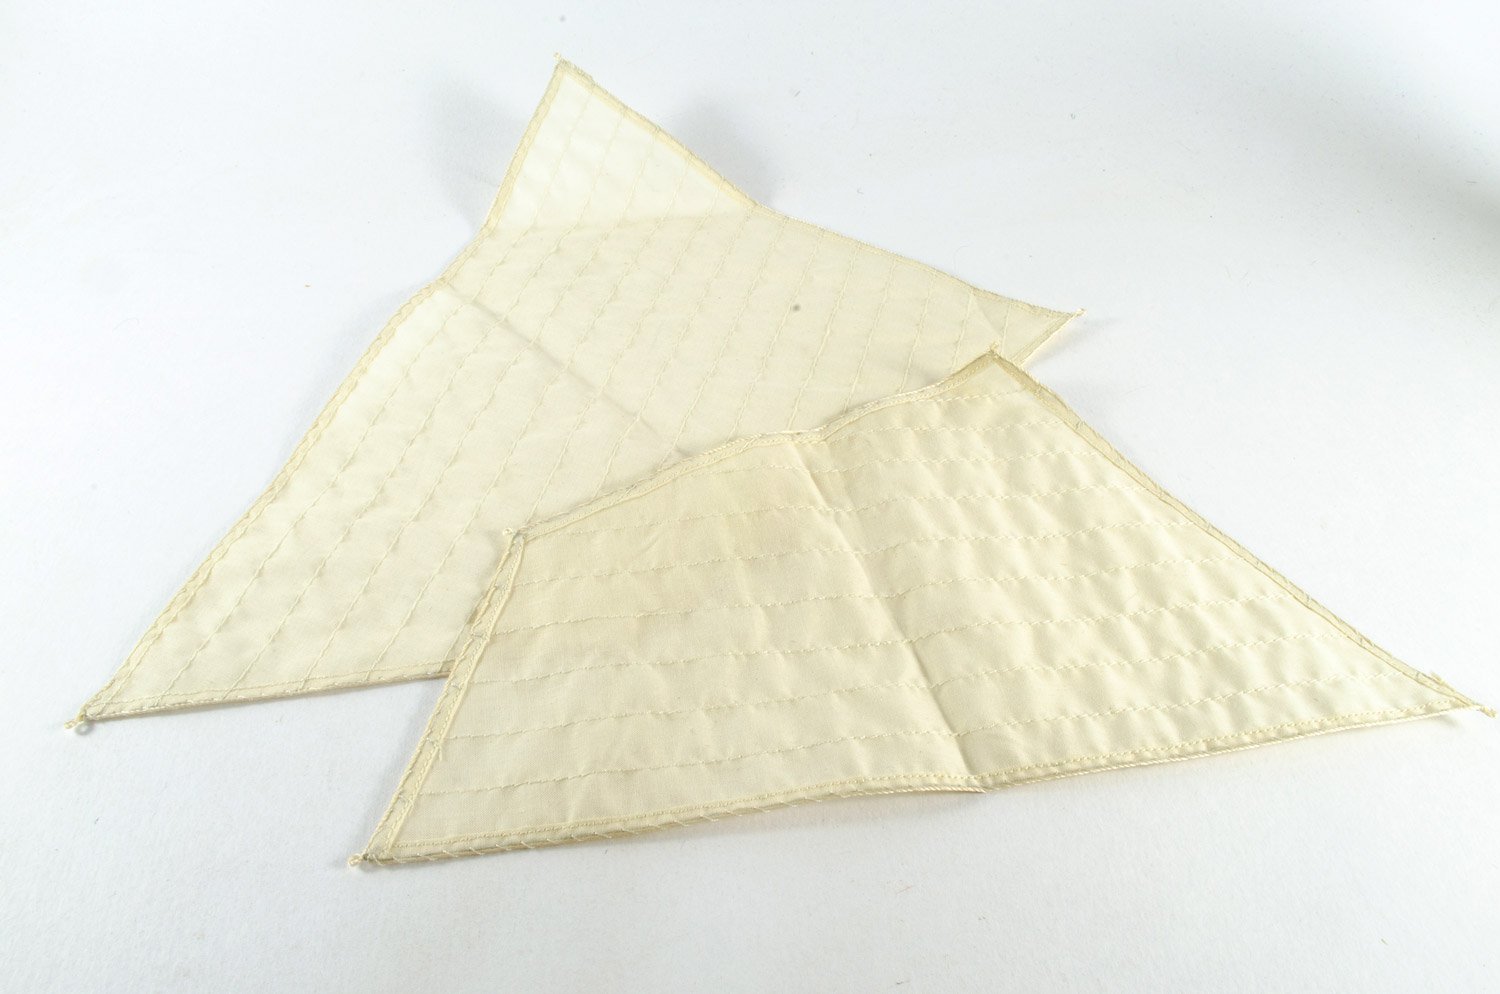
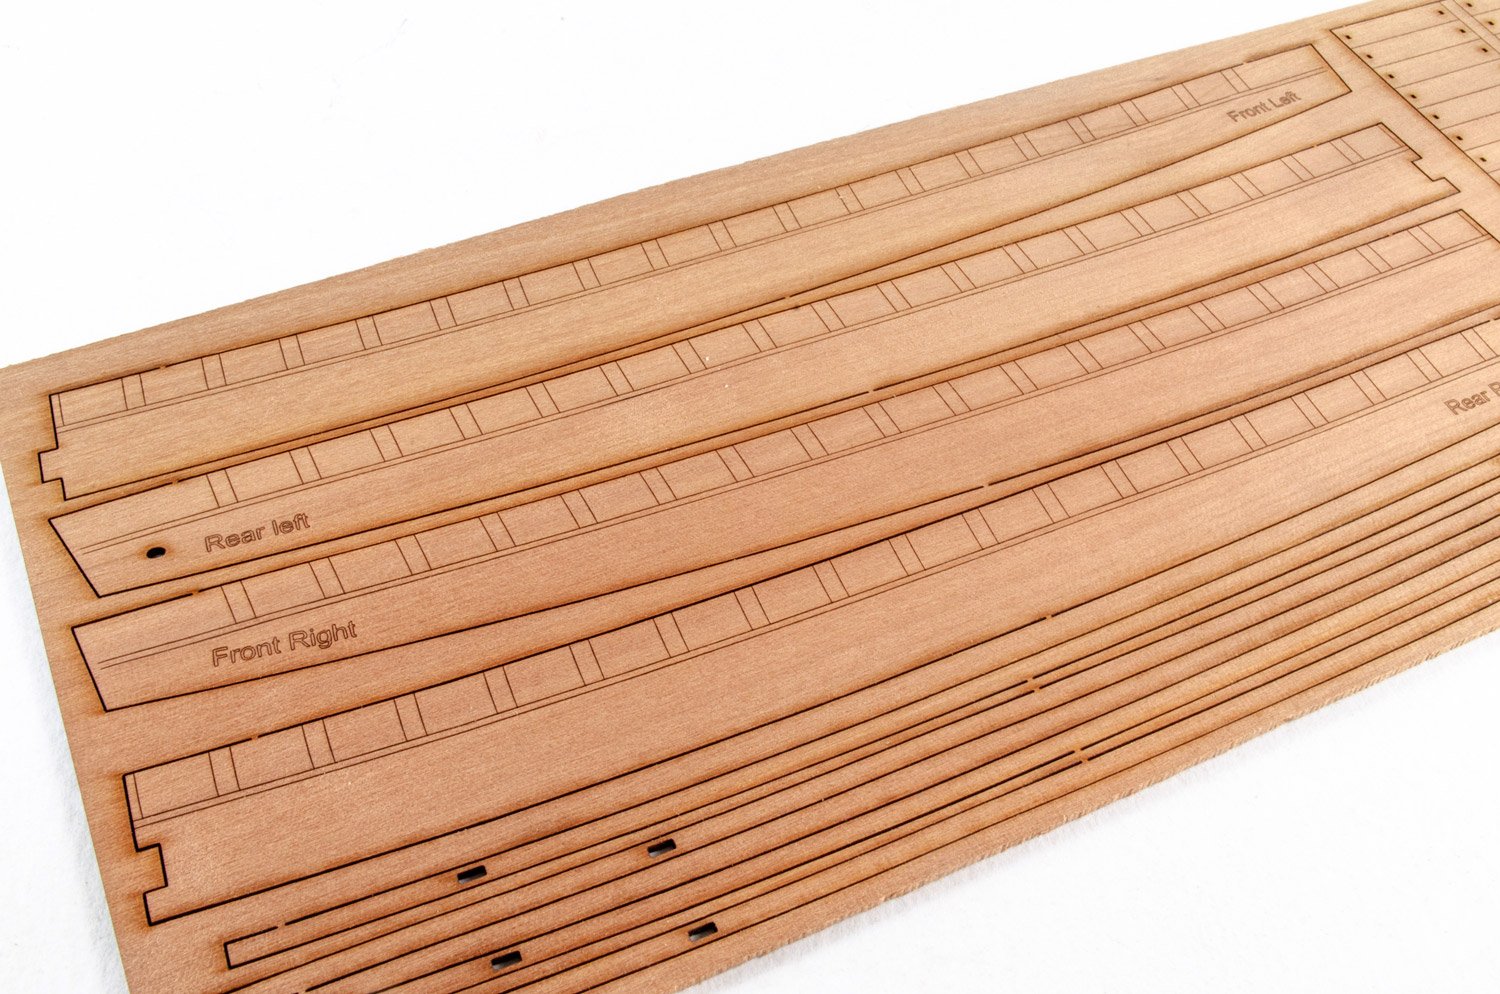
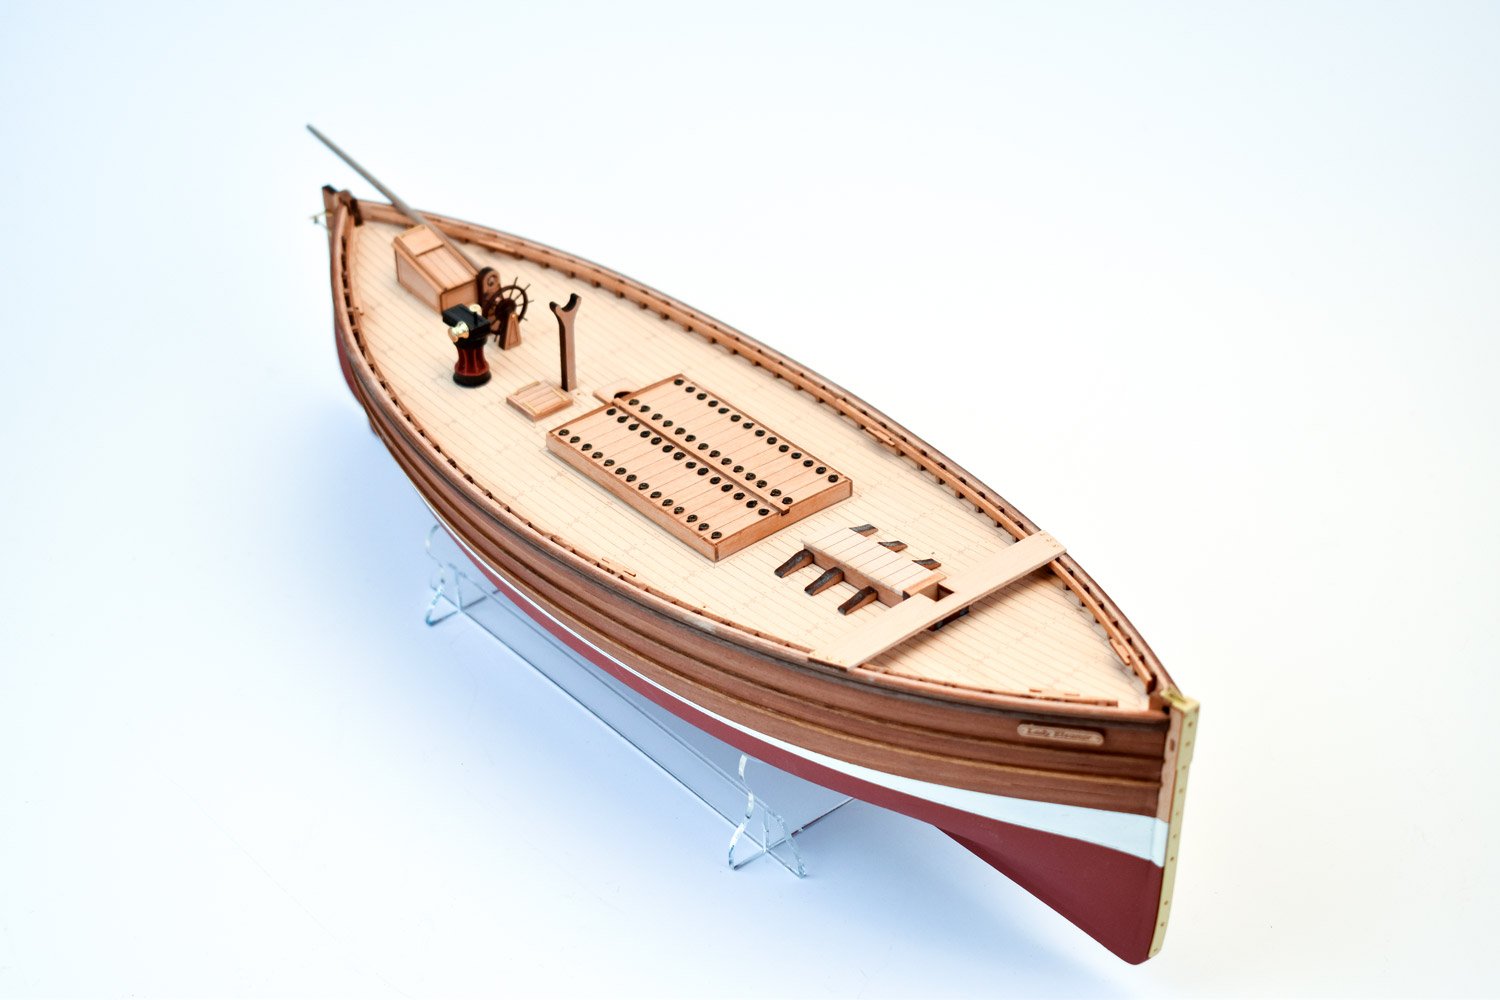
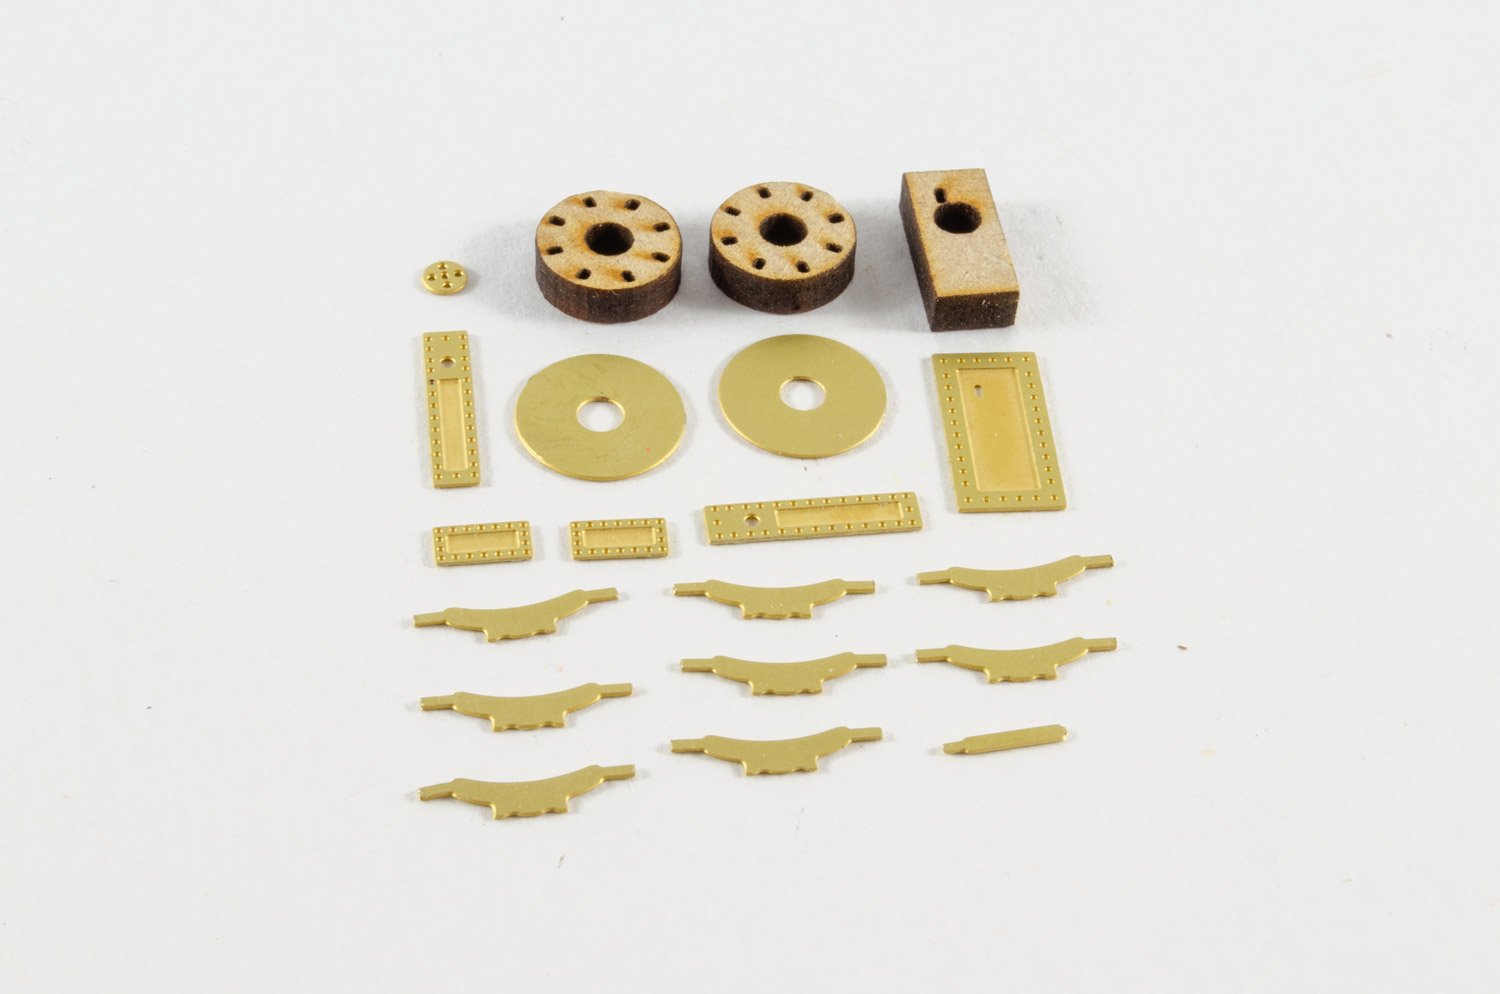
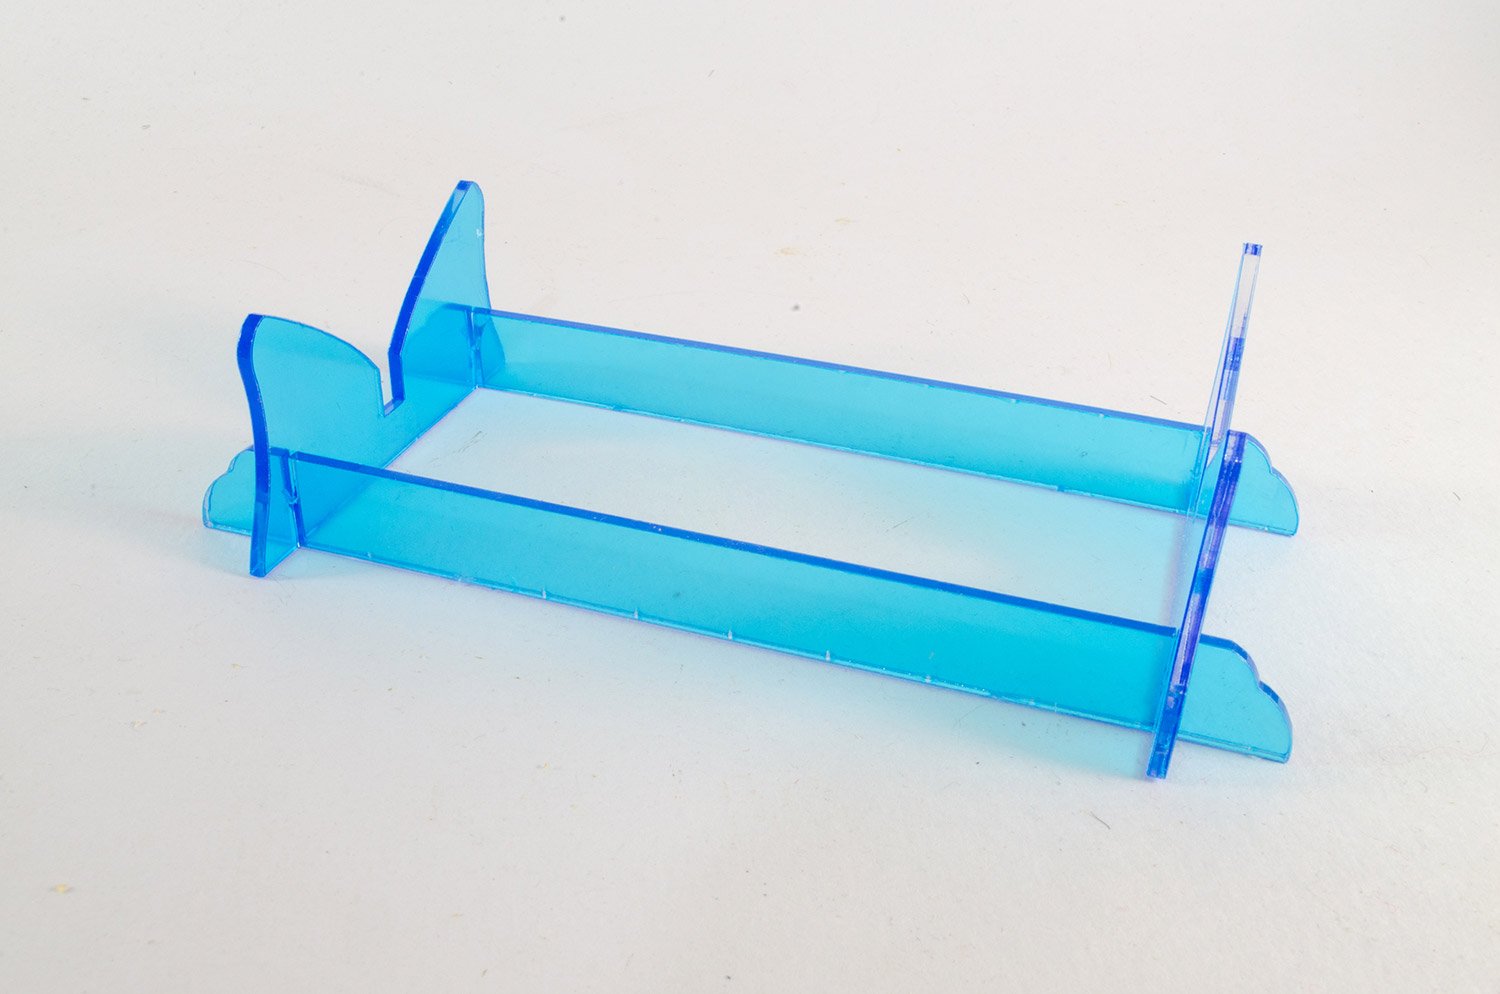
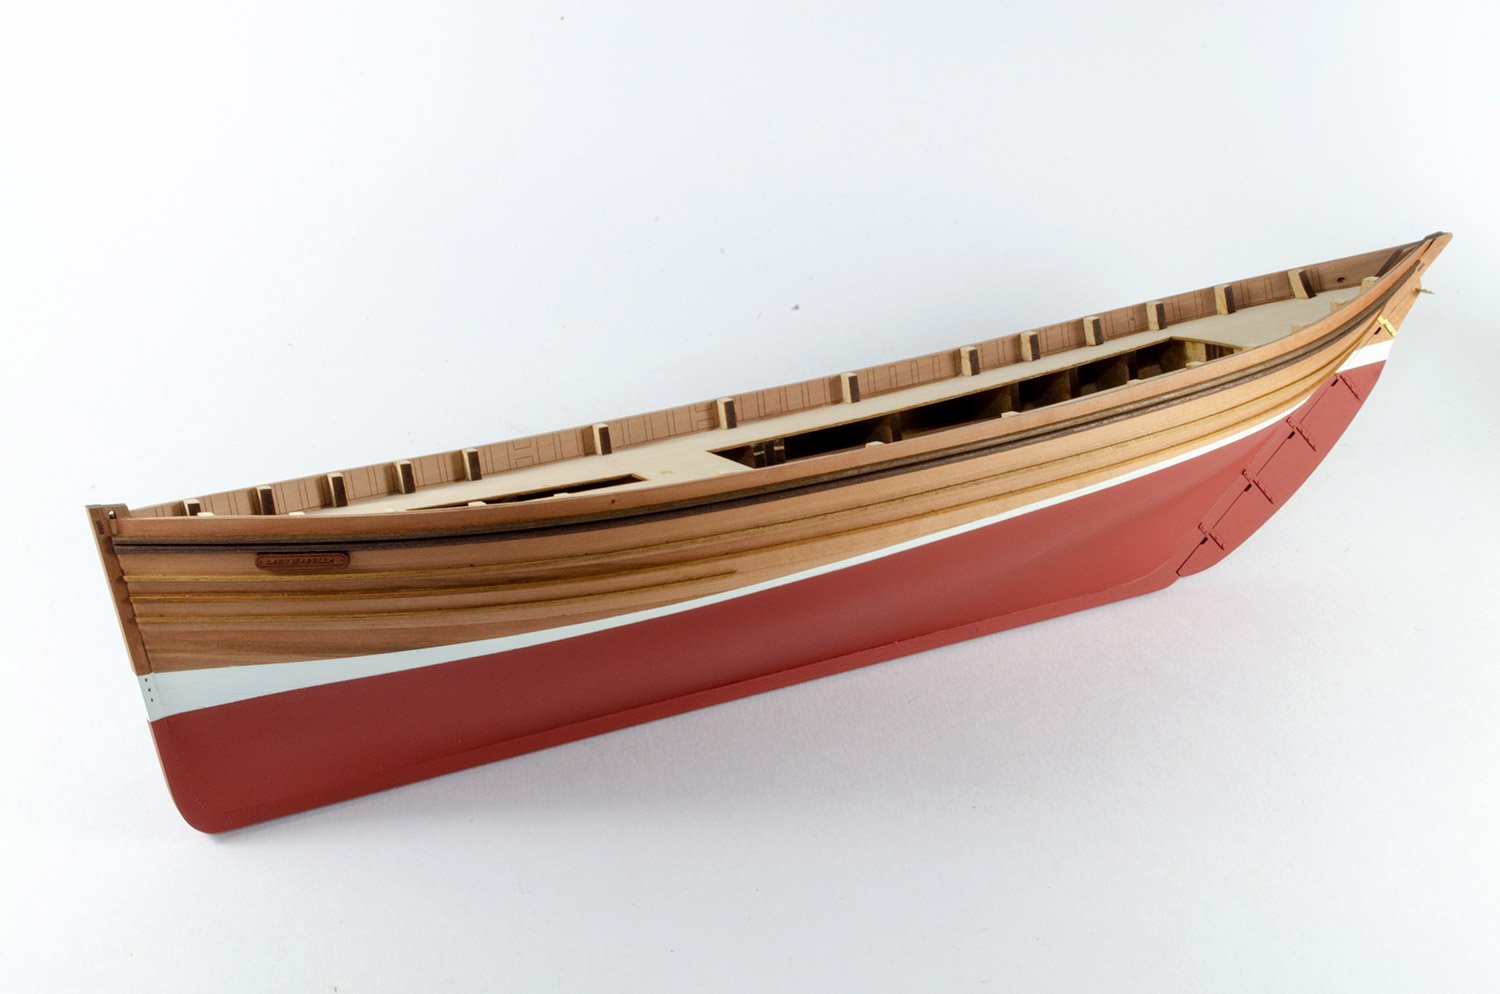
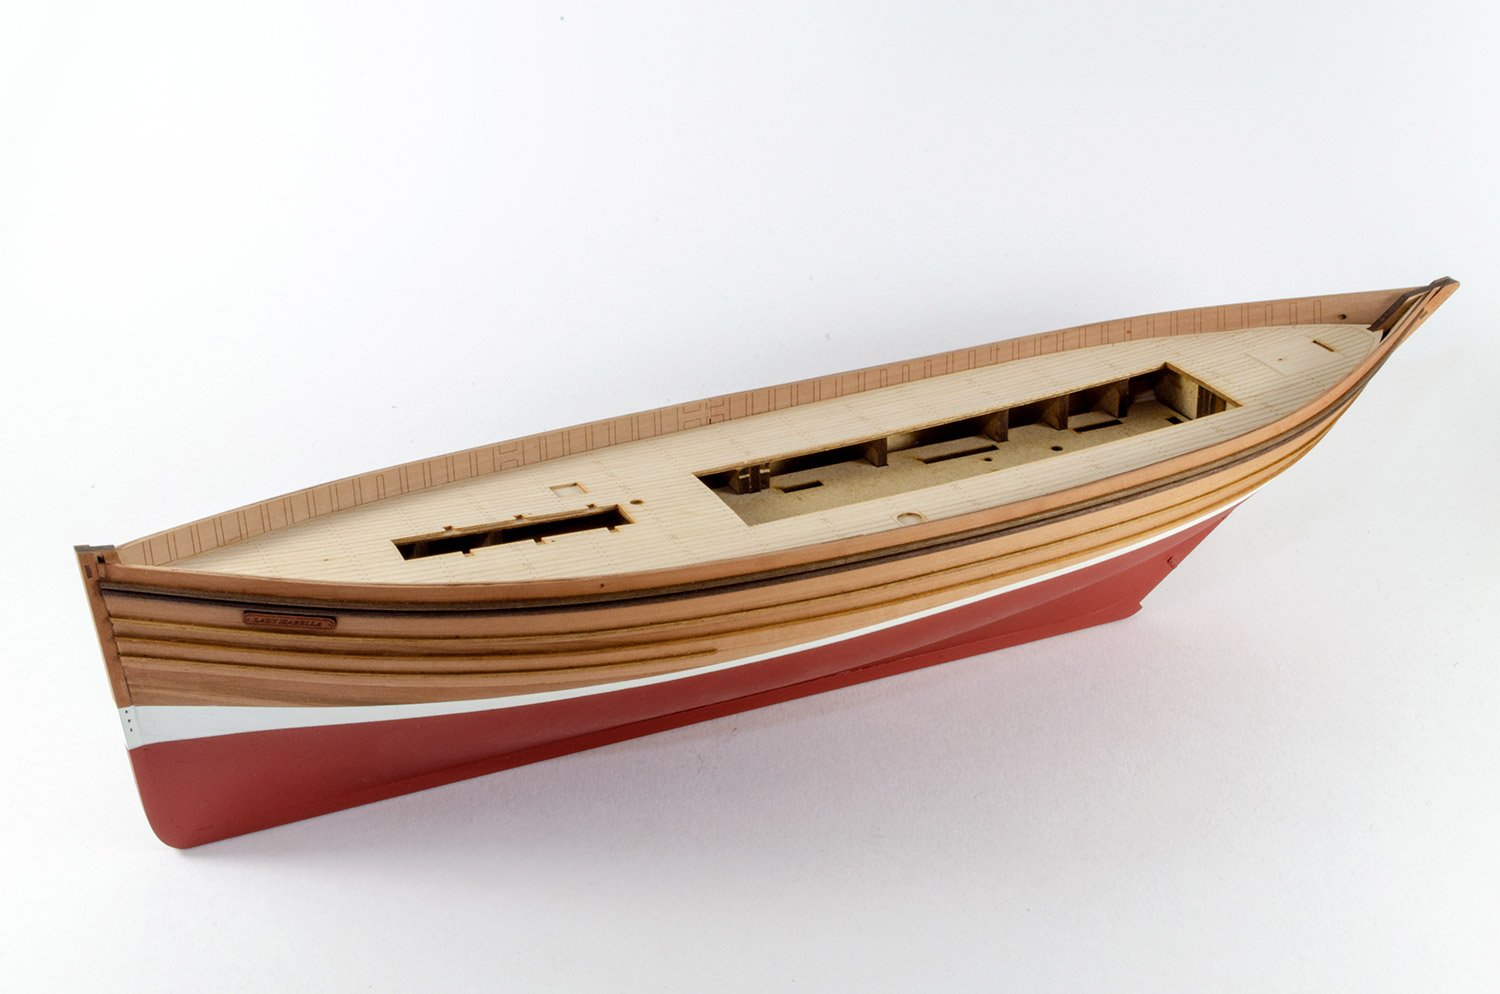
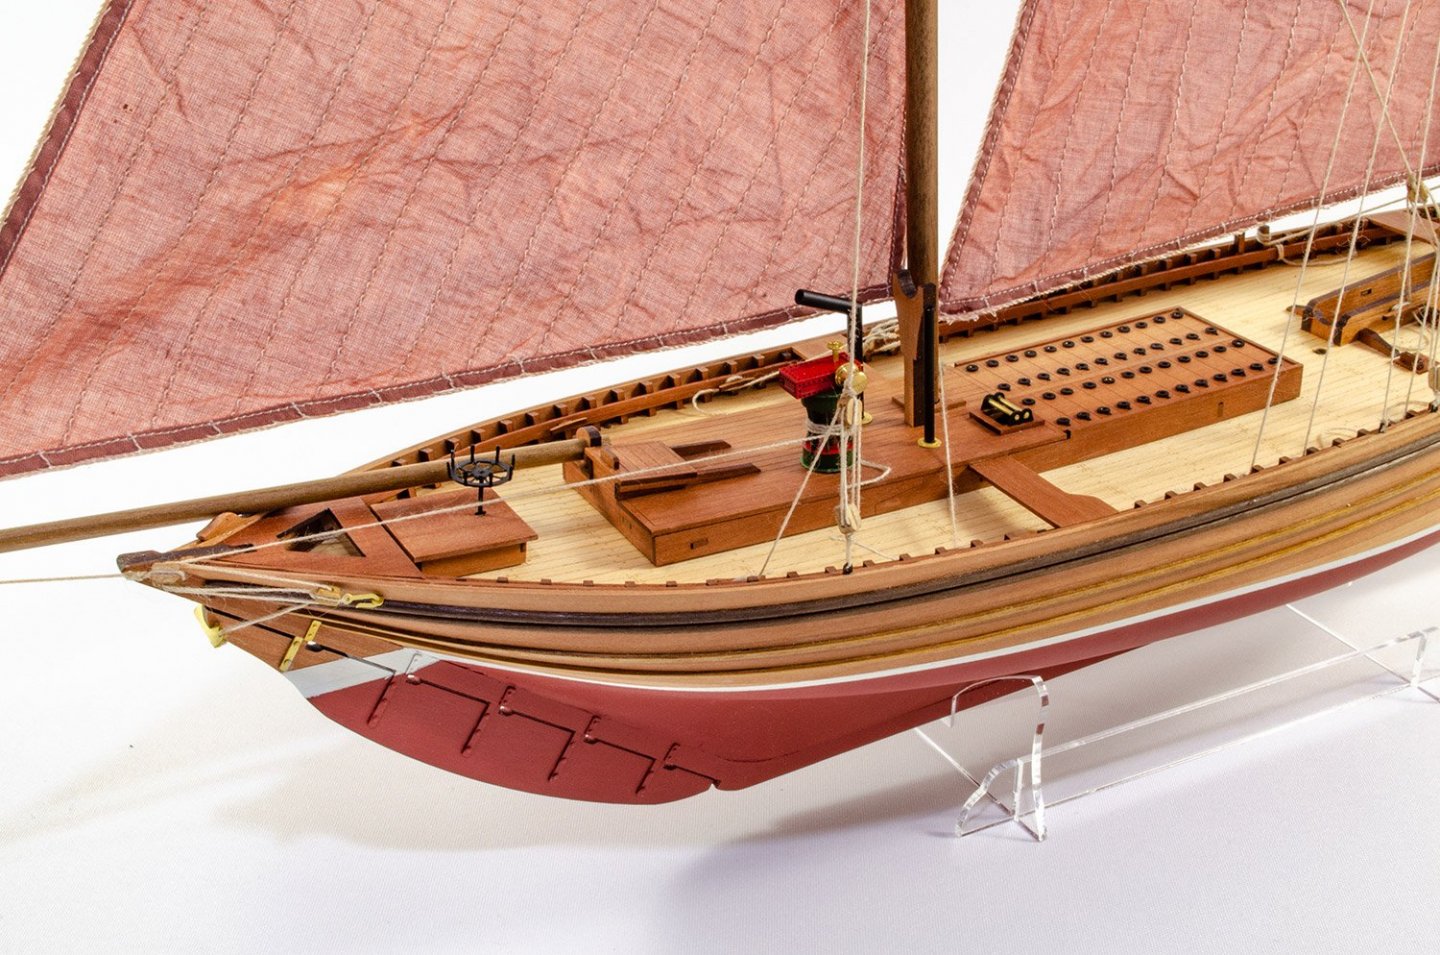
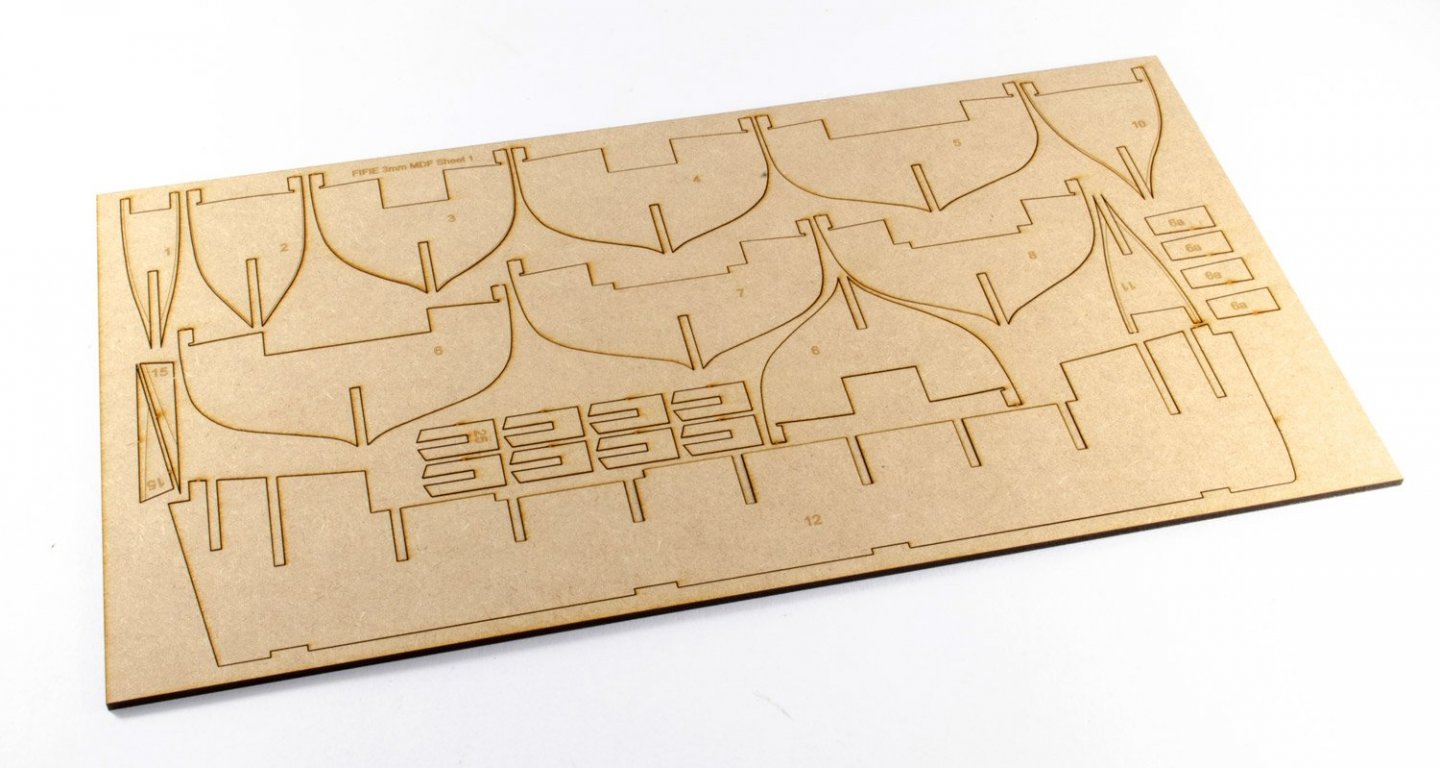
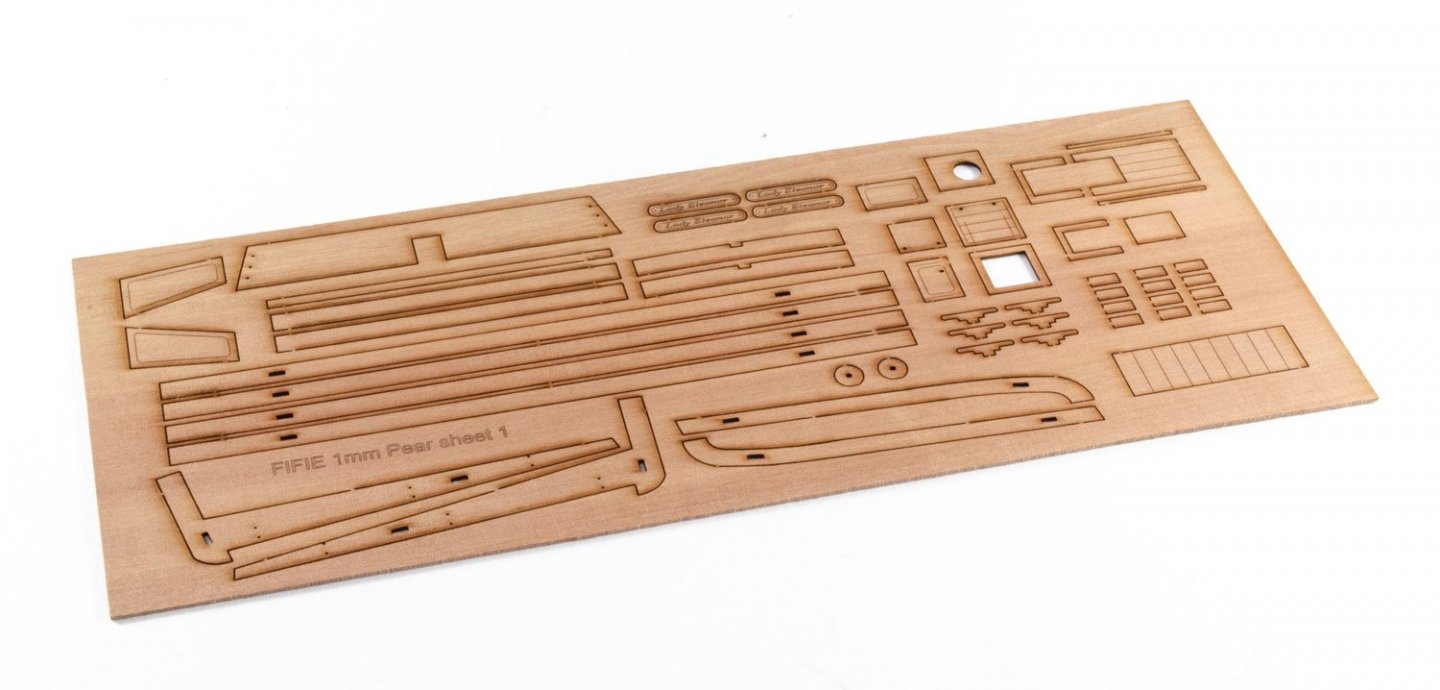
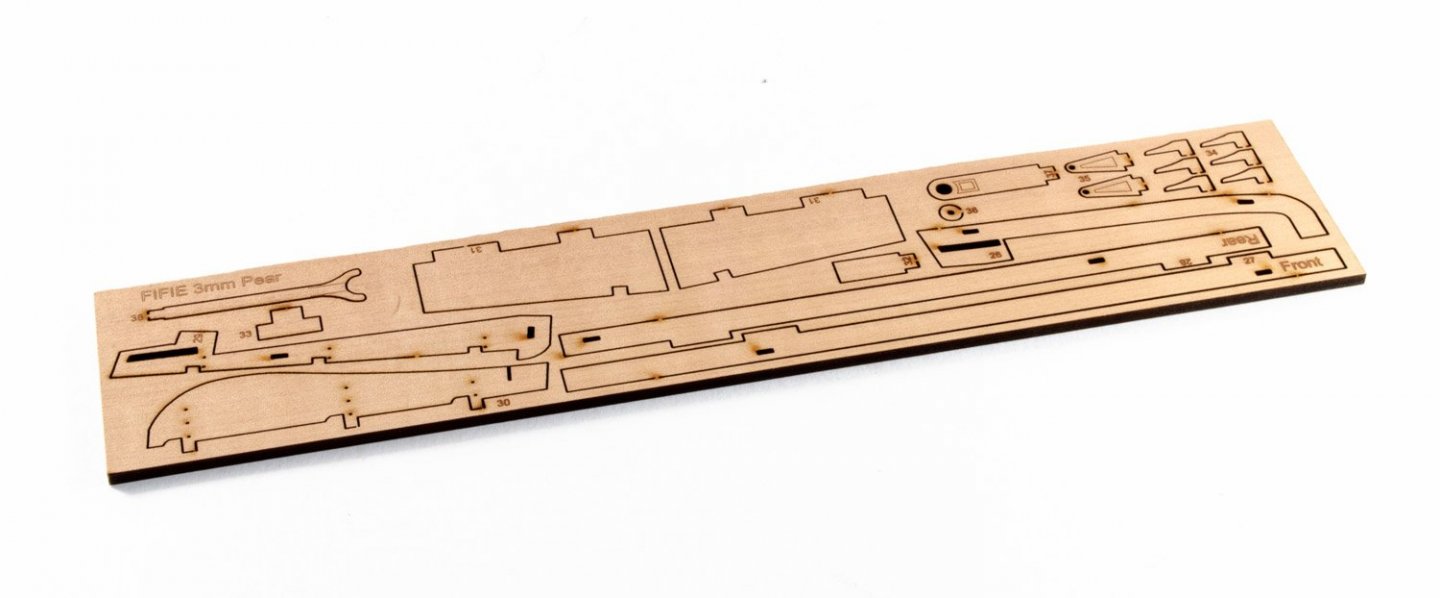
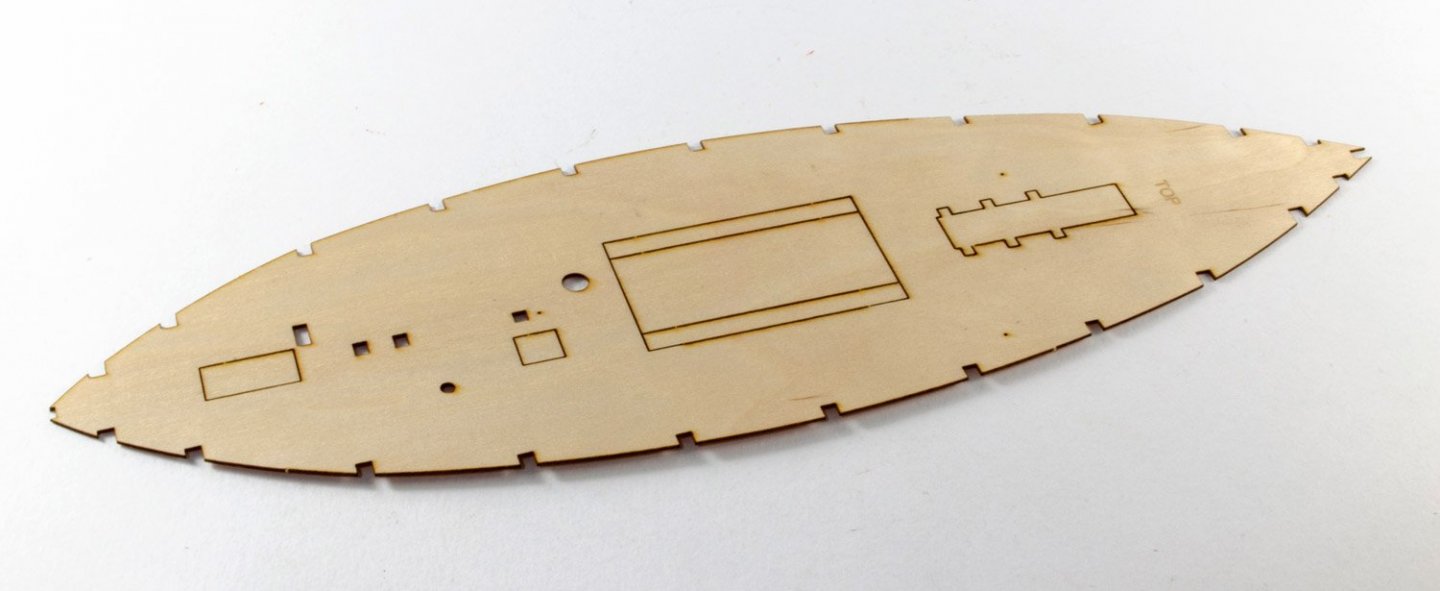
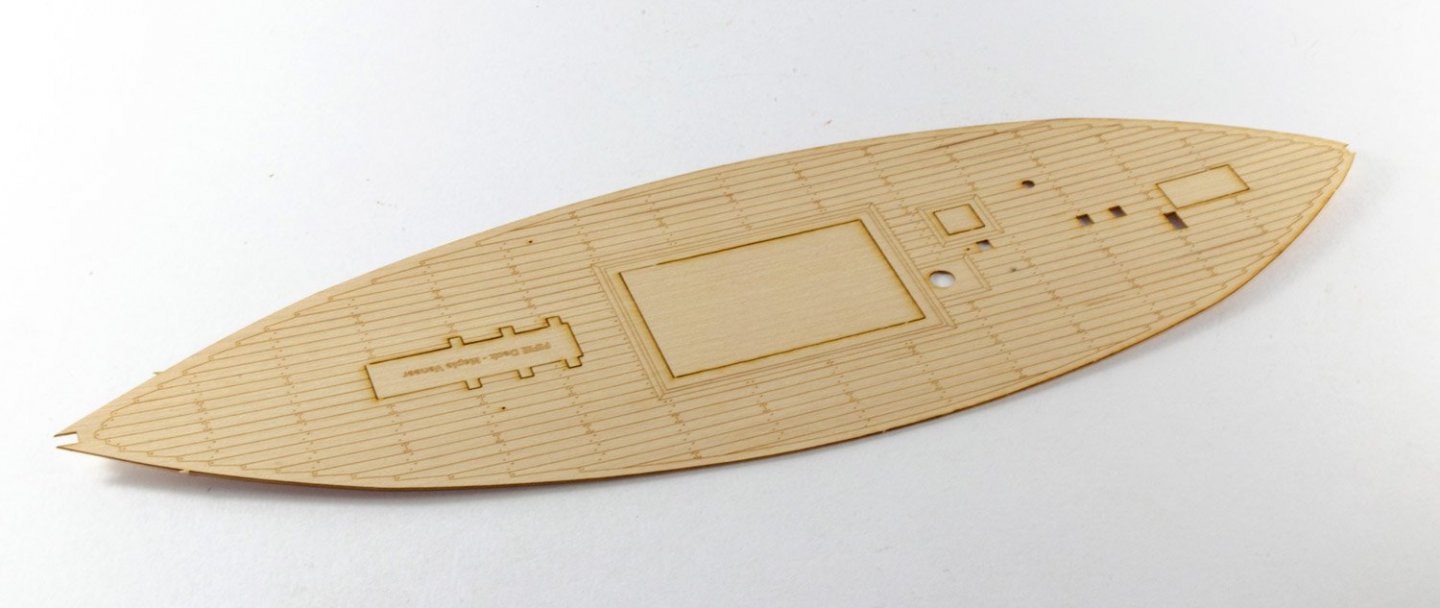
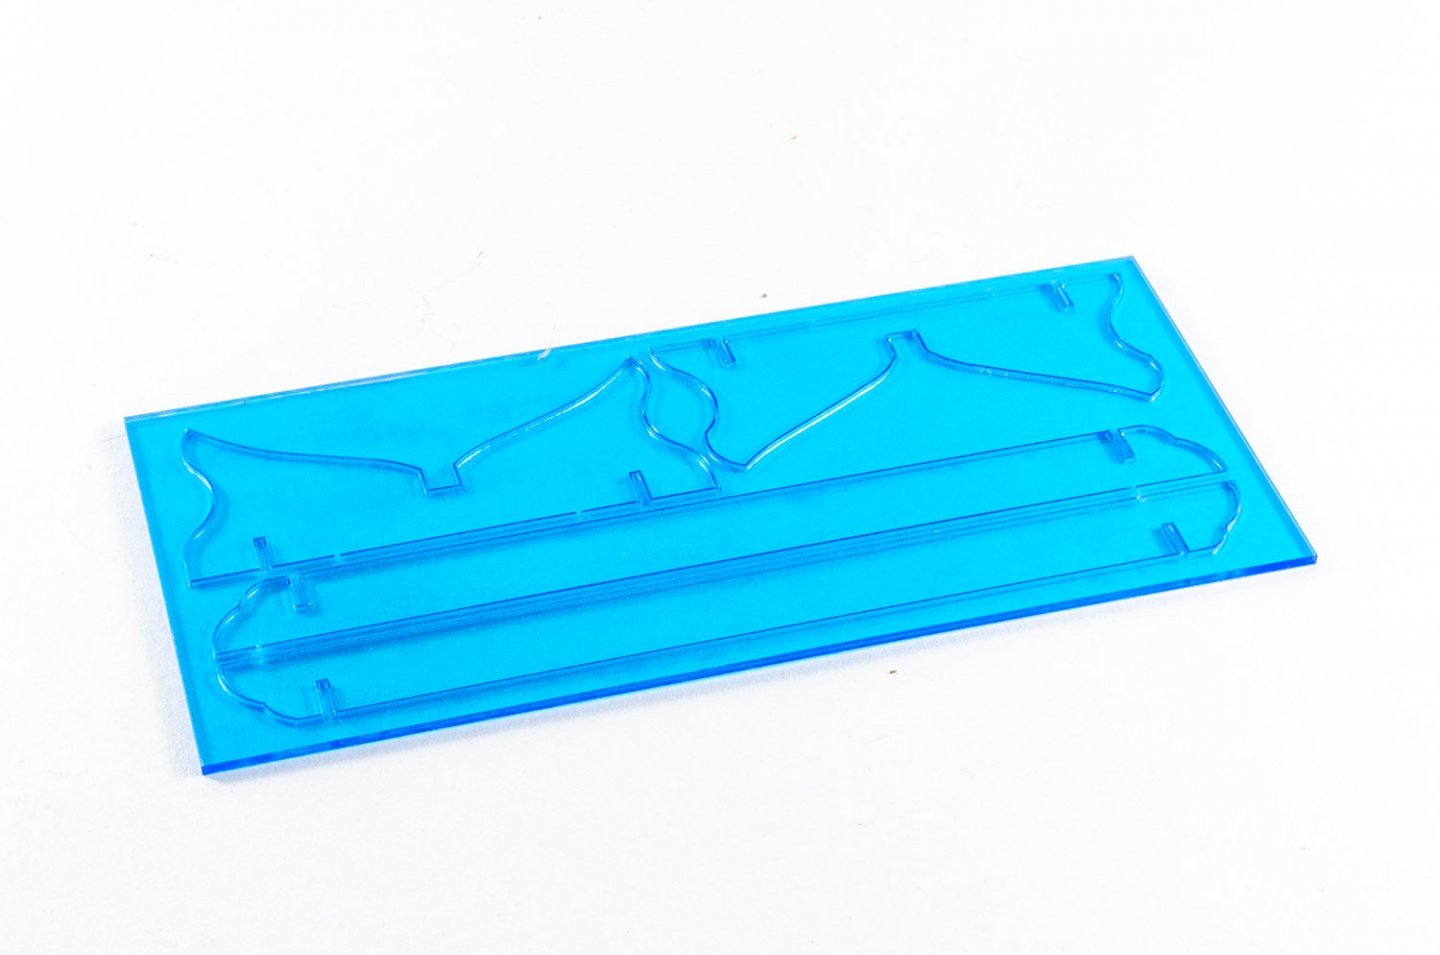
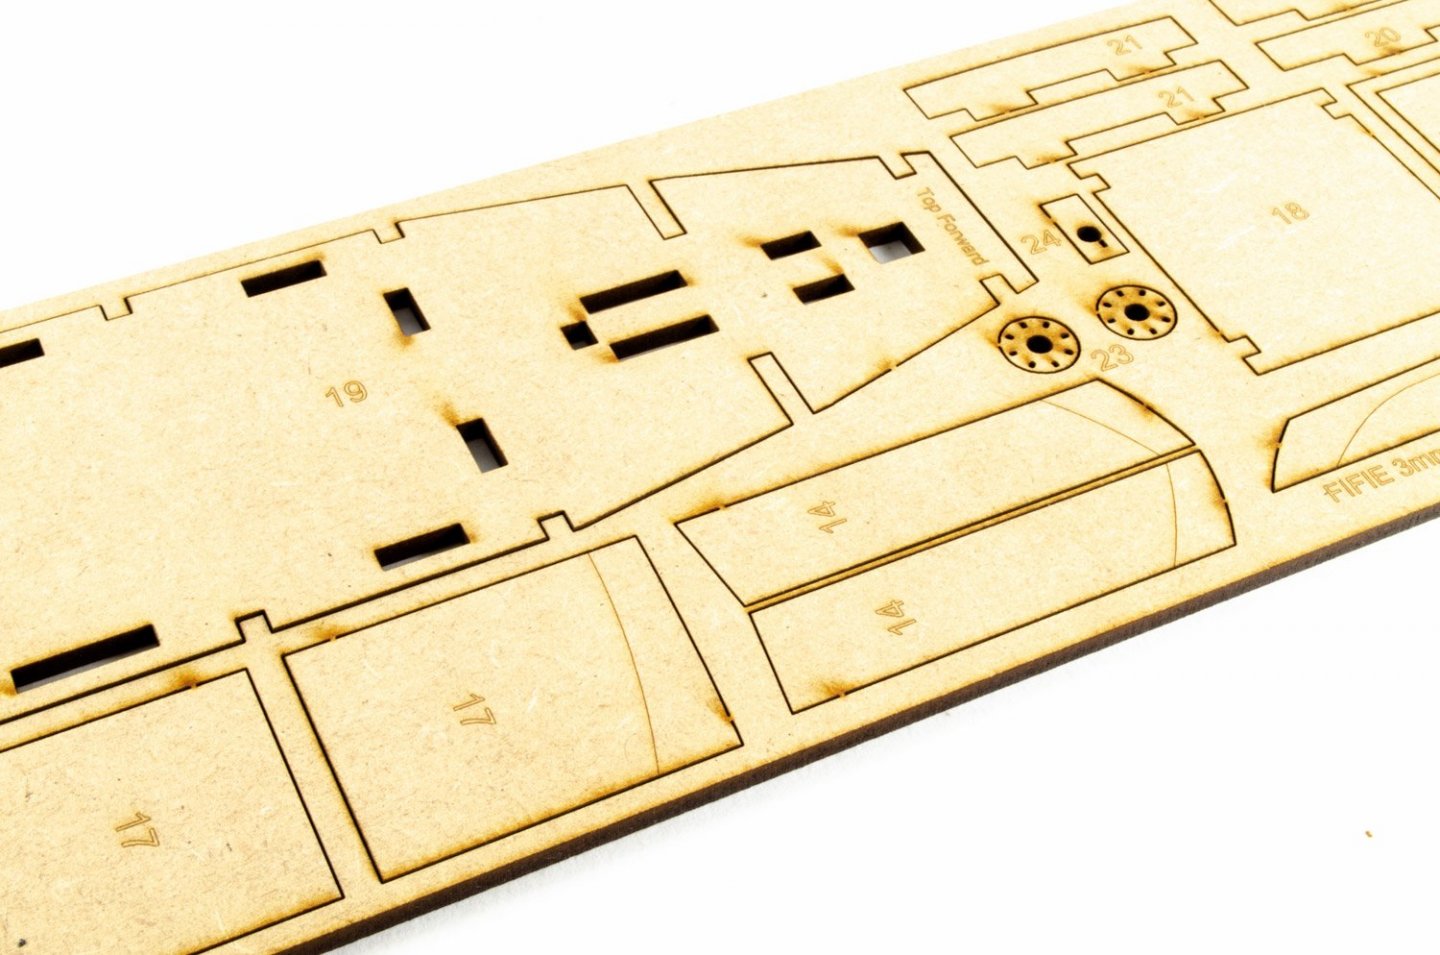
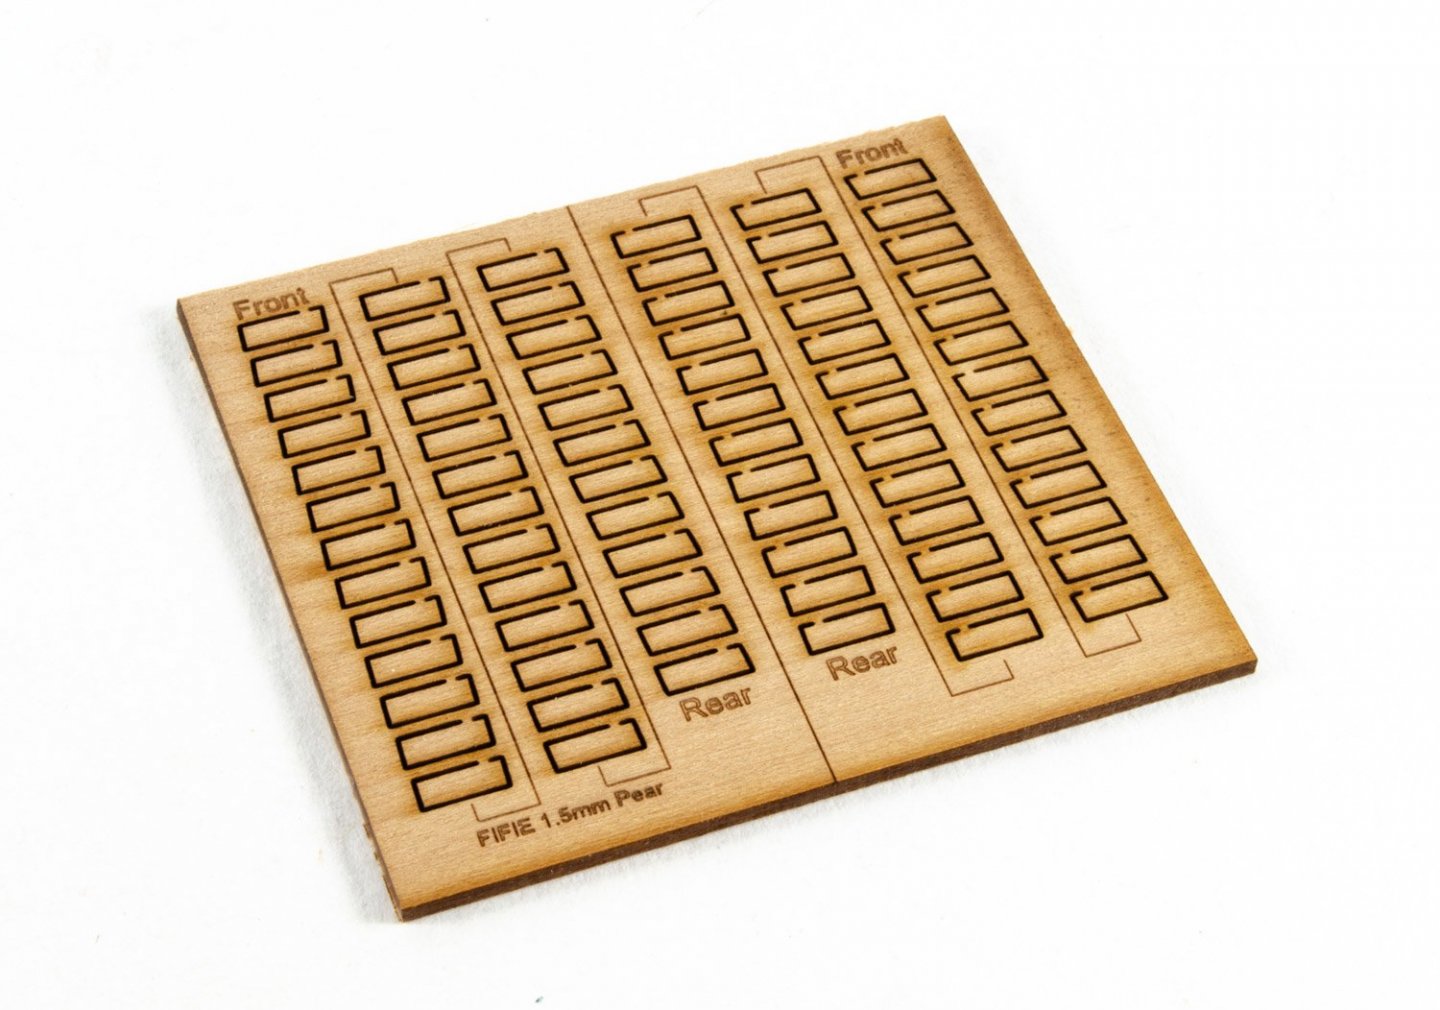
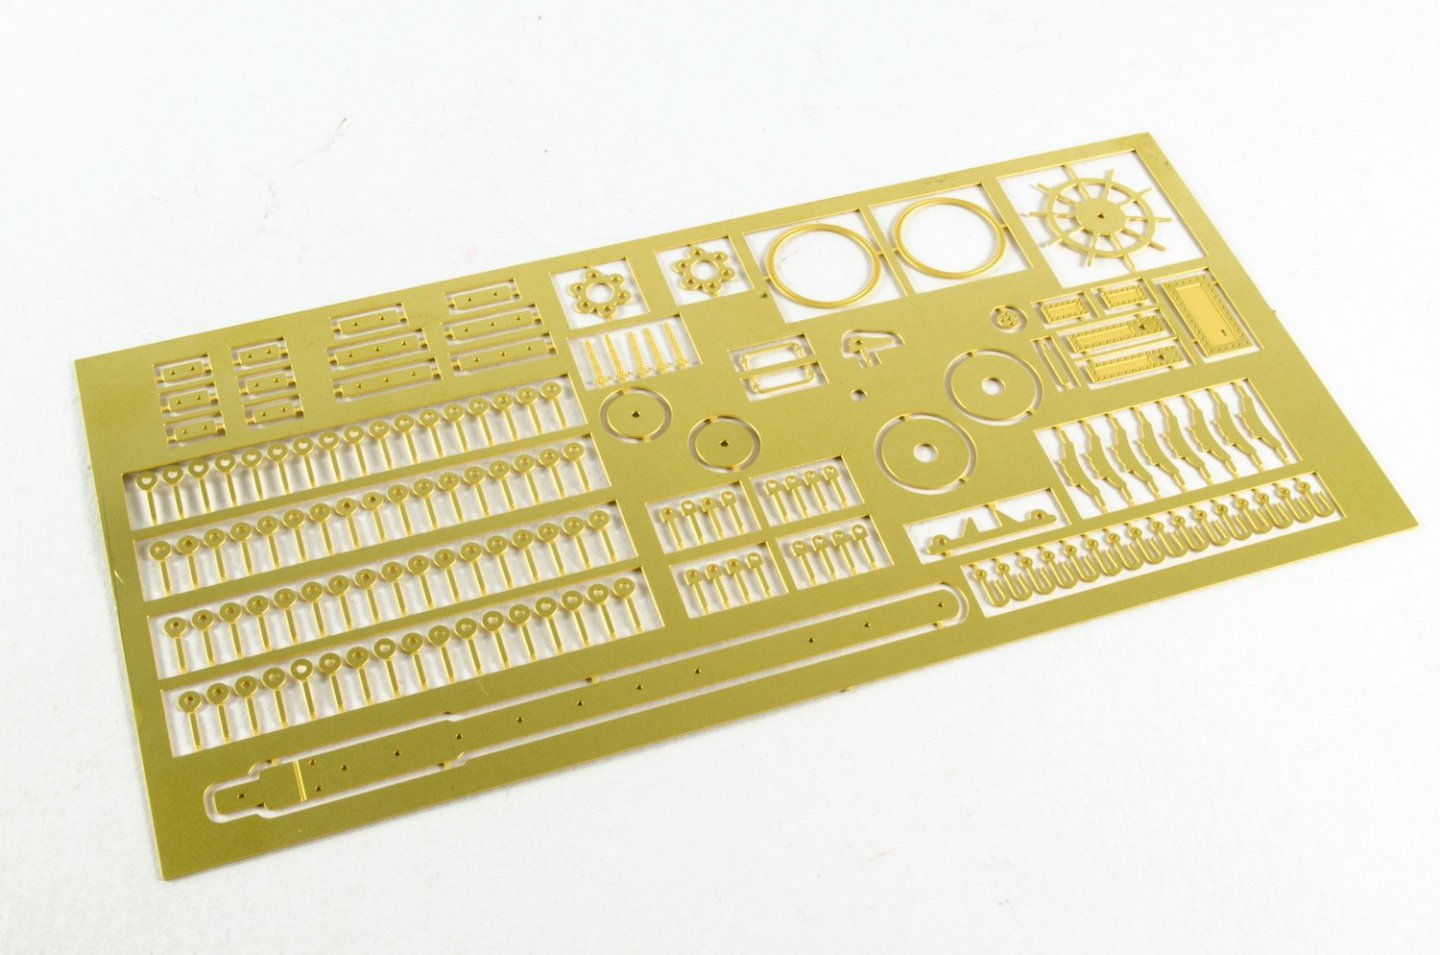
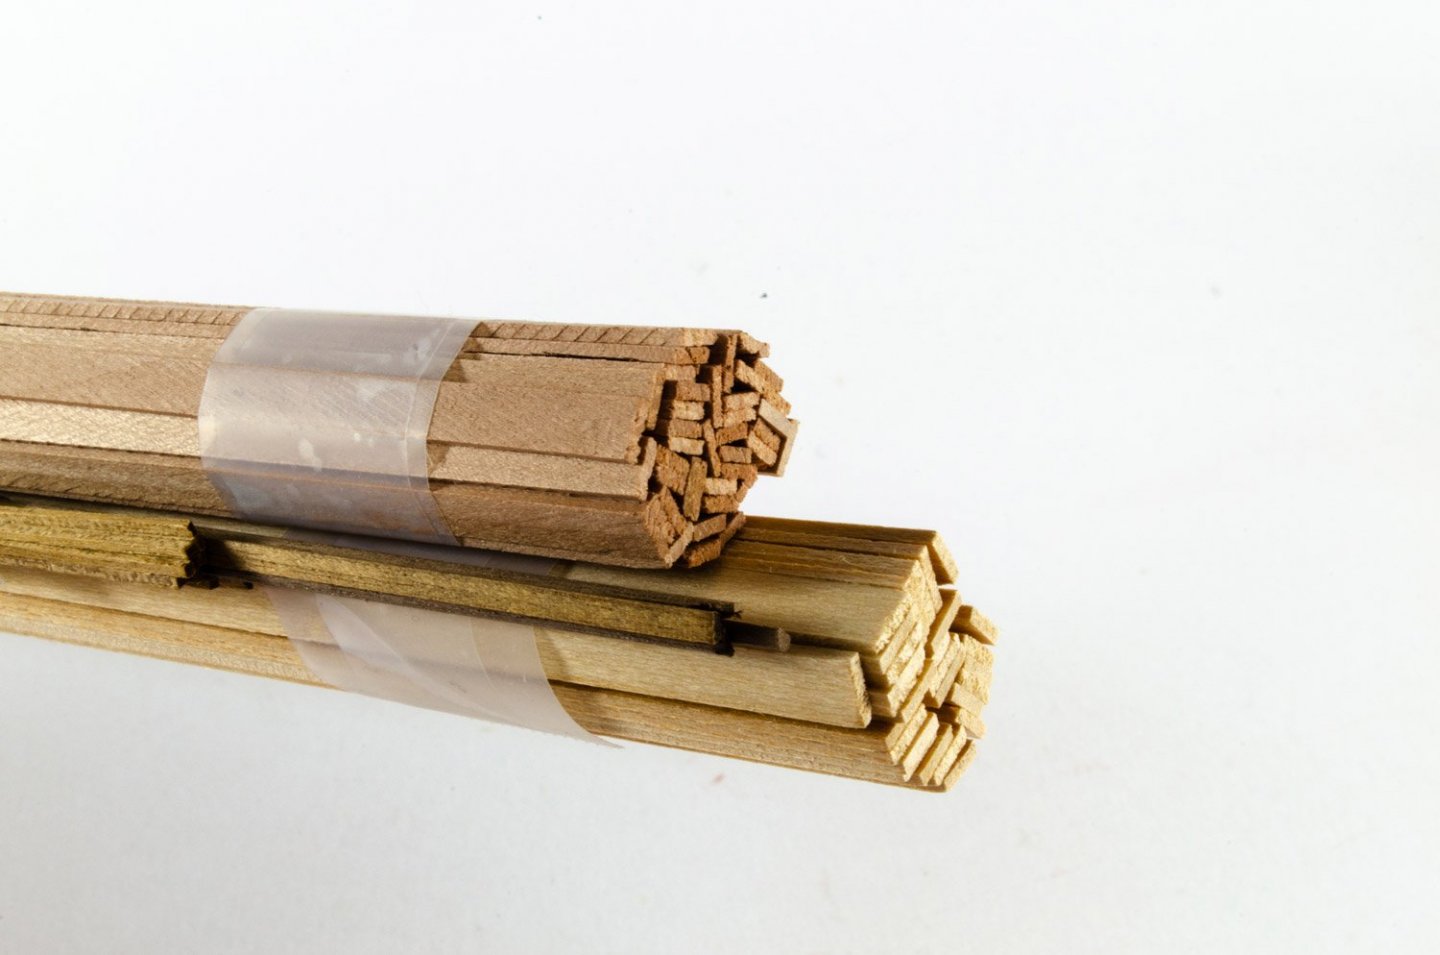
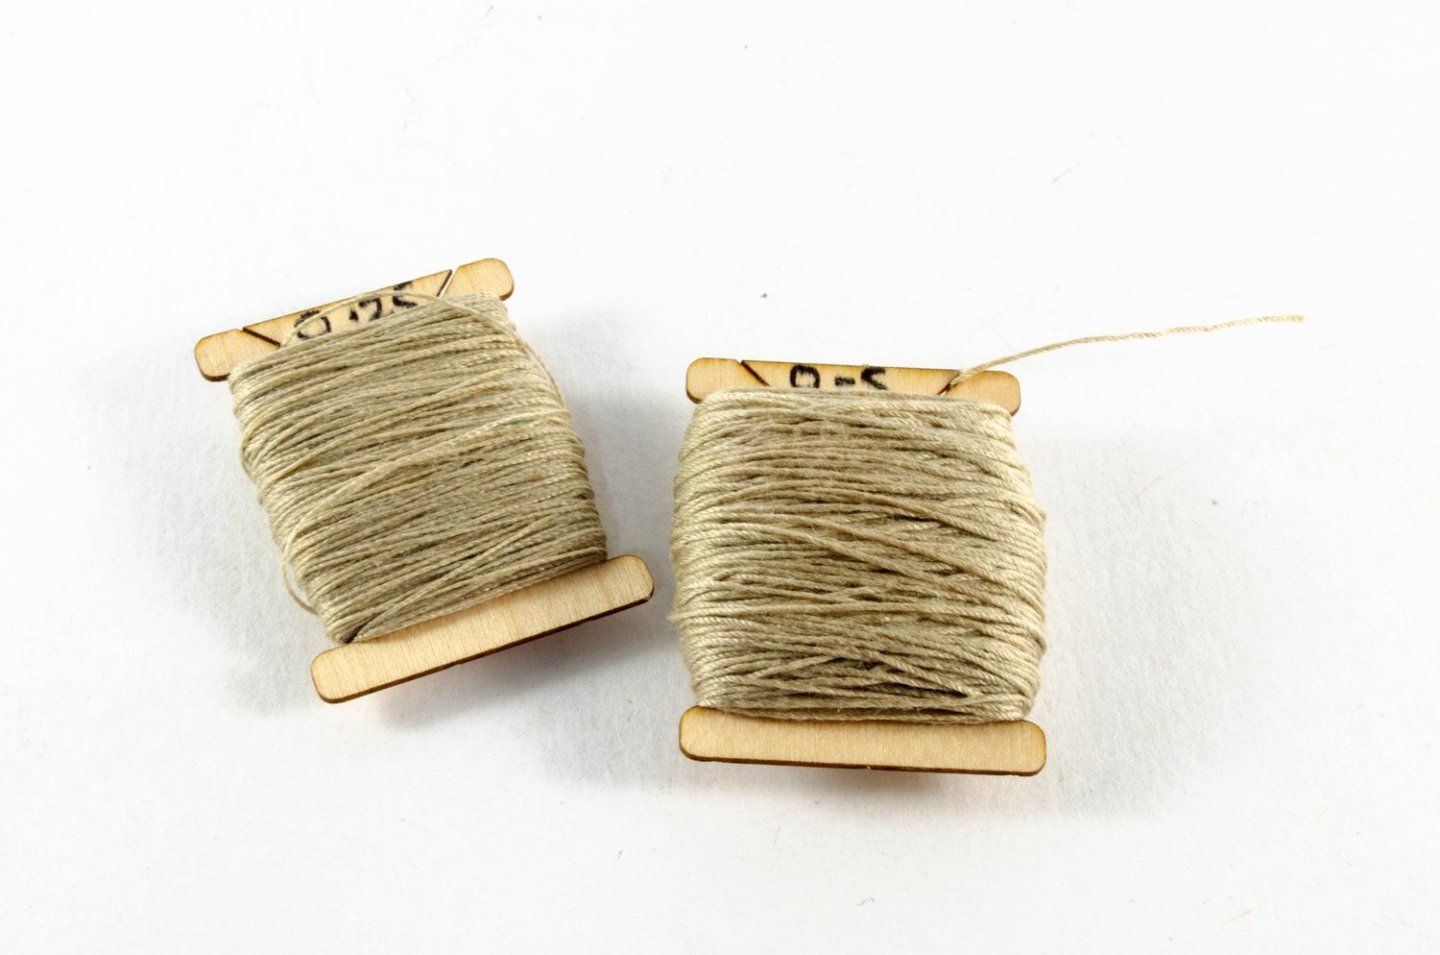
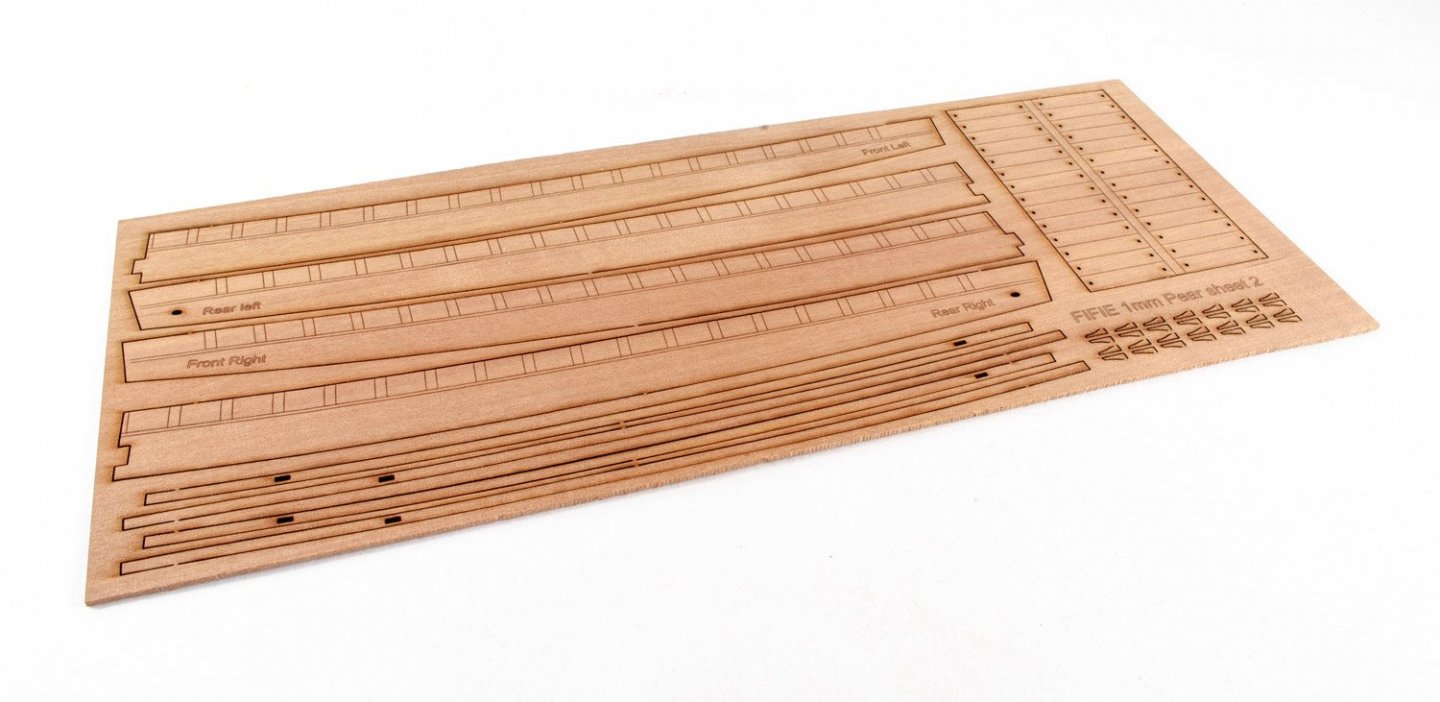
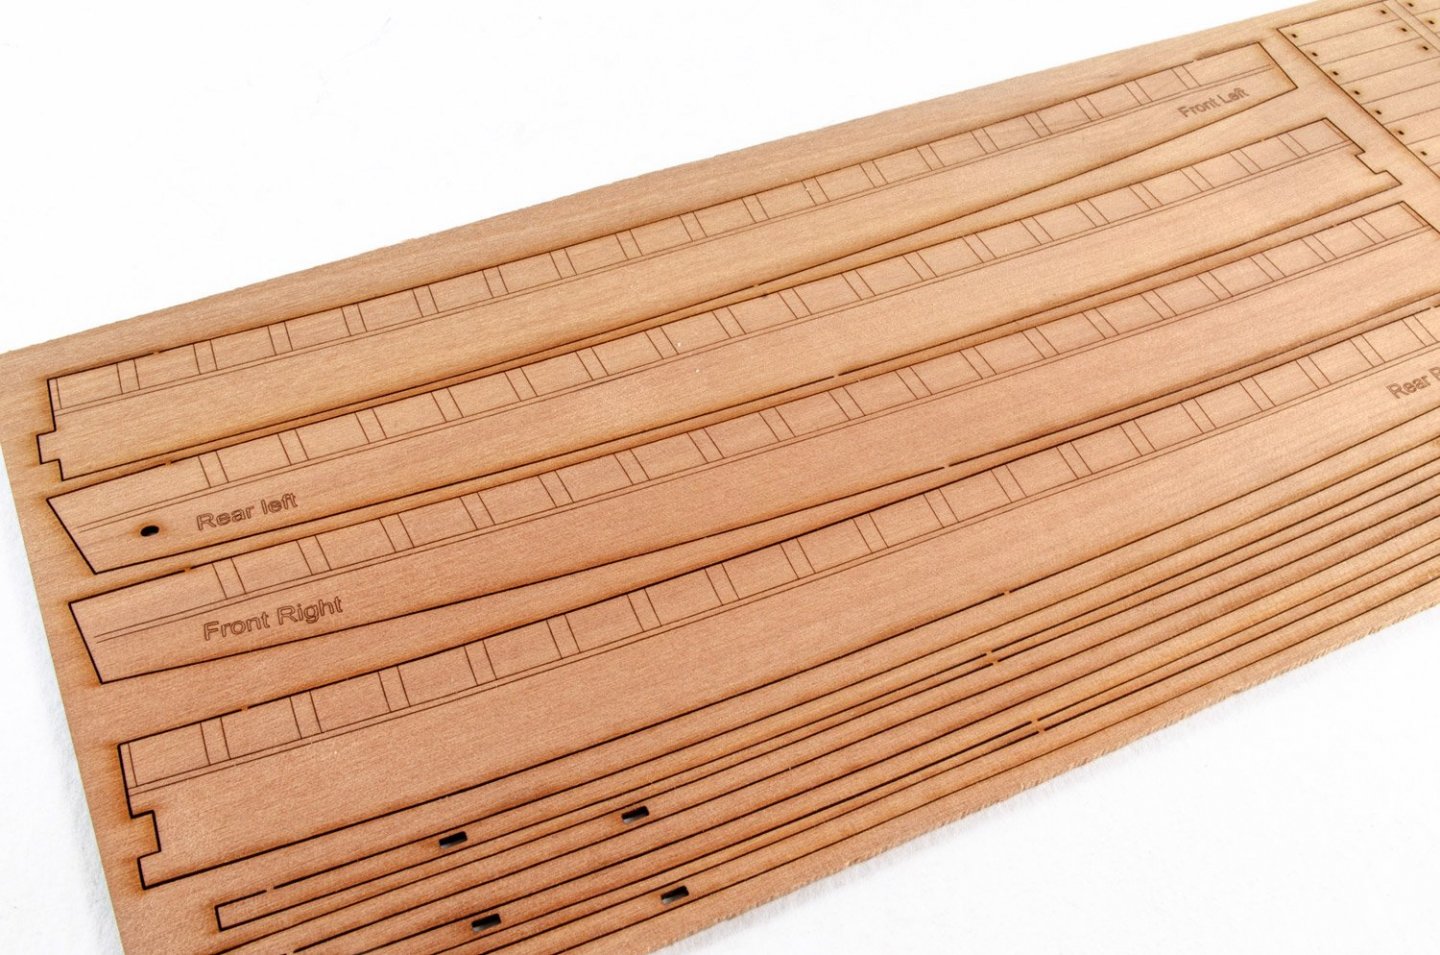
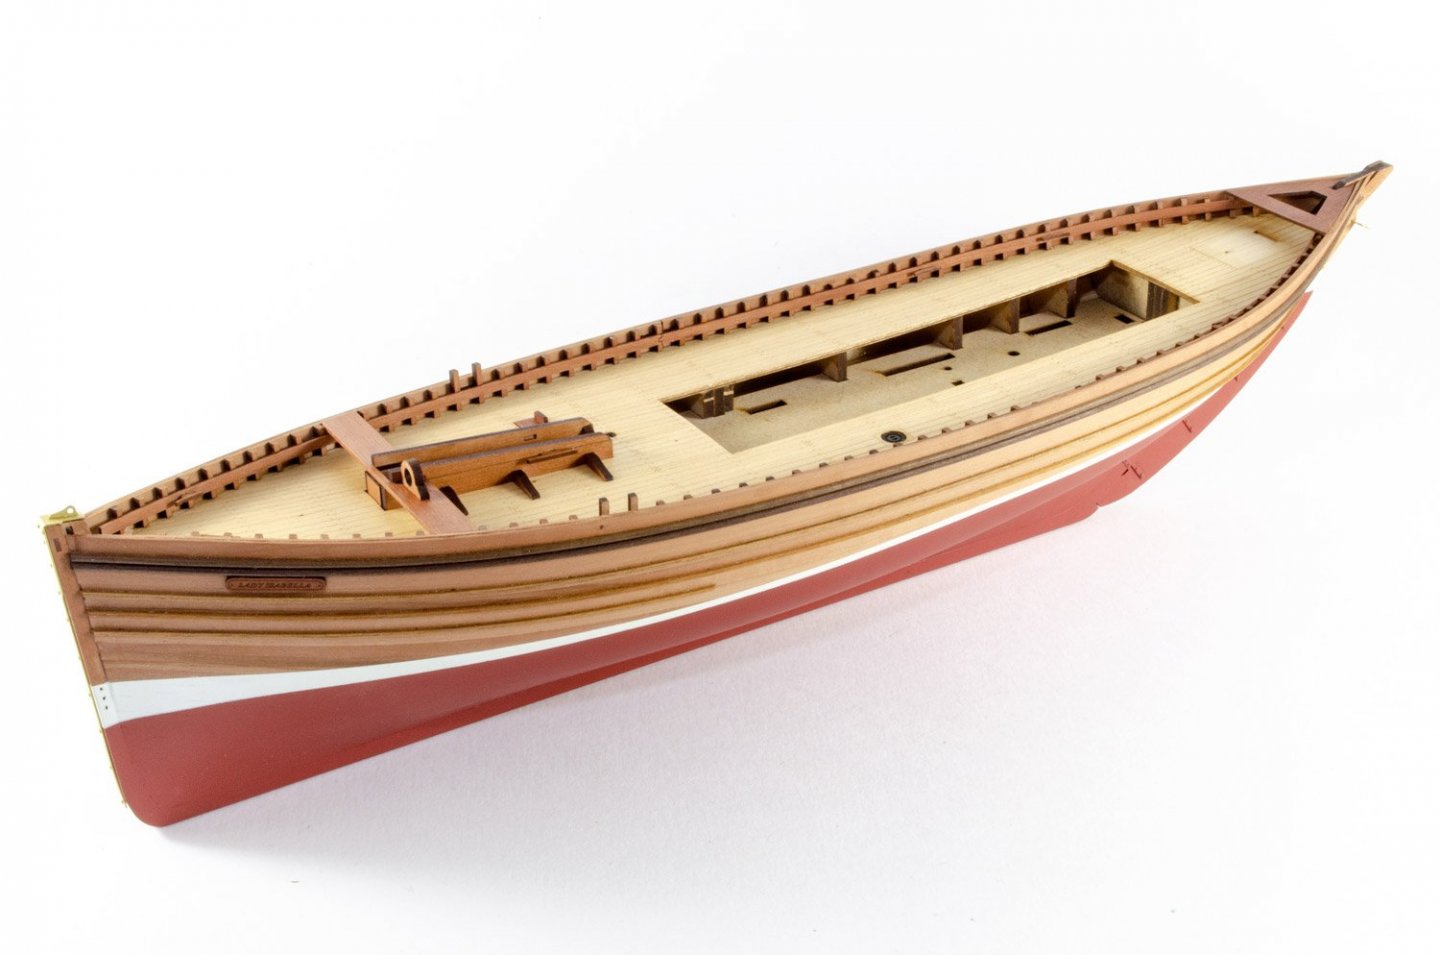
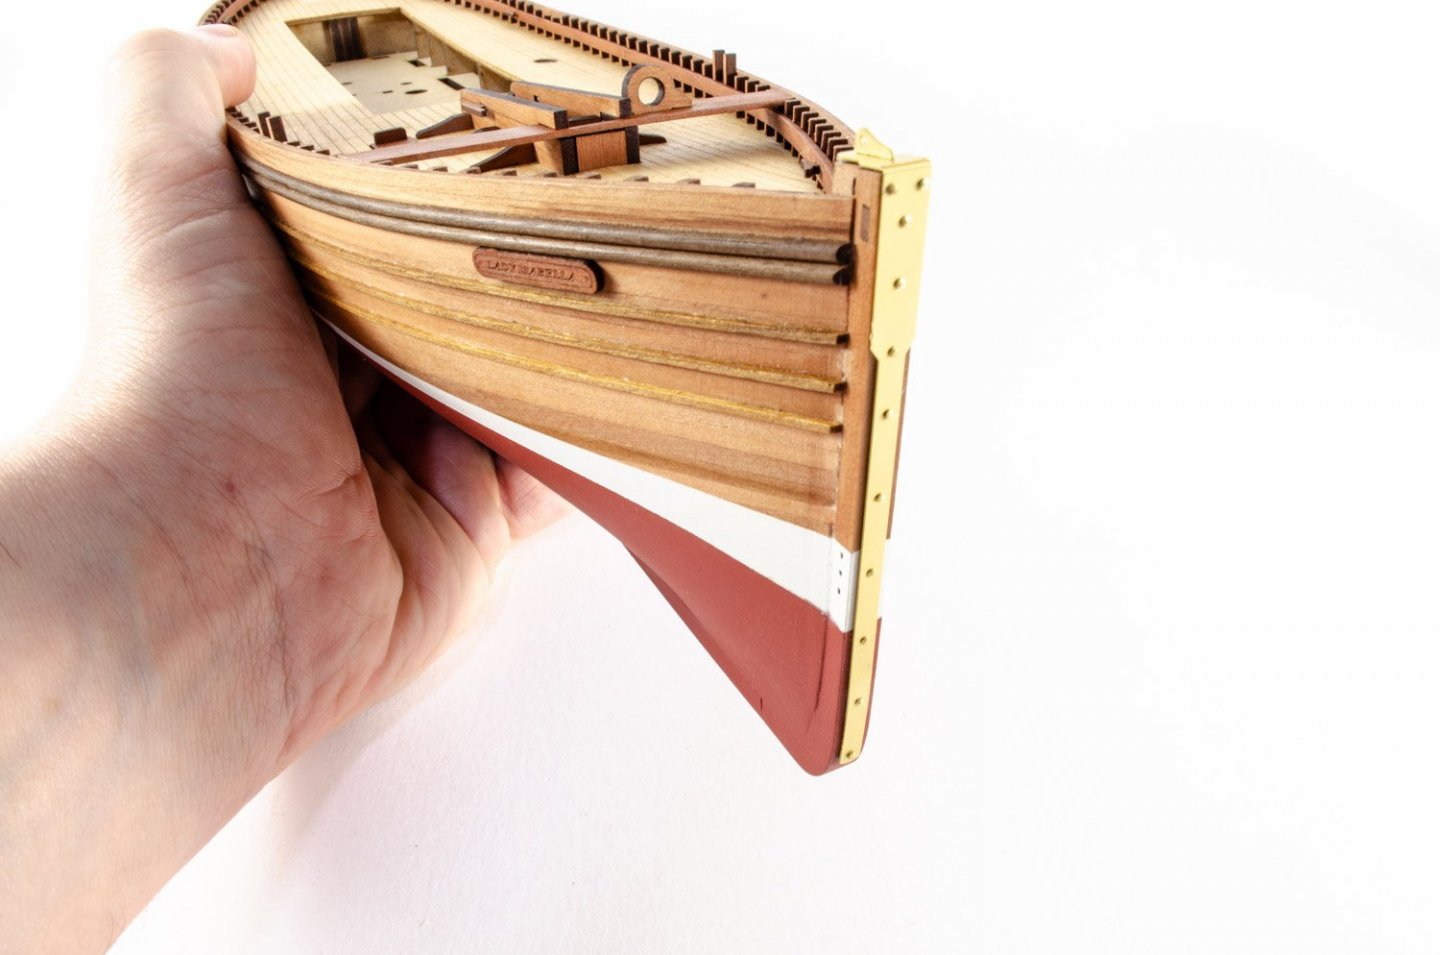
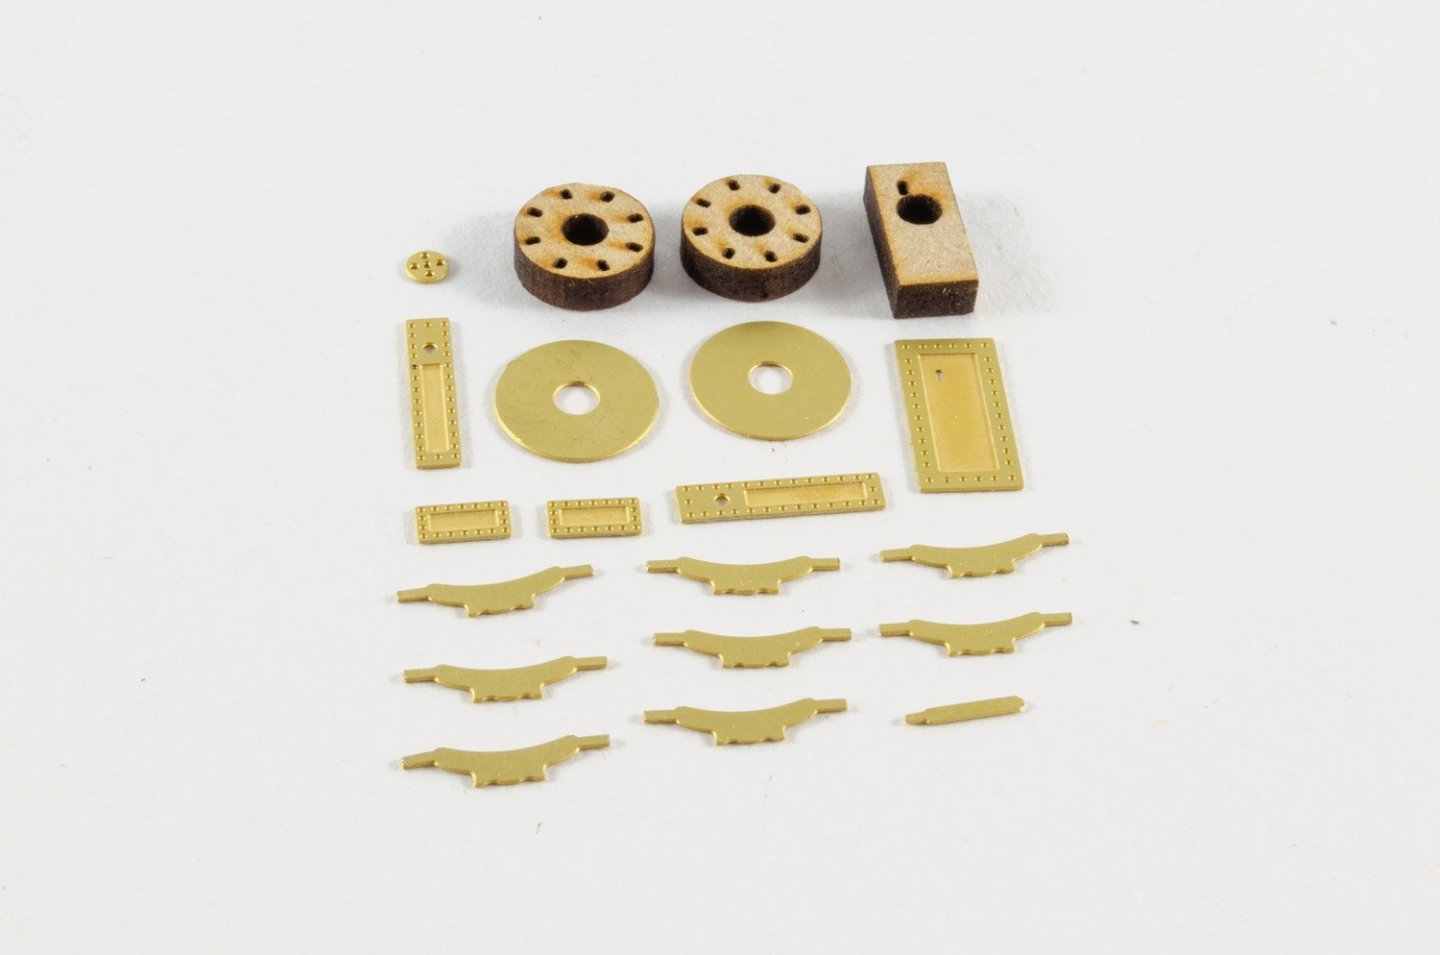
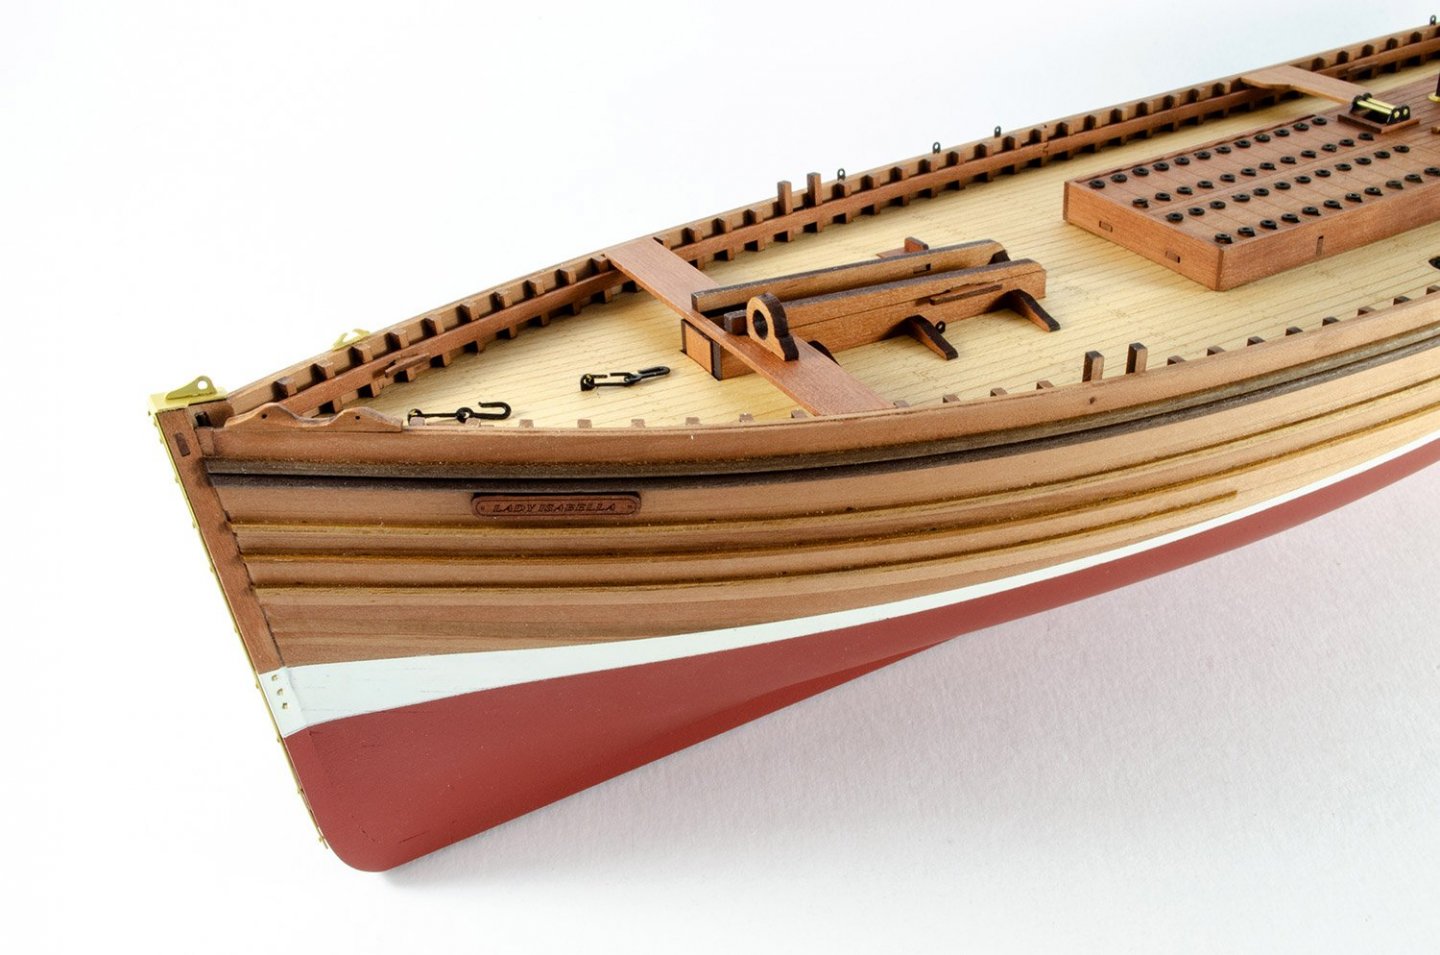
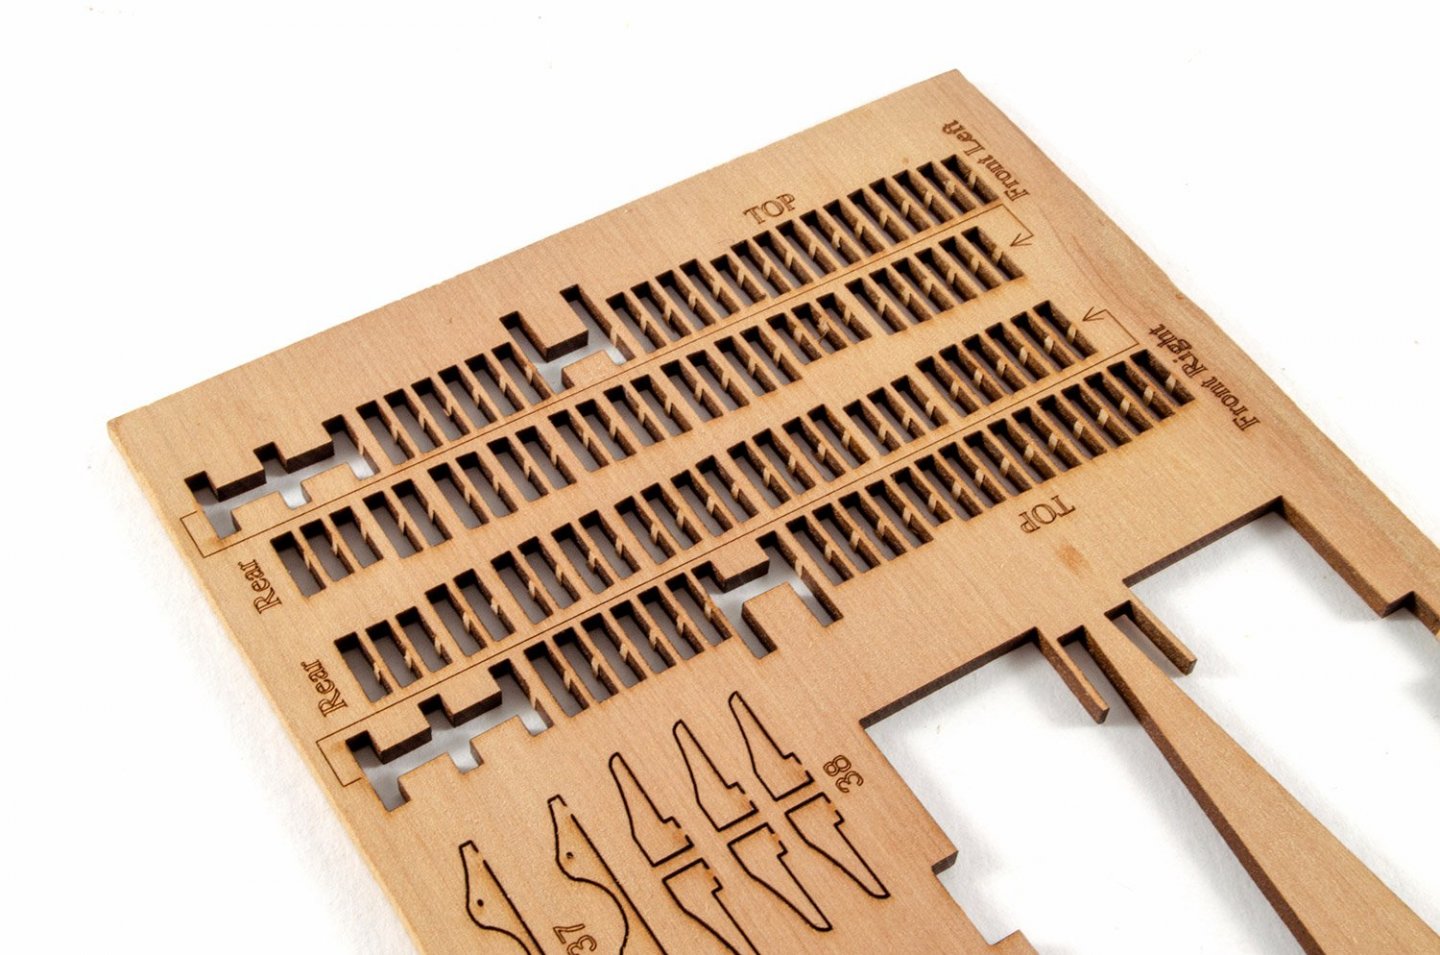
1:64 Fifie Fishing Boat, 'Lady Eleanor' - KIT PREVIEW Vanguard Models **Coming soon** To be released at the same time as the Vanguard Models' 1:64 Zulu fishing boat, reviewed HERE, will be the traditional sail version of the Fifie. Again, this kit is aimed at the beginner, but with materials and detail that will appeal to the more experienced modeller too. Having more or less built the Zulu, I can tell you that I had great fun doing so! The kit will be supplied with lime planking for the first layer, and pear planking for the second, as standard, plus pear for the keep and numerous other elements such as inner bulwark facings and superstructure parts. Timber quality is excellent throughout, as are the fittings etc. As with Zulu, this Fifie was shipped to me without the plan sets which are currently being worked on, and without the box or instructions. This kit I have here will be built for the instruction manual you will be provided with. The Fifie contains: 2 x 3mm MDF sheets 2 x 1mm pear sheets 1 x 2mm pear sheet 1 x 3mm pear sheet 1 x 2mm acetate sheet 1 x 0.8mm ply (single part) 1 x 0.7mm maple or lime wood laser cut/engraved deck (lime is standard) 1 x 0.4mm PE sheet Timber strip Rigging cord, parrel beads, rigging blocks MDF sheets Two 3mm sheets are supplied, and as you can see, these also include engraved bearding lines etc. All parts are laser engraved with numbers too. Cutting is clean and it won't take more than quick knife cut to release the various elements. You will also see parts for the winch, temporary clamps for the keel, and superstructure core parts. Note that the bulkheads have a recess into which the deck will click, meaning no pesky nailing down at the edges. 2 x 1mm Pear sheets These sheets contain superstructure external facings, inner bulwarks in two parts each, and also keel facing parts. After the main keel is fitted, these sit on top, with tabs to locate them. This creates a rebate into which the second layer of pear planking will set. It's a neat idea and worked great on my Zulu. Note the 'Lady Eleanor' plates that fit on the boat's bow. 1 x 1.5mm pear sheet This small sheet just contains the timberheads for the inner bulwarks. 1 x 3mm pear sheet Like Zulu, the Fifie has a single sheet of 3mm pear. Here you will find the keel parts, foremast step and crutch, rudder, and elements for mounting the boat's wheel etc. 1 x 2mm acetate sheet This model also comes with a clear acetate display stand. Just peel off the protective blue film and slot together! 1 x 0.8mm ply (single part) The deck is supplied in two layers with this ply deck being what you glue to the hull carcass. Like my Zulu, this will just click into place nicely. I even added glue after this was fitted! 1 x 0.7mm maple or lime wood laser cut/engraved deck My kit was supplied with a maple deck which is at a slight extra cost to the standard kit. A laser-engraved limewood deck is standard. 1 x 0.4mm PE sheet One sheet of PE is included. Here you will find parts for the winch (plates, mechanism box and whelps), rigging points, boat wheel and keel plate for the bow. Timber strip All timber is high quality. Here you will find both layers of planking and the rubbing strakes. Rigging cord, parrel beads, rigging blocks 0.25 and 0.5mm natural cord is included, as are the various blocks and fittings etc. Please excuse the inaccurate number of blocks in these photos are my Zulu blocks are also in there and not yet separated. Optional sails If you want to finish your fisher with sails, and they do look great on this type of model, then they will be available as an optional extra. These are cotton-based and pre-made with a bolt rope etc. Lastly, here's a photo of Chris's prototype Fifie. I'll be starting mine tomorrow.


-
Welcome to MSW, Romulus. You'll love the Santa Maria. That was one of the first models I built and you shouldn't find it too difficult. The Lady Nelson and the other Amati/Victory Models kits were designed by @chris watton so hopefully you'll be able to follow this up with one of those too, or one from his new range. Time to hunker down while this virus thing is raging. Hope you have plenty of toilet paper 🤣
-
If you mean on the winch, then you don't really need to. I rarely prime metal, but as I was also wanting to seal/prime the MDF discs, I also sprayed the brass parts.
- 100 replies
-
- 3
-
-
- zulu
- vanguard models
- (and 2 more)
-
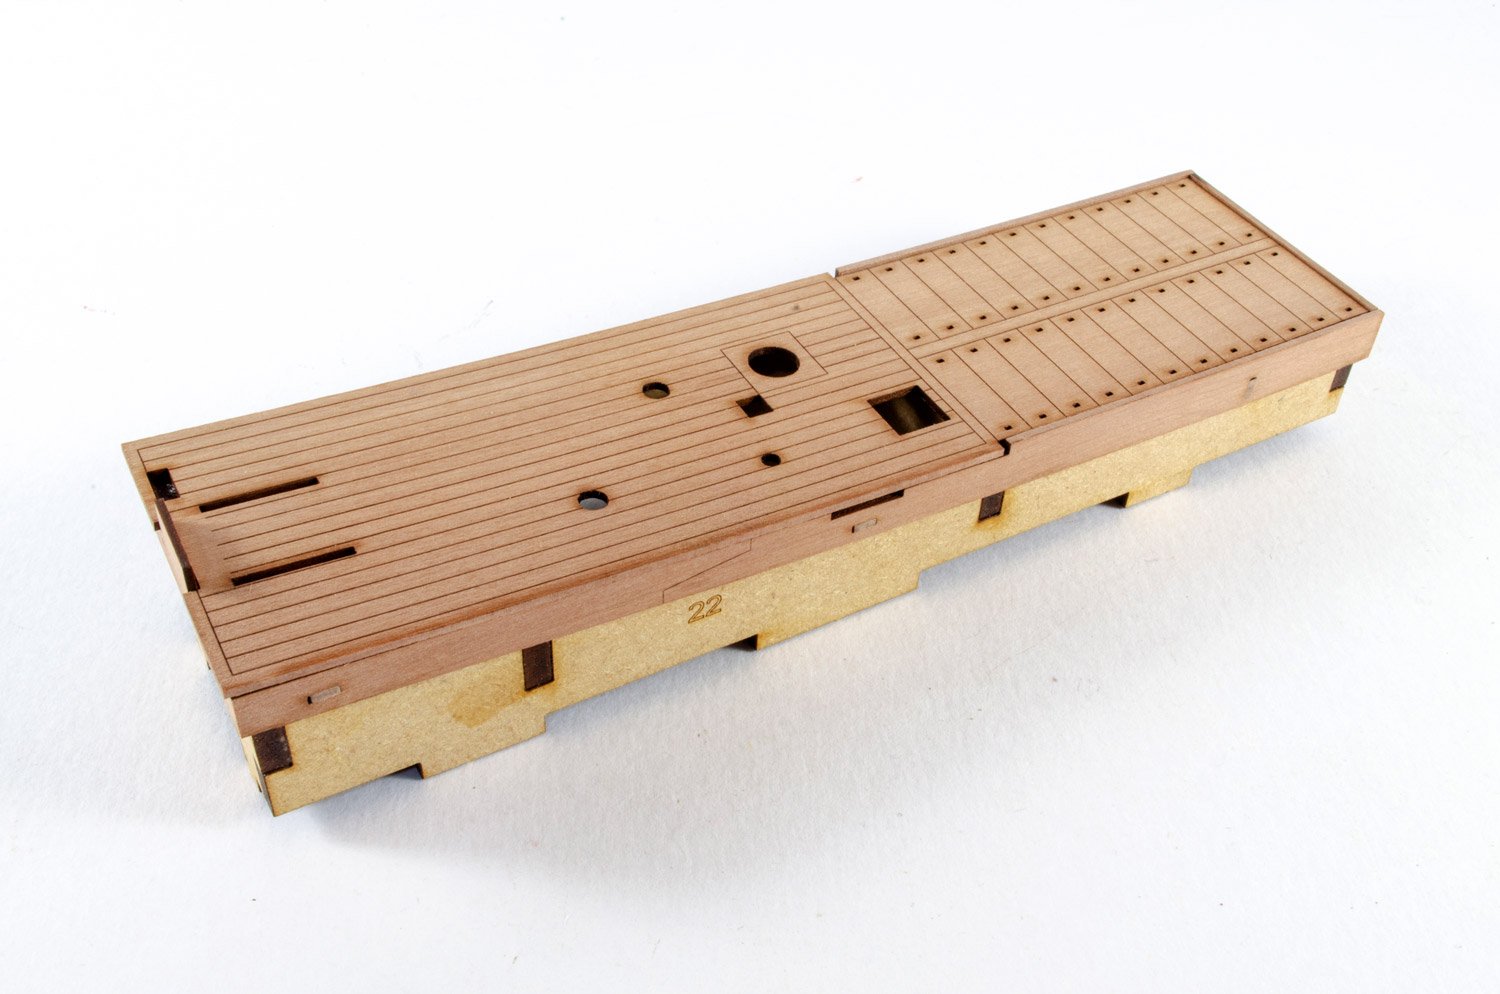
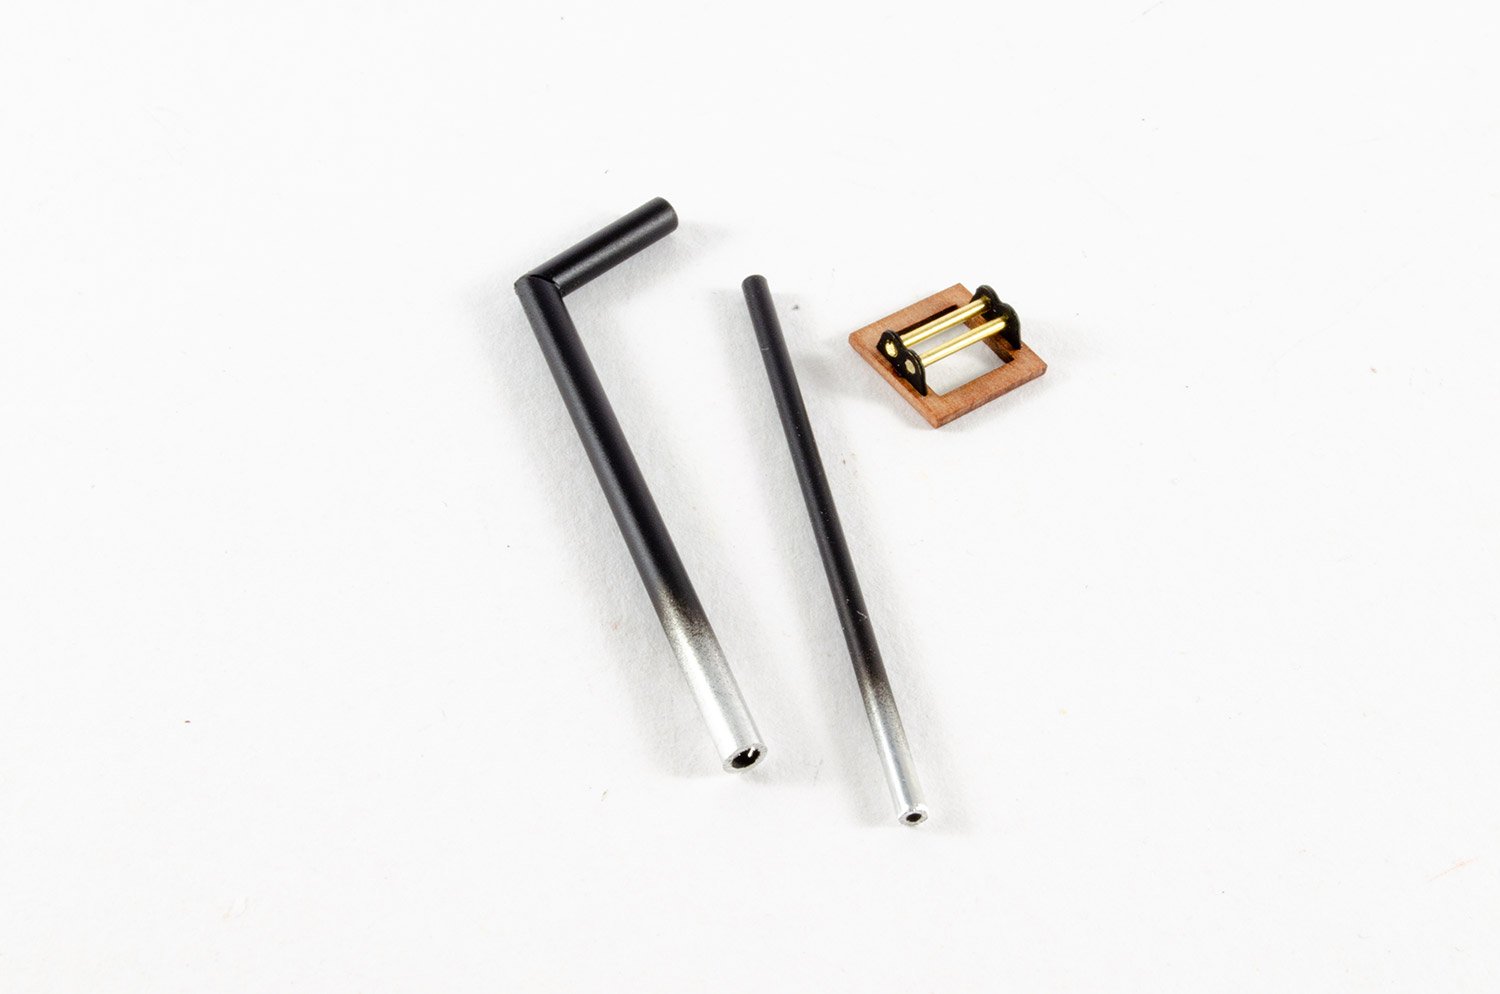
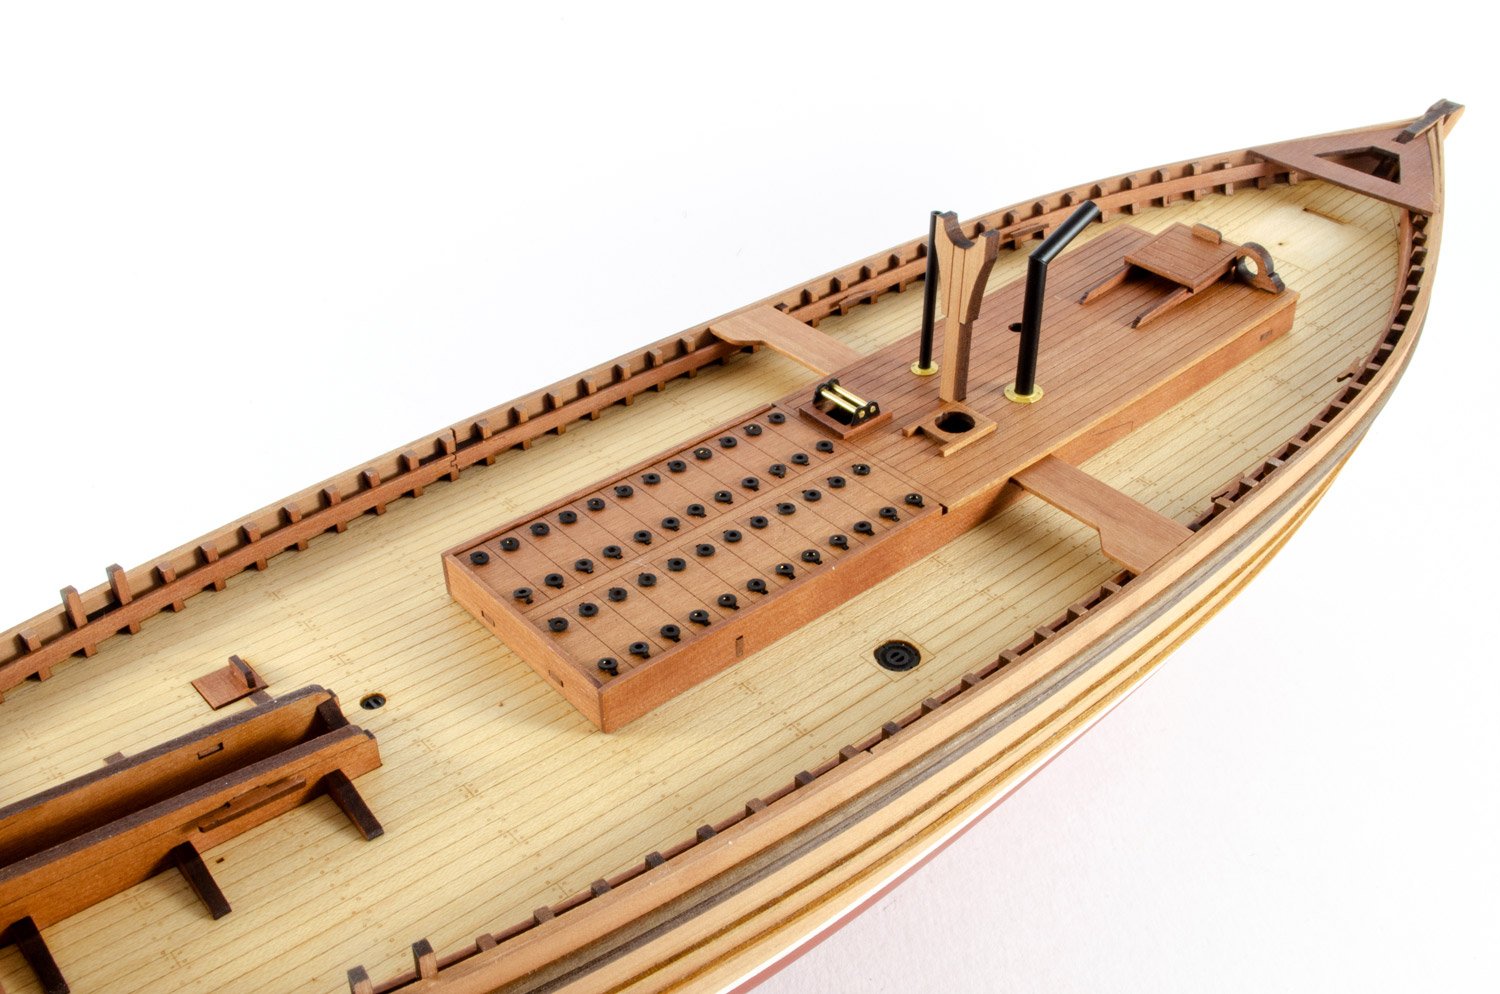
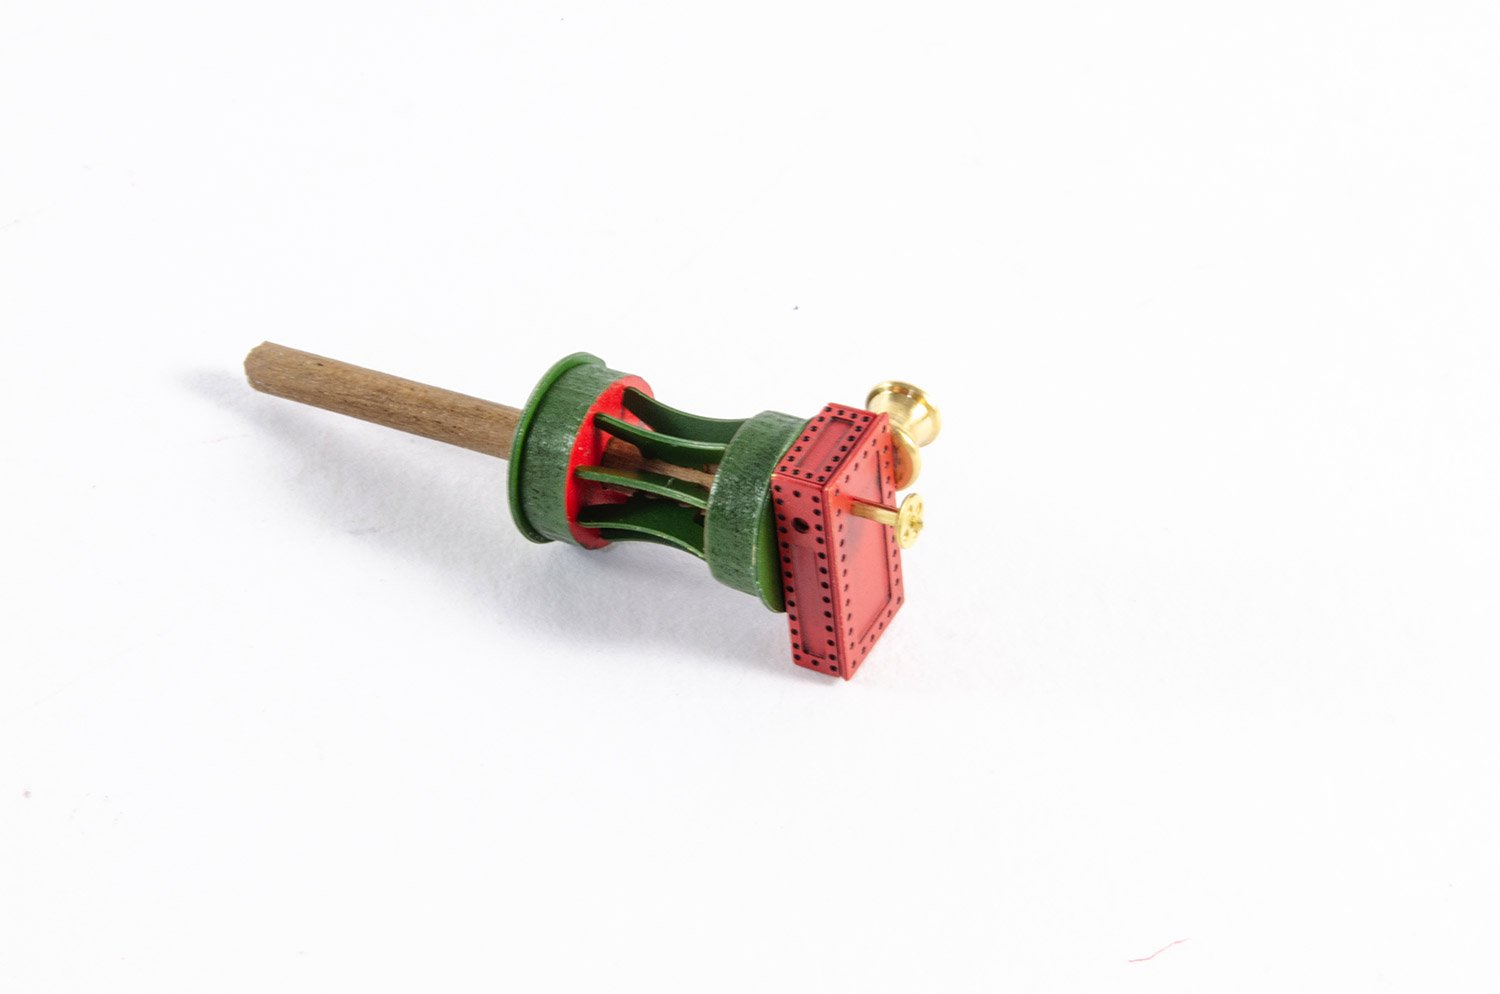
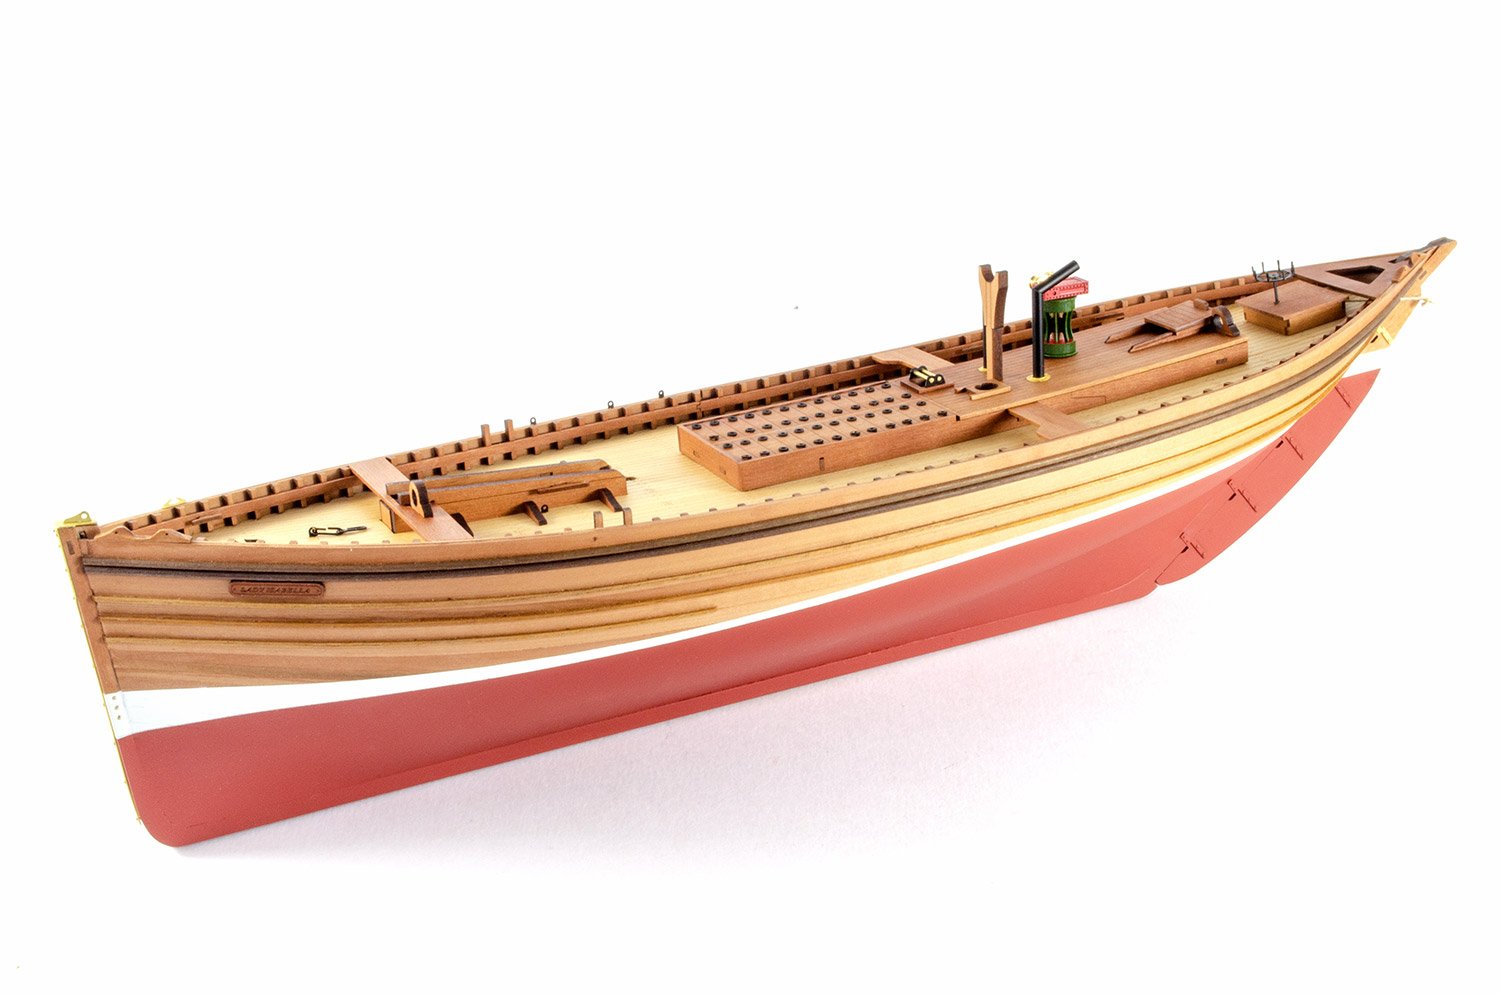
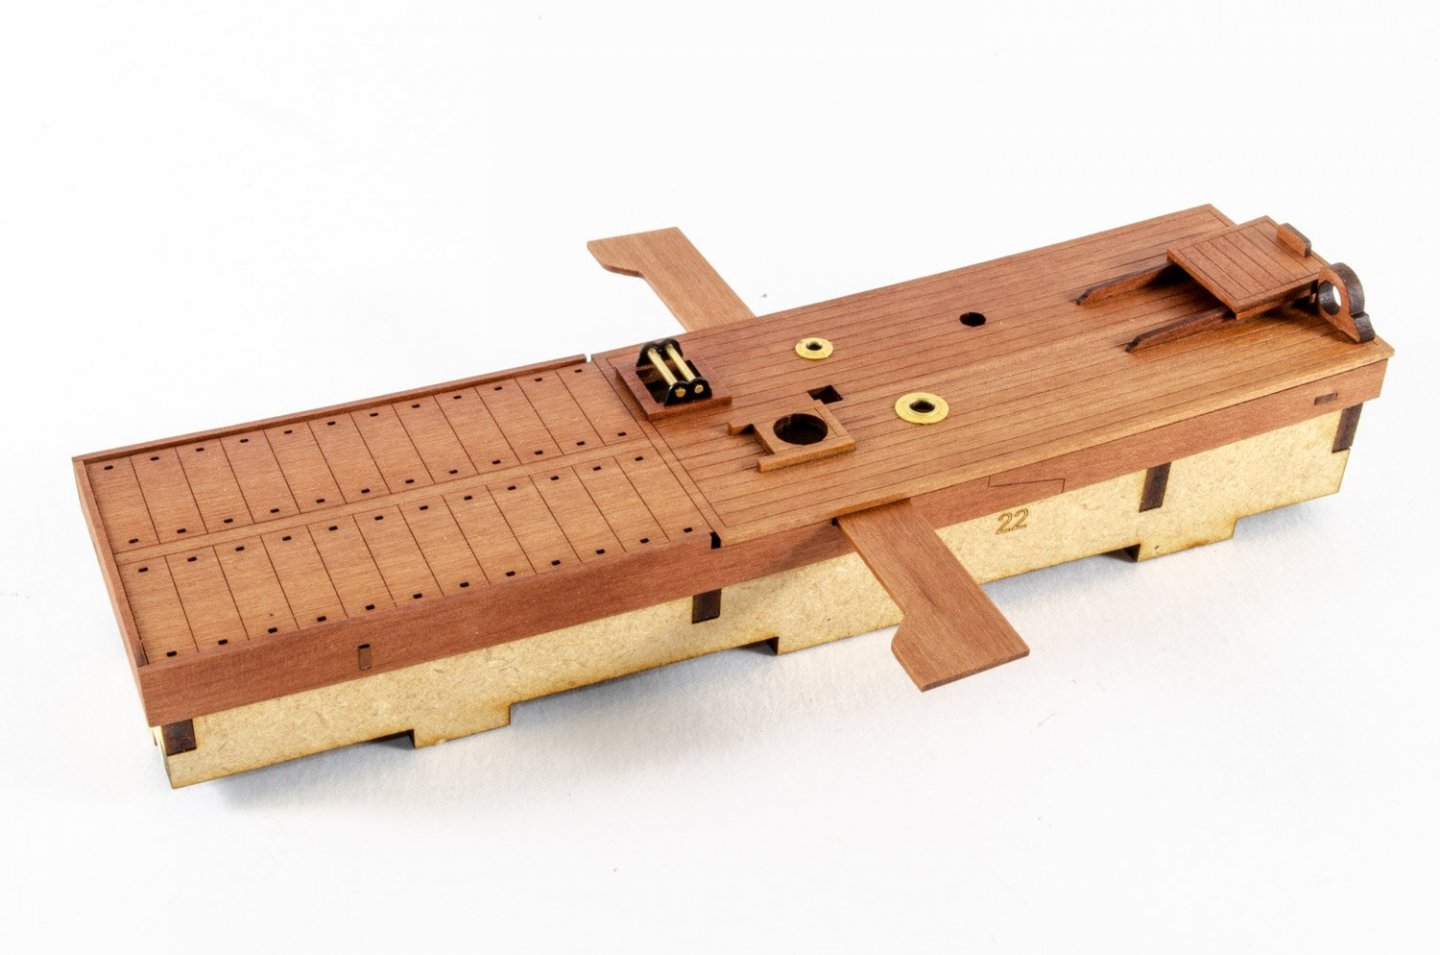
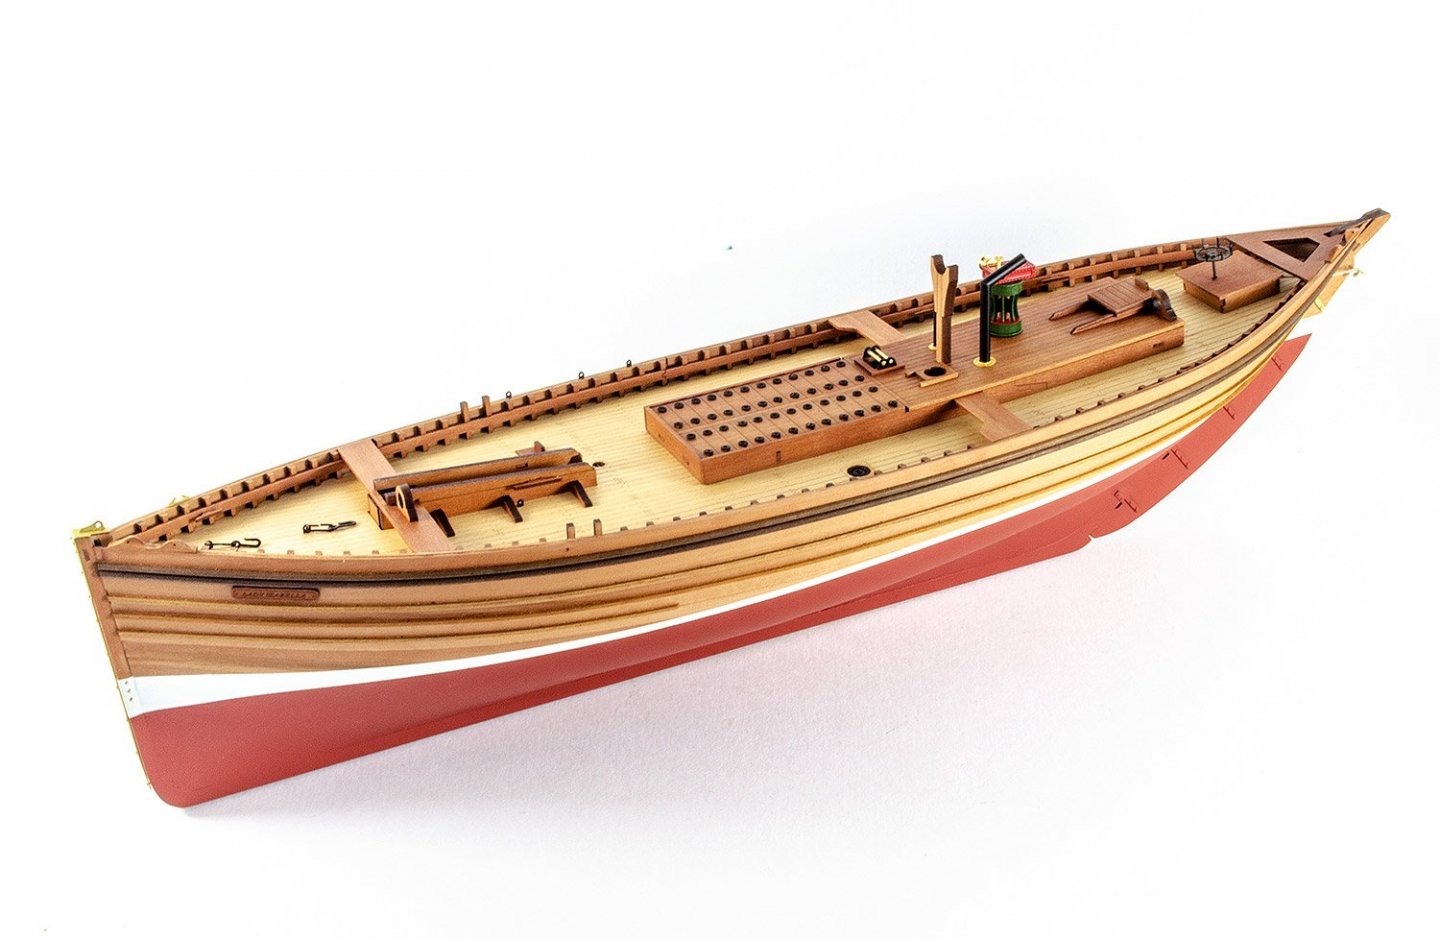
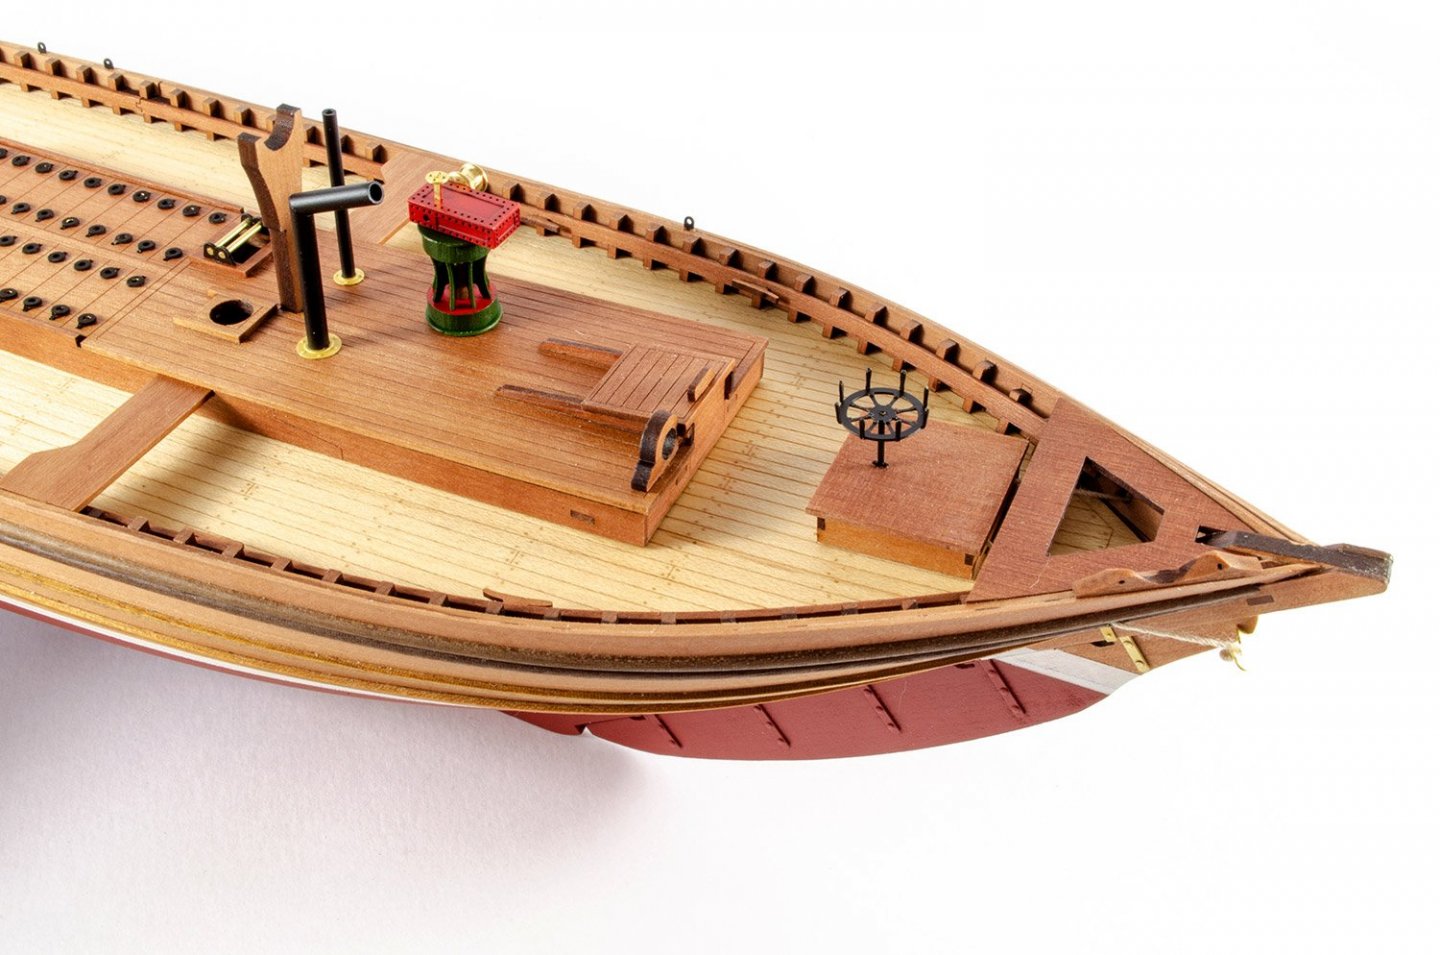
Ok, this is the last update before I start making the masts. The hull is now complete. First up, I fit the roof to the main superstructure. This is a single, laser-engraved piece, and I glue with CA gel because of the slight curve across the grain. This takes about 10 seconds with Gorilla Glue CA gel. This isn't too bust a deck, but the details are very nice. Aluminium tube is supplied to make the two stacks. One of these is cut and glued back together at an angle before they are both airbrushed in satin black paint. I don't know what the other little item is, but it was fun to make! Whilst the pear and maple deck look great, it has a real warmth to it when a light coat of matt polyurethane varnish is applied. I do the first layer mostly with a brush, but them an airbrush is used for the final couple of light coats, especially in those areas where things are a little hard to reach, like the areas around the timberheads. I'm also careful not to get any varnish into the foremast step as this is suited to fit the mast quite tightly. The bow also has this plate. I could've blackened it for more realism, but for the purpose of this build for the kit box art, I thought I would leave it bright as it's quite attractive. Nails are also cut down somewhat and applied into the holes I marked and drilled. The last of the MDF core is now hidden under the superstructure as it's now finally glued into place with CA gel. I have also added the PE eyebolts to the cargo hold lids, plus other roof details such as the mast crutch. Some edges have been left in char simply for the contrast with the rest of the timber. One thing (amongst many) that I like about this kit is the superb winch! Two laser-cut discs hold the whelps, and these are flanked with PE discs. The winch box is a PE-plated piece of MDF. The whole lot takes minutes to build. Tamiya paints were used to paint this. The rudder is now rigged to the steering box and the wheel added. Here's the finished hull. Onto masting and rigging now!


- 100 replies
-
- 27
-
-
- zulu
- vanguard models
- (and 2 more)
-
What a beautiful vessel. I like that very much.
-
What a great looking vessel. I like that system of deploying the gun.
- 216 replies
-
- 3
-
-
- masterkorabel
- ships
- (and 3 more)
-
About 2 months, give or take. you shouldn’t have tax problems with Brexit as the UK’s transition period is until the end of year. All current arrangements stay in place until at least then.
- 100 replies
-
- 3
-
-
- zulu
- vanguard models
- (and 2 more)
-
Hi Richard, You'll find this one a dream, and there will be plenty of help for you here with it. Any questions, then I'll do my best to answer them for you.
- 100 replies
-
- 3
-
-
- zulu
- vanguard models
- (and 2 more)
-
That's pretty much where this is pitched, but interesting enough a subject to appeal across the board. Nice to see such a kit with pearwood as standard too. The maple deck will be an option, and lime is standard.
- 100 replies
-
- 5
-
-
- zulu
- vanguard models
- (and 2 more)
-
No, that's just the 10s timer mode. Cheers. It's a lovely kit. Very intuitive.
- 100 replies
-
- 7
-
-
- zulu
- vanguard models
- (and 2 more)
-
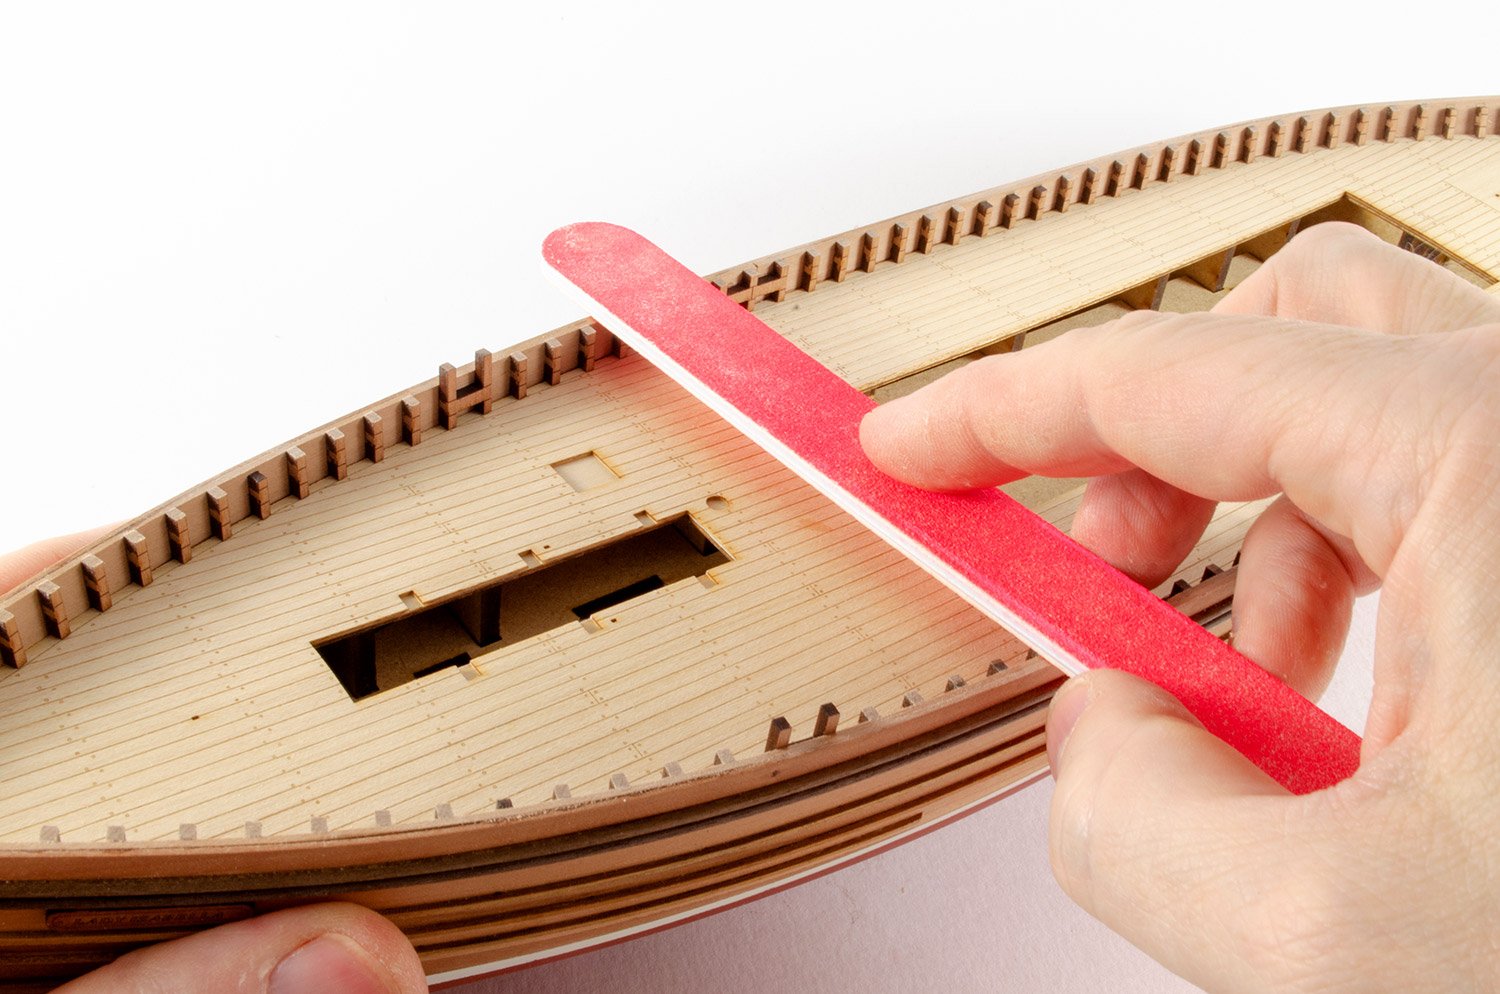
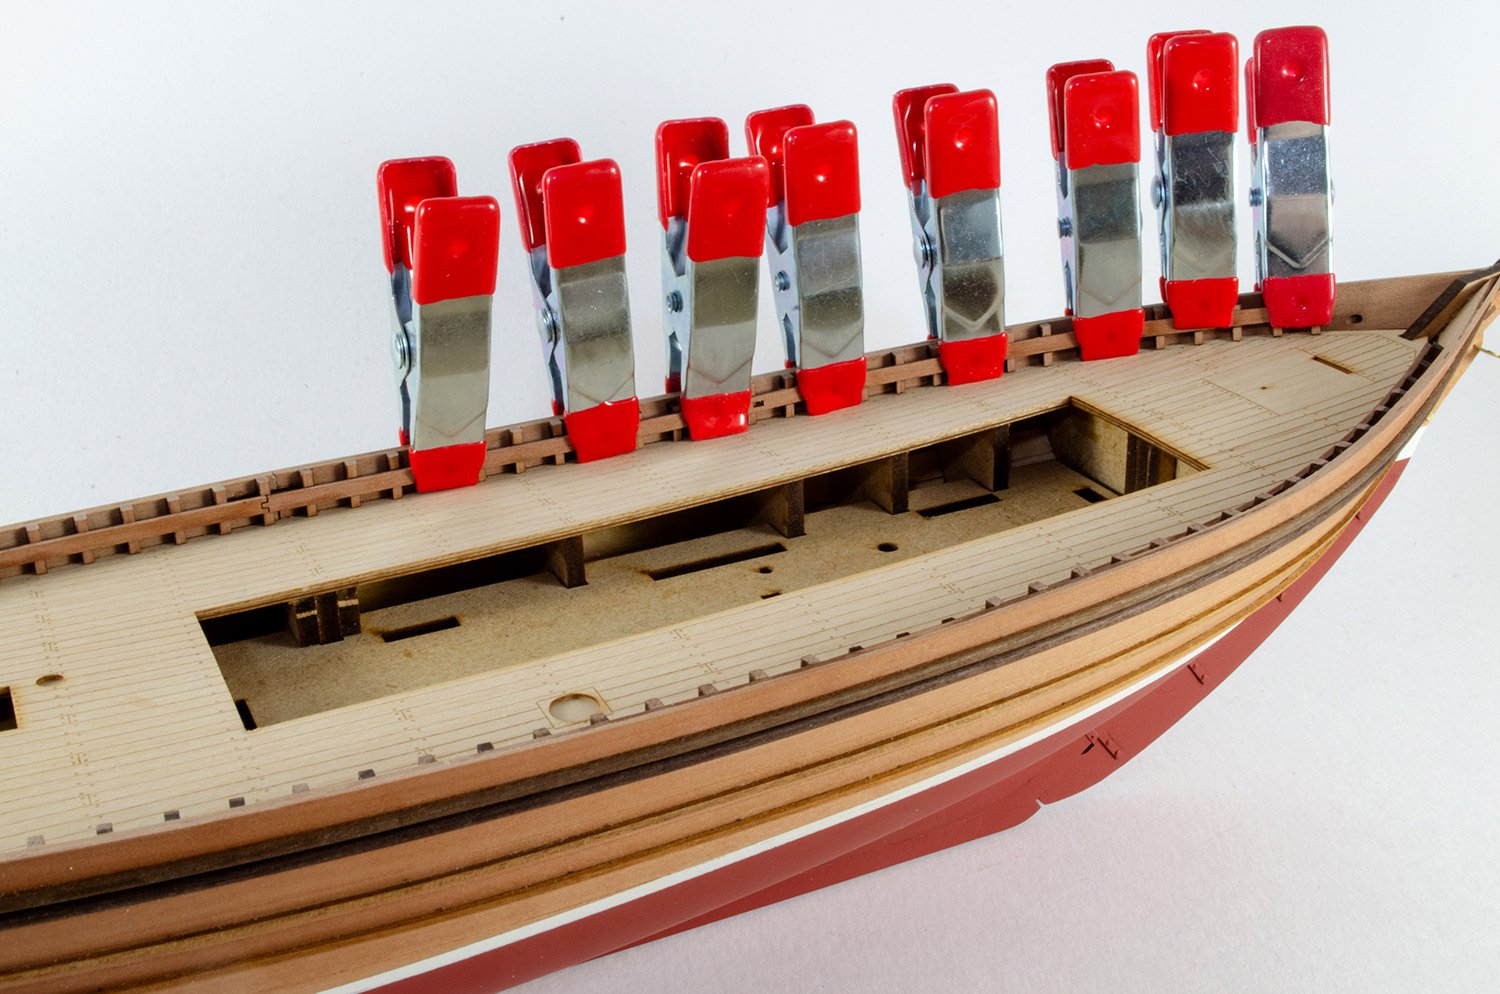
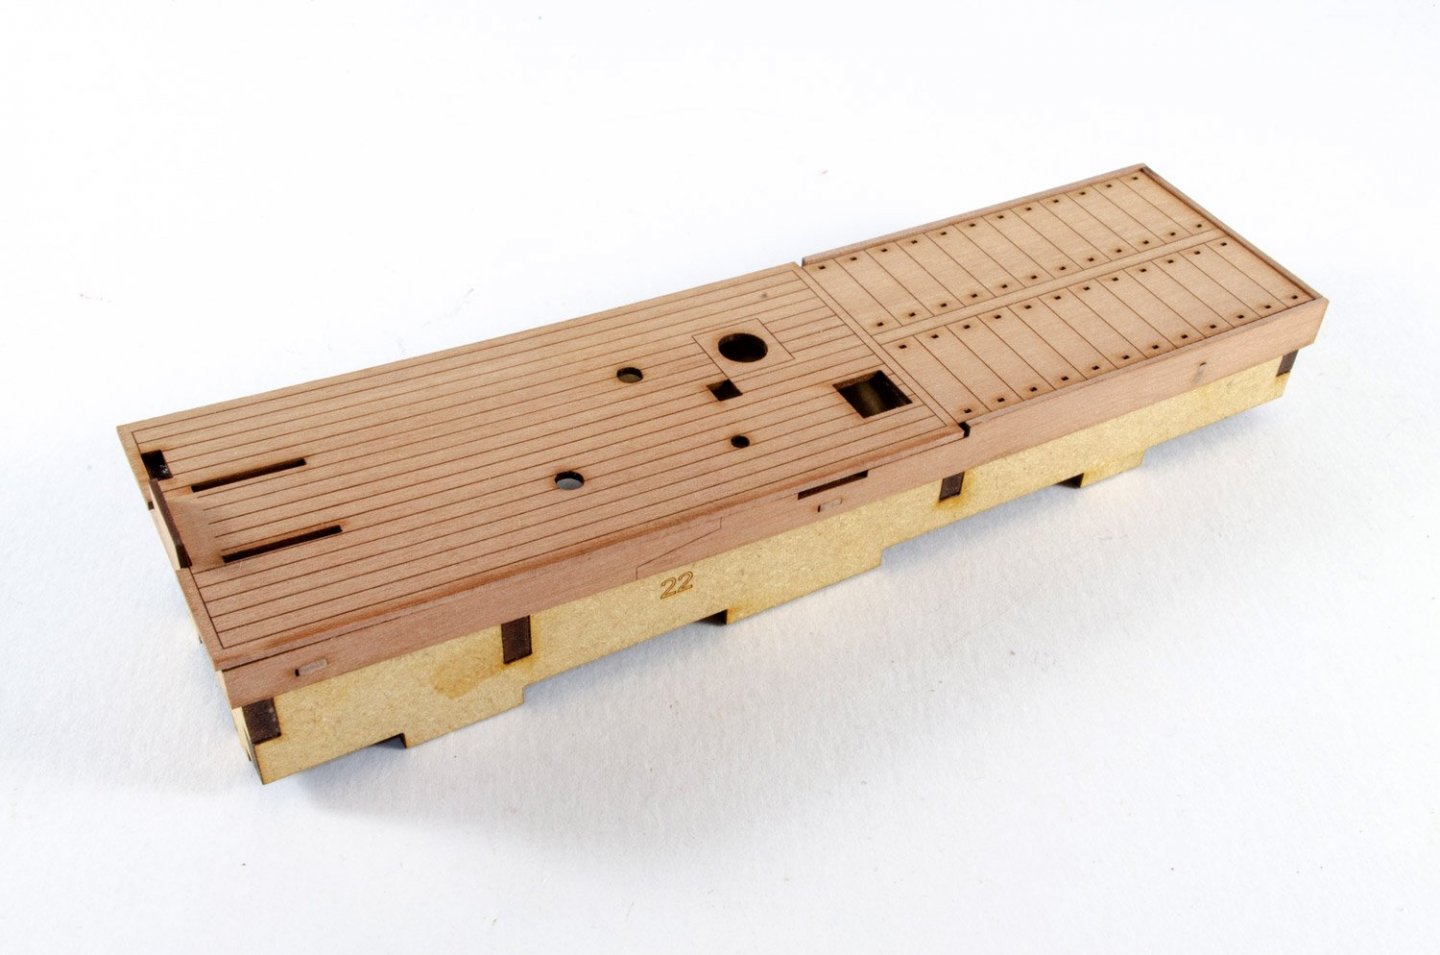
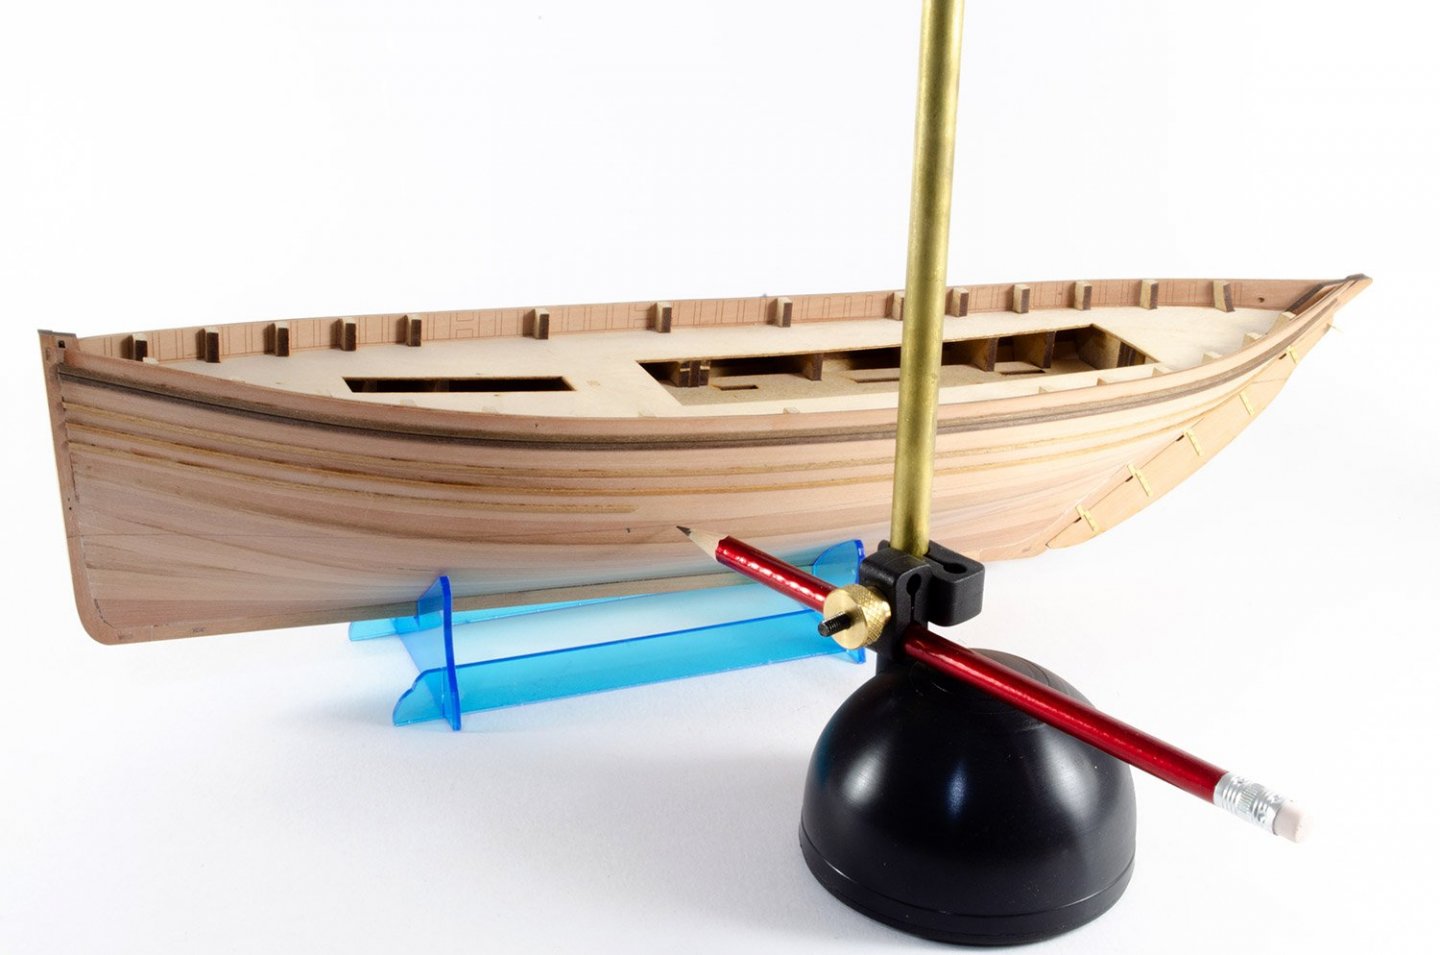
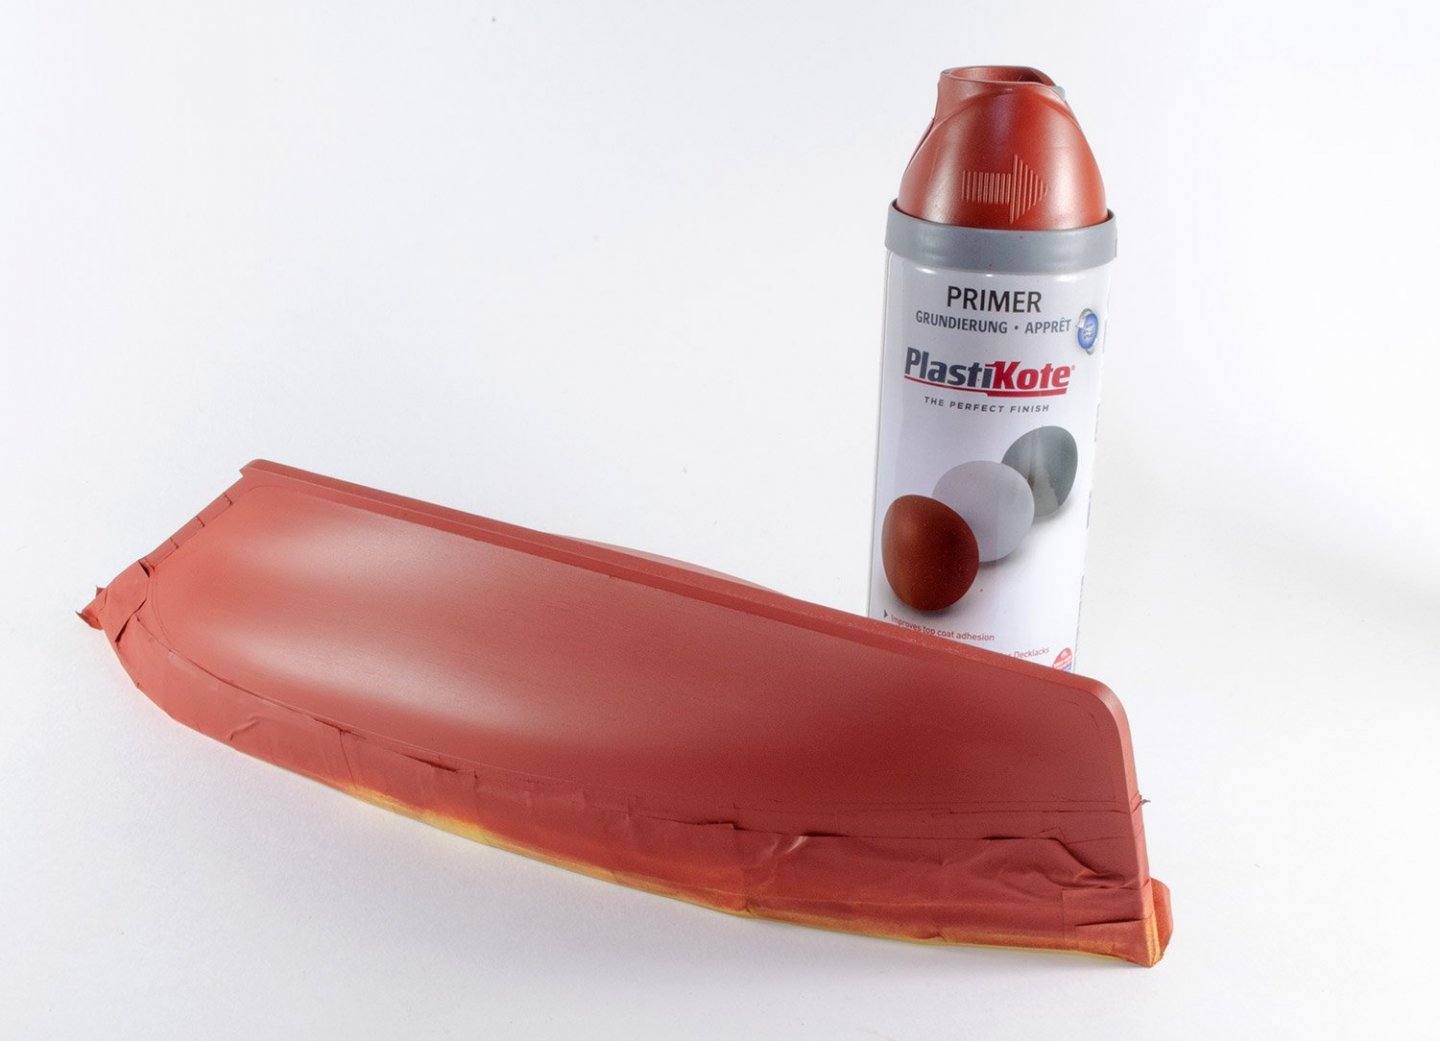
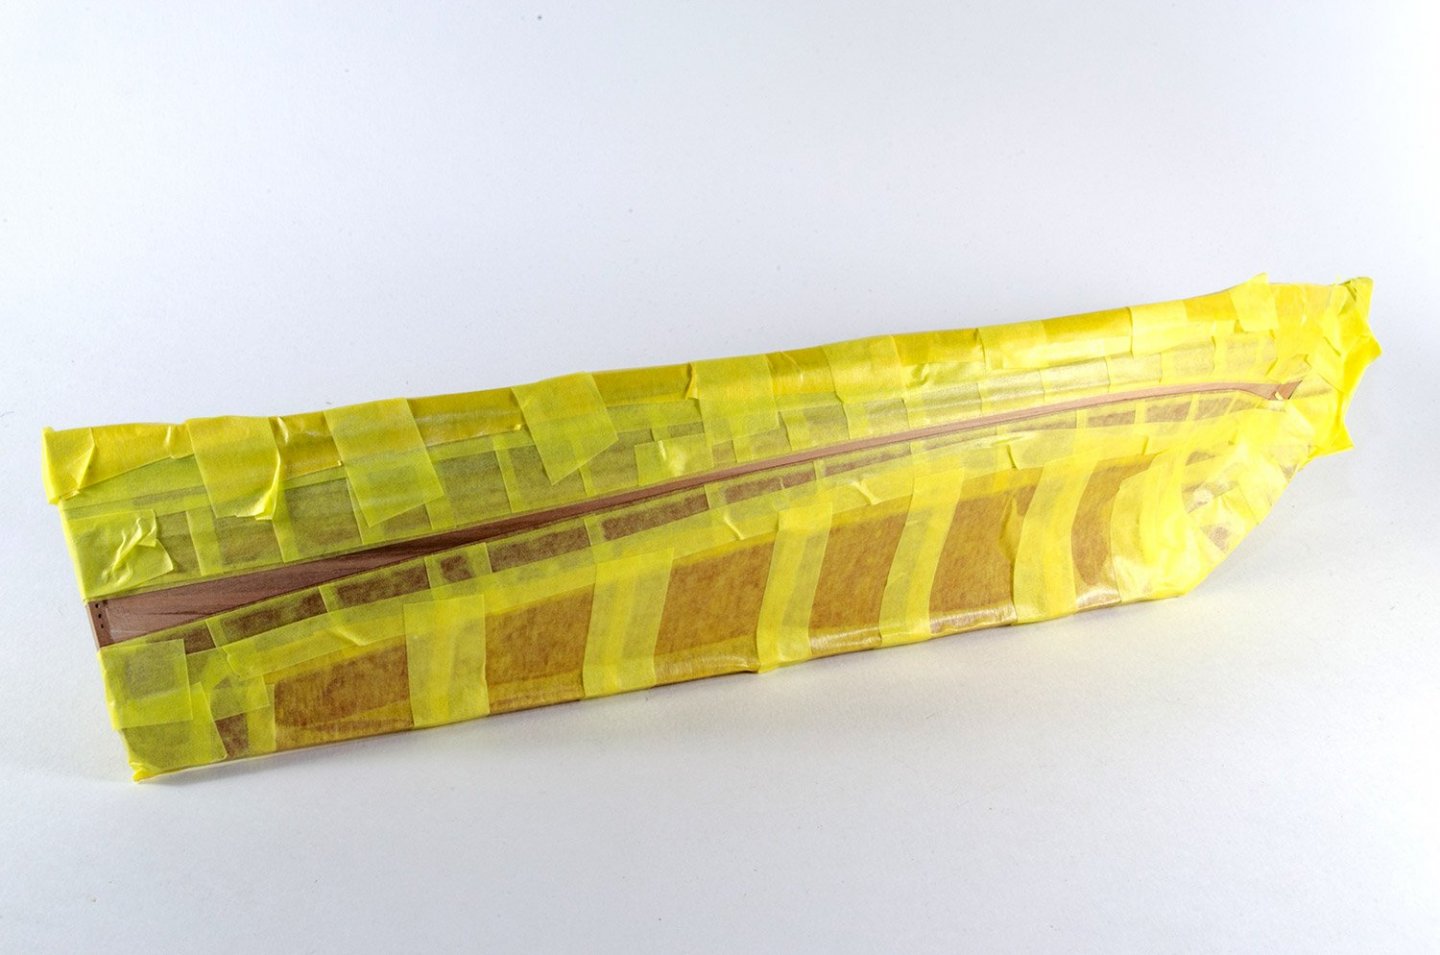
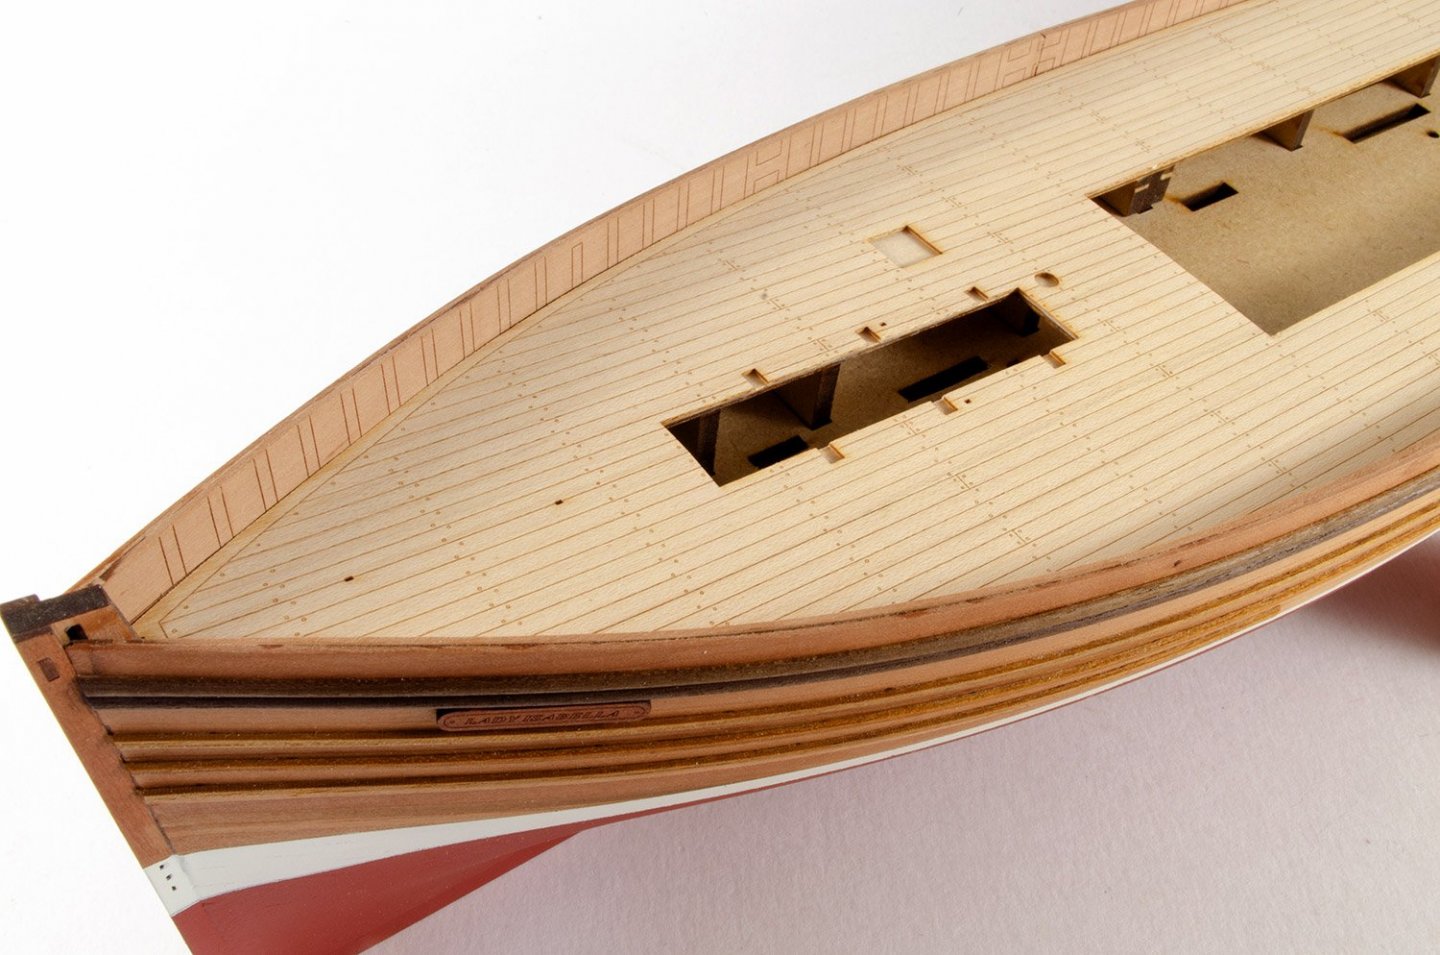
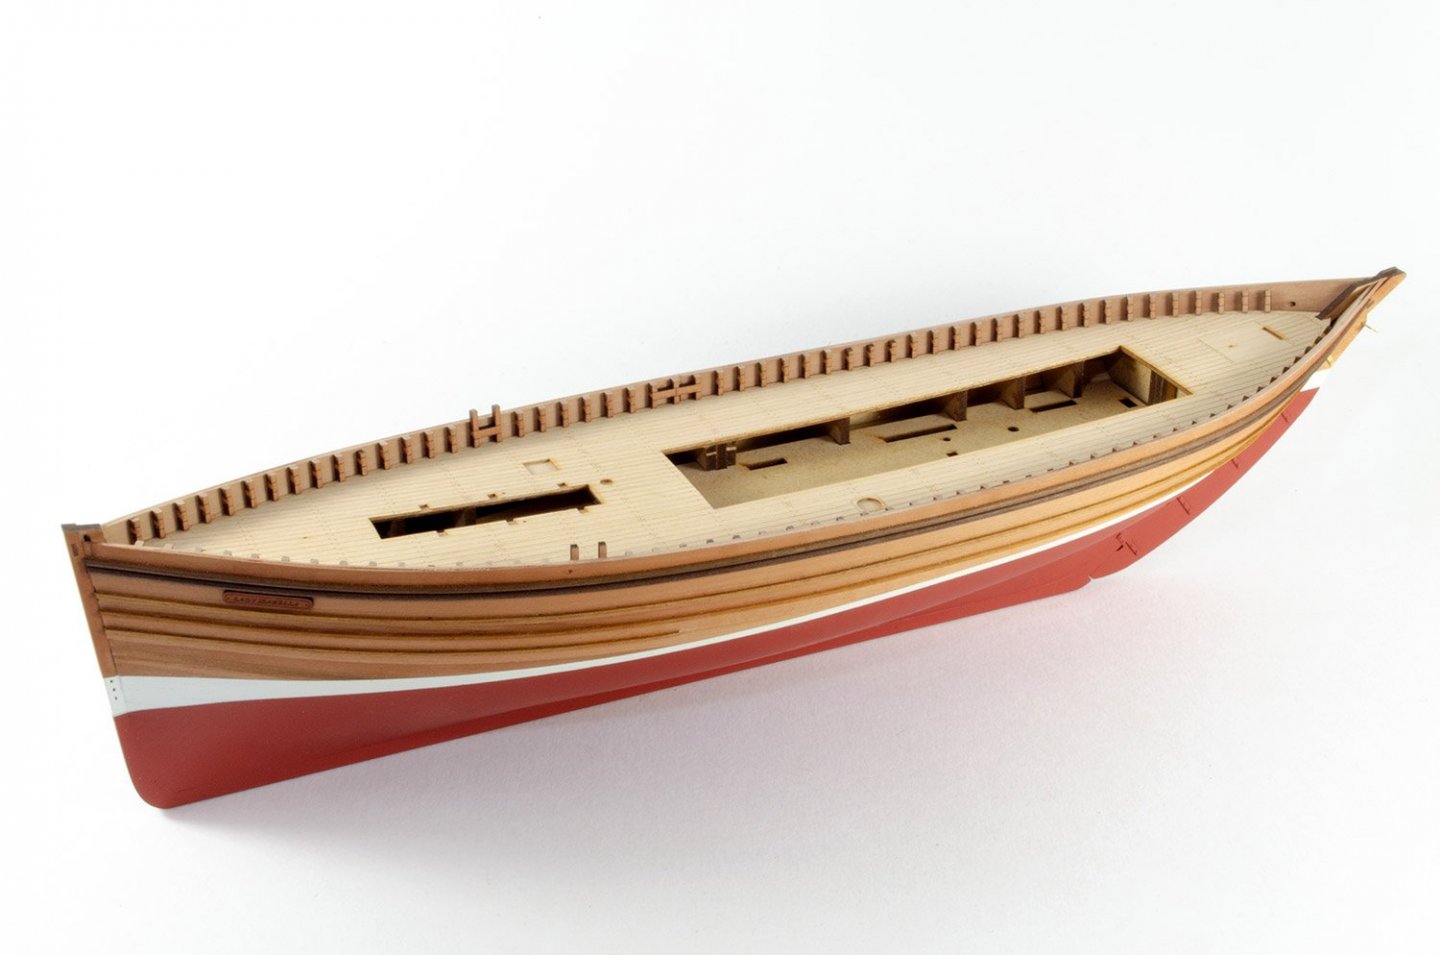
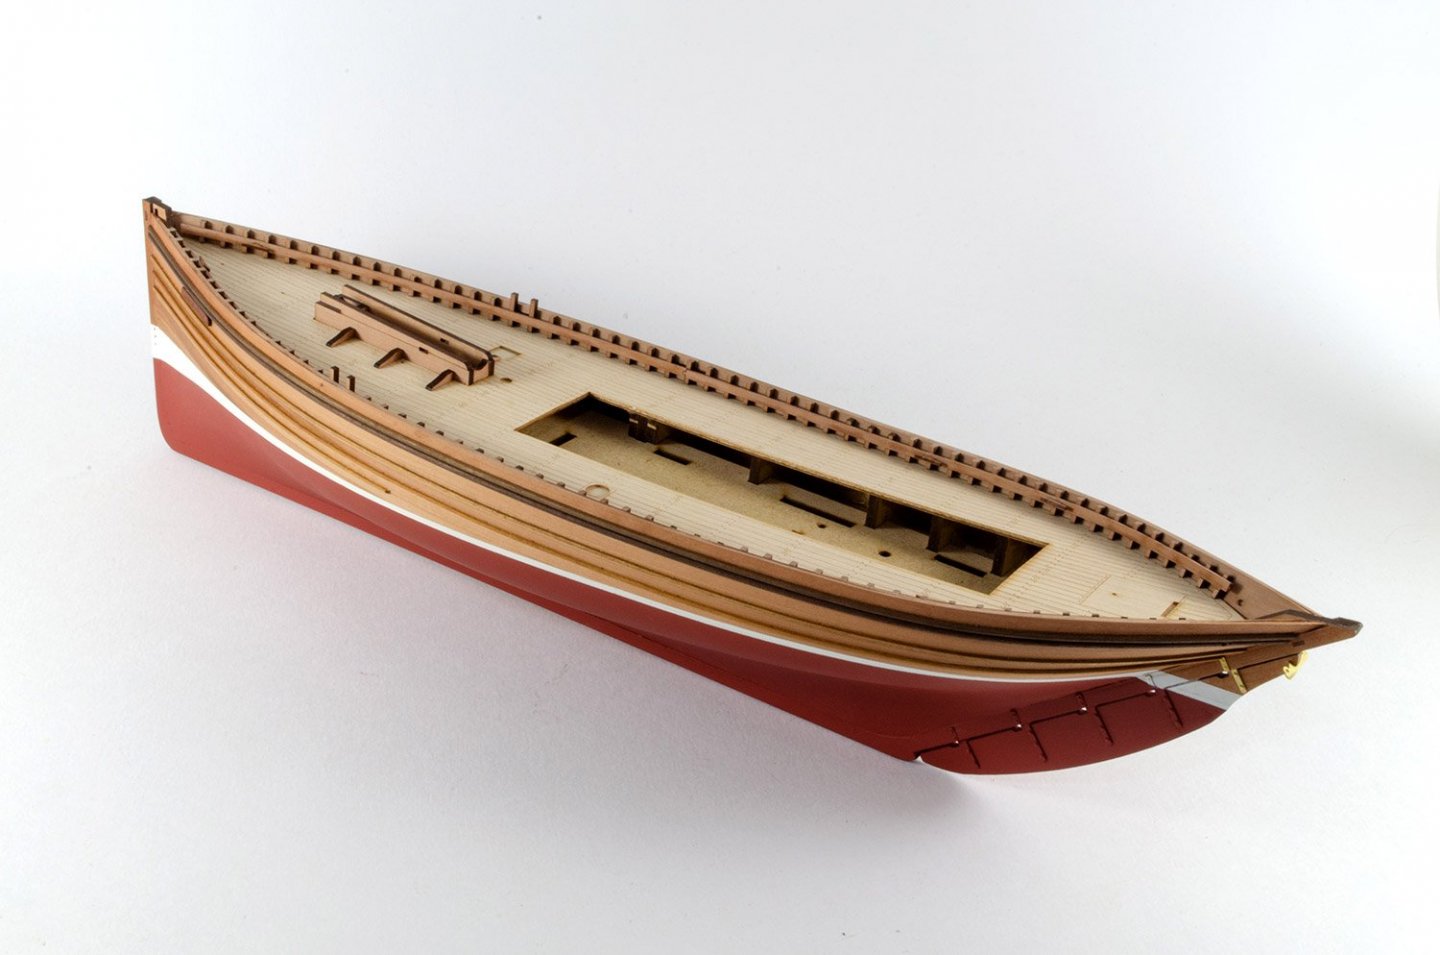
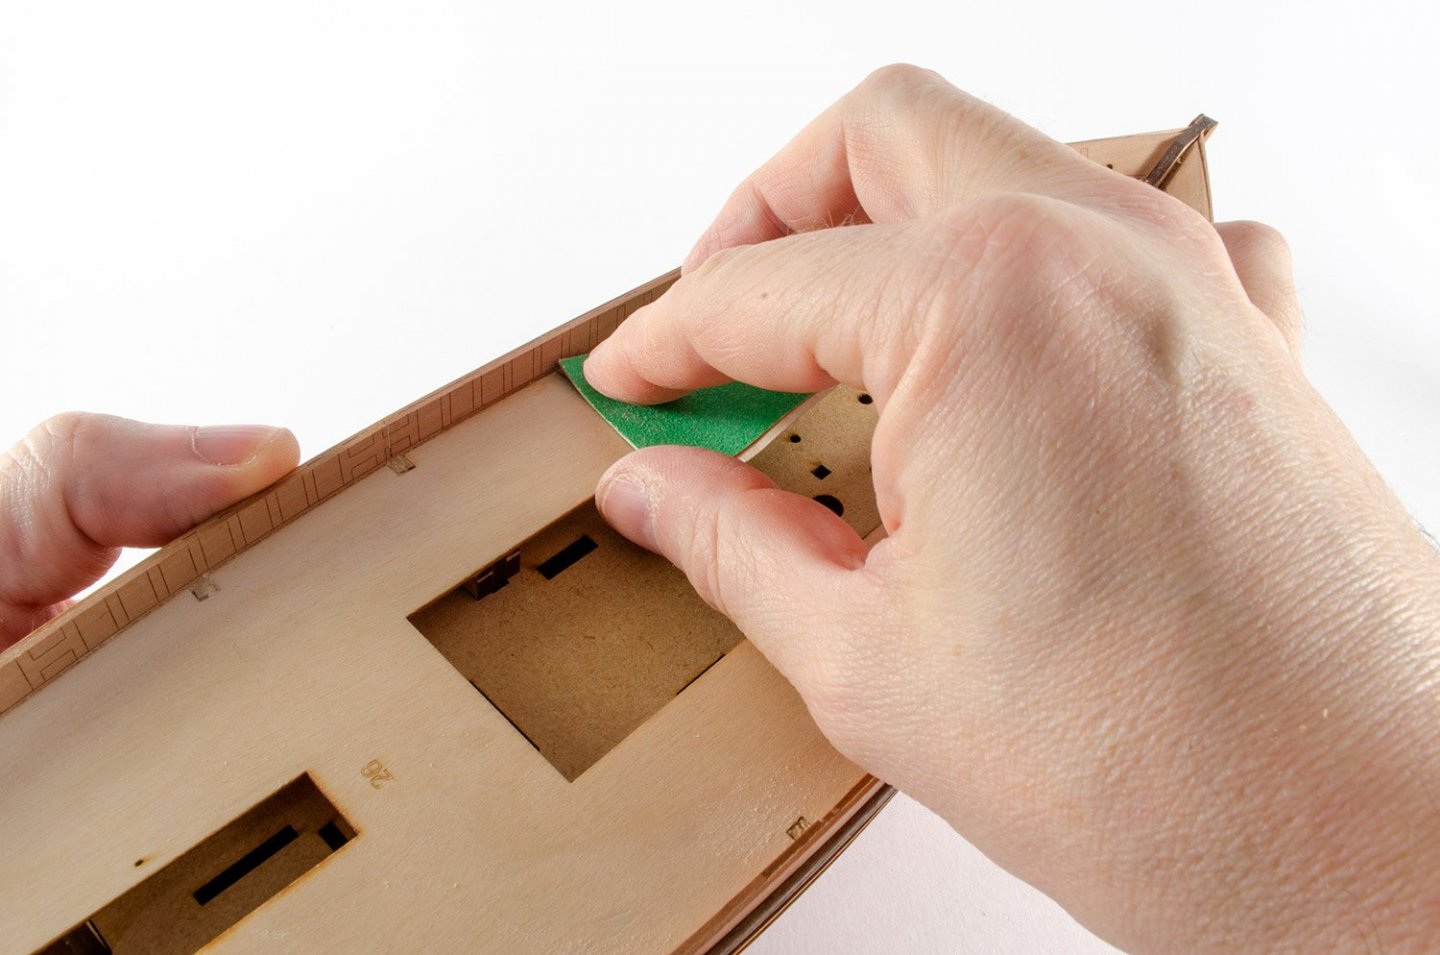
A busy couple of days in the workshop, but taking full advantage of the government's new isolation rules. First up, I slotted the stand together but left the protective film on it so I didn't scratch it. I really don't recommend you do this as it was extremely tight and I don't know how breakable this is. The reason for slotting this was because I wanted a cradle that would hold the hull evenly whilst I added the waterline. The waterline also doesn't run parallel to the bottom of the keel either. My Amati waterline tool was now given its baptism of fire. Masking tape was cut into thin strips and laid along the outside of the waterline. The rest of the model was then totally covered so no overspray could happen. Plastikote's Red Oxide primer was not applied to the underside of the model, in several light coats, building it up gradually. It's pretty important that you make sure that the planks aren't popping out with their gaps with this on, so I used some wood filler first and sanded back, checking the hull against the light to make sure as few lines as possible could be seen. I left the primer to cure overnight and then carefully masked off the whole area. From there, more thin strips were used to create the bootstrap. This took a few attempts to get it even on both sides. A couple of whisky were definitely needed after that! Again, the remainder of the hull was masked to protect it before matt white spray was applied to the bootstrap and in thin coats. The whole hull exterior was given several coats of interior matt polyurethane varnish which is pretty tough (Ronseal). That was left overnight and when the hull could be handled, I snapped off the tags on the top of the bulkheads, and sanded their remnants flush with the ply deck. This kit will come with an option for a laser-engraved maple ply deck and this is gorgeous! This was now fitted using CA gel. Very little fettling needed to be done for this. I could now move onto adding some detail, and this starts with the timberheads. These are all laser cut, and there are almost 100 of them, added with around 300 spots of CA gel. All these needed doing was a small bevel added to the deck edge to conform to the curve. These are just glued in over the laser engraved bulwark positions. You'll note a few that are shorter. These are to accommodate some platforms which I'll added later. With the timberheads fitted, a sanding stick is used to level them to bulwark height. The laser marks on the timberheads themselves are for the rail which will be fitted in a moment. The timberhead rails are fitted in halves and these perfectly match the engraved marks. It's a real no-brainer! A few clamps are used to hold them whilst the white glue dries. Now the construction of the foremast step/well is built, all in pear wood. I've left the dark laser edge on many parts as I think it really lends itself to the colours of the timber, and breaks things up nicely. That's it for today. More soon!


- 100 replies
-
- 25
-
-
- zulu
- vanguard models
- (and 2 more)
-
That is impressive! If you haven't uploaded any gallery images, you should definitely add some of your finished images of her.
- 77 replies
-
- 6
-
-
- morel
- master korabel
- (and 1 more)
-
Mantua Model 1:12 Norman Catapult
James H replied to jagdmirage's topic in Non-ship/categorised builds
I seem to remember that I took it to work to use a pillar drill for the main axle of the catapult part. The netted bags with stones are a little tricky and I used quite a bit of PVA on them and repainted the stones in grey. -
Mantua Model 1:12 Norman Catapult
James H replied to jagdmirage's topic in Non-ship/categorised builds
This is a great kit! Built one myself, many years ago. -
HMS Victory by Helli - Caldercraft
James H replied to Helli's topic in - Kit build logs for subjects built from 1751 - 1800
You are a brave man taking this on for a first build, but your work looks simply amazing! I am definitely following this one.