TBlack
-
Posts
1,305 -
Joined
-
Last visited
Content Type
Profiles
Forums
Gallery
Events
Everything posted by TBlack
-
 Cap't Bob, As you know, I, too, like to step away from sailing craft from time to time. I think it adds to our diversity. I'm eager to see how you tackle this build. Tom
 -
SS Vinal Haven by TBlack - FINISHED
TBlack replied to TBlack's topic in - Build logs for subjects built 1851 - 1900
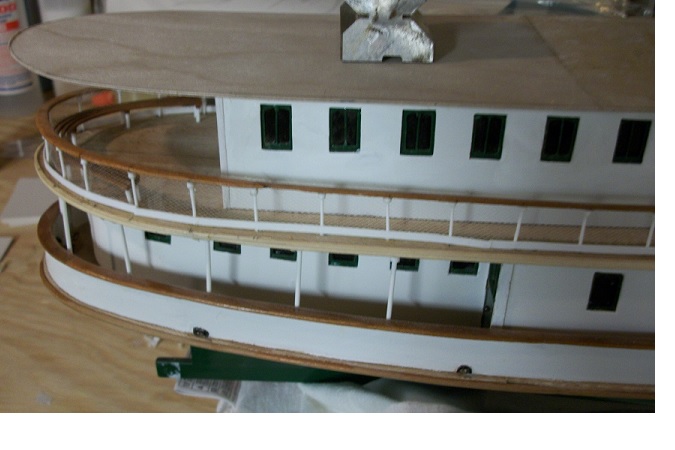
Michael, Popeye, Bob, Thanks for the thoughts and sentiment. For me, this project has been a new frontier, at least above the hull. A squared rigged ship doesn't have a superstructure as such. It has deck furniture. Maintaining the sweep of the sheer line for several decks, and knowing that it would be a visible feature of the model had me pondering. how to go about it. I chose to extend the bulkheads up through to the 01 level which seems to have worked. The other new area was my use of styrene in various places on the model. It has its pluses and minuses, but is a helpful medium especially around the pilot house. The only area yet to do that has me in a quandry is the eagle on top of the pilot house. I'm hoping to produce something that passes. We'll see. Tom -
SS Vinal Haven by TBlack - FINISHED
TBlack replied to TBlack's topic in - Build logs for subjects built 1851 - 1900
Popeye, For you, anything always! My fellow yankee inspiration: I'm in the middle of applying "canvas" to the boat deck.

- 326 replies
-
- 5
-

-
- vinal haven
- steam ship
- (and 1 more)
-
Amanda by Tblack - FINISHED - RESTORATION
TBlack replied to TBlack's topic in - Build logs for subjects built 1851 - 1900
JC Frankie, I know that the owner of this model is about my age and that his grandfather bought the model. So, say it was bought around 1890-1900. The restoration is not complicated; it's the scale that's getting to me. I bought an optivisor for this project; that's made a world of difference! I'm going to try some of Chuck Passaro's smallest cordage for the larger stays and shrouds, although I haven't a clue whether it will be to scale. Tom -
Bob, looks like a fun project. I have to salute you for two reasons: your ability and facility with CAD programs, and your ability to work in 1:96! Kudos to you! This will be fun for us spectators. Tom
-
Amanda by Tblack - FINISHED - RESTORATION
TBlack replied to TBlack's topic in - Build logs for subjects built 1851 - 1900
John, It's a pretty small scale ( less than 1:96) the holes in a 2 mm deadeye look almost invisible! Hope I'm up to it. Tom -
SS Vinal Haven by TBlack - FINISHED
TBlack replied to TBlack's topic in - Build logs for subjects built 1851 - 1900
John, Vinalhaven is starting to look like something. This deck shouldn't be too hard to put together. It all seems to fit OK. In that picture I'm actually in tears and she's trying to comfort me. It's the first time I've seen her in that dress..."my little girl" has disappeared and this young woman has taken her place; what the heck happened!? Tom -
Amanda by Tblack - FINISHED - RESTORATION
TBlack replied to TBlack's topic in - Build logs for subjects built 1851 - 1900
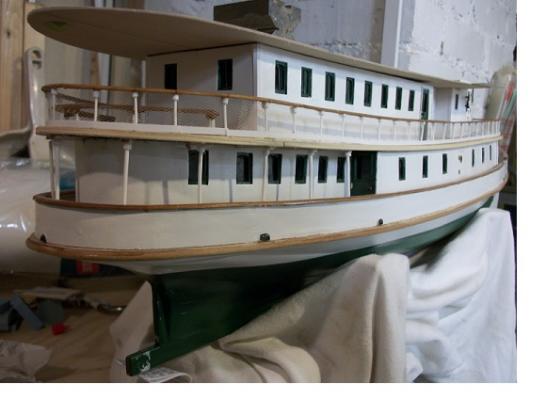
"Just painting" takes a while. The main problem was the gold stripe along the side. It's in a groove that is not sharply defined (the edges wander a bit). That makes it very difficult to place masking tape. Some of you folks have an artistic background and could probably paint the stripe freehand; not me...I need all the help I can get. Anyway, here it is with those deadeyes from Cornwall (fast delivery, by the way). I just guessed on the appropriate size. These are 2mm and 3mm. I don't think they look too out-of-scale? Tom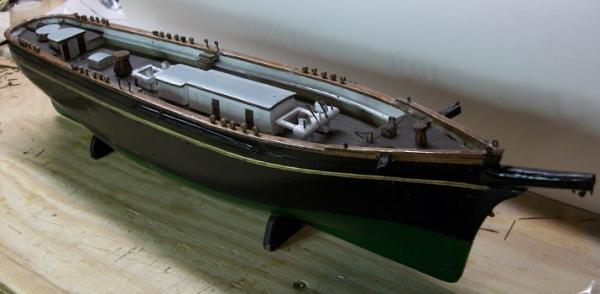
- 40 replies
-
- 2
-
-
- restoration
- finished
- (and 1 more)
-
SS Vinal Haven by TBlack - FINISHED
TBlack replied to TBlack's topic in - Build logs for subjects built 1851 - 1900
Thanks Bob, I've had some health issues that side-lined me for a while, and I'm working on a restoration of a clipper ship "Amanda" that is giving me fits and taking its own sweet time (I'll up-date that later). And Robbyn isn't the only one who went to a wedding this August. Here are me and my daughter:
- 326 replies
-
- 3
-
-
- vinal haven
- steam ship
- (and 1 more)
-
SS Vinal Haven by TBlack - FINISHED
TBlack replied to TBlack's topic in - Build logs for subjects built 1851 - 1900
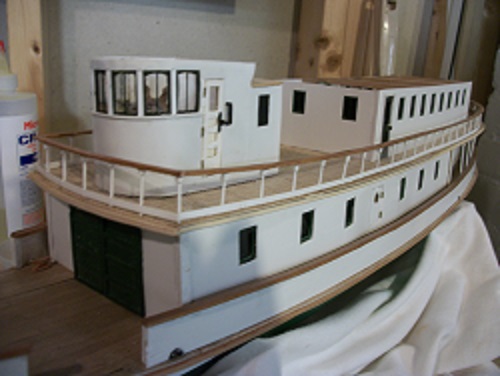
I've gotten the boat deck shaped and fitted; it's 1/32" plywood. I'm assuming the decking would have been canvas which I'll simulated with painted card stock, overlapping the edges to create seams. The second photo shows that the edge of that deck had a wooden border laid over the canvas around the edge.Pretty straightforward. Tom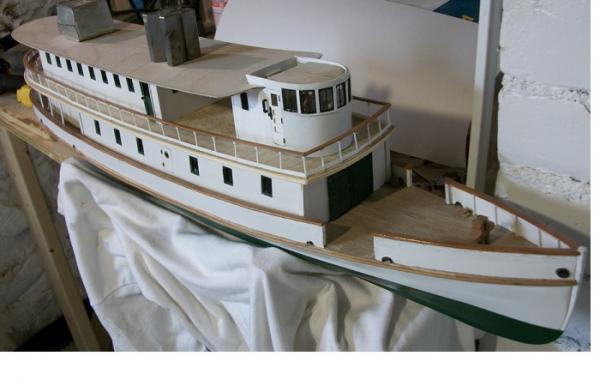

- 326 replies
-
- 2
-
-
- vinal haven
- steam ship
- (and 1 more)
-
Look at that overhang! It could almost double as a harpoon! The sea is calm and yet the deck is awash.
-
Amanda by Tblack - FINISHED - RESTORATION
TBlack replied to TBlack's topic in - Build logs for subjects built 1851 - 1900
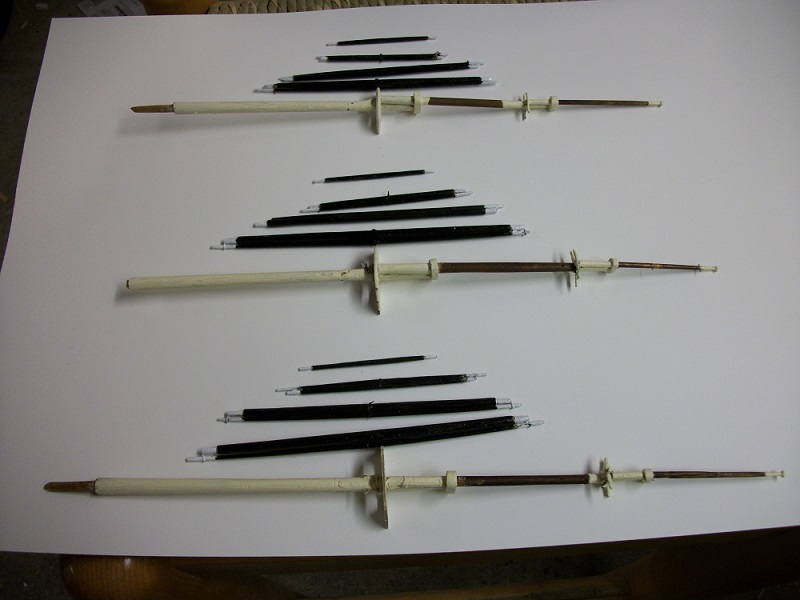
Just dropping in to let you know that, despite several serious health problems, a daughter's wedding and other responsibilities, I have made some progress on this project. More importantly, I've also decided on the scope of my work which will allow me to move forward more purposefully. On the spars, I needed to make one royal yardarm, two mast caps and one mast top, and paint the whole thing. On the hull, so far, it's just painting to make it more crisp looking. Although, you'll see holes in the cap rail where I've pulled out a series of eyes that will be replaced with deadeyes, coming from Cornwall. Blocks will be from C. Passaro,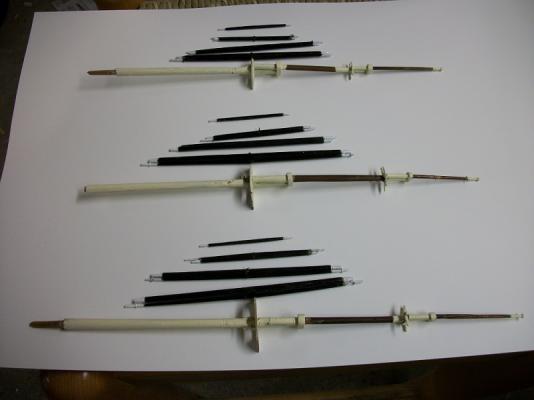
- 40 replies
-
- 2
-
-
- restoration
- finished
- (and 1 more)
-
I'll second what Frank just mentioned. You must have a huge shop to be able to tackle all of these projects at once. But I'd also comment on how focused we all are on the model. What I really want to know is how the blackberry muffins turned out that you made back on the 14th? Tom
-
The main sheet traveller;24 parts in 1/4"? The mind boggles! Your ability to see and solve these problems is truly outstanding!
-
Amanda by Tblack - FINISHED - RESTORATION
TBlack replied to TBlack's topic in - Build logs for subjects built 1851 - 1900
I've decided to repaint the whole thing. My inspiration, or at least my muse, is Sailcat and his tackling Cutty Sark. In some ways it makes it easier, and I don't think it really upsets the integrity of the original build. Furthermore, there has been at least one repair to this ship in the past and no consistency to the paint job. I'm going to use Harold Underhill's "Masting and Rigging the Clipper Ship and Ocean Carrier" as my guide to putting the rigging back together. But there will be a little bit of a hiatus, as I'm off to Colorado to give away my daughter in marriage to a wonderful young man. In this, I think we are slightly ahead of Robyn who gets married in a week or so, I'm remembering? Tom -
Amanda by Tblack - FINISHED - RESTORATION
TBlack replied to TBlack's topic in - Build logs for subjects built 1851 - 1900
Thanks, Mark. Big help! Yes, a clipper. Tom -
Amanda by Tblack - FINISHED - RESTORATION
TBlack replied to TBlack's topic in - Build logs for subjects built 1851 - 1900
Mike Taylor moved this thread over from the thread that lists the latest pictures of your build. Over there, a number of you are throwing bouquets at me for doing this project for a friend. Let's slow down....I'm getting paid, not much, but it does ruin my amateur standing. So, I'm no great saint. Right now, the owner is questioning the white paint on top of the cabins and at the foredeck and poop; he may want me to change it. My thought is to leave it the way the builder made it, but it's not up to me. This model is not museum quality; for example, there are no channels and deadeyes for the shrouds. The shrouds come down to an eye on the cap rail My problem is that I've had to make a new top for the main and mast cap above. These need to be painted, but I don't know how to weather the paint so that it blends in with the rest of the mast. Right about now Chuck Passaro, with his artistic background, would be a big help. Tom
-
Bob, I'm not going to let you get away with that statement. There aren't many people who know how to drill a .02" hole in a .04" wire. It's tricky! Tom
-
Amanda by Tblack - FINISHED - RESTORATION
TBlack replied to TBlack's topic in - Build logs for subjects built 1851 - 1900
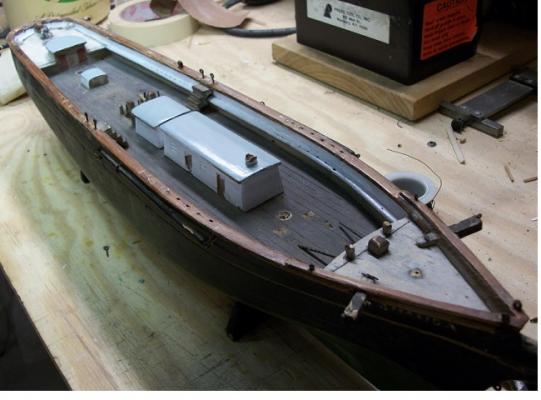
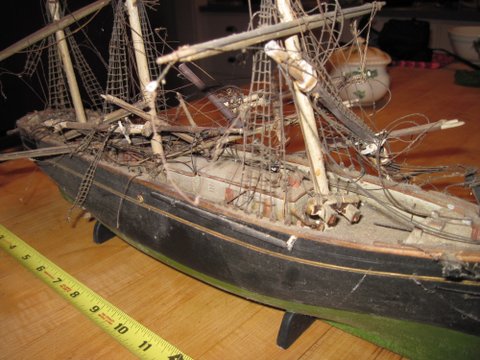
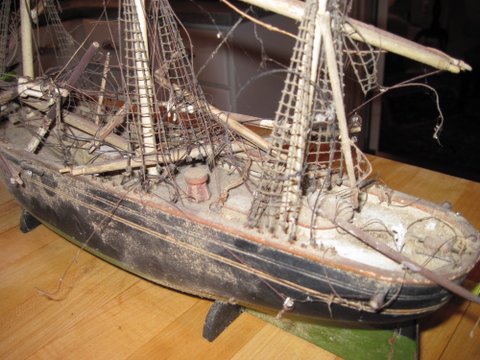
At this point, if I've still got your attention, I need your help. In the first photo, just forward of the steering station, is a round place on the deck that has no decking. Something was there; got any ideas what it might have been? In the second photo, on the fixture on top of the house. Could they have stored a boat up there?

- 40 replies
-
- 1
-
-
- restoration
- finished
- (and 1 more)
-
Amanda by Tblack - FINISHED - RESTORATION
TBlack replied to TBlack's topic in - Build logs for subjects built 1851 - 1900
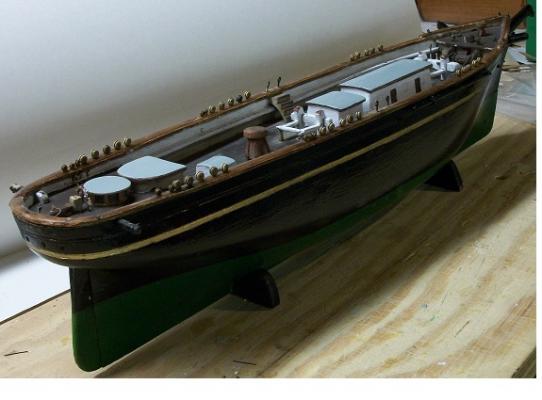
Amanda (that's the name at the bow and on the stern) is a full rigged ship. I've gotten her cleaned up a bit, and the damage isn't too bad; I think it's easily repaired.


- 40 replies
-
- 2
-
-
- restoration
- finished
- (and 1 more)
-
A friend of mine asked me to take this on, and, at the time, I thought it would be a nice diversion from my Vinalhaven build. I wasn't sure where to post this project, so I'm following Michael Mott's example and sticking it in here.(I've been moved, so disregard this statement). I need to post it, because I'm going to have some questions for you, if you'll permit me. Tom

- 40 replies
-
- 2
-
-
- restoration
- finished
- (and 1 more)
-
Now that's a nice looking wheel! Remarkable. Such talent. TB
-
SS Vinal Haven by TBlack - FINISHED
TBlack replied to TBlack's topic in - Build logs for subjects built 1851 - 1900
I've finally gotten to the point where I can show something. i had some health issues that got in the way for the last month. I don't have the right tools to build a proper ship's wheel, and I wasn't going to buy one. I figured that you can't really see it all that well once the roof is on. It's a bit of a clunker, but it will do. Also, I'm disappointed that, with the roof on, you can't really see the interior detail, sigh!
- 326 replies
-
- 2
-
-
- vinal haven
- steam ship
- (and 1 more)
-
Well, that turned out cracker jack! It's hard to believe that there was ever an issue on how the hull lines blended together. Tom
-
Paddy, I'm no expert on this, but my understanding is that only standing rigging gets tarred. Any line that is going to be worked is left natural. Tom