HOLIDAY DONATION DRIVE - SUPPORT MSW - DO YOUR PART TO KEEP THIS GREAT FORUM GOING! (89 donations so far out of 49,000 members - C'mon guys!)
×


usedtosail
-
Posts
2,414 -
Joined
-
Last visited
Content Type
Profiles
Forums
Gallery
Events
Everything posted by usedtosail
-
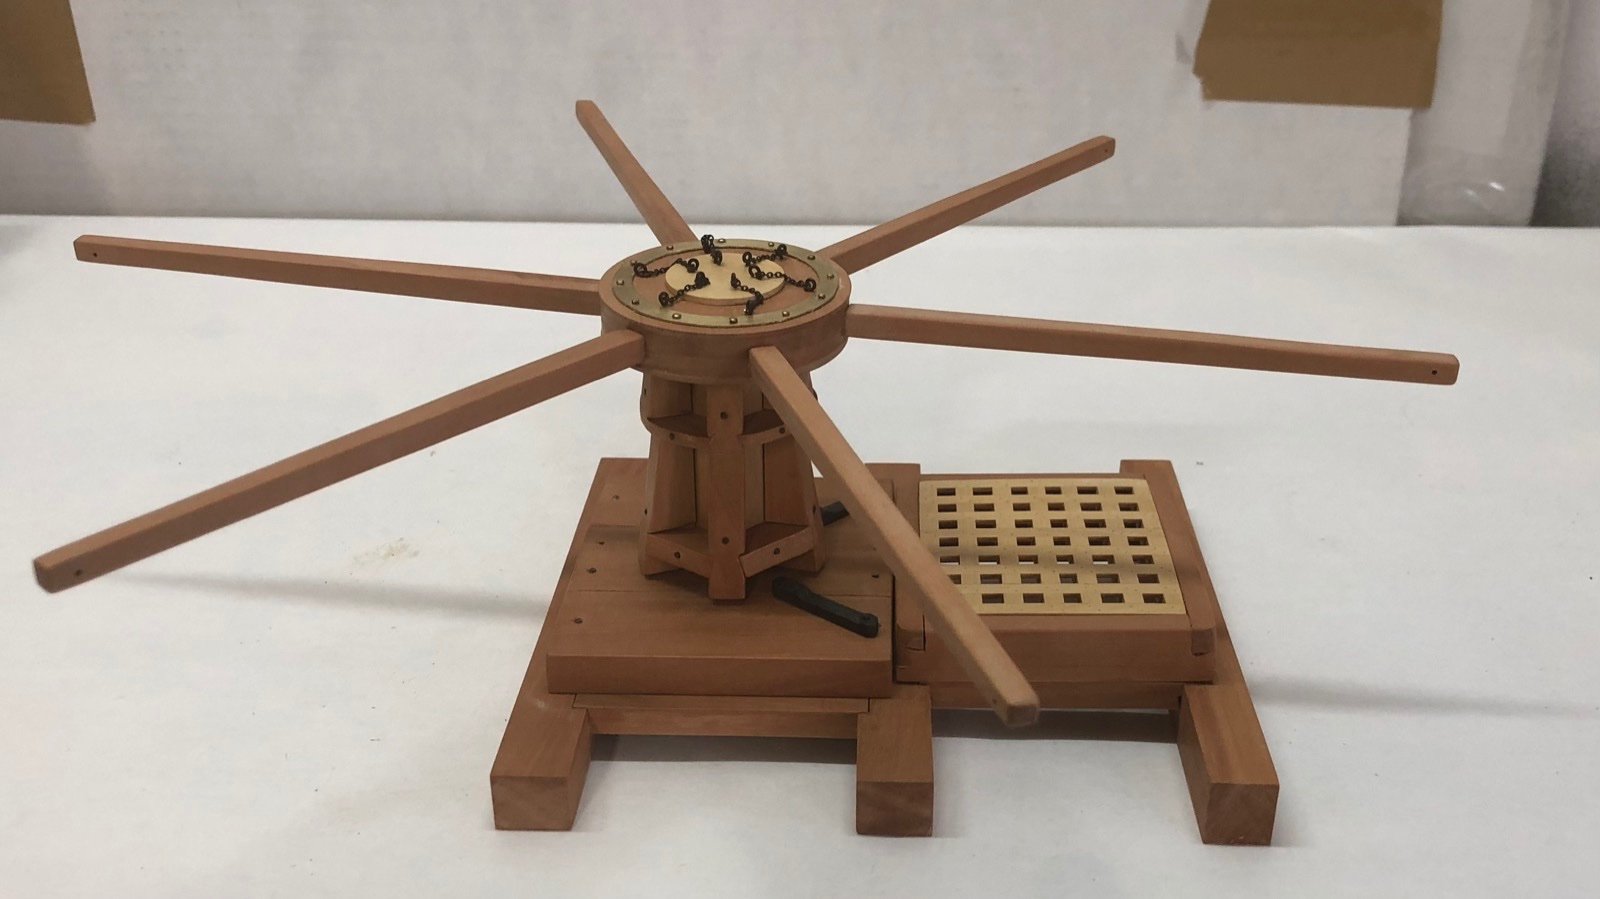
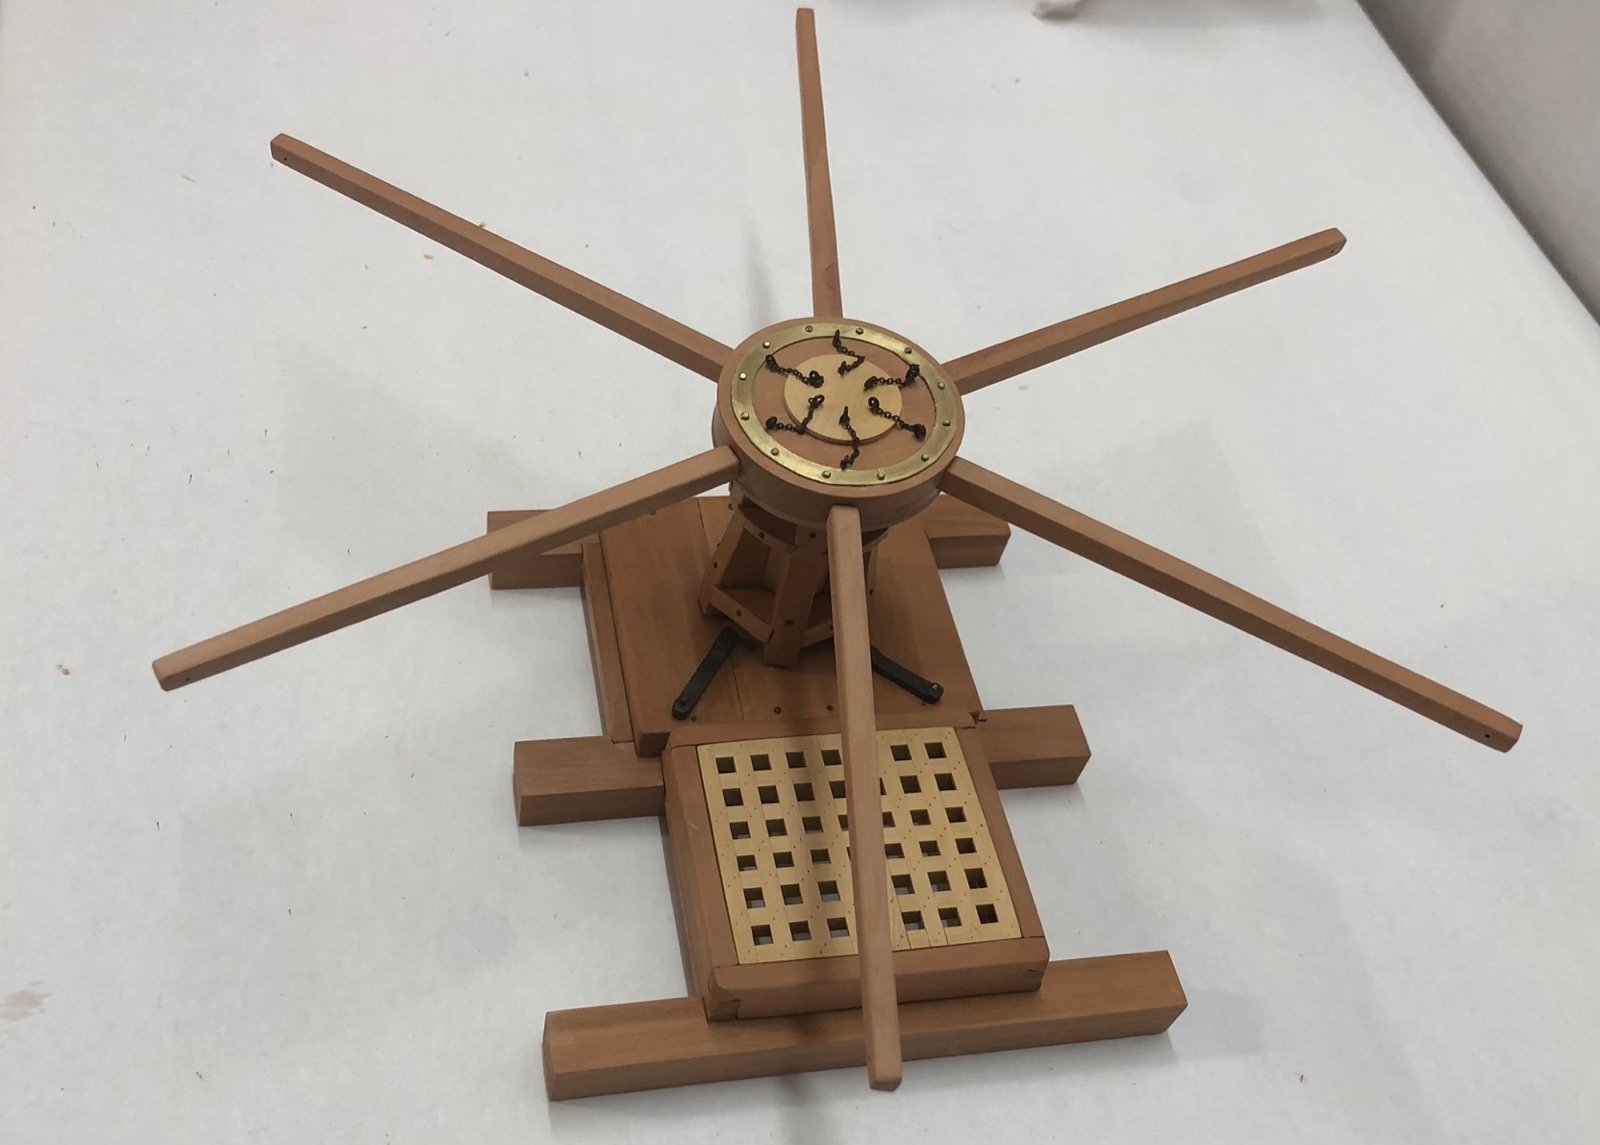
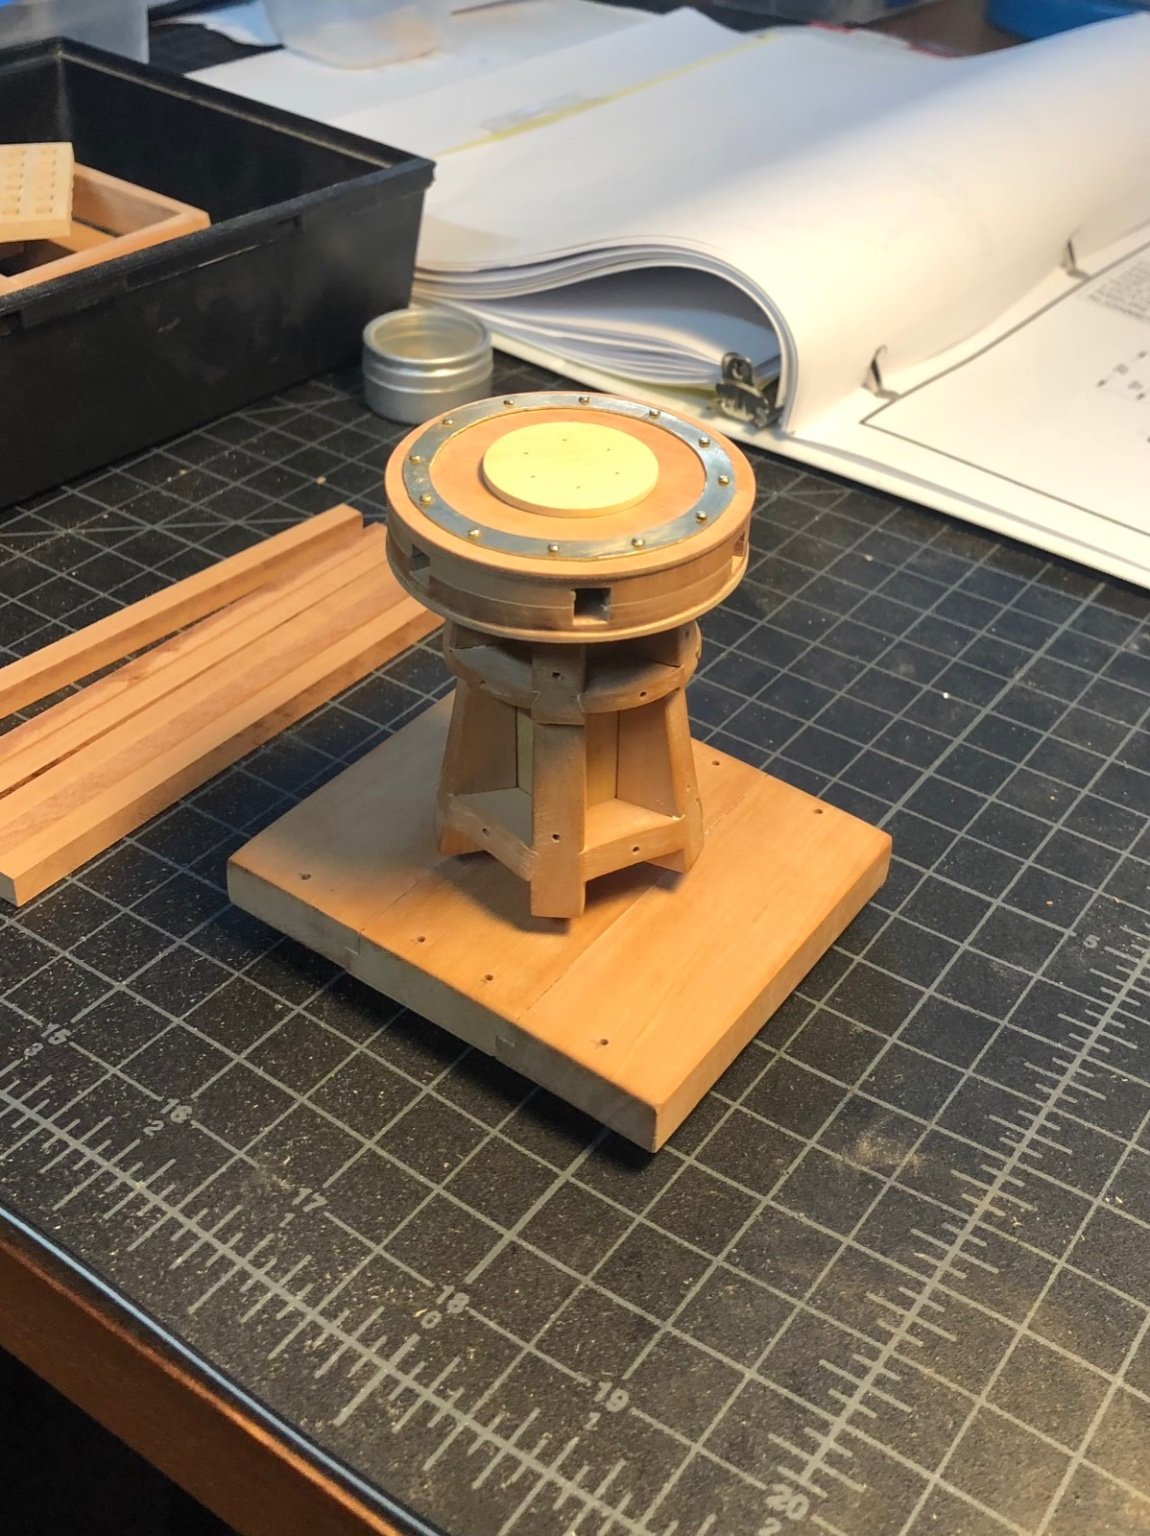
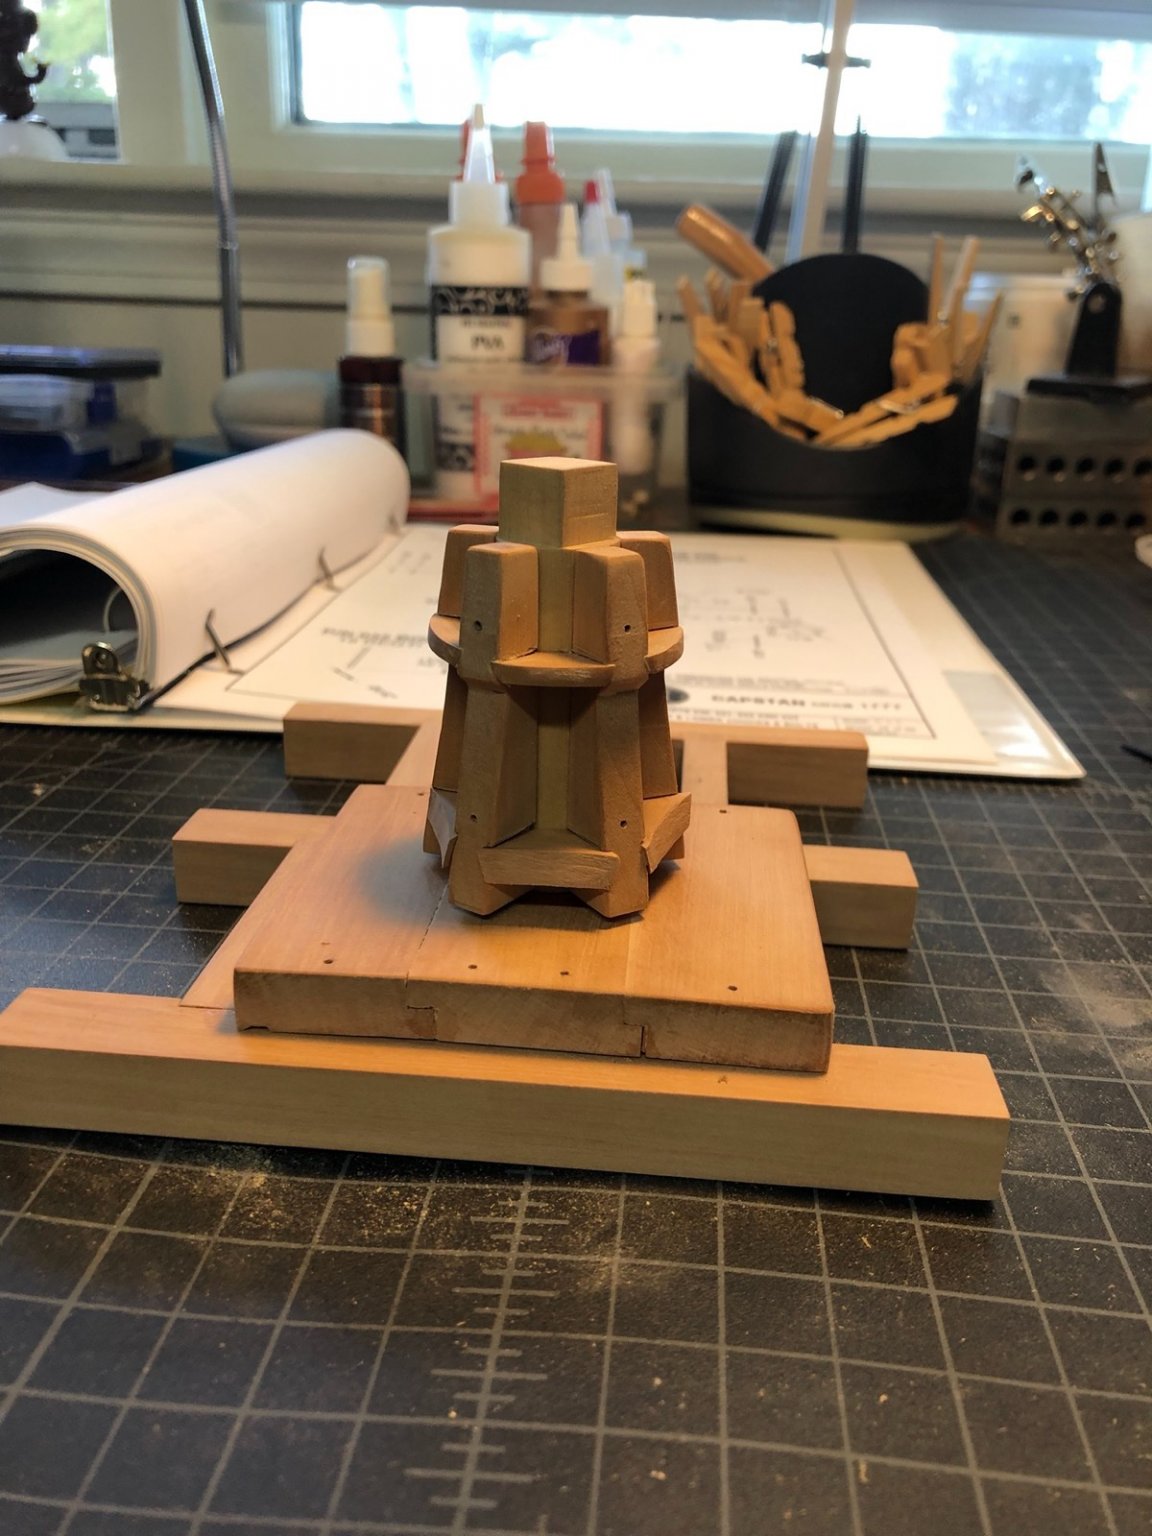
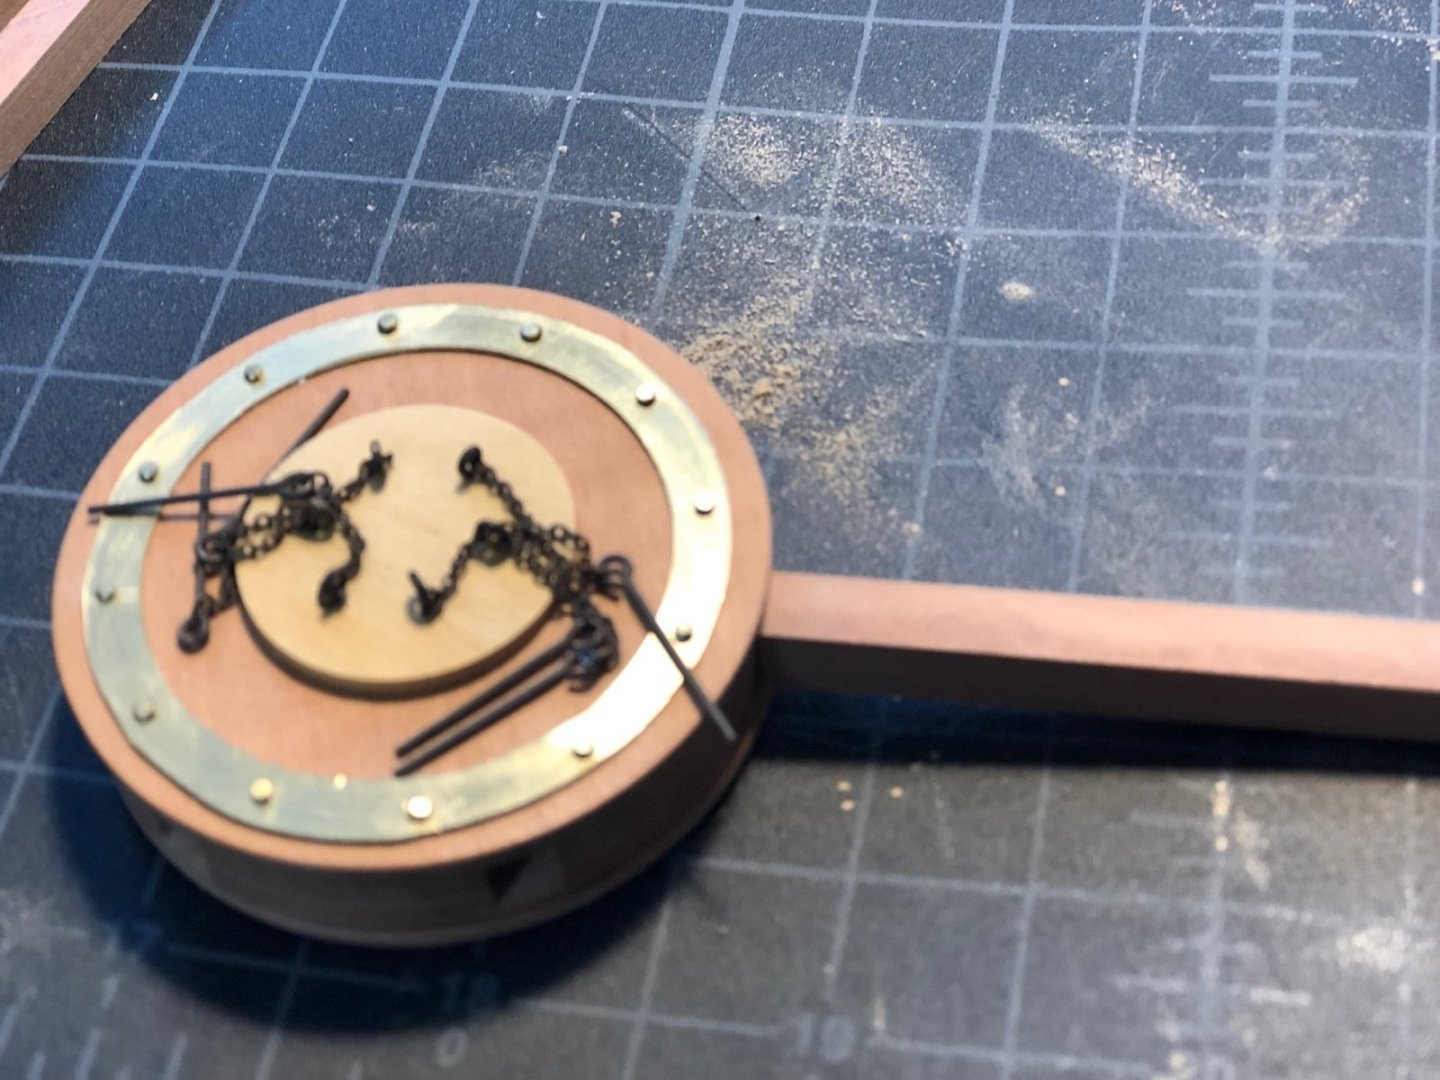
 I installed the capstan barrel and drum head, which completes the capstan project. This was a fun project and I especially enjoyed the scratch build aspect. I am not sure I am ready to tackle a whole ship as a scratch build project but it is not out of the question in the future. Thanks to the NRG and especially Toni Levine for her great instructions and plans, and her help during this build.
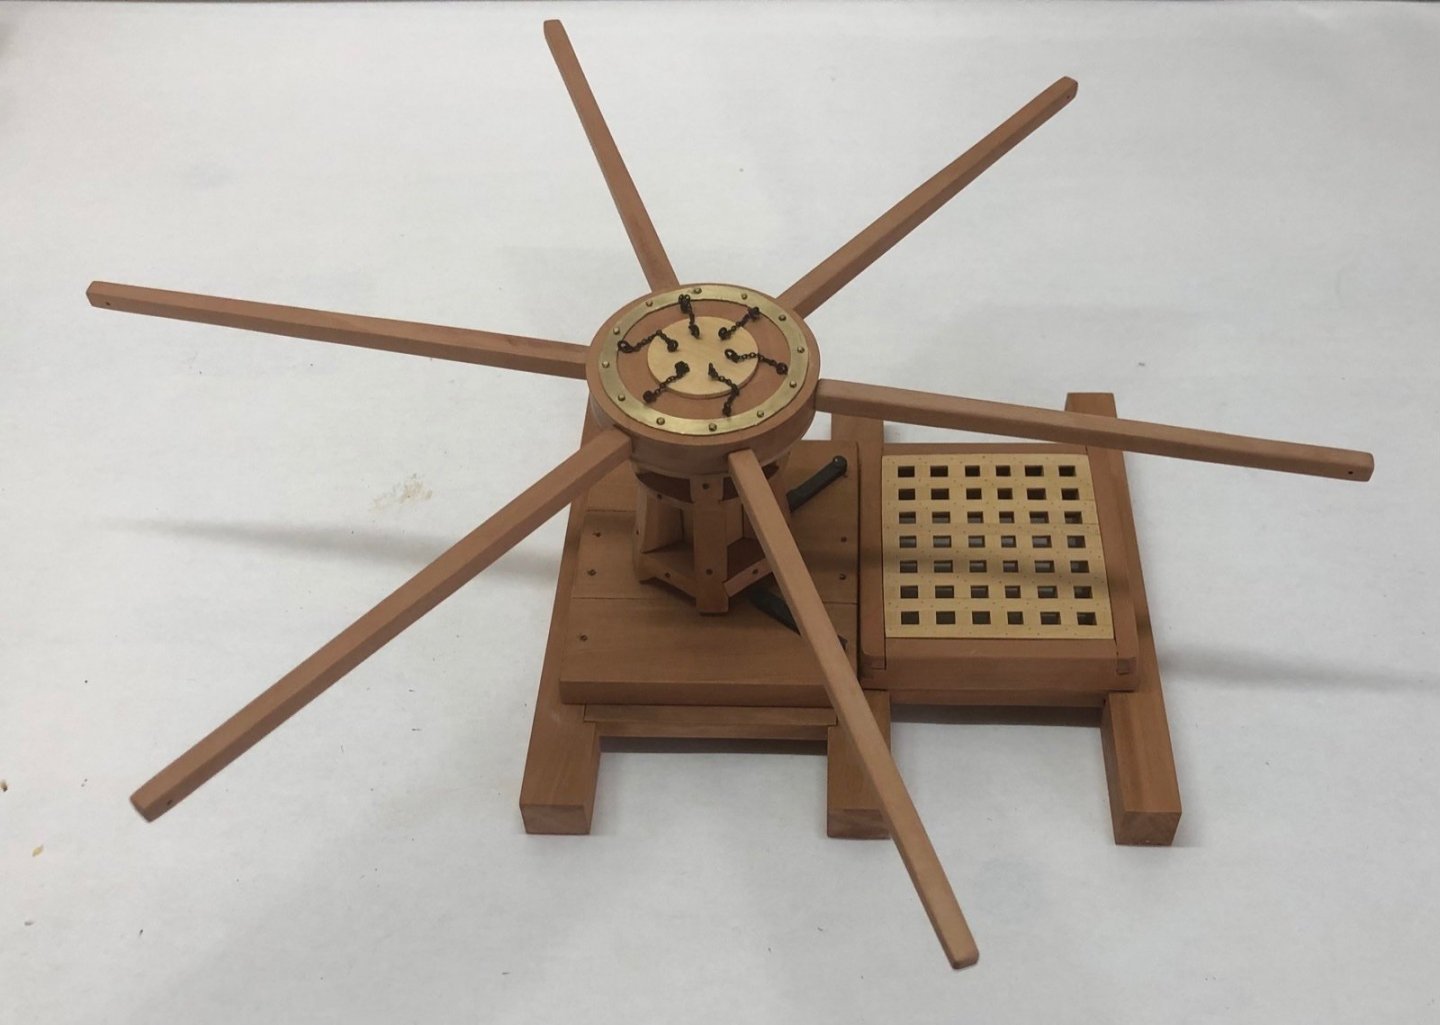


-
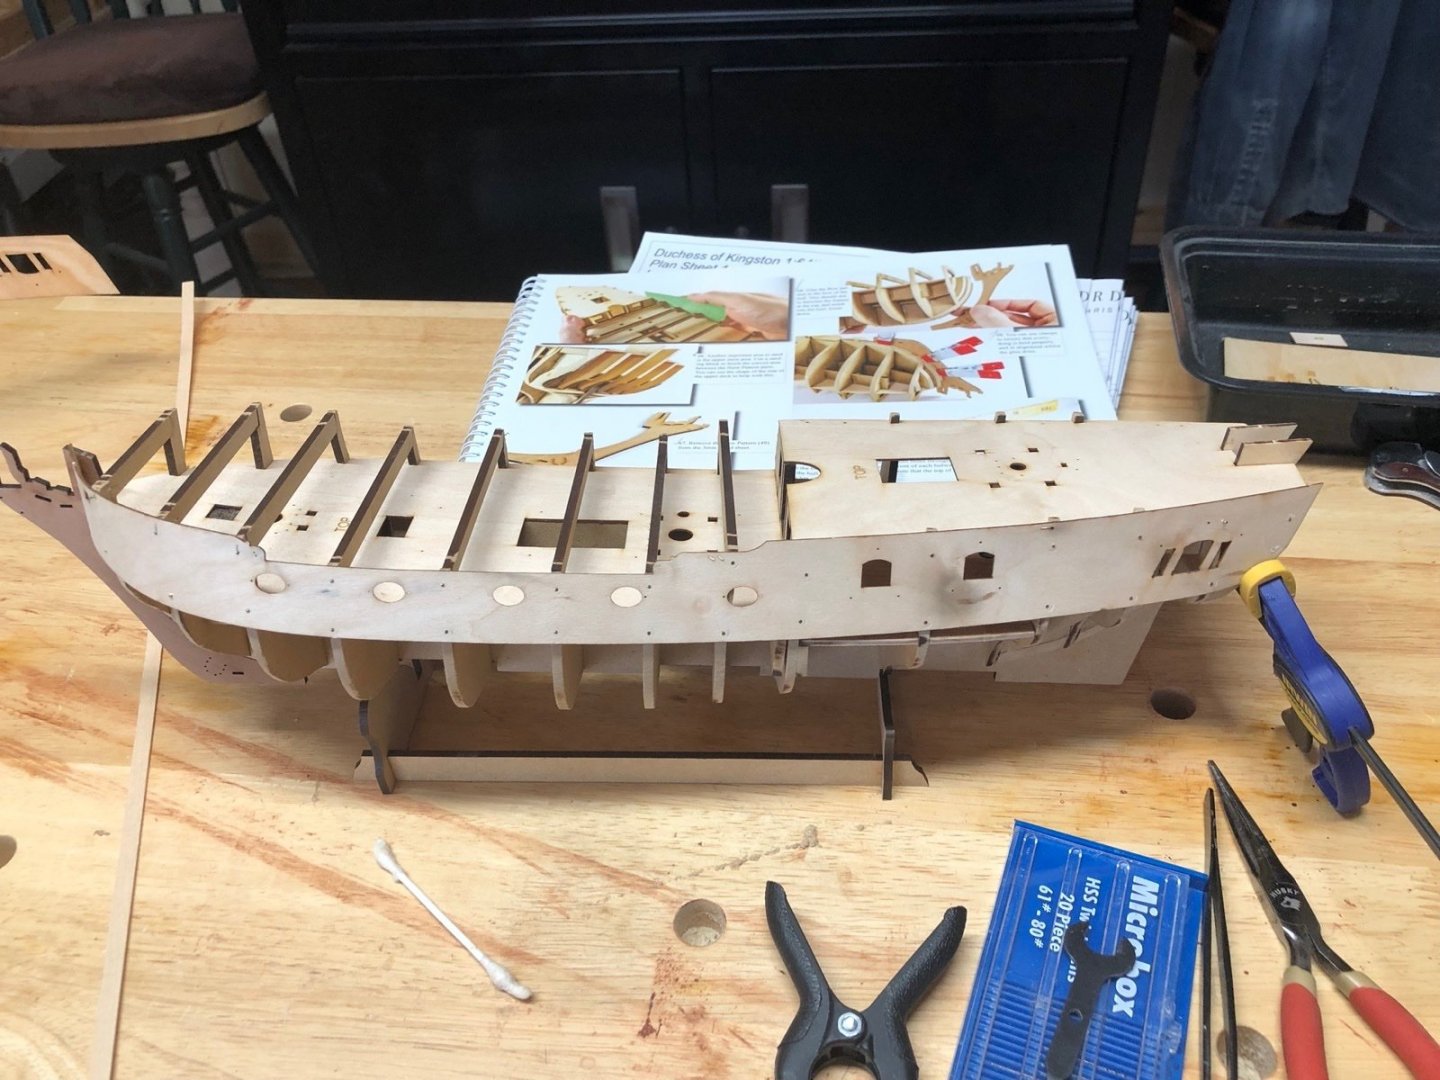
I tapered the first planks on each side, soaked them in water and bent them for the bow using an electric plank bender. I clamped them to the bulkheads to dry. This morning I started gluing the port side plank to the frames, starting with the first three bulkheads at the bow.
- 118 replies
-
- 6
-

-
- Duchess Of Kingston
- Finished
- (and 1 more)
-
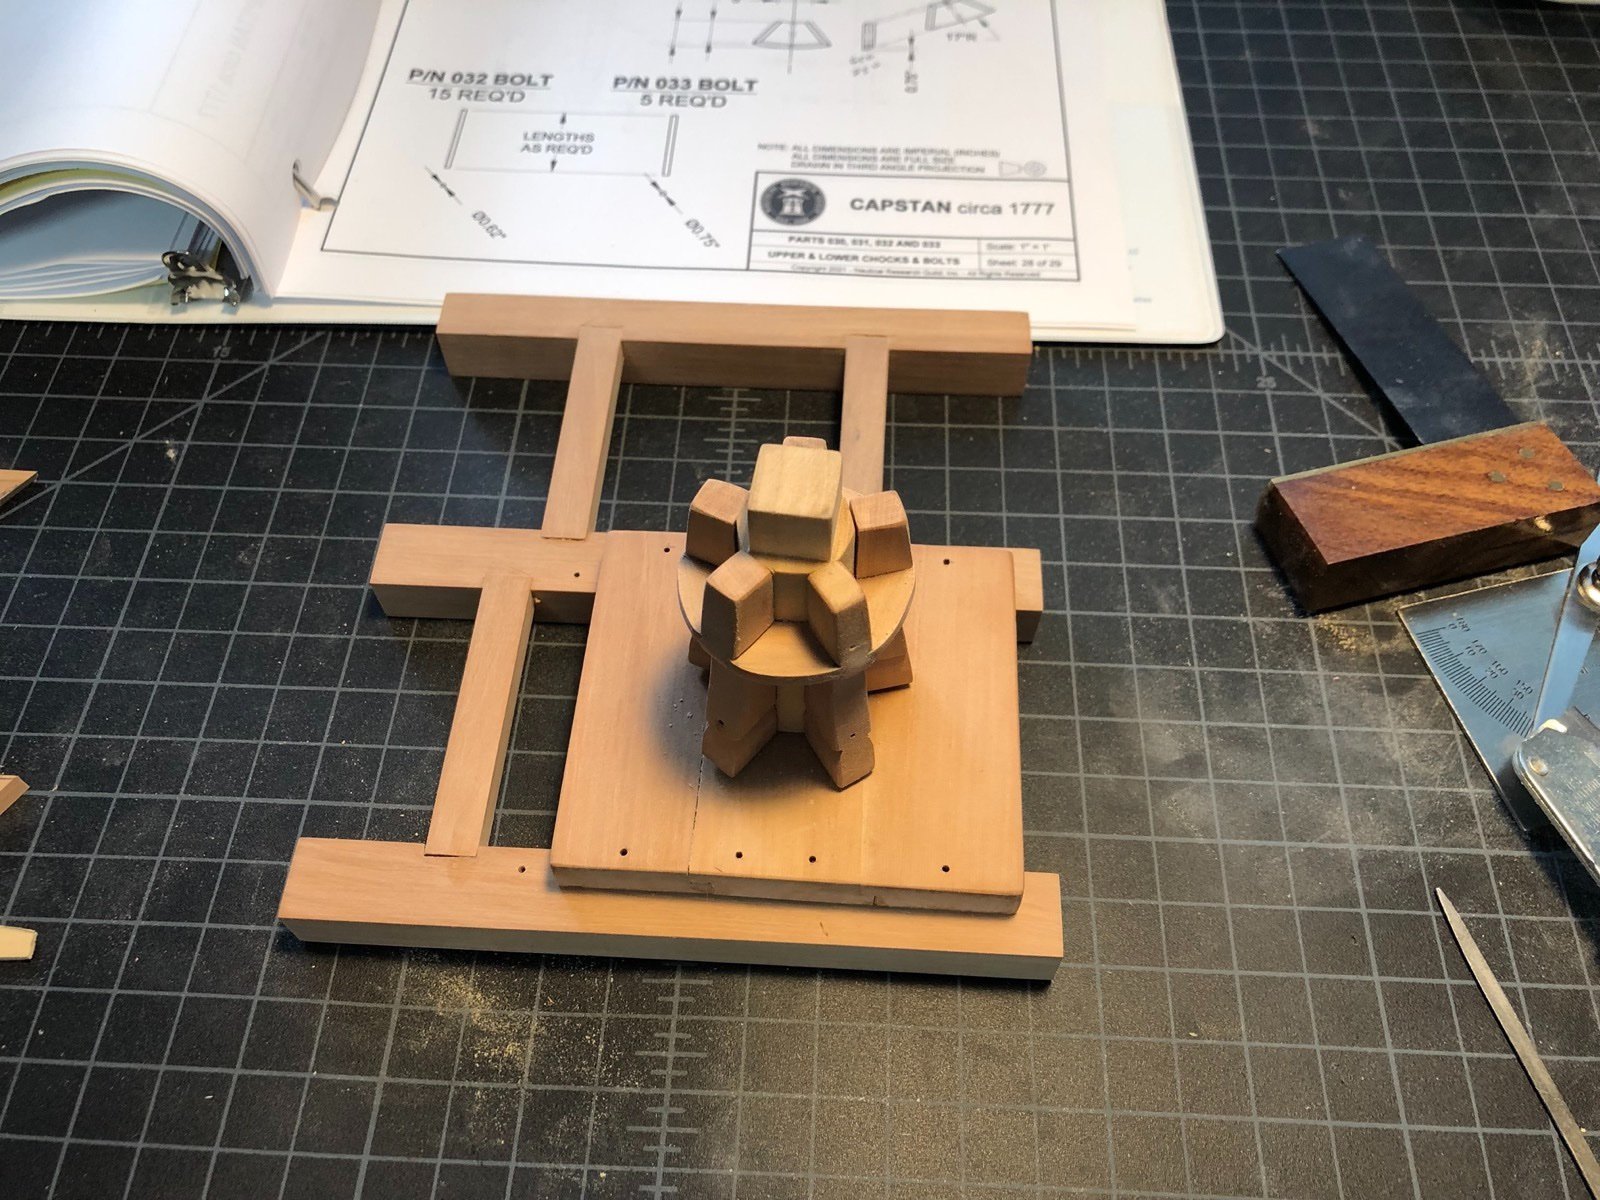
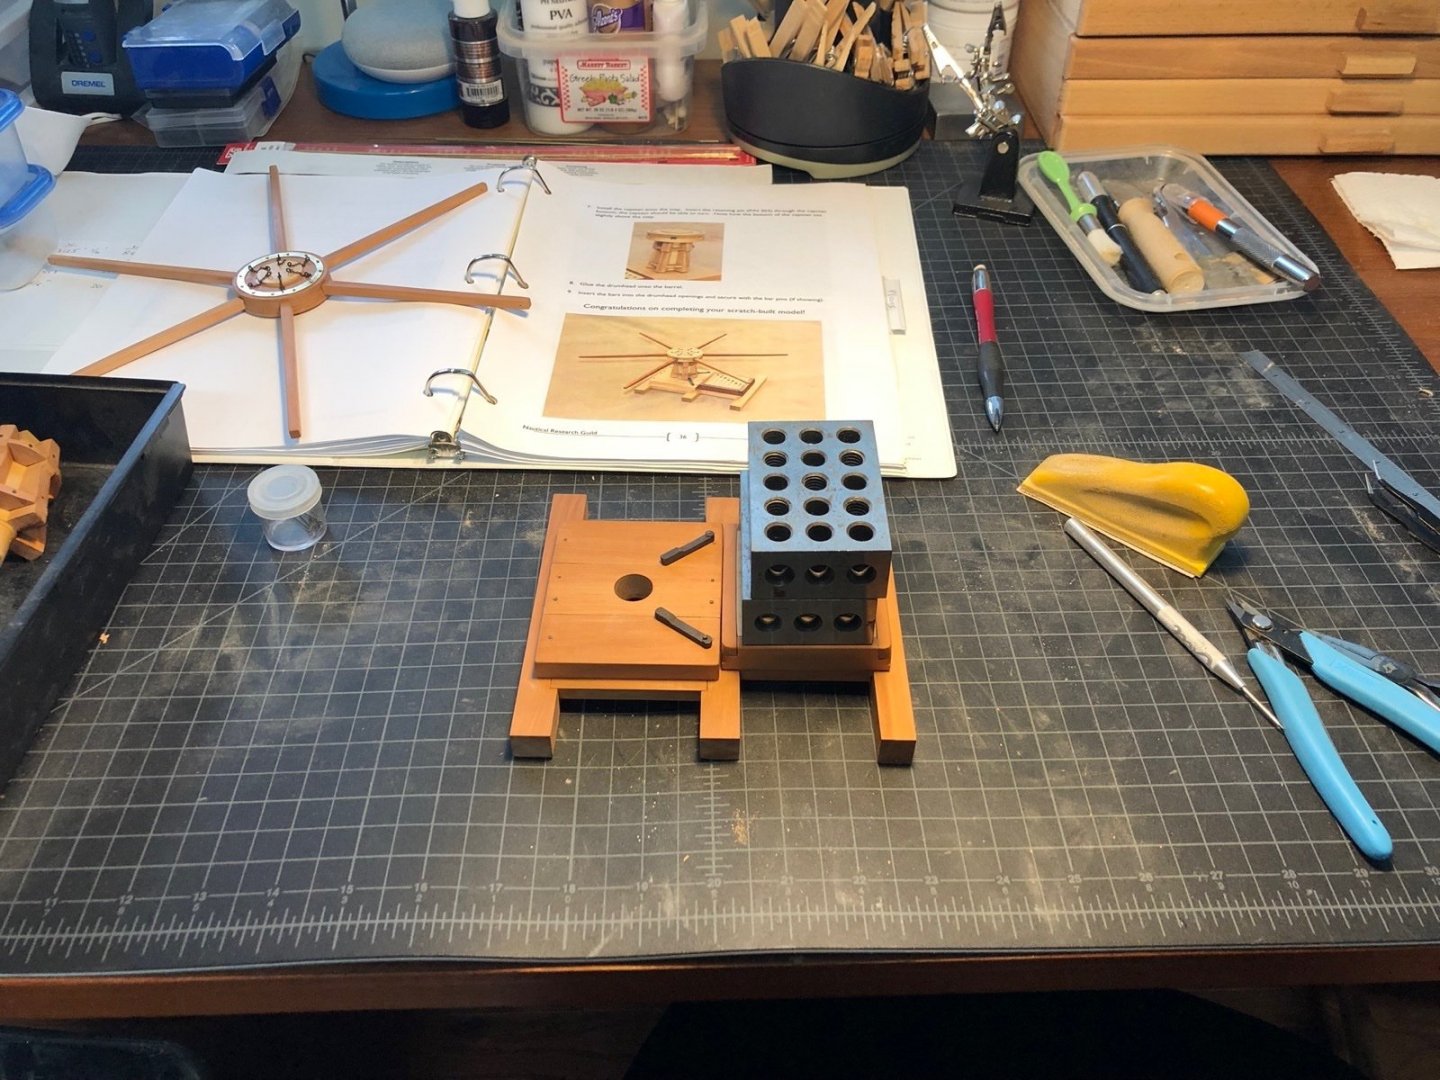
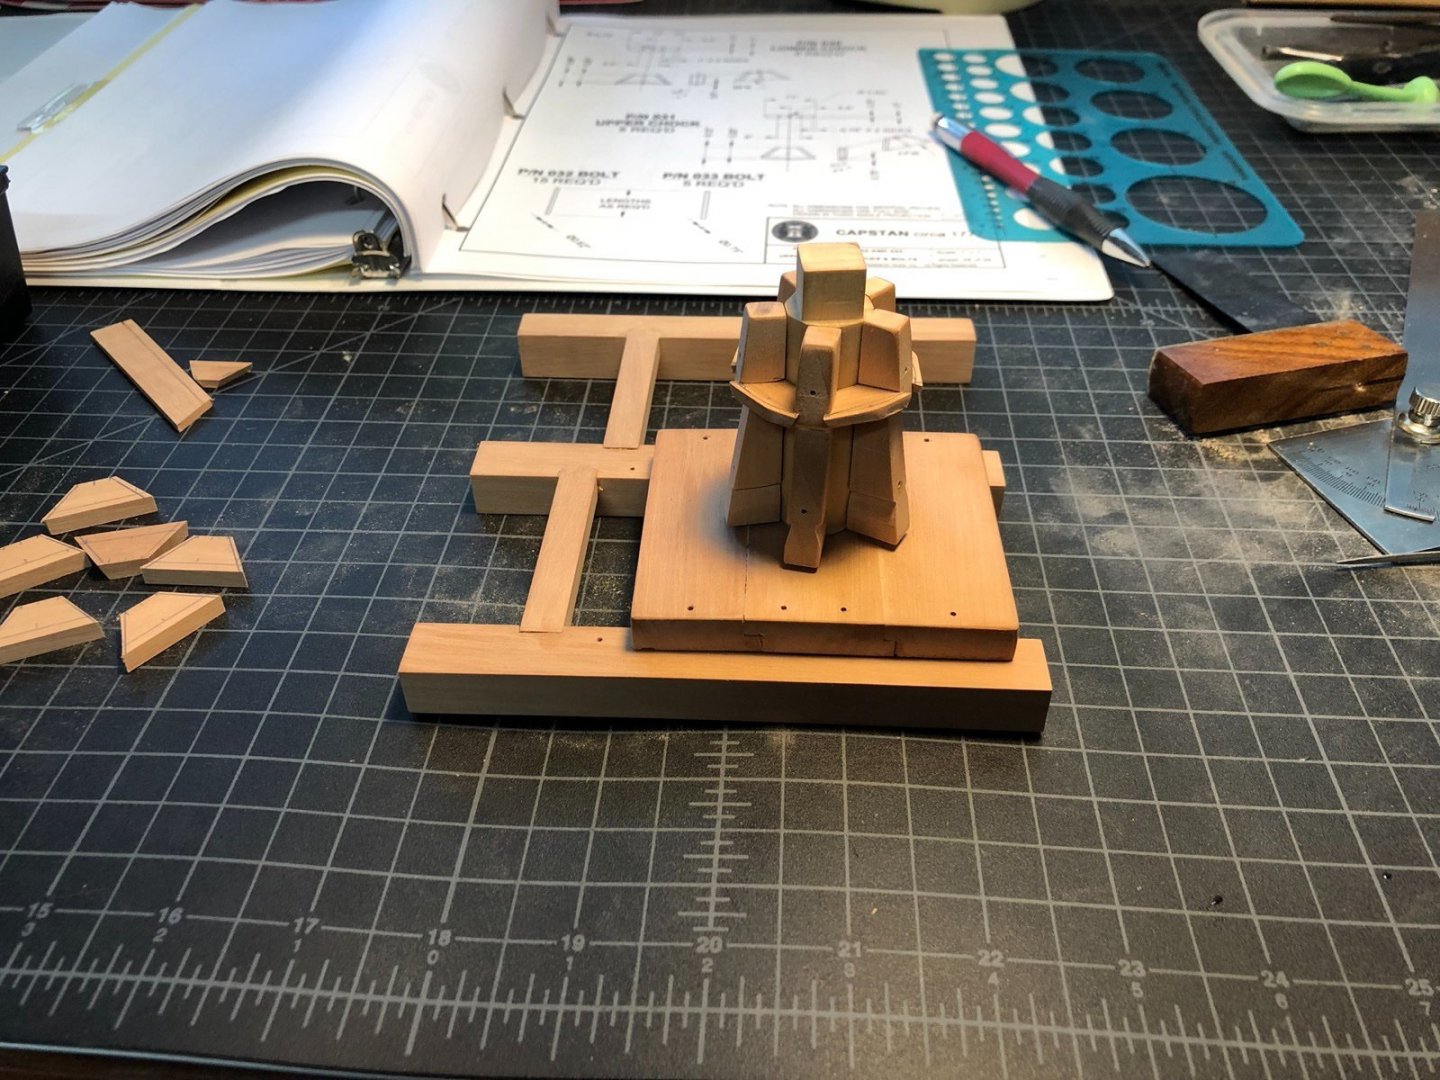
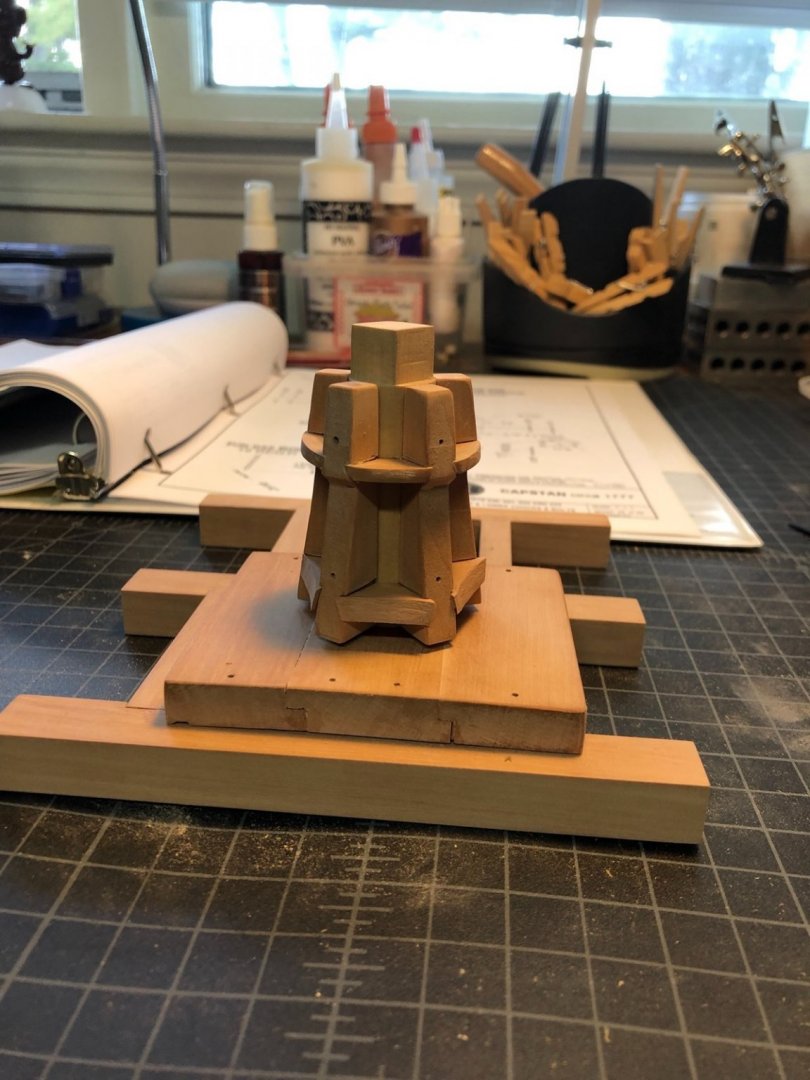
I gave all the assemblies a coat of wipe on poly then finished adding the pins to hold the bars in place. I glued the capstan base to the beams using the corner bolts to locate it to the holes I had already drilled. I used some weights to hold it down while the glue dried. This morning I started the assembly of the capstan model. I first trimmed the bolts for the capstan base and added them to the base. I then drilled the holes for the brakes and added the pins for them. I put the hatch into the coaming and glued the coaming to the base, again using weights to hold it down.

-
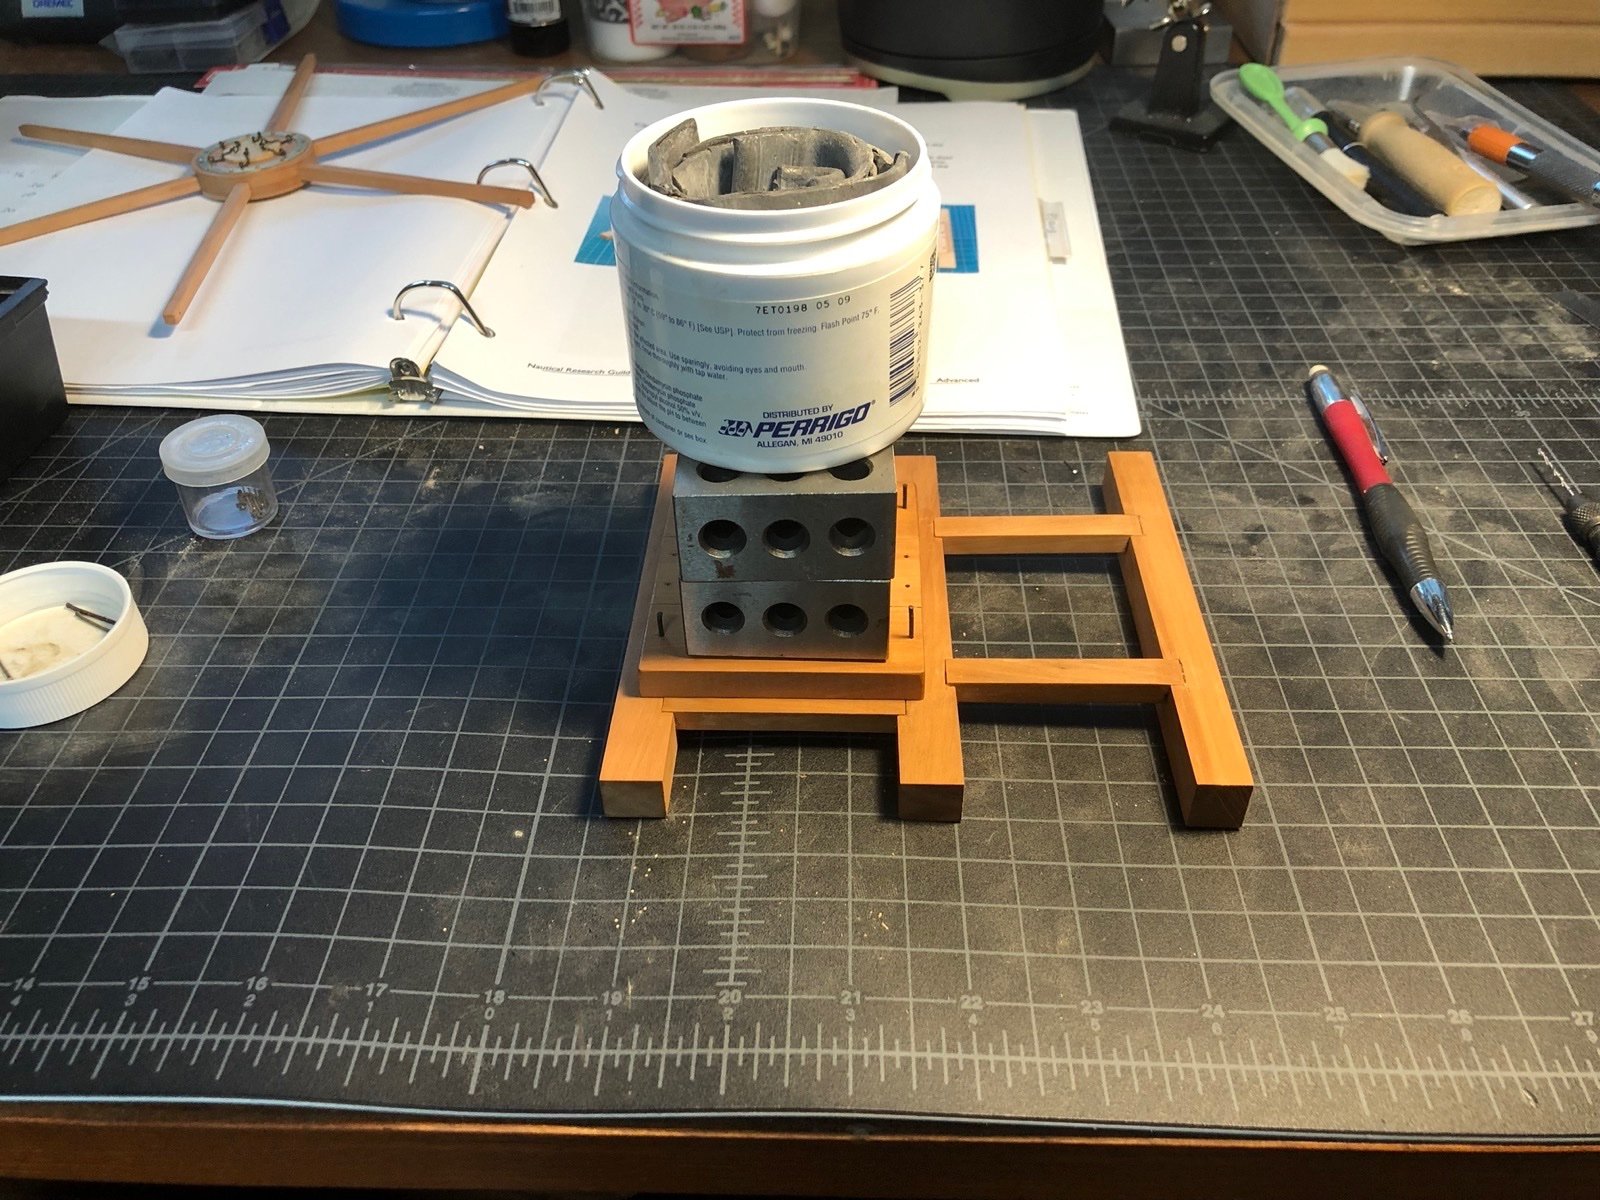
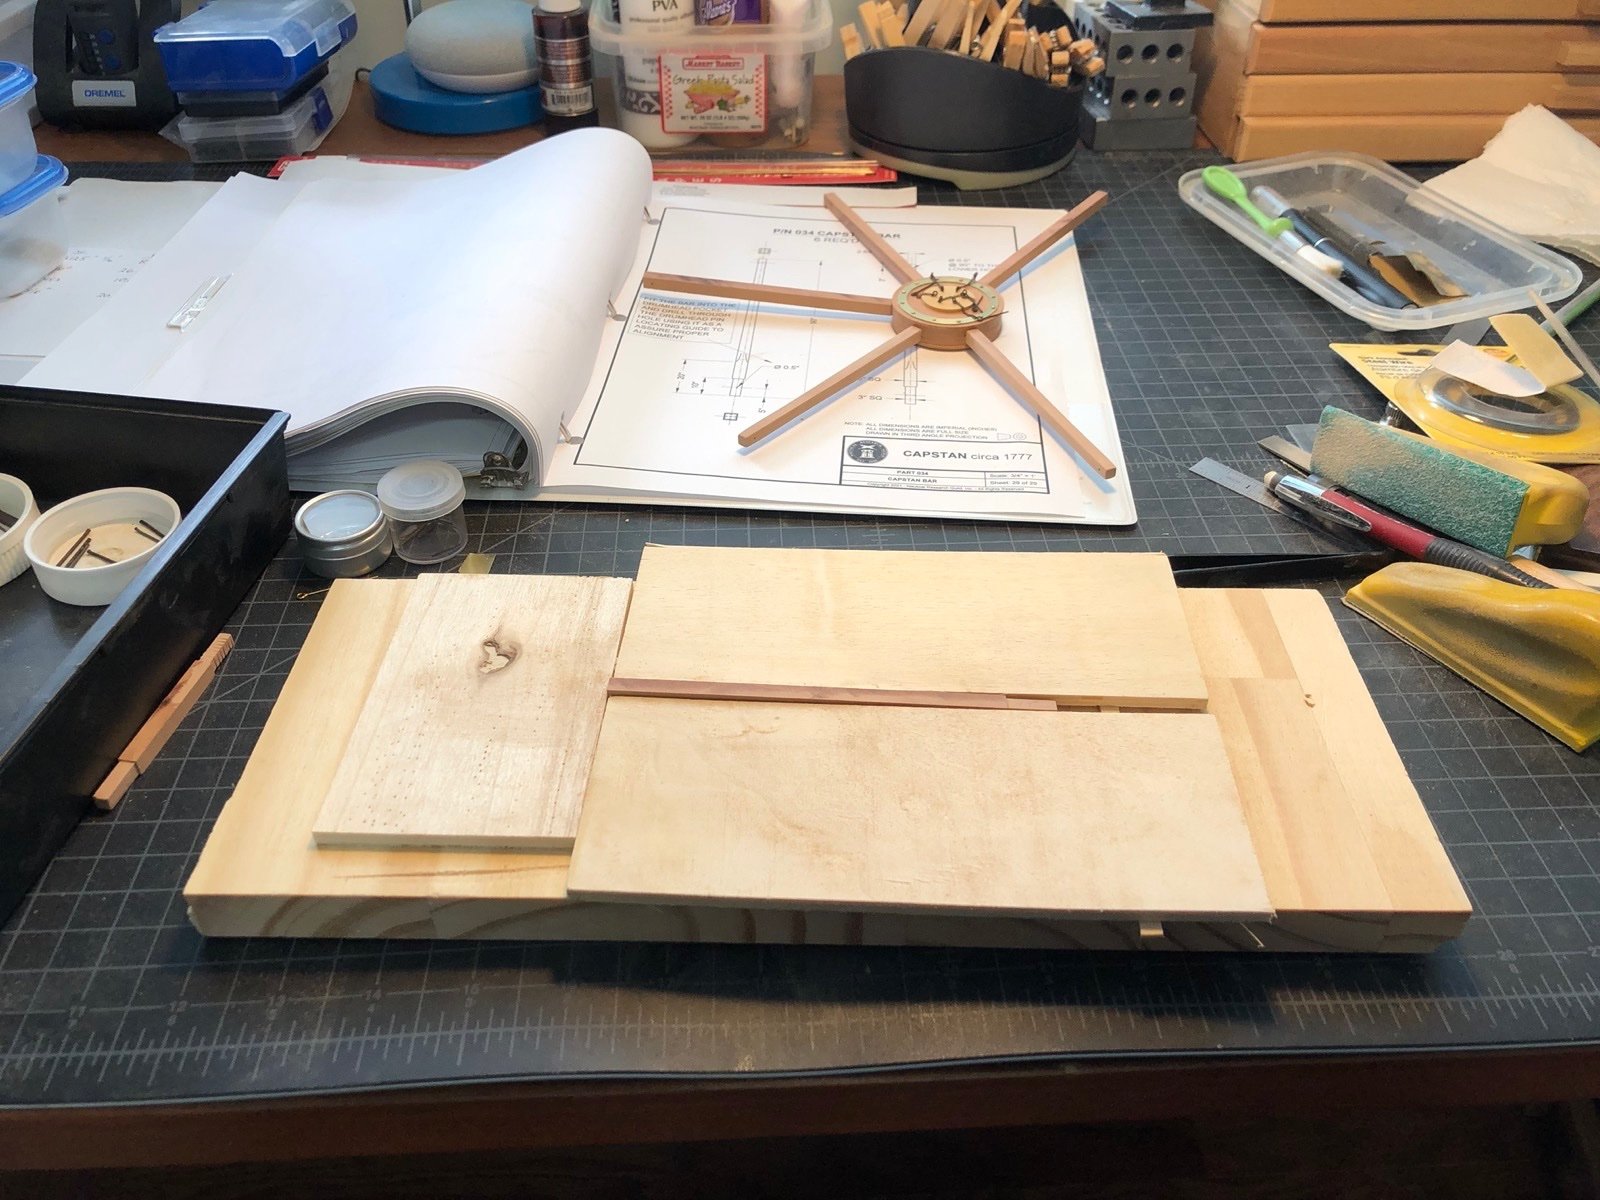
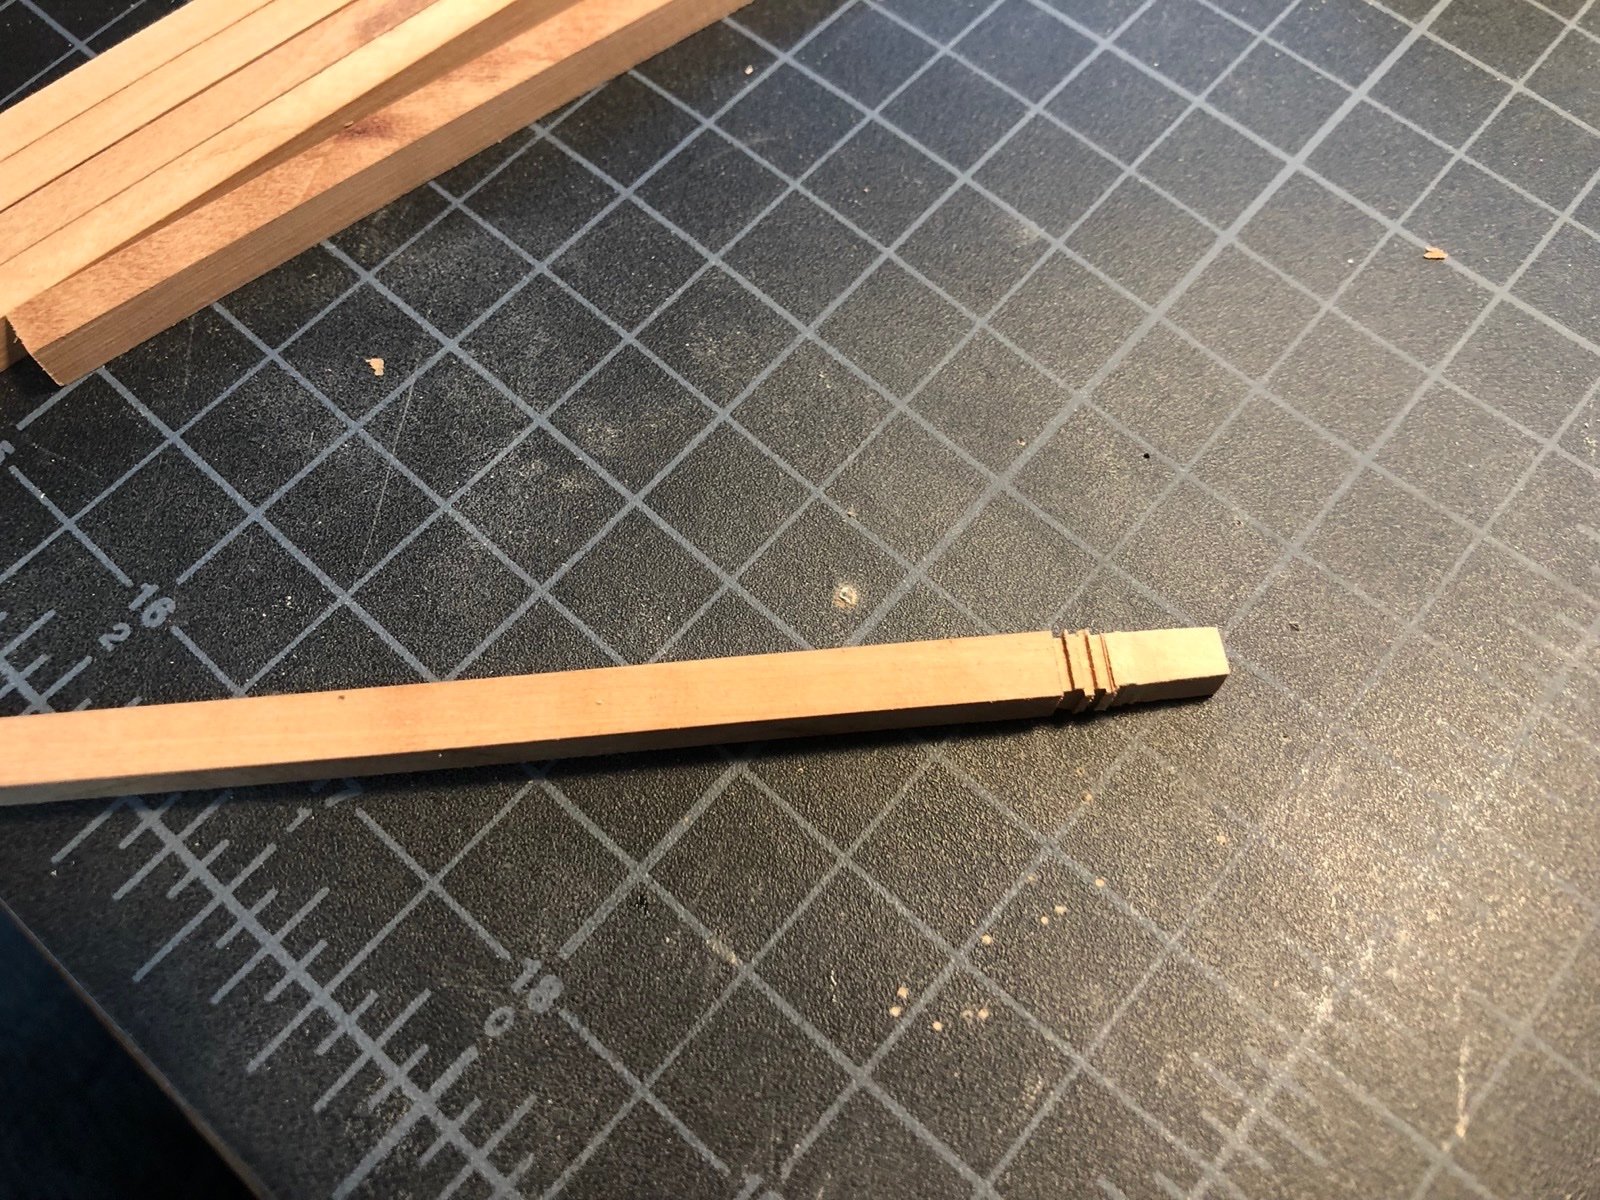
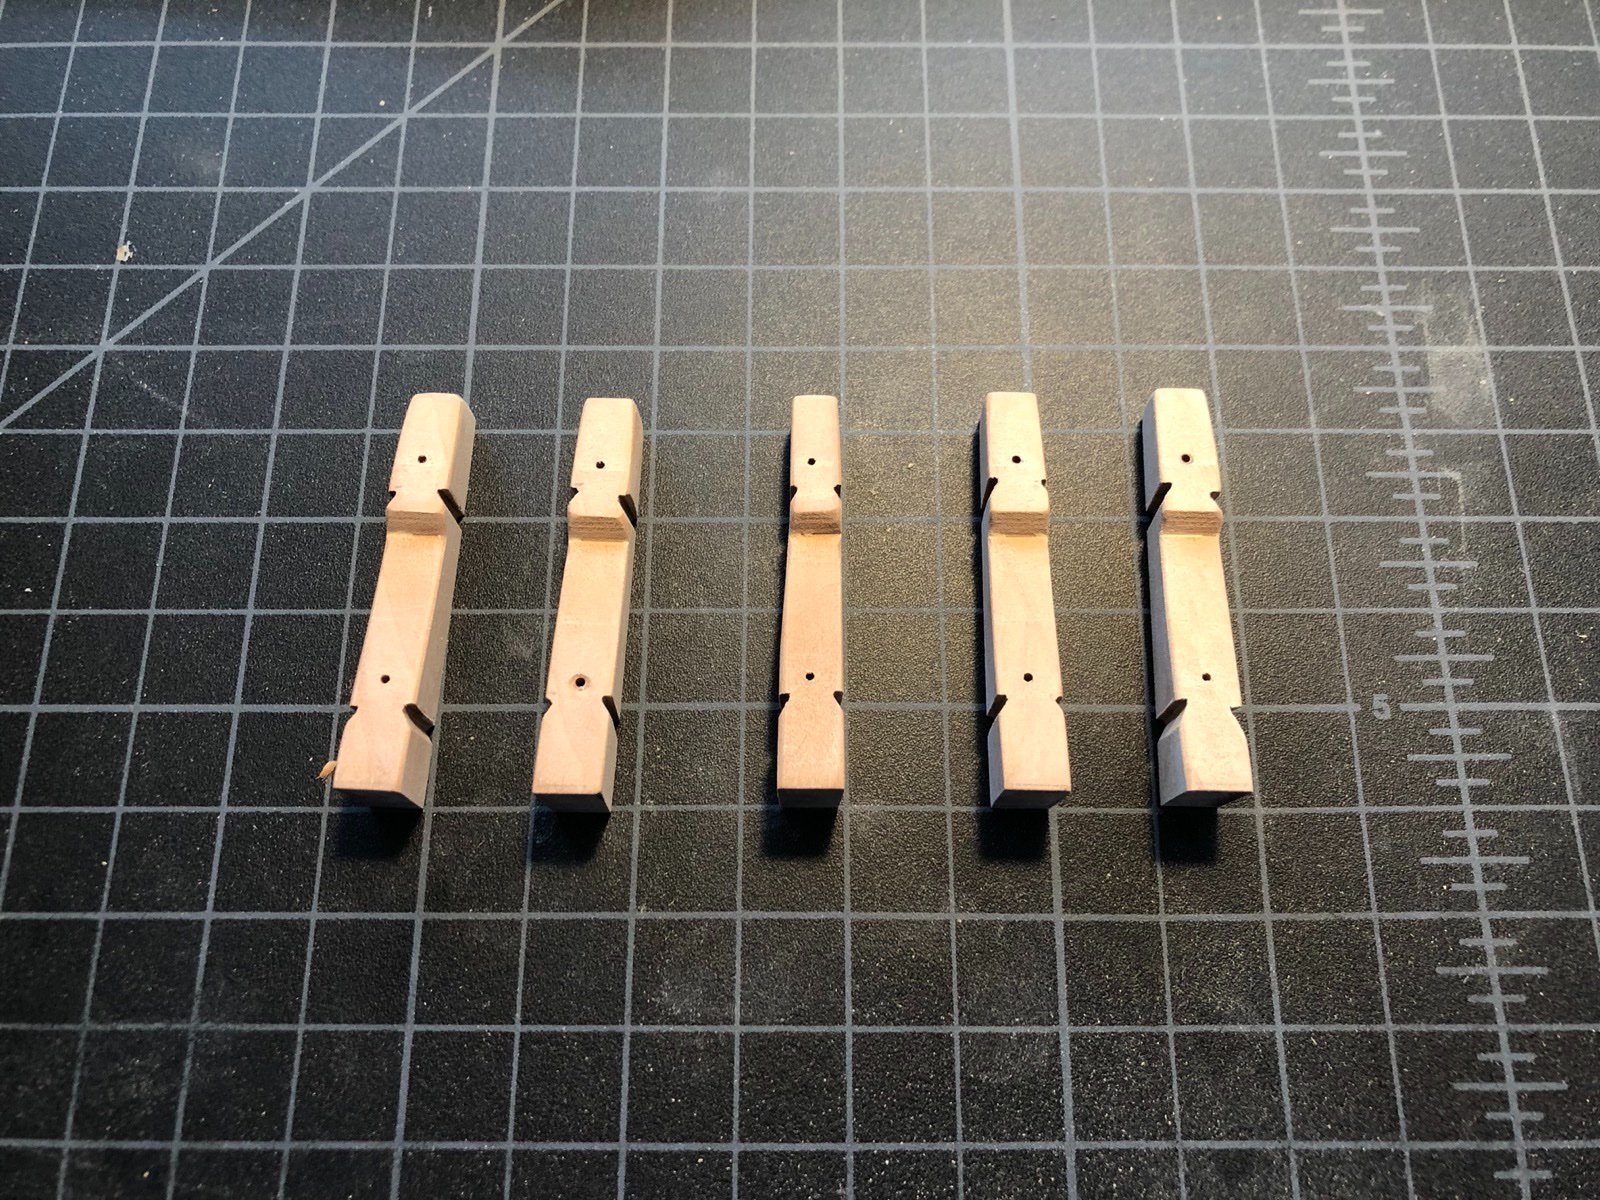
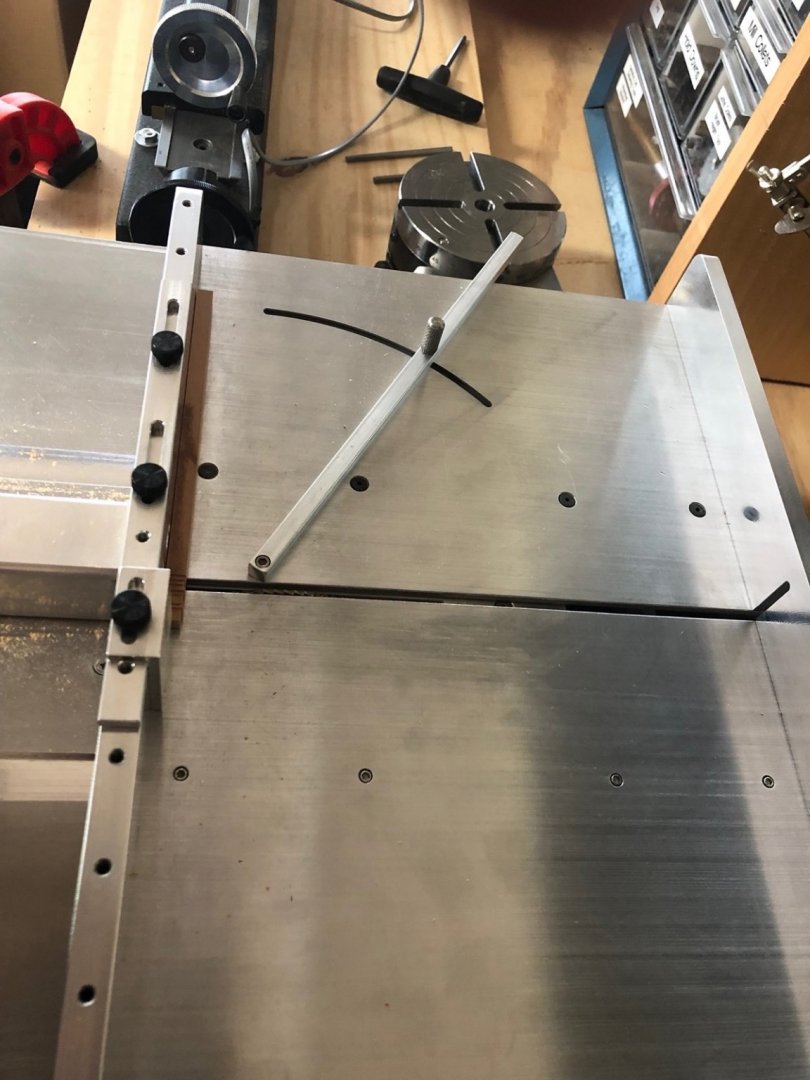
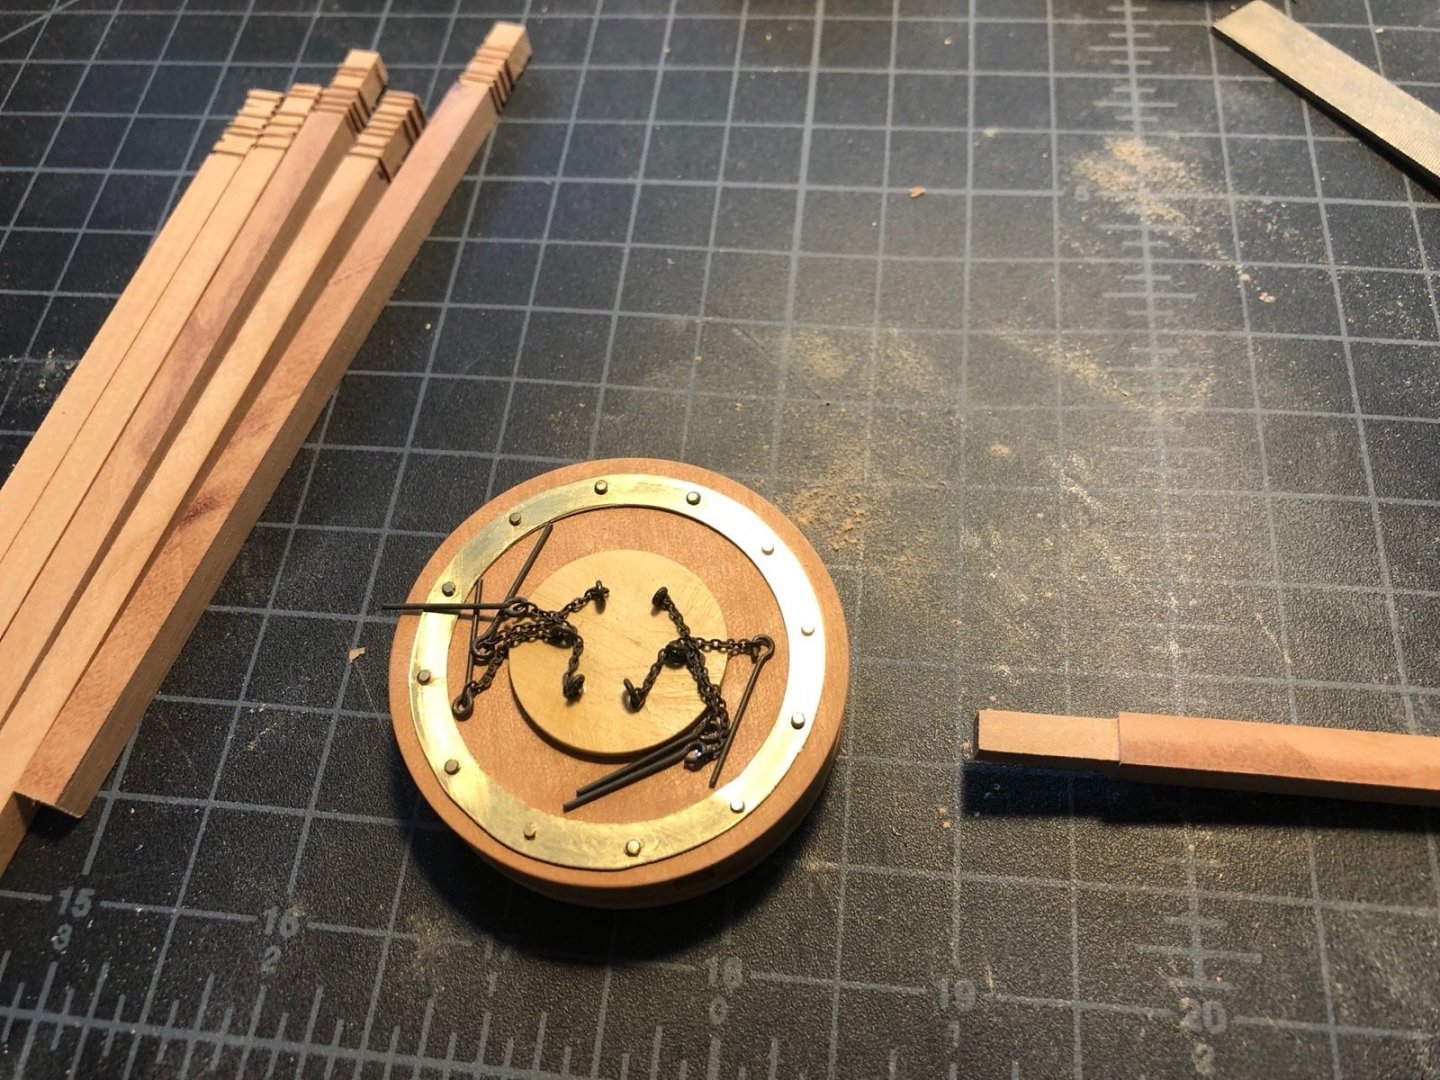
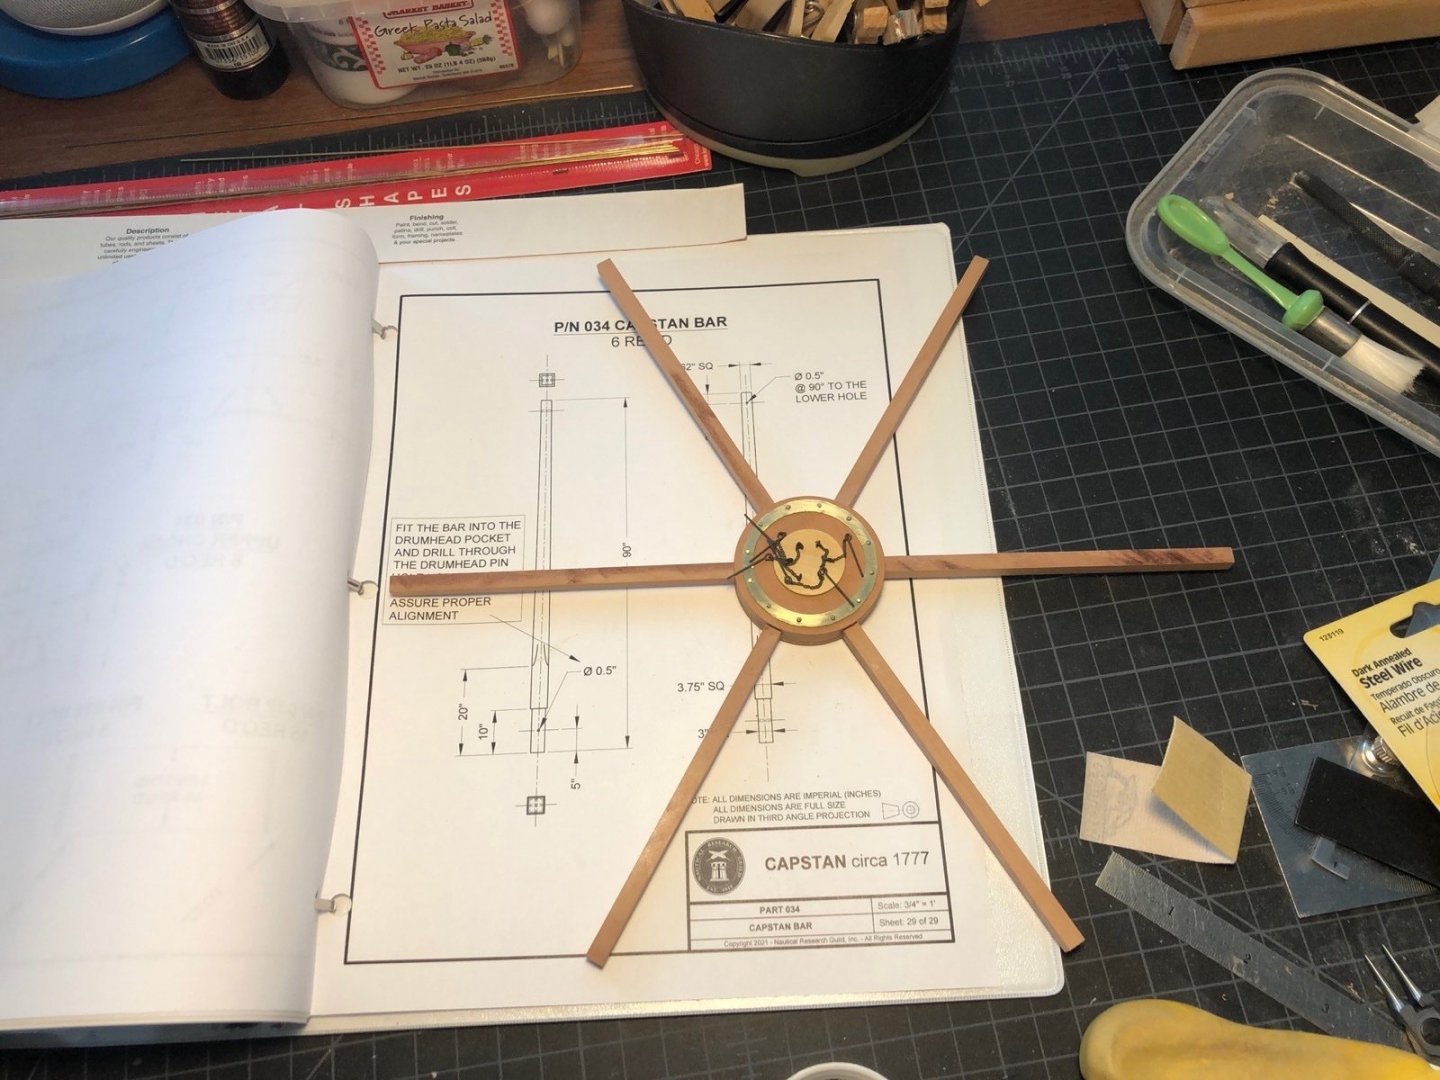
Here is the jig I made to help taper the capstan bars. The two side pieces are glued to the base board at an angle with just enough room between them for the untapered bar to fit. The board at the top just keeps the bar from moving in the slot. I start by tapering two sides with a small plane, then put a brass shim at the stop to hold the bar a little higher when I plane the other two untapped sides. Then I put another shim over the first and sand all four sides with coarse sand paper, then finish with medium and fine paper. And here are all six bars tapered and ready to finish.

-
Thanks guys. All good information. I had seen those washers in the Micro Mark catalog but didn't know how they would perform.
-
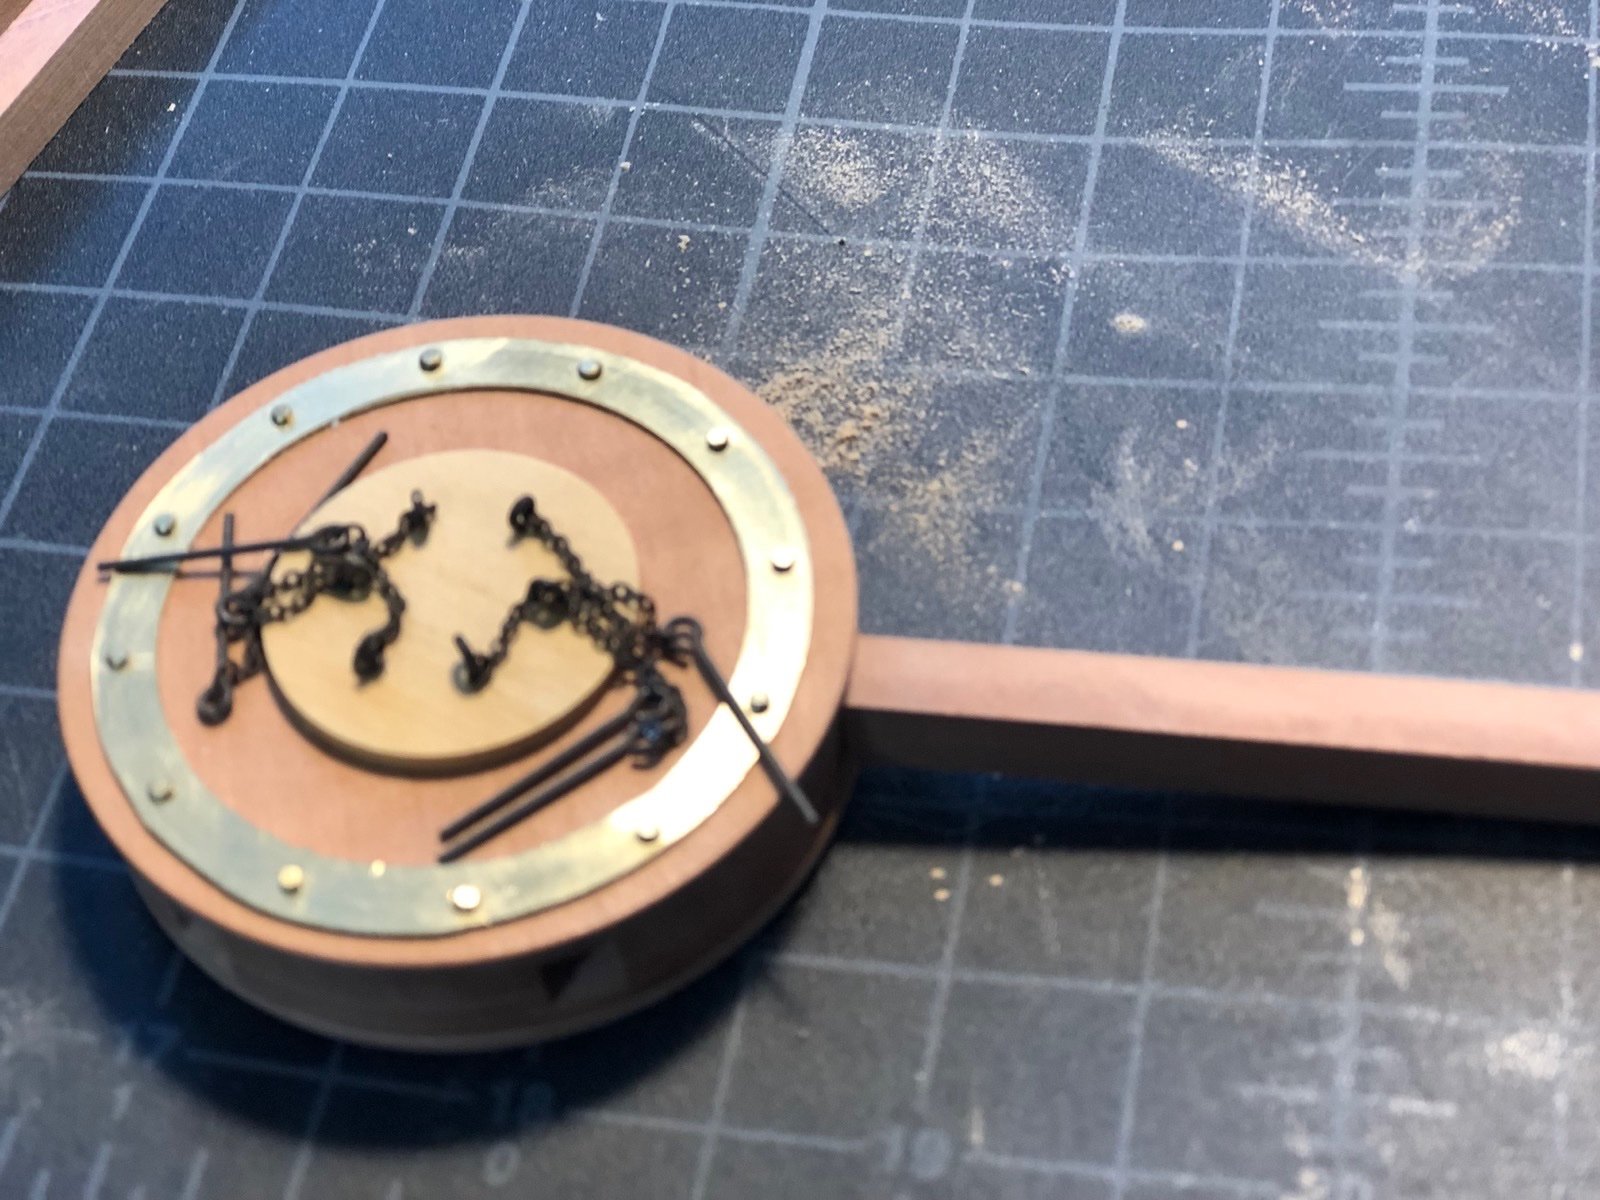
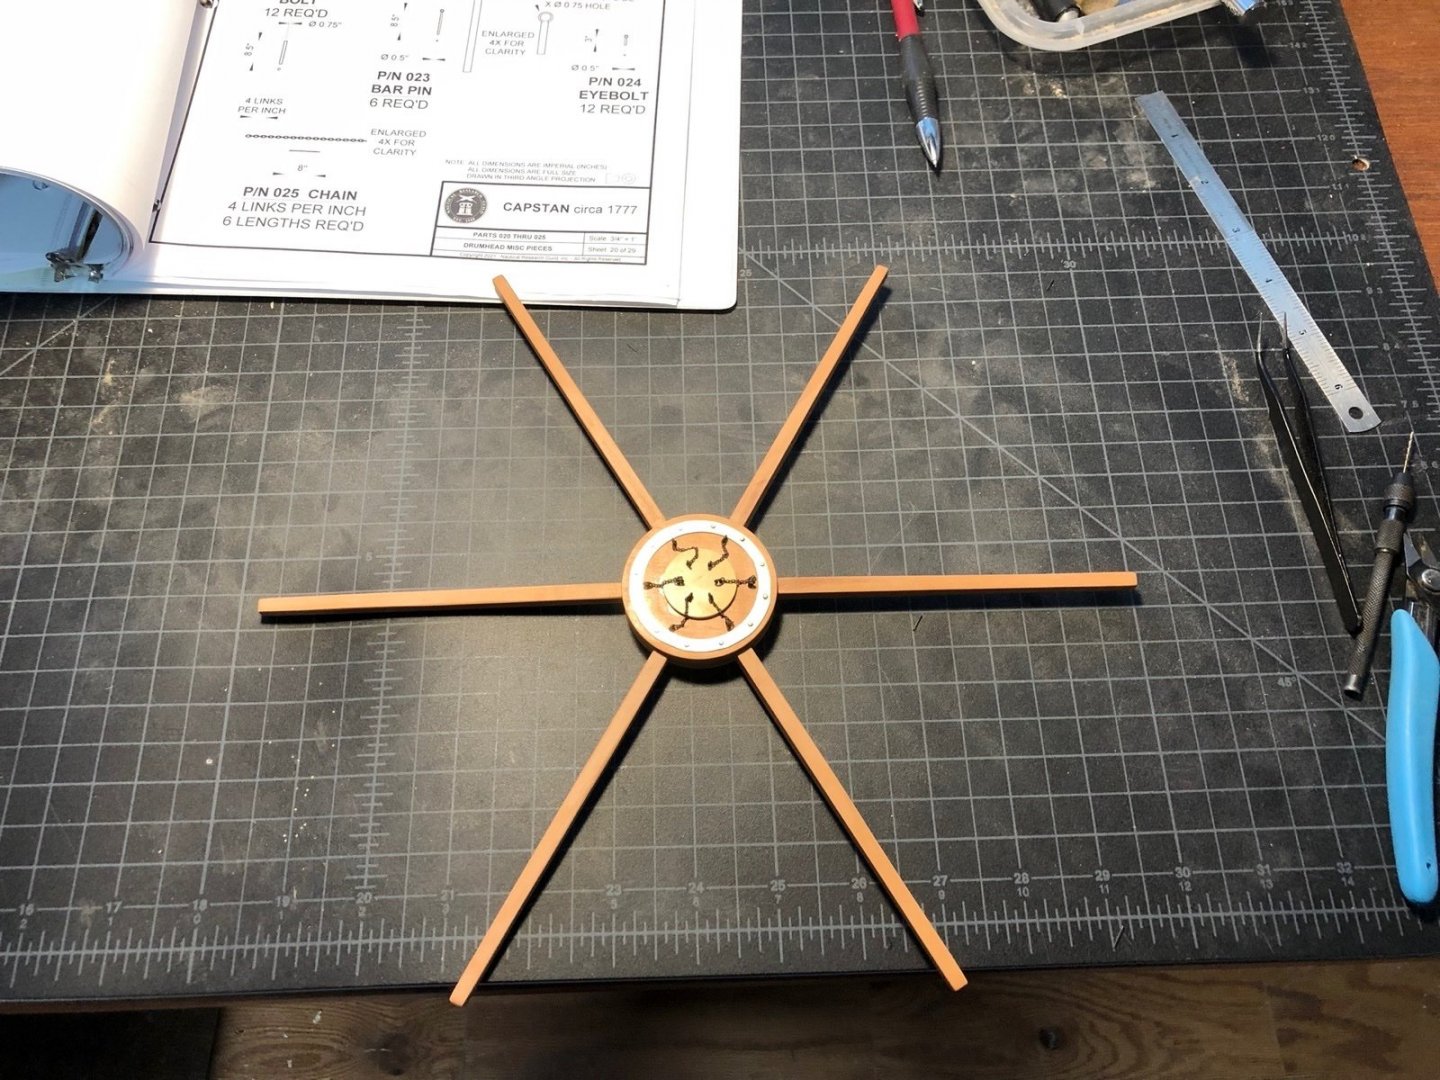
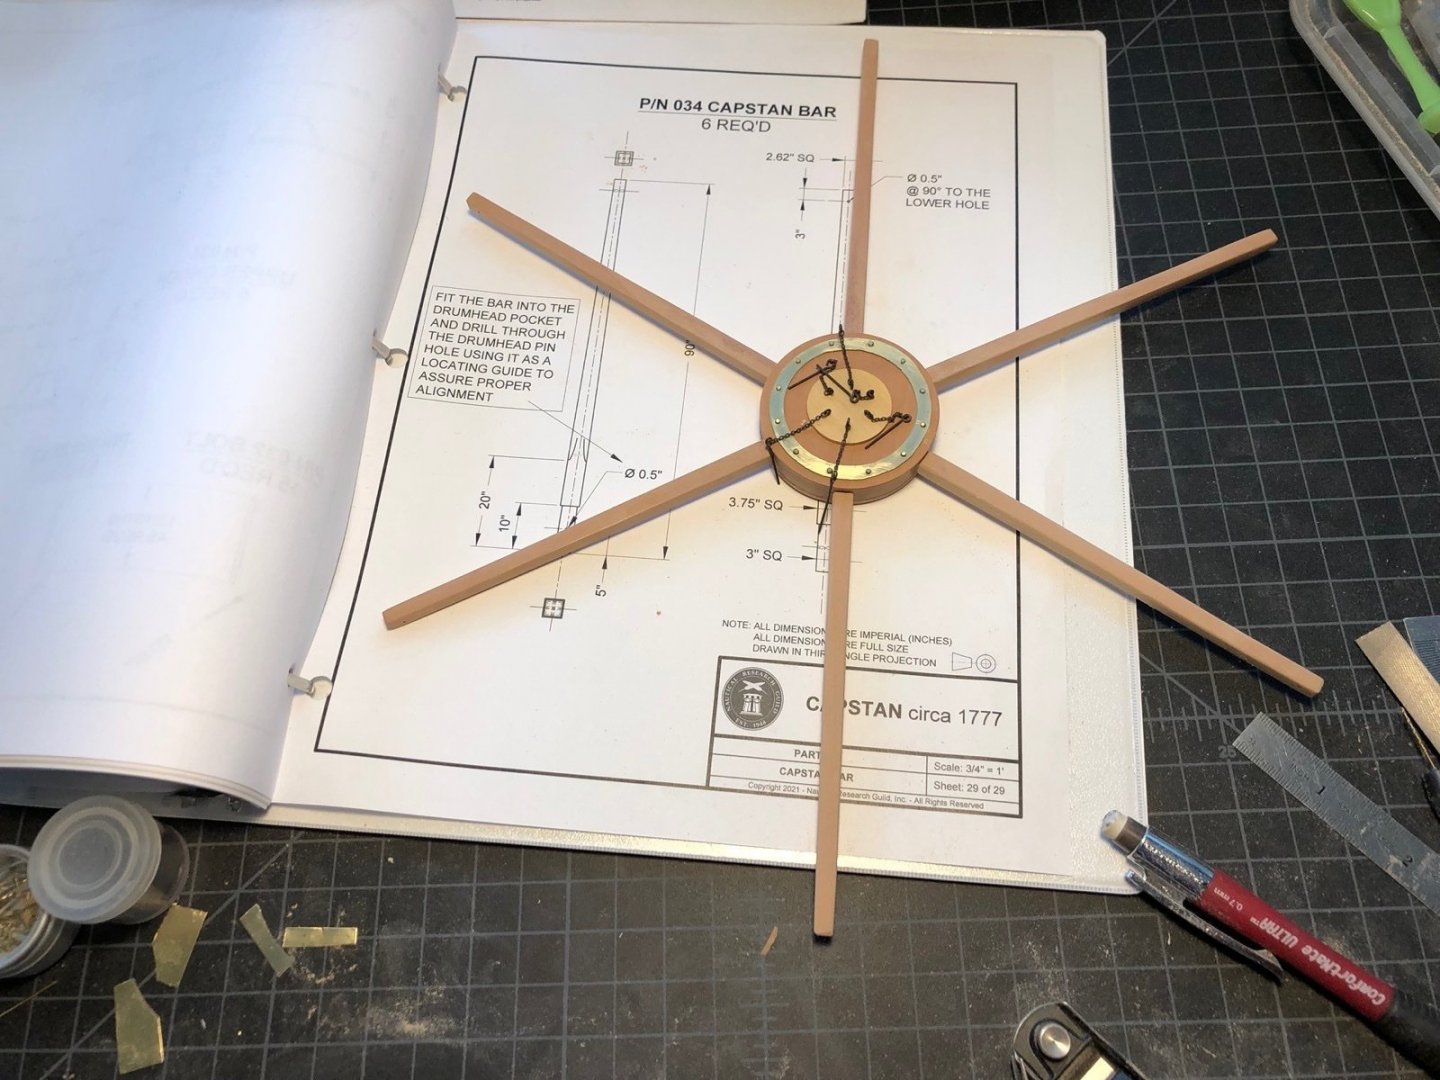
Thank you GL and the likes. We are getting to the home stretch now. So I blackened all the brass parts and gave the wood pieces a coat of wipe on poly. I then added the little chain sections to the eyebolts and glued one eyebolt into the cap in the six positions for the capstan bars. I then started making the capstan bars. The instructions say to use a chisel to cut out the sections to fit in the square holes but I used a different method. I set up the table saw with the blade barely above the surface of the sliding table and a depth stop at the length of the section to be cut. I then used the blade like a dado blade and made a series of cuts on each of the four sides of the blank. BTW does anyone know of a small dado blade that would work with the Byrnes saw? Has anyone tried using multiple blades at the same time to get wider cuts? I then used a flat file to file down the excess, starting with the very end until the end fit into the hole. I then removed the excess from the rest until the whole length had a nice tight fit in the hole. I did this for all six holes so each bar is specific to a single hole. I now have to taper these bars and I am in the process of making a jig to help with that. More to come on that later.


-
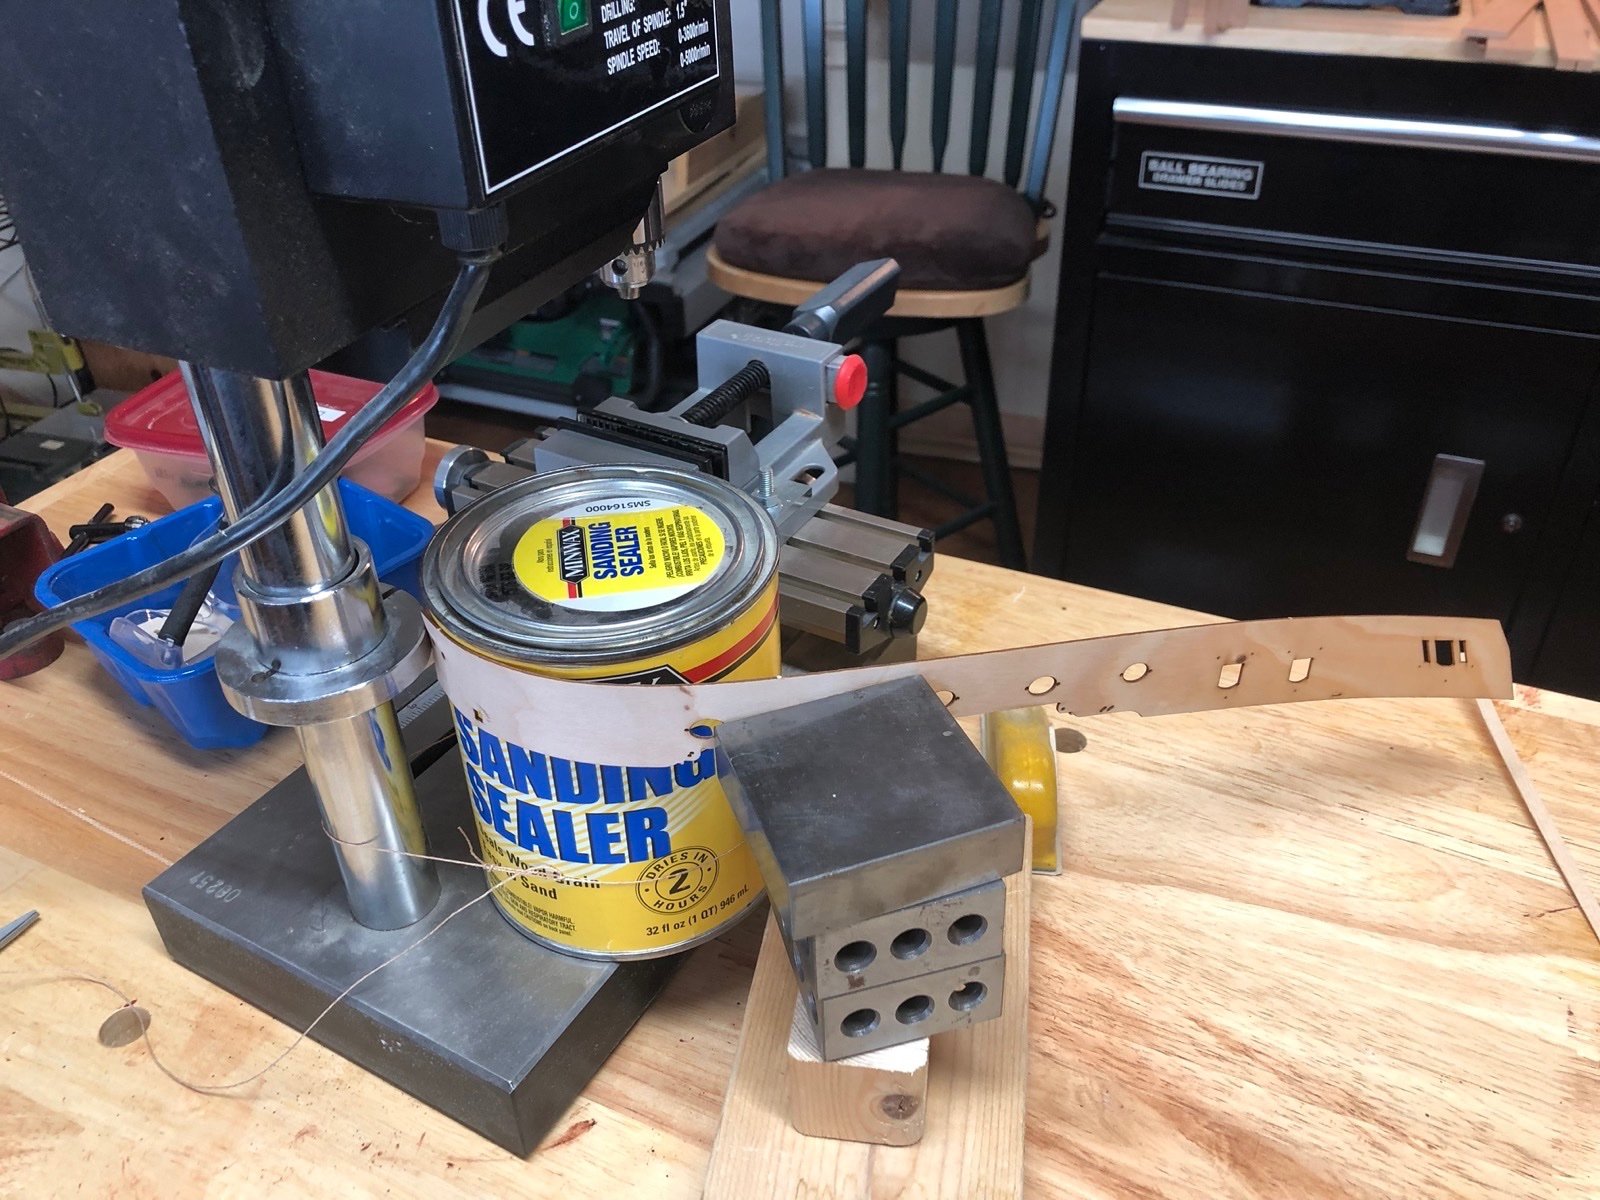
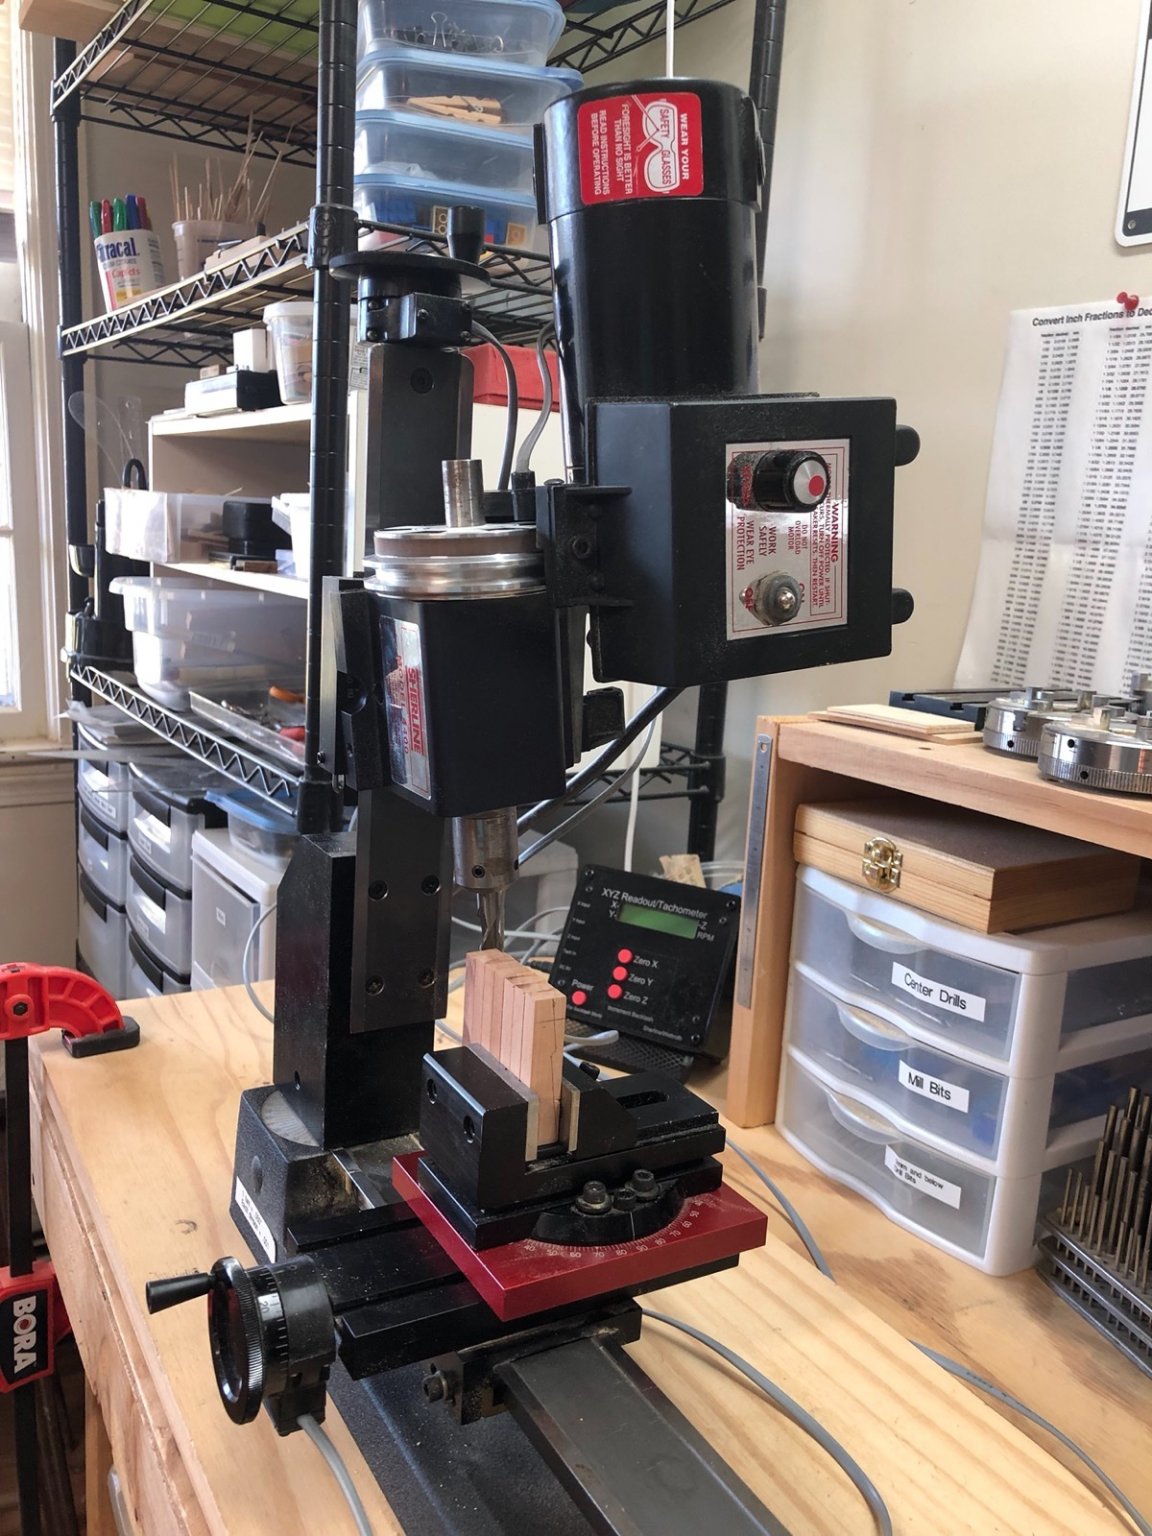
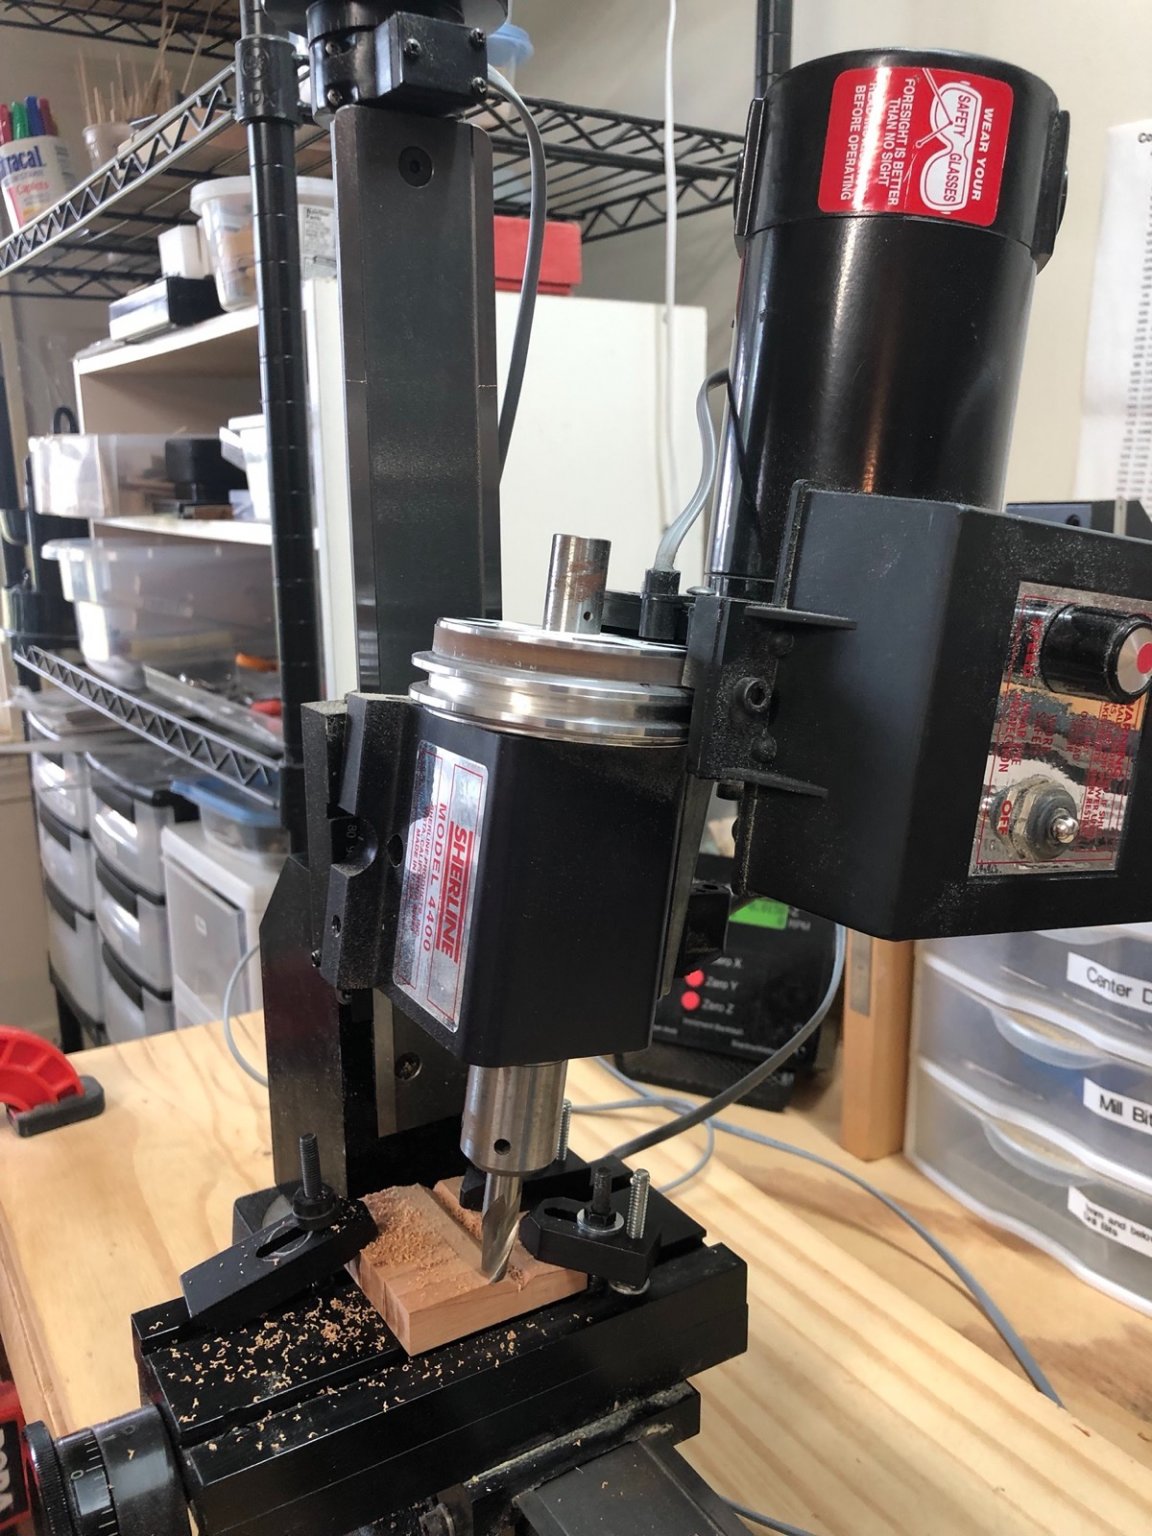
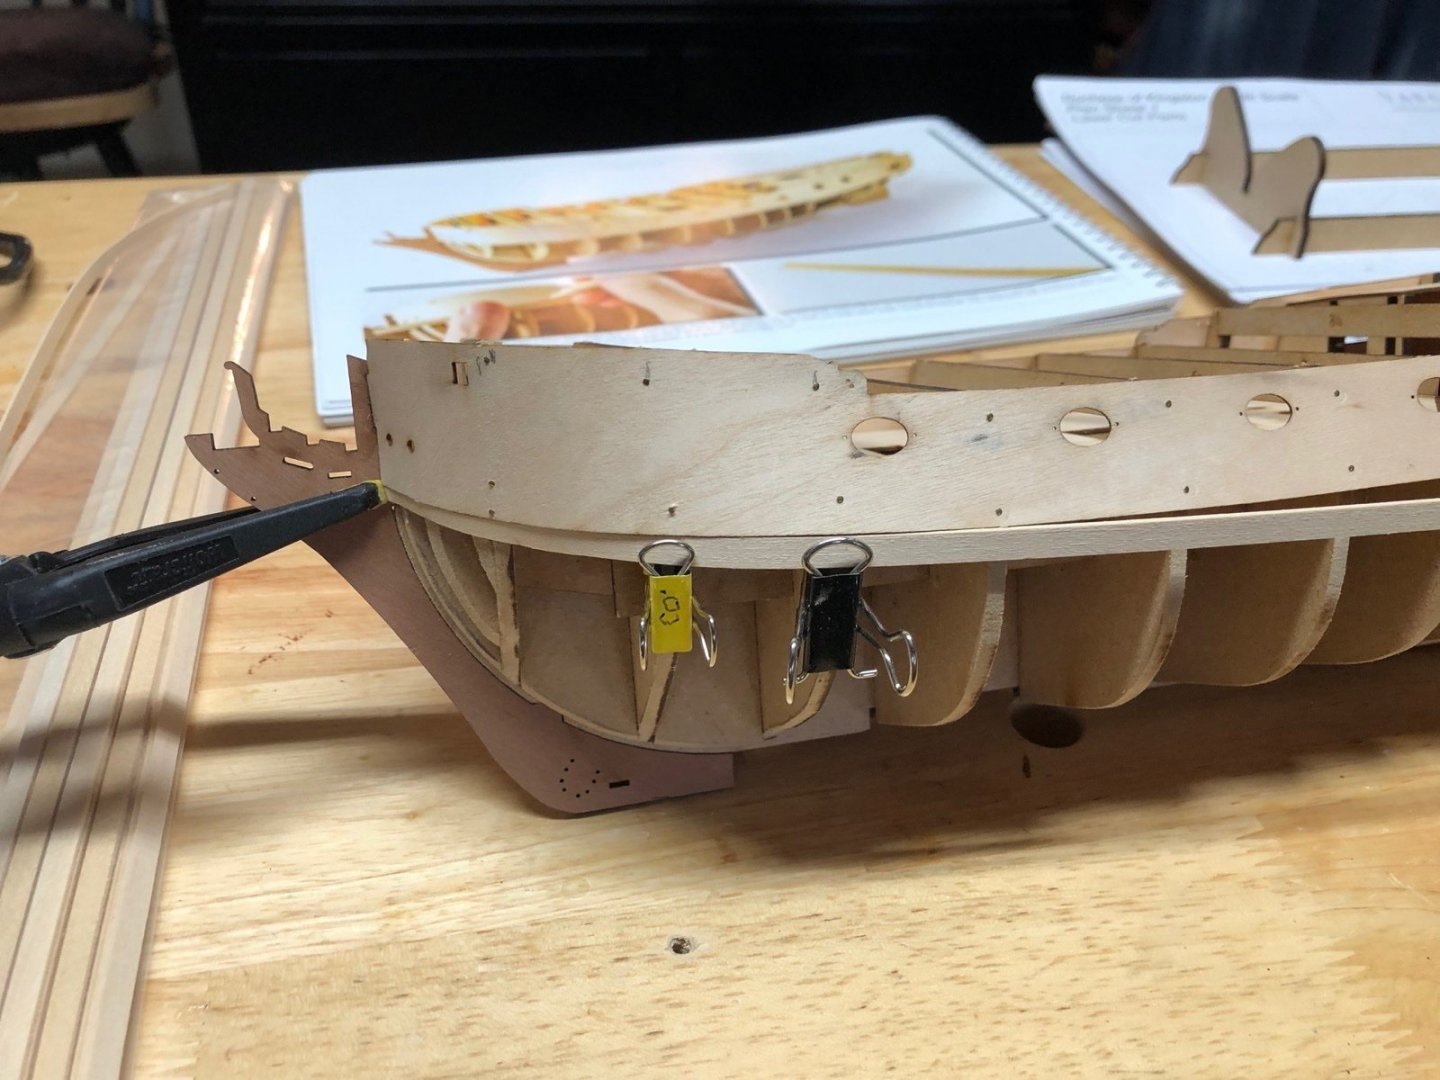
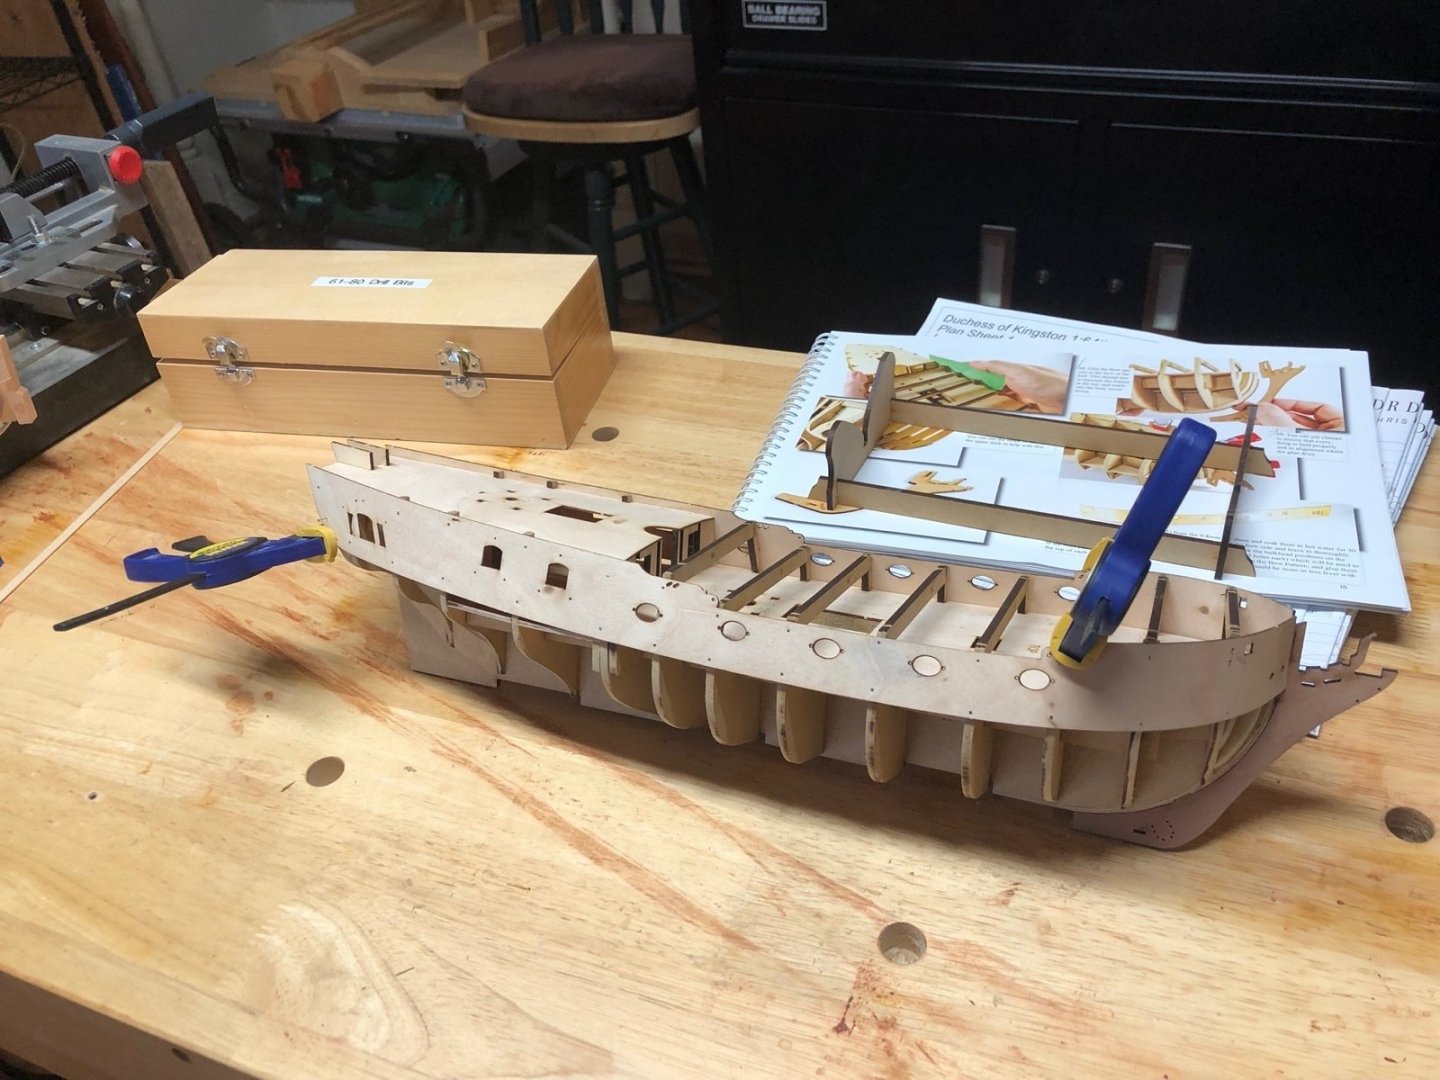
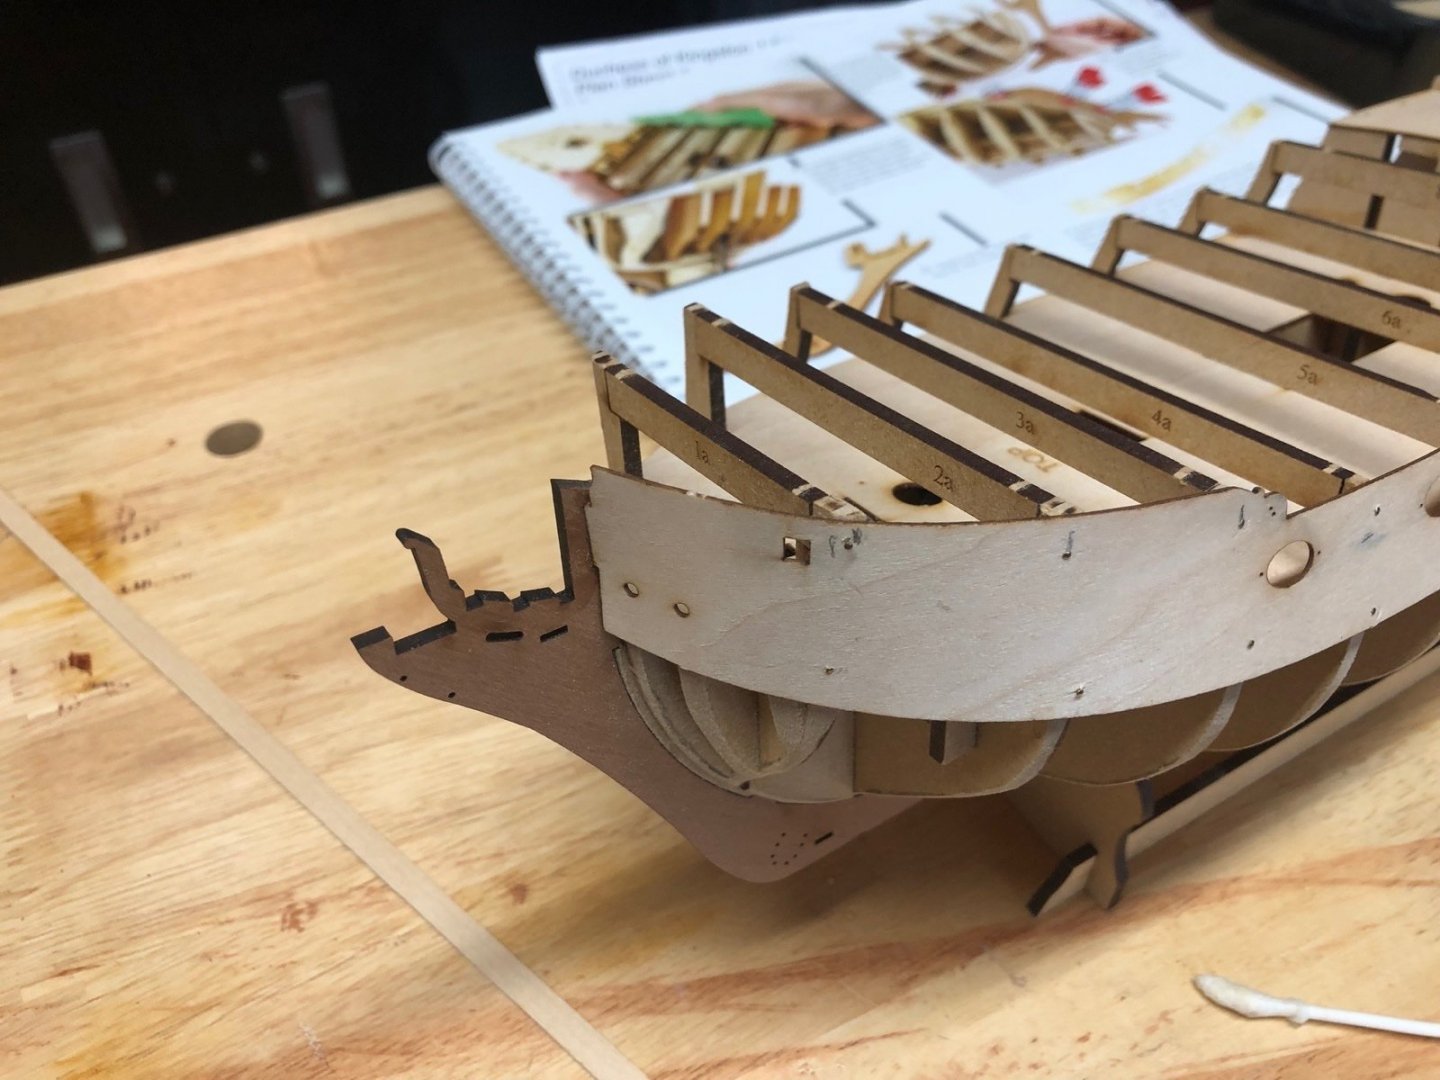
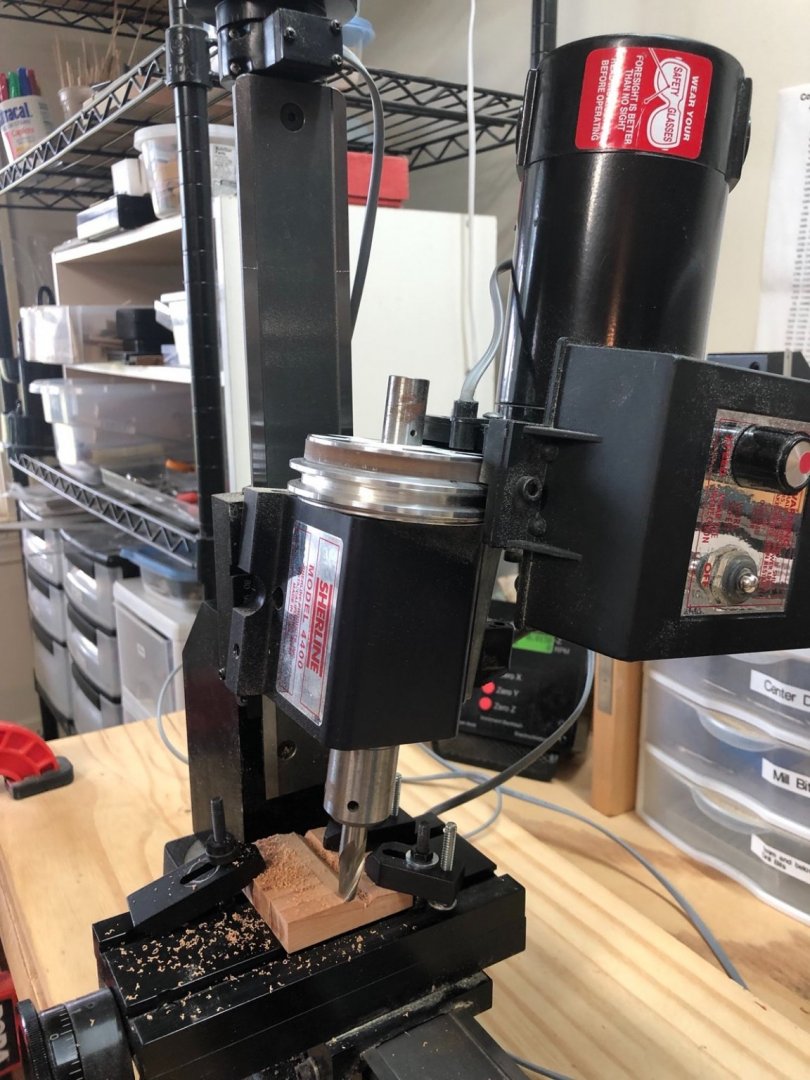
Those bulwark pieces turned out not to be too scary. I started with the port sidebar soaking the piece for a little over 30 minutes in hot water. I then wrapped the bow section around a Sanding Sealer can that seemed to be about the right diameter. I have had no success in the past trying to clamp something like this around the can so I can up with a jig using my drill press and some weights to hold the piece in place while it dried. I also used a hair dryer to dry the piece some but left it to dry overnight. This picture is actually the starboard piece in the jig, held upside down. When it was dry I started gluing and pinning it to the frames. I used the pins supplied in the kit which worked great. I used nail insertion pliers after drilling a small hole through the bulwark with a Dremel. I did this frame by frame instead of drilling all the holes before attaching. I had to redo the front two frames because my initial attempt didn't have the bulwark piece all the way into the slot in the bow piece. Once I got to the stern I used a clamp to pull the lower part of the bulwark piece tight to the transom piece. I did the same thing with the starboard side piece and attached it using glue and pins. You can see another clamp being used to pull both the starboard and port bulwark pieces tight to the third frame. Next is the first planking.

- 118 replies
-
- 7
-
-
- Duchess Of Kingston
- Finished
- (and 1 more)
-
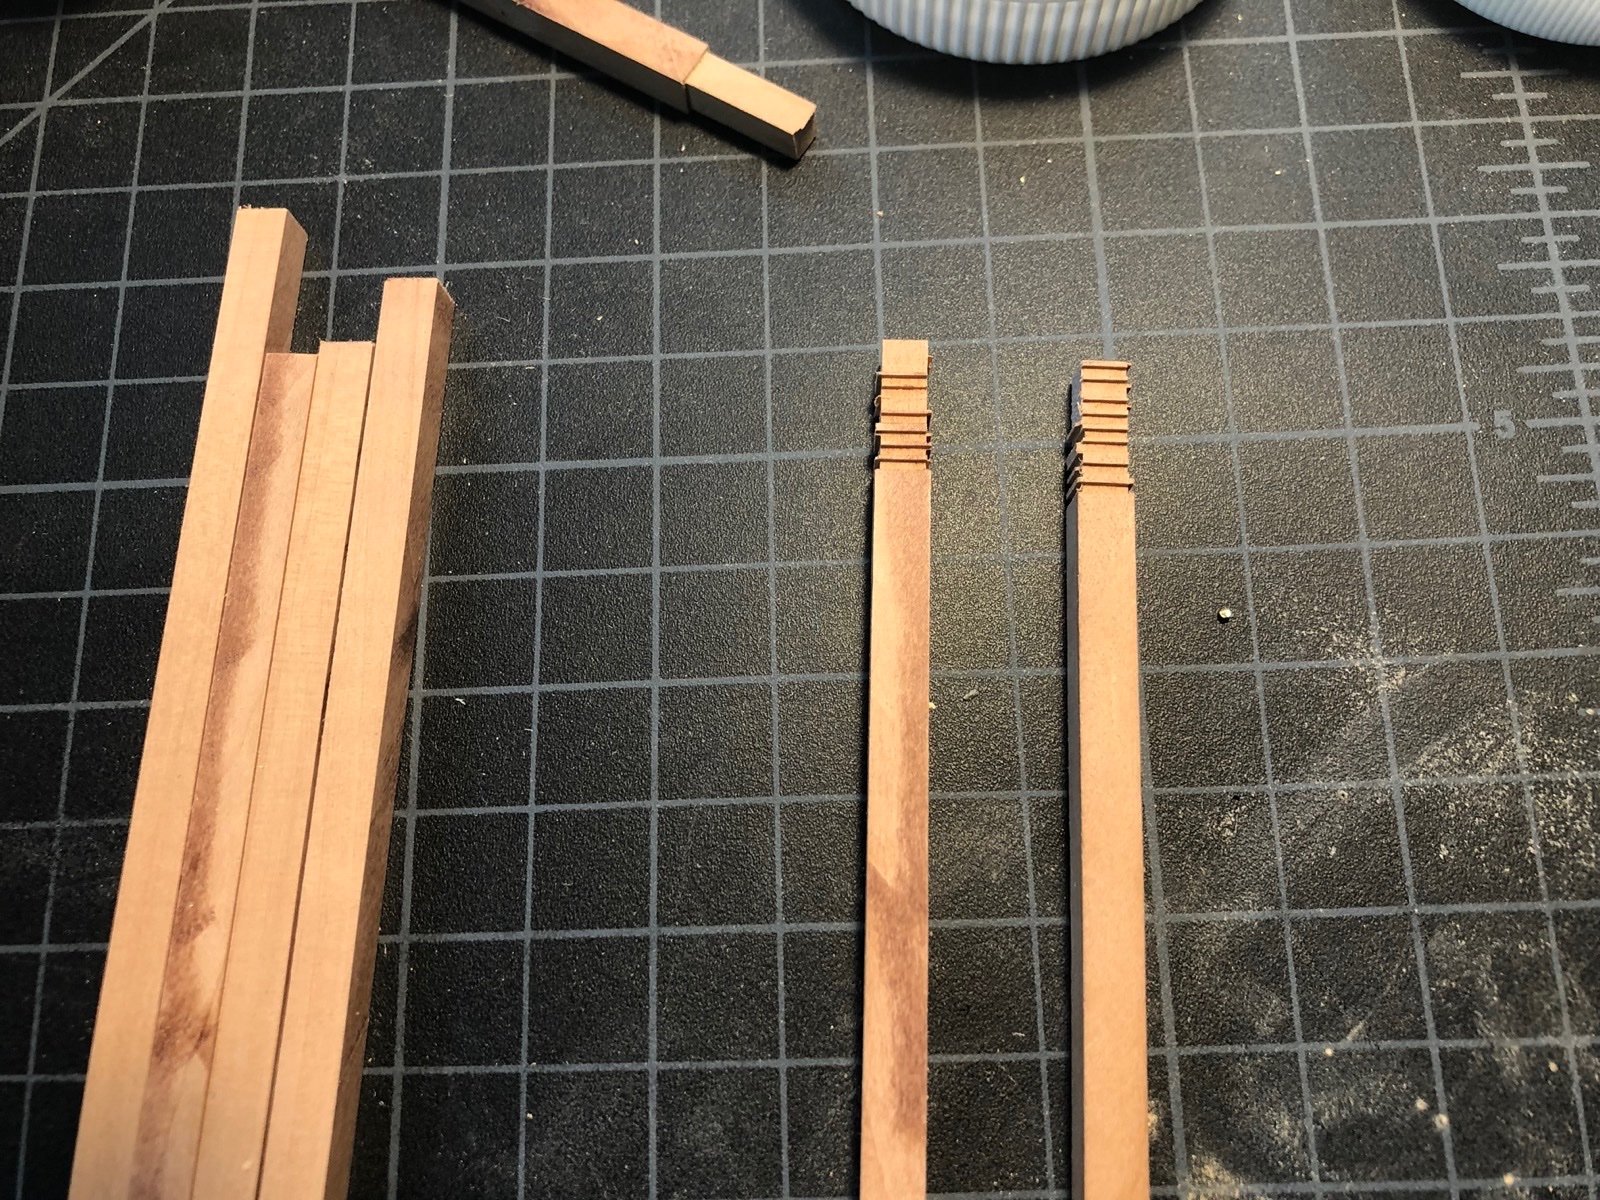
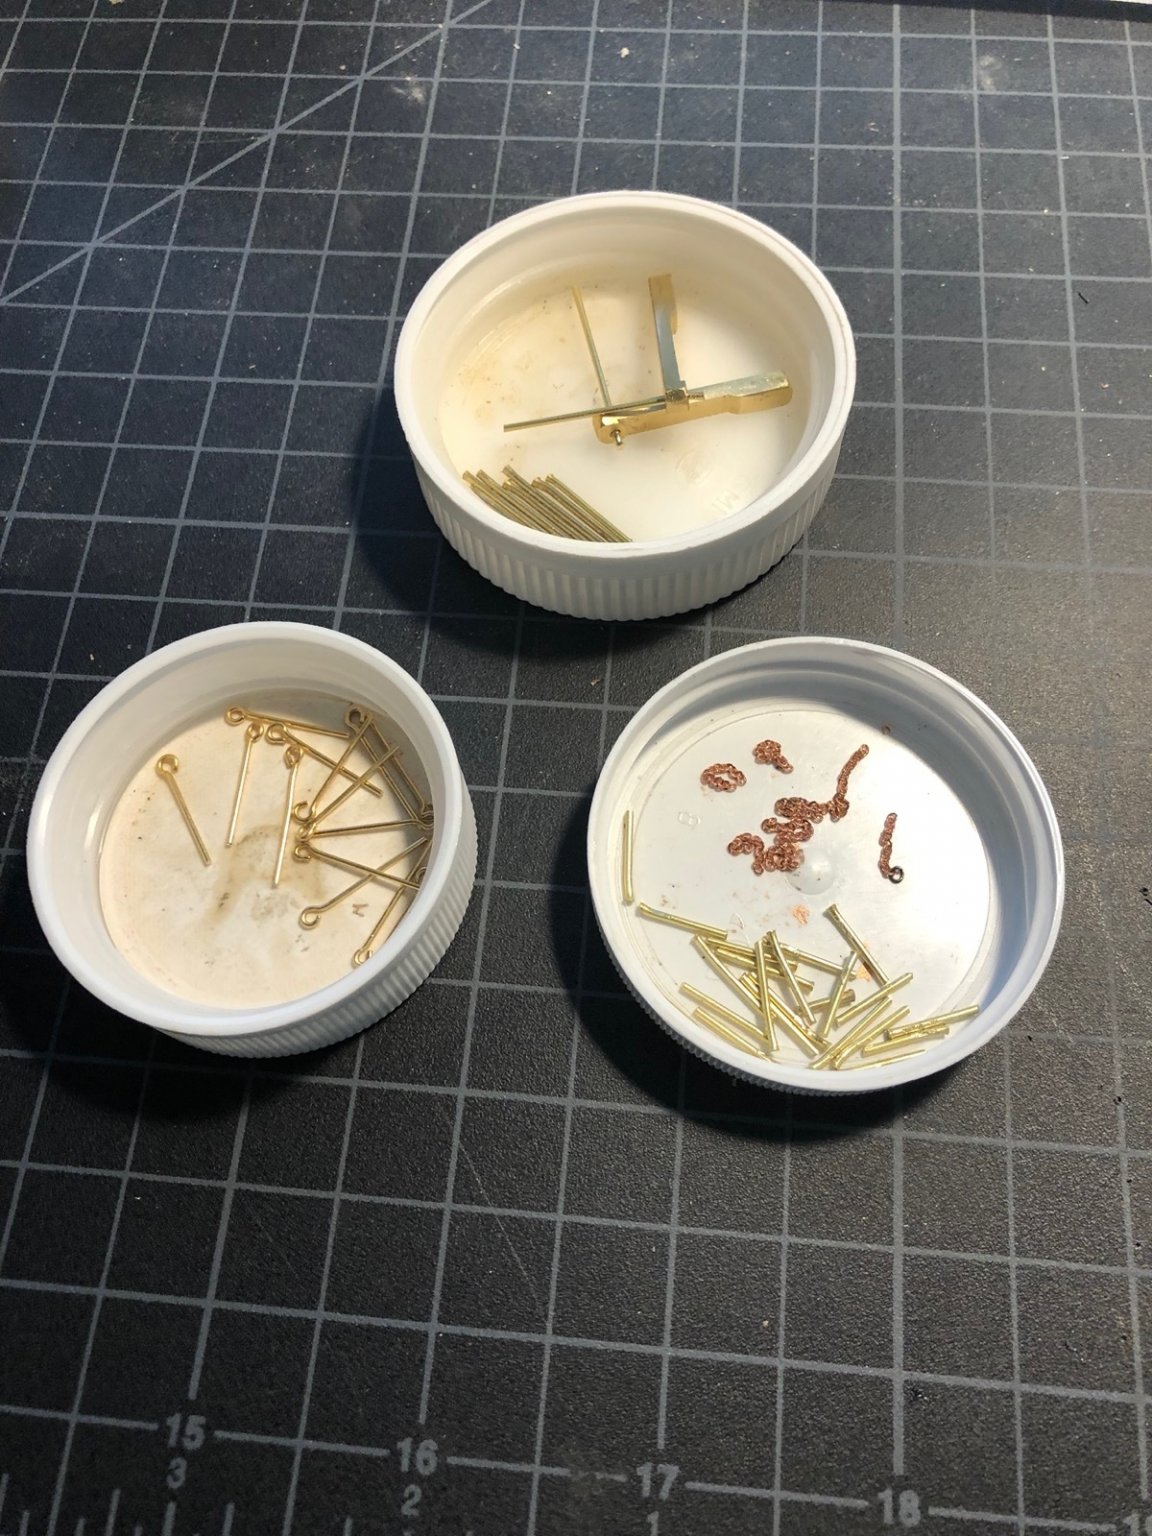
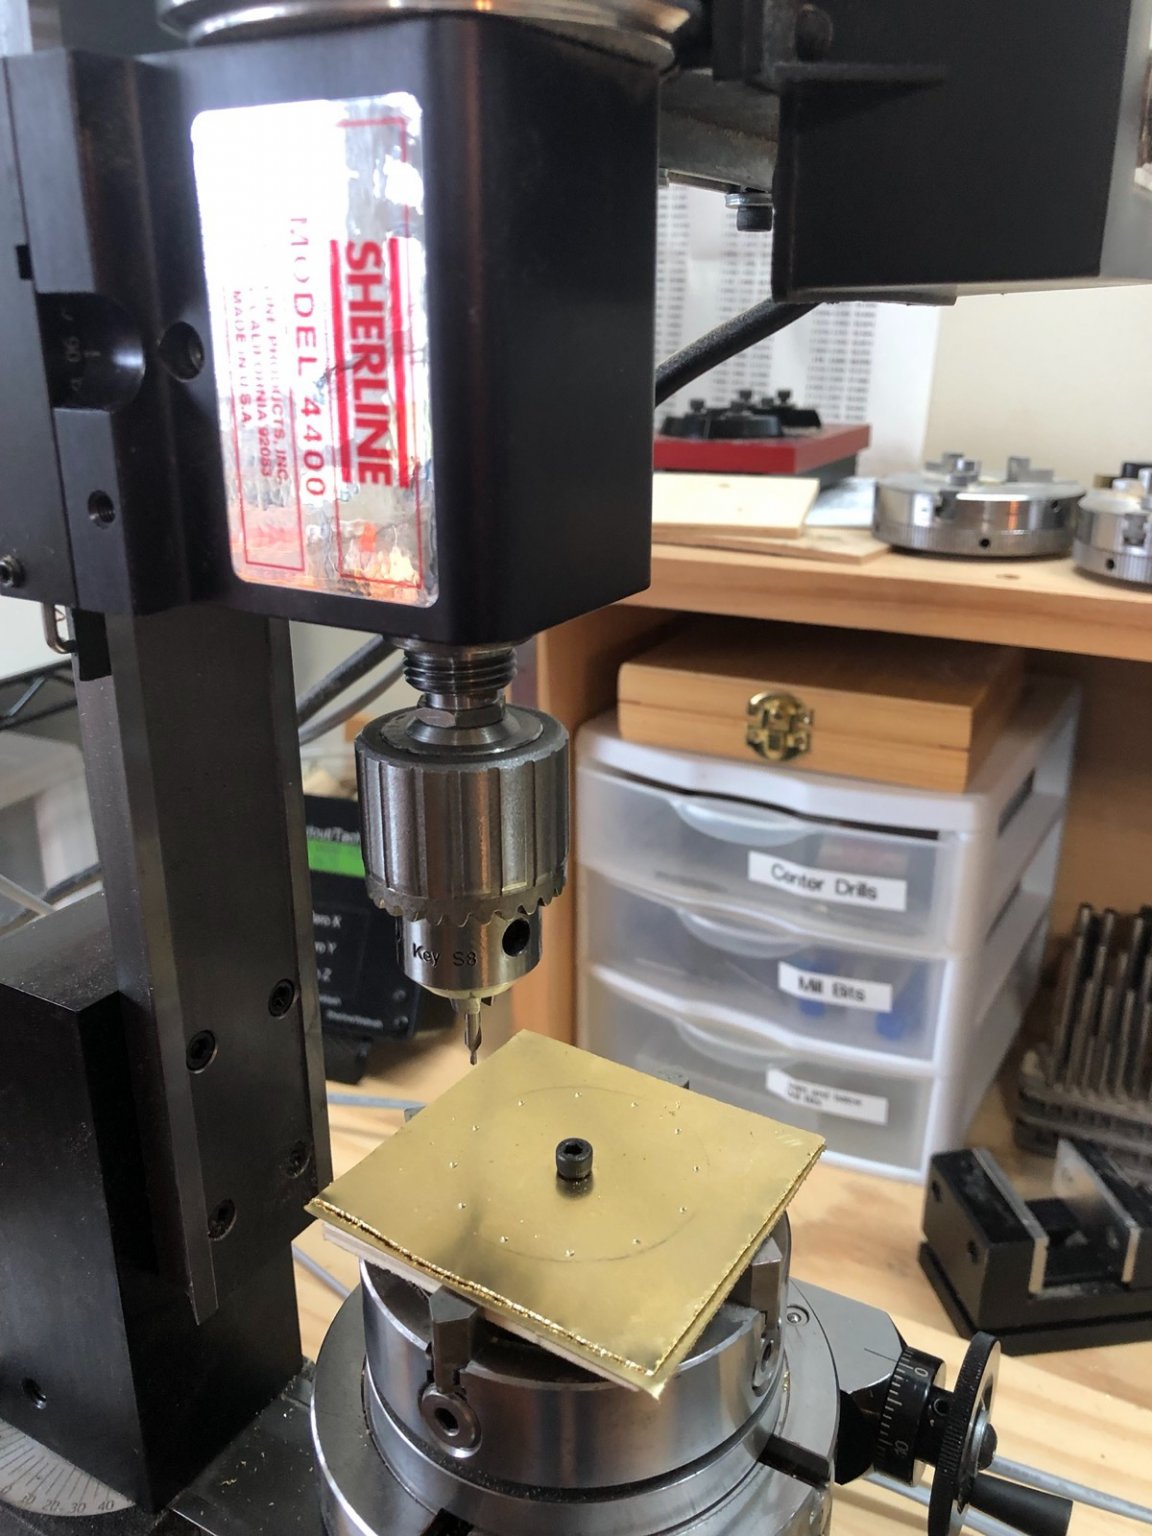
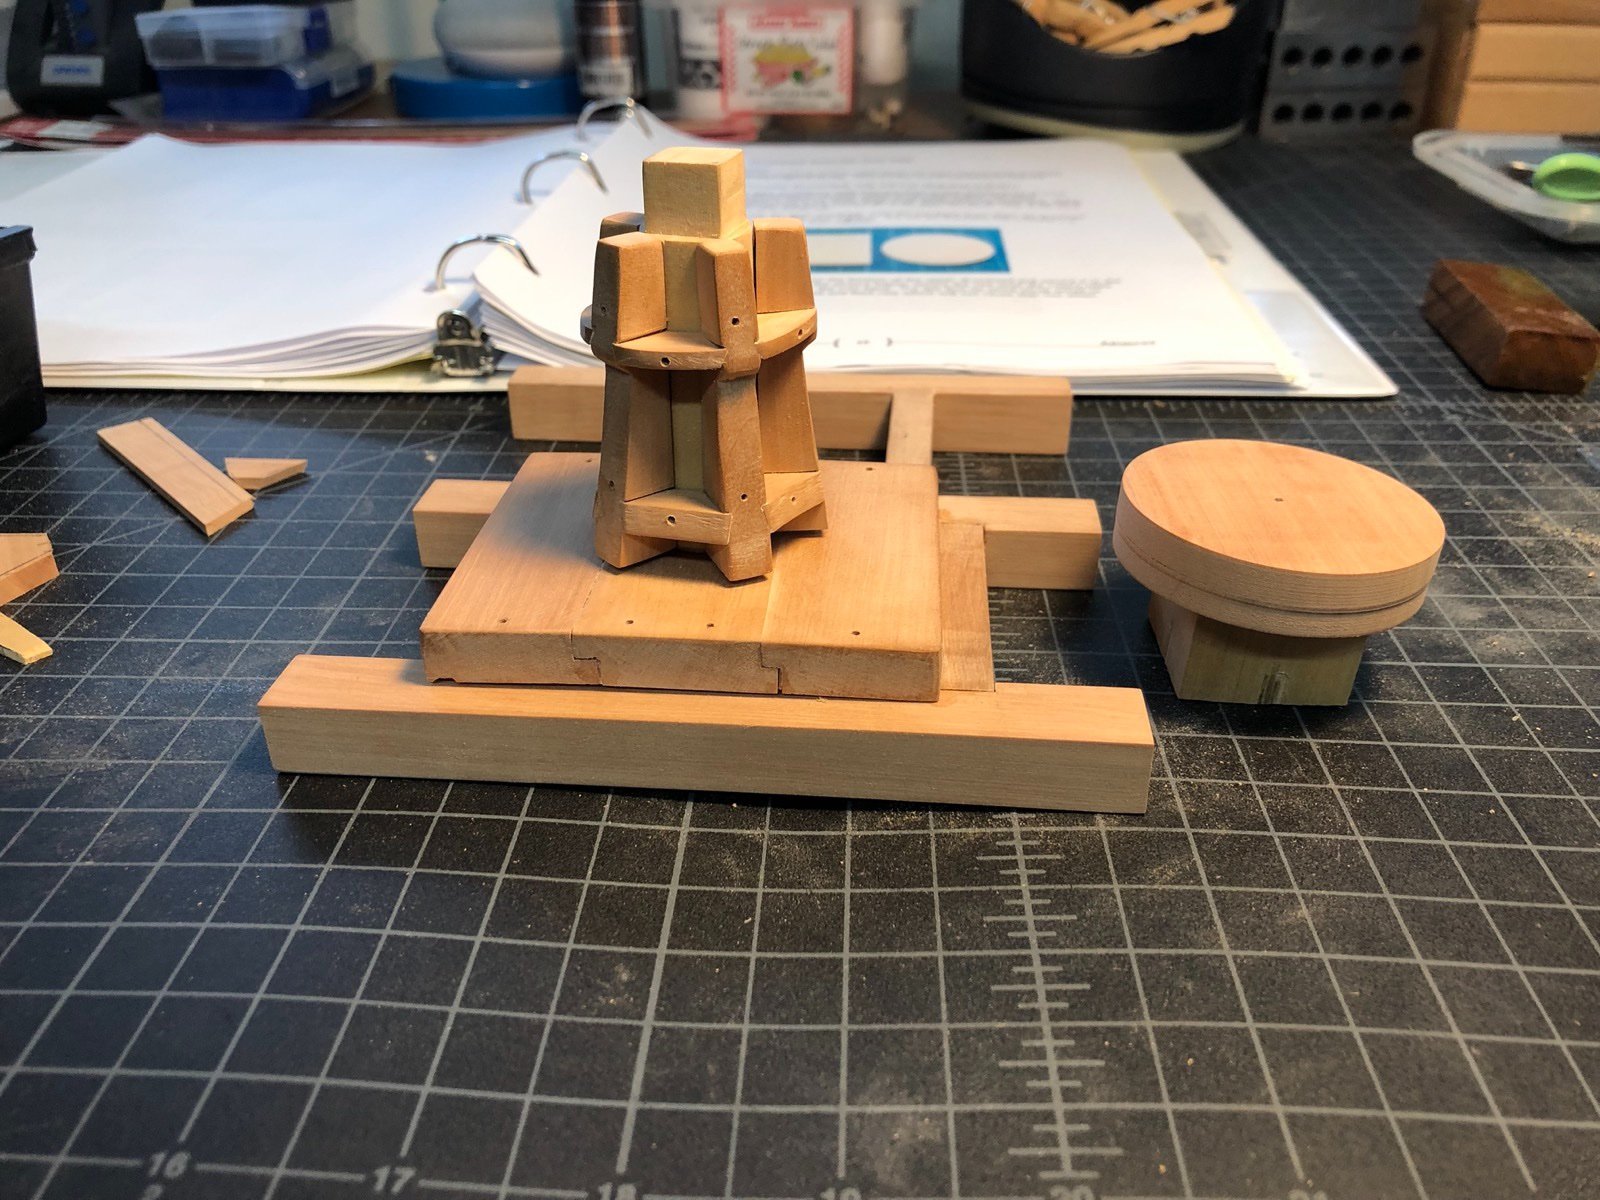
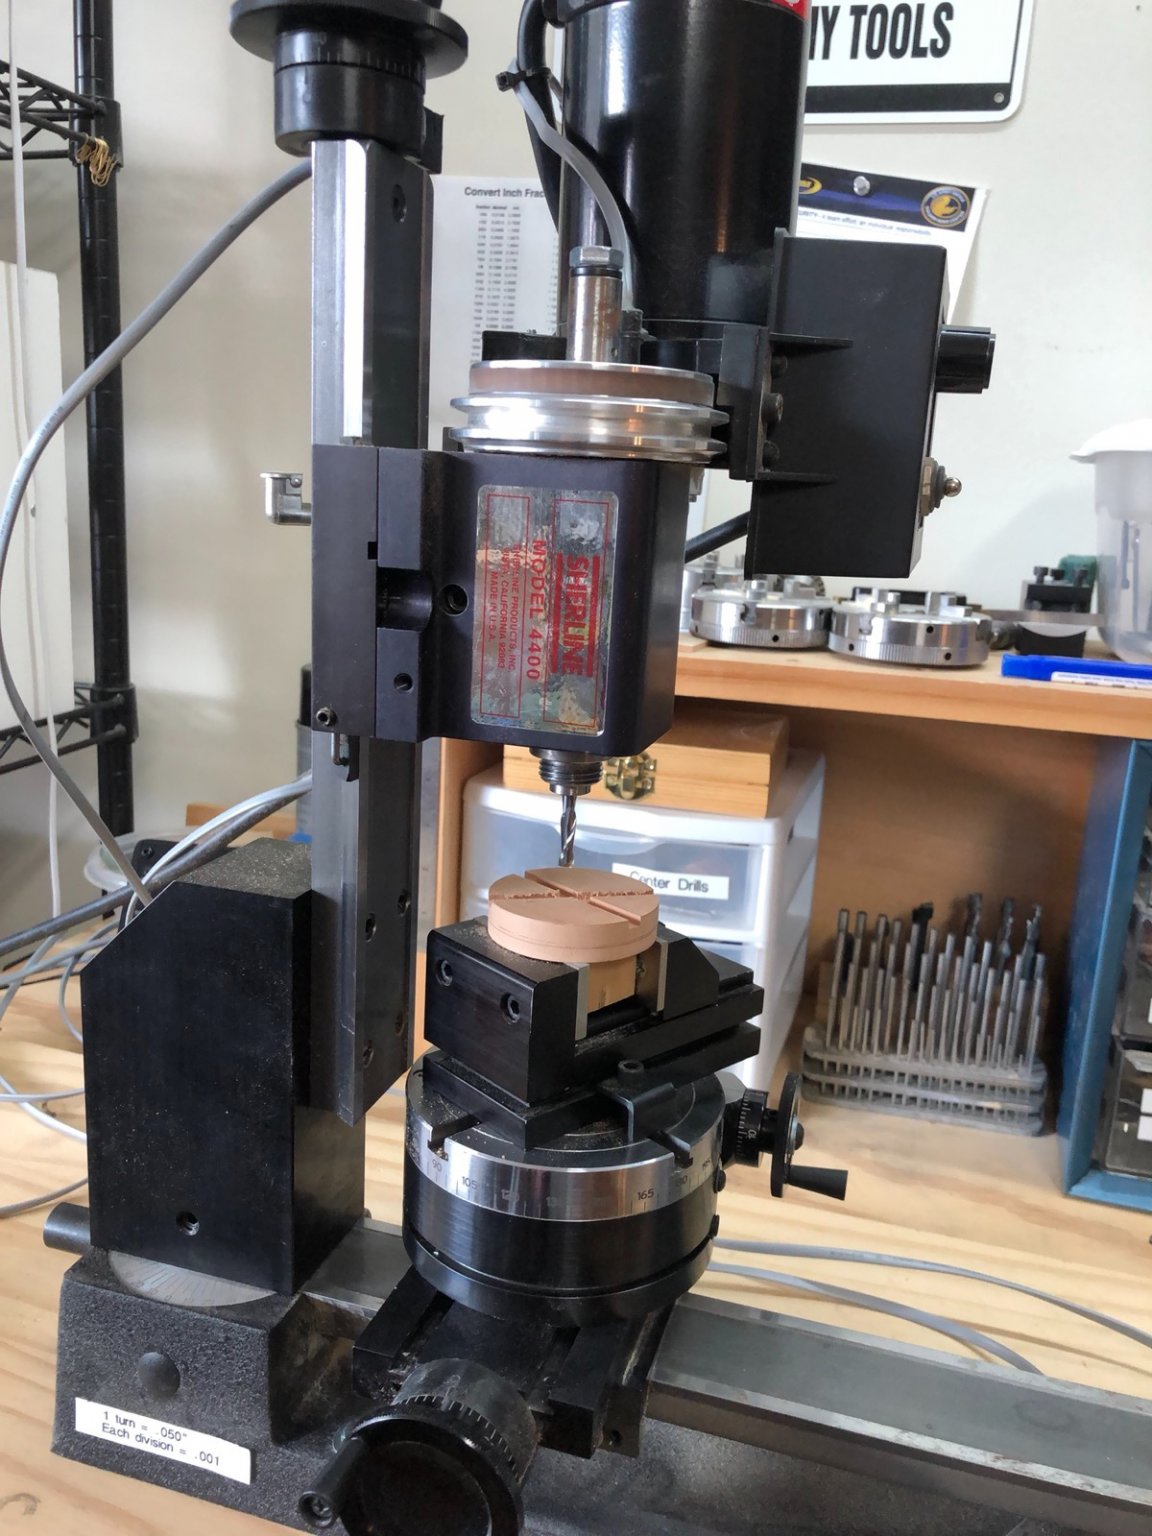
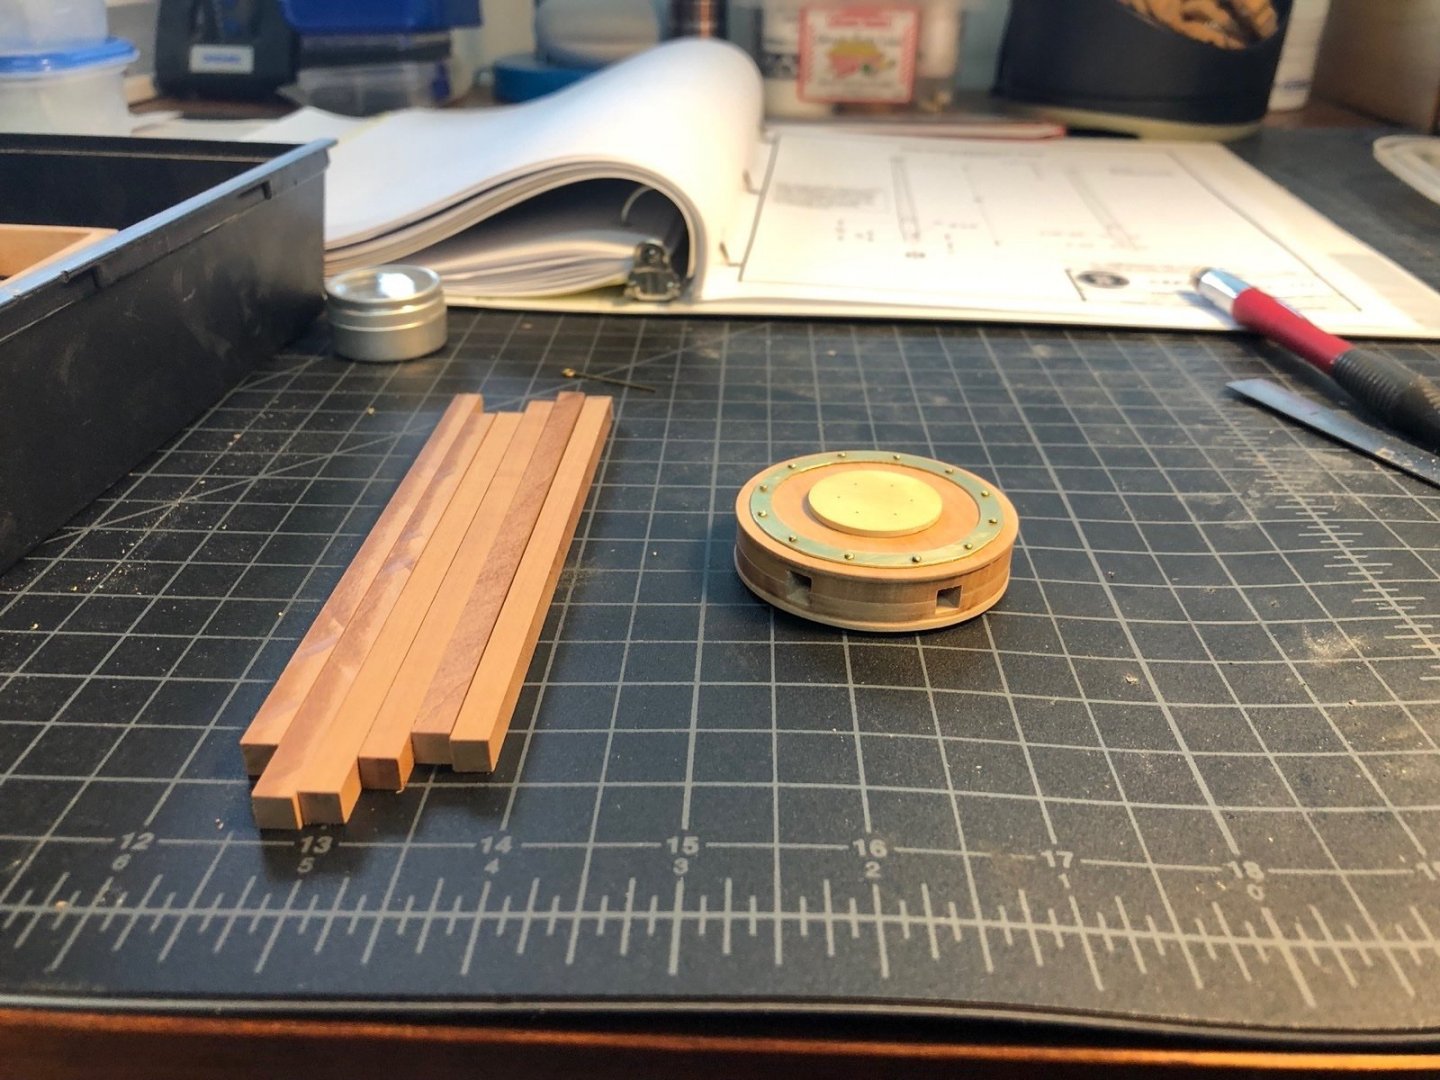
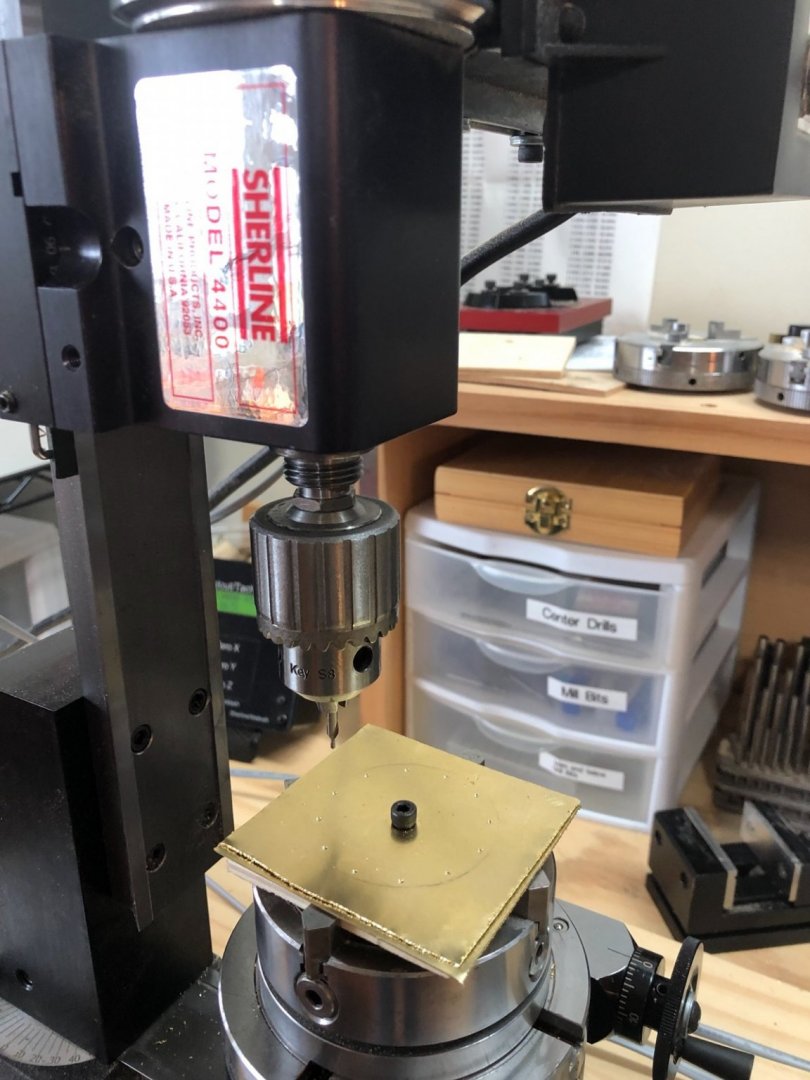
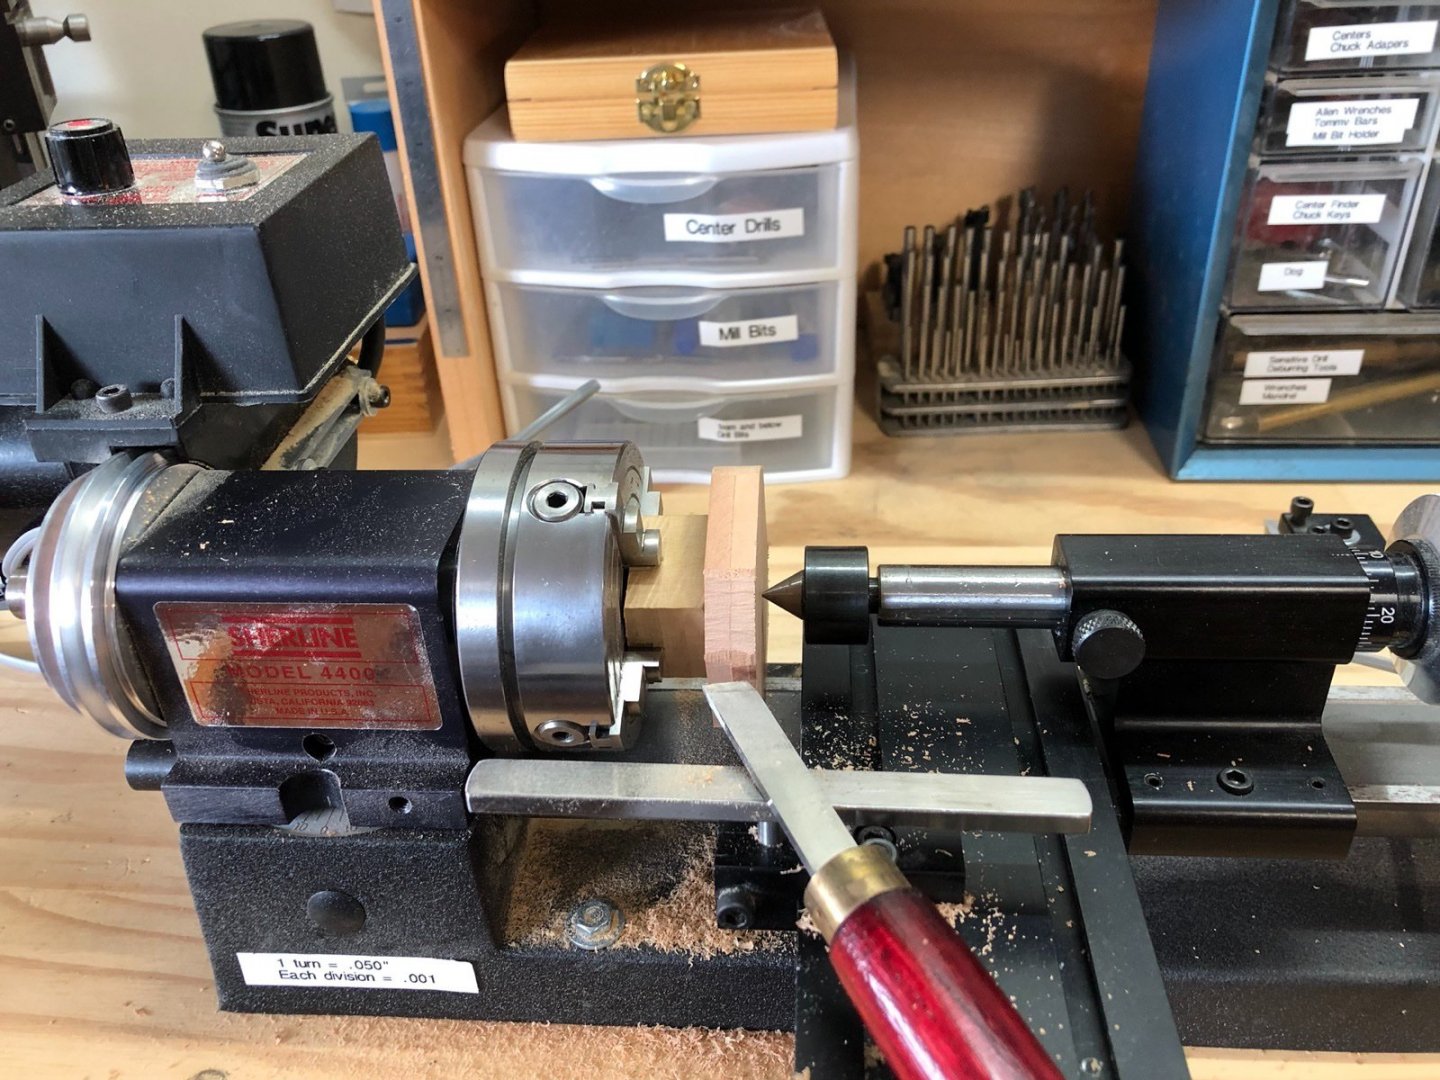
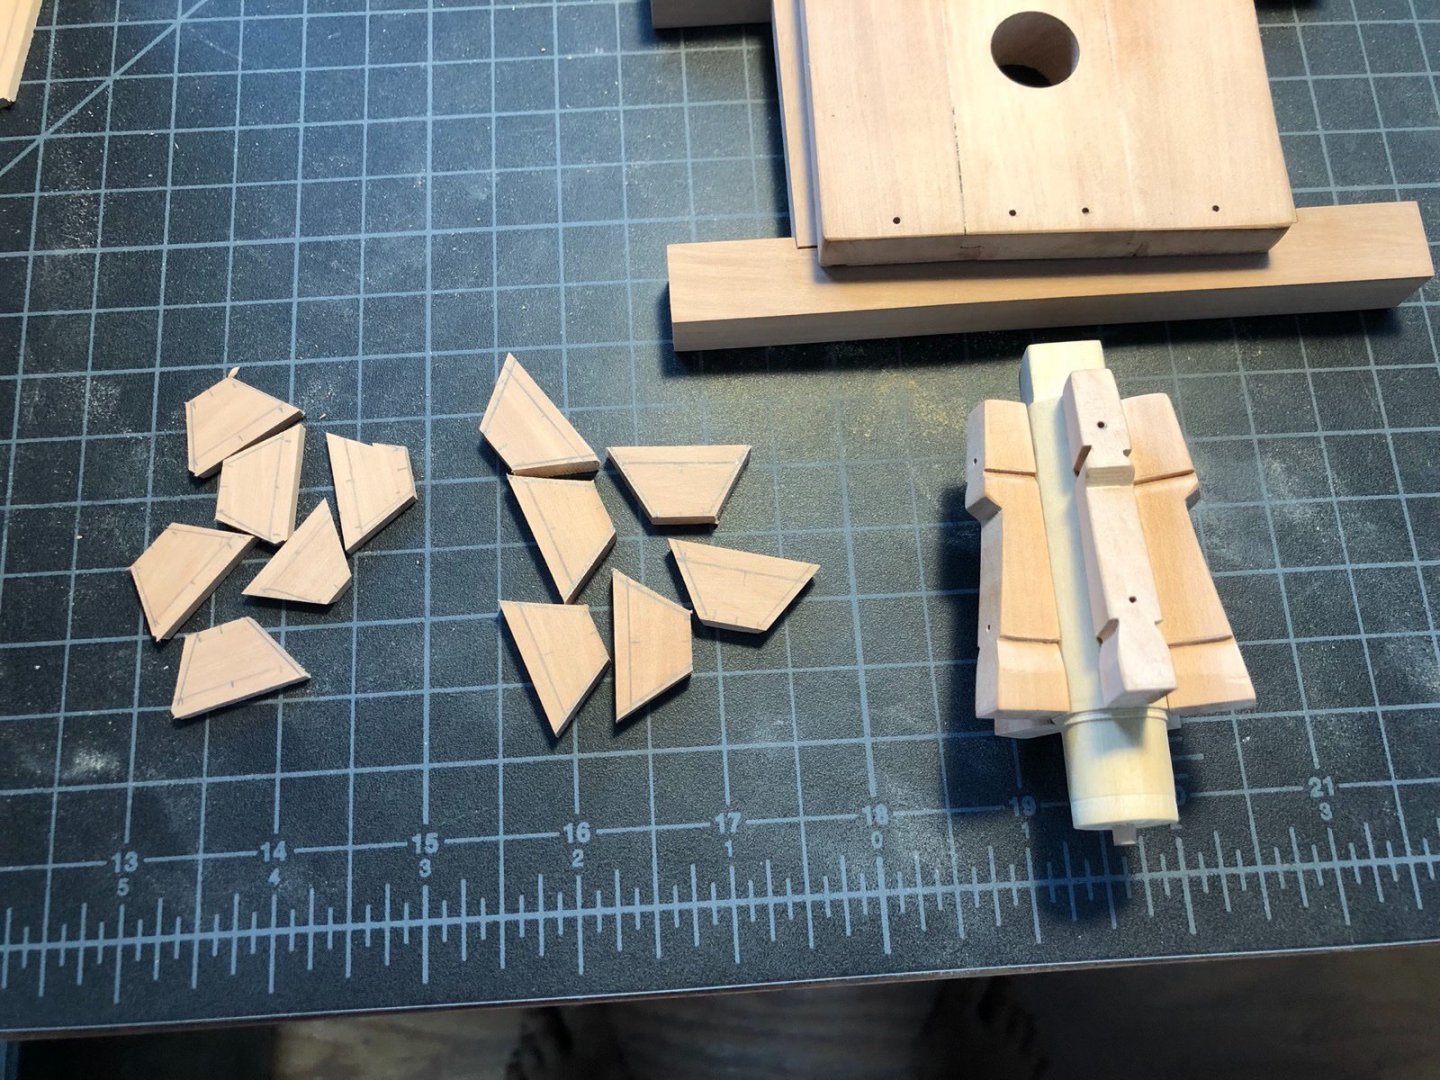
I drilled through the holes in the brass rings into the drum head halves and glued in brass nails for the bolts. I filed the tops of the nails flat. As did Toni, I am going to leave the rings and bolt heads bright instead of blackening them. As for blackening, I cut all the bolts I will need for the beams, whelps and chocks and flattened one end of each by placing the rod in a metal vise and hammering it with a small ball pean hammer. I also made the eyebolts for the top of the drum head and cut lengths of chain for the capstan bar retaining pins. I cut the smallest chain I have which is 27 links per inch, which is a little over scale but really the smallest I can work with. Here are all the parts to be blackened, including the brakes that I made earlier. I glued the two drum head halves together last night. I used small pieces of 3/32" square basswood in the slots when I put the halves together to line up the slots but took them out before the glue set up so I wouldn't accidentally glue one into the hole. This morning I turned the cap from a round piece of boxwood I had left over from making the barrel. I first turned it round then faced the outer side on the lathe. I used a parting tool to cut about half way through the blank, then set up the mill with the rotary table and the chuck the blank was in to drill the six holes in the cap. I removed the blank from the mill and finished parting off the cap with a razor saw. I then sanded both sides of the cap to clean up the faces and thin it down. I did not get it down to half an inch actual size but it is pretty thin. I glued the cap to the top of the drum head. Here it is with the six blanks for the capstan bars. And here it is dry fit on the barrel. Once I blacken those parts and give everything some wipe on ploy I will add the eyebolts and chains to the drum head.


-
I gave the Duchess a little love this morning, although I have been focusing on the capstan project to get that finished. I finished fairing the framing (I think) and glued on the bow piece. That piece fit like a glove and I didn't use any clamps a they tended to pull the bow piece away from the framing. Next up are the scary bulwark plywood pieces.
- 118 replies
-
- 6
-
-
- Duchess Of Kingston
- Finished
- (and 1 more)
-
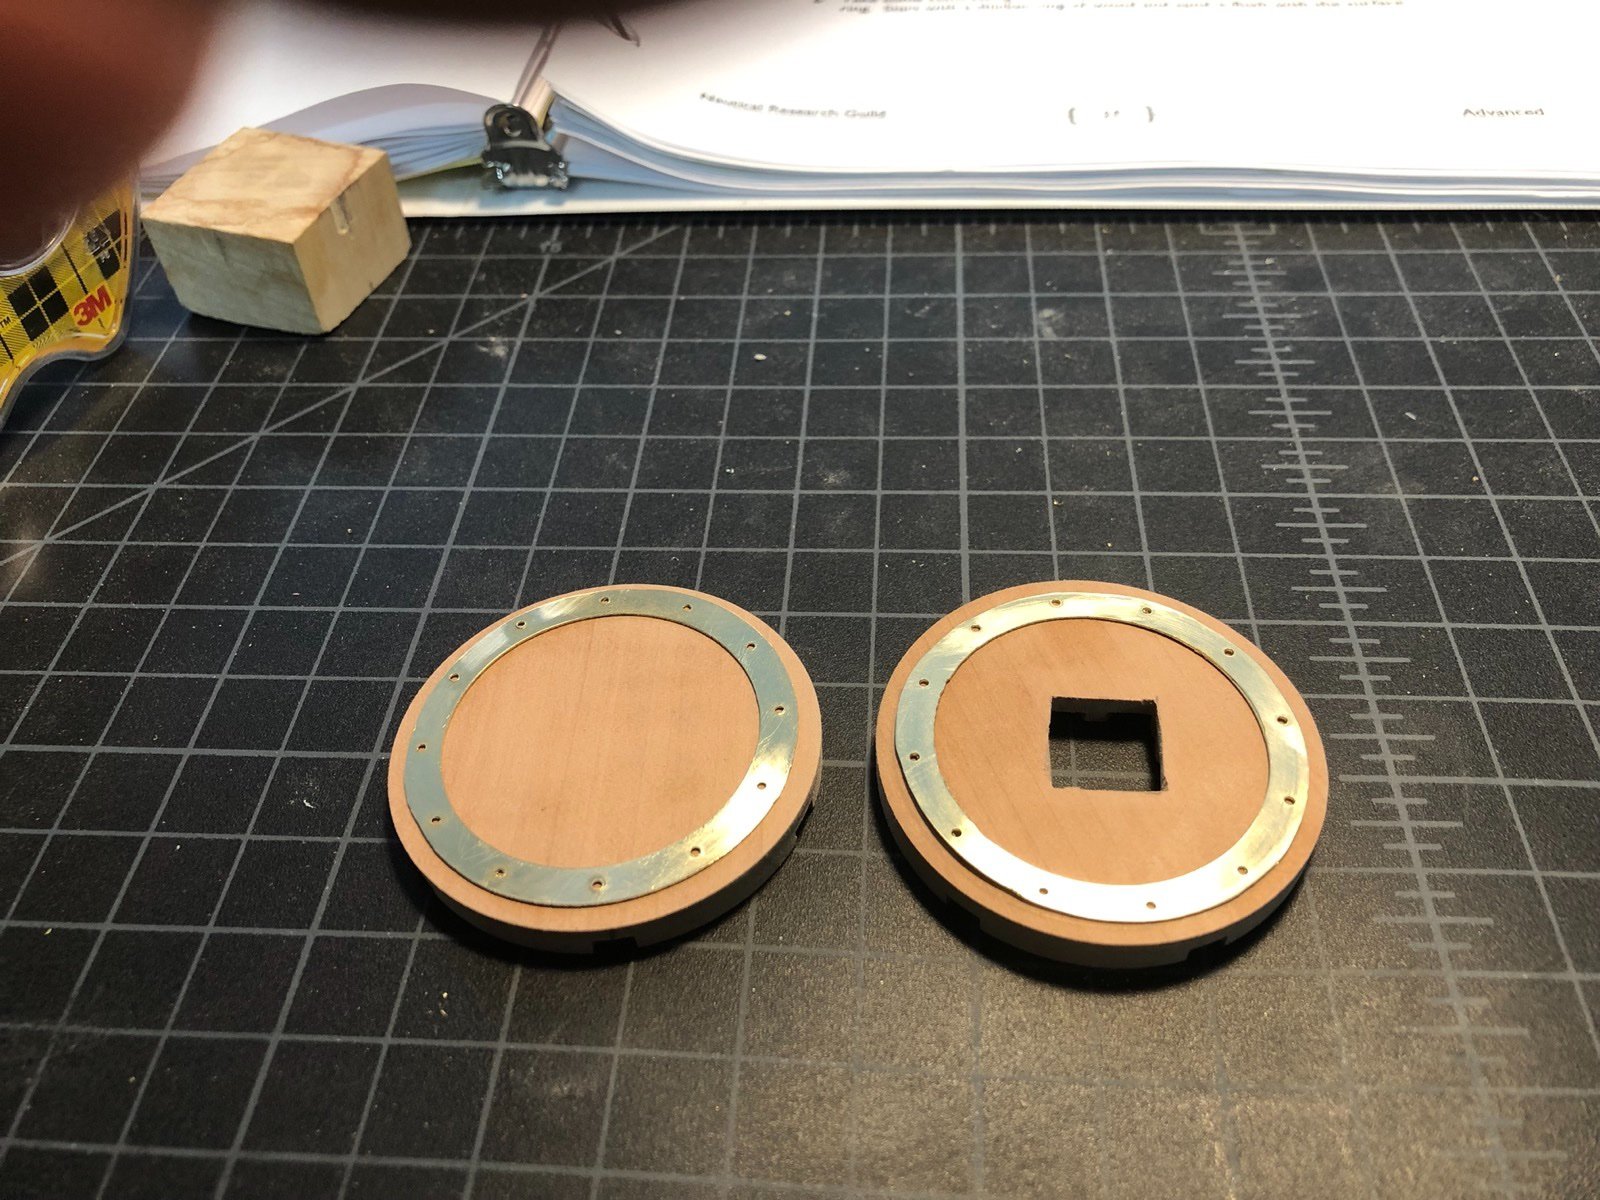
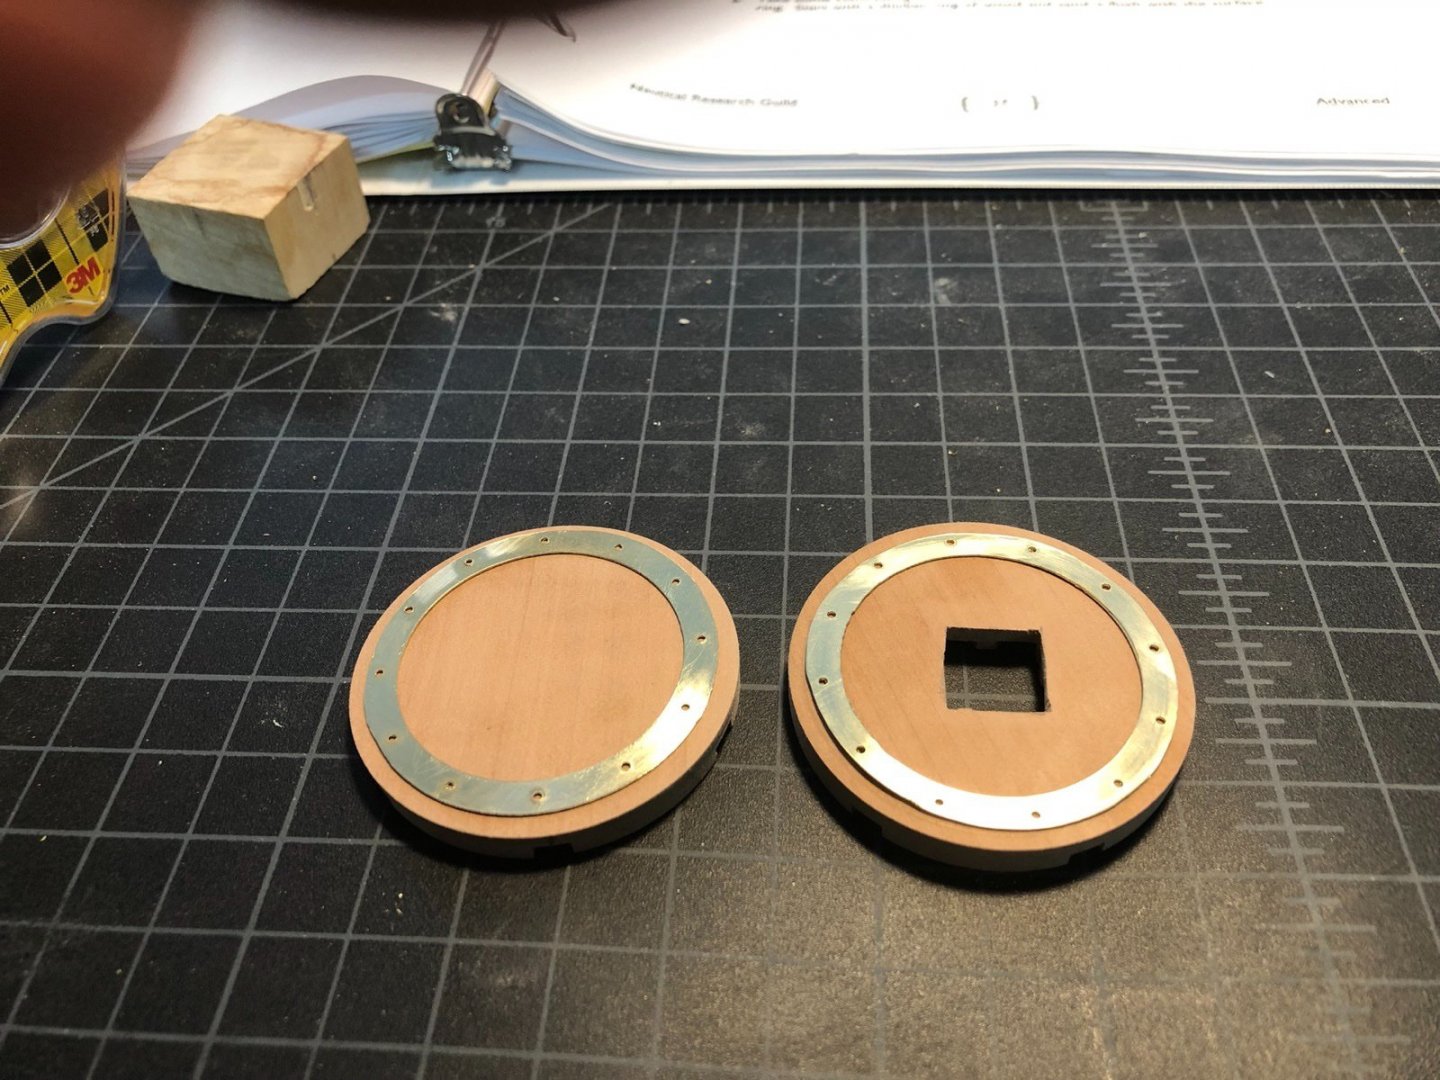
I have spent this week working on the drum heads for the capstan. I milled the slots in the upper drum head to match those in the lower head. I held the drum heads together and marked the locations of the lower slots on the upper and used the marks to align the mill bit as I cut the slots. I cut each slot only close to the center not all the way through as I did the lower. This helped with any misalignment that may have been present to all the slots had a better chance of lining up at the edges. I also milled away the center part of the upper drum head to fit over the end of the square part of the barrel. This is necessary because the top of the barrel is 6" high actual and each half of the drum head is 4" high, so an extra 2" in the upper head is needed so the drum head sits flush to the tops of the whelps. This isn't shown in the plans. After this photo was taken I milled the square hole in the lower drum head to fit on the square part of the barrel. I then worked on the rings for the drum heads. I used Toni's alternate method and made the rings from 0.016" brass sheet, using the rotary table in the mill to drill the holes and cut the rings out of square pieces of the brass sheet. I screwed two squarish pieces of the brass sheet to a piece of wood and used the 4 jaw independent chuck to hold it to the rotary table. I drilled the 12 holes first with a starter bit then a regular drill bit. After I cut out the rings I cleaned them up with files and sand paper and glued them to the drum heads with medium CA. Here they are before I glued them down. I will add brass bolts in the holes and make the cap for the upper head next.
-
The framing is completed so its time to start fairing.
- 118 replies
-
- 6
-
-
- Duchess Of Kingston
- Finished
- (and 1 more)
-
Here are the completed whelps and chocks after sanding the lower chocks to be flush with the whelps and the bolt holes in the chocks have been drilled. I am pretty happy with the outcome but it could be a lot better, especially the positioning of the chocks. If I were to build this again I would find a way to mill all the grooves for the chocks at the same time so they would be more evenly lined up. Making a jig that would hold each whelp separately for milling would have worked better too I think. Oh well, this is a learning experience isn't it.

-
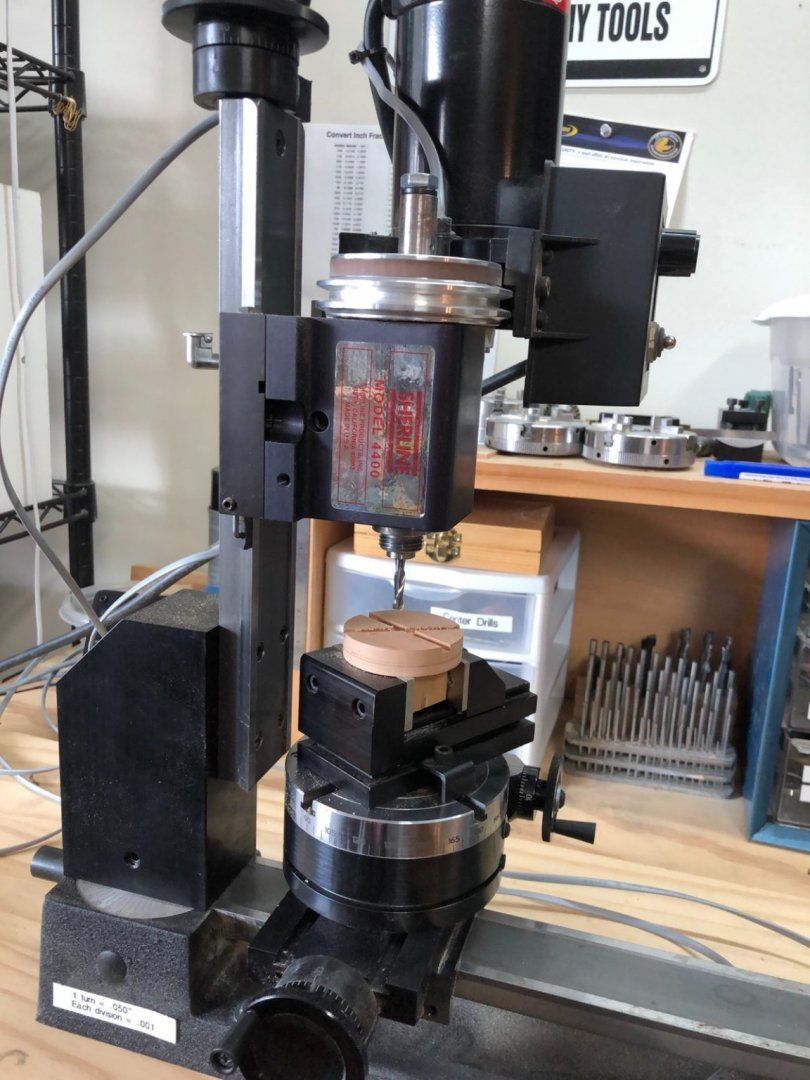
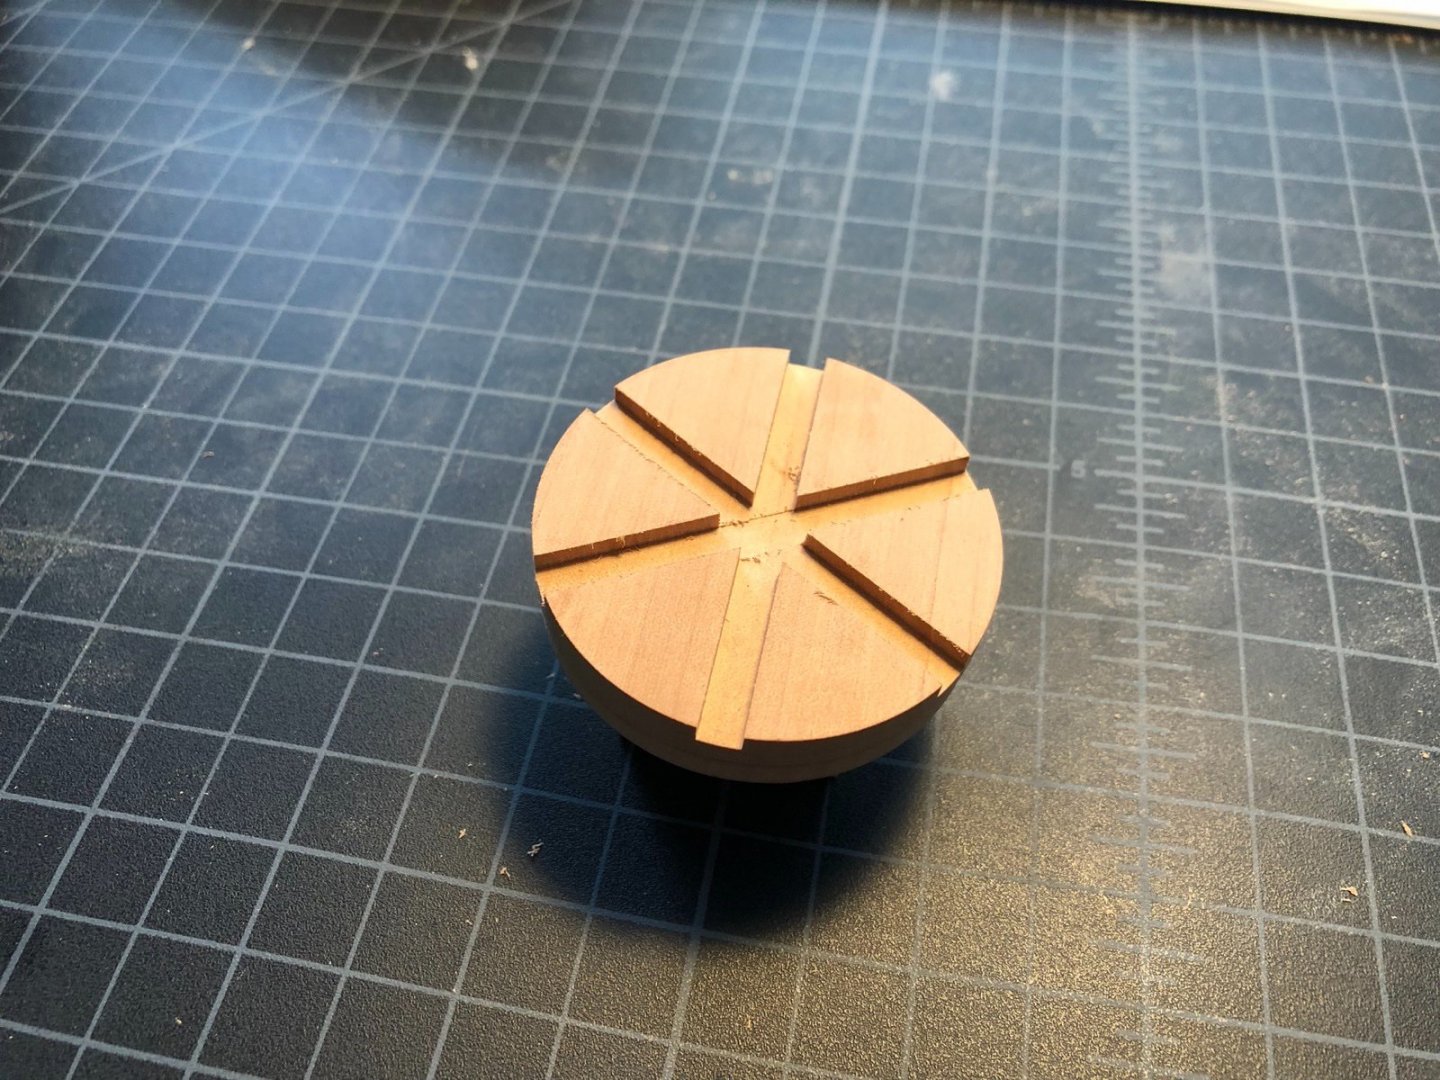
Thanks for the tip Greg. My stack is actually two pieces glued together so I will be separating them and milling the slots in each half. They are not two semi circles though as per the instructions so I will be leaving the upper and lower halves as full circles at this point. I set up the mill with the rotary table and put the drum head blank in the vise. This was a little tricky as I had to make sure the rotary table was centered, then the vise on the rotary table, then the blank. Once I was happy with the centering process, I milled the three slots for one of the drum heads. I can use this for either the upper or lower drum head since I milled out the dimple from the live center. I have the blank soaking in isopropyl alcohol now to separate the upper and lower drum heads and the square block holder.
-
That's awesome!
-
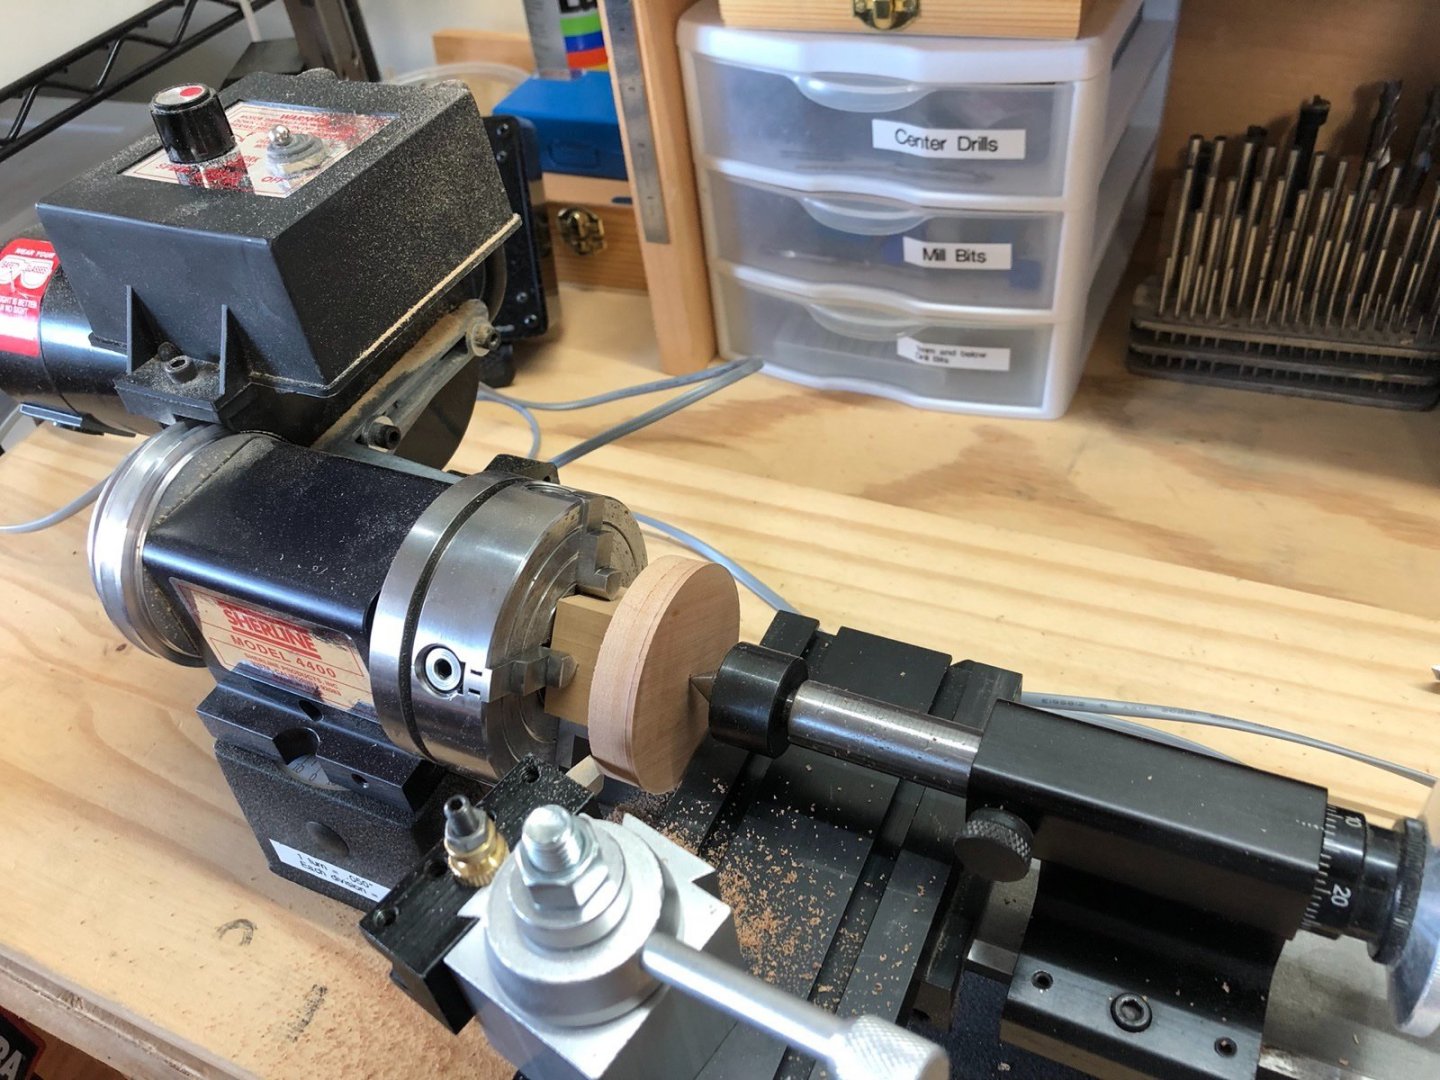
I also started making the drum head pieces while waiting for the chocks to dry in the whelps. I glued up two square-ish pieces of 4" pear sheet with a square chunk of boxwood to hold them in the lathe. I let that dry overnight while clamped in a vise, then used the band saw to cut the corners off and square up the inner face of the holding block. I chucked the blank in a 4 jaw independent chuck and centered it using a live center. I then used a flat chisel on a steady rest to turn the blank to a circle, which only took about a quarter hour. I then used the lathe cutting tool and DRO to get the blank to the final diameter.
-
After the whelps had dried on the barrel I fit the five upper chocks. The angles of the sides had to be adjusted a bit on the blanks which I did with the disk sander as I sanded in the bevel on the edges. Once I had a chock with a good fit I marked the location on the top where the edges intersected the whelps and drew an arc between the points. I trimmed off the excess close to the arc and glued that whelp in. Here is how it look with all five chocks glued in but not shaped yet. I then used a Dremel with a sanding drum to lightly shape the outside edges of the upper chocks, then s sanding block to get the edges flush with the whelps and curved to look like they are all part of a circle. I then shaped the lower chocks using the same procedure but with the thicker blanks. These have a shallower angle on the edges. I also marked an arc on these when I had a good fit but this time it was a concave arc. I cut a small piece of boxwood to the correct arc and used it to mark the tops of the lower chocks. When I had five chocks with a good fit I glued them in place. Here is how it looks now while I wait for the glue to dry to do the final shaping.

-
Tom, I have been following your build with a lot of interest. It looks like something I may try to build sometime in the future. I don't know if you have seen this before but... https://www.google.com/maps/@42.3724294,-71.0563979,3a,75y,320.17h,95.15t/data=!3m6!1e1!3m4!1s6yRcVEMl1hYAAAQZLBJ9aQ!2e0!7i13312!8i6656 it allows you to take a virtual tour of the Constitution from a few years ago. I found it very helpful especially for gun deck details when I was building my Connie model.
- 163 replies
-
- 1
-

-
- Model Shipways
- Constitution
- (and 2 more)
-
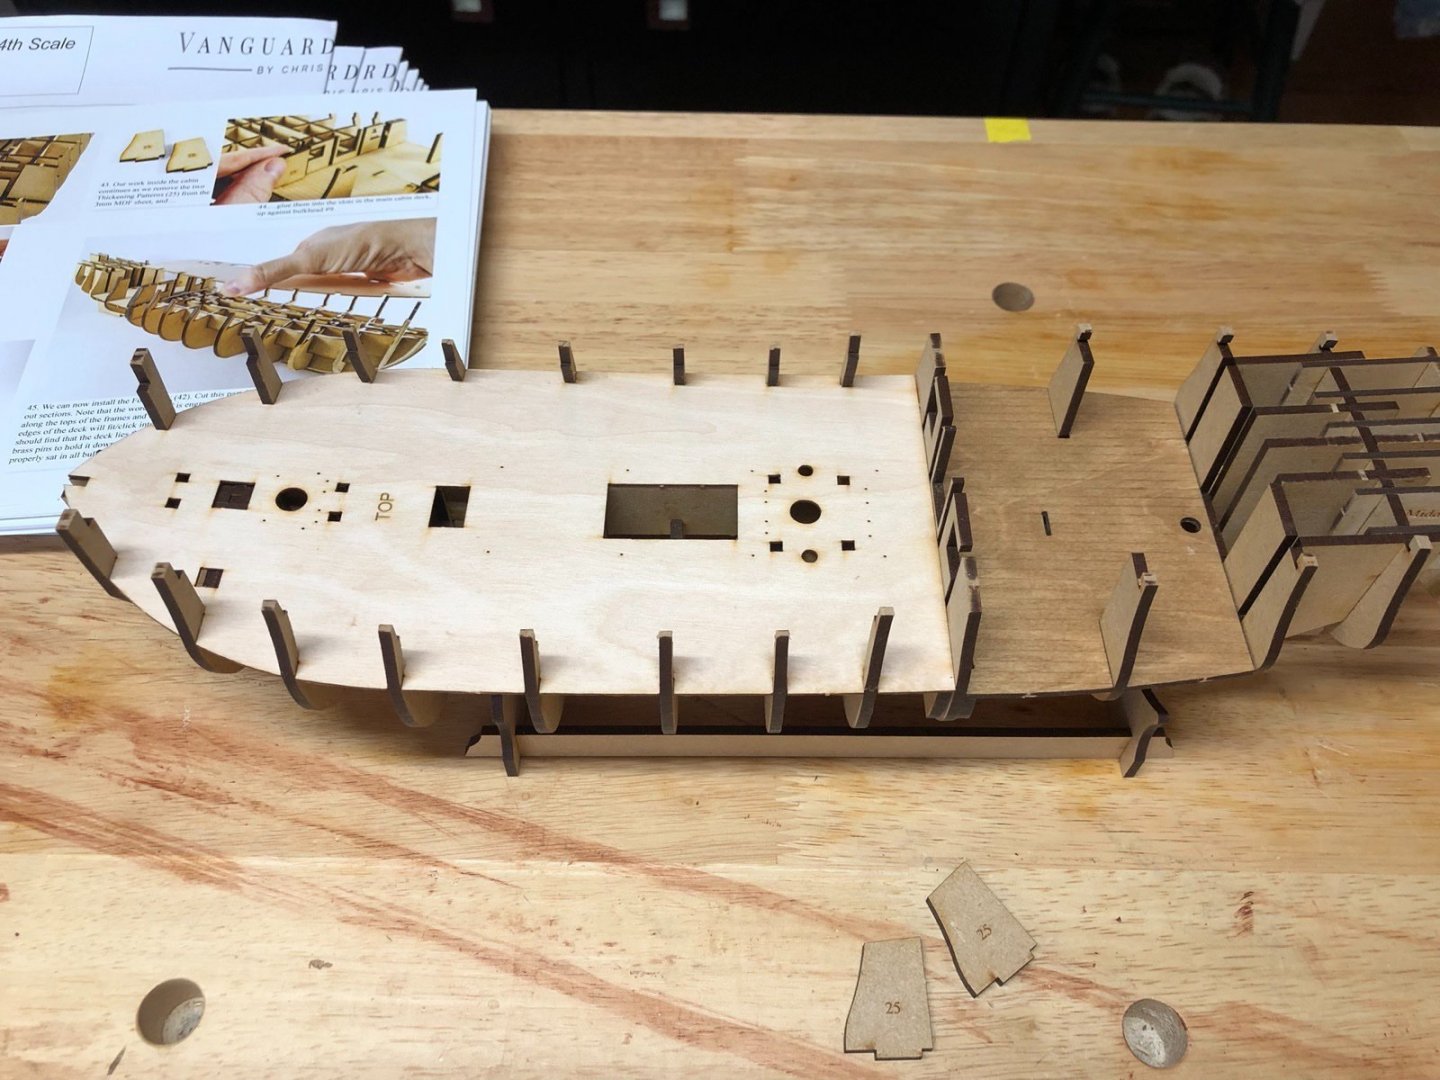
I glued the lower deck onto the frames and clamped the edges as it dried. I then wanted to test fit the upper deck and got it half way on by bending it pretty severely. At that point I didn't want to try taking it off, so I put glue on the frames and got it to sit the rest of the way on. It did snap nicely into place with no part of it away from the frames, but it is as scary as it seems. I did manage to break off one of the bulwark extensions so I glued it back on but it won't really be secure until I put the temporary beams across.
- 118 replies
-
- 4
-
-
- Duchess Of Kingston
- Finished
- (and 1 more)
-
I cut out some rough blanks for the chocks and used a disk sander to angle the sides of one of each size. The upper chocks fit pretty well into the grooves I cut in the whelps but the lower chocks are a lot thicker and the grooves were too small. I used the same file I used to cut them initially to expand them for the bigger chocks and they fit well now. I then glued the whelps to the barrel making sure they were straight. I will give them a good 24 hours to dry before I start fitting the whelps.
-
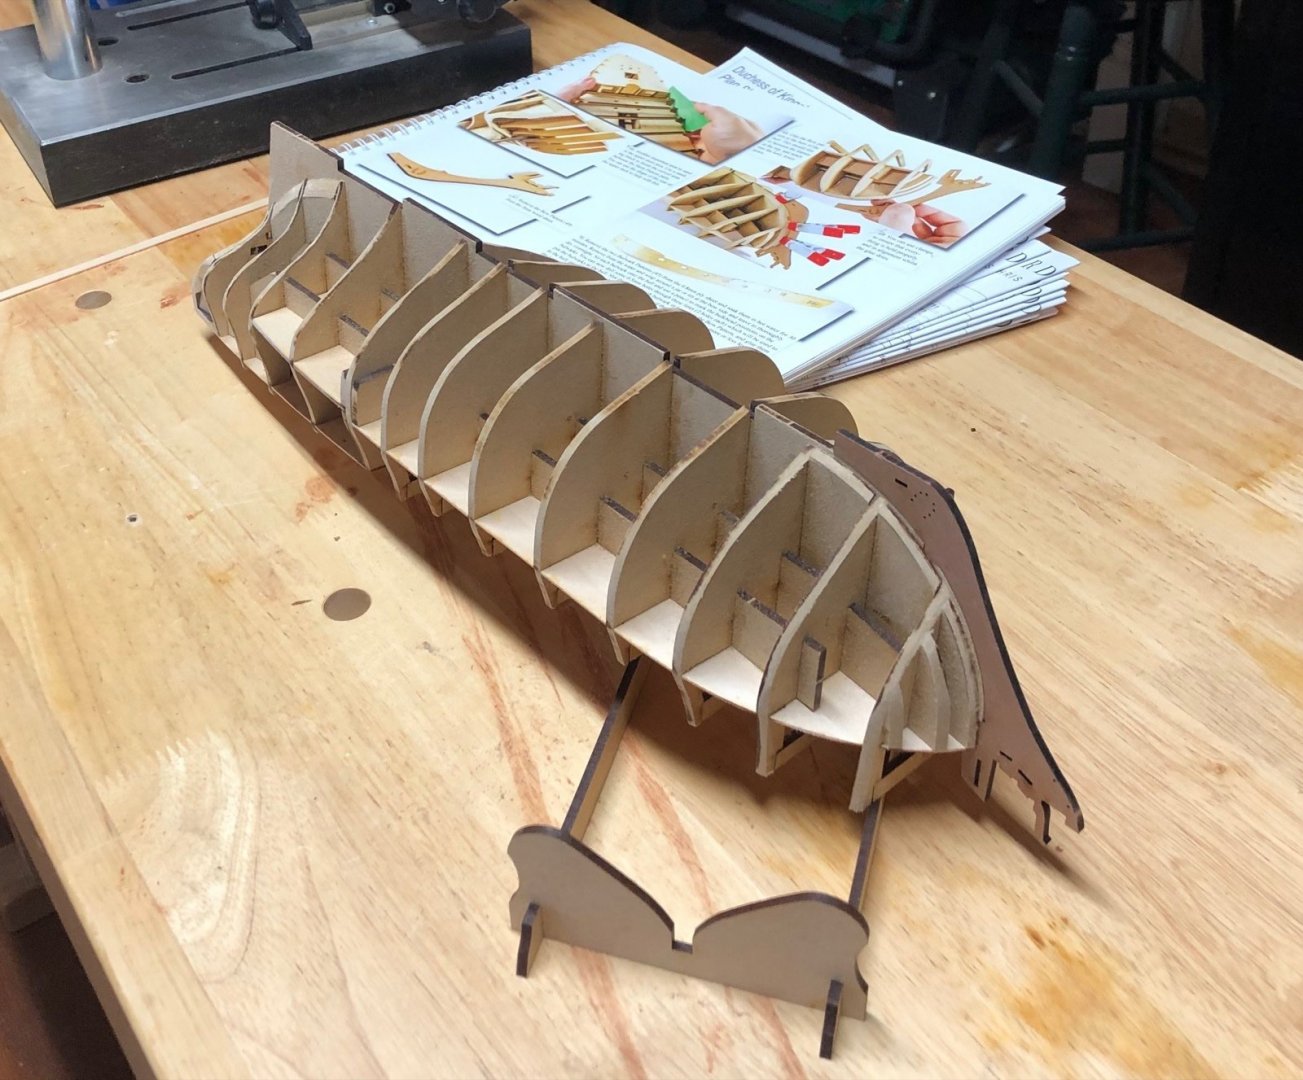
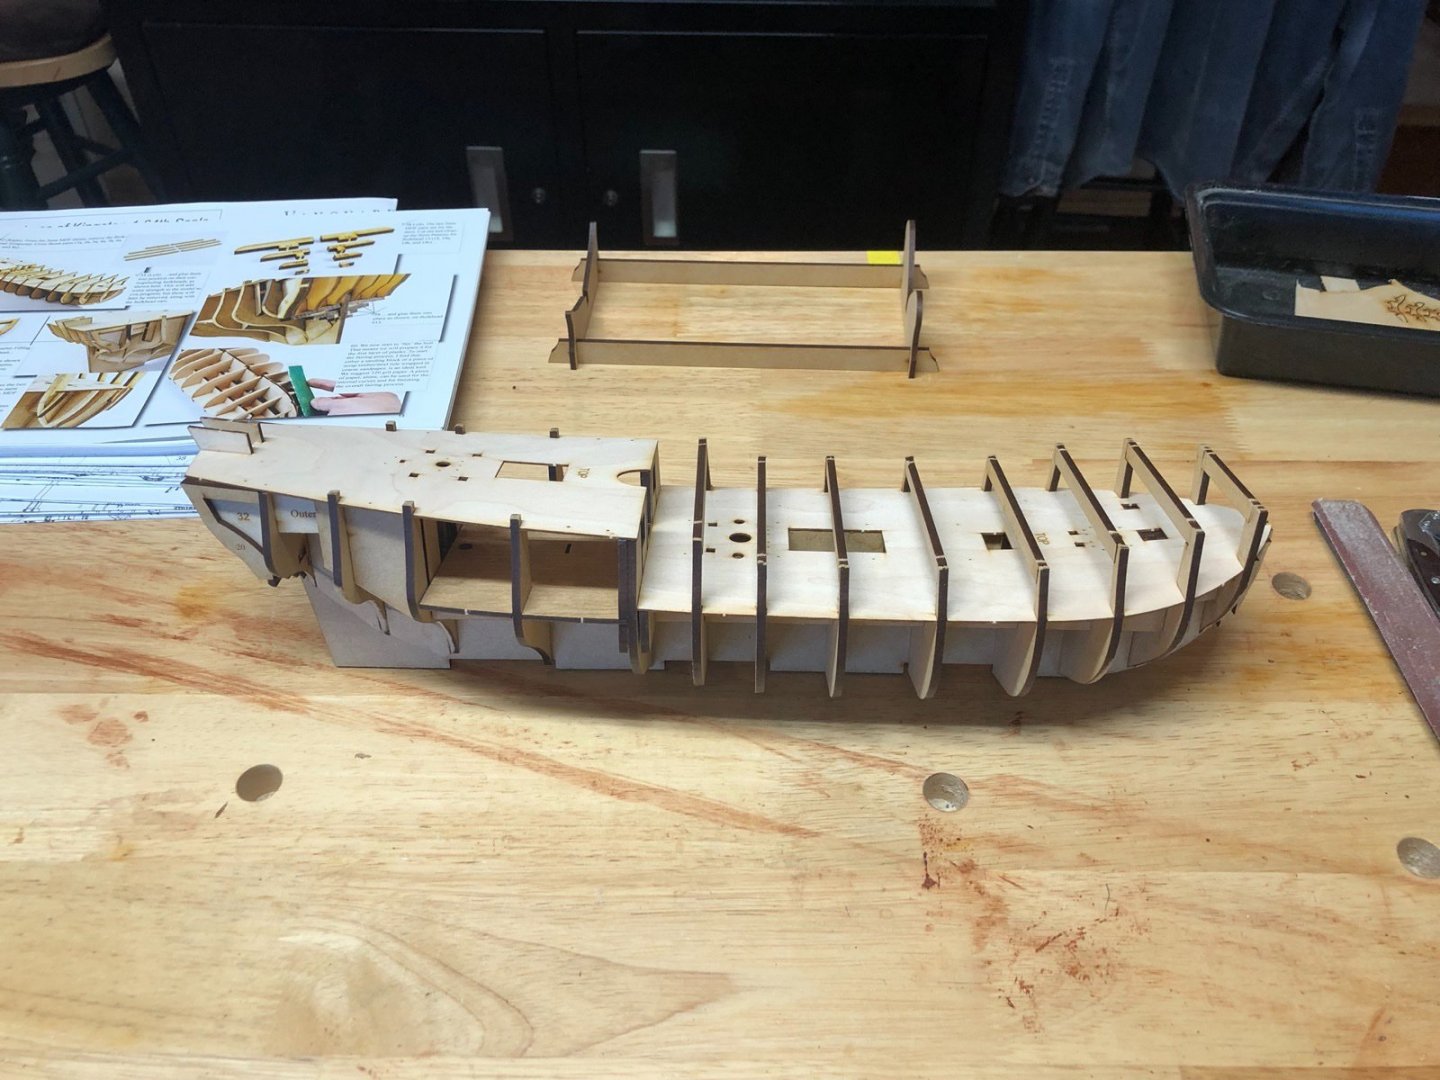
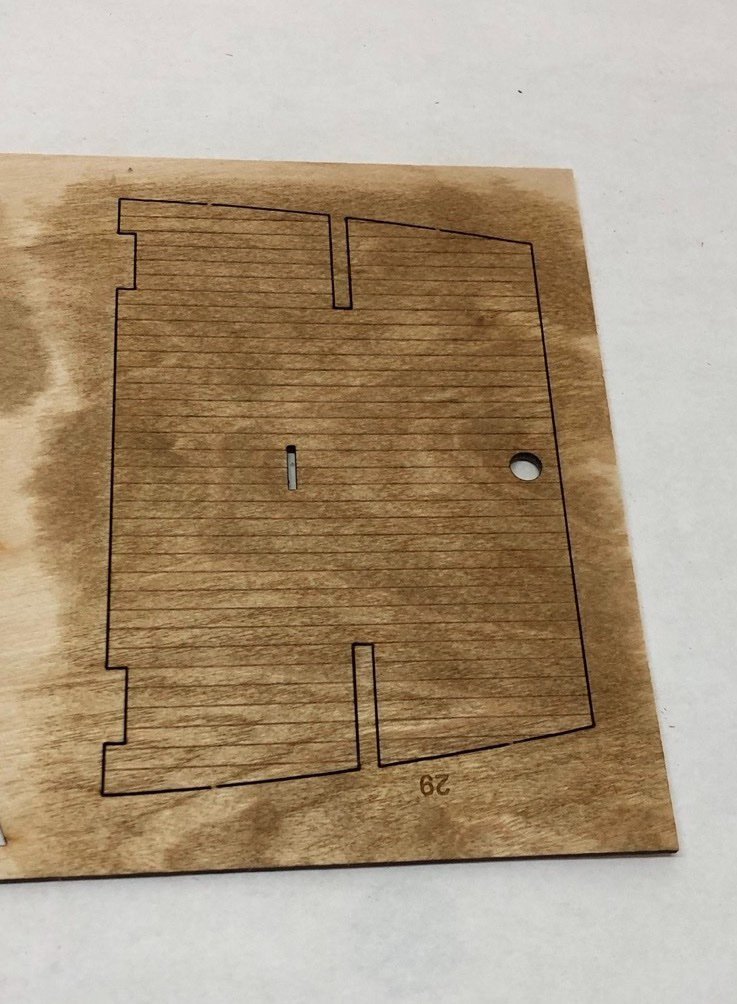
Here is the first progress post. I am just about finished putting the frame together and had no real difficulties at all. Everything fit very well together and nothing got broken. The MDF is really easy to work with and all the parts came off the laser cut sheets with very little effort. The next step is to add the lower deck but before I add it I cleaned it up by sanding it to remove some char, which did not affect the laser etching at all. I then gave it a coat of Golden Oak stain and a coat of wipe on poly, so it is now ready to install.
- 118 replies
-
- 7
-
-
- Duchess Of Kingston
- Finished
- (and 1 more)
-
I drilled the bolt holes in the whelps then sanded the two tapers on each one. For the long taper (top to bottom) I used a disk sander and for the short taper (front to back) I used an angled sanding block. I then marked the grooves for the chocks and cut them with a triangular file, with one face of the file vertical. I first scored the location of the vertical face with an X-Acto knife to guide the file at the start. I cleaned up the inside with a small flat file. I rounded all the exposed edges and cleaned up the faces with sandpaper. Next up are the chocks.

-
I am joining the other Duchess build logs as I get started on this kit. I had ordered it a few months ago and I am finally ready to start it. I am currently building the frame but I won't go into detail here as it is very straight forward and many other build logs have gone through the process. I will add more content when I start planking or earlier if I run into problems.
- 118 replies
-
- 3
-
-
- Duchess Of Kingston
- Finished
- (and 1 more)
-
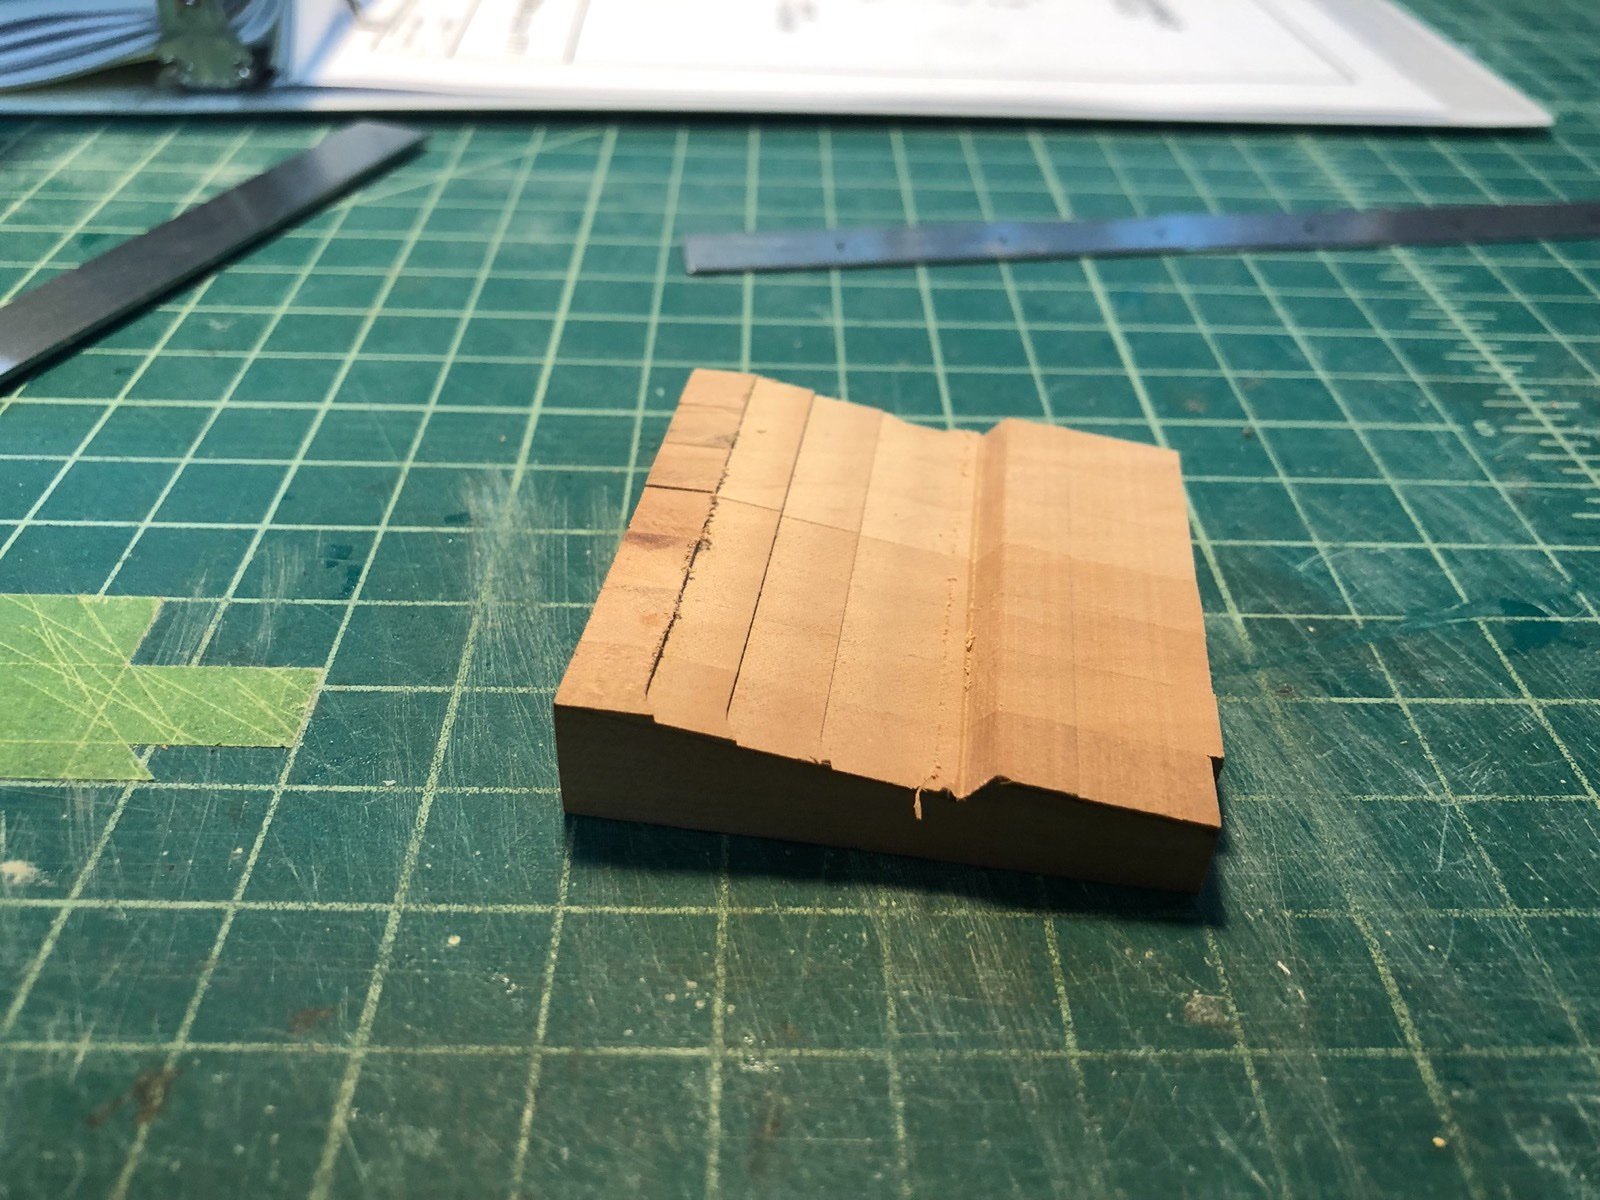
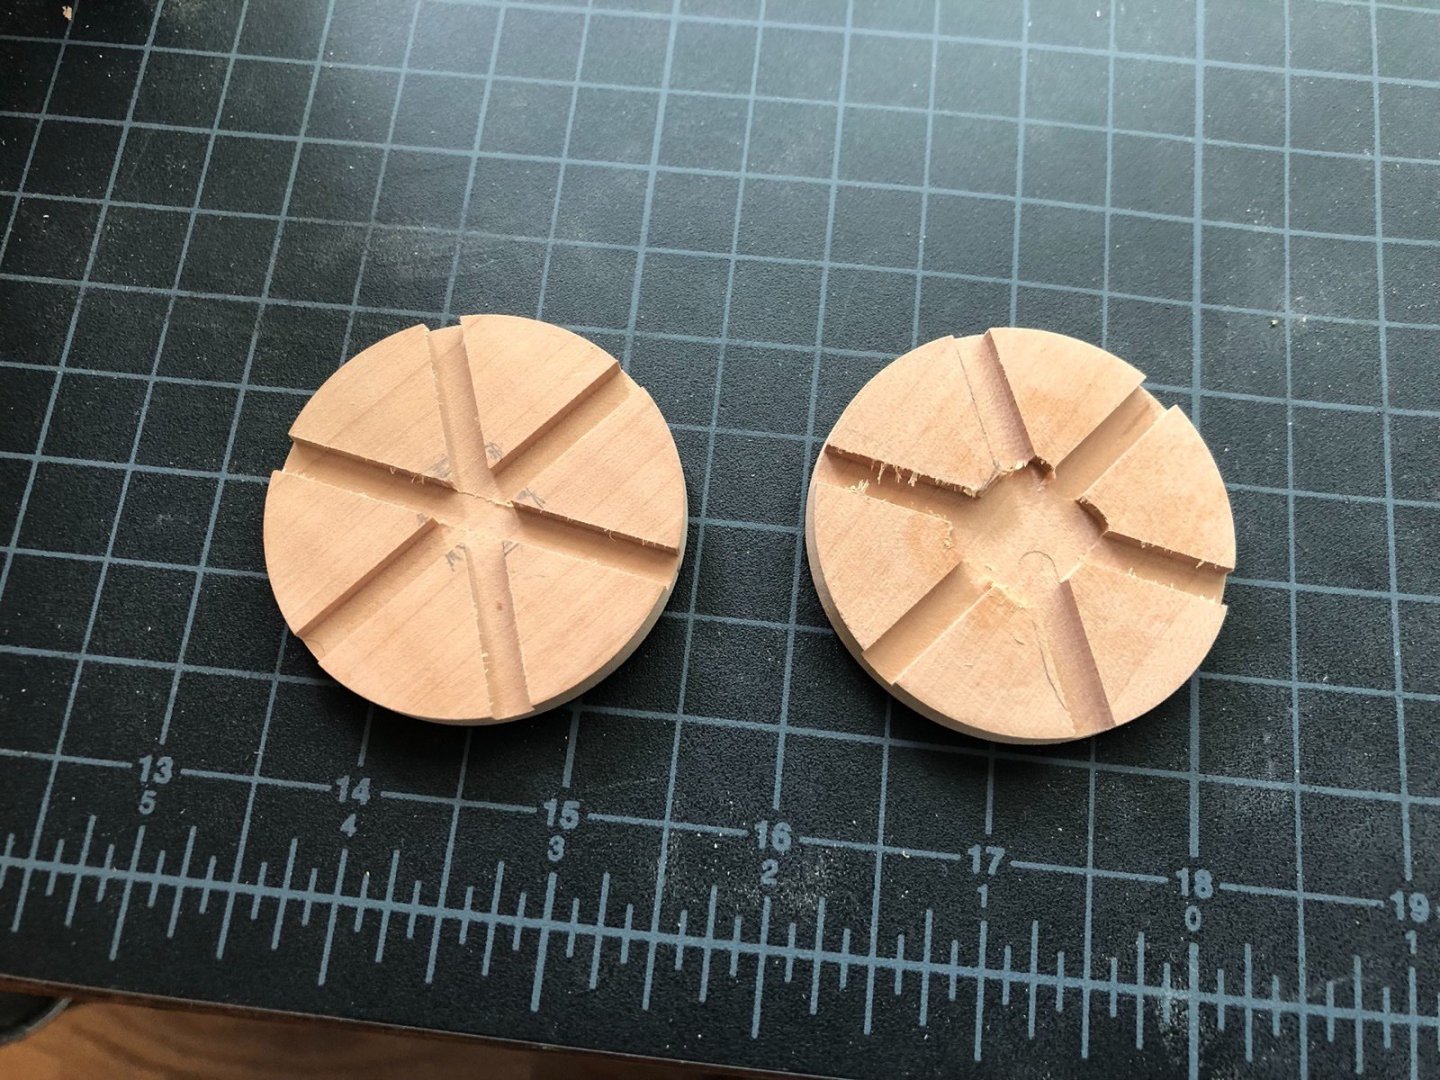
I cut blanks for the whelps with a few extras from one of the pear sheets I cut at the beginning of this project, then glued them together with a few spots of wood glue on each one. After the blank dried I put it in the mill vise and set up the mill to cut the three faces. As per the instructions, I milled the top face first, then the small face in the middle. For the third face the blank was too big to fit in the vise, so I clamped it to the cross slide table instead and then milled most of the face. Here is how the blank looked when I removed it from the mill. And here is how it turned out after cleaning up the faces with some files. I soaked the blank in isopropyl alcohol and separated the individual whelps. I still have a bunch of work for the various tapers on the whelps which will be next.


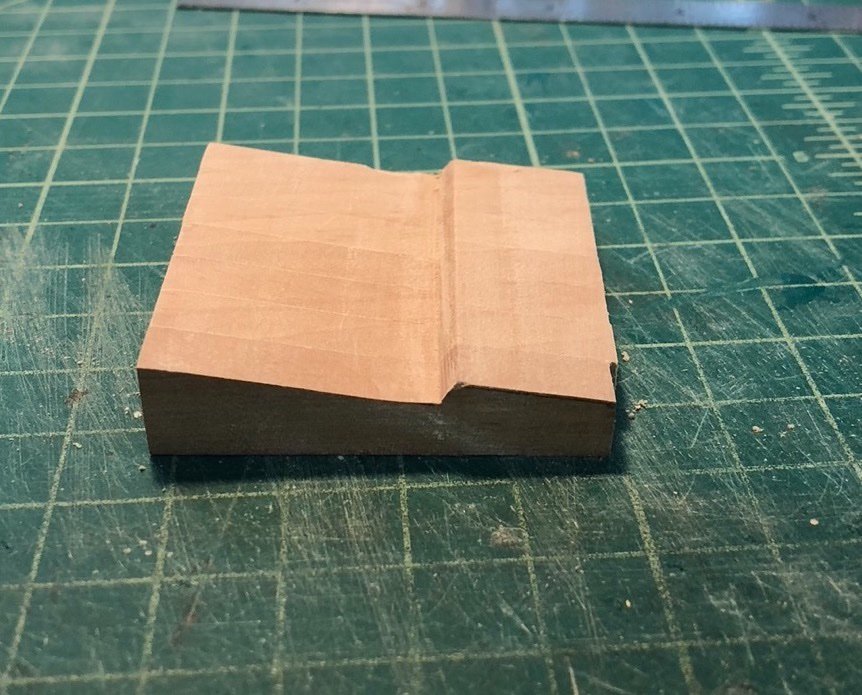
-
Thanks for the info Alex. This piece will be hidden under the base so not seen.
-
Thanks Toni. While starting to make the whelps I realized I made the flat section of the barrel too long. So I chucked it back into the lathe and turned a new gasket and bottom section. This time I had enough length to make the bottom section the same length as the depth of the hole in the base. I cut the barrel to the correct length and redrilled the hole in the bottom for the retaining pin. I also put the pin base back in the lathe and cut off the inset portion I had added to it as it was no longer needed. It all fit together nicely and now the whelps will fit correctly to the flats. This scratch build stuff is challenging!