usedtosail
-
Posts
2,417 -
Joined
-
Last visited
Content Type
Profiles
Forums
Gallery
Events
Everything posted by usedtosail
-
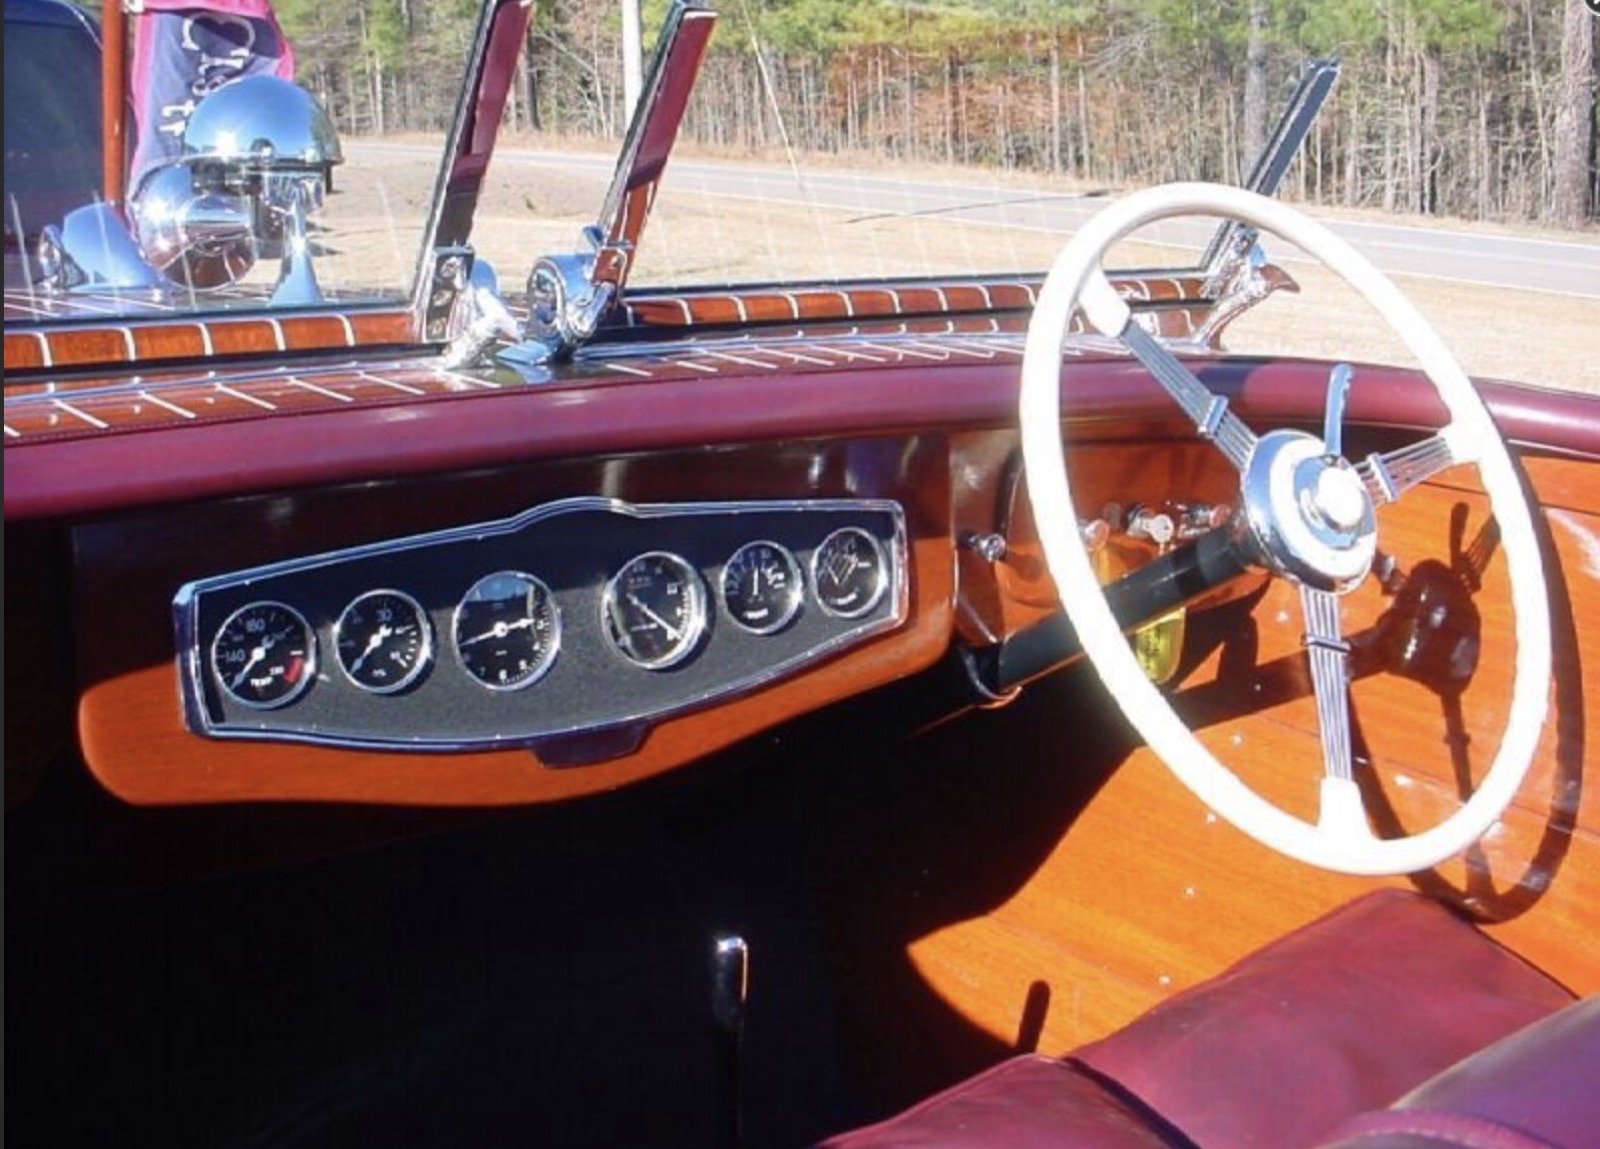
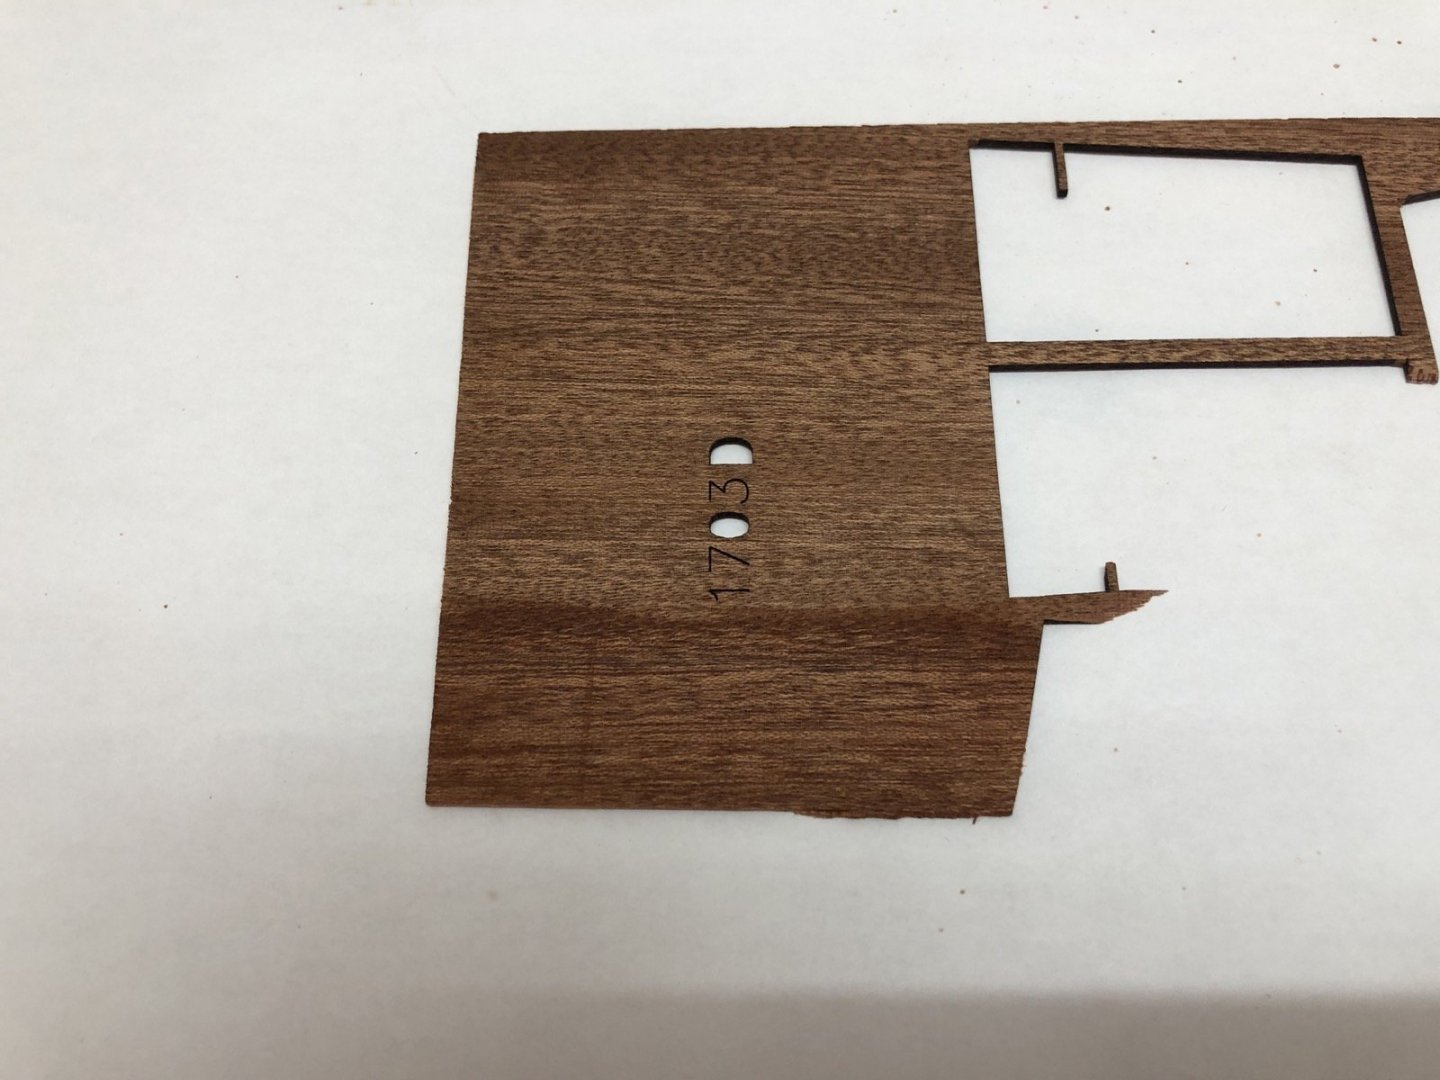
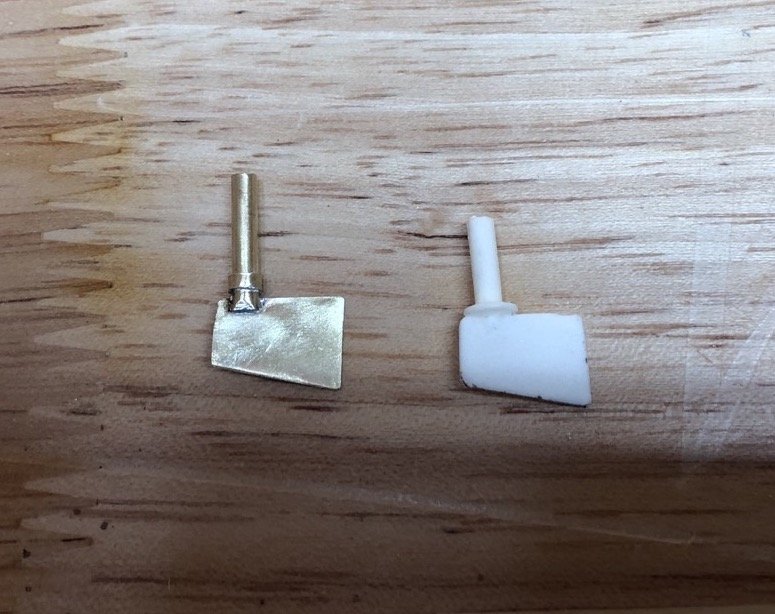
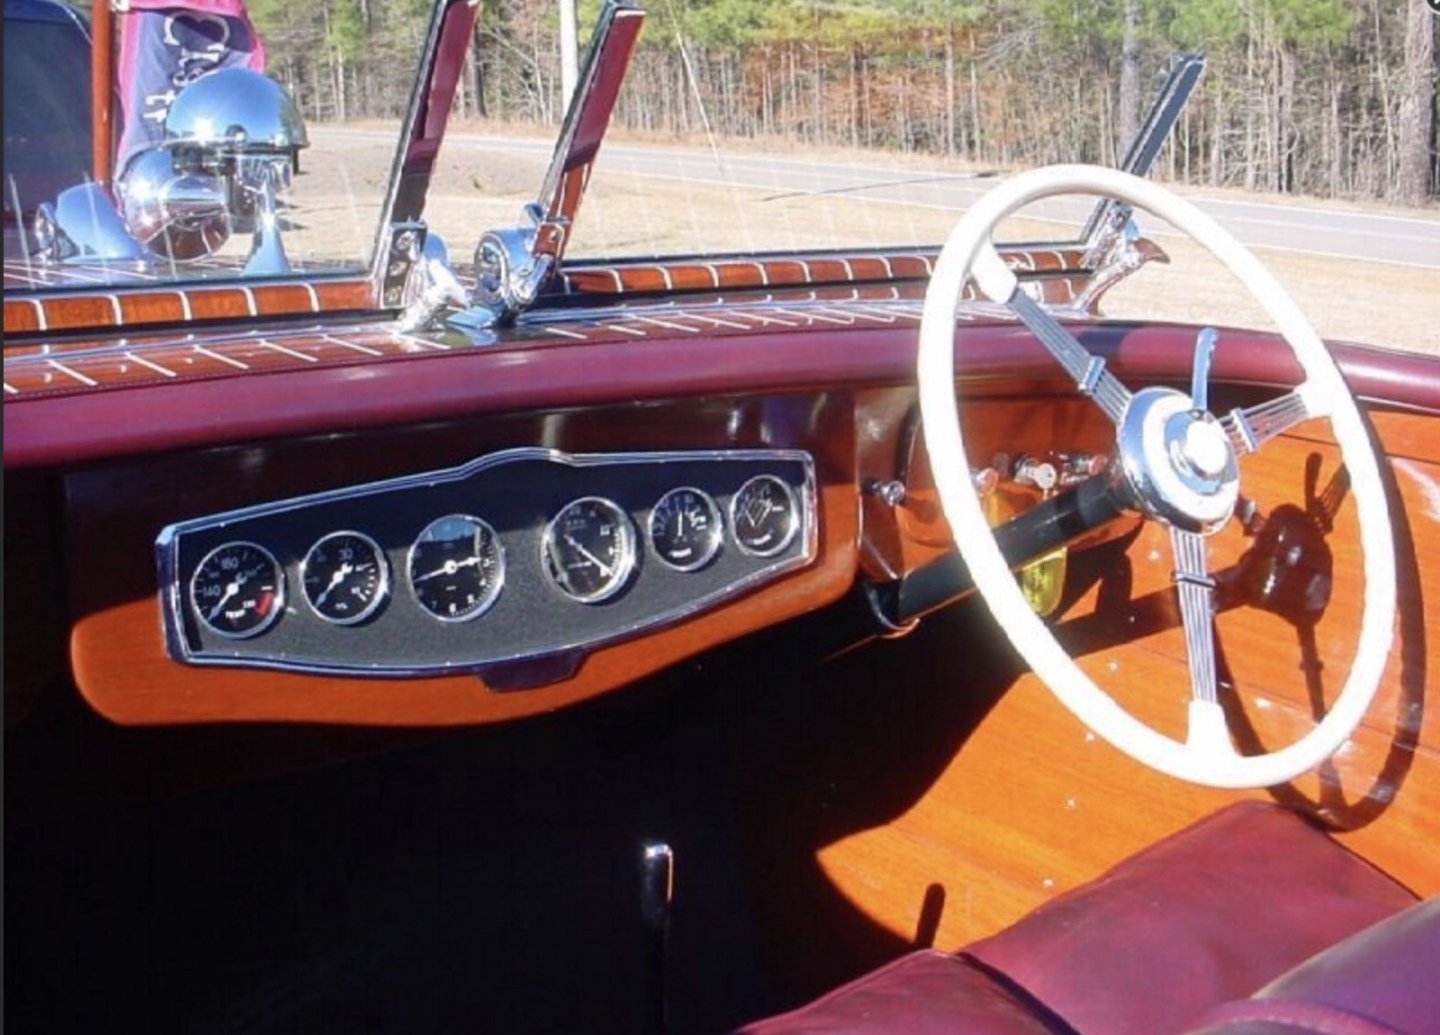
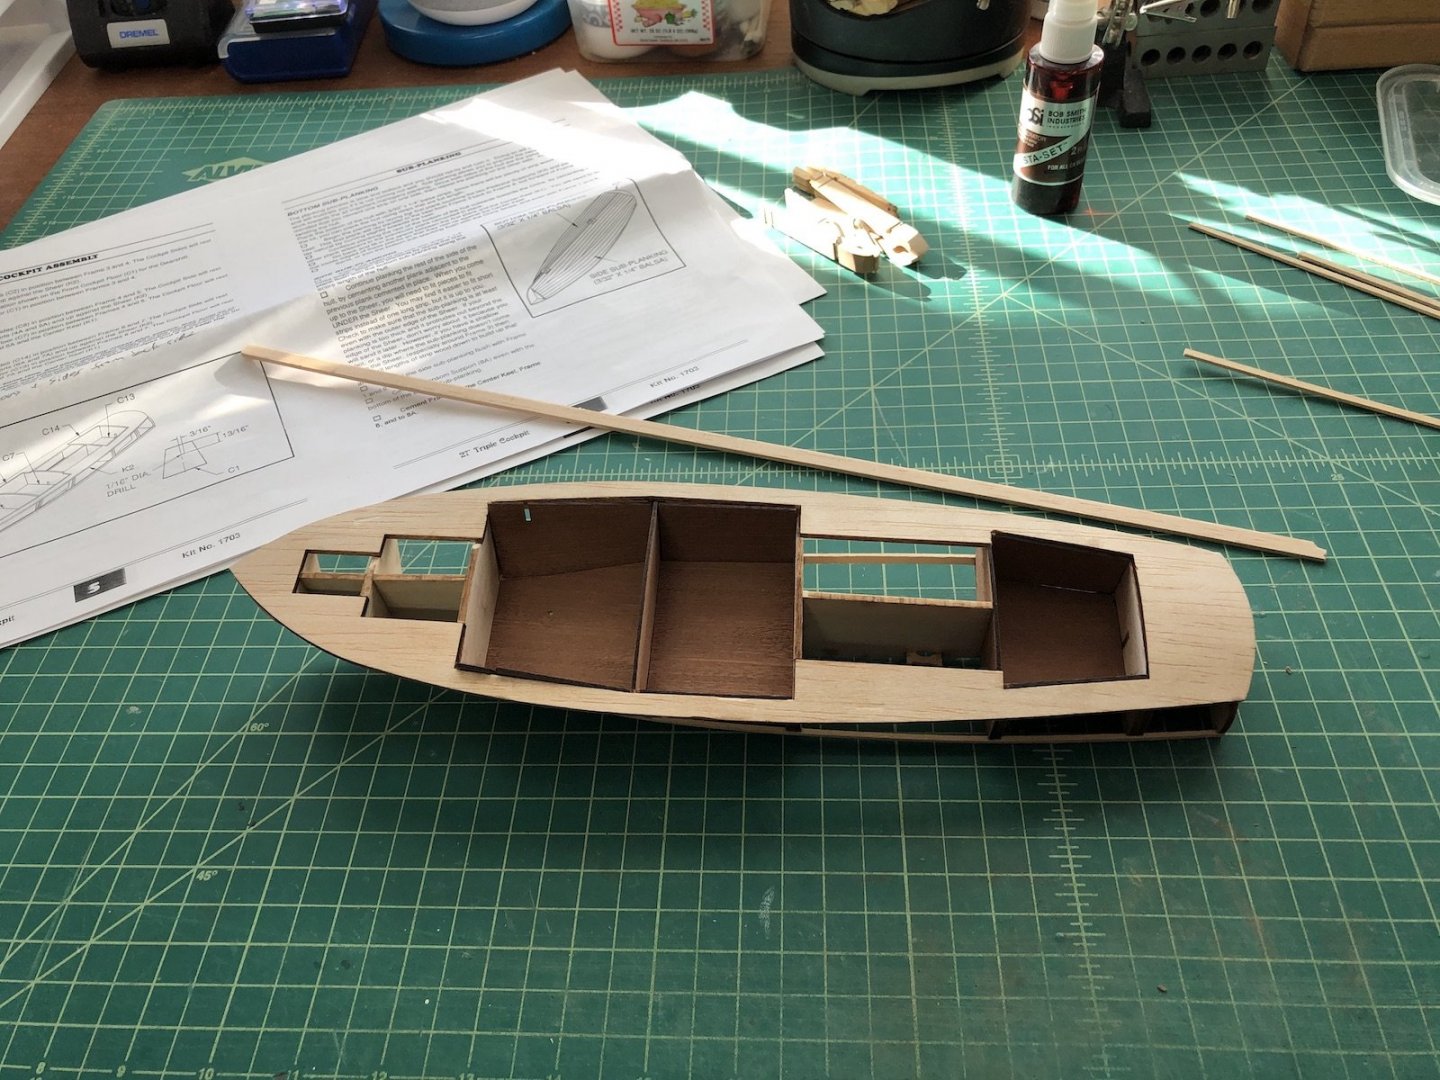
 I finished adding the sub planking to the frames and sanded them to shape. The chine sort of disappears at the bow. For the bow area I used the supplied balsa block to make filler pieces then carved and sanded them to shape. A problem I found with this model, which you can see in the previous picture, is that the first frame does not meet the bottom of the keel, but the planks should, which is very obvious when you add the bow filler pieces. I could have made filler pieces to fit this area but I just filled it with wood filler and sanded it to shape. Since this will all be covered by the mahogany planking it will not be seen later. Here is the finished sub planking. I used wood filler on the gaps and low spots too. The instructions suggested staining the mahogany with mahogany stain to even out the color, so I tried it on some scrap from the laser cut sheet. The stain is on the bottom section below the number 1. I liked the look so I figured this was the time to stain the cockpit interiors before I started adding details which are the next steps. Above the stain they suggest to coat the mahogany with Sanding Sealer, so again I tried it on the scrap stained piece and liked the look, so I applied it to the interior cockpit pieces. In between these tasks I made a new rudder from brass sheet and tubing. Here is the new rudder compared to the supplied plastic one. I did clean up the plastic steering wheel and painted the spokes and hub with silver enamel paint and it looks good to me, so I then painted the rim with brown enamel. The jury is still out on this but I think it may be better than one I could make. I'll have pictures when it is done. I also found this picture of the dashboard of an existing boat that this model represents. You can see how the gauges are on a metal backing, so I cut a piece of aluminum sheet to glue them, which I will then glue to the mahogany dashboard. More to come on this too.

-
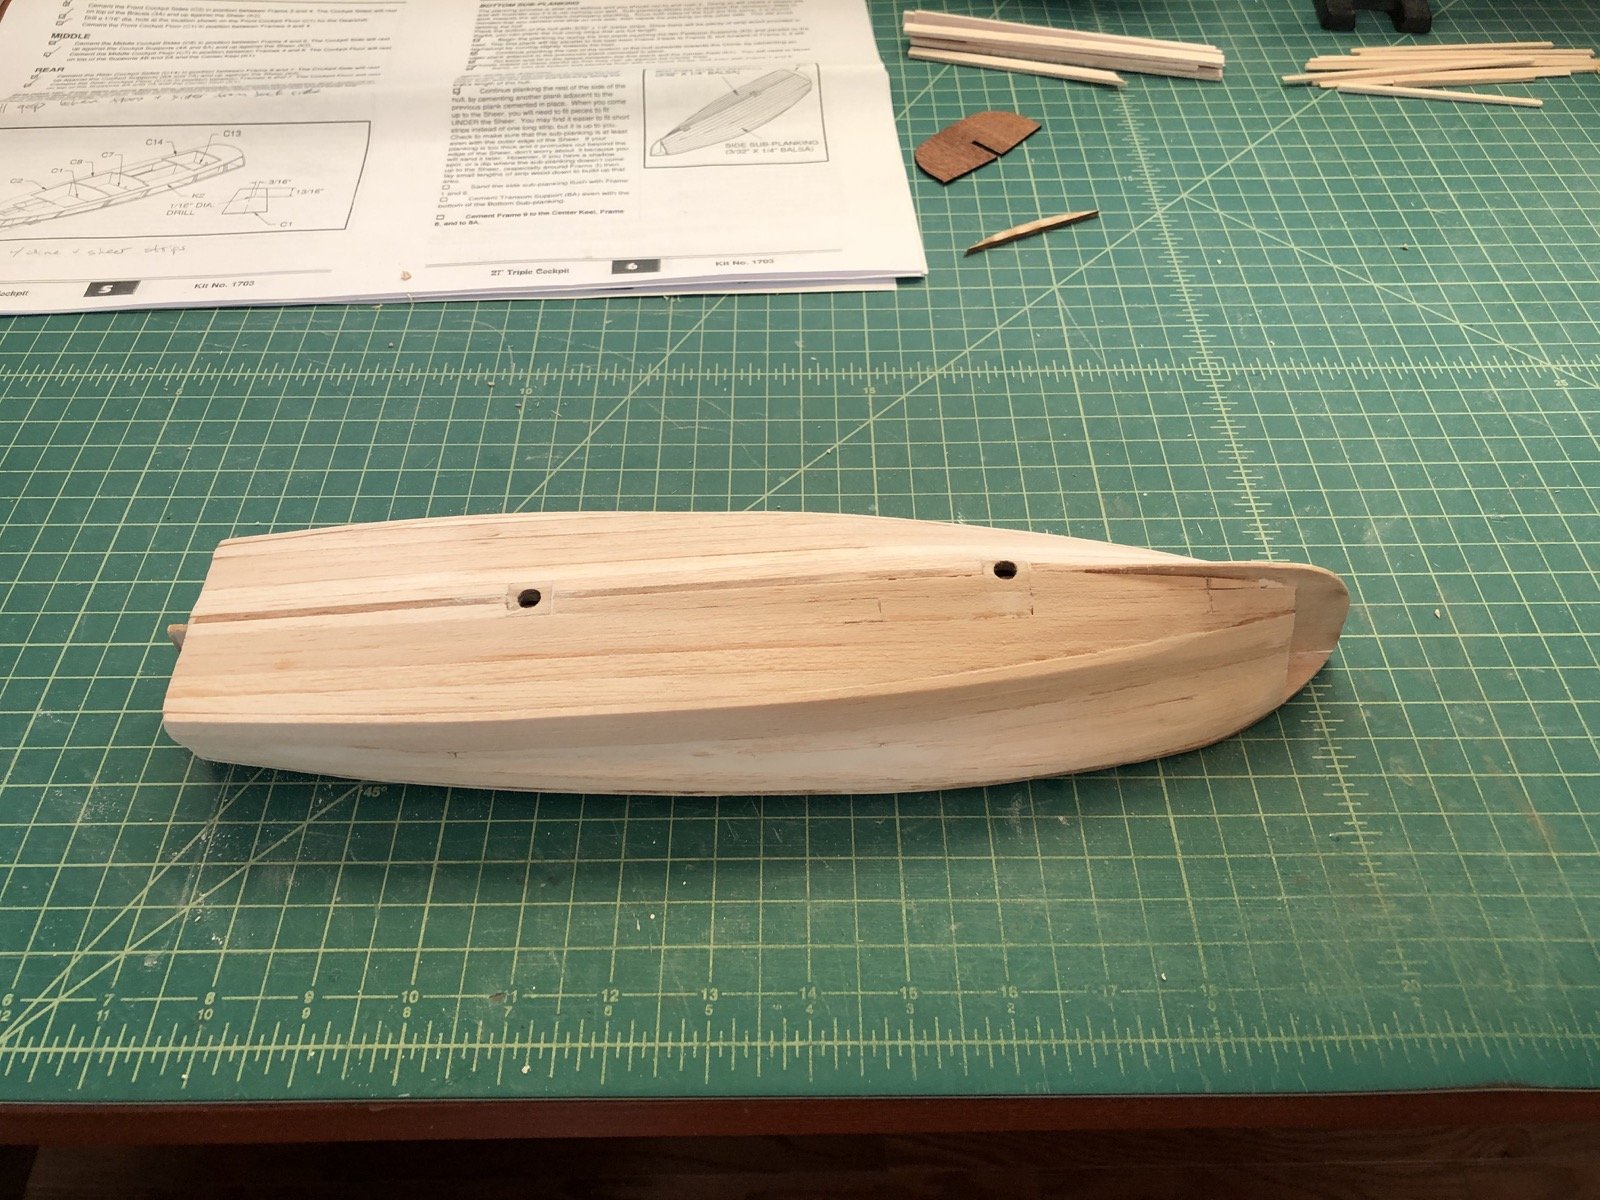
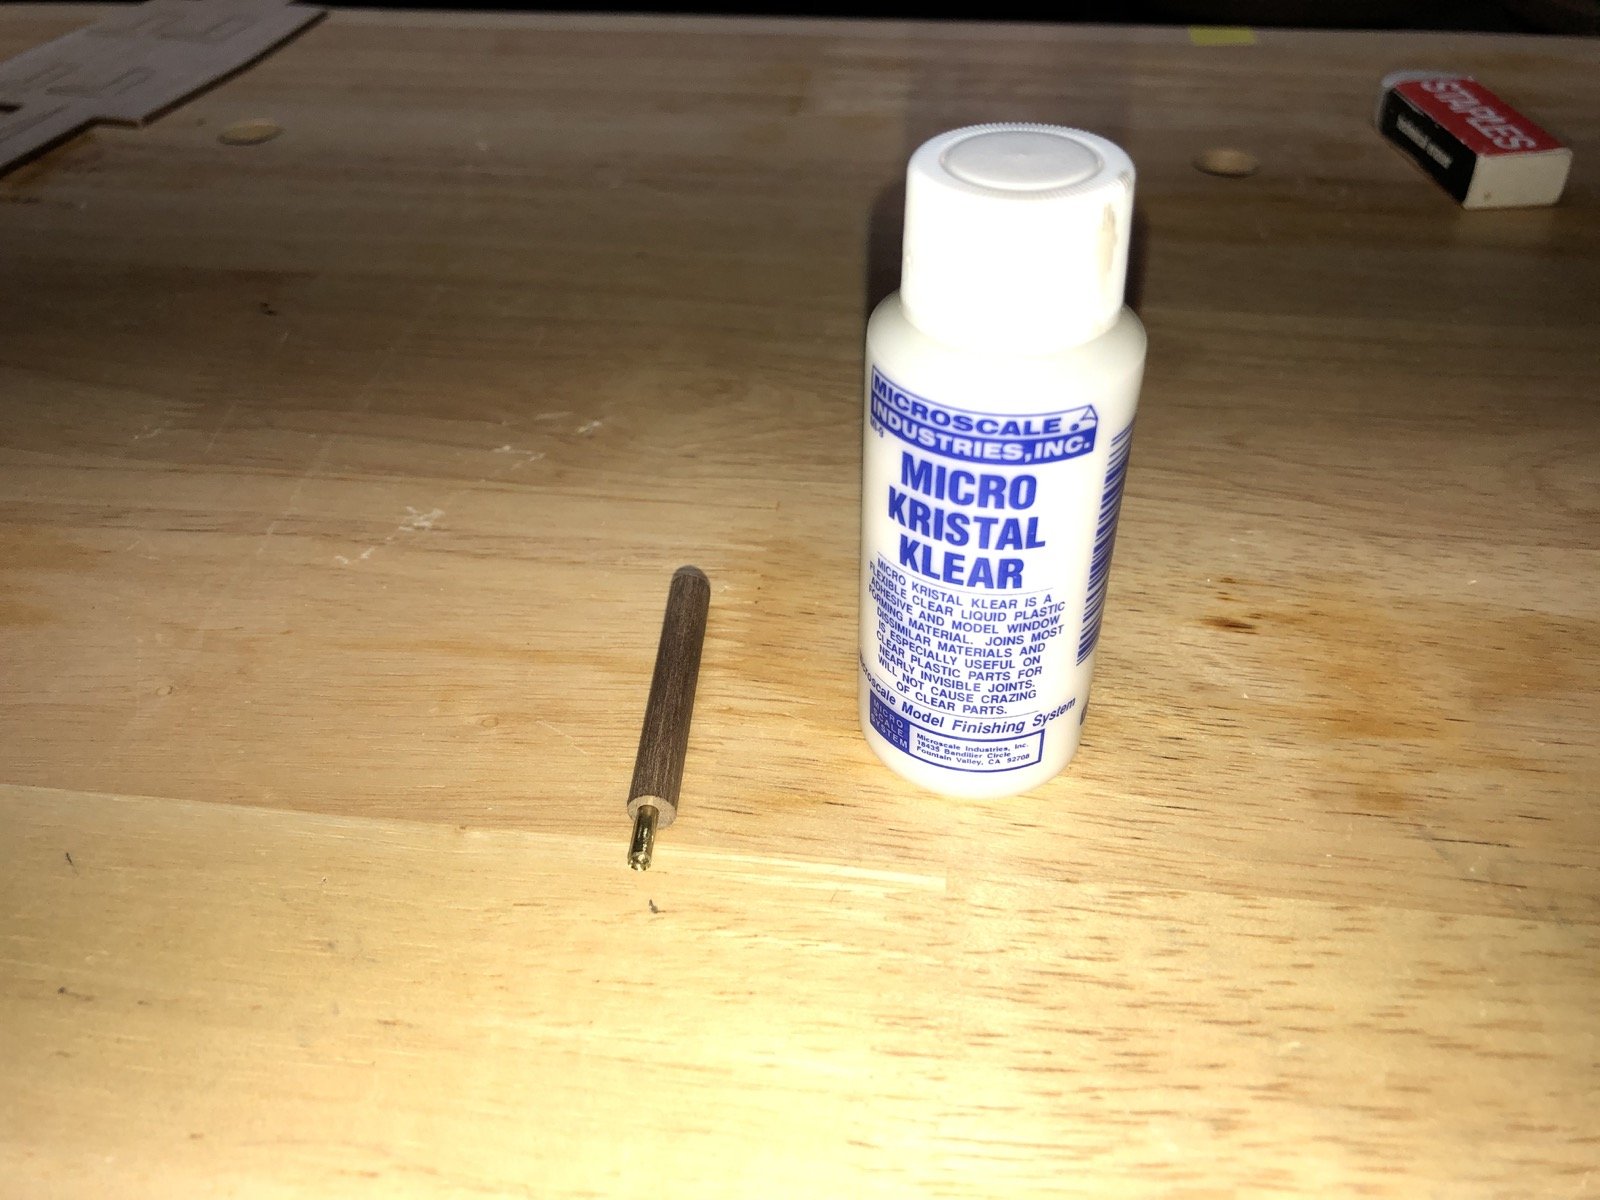
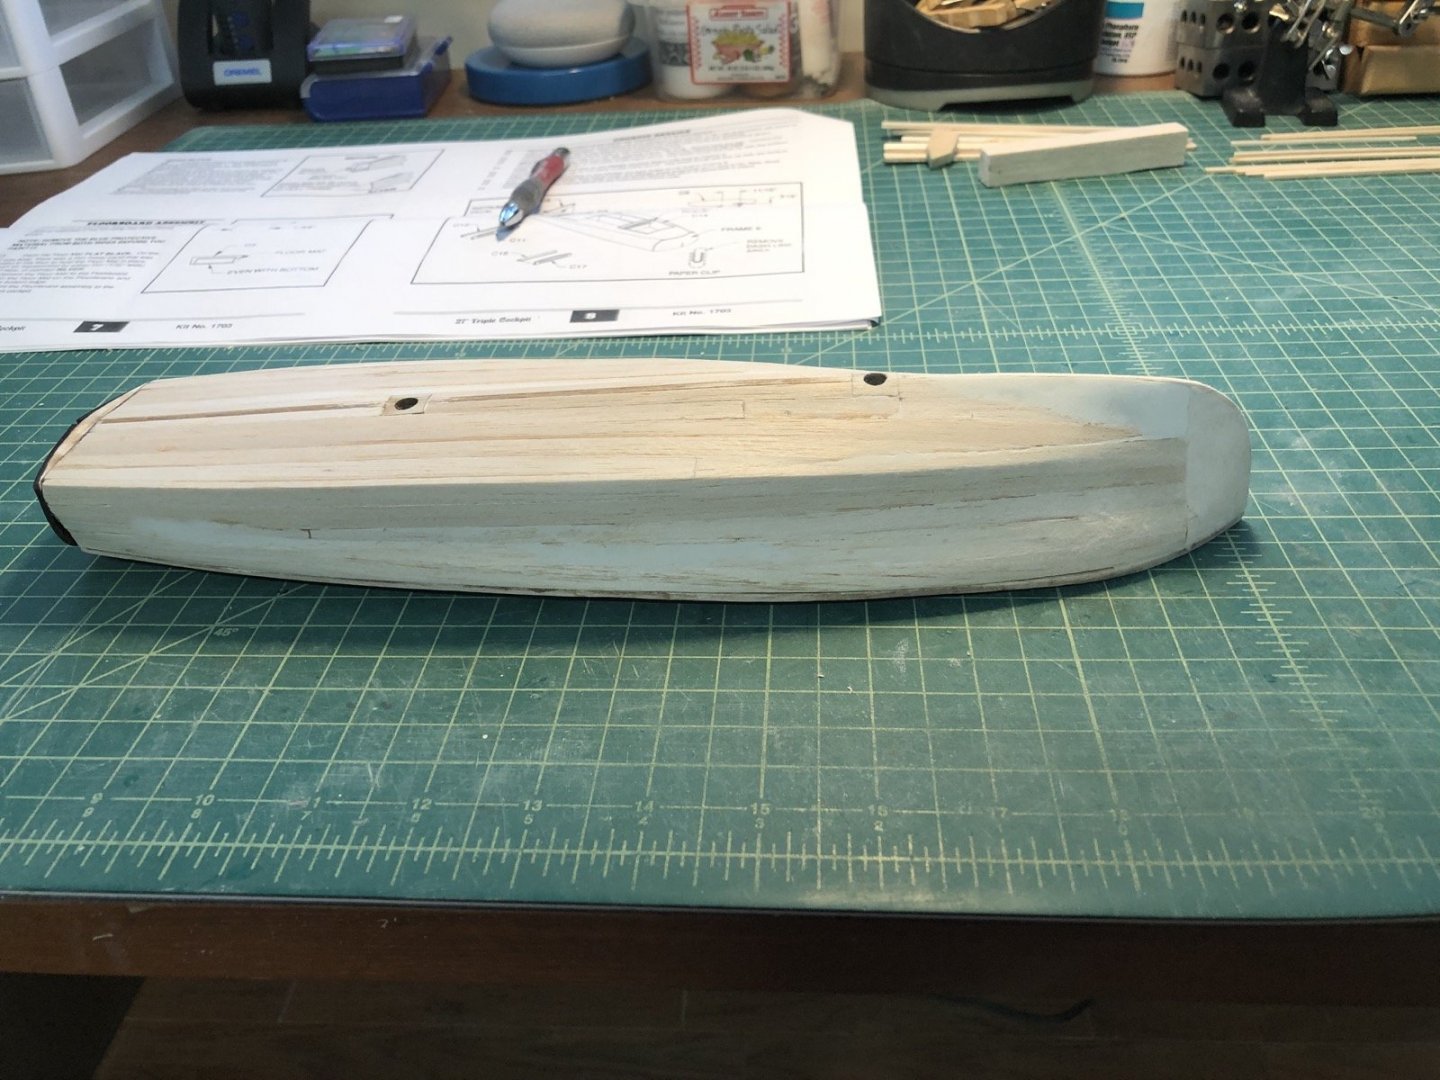
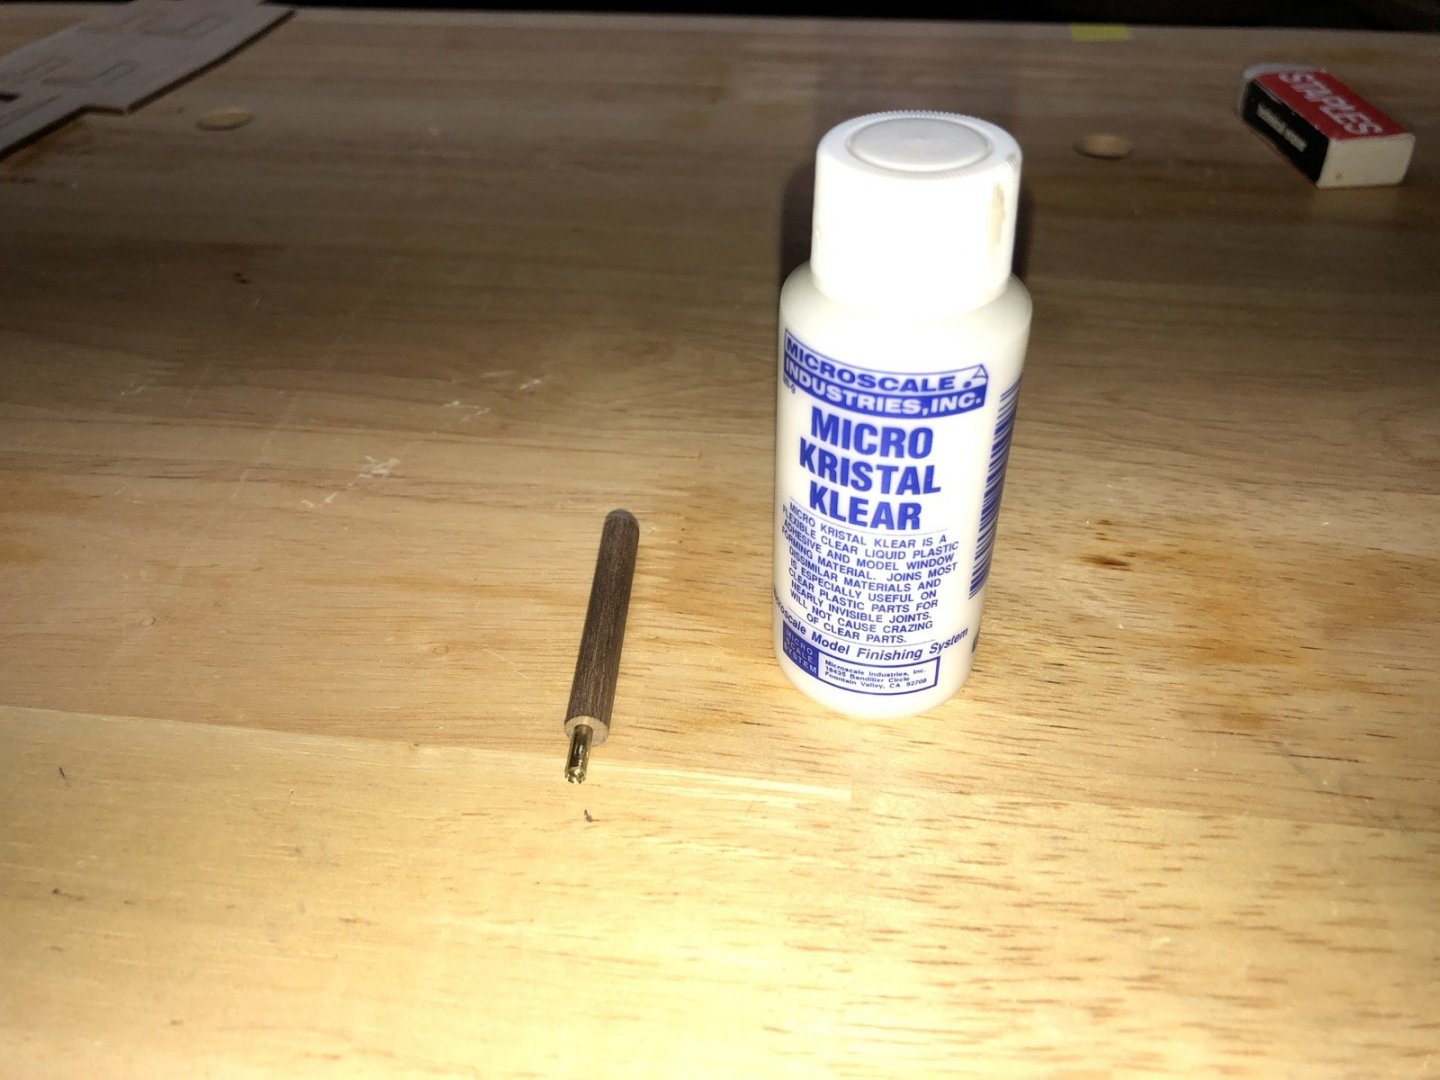
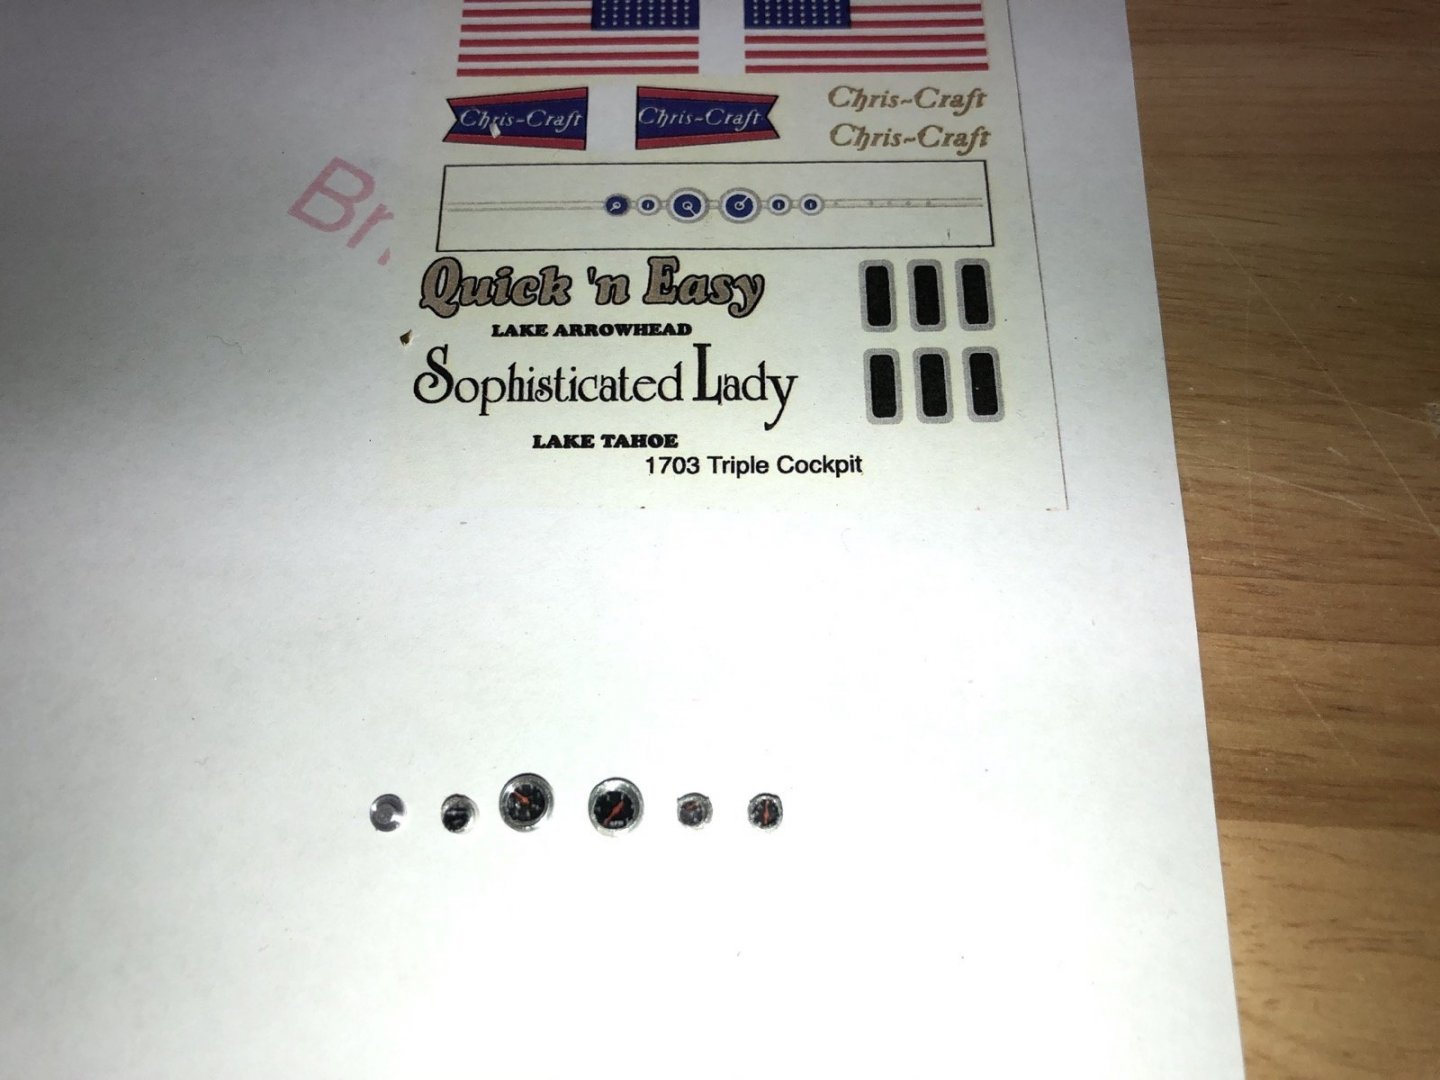
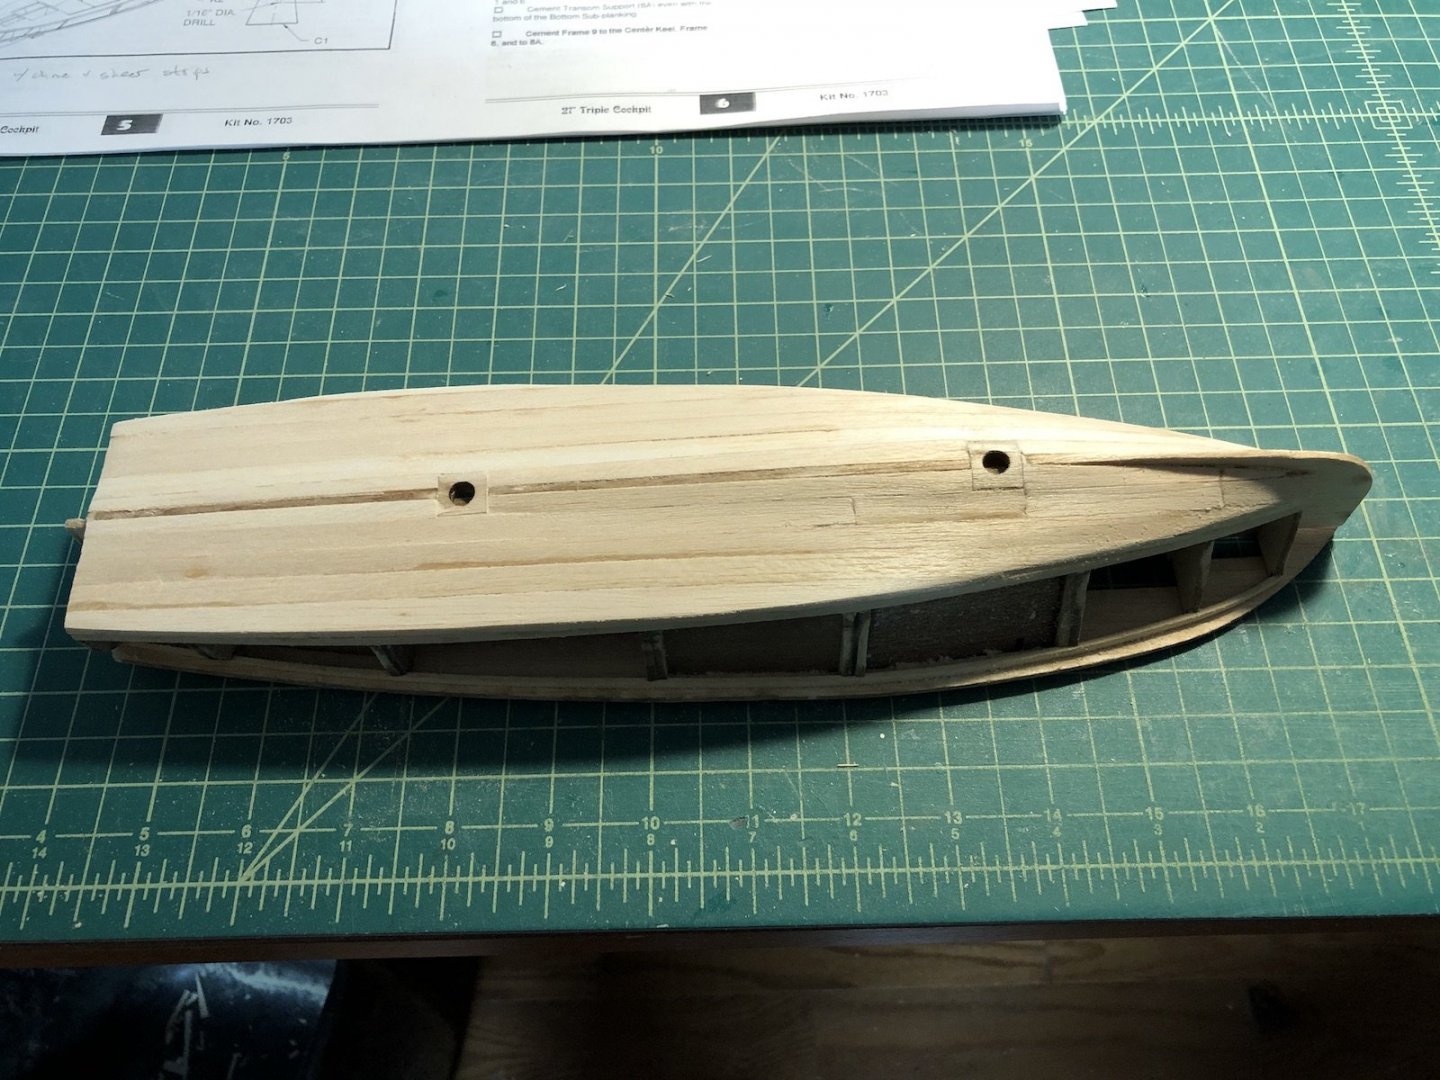
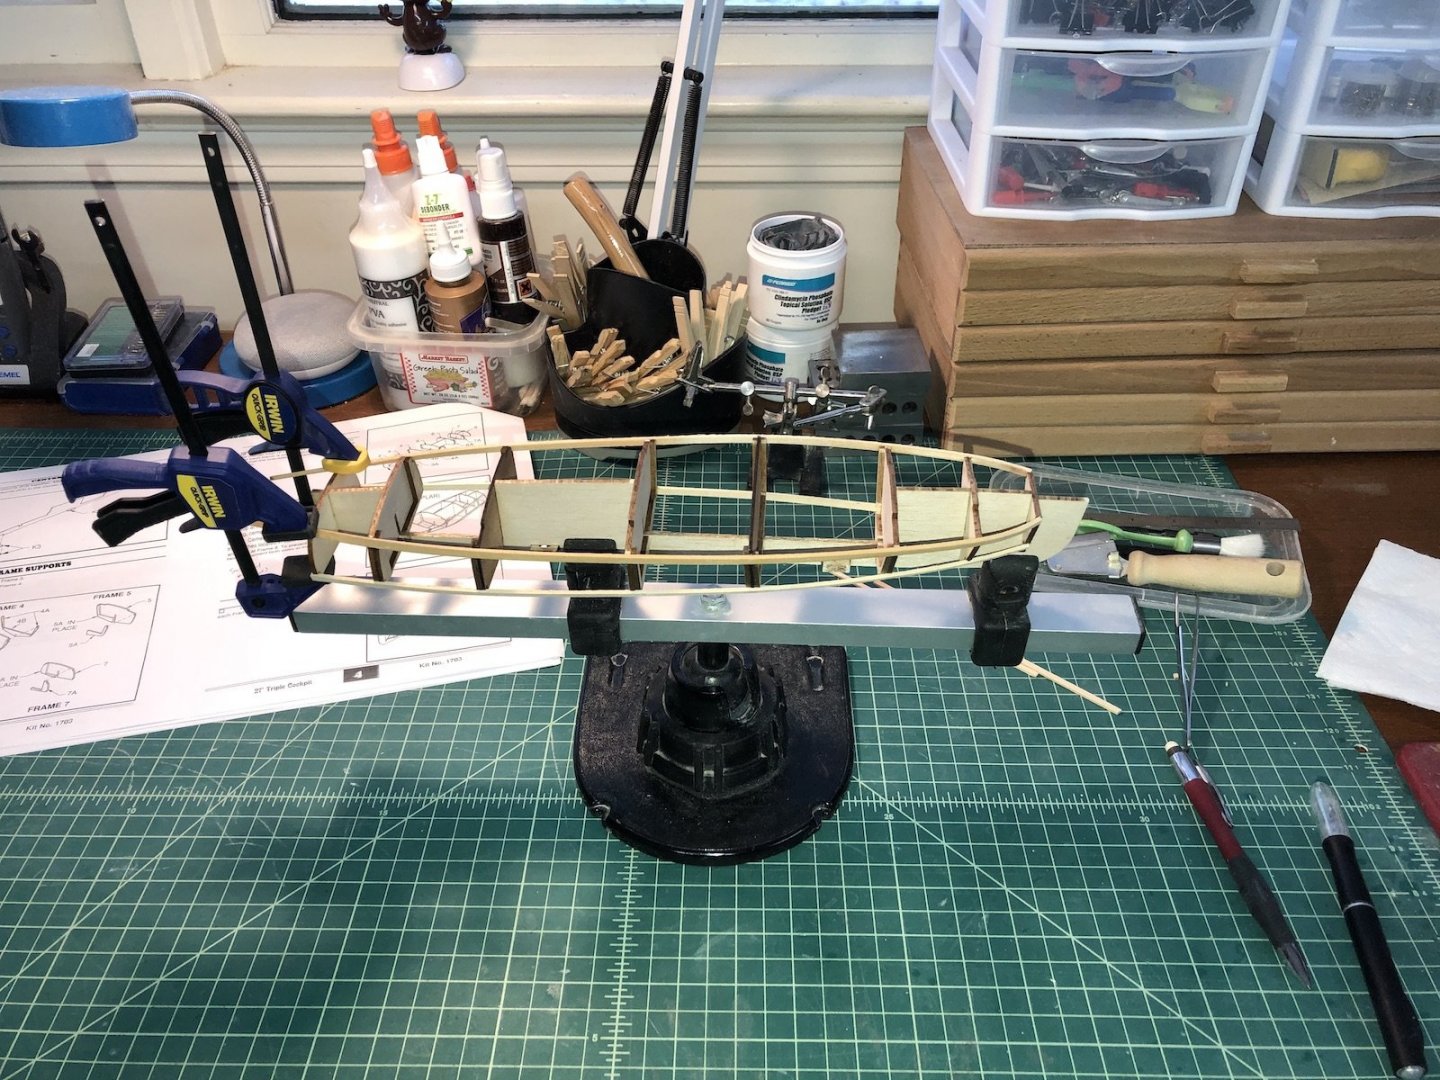
I am a bit behind on the build log so here is what I have been up to this week. First I cleaned up the propeller with files, sandpaper and a wire brush in the Dremel. Here is how it came out next to the supplied plastic propeller. I have a piece of tubing cut for the strut, but I will make the strut when I can fit it to the model later. I finished the gauges for the dash board too. I shrunk images of real gauges and used a circle cutter to cut them to fit into the large gauges. I didn't have a circle cutter small enough for the small gauges so I made one out of some brass tubing and a piece of dowel, which you can see here. I used an X-Acto blade around the inside of the tube to sharpen it then just pushed it into the paper while turning it to cut the images. I glued all the images into the gauges using the Micro Kristal Klear and also used it to cover the images to create a sort of glass cover. It goes on white and dries very clear. Here are the gauges compared to the dashboard decal that came with the kit. I have also been adding the sub-planking the hull using the fairly thick balsa strips that came in the kit. I have not used balsa very much so there was a bit of a learning curve. First of all, it breaks very easily, so I couldn't bend it like I do basswood. I found if I just soak it for a few minutes it will then bend very easily. Also, wood glue didn't work too well without clamps and you can't clamp the balsa at all without crushing it, so I have been using medium CA to hold the planks down, which works very well. I first planked from the chine strips to the keel, after doing a little fairing on the frames where the chine strips meet the frames. I sanded the excess and here is how it came out. You can see I had a bit of a problem at the first two frames. I then started adding the sub-planking of the sides by first building up the sheer strip and frames in places where the sub-planking strips fell short of the outside edge of the sheer. These were tapered so the planks fit flush to the adjacent planks. I then glued the first plank along the outside edge of the chine strip. Instead of planking up from there, I decided to add the plank along the sheer next and then I will plank between them. I also decided to taper the planks like I would do on any other planking job instead of using full width planks that would come to points along the sheer, as the instructions wanted me to do. So I measured off the distances at each frame and tapered two planks, soaked them for a few minutes and started gluing it down at the first frame, then each frame until I got to the aft end. This worked really well and now I can start filling in the area with three more tapered planks on each side.

-
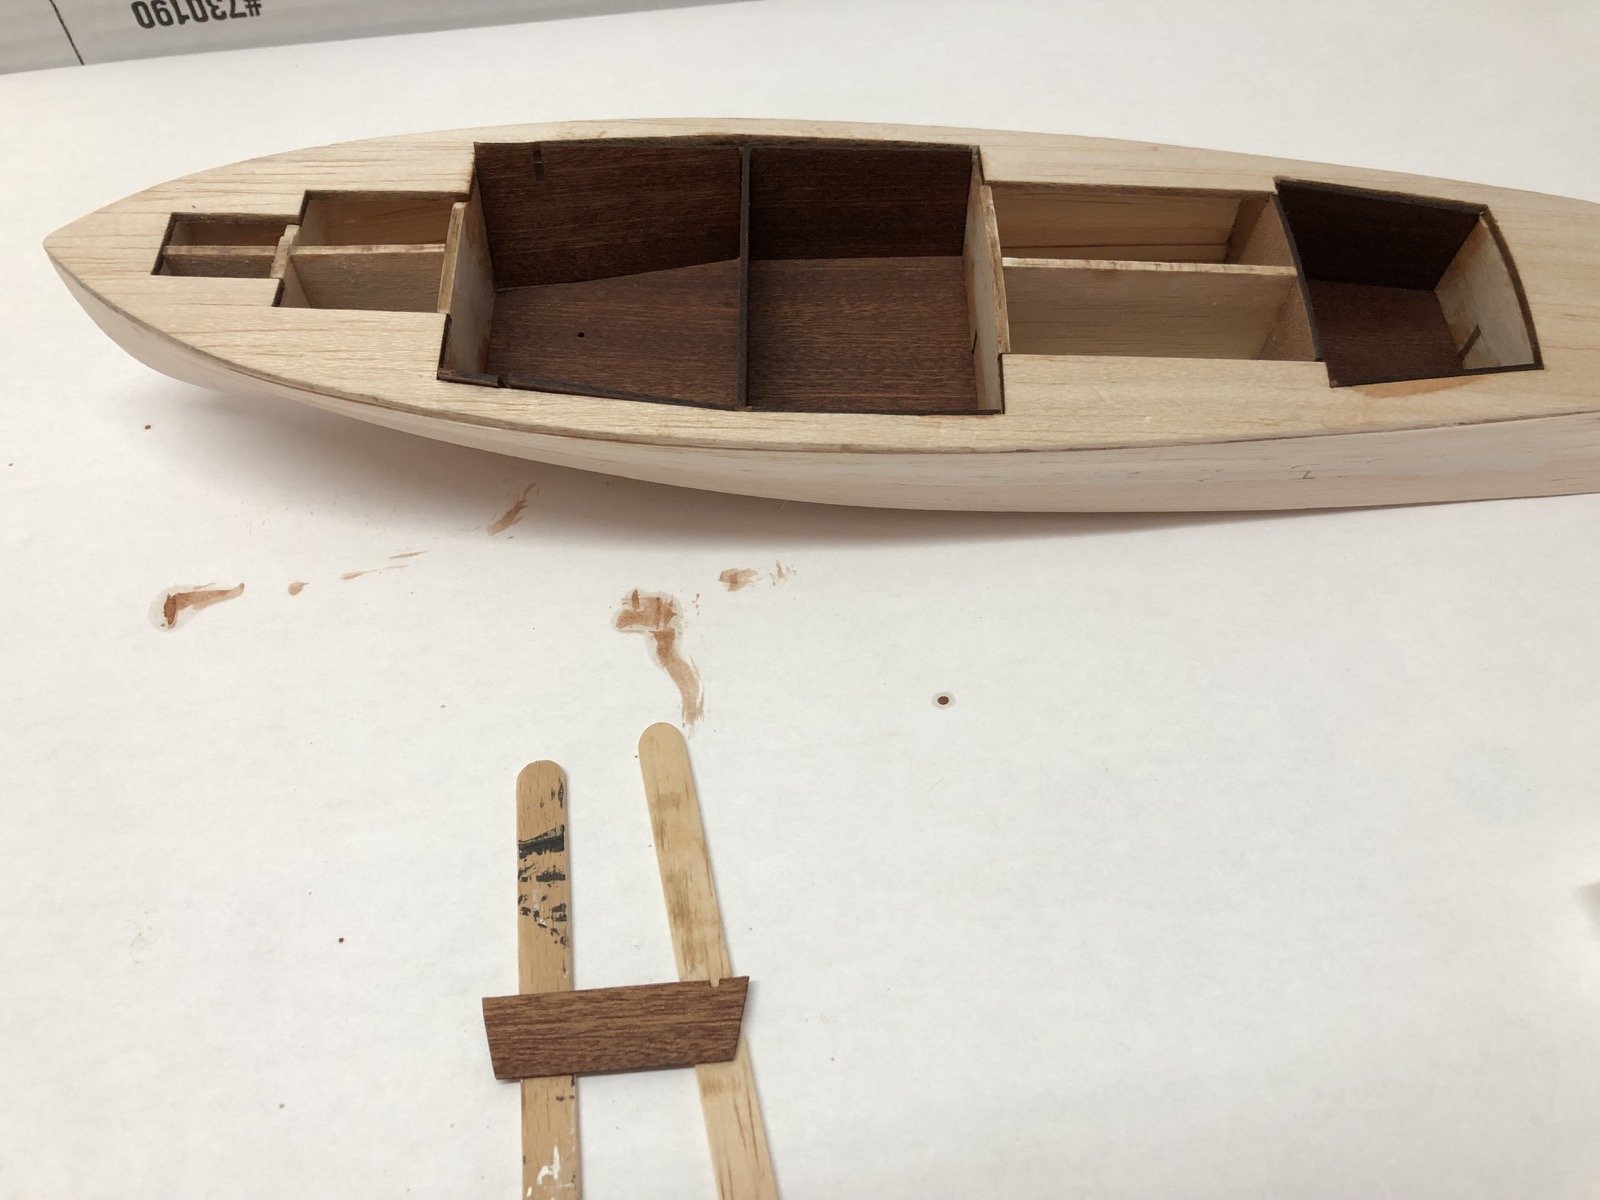
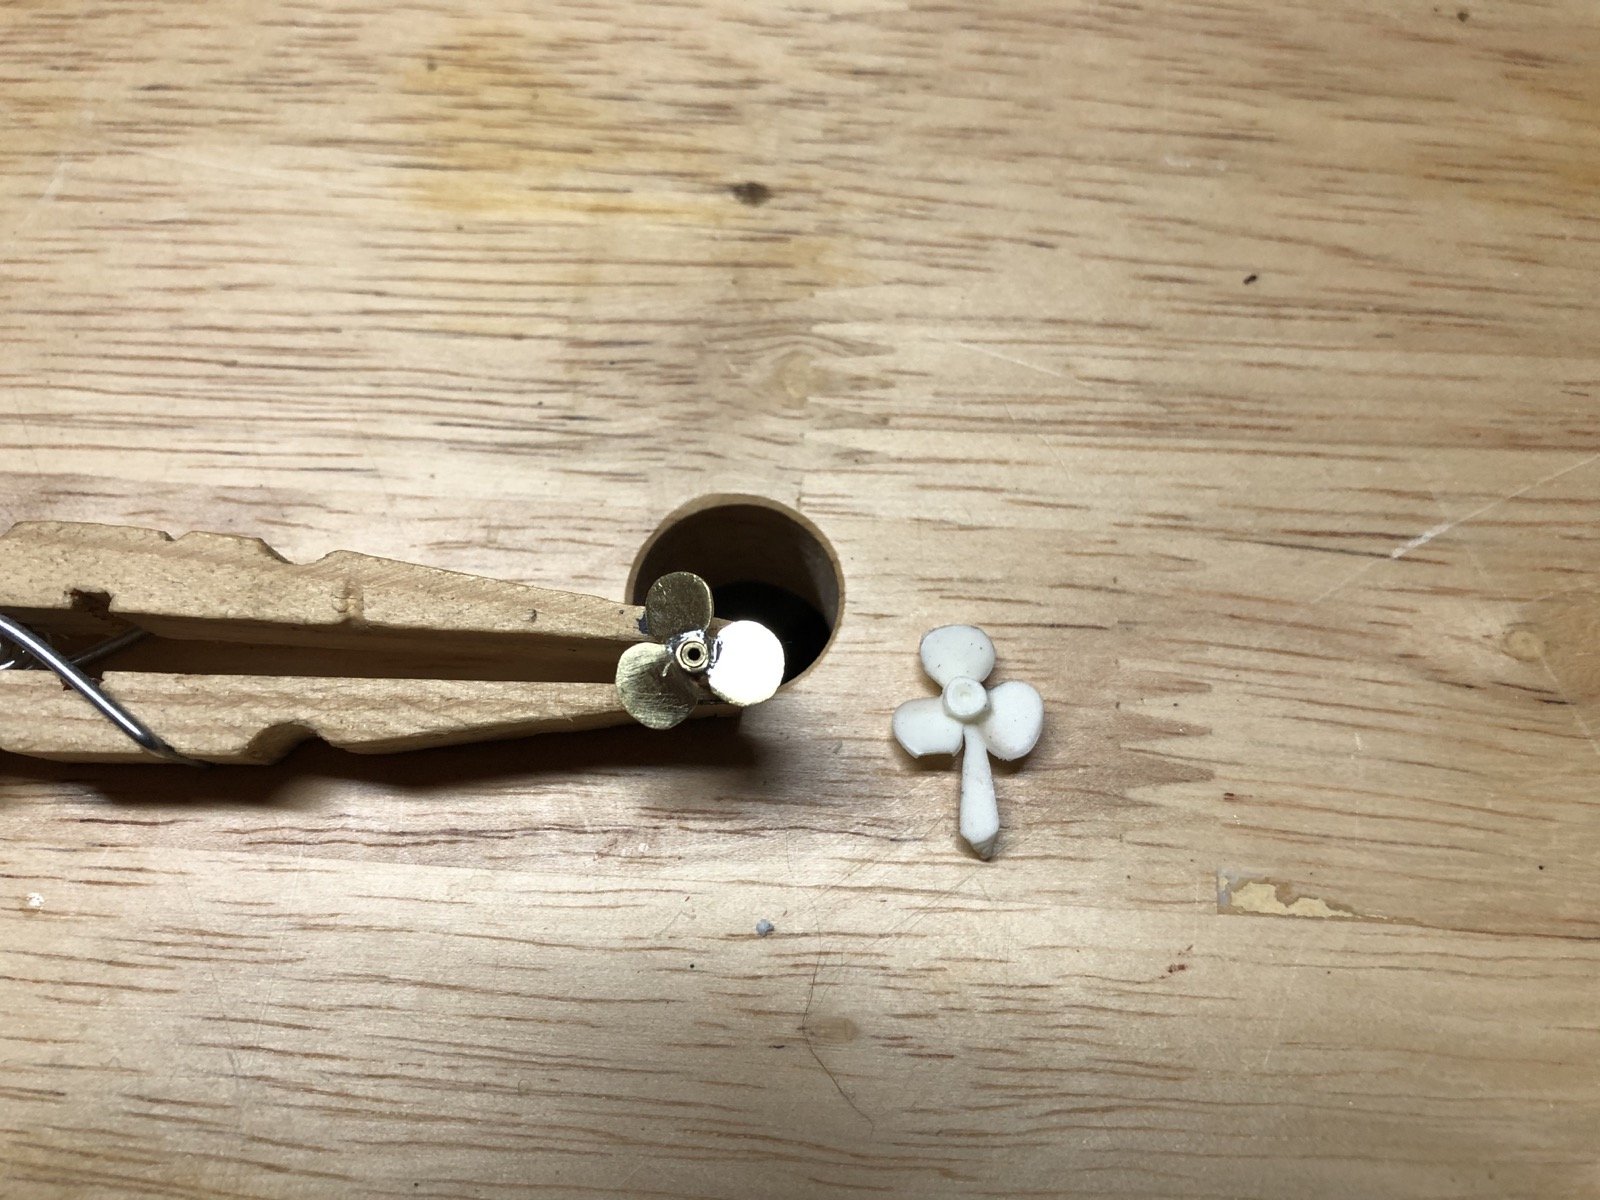
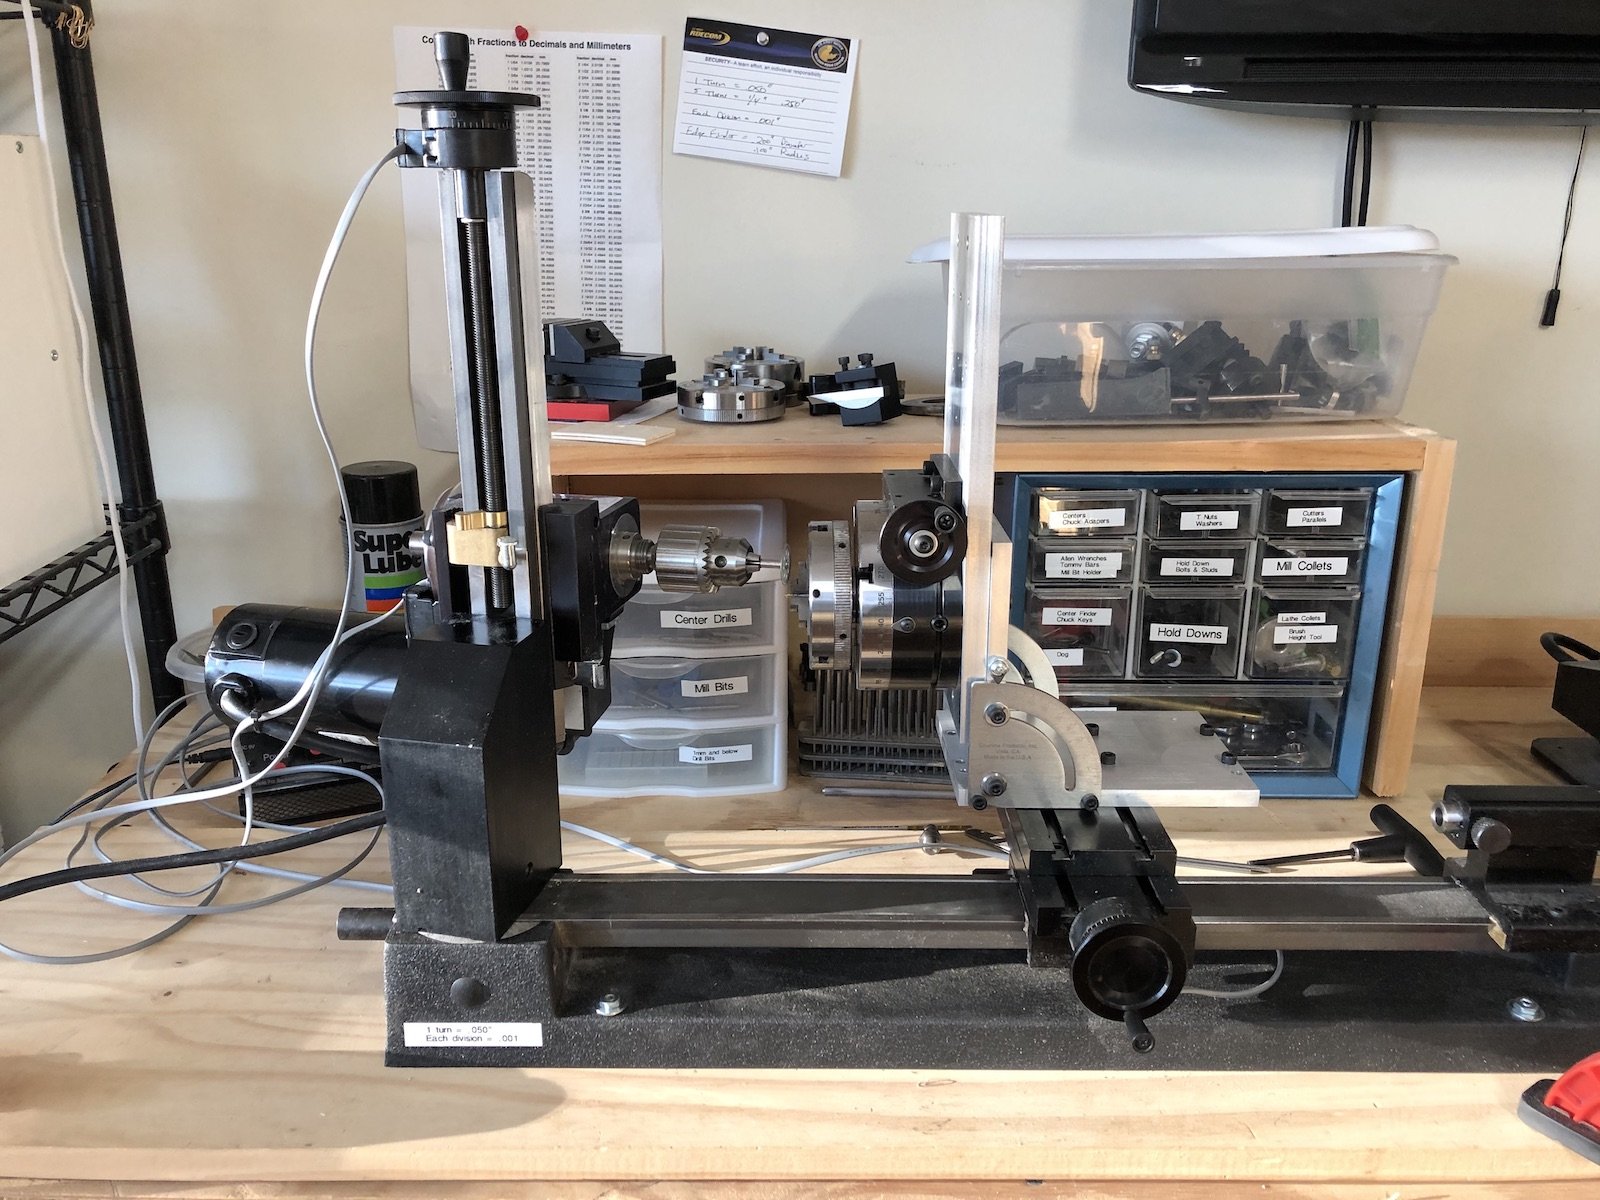
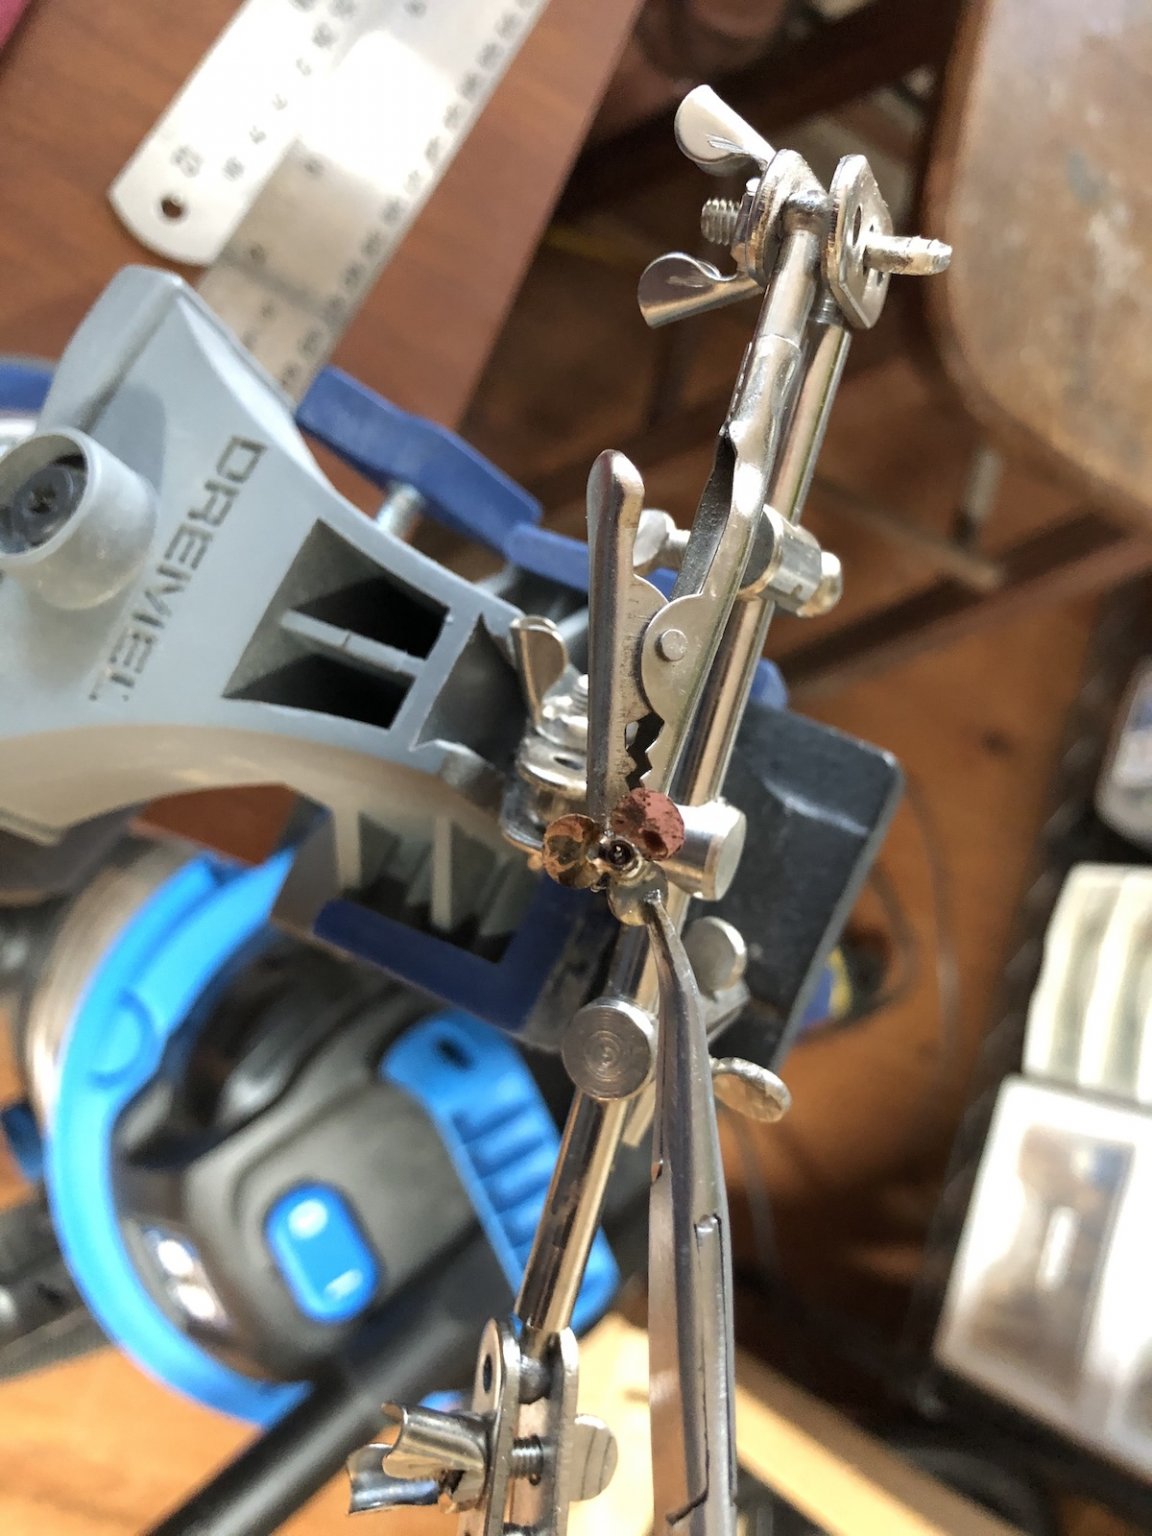
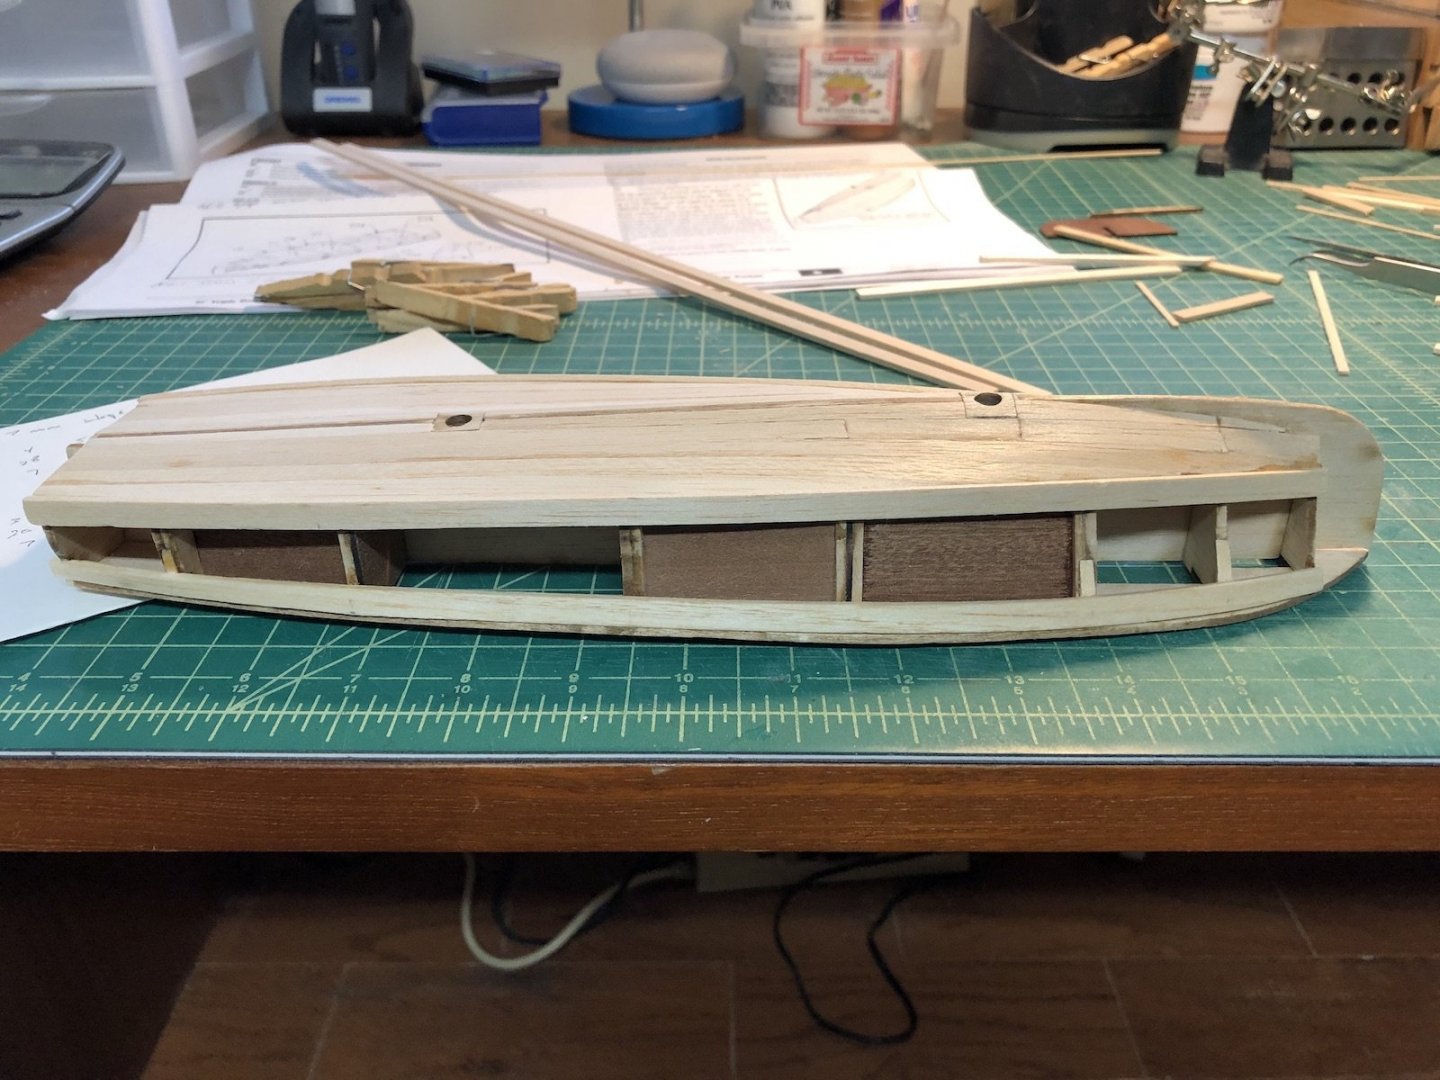
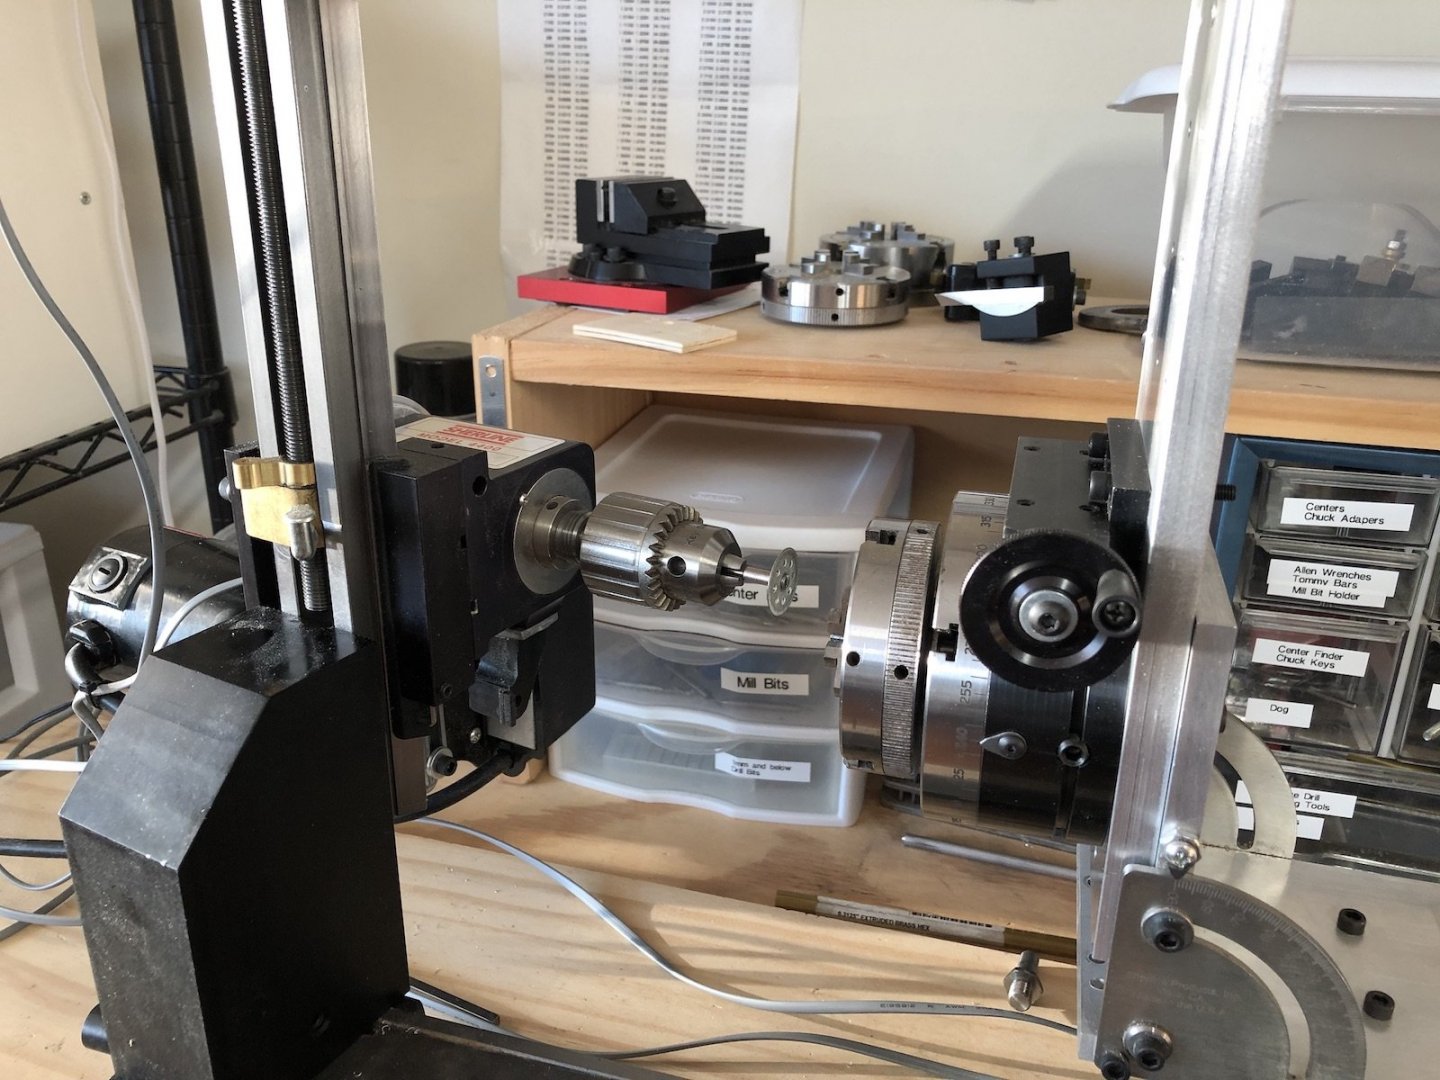
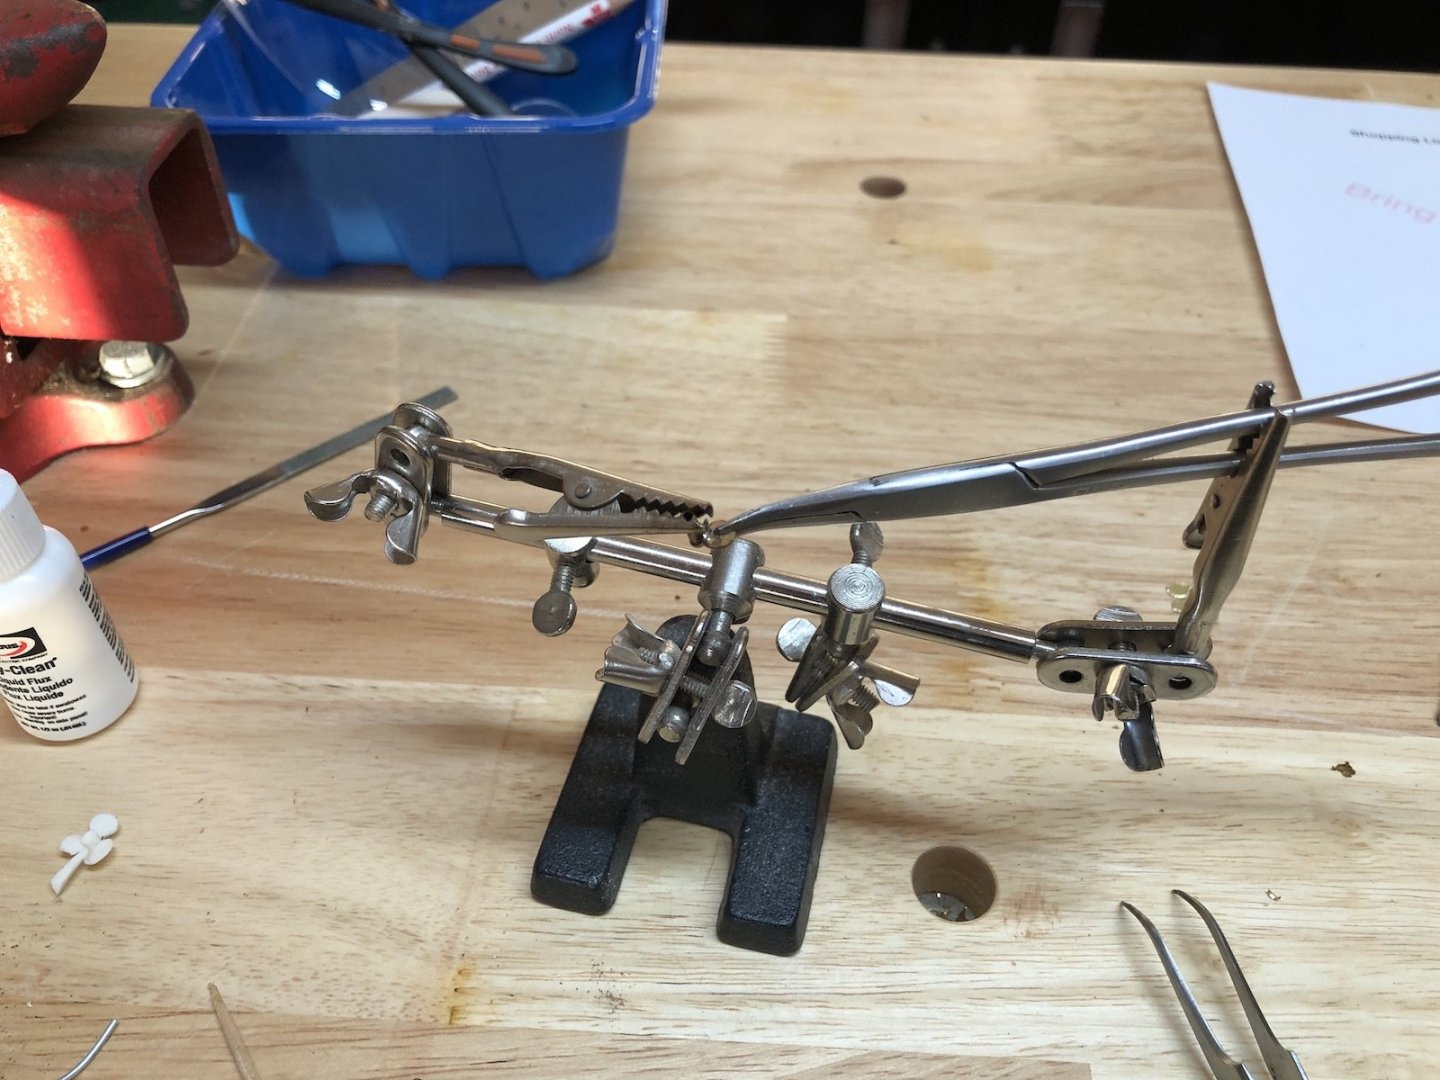
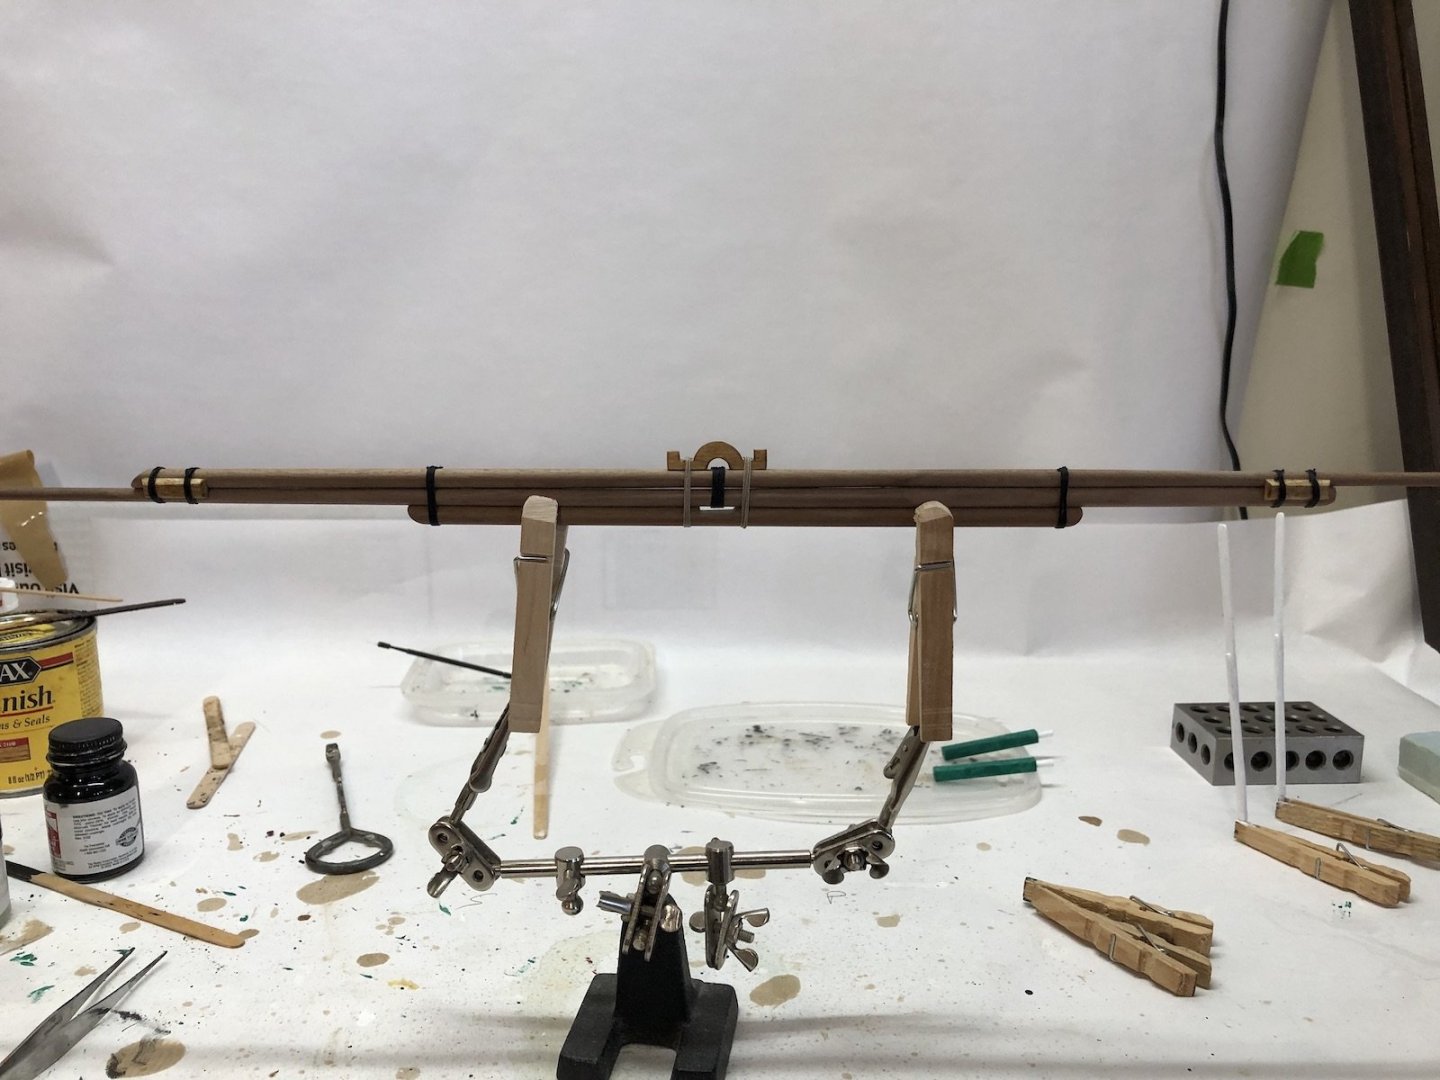
I made a lot of progress over the last couple of days. On the hull I glued in the mahogany sections that make up the cockpit sides and floors. There were some slight gaps along the floor joints so I used some excess mahogany from the laser sheet to cover them on the underside of the cockpits. These will be planked in so they won't show later. In fact the next step is to add the first layer of planking which are balsa strips like the one shown in this picture. They are certainly easy to bend but this is a first for me. They will bne covered later with mahogany strips. I spent some time today working on making a propeller since the plastic supplied prop was pretty bad. I started with two brass tubes that slide together. I will use the smaller tube for the prop shaft and used the larger one for the prop hub. I set up the Sherline mill as shown, which is the most complex set up I have done to date and it is all for three small slots. On the mill side, I used a Dremel saw disk in the drill chuck to get enough distance of the blade from the mill column. On the lathe bed I first mounted the angle plate at a 90 degree angle, then added a long work plate that has holes for mounting the rotary table. This was needed to get the 3 jaw chuck that was mounted in the rotary table high enough to get under the working distance of the mill column. I put the brass tubing for the hub in the chuck and brought the saw down to make a small slot, rotated the chuck 120 degrees two times to make the other two slot. I was pleasantly surprised that the hub stayed together with those cuts. I made the blades from some brass sheet I had, which I cut out and filed to shape. I made one and used it as a template for the other two. I then used the third hand and some forceps to hold the hub and blade will I soldered them together. I did this one blade at a time using Stay Bright low temp solder, but I cut a very small piece of solder and placed it on the blade, then used a butane mini torch to heat them instead of a soldering iron. This worked really well and I had no problem with the previous blades desoldering while I soldered the next blade. I think if I tried to do this with a soldering iron I would have had problems. You can see the propeller after the last blade was soldered on in the previous picture. I need to clean it up now but I am very happy with how it came out so far. I have also been working on the gauges and will have pictures of them tomorrow.

-
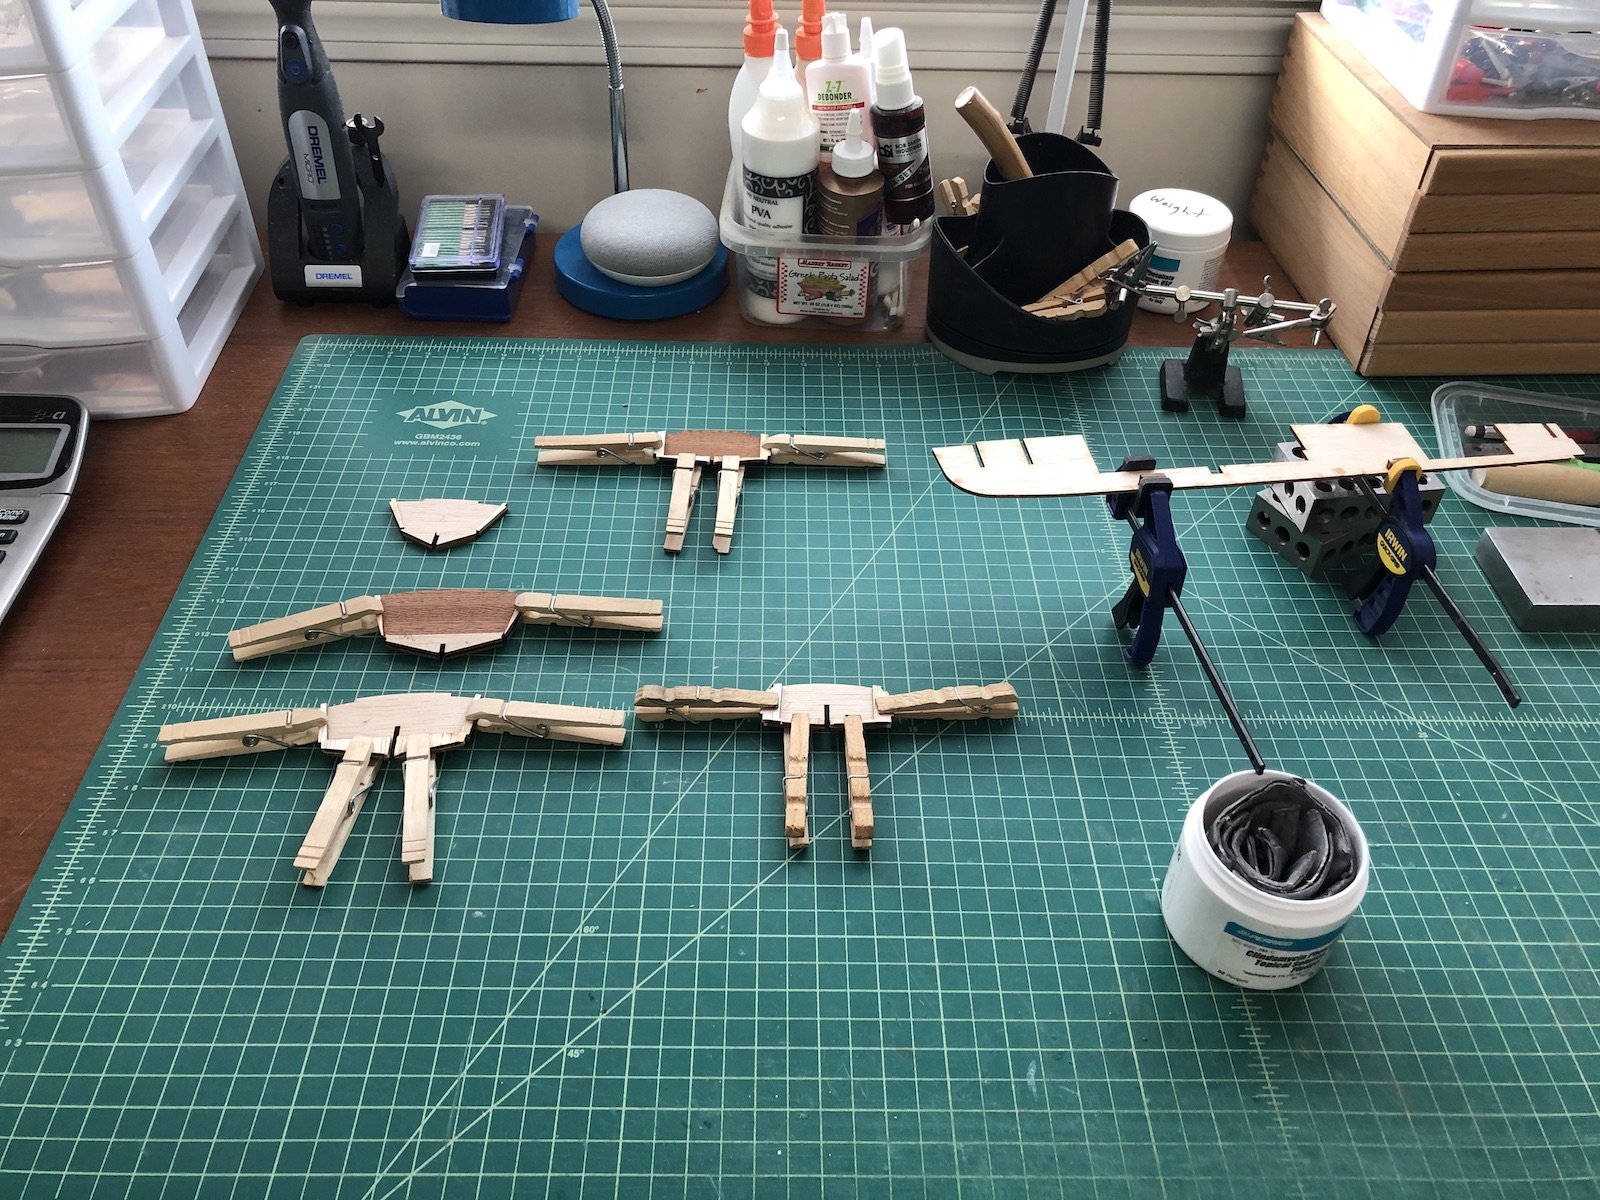
I pre-bent and glued the sheer strips to the frames using the same technique as the chine strips. They have a big twist on the last two frames but I was able to clamp them while the glue dried. I also took another shot at the bevels. I was able to make them look thinner than the first try and I also was able to make the smaller ones too. I have two more small ones to make.
-
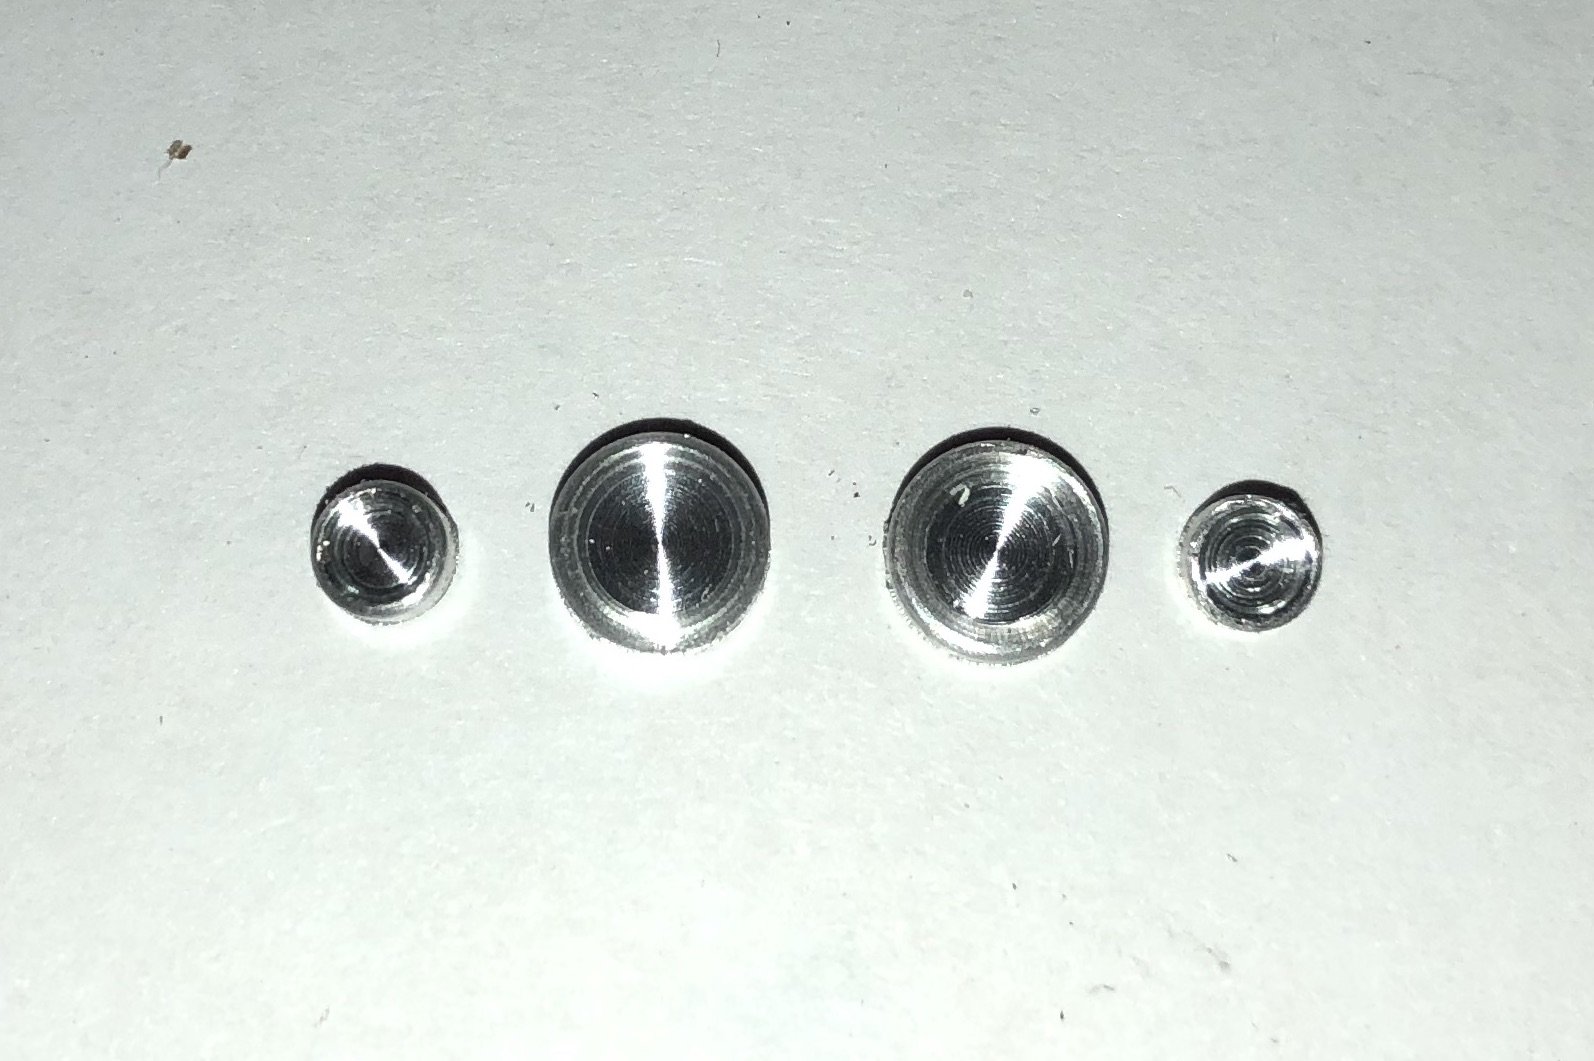
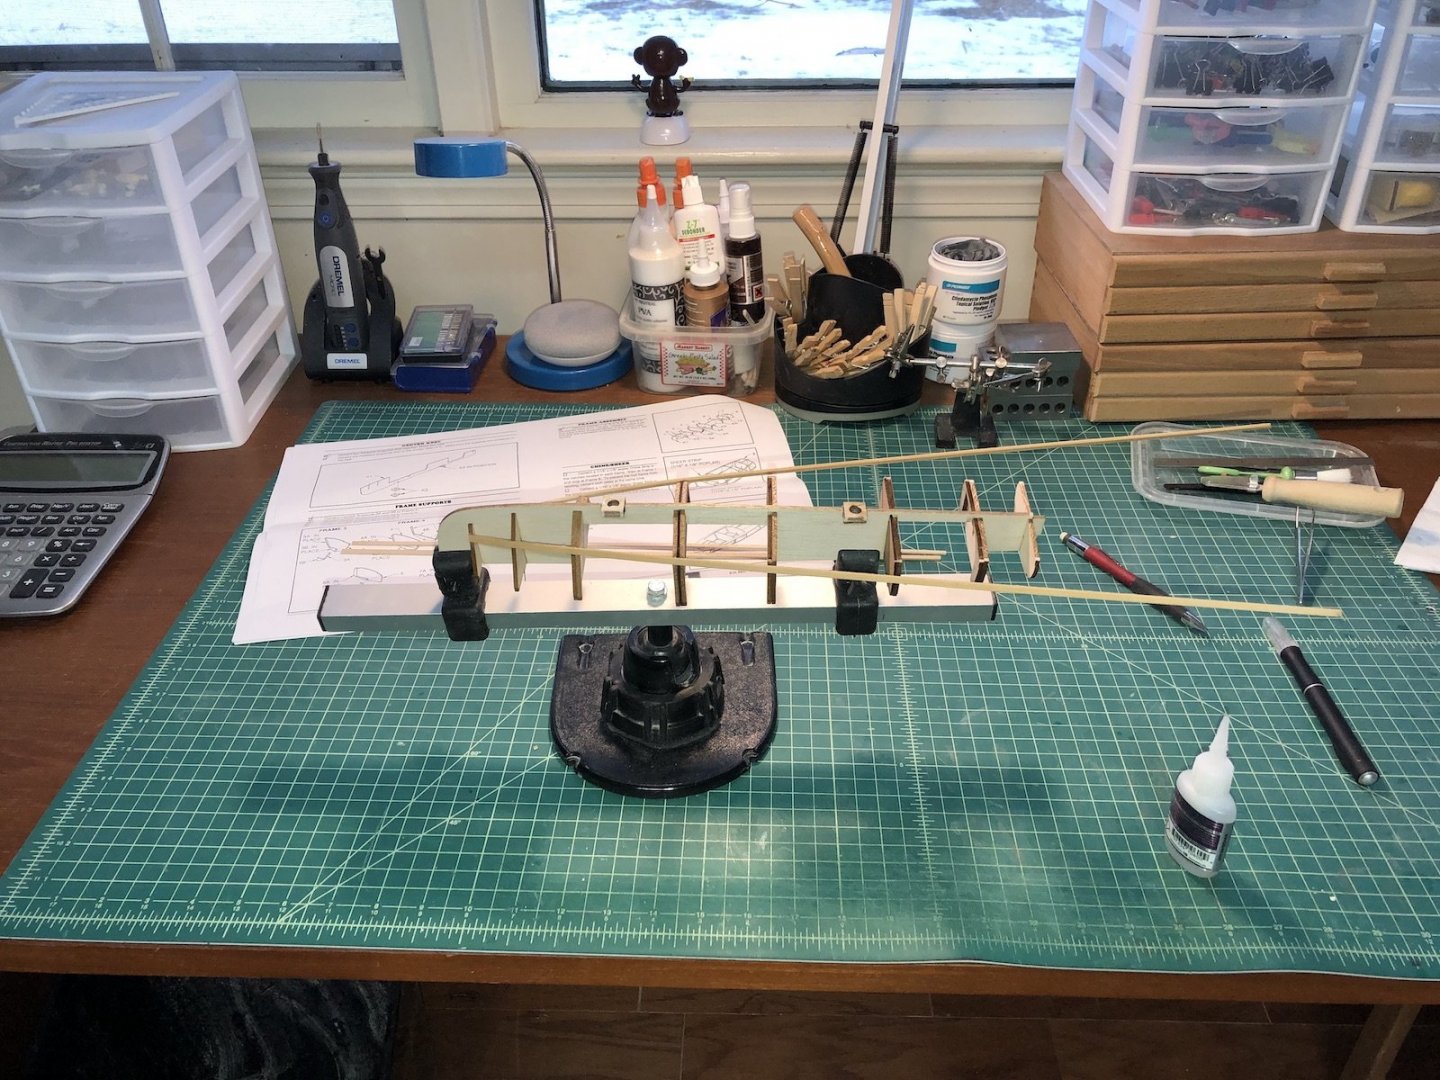
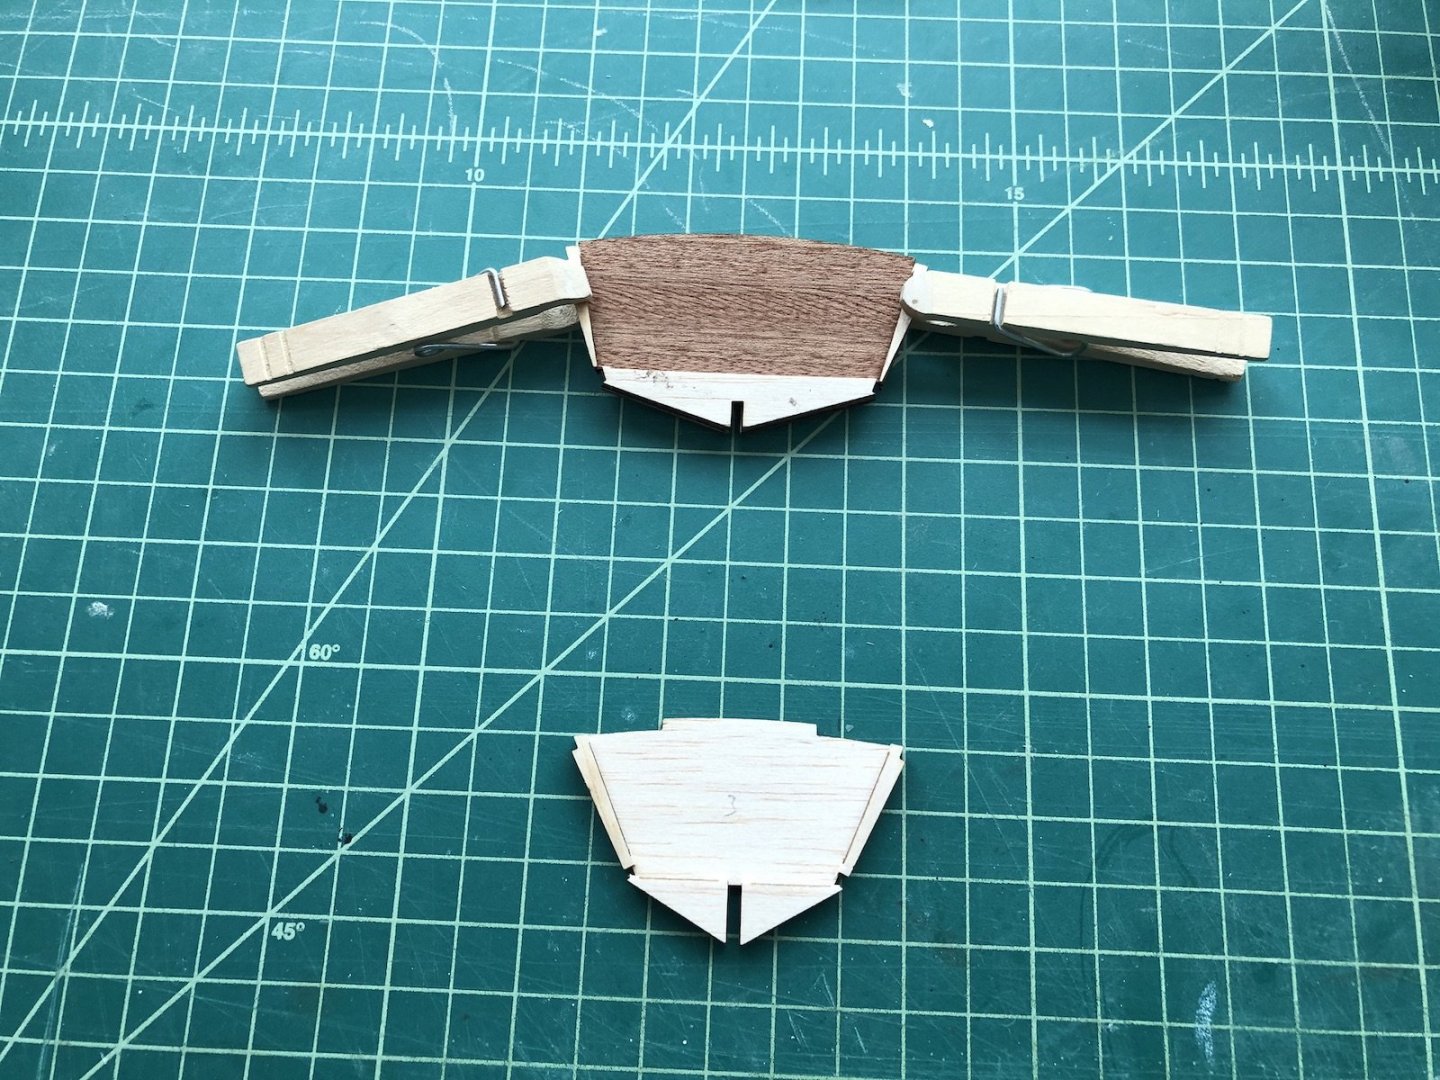
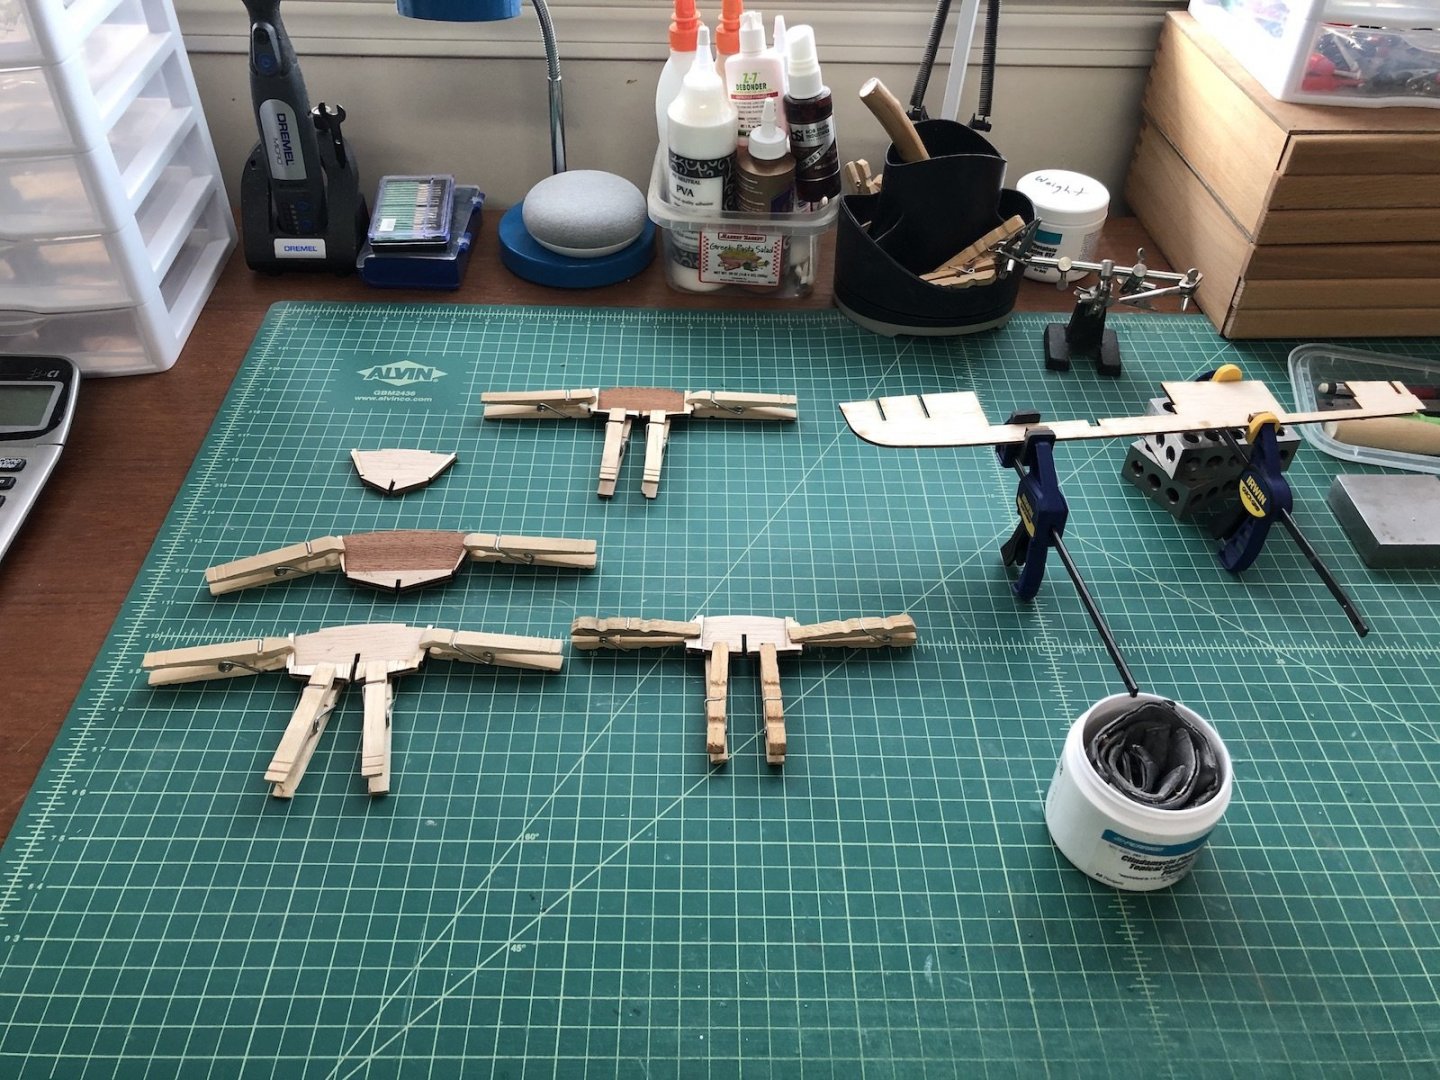
I glued the frames to the keel using Lego blocks to hold them perpendicular to the keel. Remember that the keel is balsa wood and very thin in places, so much care was taken in this process. I was able to get them all on without breaking the keel so I was very happy. The next step was to glue two chine strips to the frames. I pre-bent the forward ends of the strips so there was no tension on the frames because with that balsa keel it can be bent very easily. I first put the keel in the clamp to help keep it straight, then glued the strips to each frame one at a time and at the same time, so I could check the straightness of the keel as I went. I used medium CA glue so that I could hold them by hand instead of clamping them. After about an hour I had them glued to all the frames. I also experimented with making some bevels for the instrument panel from aluminum round stock on the lathe. Here is my first attempt compared to the decal that is supposed to represent the dash. The outside diameter matches the decal when measured but the bevel looks too thick so I will try making them thinner.
-
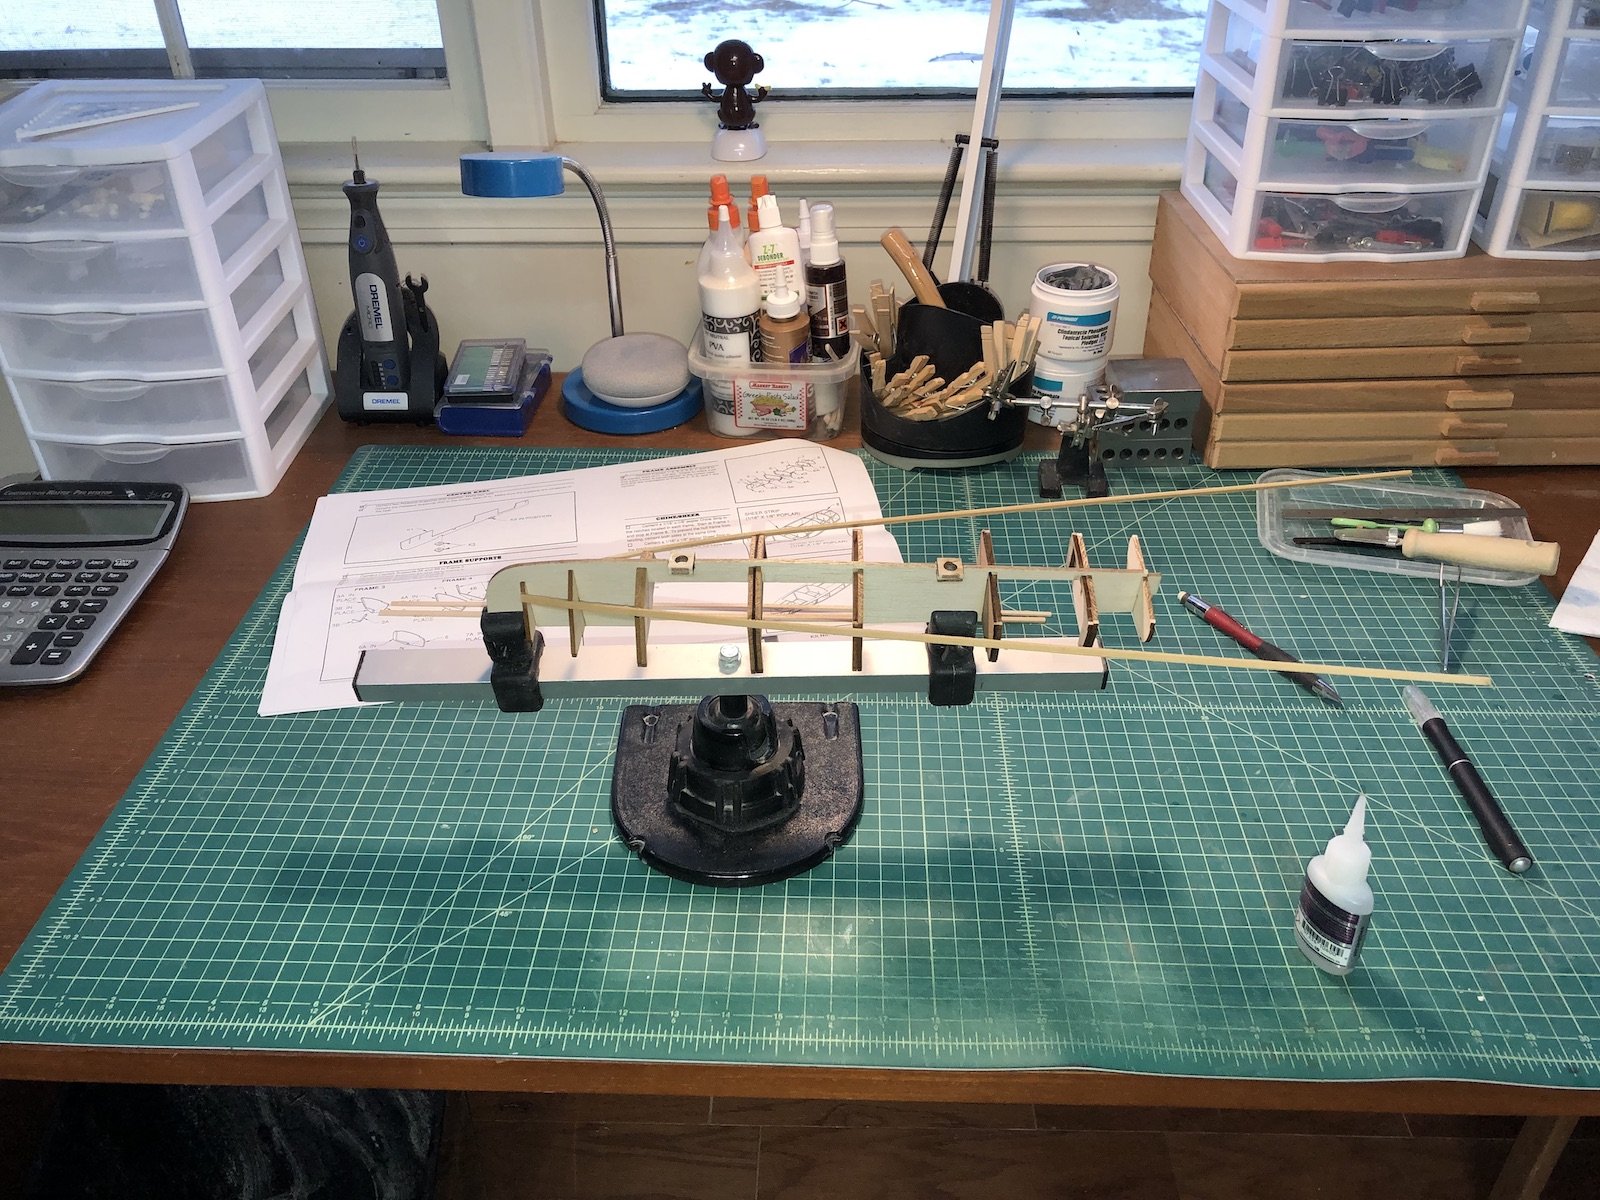
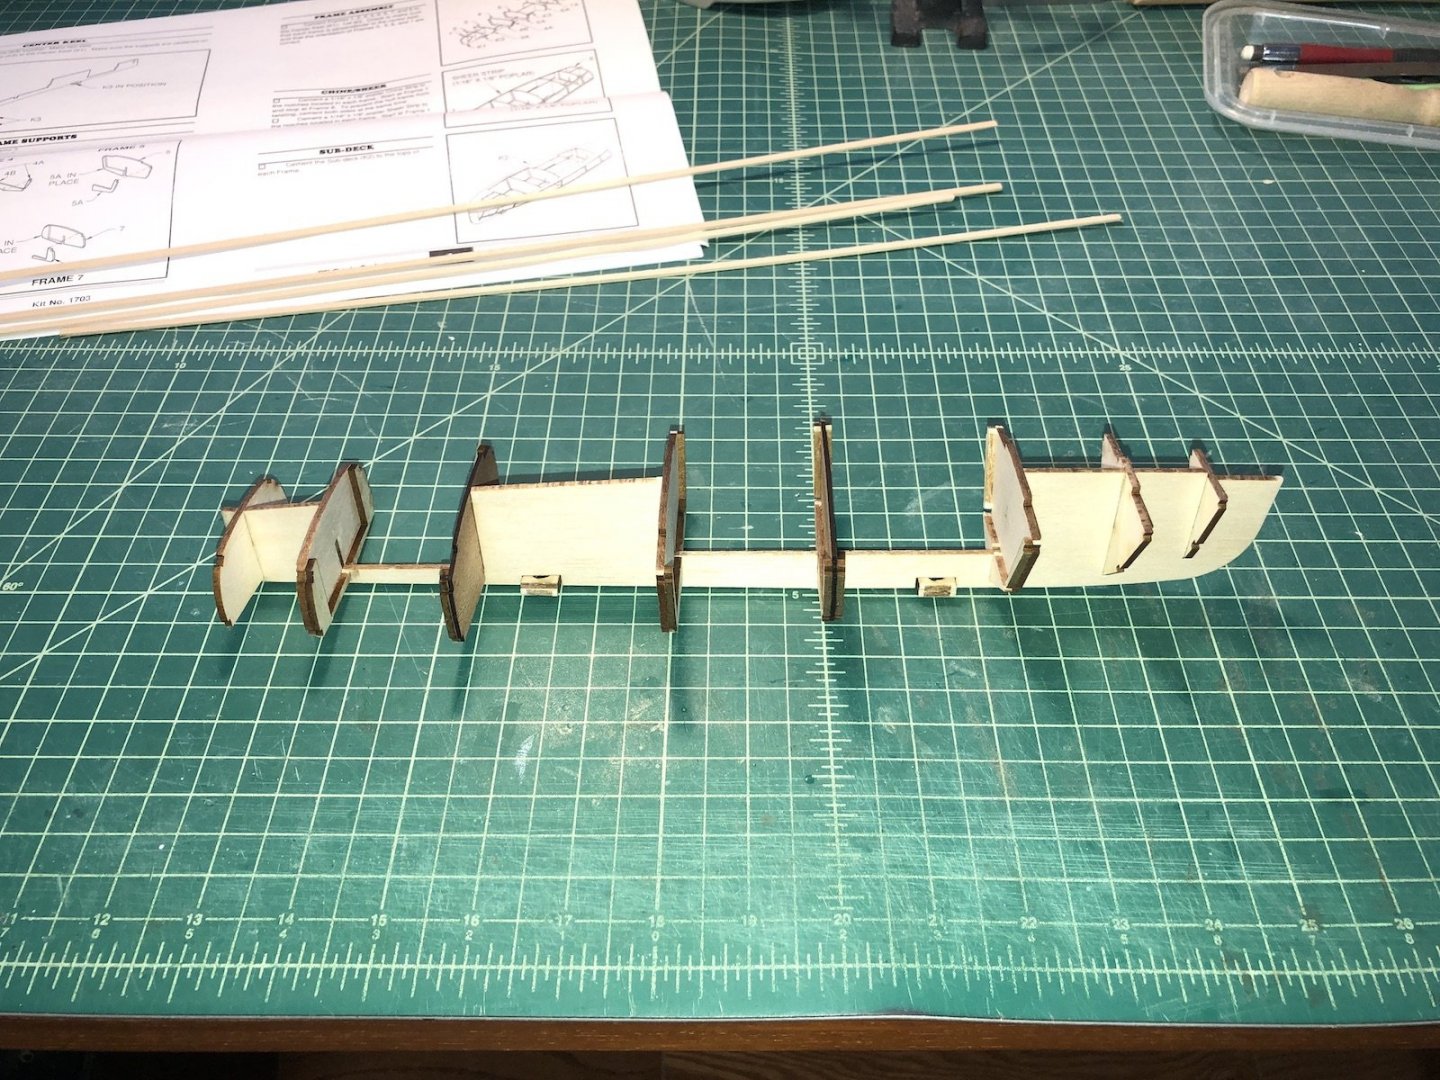
Here are all the frames with the thickness pieces added. Next is to add them to the keel, which has the pieces that hold the pedestals glued on.
-
Excellent job on the lashings. Those are tricky to do. Your boat is coming along beautifully.
-
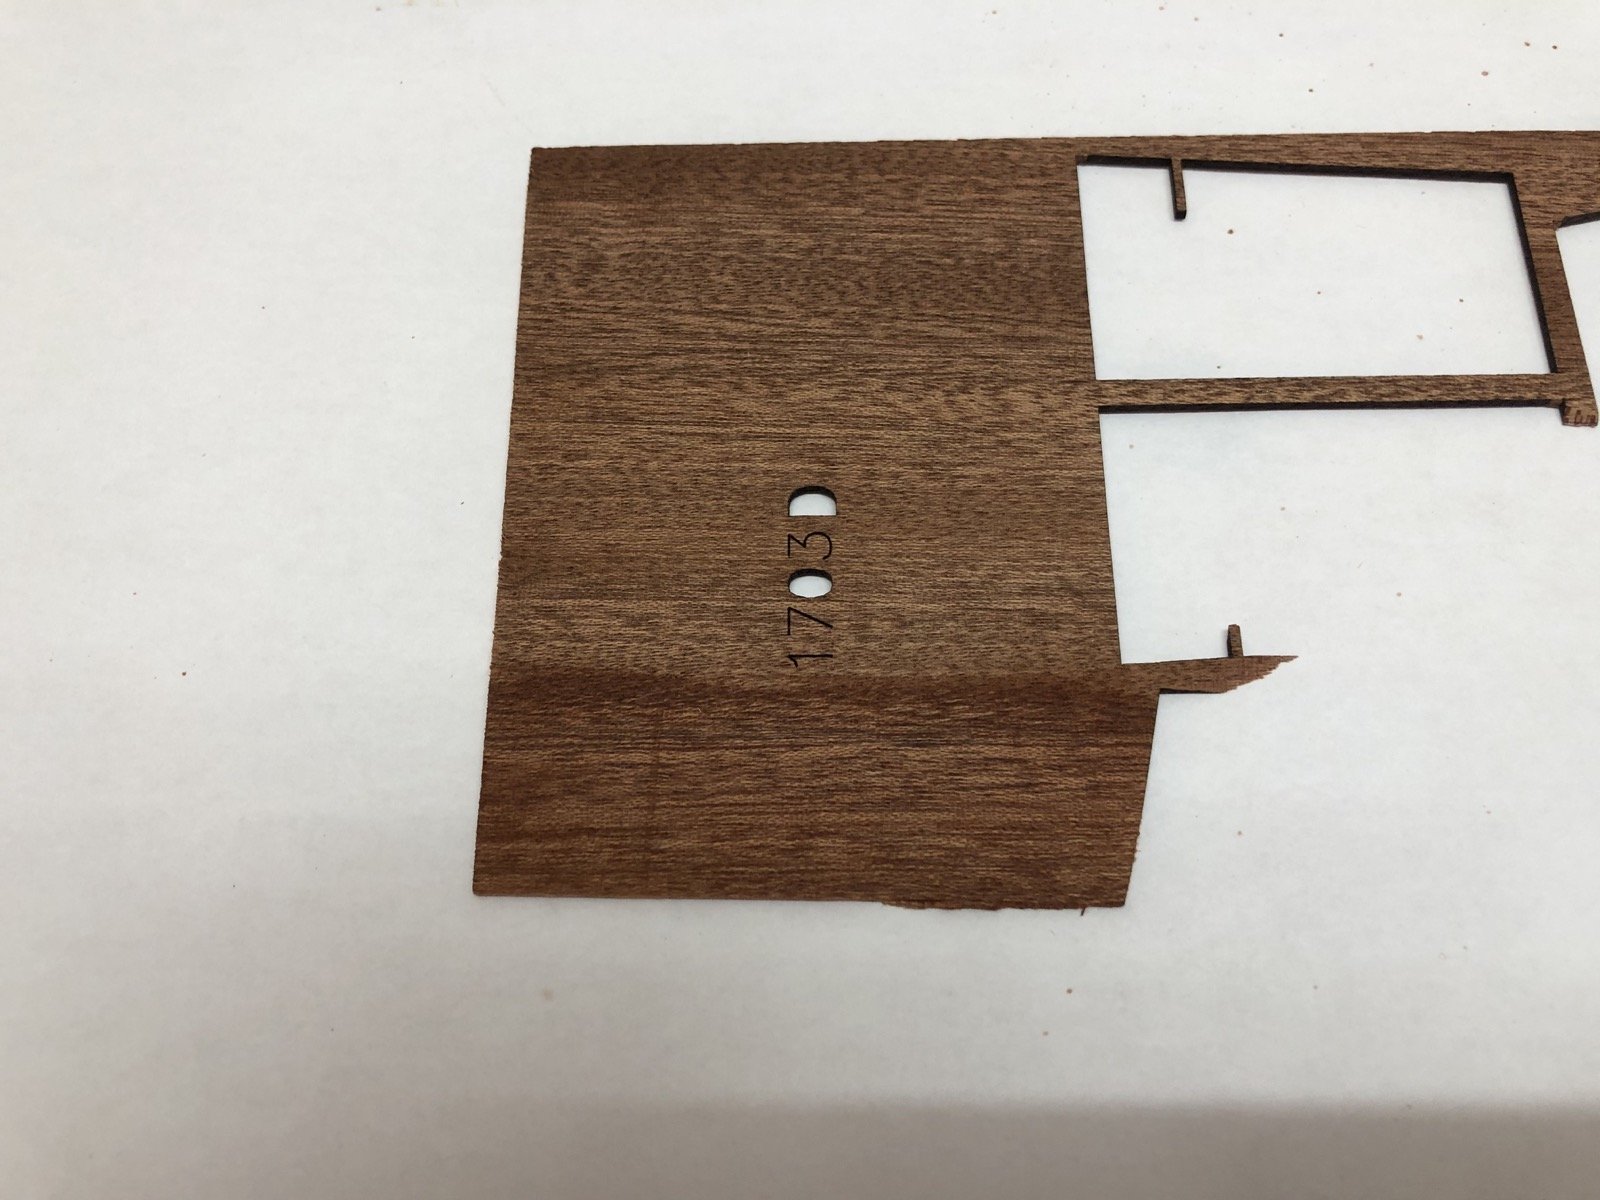
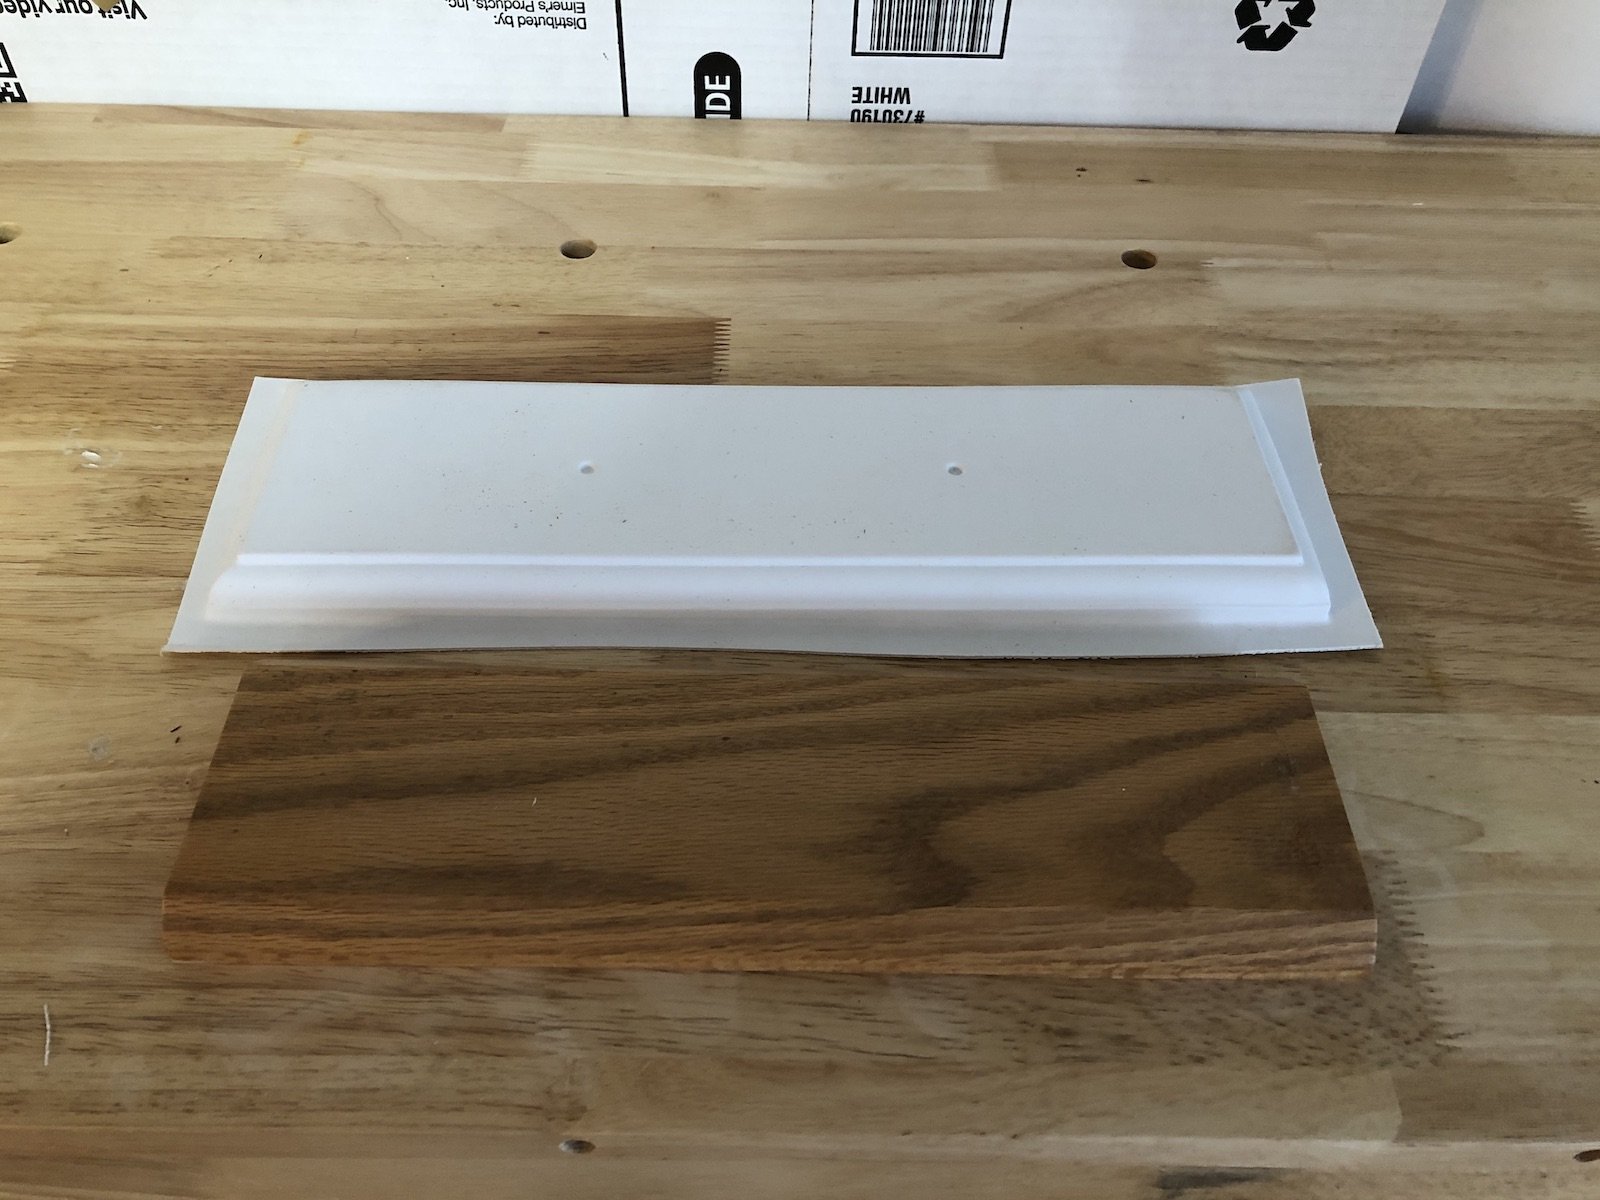
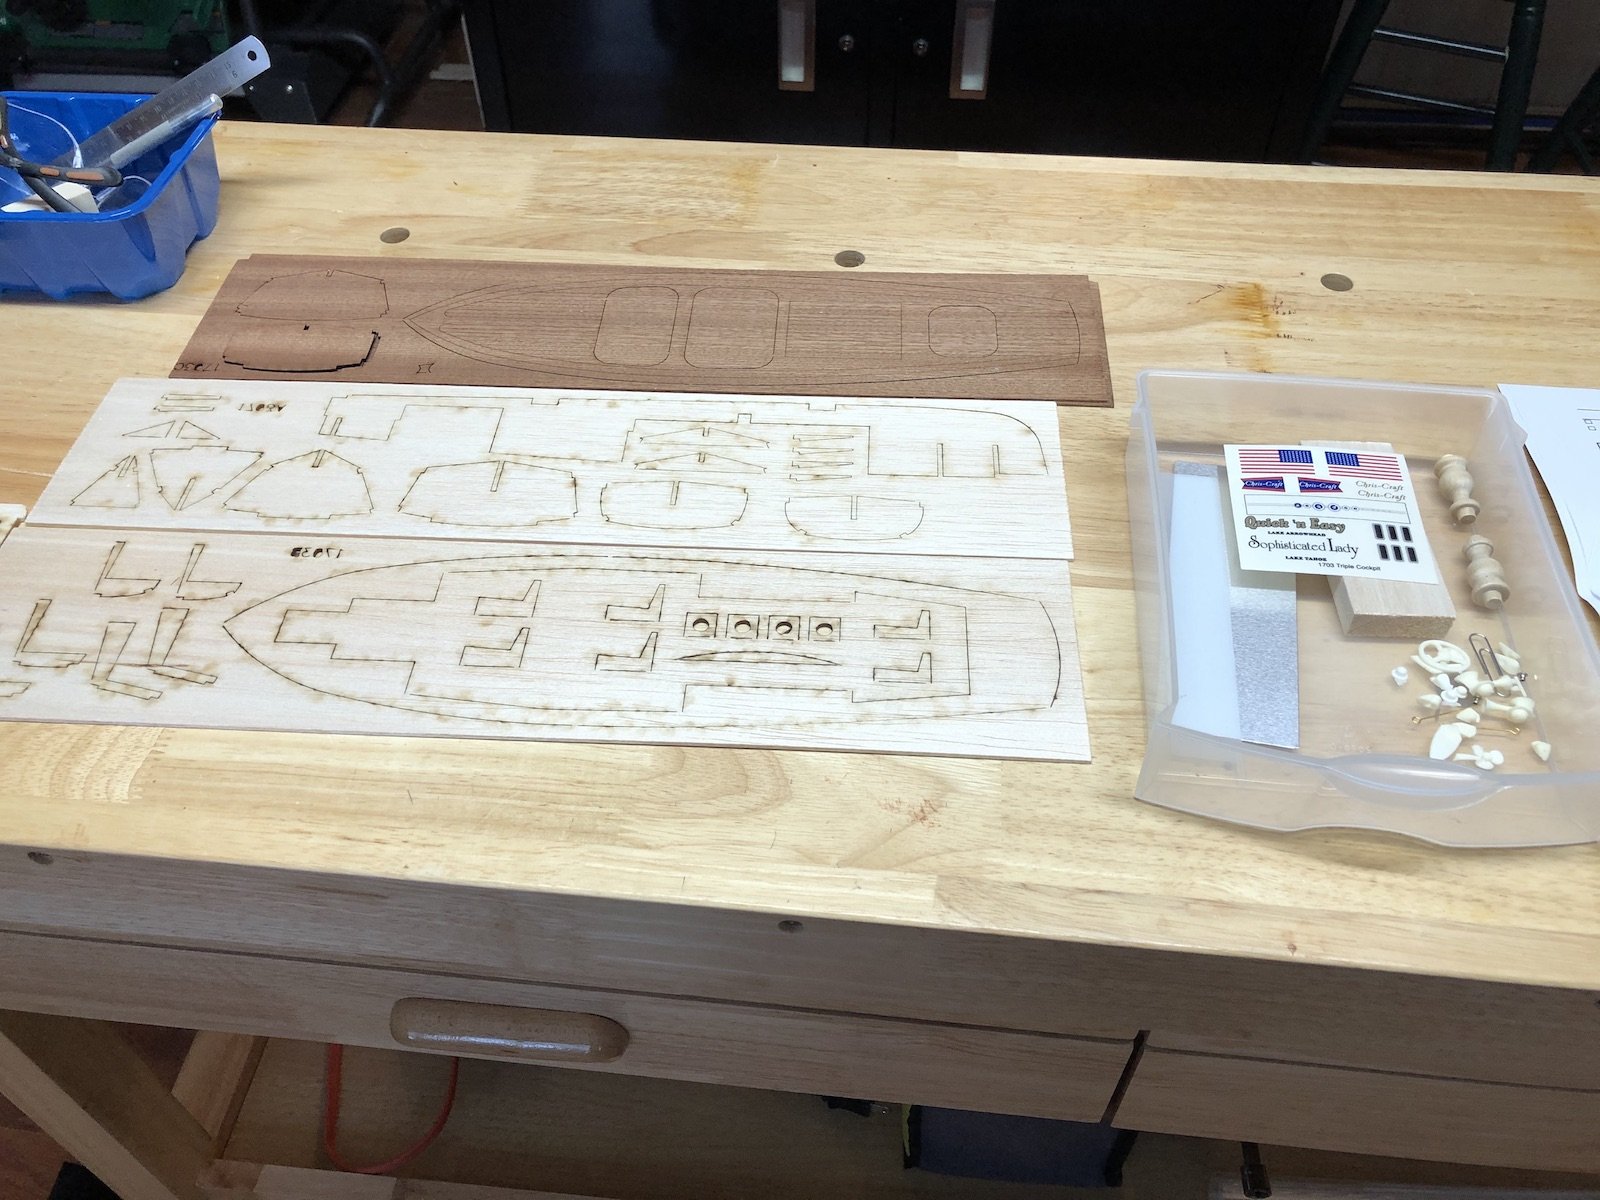
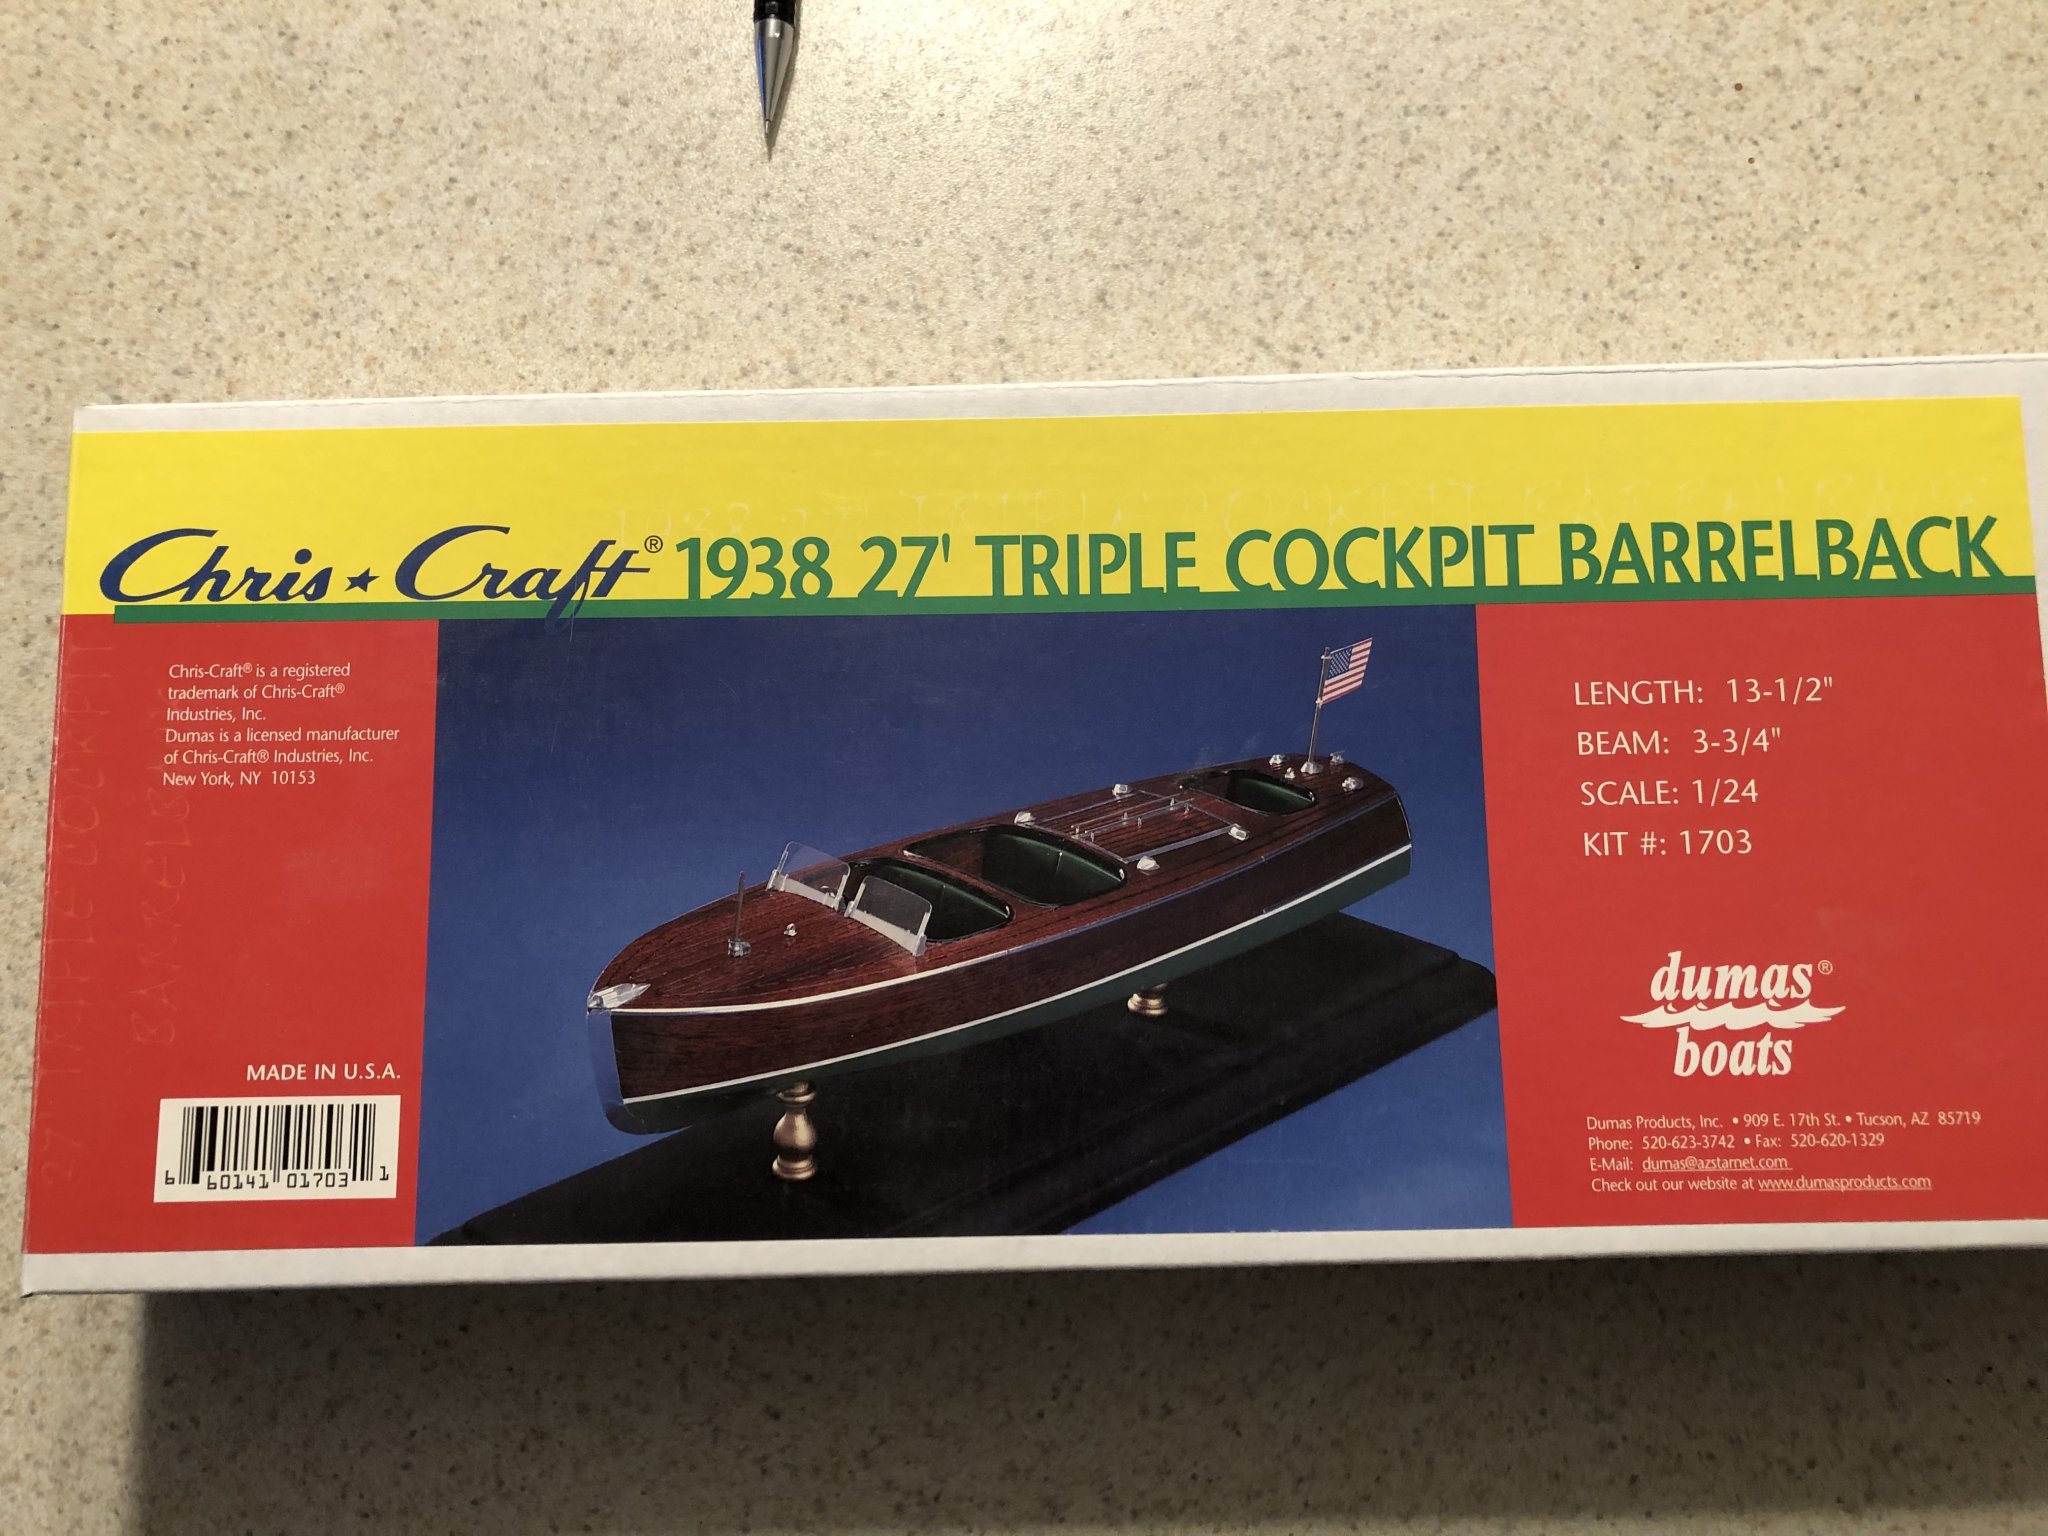
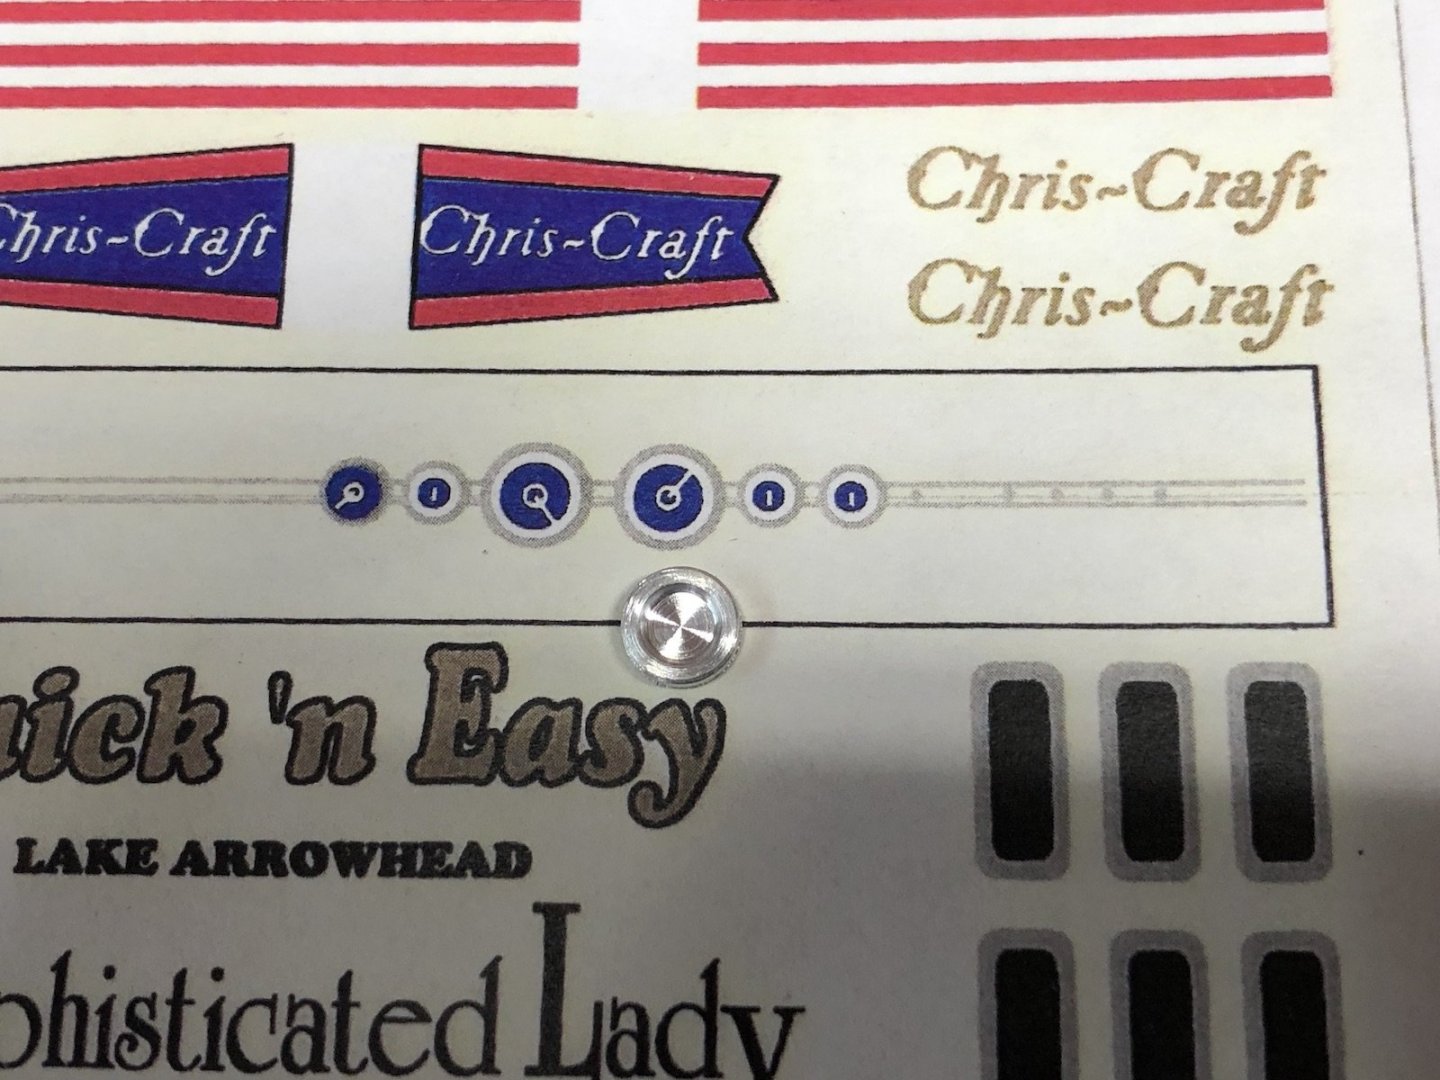
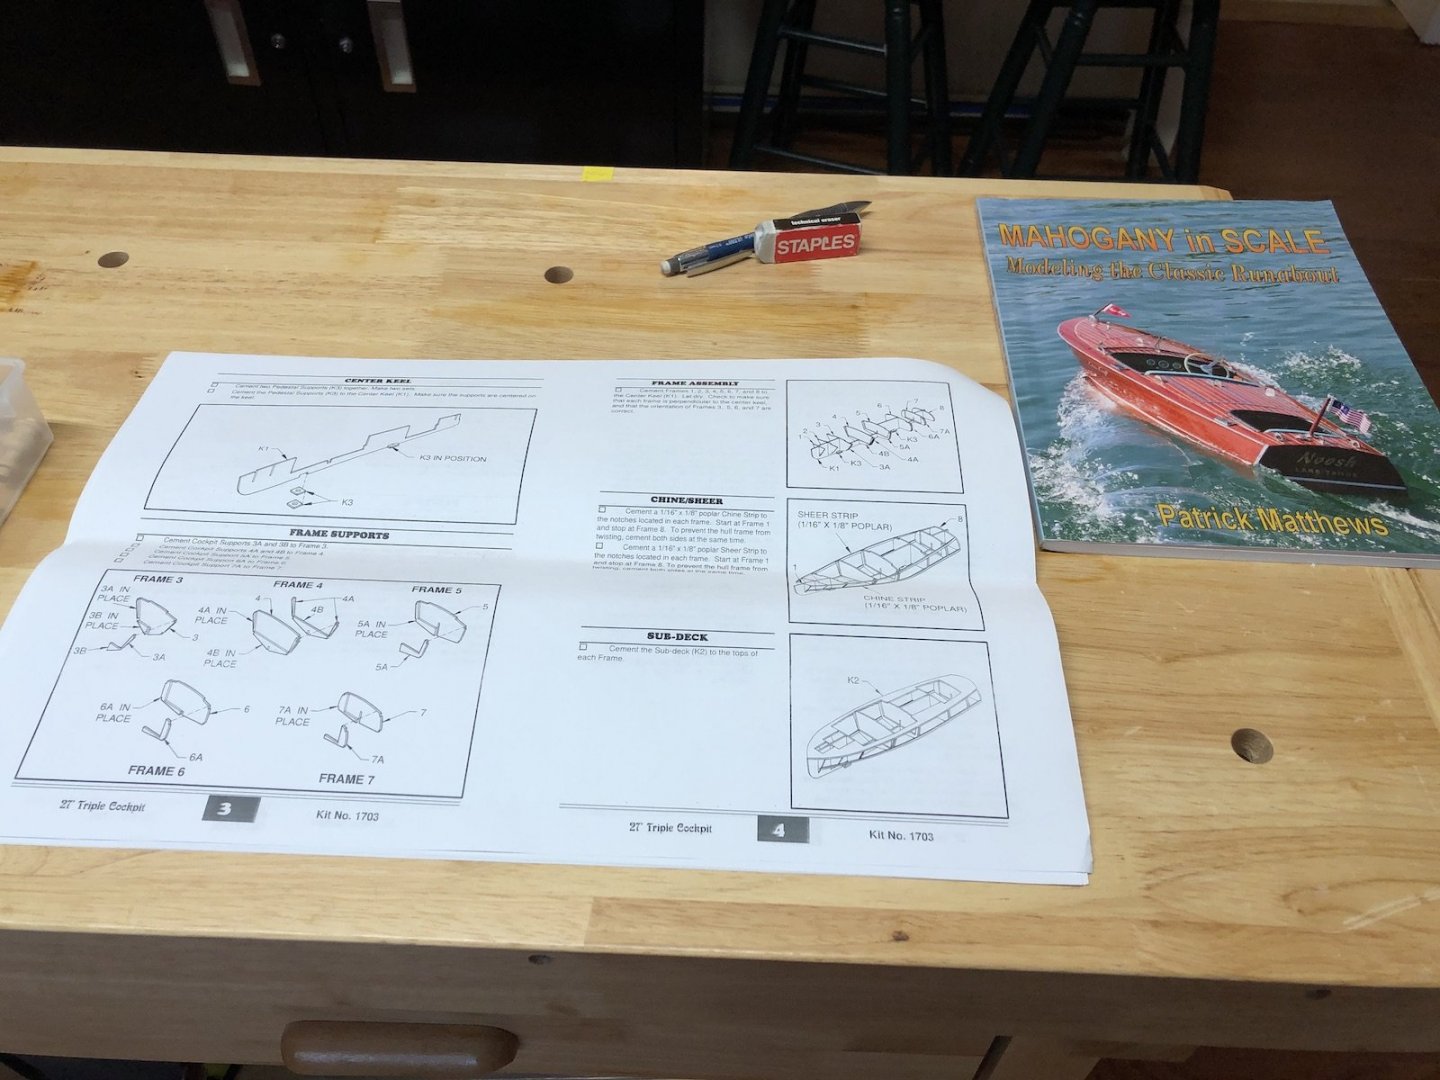
Here is what the contents of the kit look like. The instructions seem good and pretty straight forward. I am also using the book shown as a guide, even though it is not this kit that they use in the book. I forgot to mention that I am making this as a static model so no RC components. The laser cut sheets are either mahogany for the pieces that show or balsa for the frame structure. I have not used balsa before like this so it is going to be interesting. The fittings are urethane and look pretty bad. One if the blades on the prop is deformed, for instance. I bought some chrome spray paint so maybe they will look better after they are cleaned up but I will most likely try making new metal parts instead. Another problem you can see if you look closely at the top mahogany sheet is that the deck planks are laser printed onto the deck. This would be fine except that there should be white caulking between the planks, like the picture on the book cover shows. I may try cutting the deck planks out of the deck frame and plank them with the caulking. The supplied decals are stick on, not the kind you soak in water, so we will see how they work out. I haven't done any plastic modeling since I was a kid so some aspects of this kit are out of my comfort zone, but it will be fun learning.' The kit supplied a flimsy plastic display board, but while cleaning the workshop I found this piece of oak that I will use instead. At least the supplied pedestals are wood. The first steps are to add thickness pieces to the frames and gluing them to the keel. I have pics of that later.


-
And now for something completely different. My wife gave me this kit for Christmas a few years ago. Since we live on a lake in New Hampshire it seems obligatory to have a wooden speedboat on display somewhere, so this will be it. I'll show box contents in the next post.

-
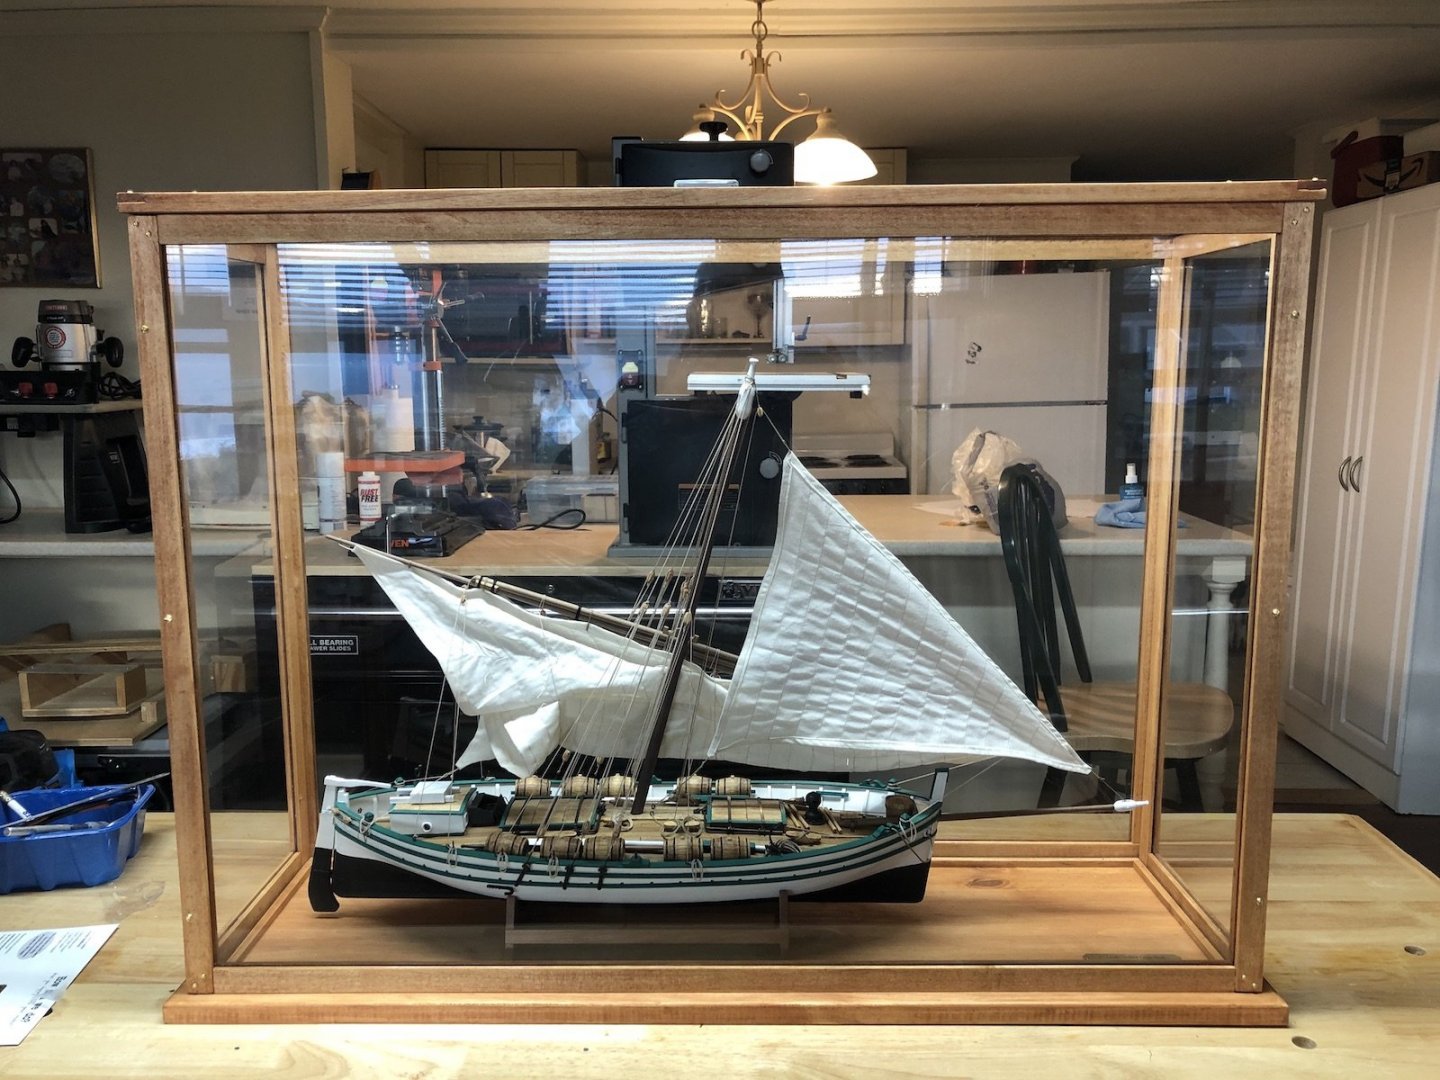
Thanks Popeye. Here is the model in the case ready to be delivered to my son.
- 131 replies
-
- 10
-

-
- santa lucia
- panart
- (and 1 more)
-
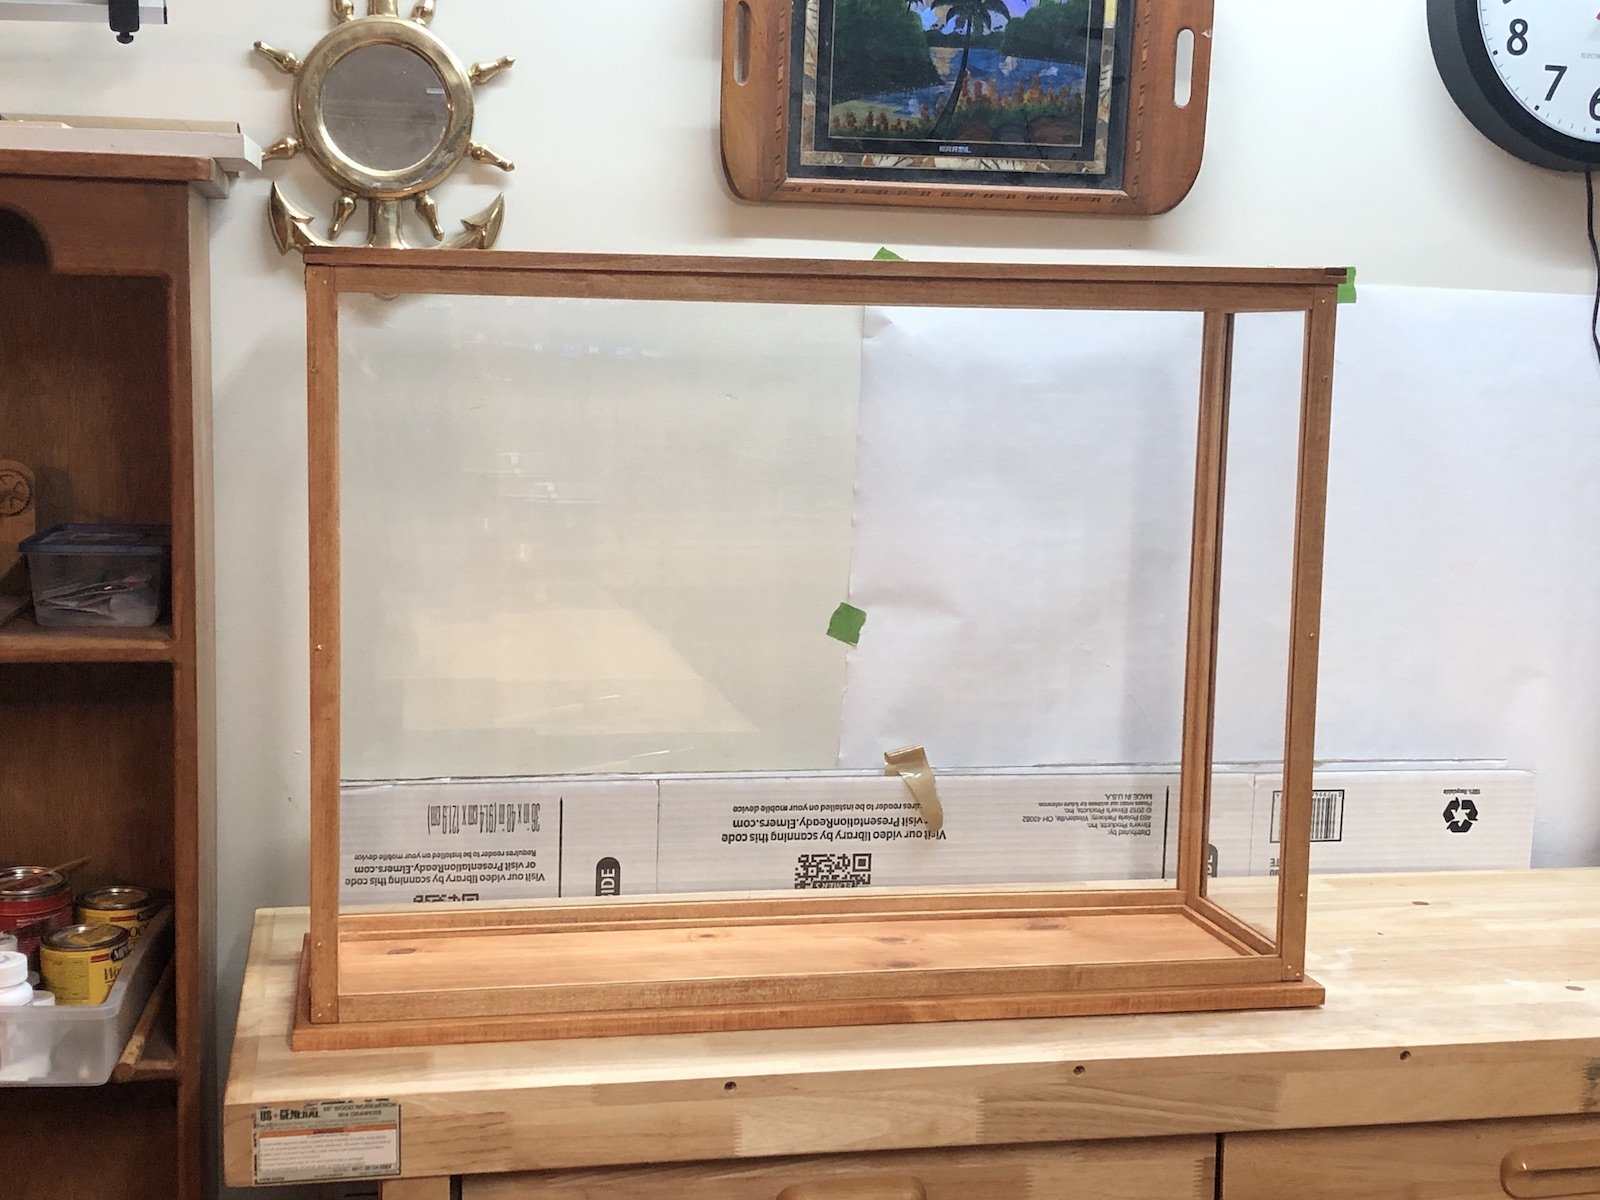
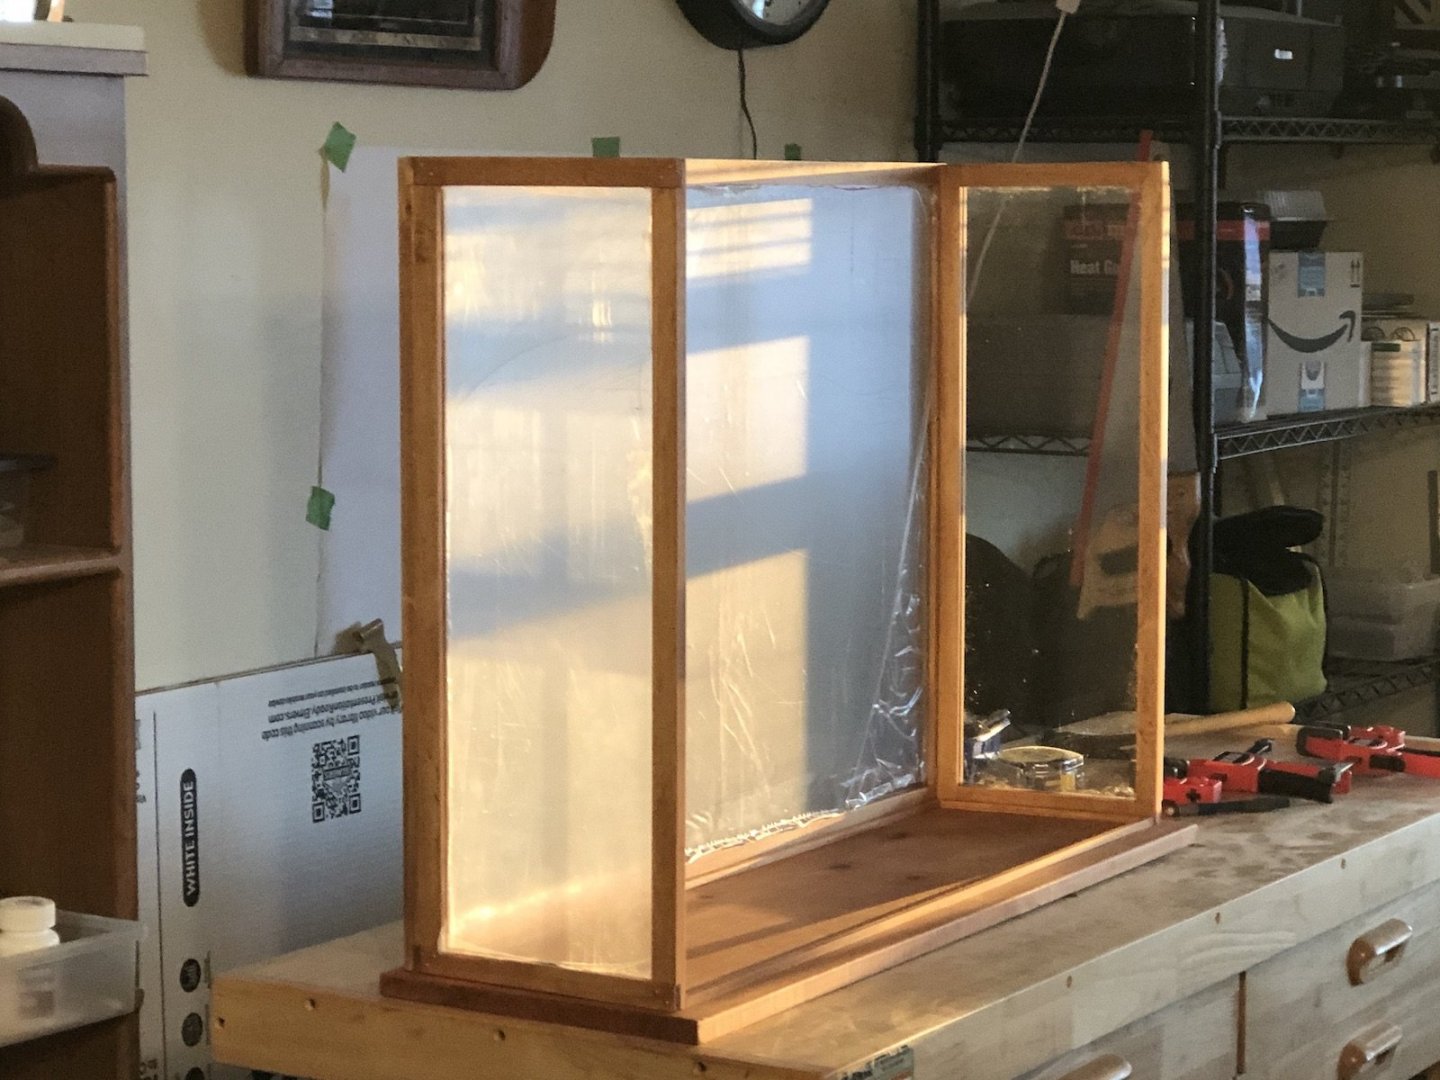
I have the case just about finished. I assembled the panels then attached the back to the two sides. I put some 1/4" square pieces on the base board to hold the cover in place then removed the plastic and cleaned the inside surfaces of all the Plexiglas. I then attached the front to the two sides, then the top to all the sides. I need to attach the cradle to the base board and it will be ready to put the model in.

- 131 replies
-
- 4
-
-
- santa lucia
- panart
- (and 1 more)
-
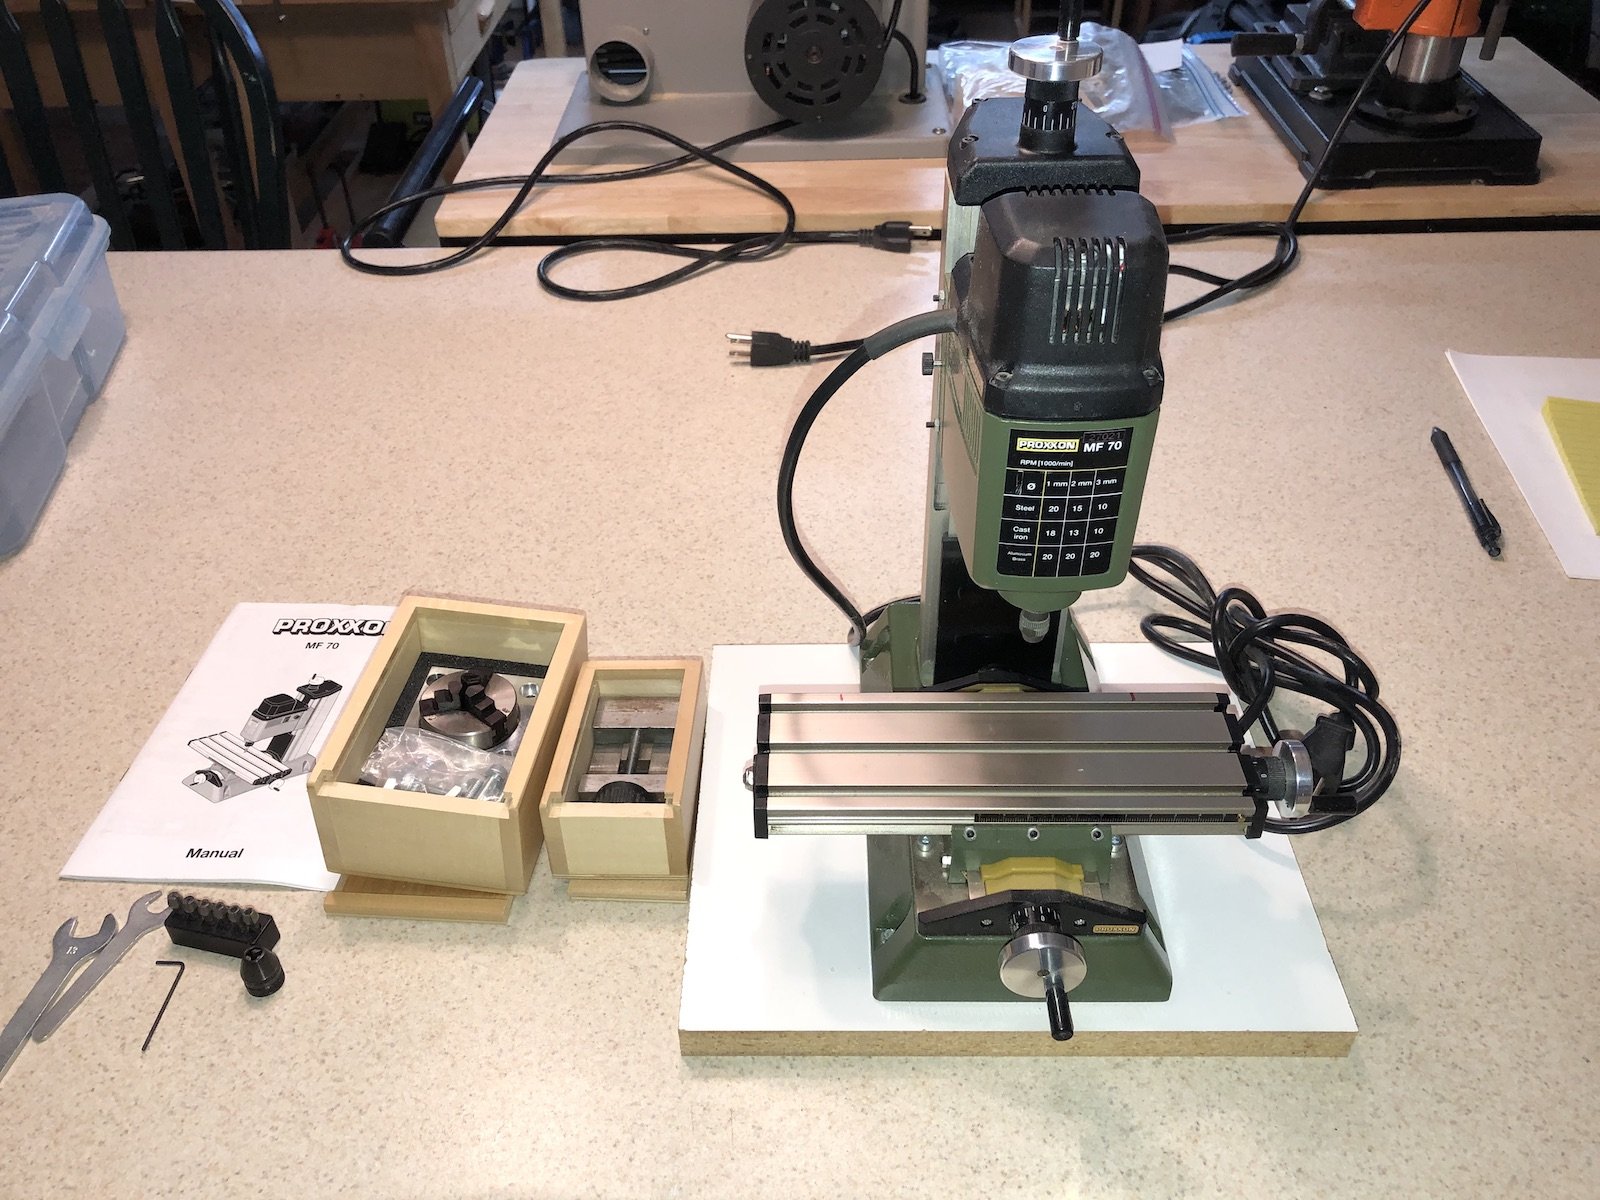
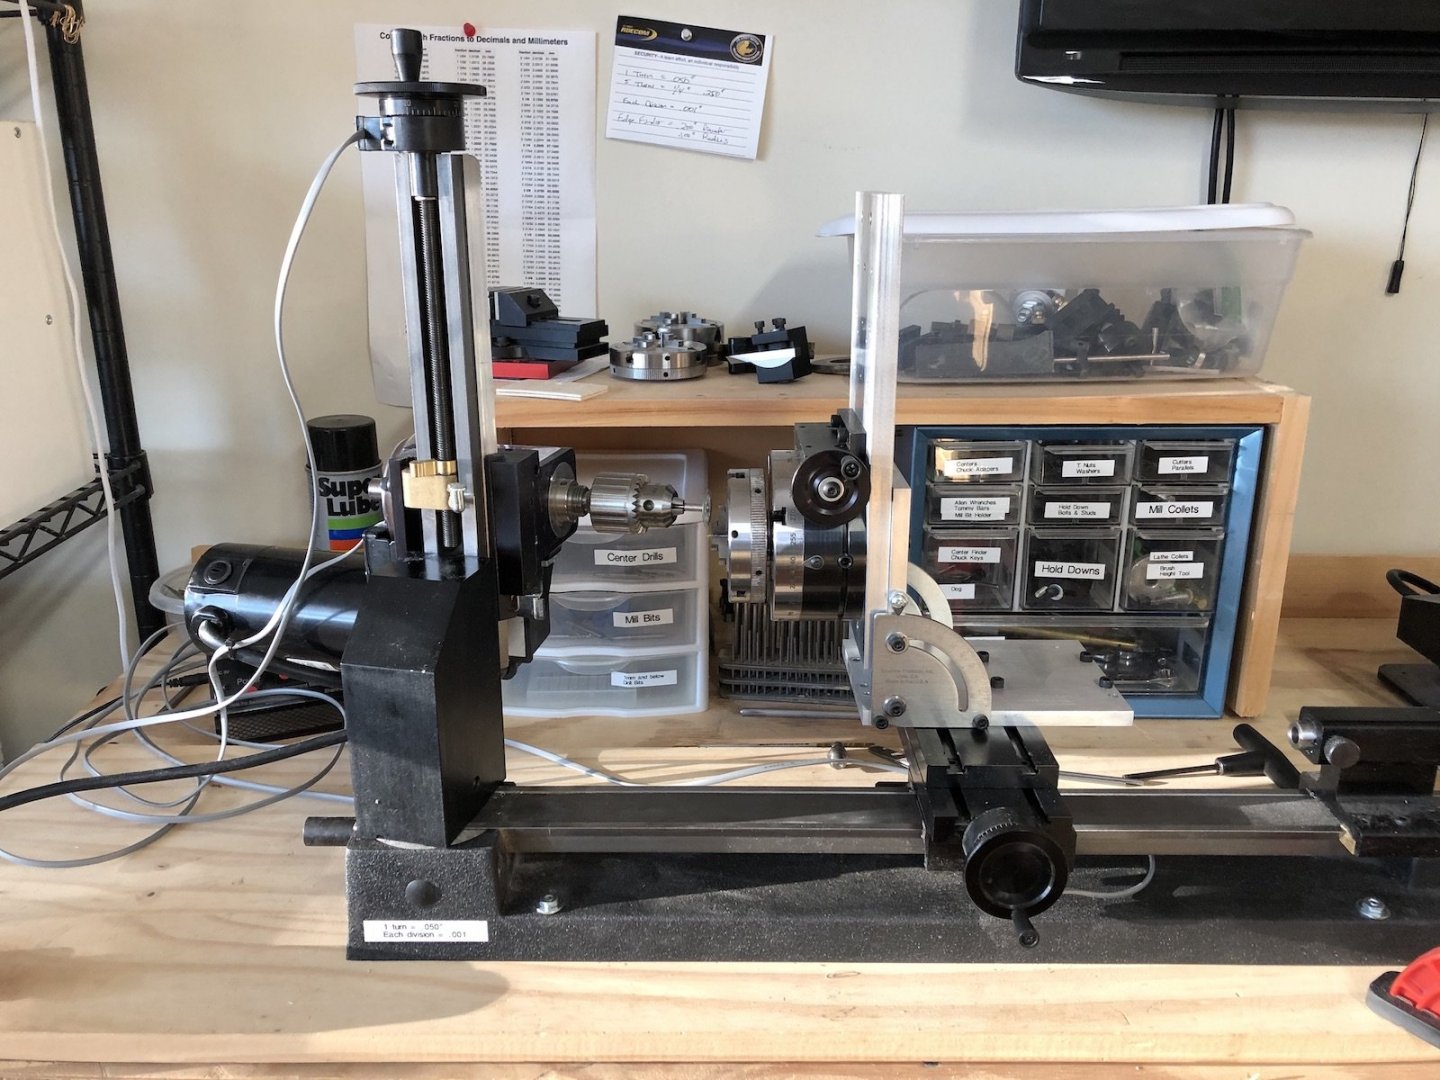
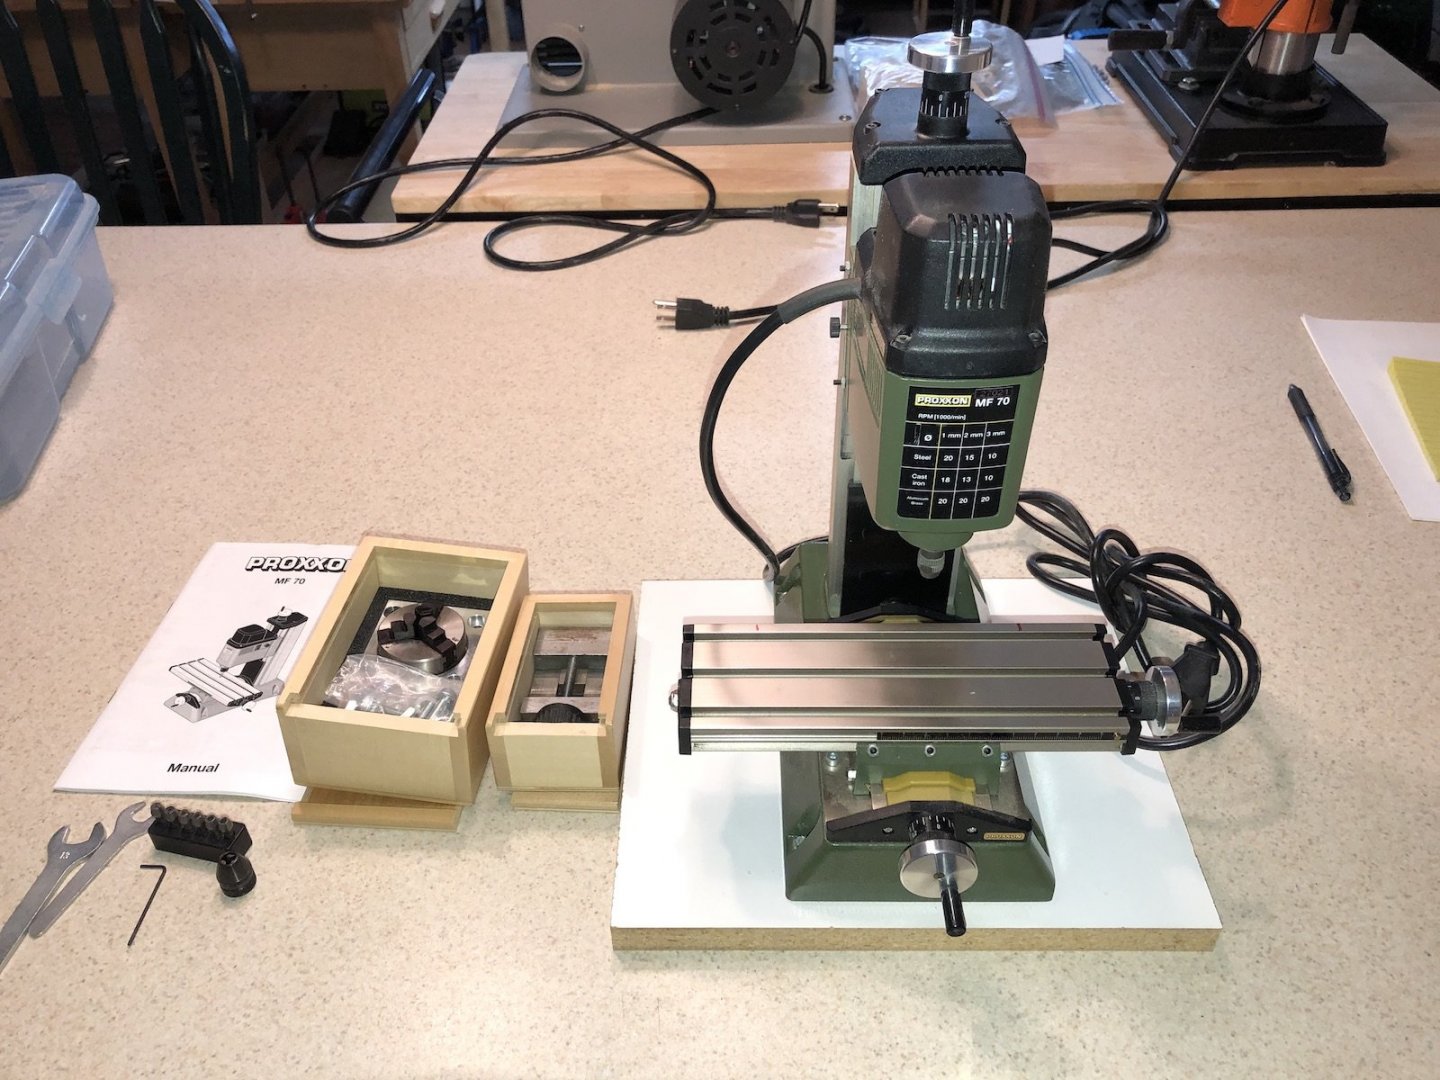
I bought this mill a few years ago new and have used it a few times but now it has been sitting idle in the workshop for a while and I'd like to offer it for sale. The mill comes with 6 collets and originally 3 bits, but I am down to 2 as the 1/32" bit broke. I also have a drill bit holder, the machine vice, and the dividing attachment. New these add up to over $500 USD but I am asking $350 USD for all. I will ship this anywhere in the US, and may consider shipping to other countries if the process is not too difficult. I will provide my phone number via PM if you want to talk about it. I do have a Paypal account so I'd like to use that for any potential sale. Ask questions here or via PM. Thanks so much.
-
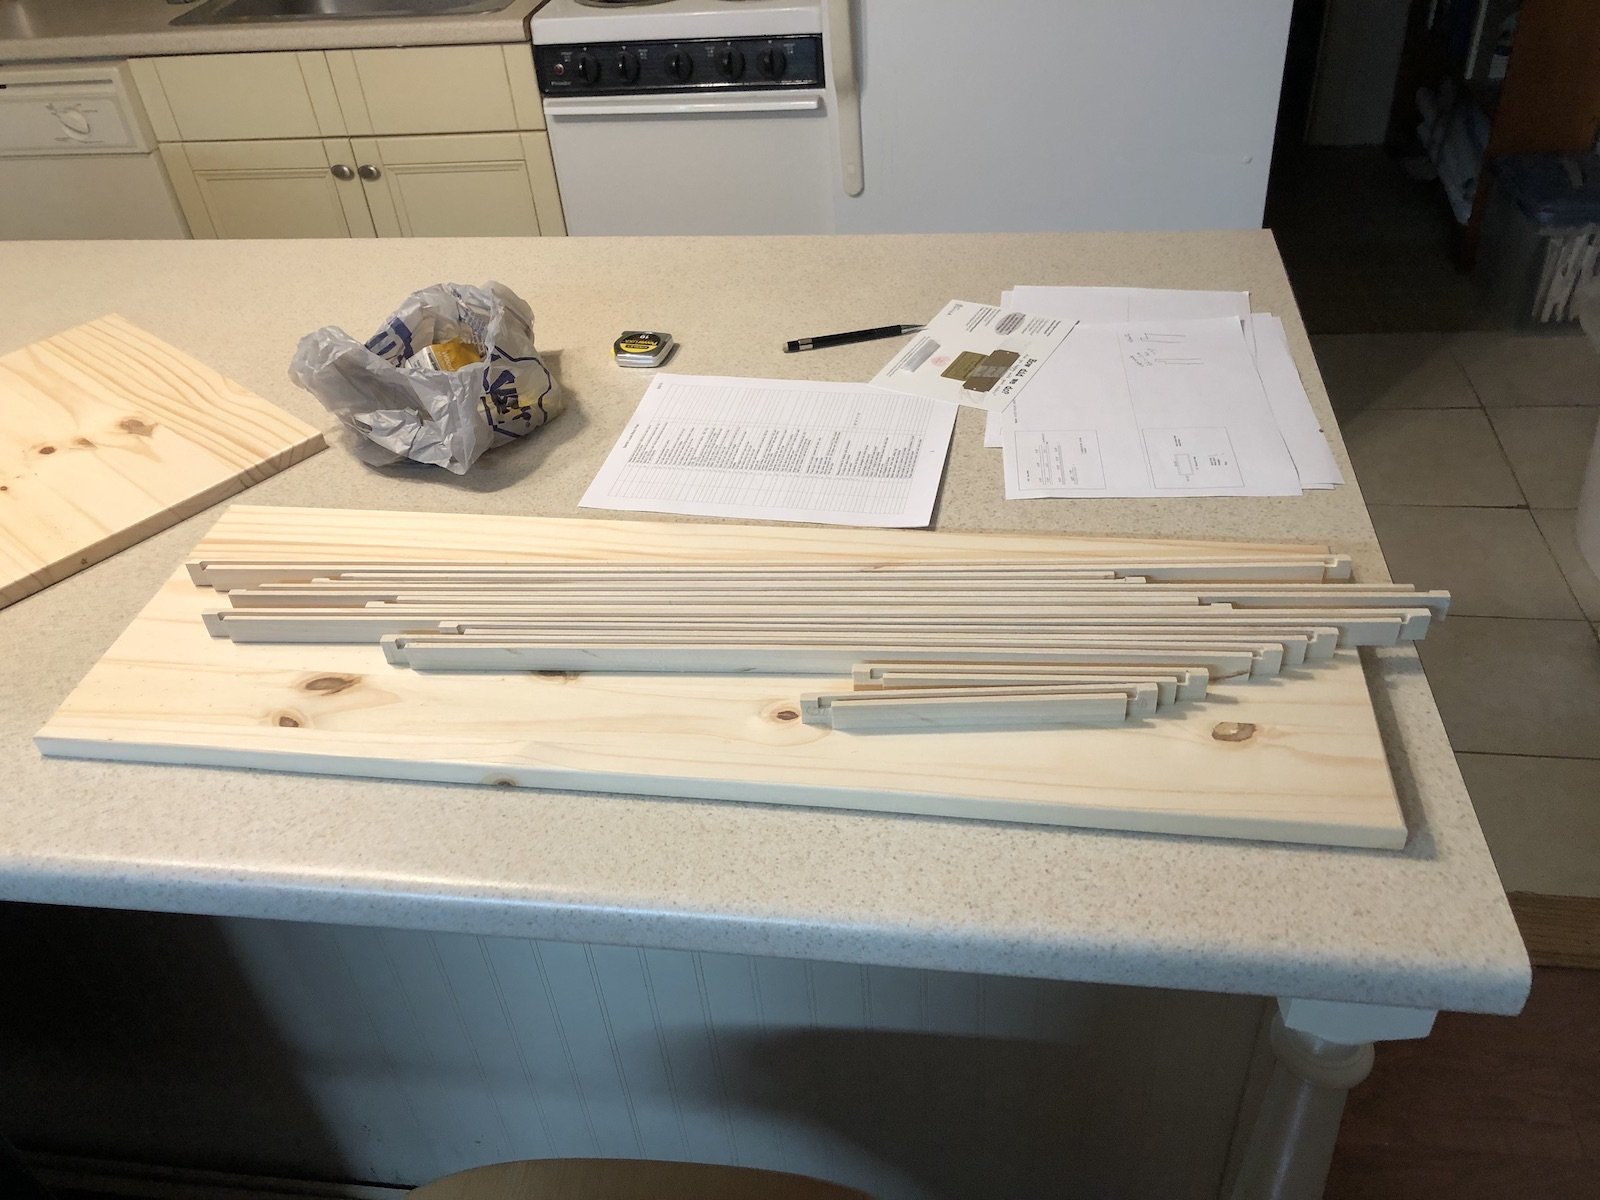
I have been working on the case all week, since buying the wood last weekend. The base board is an edge glued pine board that I bought at Lowes. I used a small round over bit in the router to round over the top edges. The cover will be made from 5 panels of plexiglas framed in 3/4" by 1/2" poplar frames. I bought a few 1x2 poplar boards and ripped them down to 1/2" on the big table saw. I used a dado blade on the the saw to cut lap joints into the ends of each frame. I made a mortice jig for the router and used it to cut the slot down the center of one side of each frame piece for the plexiglas to fit in. To avoid splitting where the cut goes into the lap joints, I only cut to about 1/4" from the lap joints. I then used the mill with the same router bit to finish the cuts on each end. I bought a sheet of plexiglas at Lowes that I cut into the panel pieces on the big table saw using a saw blade for plywood. I am now in the process of sanding the frame pieces. Here are the some of the frame pieces on the base board.

- 131 replies
-
- 5
-
-
- santa lucia
- panart
- (and 1 more)
-
Thanks EJ and Peter. I am giving this model to my son to put on his fireplace mantel as he bought his first house last year. We will be celebrating Thanksgiving there this year for the first time, so the next generation is stepping up, which is nice. Thanks for all the likes too.
- 131 replies
-
- 4
-
-
- santa lucia
- panart
- (and 1 more)
-
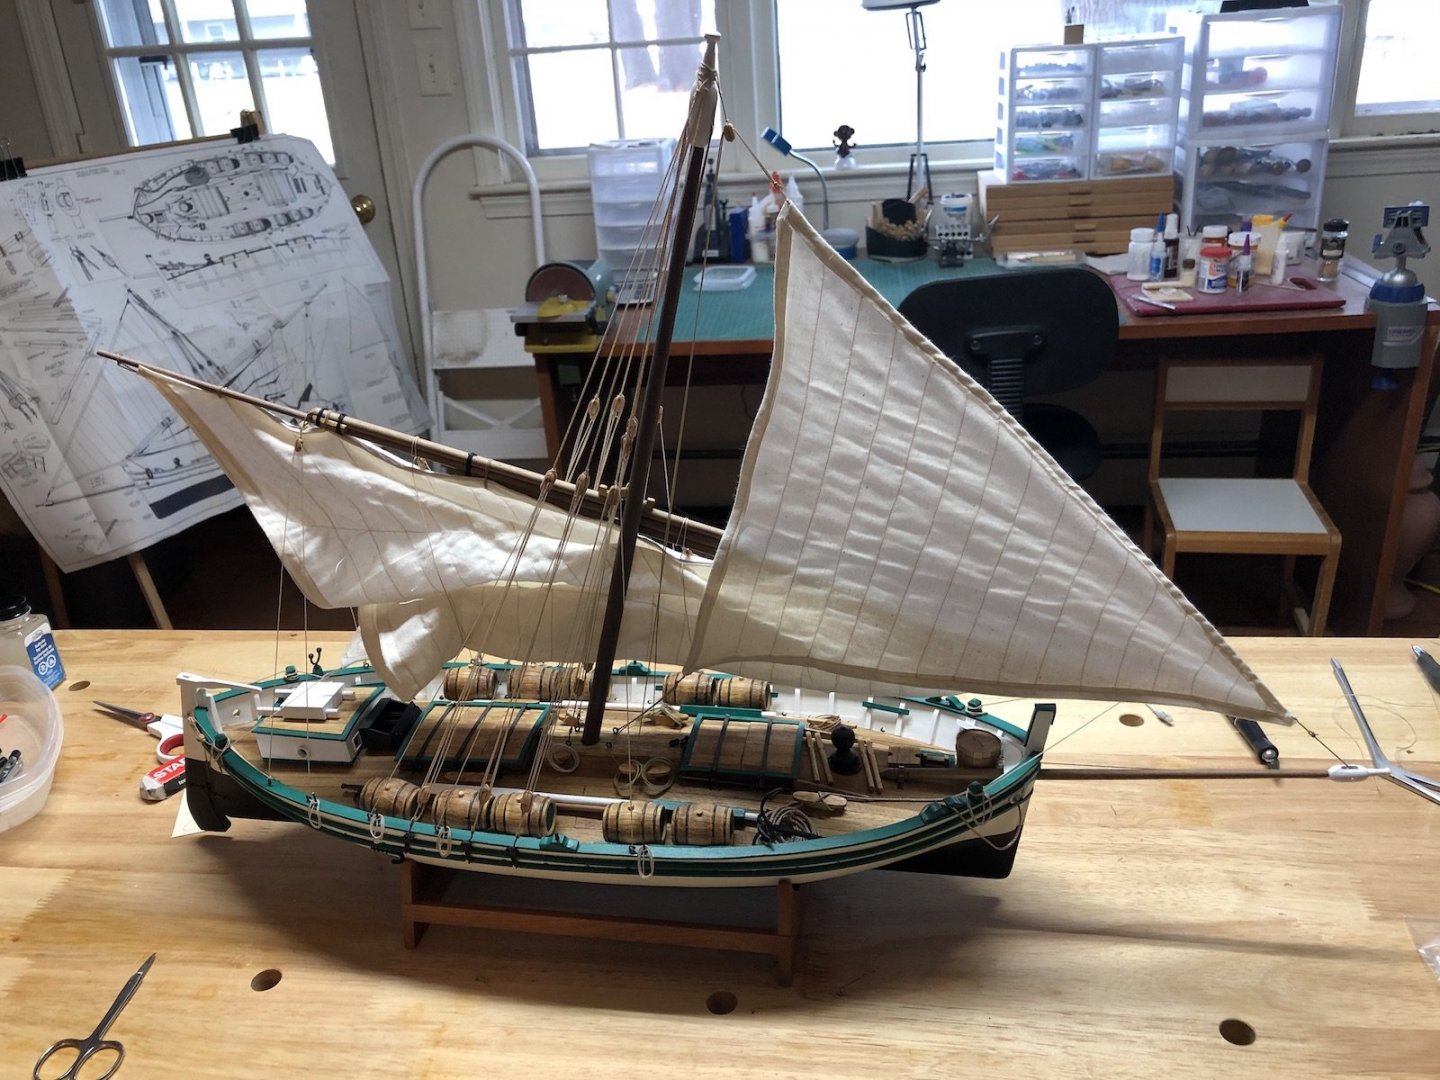
As promised here are a few better pictures. I will put these and more in the gallery too.


- 131 replies
-
- 9
-
-
- santa lucia
- panart
- (and 1 more)
-
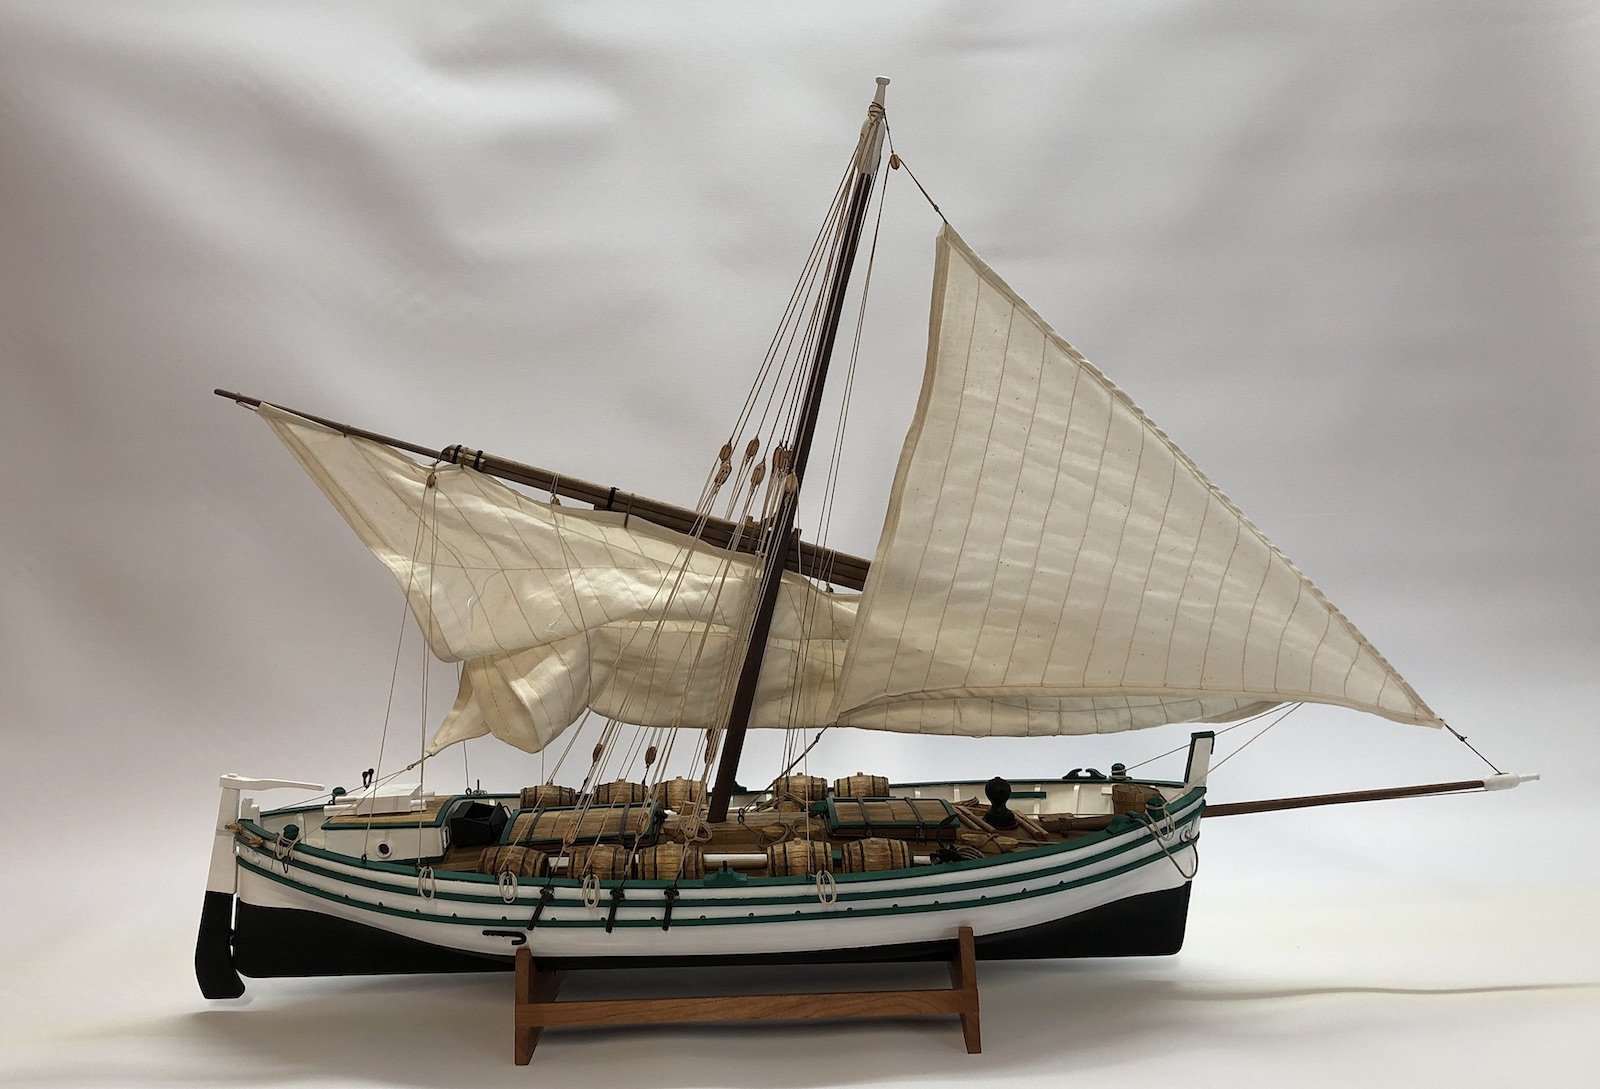
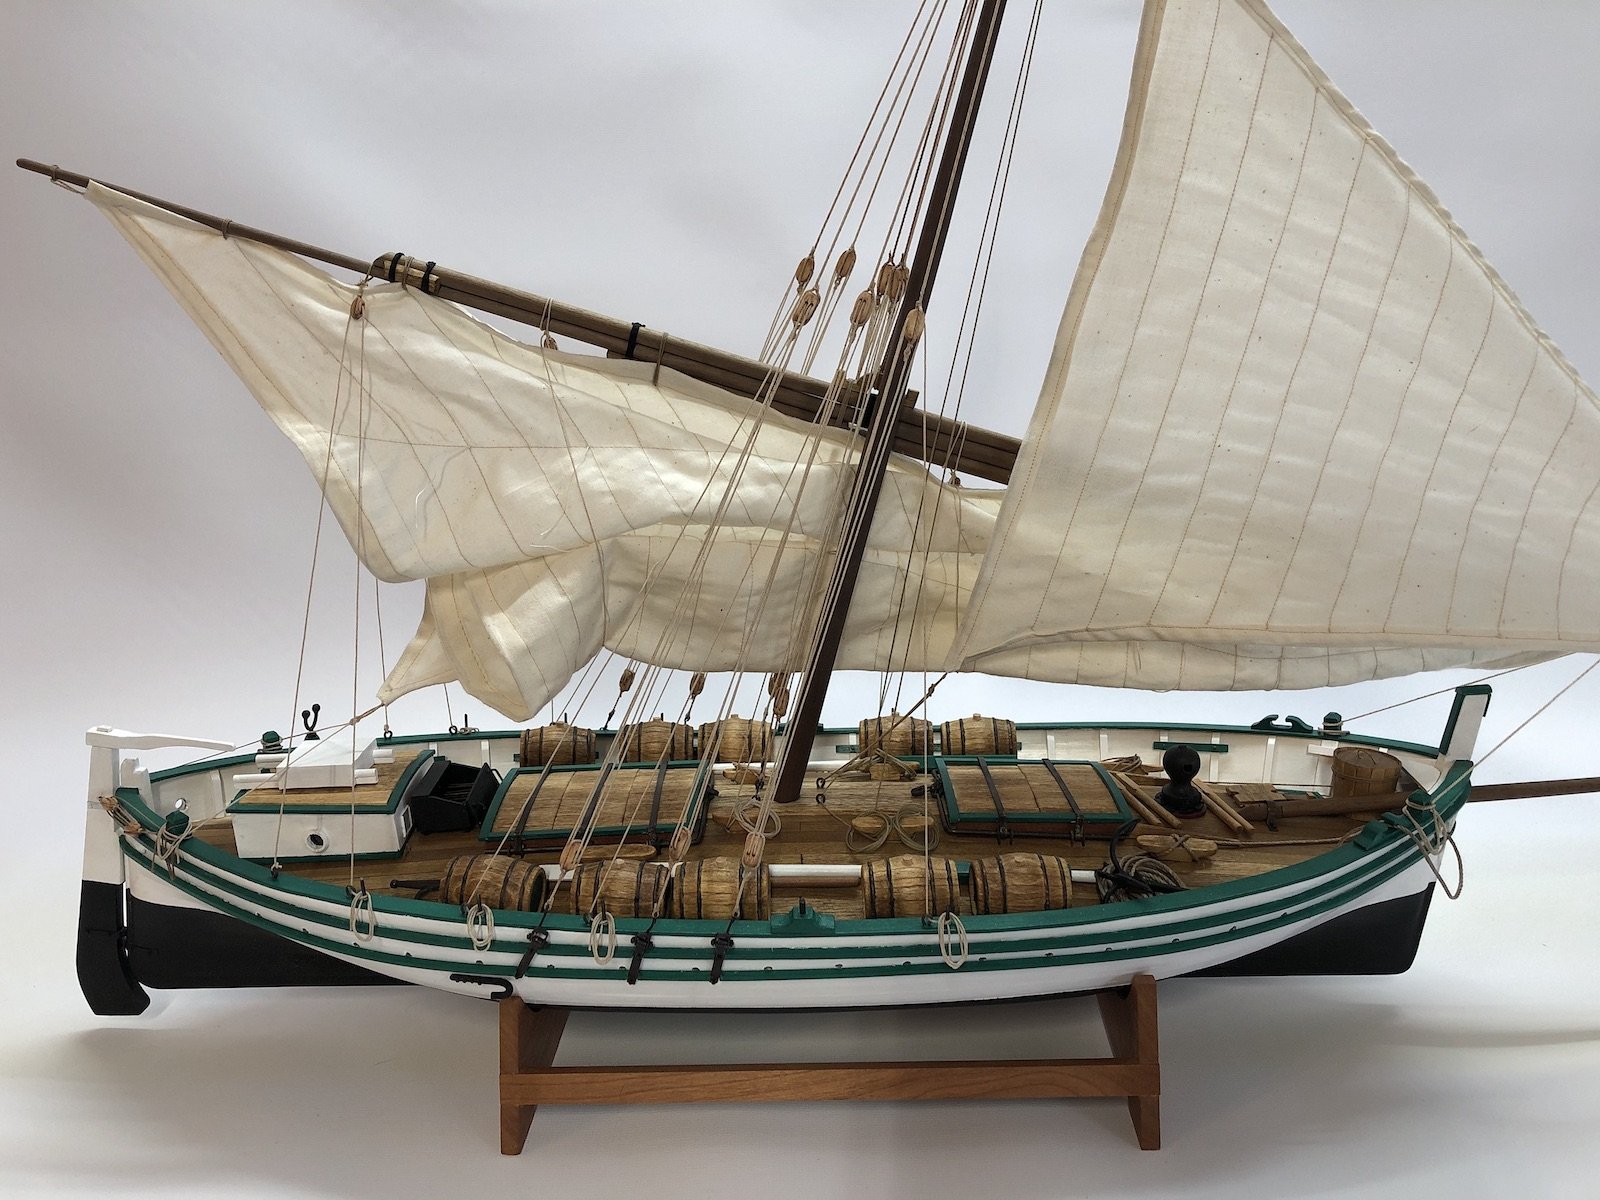
Thanks Fernando. This was a fun kit and much different than any other models I have done. It is now completed. Here is a quick pic but tomorrow I will set up the back drop and take some better ones. I still have to make the case so I will still have a few more entries on this log. Thanks for all the great advice and interest in this build. One thing I forgot to mention, but anyone building this kit in the future you should know that the supplied line is very inadequate. I ended up making my own for mist of the lines and used four different sizes.
- 131 replies
-
- 4
-
-
- santa lucia
- panart
- (and 1 more)
-
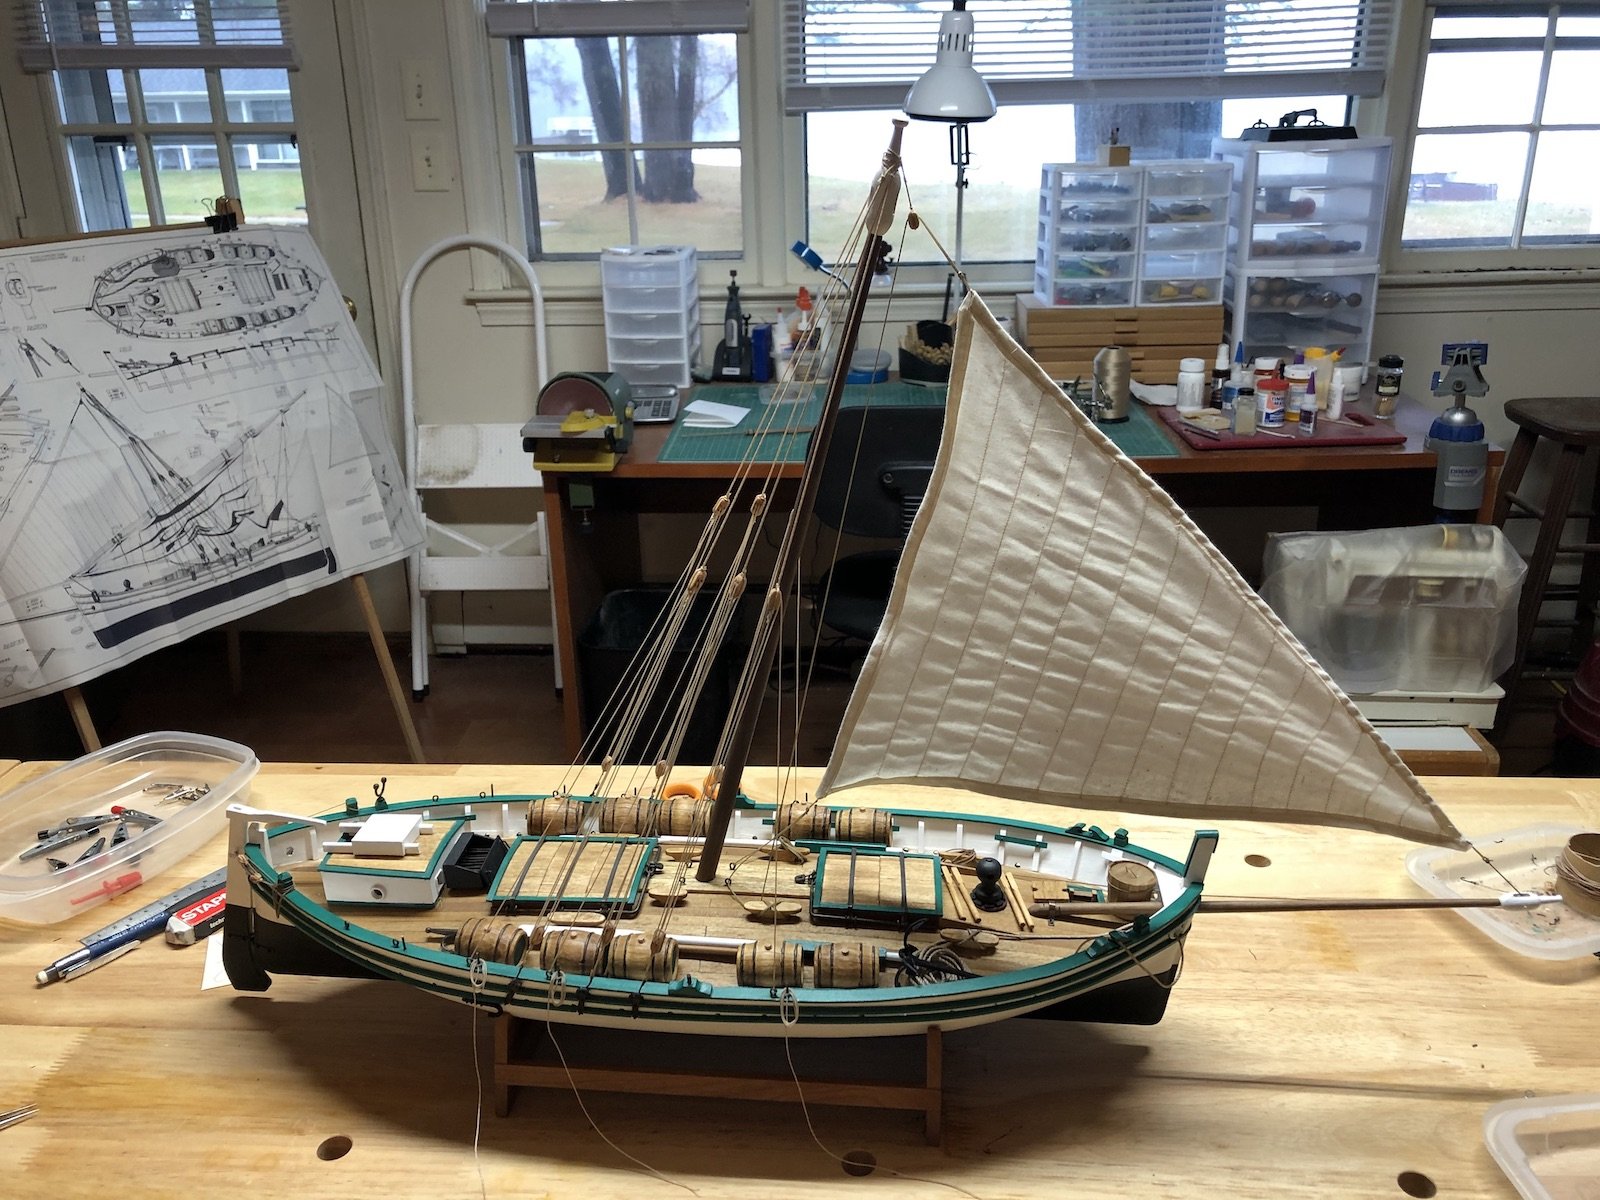
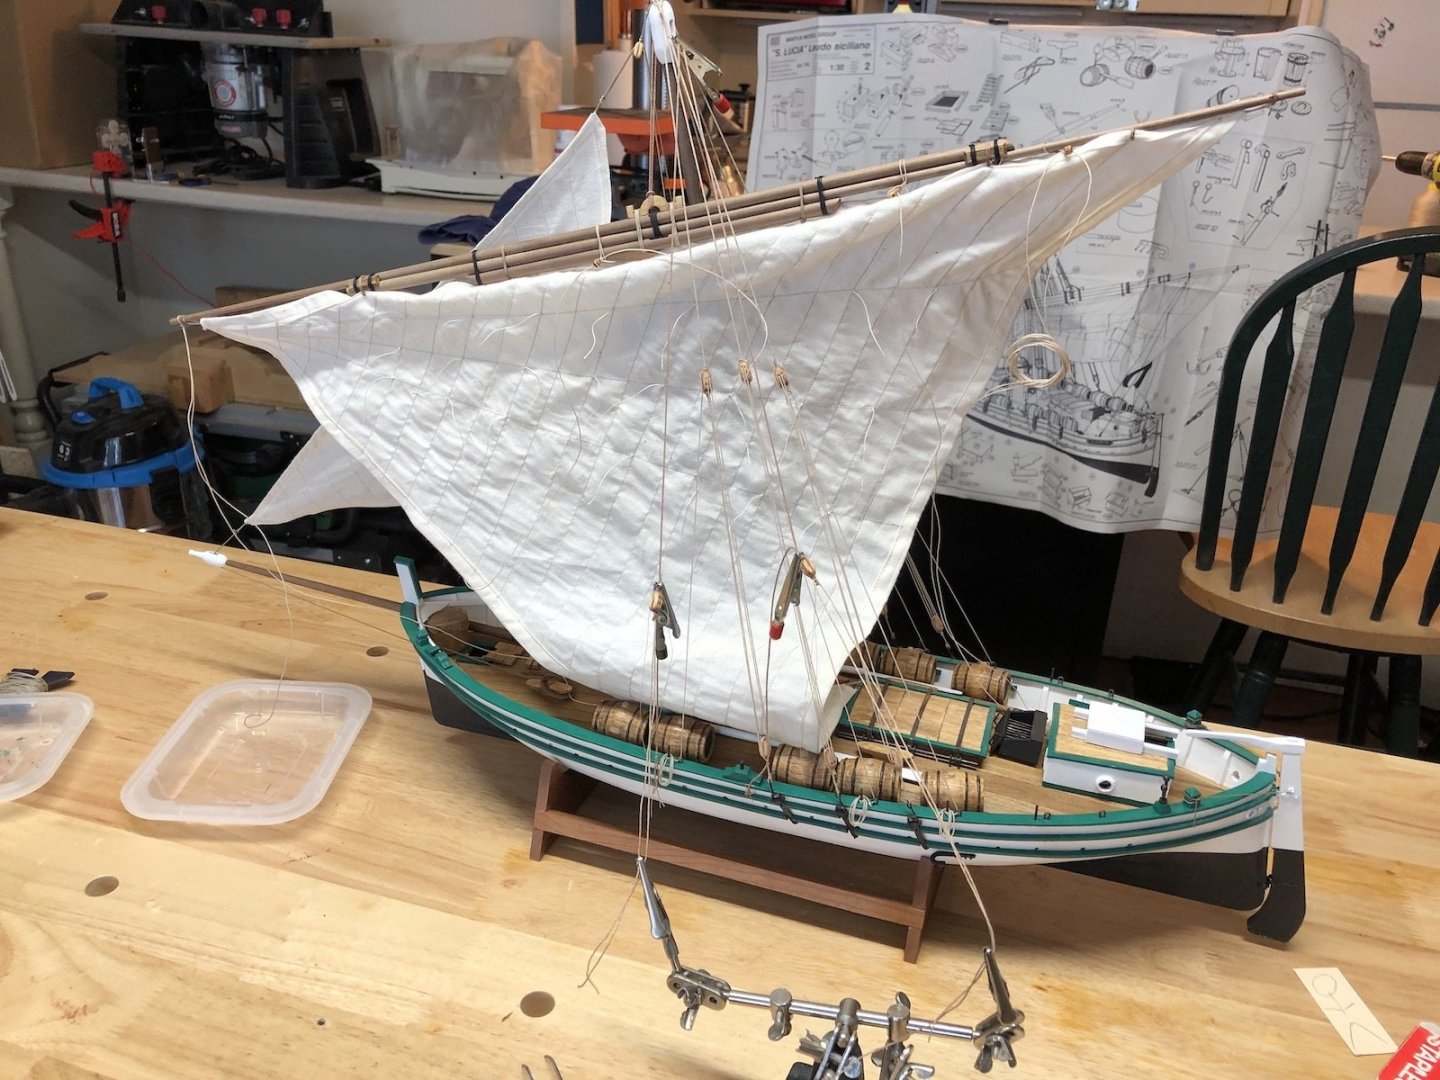
I finished the main sail and attached it to the lanteen yard along with all the lines and blocks. I then passed the two yard halyards through the block at the top of the mast. I then had to seize two blocks to the end of the line for the yard halyard tackle. I will seize the tackle lines to the blocks next then set the yard to the right height and tie the control lines to keep it in position. I am getting close to the end now. Once the yard is in position I will take measurements for the case. I should be starting to build the case by the end of next week.
- 131 replies
-
- 6
-
-
- santa lucia
- panart
- (and 1 more)
-
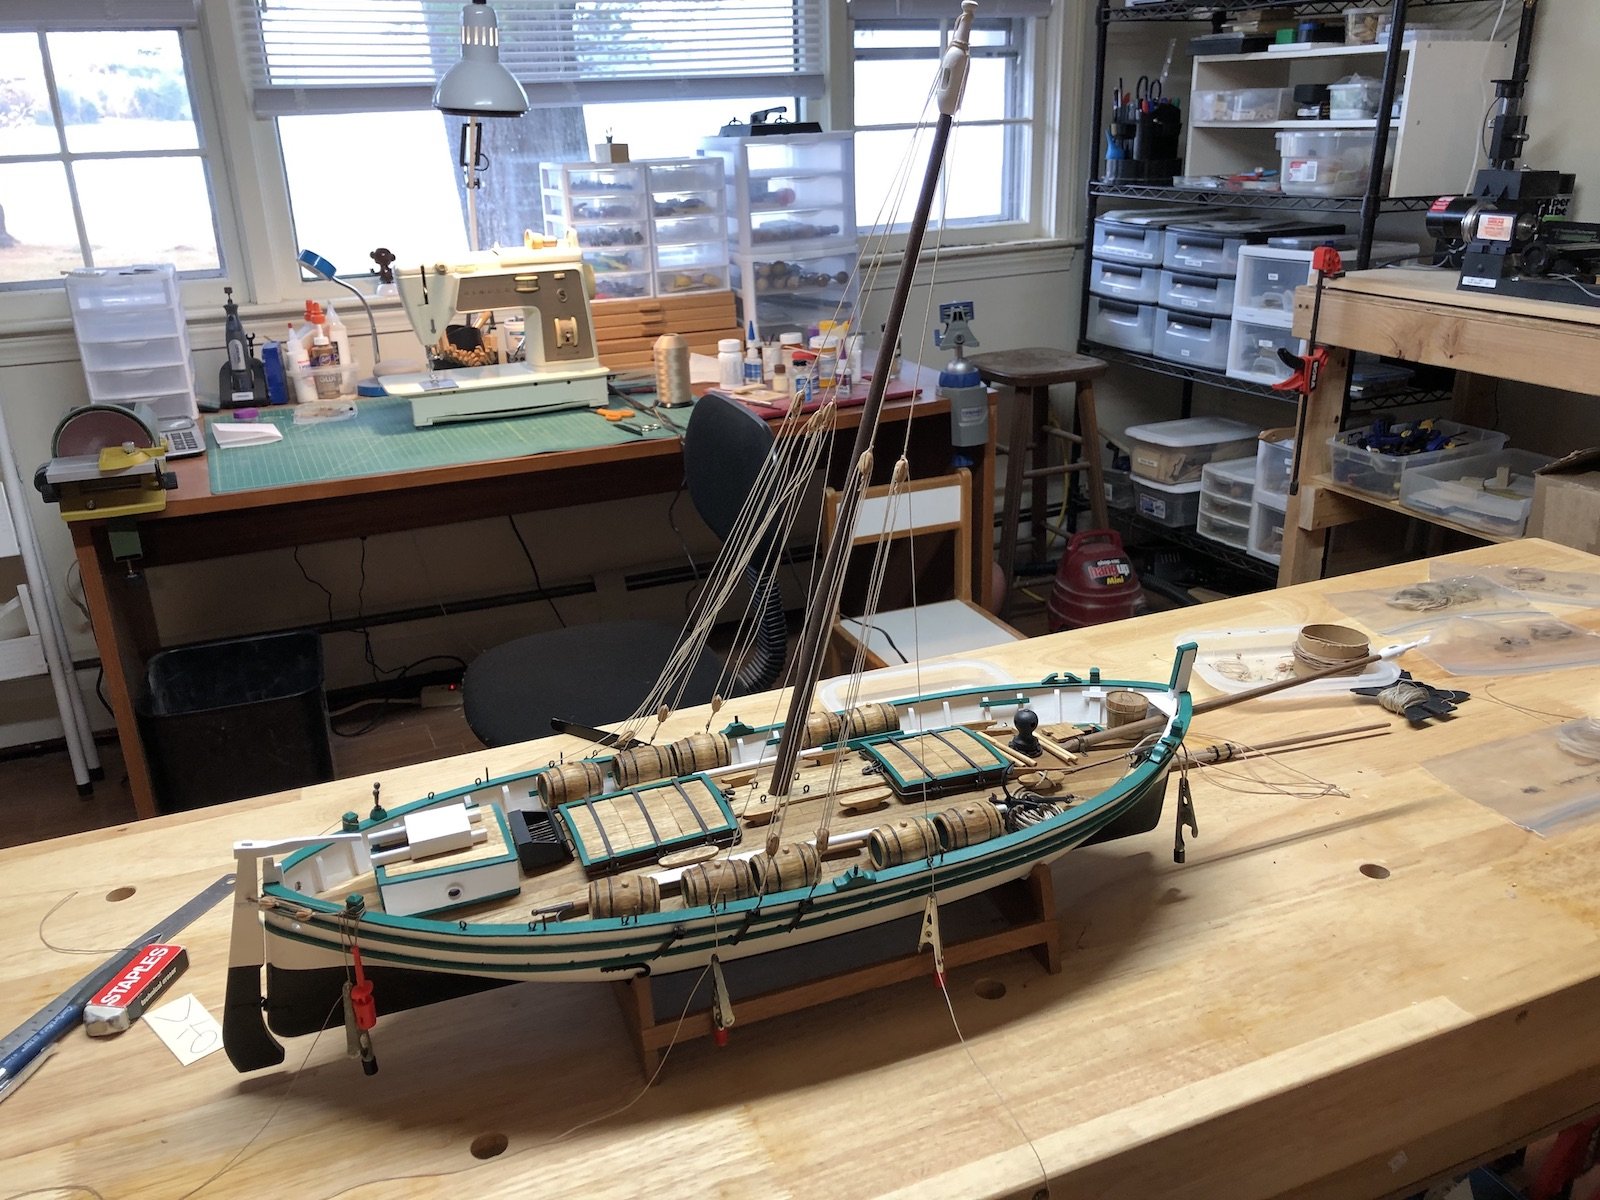
Thanks Fernando. It makes sense to keep the tiller from flopping around. I am still not sure why blocks are needed except to make it easier to adjust the heading? I have finished installing the shrouds and the jib sail. I was able to loop the excess shroud lines around the belaying pins a few times and used some Dulcoat lacquer to hold them in place while I hung an alligator clip as a weight. When I removed the clips the coils stayed in place nicely, so I don't have to make separate rope coils for these. The jib lines all end at cleats on the deck, so after I tied these off to the cleats I brushed on some lacquer to hold them and later cut the lines at the cleats. I made separate rope coils for these and used them to cover the rope ends. You can see one of these coils on the port cleat in front of the mast. The other coils are still drying so not installed yet. I am also getting the yard ready for the main sail. I added the blocks to the yard and some of the sail furling lines. I have the main sail cut out and ready to sew the seams and seam lines so I should have that ready to go tomorrow.


- 131 replies
-
- 5
-
-
- santa lucia
- panart
- (and 1 more)
-
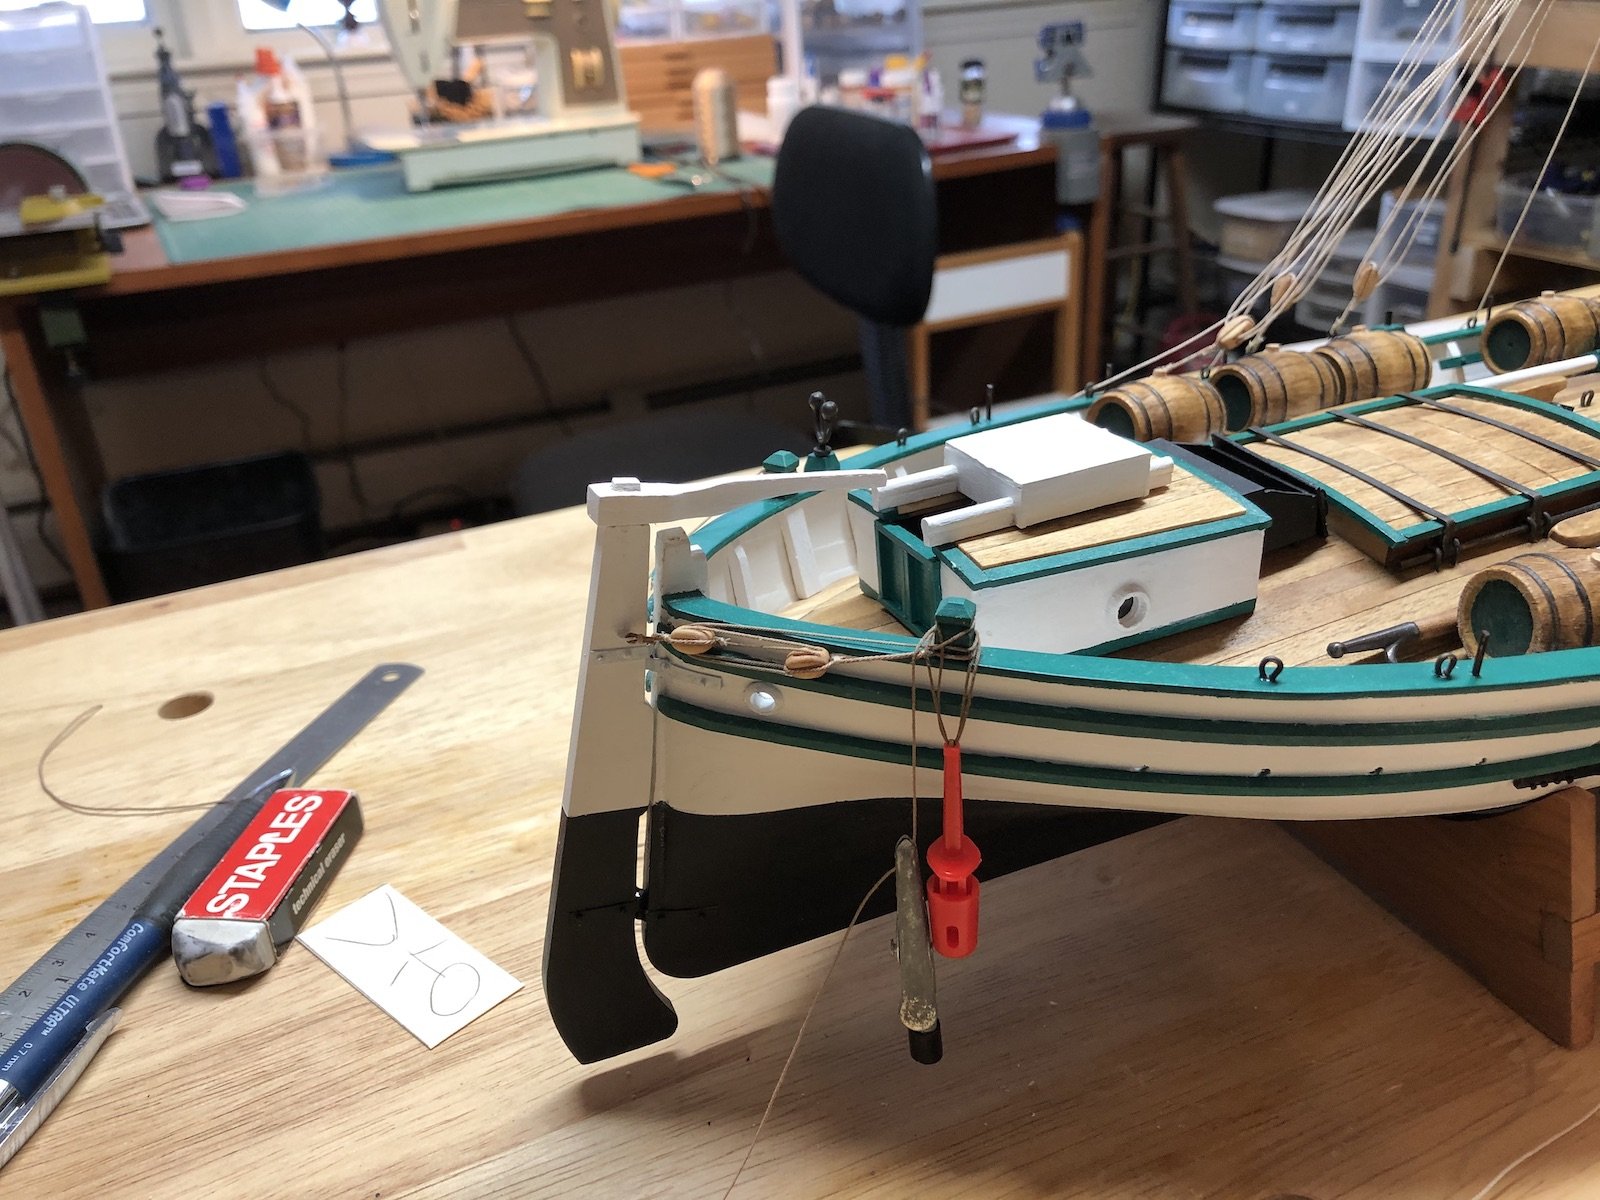
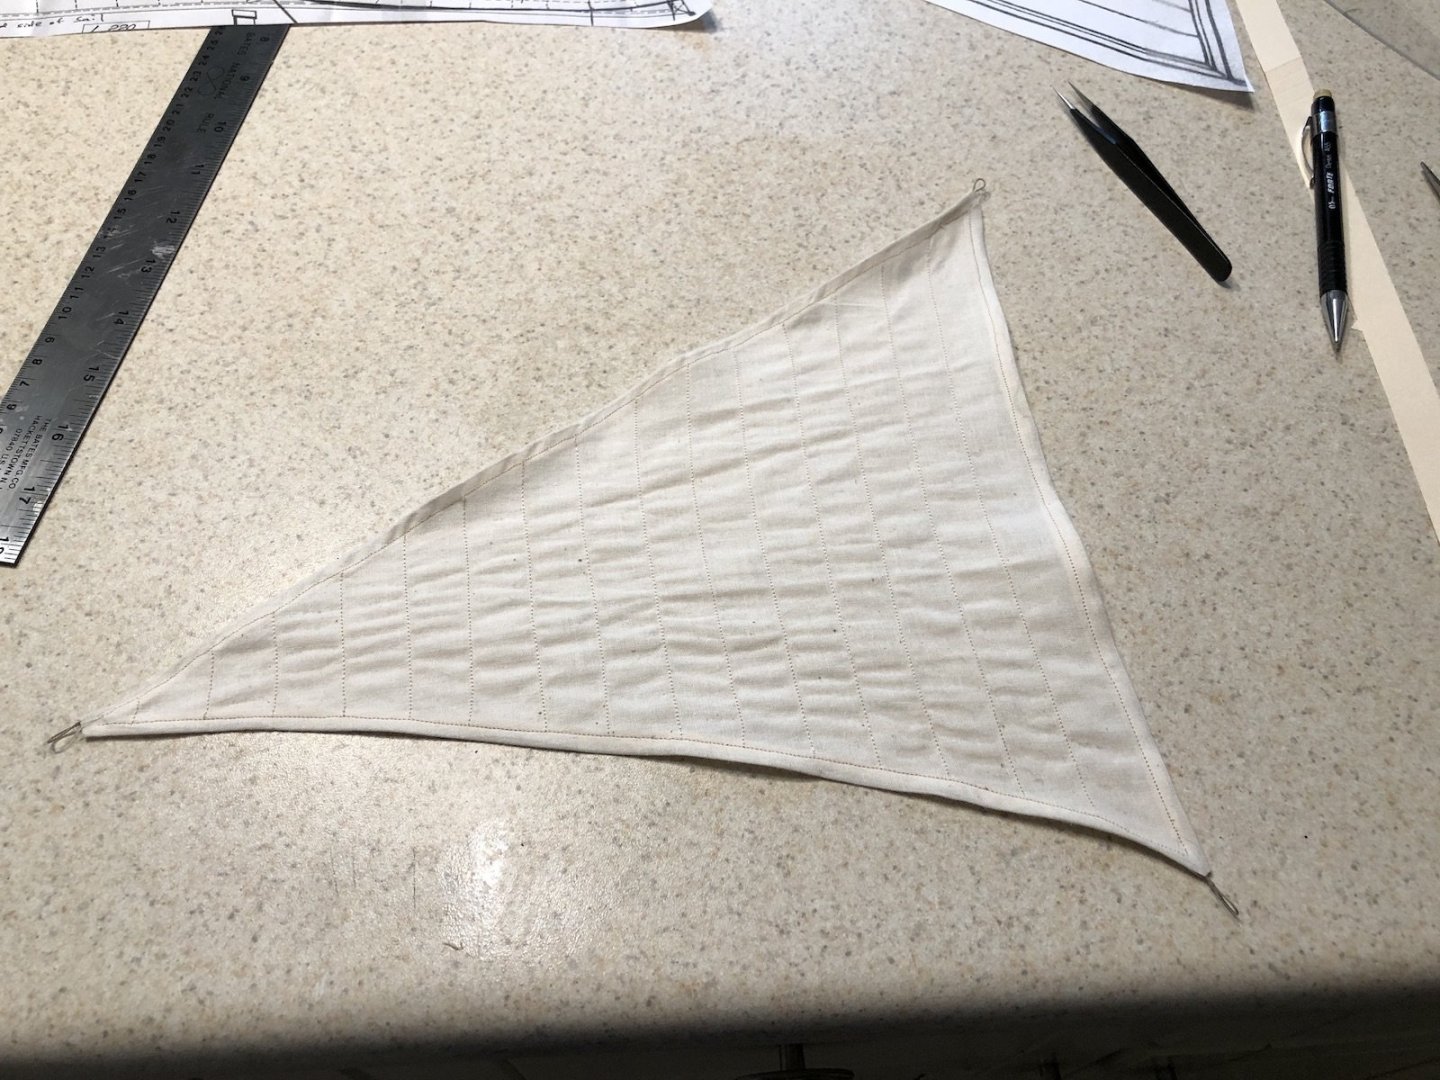
I sewed the seams on the jib sail today and was pleased with the result. I then drew light pencil lines on the back of the sail where the seams are using a piece of manila folder material that I cut to the width between seams. I then used the sewing machine to sew the seam lines. Here is the completed sail. I am really happy with it so now I will make the main sail the same way. I have also started rigging, first with the shrouds on the mast. I have the tackle lines rigged but not tightened yet. I also am in the process of remaking the single shroud on the starboard side because it was noticeably shorter than the rest. Here is another curious feature on this boat. There is a tackle on the starboard side of the rudder, and just a line on the port side. I am really not sure why a tackle is needed or what this rigging is supposed to accomplish. If anyone knows please let me know. Maybe it is just a way to hold the rudder without having to man the tiller?


- 131 replies
-
- 6
-
-
- santa lucia
- panart
- (and 1 more)
-
I experimented with sewing the sails using a sewing machine that my mother had back in the 60s. The thing works great after all these years and just needed a little cleaning. I even found the manual for it on the Singer web site. I am going to make the jib first and see how it comes out. I started by using the template to mark the sail on the fabric. I went around the marked line with anti fray solution and cut out the sail after it dried. I cut it out larger than the actual size and folded the edges to size, using a steam iron to hold the folds down. It worked pretty well. Next I will make the cringles on the bolt rope, then try sewing the seams with the bolt rope in them. If I don't like how they come out I will make a new one and glue the seams closed instead. But first my wife and I are going for a bike ride on this beautiful Fall afternoon.

- 131 replies
-
- 5
-
-
- santa lucia
- panart
- (and 1 more)
-
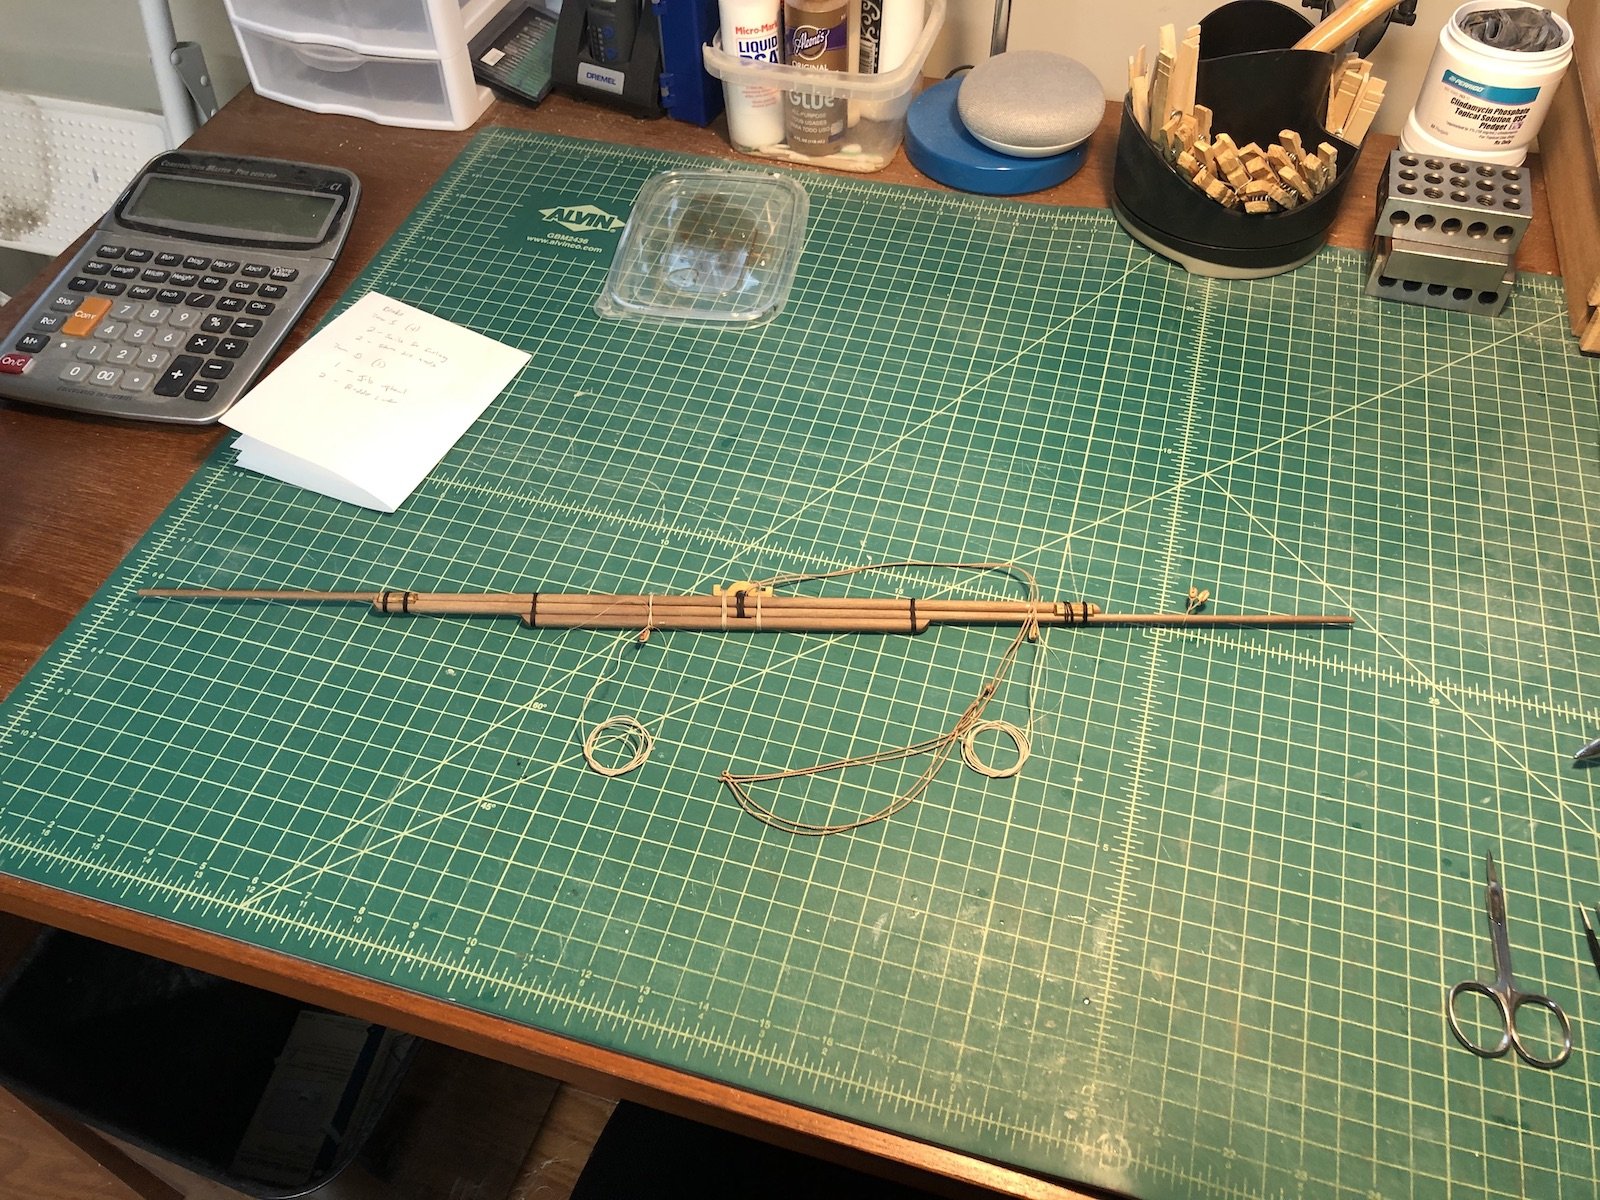
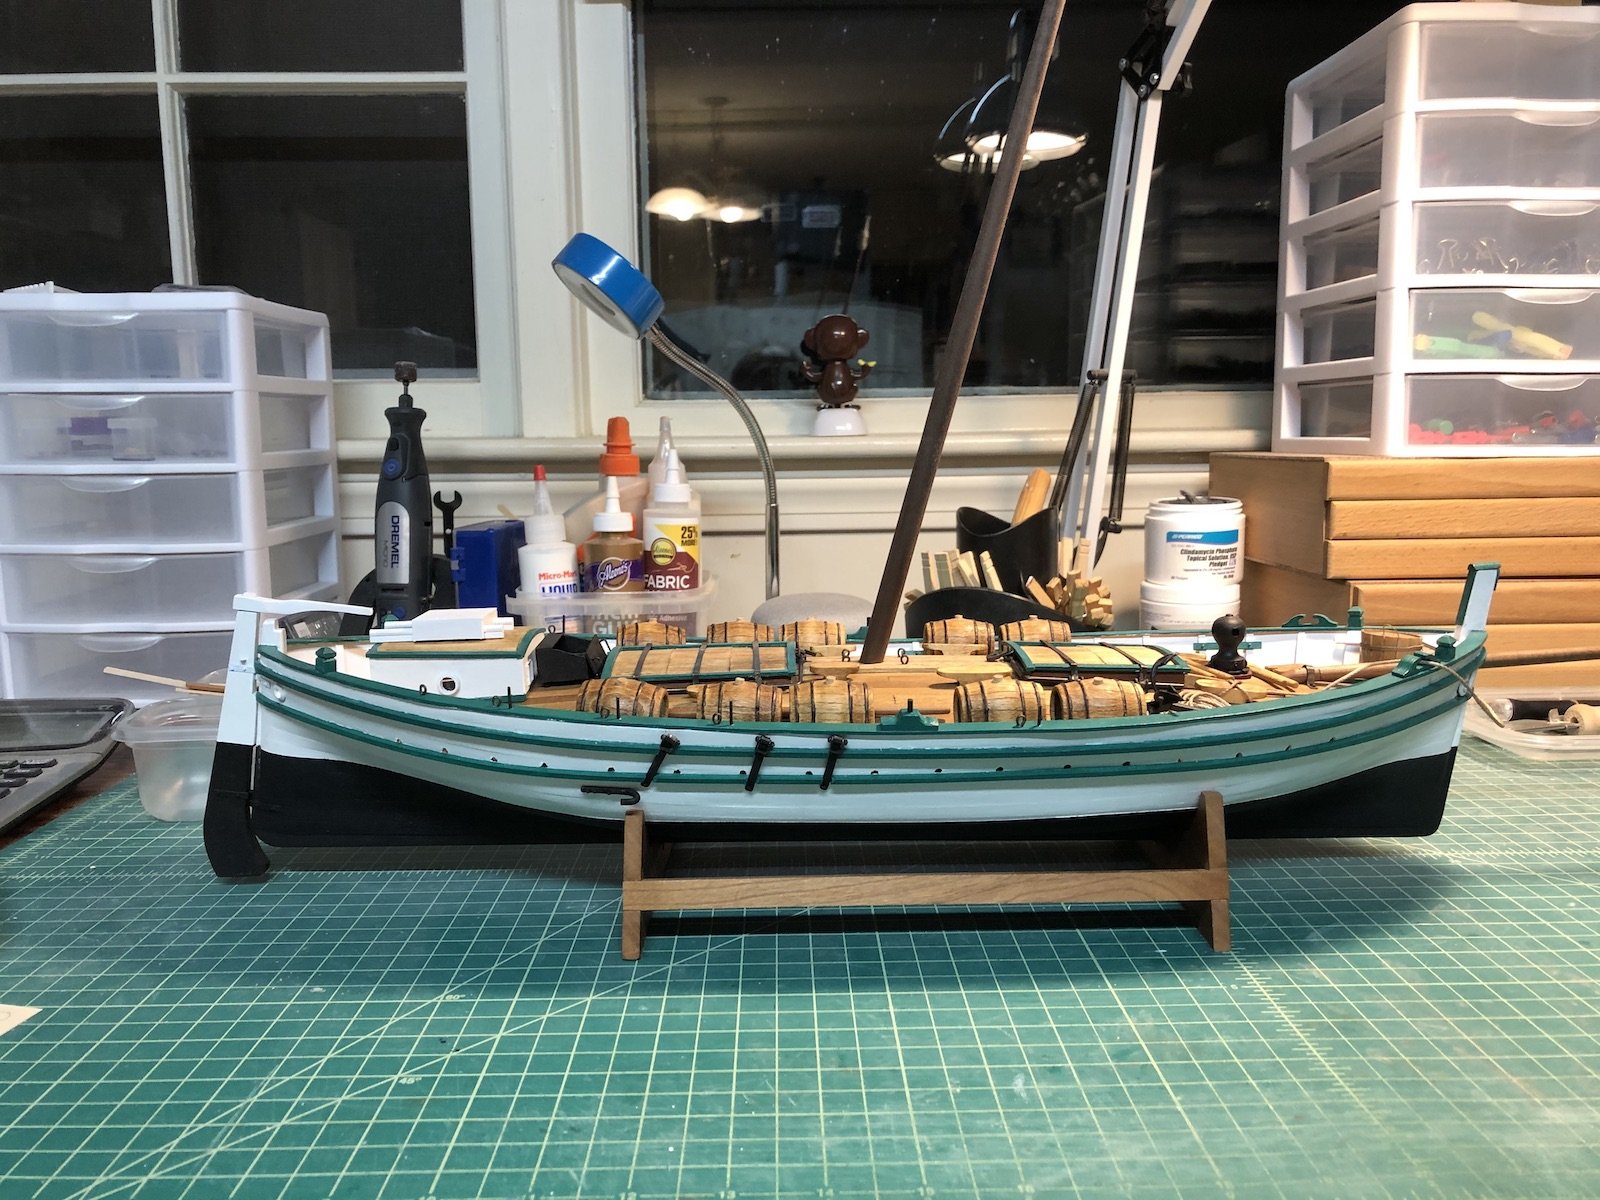
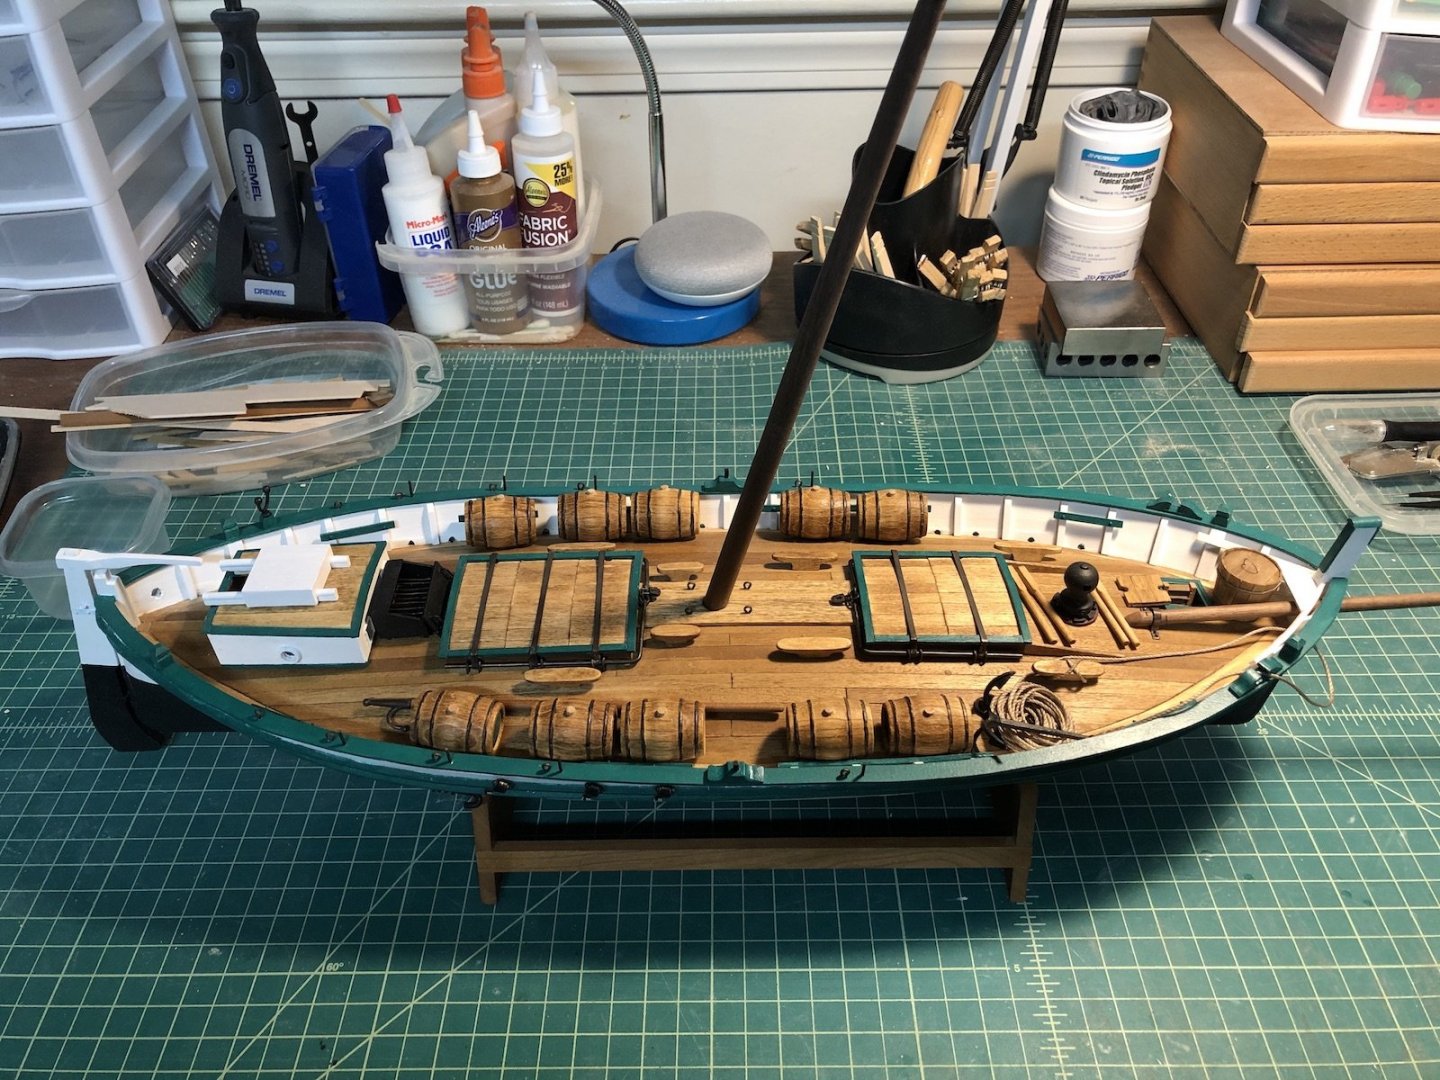
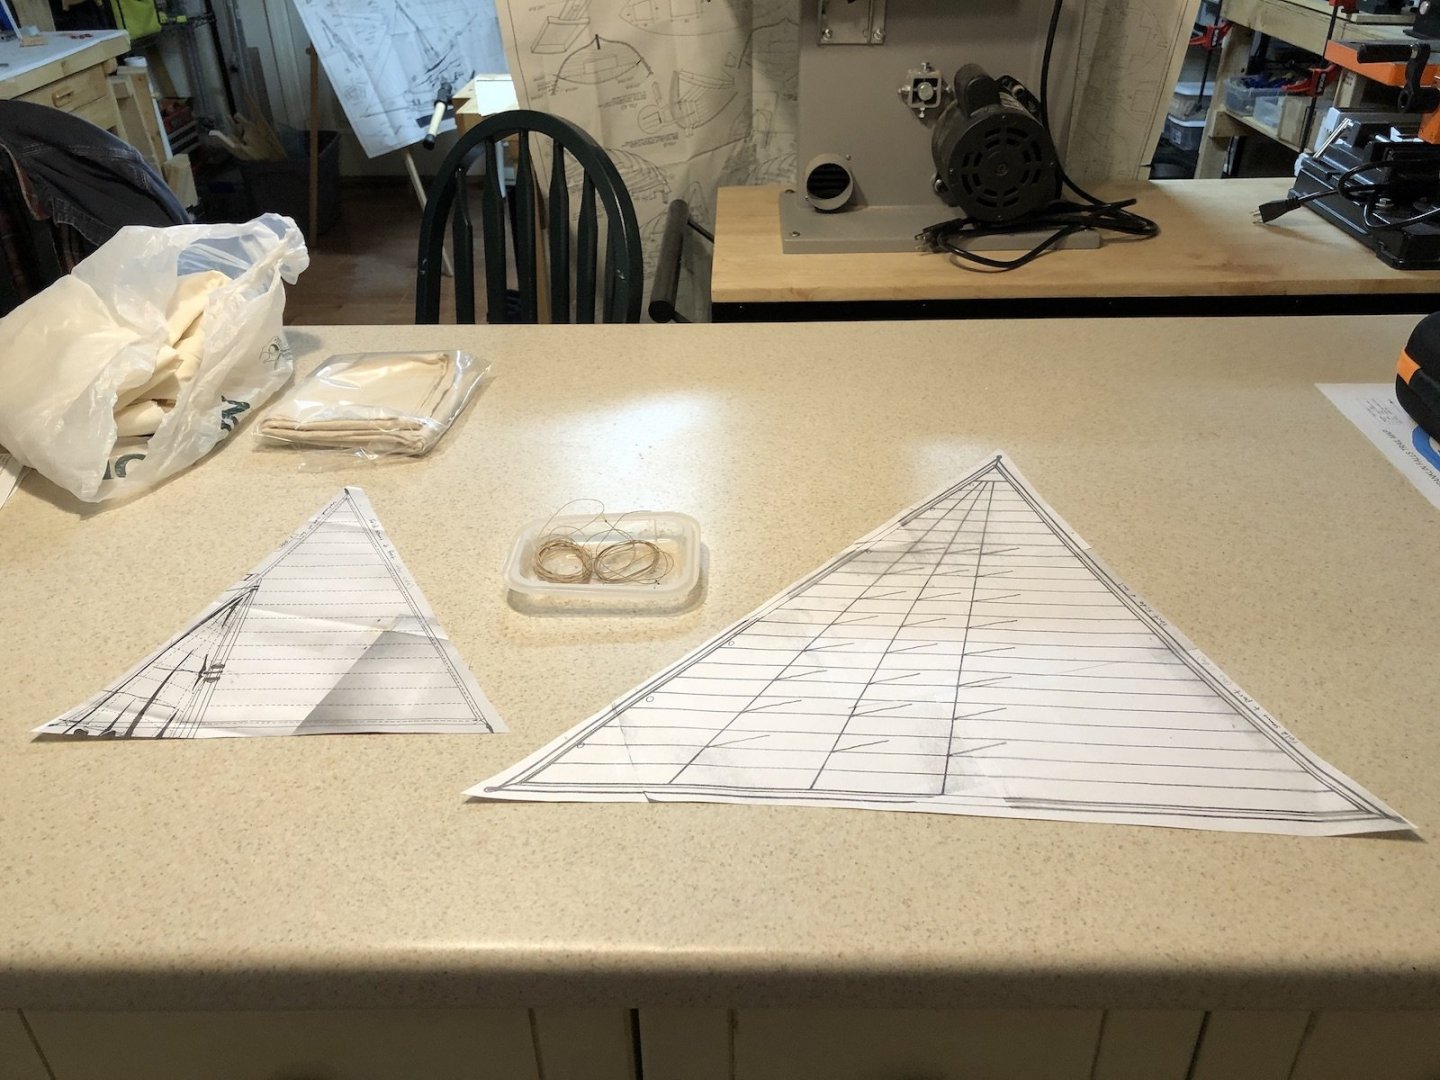
I finished the lanteen yard so it is ready for the sails. I remade the yolk piece because the kit supplied piece was about .5mm thick. This one is 2mm which is what the plans show. I fixed all the wrappings with Dulcote Lacquer. In the past I have used thin CA but I am trying the get away from it for fixing knots and the lacquer seems to work well so far. And it dries nice and clear. For the sails I have made two patterns from the plans. The jib is shown full size on the plans but the main sail is shown at 1:3 reduction, so I had to enlarge it on the photo copier and stitch the parts together. Not too hard to do since there are so many straight lines on the sail plans. I want to make the bolt rope out of one piece of line so I made a really long line on the rope walk for the main sail. In my new workshop I have a really long counter that I can run the rope walk on so I can make lengths about 6 feet now. Now I need to decide how to represent the panel lines on the sails. The instructions say not only to sew them but to make them very prominent, which goes against everything I have read about model sails. I will probably just draw them on the fabric like I have done in the past. I finished up the deck furniture except for the oars which I am still painting. I put the boat onto the cradle I built for it (no more socks to have to look at) and glued down the barrels, capstan bars, boat hook, grill cover, bucket, and hatch cover. I also glued the tiller to the rudder and hung the rudder on the gudgeons. I also added the eyebolts and belaying pins to the rails. I used a smaller diameter brass rod for the pins than the 2mm diameter pieces that came with the kit. They looked too thick in my opinion. So now its sail making and rigging. I have also started drawing up the plans for the case I will make for this model.

- 131 replies
-
- 7
-
-
- santa lucia
- panart
- (and 1 more)