HOLIDAY DONATION DRIVE - SUPPORT MSW - DO YOUR PART TO KEEP THIS GREAT FORUM GOING! (Only 72 donations so far out of 49,000 members - Can we at least get 100? C'mon guys!)
×


jwvolz
-
Posts
979 -
Joined
-
Last visited
Content Type
Profiles
Forums
Gallery
Events
Everything posted by jwvolz
-

Red Paint or Red Ochre
jwvolz replied to davyboy's topic in Painting, finishing and weathering products and techniques
Chuck: Add tan/sand type color to red to make it lighter and keep from going pink. Keeps it to the yellow side. -
Chris, Check the plans. I bet your rabbet is fine. My suspicion is that those bulkheads need to be seated lower so that they are even with the top of the keel plate. They all seem to be above it by a bit. Good luck on the build, she's a pretty vessel.
-
Thank you guys. B.E. : I think now that the copper has settled into its final state and is sealed I can safely paint the rudder braces to more closely blend with the copper itself. There really are no references to color for them in the Caldercraft instructions. The book is quite thin, and I'm glad I don't need it! I'd hate to be new to wooden ship building and trying this kit with those instructions. Mike: The wheel should work perfectly for your Morgan, the scale is correct.
- 136 replies
-
- 1
-

-
- caldercraft
- Cruiser
- (and 2 more)
-
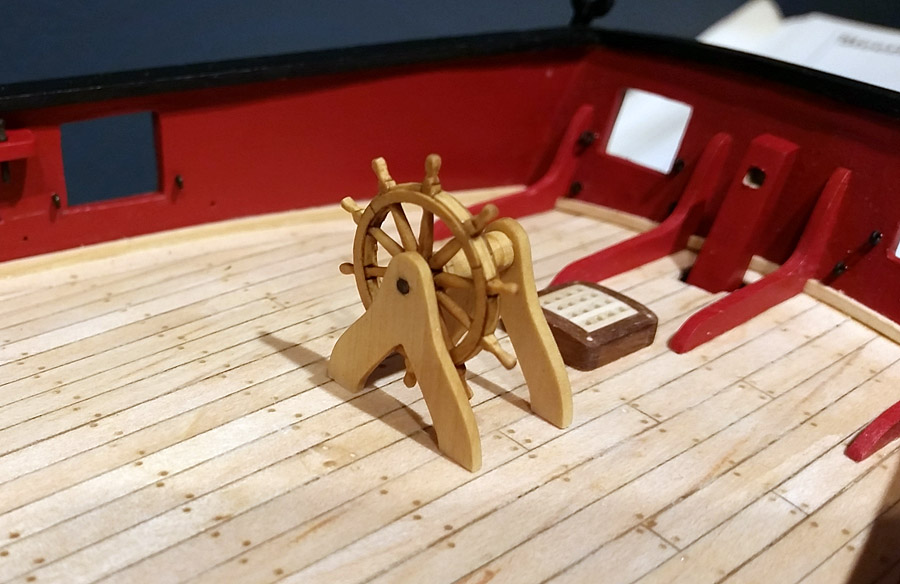
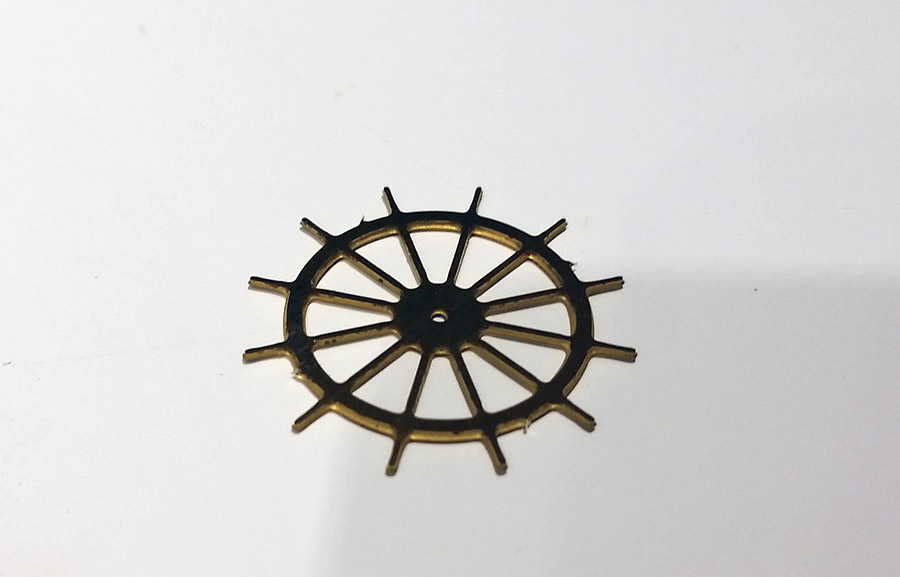
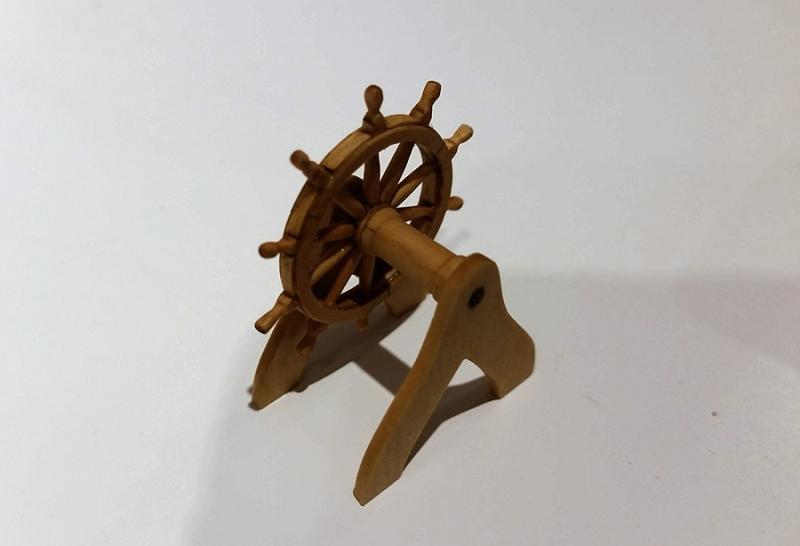
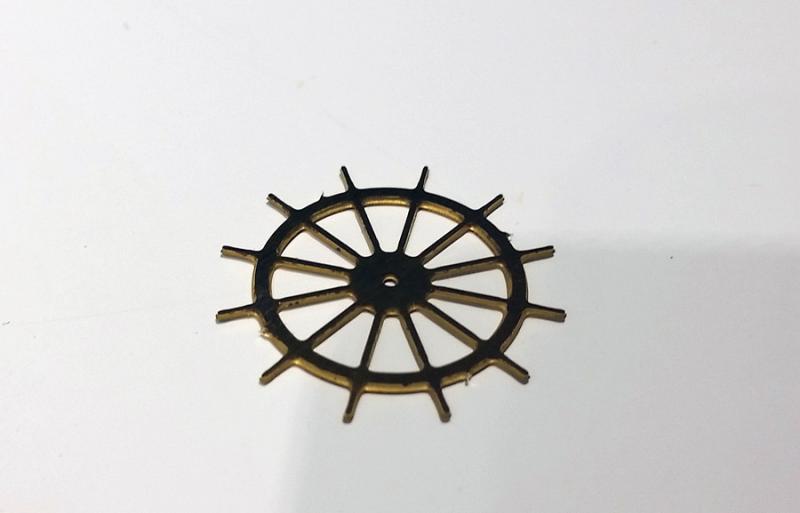
I took a little break from the head work to assemble the Syren wheel kit I purchased. This is one little gem, and I do mean LITTLE. The span across the spokes is less than an inch. Chuck has done a fantastic job engineering this kit and I can't recommend it highly enough. The online instructions are very clear and well illustrated. The spokes were a bit of challenge, but there are plenty provided and I chose the best of the lot after turning them. I used the kit parts as a template for the pedestals, made them from boxwood and made them a bit thinner and finer in the process. The barrel is a turned piece of boxwood. Again, BUY THIS WHEEL KIT!!! Oh, and here's the PE part Caldecraft supplies. Presented without comment...

- 136 replies
-
- 12
-
-
- caldercraft
- Cruiser
- (and 2 more)
-
Just part of the natural process Gemma. The slight variations give it lots of character.
-
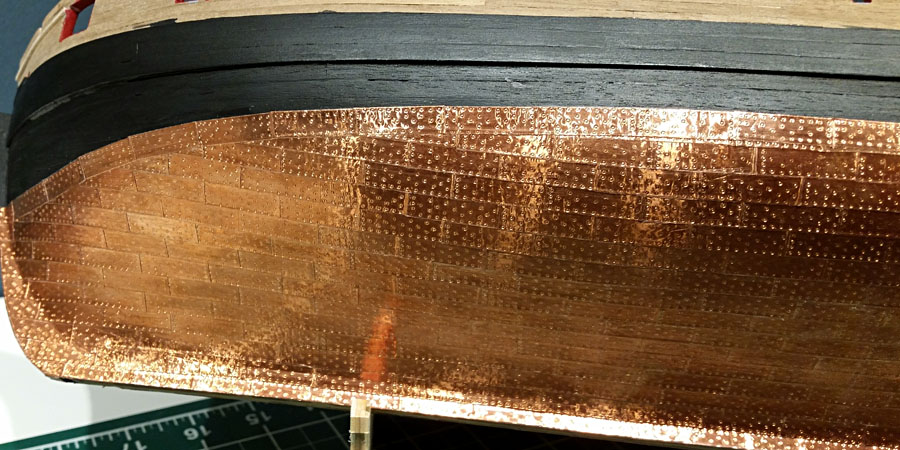
Yes, it is really pee... All in all it's not a bad experience doing it (differing sources say urine is sterile). It works rather quickly and there is no residual odor. I clear coated mine with Testor's dullcoat. Make sure the copper is very clean before application to avoid an inconsistent finish.
-
Thanks Phil. Here it is:

-
Druxey: "Pee treat" I did it after they were applied. The model is 1/64.
-
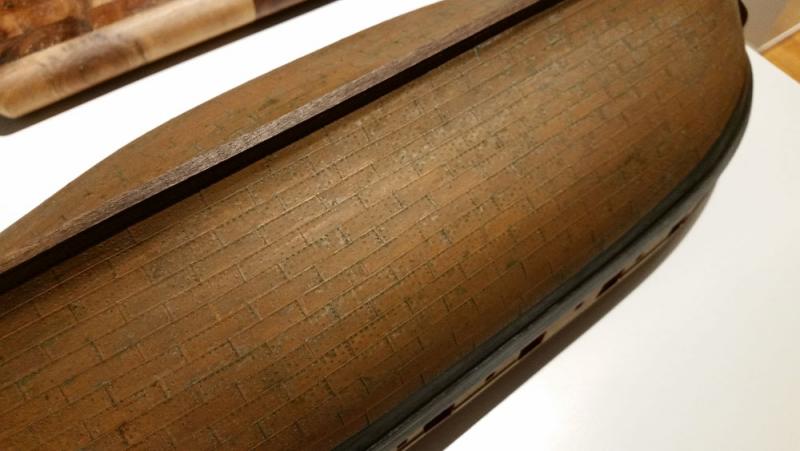
Here's my take: Model Expo copper tape with nail pattern made from very small hypodermic tubing, so it is not raised, but rather shows the nail outline. Weathered with the "bodily fluid" method. There's more pictures of the copper and the stamping jig in my build log.
- 55 replies
-
- 16
-
-
Thanks for posting the template Chuck. That will come in handy. Everything is looking terrific on the build.
- 1,051 replies
-
- 3
-
-
- cheerful
- Syren Ship Model Company
- (and 1 more)
-
Man, she's big Wayne... ! This is really quite different undertaking now that you're into the RC stuff. Very neat.
-
Thanks guys. On another note, I have decided to build her as Cruizer, with the original long gun armament. I couldn't bring myself to toss any more parts from the kit, so I am going to use the supplied brass 6 lb guns, but have ordered replacement carriages from Syren. Maybe another ship in the class at some later point...
- 136 replies
-
- 1
-
-
- caldercraft
- Cruiser
- (and 2 more)
-
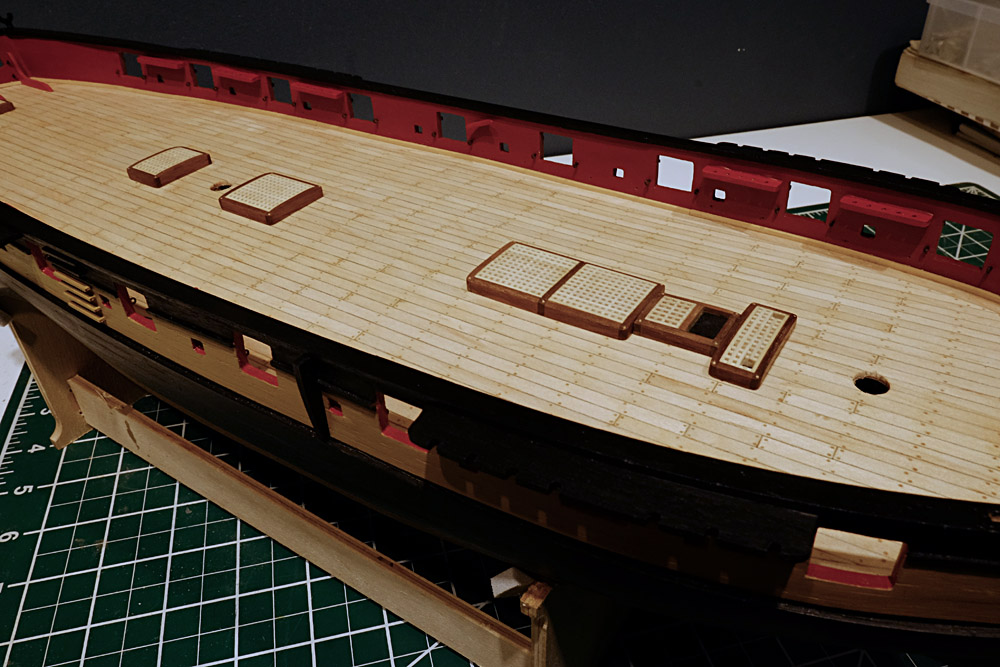
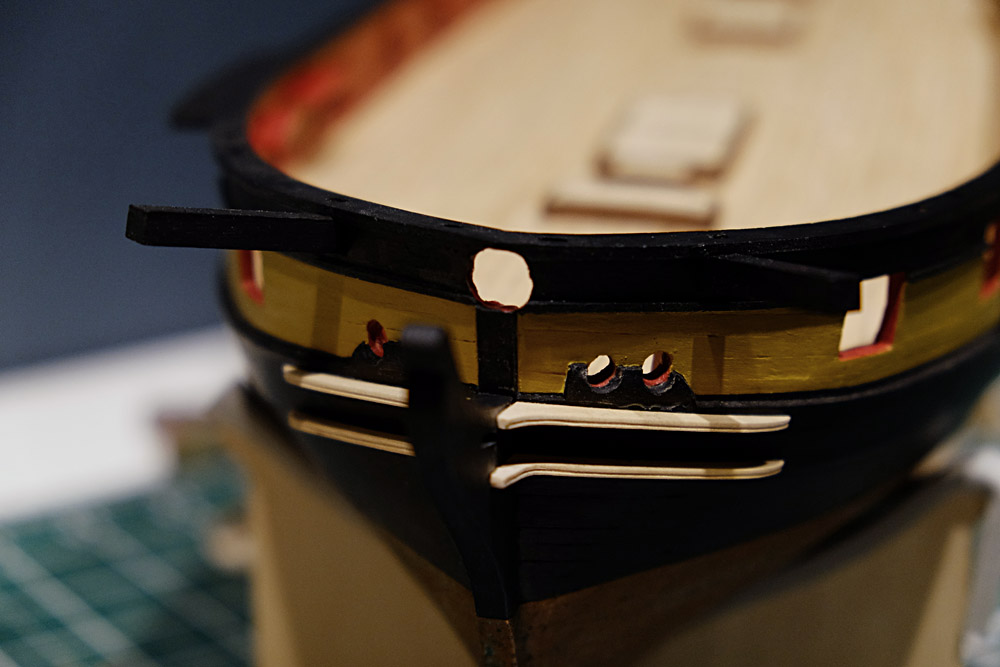
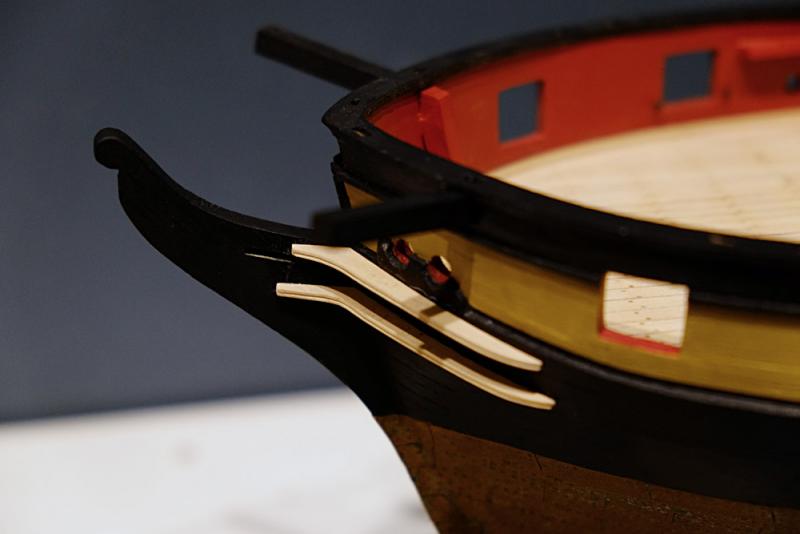
I've completed the hatches and have used the Gannet deck layout to position them. The companionway and capstan are also complete, but I'm likely going to leave them off until cannon rigging/installation is complete. I'm going to base the head off of the sister ship drawing of Epervier in Chapelle's History of the American Sailing Navy. The kit plans and parts are not even close to correct in this area. Work has begun on the cheeks. These pieces are made from Boxwood.

- 136 replies
-
- 10
-
-
- caldercraft
- Cruiser
- (and 2 more)
-
Cruizer-class Brig-Sloops of the Royal Navy
jwvolz replied to molasses's topic in Nautical/Naval History
Thanks for the photos Jason. The brig model had been acquired, but wasn't displayed yet the lest time I visited the USNA museum. I found that article awhile back in my research of the class. Interesting read and really shows the lack of hard information, as well as the changes that occurred over time in such a large class of ships. -
Still in mothballs Mike. Deep, in mothballs... Cruizer is keeping me plenty busy though.
-
Great stuff Mike. Clever work with the multiple woods.
-
Looking very good Erik.
-
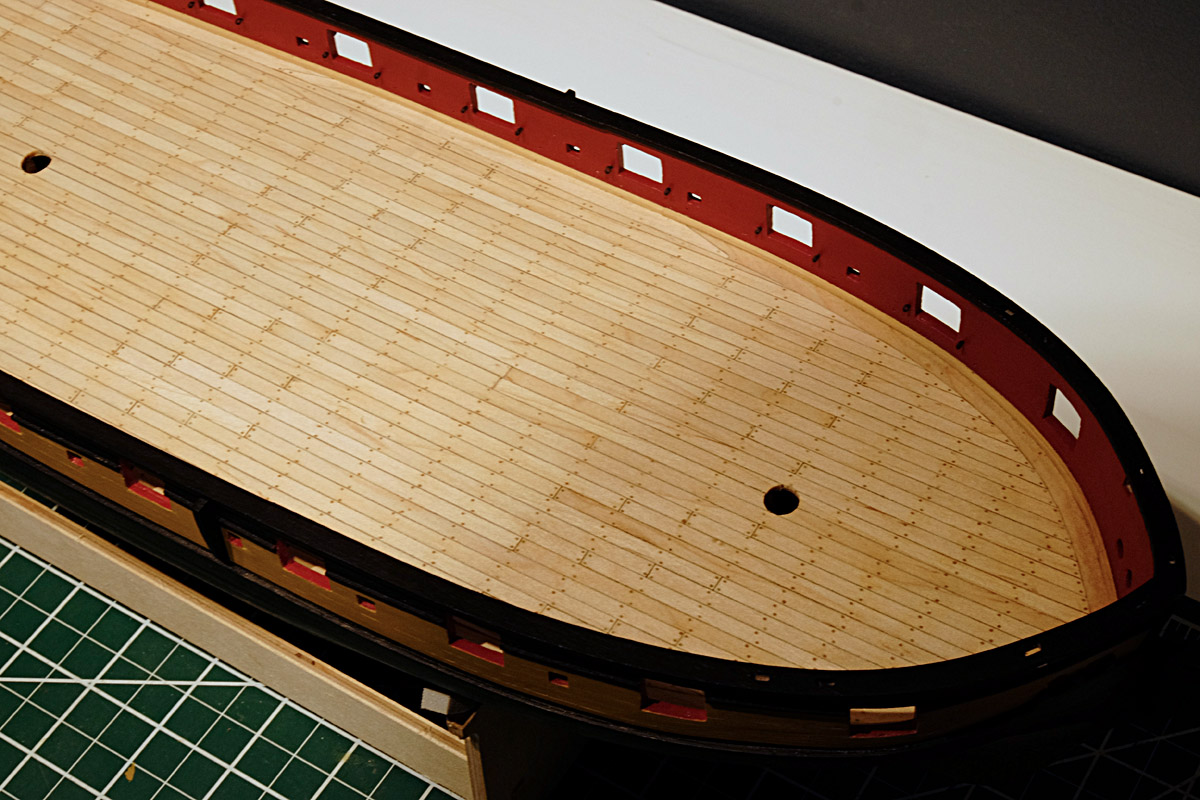
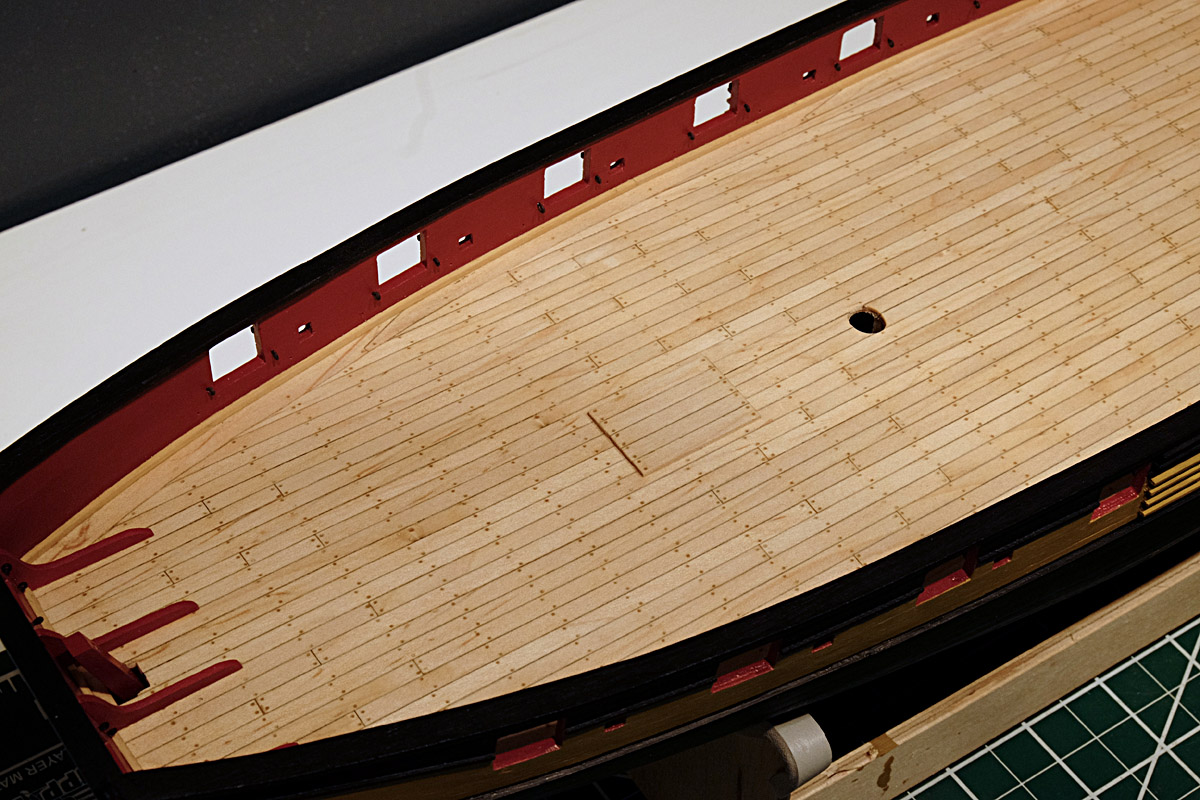
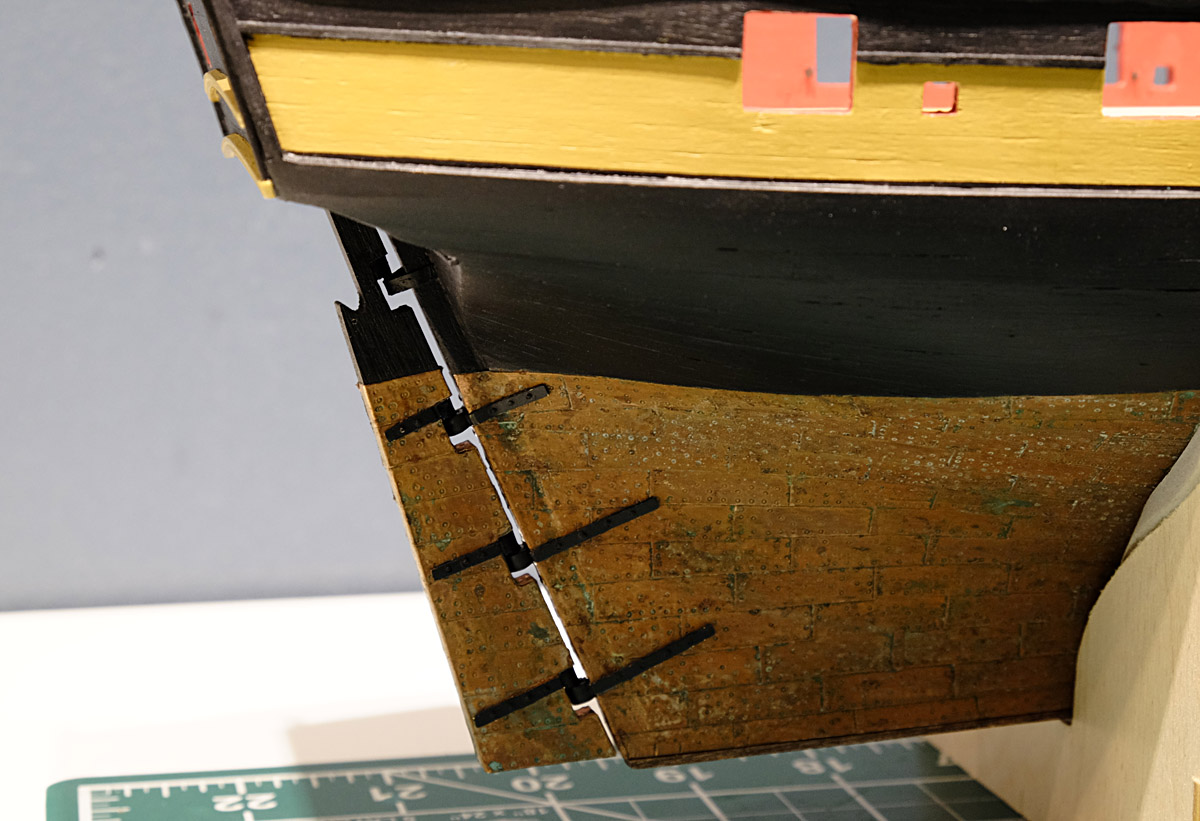
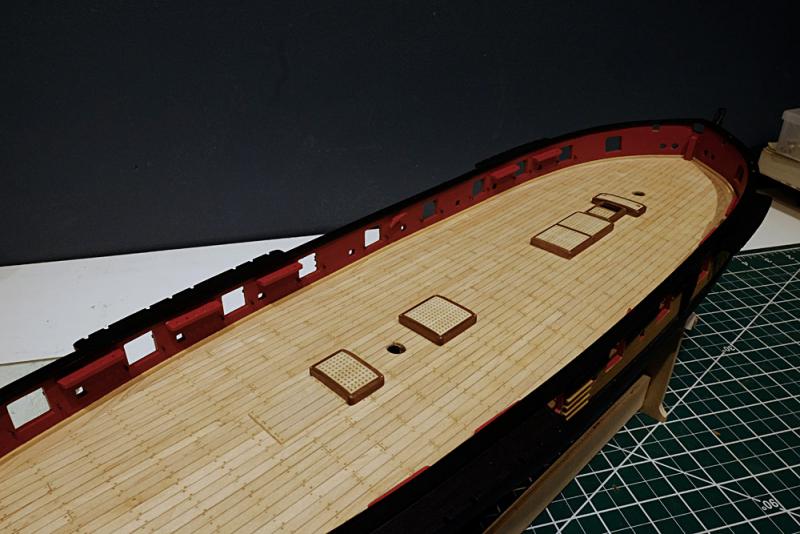
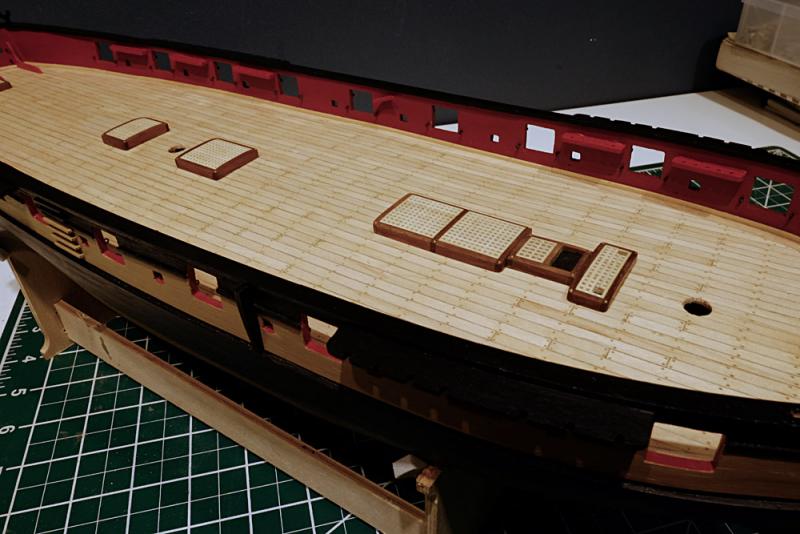
The deck has been laid. I used maple from Crown Timberyard, with a boxwood waterway. . I like the subtle variations and look of the maple, and had used it previously on Granado. I rough counted the treenails at somewhere over 1800 holes...They were done with the drill and fill method. This filler ended up having a bit more contrast than I wanted after staining, but the deck furniture and armament will hide a good bit of the "busy-ness". I also hung the rudder. On to the deck furniture.


- 136 replies
-
- 12
-
-
- caldercraft
- Cruiser
- (and 2 more)
-
Jason: Thanks, I'm probably going with the Caldercraft ones, as I've yet to find another alternative in 1/64th, as painfully expensive as they are. I don't have them yet though. So one further question, what is your lower sill to deck measurement on the model? It sounds like I need to make the size adjustment to the top of the port based on your build log. Thanks very much! Bob: It's another nice Caldercraft kit, with a lot of room for improvement. Thanks to all the "likes".
-
Thanks guys. Jason: Do you have your Snake plans handy? I'd be curious to know the difference in the port size vs. the Cruizer plans. I know I could dig through you log, but did you increase the port size on your build? Thanks.