


torpedochief
-
Posts
369 -
Joined
-
Last visited
Content Type
Profiles
Forums
Gallery
Events
Posts posted by torpedochief
-
-
-
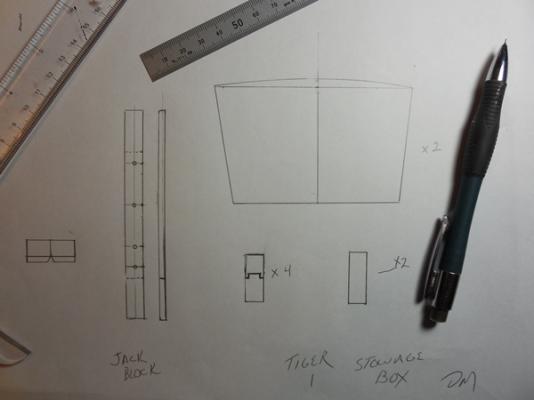
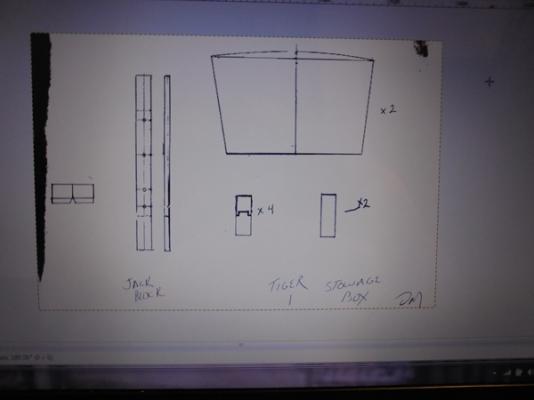
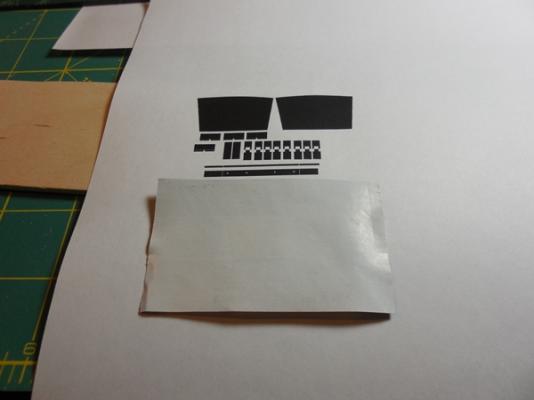
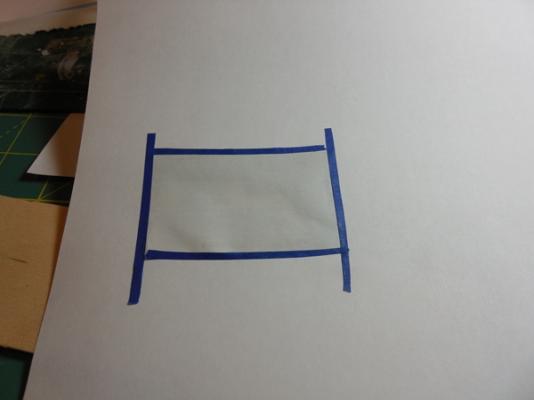
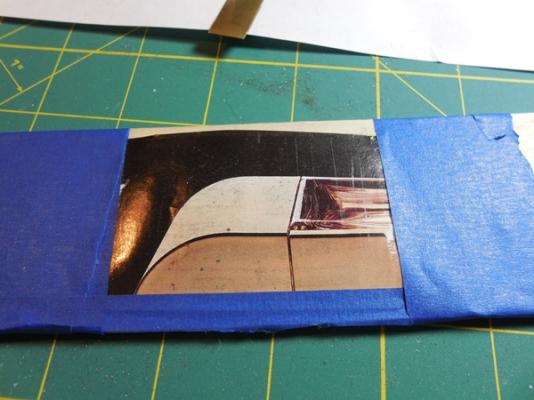
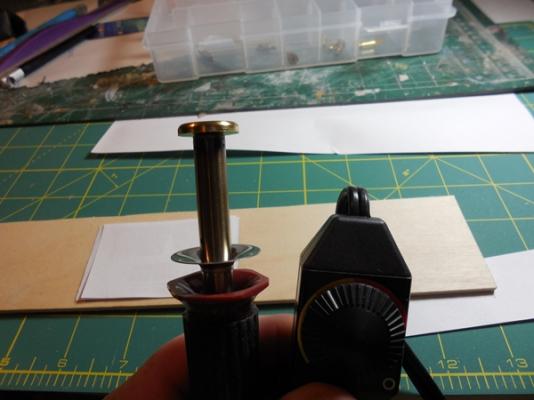
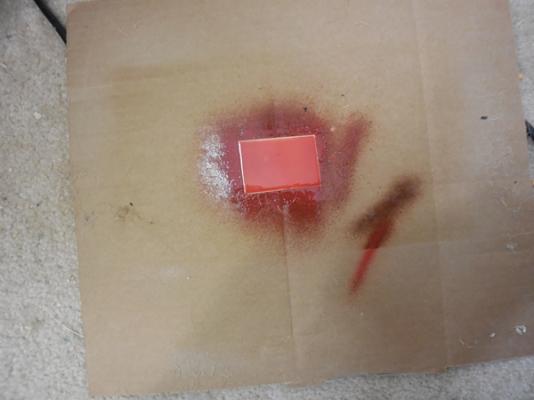
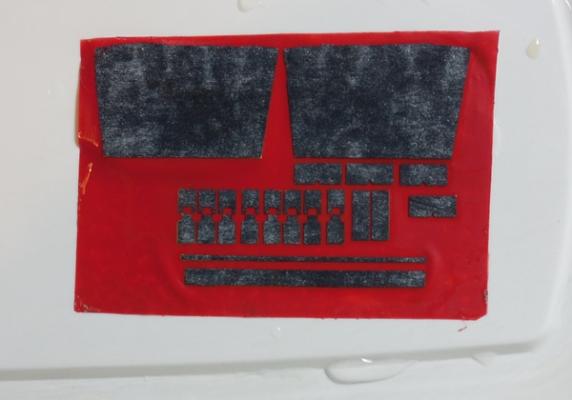
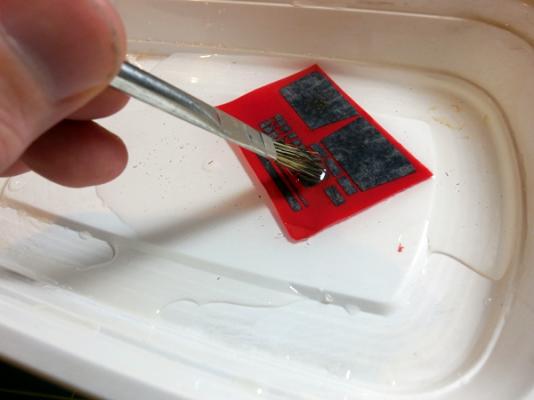
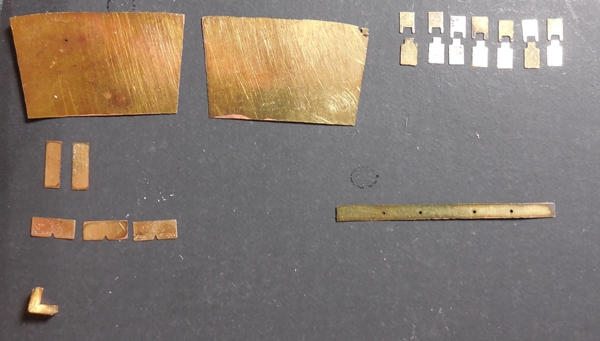
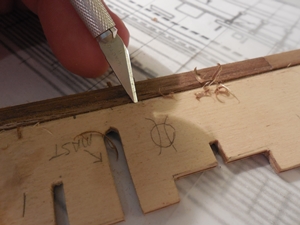
Shipmates, Here is a way to make your own photo etch parts for a few Bucks, Euros, Yen, Rubles. or Pounds. I wrote this tutorial for those in my RC tank community. However it started while I was and still making parts for 1/110 whale ships.
I sure hope you all find this useful!!


-
Brother's and Sisters,
Sorry for the long delay. Life gets in the way of ship building. Hate it when that happens! LEE is going slowly, but I think that is okay. I read in Anatomy of Nelson's Ships that the author took 12,000 hours to build the Victory.
I have the hull almost ready to plank. I have been extra careful in the fairing of the bulkheads. Planking scares the jibbies outa me, so I am polishing that cannon ball to the extreme.
I also have been wrestling with the transom and counter. It has taken five attempts but I now have it done correctly. I am still doing some looking but I think the stern of the plans is not correct. If I were building a framed model the plans for the counter would not work as the last frame would be too thick. In the bulkhead version I was able after a few tries to move the bulkhead to make the counter work. At least that is my findings. I found an old book NAVIES OF THE AMERICAN REVOLUTION that shows a color plate of the "LEE, " that features the stern as the way I built it. However the rest of the plate is nothing like the LEE in Mr. Leaf's book. I bit the bullet and carved my fillers from bass wood instead of balsa. I want all the advantages I can get.
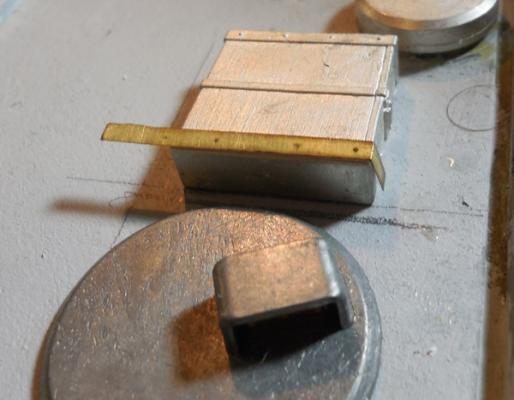
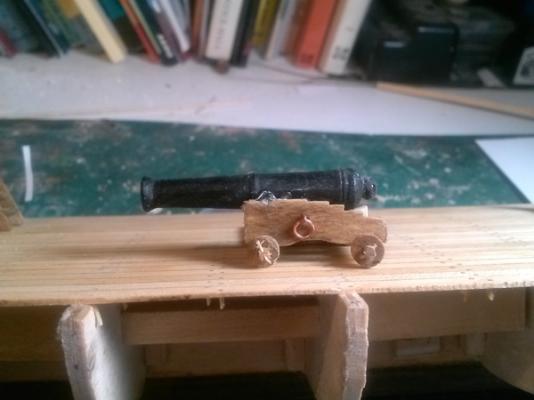
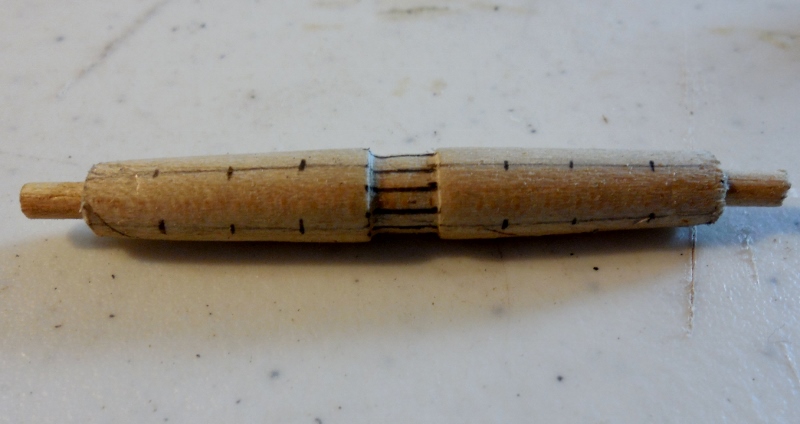
I did take a break and gave building a cannon a try. This is by no means a finished ready to fight cannon. It is just me trying my skills with the Dremel lathe, and making a template. Not to terrible for a first ever try, however the guns of LEE will be much better, (I hope.) I also took a better picture of the Windless I built
I get such a charge out of all the projects I see going on. You folks are all top shelf! Oh by the by, if anyone is interested I have a way of making Poor Man's Photo-Etch Parts, for less than $40.
Ok time for me to get back to writing the "Great American Novel." Yeah Right.
Chief

-
Hey Shipmates!
Still at it. Tons o stuff going on round here. Sorry for the delay.
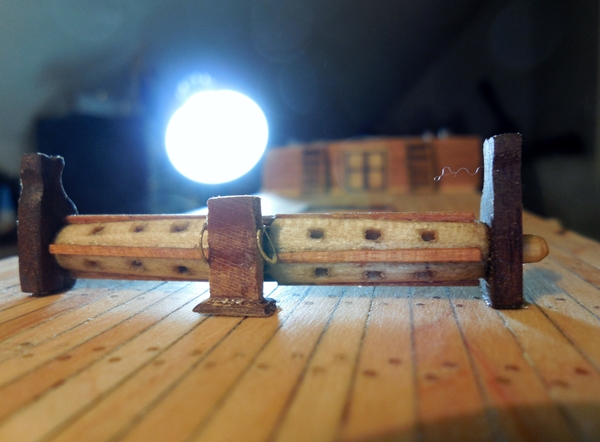
Okay now LEE is moving along slow but sure. I made my first grating from walnut and cherry. I found a 4 inch table saw and I used the blade kerf and a small rip fence to make the slats. Turned out nice, not perfect but nice.
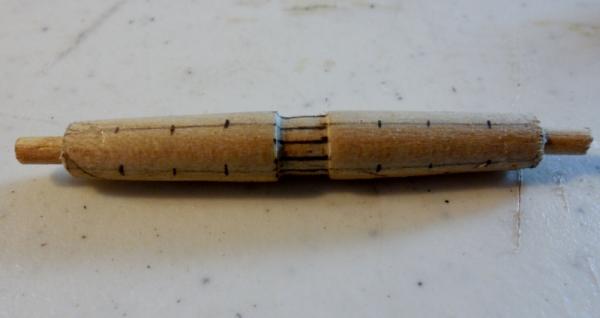
As I was fairing my frames.....ugg, I would take breaks and build this or that for the ship. I went with an older style windless as LEE was built hastily and by folks who did not have all the proper tools. I turned the barrel from maple. The pawls are of walnut as are the supports. I made the rings by sawing thin slices of brass tube then sanding to the proper size.
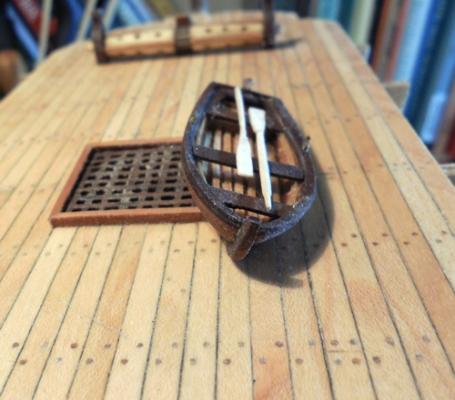
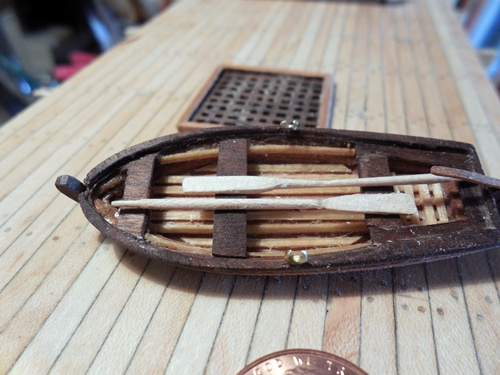
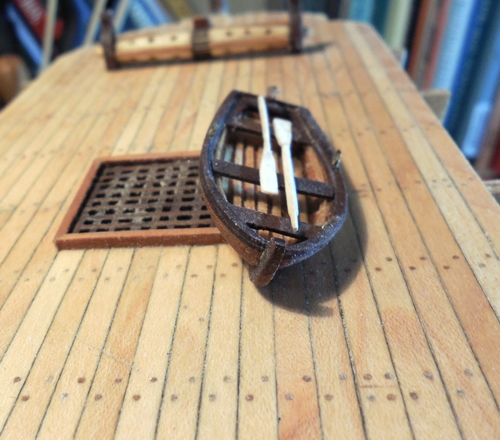
Although there is no record LEE may have had a small boat. I almost went with a canoe but found no evidence of any involvement of local Native Americans. I did do some looking in to boats built around that time. This is an educated guess as to what it might have looked like. Fast to build and able to navigate shallow waters. I used thin cherry to build up a bread and butter hull. The keel, stem, and stern post are of Walnut and the interior is maple, as are the oars. Again I wen to brass tube to make the oar locks.
More to come my friends!! Having a blast. I think once LEE is built I will have acquired the needed skill to attempt a kit,,,,but we shall see.
Chief Going Deep!!


- WackoWolf, mtaylor, qwerty2008 and 4 others
-
 7
7
-
-
-
Nicely done! Your build really shows how powerful a ship like this had to be built.
Chief
-
-
I now have myself a photo etch machine. I want to make oars, harpoons, ratlines, deadeyes blubber hooks and any numer of whale ship gear. Of course items for other ships as well. I downloaded DraftSight, and they lost me at X Y. Is there a simple free program I can use?
Much thanks.
Chief
-
Hello Again,
Sorry for the delay. Had computer problems. LEE is coming along nicely. I have the maple deck in place. To make assembly somewhat less difficult. I made the top of the bulkheads removable. When I am ready I just slide the key into a slot and glue.
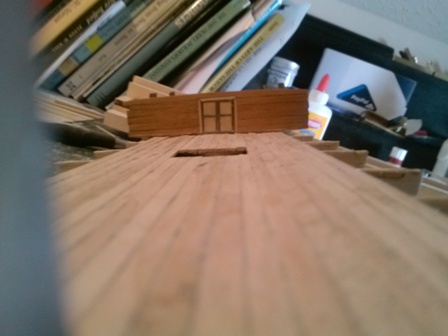
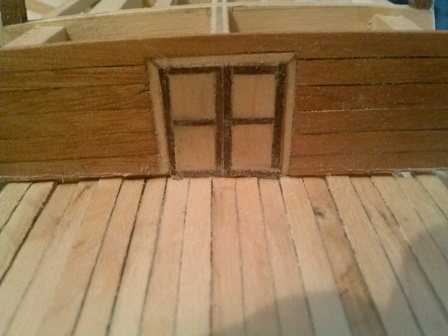
The entrance to the great cabin is planked in cherry. The door is lemon trimmed in walnut.
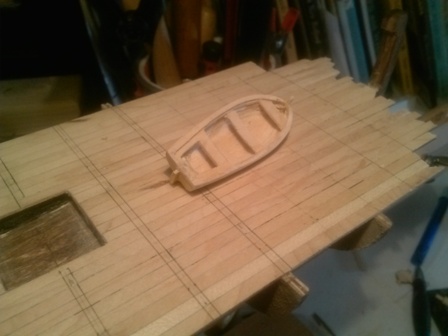
I have the windless turned. I also took a stab at building a gig for the ship. Not looking to bad. If it turns out I will build one in lemon and walnut.
I am now in the process of drilling the deck for the trennels. I will use bamboo for the dowels.
I woul like to have the great cabin interior visible through the windows. However I have not a clue what it sould have looked like.


-
Hey Shipmates,
Having login trouble on my laptop keeps telling me I have not entered a username. So I will be using my phone to continue LEE's build log. Got lots done and I have been trying some ideas of my own. Deck is planked in maple. Ok let me see how to post pictures with my phone. Uhhh no I am a potato head. Ok back to try the laptop.
-
I like this ship! It only sailed in one battle. It was miles from salt water. It was not well built, not for lack of desire but due to being built in an ad hoc shipyard by folks who really did not know what they were doing. She was built as fast as possible. She was a weapon in an arms race with British forces in Canada. The crew; brave as they were had no where near the training to even sail the ship, much less take her into battle. There were not enough guns. The guns they did have were varied, and there was precious little powder to train with.
All the above is the reason I want to build this ship. Those people embraced the cause of Freedom. Although they knew little of ship building, they did it. The crew with everything against them took her to battle with the most professional navy on Earth at the time. They did not win the battle. LEE was forced ashore and abandoned, however her actions along with other hastily build ships tied up the British long enough for the Americans to gain needed time to prepare and rearm.
So those are the main reasons I chose this almost forgotten little cutter. This is my first ever Plank on Bulkhead model, so the learning curve looks more like a corkscrew.
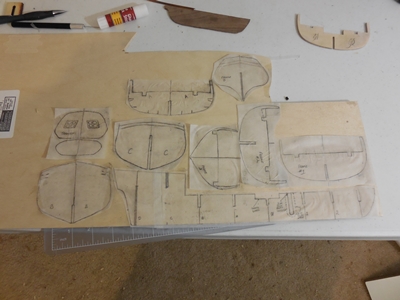
I found the plans for the LEE in SHIP MODELING FROM SCRATCH by Leaf. The plans called for a model that would end up at 16 inches. Don't have that much space and the Admiral even has eyes on my shipyard.......Oh no! So I scaled the plans to produce a model at 11.9 inches no counting the bow sprit.
Now if I can figure out how to put captions on the pictures I'll get you the 411 on my build.
Oh almost forgot. Island Belle is next in line now. I have been assigned a great mentor by the Nautical Research Guild. I was getting to comfortable with solid hulls and I need to step it up!
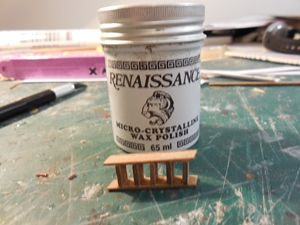
Looks like I am not that bright. I don't know how to put captions on the pictures So after sizing the plans, the first thing I did was build a ladder out of teak. I don't know why. However it did give me the chance to introduce some of you to a great finishing product, that is also great for tools! Renaissance Wax was developed by order of the Queen for the British Museum. This stuff really means it when the say a little goes a long way! It goes on smooth and hardens instantly. then a soft buffing brings out beauty in wood like you never thought possible. On tools it lubricates and protects. I use it not only in my scrimshaw but on my band saw table, Scroll saw table, and sander. Make anything move friction free and protects the surface to boot.
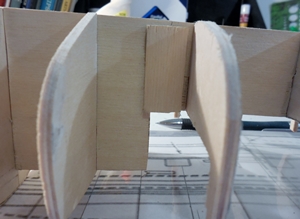
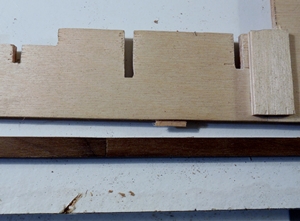
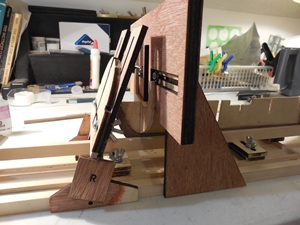
With the ladder done and waxed I next traced the false keel and bulkheads on parchment and then laid them out on my 1/8 ply. With the false keel cut I reinforced the area where the Main Deck goes to the Poop. This was done since the weight of the aft end is more and the center of force is higher. That adds up to a snapped part if you are not careful. I also cut the mast step.
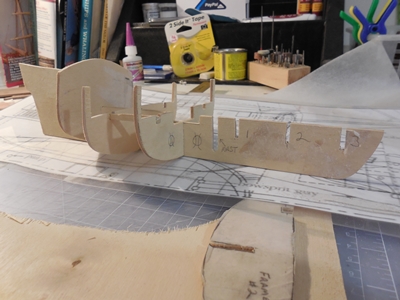
When the bulkheads were cut and trued I test fitted them. The last Bulkhead tapers way thin near the keel. I cut a channel on each side so the thickness of the bottom of the bulkhead and the thin ply of the keel would work out. First try was close but a little off the mark which I corrected by widening to one size and shimming so the fit would be snug.
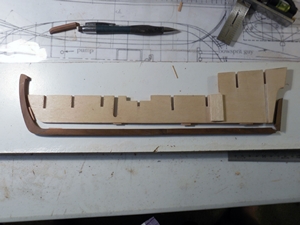
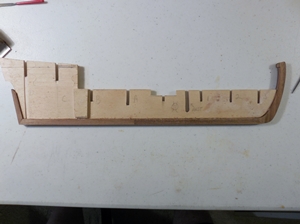
The model will be left natural wood as a tribute to those who built her. I fashioned the Keel, Stem and Stern Post from walnut. The scarf joints are not correct on purpose, again to indicate the haste the ship was built in.
I next cut slots into the Keel and the false keel to receive wooden "Tabs" these assured alignment and gave me a very tight bond and providing my surface area for the glue.
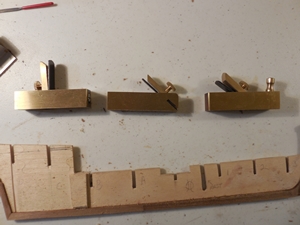
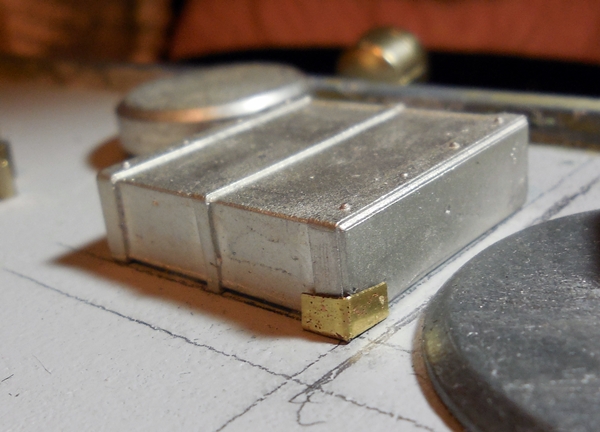
Oh Yea!! Those little brass planes you see. I picked those up at Harbor Freight $10 for the three. Let me tell you, these things are just wonderful to work with, and too look at.
Once dried I proceeded to try cutting rabbets. I ground down the tip of a #11 blade. I made a line along the keel and a bit at a time removed the wood. Three hours later and with 600 grit paper to smooth it out the rabbets were done. SCORE!!!
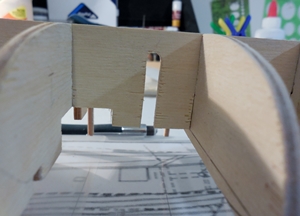
Next I trued the bulkheads and using my FAIR A FRAME (Which I do not care for in the least,) I glued in my bulkheads. Oh no first timer here... gonna be a disaster! Nope. Everything went in square! How I did that I will never know and most likely will never be able to again. I strengthened the bond with four small piece of bass wood where the bulkhead transverses the false keel. Using such small ply I beefed the whole frame up by using 1/4 basswood. I alternated the how the supports met the bulkheads to spread any stress while planking and what ever time and humidity can do to my little boat.
All for now my sisters and my brothers .
-
When I was stationed at the Submarine Base in Groton Ct. We were members of the Seaport and most weekends would find us roaming the grounds. I got to Groton as a 2nd Class Torpedoman and left as a Chief. I sorta grew up on the Morgan you might say. To see this build leaves me yearning for the days when my children were young and on cool fall days we would sit on the grass, eat clam fritters and watch the ship.
You are doing so a wonderful job my friend. I hope I learn as much as you have forgotton.
Chief
-
-
-
I have this kit also POPEYE. Following right along. You really are a speedy, yet a builder of supreme quality. Great work!
-
Hey John!
Brother I will be hanging on every word and picture. I have a Kate Cory that is coming up in the building que. She is quite the ship!
Chief Don
-
I tried my hand at making a few crew members for my up coming build LEE. I used thin copper wire to make the armatures.
Never having done this and thinks my expierence as a wood carver would make this no challenge.
However I was very wrong. The sulpy would not cooperate at all. It would fall off. Slip and slide around till I had one crew member who looked like Shrek and another like the Elephant man without pants.
Just about to give up I noticed a spool of my rigging thread. So I used the thread to wrap the armature. I made two passes, and secured the bitter end with CA.
Now the sculpy works great. The thread provides more surface area and a tooth for the clay to adhere. I managed to wrap it tight enough that the raw black thread Is now my little mate's shoes.
I feel that once you have an armature and wrap it you will begin to see how the body is shaped and start sculpting. If I can do it you can too. I had some pictures but butterfingers here somehow managed to delete them.
Take Care Shipmates!
Going Deep!
-
Someday I hope to half as good as you. Just wonderful. The flow of your planks leads the eye along a sleek and very well built hull.
-
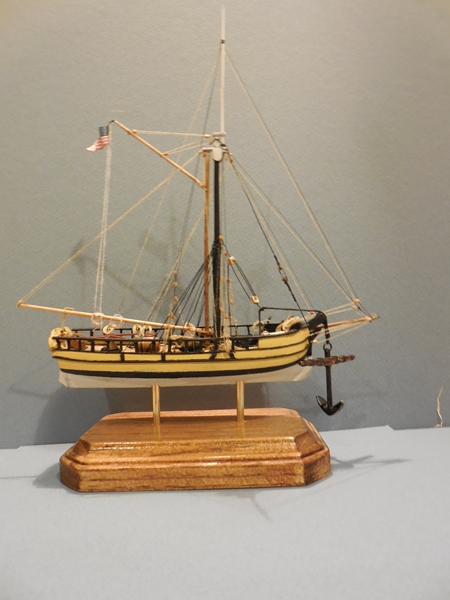
DTG 20140514 2256R
To: All Hands Model Ship World 2.0
From: MMC/SS Don Meadows USN Ret.
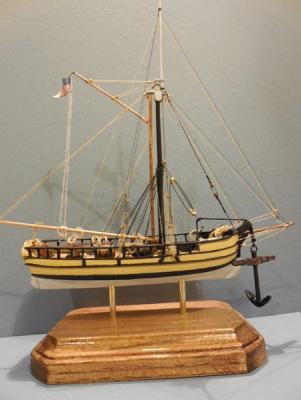
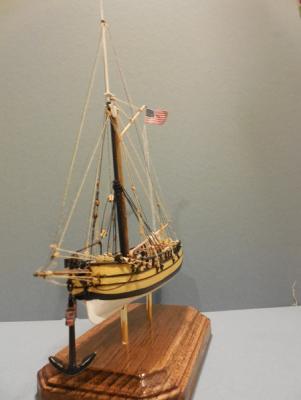
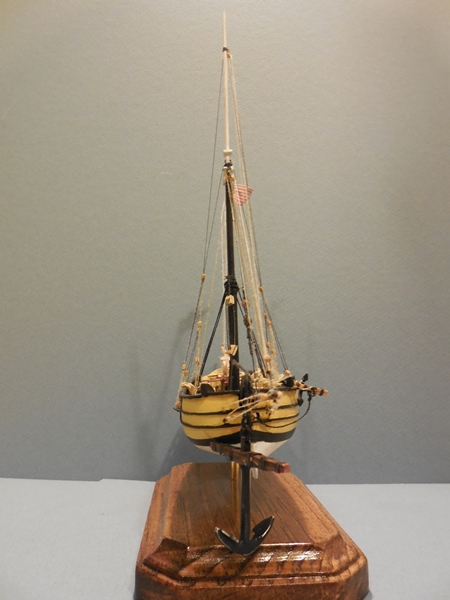
Subj: COMPLETION OF USN ANCHOR HOY Circa 1819.
I am so pleased to report completion of my first ever wooden ship and scratch build. Many of you on this site knowingly or not knowingly helped just like shipmates do.
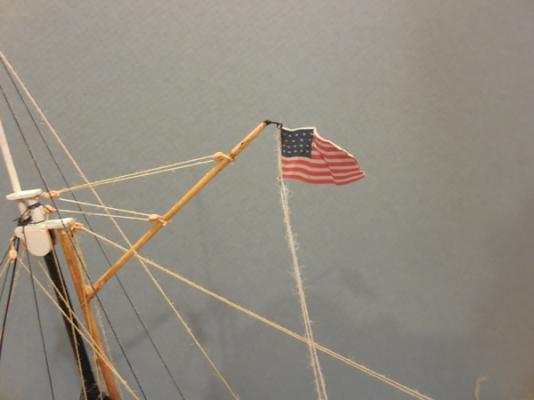
I made my flag based on discussions here, matter of fact just about everything I learned on here. The idea here was our little Hoy is multitasking, she is out tending anchors, while supplying warships at anchor in Hampton Rhoades. She is dirty, and worn, however her crew are proud and do what they can with what they can to make her look as good as possible. The symbol of my rank as a Chief Petty Officer was a fouled anchor, and this little ship though a non combatant did her duty as is in the finest traditions of the United States Navy. I am as proud of what she stands for as I am of the fact I built her.
I am feeling so confident after this I will now build the entire Spanish Armada out of Macaroni, blades of grass and Unicorn tears.
Thanks Again all!!
Chief


-
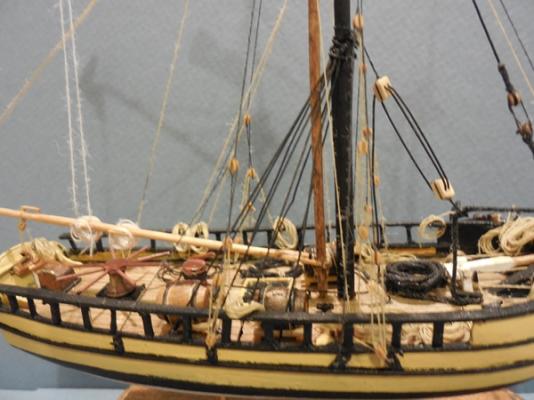
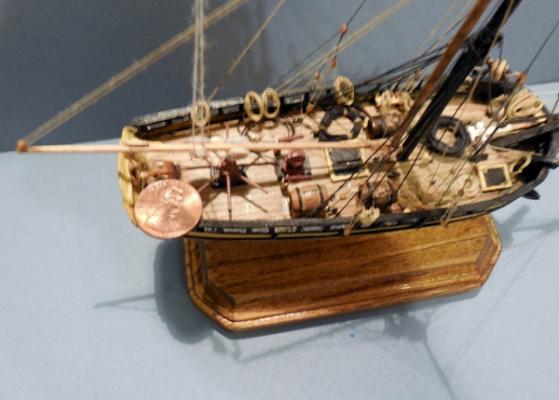
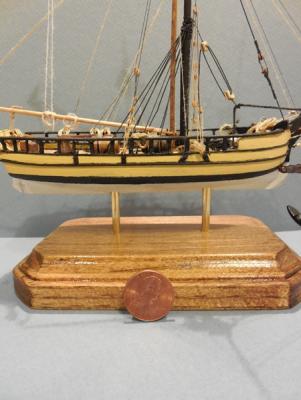
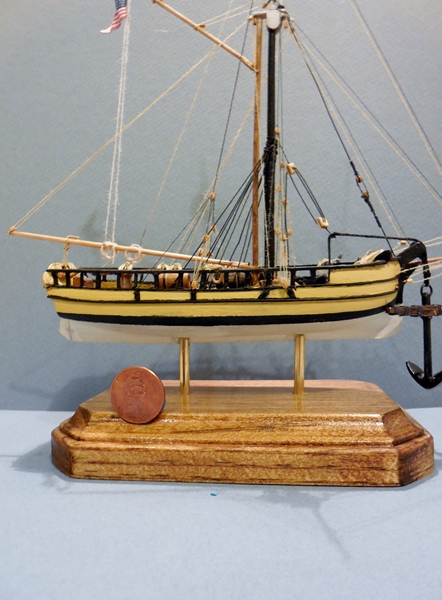
Hey Shippys!
I can not begin to tell you the joy this little model has brought me. This time last year it was doubtful I would even be around. However things are looking up some.
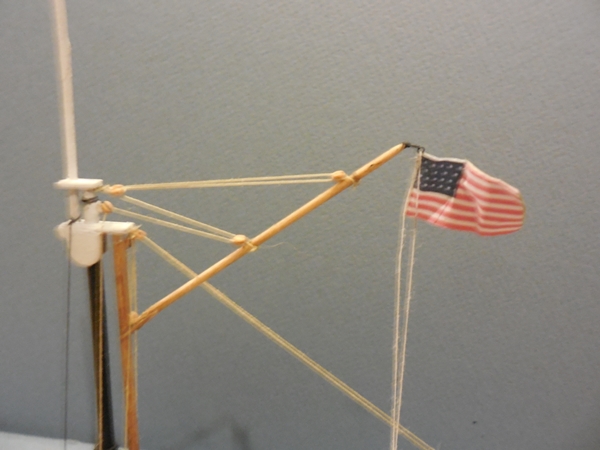
When I pulled on the tiny gaff topping lift and it rose into place, nothing in the world could have been more thrilling. For a second I was there on the Anchor Hoy early on a brisk fall morning setting sail to resupply the warships all around Norfolk.
I am sad that this build is nearing an end. The challenges, setbacks, discoveries, everything has just been beyond words.
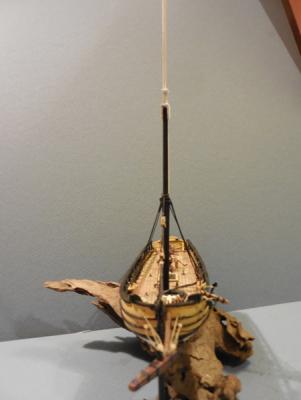
All the spars are installed and 1/2 the rigging is in place. I even made a barrel to give it that extra touch. Next is to rig the jib and finish the stays.
I have wrestled again and again with the idea of putting sails on the little beast. Not sure if I will or not. Thanks you all for your support of this effort.
Going Deep!!
Don


-
Hello again Shipmates!
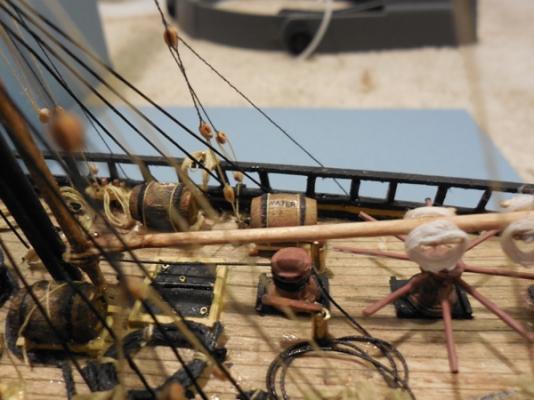
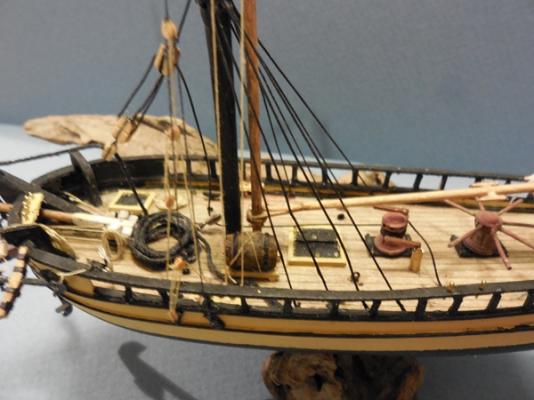
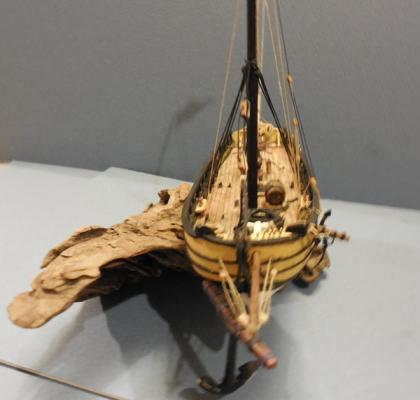
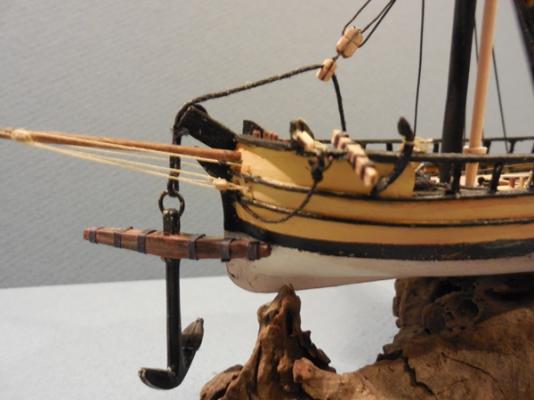
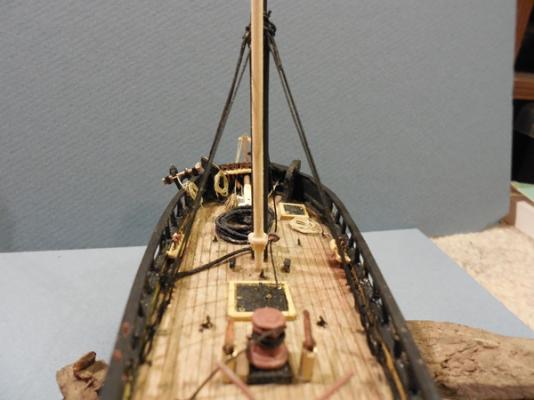
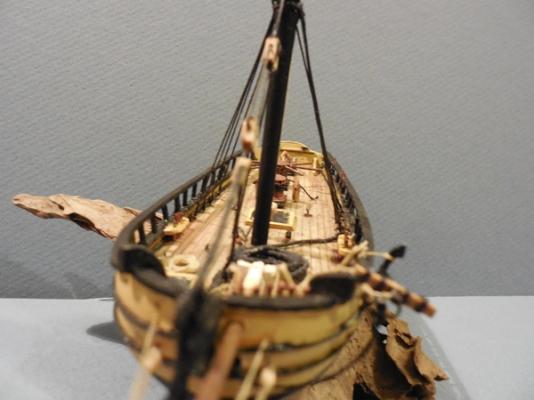
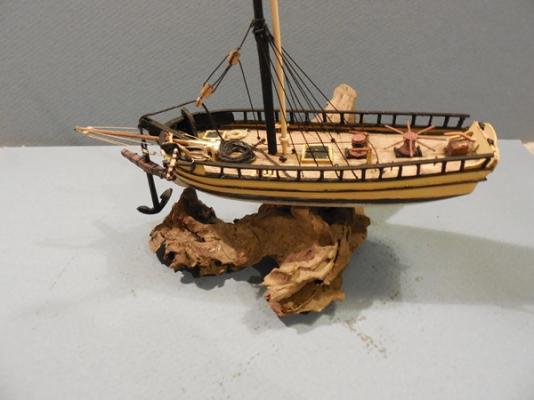
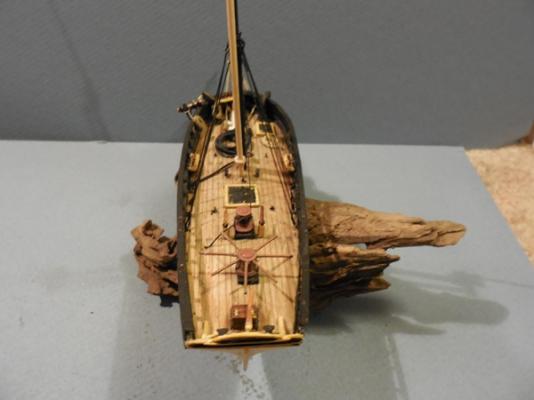
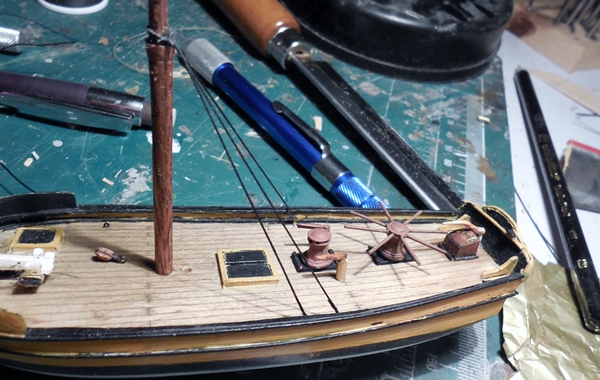
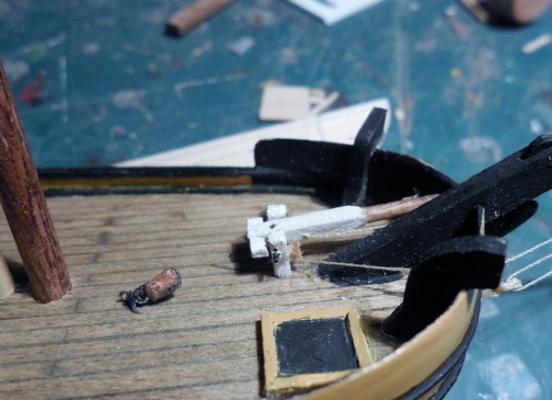
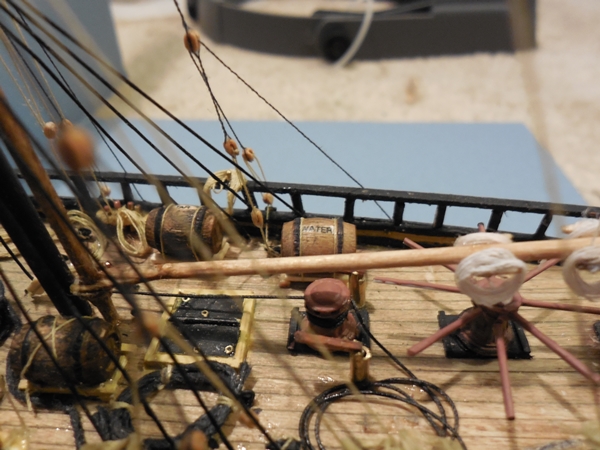
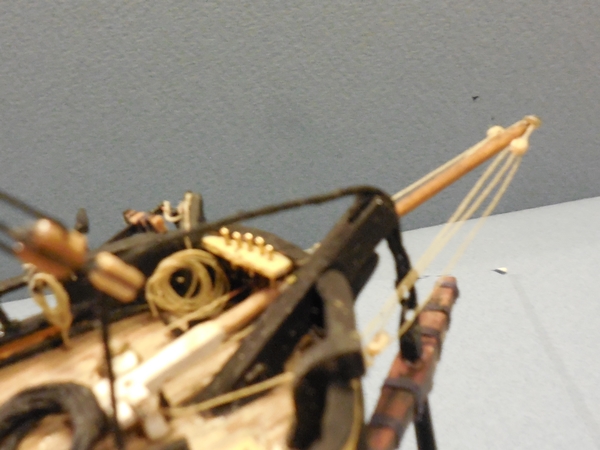
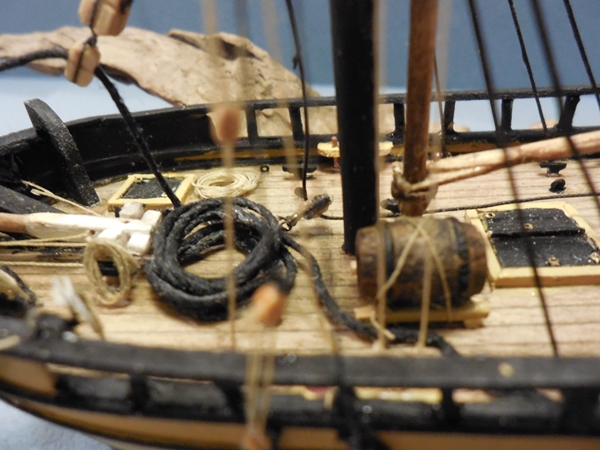
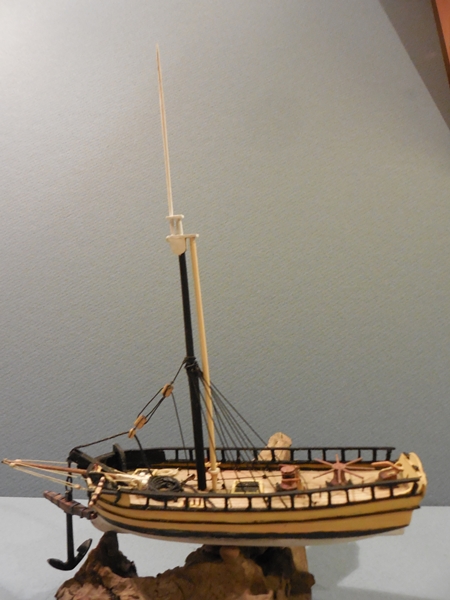
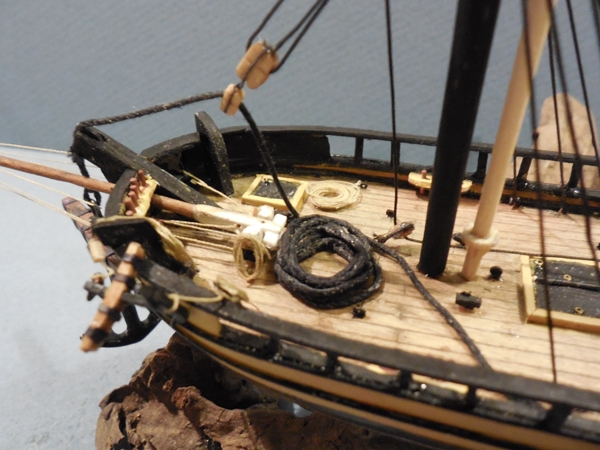
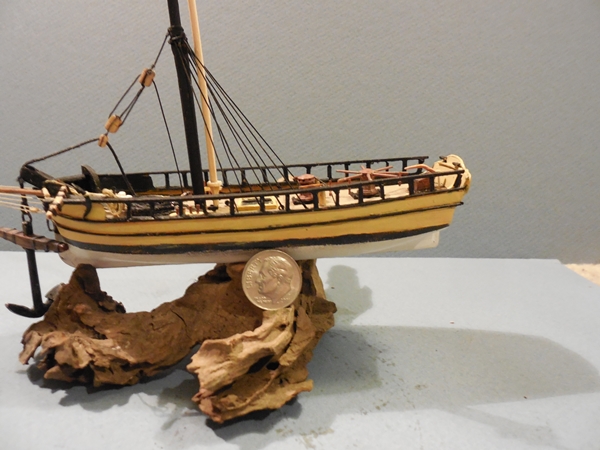
Wow been a building on my little bitty boat every night for at least 4 hours. So far about 80 hours. Getting closer though!. Since we had our last GAM (Whaling Term for a meeting of two whalers at sea,) I have made and installed the boom rest on the Spenser Mast and stepped the Mast. Doublings and top mast are made and installed. My Anchor Handing gear is also rigged but not tightened yet.
I have made and catted the little boats own anchors. Railings are installed. About 10 cleats still need to be made not counting those on the boom.
Gosh I also have made some coils for the rigging and gear thus installed. I have installed temp belaying pins. I am working on the scraper idea to make the pins. A hacksaw blade with a profile cut into it and held against a rotating bit of stock. So far cherry wood flies into a billion slivers. Bass wood turns into a fuzz ball. Next I will see what brass does.
The use of surgical sutures works pretty good. It also has the advantage in this small scale of being realistically rope laid.
I want to add an anchor buoy but I cannot find a ref. to tell me what color they might be. If anyone has the 411 please help me out. I want to put a buoy on my Hoy.

In other news. It was on this date in 1986 that the submarine I was on USS RAY SSN 653 and two other submarines surfaced together at the North Pole. First time ever in history.


-
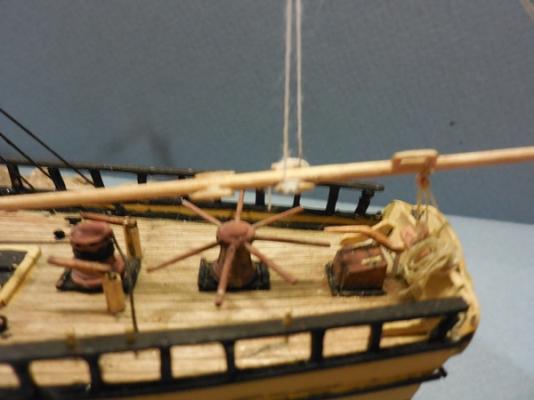
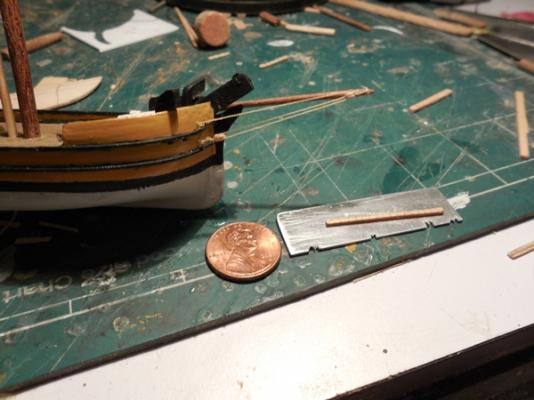
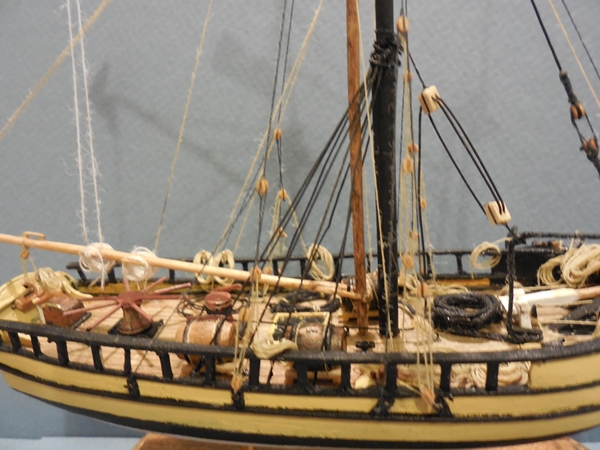
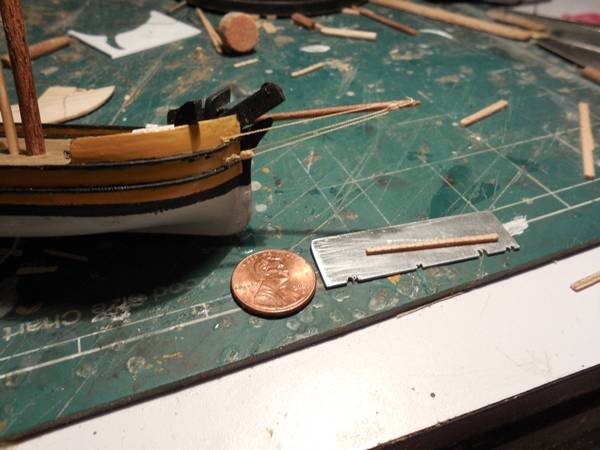
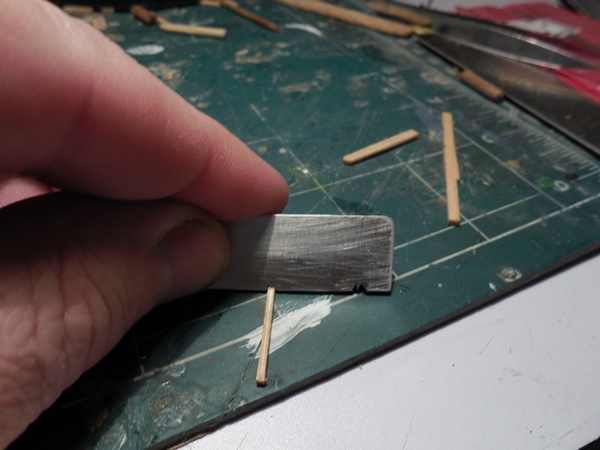
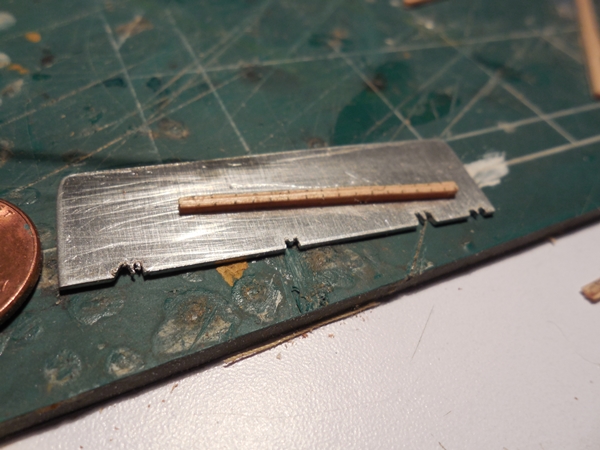
Ole Chief doin' the happy dance!!! Yepers, I found a way to make blocks, molding, and just about anything in just about any scale and in just about any material.
If this is old news then please forgive. Just for the record: This was not my idea, but I sure wish it had been! Found a fella building a scratch HMS VICTORY and he described using a scraper to form all sorts of things for his model. So I went to the hobby store, pent $3.16 on a bit of aluminum and proceeded to use my jewelers saw to make the cuts needed to make the scraper for making a molding, and the tiny blocks I needed.
A bit of trial and error but suddenly BAM! I got me some blocks now!! Used a #80 drill to make the hole, and did final shaping with a needle file before cutting it off. The grooves are perfect! The molding turned out great and will be used in a later project.
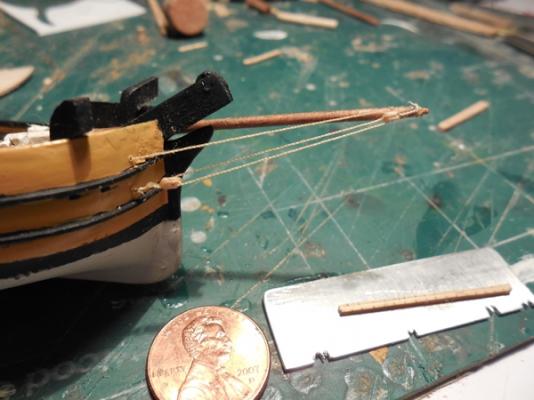
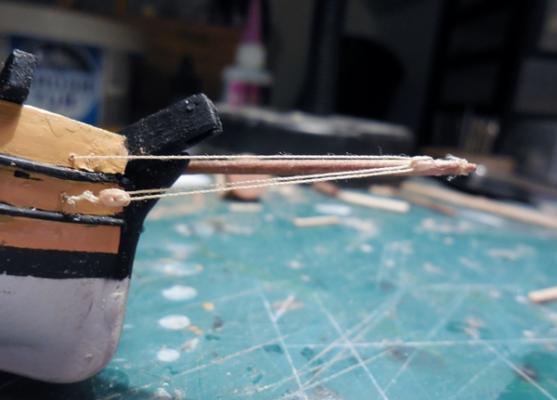
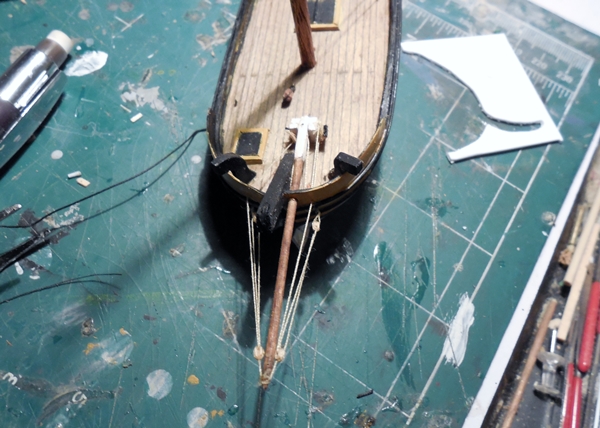
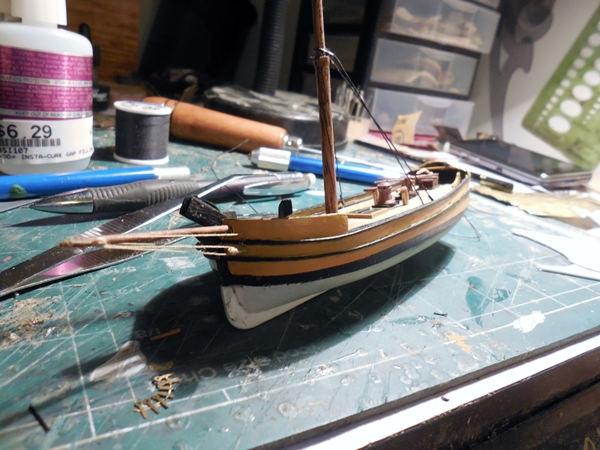
I was so happy I decided to execute my first ever rigging of scratch built ship with scratch built blocks. Wow this thing is tiny!I rigged the jib boom. Took a while but I am happy with it
Looking at the pictures I see I have a lot of clean up to do. I want the boat to look used and some abused, but I might have overdone it. No worries. Lots of touch ups to get done as soon as I can keep my big meat hooks off the thing.
Oh if any of you out there are wondering about scratch building vs kit, I recommend you find you a subject that you think in your present skill level and scratch build. No matter how it turns out, do it! We are not really looking for a museum model, for that matter you can take this one and hide it later. the purpose of this scratch build is you will find you have skill you did not even think you had. Once complete, and no matter how it looks you will look at that kit and maybe giggle a bit, because you have now armed yourself with the skill and confidence that will make that kit a real breeze and joy to build.
Have fun shipmates! Keep a zero bubble!
Don


-
Thanks Brother Hank. Love this site!
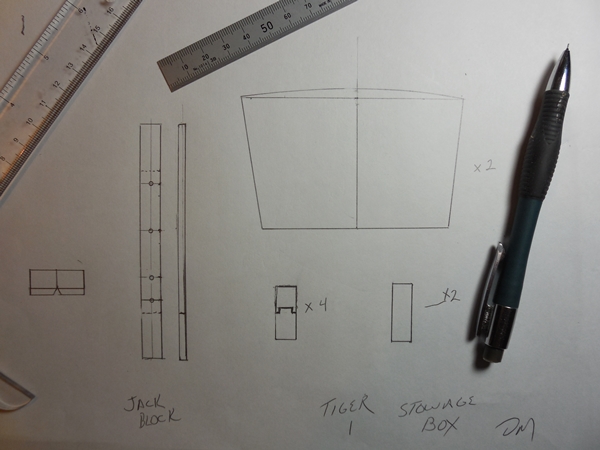

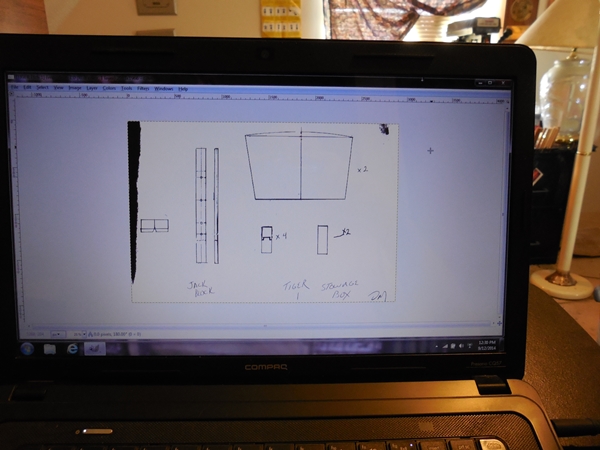
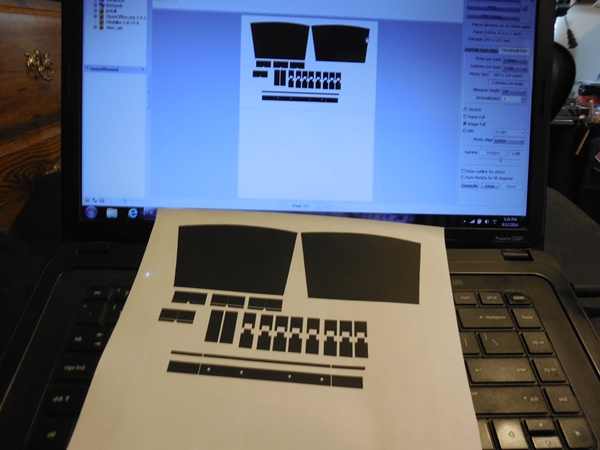
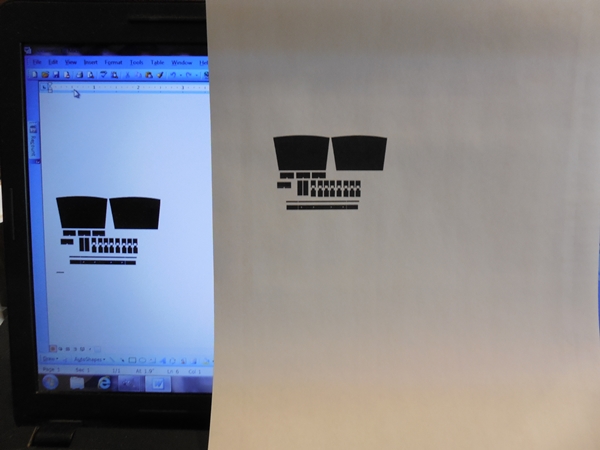
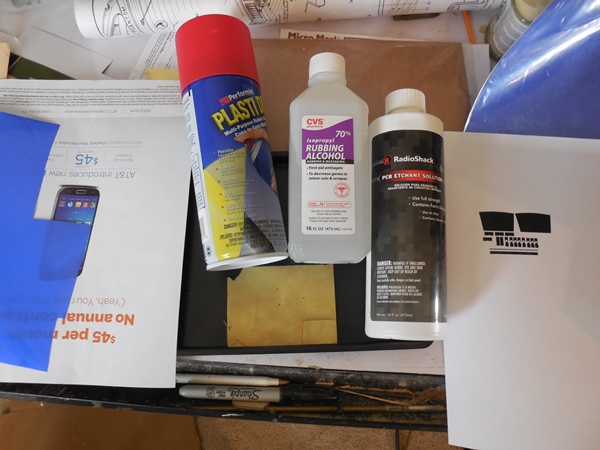

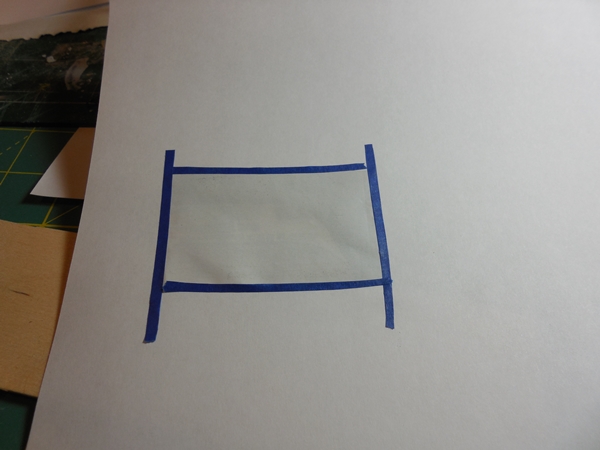
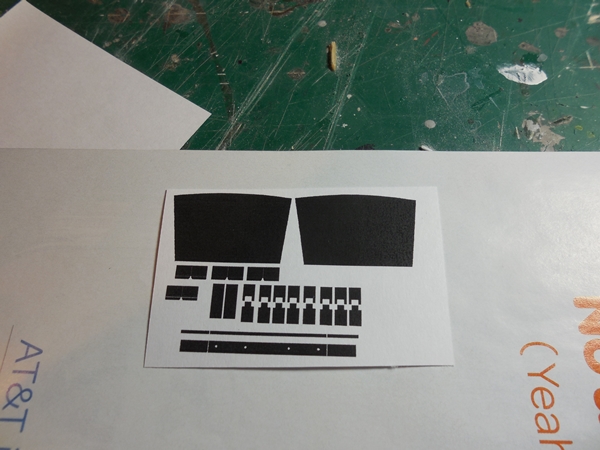
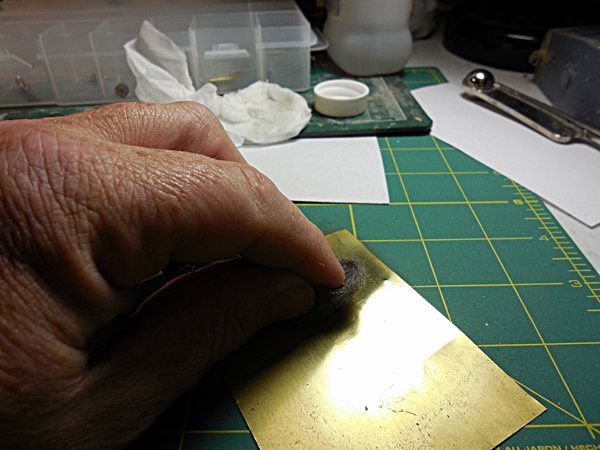


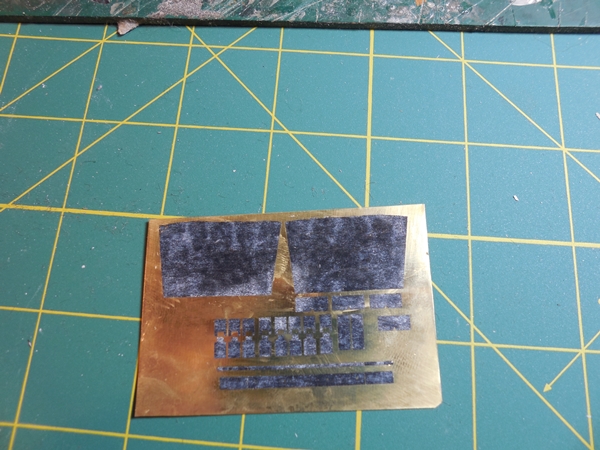


Poor Man's Photo Etch Parts
in Metal Work, Soldering and Metal Fittings
Posted
Yes sir I sure have. You can do 1/700 railing and radar with ease. I am working up a set for 1/700 Type IXC U-boat. And getting ahead of myself I am doing some work on my scratch EDMUND FITZGERELD in 1/350.