Chuck Seiler
-
Posts
1,878 -
Joined
-
Last visited
Content Type
Profiles
Forums
Gallery
Events
Everything posted by Chuck Seiler
-
 What size drill bit did you use? The item you are trying to duplicate is only an inch to 1.5 inches in diameter (scale) Remember, decks are not tree nailed. They are bolted. What you see is a plug used to protect the bolt heads from weather, etc. Plugs, like tree nails, will be subtle. Looking at your model from 3 feet away is like looking at the real ship from 20, 30 feet away. Subtle. If it were me, I would give the deck a good soaking with rubbing alcohol, rip up the deck and re-plank (sez a guy who just ripped off 4 weeks of hull planking to get it right.)
- 42 replies
-
- 11
-

-
Red Paint or Red Ochre
Chuck Seiler replied to davyboy's topic in Painting, finishing and weathering products and techniques
Dave, I agree, in the end, go with the colour you as the builder like. (within reason....I would question the metal flake hot pink and iridescent green...but who am I?) Joel has echoed your thoughts on manufacturer vs difference in color. I think Chuck even mentioned that he used to use one brand, but they changed and the color is slightly different. Anywho, while I will continue to experiment, I have the answers I was looking for. For me, give that a shipyard of yore could mix a batch of paint one day that looks like one panel and then another batch a week later that looks like another panel leads me to a conclusion: Pick the hue I like best for the bulkheads. Pick another for the gun carriages and deck furniture. See if anybody can tel the diff...or if anybody cares. Thanks all. -
Red Paint or Red Ochre
Chuck Seiler replied to davyboy's topic in Painting, finishing and weathering products and techniques
Carefully. One possible way would be to install some pre-painted 1/64" thick fillers. -
Red Paint or Red Ochre
Chuck Seiler replied to davyboy's topic in Painting, finishing and weathering products and techniques
How does it compare to the hues in post 18? -
Wood masts for a plastic model... Tips?
Chuck Seiler replied to SomethingIsFishy's topic in Plastic model kits
Oh yes, so he did...back in post #6. When he stated that he 'checked his kit' I was envisioning him opening the box that has been on his bedside cabinet for 10 years. I have some that have been sitting around AT LEAST that long. Just sayin'. -
Red Paint or Red Ochre
Chuck Seiler replied to davyboy's topic in Painting, finishing and weathering products and techniques
Understood. What I am trying to determine is, which (if any) of the colors/hues I posted would be reasonably good for use on a model of a late 18th century Continental warship? ....or should I continue to experiment? -
Wood masts for a plastic model... Tips?
Chuck Seiler replied to SomethingIsFishy's topic in Plastic model kits
Is it constructed or still in the box? -
Red Paint or Red Ochre
Chuck Seiler replied to davyboy's topic in Painting, finishing and weathering products and techniques
True. I used the term acrylic red to differentiate between oil, acrylic or water color. There are a significant number of hues within the 'red' range based on what they were made with. These are further expanded with mixing and shading. -
Red Paint or Red Ochre
Chuck Seiler replied to davyboy's topic in Painting, finishing and weathering products and techniques
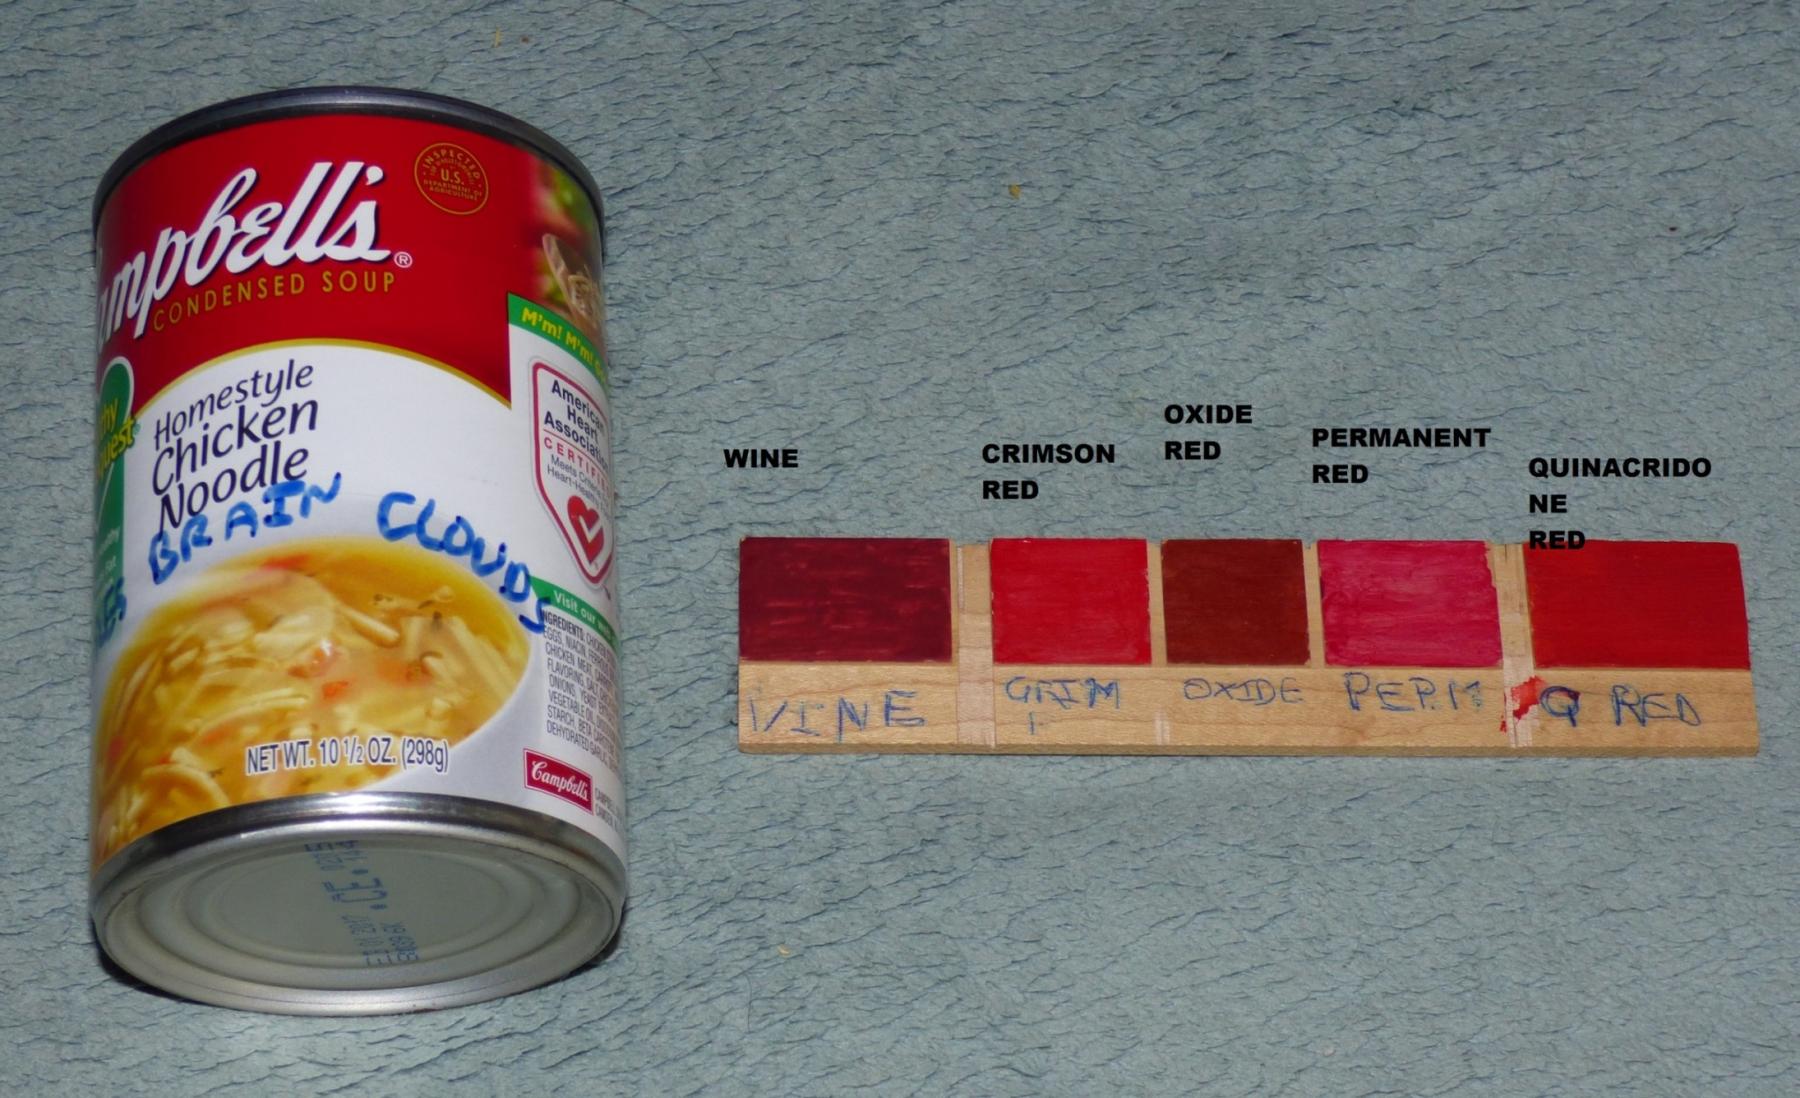
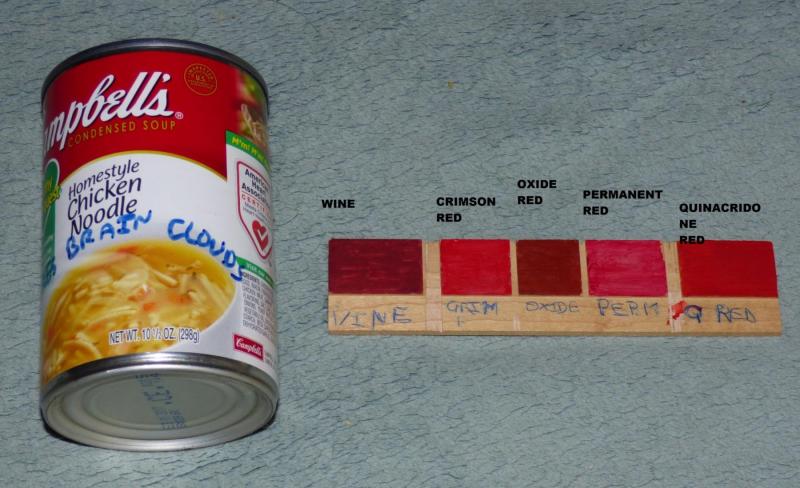
He uses Crimson Red. The second from the left on my plate #2. -
Red Paint or Red Ochre
Chuck Seiler replied to davyboy's topic in Painting, finishing and weathering products and techniques
The other option is when you make a custom color, make a whole lot of it. <then, of course, it sits in the container and gets all dried out..... :-( > I guess I was supposed to use -
Wood masts for a plastic model... Tips?
Chuck Seiler replied to SomethingIsFishy's topic in Plastic model kits
The answer to your question will depend on what your experience with woodworking is and what equipment you have to work with. Making a mast and yards from square stock may be the best answer, but may not be practical for you. Another option might be to use something to reinforce the existing mast. If the mast is hollow, try brass tubing for the inside. -
Red Paint or Red Ochre
Chuck Seiler replied to davyboy's topic in Painting, finishing and weathering products and techniques
I have to say that I have been interested in getting 'the right red' almost to the point of obsession for several years. I looked at different woods, different dyes, etc. This is an extension of that. It also explains why I have seemingly alot of reds laying around. Shortly after Joel posted his color swatches above, I got with him IM and discussed different reds. It prompted my to develop my own swatches, which I took to the NRG conference. Unfortunately, I did not take the opportunity to discuss wit may people. One thing did get from Joel was to post a common item, like a can of soup, so differences in monitors, etc, can be gauged. Plate 1 consists of some colors I was playing with (upper) as well as combinations. CABOOSE RED is obviously not close to red ochre, but it was a possible option for bulkheads and gun carriages. Plate 2 consists of plain reds I had. WINE and PERMANENT RED are not very appealing to me. Thoughts and comments?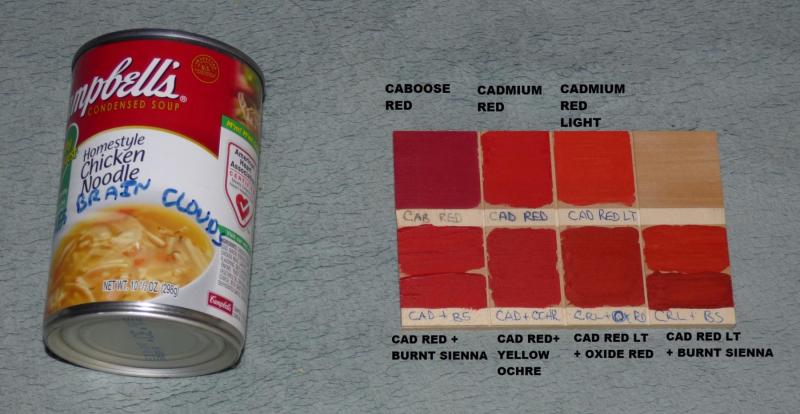
-
Some criteria for starting a new group project
Chuck Seiler replied to Chuck's topic in Group Projects on Model Ship World
Count me in! -
Some criteria for starting a new group project
Chuck Seiler replied to Chuck's topic in Group Projects on Model Ship World
Chuck, Will we get the carving blanks thru SYREN or thru NRG? -
Wales
Chuck Seiler replied to -Dallen's topic in Building, Framing, Planking and plating a ships hull and deck
Dealing mostly with 18th century ships, but also having worked on a 1607 vintage ship model, I got some insight on wales. I am sure there are more knowledgable people on the subject, but I will add my 2 quid. One function of the wale is to hold the frames together...sort of like barrel hoops. I am not sure if that is the intended function, but as a major structural part, that's what it does. What I believe to be the primary function, is to provide structural "meat" to support other parts of the ship. In the 18th century, this was to support the deck structures, such as the clamps, knees, etc. In earlier years, the frames were much different. Then, the futtocks were NOT bolted to each other. Rather, they were bolted to a wale where the two futtocks overlapped. That is why you see several narrower wales on ships like the Santa Maria or same era ships. ...and, yes, from what I could tell from the plans, there were wales below the waterline. -
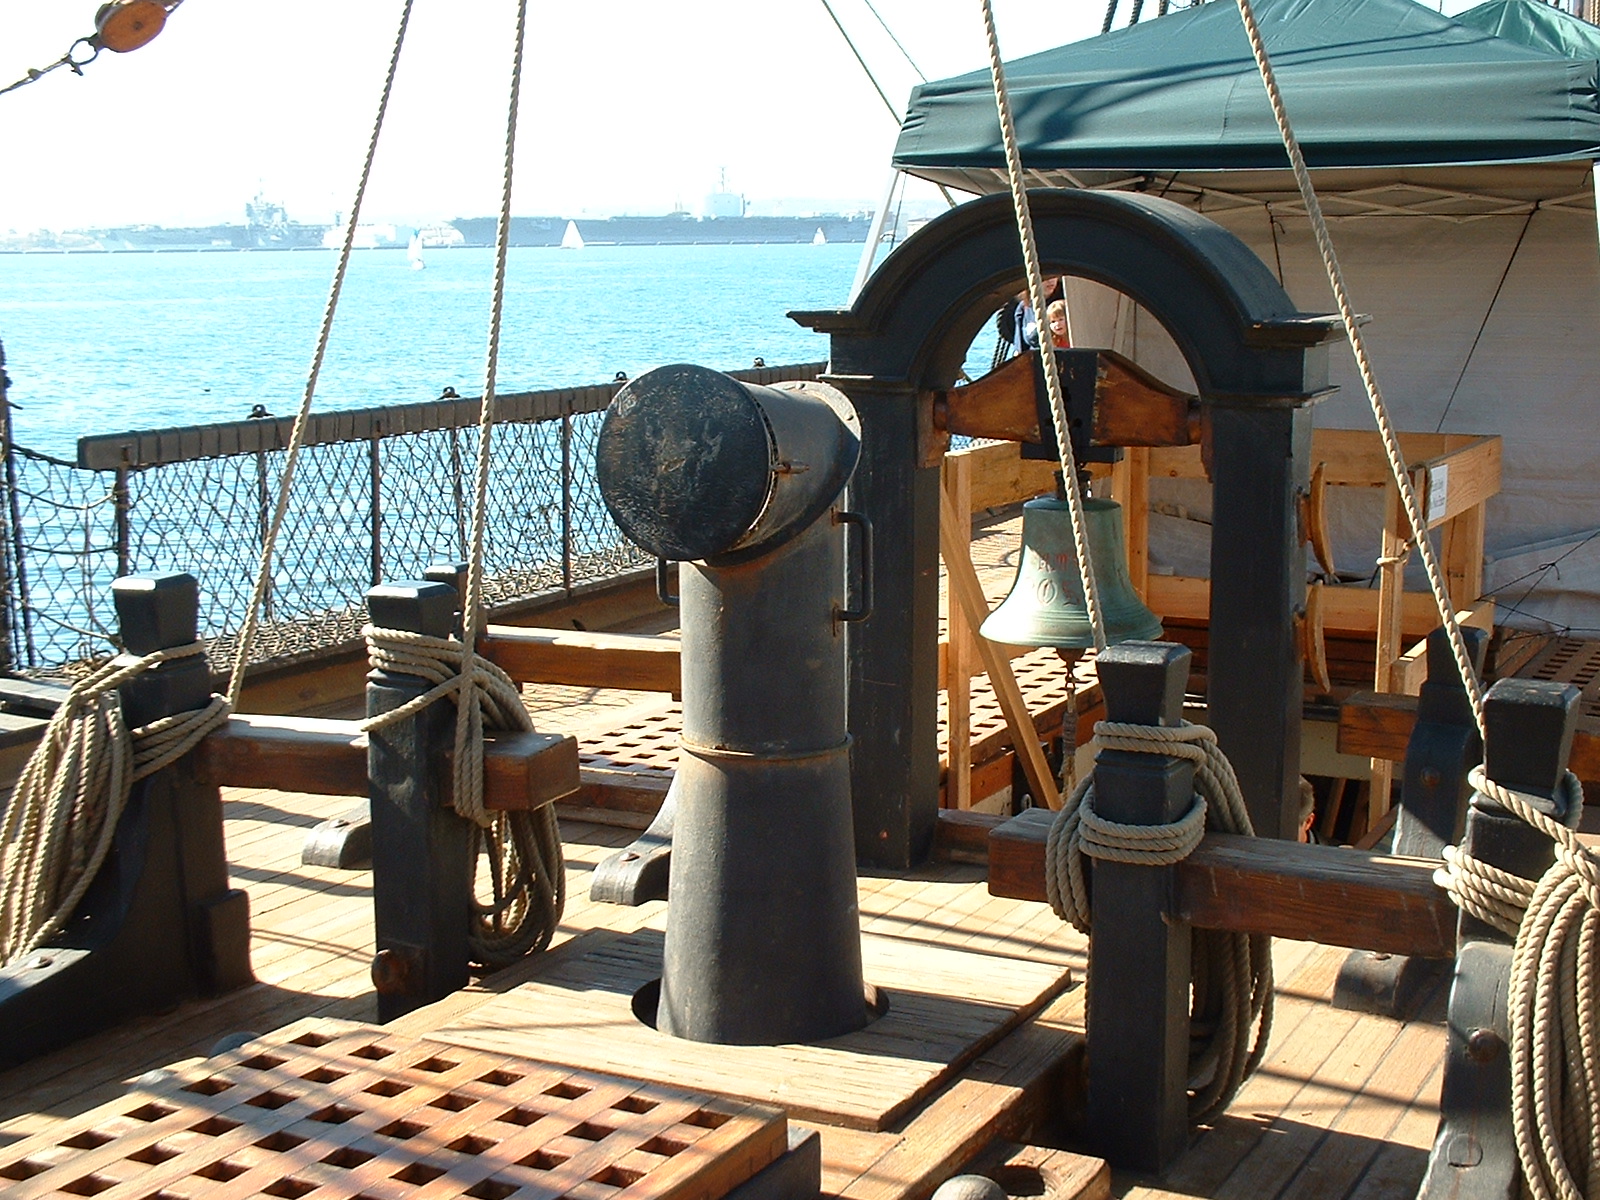
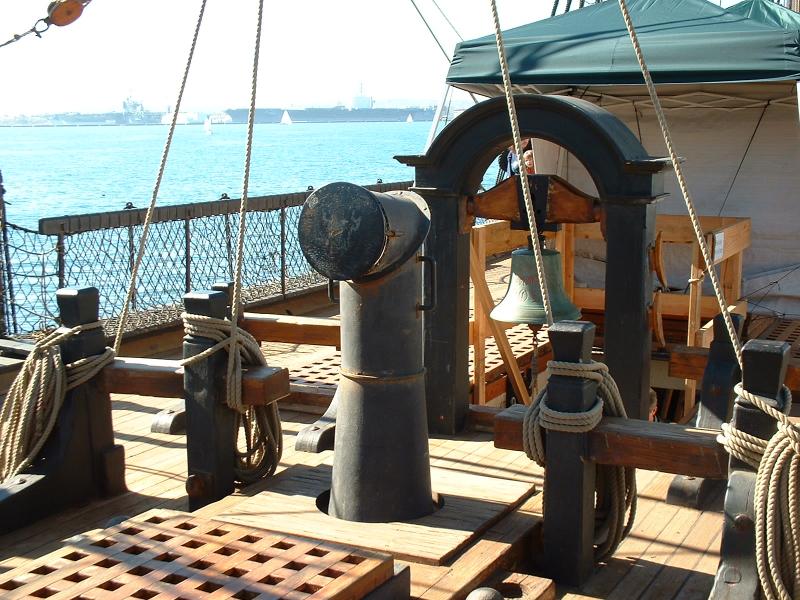
Great timing. I was going through some pictures of SURPRISE and found a shot of the galley smoke stack (Charlie Noble).
-
Red Paint or Red Ochre
Chuck Seiler replied to davyboy's topic in Painting, finishing and weathering products and techniques
Gadzooks! Checking the various hues online I find there is alot of paint out there. Monitor color does not reflect true color however. I may need to head down to Dick Blick, who has MANY different brands, and check out the swatches. Is anybody going to be talking 'color' at the upcoming NRG conference? None on the schedule, but maybe in a round table. -
Red Paint or Red Ochre
Chuck Seiler replied to davyboy's topic in Painting, finishing and weathering products and techniques
I have tried Crimson, but am not wild about it. Cadmium Red and a little Burnt Sienna. I am on track but need to work on it. I recently got Iron Oxide Red I will experiment with in conjunction with the others. The problem may be that I am shooting for a barn red look, when that may NOT be what I want. The red cliffs of non-Dover (above) seem to have more yellow. -
Red Paint or Red Ochre
Chuck Seiler replied to davyboy's topic in Painting, finishing and weathering products and techniques
Does anybody have a good formula for replicating red ochre? I am experimenting with various hues of acrylic red to find a shade I like. So far, I am close but not on target. -
After having spoken from memory, I checked my sources and found that there is also the half breath plan. At any rate, here is a better discussion of the lines using SULTANA as a reference. http://modelshipworldforum.com/resources/plans_and_research/InterpretingLineDrawings.pdf I only used waterlines to create a hull once (with success). I have used the station lines several times to make bulkheads...using them to make a hull. Starting the model is easy. Finishing it is...
-
CA, I had similar experience as you with the hull block. After I screwed it up the first time, I decided to make the hull using the bread and butter method using lifts based on the horizontal waterlines from the body/sheer plan. It turned out to be much easier than trying to sculpt the single block of wood.
-
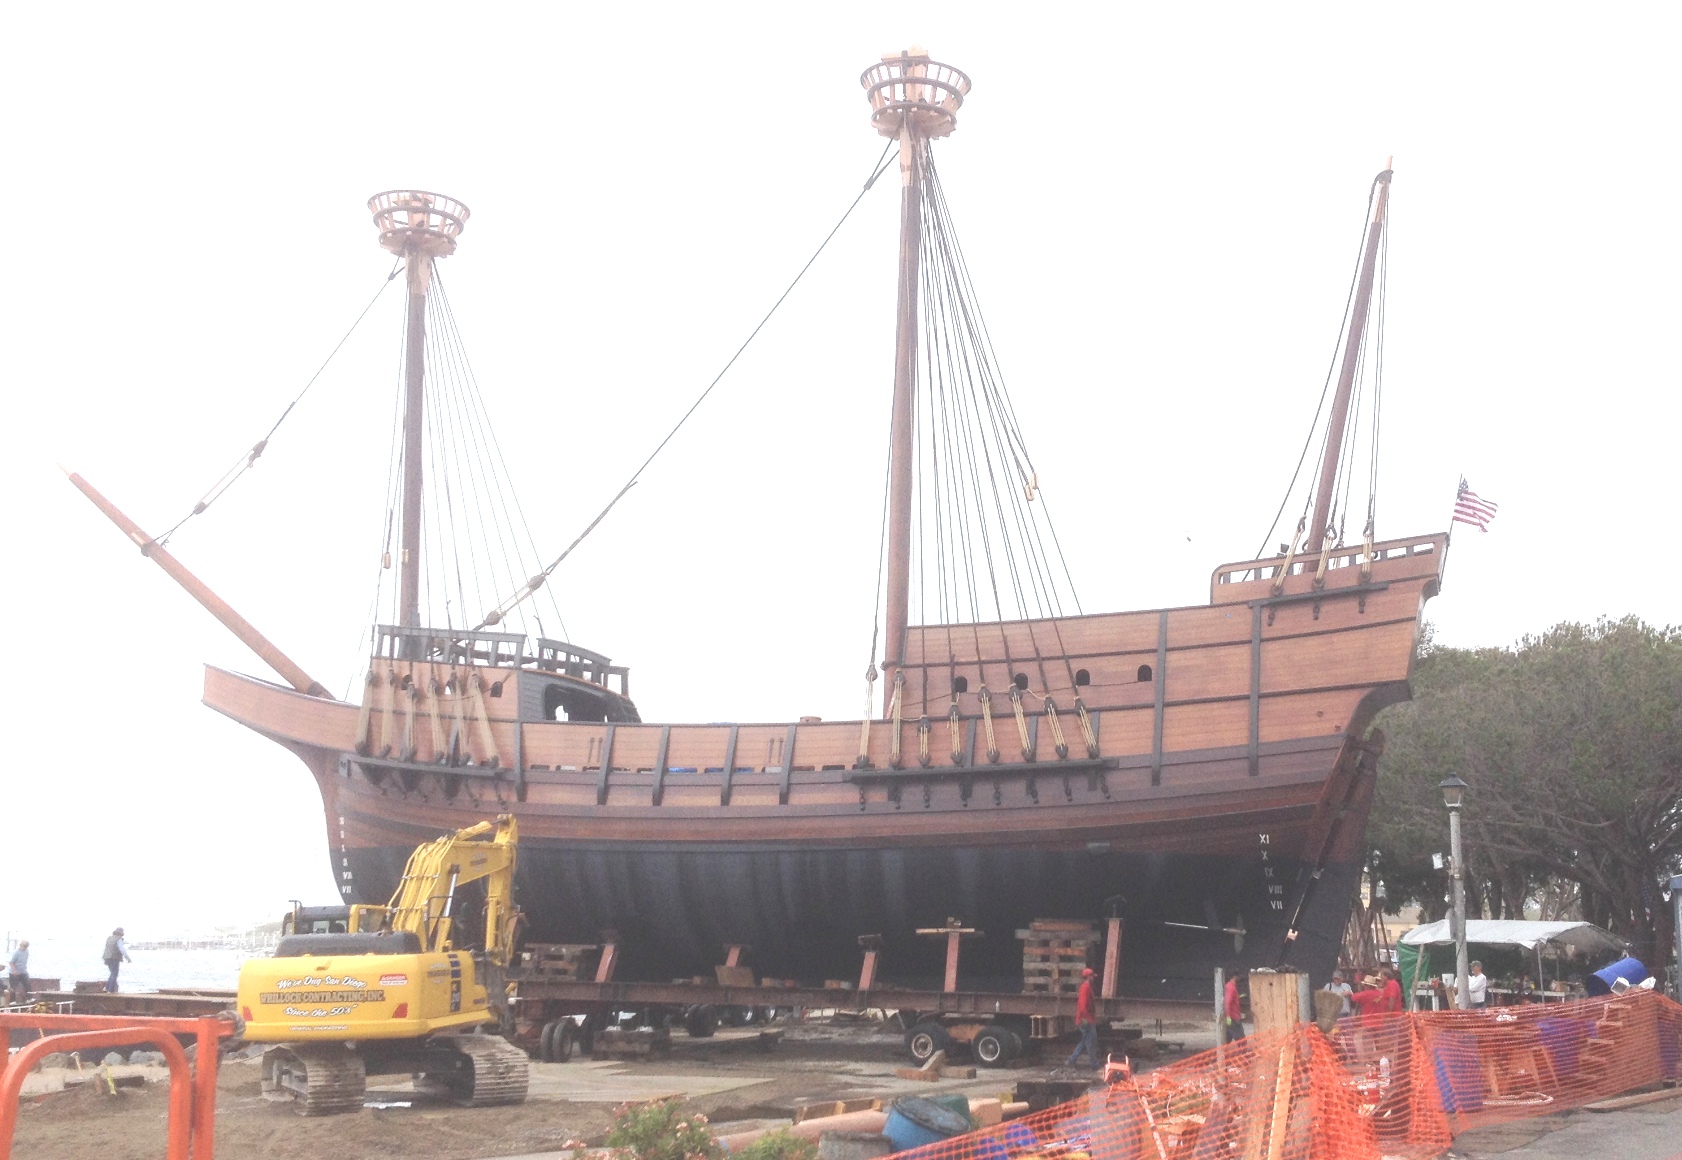
It is the "SAN SALVADOR" from the San Diego Maritime Museum. Below i a picture after construction but before commissioning. Here is a link to the site. https://sdmaritime.org/visit/the-ships/san-salvador/

- 27 replies
-
- 2
-
-
- san salvador
- maritime museum
- (and 1 more)
-
I found that padauk wood also makes a reasonably good brick. I used it on my scratch PHILADELPHIA for the hearth.
- 504 replies
-
- 4
-
-
- washington
- galley
- (and 1 more)