


jack.aubrey
-
Posts
1,268 -
Joined
-
Last visited
Content Type
Profiles
Forums
Gallery
Events
Posts posted by jack.aubrey
-
-
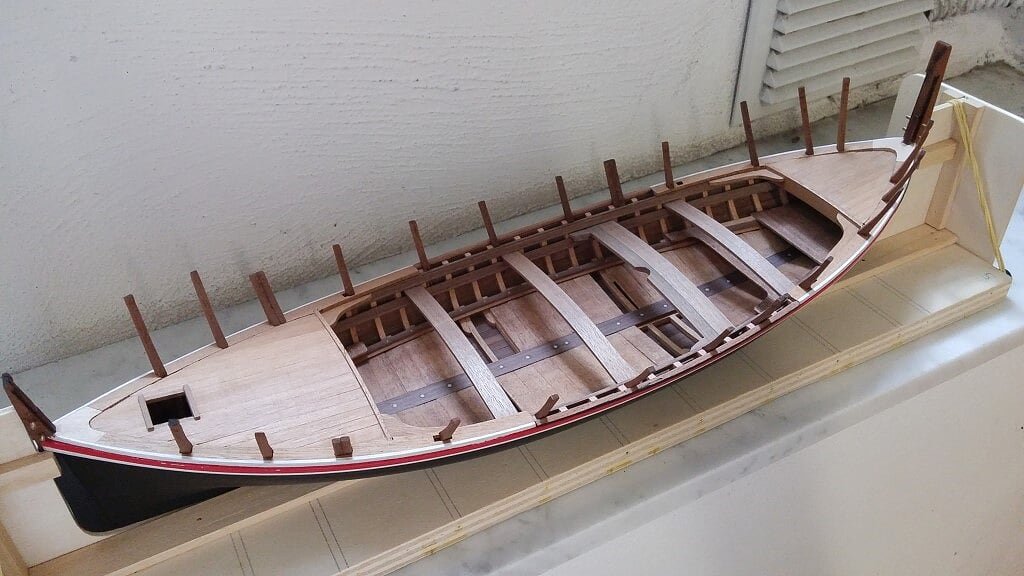
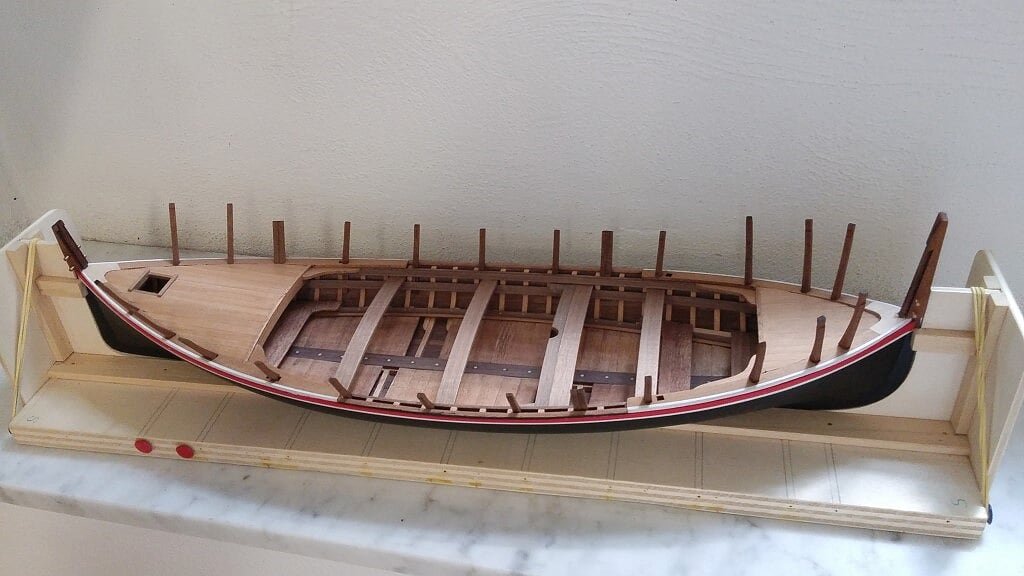
Tuesday, July 4, 2017
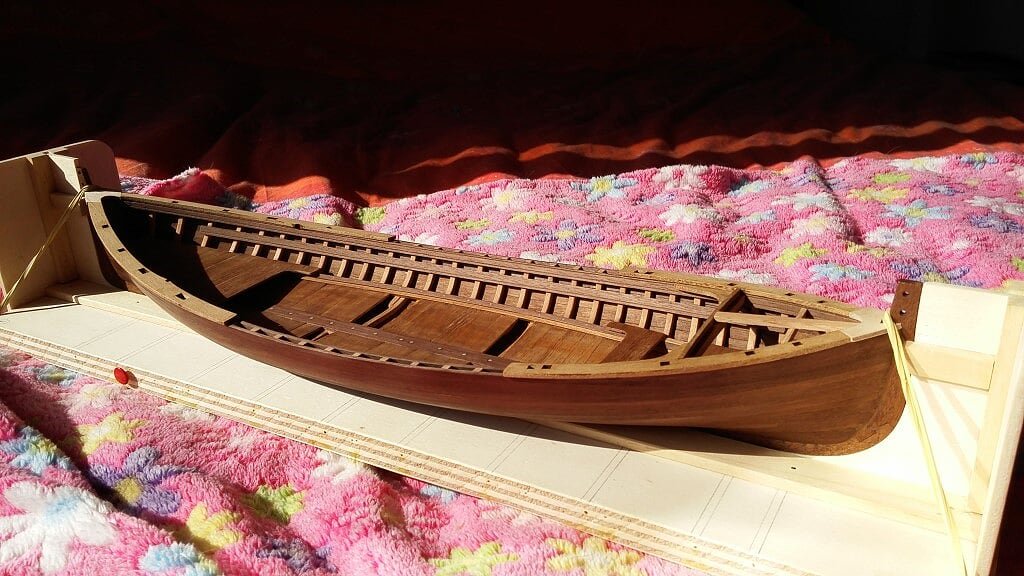
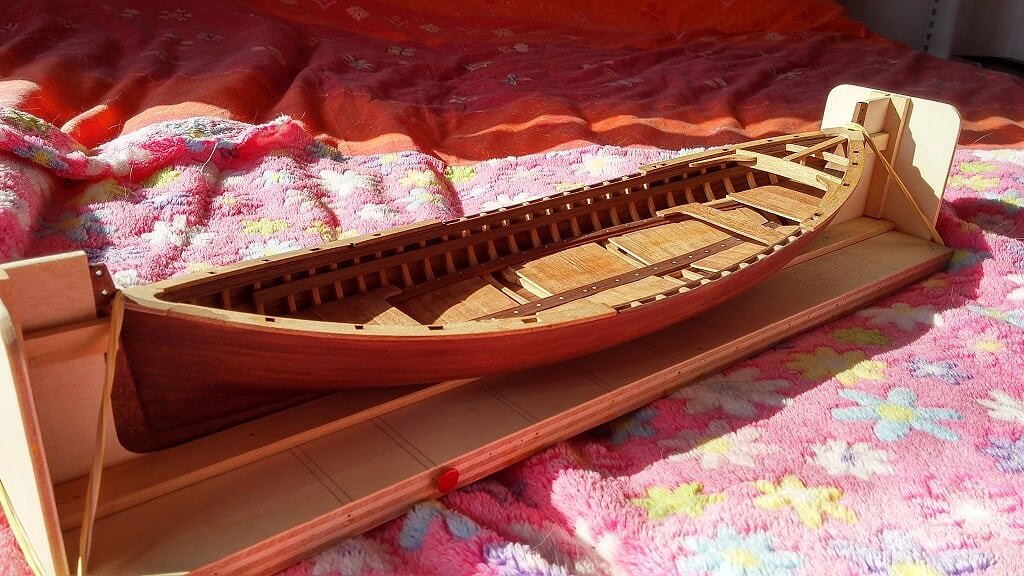
Despite the unlucky "PHOTOBUCKET" event, and therefore accepted, though with great sorrow, the loss of a wealth of personal memories, I decided that I'll continue with this journal until completion.
Obviously all the previous images are lost, or as we say in italy, are gone to infantry.
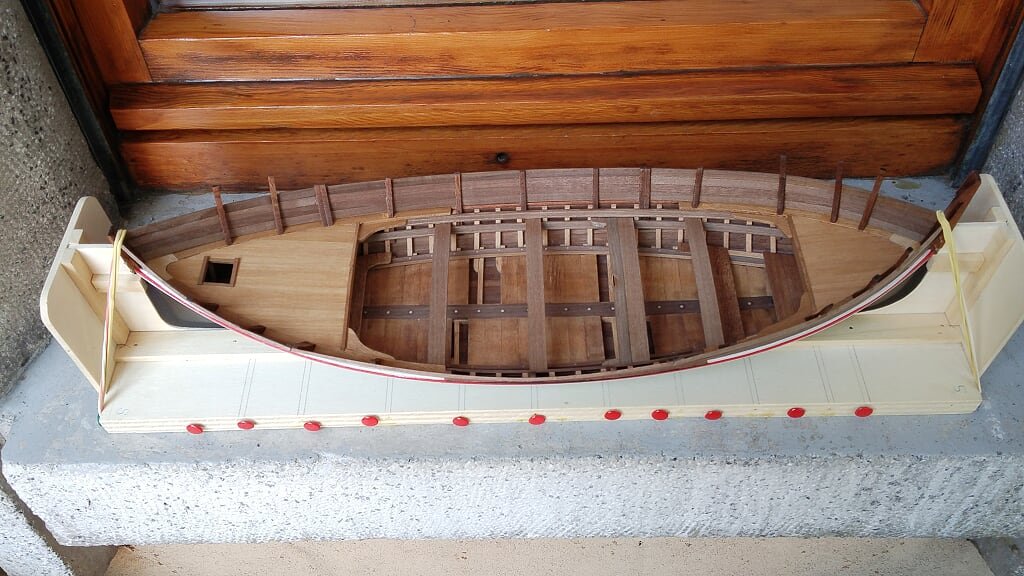
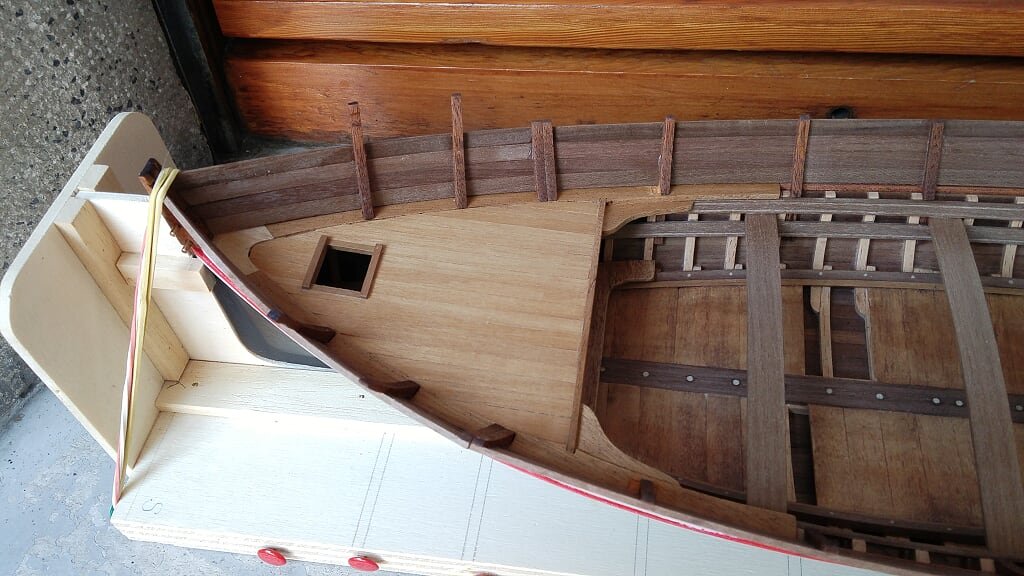
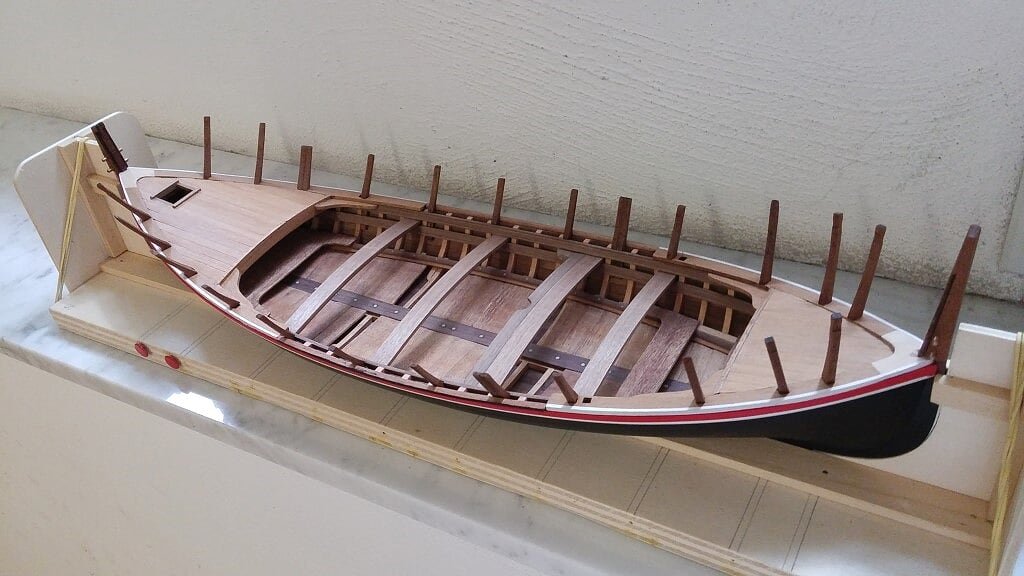
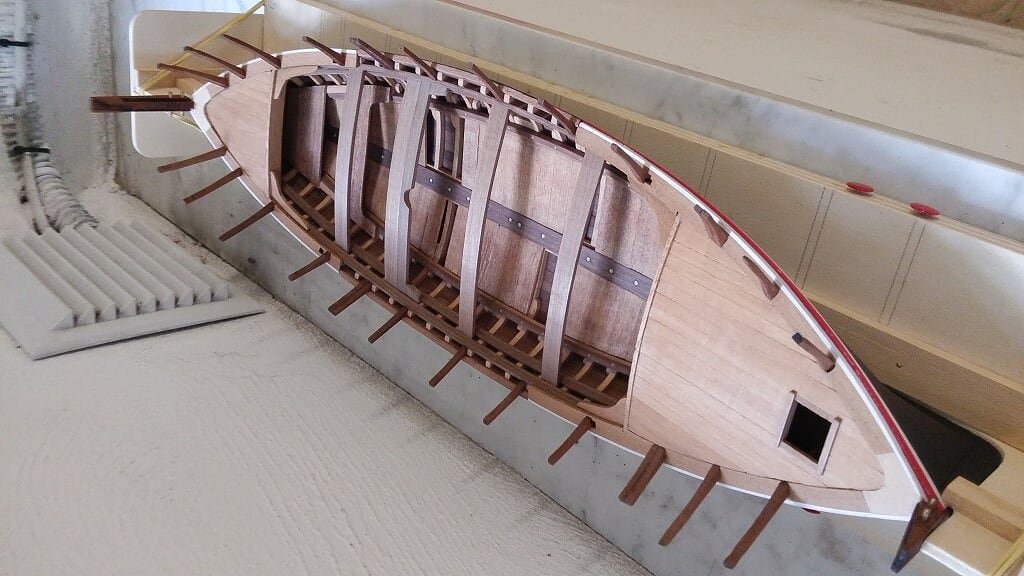
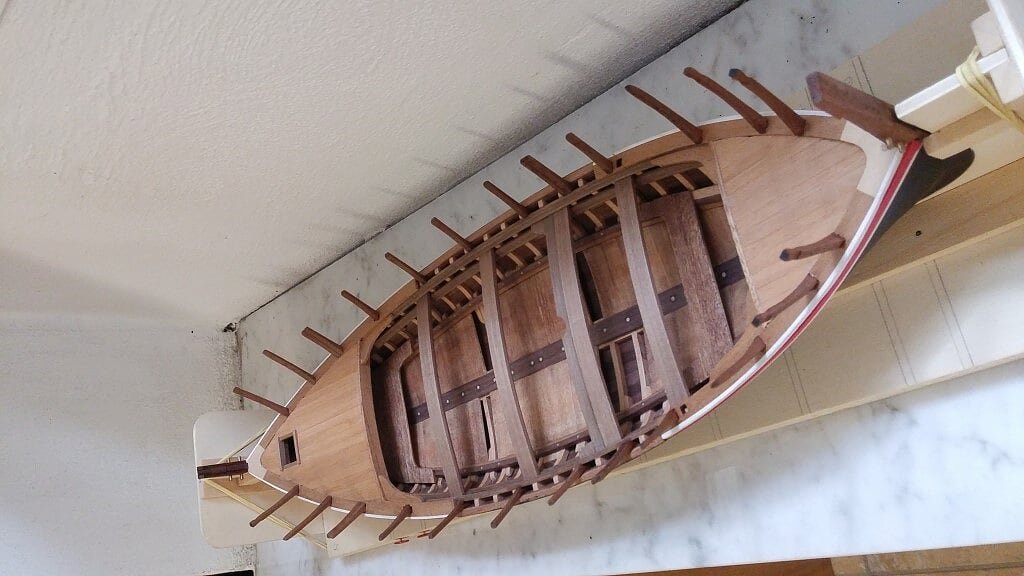
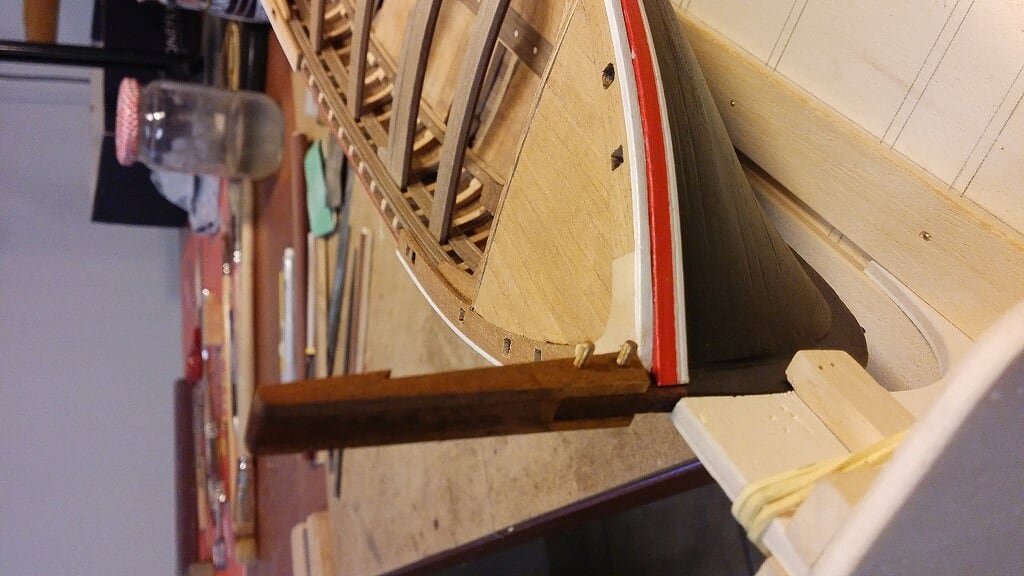
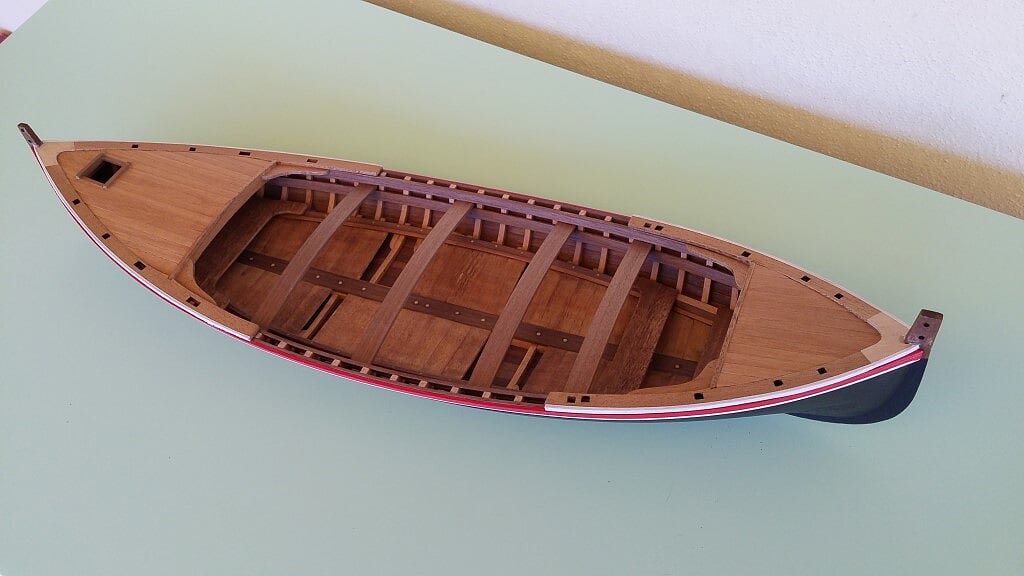
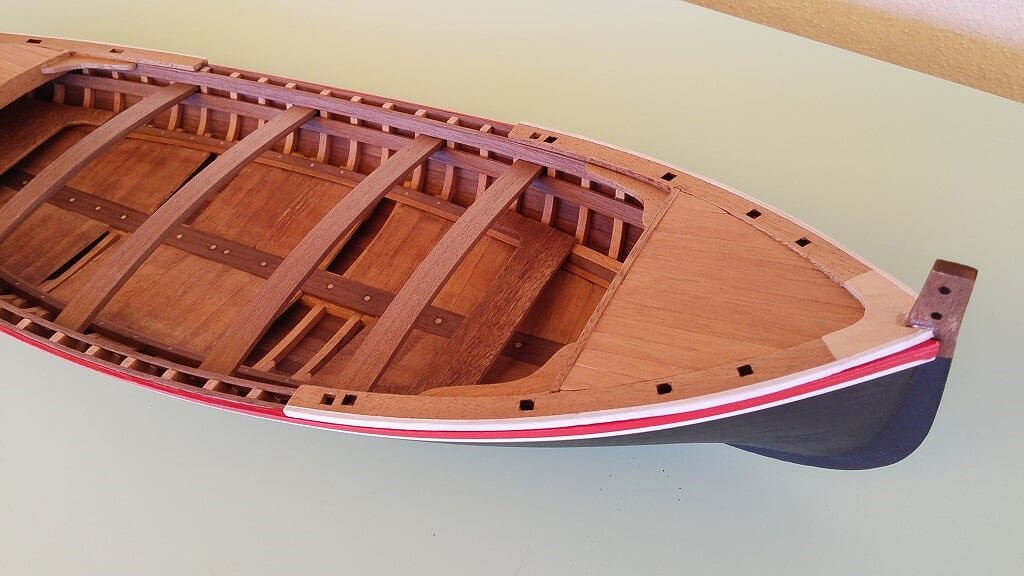
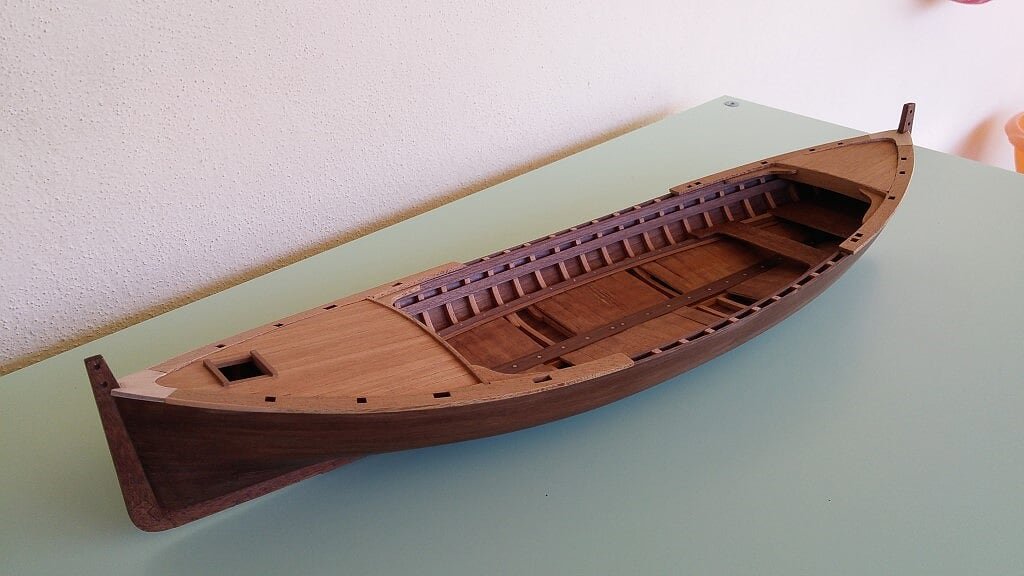
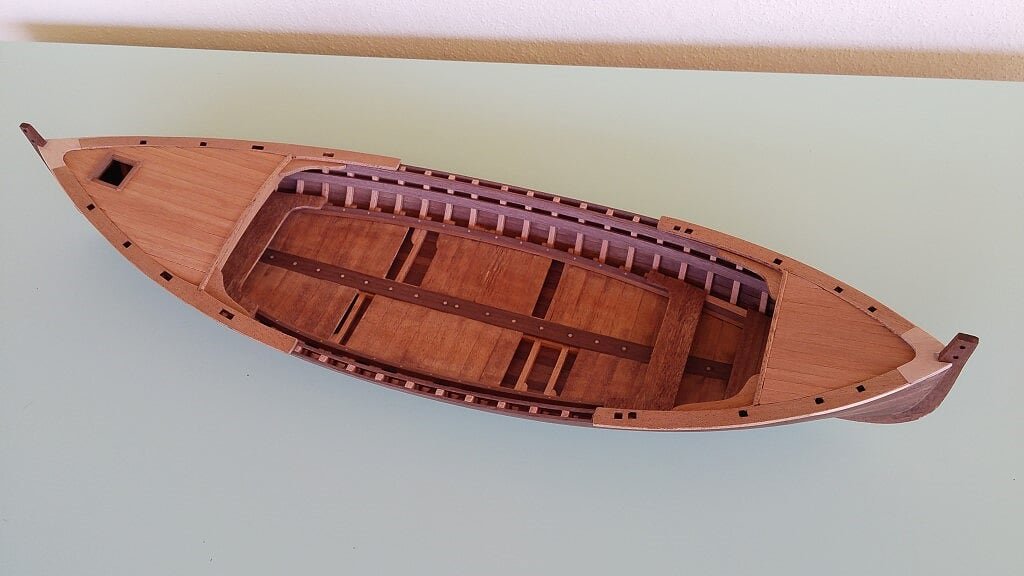
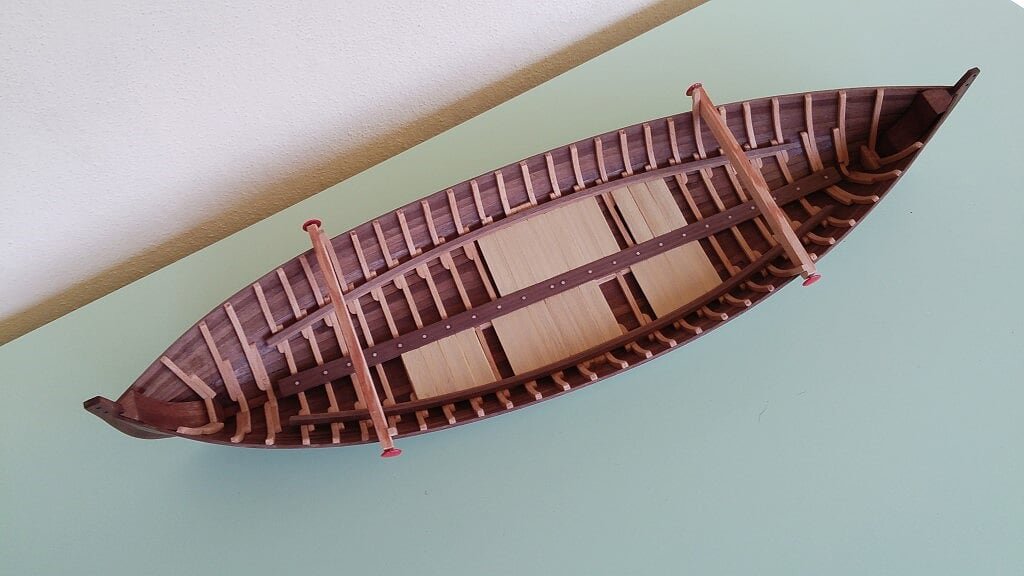
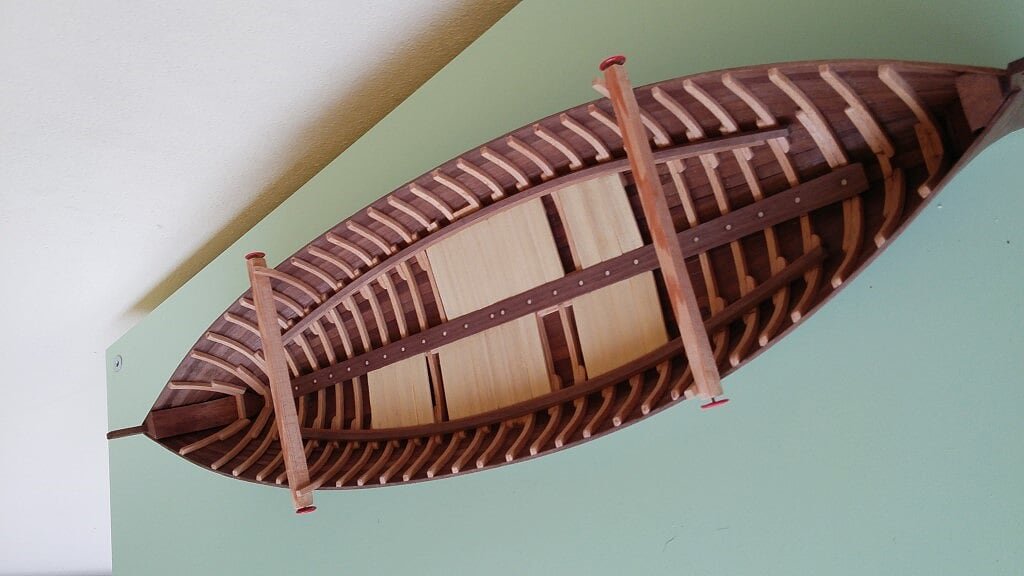
So let's imagine to start from now.I am now building, even if not removable, the so-called "falke". We are still far from completing them, but we already have an idea of how the hull completely changes . . From a boat low on the water we are now facing a high-sided boat, much more suitable for sailing.
Enjoy these images. These should be forever . .01 - 20170704_144401.jpg
02 - 20170704_144407.jpg
03 - 20170704_144416.jpg

04 - 20170704_144423.jpg
05 - 20170704_144431.jpg
Regards, Jack.
- SGraham, MarisStella.hr, RFP and 4 others
-
 7
7
-
Thanks Don and Mark for your comments.
I don't know the reasons Photobucket made this behaviour change regarding their free customer, but, over all, they could imagine the impact of this change. If the fee was $50 instead of $400 may be I accepted their request, considering the potential loss but in this way is not acceptable.
Any possible migration from Photobucket to other sites (for example I have 1TB disk space of OneDrive coming fron an Office 365 purchase where to load the images) is possible but difficult and requires a lot of work to implement. Automating this process is, for the moment, out of my capabilities.
-
Sunday 2 July 2017 ------ ATTENTION ------
The following three images will probably be the only images of this model visible forever in this building log.
Unless I can implement a solution that will allow to review the images contained in all the posts I published from 2009 onwards, a solution at the moment I don't have, you will no longer be able to view the images in this thread.
But not only: even all my other "topics" I created and managed since 2009 are concerned (!)What's happened ?
Since 2009 I took the habit to publish my posts in several forums. More precisely two italian forums, using my mother tongue, and two in english language.
To avoid uploading images onto four different sites, with often different loading rules and methods, I had found the solution of uploading them onto a single site, since then free of any charge, acting as a "database" of my photos.
By sharing its link, inserted into the body of the forum message, the image was thus displayed. Basically: a single source code for the forum that can be used anywhere.This has worked since 2009. . . Until a few days ago.
On June 28, 2017, the owners of the site where I uploaded the images decided to provide this service only for a fee, at the modest annual charge of $ 400.00 !!! All this was communicated with a banner linking the following page: http://photobucket.com/terms
Now I don't want to comment the behavior of site owners http://www.photobucket.com ; it's not worth waste time. I'm sorry because a treasure (probably only for me but I'm illuded could be regarded as such by others) of events, problems, solutions and work, time and efforts spent in promoting and making known ship modeling is simply disappeared.
This fact will most probably lead me to leave my habit (and my pleasure) of publishing and share my experiences in the near future . . Even though I cannot 100% foresee what will happen. So it's with great sorrow that I am going to say goodbye to you: now I do not feel calm and peaceful to continue presuming that nothing happened.
A embrace, Jack.
01 - 20170628_110435.jpg

02 - 20170701_172050.jpg
03 - 20170702_122726.jpg
- Landlubber Mike, Papa, Mfelinger and 5 others
-
8
-
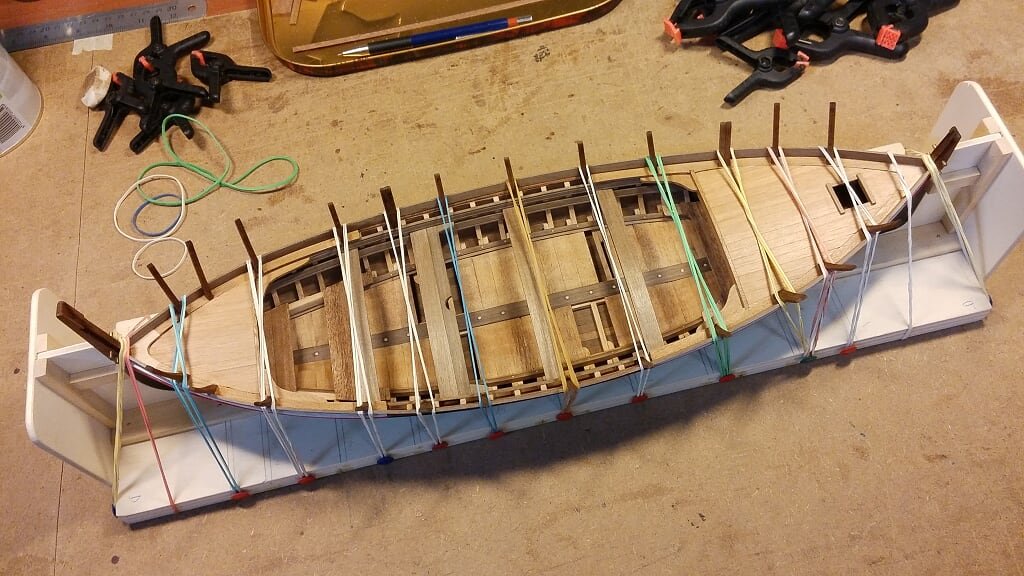
Wednesday 28 June 2017
I put the items shown in my last message of June 24 (and displayed into its last image) in their proper locations so that, once the glue will be well dryed, I'll can start to install planks over these new hull elements.
I thought for a long time to find a method of building these "falke" in order to allow them to be removable, instead of leaving them permanently held but, although I had some idea, I didn't feel confident to try it. There were too many unknown things, one for all: did these so assembled falke maintain their correct shape once extracted from their beds ?
So, though with a little reluctance and remorse for my defeat, I decided to fix them. In the photos here below I show all the bulwark stanchions in their room, obviously well glued, indeed rather than well.
01 - 20170628_110441.jpg
02 - 20170628_110355.jpg
03 - 20170628_110435.jpg
04 - 20170628_110428.jpg
05 - 20170628_110416.jpg
Cheers, Jack.- MarisStella.hr, oneslim, yvesvidal and 5 others
-
8
-
Saturday, June 24, 2017
It's since April 20th that this log isn't updated anymore. The reason is relatively easy to explain: in this period of time I went back to Milan from Tuscany and, as often happens after long absences from home, I found myself to be involved in everything and more. So nothing or very little modelling, save a timid resumption of activity over the past ten days.
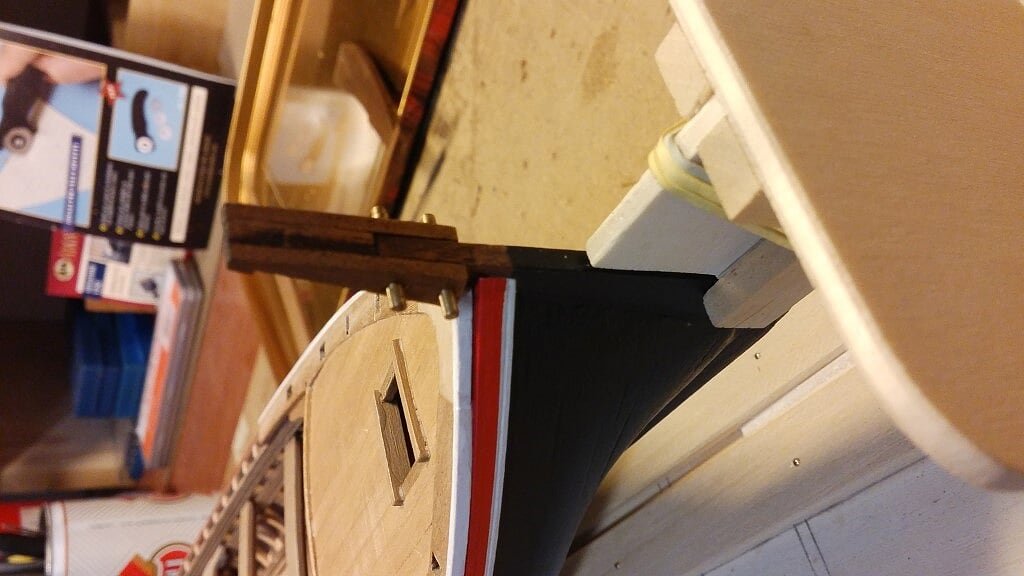
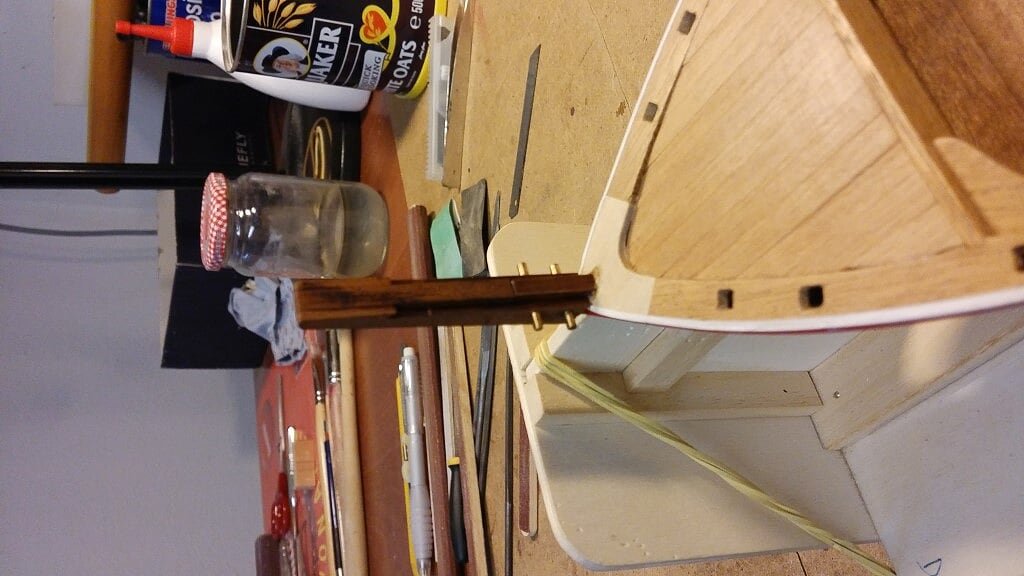
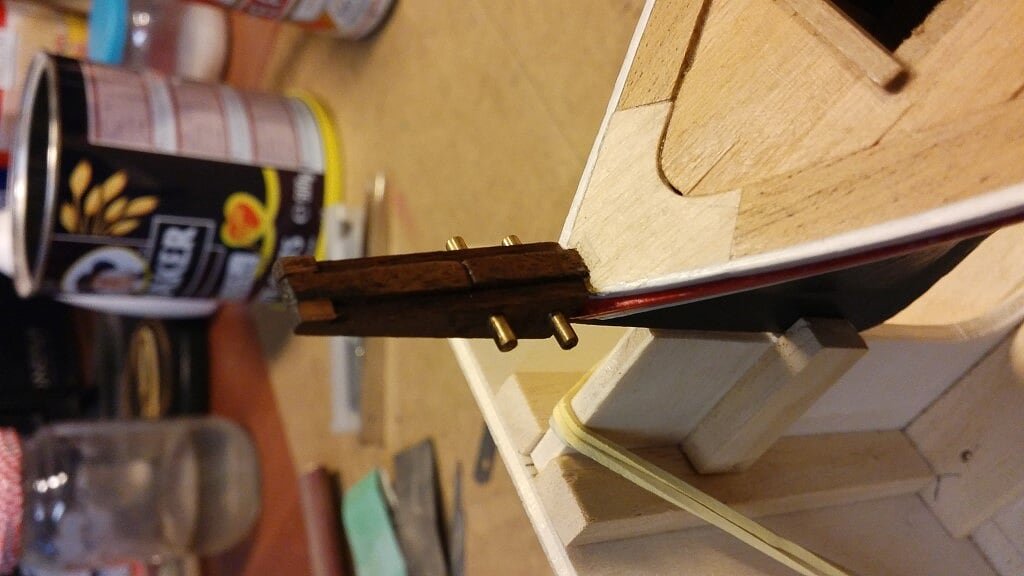
Now my ultimate goal is to build the second part of the boat sides, the famous elements that could be removed after sailing and reassembled after fishing. The so-called "Falke". I do not think it will be an easy task, so I'm moving very carefully.
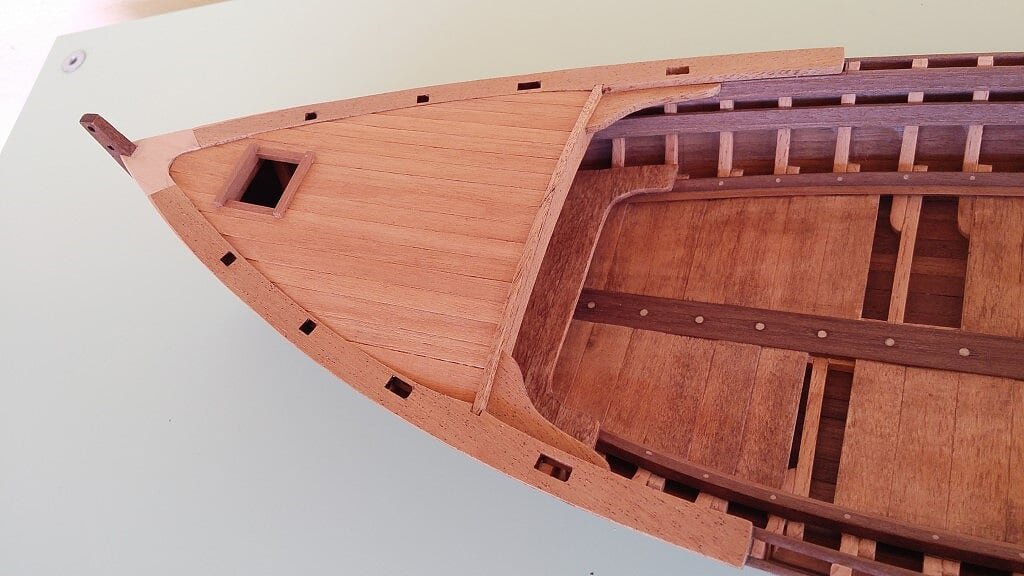
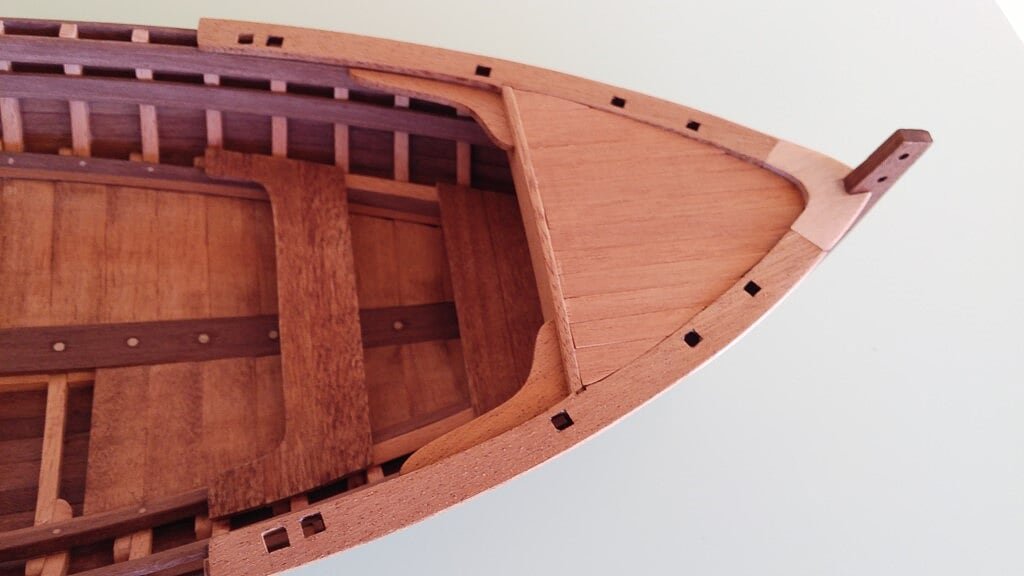
I started preparing the removable extensions on the bow and stern. I think the next four images can explain by themselves: these extensions are fixed to the protruding part of the keel and clutched on two metal pins holding this accessory firmly fixed. .
01 - 20170624_102723.jpg
02 - 20170624_102733.jpg
03 - 20170624_102906.jpg
04 - 20170624_102714.jpg
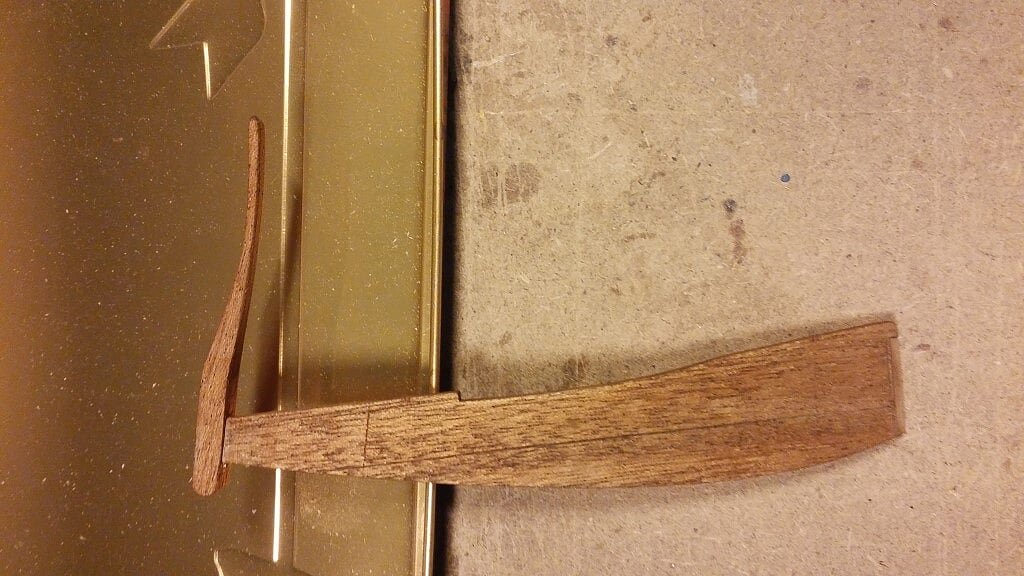
By the way I built the rudder, though it will be needed a lot further. Below is a photo of this item.05 - 20170624_102639.jpg
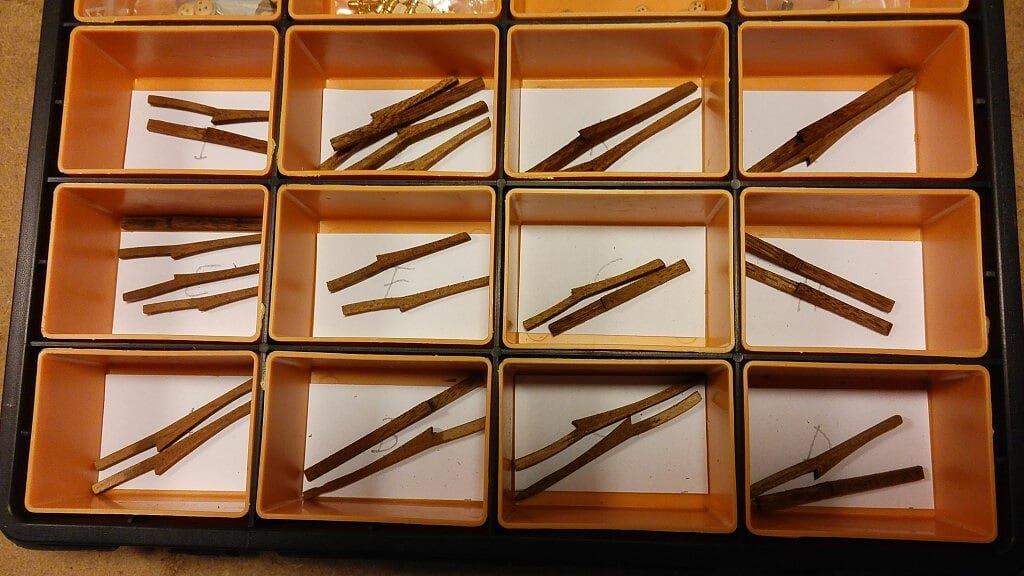
And here's the most demanding part: the picture below shows all the bulwark stanchions on which the "Falke" planking will be applied. Here are presented after the long treatment received. The pieces were laser precut and obviously, on the cutted side, they were all black and burnt. The first activity was to remove the burns to get the original color of the wood.
Afterwards I had to work to fit the openings of the gunwale, where to plugin every single stanchion, a rather delicate and boring task: 24 square holes to fit.
Finally, when everything was fine, I could stain all the stanchions with a medium wood color. Now they are drying and finally the next job can start, provided the necessary checks to assure everything is properly set up.06 - 20170624_102617.jpg
Hopefully, I hope not have to wait two other months to post the next message. Cheers, Jack.
- mtaylor, AntonyUK, MarisStella.hr and 2 others
-
5
-
Thankyou Zoran, I hope to restart in the next days, as soon as I'll close all the many task I've to manage following my return in Milan a week ago.
Regards, Jack.
-
Jean-Pierre, Mark and Yves.
Many thanks again for your more than positive comments.
I'm now in the process to leave Tuscany and come back in Cinisello (Milan) to my "official house". Having not decided what to do after my return in Cinisello, I'll bring with me this model and its materials, plans etc in order to be able to continue, if I'll decide so, and finish it.
I want to remember you I'm also working on
in Cinisello, and its shipyard is idle since many many months. Your sincerely, Jack.Aubrey
- yvesvidal and MarisStella.hr
-
2
-
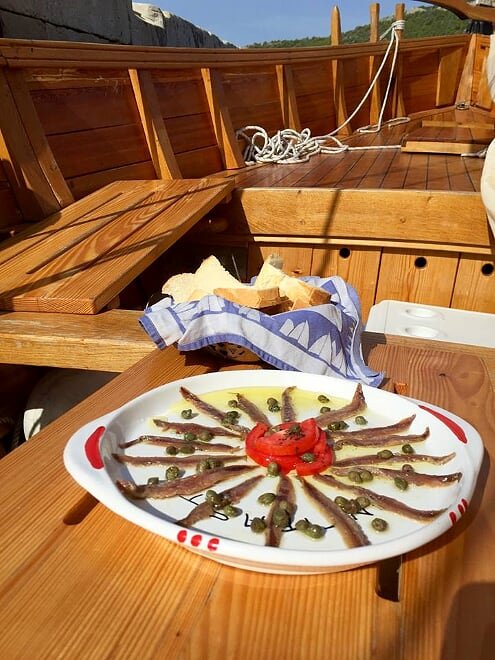
4 hours ago, yvesvidal said:
Anchovies, tomatoes and capers.....the fruits of the Mediterranean basin.
Well done Jack.
Yves
But they are quite salted . . and you surely may need also to drink enough: wine or water ?
-
Thursday 20 April 2017
My stay in Tuscany is now approaching the end: next week I will be to the island of Elba for a short vacation that will allow me to see the island in the spring; people say it's very beautiful. Then again another 15 days and then I will return to Cinisello.
The next important step for completing this model is the construction of the so-called "falke" (I think it is translated in frisate), but for me this is an activity that is still to be understood, so I prefer to delay it when I'll resume work on this model.
So now I'm carrying on small "integrative" activities like the one described below with images. These are tables that are positioned fairly freely, between seats and having different functions . .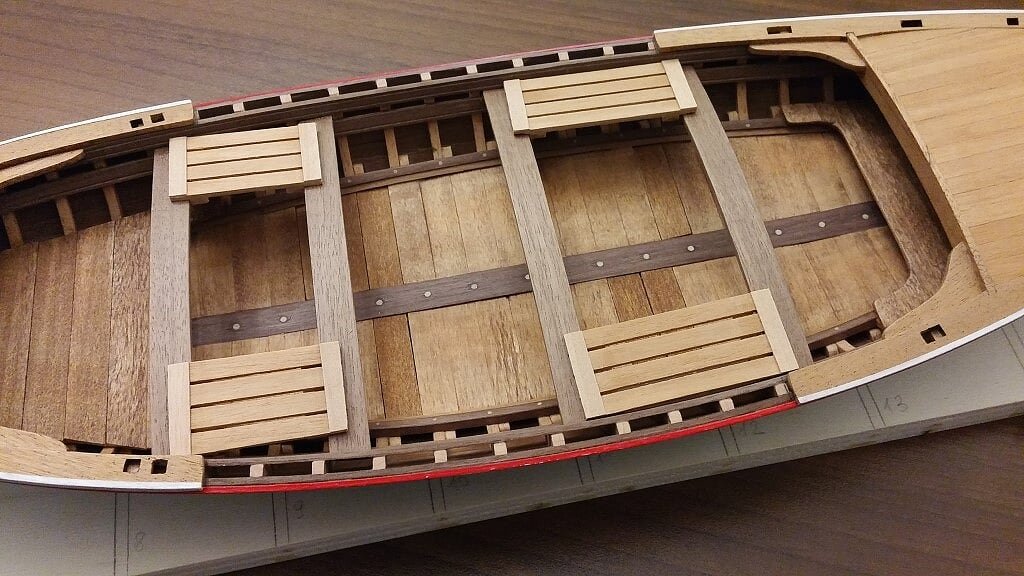
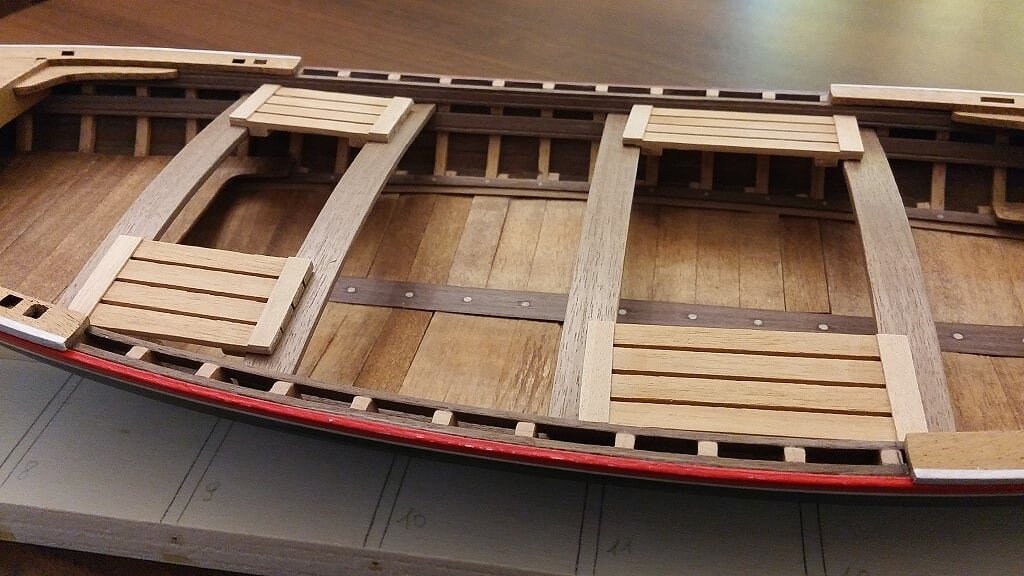
Surely an important function is to serve as a table for the food, which is necessary to bring on board as these boats were in the sea from early morning to late evening . .03 - 12027496_1215228315169422_275117200362761938_n.jpg
Another usage was to make life a little more comfortable on board, adding more seats . .
04 - 13245380_1414127791946139_4658153669254213566_n.jpg
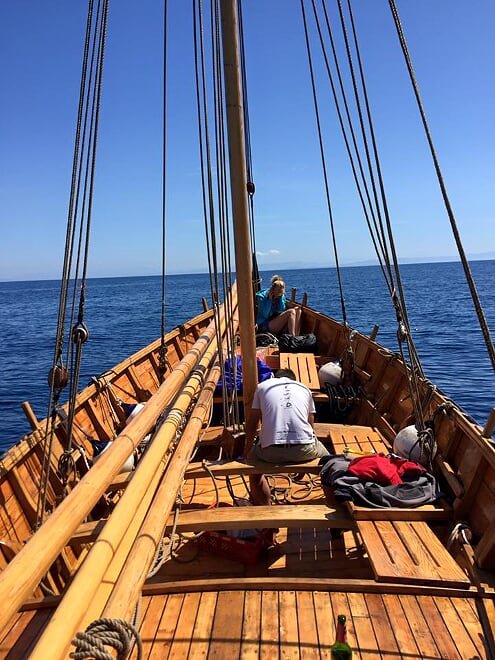
But, I think, the main function is to allow rowers to do their job, the picture below shows how the rowers work and we can understand that these boards put them in the most suitable position for rowing effectively . .
05 - 11229305_1140508929308028_5158174534400611462_o.jpg

These are details not provided in the kit, but can be seen in the photographs of the real boats, so why omit them ?
To next time, Jack.
- MarisStella.hr, mtaylor and RFP
-
3
-
Wednesday 19 April 2017
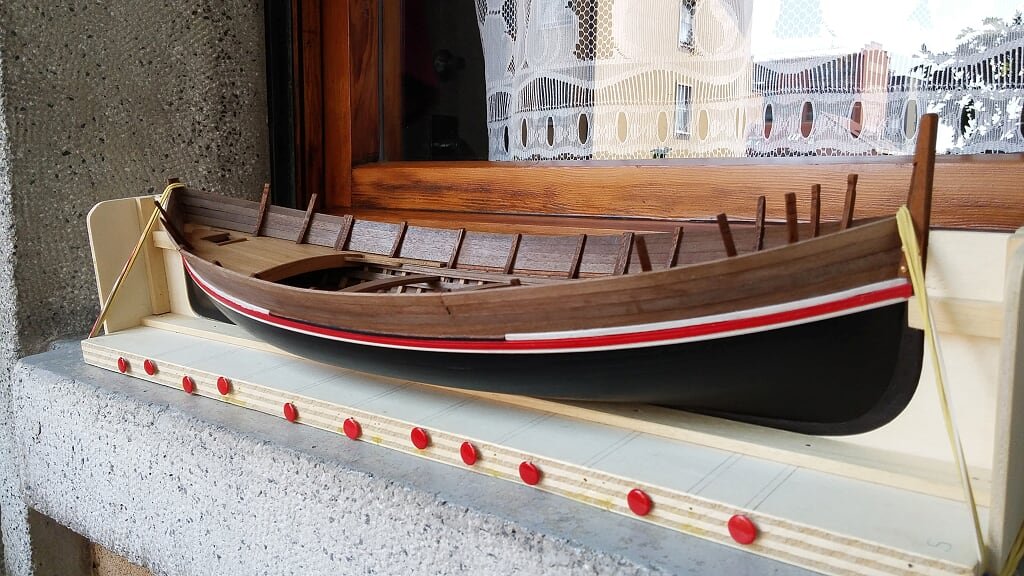
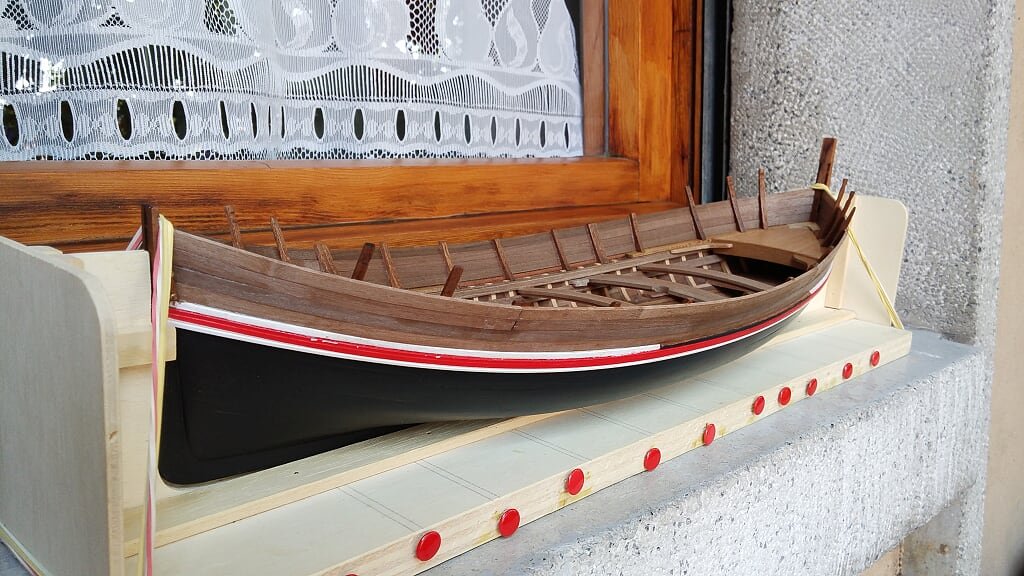
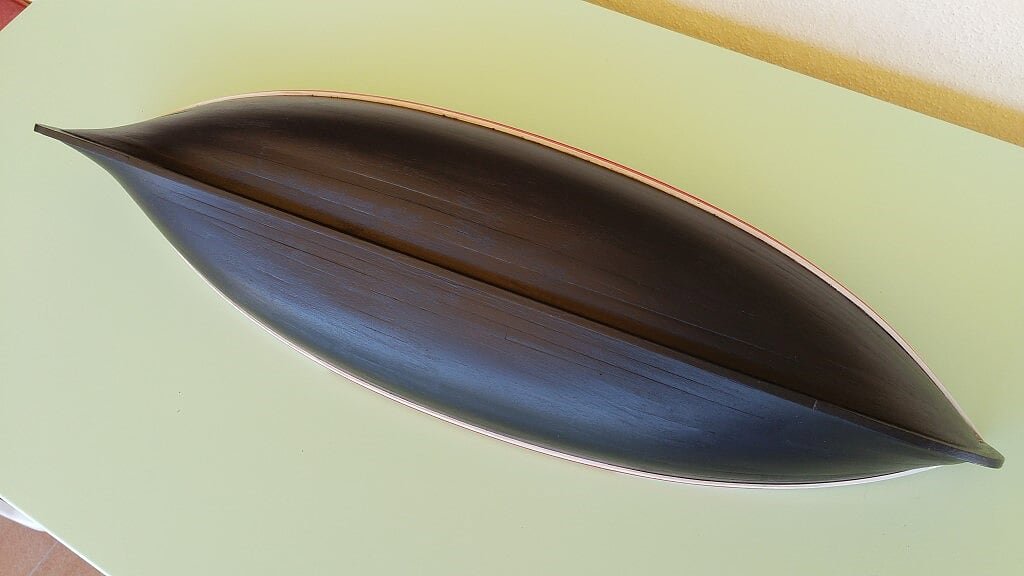
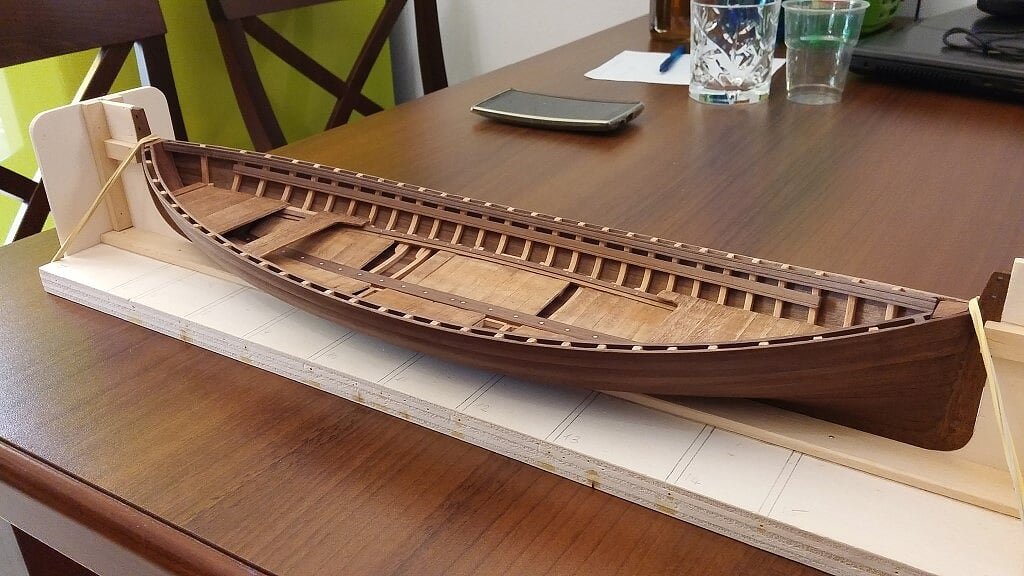
I installed the wales on top of the hull, just below the gunwales. Then I had to do some minor adjustments to cover the small damages caused during the gluing of these strips and, finally, a coat of matt transparent paint, or rather, slightly satin.
The real boat is completely polished black, but in a model I think a polished finish is not much suitable, so I opted for a compromise: a satin matt finish.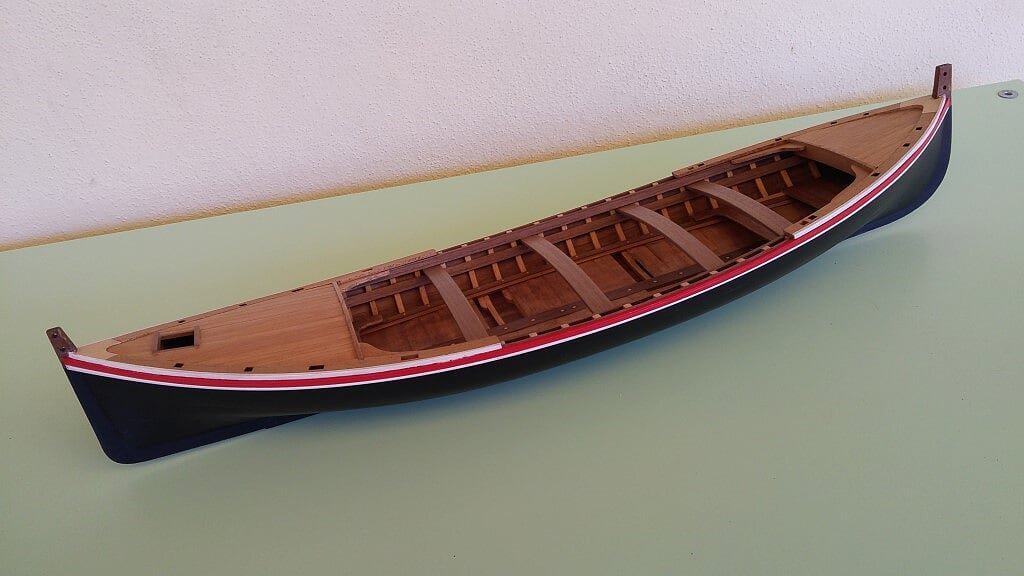

Regards, Jack.
- MarisStella.hr, Tim Curtis, mtaylor and 1 other
-
4
-
Monday and Tuesday, April 17/18 2017
It 's time to get myself dirty with brushes and colors . .
More precisely I painted with a matt acrylic white part of the gunwales.
For the first time I experienced the suggestion I received sometime ago from a friend modeler (expert in plastic modelling) that explained me the trick to prevent paint managing to sneak under the masking tape. The trick is to apply a coat of transparent (and matt in this case) paint on the border area between the masking tape and the part to be painted before using the final color paint. This clear paint seals the microscopic cracks that inevitably form . . It works great, thank you rudyf-104.01 - 20170417_171203.jpg
02 - 20170417_171155.jpg
I have also painted two wood strips in white: these are the wales to be applied immediately below the gunwale. My only problem: I do not know why but the acrylic white covering was poor and I had to apply many coats before obtaining a proper color. Luckily with the hairdryer trick I did not have to wait the paint getting dry between coats.03 - 20170417_171323.jpg

Finally I proceeded to color with black acrylic the outer part of the hull, leaving for the moment unpainted the part where the wales will be installed, still to be completed and glued. I will do this task in the coming days.
04 - 20170418_174811.jpg
05 - 20170418_174804.jpg
Greetings, Jack.
- yvesvidal, mtaylor and Pierretessier
-
3
-
-
Further images, greetings, Jack.
01 - 20170414_191118.jpg
02 - 20170414_191107.jpg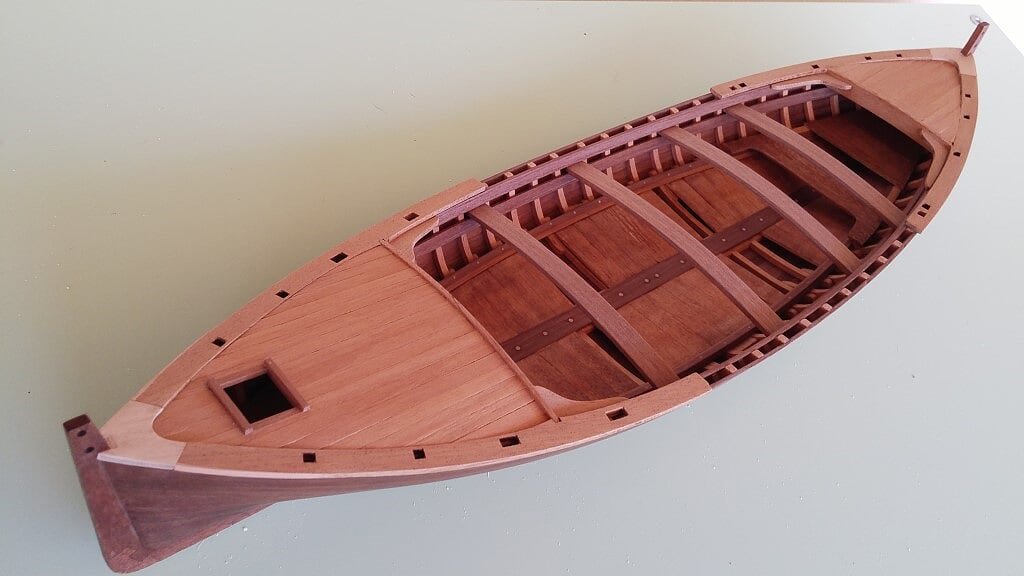
03 - 20170414_191130.jpg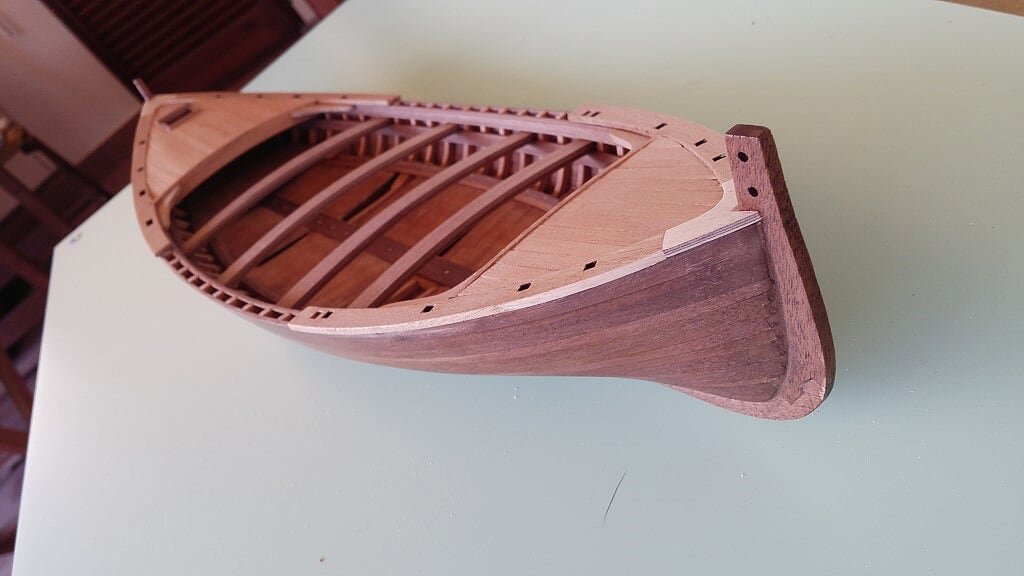
04 - 20170414_191136.jpg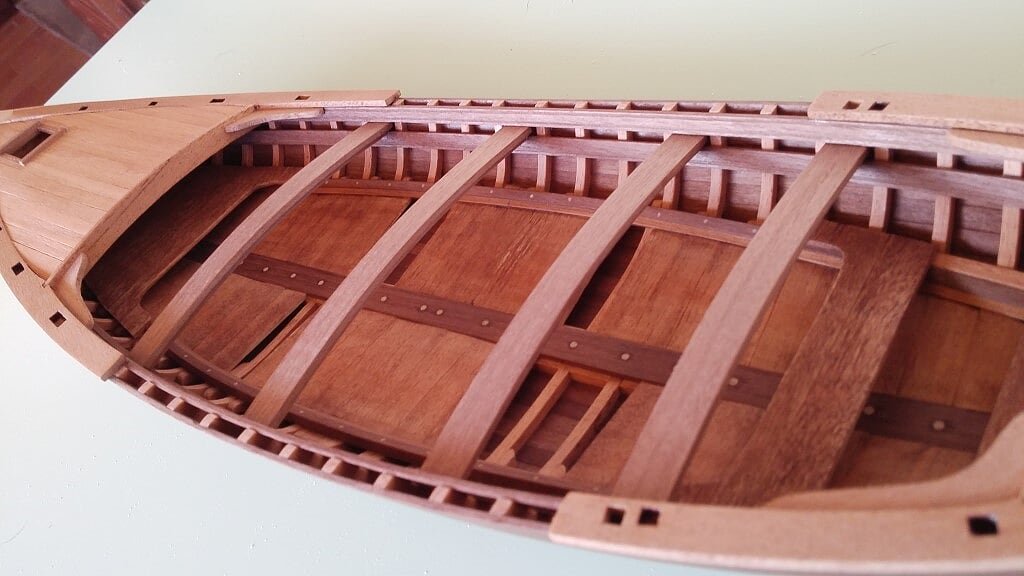
05 - 20170414_191050.jpg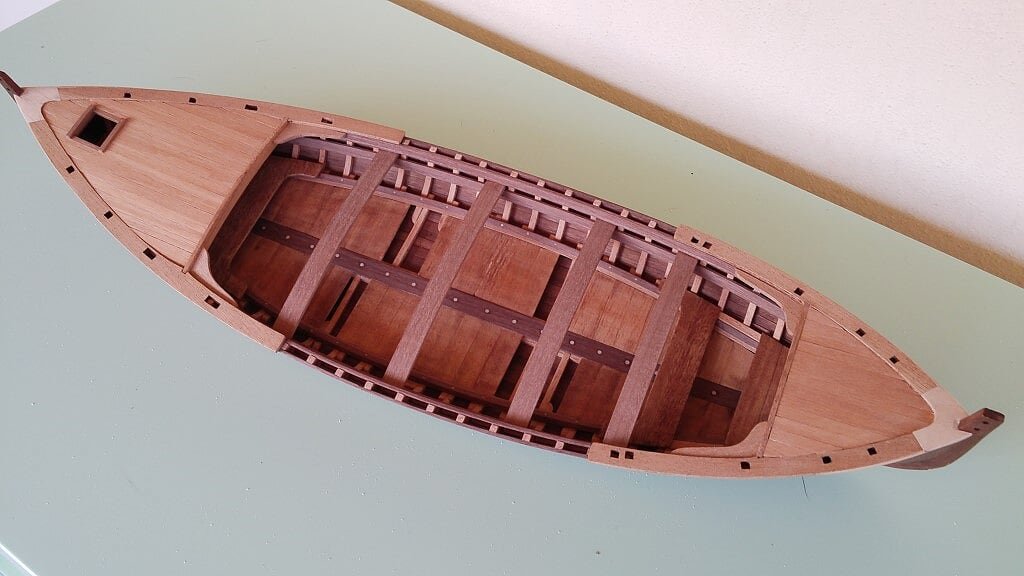
- mtaylor, MarisStella.hr, AntonyUK and 2 others
-
5
-
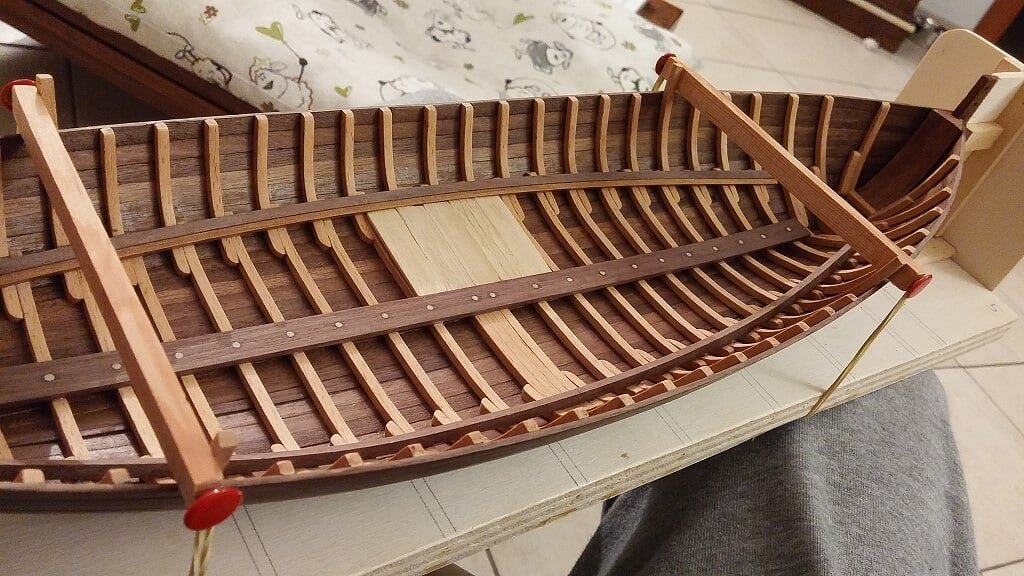
Thursday and Friday, April 13-14, 2017
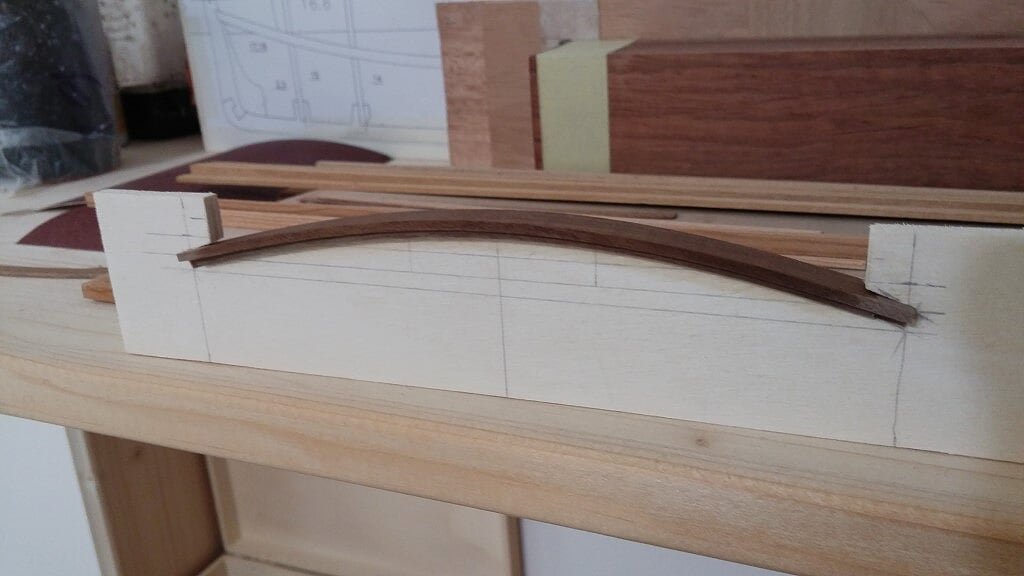
At the end I decided to install the seats . . .
There were some difficulties to solve, so I decided to do a test with some unused material. The first difficulty was to bend the strip which constitutes the seat, giving it a humpbacked curvature that was stable and, above all, reproducible in four equal pieces. At the end I opted for bonding two strips held to dry in a jig having per proper shape which gives it, once the glue is dried, an right curve.Then I had to solve the problem of how to insert the seat in the right place. The following photo shows the solution I found.
01 - 20170413_143920.jpg

Picture 02 shows the method I used to obtain the required shape for the seat.
02 - 20170413_142148.jpg
The remaining images show the final result. I think it's a good achievement . .
03 - 20170414_191057.jpg
04 - 20170414_191154.jpg
05 - 20170414_191145.jpg
More significant images will follow soon. Salutoni, Jack.
- mtaylor, yvesvidal, Tim Curtis and 2 others
-
5
-
Tuesday, April 11, 2017
The work is progressing well, not at high speed, but it goes well and I'm having fun.
Today I finished the two decks at bow and stern and then I better refined the gunwale. I'm glad I guessed the suitable wood for decks. When I was back to Cinisello I did a little research in my personal timber store and found these light walnut strips that make a good contrast with the color of the other boat elements. Those supplied by the kit seemed me too dark for these task.01 - 20170412_090753.jpg
02 - 20170412_090744.jpg
03 - 20170412_090736.jpg
04 - 20170412_090715.jpg
05 - 20170412_090724.jpg
06 - 20170412_090729.jpg
Now I must understand what are the next steps, so I have to study the plans/instructions to decide the correct sequence for installing the other details. However, the date of my return to Cinisello approaches and I definitely will not be able to finish this model in time. I must then decide whether to let him in Pisa waiting to complete it on my return next fall or bring it with me in Cinisello and finish it there, similarly as I did with the Viking ship model.
Should I decide for the latter, of course the other model (Brick de 24) I have in the shipyard at home would still remain idle.
Sincerely yours, Jack.
- Tim Curtis, Ondras71, AntonyUK and 2 others
-
5
-
Thursday, March 30, 2017
More details, the job begins to get interesting and fun. Now I'm back for 4/5 days in Milan, I plan to return to Pisa next Tuesday. So do not expect news soon.
01 - 20170331_095742.jpg
02 - 20170331_095753_HDR.jpg
03 - 20170331_095735_HDR.jpg
04 - 20170331_095729.jpg
05 - 20170331_095805.jpg
06 - 20170330_130908.jpg
- AntonyUK, Charter33, Tim Curtis and 4 others
-
7
-
Tuesday, March 28, 2017
A new small step forward: I have corrected a blunder that I discovered in the execution of the two floor decks at bow and stern. Now these two "decks" have the right length, 'cause before were too long, although on the plans there aren't the two small lateral extensions which unfortunately I could not totally eliminate.
I hope that the replica shipbuilders will forgive me. For me this detail introduces an aesthetically improved element [cursing] [cursing] [cursing]Previously I installed, not without some difficulty, the two side counterwales. Unlike the stringer, the engravings on the counterwale are two. Now I became a master in its execution. When the boat will be completed with the so-called "falke", there will be three wales/counterwales per side, two outside of the hull, one inside.
Now it's time to study in deep the assembly instructions in cojunction with the plans to setup a proper planning for the next steps.
They are not so obvious . .Salutoni, Jack.
01 - 20170328_174827.jpg
02 - 20170328_174722.jpg

03 - 20170328_174815.jpg
04 - 20170328_174759.jpg
- zoly99sask, hof00, mtaylor and 1 other
-
4
-
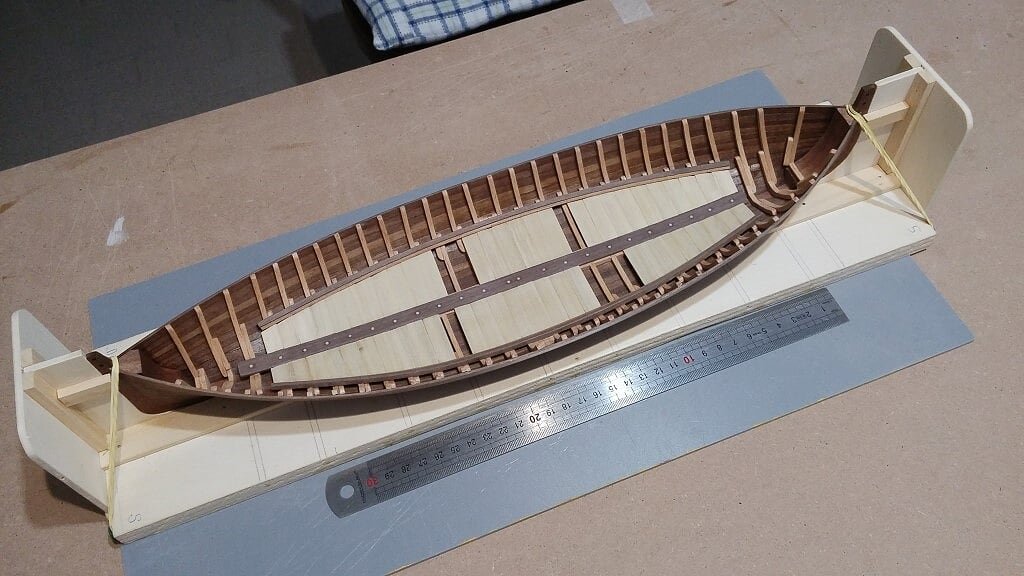
Friday, March 24, 2017
I completed the installation of the prow and poop floor timbers. Here I've also left some timbers removable in order to show the underlying parts.
I've also installed two side stringers.01 - 20170324_170234.jpg
02 - 20170324_170238.jpg
03 - 20170324_170241.jpg
Regards, Jack.
- mtaylor, yvesvidal, zoly99sask and 1 other
-
4
-
1 hour ago, Thebigone said:
Hello everyone
First I want to say that I appreciate you for your work. I am passionate about and I want to build model ship viking ship gokstad only plans do not find something free (no material possibilities helps me to buy one) so if I can help myself and someone I will be eternally grateful. I also like Drakkar viking ship.
Sincerely
EugenHi, Eugen.
The "Dusek Skip Kits" kit of this model doesn't contain plans suitable for scratch building.
All the bulkheads and the planks are laser cut and are not reported on the plans.
May be you can try to see other kit manufacturers if complete plans are available.
Regards, Jack.
-
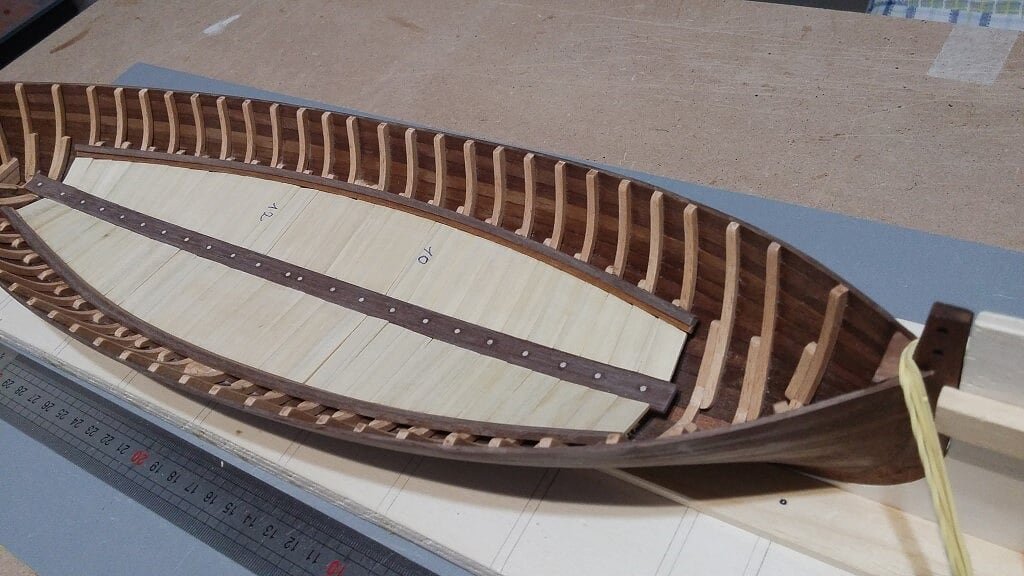
Wednesday, March 22, 2017
As anticipated, I selected a solution for the floor timbers not requiring aging. So I decided to dye lightly the limewood timbers, in my opinion too white. Accidentally happened that the dye was not uniformly absorbed by the wood and therefore has assumed a barely lived look.
Below I then begun to install additional decks at bow and stern, which are slightly raised above the main one. When finished they will be obviously dyed.
01 - 20170322_173409.jpg
02 - 20170322_173458.jpg
03 - 20170322_173420.jpg
04 - 20170322_173429.jpg
Regards, Jack.
-
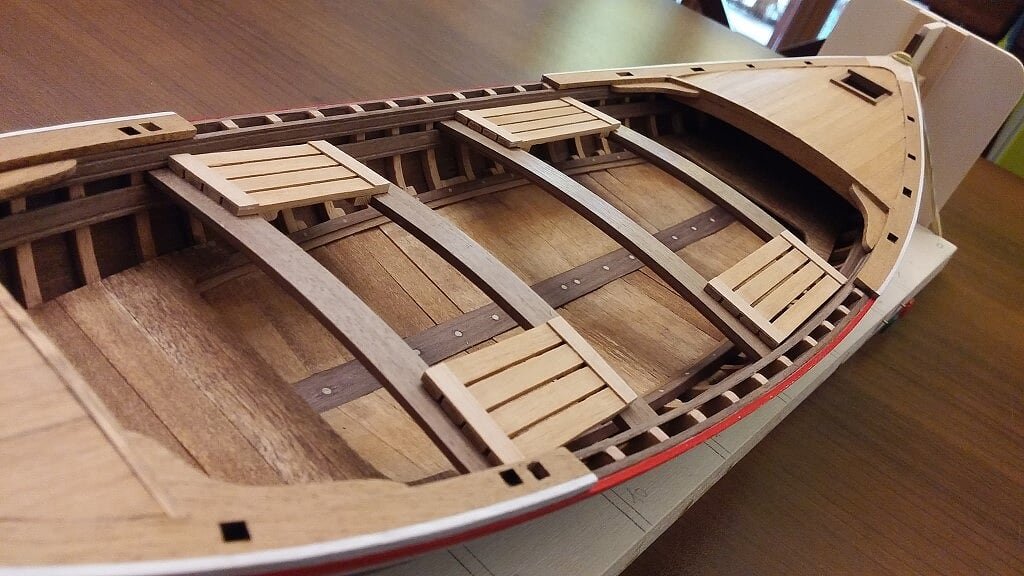
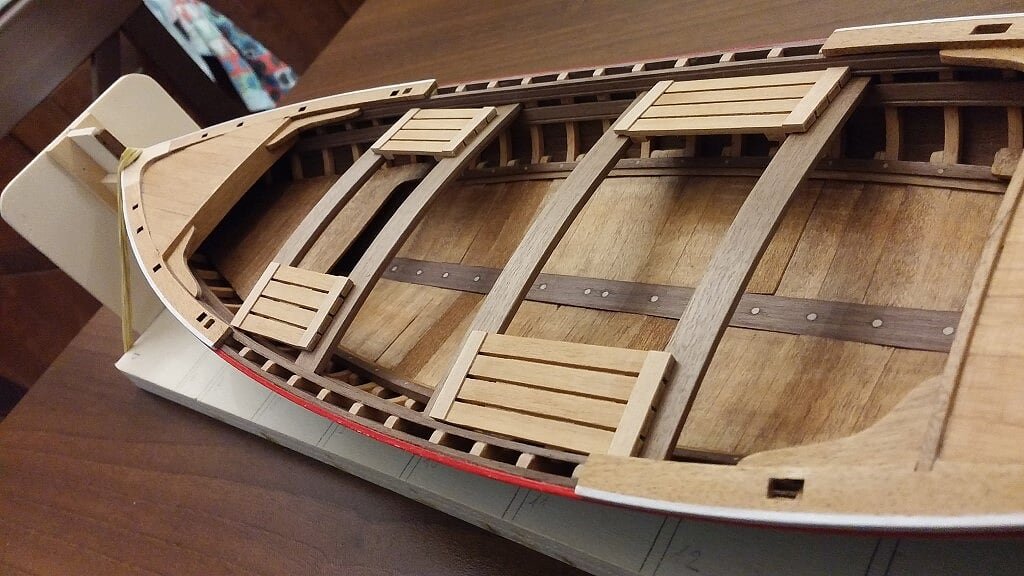
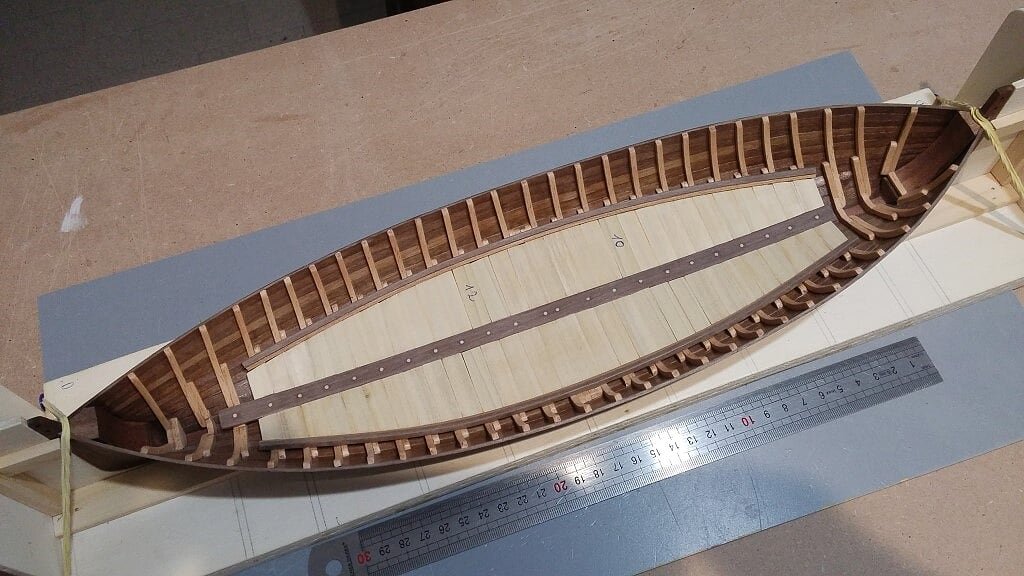
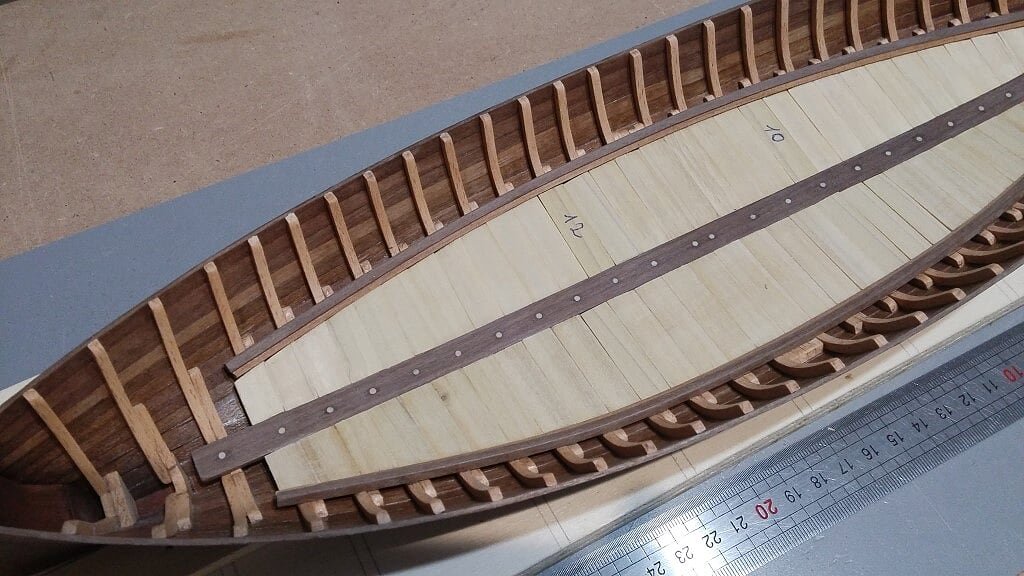
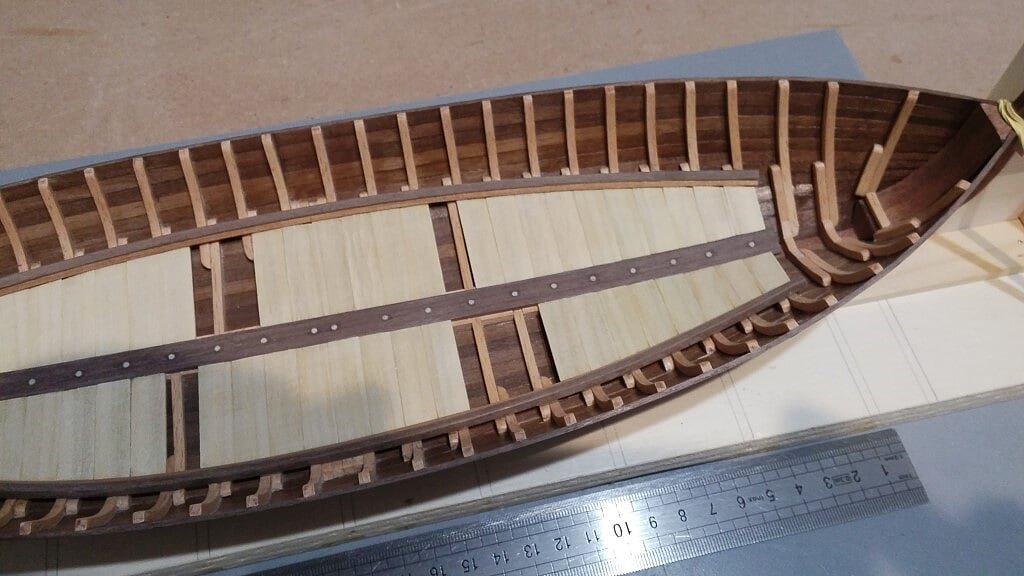
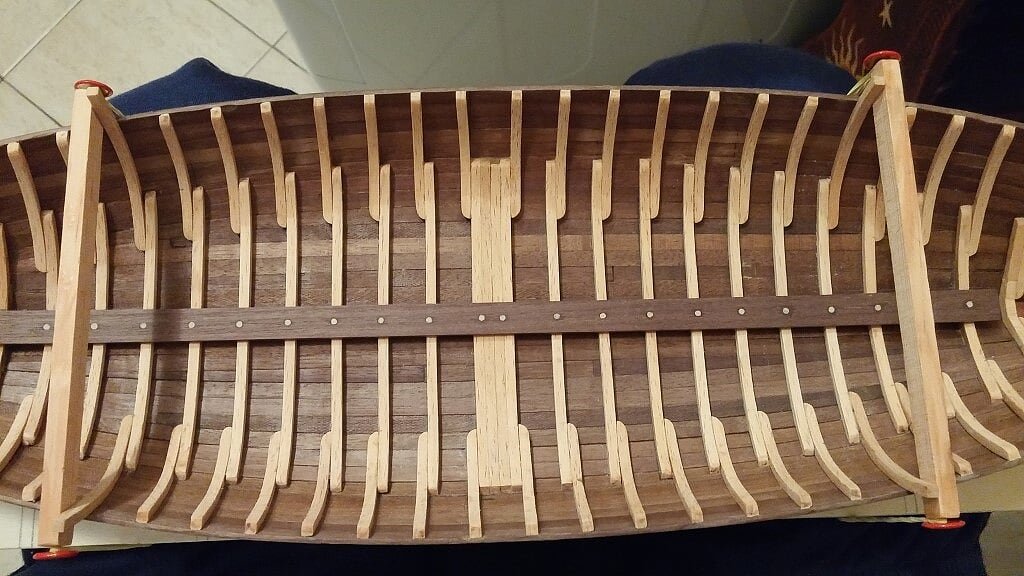
Monday, March 20, 2017
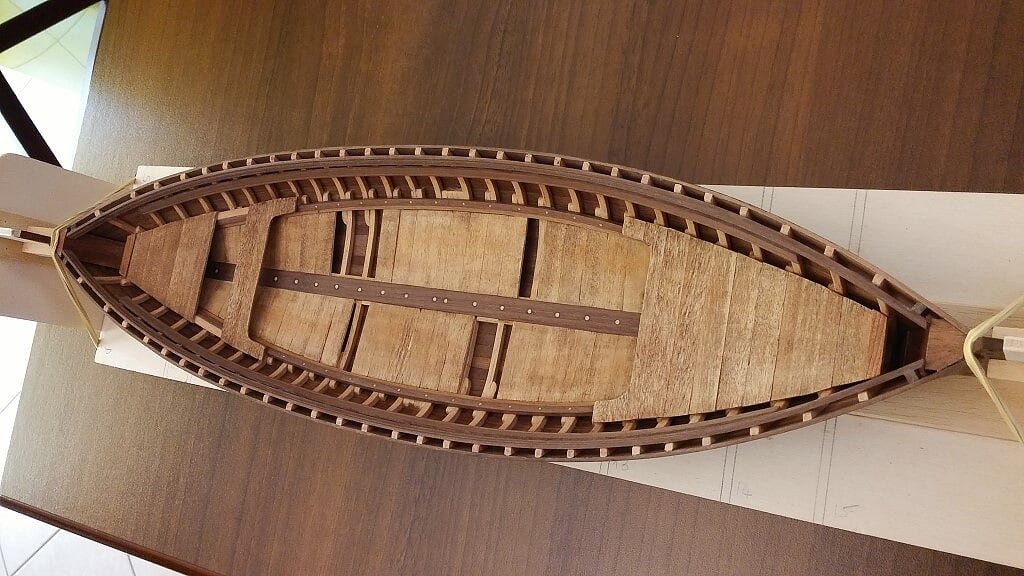
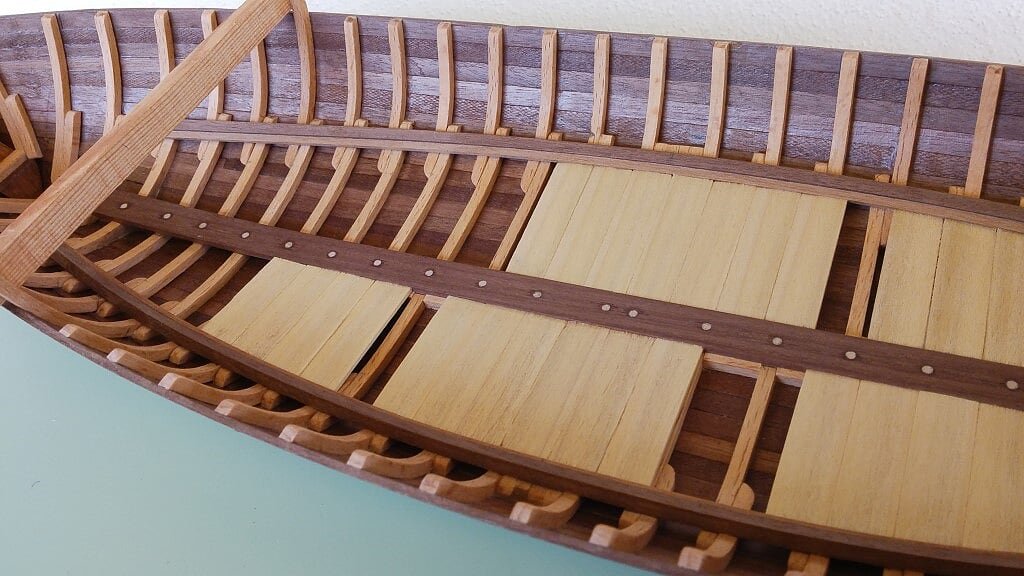
I finished the floor timbers installation . .
In the first three images you can see how all the work done during the installation of the ribs is almost completely hidden. The two numbered floor timbers that you see must be redone because I put the numbering on the wrong side. Just stuff.01 - 20170320_180428.jpg
02 - 20170320_180436.jpg
03 - 20170320_180449.jpg
But I arranged that some timbers of the boat flooring can be removed; in this way it's possible to show, even if in a small way, the underlying work. The removable parts should be, once finished the model, spread properly on the boat bottom.
04 - 20170320_175905.jpg
05 - 20170320_175909.jpg
06 - 20170320_175913.jpg
07 - 20170320_175923.jpg
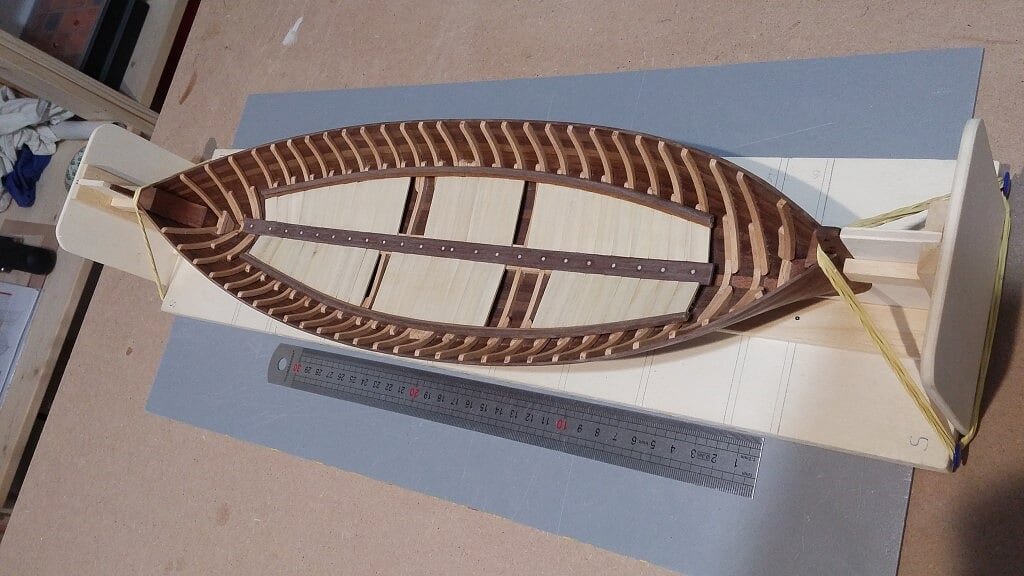
I'm considering whether to treat the bottom with vinegar and iron wool, to make it aged. Similarly I made for the Gokstad viking ship model. I honestly do not know what to do because the only two, maybe three, Gajeta Falkusa existing today are recent replicas and, from their photos, they are beautiful new without any slightest aged area.
What would you think?
Finally a sincere agreement with the comments from Don and Zoran. I really appreciate.
Greetings, Jack.- yvesvidal, Keith_W, Mirabell61 and 2 others
-
5
-
Friday & Saturday, March 17-18, 2017
Some few progress after nearly a month's absence . . A lot of work will be hidden with the bottom timbers

01 - 20170316_203251.jpg
02 - 20170318_153309.jpg
03 - 20170318_153348.jpg
04 - 20170318_153339.jpg
05 - 20170318_153322.jpg
06 - 20170318_153333.jpg
See you soon, Jack.- Pierretessier, Mirabell61, mtaylor and 2 others
-
5
-
-
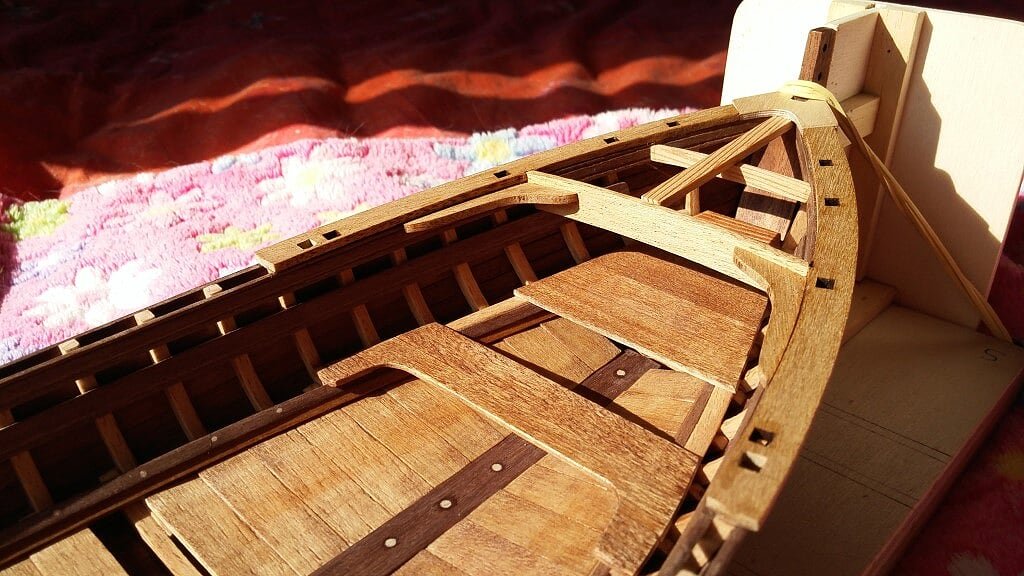
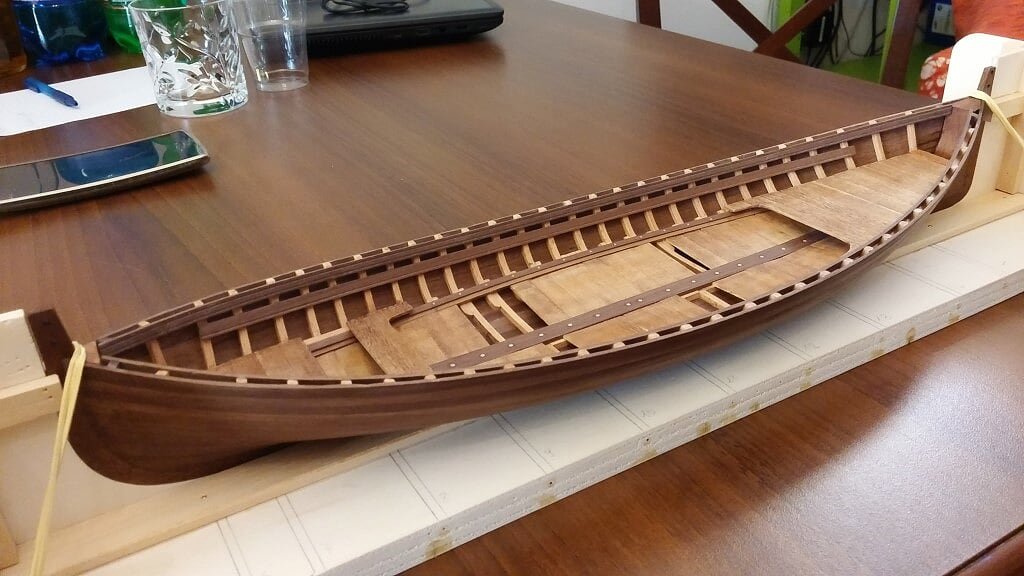
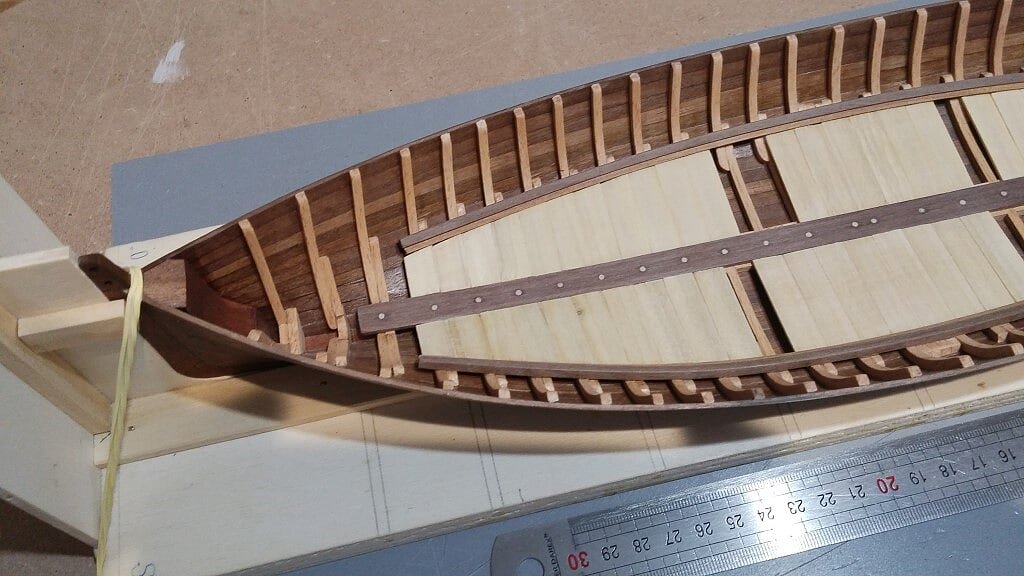
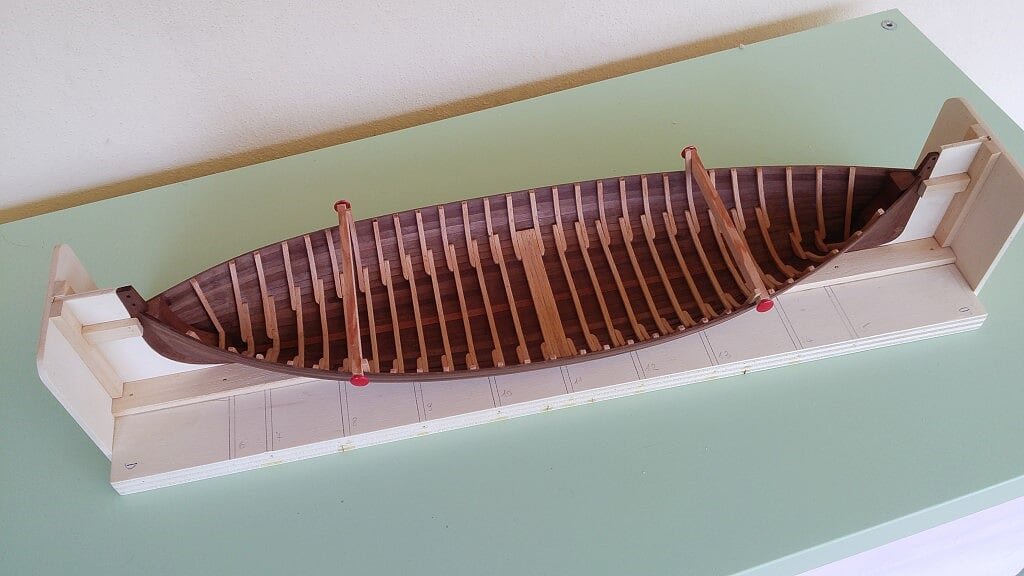
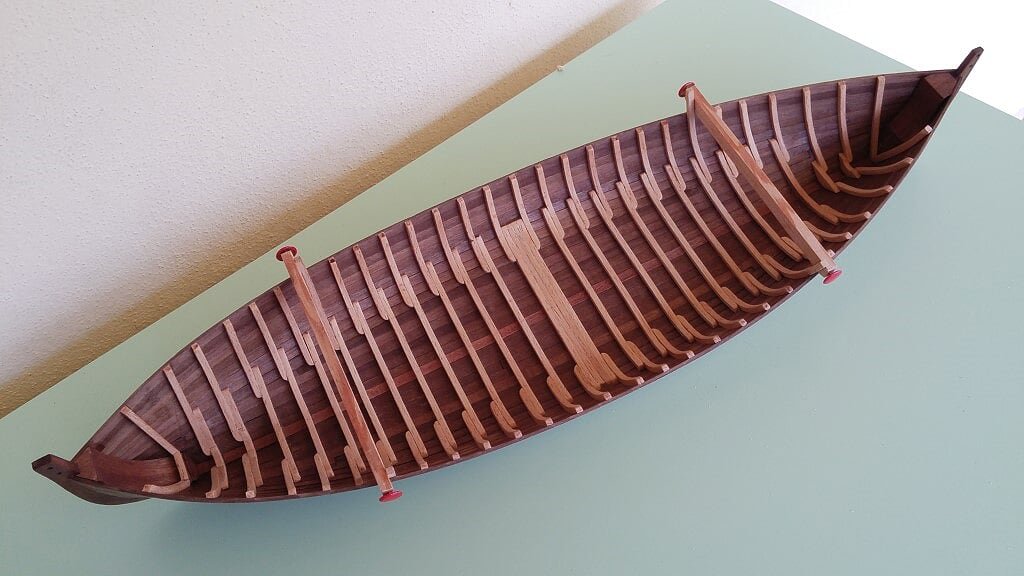
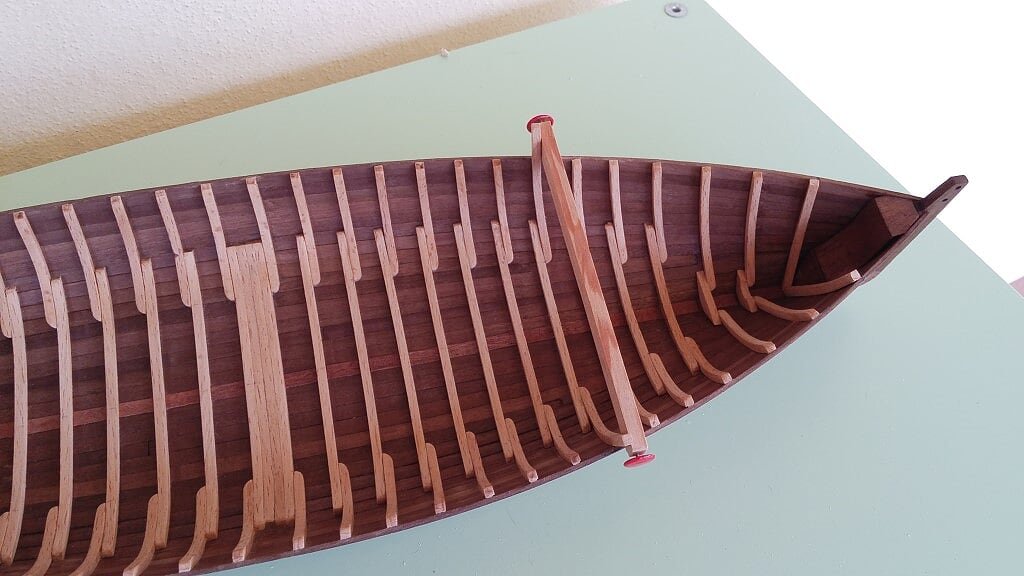
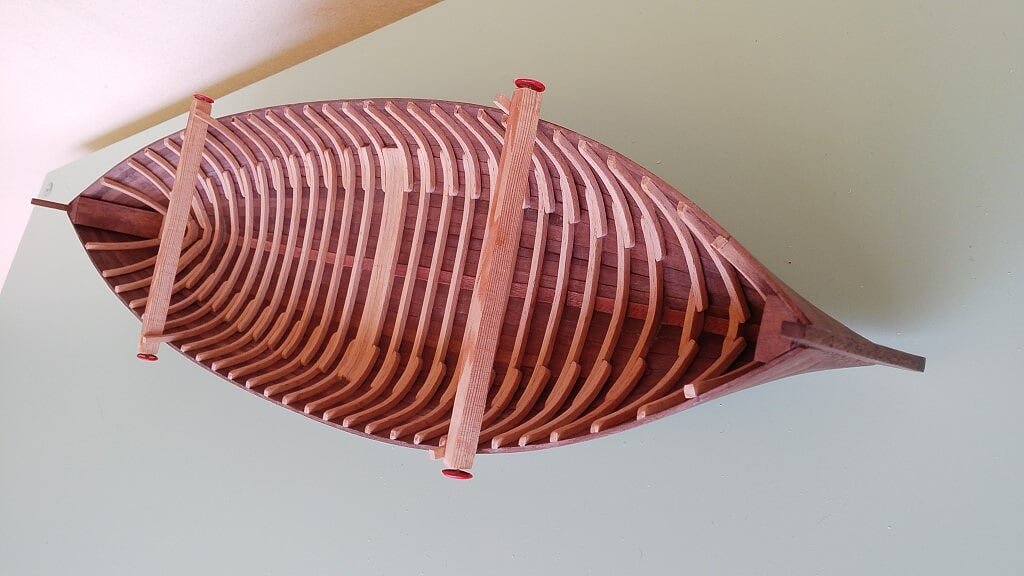
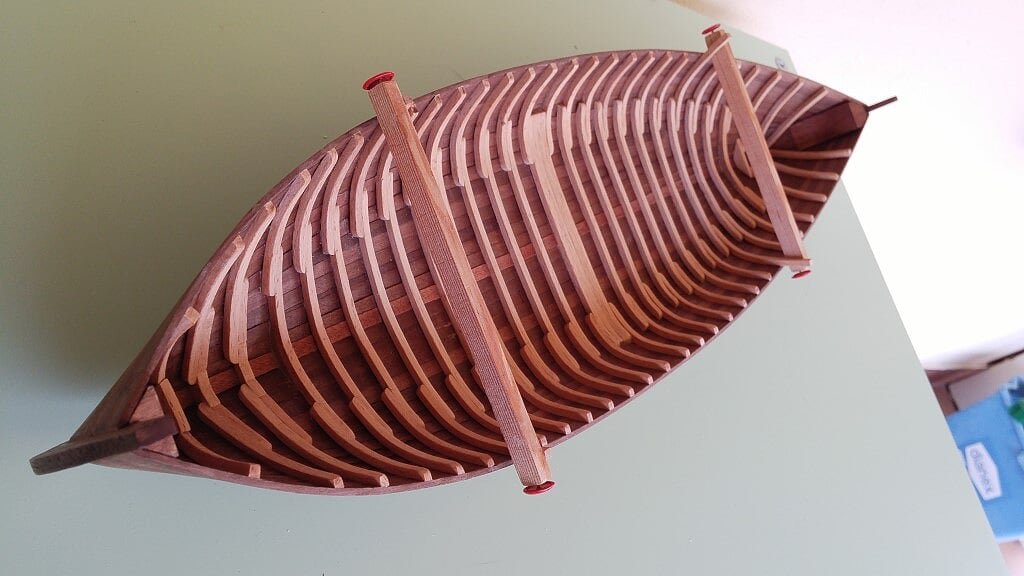
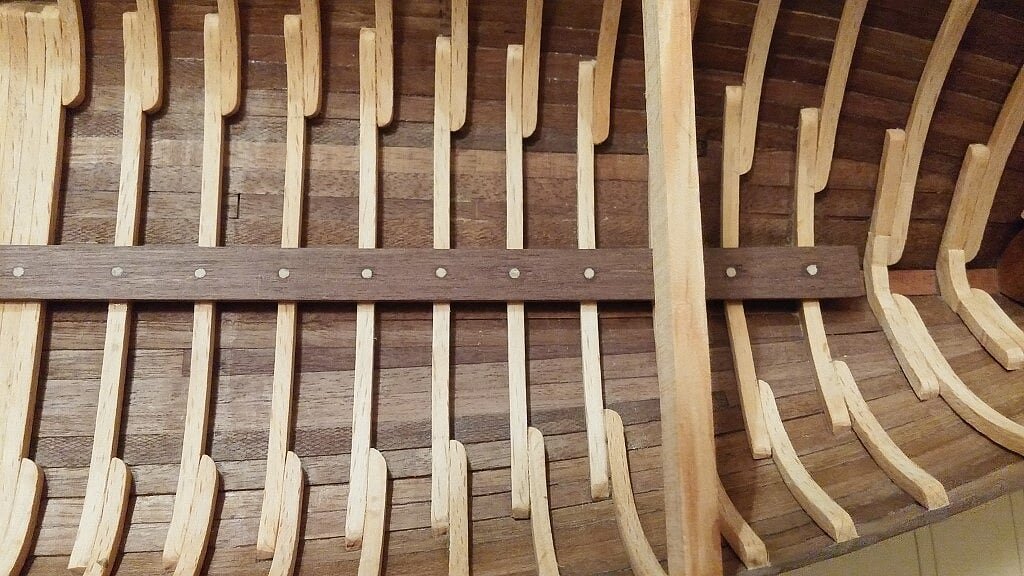
Friday, February 17, 2017Finally, I almost finished this long and tedious task . . now only a few small details are still missing.While considering that I haven't spent a lot of time on shipmodeling in this period, due to various setbacks, it was still a job that has challenged the "prince" of ship modeling attitudes: being patient.
Could I spend less time if I used the CA glue instead of the vinyl one?
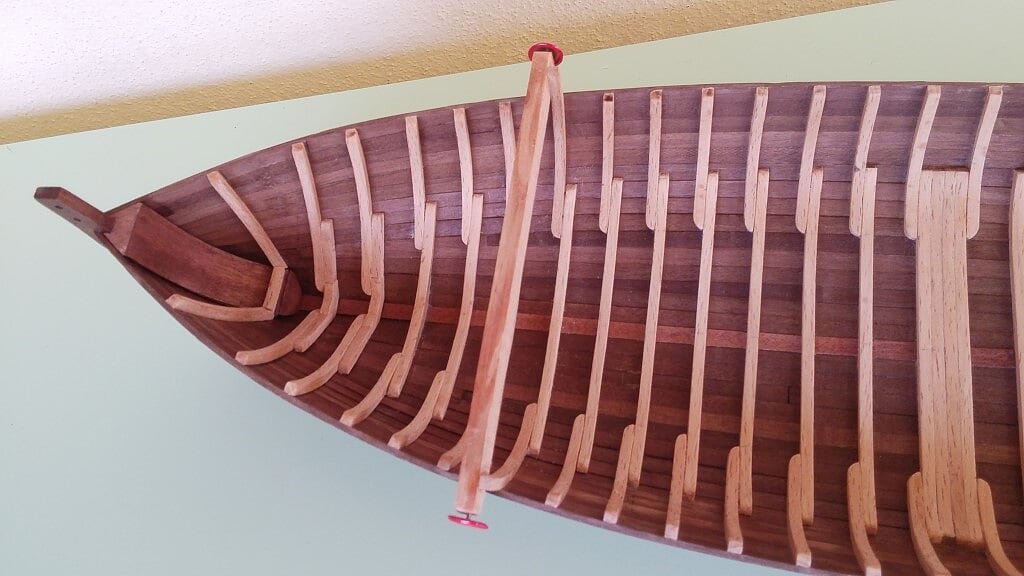
Most probably, but certainly the strength of the joints would not be the same, and here it is necessary to emphasize that this framework, for this specific model, plays a structural role rather seriously. In fact, now that the skeleton is almost complete, it works very well as an element that keeps rigid and not deformable the whole hull. This wasn't the same before this task, when it appeared like an empty shell. However, to avoid more risks, I left two fixed reinforcements (visible in the photos) plus one removable, that I will disinstall at the proper moment; they should prevent the shell to change its original shape.
I consider myself quite satisfied with the result even though, after a closer inspection, not all the ribs are perfectly aligned, perpendicular and equally spaced between them.
This goal seems like a pretty easy job to be achieved in the theory world, but incredibly difficult in practice. Indeed, probably impossible, because it is a problem that lies in the method of construction adopted, that is, 1) to prepare first the hull shell and 2) then subsequently build inside the backbone structure. There is the need to bend in the right shape every piece, to obtaining the correctcamberbevel, to glue and clamp etc .. with all this matter to consider, errors of a few tenths of millimeter are very common.Anyway it should be emphasized that very little of this complex rib structure will be really visible when all the remaining fitting details will be installed.
For this reason, to avoid hiding almost the incredibly profused workload to get here, I'm thinking to setup the bottom fitting not completely closed, perhaps completely removable, in order to see these interesting details.
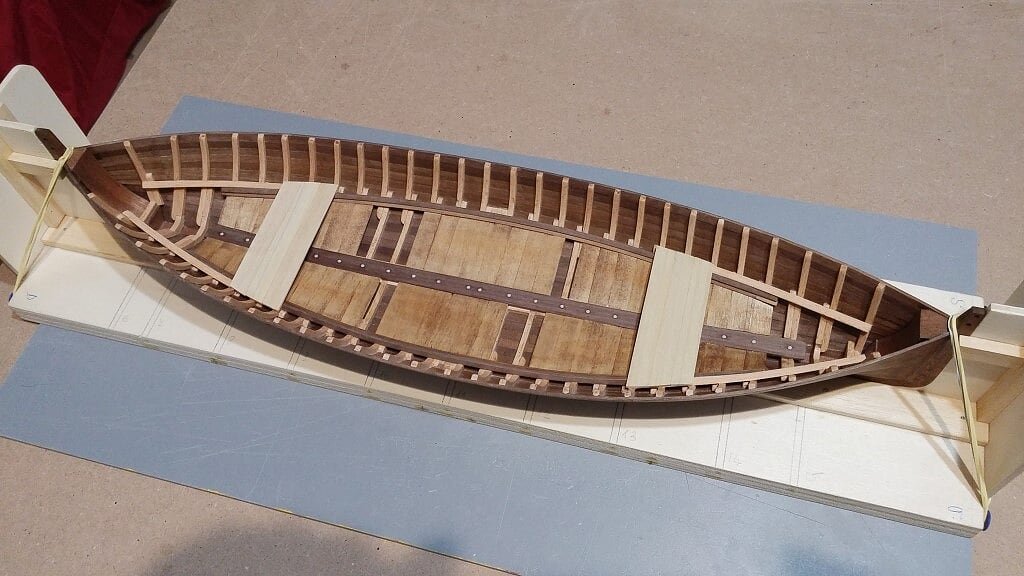
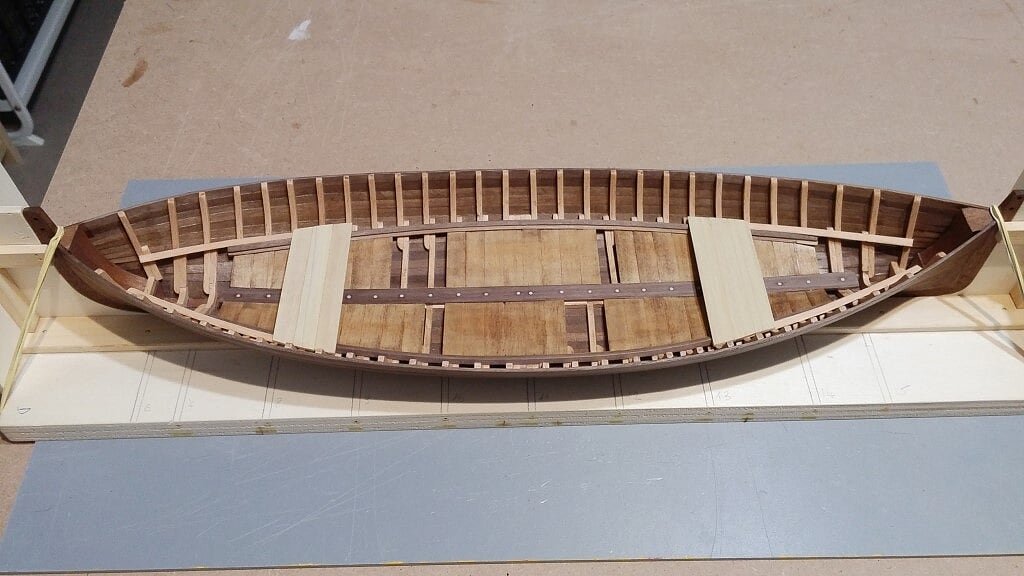
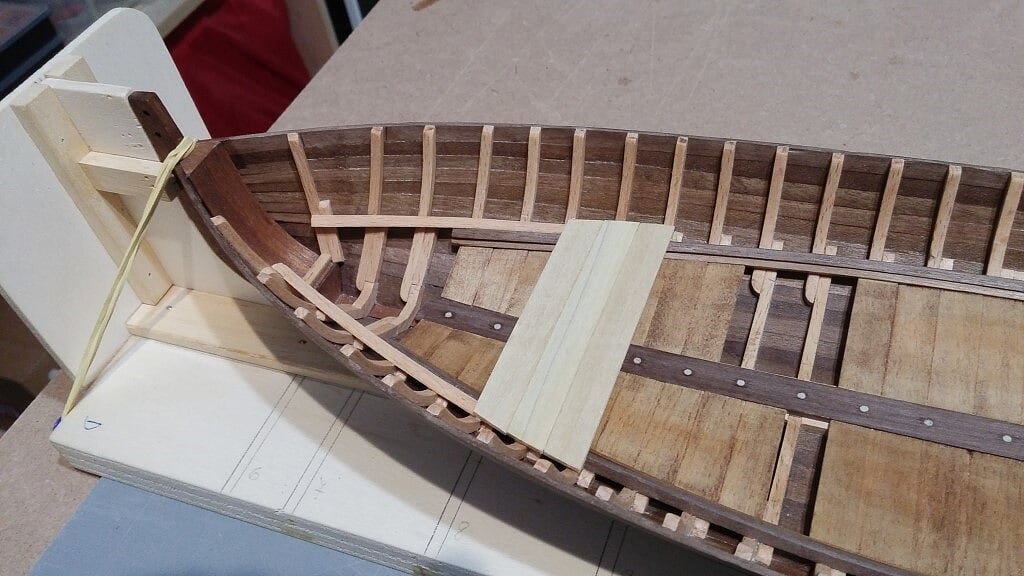
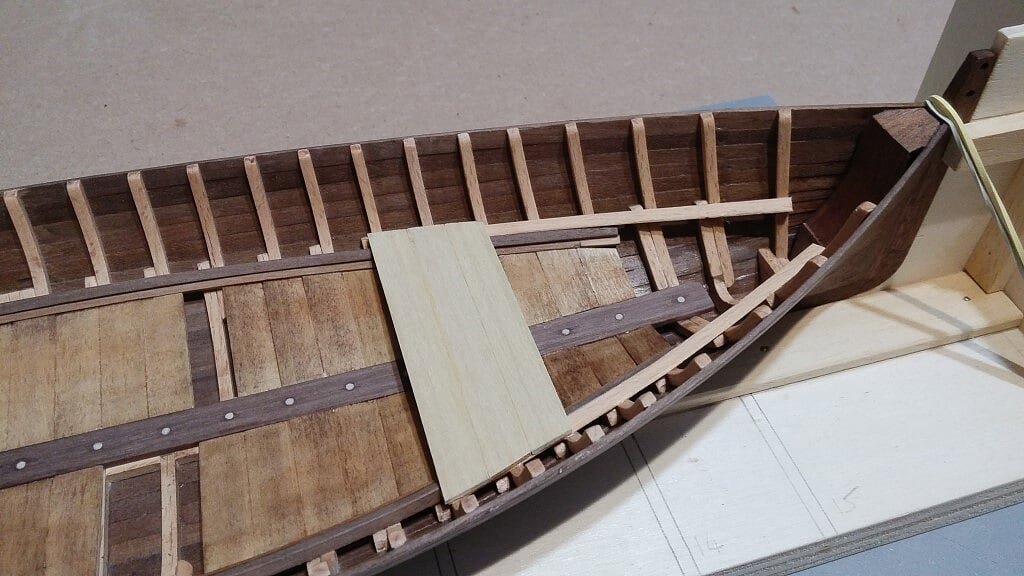
We will see later. Now here are some photos of the model as it is today. Sincerely, Jack.
01 - 20170217_094533.jpg
02 - 20170217_094602.jpg
03 - 20170217_094623.jpg
04 - 20170217_094611.jpg
05 - 20170217_094631.jpg
06 - 20170217_094641.jpg
- MarisStella.hr, Tim Curtis, mtaylor and 2 others
-
5


Gaeta Falcata (Gajeta Falkusa) by jack.aubrey - FINISHED - Marisstella - 1:20 Scale
in - Kit subjects built Up to and including 1500 AD
Posted
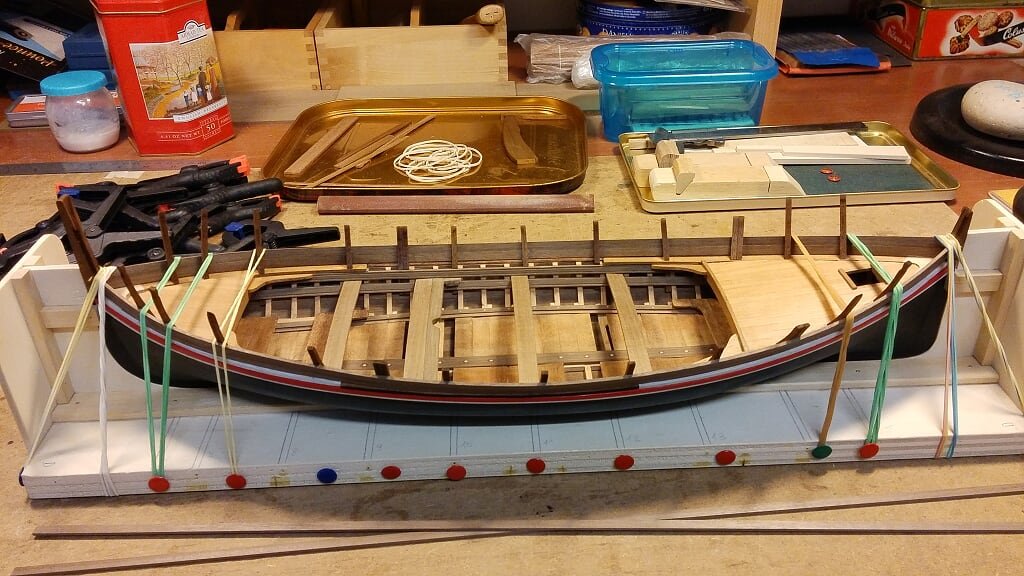
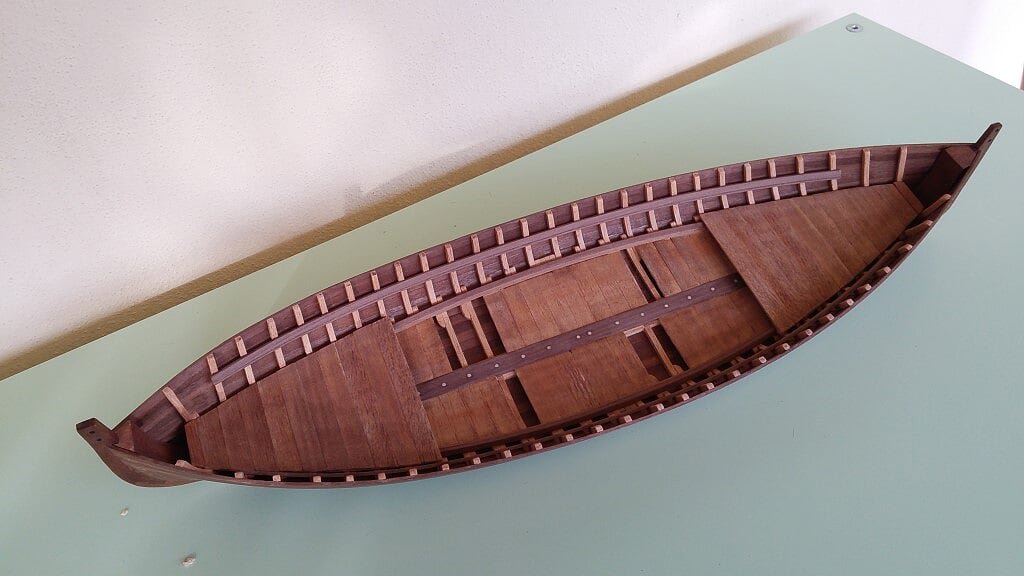
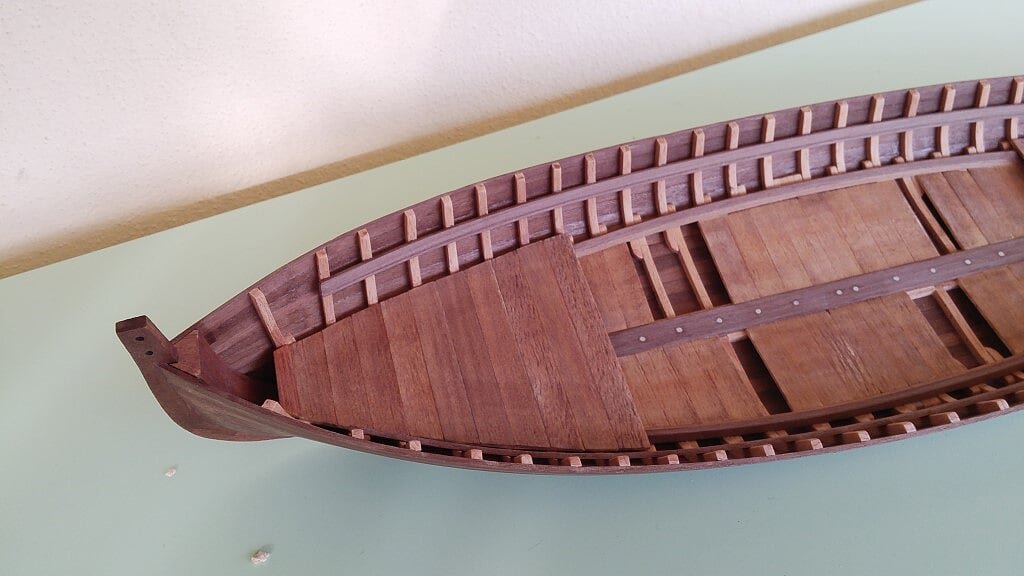
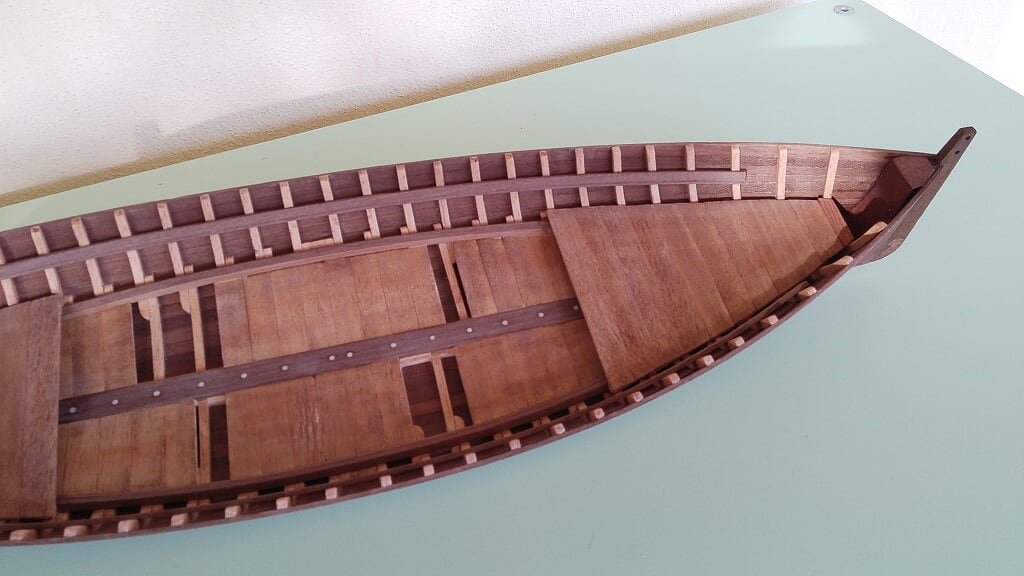
Saturday, July 8, 2017
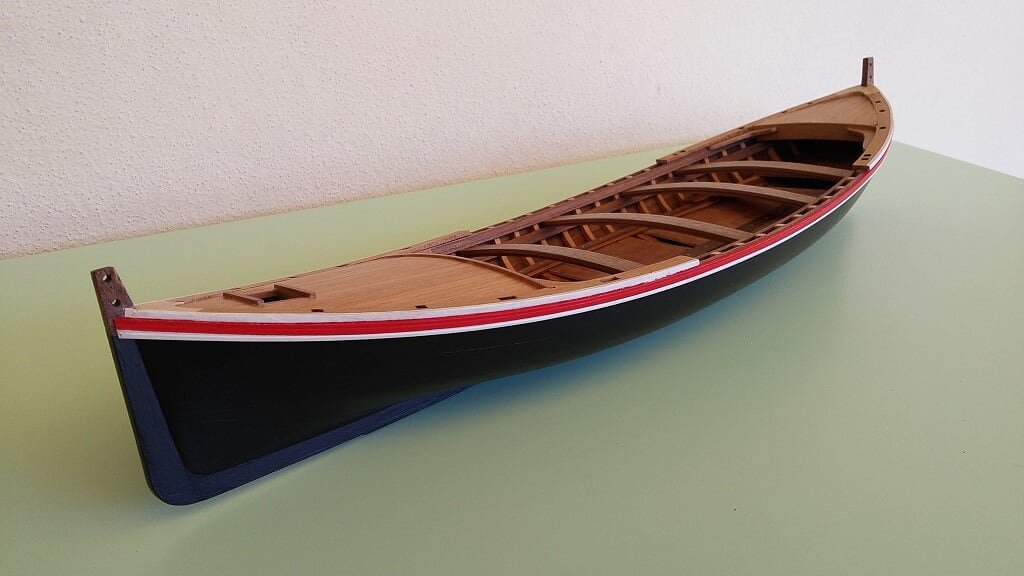
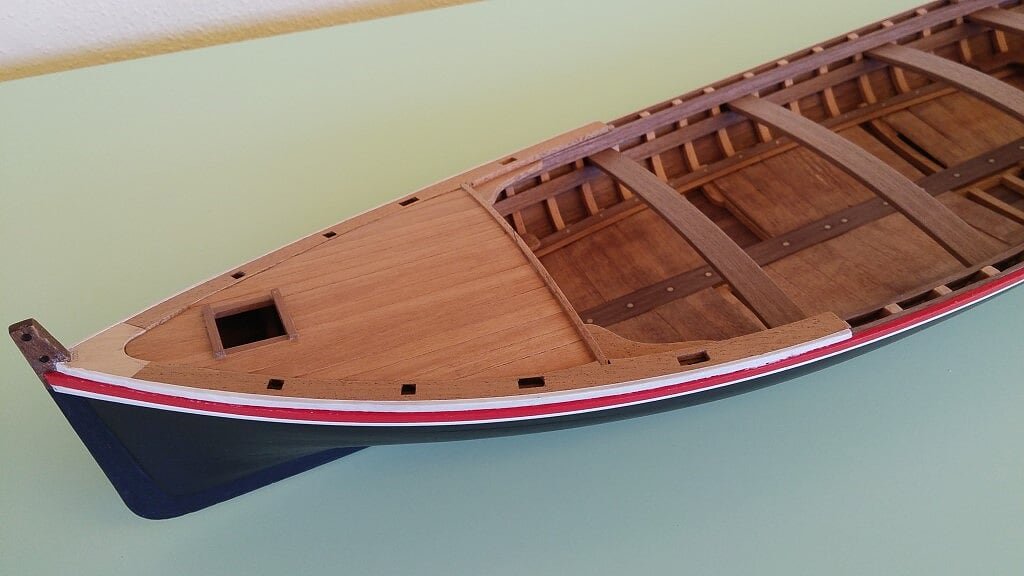
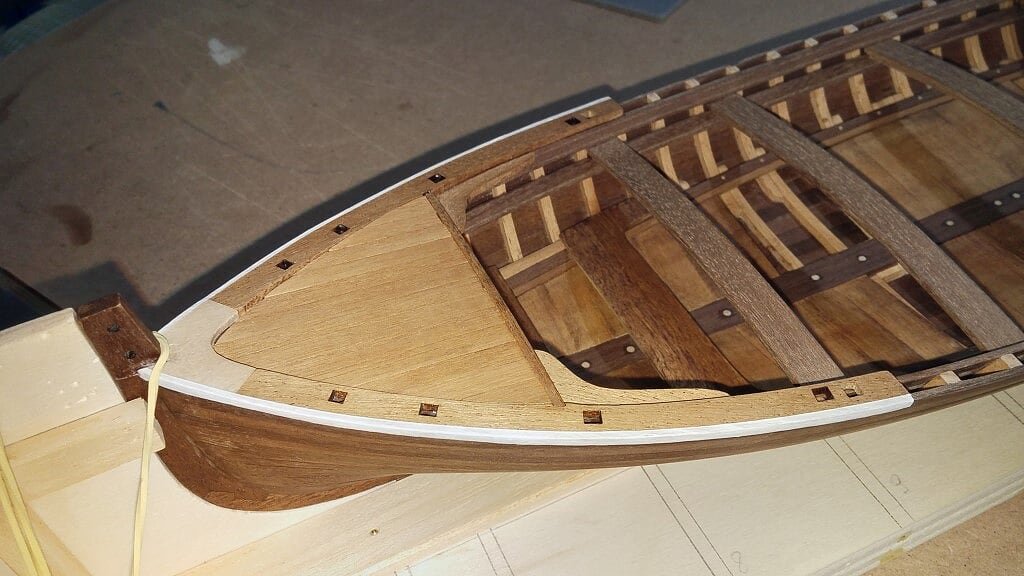
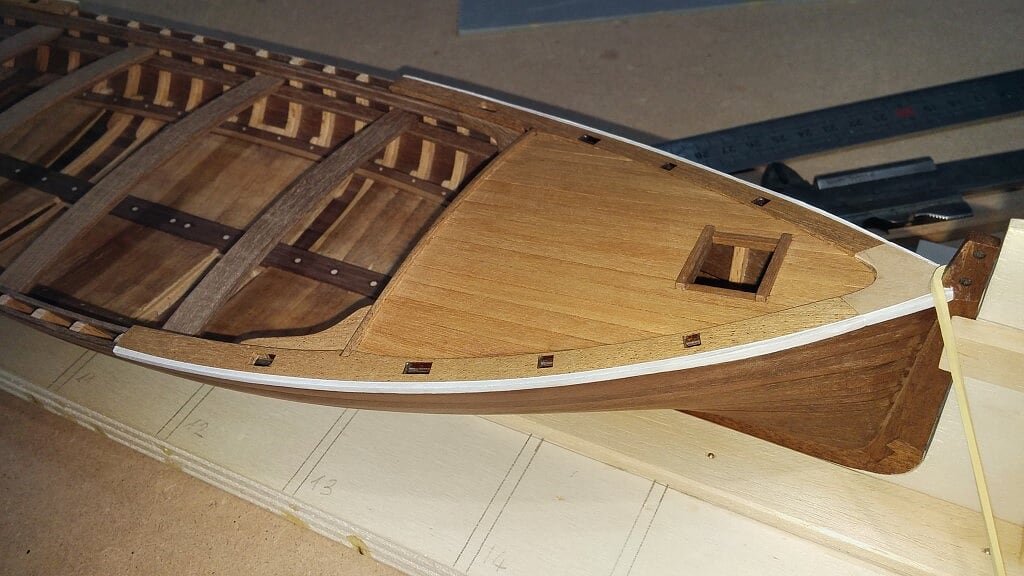
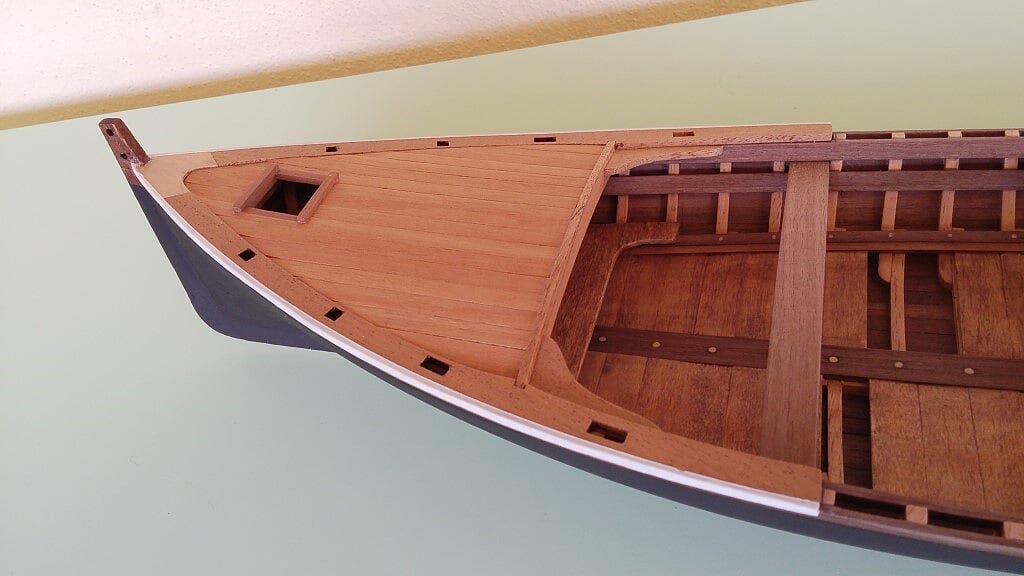
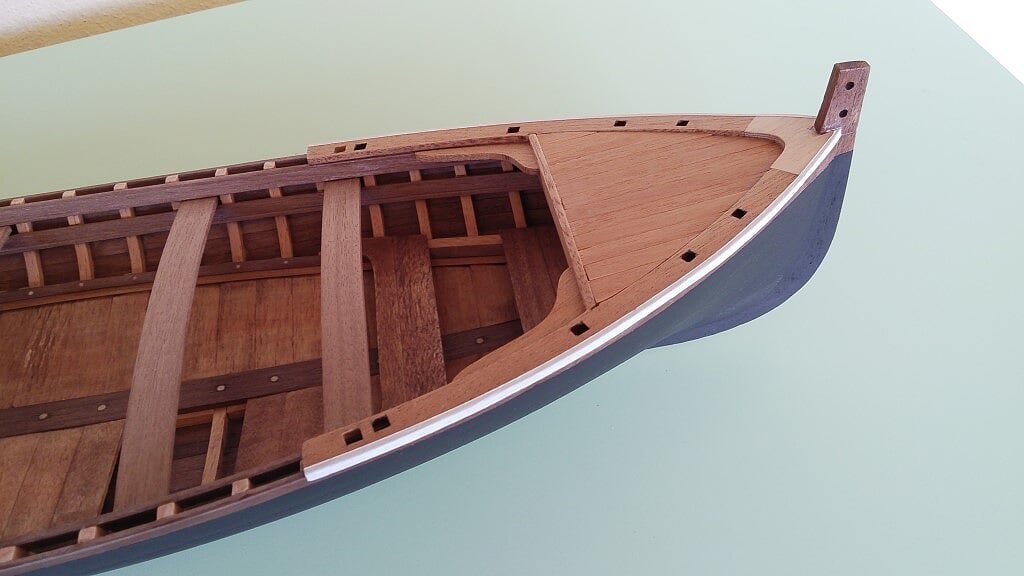
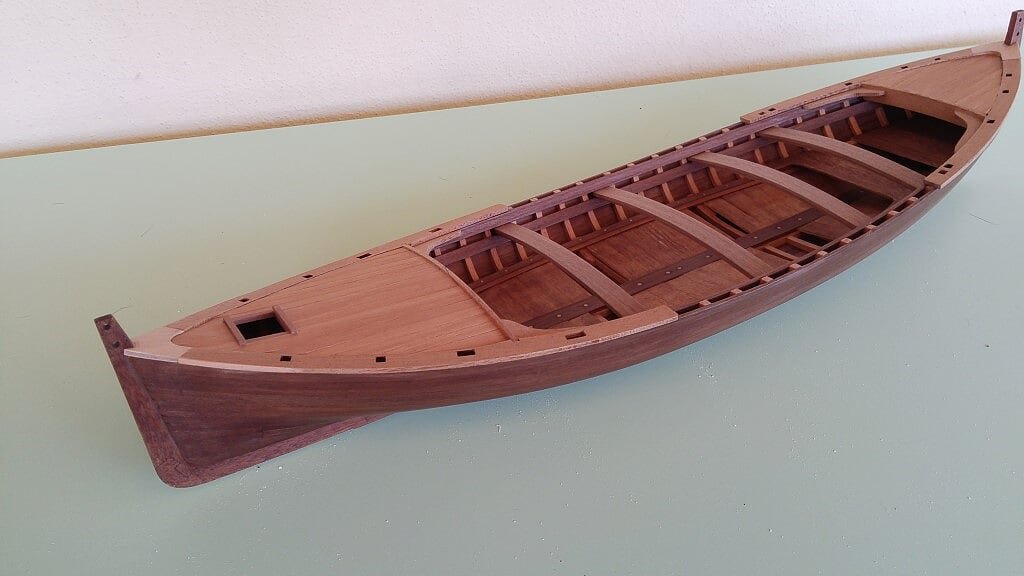
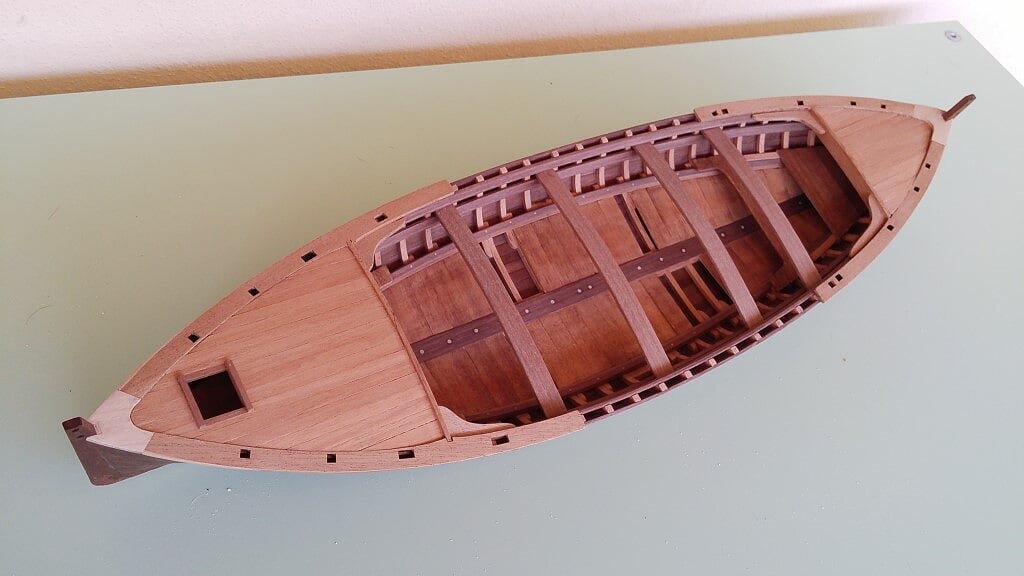
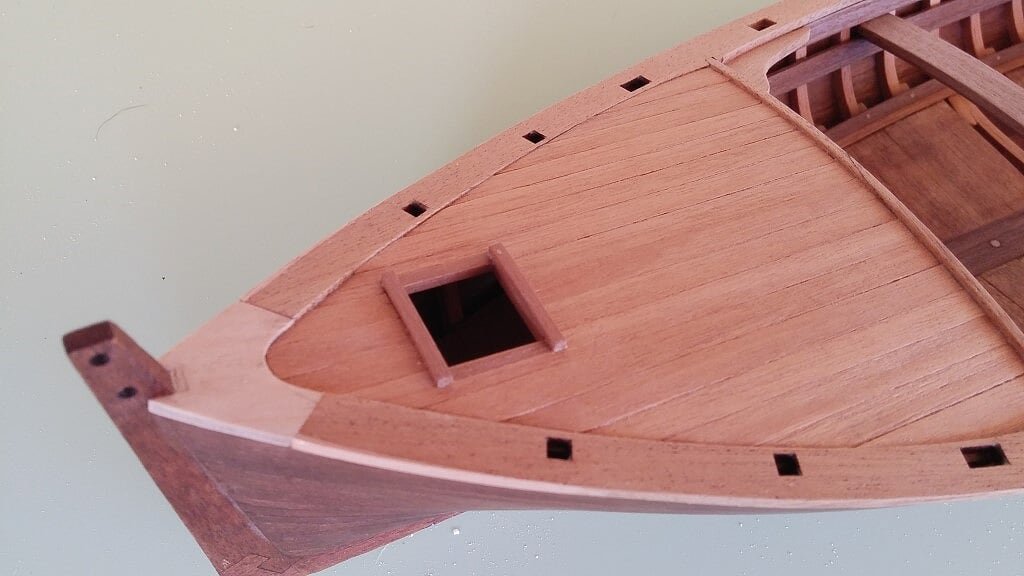
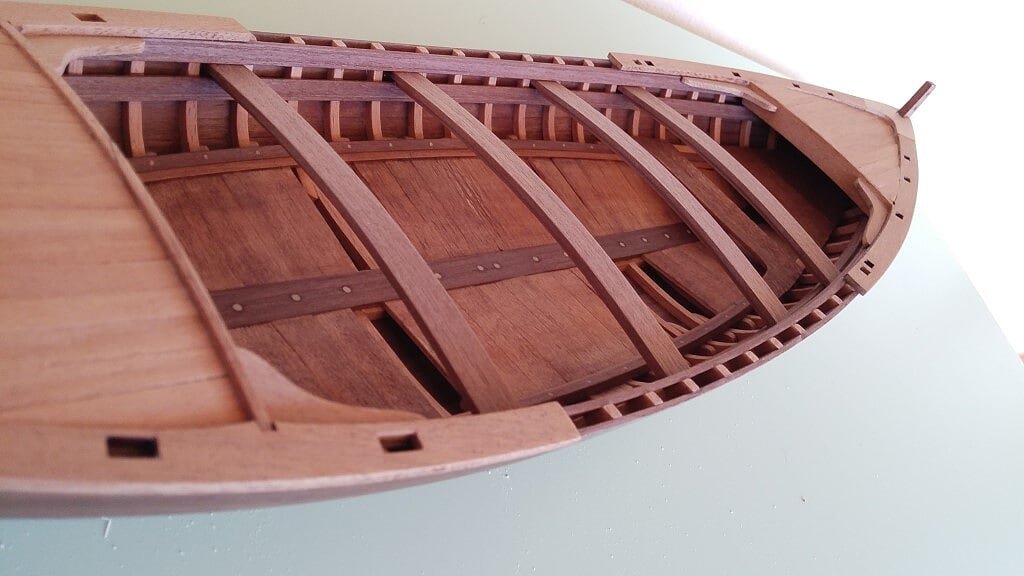
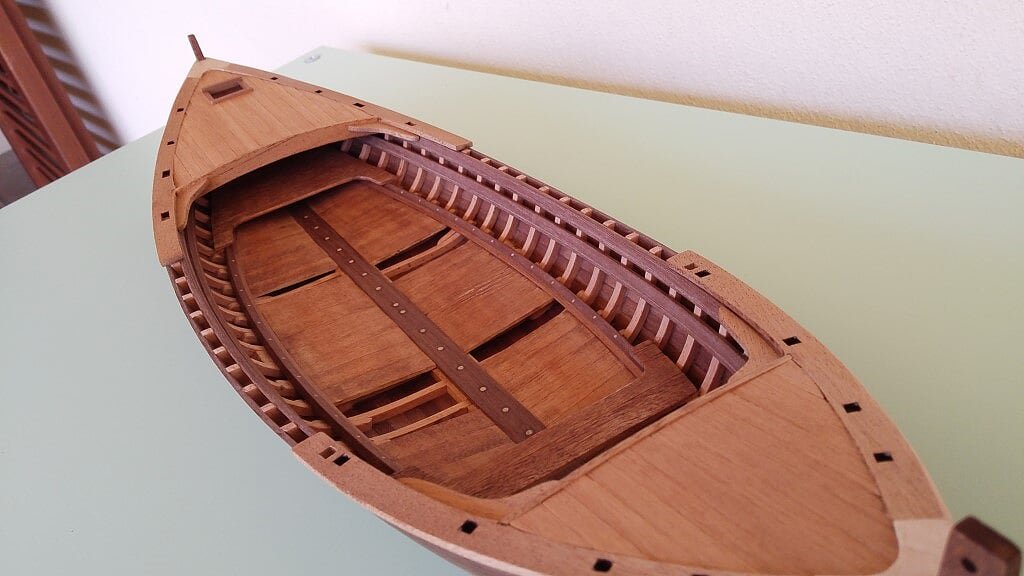
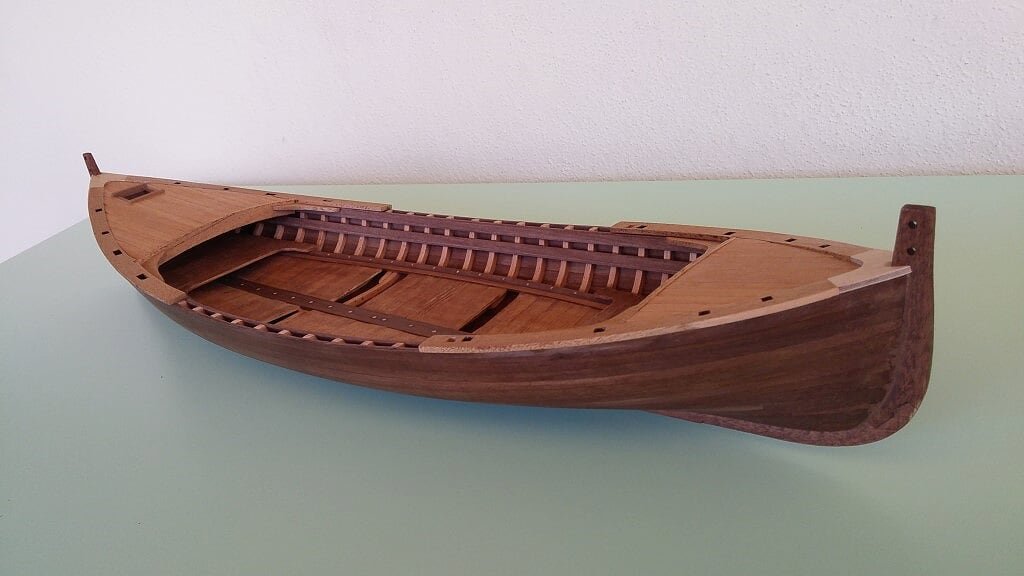
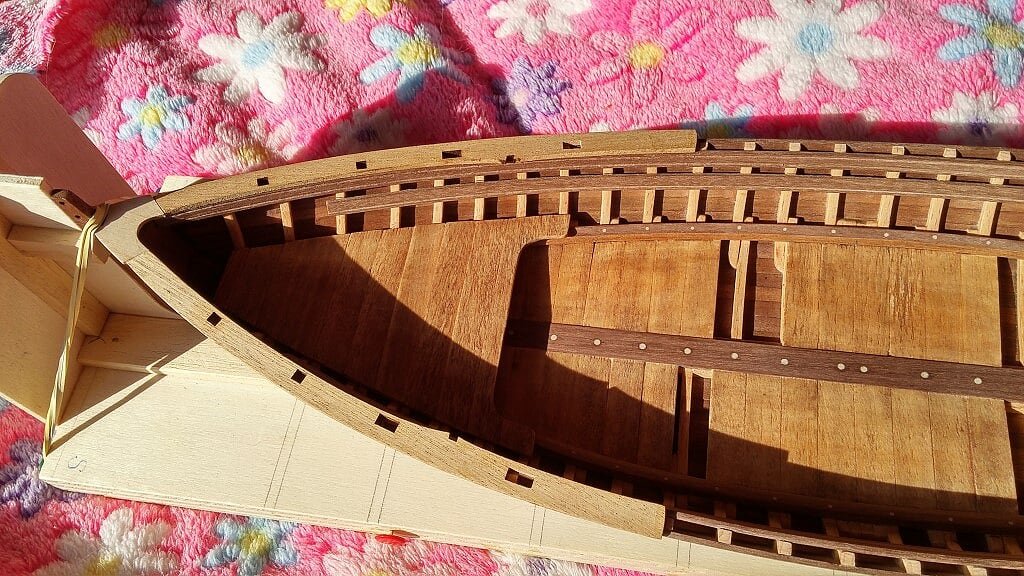
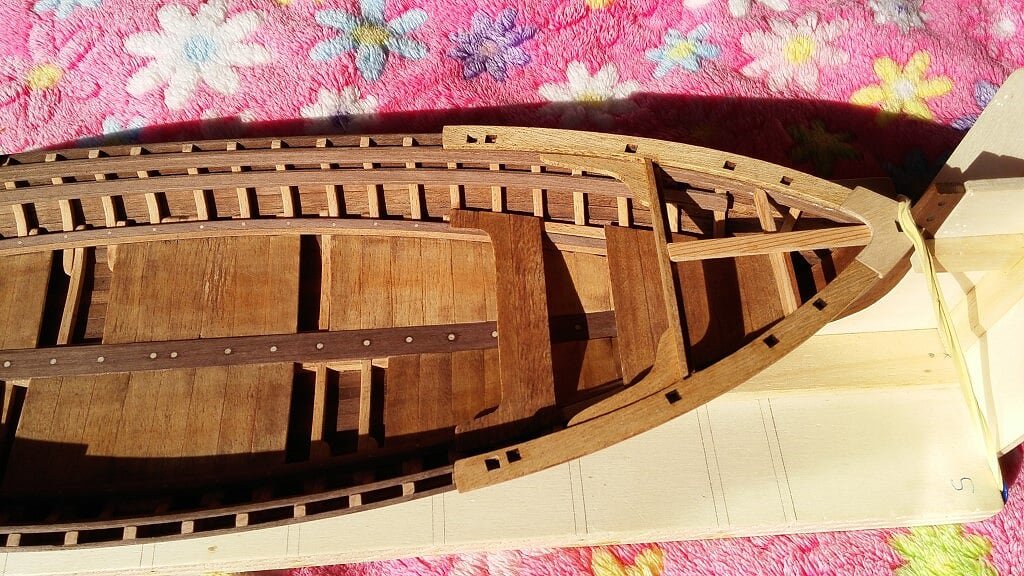
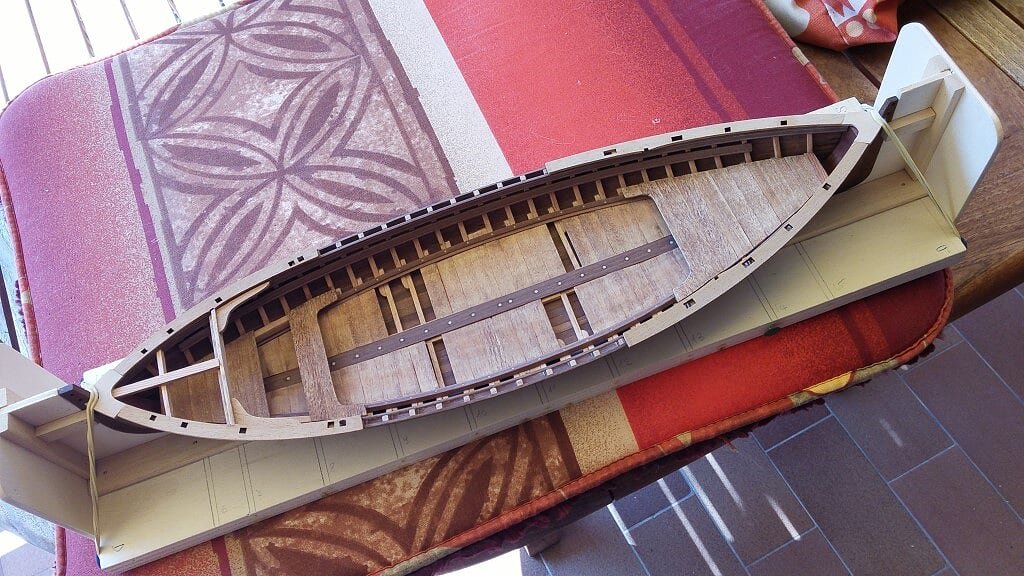
Completed the planking of the top sides on the hull, in particular I raised, as planned, the height of the sides in the stern and, above all, in the bow area.
Now I've to start the cleaning and refining tasks before proceeding with new details of these "falke".
01 - 20170708_084910.jpg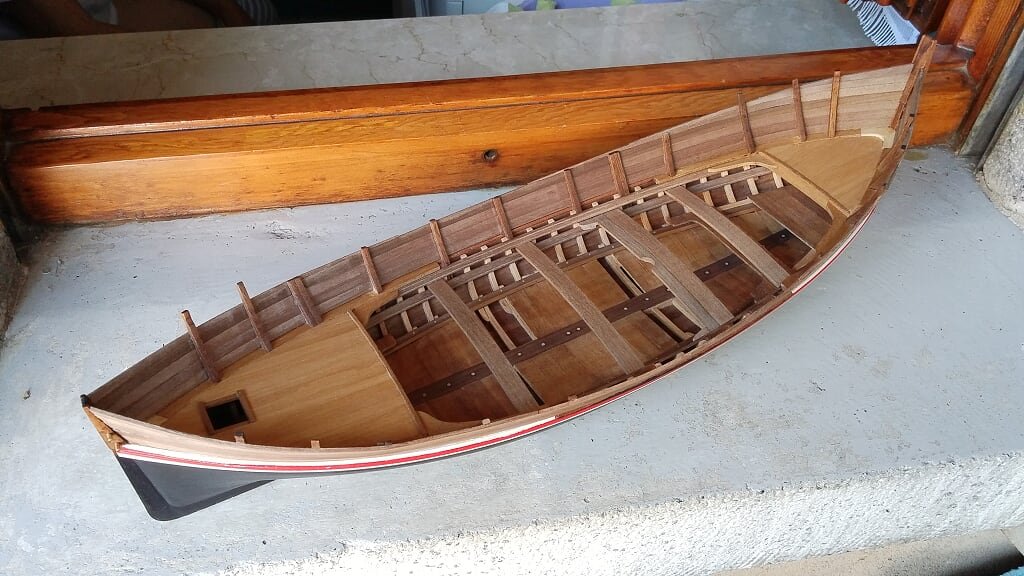
02 - 20170708_084920.jpg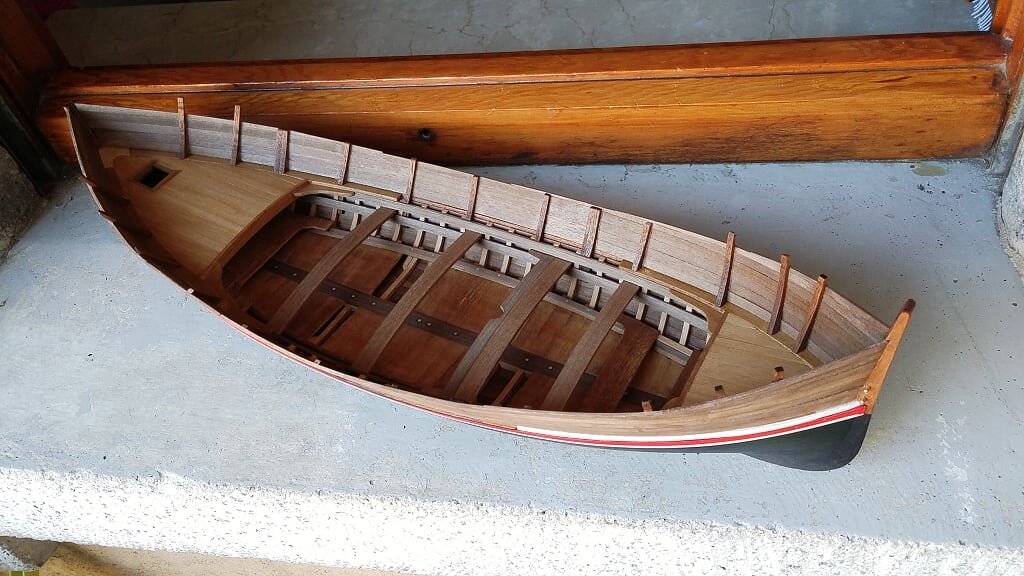
03 - 20170708_085047.jpg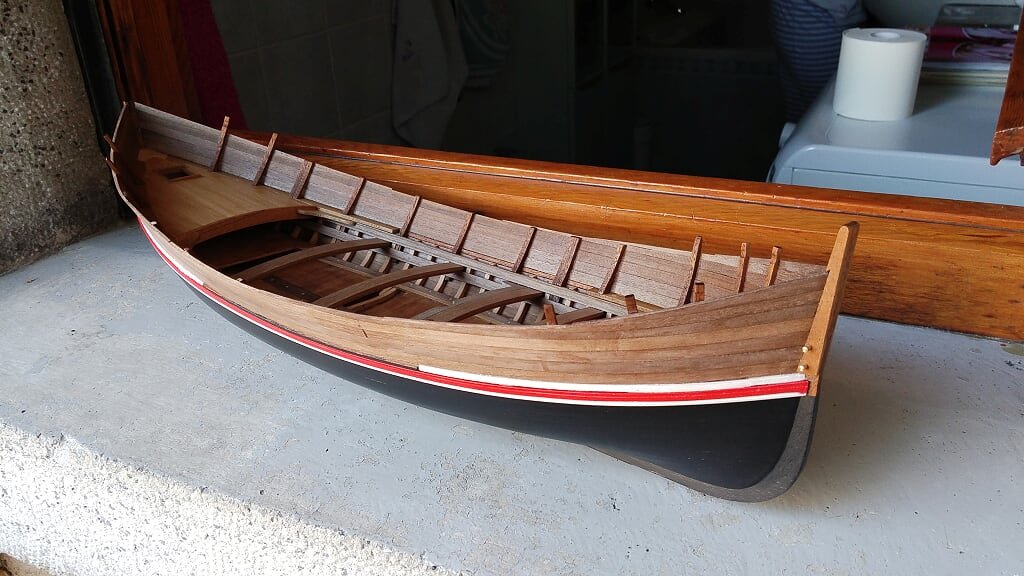
04 - 20170708_085103.jpg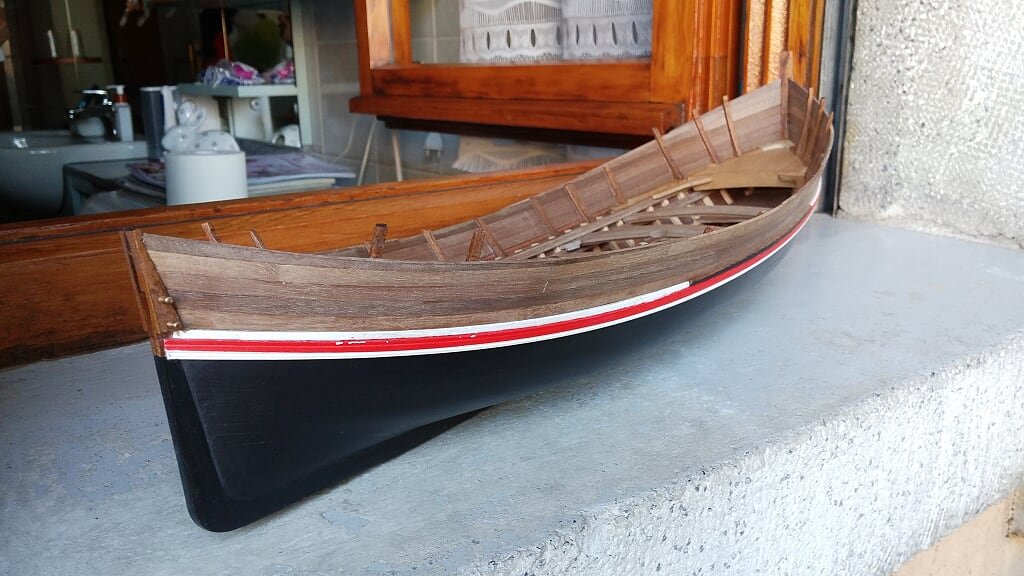
05 - 20170708_085141.jpg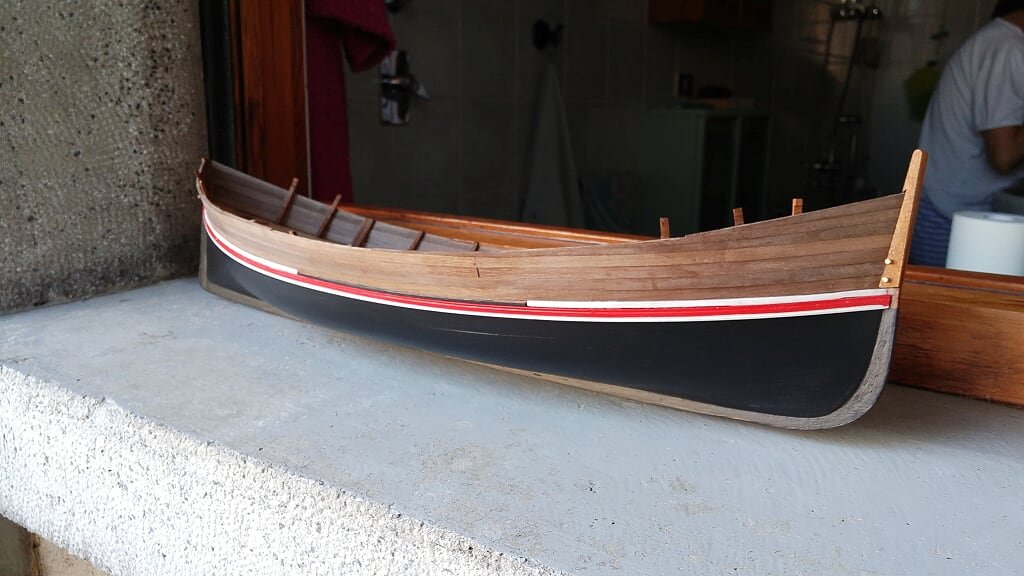
See you soon, Jack.