


jack.aubrey
-
Posts
1,268 -
Joined
-
Last visited
Content Type
Profiles
Forums
Gallery
Events
Posts posted by jack.aubrey
-
-
Look at this digital animation . . amazing and impressive
https://www.facebook.com/Vikingeskibsmuseet/videos/10154152436556487/
- mtaylor and Seventynet
-
 2
2
-
Monday, October 24, 2016
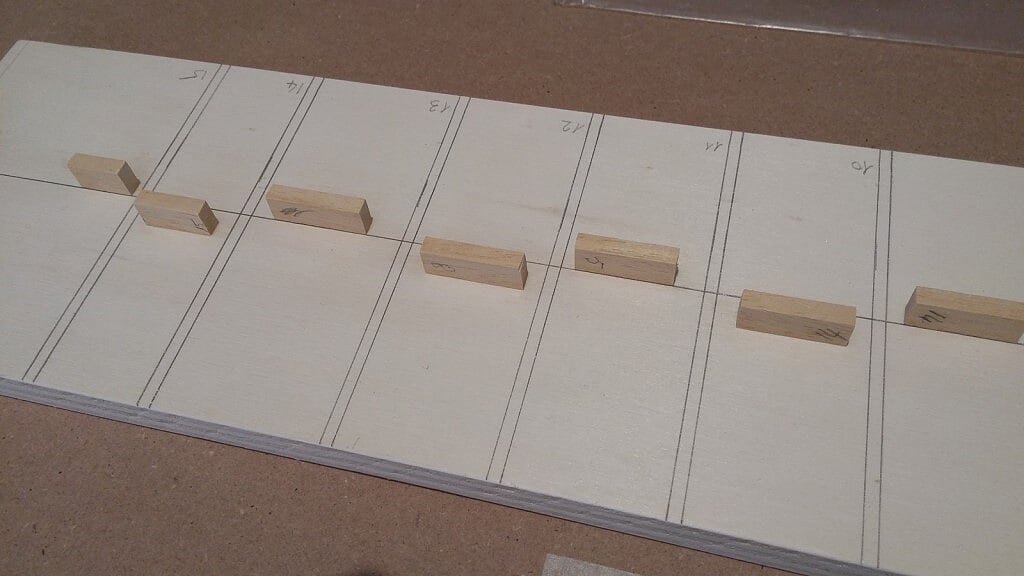
While I was assembling together the elements of the keel I started also to prepare a first building slip that, for this model, I believe is even of greater importance than in my previous experiences, perhaps excluding the Viking ship. In fact this model was thought by MarisStella as a mean for planking the hull with the bulkheads facing downwards.
This building slip is made with a plywood board of 2cm on which I wrote the position of the bulkheads and the central element that aligns them. To keep in the correct position this element I applied some wood guides positioned properly.
Here two images of the building slip, as it is now. I do not exclude some modifications and/or additions later.
 01 - 20161025_090412.jpg
 02 - 20161025_090418.jpg
Here below, three later images of the slip with some pre-cut laser elements of the kit already positioned. Thay make up the hull skeleton.
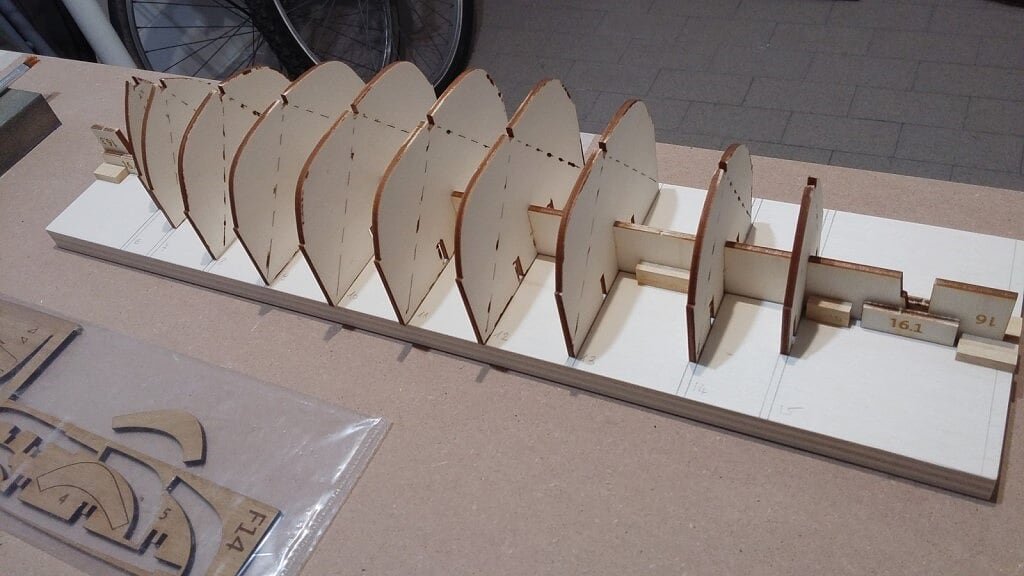 03 - 20161024_164728.jpg
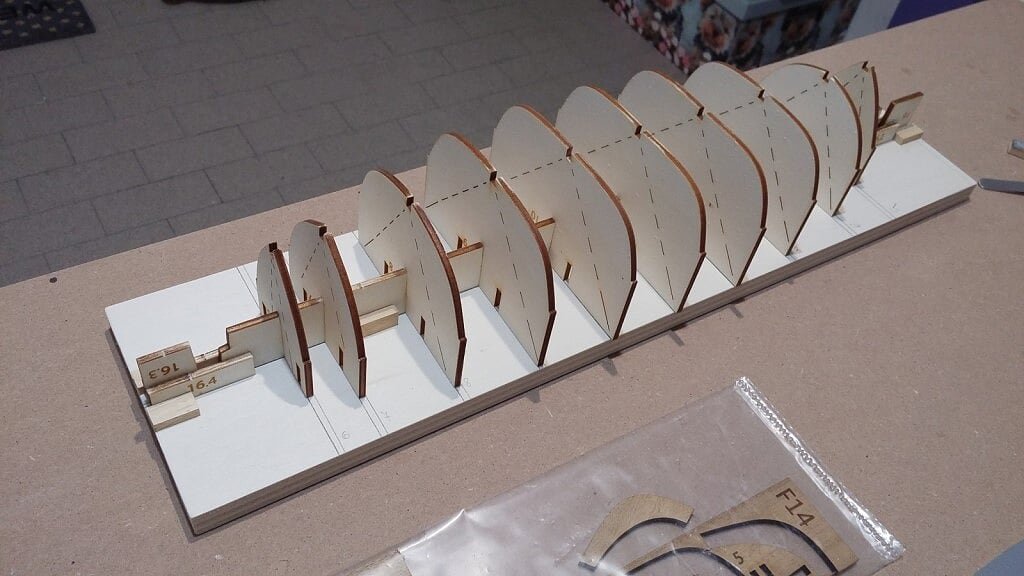 04 - 20161024_164720.jpg
 05 - 20161024_164658.jpg
That's all for today, to the next issue . . Jack.
- yvesvidal, hexnut, Robin Lous and 6 others
-
9
-
Monday October 24, 2016
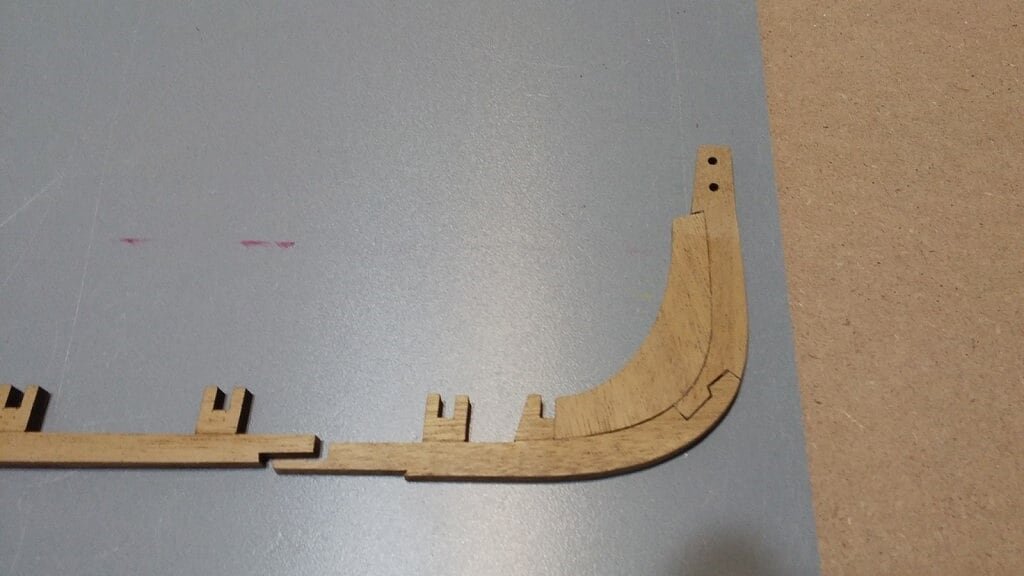
I'm starting with the most classic and intuitive boat component: the assembly of the various elements that together make up the keel.
There are here three main pieces, of which the first two are the most structured: the stern . .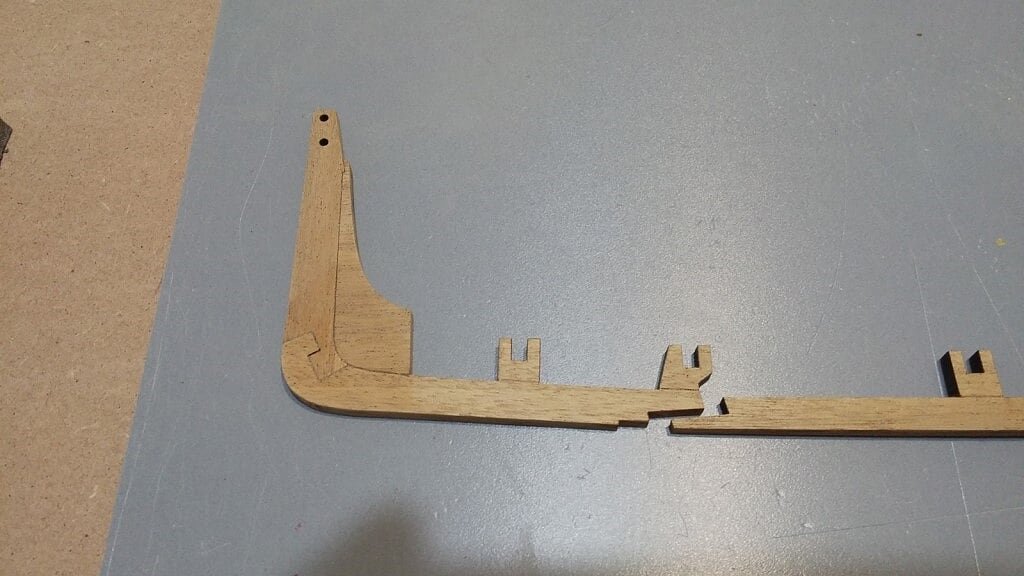 01 - 20161024_164802.jpg
the bow . .
 02 - 20161024_164808.jpg
and the central body that connects the two ends.
The material used for the keel is made from a walnut tablet 4mm thick.
The pieces fit together perfectly and so there were no significant adjustments to make.
The only activity necessary by now was the removal of the "burnt" of laser cutting. In fact, I noticed that this burned surface, if not previously removed, was making the PVA glue working badly.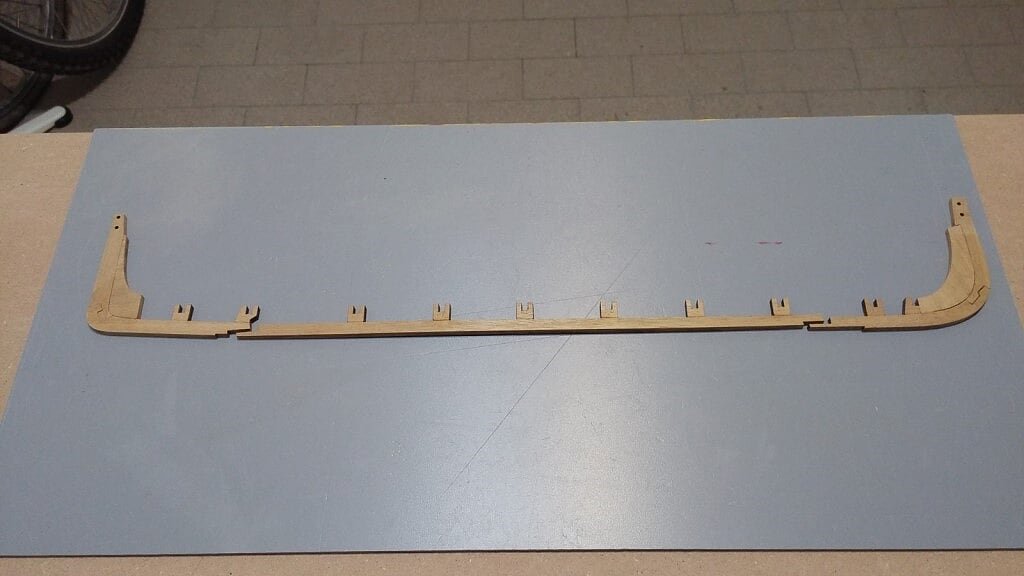 03 - 20161024_164756.jpg
In short, a few minutes homework . . Regards, Jack.
- zoly99sask, coxswain, yvesvidal and 5 others
-
8
-
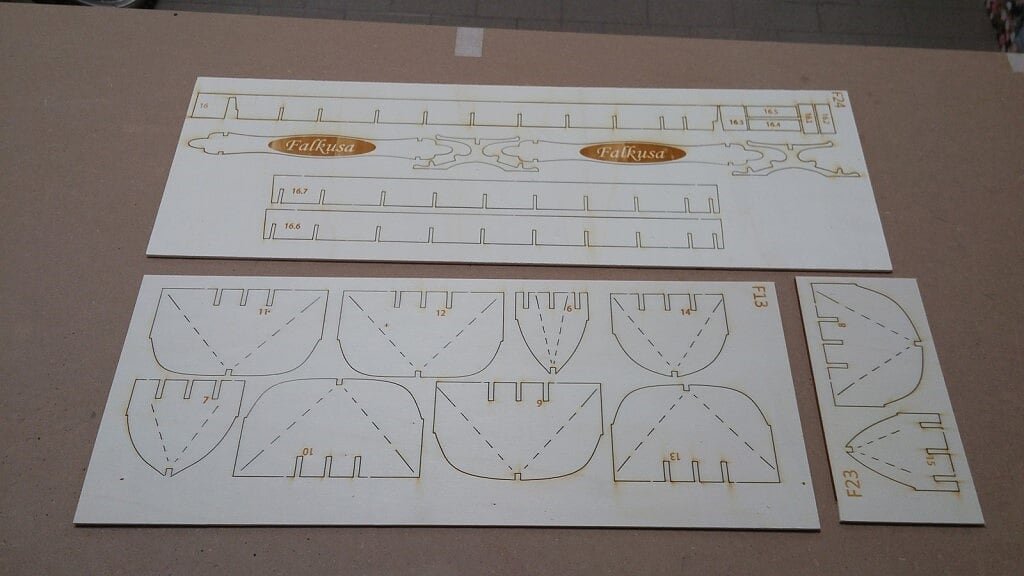
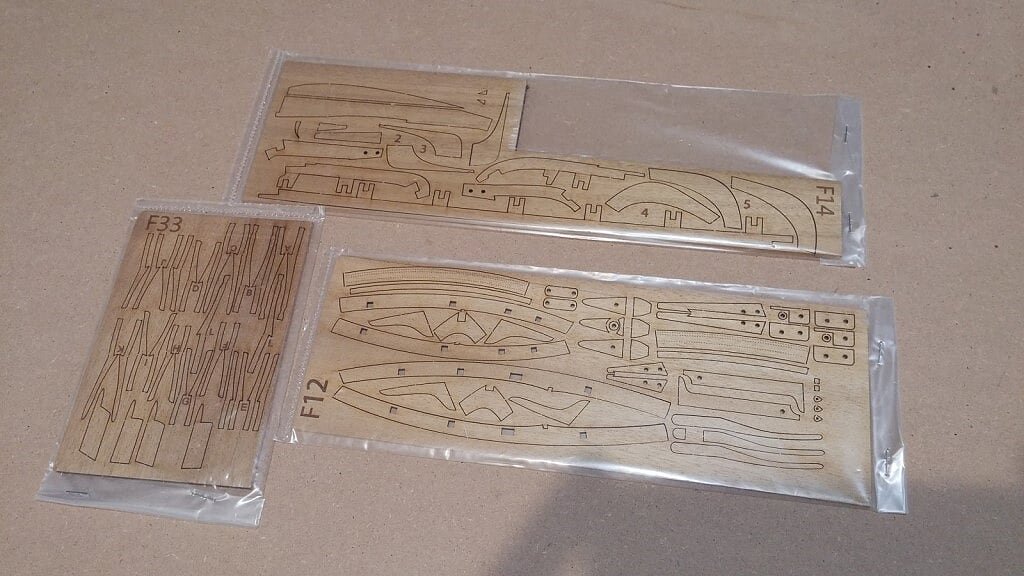
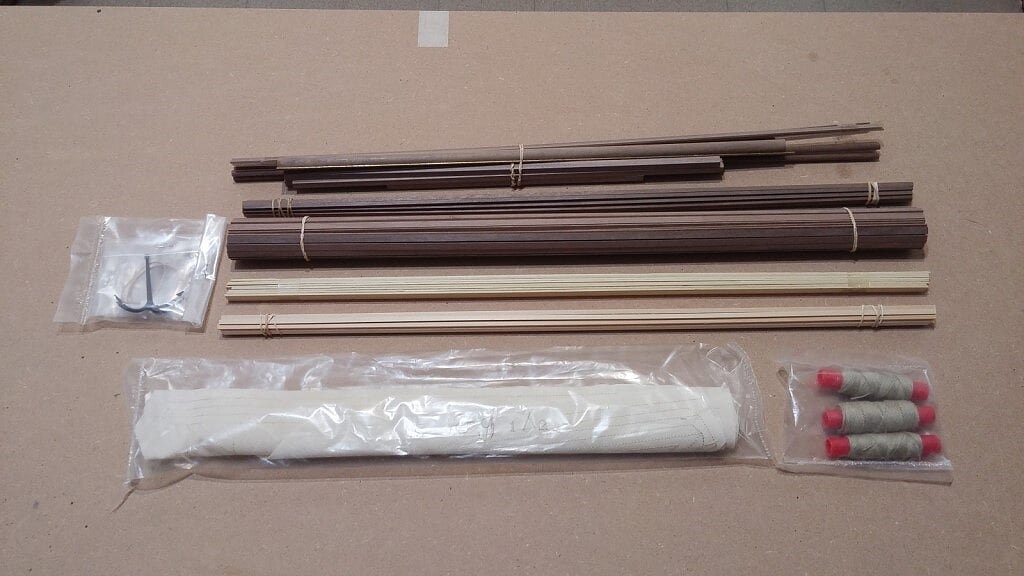
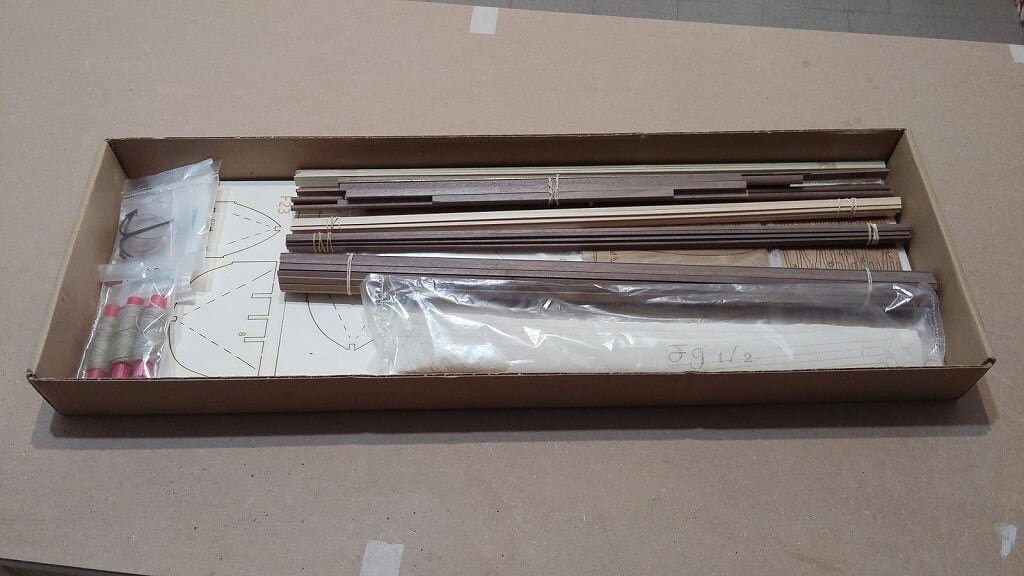
Saturday, October 22, 2016 - Inside the box #2
The laser pre-cut material in poplar plywood: it contains the elements to setup the mounting structure for the hull and the pedestal;
 01 - 20161021_164317.jpg
The pre-cut material in solid wood . . on top the elements constituting the keel and rudder;
 02 - 20161021_164247.jpg
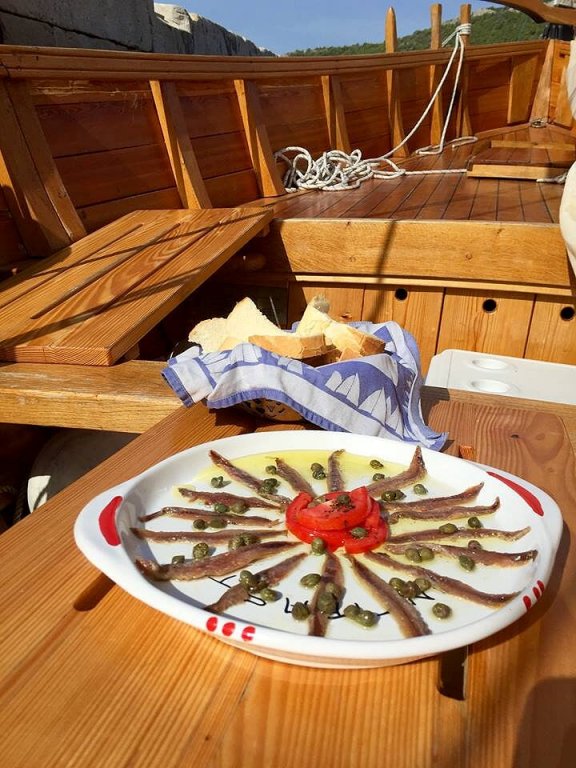
strips of wood, walnut and lime, for planking and other model's elements such as oars, masts, rods etc. The pre-sewn sails, ropes for rigging and the anchor . . only the dish with anchovies which I have proposed in the other thread about the Adriatic Sea boats is missing.
 03 - 20161021_164206.jpg
With this post I have finished the presentation of the kit, it is now time to get down to work. In the dead time I'm trying to understand the instructions, thing a little complicated, and I'm writing my English revision of the installation instructions. After I think I could make even the Italian version as a gift for the kit manufacturer, provided that MarisStella can find it useful . .
-
-
Let's continue with the series of images with a vengeance . . at least let's admire the sights and the landscapes.In fact I'm starting to make a little thought for the next summer holidays.
Goodbye to the next issue, Jack.
images/12715593_1314013735290879_2037135751945228254_n_zpsgnu1euug.jpg
images/12042903_1215228331836087_295011510375137396_n_zpsv3hlne6b.jpg
images/11012378_1215228275169426_6462948114002841846_o_zpsgjwhtiur.jpg
images/10463693_927335837292006_6394385187921804234_o_zps2zvgjbcw.jpg
images/10317732_1215228268502760_6401978997122026300_o_zpszc7pc6ry.jpg
-
Saturday, October 22, 2016 - Inside the box #1
Let's start by opening the box and analyze its contents. In the background of this first image the printed material, ie the building plans, the assembly instructions, and other; in the foreground the timber and accessories . .
 01 20161021_163757.jpg
Below: on the right the booklet of the building instructions, in English and Croatian language, with a good number of photographs in black and white; on the left side, some color images of the finished model and a small catalog of the models produced by MARISTELLA.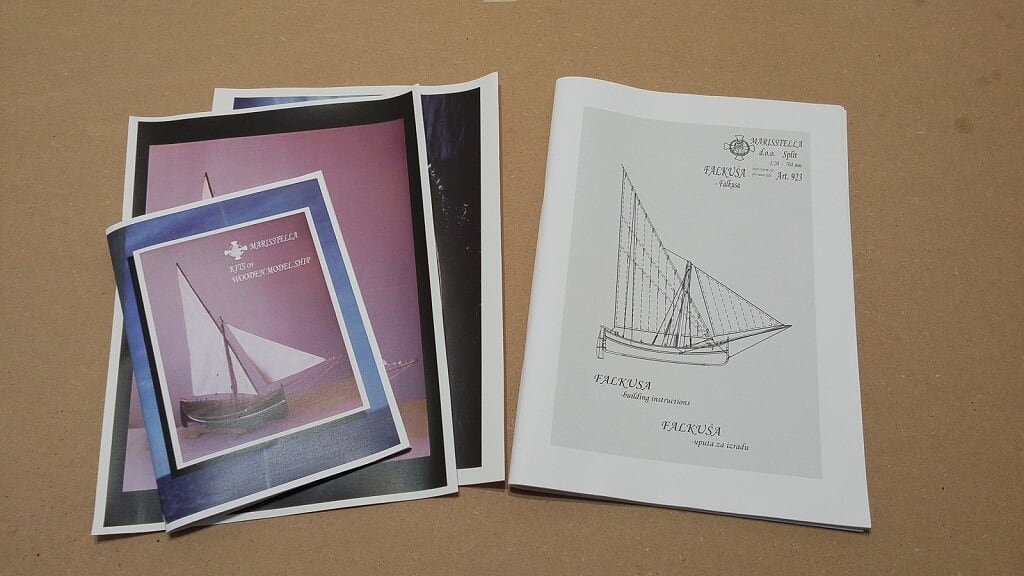 02 - 20161021_163850.jpg
The part relating to the timber and accessories: plywood pre-cut laser elements, solid wood elements always laser cut, strips for planking and other details, as the pre-sewn sails, rope reels of various diameters and accessories usually on board this boat.
 03 - 20161021_164119.jpg
- cobra1951, zoly99sask, mtaylor and 7 others
-
10
-
Watch also this video . .
-
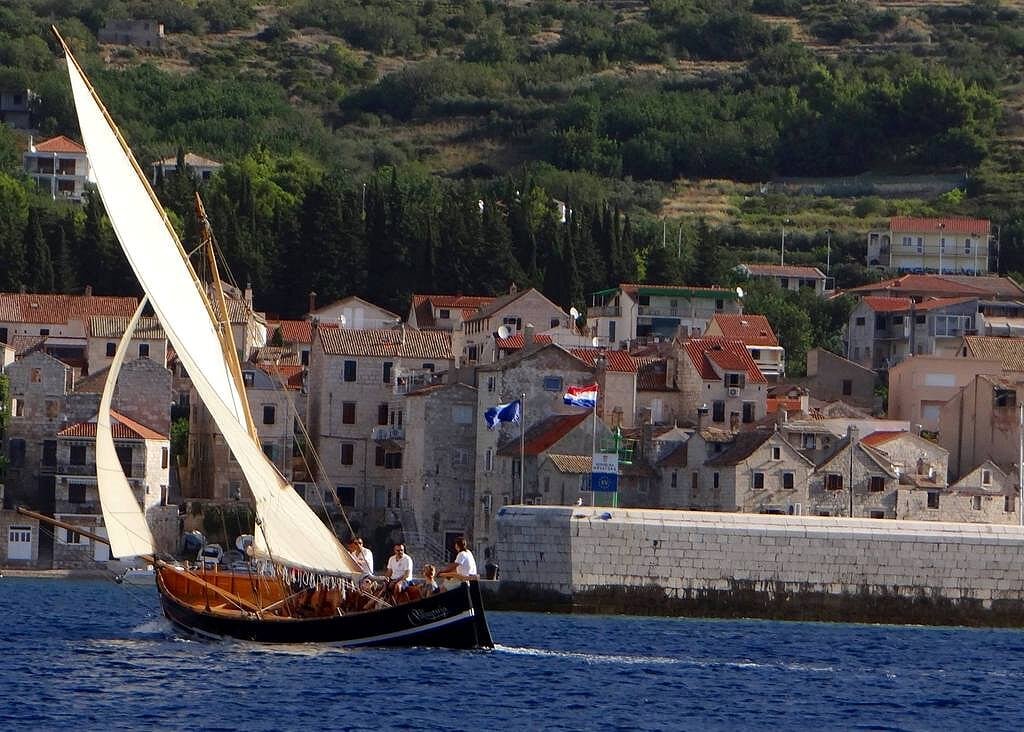
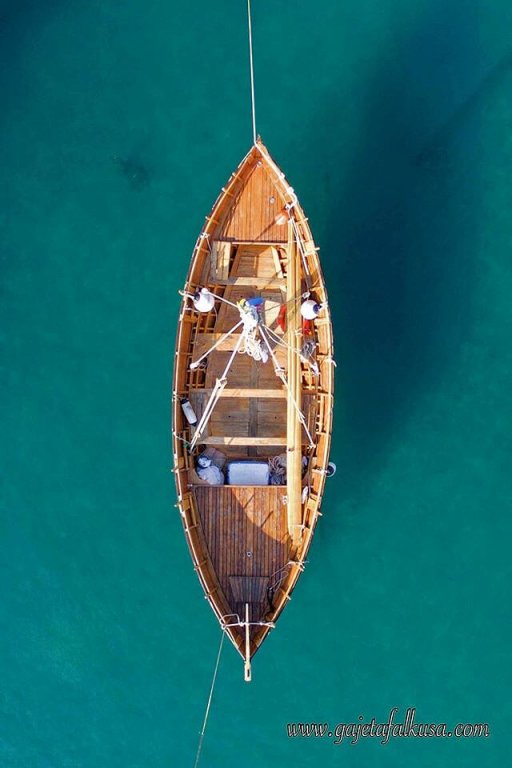
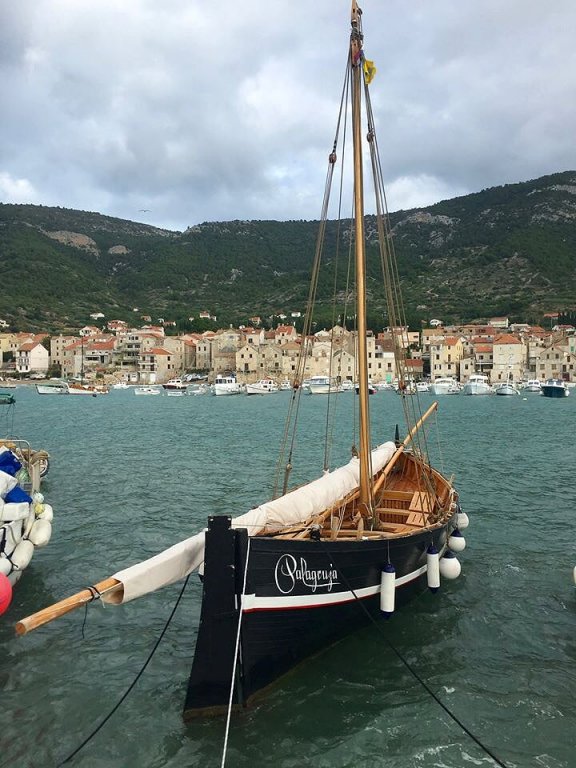
Further images of another modern replica . . the Palagruza
images/13323574_1038120669629402_1927967706908715442_o_zpsogkn3bxp.jpg
images/14310581_1536718136353770_168924993715352107_o_zpscwiopnh0.jpg
images/13245380_1414127791946139_4658153669254213566_n_zpsehgsb3s2.jpg
images/11229305_1140508929308028_5158174534400611462_o_zpseguowijc.jpg
images/11218908_1253918054633781_3524135998334951931_n_zpsrc8fifi5.jpg
-
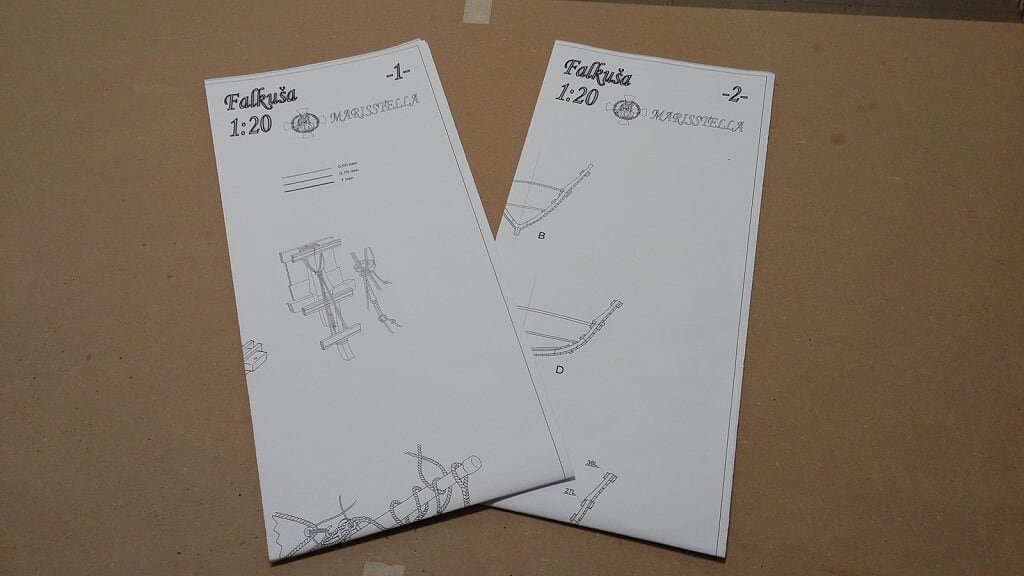
Saturday, October 22, 2016 - The plans
Plans are grouped into two (quite large) sheets, scale 1:1
 01 - 20161021_163929.jpg
The first sheet, whole image . .
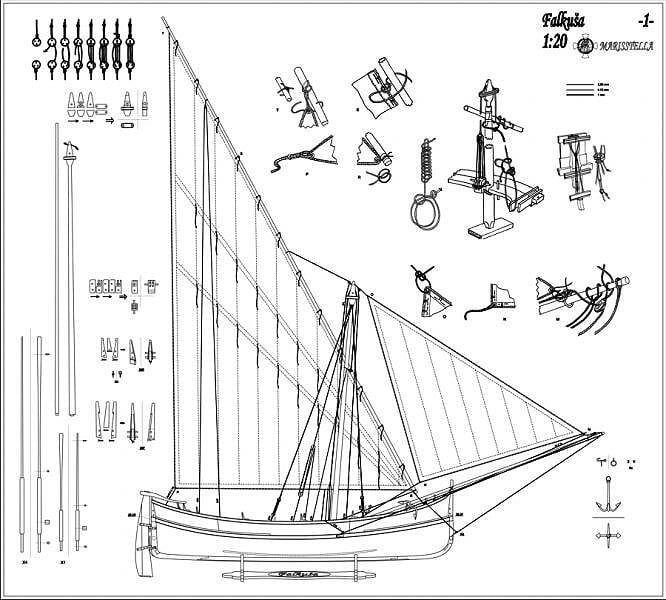 02 - Falkusa1.jpg
. . and here the second sheet, more useful than the first one to see and plan how to preceed in building the hull
 03 - Falkusa2.jpg
[/img]
Some detailed images of the plans, they are clear and well done and every component is correctly numbered.
A image from sheet #1 . .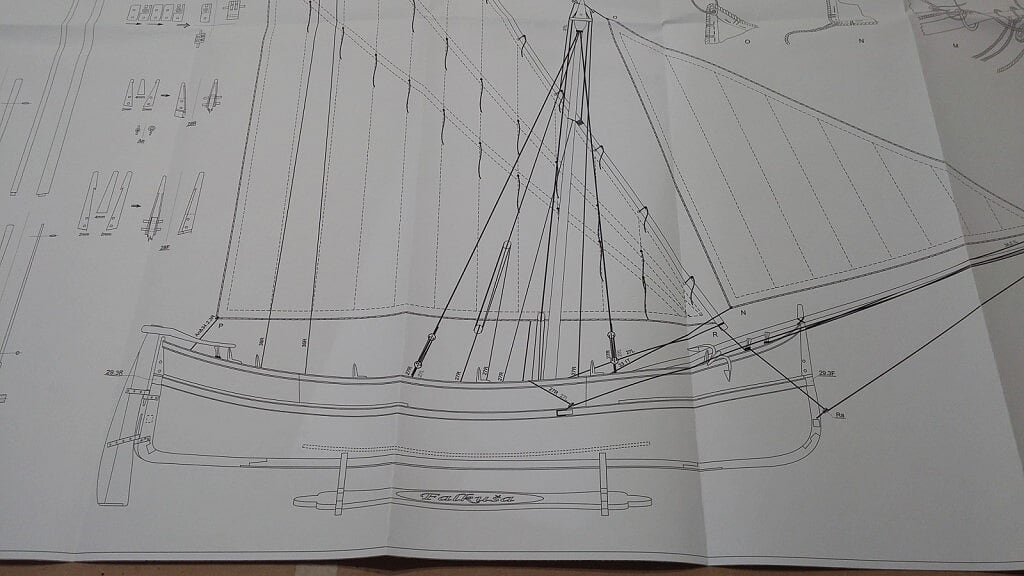 04 - 20161021_163953.jpg
And a couple of images from sheet #2 . .
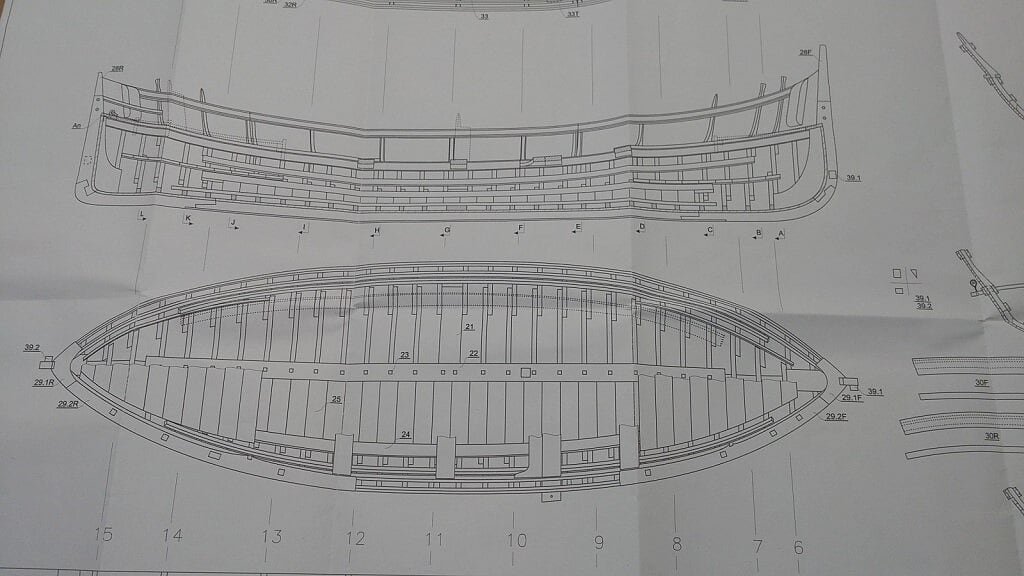 05 - 20161021_164028.jpg
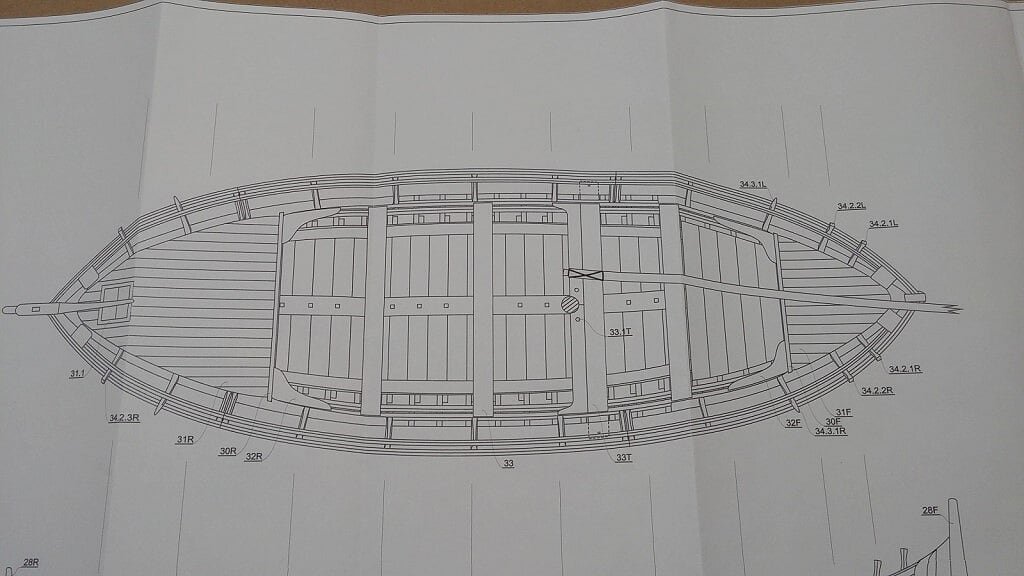 06 - 20161021_164052
A final clarification: the construction of this model will take place while I'm staying at my daughter's house in Calci (Pisa). As I explained when I was working on the Viking ship, considering the limited equipment I have in Tuscany, I opted to purchase a kit rather than planning a scratch build; this in hope of having less need of the materials and the tools I keep in my workshop in Cinisello (Milan). On the other side, when I'm living in Milan, I will be mainly working on the Brick HMS Guadelupe.
Cheers, Jack.
- Robin Lous, Mirabell61, zoly99sask and 4 others
-
7
-
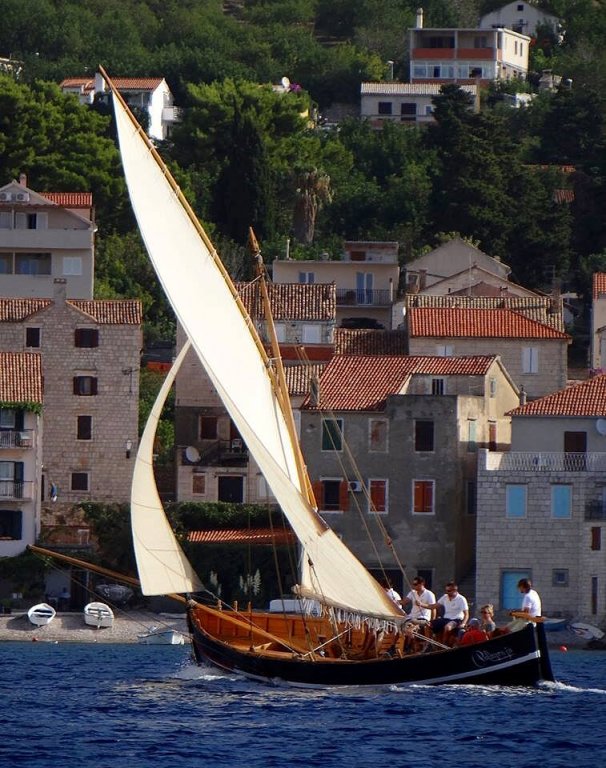
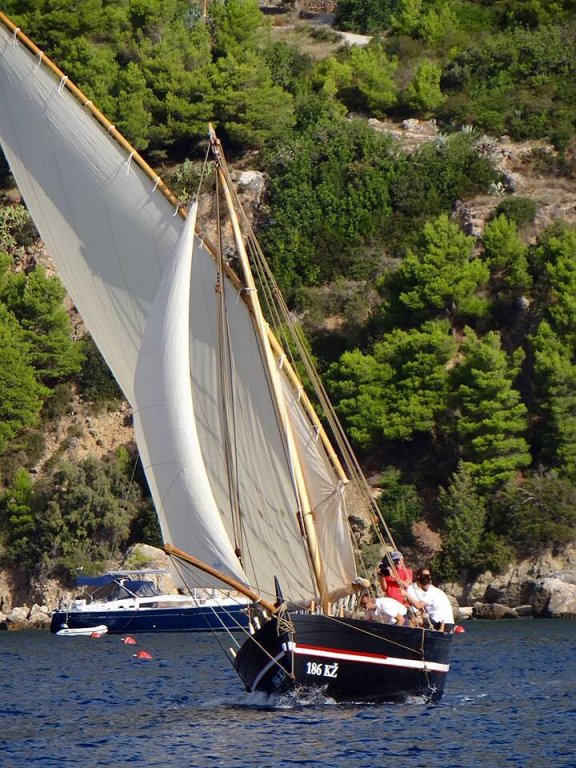
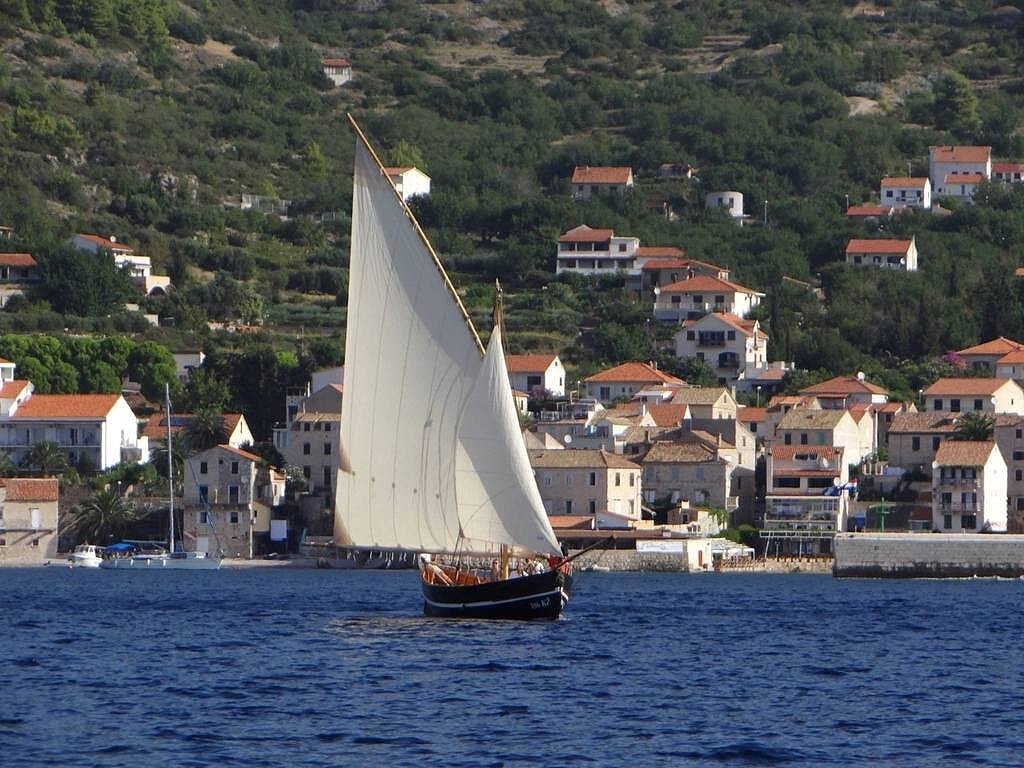
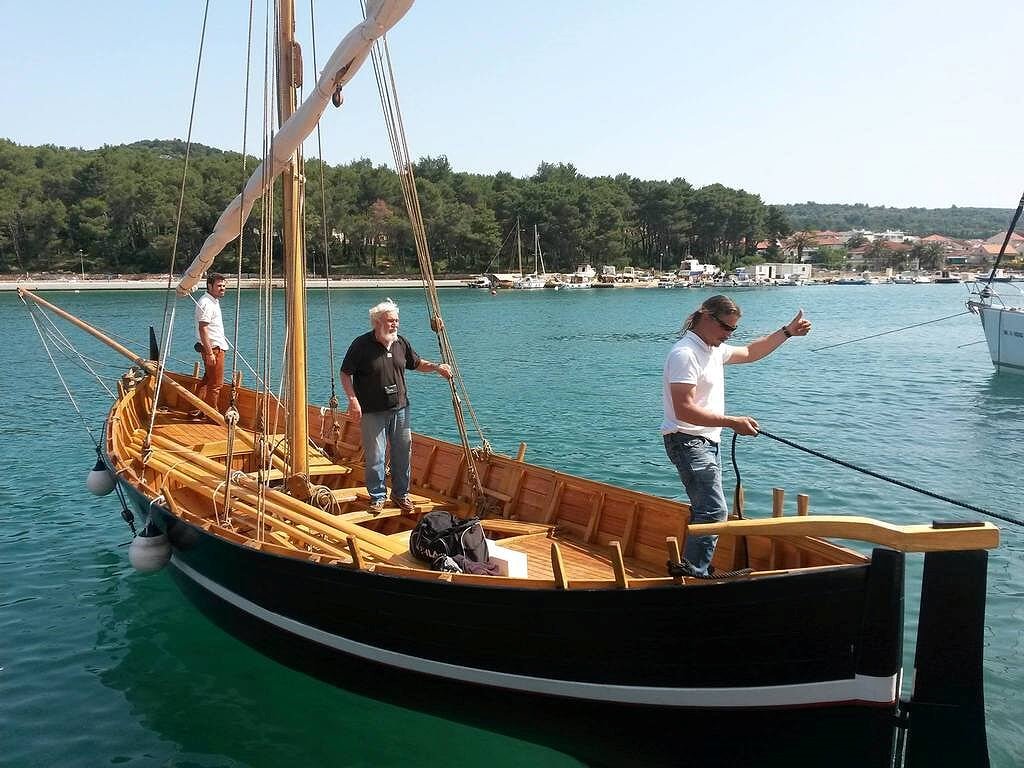
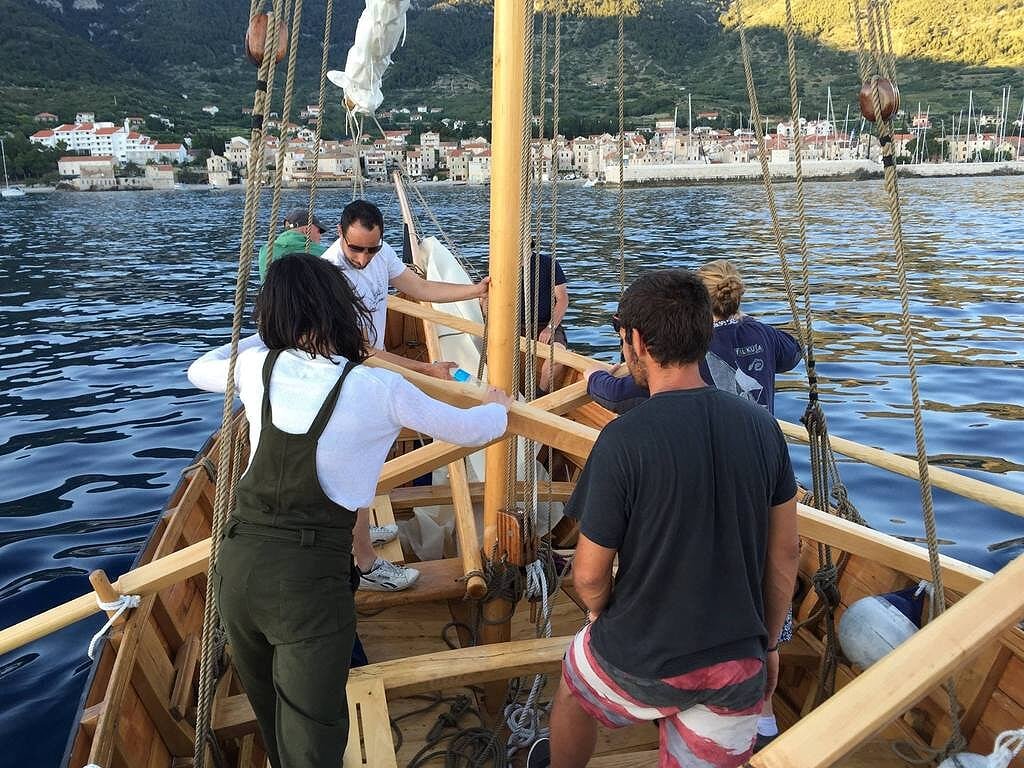
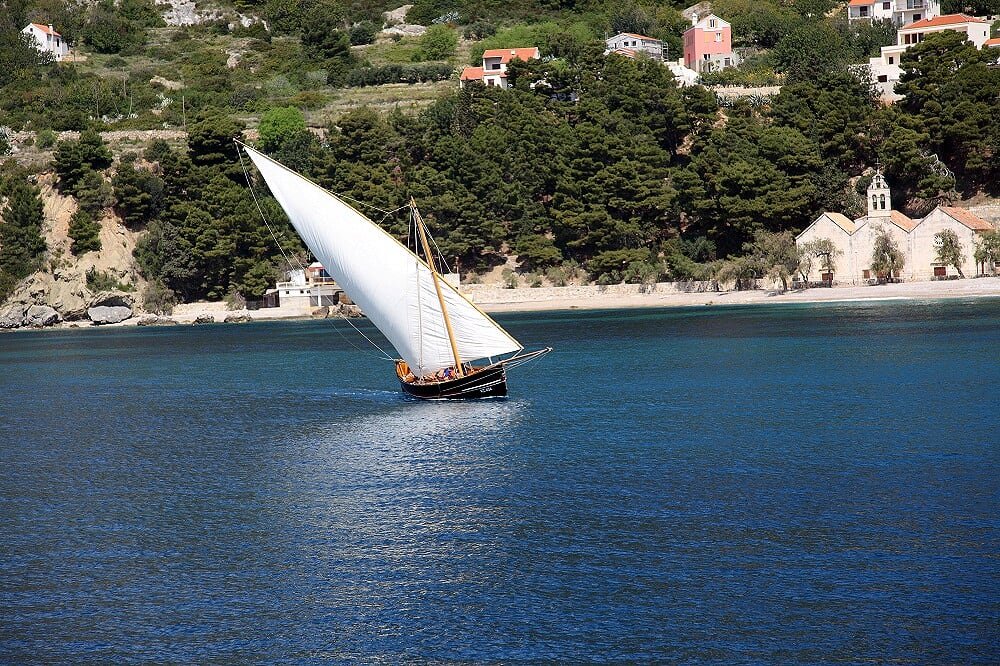
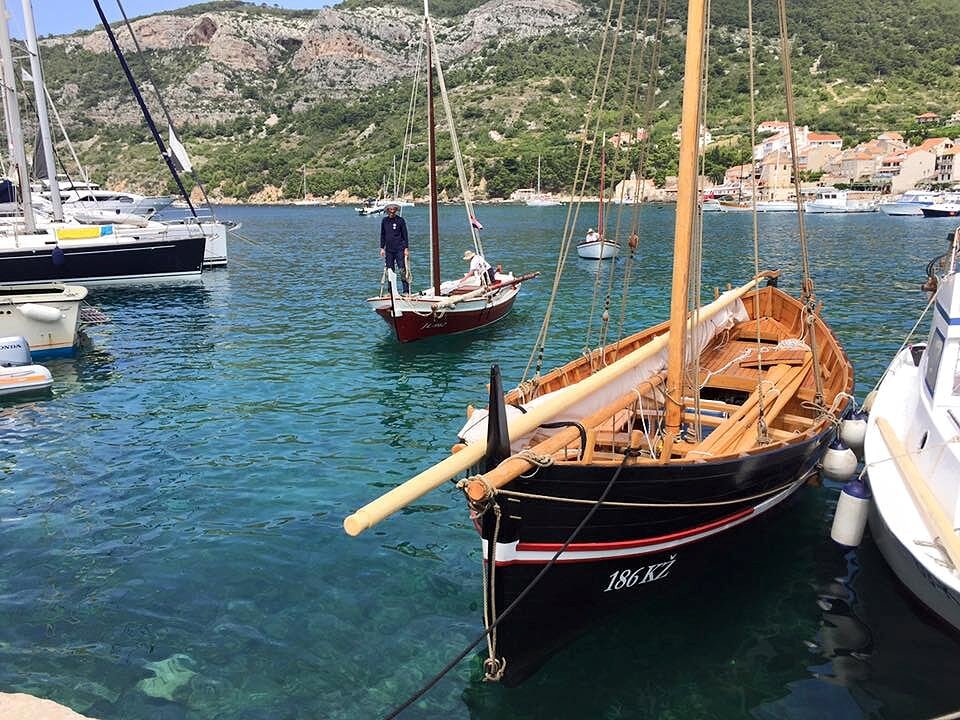
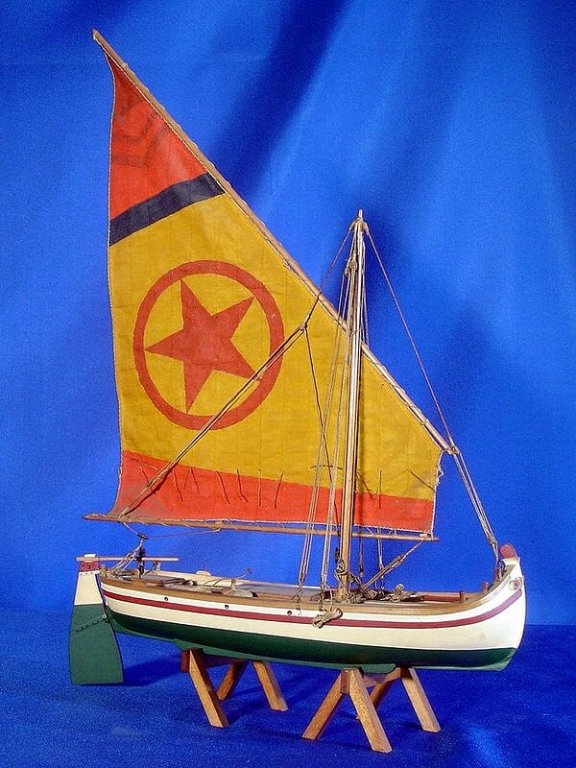
The "Comizo Lisbona", the first modern replica of a original "Gajeta Falkusa" . .
- grsjax, Landlubber Mike, mtaylor and 4 others
-
7
-
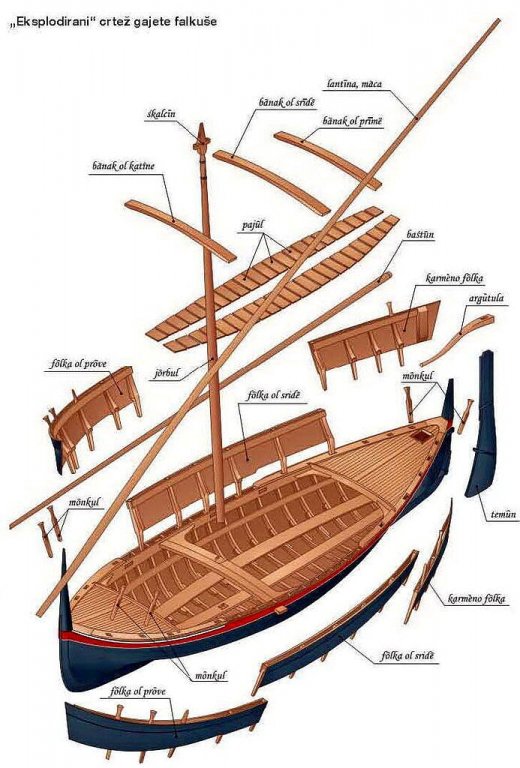
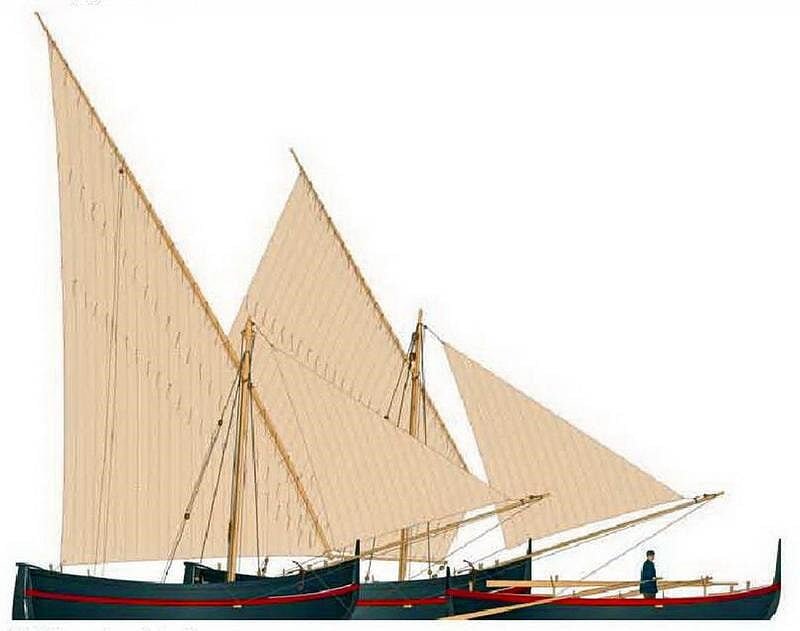
Saturday, October 22, 2016 - IntroductionDuring the end of last week I issued on the internet an order for a kit of a new ship model. Yesterday I regularly received the package from the manufacturer and now I am going to open a new shipyard that I believe will keep me happily busy for the next months. Knowing myself I think I'll need, excluding unforeseen situations, a whole year to finish it, but this is just a raw idea.My thinking is that the model I chose was greatly illustrated with a plethora of images in the topic "Italian boats (and not) in the Adriatic Sea". Goto here to review it http://modelshipworld.com/index.php/topic/14414-italian-boats-of-the-adriatic-sea/ . I'm referring to the "Gaeta Falcata" or "Gajeta Falkusa". As widely explained in the topic mentioned above it is a boat originating from island of Vis and used in the past by fishermen of Comiso, a village of that island.The kit is produced by a Croatian company, MARISSTELLA from Split, established in 2008. I discovered this company on ModelShipWorld forum where it has, in the home page, a ad banner. MARISSTELLA has a very interesting catalog, especially focused on boats of the Adriatic Sea. The first impression is positive: the material inside contained is quite valid, the timber is of good quality and the two paper sheets of building plans are very well made. The wood pieces are laser pre-cut, using both plywood and solid wood.For now, in my opinion, the major weakness consists in the building instructions: they are written in Croatian language and English.Well, you may say, you know English quite well and so, where is the problem? The problem is that that English is a lot to be desired and definitely looks like a translation made with Google Translator, most probably a version of a few years ago, and it is therefore hard to understand the concepts to be followed for the building. Luckily there are plenty of photographs of the various build stages, which help me a lot, but, although abundant for some steps, they are totally missing for others and I find several problems in understanding the whole process in a consistent and methodic way.For now I'm spending a bit of time to read them, interpret them, understand them, and given that I'm studying them, rewrite them in a better English with the objective to propose this translation as a gift to the kit manufacturer when all the steps will be checked (this just to avoid me too to write wrong things).Finally, again in terms of weaknesses, I would expect that at least all the frames of this model, in the classical three-pieces structure, were already laser pre-cut. Instead the kit provides many walnut and lime 3x3mm strips that must be soaked and bent before being applied inside the hull. This operation, anyway possible, stretches and increases the overall processing time. Being it a kit, it seems a pretty serious lack. I'll experience in practice how much more time it will need.We will analyze more in detail later all the steps that will lead to the building of the hull inside and outside. Now it isn't the right moment.Here, instead, I would like to propose some of the kit images and the material contained inside.First, a bit of data:
1:20 scale
total length (with boom) 70.4 cm
packaging dimensions 65 x 21.5 cm
Now we can start looking at our kit box before opening it: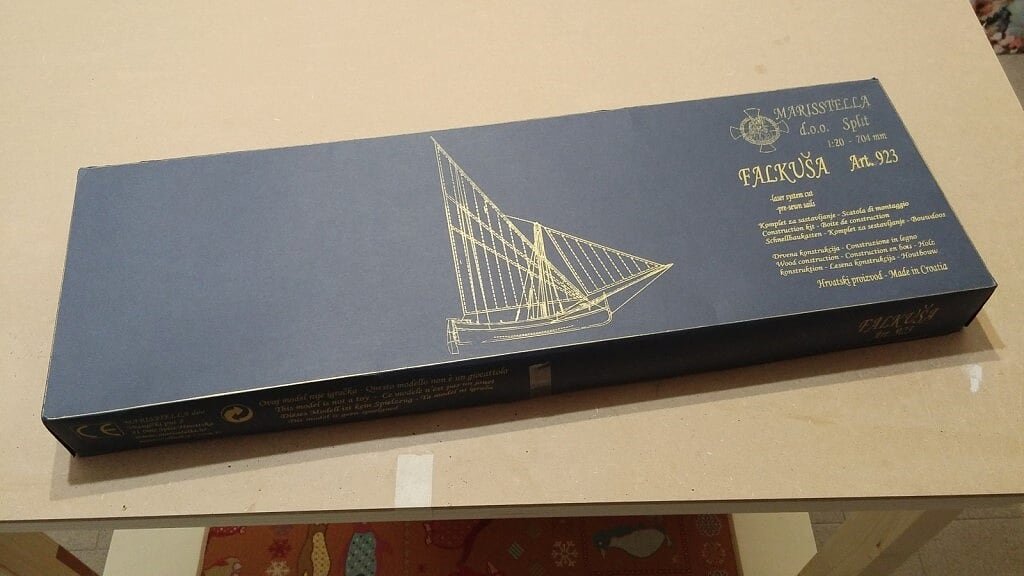
-
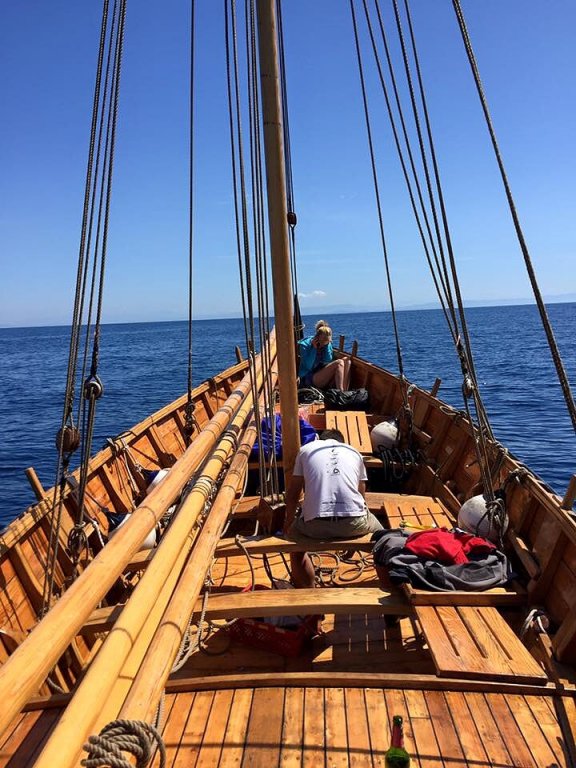
Additional photos . . see also this wonderful sea . .
images/IMG_0025_1-2_zpsp3i0zkey.jpg
images/GAJETA-FALKUSA-FRONT-3_zps8zfdap6t.jpg
- Landlubber Mike, druxey, Robin Lous and 3 others
-
6
-
Continuation with shipyard images . .
24 images/10259214_887783297913927_7019860029147285928_o_zpst7jyyyju.jpg

26 images/1654300_826070370751887_366702672_n_zpseacotl9f.jpg
37 images/20131106-135910_zpscdx5d2j1.jpg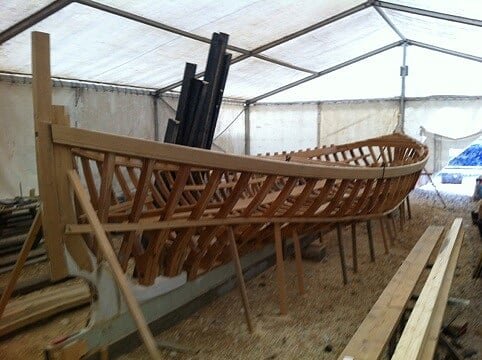
38 images/20131106-135804_zpsovvhldwp.jpg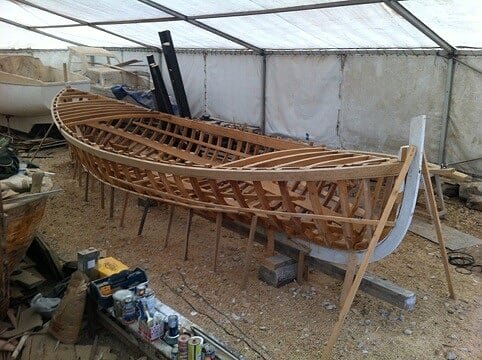
39 images/rebra_zps6ldz7yxj.jpg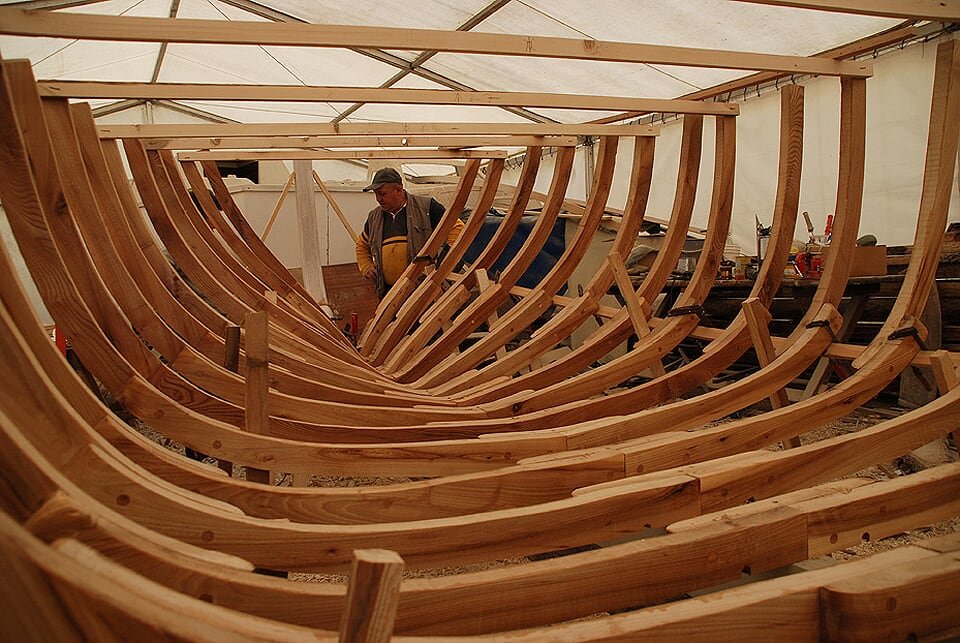
- grsjax, Robin Lous, druxey and 3 others
-
6
-
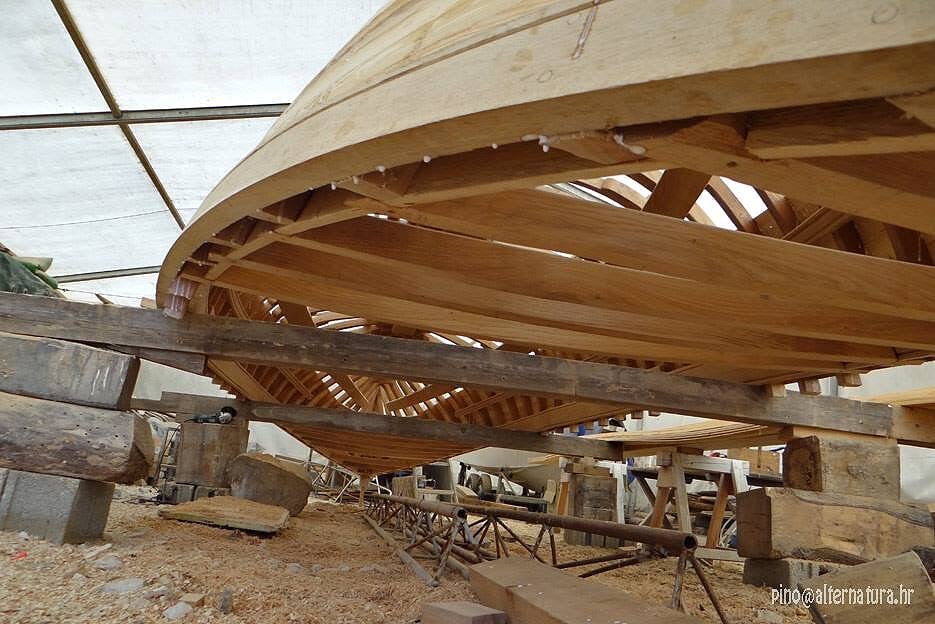
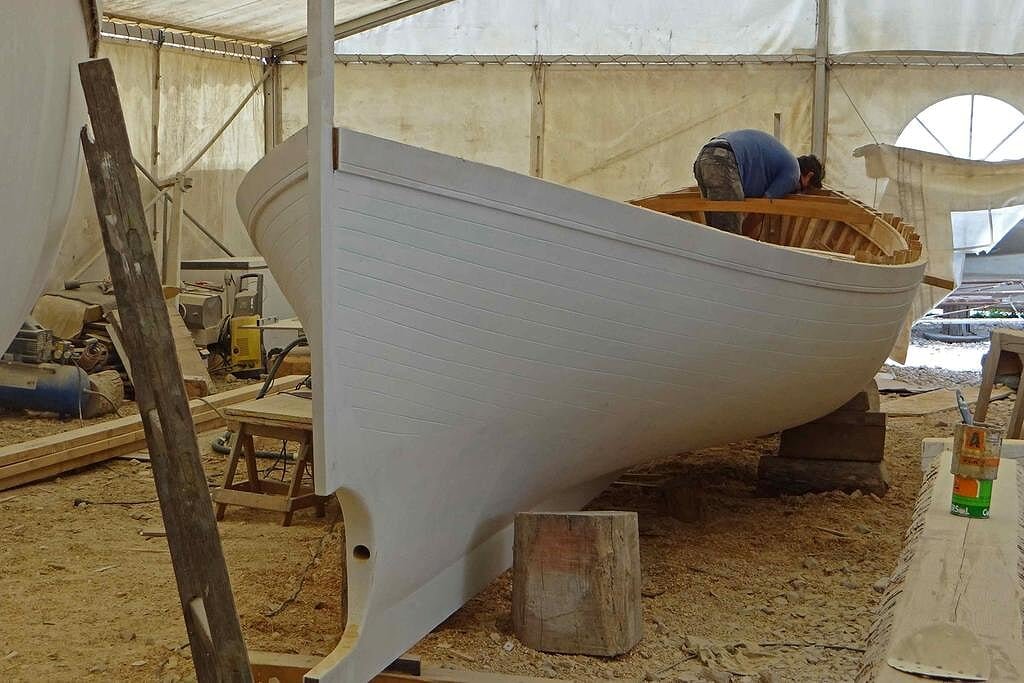
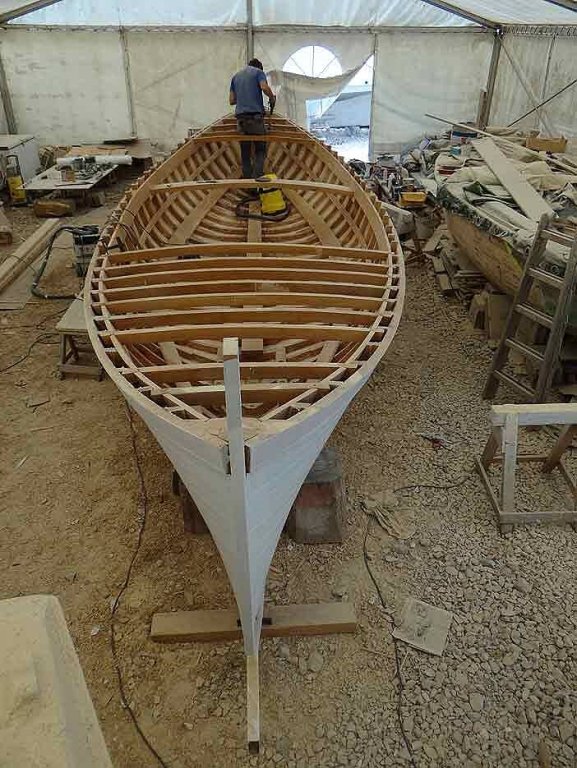
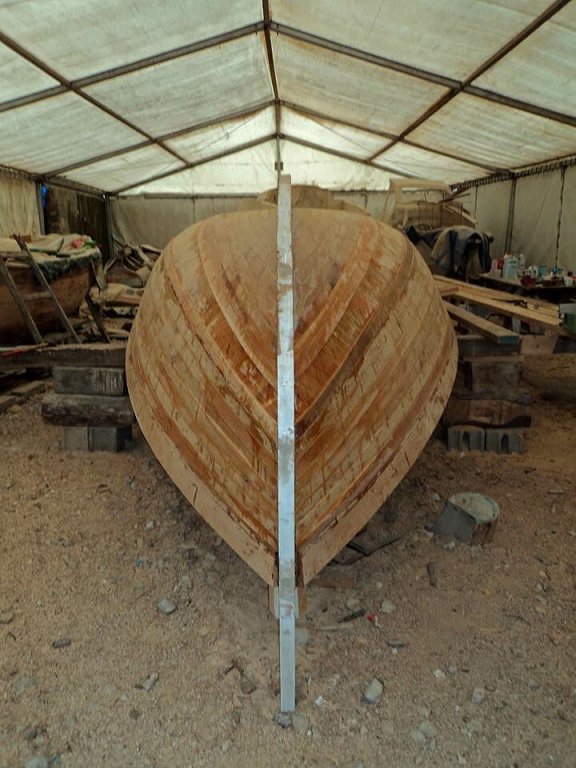
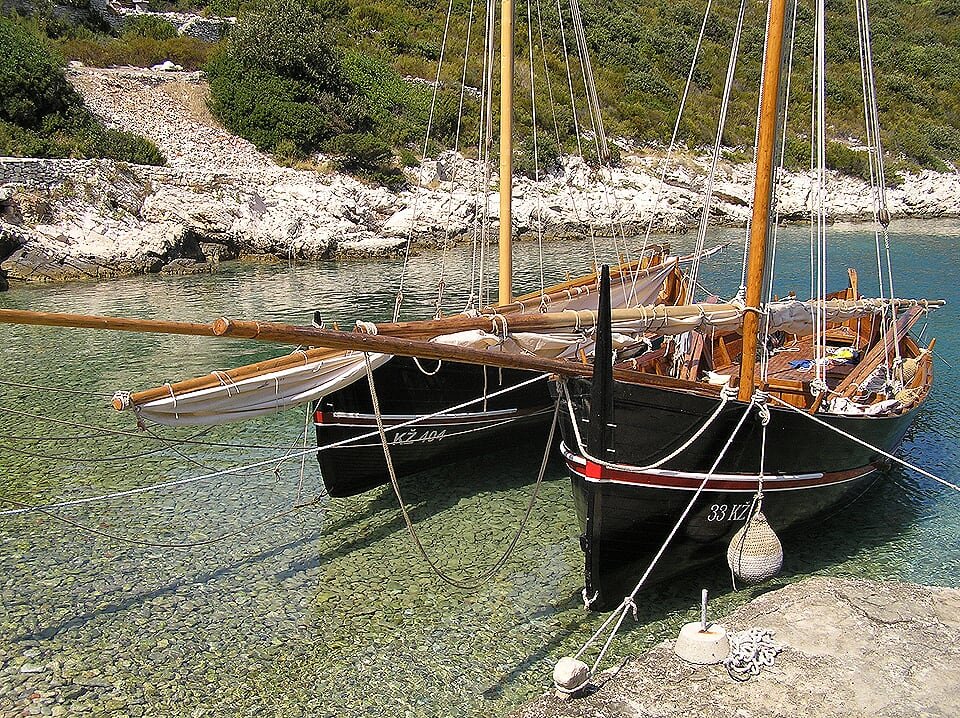
Further images of a boat of this kind under construction . . . the only concession to modern times seems to be the space left for the screw.
03 images/image_zpsdpgpnyrl.jpg
08 images/DSC01514a_zpsisnqpekf.jpg
15 images/12027496_1215228315169422_275117200362761938_n_zpsxncoclzw.jpg
18 images/10380473_887783317913925_912892330157762390_o_zpsun7ulcwp.jpg
21 images/10300435_887783247913932_8779896280065296570_n_zpssgccty7t.jpg
23 images/10300230_880321261993464_2183553797794728141_n_zps2vqfftgo.jpg
-
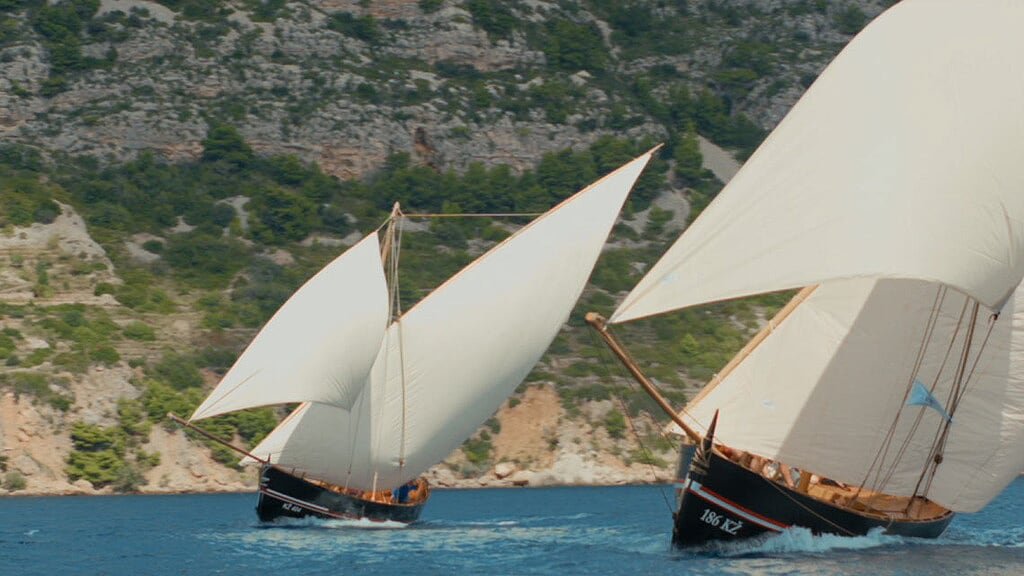
Here are other images of this interesting boat . .
images/Falkusa-2_zpscpvziyga.jpg
images/10838111_1125193267506261_3848311719629909237_o_zpsfahchti4.jpg
images/Falkusa-1_zpswokpwsjz.jpg
images/13495041_1436404193051832_207663964353685171_n_zpswrqawqxs.jpg
images/12006445_542691249215097_4094479188976777793_o_zpsvrc8sfmg.jpg
-
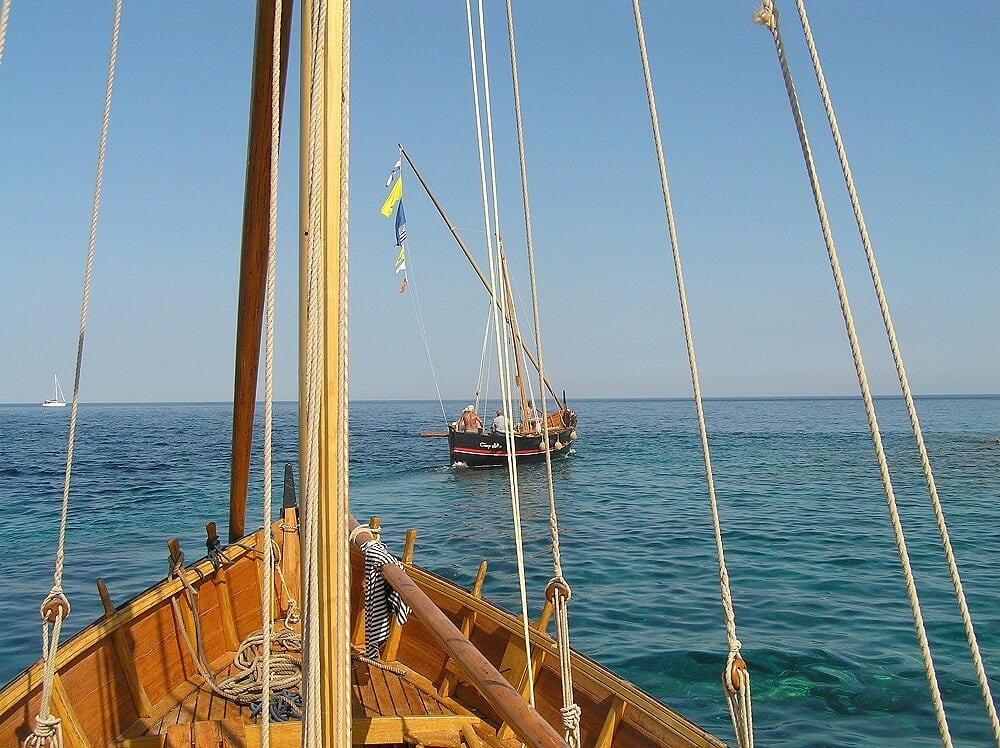
Some additional closest details about this boat . . but take a special look at this wonderful sea . .
images/P9020171_zpsnaozx78q.jpg
images/P9020154-2_zpsjirw7xwy.jpg

images/P9020153-2_zpsrkwefhia.jpg
- Seventynet, iosto, Mirabell61 and 4 others
-
7
-
-
-
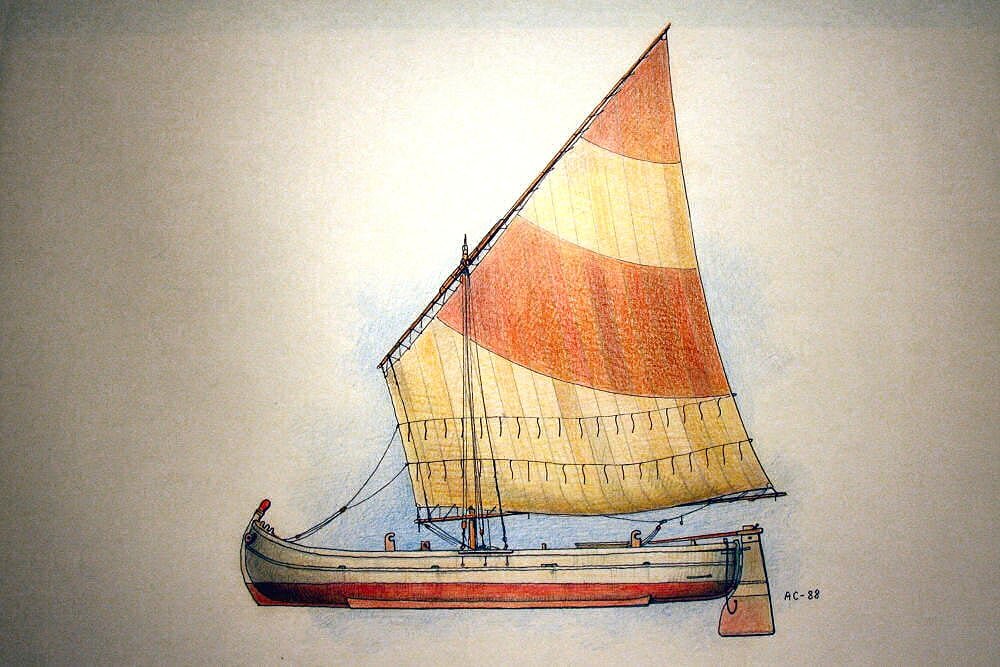
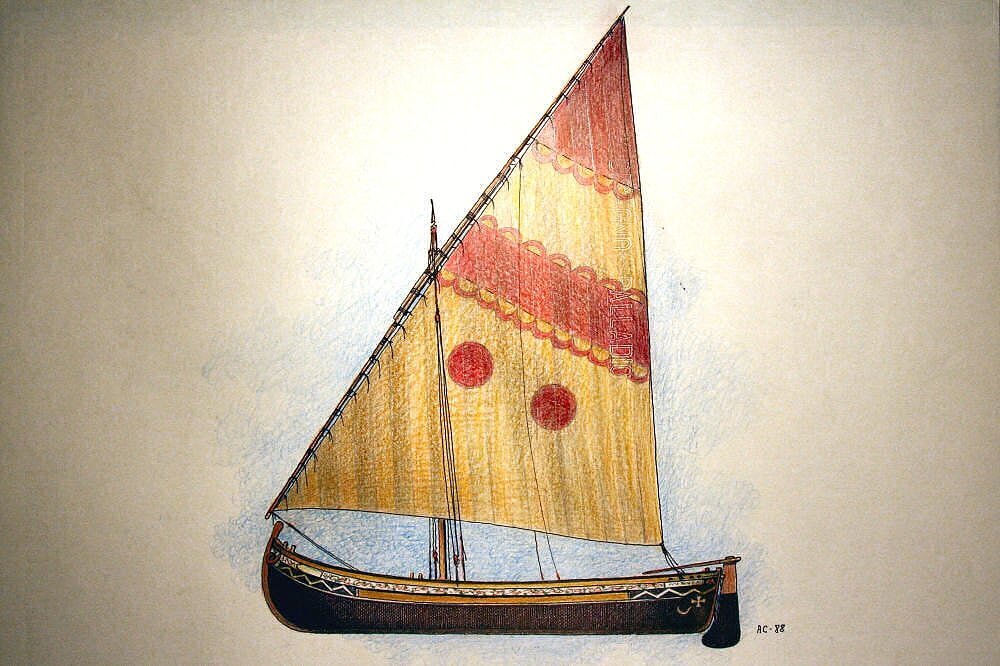
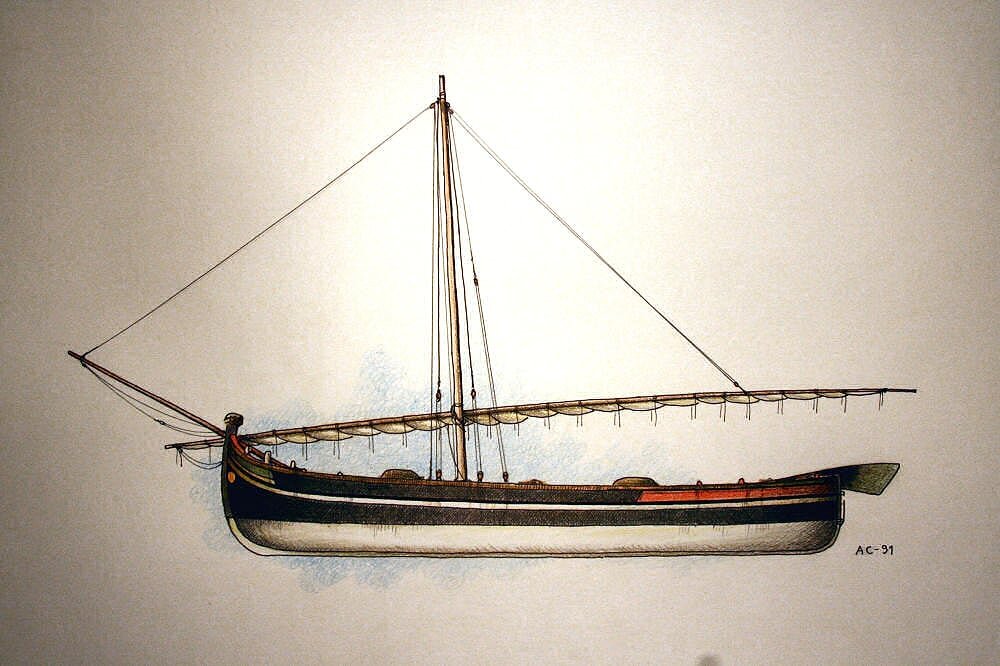
Italian Boats of the Adriatic SeaThe Gaeta Falcata (Gajeta Falkusa)
Here follows a collection of pictures of this particular type of Gaeta, native of the island of Lissa, Vis in Croatian.
I am gathering some information material with in mind the idea of possibly start building a model of this vessel.
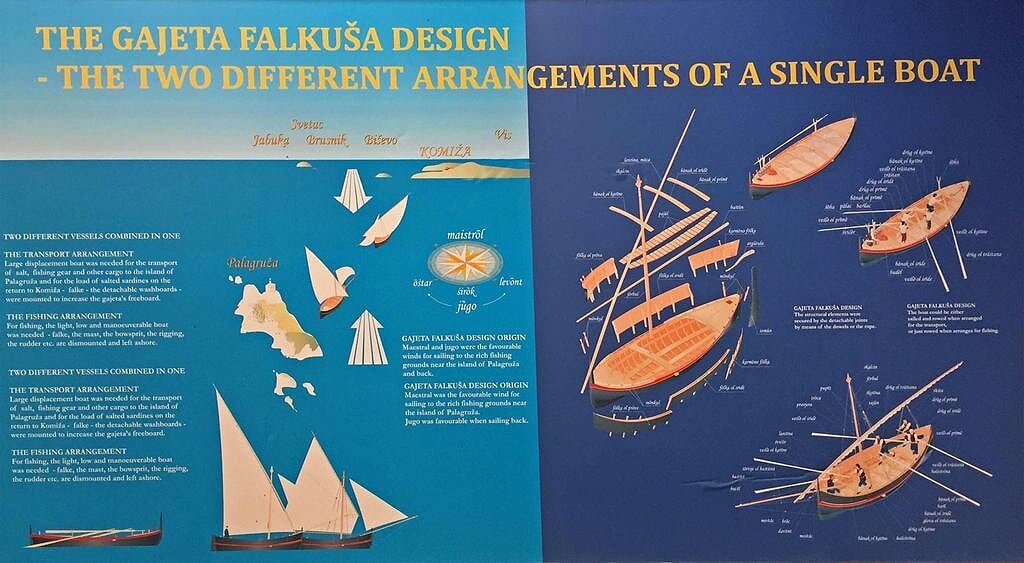
In fact it's a bit particular kind of vessel: this Gaeta was used by local fishermen for the sardine fishing. Because the most numerous banks of these kind of fish were at a distance of 80-100 km from their base harbour, the town of Comiso, they had to reach the fishing area under sail. So it was very useful to have the boat sides rather high to keep better the sea, because the sail, as you will see from the pictures, was slightly abundant. Once on the fishing site, instead, it was more useful a boat with low sides to be able to handle more easily the fishing nets.
So, the special feature of this boat was that it had removable side panels to be used in case of need and to remove while fishing. Hence the term "falcata".
images/img_4608_zpsogbsjnzs.jpg

-
Thanks for the information! Patrick O'Brian sometimes mentioned the Trabaccolo in his novels, and I wondered what they were!
I know. I read all the O'Brian novels and that boat is cited in the 1° one (Master and Commander) and in the 8° (The Ionian Mission). All the 21 noves are wonderful for me . . Rgds, Jack.
- uss frolick and mtaylor
-
2
-
Italian Boats of the Adriatic Sea
The Paranza
Pictures by http://www.cherini.eu/
Cherini/05-Paranza marchigiana_zps91cbip0h.jpg
Cherini/03-Paranza pugliese e picena_zpslxxvc5pv.jpg
Cherini/04-Paranza del primo Ottocento da ex voto_zpsf7ev57ar.jpg
 For "Paranza" we mean a italian vessel typical of the Central Adriatic.
The Paranza, like all popular boats, was the result of a complete historical evolution and adaptation to structural requirements dictated by both the environment and the usage.
Measuring between 7 and 16 meters, the hull, rather short and almost flat bottomed at the midship section, was characterized by a curved and retroflex bow, with the end fashioned as a "cap"; the stern post was slightly inclined and projecting outwards. Another distinctive feature was represented by the profile and the strong structure of the bow, the sheer of its gunwale and the typical succession of the bollards. The bow eyes, always present, were usually applied and carved in relief.
The enormous rudder, with a draught far below the keel level also effectively performed the function of a stabilizer. Normally the boat was parked on dry over the beach and was equipped with two side keels or thick blades, intended to facilitate the hauling and to stabilize the hull. With a strong camber, the deck has a relatively modest sheer.
Already documented in the Adriatic below the mid-nineteenth century, the Paranza has originally a "Calcese" mast with Latin sail hoisted on a long antenna, made in one single piece. Such equipment was gradually replaced by more manageable lugsail, more traditional in the northern Adriatic coasts.
Cherini/Paranza_of_Foletti Olindo_zpsxym5ayht.jpg
Model by Foletti Olindo (ANVO)
- Landlubber Mike, grsjax, Seventynet and 2 others
-
5
-
Hi Jack and thanks for the info.Do you Know whether the boats in the photo (taken in Kalamata Peloponnese-SW Greece) belong also to Italian marine tradition (hull and rigging).Thanks
Hi Thanasis,
unfortunately I'm not able to help you . .
Do you know which kind of boats are them ? If you know their name may be I can help you, otherwise its impossible for me.
Regards, Jack.
-
Italian Boats of the Adriatic SeaPictures by http://www.cherini.eu/
The Topo
Cherini/21-Topo%20veneto_zpsjwpgstnc.jpg
 The topo (meaning “mouse”), also known as a mototopo, is a traditional Venetian cargo boat. It is still commonly used today in the Venetian Lagoon. An Istrian version of the boat, known as the topo istriano, was very popular among fishermen in Istria. These boats were traditionally made in Venetian shipyards (called squeri or squeri veneziani) in the Istrian cities of Pirano and Isola d'Istria.
The Battana
Cherini/Battana_del_Delta_zpso9yowzav.jpg
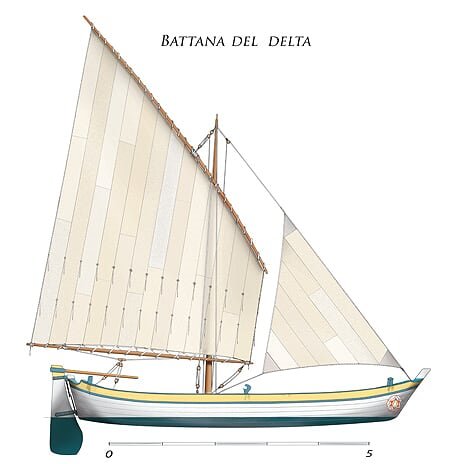 The battana is a traditional wooden boat used in the regions of Veneto, Romagna and Istria. The battana originated among the ancient Italian navigators of the Po Valley and Venetian Lagoon. From here it spread to the areas surrounding the cities of Bellaria-Igea Marina, San Mauro Mare and Goro in Romagna, Fano and Senigallia in Marche, and Rovigno in Istria. The battana was very popular along the Adriatic coast because it was cheaper and easier to build.


Gaeta Falcata (Gajeta Falkusa) by jack.aubrey - FINISHED - Marisstella - 1:20 Scale
in - Kit subjects built Up to and including 1500 AD
Posted
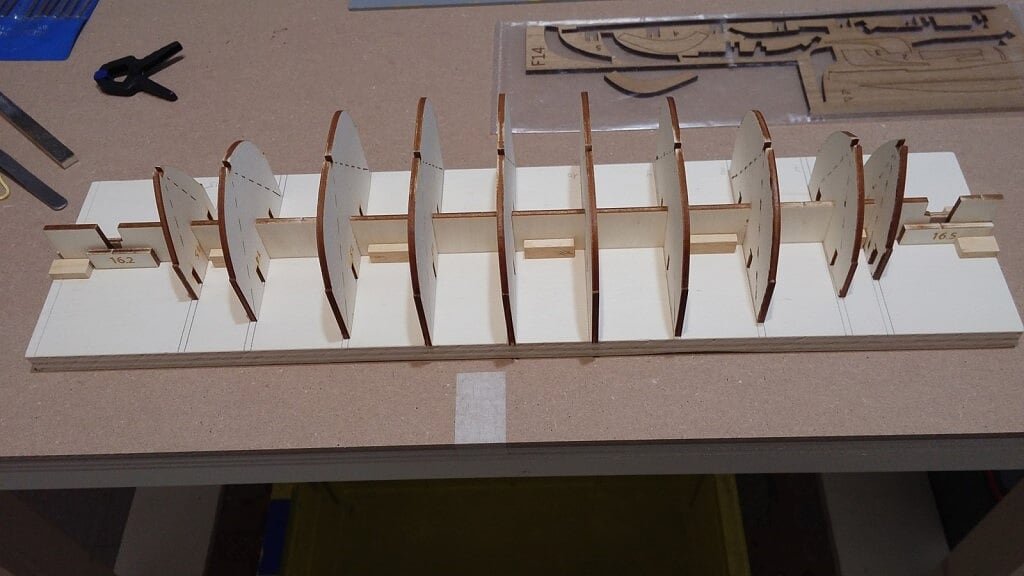
A small step forward. .
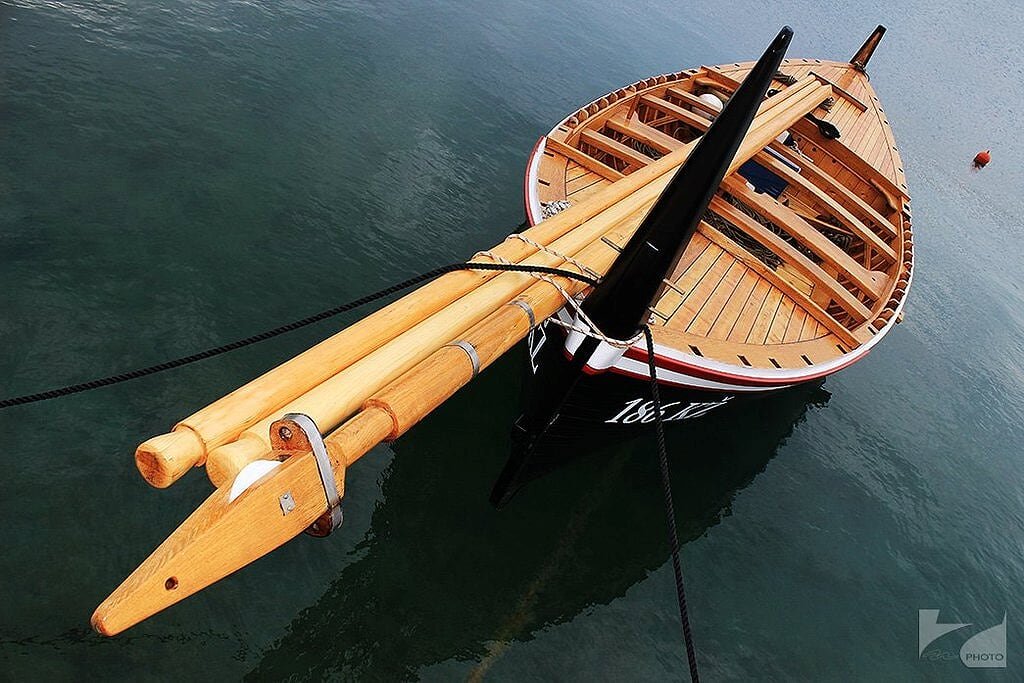
Today I proceeded to glue together all the three main elements of the keel. To insure their correct positioning, I proceeded to glue under them a photocopy of the drawings where the keel is visible. This because the keel is not perfectly straight but is slightly curved and only the plan give the right way. Now it remains to apply a strip 5 x 1.5mm which will form the false keel to complete. At this point the keel can be positioned on the hull skeleton. All joints are refined and tested.
01 - 20161027_155255.jpg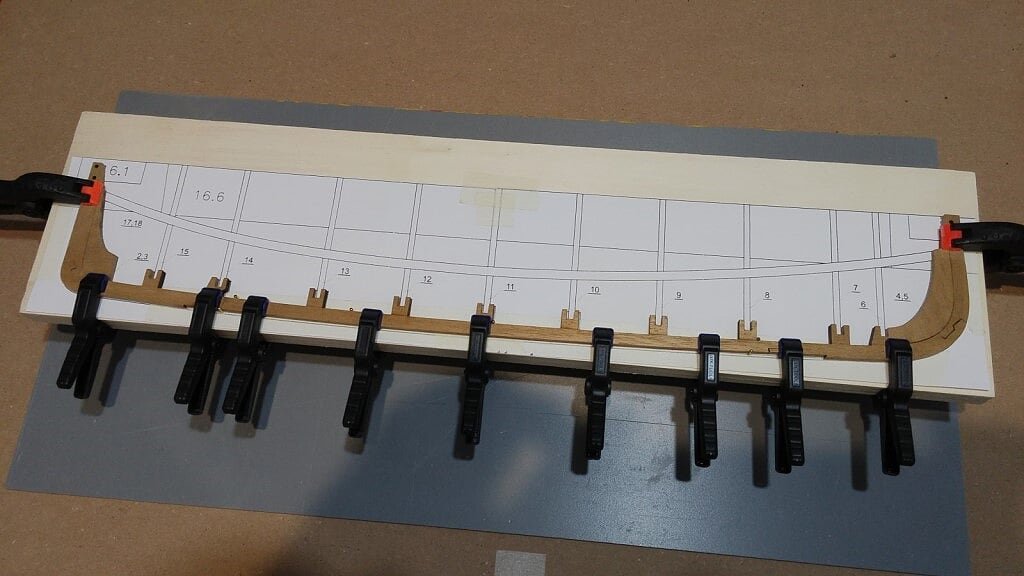
Meanwhile the hull structure has been enriched by new elements that hold the complex together and stiffen it.
03 - 20161027_155152.jpg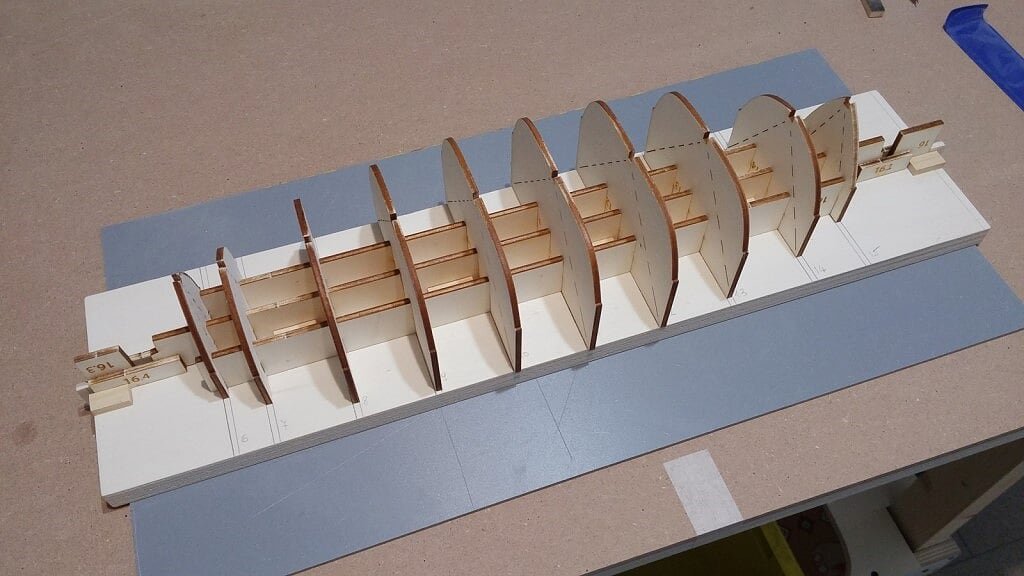
04 - 20161027_155210.jpg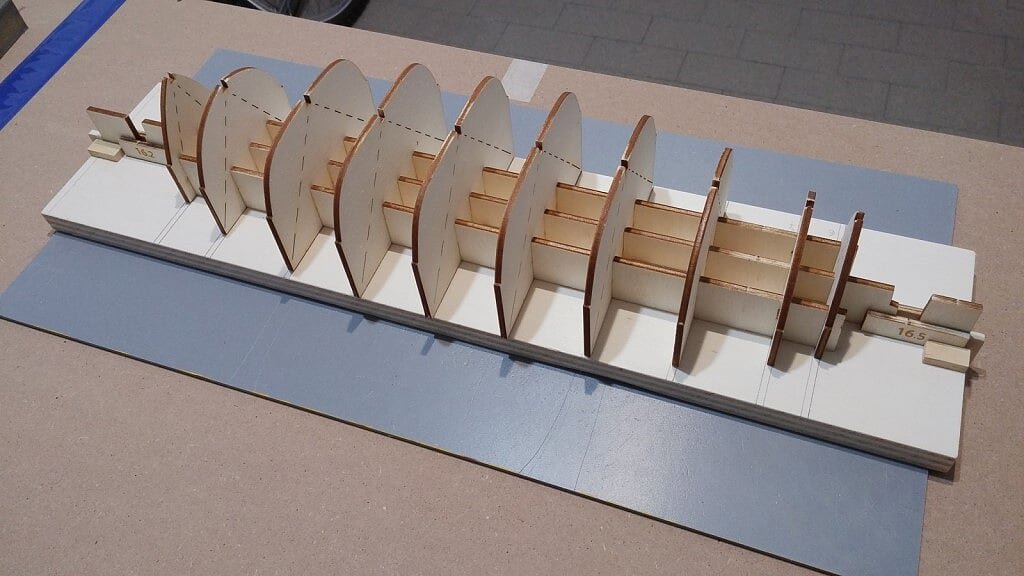
See you tomorrow . . Jack.