DONATION DRIVE - SUPPORT MSW - DO YOUR PART TO KEEP THIS GREAT FORUM GOING!
×


clearway
-
Posts
2,235 -
Joined
-
Last visited
Content Type
Profiles
Forums
Gallery
Events
Everything posted by clearway
-
 looking good- i split the railings into sections with the ends of the rod hidden in the ball stanchions- something i missed from my Polaris plans is the railings angle inboard slightly aft of the bridge wing to make room for the ships boats. Keith
 -
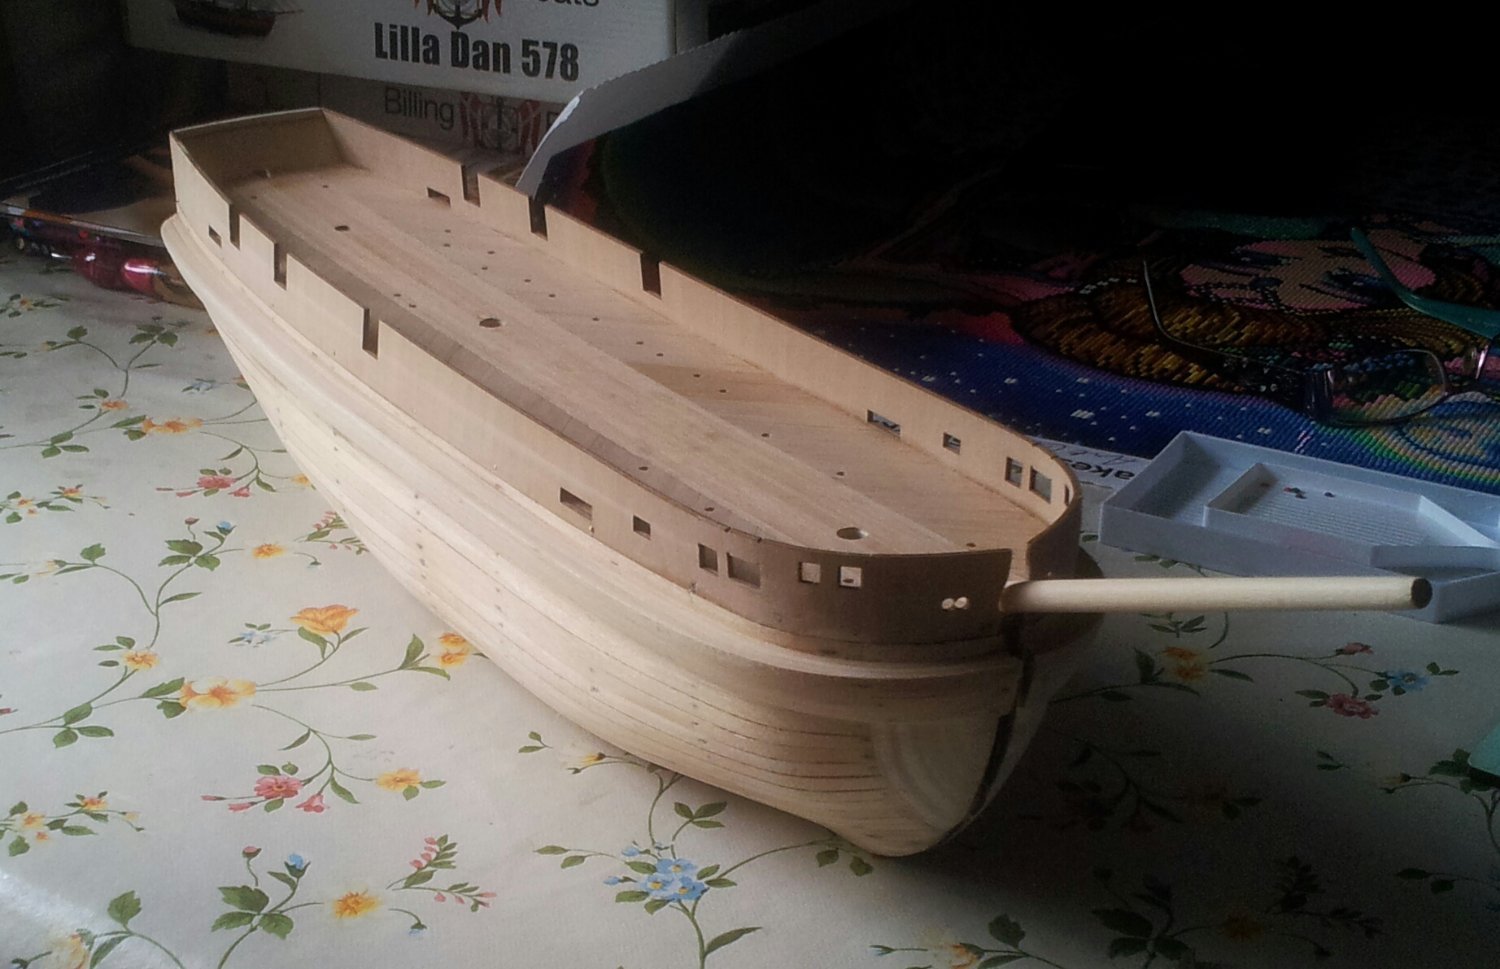
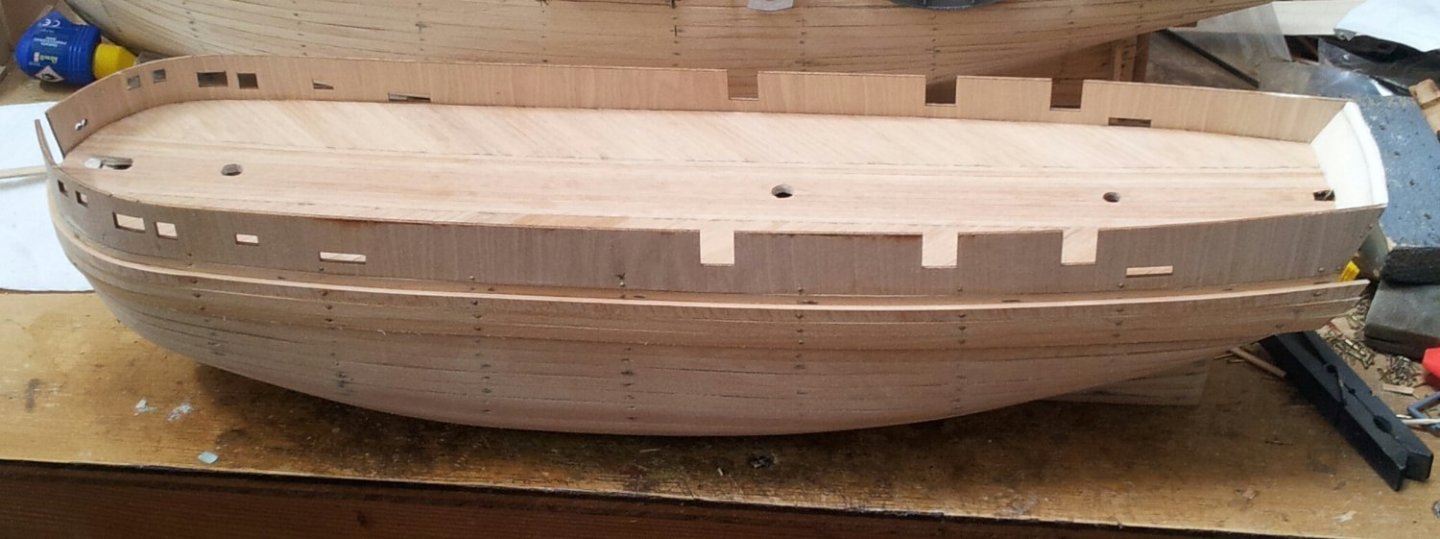
Thanks for the likes and looking in, I have sanded the forepeak a little shorter along with shaping the rudder/ sternpost and gluing it in place. The other thing i am doing on Erebus i didn't with Terror is painting the shroud protector white instead of just varnishing- i will still be cladding the rest of the hull with varnished walnut strip though. i feel the altered forepeak captures the look of Erebus better now. Keith
-
I used a pair of small smooth pliers to flatten the strops on the end- On Terror i went with the kit supplied deadeyes, but with Erebus i will be using 4mm and 3.5mm as opposed to the kits 5mm and 4mm- oh i am sooooooooo looking forward to making the strops/ chainplates again🤪. Keith
-
They also had cleats incorporated into blocks as well just to confuse matters even more! On the main mast apart from the tackle to use the boom and the halliards for the sail the braces for the foreyards would lead there- if you look carefully there are also pinrails on the shrouds just above the deadeyes. I have Harold Underhill's "rigging the clipper ship and deep sea carrier" as a source of reference but havn't delved too deeply into yet. Keith
-
I think Keith S drilled out the scupper holes on his Terror and Daniel D- i suspect the 5 extra holes might be to facilitate water egress from the massey pumps- i didn't add them on my Terror but will most likely add them to Erebus. Keith
-
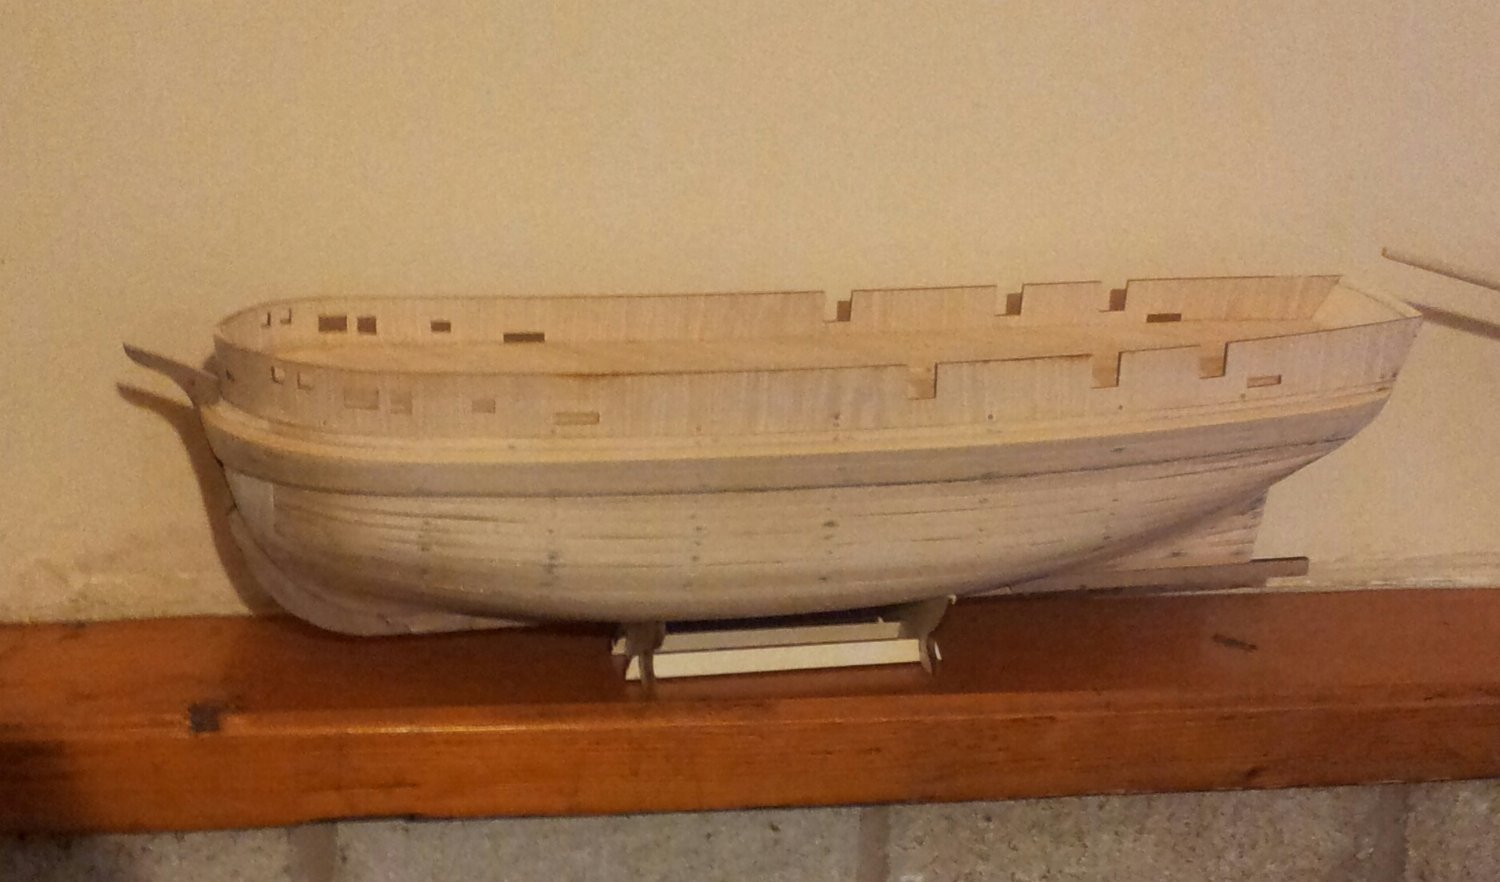
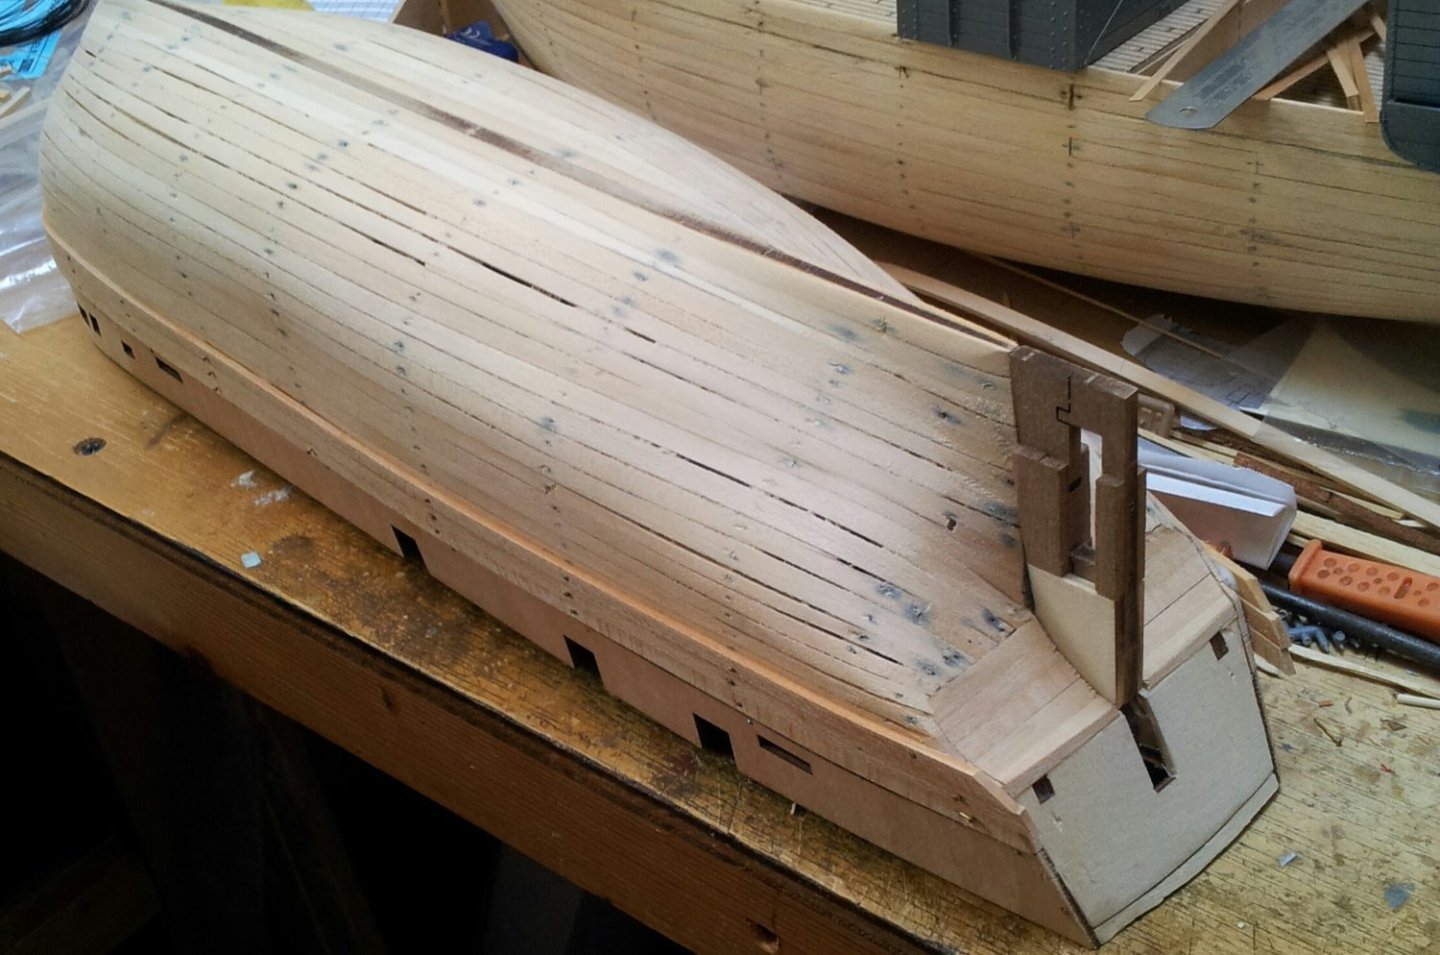
Thanks for looking in- i now have the keel pieces and altered forepeak glued in place- as already mentioned i trimmed it back below the gammoning hole to look more like the admiralty plans while altering the angle slightly to align with the altered bowsprit (also had to take a little off the scarph joints). Sorry about the grainy finish but artificial light and my phone don't mix- OMG this means the long bright summer evenings are getting darker! take care all. Keith

-
yep- i think that shot is showing the foremast and front bulkhead of the ritz- on other pics the mainmast has a steel spider band incorporated into the swan neck fitting for the boom. On mine i have wooden pin racks fore and mizzen but will add the steel spider band to the main (might actually replace the mizzen one with a steel band next. As regards eyebolts on the deck- yes heavy hauling lines (yard lifts, halliards etc) would have led to a block hooked onto the deck at the base of the mast to take the strain then to the belaying pins. Keith
-
Its an old billings stovepipe fitting altered to look more accurate- so the rain hat is turned brass from the fitting with 3 pieces of brass wire added. The pipe is 35mm from the deck with the rainhat 5mm above that- pipe diameter is 4mm. Keith
-
the stovepipe is for the galley stove and is fitted towards the front of the ritz. The galley occupied the port forward side and an entry way/ staircase leading below decks to starboard with the "ritz" taking up the rest of the room leading astern- well i aint tearing my ritz off and adding the square window now😁- On the pre conversion plans i have for Polaris the plans show 3 square windows each side on the ritz- and even the the ones on the quarterdeck are square. Keith
-
I agree Craig- on the original plans all the windows on the ritz are straight sided with slightly curved top and bottom frames and the walls are panelled - it looks like they tongue and groove planked over it and added round portholes with the one pictured left square. Regards the hatch near the ships wheel, if you look at the top picture on this page (with the gut in the hat in the doorway) you can make out the sliding hatch. Keith
-
Hi Andrew- i bought Victory etchings set from Cornwall Model Boats (Panart i think at 1:78 scale)
-
Thanks for looking in and the likes -ever had that feeling you have been here before! I stated in my Terror log that sanding the ice bumpers was like prison punishment and i am sticking with that statement😁- will be sneezing sawdust for a month!!! have trail fitted the replacement bowsprit and tried the forepeak in place - this will need the raised "humps" removed and fettled further down the stem. One thing i have noticed is that there is no slot for gammoning under the bowsprit on the admiralty plans of her so might actually remove material till the bottom of the gammoning hole on the forepeak. starting to look a bit Erebus shaped😁 Take care all Keith

-
I hear ya my man😉 Keith
-
i drill two holes and remove a sliver of wood from between them to make a groove- i think daniel d actually added pulley blocks into slots but it depends on how thick the posts are. Keith
-
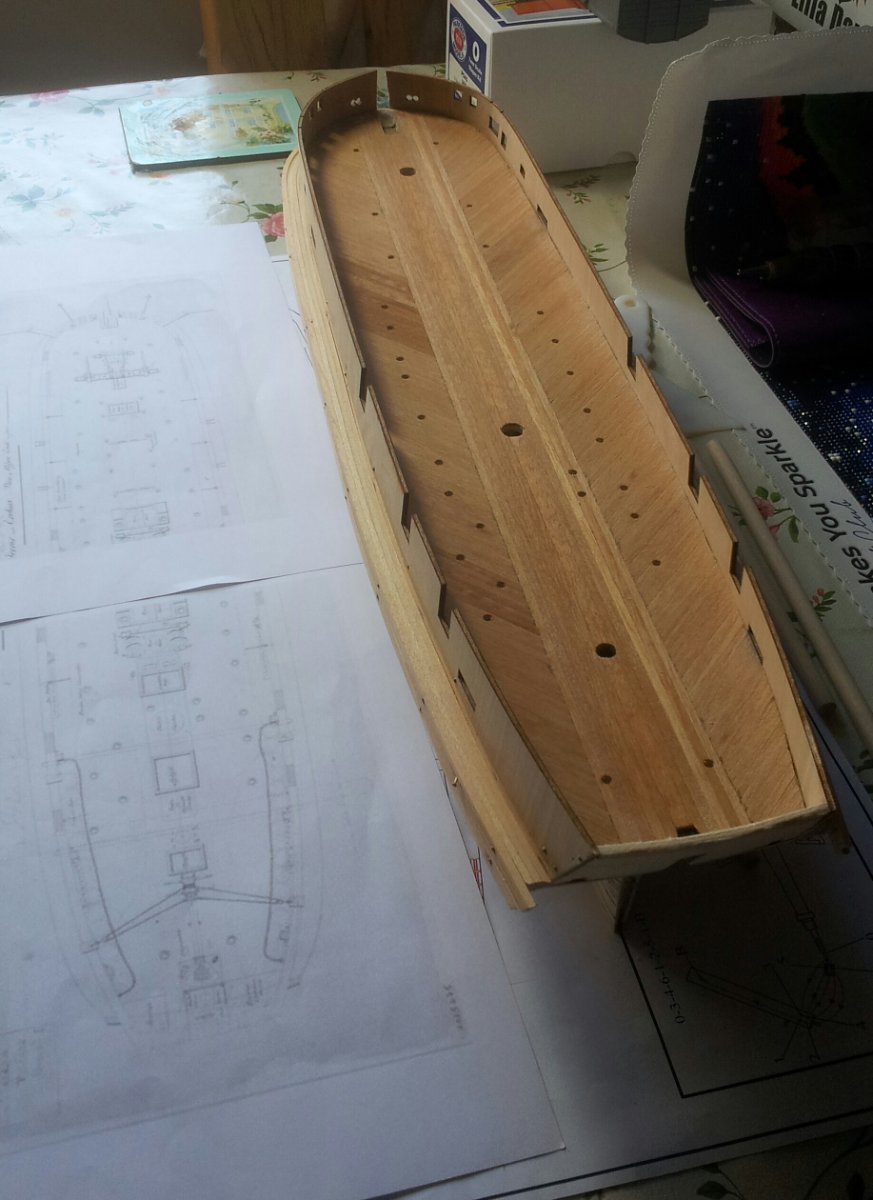
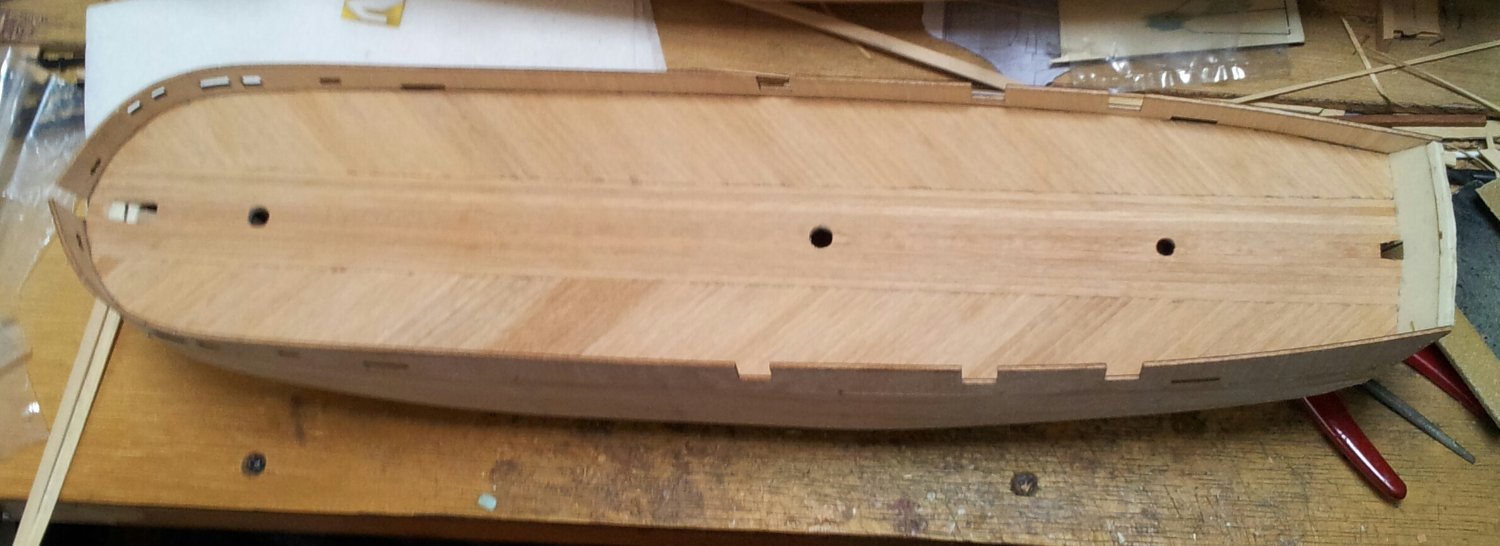
The ice bumpers continue- only one plank a side to add now! For a change of scene i marked out and drilled the holes for the sunlights. When i compared occres 1-1 deck layout drawing compared to the admiralty plans they weren't far out- i only had to move the ones near the bulwarks a bit further inboard. Thanks for looking in and take care all. Keith

-
Nice model and great to see the 1:1 version survived the "modernisation" insanity of the 60s and 70s. Keith
- 45 replies
-
- 3
-

-

-
- Earnslaw
- Paper Shipwright
- (and 2 more)
-
That is what i have been thinking- especially after seeing the pic of the model Hakezou found with the altered deck abaft the ritz. Keith
-
I must admit i am thinking the same way which is why i havn't actually glued anything in place regards the roof of the ritz- what threw me off is the base of the hatch does look like a covered over skylight that has been re-purposed. Also note the companionways sit on top of the decks and are not an integral part of the structure that occre have them. I will most likely replace the hatch with a skylight as i am modelling her before the kennels and antarctic mods were made- if modelling in the ice configuration don't forget the homemade pointer to assist the helmsman on the ritz roof. Keith
-
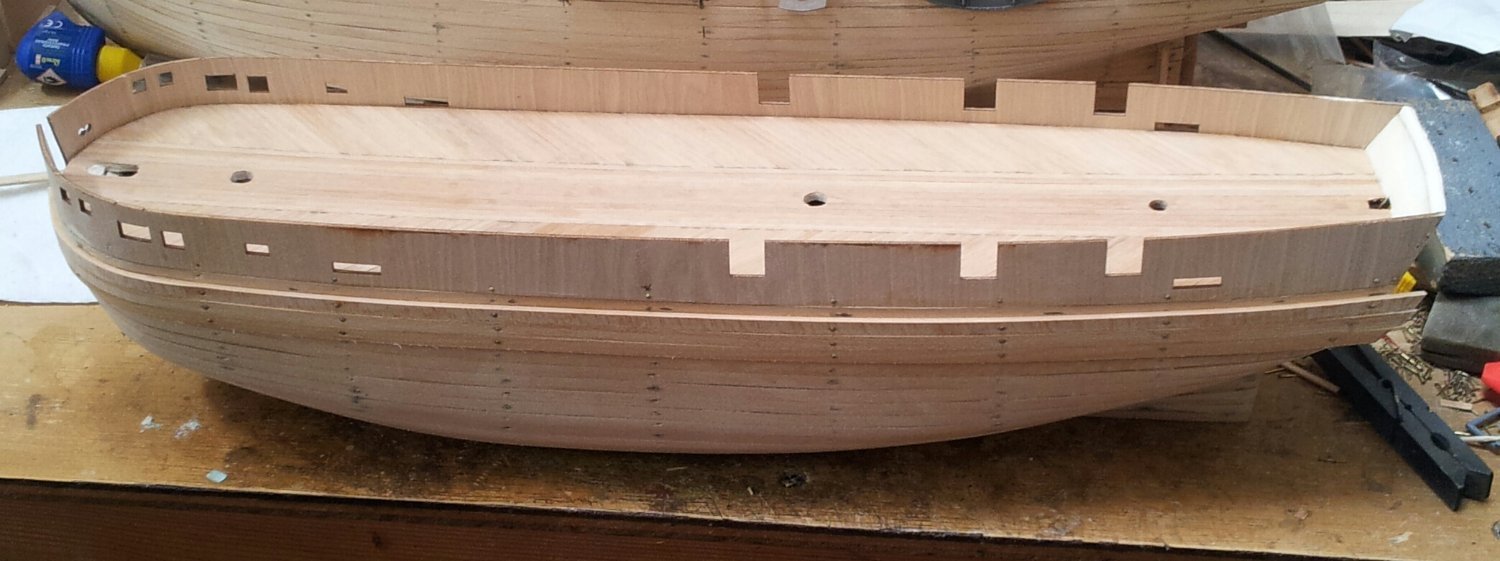
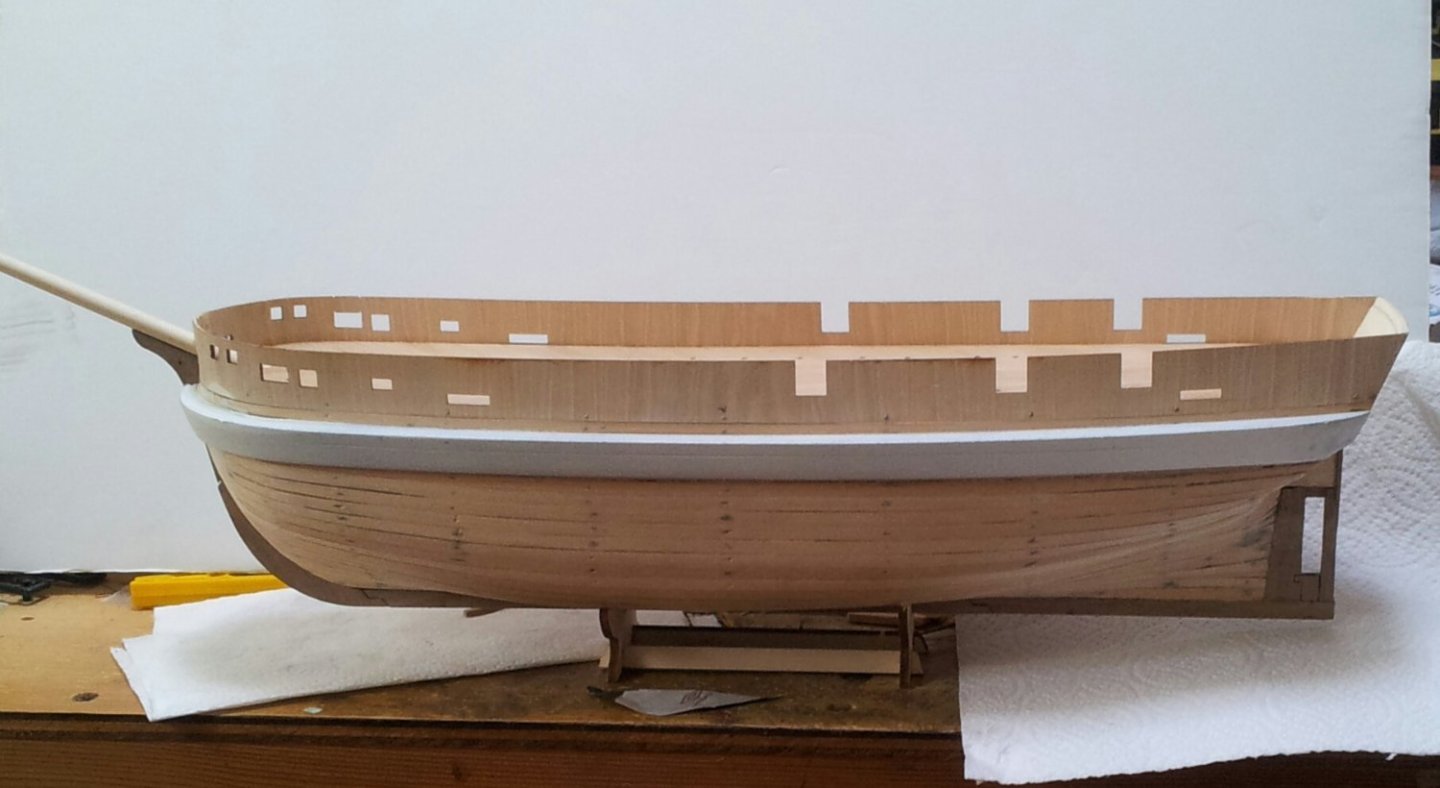
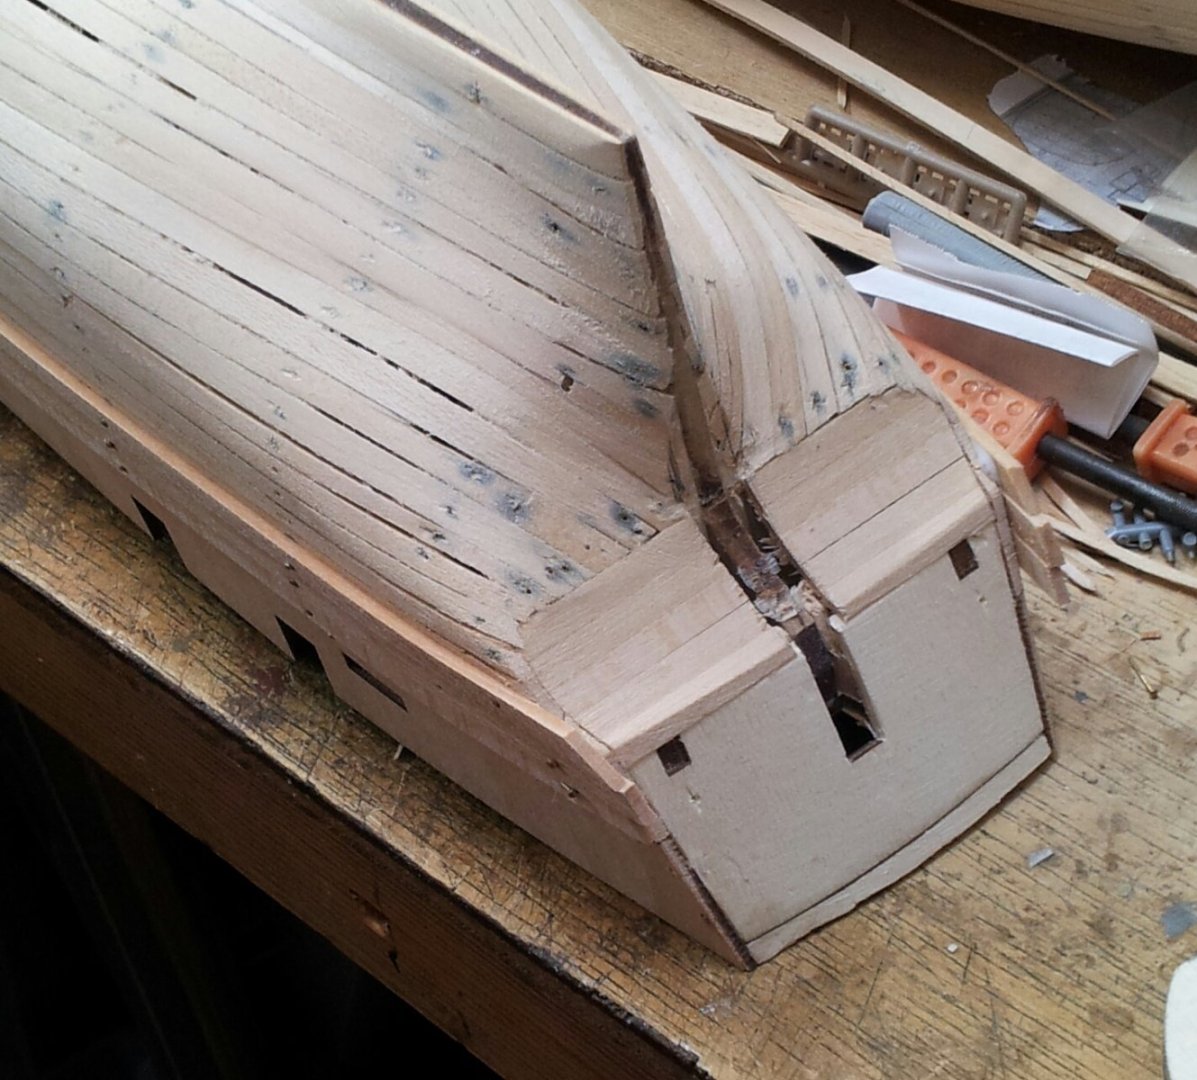
more poor weather = shipyard time😁- because i altered the stern from occres instructions had to cut a slot in the transom planking to accept the sternpost. Also started on the shroud protector/ ice bumper- in my Terror instructions they had the distance from capping rail to bumper to narrow- they must have listened to Keith S as they have amended the distance (i had to add another 4mm due to heightened bulwark). On the sternpost i cut the ply former above the slot for the prop and added some walnut stock from my bits box- seeing as they had used laser cut walnut as opposed to ply used on my Terror kit i didn't want to ruin the finish the varnished walnut will give. On the plans for Terror/ Erebus you can see the entry ways etc are way above deck level compared to how occre have them. I was trying to figure a way of doing the ice bumpers better, but went with kits method in the end- however this time i am under no illusions as to how much sanding is in store for me this time! Thanks for the likes and take care all. Keith
-
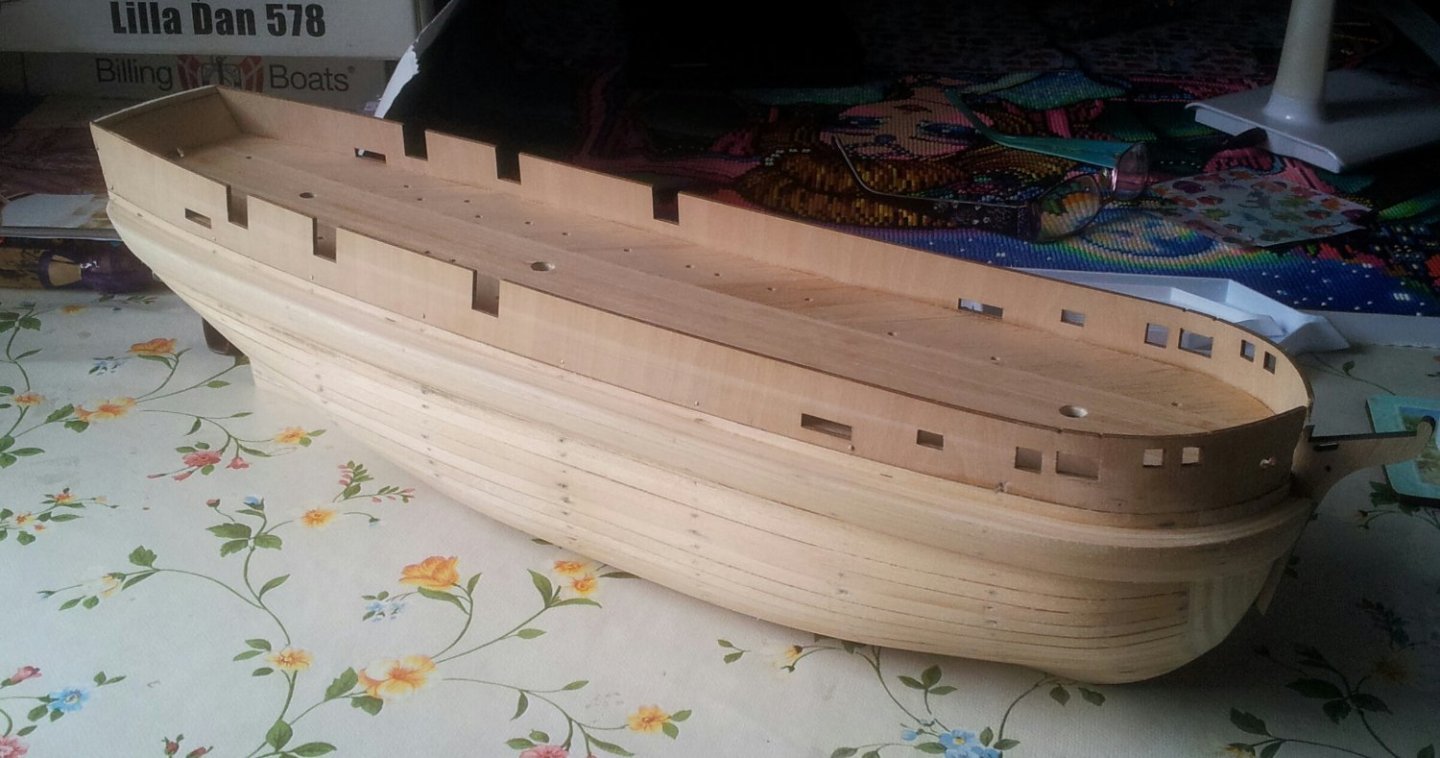
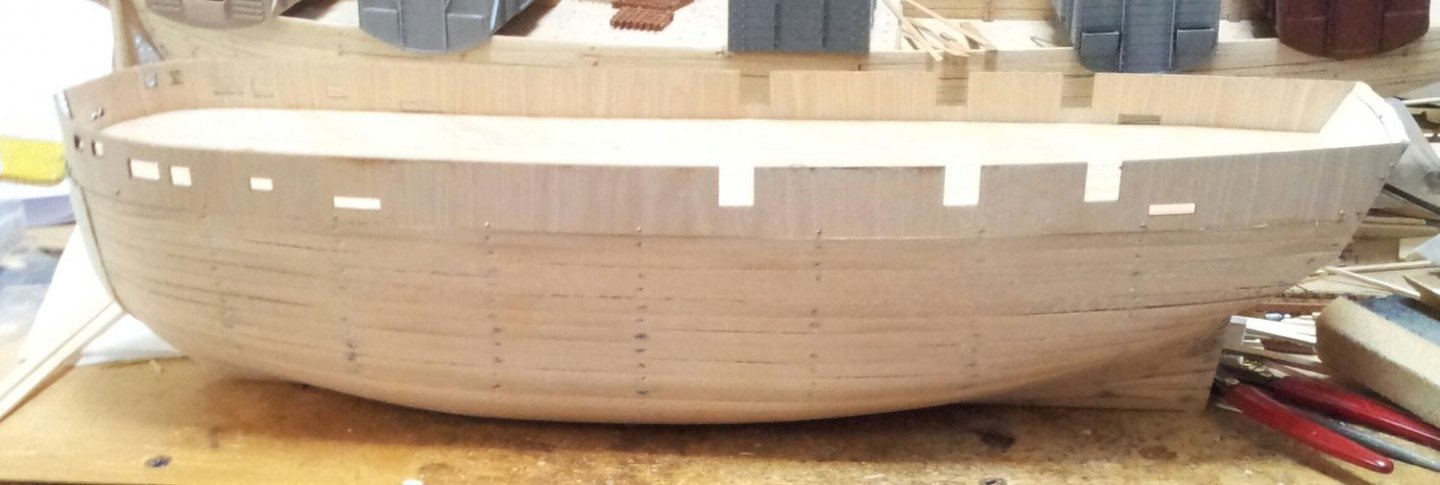
Thanks for the likes and looking in- i have finished planking the deck and have the bulwarks in place, also sanded the formers at the bow though not fully to shape yet. The king plank is 5mm while the fore-aft planks are 3.5mm, the diagonals are 3mm (this is another thing i wish i had altered on Terror). anyone building occres Terror or Erebus will notice the heightened bulwark evidenced by the two slots that should have been located in the two tabs (removed on mine) on the deck ply former- i also used an offcut of ply to heighten the transom. Take care all Keith

-
Nice to see the MDF bulkhead survived (i was lucky with mine too)- regards the prop, could you not file the blades down as my billings prop was too wide and had to trim that down? Regards the planks ,after sanding you could use a scriber to clear the gunk from between the planks before painting (i get a similar problem when painting model railway goods wagons (freight cars to our brethren across the pond). Keith
-
welcome to the ice bridge conundrum 😁 Keith