clearway
-
Posts
2,228 -
Joined
-
Last visited
Content Type
Profiles
Forums
Gallery
Events
Everything posted by clearway
-
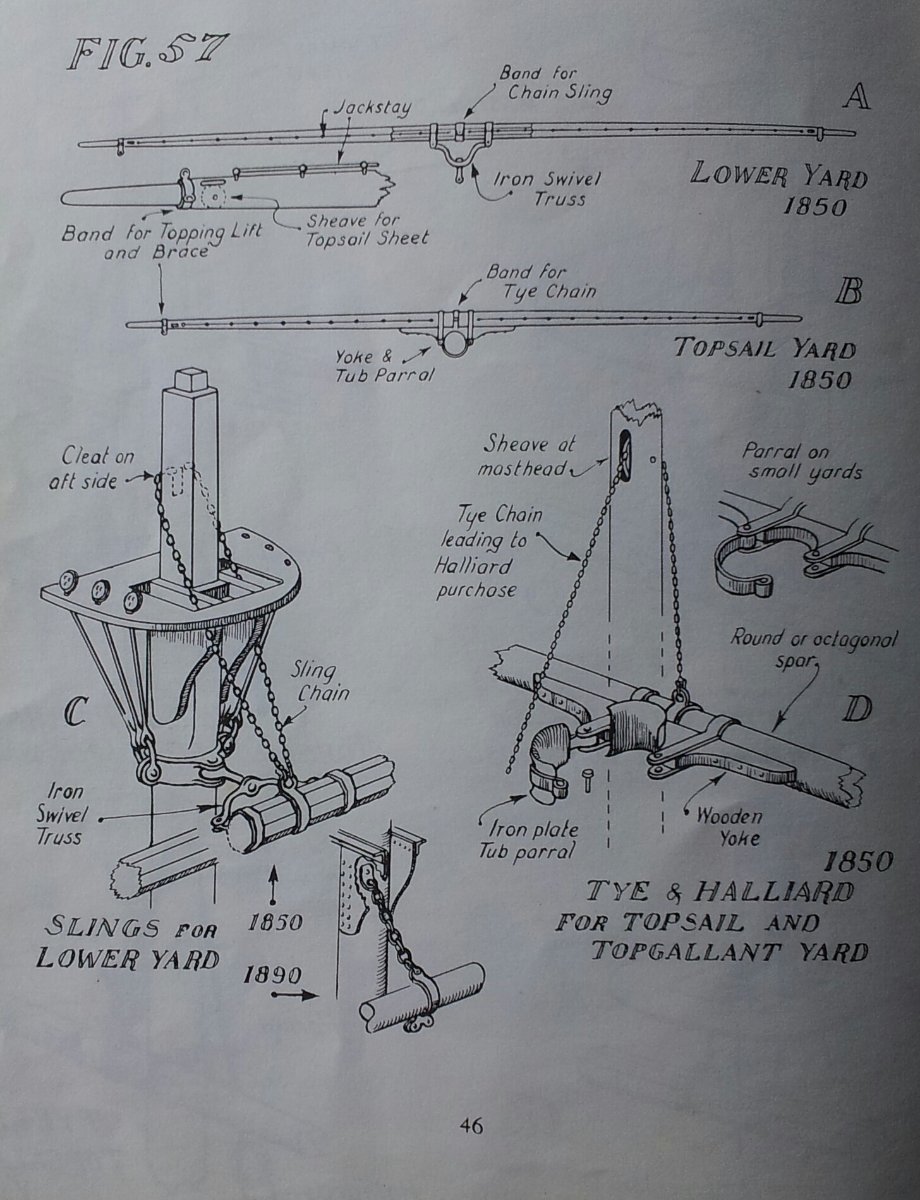
 You are certainly more organised with your shipyard than me Josh! Reference to the yard crane- also called a truss here you go:- Hope this helps Keith
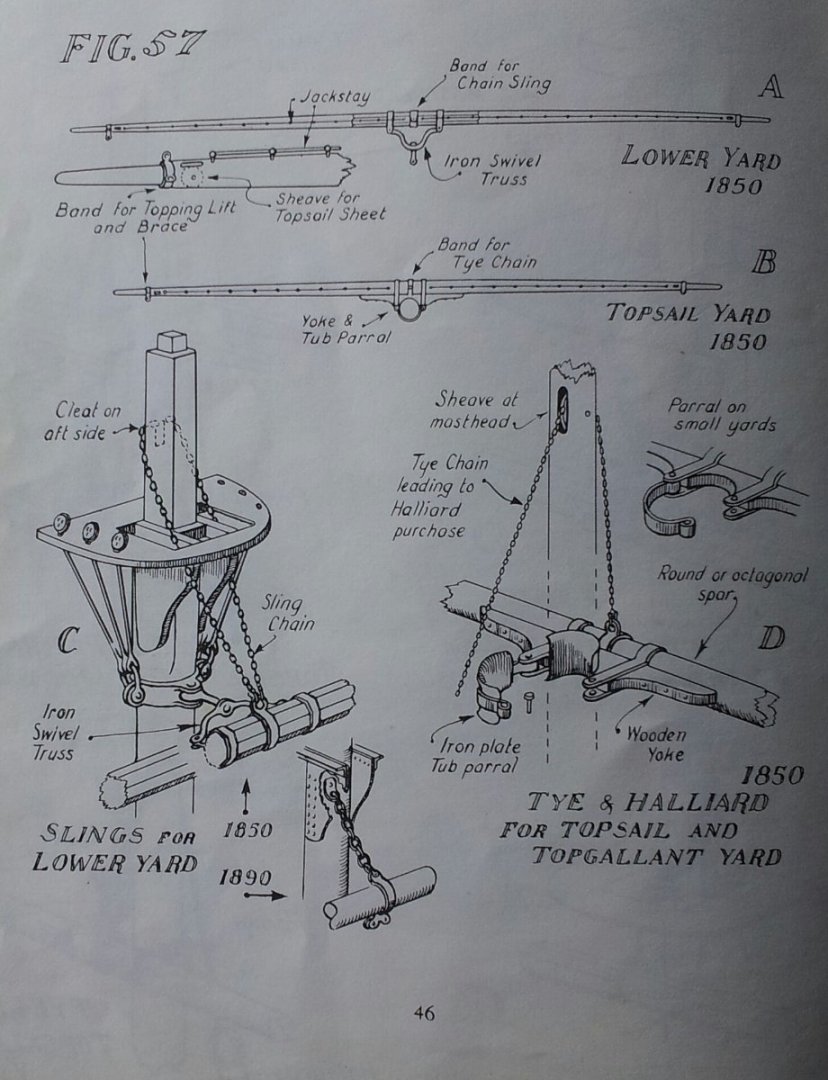
-
Coming along Josh- I suspect the lower yard would have been fitted with a yard crane as opposed to how occre have it. Keith
-
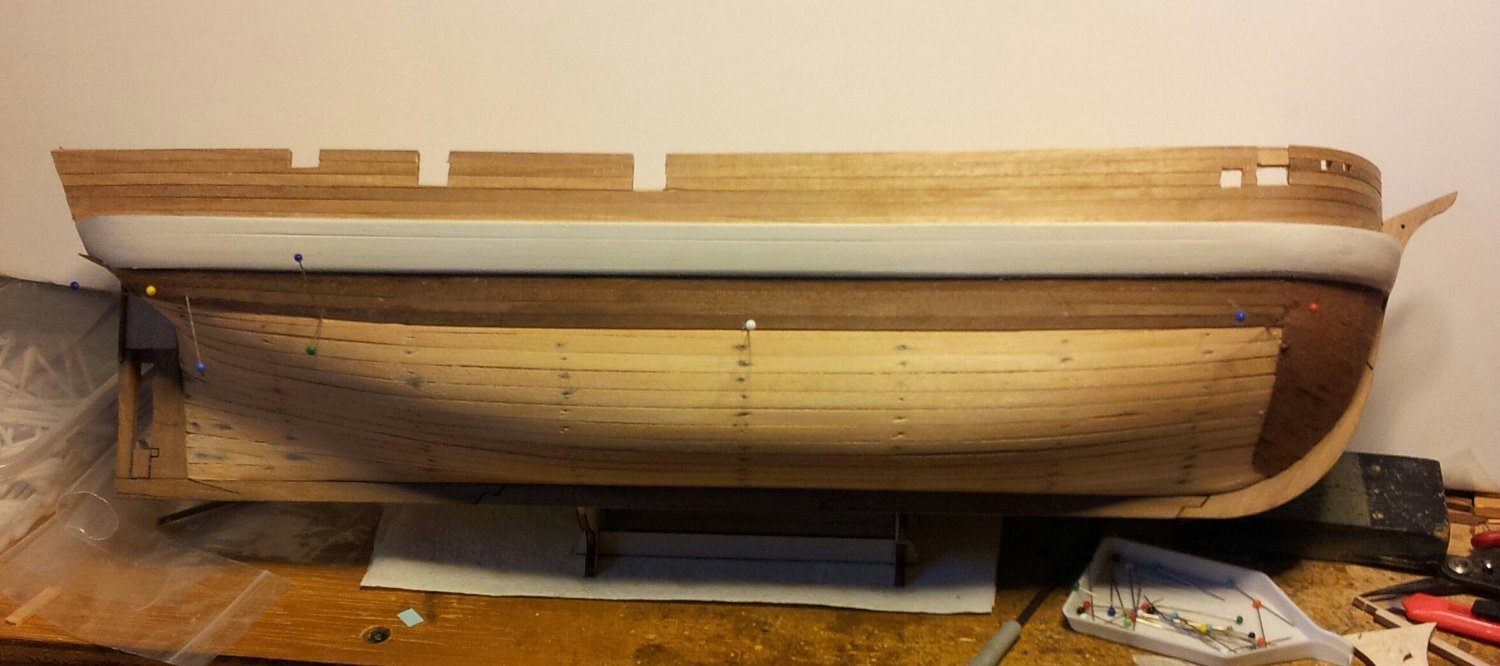
Thank you Hake and pull up a chair- still plodding away with the walnut 2nd planking at the moment, and due to using white wood glue whilst getting a good join it means only one or two planks an evening due to setting times! Keith
-
harold underhill's rigging the clipper ship and deep ocean carrier covers our time period and nice work on the blocks josh Keith
-
Hey Keith nice to hear from you and nice to see you are still going to carry on with your little Terror. I agree and i think we discussed it back at the beginning of our logs about the weird bulge in the hull, but as you say there is an lot going on to draw the eye (however my lil Terror is on a shelf in the workshop and the bilge is right in line of sight! The Keiths are back Keith
-
Nice bit of work there Josh- i have fitted 11 belaying pins on each pin rail but i think they should be split though not as far apart as occre have them- there will also be 8 belaying pins on the collar near the base of the mast. Keith
-
equates to about 3 inches give or take so won't look too weird- upto you really. The Caldercraft wheel is 24 mm across the spokes so made my brackets to fit it- look at the pics on my log of the wheel assembly to see the gap between spoke and deck which is only about 1mm or so.. Keith
-
Nice work on modifying the mizzen top Hake- if everything stays together without glue the gluing will only make it stronger. Regards the weather we are catching the back end of the two hurricanes in the Atlantic now with rain followed by rain and wind followed by rain .......... sods law last weekend when we had nice weather the builders merchant didn't have the mineral felt capping sheet in stock for my mother in laws shed (base layer is already nailed on though) - i said to her it will be in stock this weekend because the weather is rubbish and sure enough! Keith
-
Well done- think it took me versions 1.1, 1.2 then 1.3 till i was happy and might even alter mine again! I used the caldercraft 10 spoke wheel but not sure how readily available they are outside U.K.- Keith S and Daniel D used 10 spoke wheels from Syren on their Terror builds. Keith
-
i was thinking of using thread dyed with heavily diluted humbrol matt 53 gun metal paint (the enamel type diluted with white spirit). Keith
-
i have yet to go on a boat or ship that didn't have handrails both sides of a laddrway so you were right to add it. Keith
-
coming along nicely craig- you could add a couple of forward facing bulkheads and just plank to the bows like on my Terror- i have to agree on the instructions with these early kits , i bought Panart's Lynx in the 90s and they had modified and laser cut the parts but had included the earlier instructions! Keith
-
looking at the model of her as built in the topsham museum she didn't have one from the start- but very common on ships (especially merchant sail)- HMS Beagle had the same set up- i suppose with no other masts up there and only the one sail (i think Matthews plans are wrong to have a mizzen topgallant mast) you didn't need a platform for the yard crews to pass? Keith
-
Don't forget Hake - no top on the mizzen mast just the cross trees and trestle trees but nice work on the tops. Keith
-
Good ole Cumbrian weather- from rain and cold to heatwave then back to cold and rain all in the space of a week! The 2nd walnut planking slowly making progress down the starboard side- will start on port side now to keep the hull even. Thanks for the likes and looking in everyone. Keith
-
looking great Daniel- i bet occre hate it when we start build logs on here Keith
-
Yeah i have been caught out like that as well Greg- unfortunately when fresh evidence comes to light it is way too late without resorting to completely scrapping all the work to date- will have to check on My Billings Pourquois Pas where they have them- on the heller plastic kit they just have a raised plank running under the capping rail. Keith
- 123 replies
-
- 2
-

-
- Le Pourquoi-Pas
- Constructo
- (and 1 more)
-
I have had this when using CA on my rolling stock and armour kits- i now leave any areas glued with CA facing upwards if possible to allow the vapour to evaporate off (doesn't always work though but leaves less mess)! Keith
-
clear matt acrylic varnish here
-
well done Daniel- i remember the fun i had when applying the yellow/ black stripes to my billings HMS Victory. Keith
-
welcome back Richard- i am amazed Occre havn't updated their kits with the deckhouses by now- certainly makes it look more Terror like (just reakised when i logged in my Erebus was in a Terror sandwich build log wise😁 Keith
-
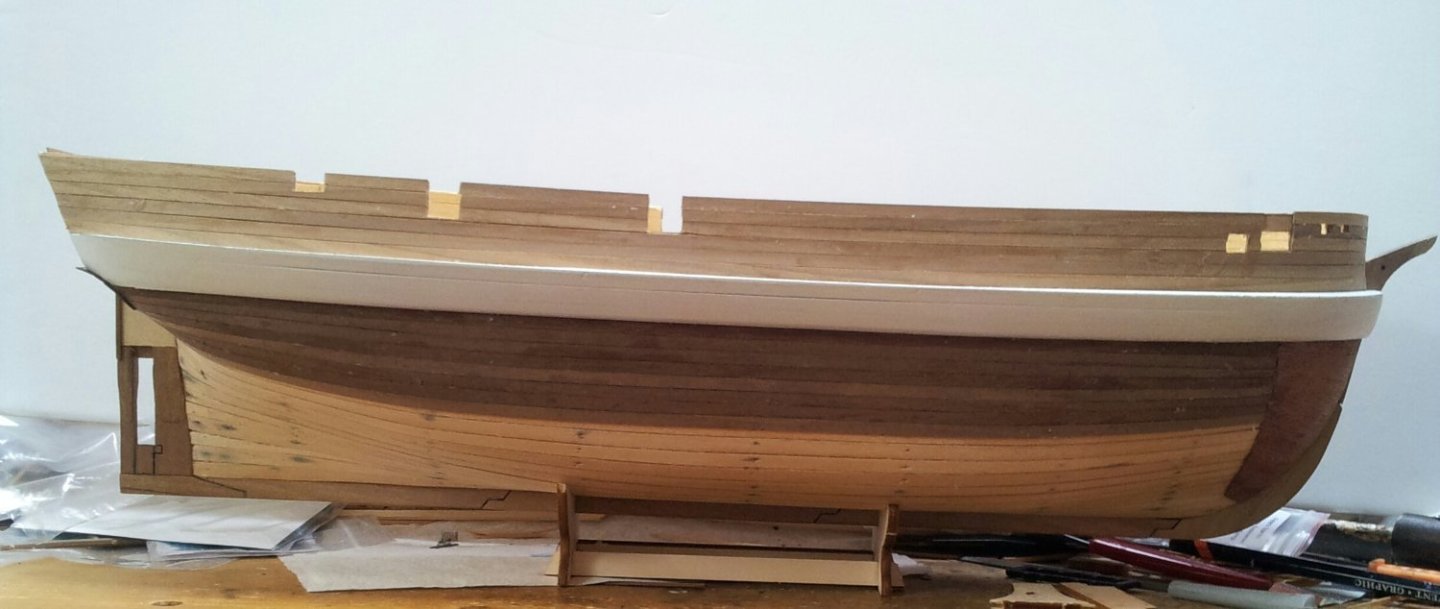
Hi everyone- wow this heatwave hitting the U.K. at the moment is making up for a dismal July/ August! Not much happening with Erebus as either too hot, sweaty and exhausted or doing out door jobs. Started on the 2nd planking below the shroud protector using a slightly darker less oxidised walnut but lack of energy with the heat at the moment. Take care all and thanks for the likes and comments. Keith

-
If painting i would paint the top white except for the upper surface of the floorboards - also the mast doubling will be white on the lower masthead and the topmast head along with the crosstrees on the topmast. I scratched new tops and cross/ trestle trees because occre had the fore and aft ends tight against the mast- you will find out when rigging the shrouds why they left a gap on the real ships- hope this makes sense. Keith
-
coming along now- the supplied 2nd planking in occre kits is splintery overscale nightmare stuff! That is why i replace it with walnut strip- but i do like to go for a varnished finish if going through the hassle of adding a 2nd layer on occre kits. Keith
-
Hi geowolf and thank you- yes it is very deja vu😁. As you can see i have already altered the wrong shape of the hull and heightened the bulwarks- you can't do Terror without having Erebus as well! Keith