DONATION DRIVE - SUPPORT MSW - DO YOUR PART TO KEEP THIS GREAT FORUM GOING!
×


clearway
-
Posts
2,235 -
Joined
-
Last visited
Content Type
Profiles
Forums
Gallery
Events
Everything posted by clearway
-
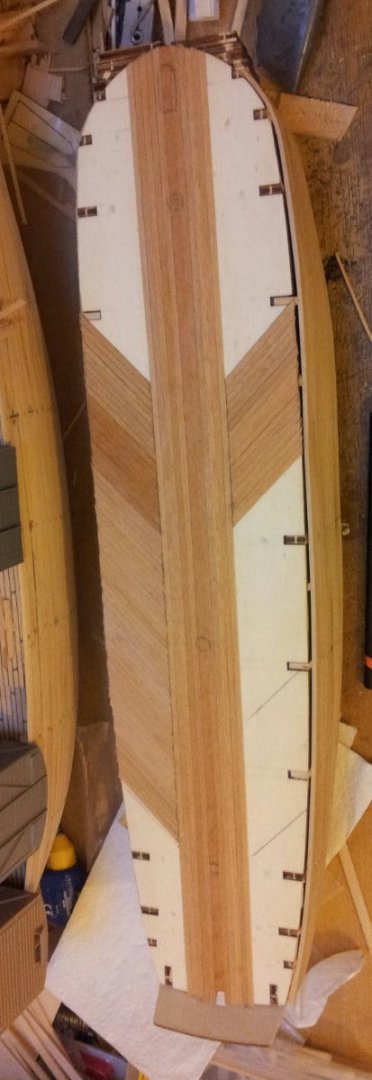
 Thanks- the one thing that never sat right when doing my Terror was the incorrect shape of the hull. Today sanded the hull, fitted the ply formers for the bow (still need sanded down) and having learnt from my Terror build started planking the deck using some finer planking from some of my billings builds. Take care all Keith
-
Certainly looks the part- i hear you on the flattening the aluminium tubing with the flare- why mine is still circular😁. Keith
-
Thanks for the likes and looking in, the first planking is on and looks better without the weird bulge midships😁- did feel strange not running the planking from the stem and threw me out of synch a bit! Next job is pull the pins and give her a good sanding (already done a little sanding on the forward frame and transom. take care all Keith
-
Can't beat those punishing tasks we make for ourselves Daniel- they look better flattened though. i have the joy of scratchbuilding deadeye strops for my HMS Erebus to look forward to! Keith
-
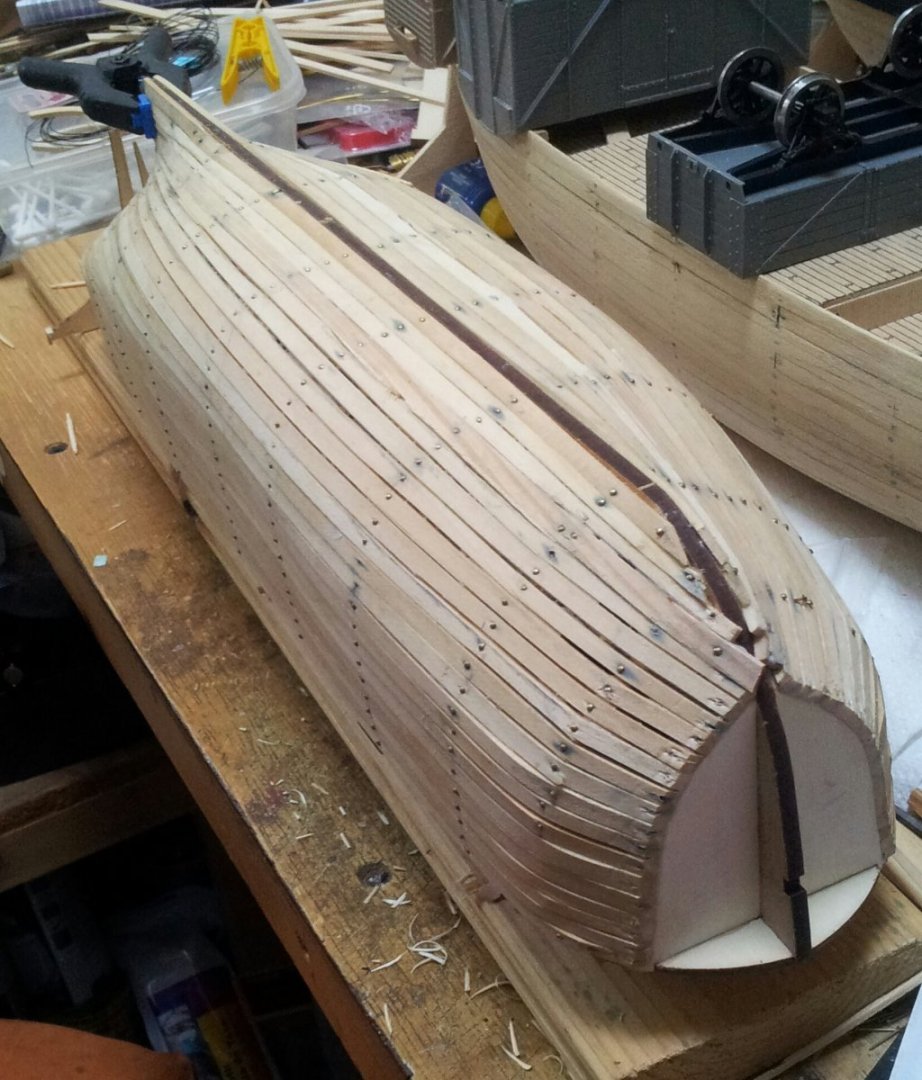
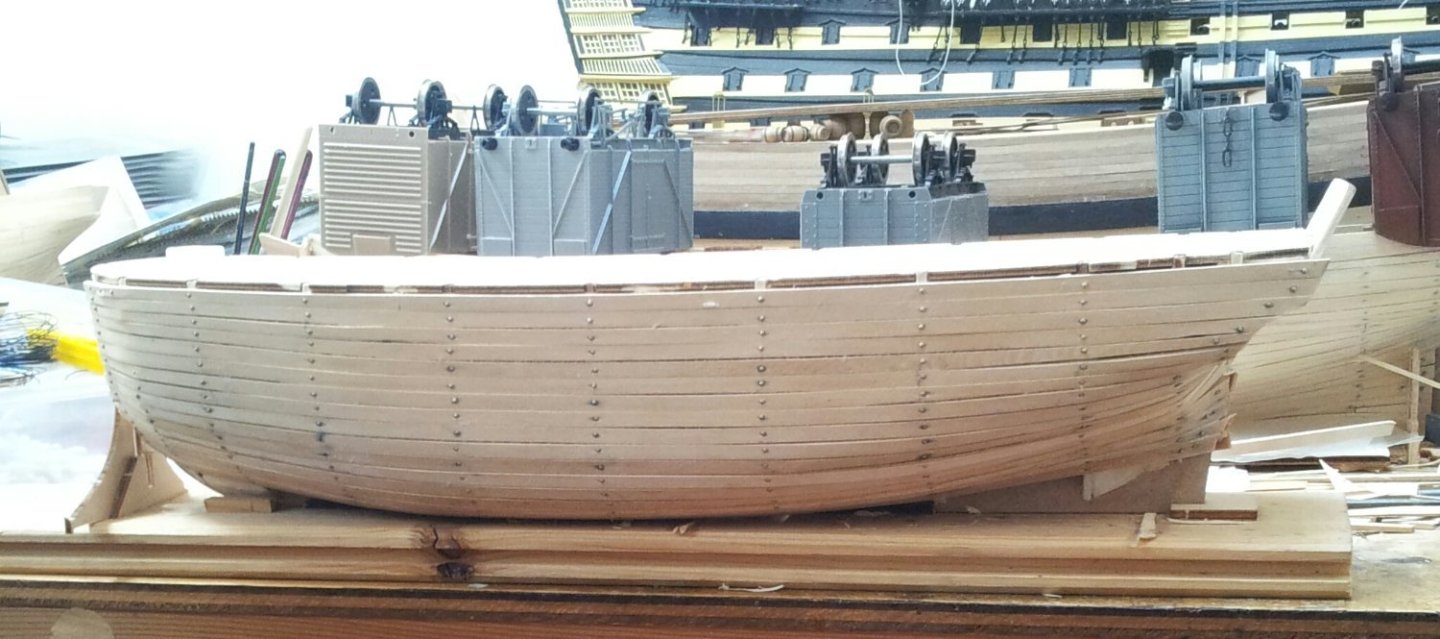
Thanks to some summer weather last Thursday managed to get my messy job garden room felted😁 - which meant i could start on the planking this weekend (still around 4-5 planks to go but nearly there- after removing pins and sanding down will have to fettle the sternpost in. The railway vans in the background are 0 gauge. Anyone who has built Terror will have noticed i have planked further up than occre state- this is because i want the bulwarks higher as just didn't feel right on my Terror. Take care all and thanks for likes and looking in. Keith
-
Welcome to the Endurance club- there are photos of her in the ice floes before she was beset in the ice with the steering gear uncovered. Under the forecastle (anchor deck there are small rooms port and starboard as mentioned in tomculbs log. Regards the smokestack forward on the ritz it is for the galley cooking stove. Keith
-
I thought i had copied it from a book as i gathered loads of info regarding Terror and Erebus a couple of years ago when the other Keith and i started our Terrors and i had a few books about them, just had a look and for the life of me can't find Erebus lines plan among them so must have just googled and saved it on the computer! however looking at Terrors plans which are in Matthew Betts book and another i have they are more or less the same and as altering the Occre kit will be sufficient- to work out frame 10 i actually used frame 9 from the kit to mark out the lower frame at the turn of the bilge. Another way might be to use frames 5 and 9 from the kit to reduce frames 6 and 7 though will result in a more rounded hull. Keith
-
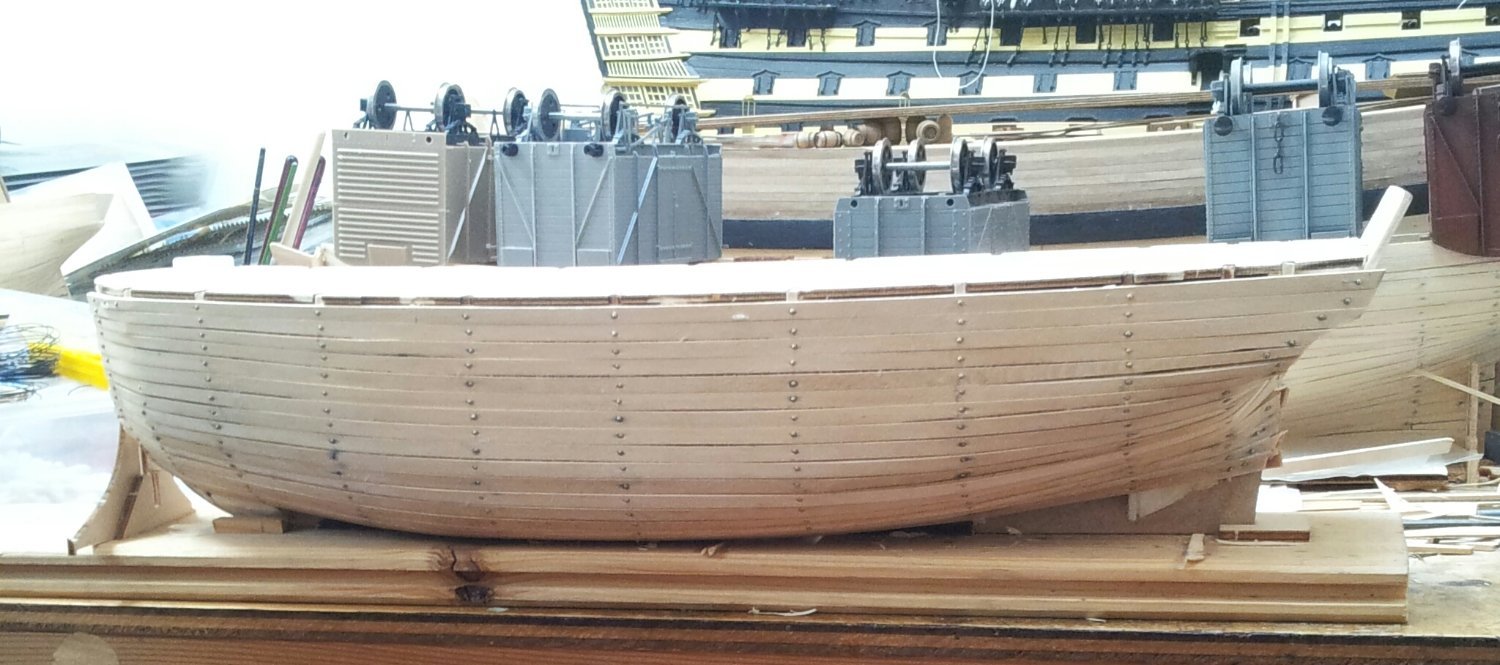
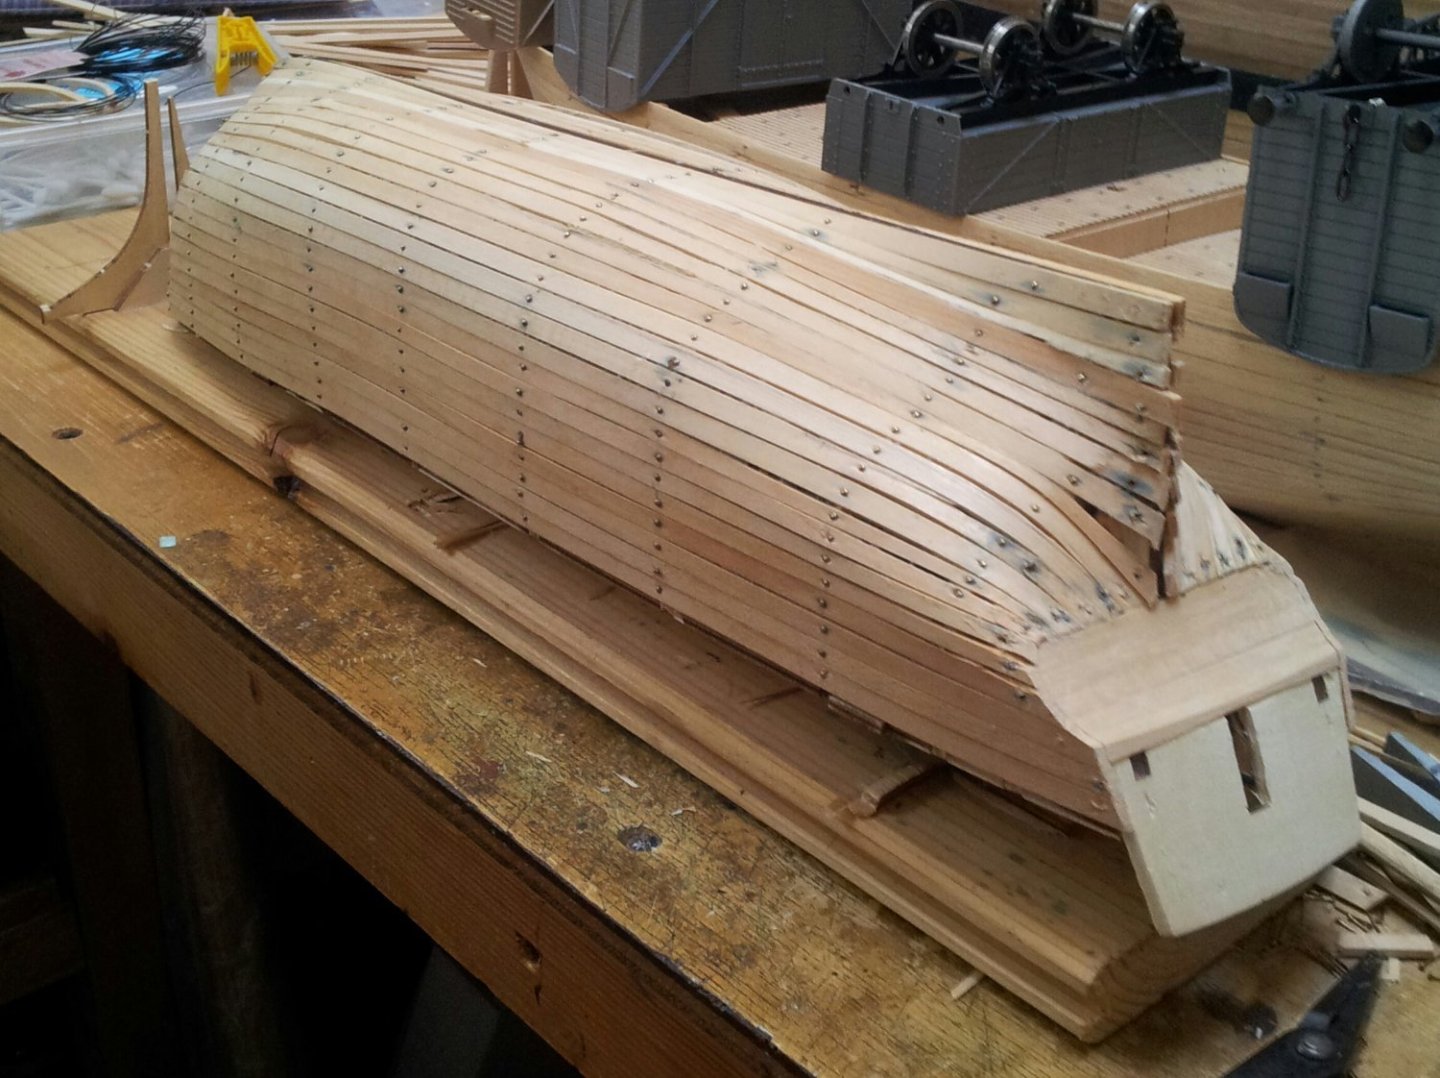
Thanks for looking in and the likes- a little more progress with the transom planked, think she is now ready for planking to start. On Terror i scratchbuilt framing at the bows and run the planks right up to the bows, this time i won't bother as second planking and plating will cover them anyways. One nice difference with this kit is the rudder, keel and sternpost are laser cut walnut as opposed to stained ply- also the planks are actually long enough to run the length of the whole hull😜 It really doesn't feel like 3 years since i had my HMS Terror in a similar state on that mantlepiece! Take care all Keith
-
Havn't looked in for a while- love those stern gallery windows and the lanterns Phil. Keith
-
The blackened version looks better if going for a painted finish- brass looks o.k. if going for a varnished finish like my build- always remember though you are the shipwright and whatever works for you is what it is about. Keith
-
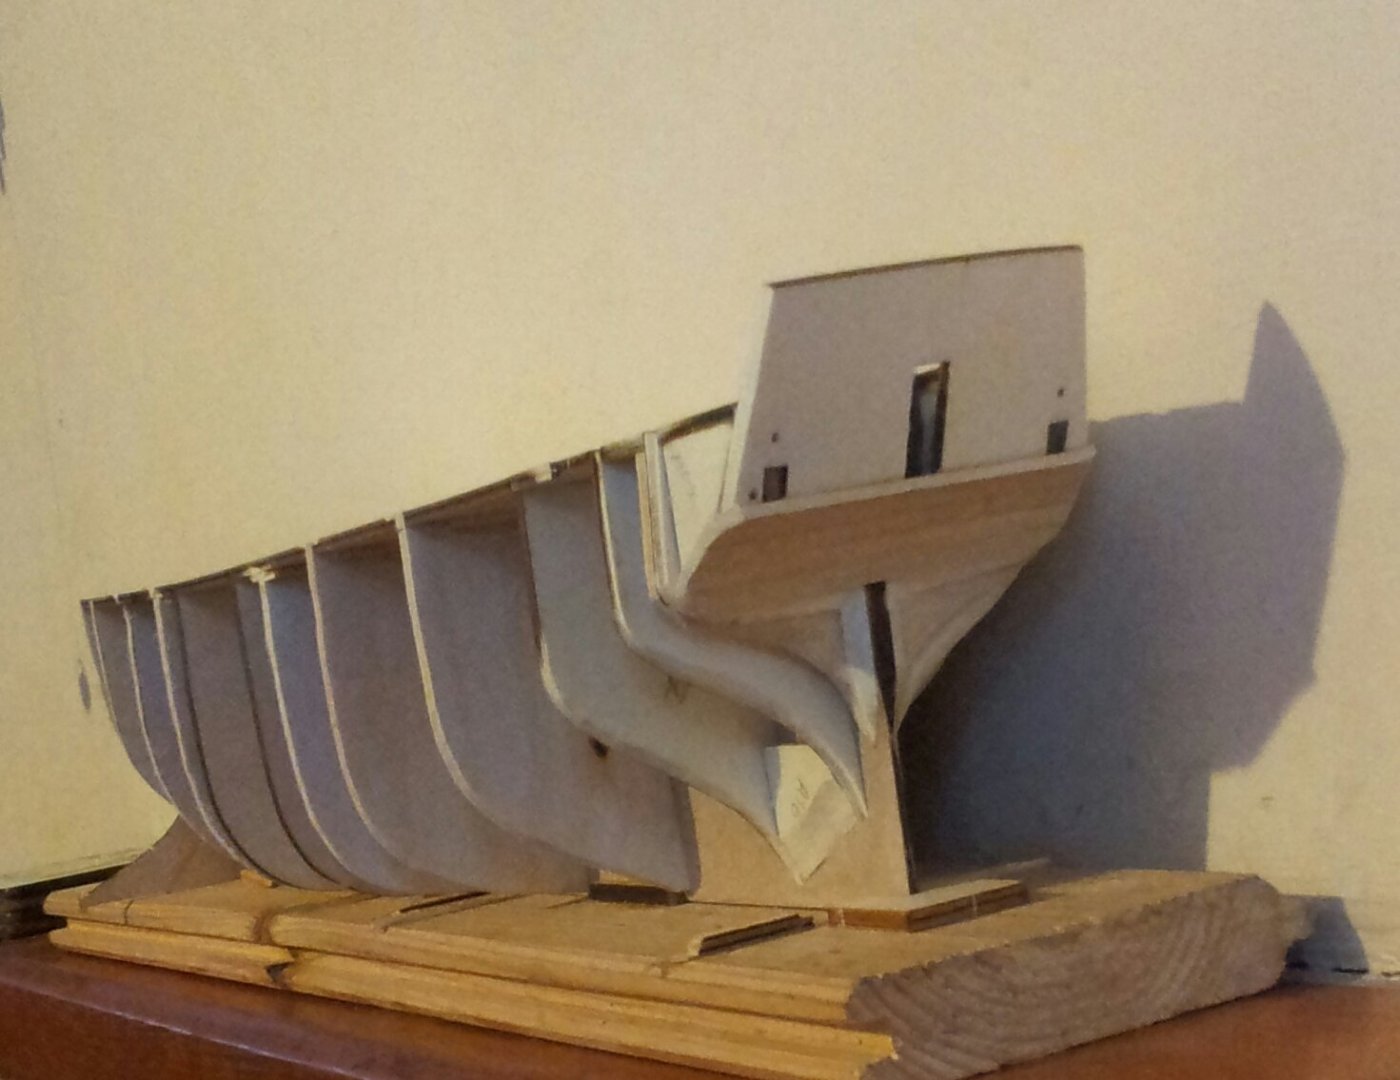
You guessed it- yet more rain so more work on Erebus! Have faired the frames - i will be doing the stern tuck like on my Terror and after that experience decided to remove more of the stern frame at the rudder post and add a piece behind it to allow the planking to curve up easier. In previous post if you look at altered frame 10 there is a dotted line- that was where i thought the outside face of the frame should be and turns out i was about right with my guestimate😁. Thanks for the likes and looking in. Seems strange working on the hull as when i was working on Terror which is identical frame wise in the kit we were in lockdown 1. Take care all Keith
-
what a difference the 10 spoke ships wheels, altered skylights, and the deckhouses make- well done. Keith
-
well done (really should get back onto my Vicky)! Keith
- 218 replies
-
- 1
-

-
- Victory
- Caldercraft
- (and 1 more)
-
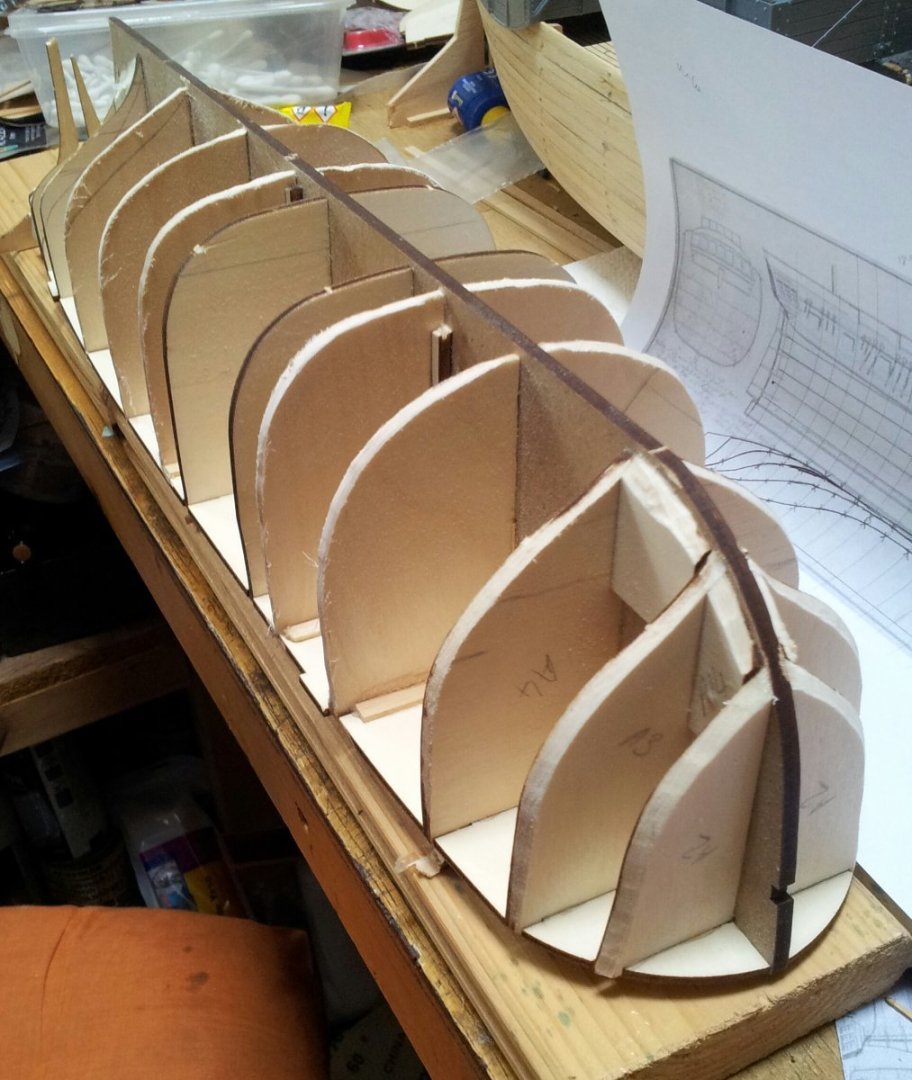
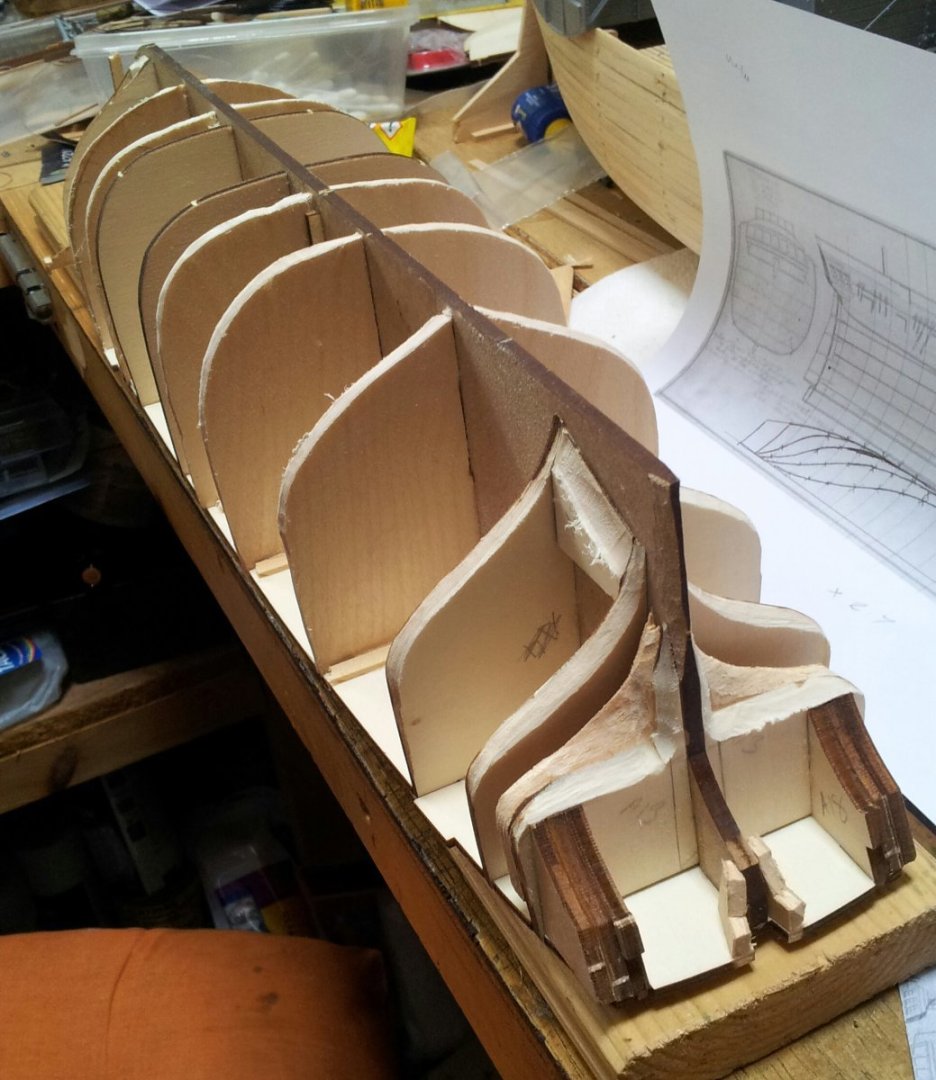
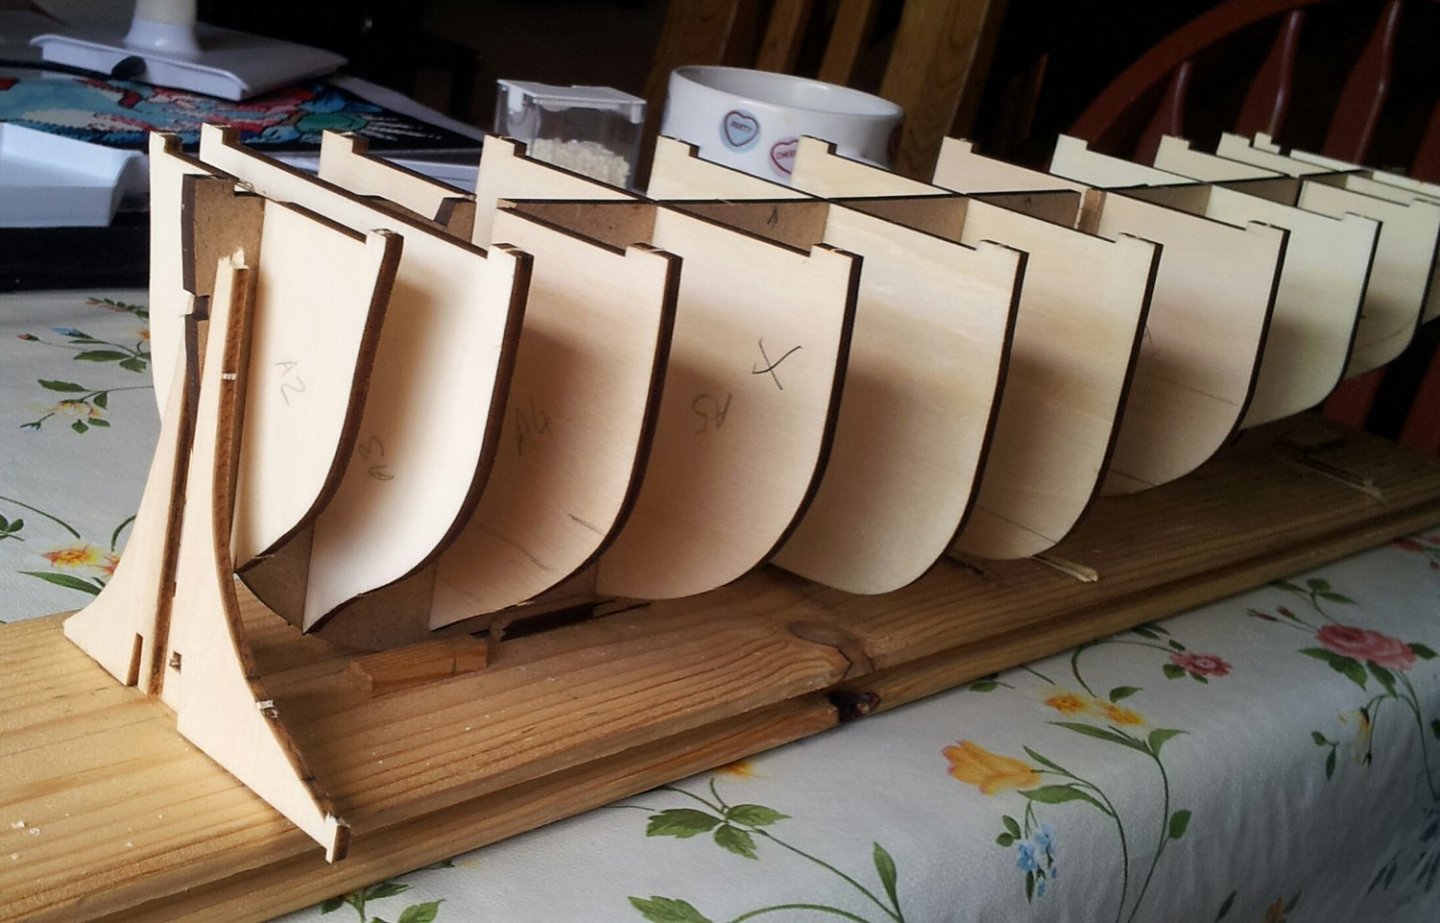
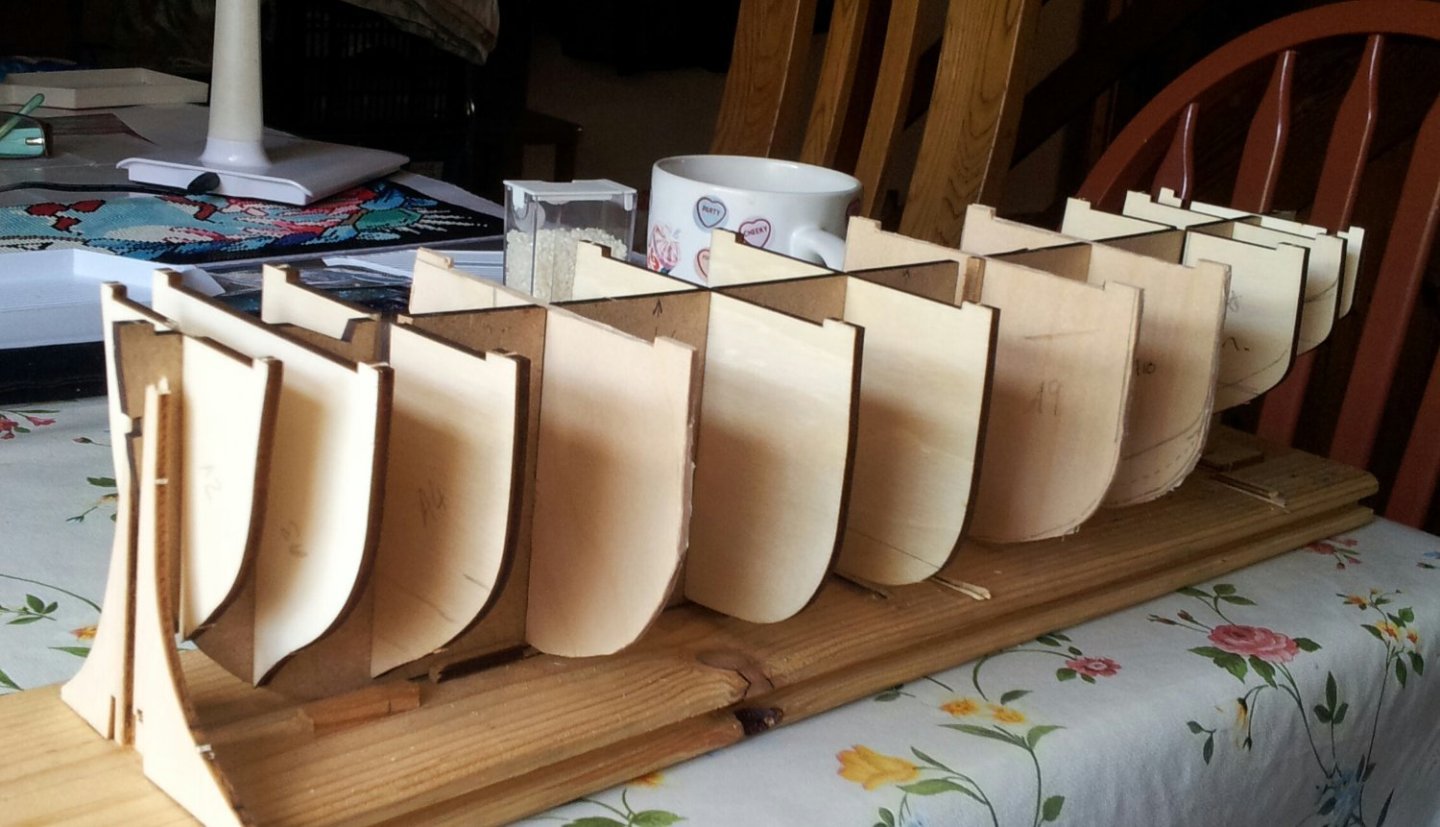
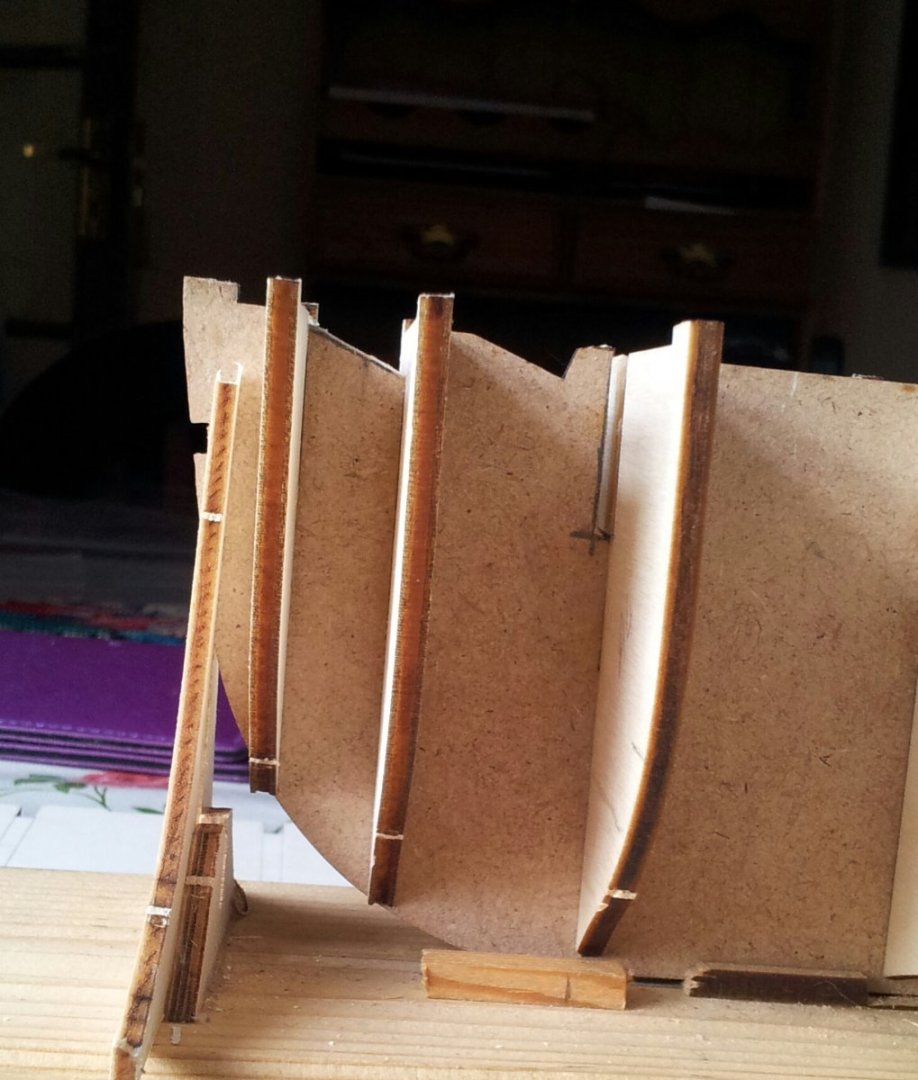
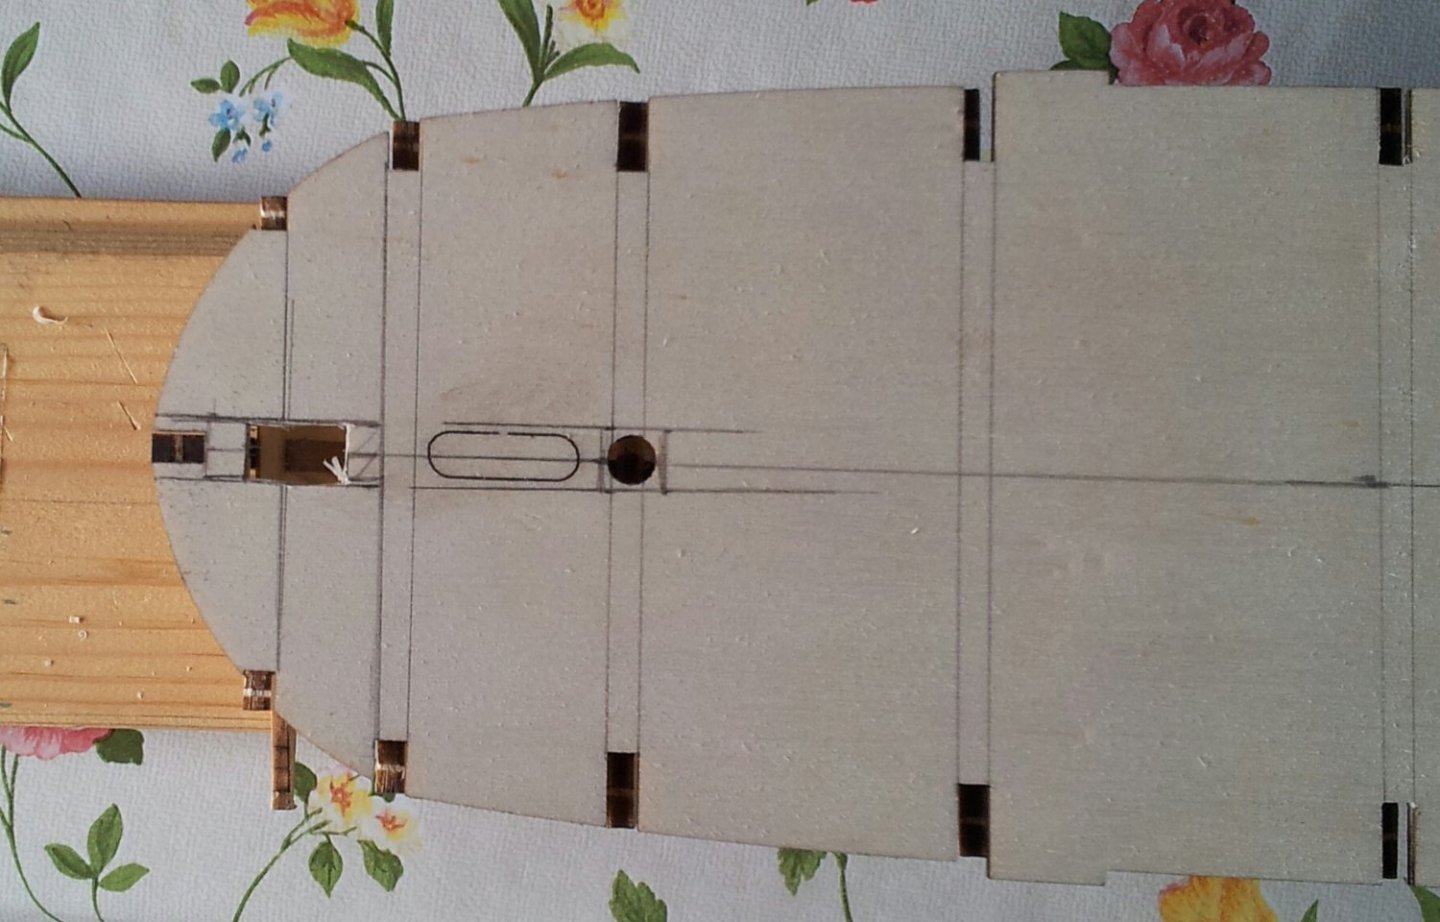
Due to more bad weather (is a couple of days of calm, dry, warm weather so i can get my workshop roof felted too much to ask) made more progress on Erebus. The new frames have been cut out- ordered a sheet of 3mm birch ply from model hobbies- and will be sanded to final shape when hull being faired. Frames 5, 9 and 10 needing work- have left frame 10 with plenty of excess as hard to fine tune due to the sterns of Terror and Erebus being altered from original profile- anyone modelling Terror could alter these frames too to avoid that weird bulge in the hull. Also cut out a hole for the bowsprit closer to the bows on the deck- glued the piece that you pop out for Terrors bowsprit and cut out a new angle between frames 2 and 3 on the keel bulkhead, and widened holes / slots for fore and main masts to accept wider masts as foremast and bowsprit should be 7mm and mainmast 8mm diameter (occre stayed with 6mm as with their Terror kit). pic 1- original frames temp fitted:- pic 2 - altered frames fitted:- pic 3- new cut out for bowsprit :- pic 4- new hole cut in deck for bowsprit (mast hole still need widened):- i have also cut out some midship frames to glue fore and aft of frames 6 and 7. I must admit if this all works out with the altered frames i am seriously considering Terror part 2! Take care all Keith
-
See my log David as i always mention where and what parts i have used to upgrade the kit. Keith
-
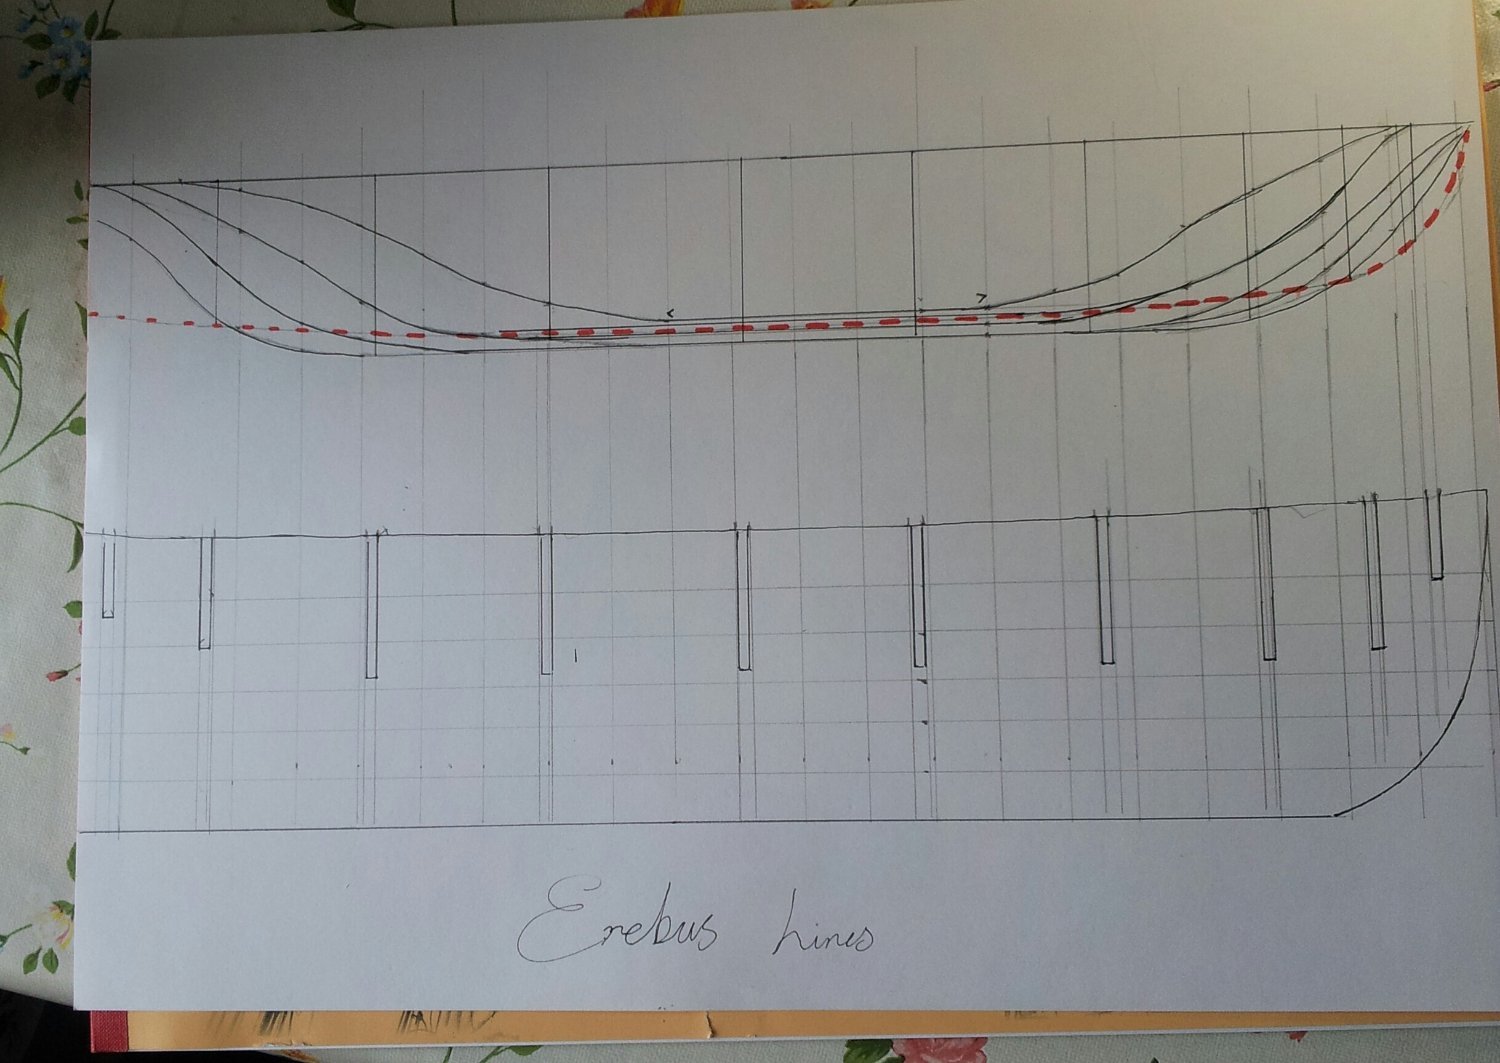
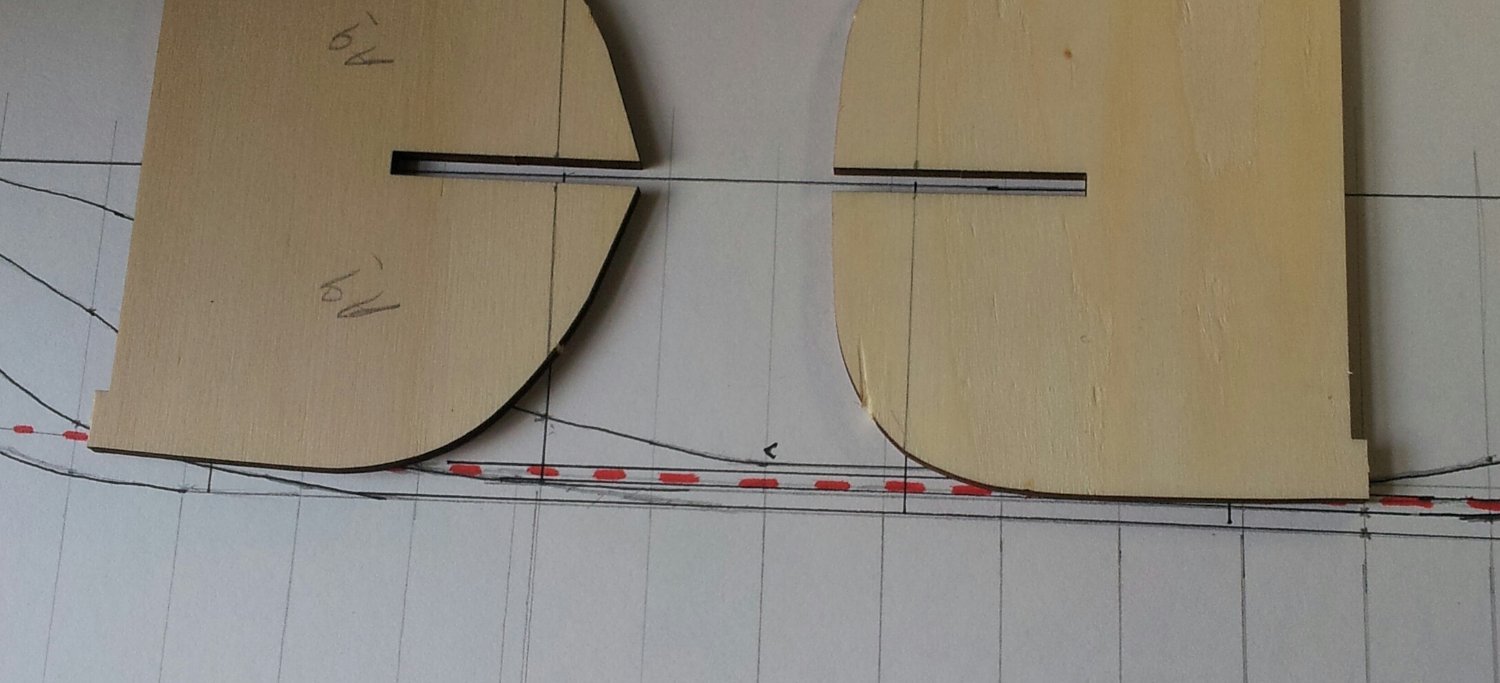
Thanks for looking in everyone -Due to good old Cumbrian summer weather (rain and wind)! got some workshop time😁- copied , enlarged and printed out lines plan for Erebus as built from one of the books i have. I only have an A3 portable drawing board but using the "keel" bulkhead managed to fit the side profile with the base of the sternpost right on the edge of the paper, so luckily i can fit all the frames bar the stern in. The red dotted line shows the outline of the occre deck piece , the two small arrows show where the fullest frames should extend to (frames 6 & 7 on model). Did a small check with frames and the midship ones are bang on (plan shows outline including planks so a i reduced 3mm need off for frame width. Frame 9 and frame 5 (either side of midship frames) need made slightly fuller but still need to check frames towards bow and stern as well. You can see how midship frame 7 (right) is o.k. if adding the planking width, but compare that to frame 9 (left) - i don't know why but frame 8 doesn't exist the part number 8 being used for the mainmast support piece. Take care all Keith


-
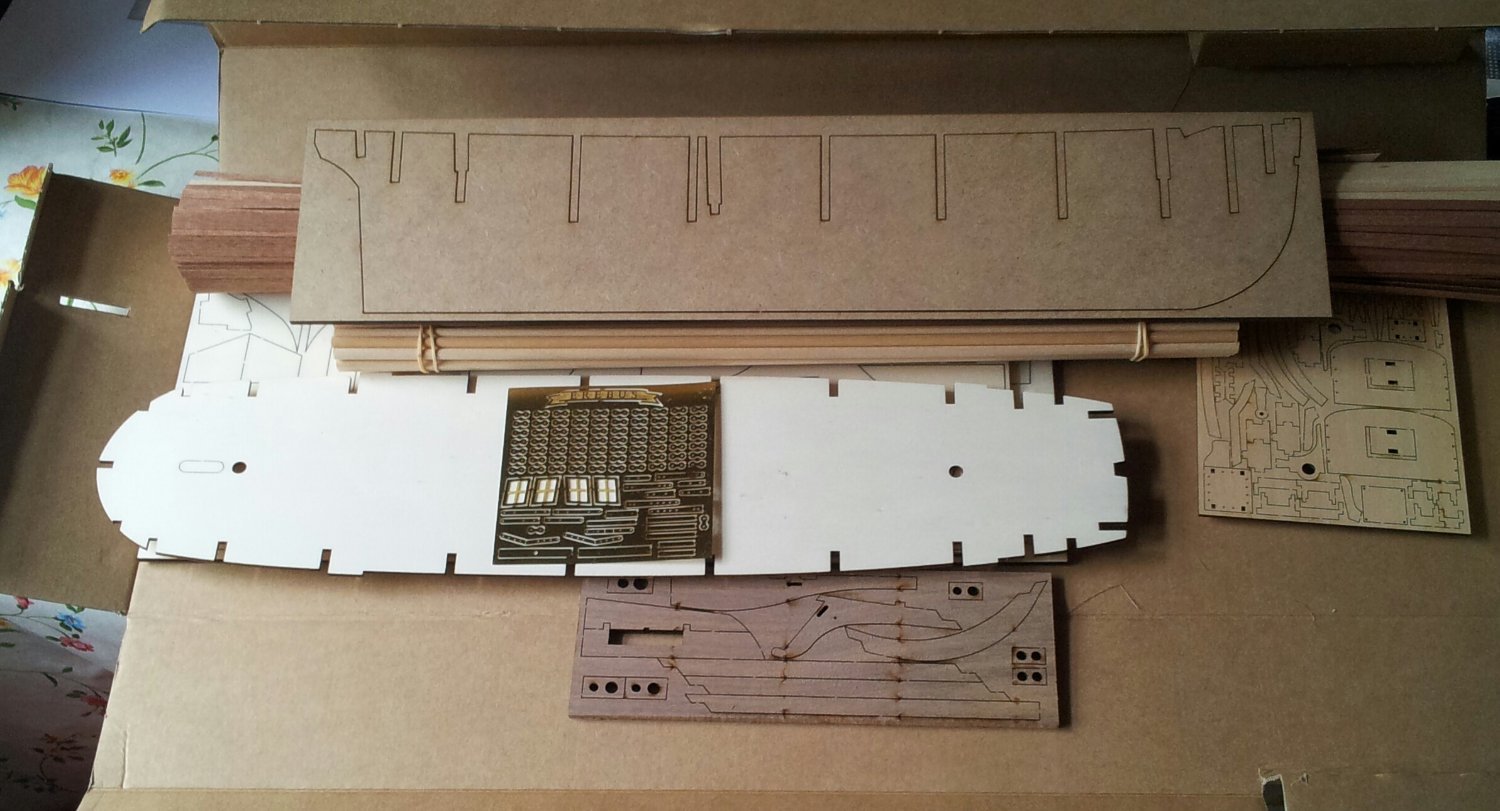
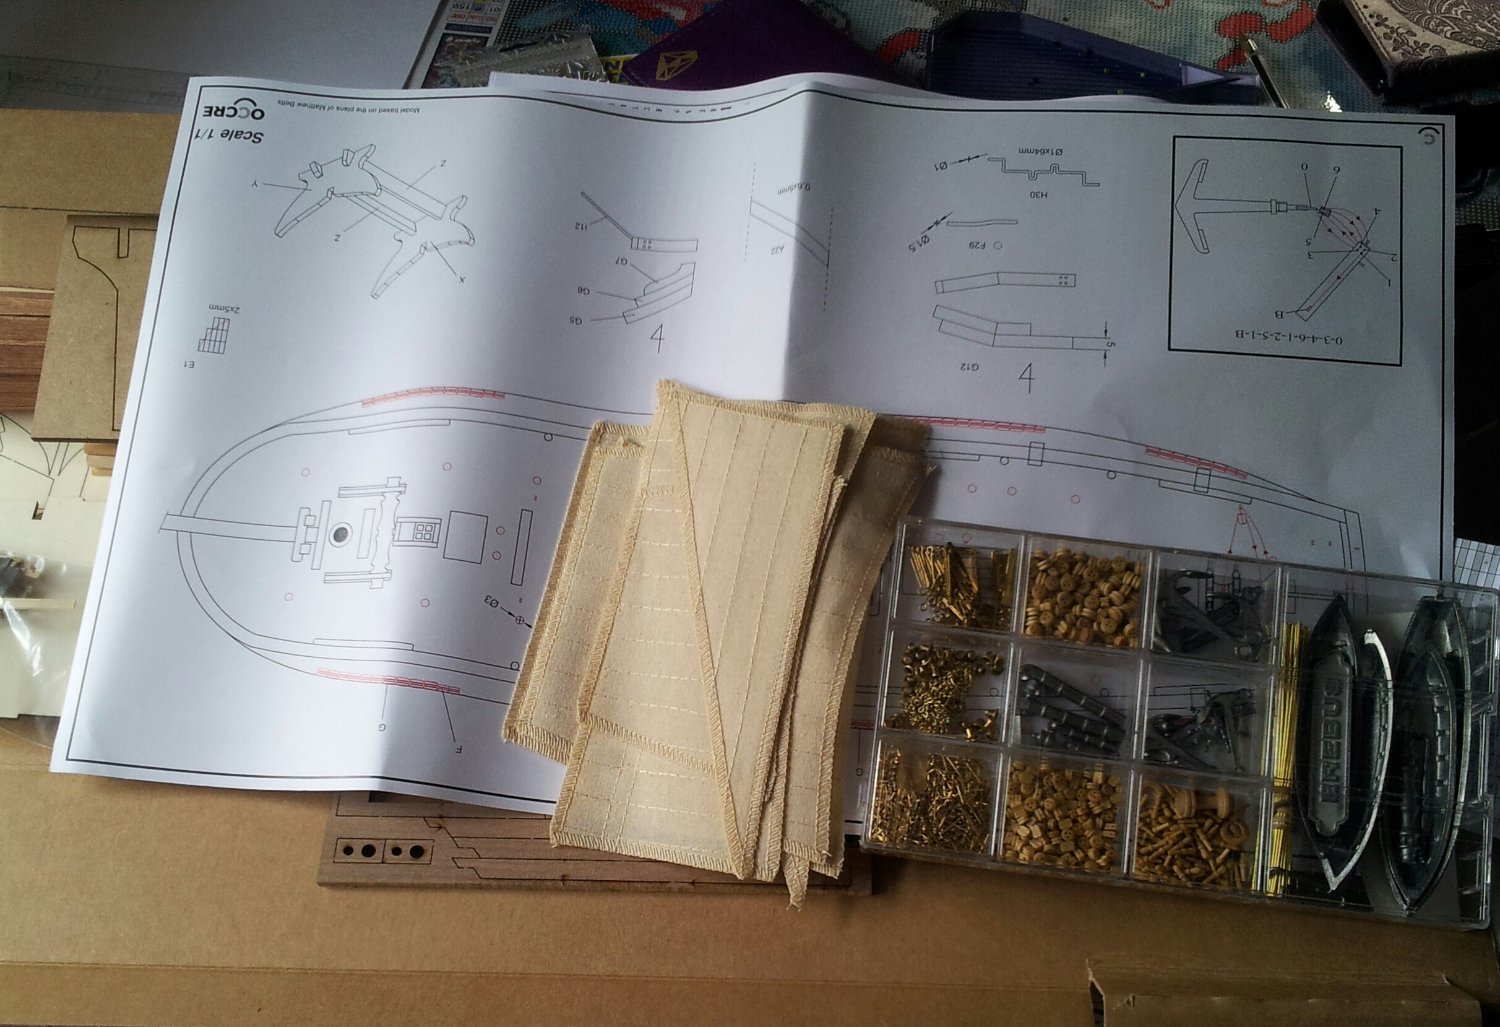
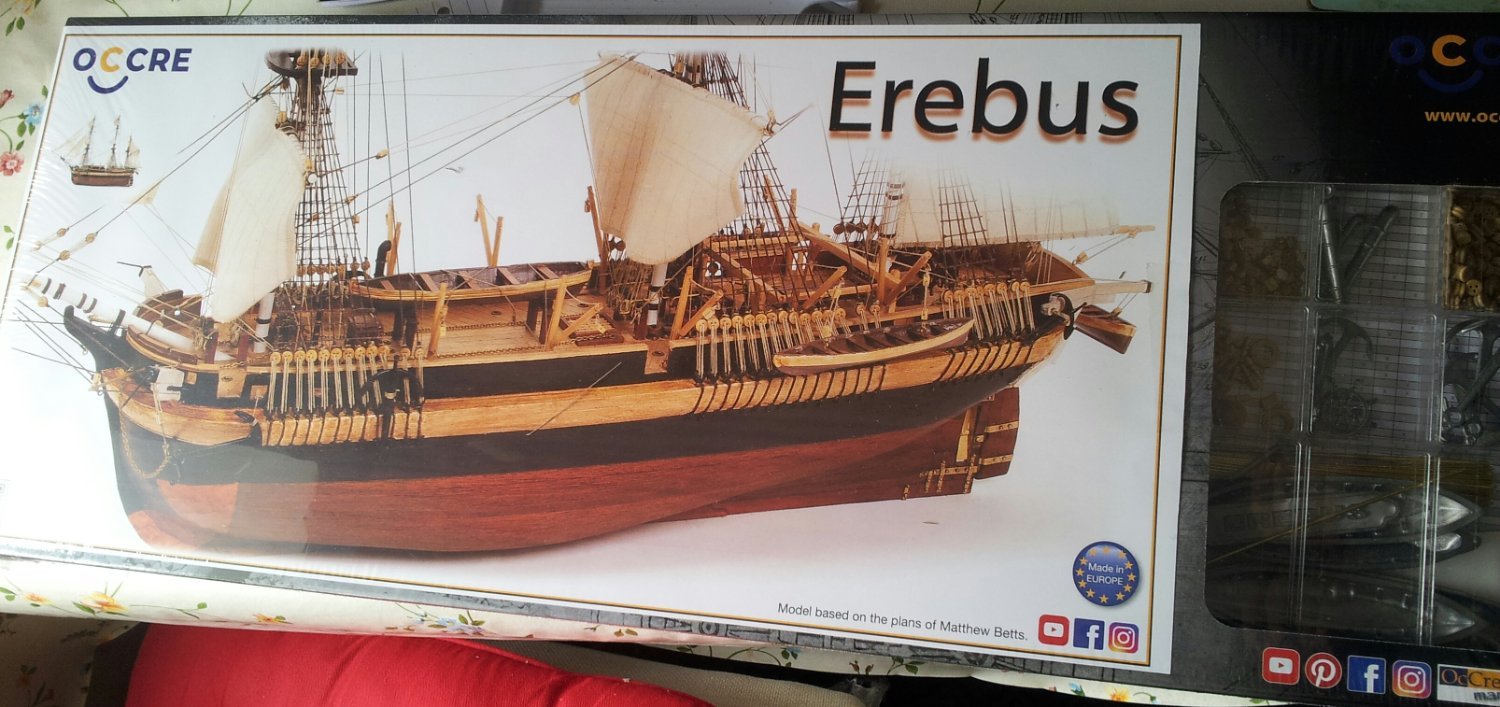
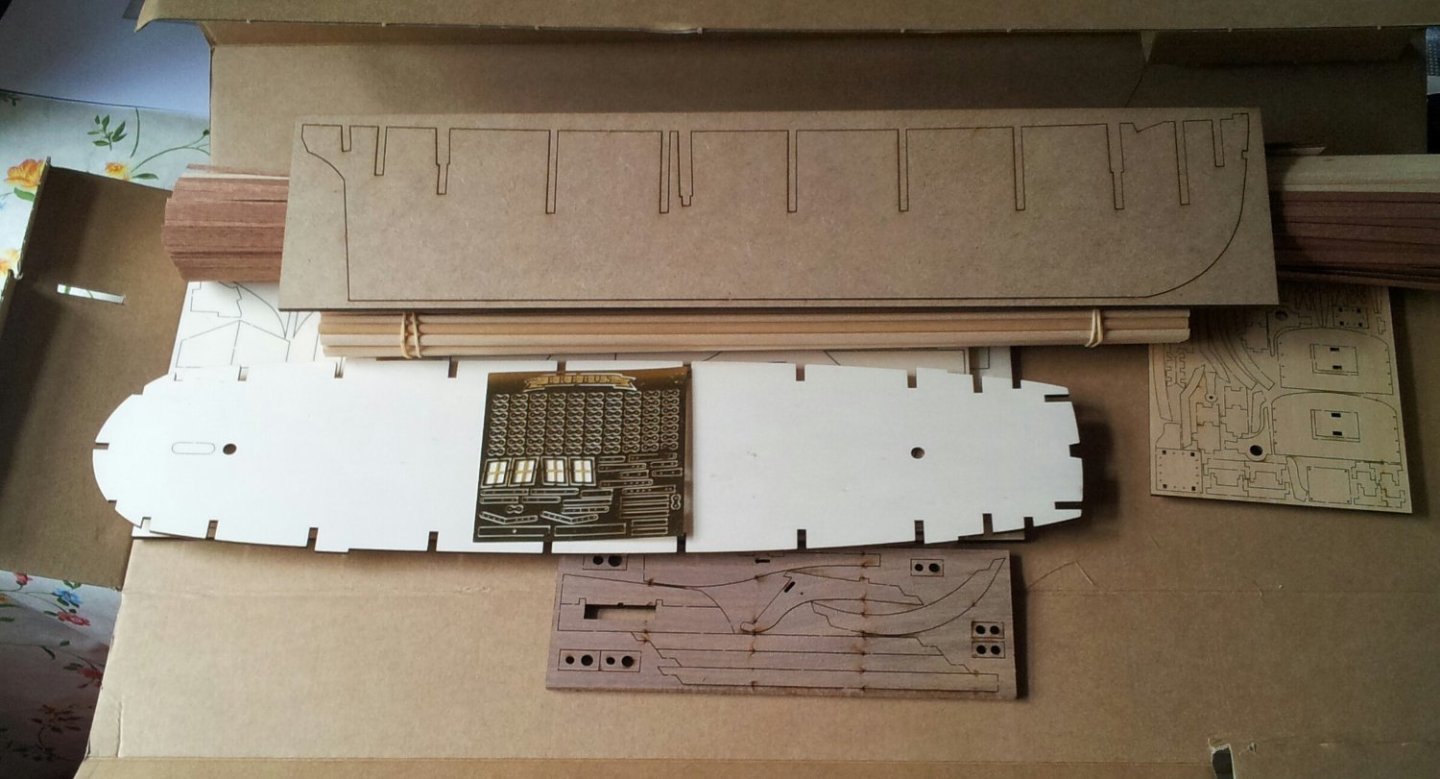
Here i go again!!! After not learning my lesson with occre's Terror here i am with their Erebus (at least i know more about the ships this time😁). Received the kit yesterday and as i suspected it is their Terror kit with a couple of amendments. This means the hull is 12mm too short, but i might just leave that as i am more inclined to alter the incorrect shapes of the frames towards bow and especially the midships to stern section -Matt Betts stated in his blog that the frames pictured were altered to stop piracy and i think it is these occre used when designing their Terror kit. Onto the kit - they have used M.D.F. instead of plywood (which seems the norm now for occre) for the longitudinal (keel) bulkhead while the frames and deck are in ply- the deck still has the bowsprit location for Terror which will need altered- another alteration is the shape of the forepeak on the stem/ keel/ sternpost sheet (looks like the style of the one on the infamous lithograph was used as inspiration). Also the etched brass sheet now has a nameplate added which looks like the style used on 'The Terror' series. Everything else is what you get in the Terror kit which has an excellent review on here and also see Keith S and my build logs for our little Terrors (even before the kit arrived i had already bought two of the caldercraft 10 spoke ships wheels)! Not sure when the build will actually start as busy rebuilding my outdoor messy jobs workshop. Take care all Keith


-
Well done beautiful build - used to seeing you work with card though😁 Keith
- 69 replies
-
- 4
-
-
- fly
- victory models
- (and 2 more)
-
Well i have done it again!!!!! Sometime this week Occres HMS Erebus kit will hopefully be delivered to me🤪. At least this time i have a better idea of what to expect, and this time will be looking to correct in wrong shaped frames (Matthew Betts stated in his blog about the frames being altered from true to stop piracy and the weird bulge on Terrors hull shows this). Looked at the kits instructions on occres website and it really just looks like they have used their Terror kit with a couple of differences thrown in. Once the kit is hopefully in my hands i will start a build log (already spotted couple of things needing altered along with all the stuff from Terror kit! Keith
-
coming long nicely- forgot to say a couple of posts back that yes you will need to add the other pinrail on the bulwarks for the mainmast. Keith
-
Welcome to the Endurance club- i kind of threw away the Occre instructions after framing- take care when sorting the formers for the stern as they are handed and sided. Keith
-
I used rub down transfers for the name, but there are a plethora of waterslide/ rub on and presfix transfers available along with etched brass and plastic lettering in various scales. Keith
-
That is an ideal stage to pause the build Hake- she is really coming along now. Keith
-
Welcome to the "littleTerror club" as Keith S named it- nice to see we have encouraged others to upgrade the kit (even just adding the deckhouses make a world of difference). Keith
-
if you look through my log you will see the difference if planking more realistically by tapering the planks (this was one of the most pleasant hulls i have planked) Keith