DONATION DRIVE - SUPPORT MSW - DO YOUR PART TO KEEP THIS GREAT FORUM GOING!
×


clearway
-
Posts
2,235 -
Joined
-
Last visited
Content Type
Profiles
Forums
Gallery
Events
Everything posted by clearway
-
 amen to that Johnny- if only we knew then what we know now! Keith
 -
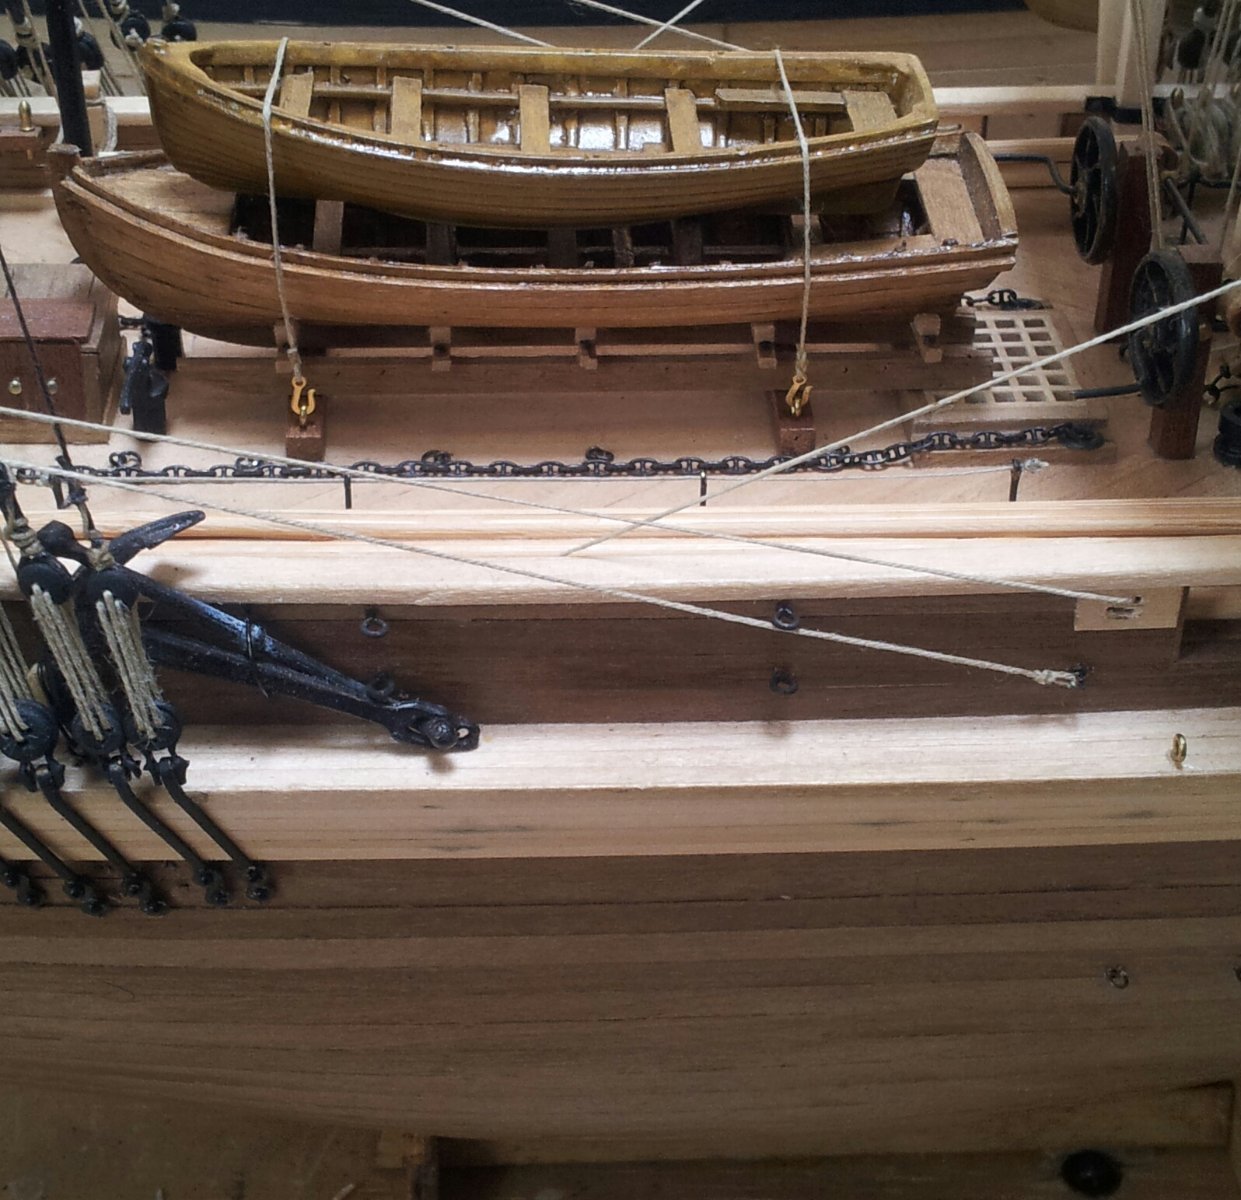
looks credible enough Tom, and yes the chain will pass through the deck. Keith
- 206 replies
-
- 1
-

-
- Endurance
- Shackleton
- (and 2 more)
-
A few people have been caught out with that dotted line across the rudder head! I use the birchwood brass blackener as well (did a mean job on the brass anchor chain). Keith
-
Thanks Richard - best to start from last post and work backwards as a lot of ideas were altered as the build went along! Keith
-
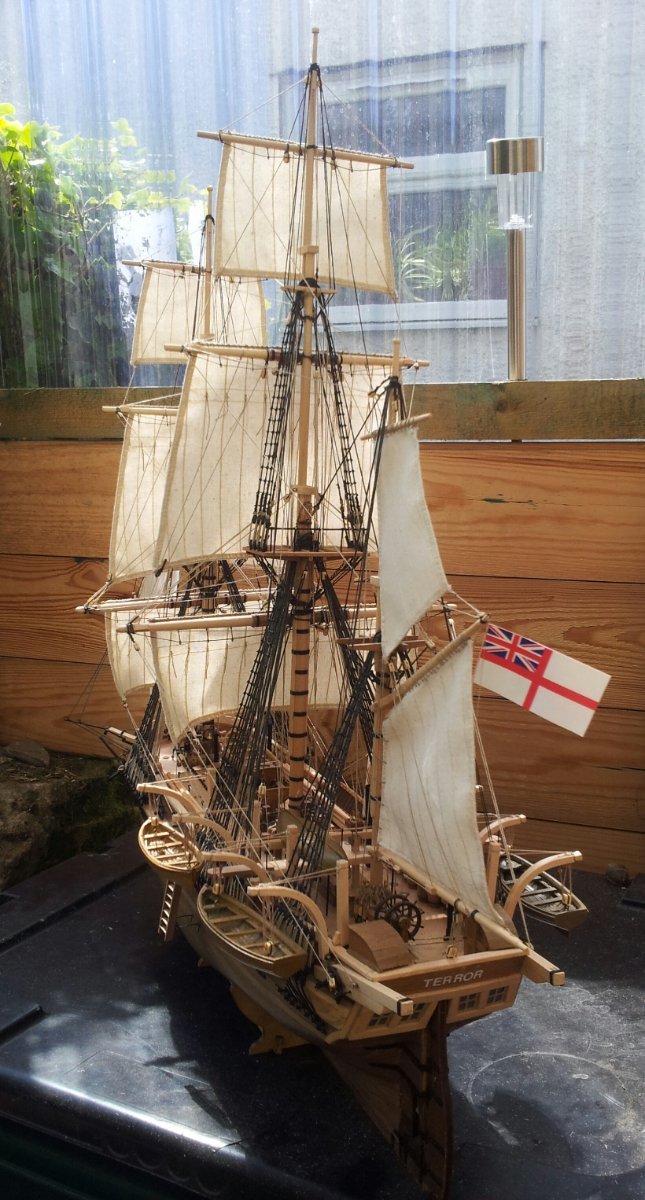
Still can't believe it is three years since Keith S prompted me to start my model of Terror which had been in my stash for a year or so, A big thank you goes to Matthew Betts whose building Terror blog enticed me to model her, and Keith S for the many convos especially in the dark days of lockdown one - really appreciated the back and forth Keith. I still can't decide what to do with the 2nd whaleboat so will leave it off (this might change)! Thanks everyone for the input, comments, likes and popping in for a view. Take care all, Keith


- 649 replies
-
- 15
-

-
-

-
the 1.5 mm refers to drilling a hole for the tiller not trimming the end- The rudderpost would indeed have been square at this period. I also drilled more holes in the rudder pintles and gudgeons to add more fasteners using Peco brand blackened model railway track pins which have a smaller head than the occre pins. Keith
-
Makes a big difference when the closets are added to the deck hake. Regards the way the amati deadeyes are made you could alter the omega loop around the deadeye to fit the 3mm deadeyes- bit of work but not as bad as scratch building them. Keith
-
the lamp discussion is nearly as involved as the great "ice bridge/ azimuth compass" debate on my Terror log Keith- i think you are on the right path with the lantern hoist/ downhaul. On their FD10 yawl billings have a lantern that runs up to a bracket on the mast doubling with an eyebolt on the base of the lantern for the down haul Keith
-
Hi jorez- i used annealed iron wire for my chainplates. Keith
-
The plating would have been fastened over the top of the planking as opposed to rebated. Keith
-
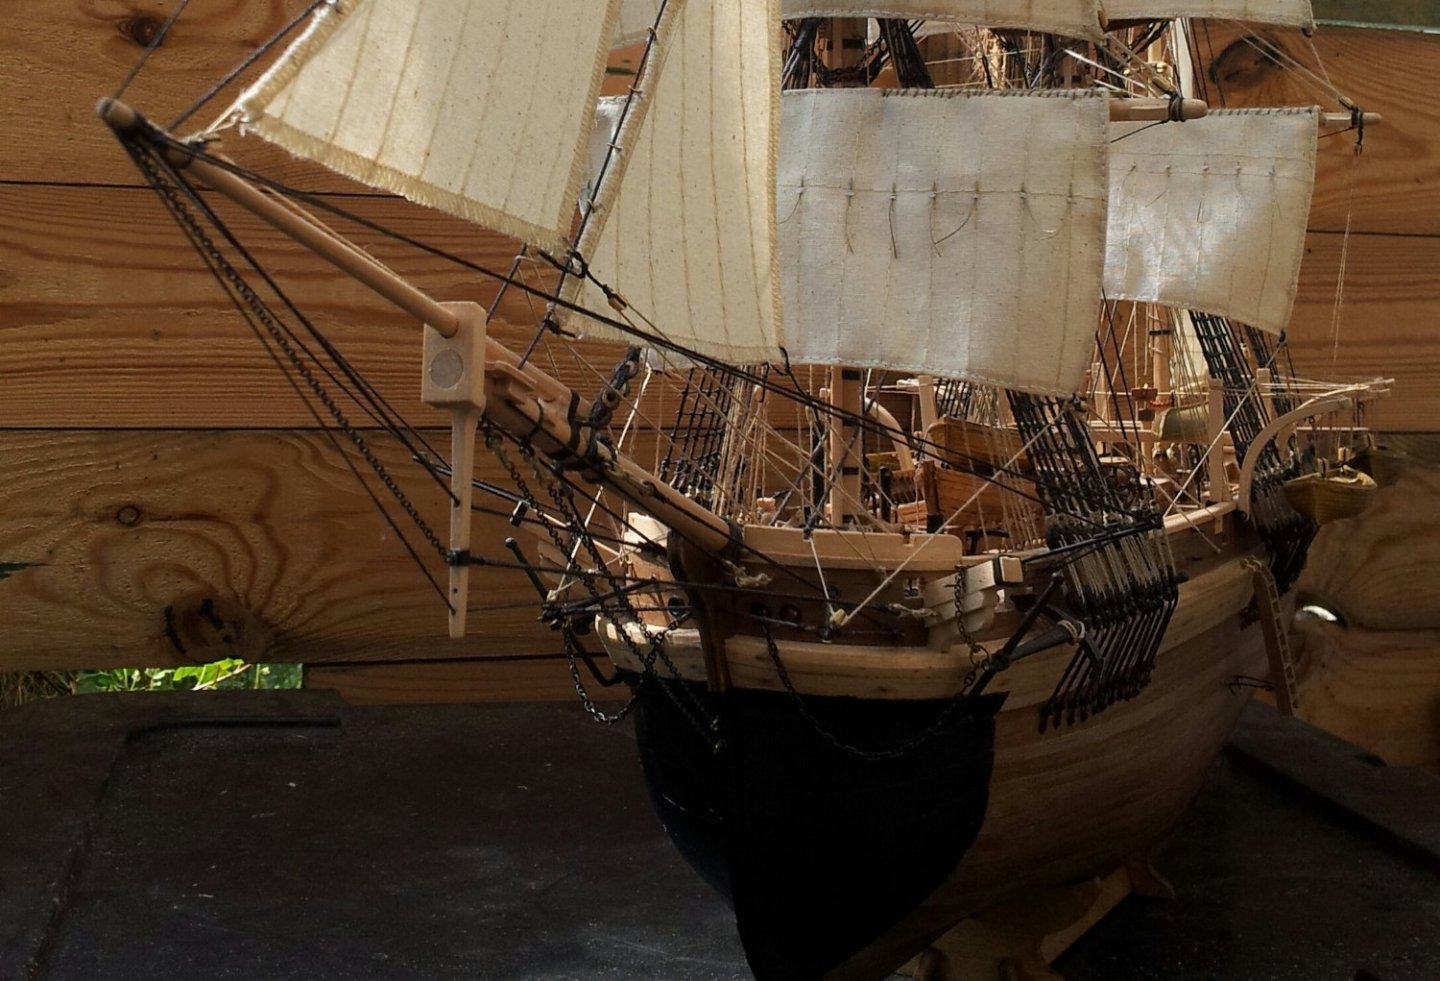
Brings back memories of a sawdusty kind!- the "bumper does narrow slightly where it rounds towards the bows - coming along and looking more Terror like. Keith
-
welcome back John- i see your shipyard is rail served too😉. how about gluing strips of wood at 90degrees to the keel with a couple of support pillars like in a dockyard? If using the pillars they would need screwed or pinned as there is a lot of weight causing stresses. Keith
-
Coming along Hake- I must admit the scratch chainplates i built were a bit of an endurance test as you say there are a few to do- if doing again i would substitute the kits deadeyes for slightly smaller ones. Keith
-
I am debating at the moment if i should either buy the metal blocks for the steering chains, or attempt to scratchbuild them- as to the wooden drum - still looks better than what occre instructs. Keith
-
Really moving along now- really makes a difference with the more accurate stearing gear. Keith
-
well into the twentieth century ships would have electric navigation lamps and emergency oil navigation lamps- hence why you see the boards port and starboard with two lamps each- usually bottom lamp electric and oil lamp above. Keith
-
gotcha- think my eyes seen the small hole there and added an illuminator🤪 Keith
-
Progressing nicely Hake- and yes once all the deck furniture is in place the illuminators arn't that obvious- regards the missing one it is on the wooden structure the capstan sits on though it was removed for the steam vent pipe (how i have depicted mine). Straightening dowel ..... not sure it can be done to be honest though i have never tried to be honest. Keith
-
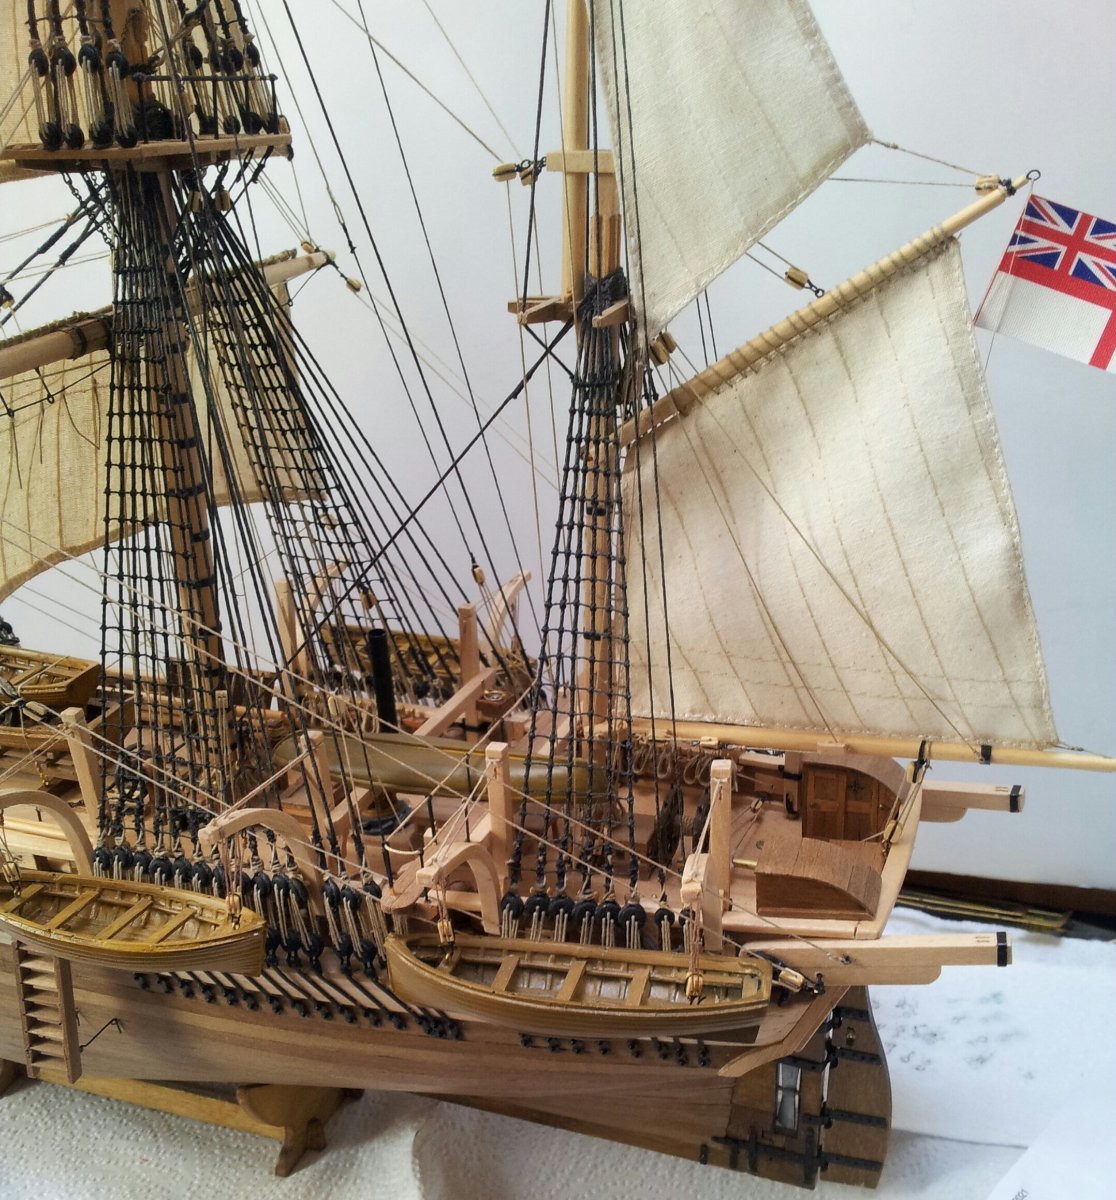
After a glorious first three days of long easter weekend working in the garden, day four equals rain so back to some more "last jobs" on terror. Using some blackened brass eyes from the kit added the empty davit mounts on the hull -Captain Crozier had the iron stanchions fitted at the waist removed but i very much doubt they would have removed the mountings. Still not sure what to do with that last whaleboat🤔 Also Crozier had the barge sent back, so should we have the larger ships boat there?!- also means you would be down to 8 boats as opposed to 9. Take care all Keith

-
Coming along nicely- i wouldn't bother filling any gaps in the first layer though as when adding the 2nd layer the glue will help fill/ seal them. Keith
-
😵💫looks like a load of greek to me 😁, but seriously that would be one hell of a device to show off! Keith
-
Ty Hake- i hope Keith S, Daniel and myself havn't scared you too much with all the altered details! Keith
-
Thanks Hake- i did realise some things too late for example the lamp room and W.C. and the open deck under the anchor deck (forecastle). If memory serves me right i think yours was the first completed Endurance on MSW. Keith