Ian B
-
Posts
659 -
Joined
-
Last visited
Content Type
Profiles
Forums
Gallery
Events
Everything posted by Ian B
-
 tried some rolled long ways and folded? which looks best--tempted to do long ways-- not so many to make lol
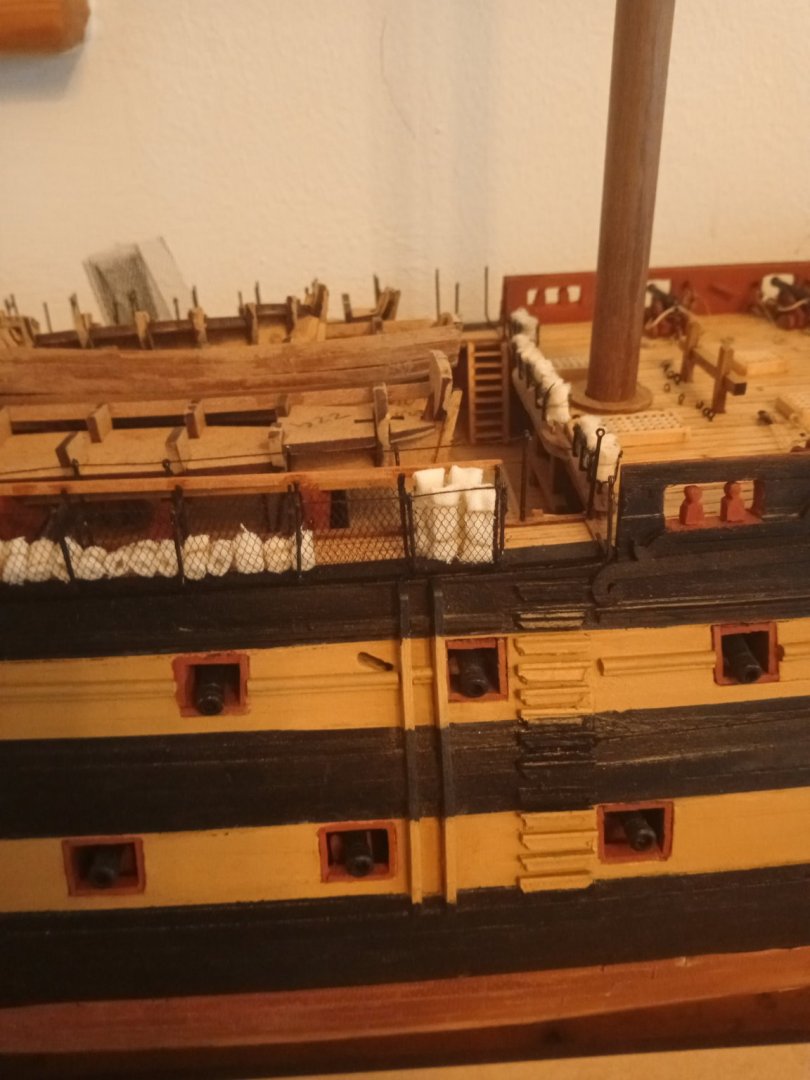
-
Thanks for the pictures, very interesting how they seem so large laid out on deck like that. I worked out roughly how big a real one would be--rolled it up and tied it around--- looks OK,,I am sure someone knows better
-
Hi, sorry there is no link
-
Hi I am just fitting the hammock netting to my HMS Vanguard build… I want to add the hammocks.. are they stacked vertically in the small nets? What about the large double nets that run parallel to the boats? I couldn't find a build that had done it--- so couldn't steal-- I mean be inspired by someone elses work
-
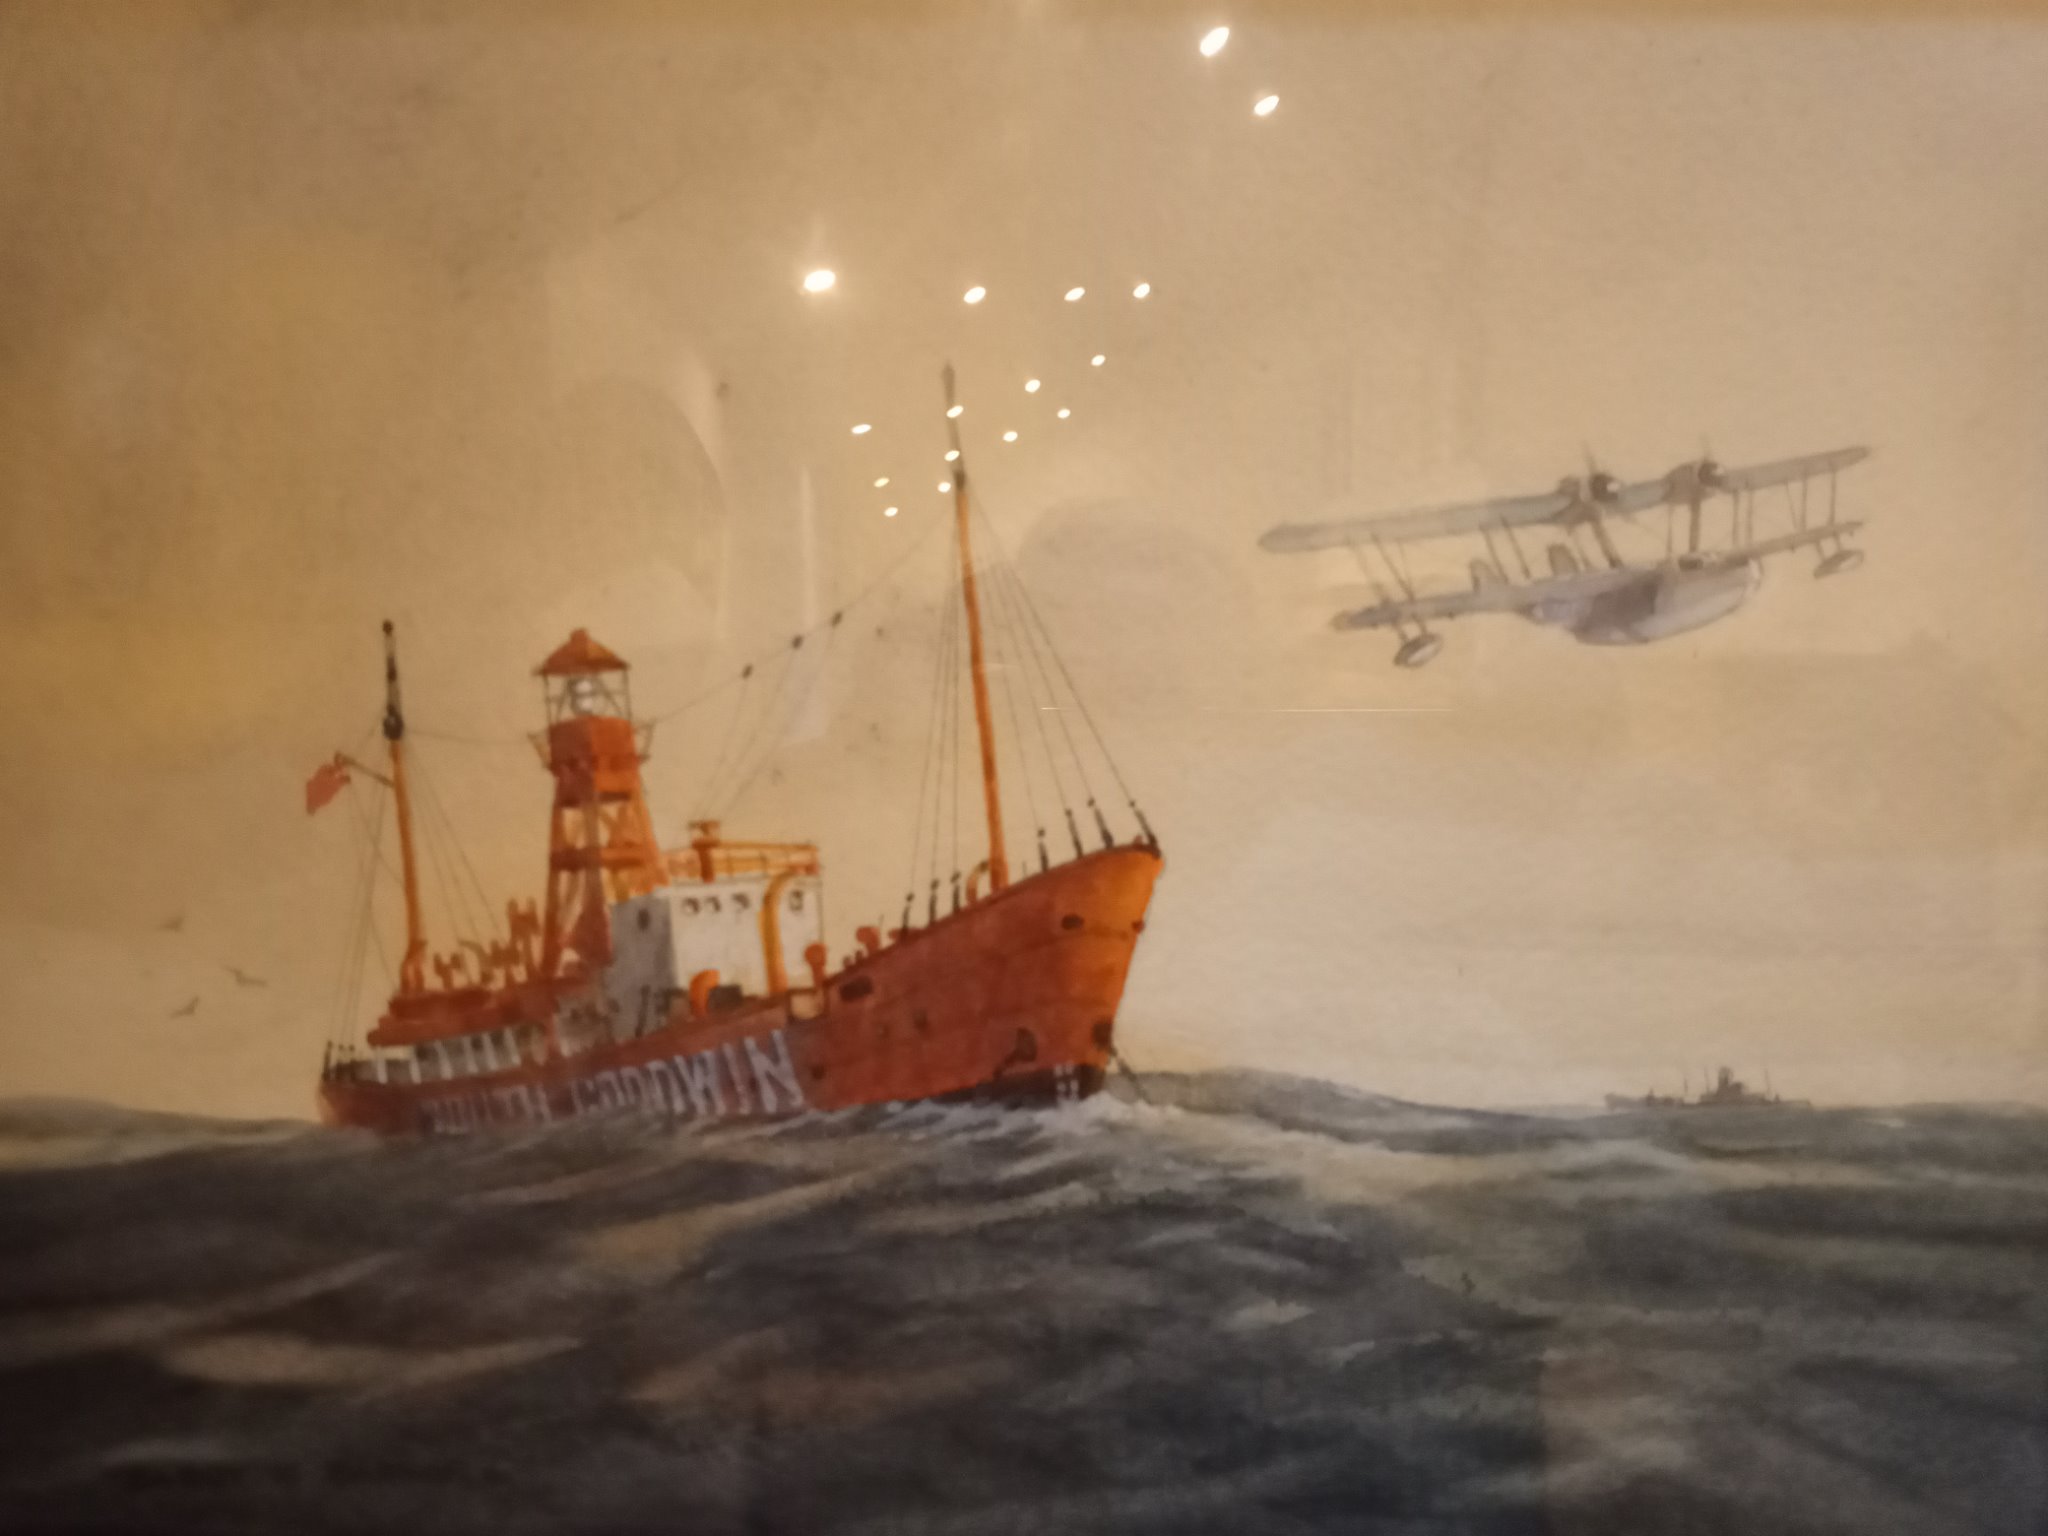
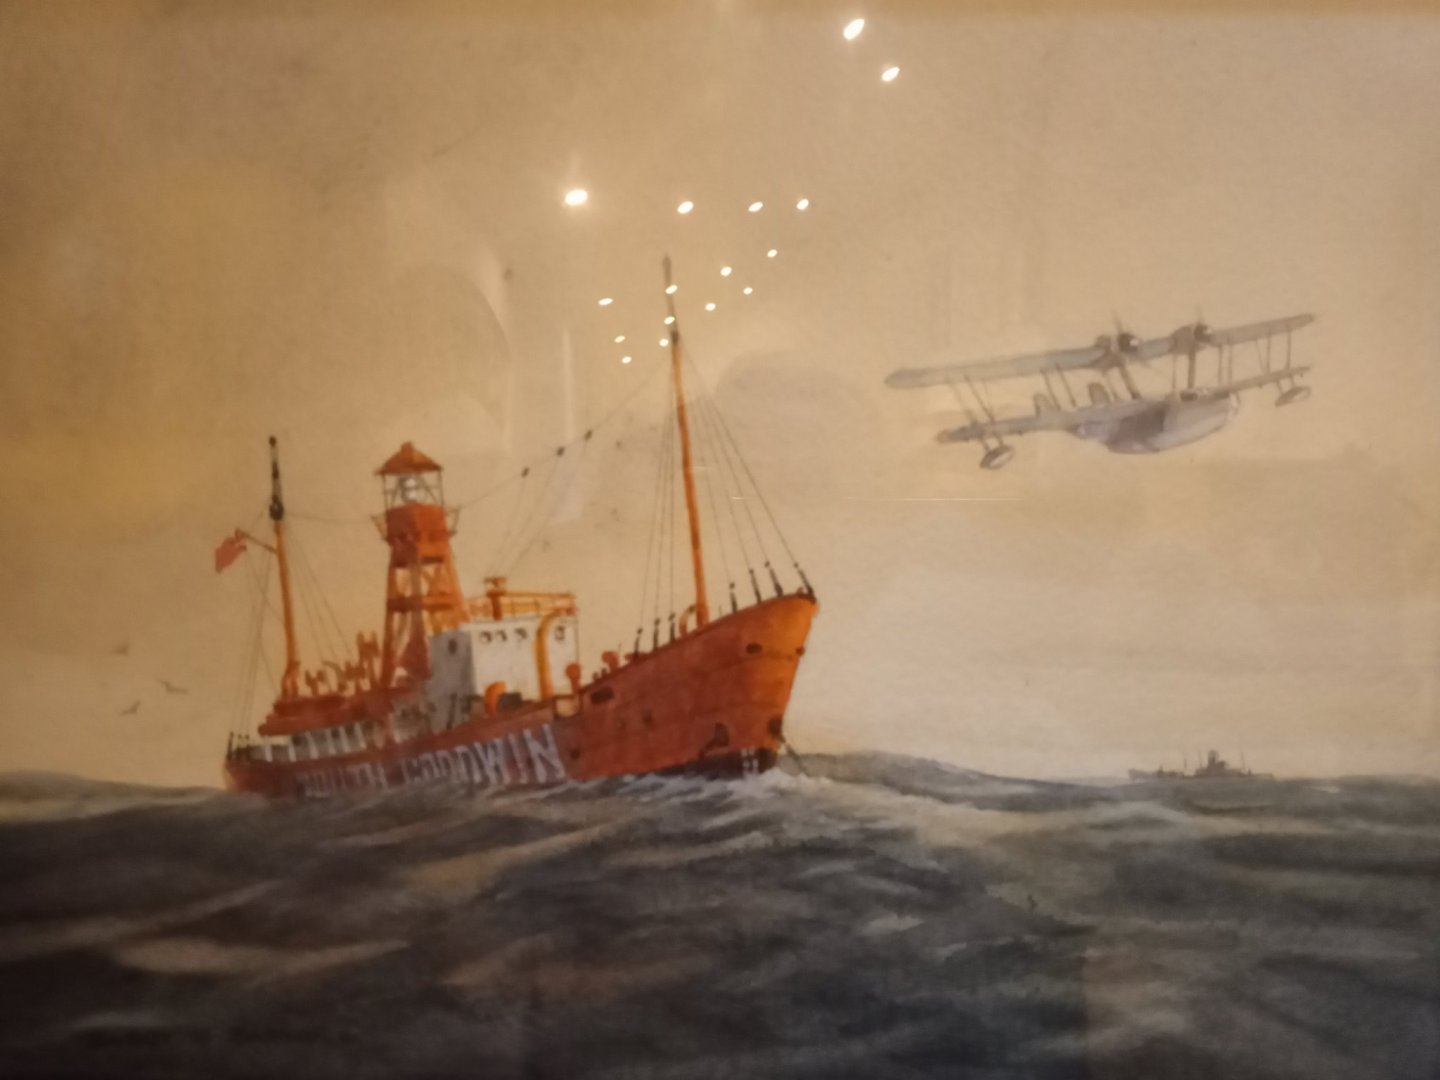
It reminds me of my favourite picture I have on the wall at home-- sorry for the poor quality photo but gives you the idea
-
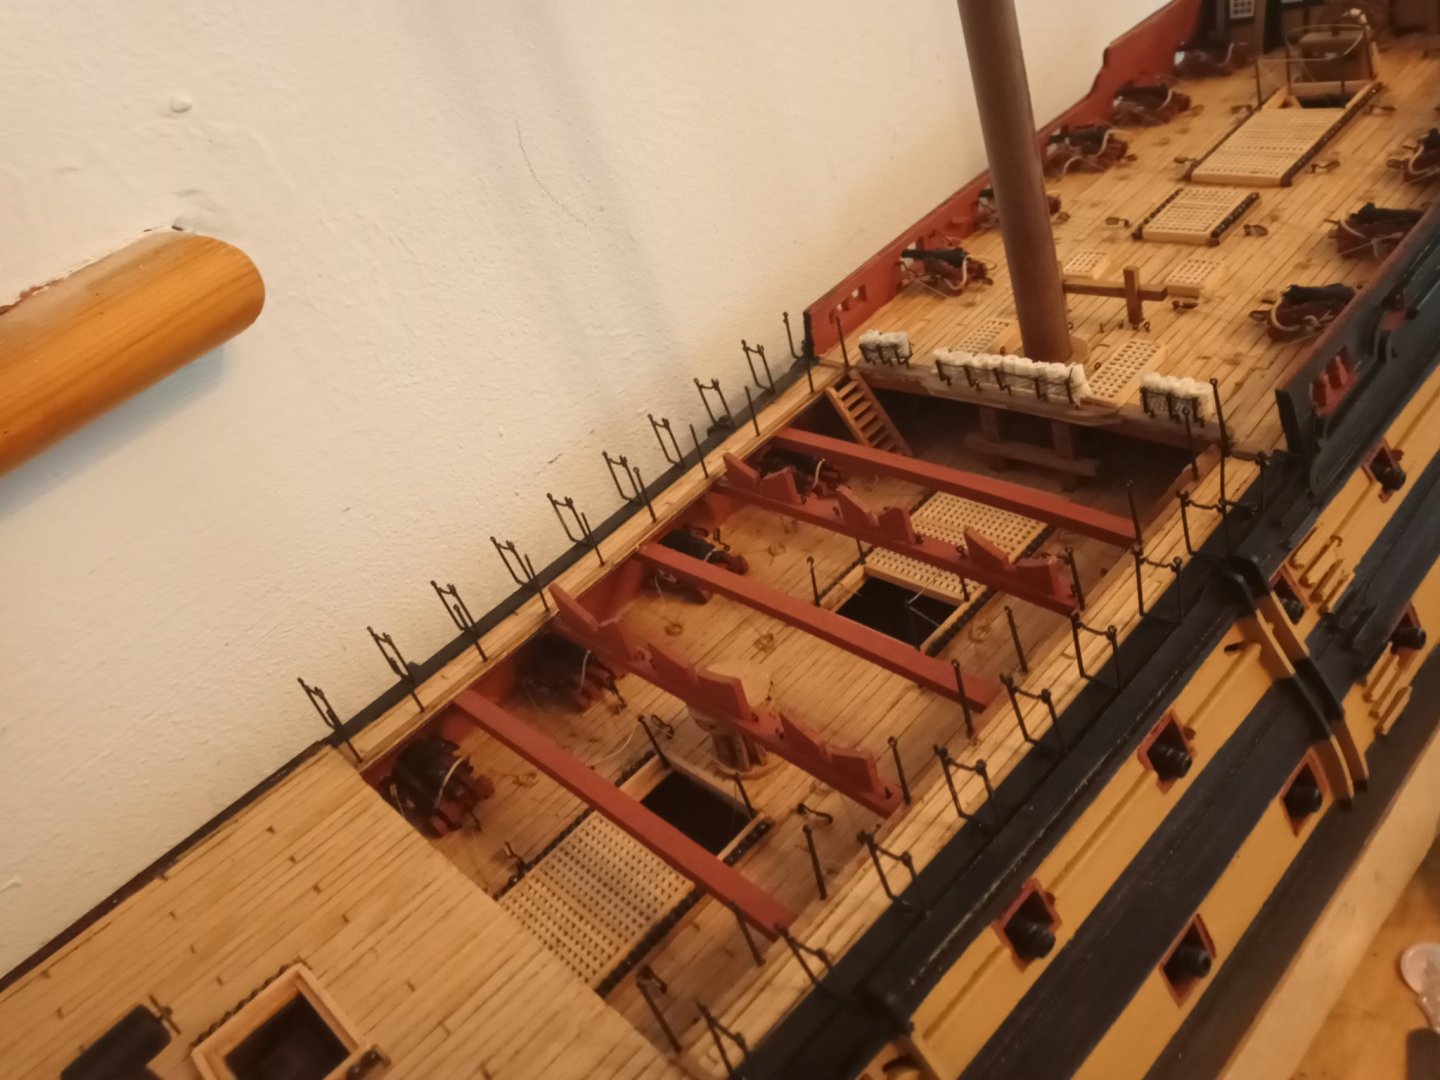
My favourite picture so far -- still enjoying all your output
-
good PDF, I am most of my way through HMS Vanguard and intend having a full set of furled sails on her so will definitely refer to this
-
wow -- love those planes-- great paint work and detail
- 33 replies
-
- 6
-

-

-
- graf zeppelin
- trumpeter
- (and 2 more)
-
Reducing mast circumference without a lathe
Ian B replied to Charlie pal's topic in Masting, rigging and sails
Same for me, it was years before I got a small lathe.. works a treat -
What super build, the cargo and the rope work just makes it outstanding-- well done
-
Hi Its coming along great. I am considering doing this kit next with added electrics (I have not yet added any to any of my previous builds) so definitely coming along for the ride
-
Converting a Backyard Shed into a Model Workshop
Ian B replied to Hank's topic in Modeling tools and Workshop Equipment
Note to self---- Stop reading this super thread and getting more bitter and twisted by the day working on a small table in my dinning room..LOL -
good luck
-
Thanks Gregory, a great resource. I shall book mark it
-
Thanks for the quick replies Chris, I am just thinking about what details I could add throughout the build. I am open to suggestions
-
Thanks Chris What about the upper deck? loving your kit by the way. I have 2 months of work (no choice) so steaming ahead with this . One other question does she have any scuppers or such like to release the water from the decks?
-
Hi I am just about to plank the decks but unsure as to what pattern they should be layed. Can anyone help? Thanks
-
When have you actually passed the halfwaypoint in building a kit?
Ian B replied to Vane's topic in Wood ship model kits
yes, once you start on the mast and rigging your over the hump..... -
RAF SAR rules OK far better in yellow 🤡 flew with 22 sqn couple of times a long time ago LOl..
-
Thanks for the quick response Allen. I will be using the Victory model kit but I hope to 'enhance it' some what. I just like adding that extra bit of detail that make so much difference and increases the satisfaction of the build.-- if that makes sense I have been reviewing the build logs on here for the kit and have some ideas already..
-
Hi I have almost saved enough pennies to buy my next build. Is there a recommended reference book I should buy I don't seem to be able to find a AOS for this ship?
-
What! No tea and chocolate biscuits? Or at least a dried ring where the mug was LOL Nice selection ….