Supplies of the Ship Modeler's Handbook are running out. Get your copy NOW before they are gone! Click on photo to order.
×


DaveRow
-
Posts
686 -
Joined
-
Last visited
Content Type
Profiles
Forums
Gallery
Events
Everything posted by DaveRow
-
 Michael, For each fake timber band, I was very careful to not use excess glue(CA). It soaks into the card and forms a solid. It is easy using a scalpel blade to slice of unwanted bits. I coated the bands with CA glue to seal each band. Dave R
 -
Hi Pat, I've lost the hours I've spent "looking ahead" to see what else should be added onto an item, so it is there when the time comes. I'll miss something I am sure. Dave R
-
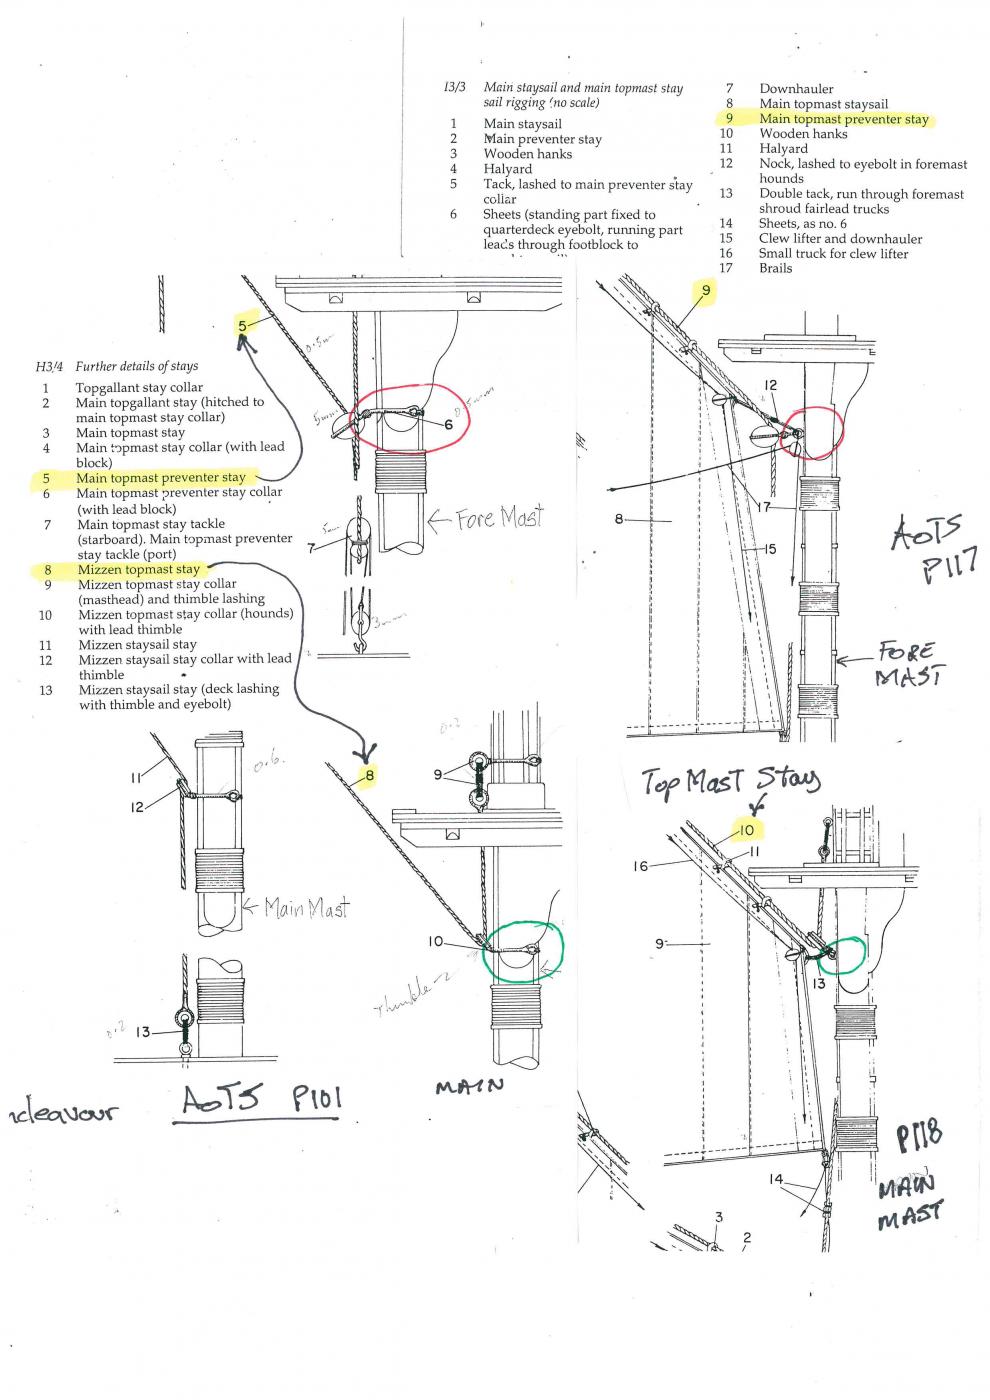
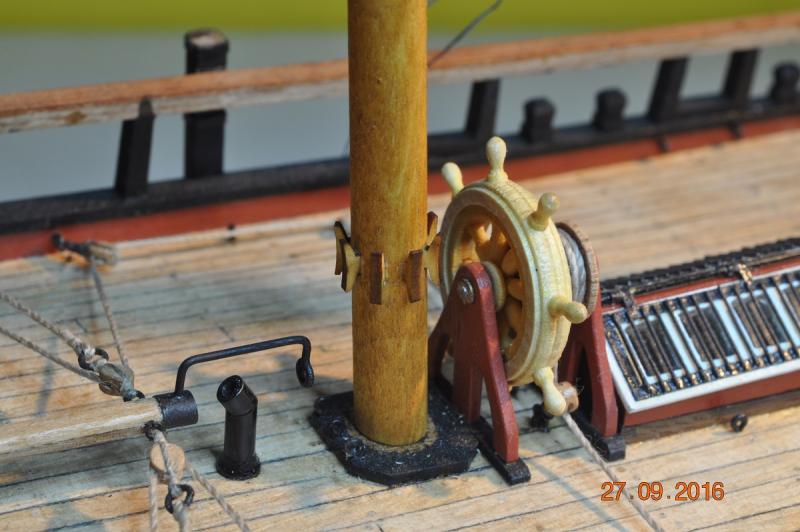
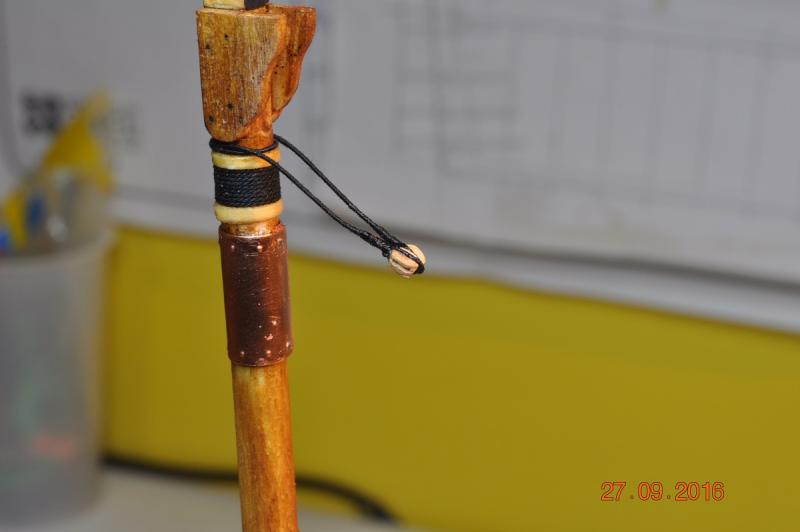
What is going on ? So have been working through on a few lashings for the stays to the masts. I came across a dilemma with Main topmast preventer stay and the Mizzen top mast stay. The clips(below) from the Endeavour AOTS show different methods of attaching the above stays. Page 101 in the Standing Rigging section and Pages 117 & 188 are from the Running Rigging section. Also had a look at some of the great Endeavour builds on the site to see what others have done. I decided to go 50/50, hope I got it somewhere near correct. Fore Mast methods: 5mm pulley for the Main topmast preventer stay 5mm Heart for the Main Stay Main Mast methods: 2 Thimbles and a Heart block for the Mizzen stays Mizzen strops: Cleats on Mizzen and Fore Masts: Small steps. Dave R


-
Hi Bob, Are you planning to add some blocking between the frames to the hull(wales line) ? Dave R
-
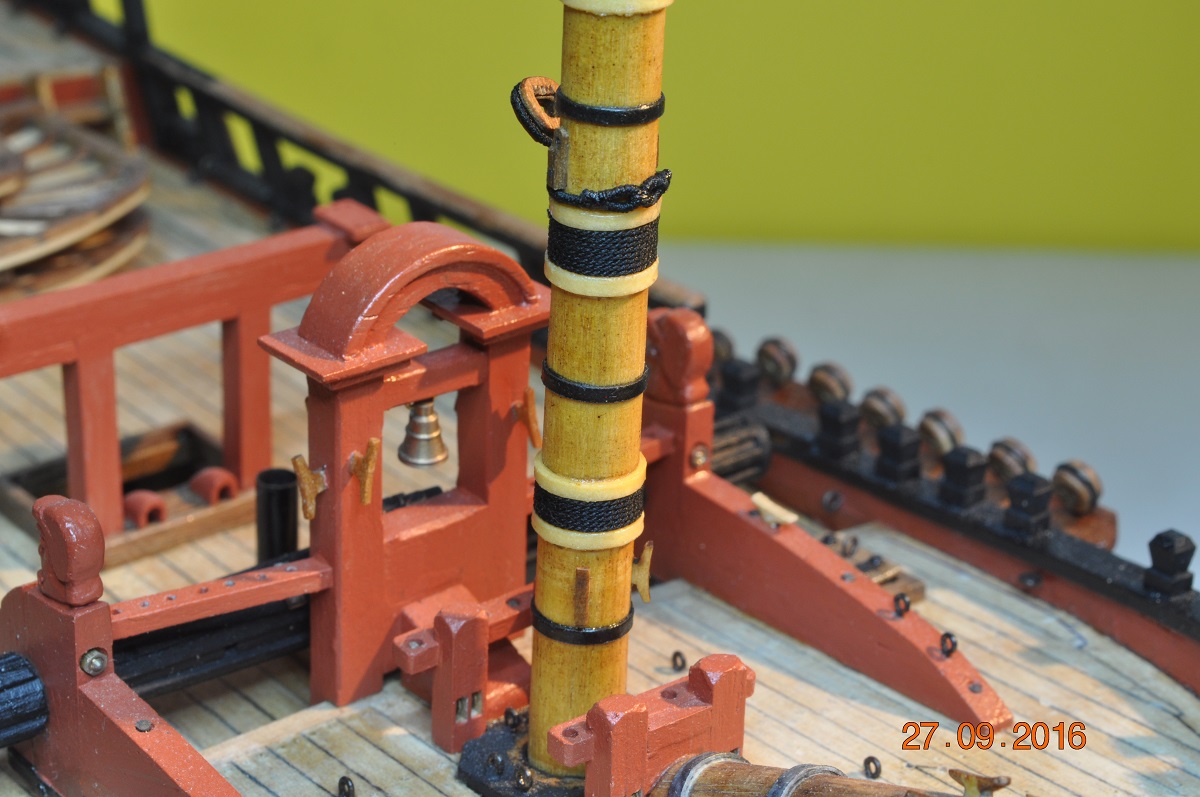
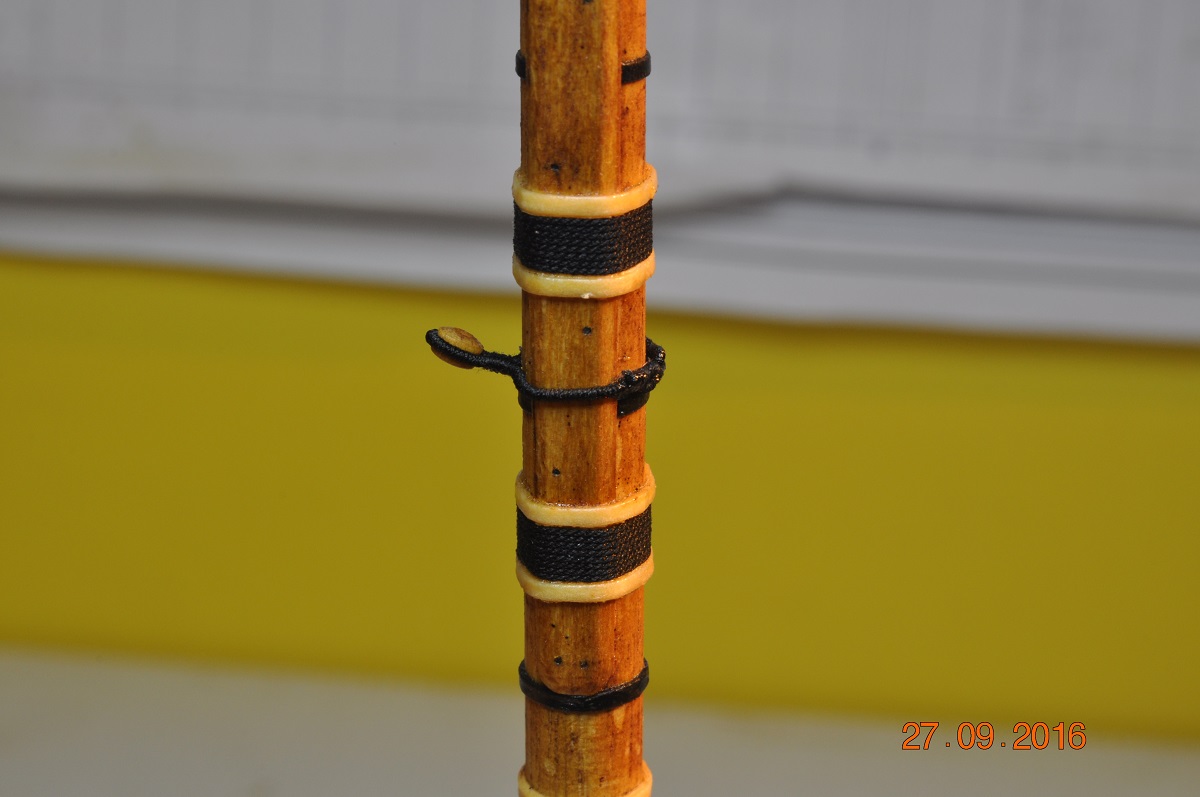
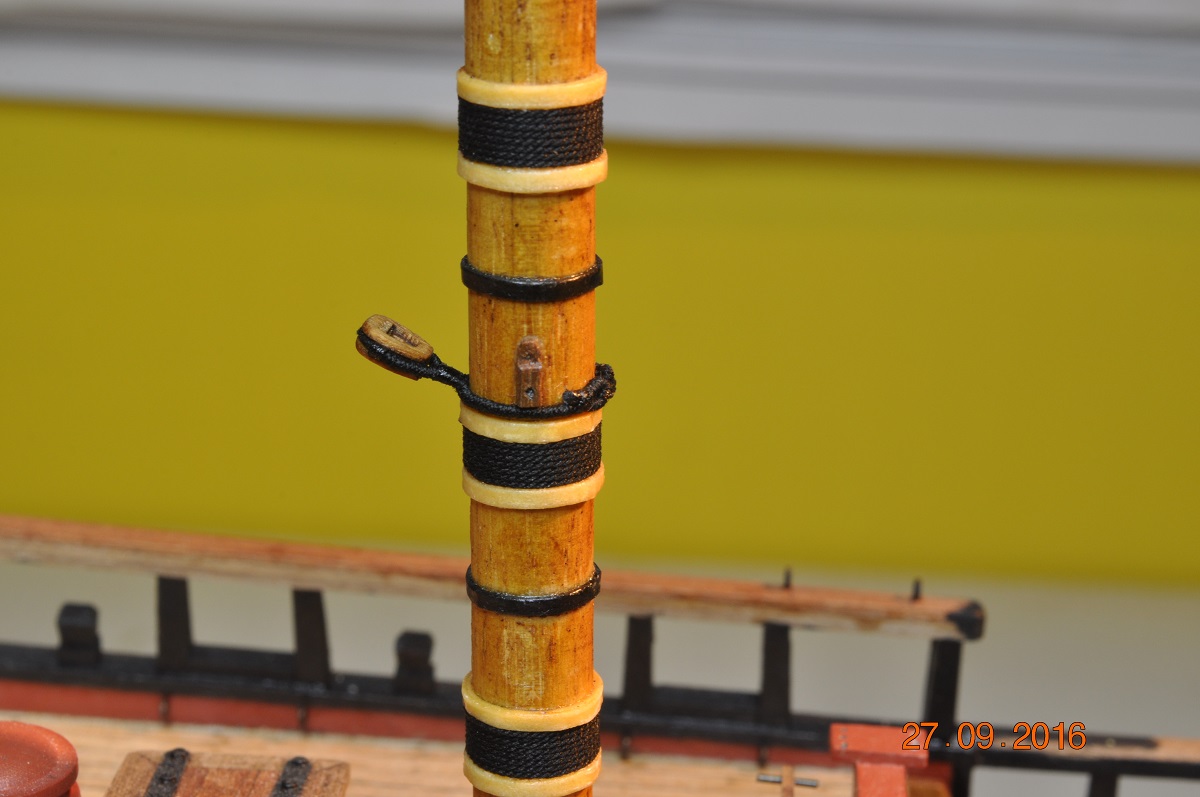
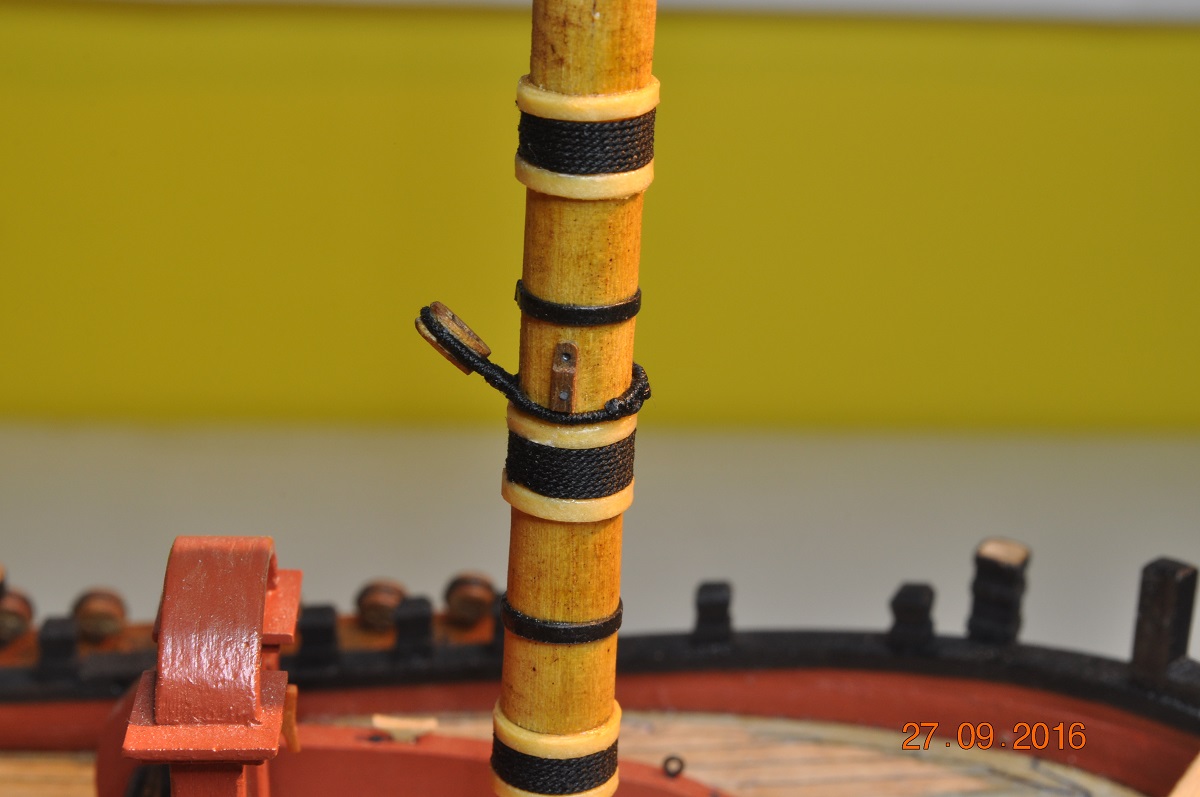
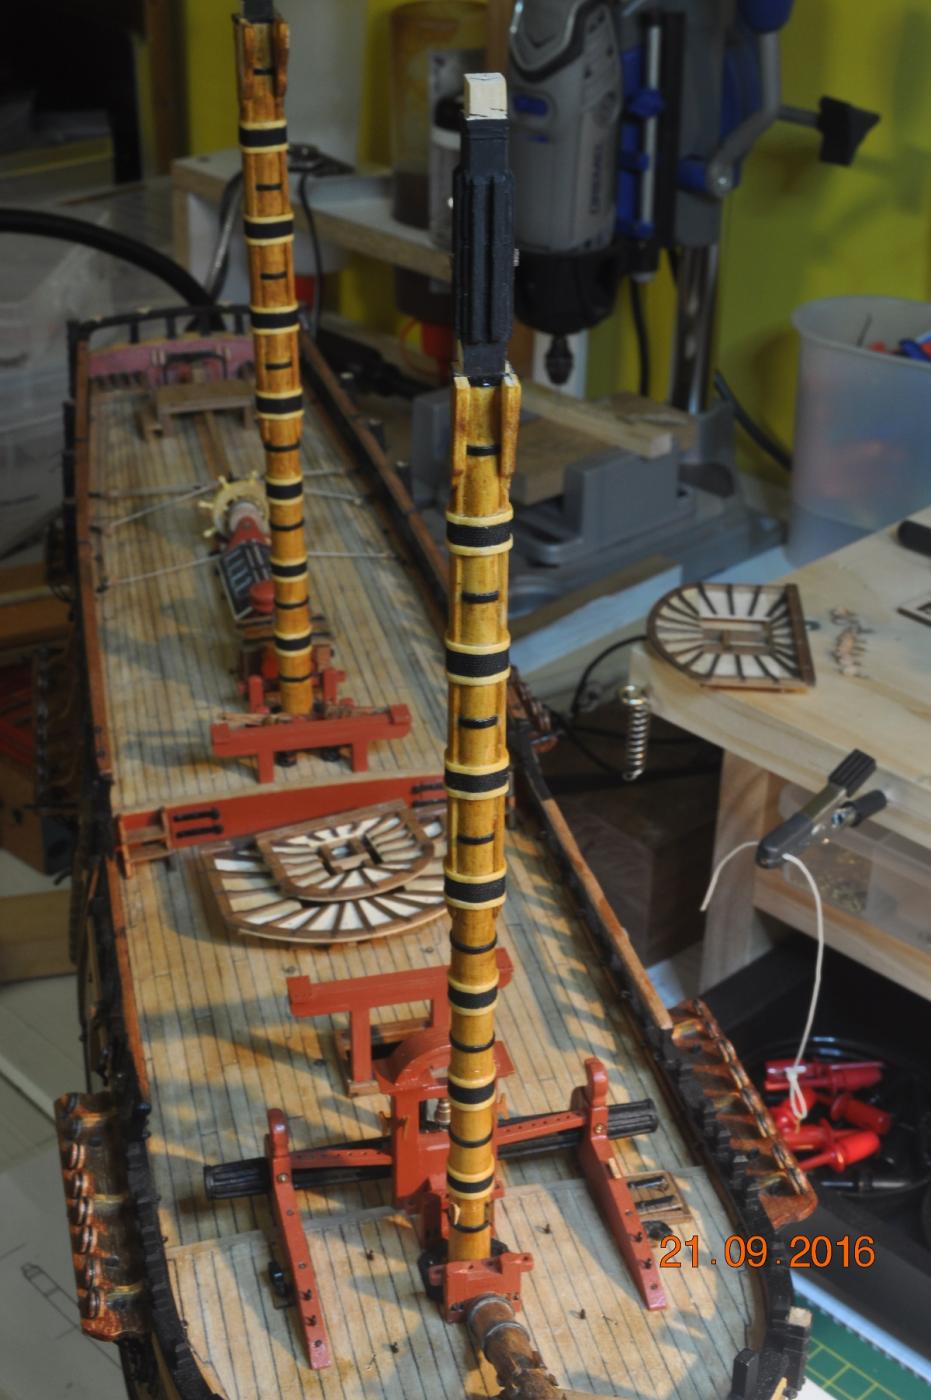
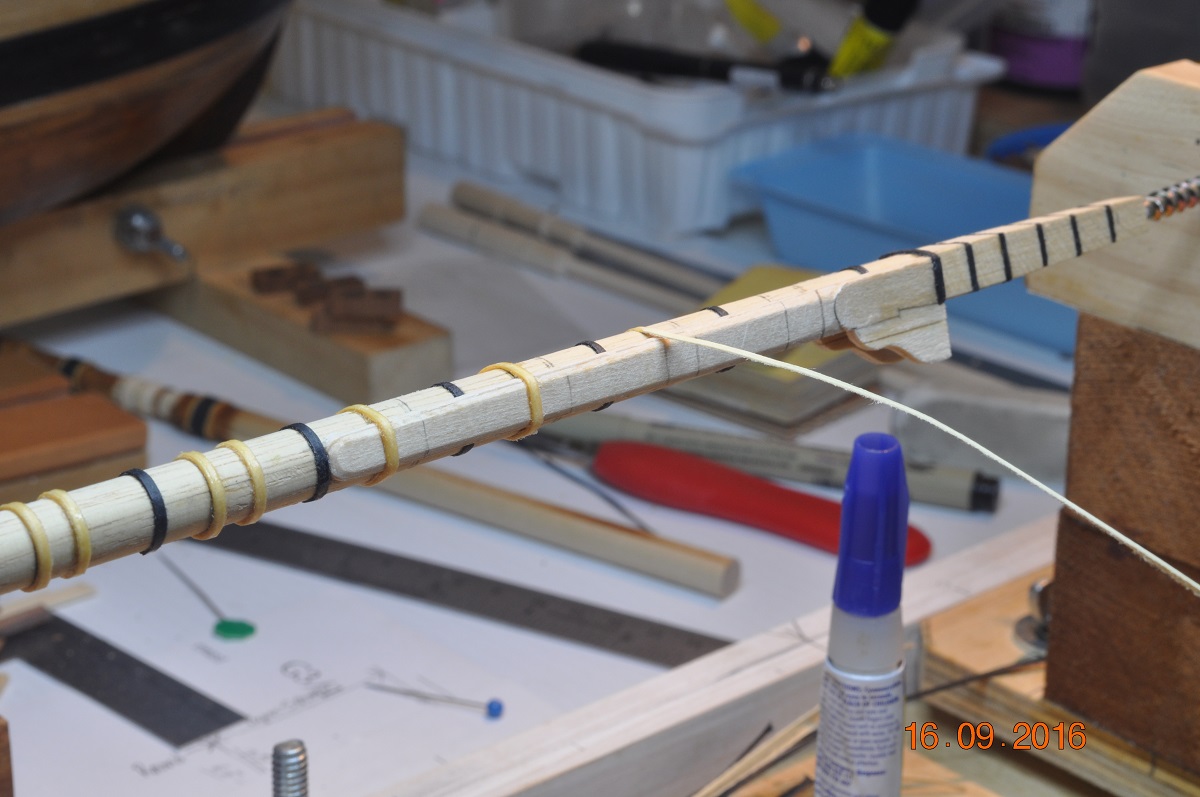
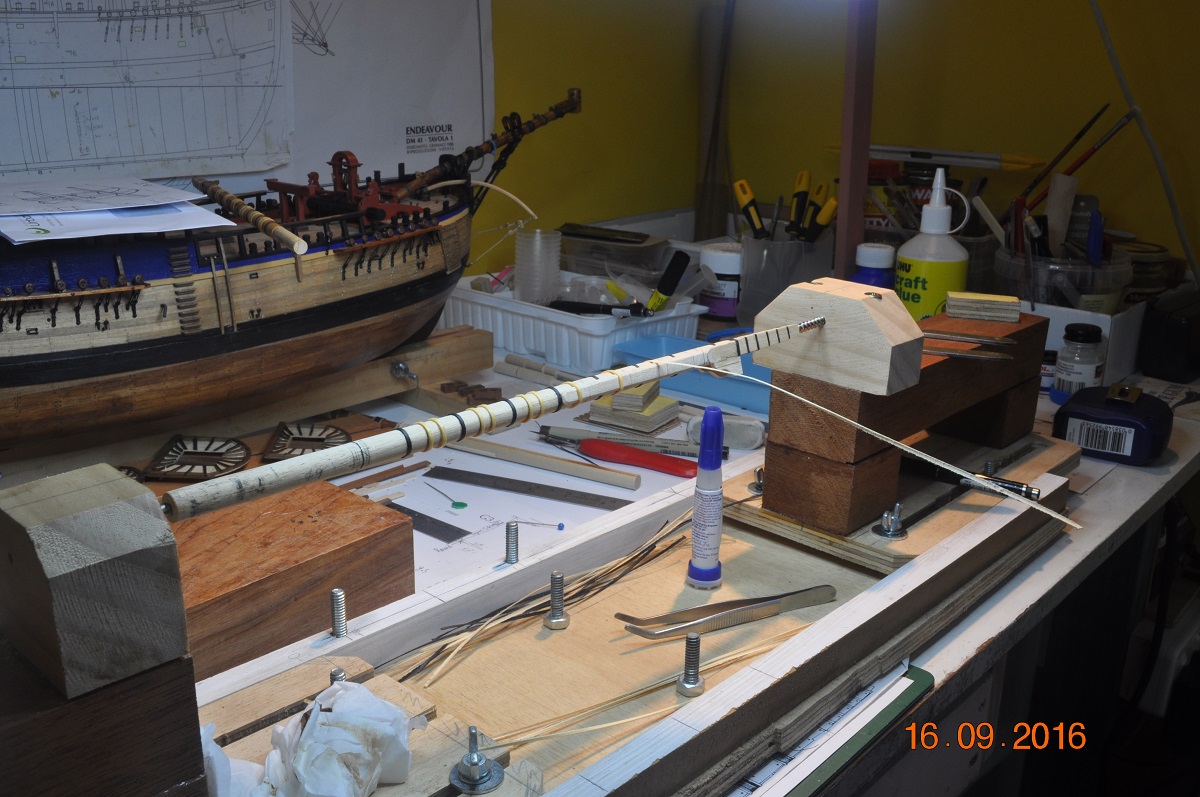
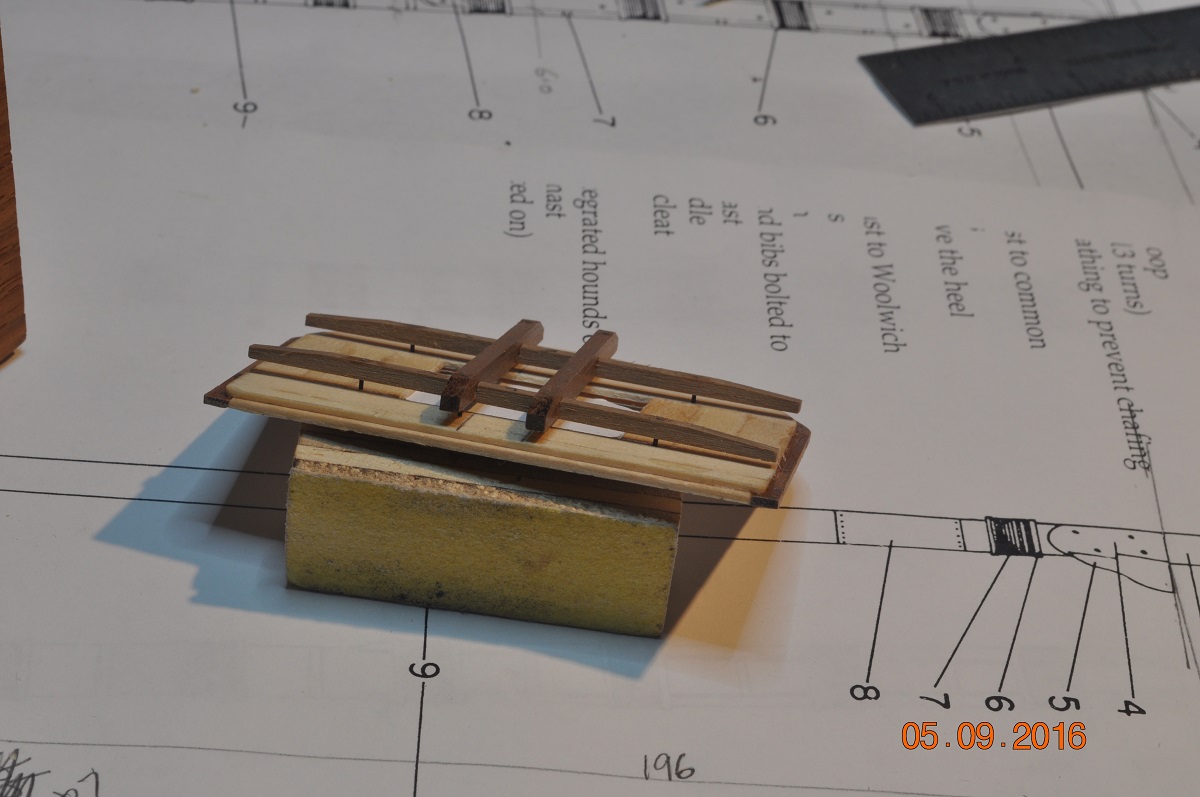
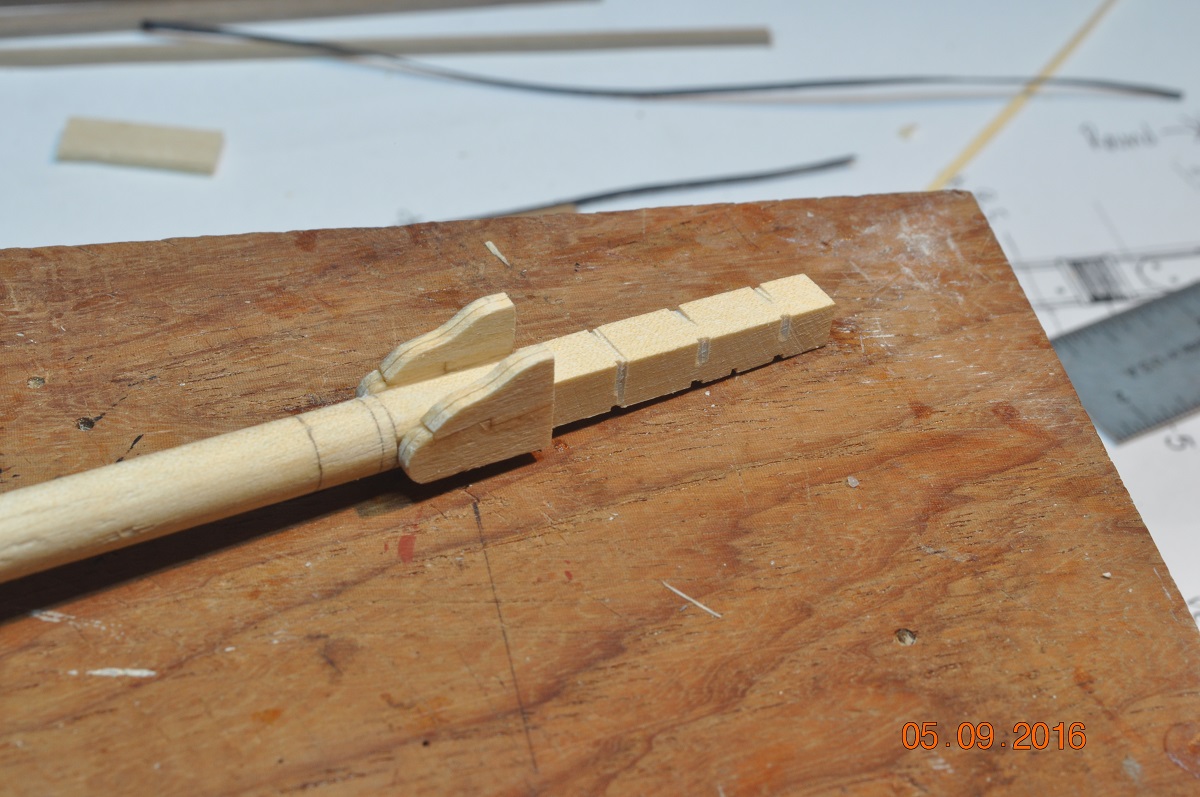
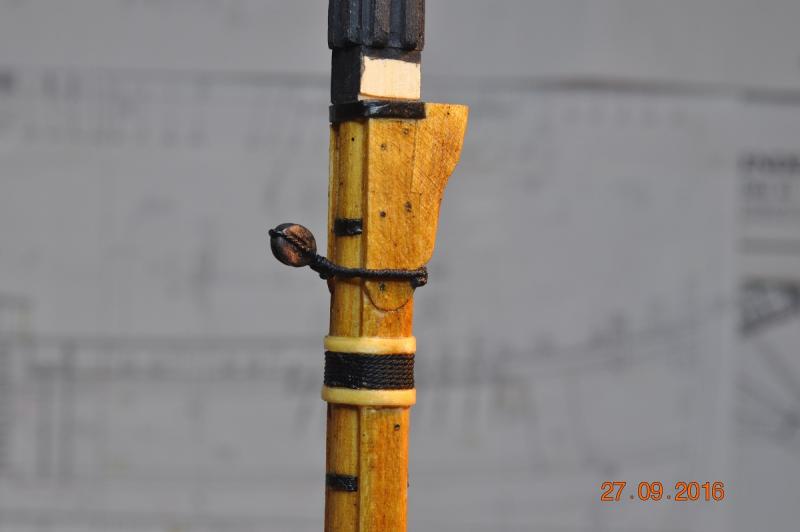
Shipyard Update: Middle Chock added to each of the 3 MastTops. Trial fit at the top of the ForeMast. Picture is just after adding the Jeer block cleats - both sides. I believe the cleats are only on the Main and Fore Masts(is this correct ? I am not sure?). I placed mine a bit higher to make sure plenty of room below for the shrouds to wrap around. Hoops being added to the Masts. I retro fitted a home made wooden "lathe" I built some time ago to hold spars(masts) so I have both hands free to work on them. Works well for wrapping card and the woolding. Main and Fore Masts standing tall. Slowly getting their, woolding and hoops on. So much more to go, I keep finding things to make and add, it seems to never end. Dave R


-
Good to see Bob, Hope the kit comes with plenty of goodies for your build. Will be watching out for the updates, I like seeing what others do with the Endeavour builds. Dave R
-
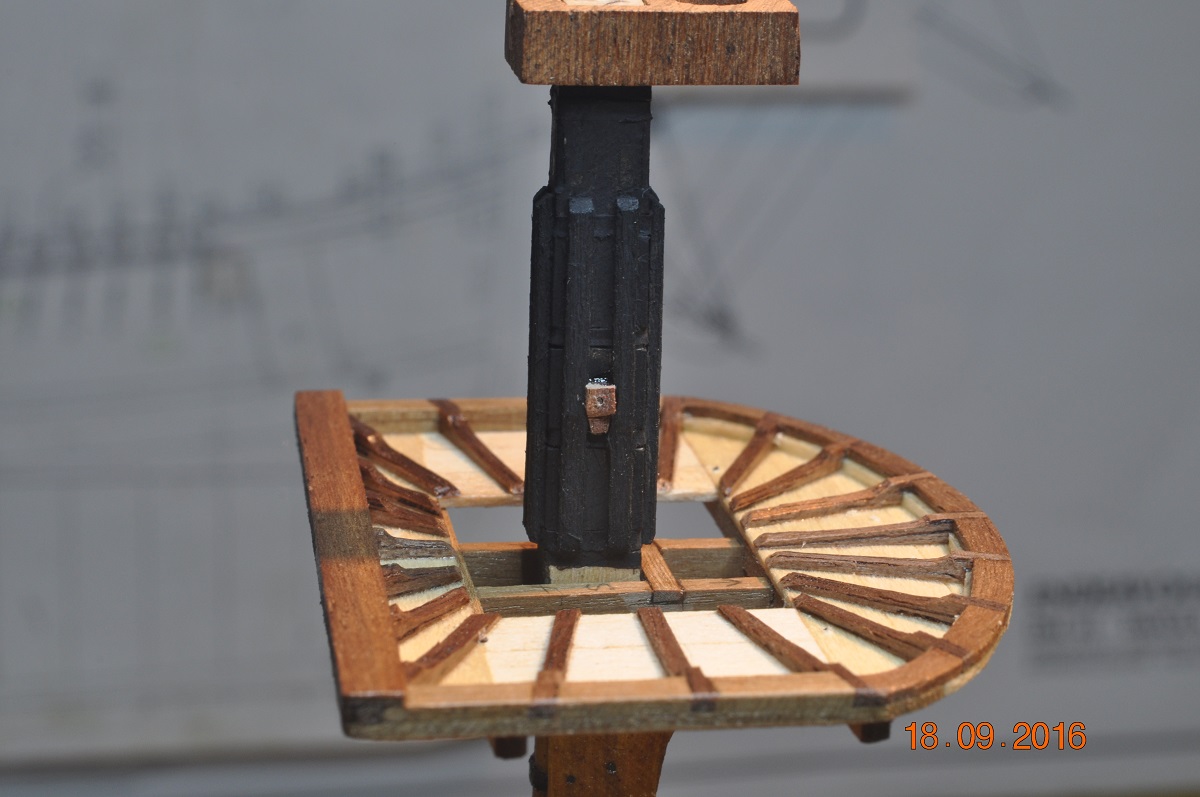
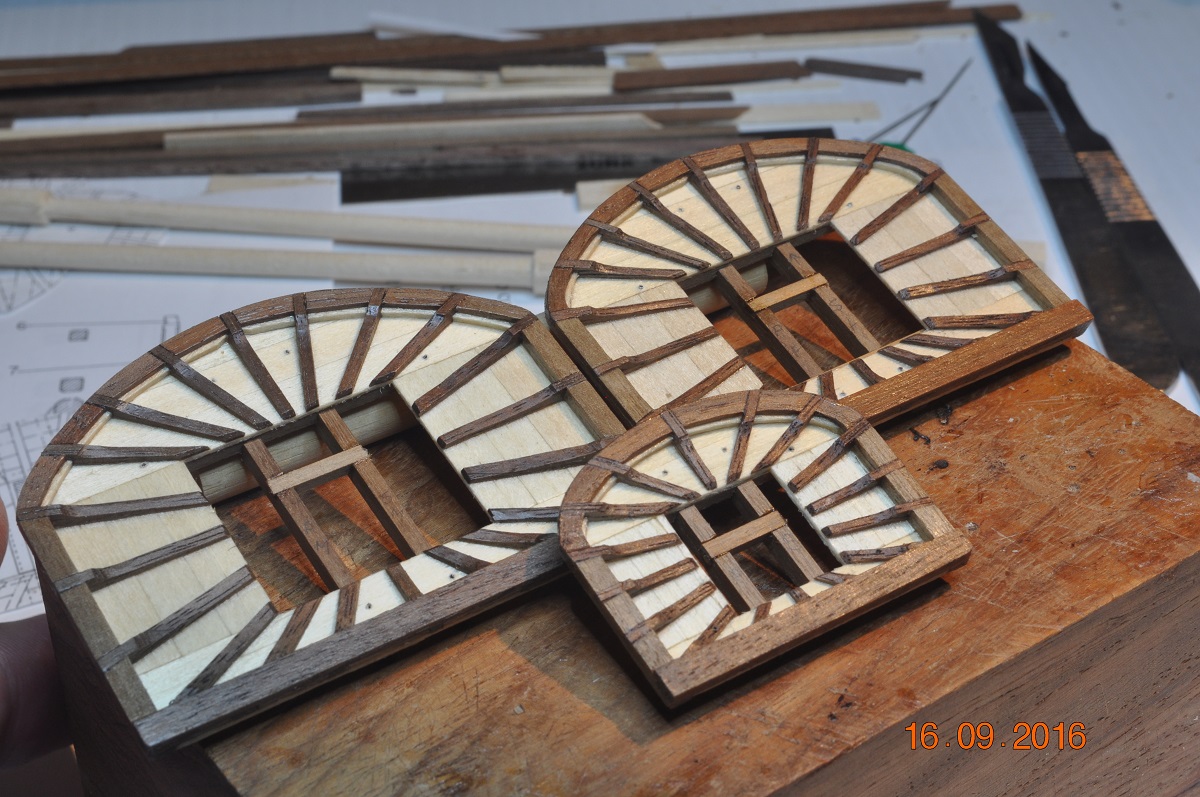
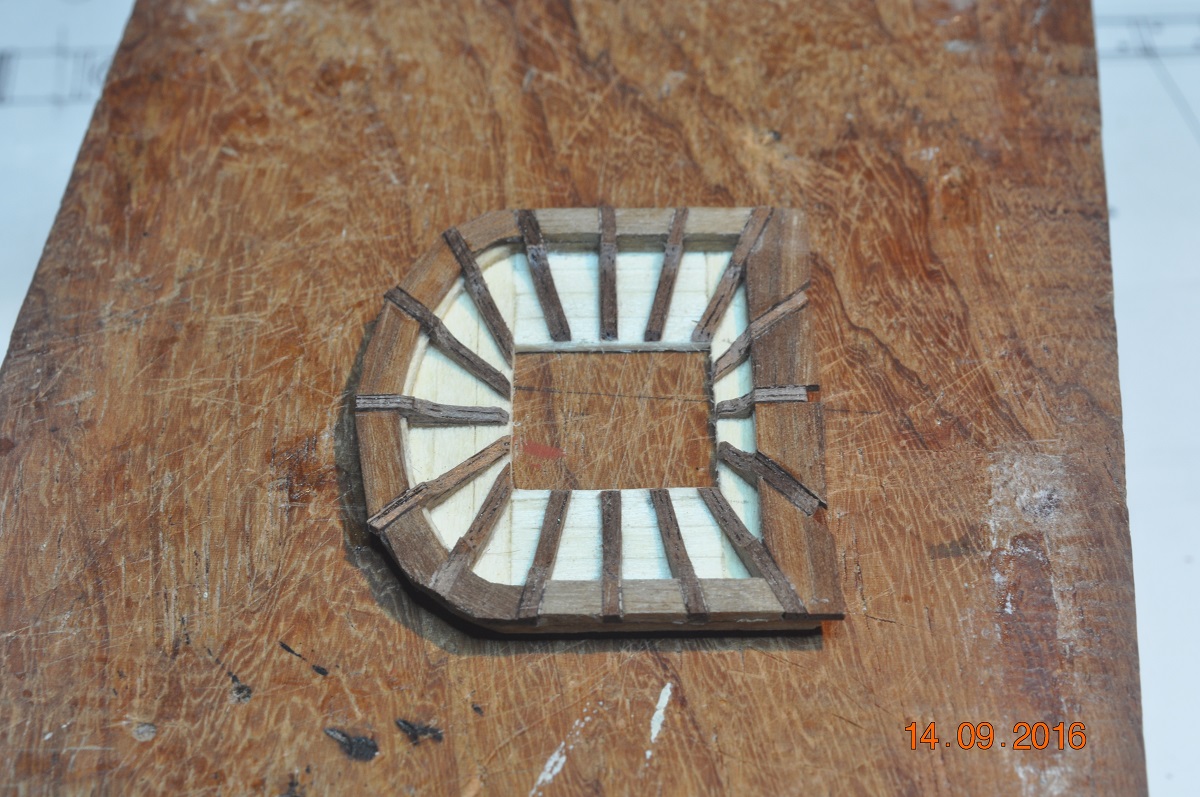
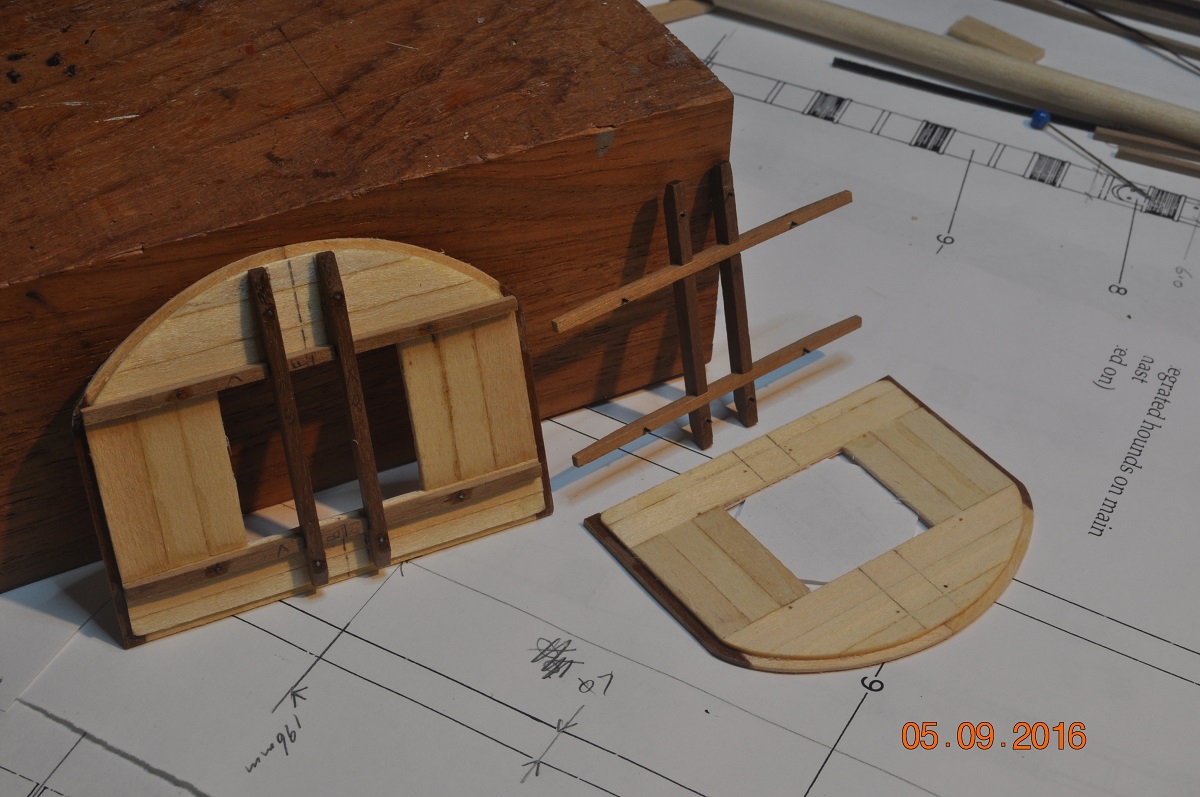
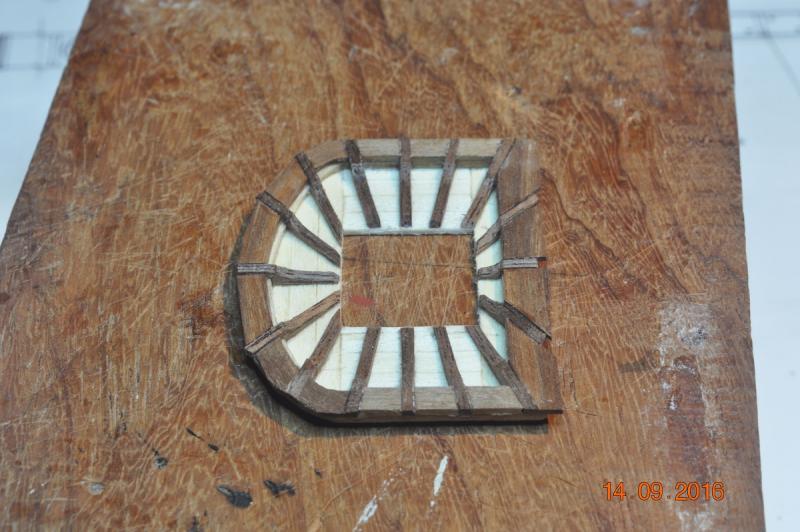
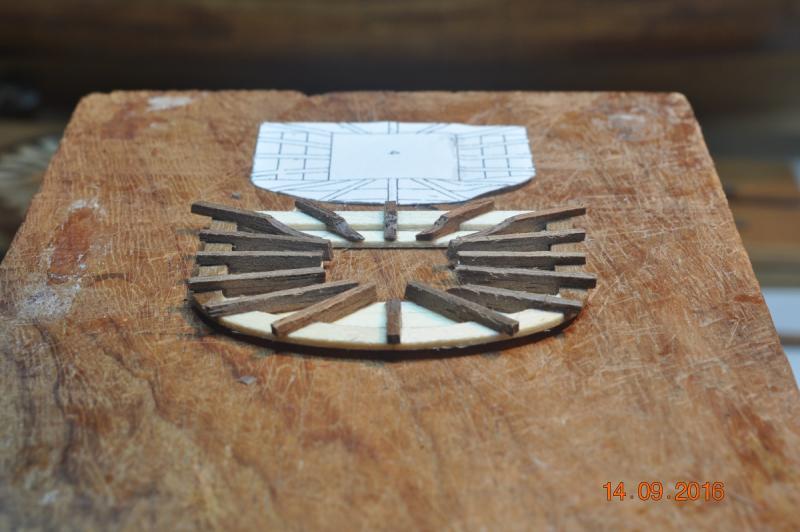
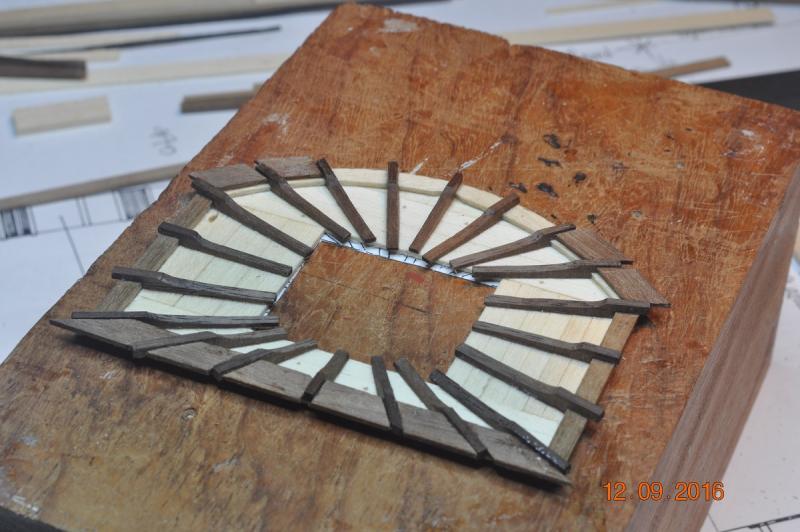
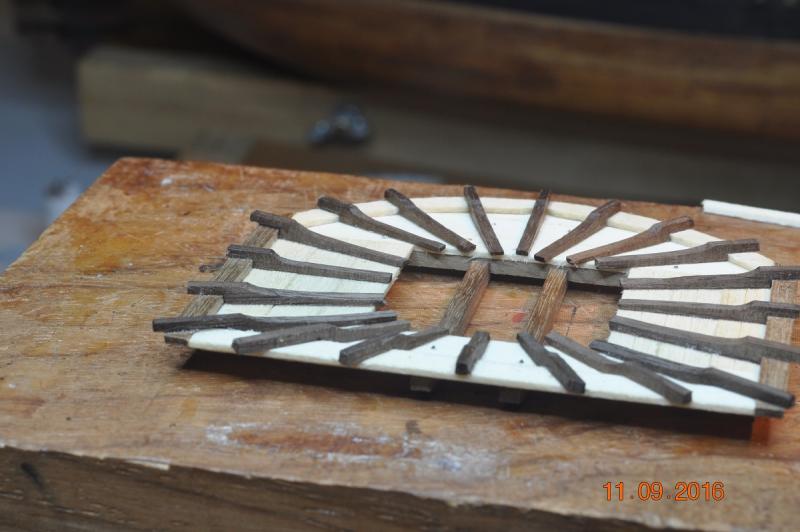
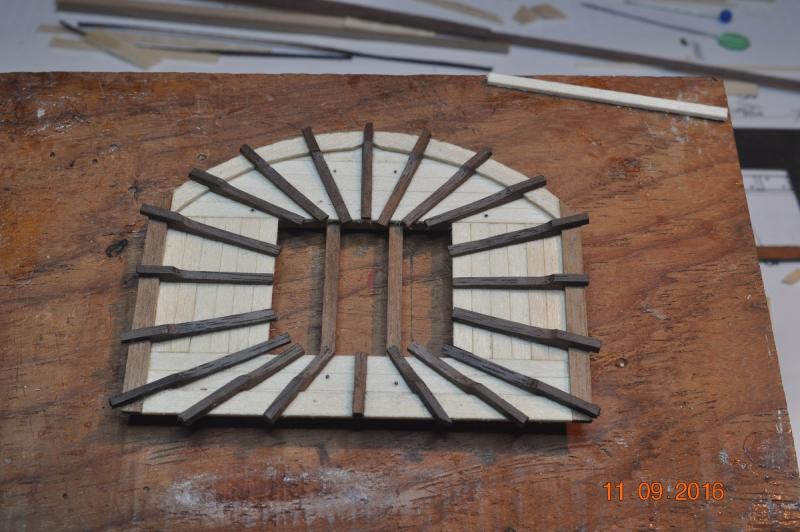
Bit more work in the Shipyard Mast Tops Mizzen Top taking shape. fiddly work this one was. inner beams/rails roughed in, nearly done. 3 Mast Tops ready for finishing off. Dave R

-
Fantastic, fantastic detail Greg, Don't know how you do it. Is their a mouse somewhere ? "cat & mouse" Dave R
- 342 replies
-
- 3
-

-
- dreadnought
- zvezda
- (and 2 more)
-
Thanks Don, Pat, Greg, Dashi & Michael for checking in and you kind comments. I follow all your build logs gentlemen, and many more. Outstanding work by all, with many details I am sure thrashed out over the cups of coffee, and hours of thought. Greg, I am inclined. I was only thinking of that same topic today, great minds think alike ??. I saw somewhere(may of been your log ?) using drafting Leads to simulate the cheek pins on the masts. And I just happen to have plenty of 0.5mm HB from my drafting days(previous life/job) which should do the trick. Michael, Just trying my best to get some detail into items. It is sometimes challenging to build a 3D picture in the head space, of what an item will finally end up as. Especially when details are spread over many pages and sketches. Like these "tops", I will be adding, as others I am sure have, all the "rigging" blocks etc. on before final " hoisting of the masts". So many more pictures to come fellas. "a picture tells a thousand words" PS Fore top done, with Mizzen not far away. I seemed to go quicker on each one. Dave R
-
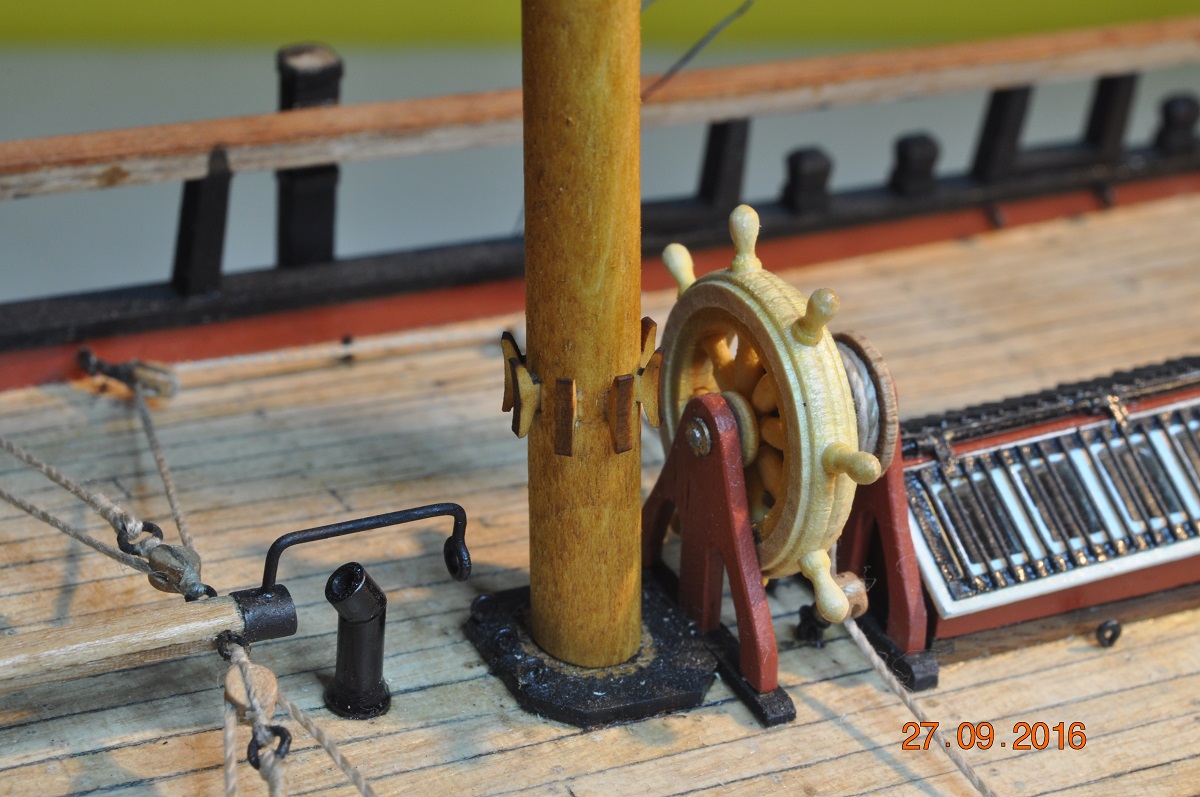
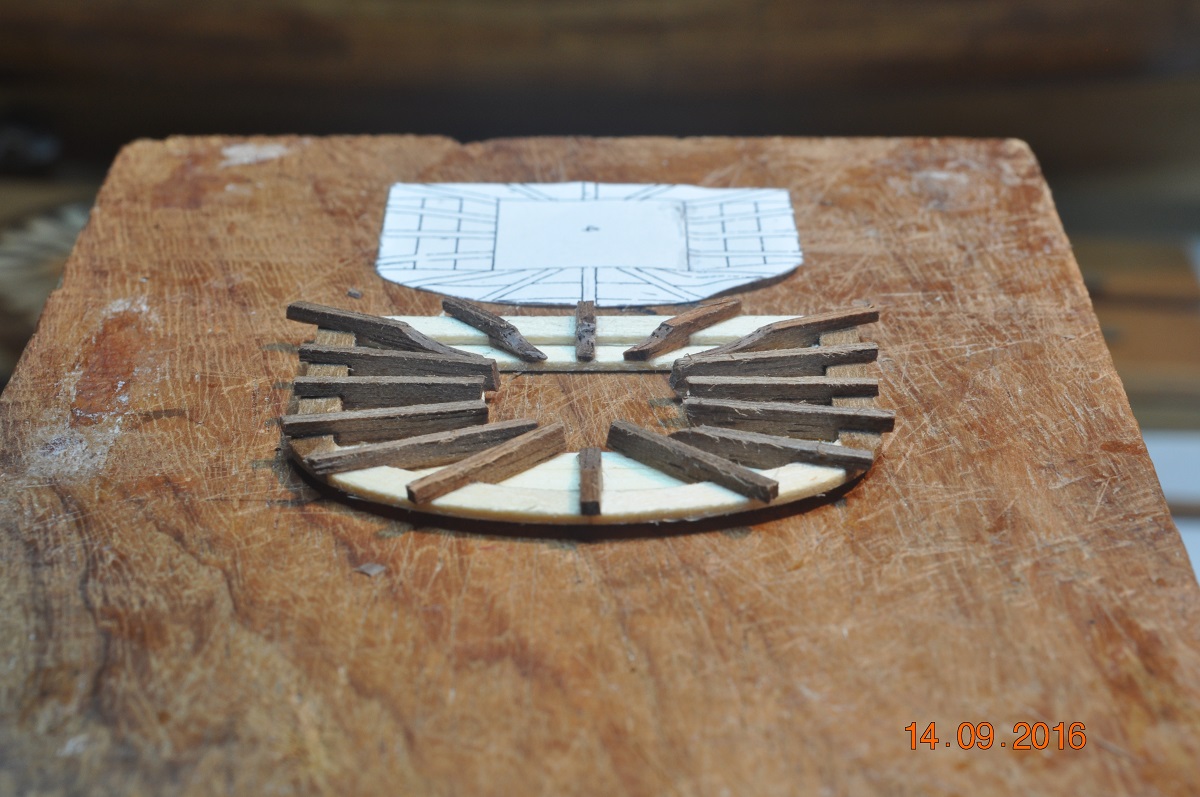
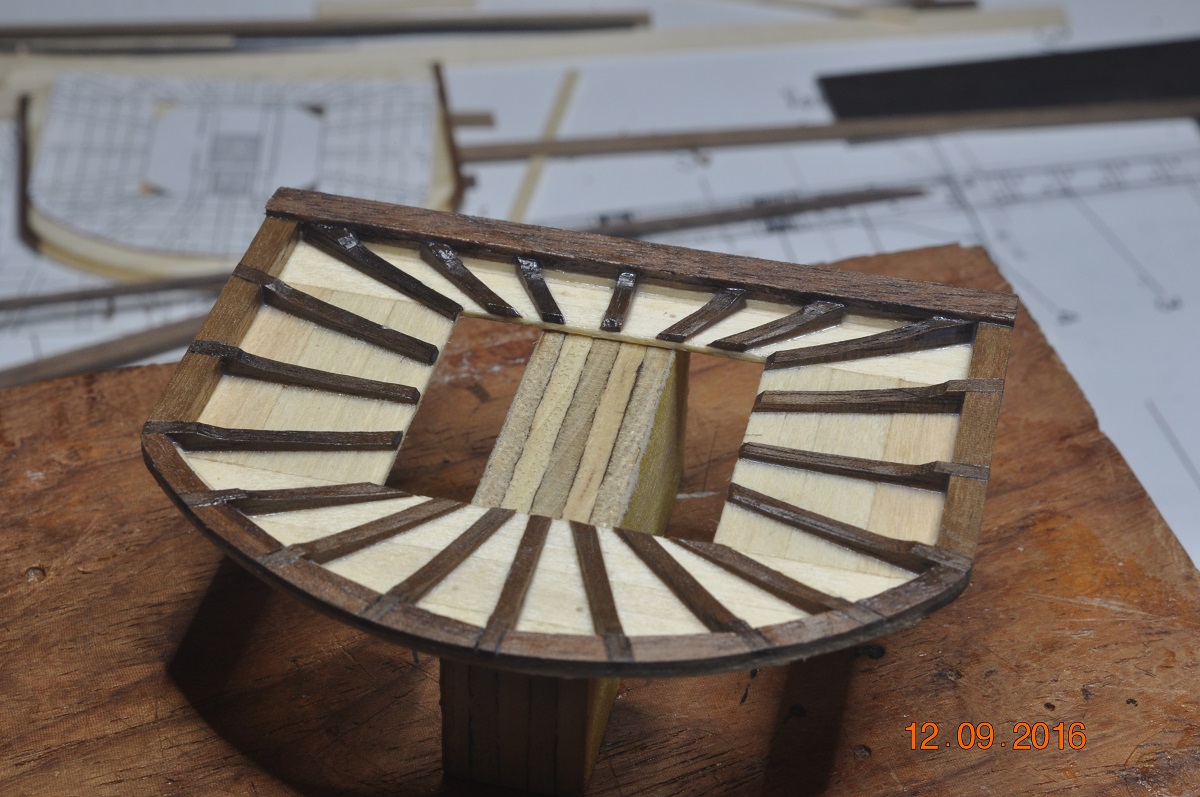
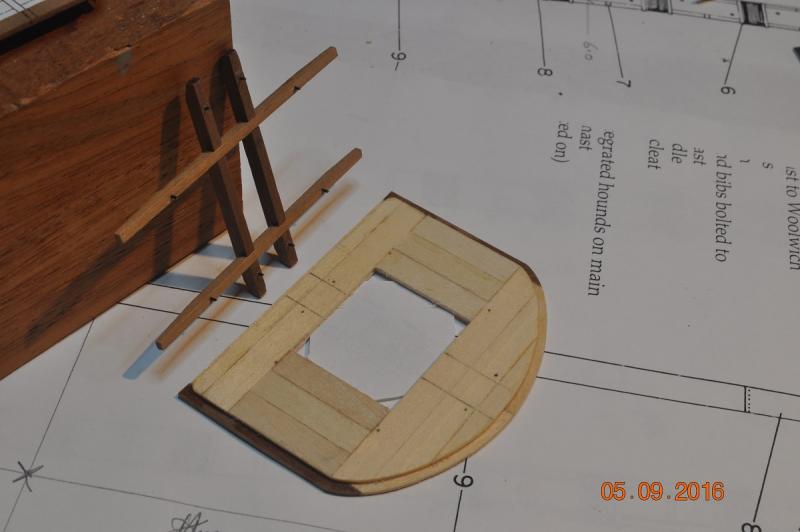
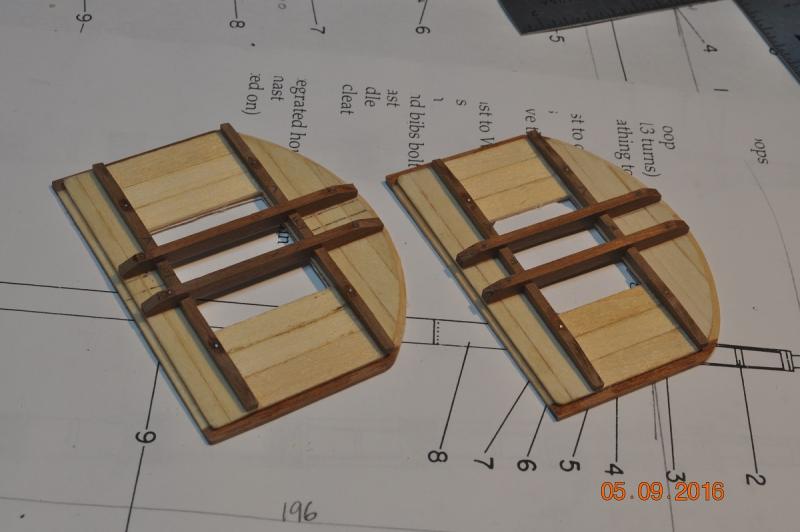
Back on Deck in the Shipyard, I decided to get into the Mast Tops(platforms), have a break from the masts. Spent what seems like hours on the Main Mast Top. Main Mast Top Inner tapered beams installed: All notched over the ring beams. No two(2) beams are the same, 20 all up. Working around the edges with infill timbers: I lined up the inner edges and left each infill piece overhang around the edges. Again all 20 different. Basic main top timber work done: Trimmed them off all the way around when all done. I plan to leave the upper side as is > clear timber finish, black underneath. Plenty of holes and attachments to go on later. Only another 2 more to go. Dave R
-
Steve/Michael, I'm to far down the track on the mast/hoop thingy. Mine will have the metal and wooden/rope woolding hoops. Dave R
-
Hi Pat, All those little things to finalize, chew up the hours I am sure. You don't really want to use those Swivel Guns do you. ? Send then up to Brisy, save me the trouble of making some. !! Dave R
- 517 replies
-
- 3
-
-
- Endeavour
- Artesania Latina
- (and 1 more)
-
Well done and functional Dashi.
-
Looks very good actually. I haven't built any of the tenders yet. The Corel Kit I have, only has 1 tender and I won't be using it. Will be a scratch build, and like you, not looking forward to them, very fiddly. Cheers Dave R
-
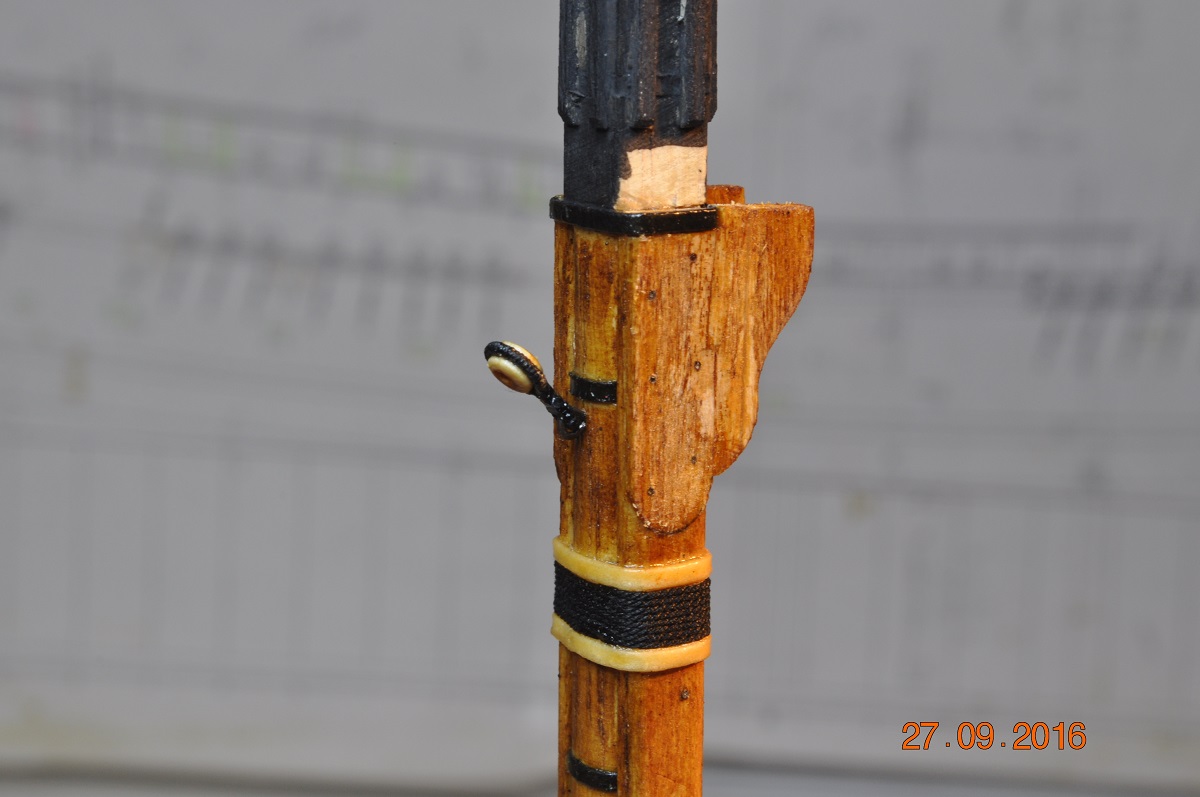
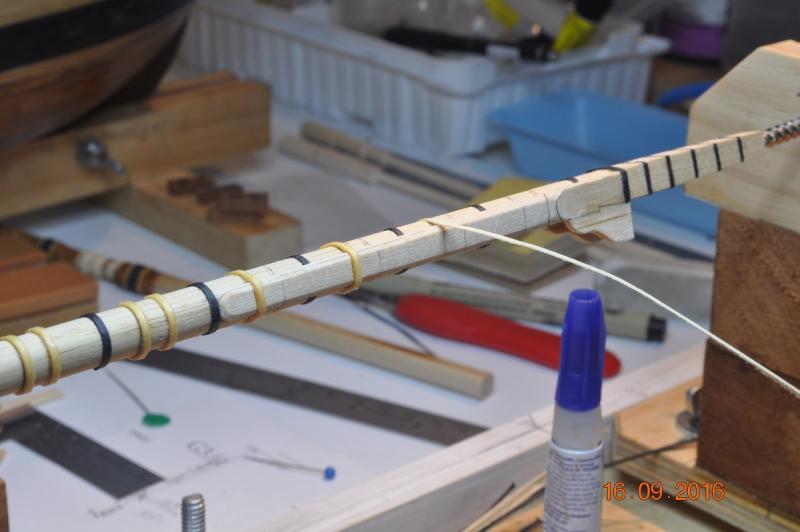
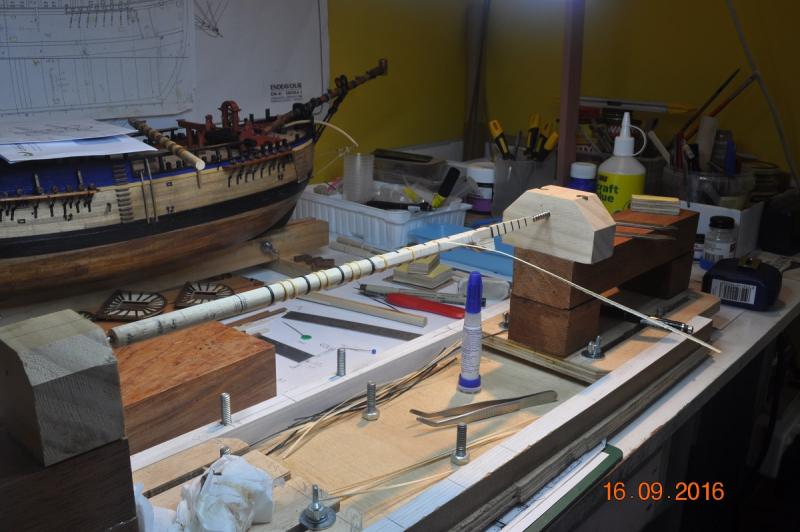
Hi Michael, You are ahead of me a wee bit lad. I have only just lathed up the rough shape of the Fore and Main topmasts yesterday. The round at the bottom I came up with 5.2mm dia. I just had a look at the caps in the Corel kit, bit rough and may use them. Bit of sanding and filling ? Steve is right. The hole in the bigger Corel caps(for lower masts) looks like ~ 5.0mm dia. maybe a wee bit bigger. May need to open up just a tad. That would be right for the hound of the Fore and Main topmasts to go up through. I scaled the AoTS page 88 up by 1.07 to get the lengths right to the Woolich lengths. The dia over the hex is a wee bit over 5mm, so all matches up for me. Today's job in the shipyard: Adding hoops to the lower masts. Not going well, not good at winding the card exactly level around the mast/cheeks. Dave R
-
Hi Michael, Found the "Mini Precision Multi Function Milling Machine x-y axis Coordinate Table" on EBay. Ordered one, AU$67 from Hong Kong. Thanks for info. Dave R
-
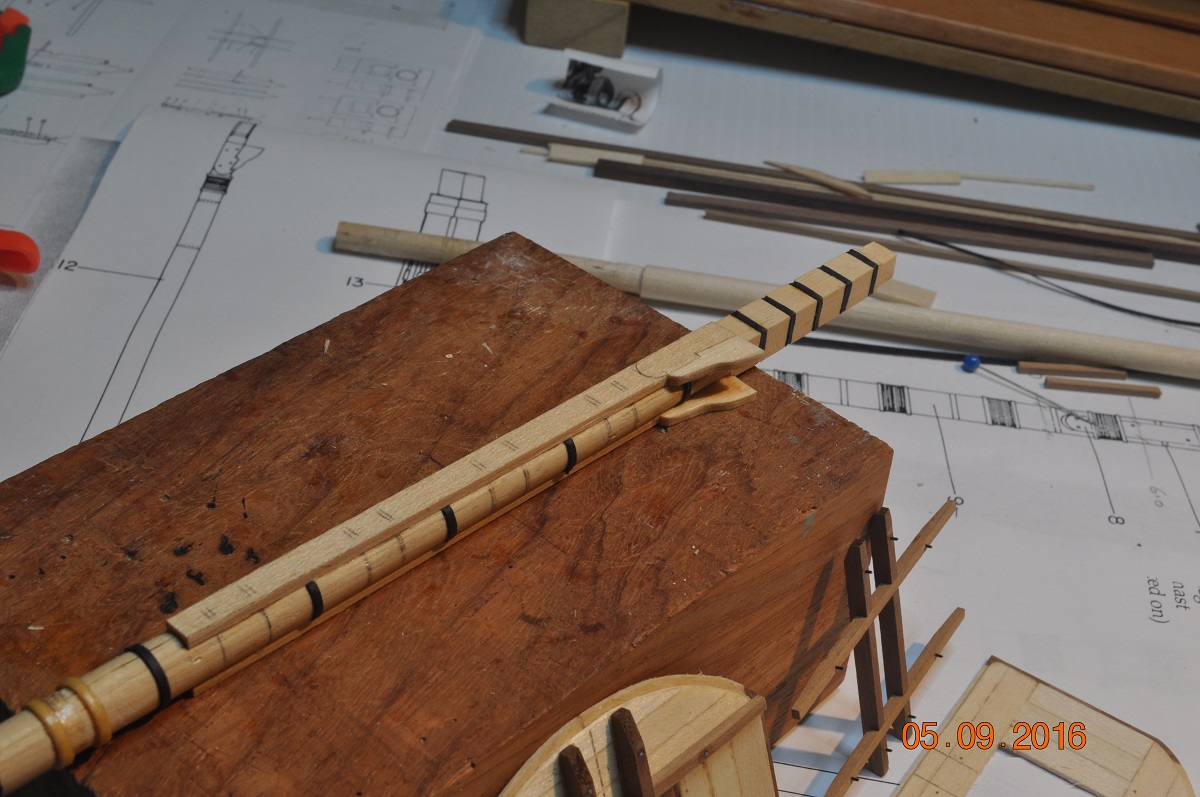
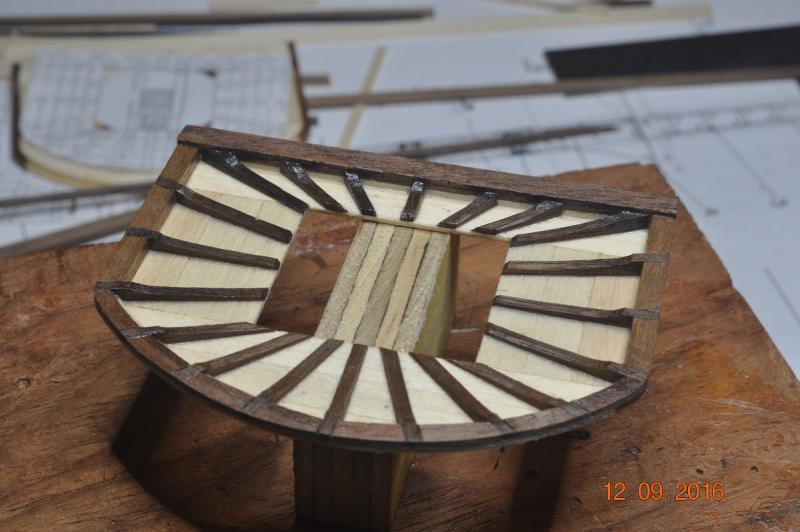
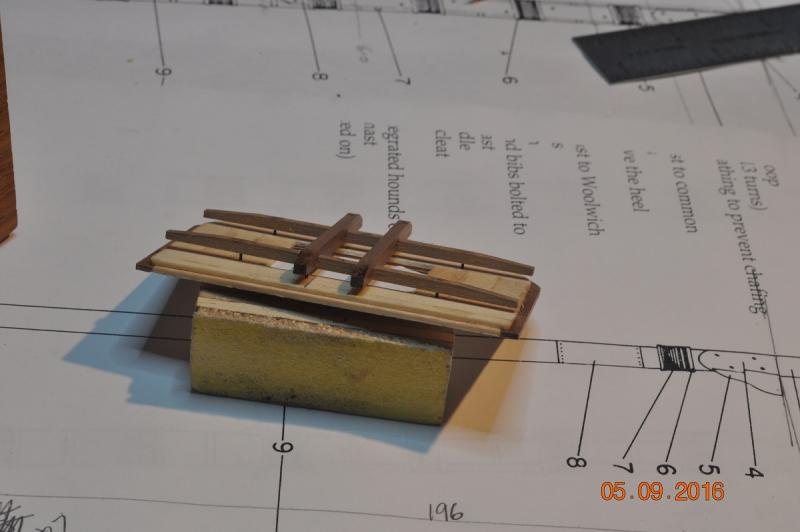
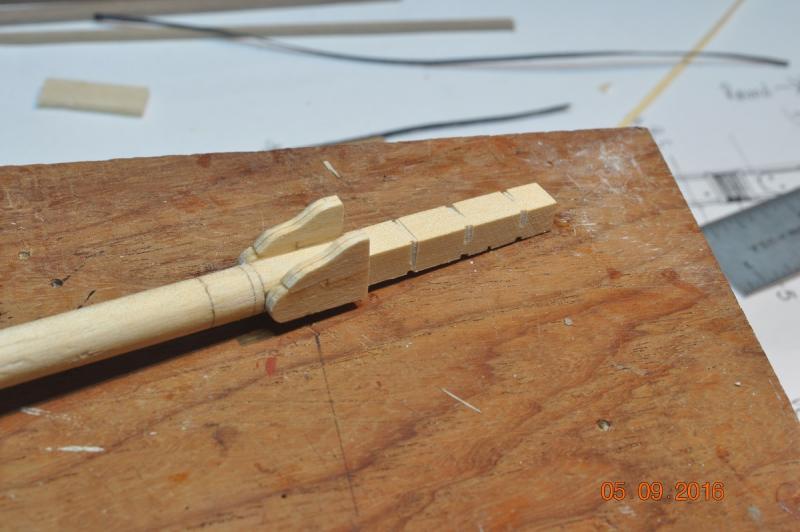
Back in the Shipyard - Masts and Tops Well the yard has been slowly progressing the many items for the above. Mast Tops: So for each of the mast tops I added some "pins" to the under beams to locate the platform accurately for re-assembly. beams and platform(underside) apart you get the idea by now ! Aligned to press together. The underside of the main and fore platforms Since most of these items are finally painted black(seems most do), not too worried about minor defects or different timbers. Although it would be nice to have a contrast their somewhere like the AMM Replica Mizz platform. Started on the Mizzen Mast: Rough at the moment, >> more work to details. Cheeks added to the Fore Mast: Also have Main mast to same stage, shape the cheeks and add the bands. Dave R


-
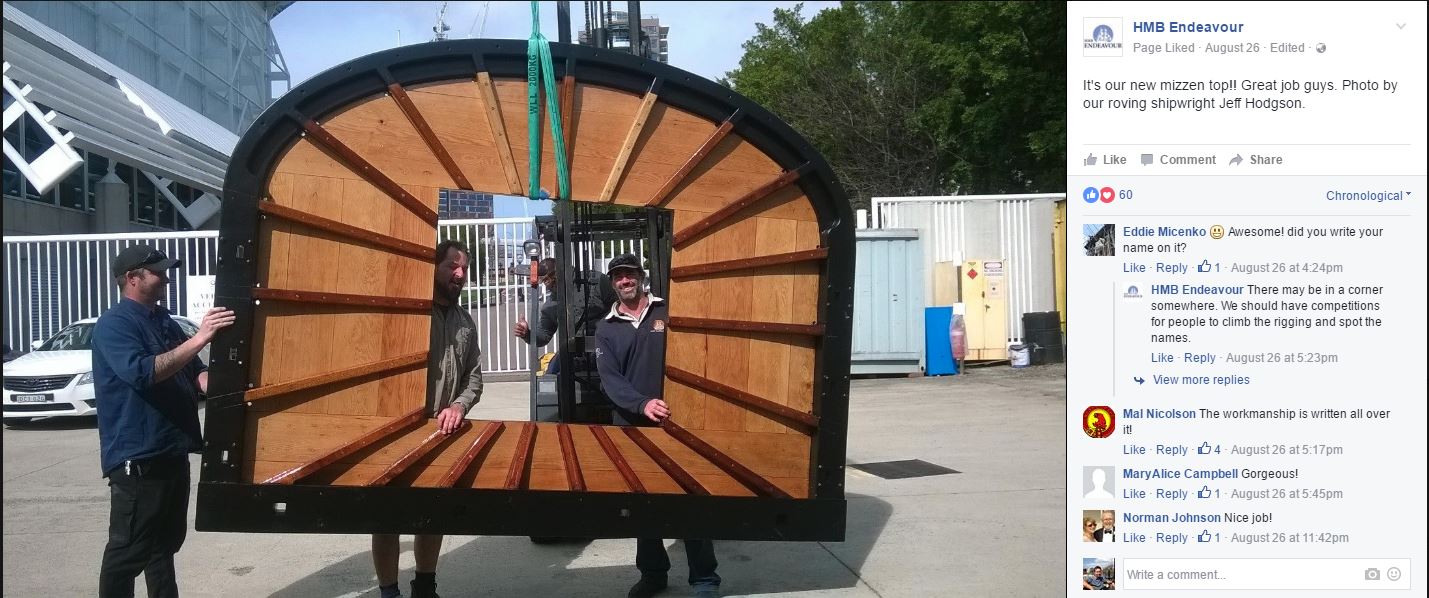
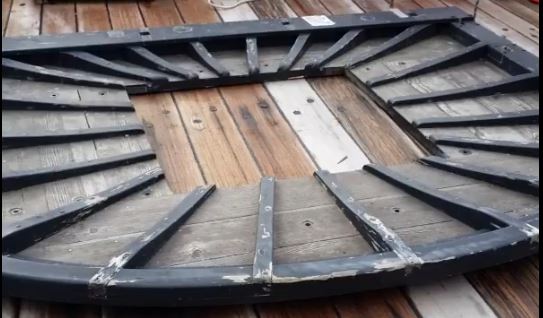
Spotted this on the HMB Endeavour Facebook Page New Mizzen Top ready to hoist onto the Replica at the AMM. Photo by our roving shipwright Jeff Hodgson Dave R

-
Hi ca.s Been away for a week in Perth W.A. I am no expert at this, learning as I go along. If I am right, the top mast sections are each "pulled" up through the hole in the cap. Will have a further look and post further. Dave R
-
Hello Mindi, You are about where I was on my Endeavour a couple of months ago. Great news you are getting back into the build. Will pull up a swivel chair and watch your progress. Actually, the more I look, you and I have had similar thoughts as to what items look like and bottom waterline. Dave R
-
Hi Dashi, You have successfully navigated your way through a lot of fiddly work their. All the channels look really well presented. Dave R
-
Once I got past the hull construction(I was using the Corel plans) I realized with all the changes I had made, I did not trust the authenticity/accuracy of the Corel plans at all. I bought the AOTS, got into reading the MSW logs of several other Endeavour builds, this convinced me I was into a kit bash. Corel plans put aside. I've since tried to follow the AOTS, retro to the hull I made. That said, my Endeavour has a longer bowsprit, so I have gone out on a limb ! Masts... I think Dashi's separate log about the mast lengths covered it all in depth. But I got lost in all the long discussions. Dave R
-
The AMM Endeavour Replica in Sydney, lowered the Mizzen Mast Top recently. Here it is on the deck. There is a short video on the Facebook Page of it coming down. Good timing I say, when I am making them for my model. Dave R
-
Hello Dashi and Ca.shipwright, I have seen and read quiet a bit of discussion about the Endeavour mast heights in this forum. I've used the dimensions from the "Woolwich Yard 16 October 1771" draft. But using the taller Mizzen as per Shardlow Report. I calculated what the mast heights above deck would be, as it depends on where each rests on the model structure below(my model). I scaled the AOTS page 84 to match the above deck lengths for each mast. I don't know what the Caldercraft deck heights are. The Corel were a little different to the AOTS. Dashi, I did a check/comparison to what I had come up with, against what you came up with in the log you posted. Pretty close, and any slight mm difference, be hard to pick. If I have stuffed it up, can raise/lower the mast bottoms. Dave R