HOLIDAY DONATION DRIVE - SUPPORT MSW - DO YOUR PART TO KEEP THIS GREAT FORUM GOING! (89 donations so far out of 49,000 members - C'mon guys!)
×


rcmdrvr
-
Posts
420 -
Joined
-
Last visited
Content Type
Profiles
Forums
Gallery
Events
Everything posted by rcmdrvr
-
I like the look of your coppered hull but I also like the look of the painted hull that is on the cover of the box. I am not sure if I want to follow in your footsteps and copper the hull or paint........decisions, decisions, decisions. I am following your build as you are doing a great job as a guide; keep up the good work!
- 144 replies
-
- 4
-

-
- Harriet Lane
- Model Shipways
- (and 1 more)
-
I am impressed.....with your courage.
-
A beautiful model. I really like the amount of "natural" wood you left in the model. Gives a "light" appearance overall.
- 72 replies
-
- 3
-
-
- Norwegian Sailing Pram
- Model Shipways
- (and 1 more)
-
Are you using any other adhesive other than the backing on the copper tape? Will you put anything over the copper to seal? Your copper taping is quite striking.
- 144 replies
-
- 1
-
-
- Harriet Lane
- Model Shipways
- (and 1 more)
-
1/48 scale is very popular in the plastic models You should be able to "google" 1/48 scale figures and get a good number of returns.
-
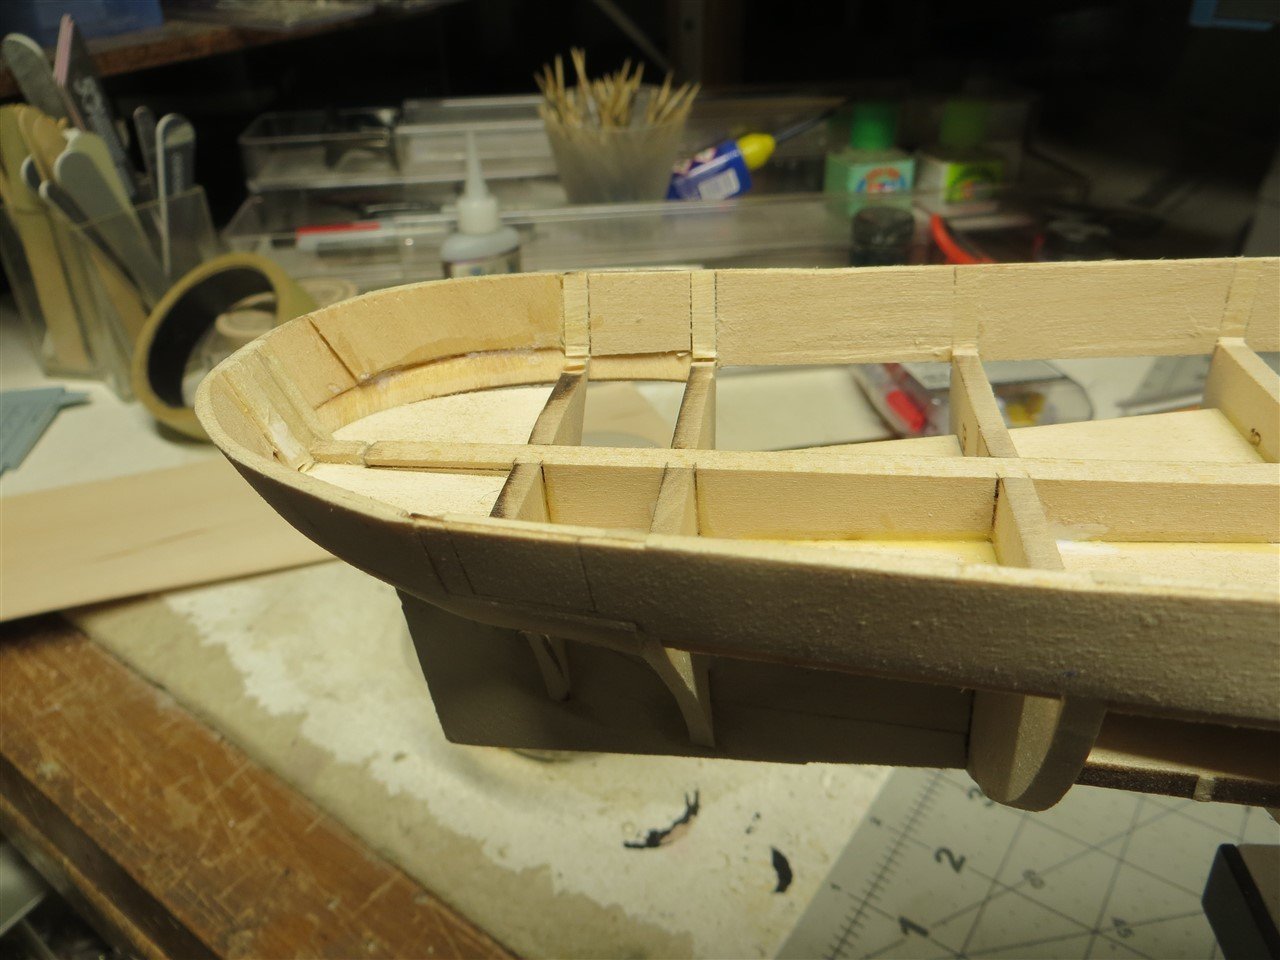
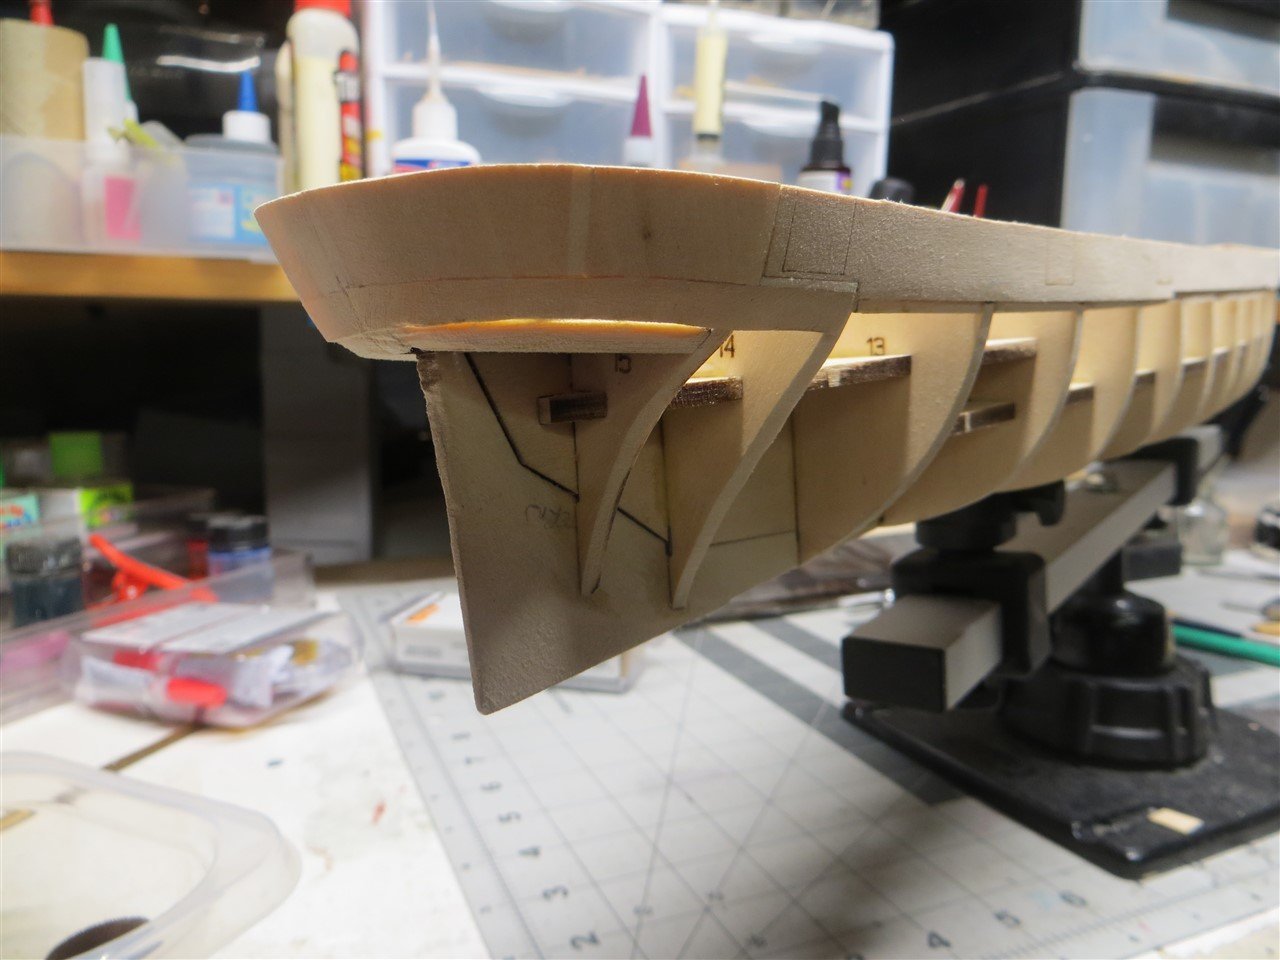
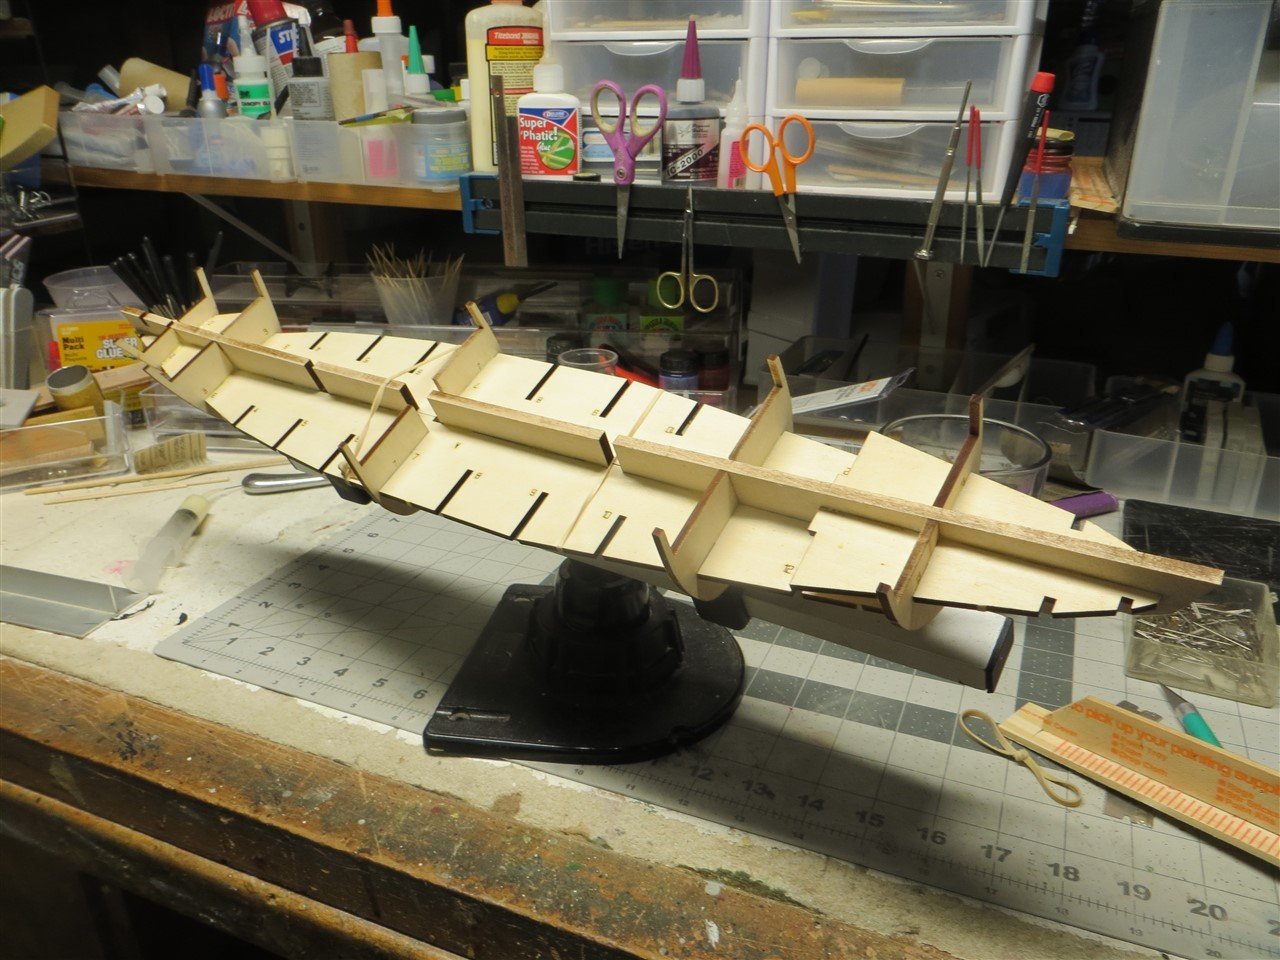
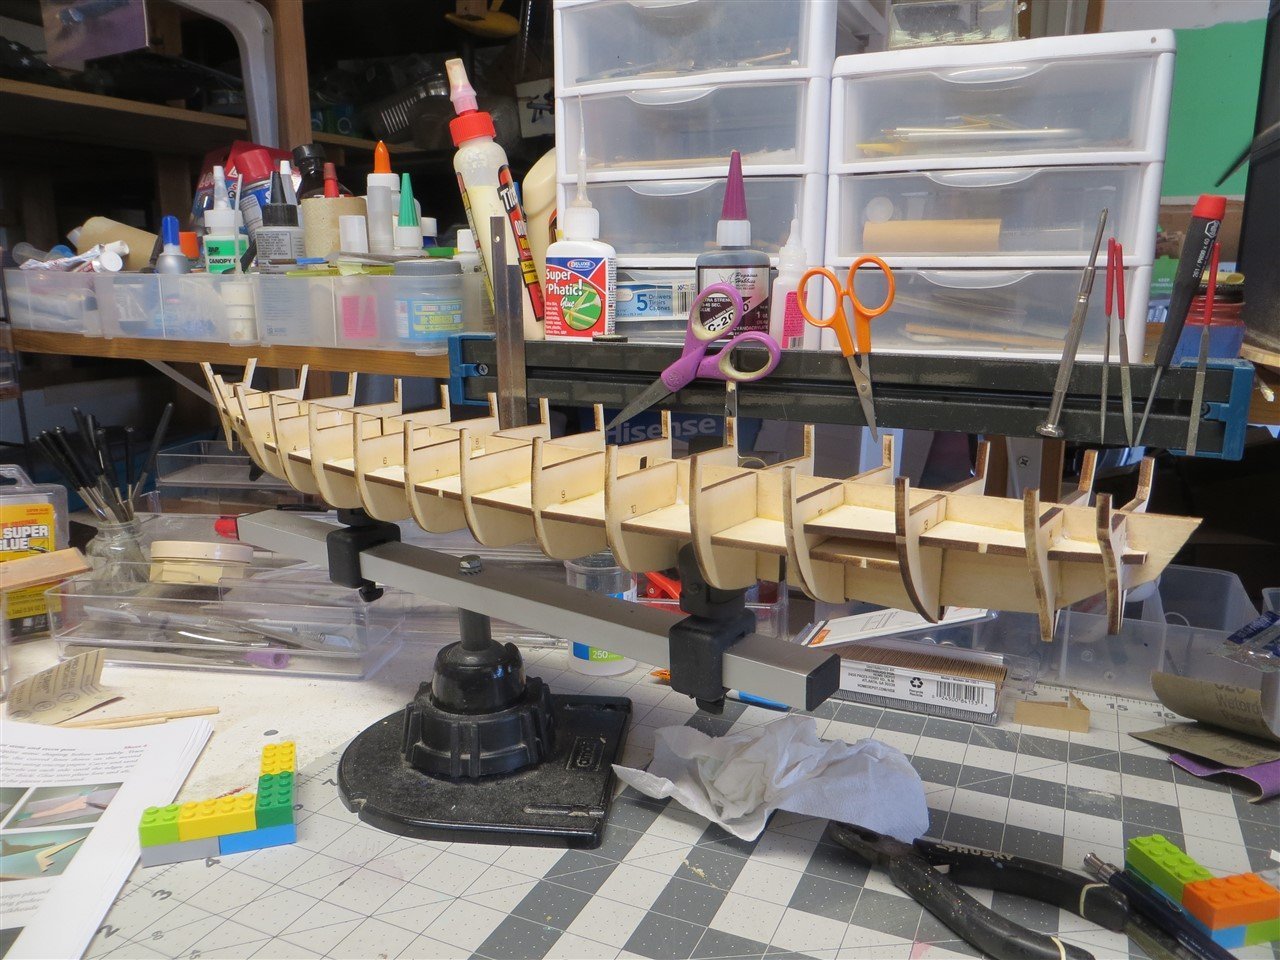
Having completed the hull bulkhead and spine assembly, the bulwark and bulwark fill was the next step. Again, the instructions were pretty clear and most of the provided wood was adequate. You first wrap the bow and sides of the hull with 1/32 inch strips that are about 1/2 inch in width. I soaked the port and starboard bow strips for about 5 minutes in water and then used CA to attach to the hull. No problems. The port and starboard aft pieces did not require any soaking. Again, CA glue was used. The bass sheeting that wraps around the stern presented a bit more of a problem. I soaked the wood pieces provided and then used a curling iron to set a basic bend in the pieces. It looked pretty good until it dried. The pieces shrunk and twisted and looked horrible. I was tempted to remove them and start over until I realized that a second piece was wrapped around the curve on the inside. Again I soaked the inner pieces in water and then carefully bent them (by hand, no curling iron). I left the original two outer pieces glued to the hull but split them with a knife so that they could be lengthened as I carefully glued the new inner pieces in place. I did not use CA during this process. I relied on good ole white glue. Well, the stern is not perfect but I deemed it acceptable. The final steps in this process was to glue 1/32 bulwark inner strips around the entire hull and "plane" the bulkheads flush with these inner strips. Except for breaking a few bulkheads during the planing process, this went pretty well. Now I am ready to begin plank the rest of the hull. Wish me luck.

- 25 replies
-
- 8
-
-
- Harriet Lane
- Model Shipways
- (and 1 more)
-
Looks like a great start.
-
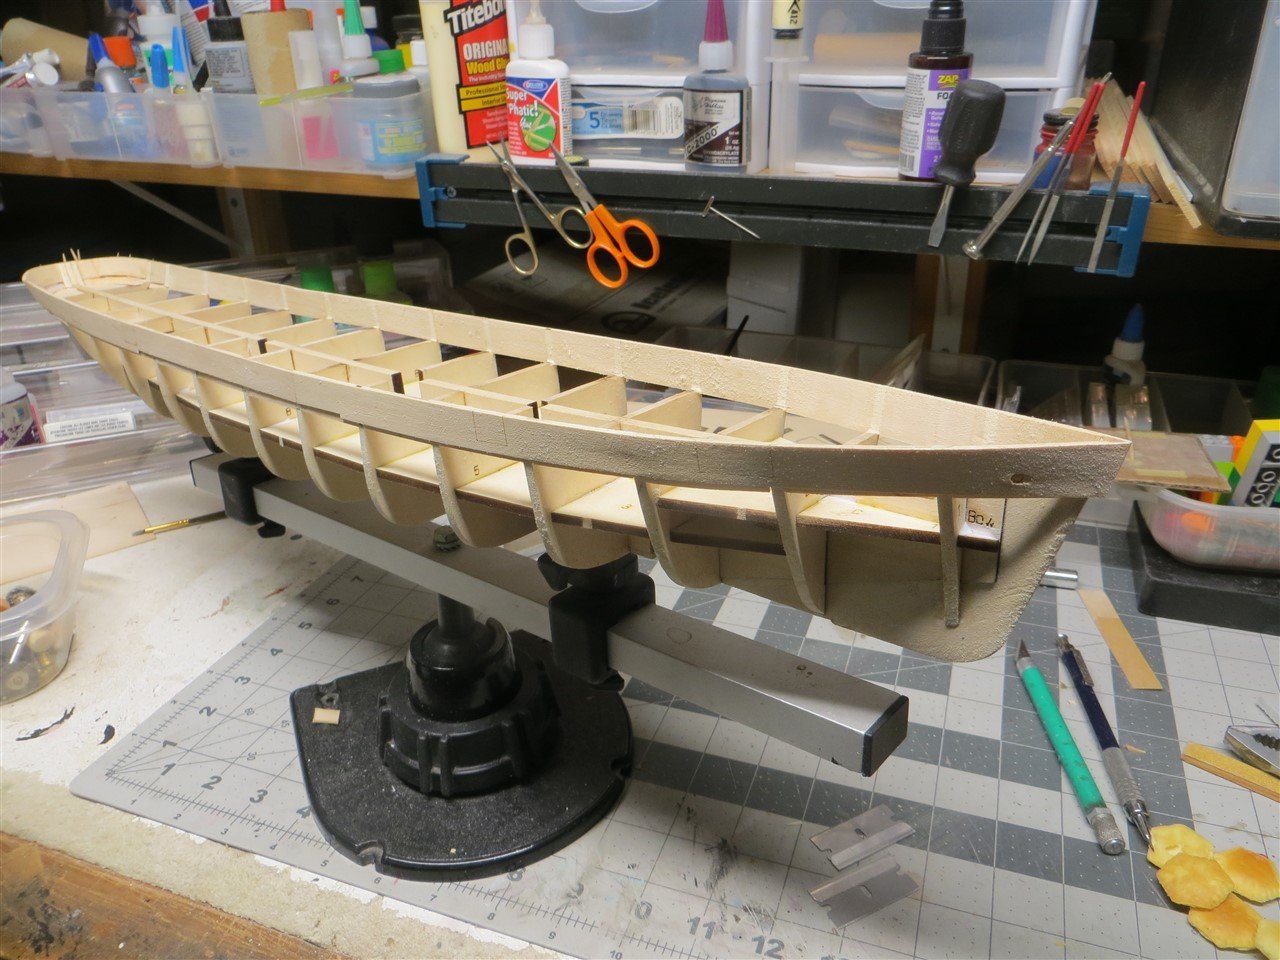
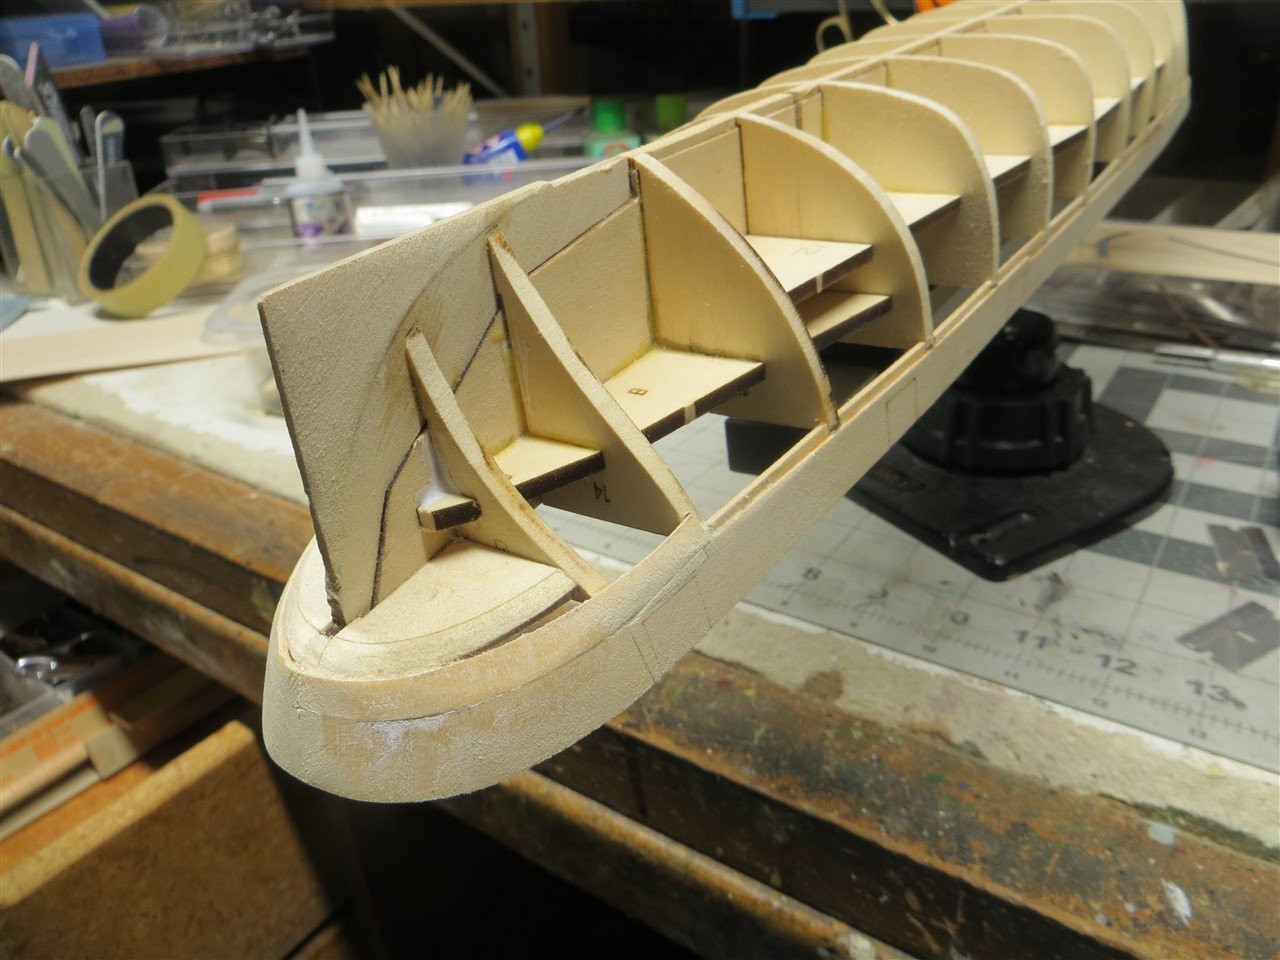
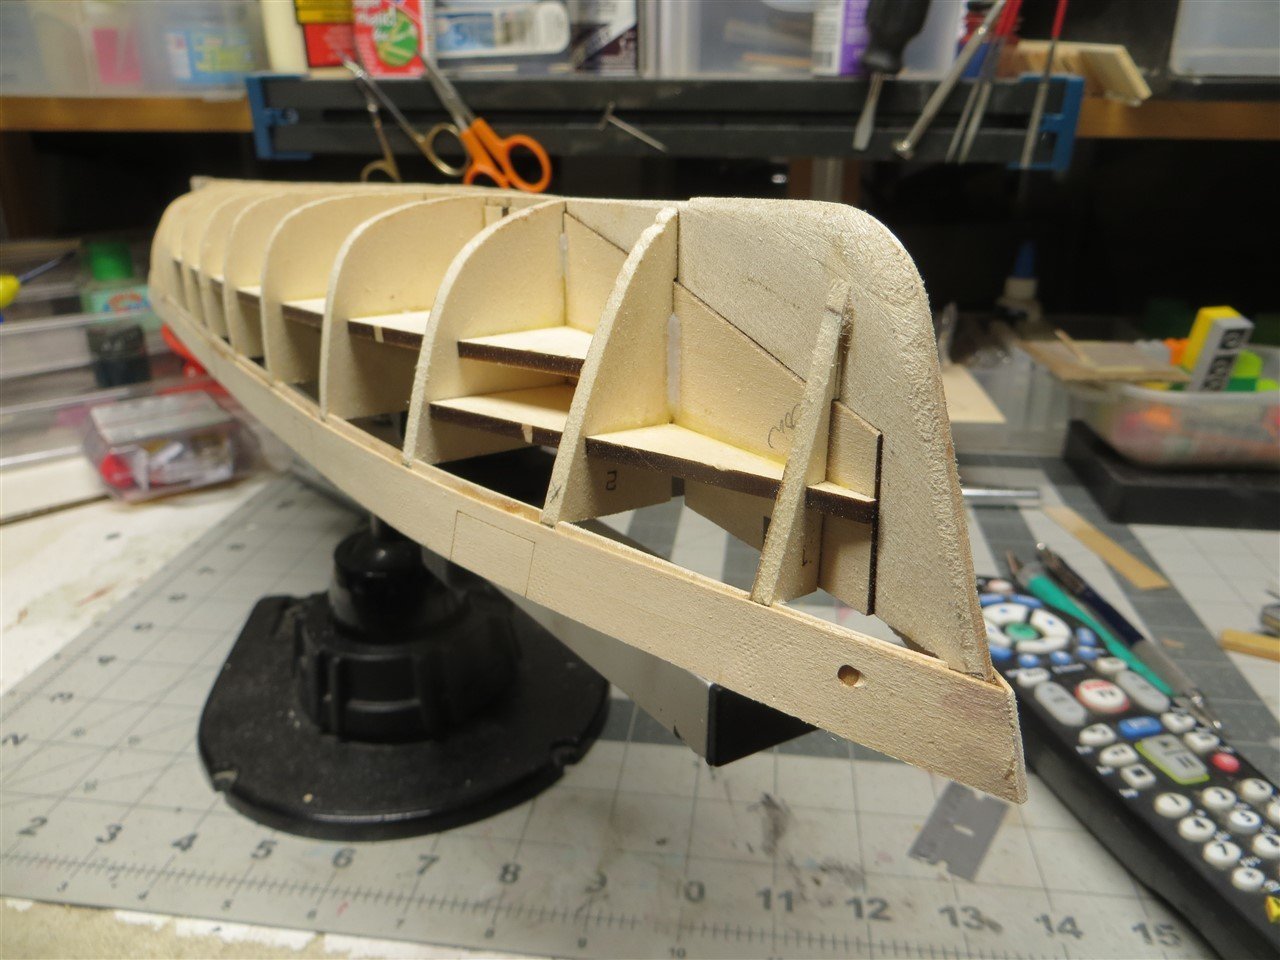
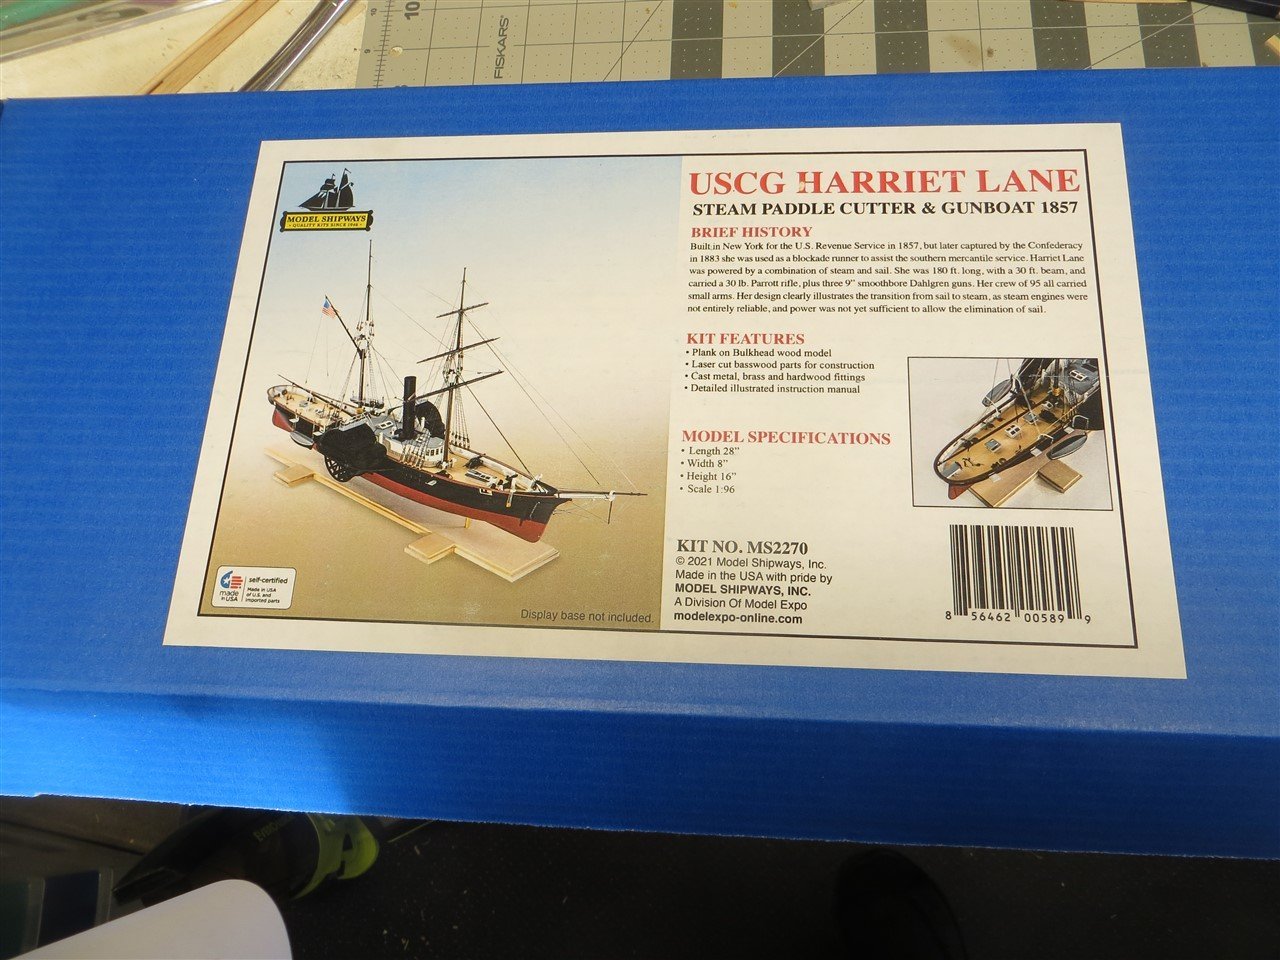
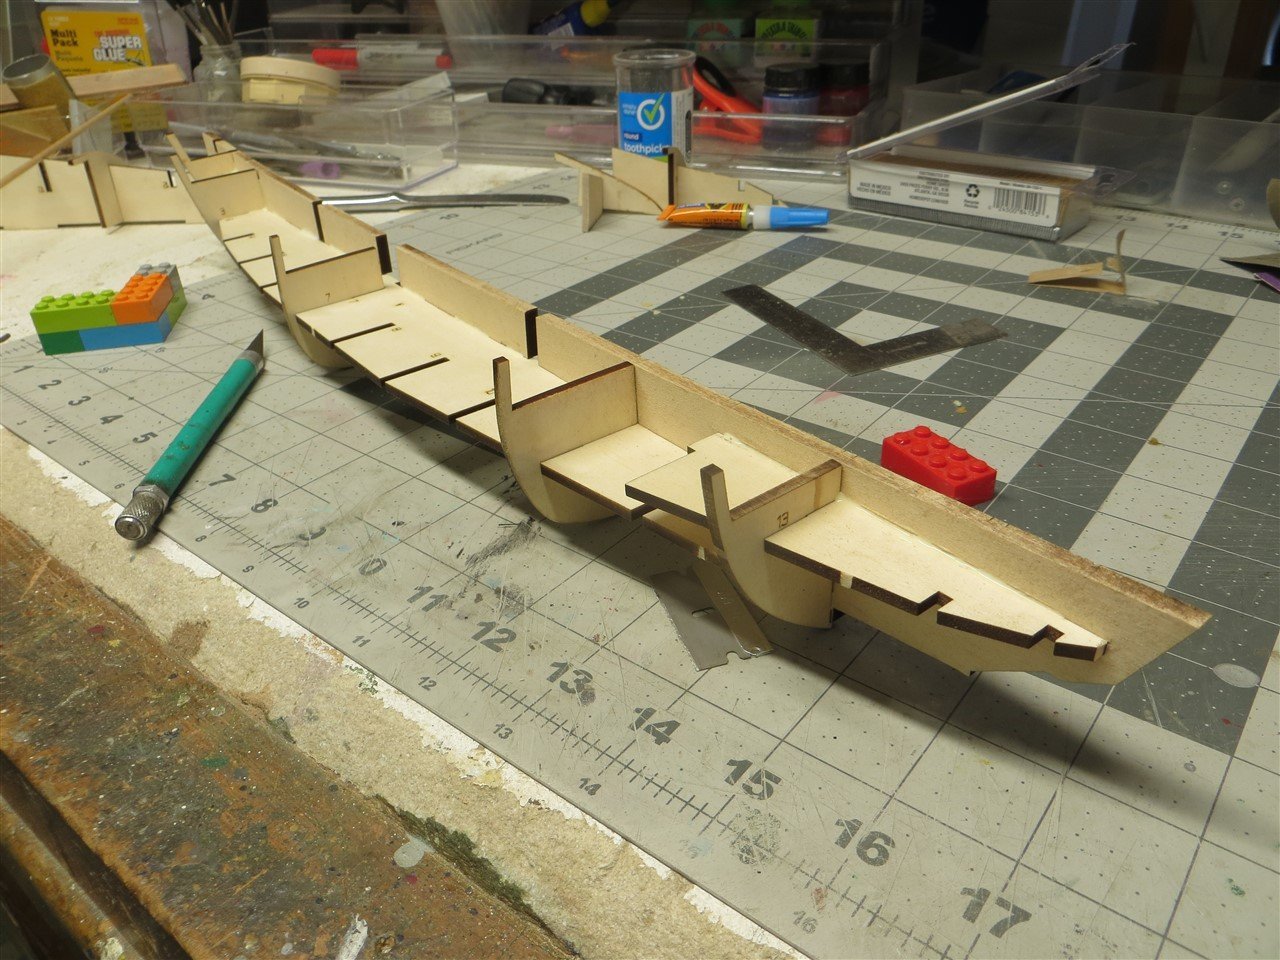
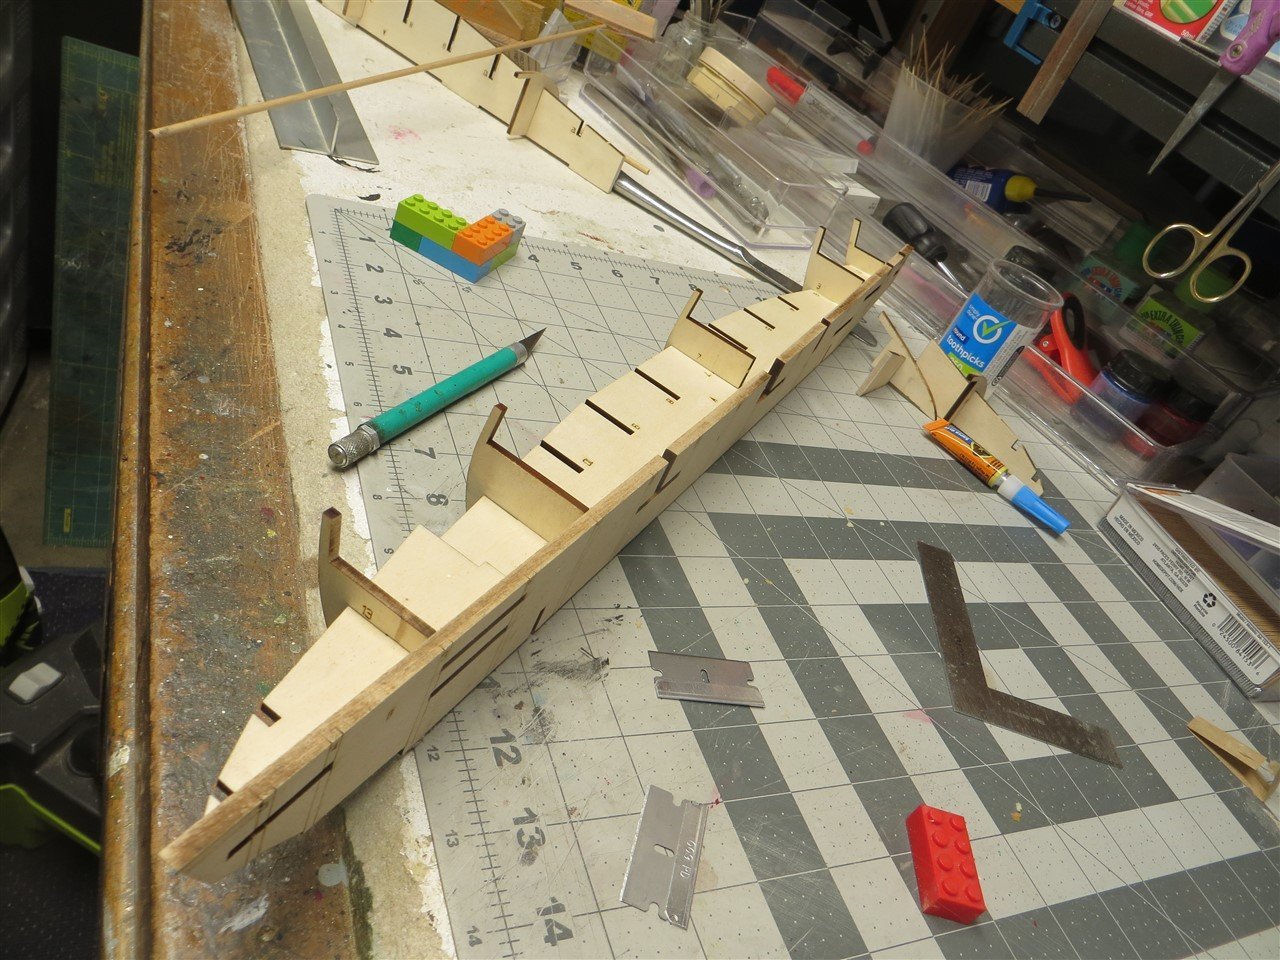
I have completed my Moncongus Bay Lobster Smack and my Harriet Lane kit has arrived. I guess it is time to get started on a new build. The Harriet Lane has been a model I have eyed for quite awhile. Model Shipways had a small solid hull model of the Harriet years ago but it somehow disappeared before I could acquire it. The period when ships were evolving from wood and sail to metal and steam power has always intrigued me; so this should be an interesting build. I do not plan to provide tons of photos and detailed descriptions of my build. I will leave that for the more expert modellers and photographers. I will try to provide photos of my progress and comments regarding the build as it relates to a modeller of my skill level. This is advertised as an "advanced" kit and I am not an "advanced" builder; so I expect I will make a few (if not a lot) of screw-ups along the way. Hopefully, I will learn a few things and maybe alert other modellers of pitfalls. The kit came in a the familiar blue box and contained what looks to be a comprehensive instruction booklet and several plan sheets. All the wood was in good condition and there were no obvious warps, cracks or other defects. The laser cutting looks excellent. Of course the model begins with building the hull skeleton by gluing bulkheads to a center spine. The instructions do an excellent job of guiding the builder through this process. I dry fitted everything as I progressed. Only a little sanding was required to get tight fits. When positioning a bulkhead for gluing; I used lego blocks. They work great to help you align your parts. I tacked parts in place with CA and then went back over the structure with wood glue. All-in-all a couple of very enjoyable evenings with this model. A few more parts and I will begin the process of fairing the bulkheads.....a task I find intimidating.

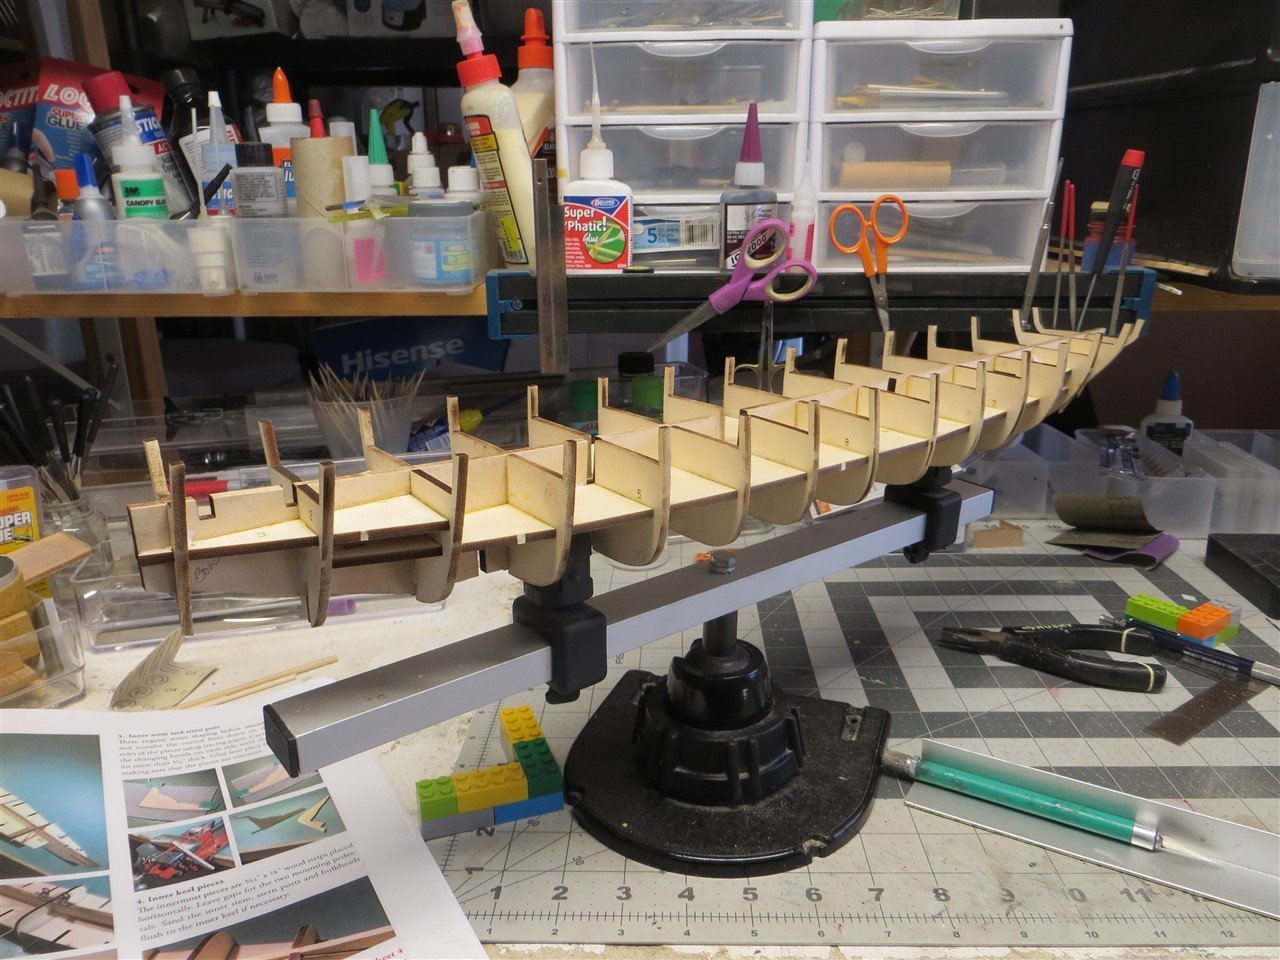
- 25 replies
-
- 9
-
-
- Harriet Lane
- Model Shipways
- (and 1 more)
-
You do very nice work. I am the painting stage on this model. For me, this has been an enjoyable build. Did not do a log, probably should have.
-
My Harriet Lane just arrived. It will be my next project. I will be following your build carefully.
- 144 replies
-
- 2
-
-
- Harriet Lane
- Model Shipways
- (and 1 more)
-
Welcome aboard Senior Chief. Rode fast attack submarines in the early seventies.
-
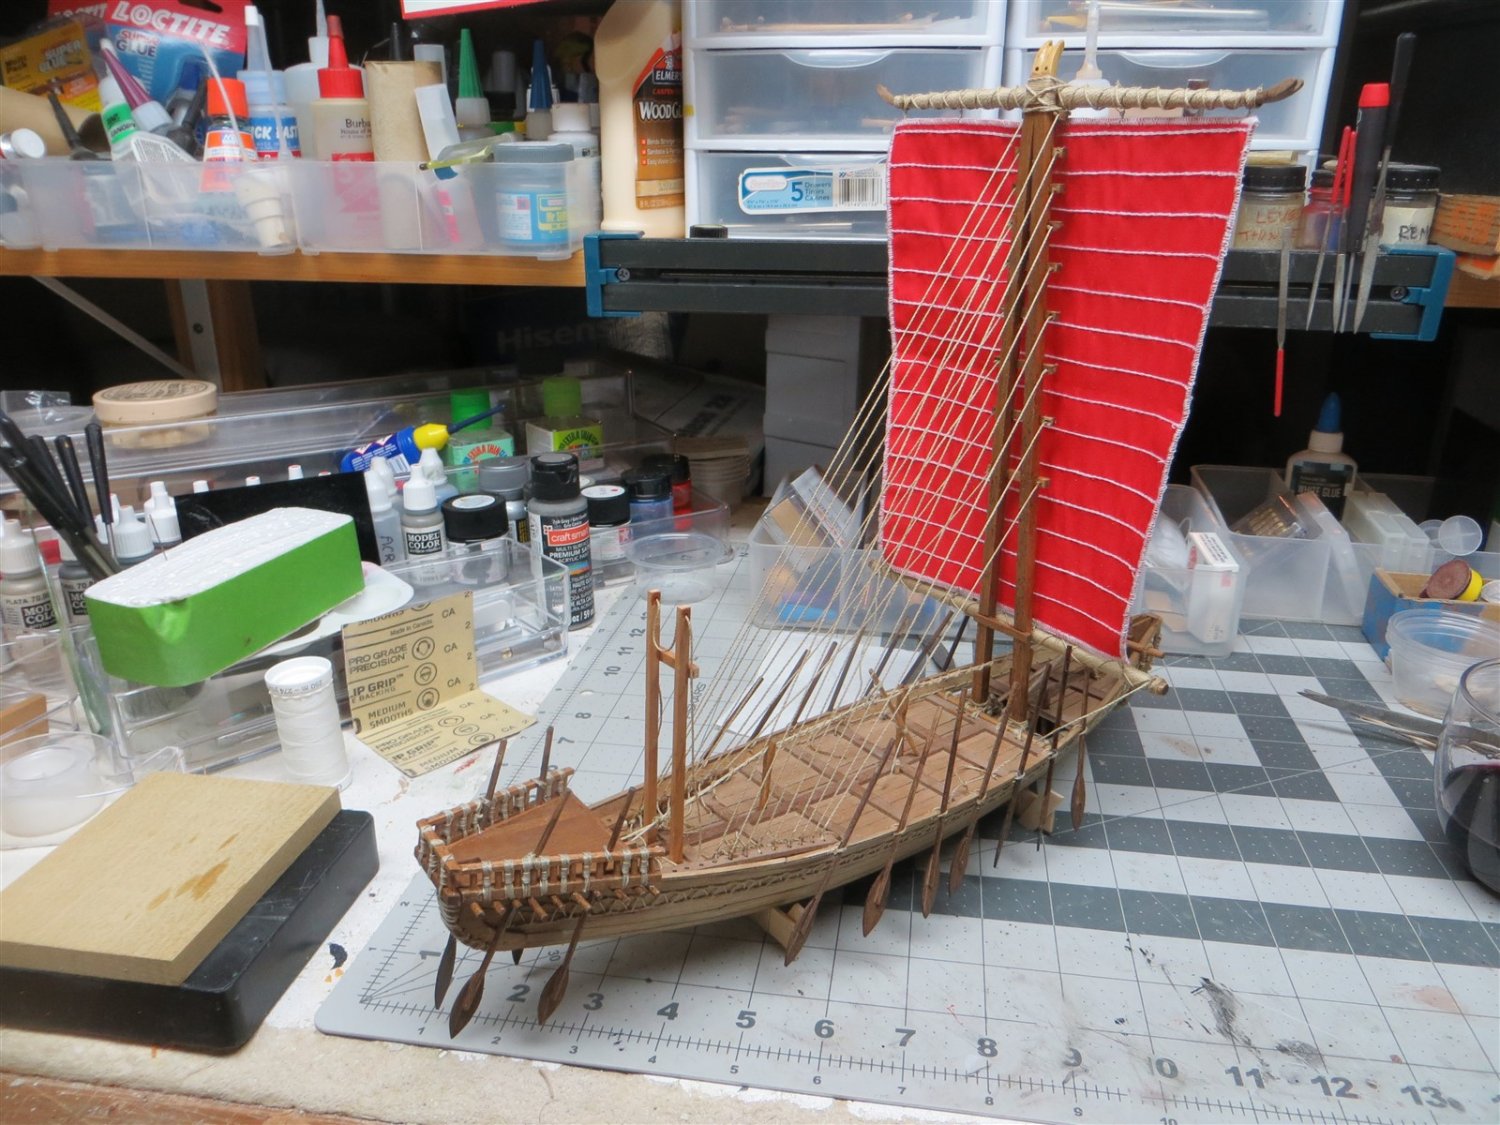
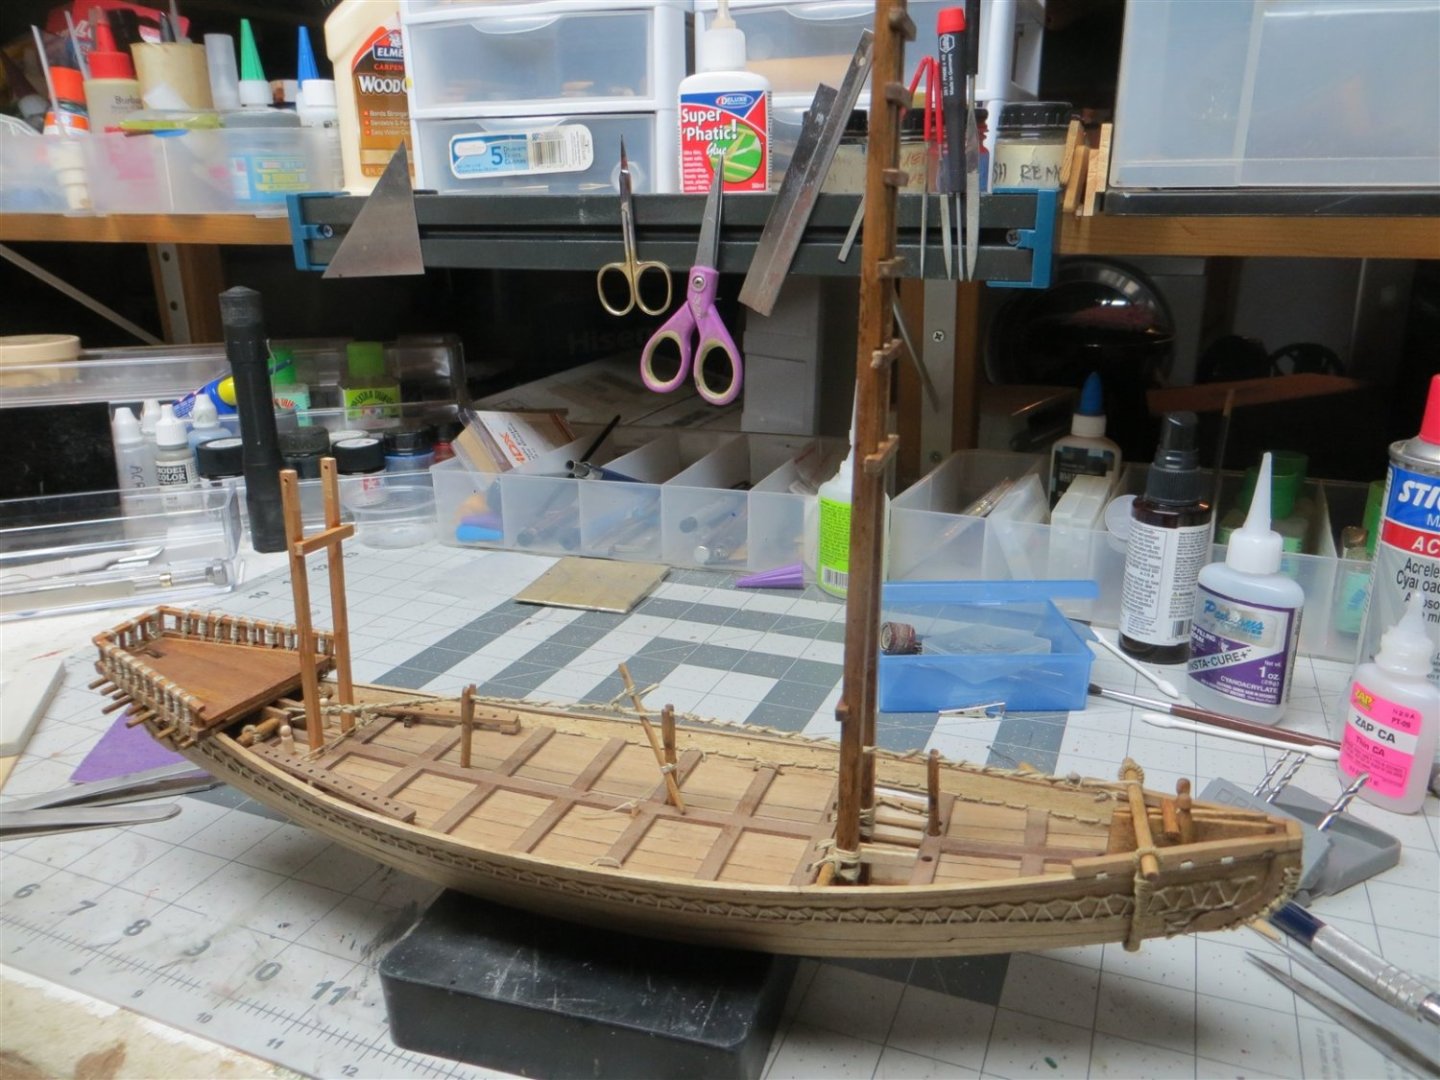
The model is finished. Here are a few photos of the completed model:


- 28 replies
-
- 9
-
-
- Nave Egizia
- Amati
- (and 1 more)
-
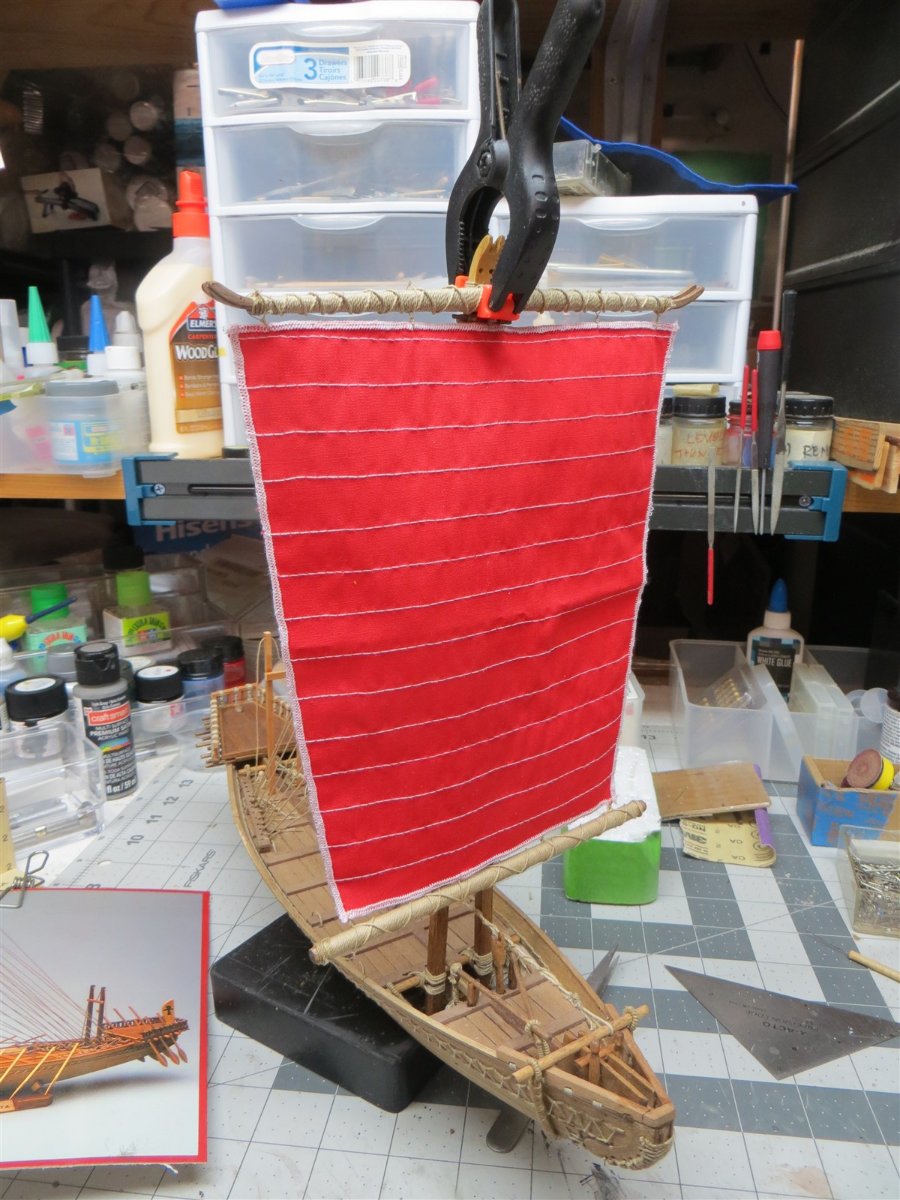
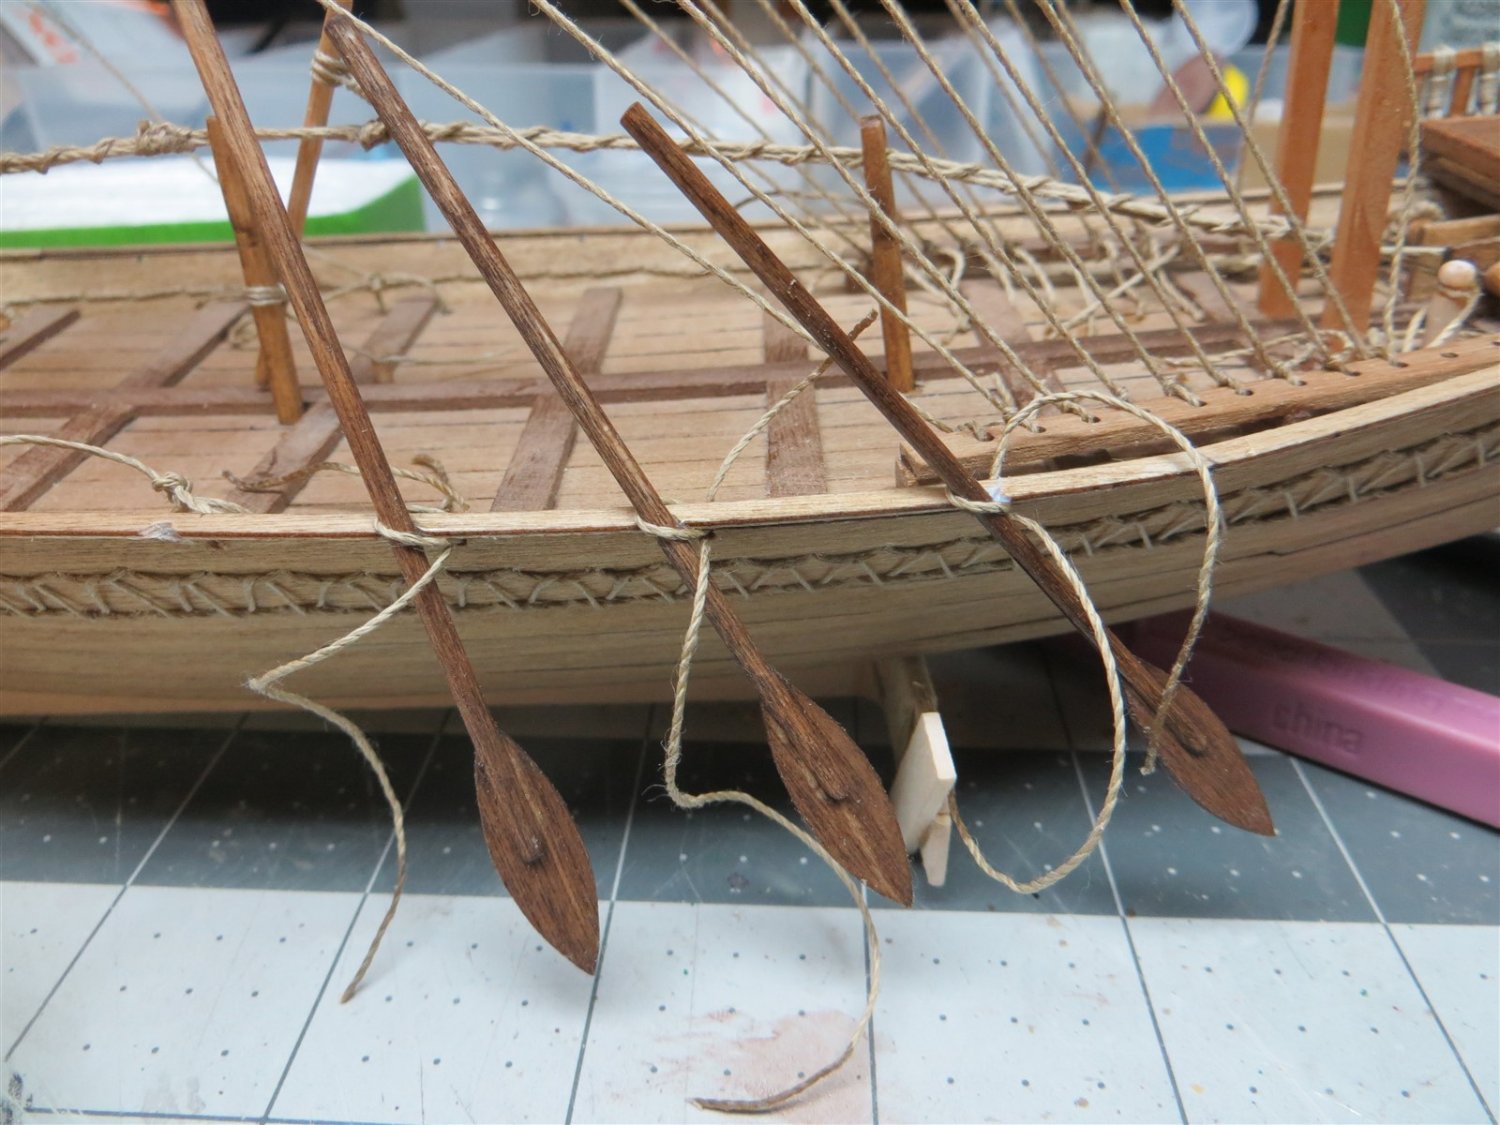
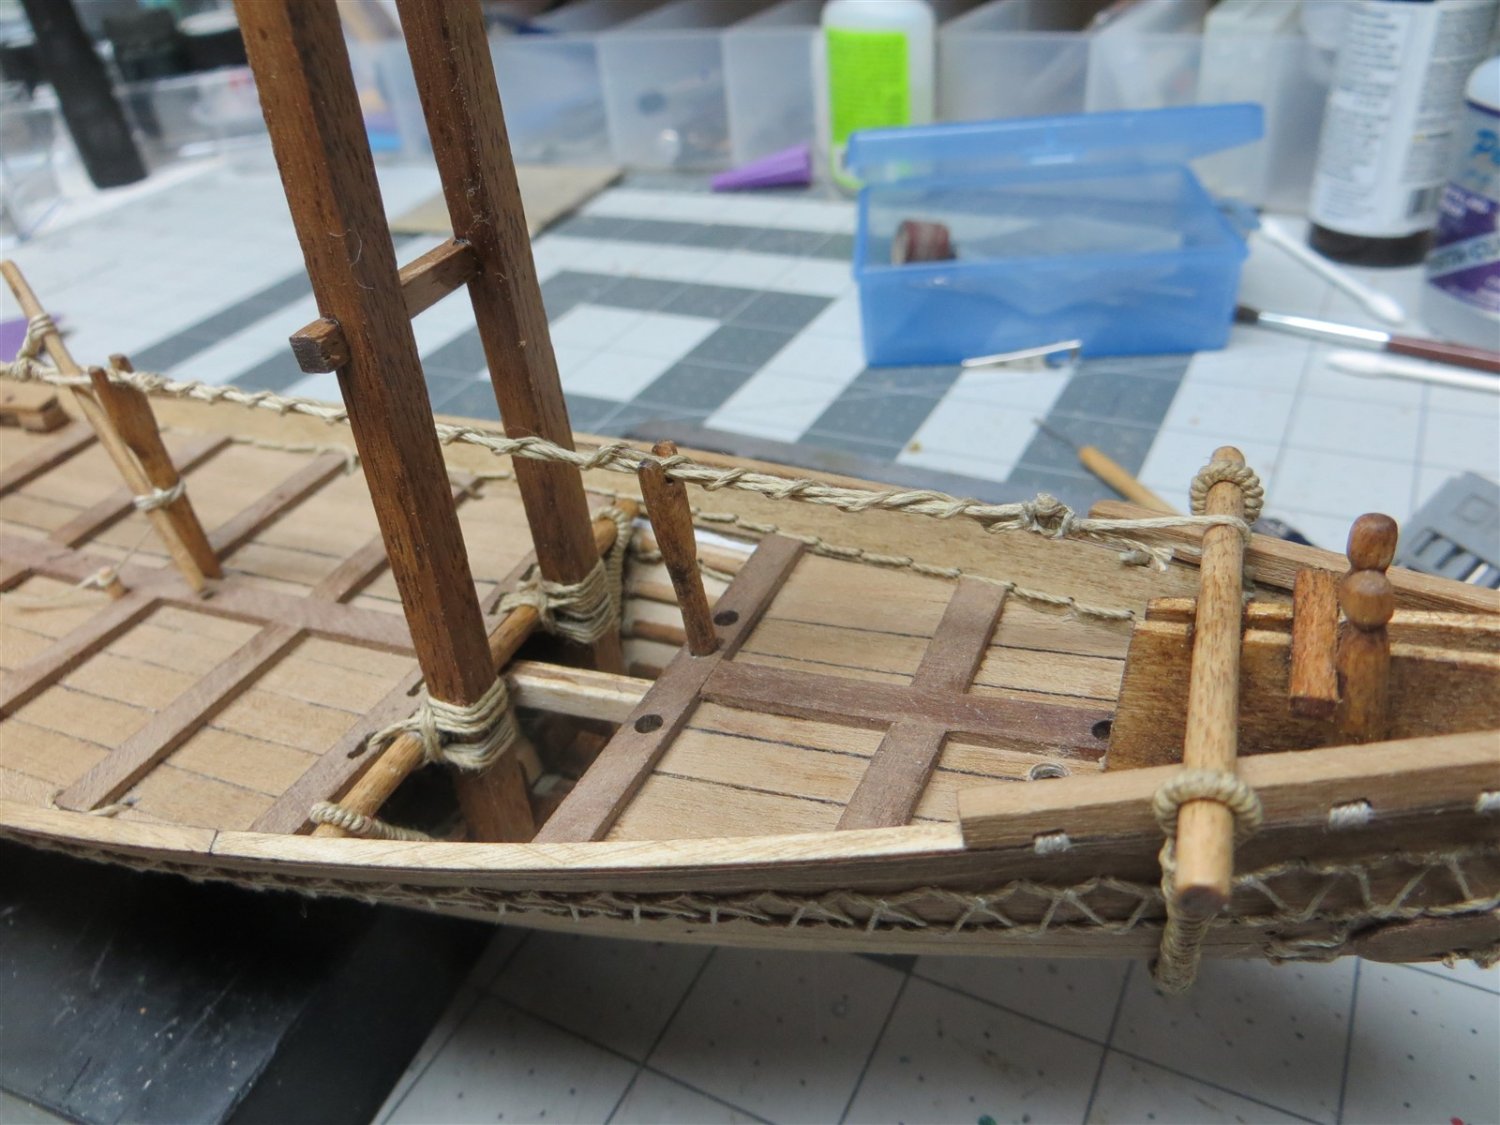
Final steps in the build were to mount the sail and install the oars and steering oars.


- 28 replies
-
- 2
-
-
- Nave Egizia
- Amati
- (and 1 more)
-
I downloaded a previous version. How do I "upgrade"?
-
I have this model kit sitting on my shelf. I will be following your build. Looks like it is going well at this point.
-
Very nice model. Your work on deck furniture is excellent. Looking forward to the rigging part.
- 50 replies
-
- 2
-
-

-
- Perry
- BlueJacket Shipcrafters
- (and 1 more)
-
Great job so far. Your planking was well done. Love your herring. A few in a case and one or two scattered about would add to the final model. Will need a few crew members to accompany the fish.
-
You are doing a great job. I built this model years ago. It makes a great conversation piece when displayed.
-
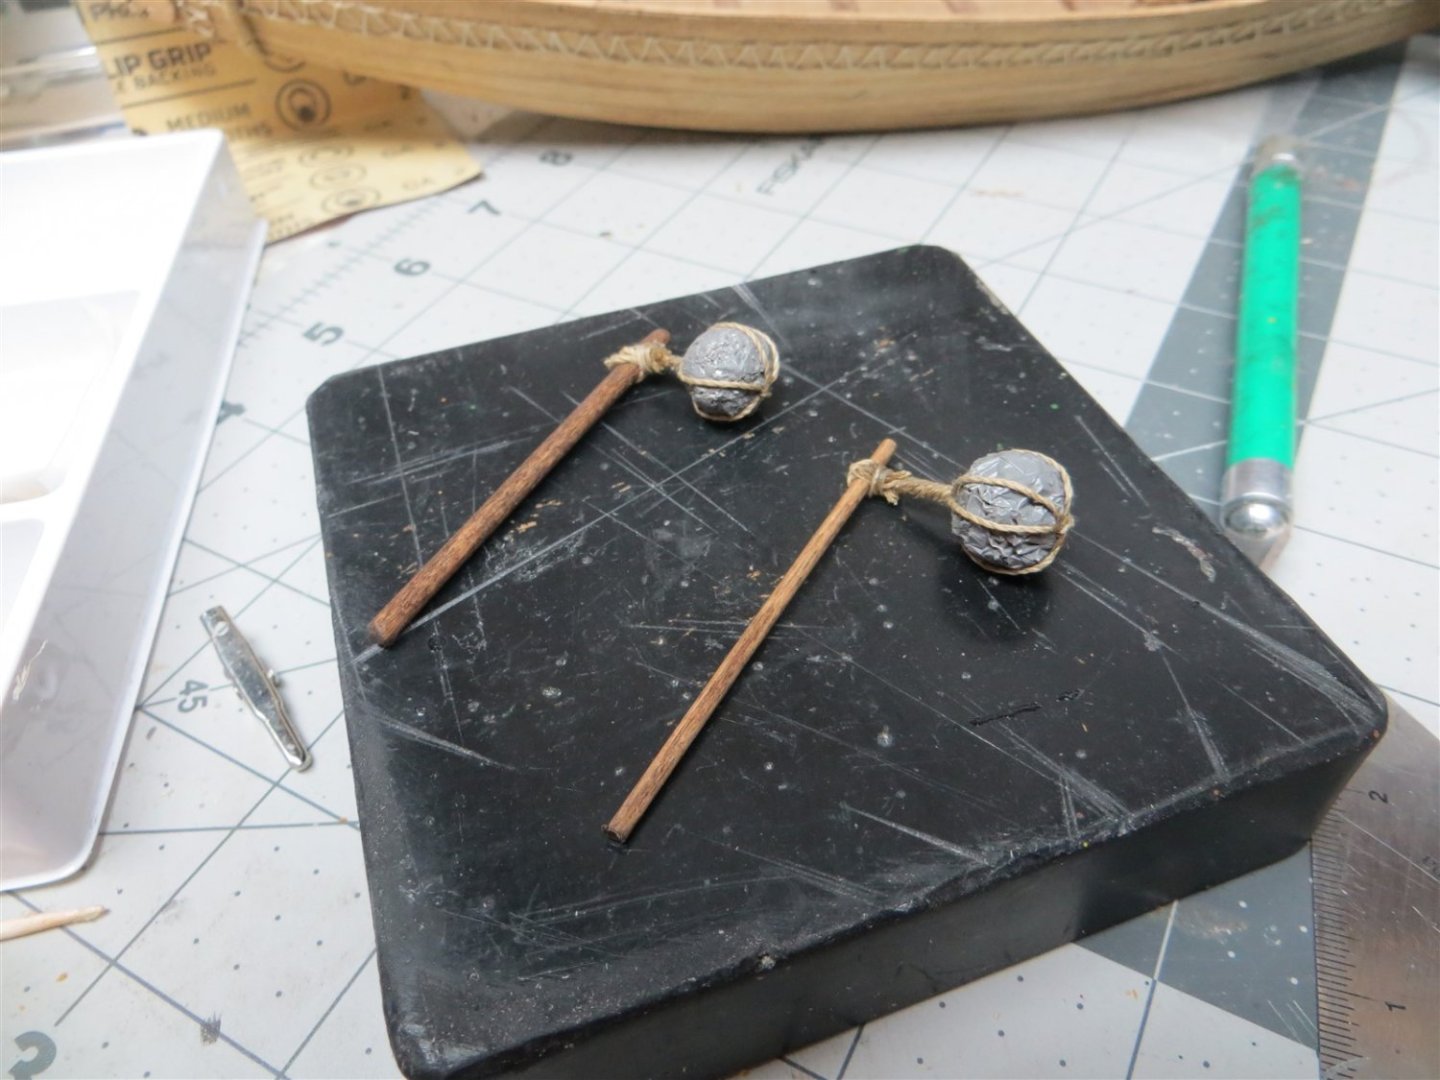
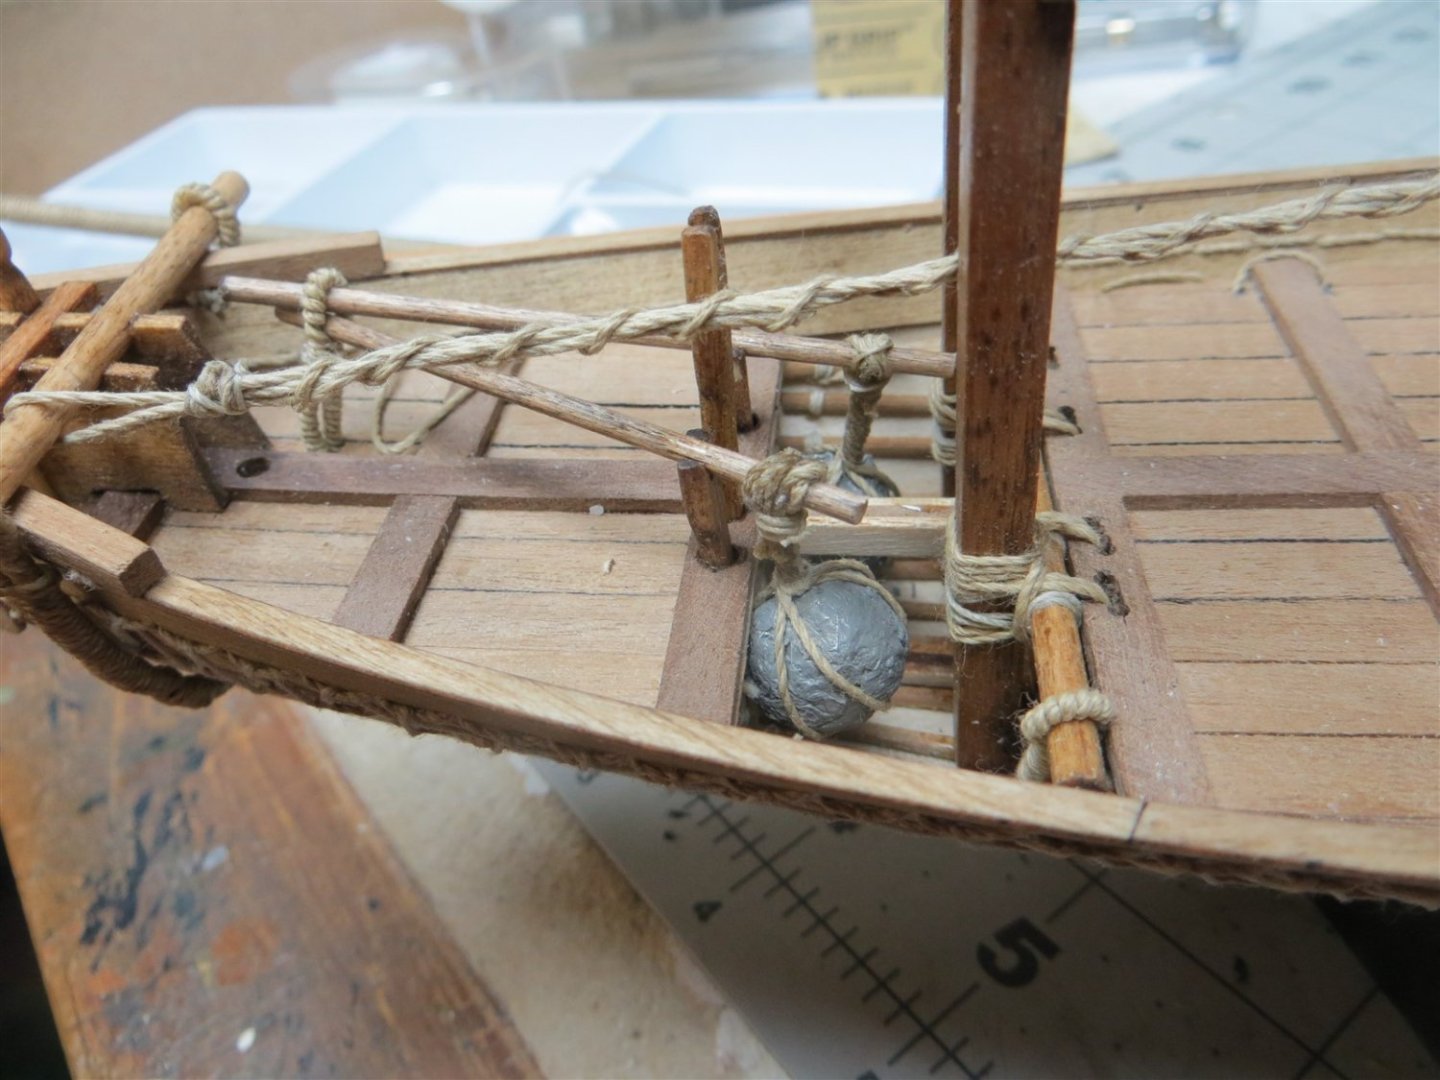
The next step was the counter-balance structure. It would appear that the designers used large boulders slug in nets over spaces in the hull to act as counter-balance to the weight of the main mast when it was raised or lowered. I made my boulders by balling up some tin foil and then painting it grey. I then made some very simple nets with the ropes and hung from the poles over the space in the hull previously constructed. I am not sure how these counter-balances worked since most of the rigging of these structures appear to be below decks and not visible.

- 28 replies
-
- 2
-
-
- Nave Egizia
- Amati
- (and 1 more)
-
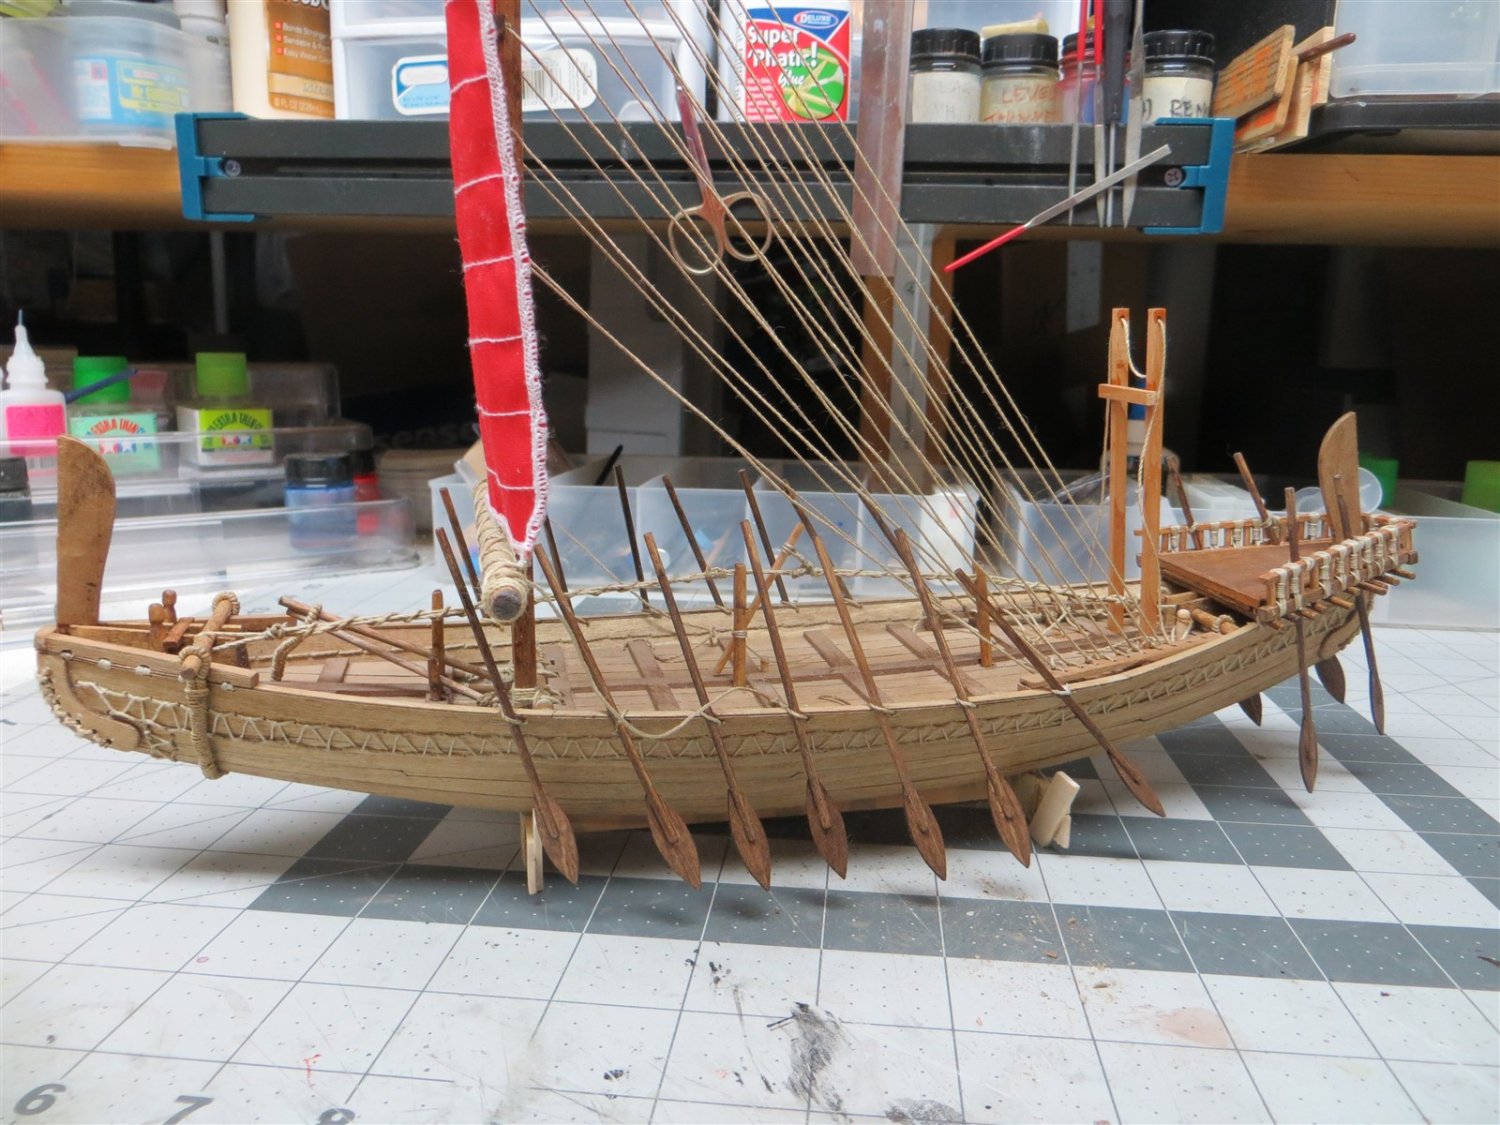
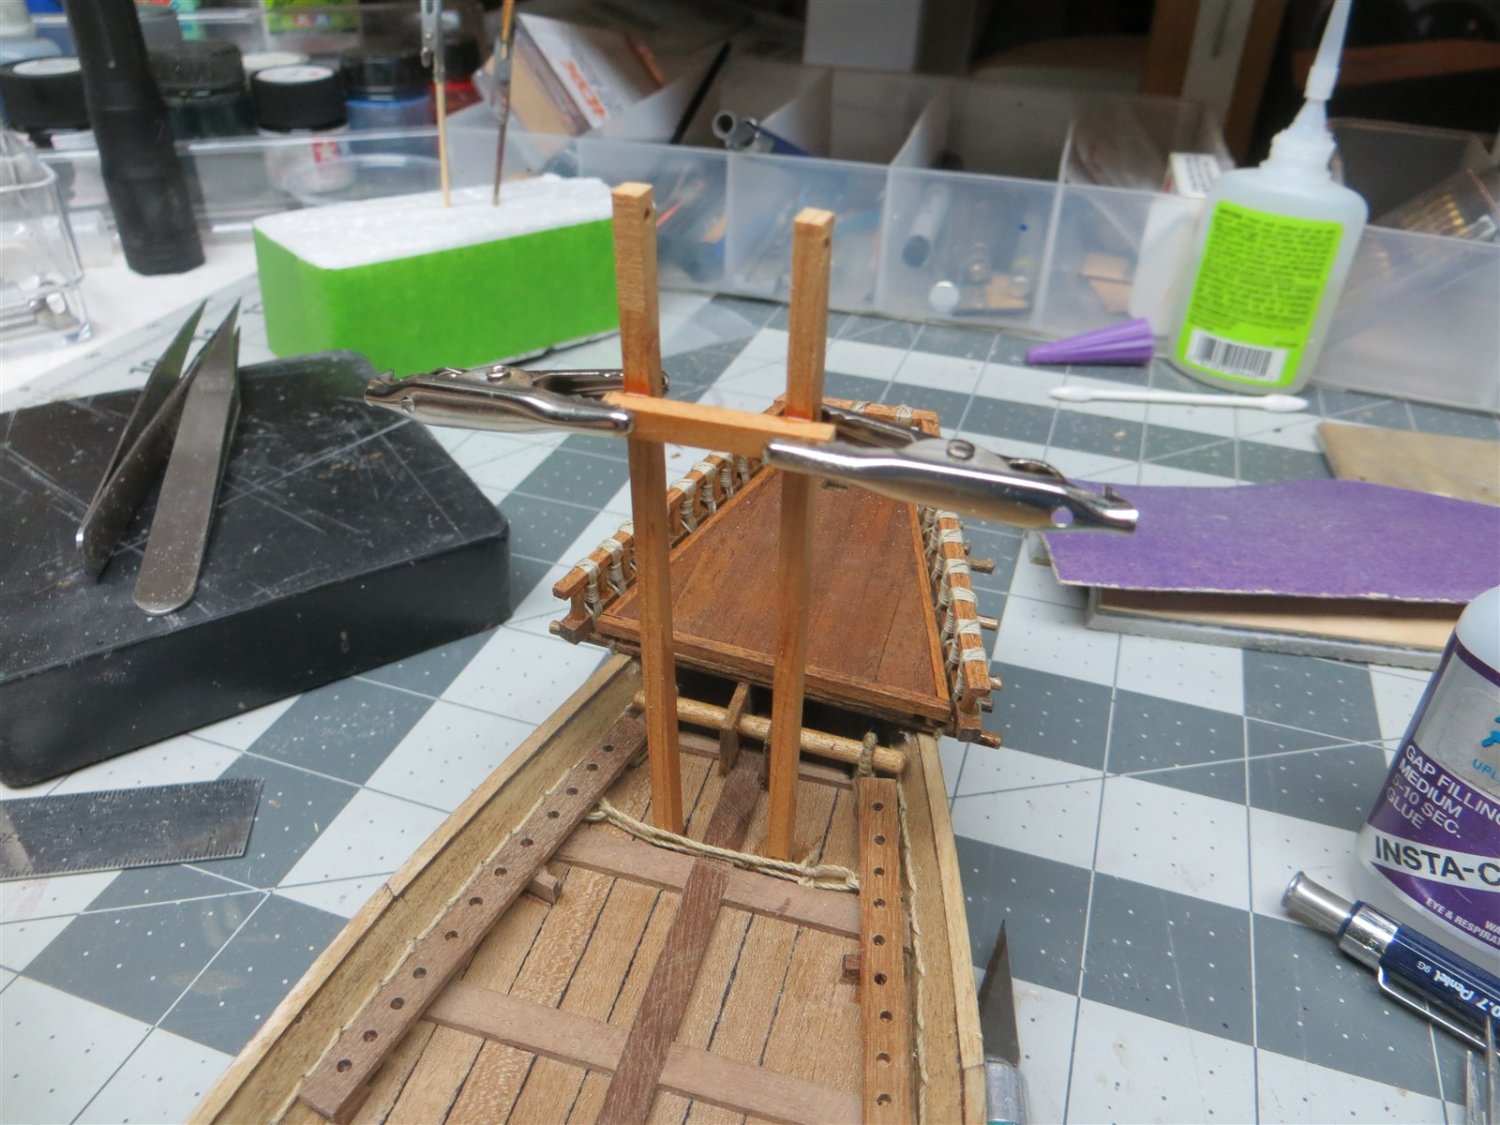
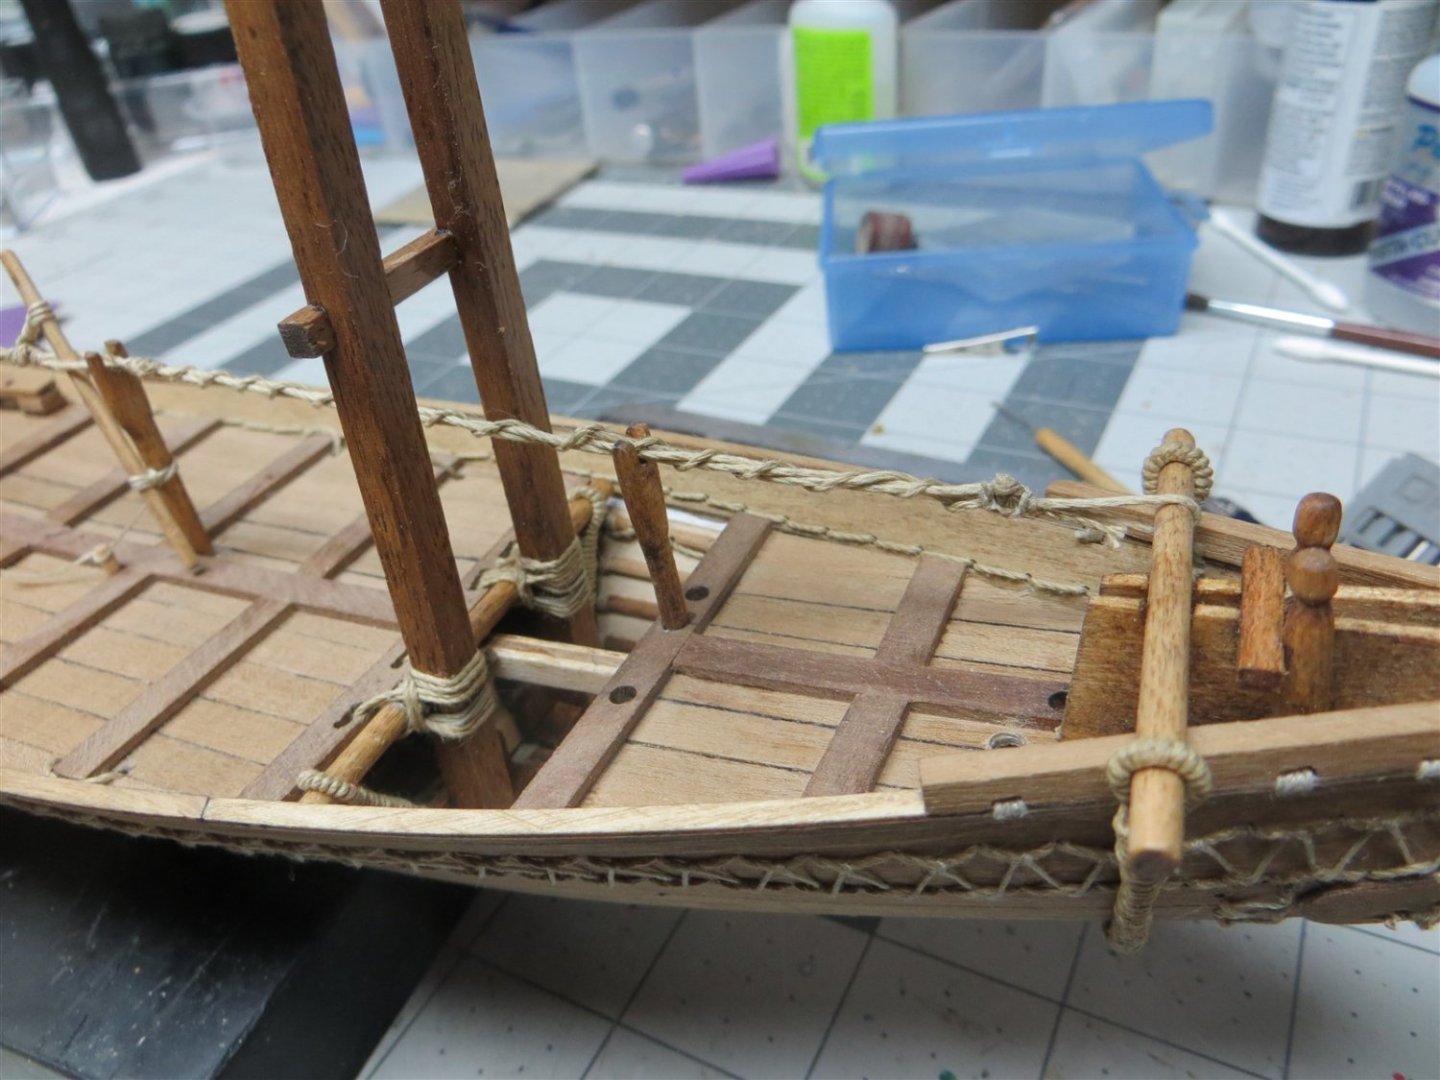
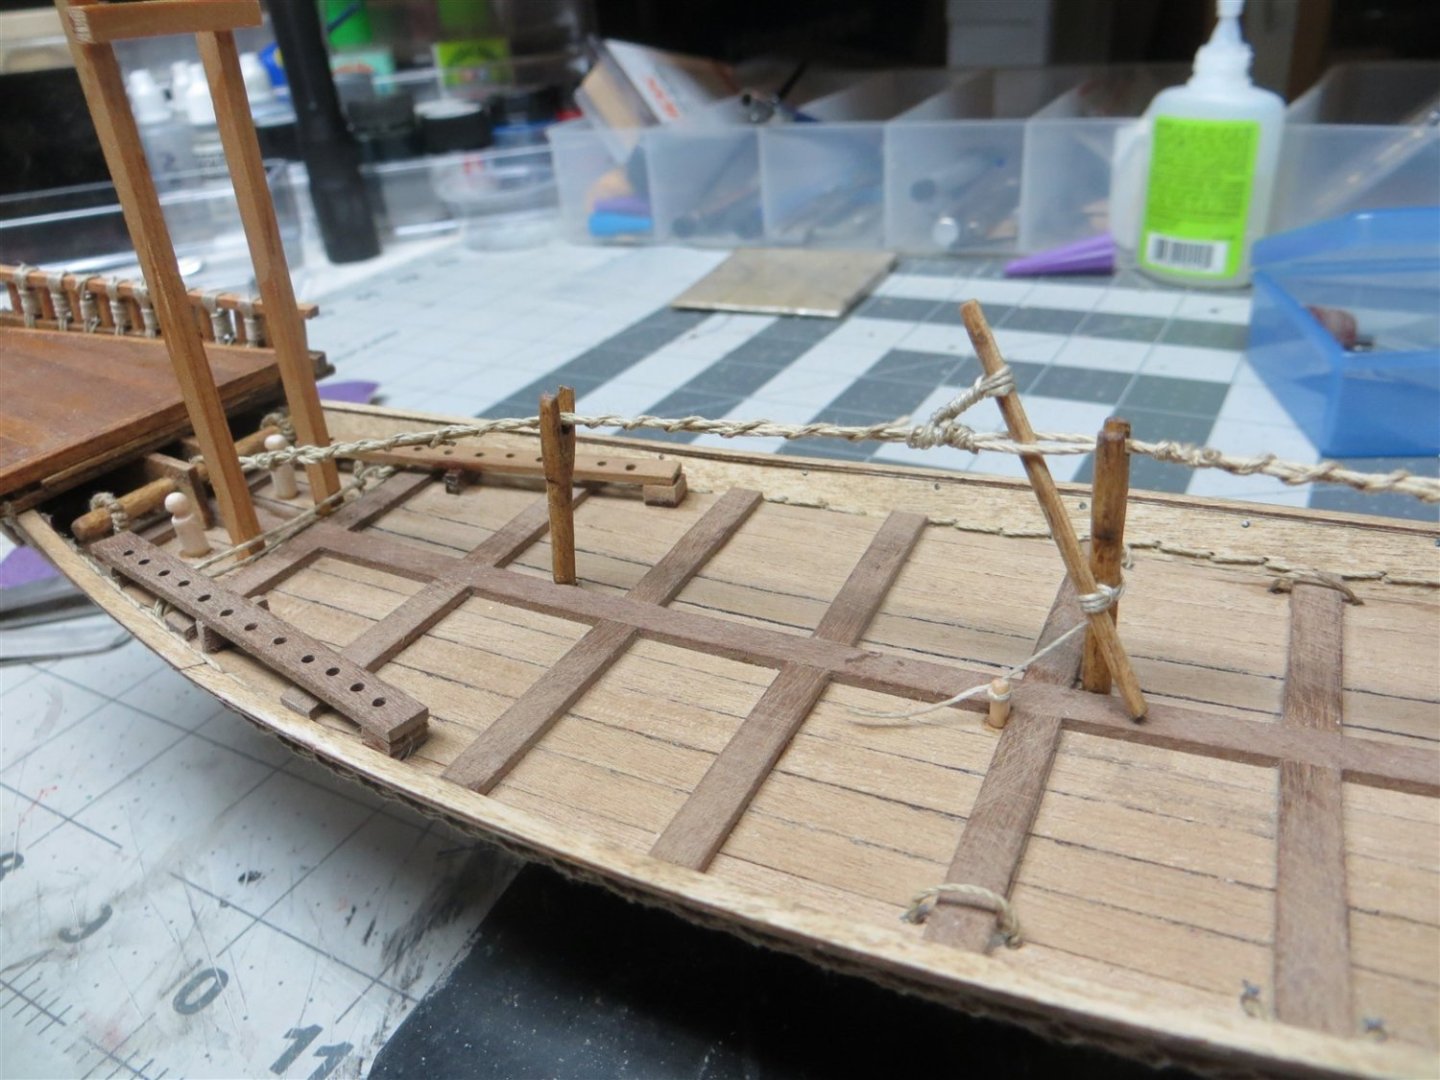
It appears that the builders of these Egyptian ships would stretch a rope from the front to the rear of the ship and then put the rope under tension by twisting. I assume this would offset the opposite forces placed on the keelless hull as the ship was loaded. The following photos show my construction of this tension line; including the fore and aft mounting and the "tensioner".


- 28 replies
-
- 2
-
-
- Nave Egizia
- Amati
- (and 1 more)
-
Been away from the workbench for awhile. Took an RV trip to eastern Arizona but got back about a week ago. The first little project was to build the "saddle" that main mast would rest on if lowered.

-
Will MDF make it more difficult to sand/shape the frames to the proper shape before planking. Would a good sanding board with 80 to so grit sandpaper (and a lot of arm work and patience) do the job?
-
After a lot of work and some frustration; it looks like you obtain an nice first planking. Like a nice smooth bourbon myself.
- 59 replies
-
- 3
-
-
-
- Swift
- Artesania Latina
- (and 1 more)
-
Looks great. It is a good feeling to complete a project like this.
-
Looks like a cute model. You are doing good work. I also think your spray booth solution is great.