HOLIDAY DONATION DRIVE - SUPPORT MSW - DO YOUR PART TO KEEP THIS GREAT FORUM GOING! (Only 27 donations so far out of 49,000 members - C'mon guys!)
×


Justin P.
-
Posts
1,008 -
Joined
Content Type
Profiles
Forums
Gallery
Events
Everything posted by Justin P.
-
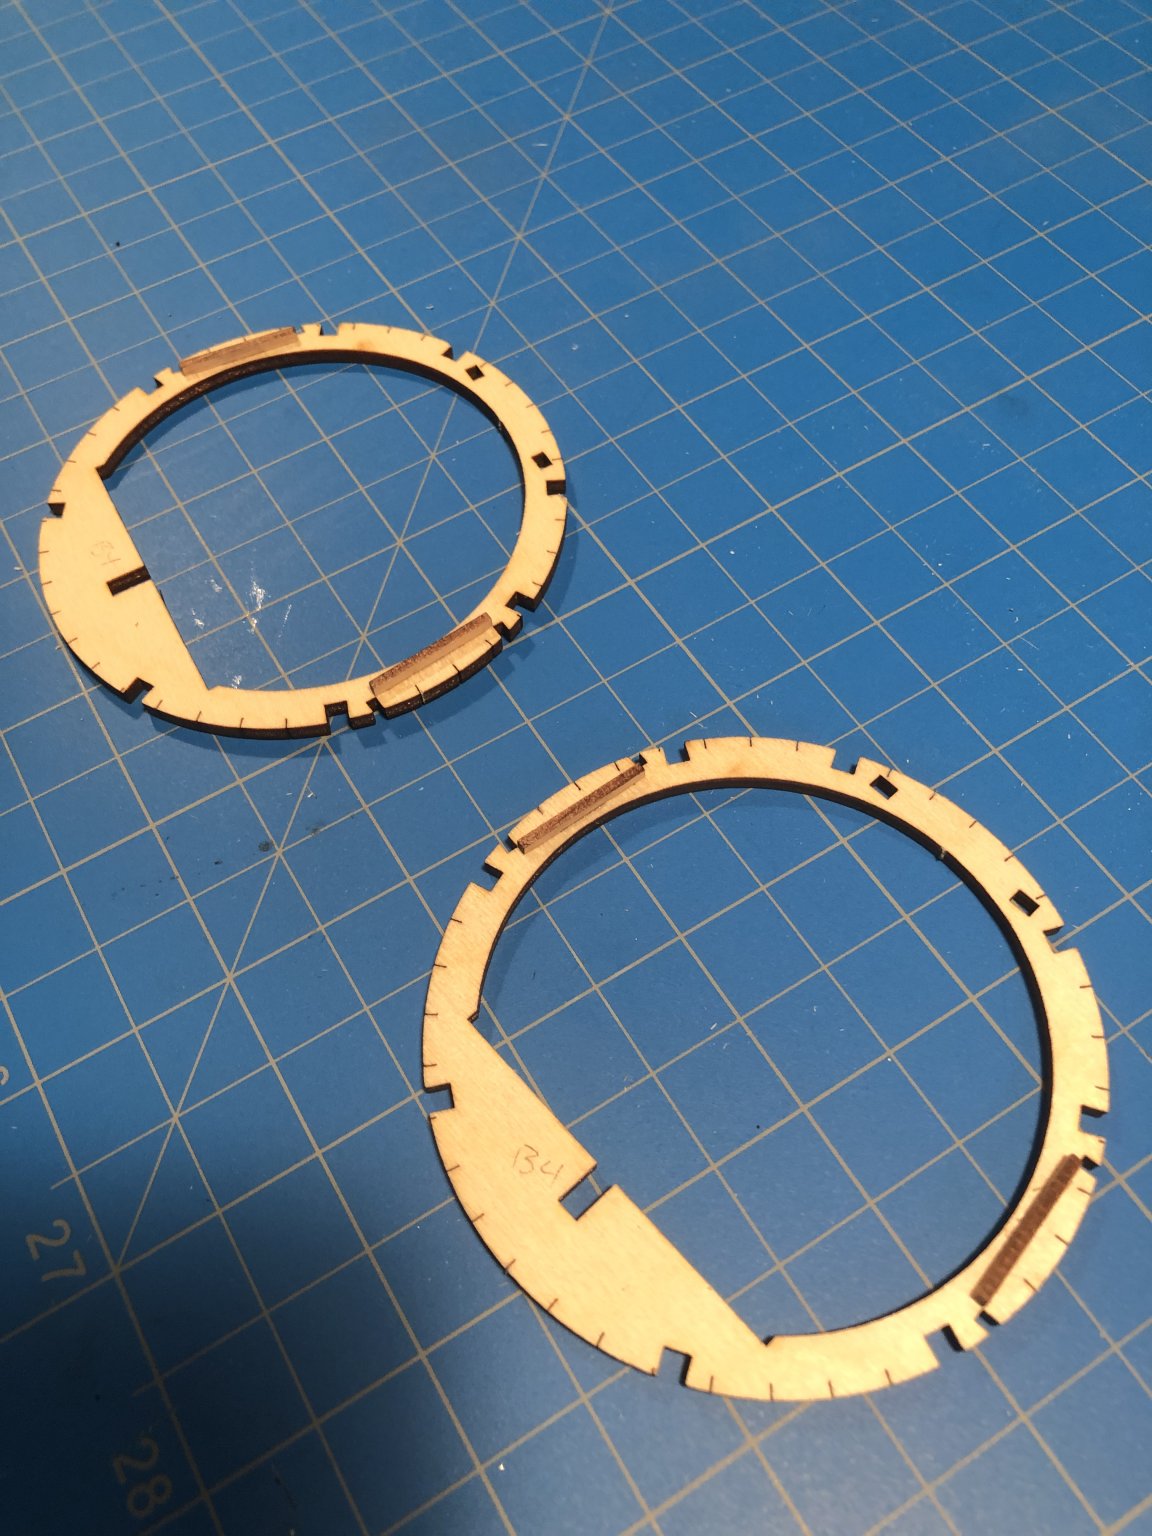
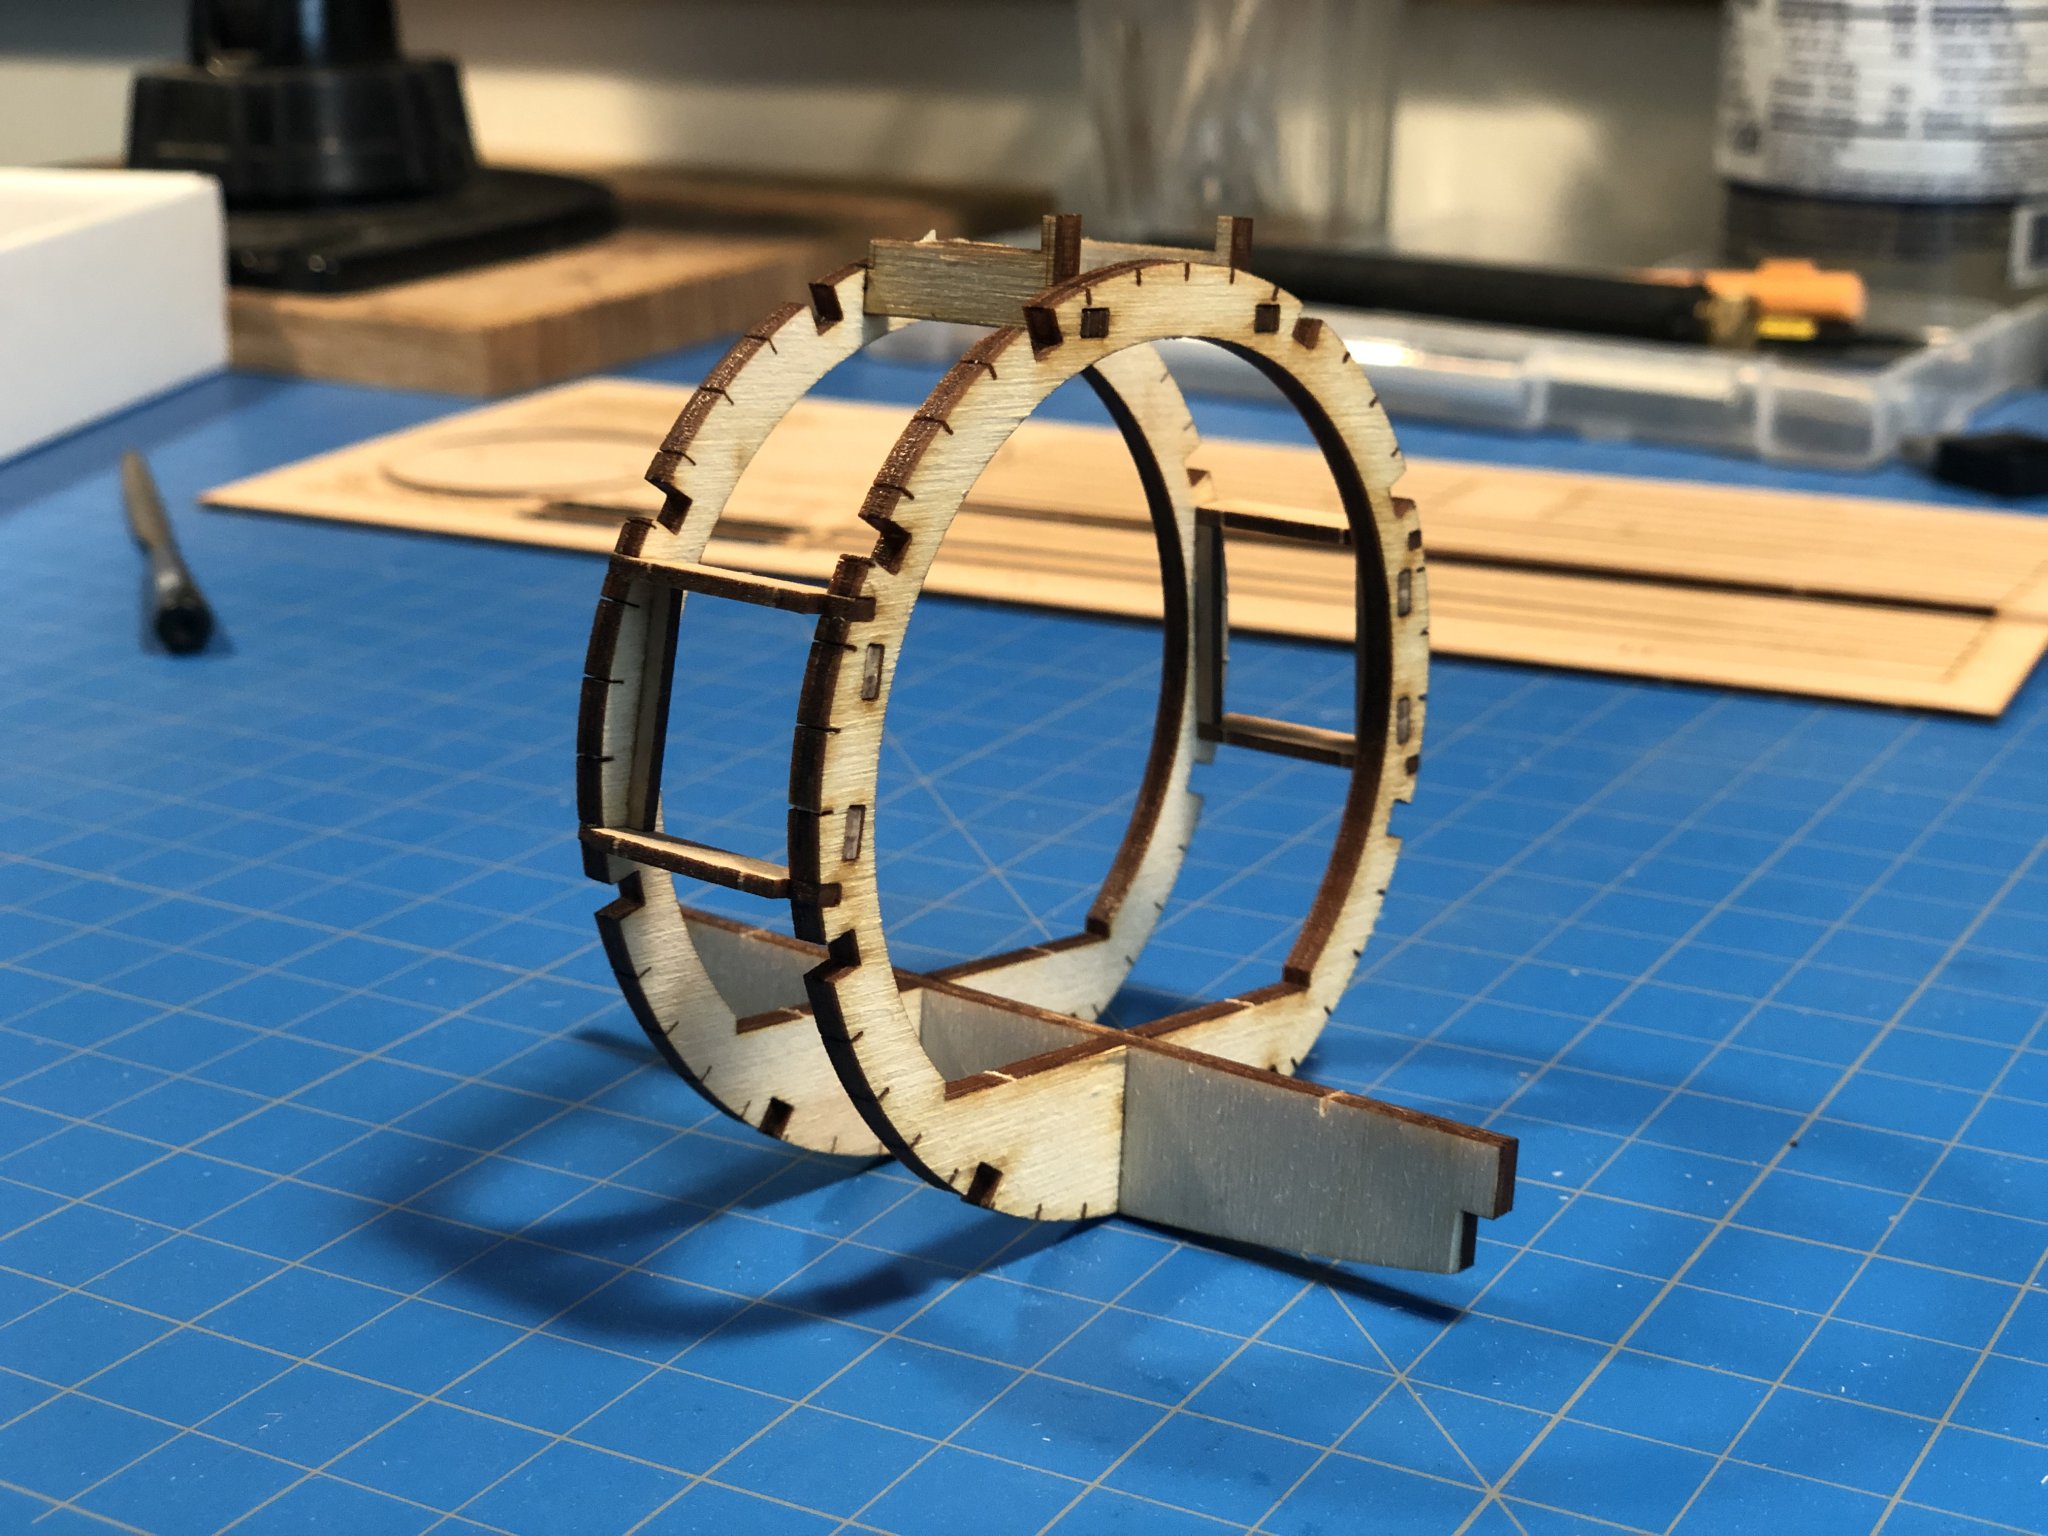
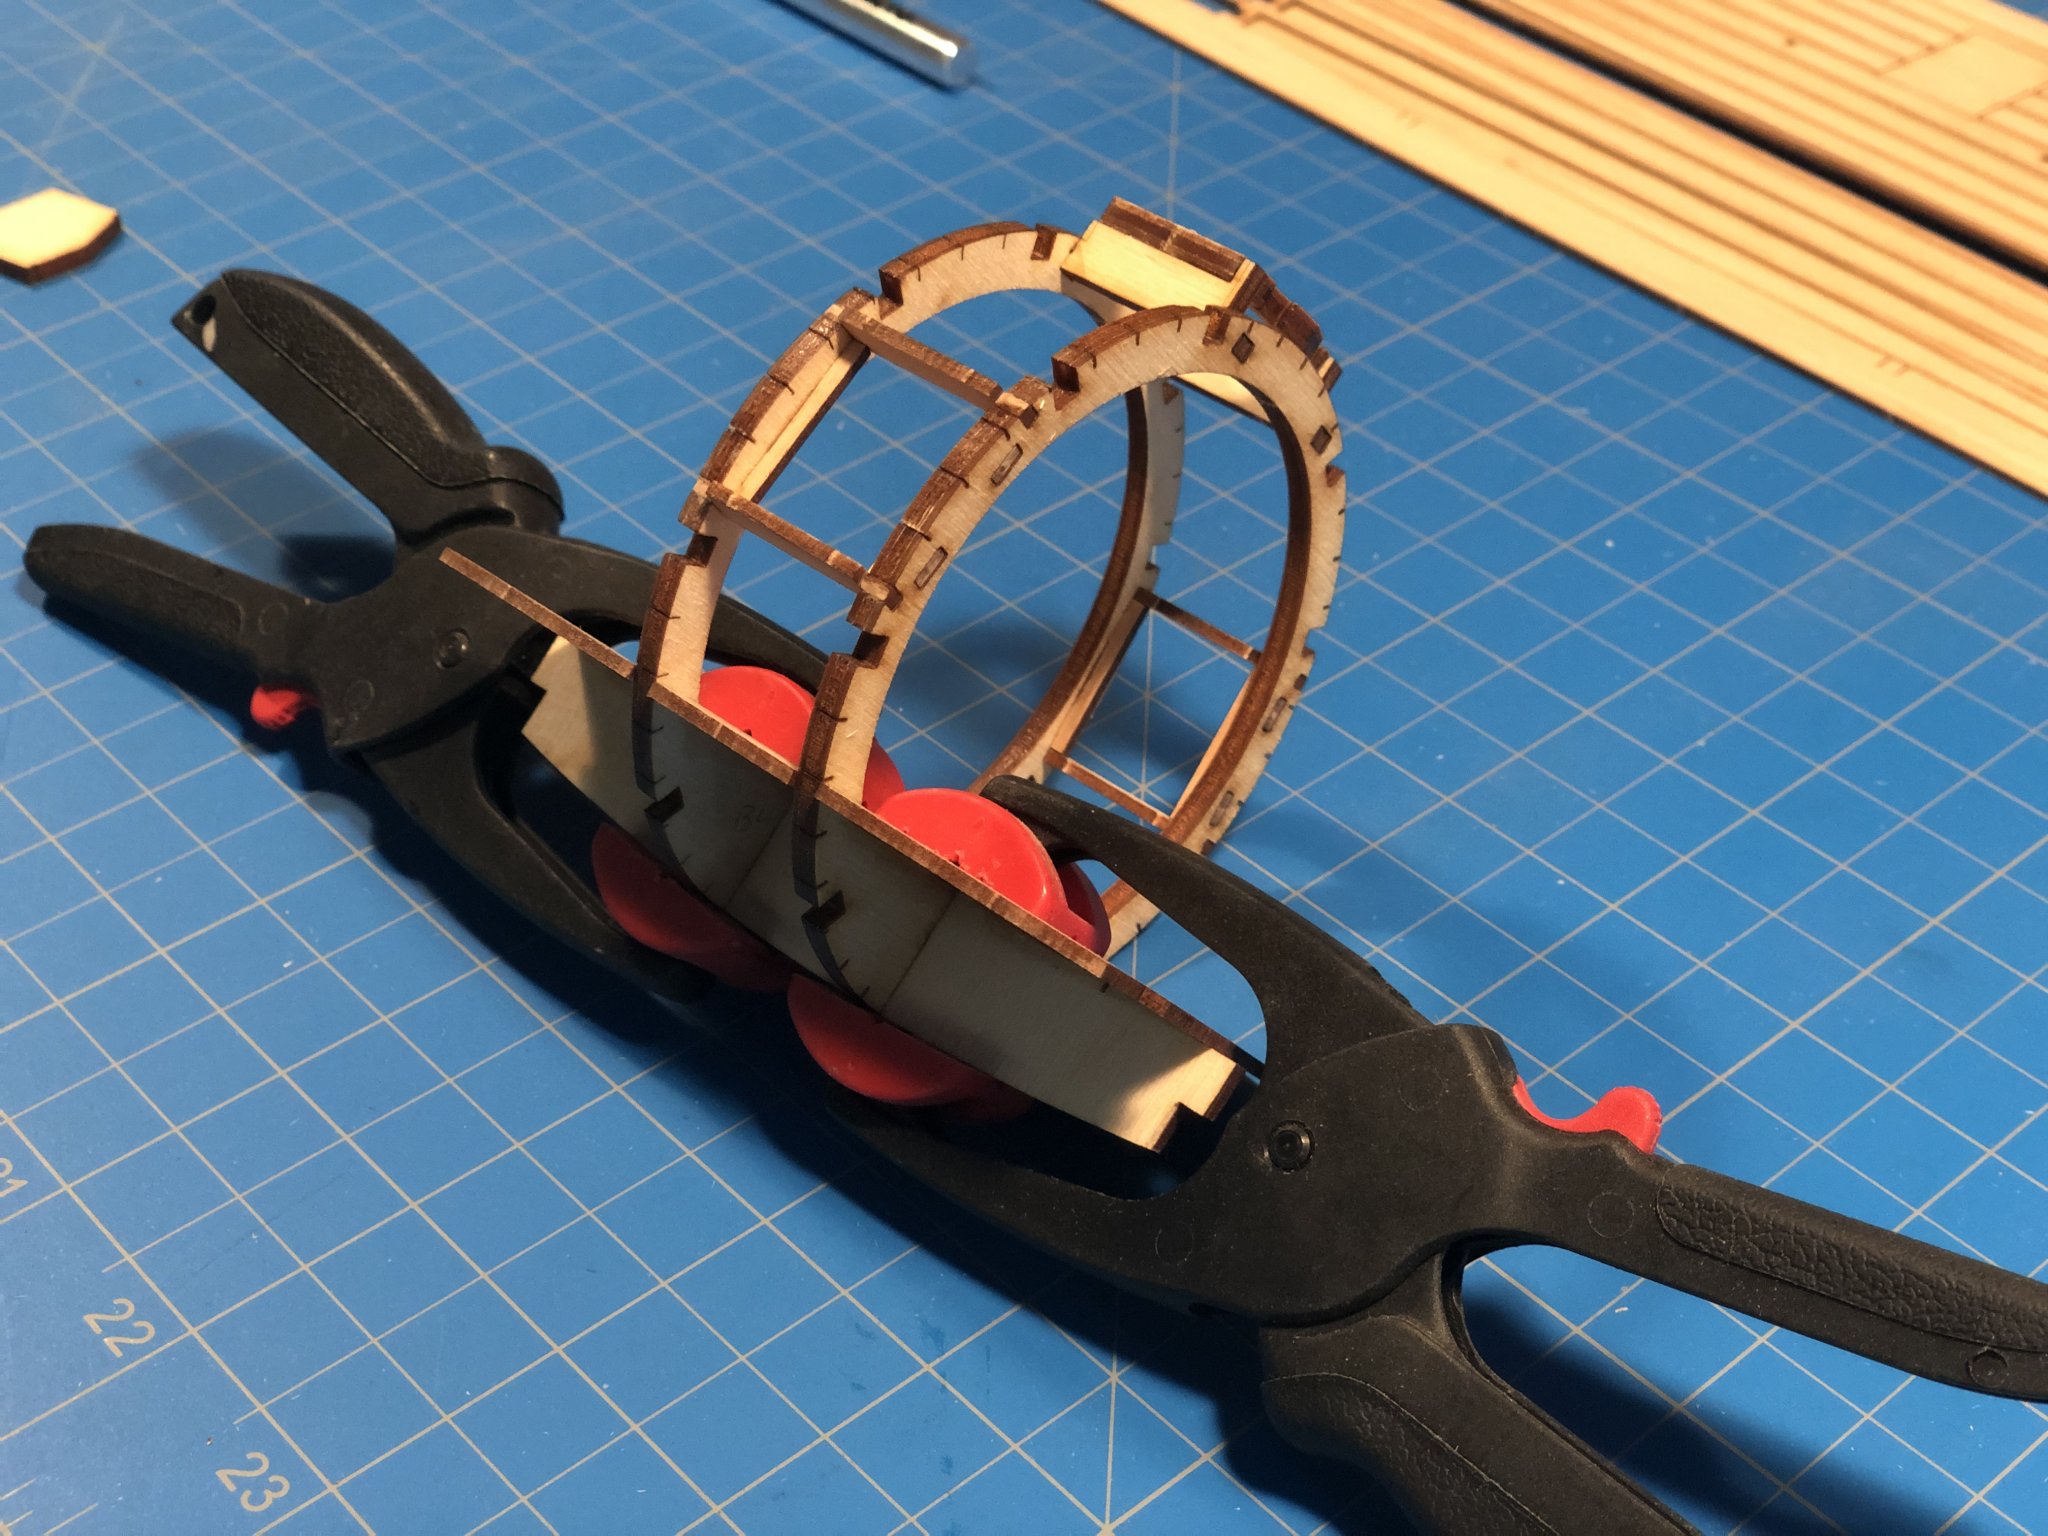
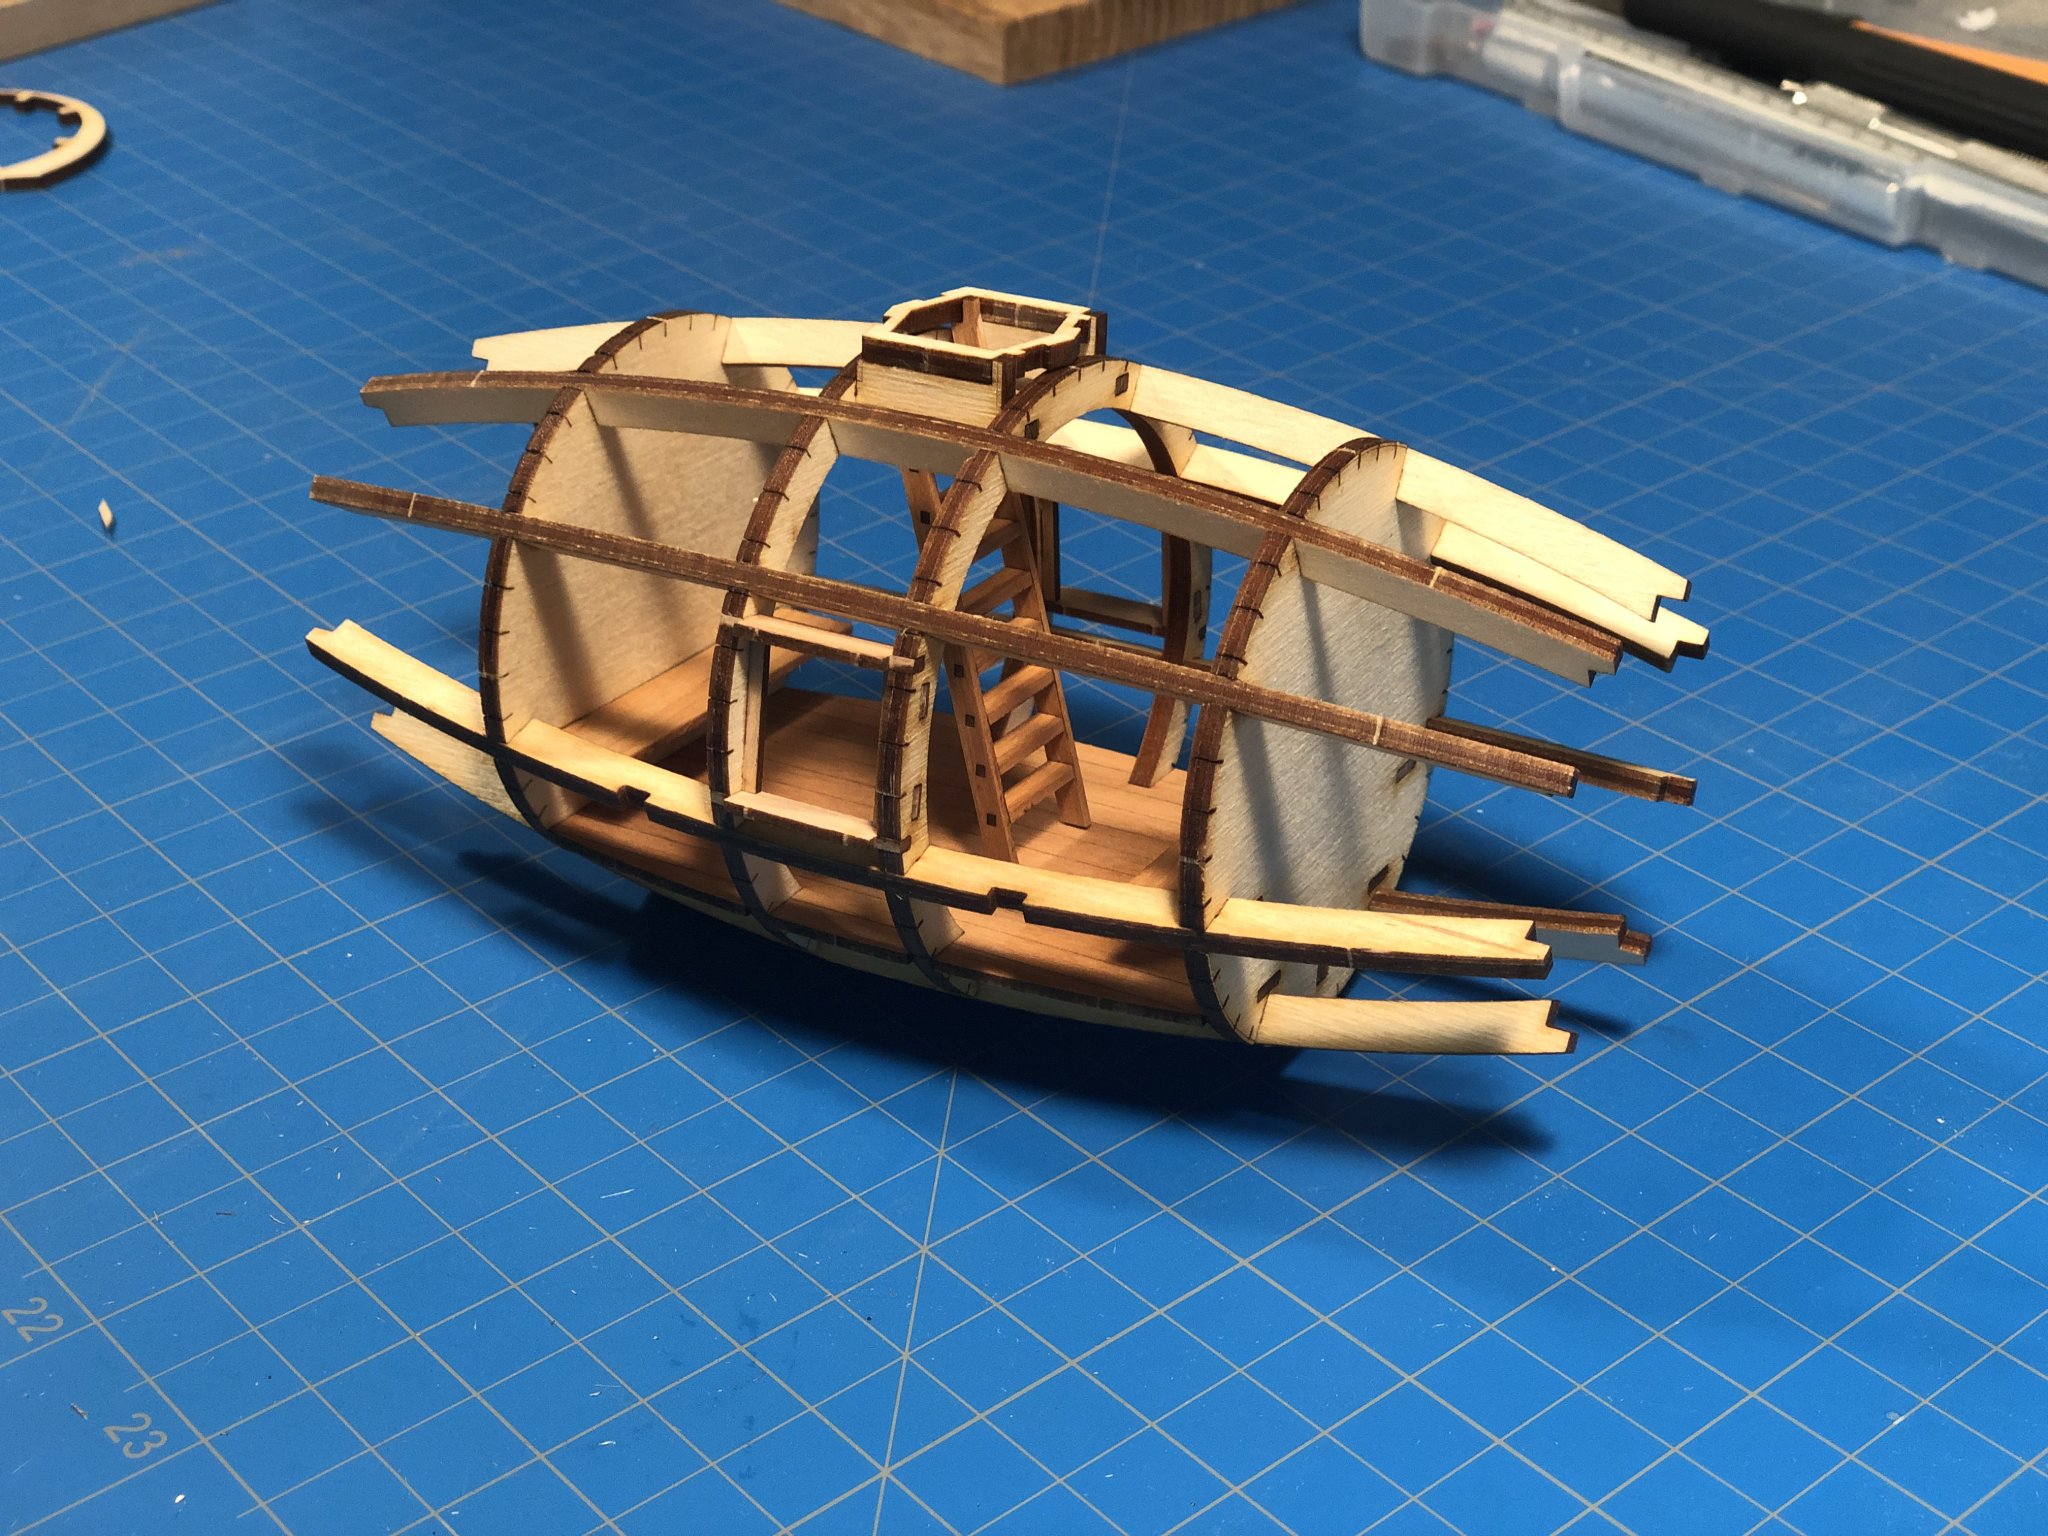
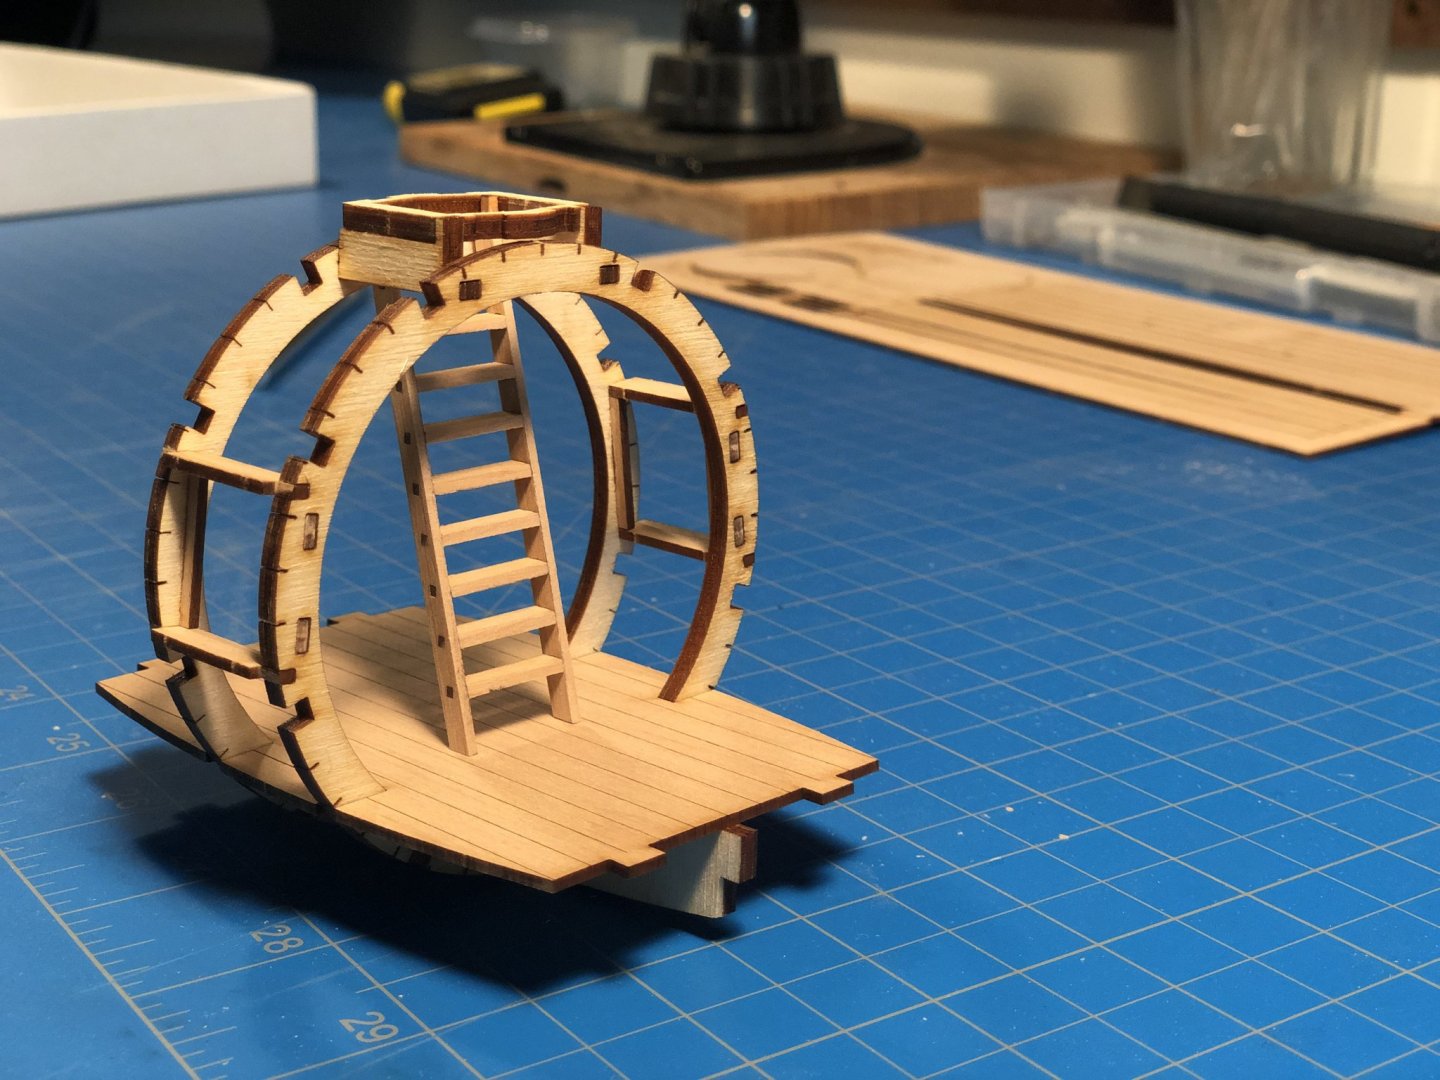
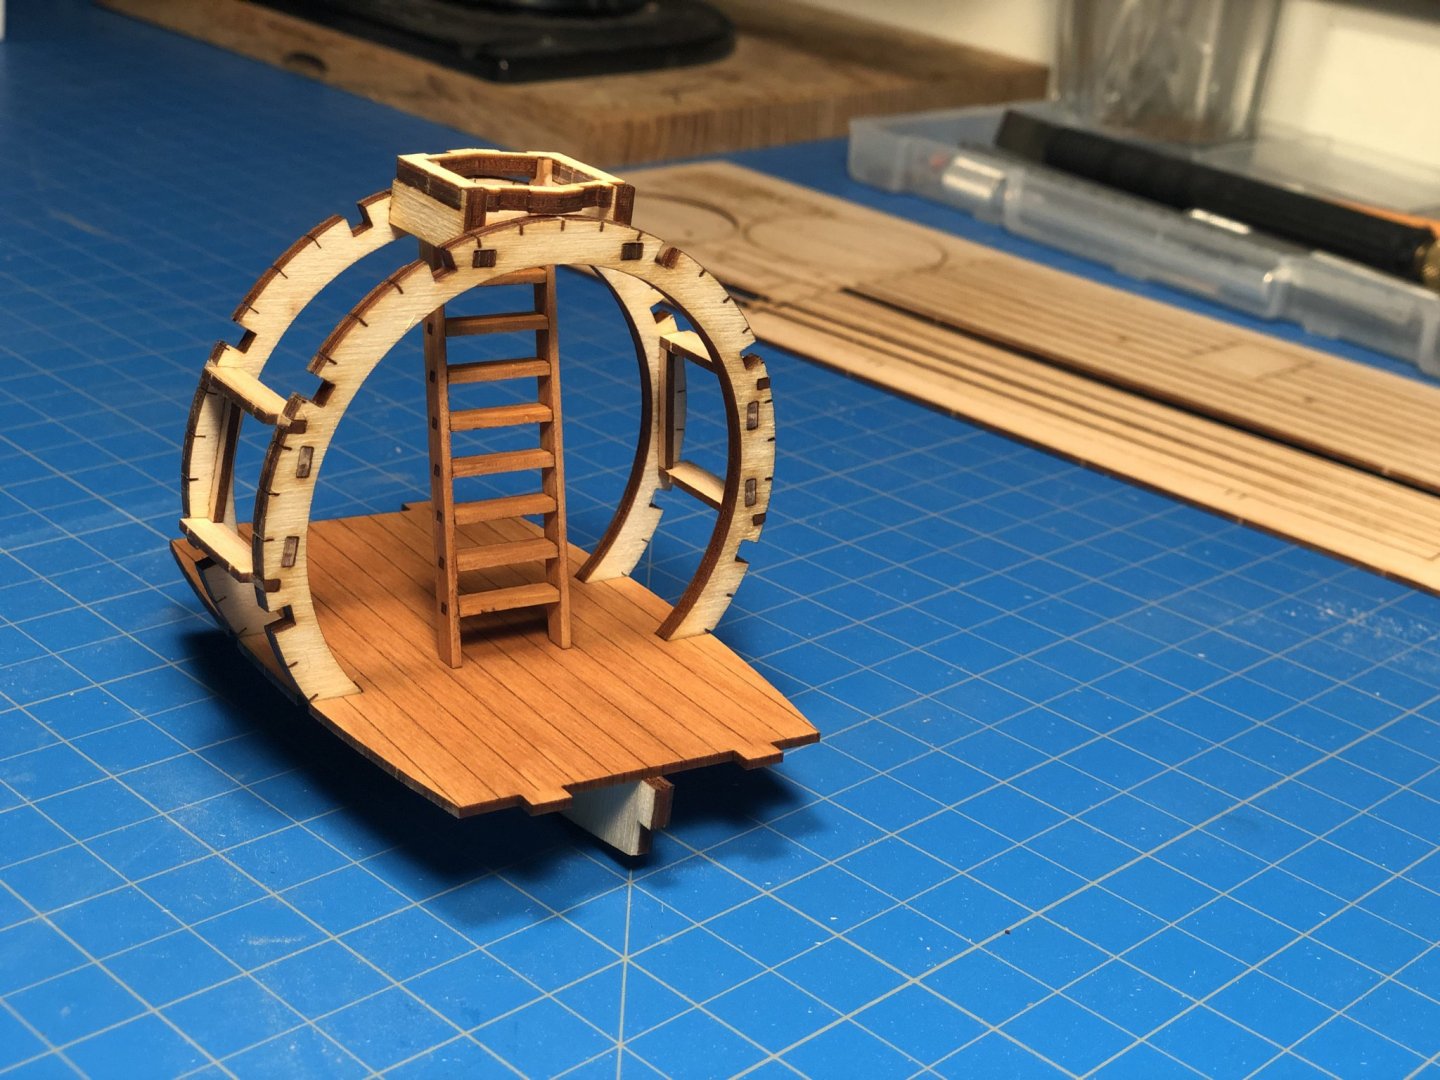
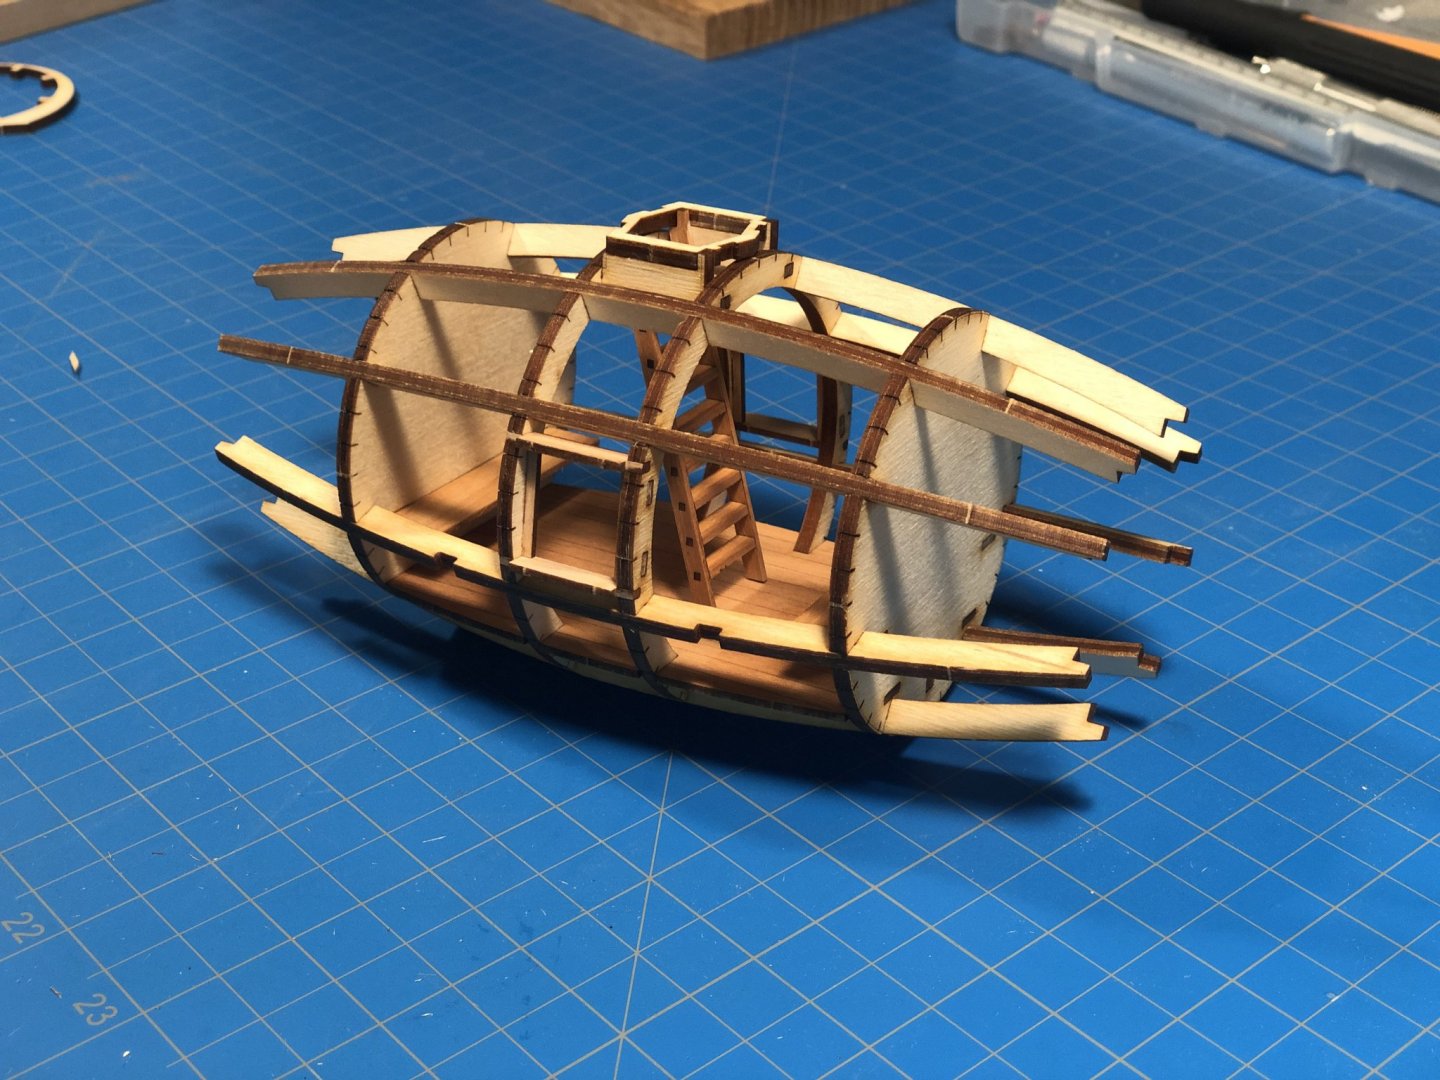
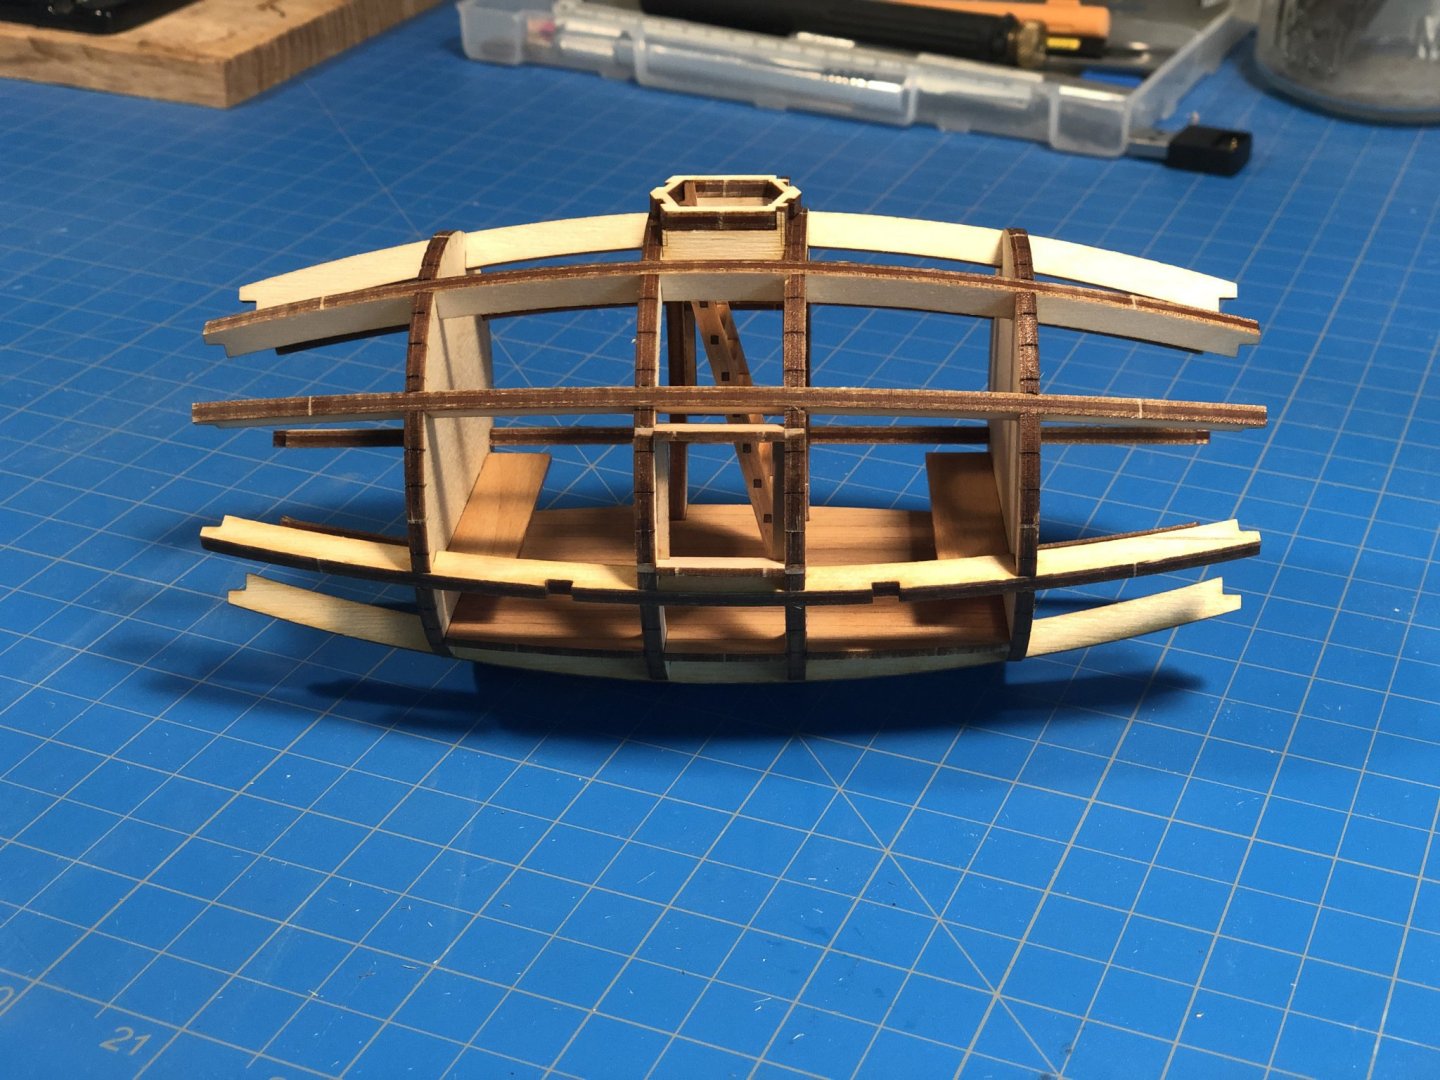
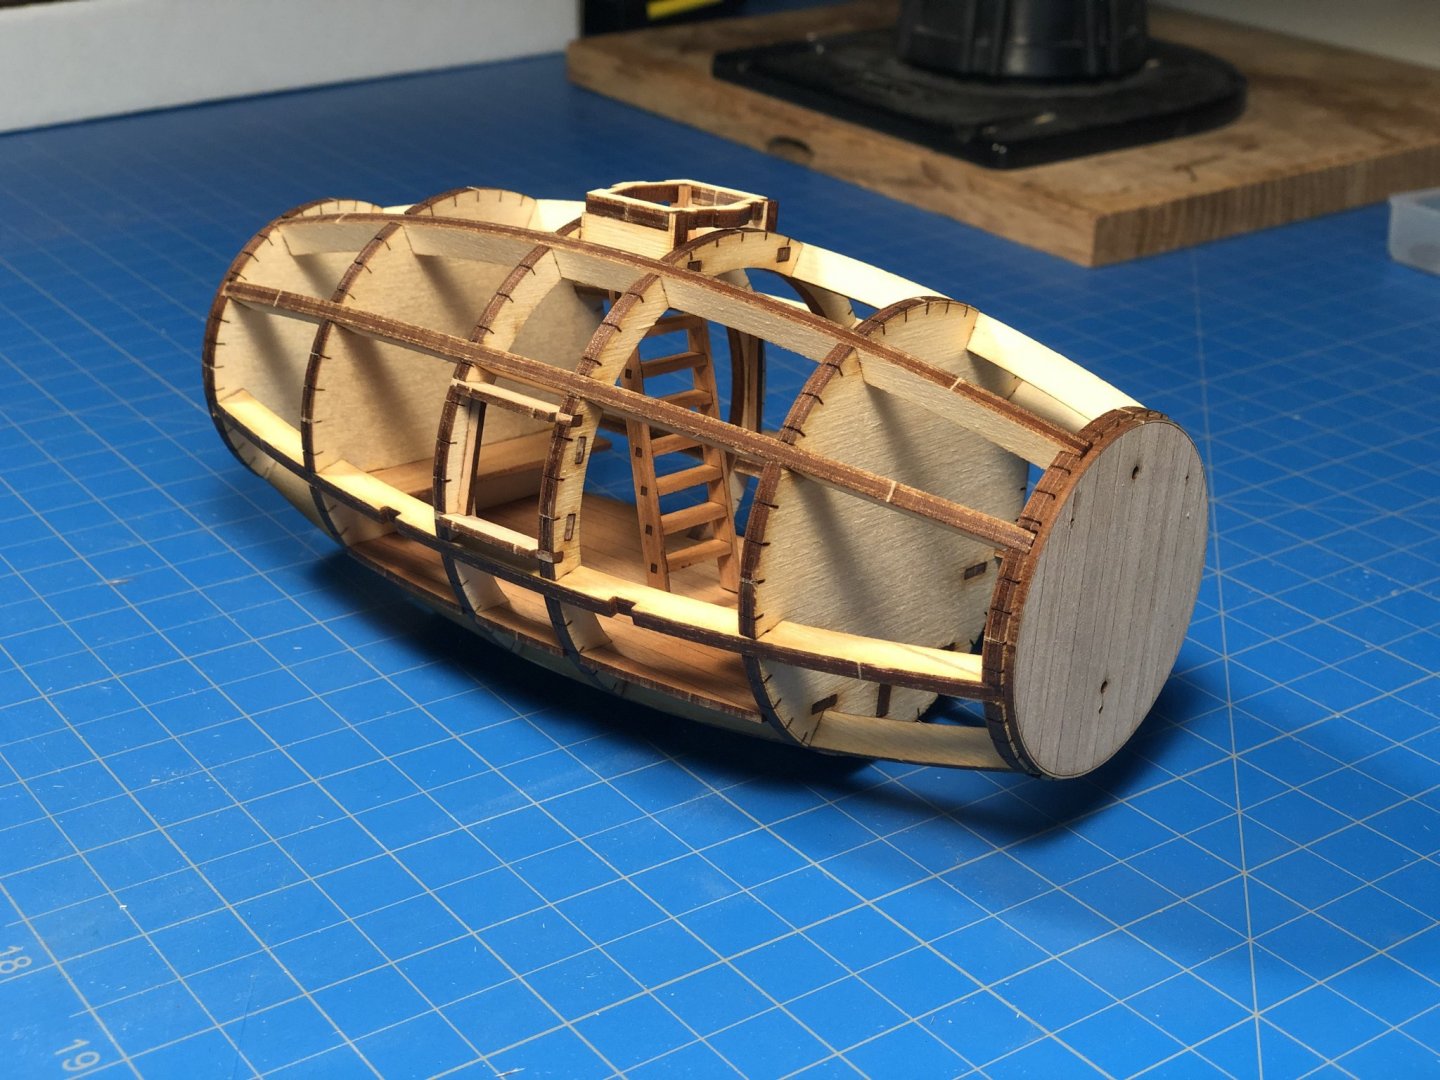
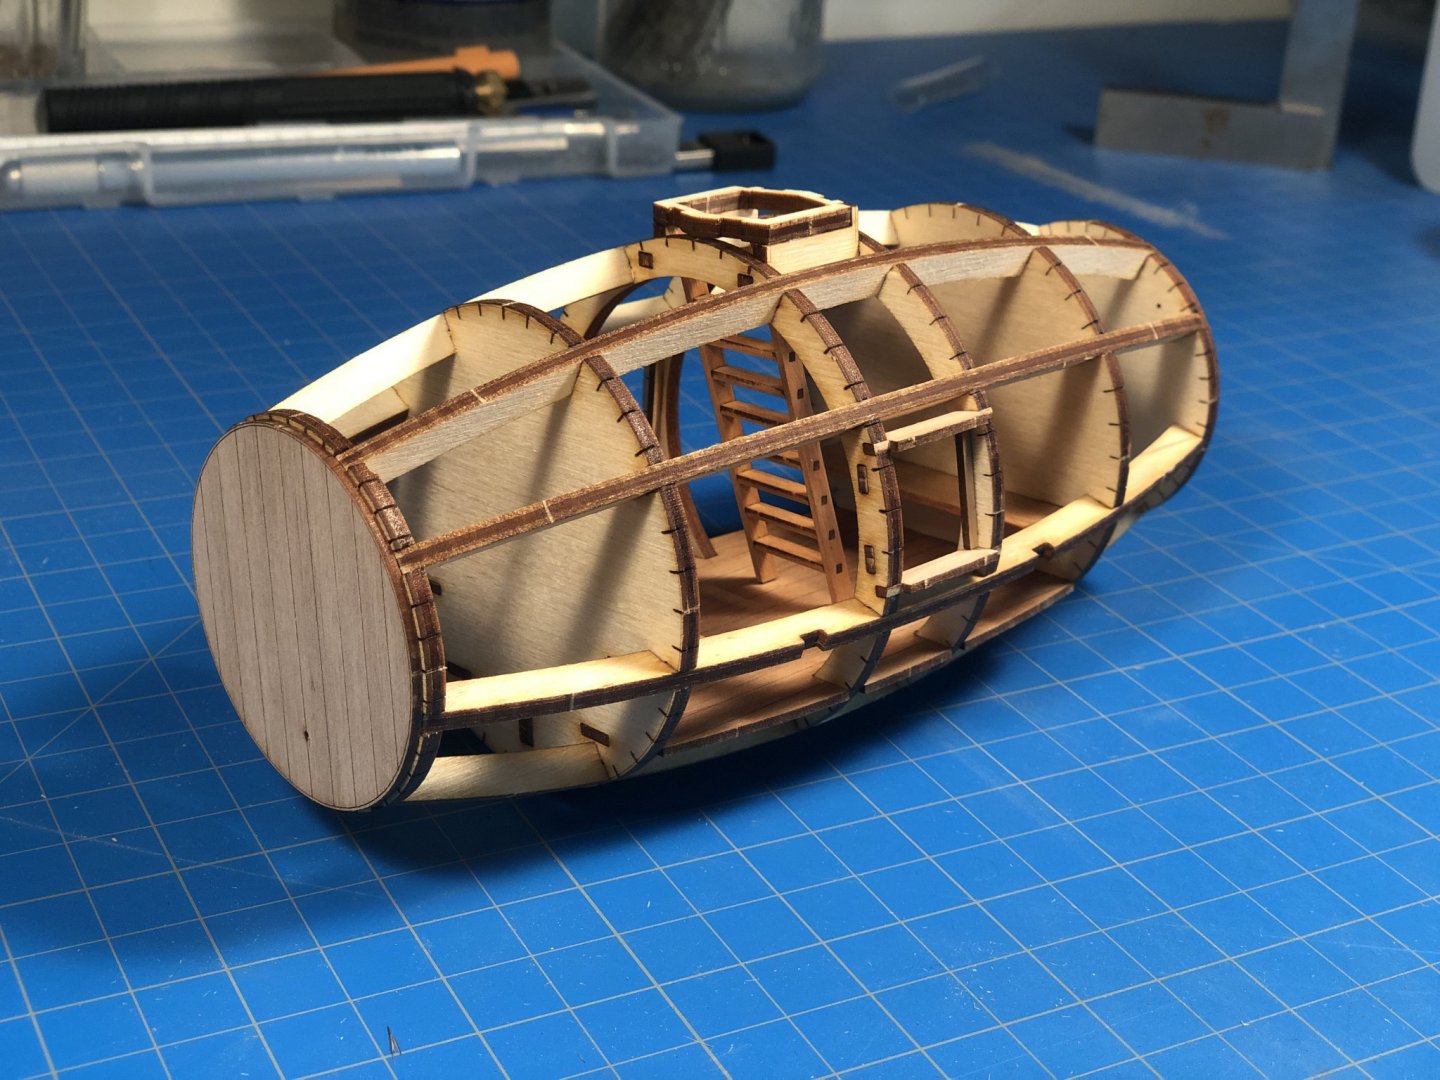
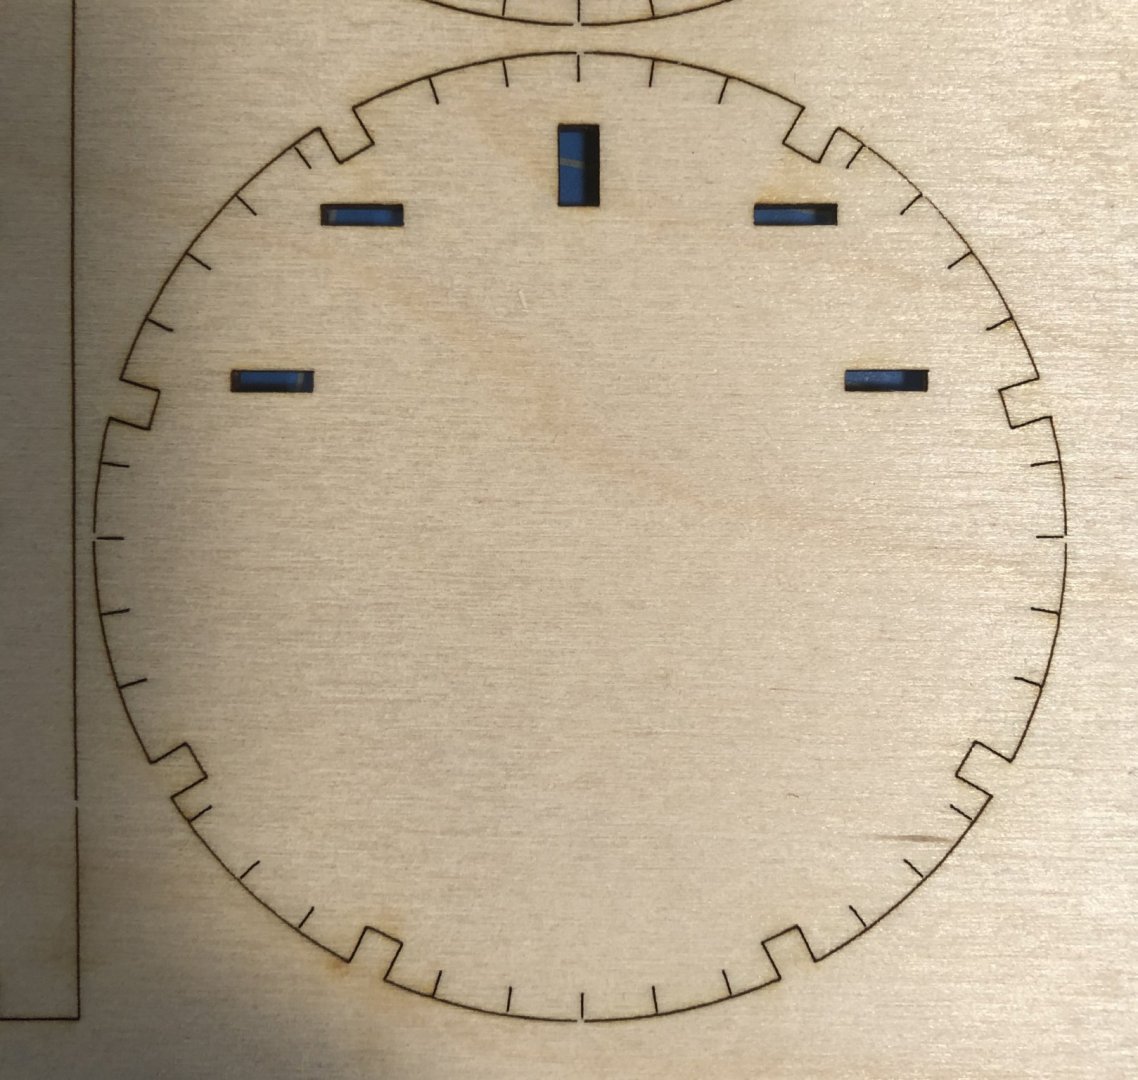
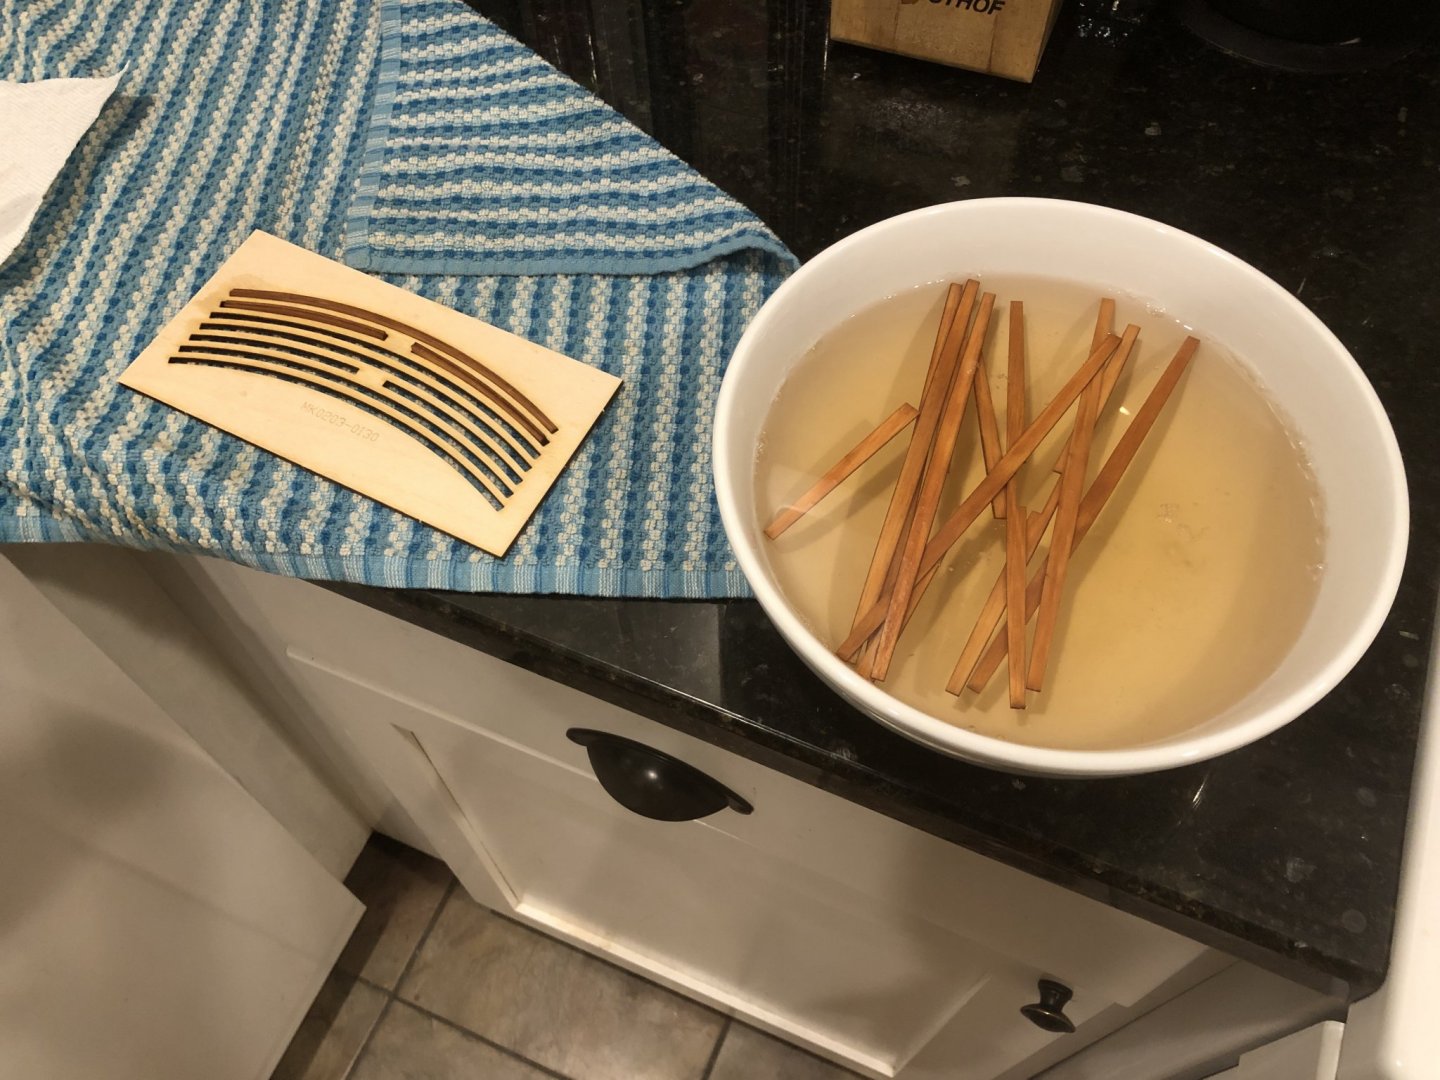
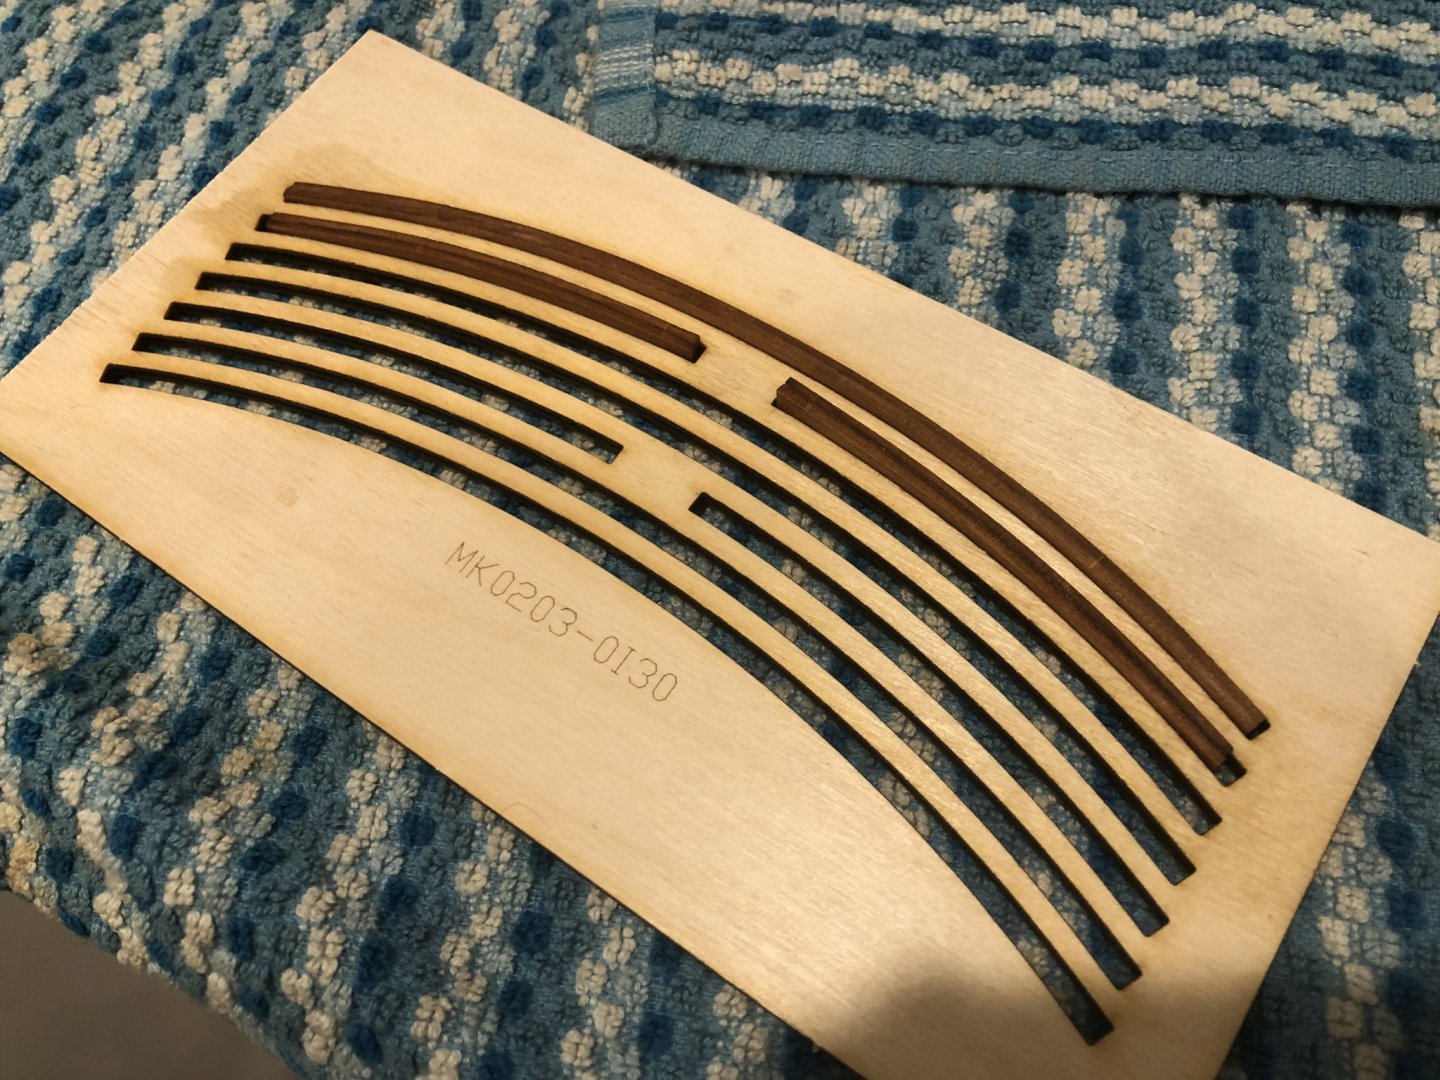
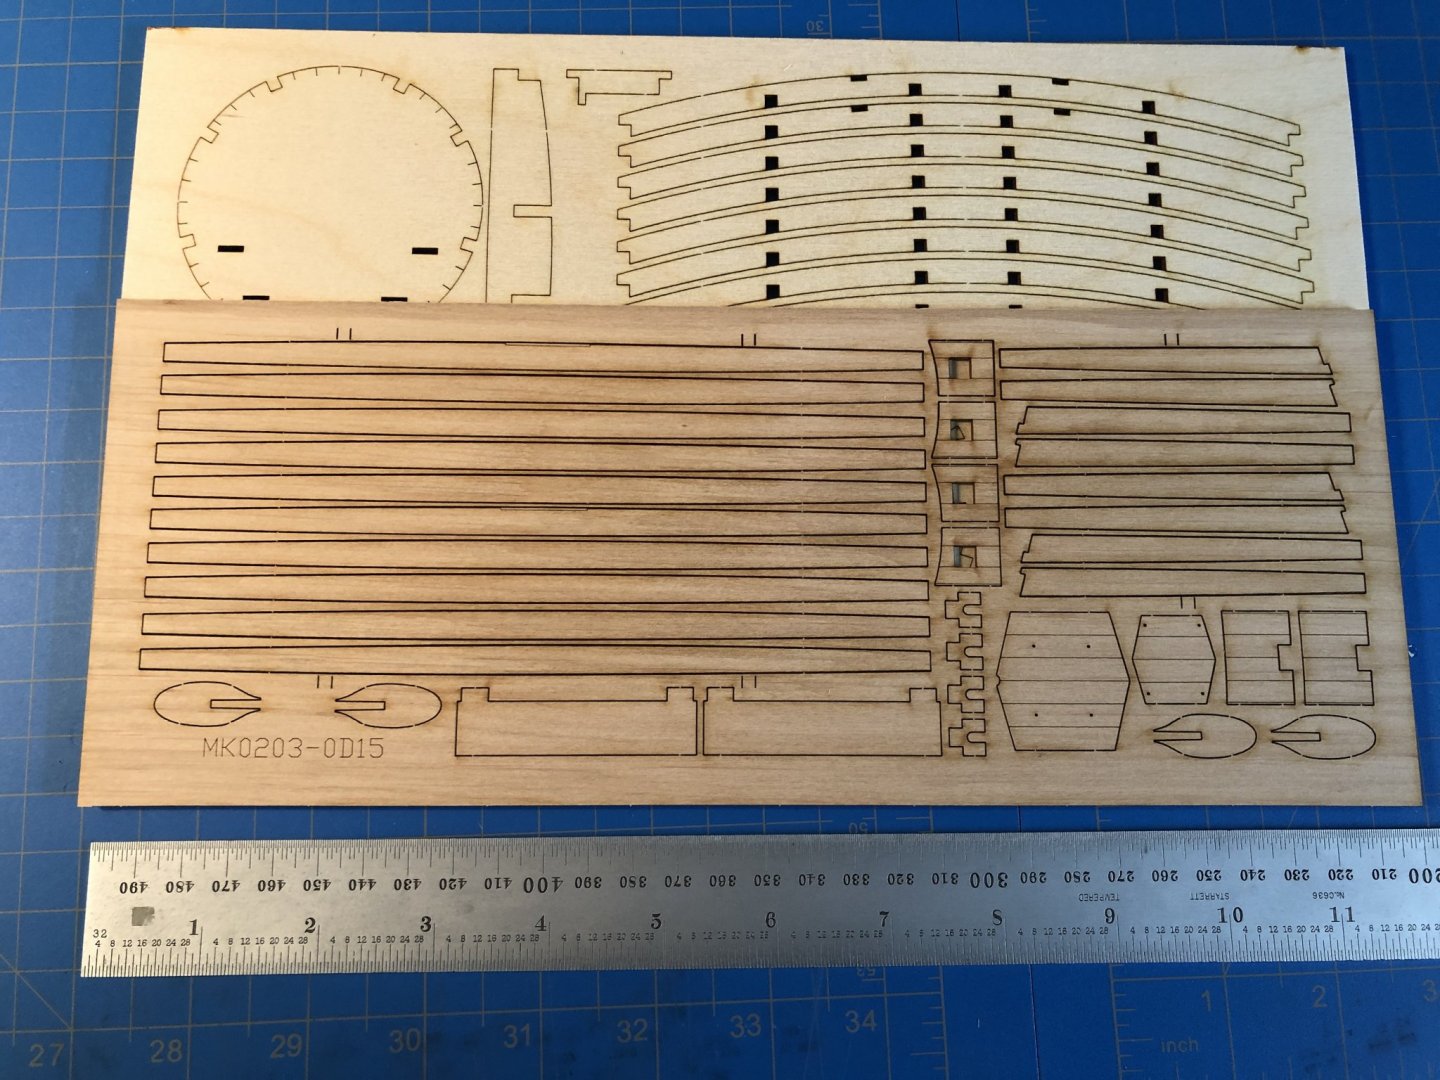
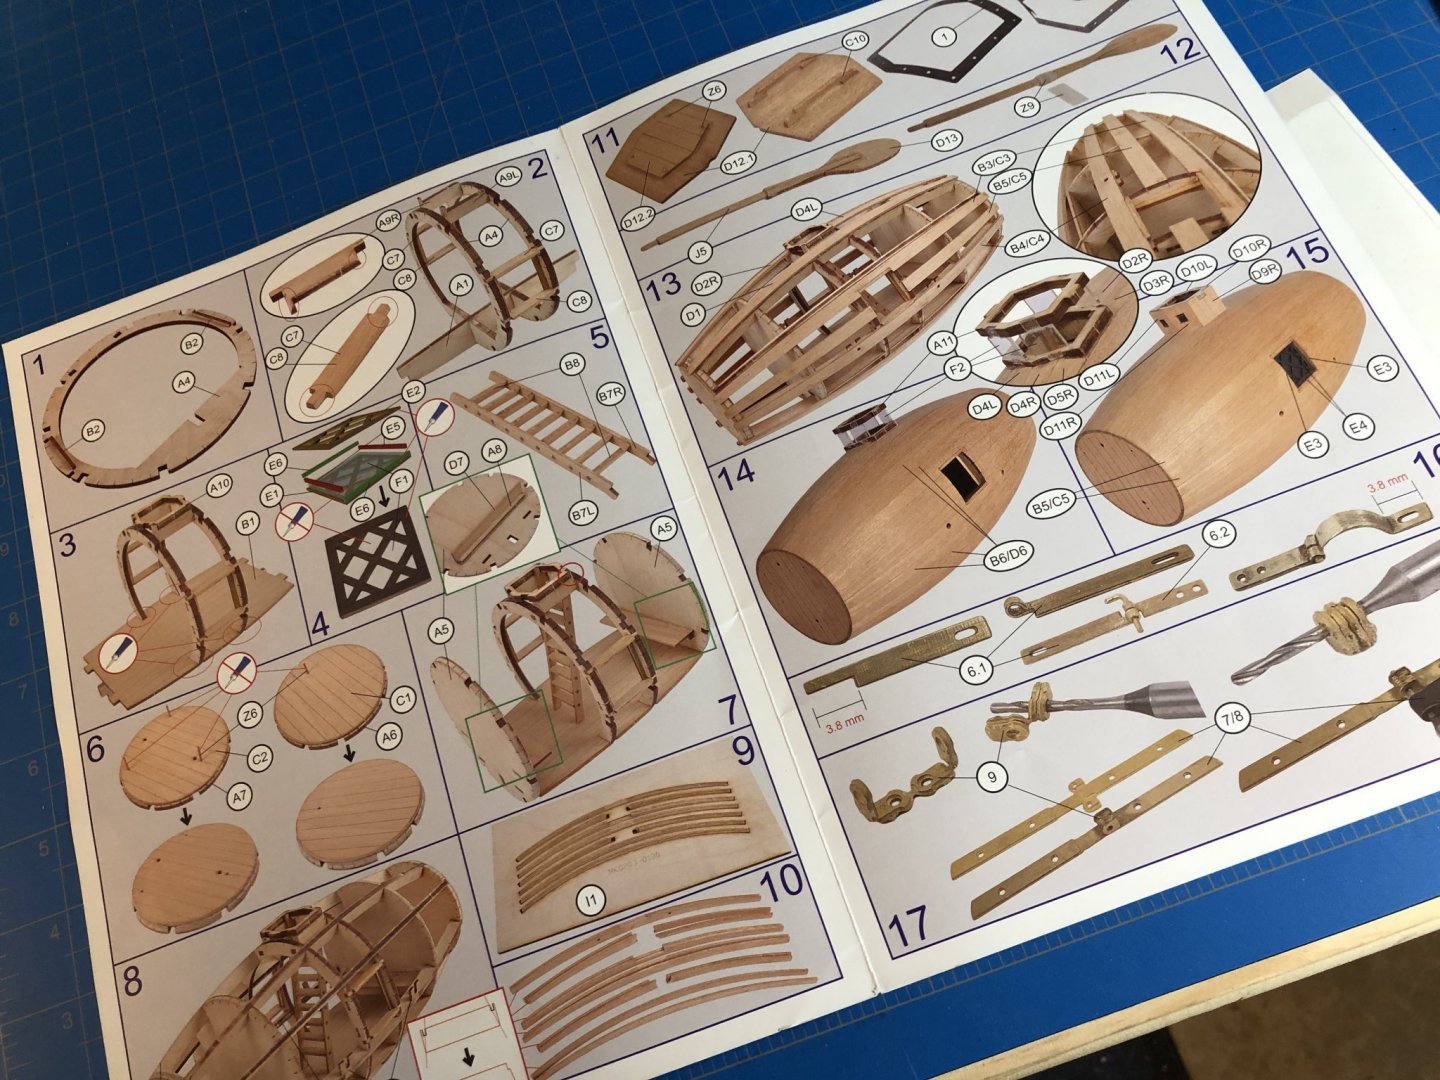
 Well I started into this evening and must say this little kit is a real pleasure to work with. My only real complaint is the size of the tabs where the pieces need to be cut from the laser cut frames (look for them in the below image, keep in mind this is about 2.5" in diameter). They're very tiny, and almost hard to see unless you look really closely. Otherwise the pieces are designed and cut so well that they literally fit together perfectly with very little, if any, modification needed. Ive never experienced this kid of tight tolerance in a kit, nearly always expecting some degree of sanding. In fact, I would say that if I took the time to sand away the char, in areas where it is more or less unnecessary, than it surely wouldn't fit together as well as it did. The instructions are pretty clear, with a few little idiosyncrasies that one quickly gets used to. There are some very specific, if not oddly described elements that one must pay careful attention. For instance, the manual often orients you the pieces according to which side the laser would have first began the cut. Its oddly described and took me a minute to suss out exactly what was meant. Otherwise the color pictorial companion does a splendid job almost on its own. So well in fact that I sort of got the gist just looking at the pictures and referred to the narrative if something wasn't immediately clear. The first step was to kit the window box to the frames and set them in place over the "keel." Then to to construct the upper hatch frame. This was followed by setting the inner deck which was of a very nice quality. All these pieces fit so perfectly, it was real joy to assemble. Minimal adhesive was required nearly all the way through. Then it was onto the interior ladder, which was probably the best made little laser cut ladder Ive had to assemble. It went together so well, fit so tight that it really didn't need any adhesive at all. It cleaned up nicely and with a light layer of wipe-on poly throughout the interior features, looked rather handsome. Then to fit the cross-members which were also extremely well made, with very tight tolerances. They too, fit together and so effortlessly tight that I opted to forgo adhesive and just added a bit to the joint areas after assembly. Then after assembling the bow and stern parts, which were comprised of a sandwich of a nicely finished veneer and single piece of plywood, I was able to fit them into place with no trouble at all (again with little adhesive required). The two pieces are guided together through the use of wire dowels so positioning them was idiot-proof. There is some beveling here and there, and some fairing to do overall but honestly it is very little and the instructions are quite clear (as is my experience) that this is best left until the very last minute and after careful review of the hull to ensure that you do not over sand. There are guides that give some indication when enough is enough, but also the design is so simple it can't be too hard to determine when you done the job. The next step is some preliminary planking, and the provided timber comes pre-spiled. Tomorrow will tell how well a job has been done with this. What I do appreciate is the clever plank former that is provided. You simply boil some of the planks and fit them in wet and leave to dry. It will take about three sessions to get all the planks dried and I found the former to be almost perfect. After fitting the planks two at the time as instructed I found that the final set of planks would absolutely not fit without damaging the edges of the planks. So Ill just go with less and see if I can open that final slot a little with some sand paper. One little unhappy plank couldn't fit comfortably, so it was left out. All told, to this point I have about 3 hours into it.


- 77 replies
-
- 14
-

-
- morel
- master korabel
- (and 1 more)
-
That deck planking is fantastic. Well done. Enjoying this log immensely.
-
The historical background provided by Master Korabel is lengthy by comparison to pretty much any other easily available resource and does provide a citation for the information they present. They even provide a link, which is a great starting point. I visited the link and found the cited article, and then processed it through Google Translate's document translation tool. It looks like it might be a chapter or article from another publication titled: "The historical path of the creation, development and formation of submarines" by an unknown author. Ill be looking a bit further into that, maybe if Cathead has some time to poke around the site he might find something useful. Russian Version siry_nikonov.pdf English Version The historical path of the creation, development and formation of submarines.pdf Should make some interesting reading, Im thinking of reaching out a bit deeper to the Russian State Archive of Ancient Acts to see what else might be available.
- 77 replies
-
- 4
-
-
- morel
- master korabel
- (and 1 more)
-
The kit provides pretty good English instructions, which is why - Im Told - it took sometime since it was announced before it became available in the West. They've been working on the translation.
- 77 replies
-
- 4
-
-
- morel
- master korabel
- (and 1 more)
-
Me too... though I anticipate it'll be a tough go of it. There really isn't much out there, hoping my resources at work can be helpful to weed past all the novelty pages out there purporting to have the real story.
- 77 replies
-
- 4
-
-
- morel
- master korabel
- (and 1 more)
-
As I said, I wanted to build it as soon as I saw it. The posted build video from the Master Korabel news thread give a little insight as well: The soundtrack of this video makes me smile. I don't know why, but it just makes me think of a Bond film.
- 77 replies
-
- 7
-
-
- morel
- master korabel
- (and 1 more)
-
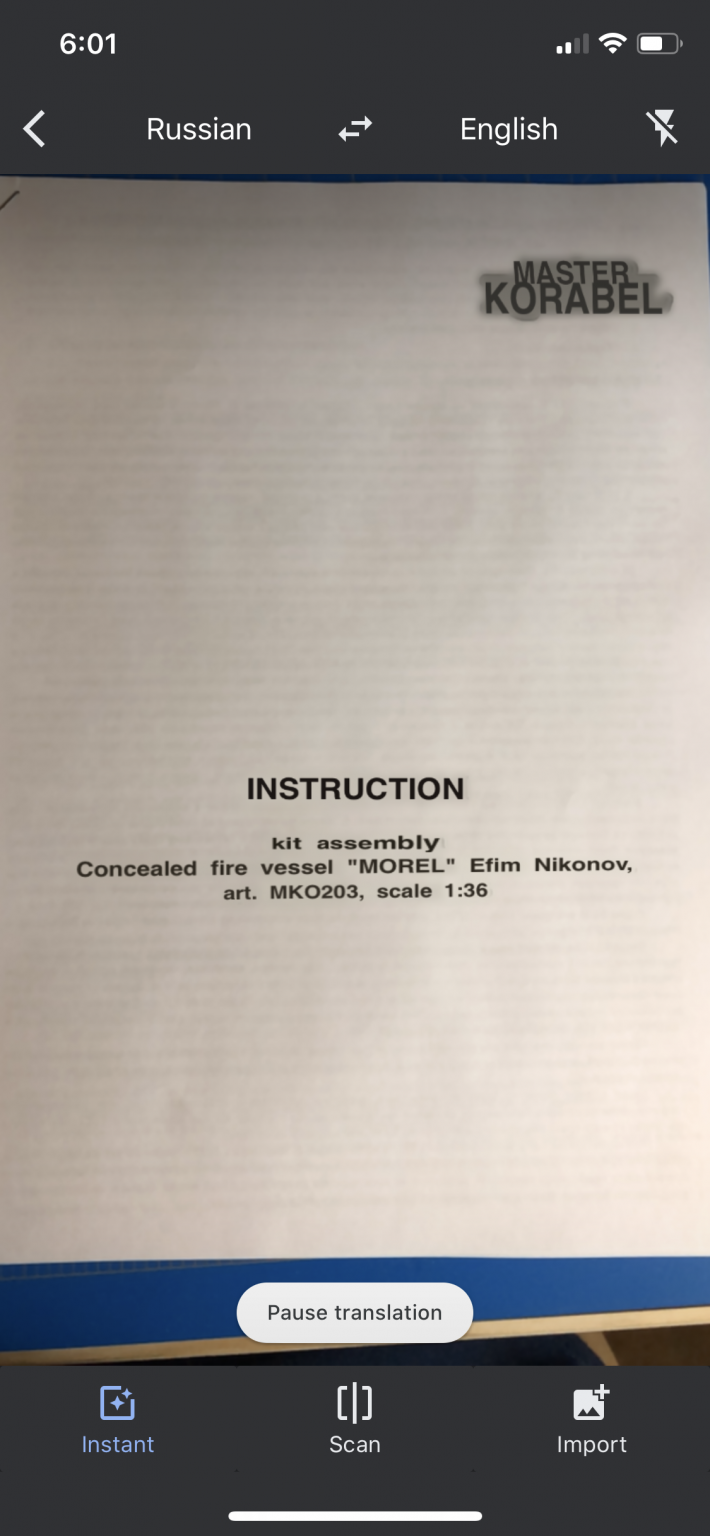
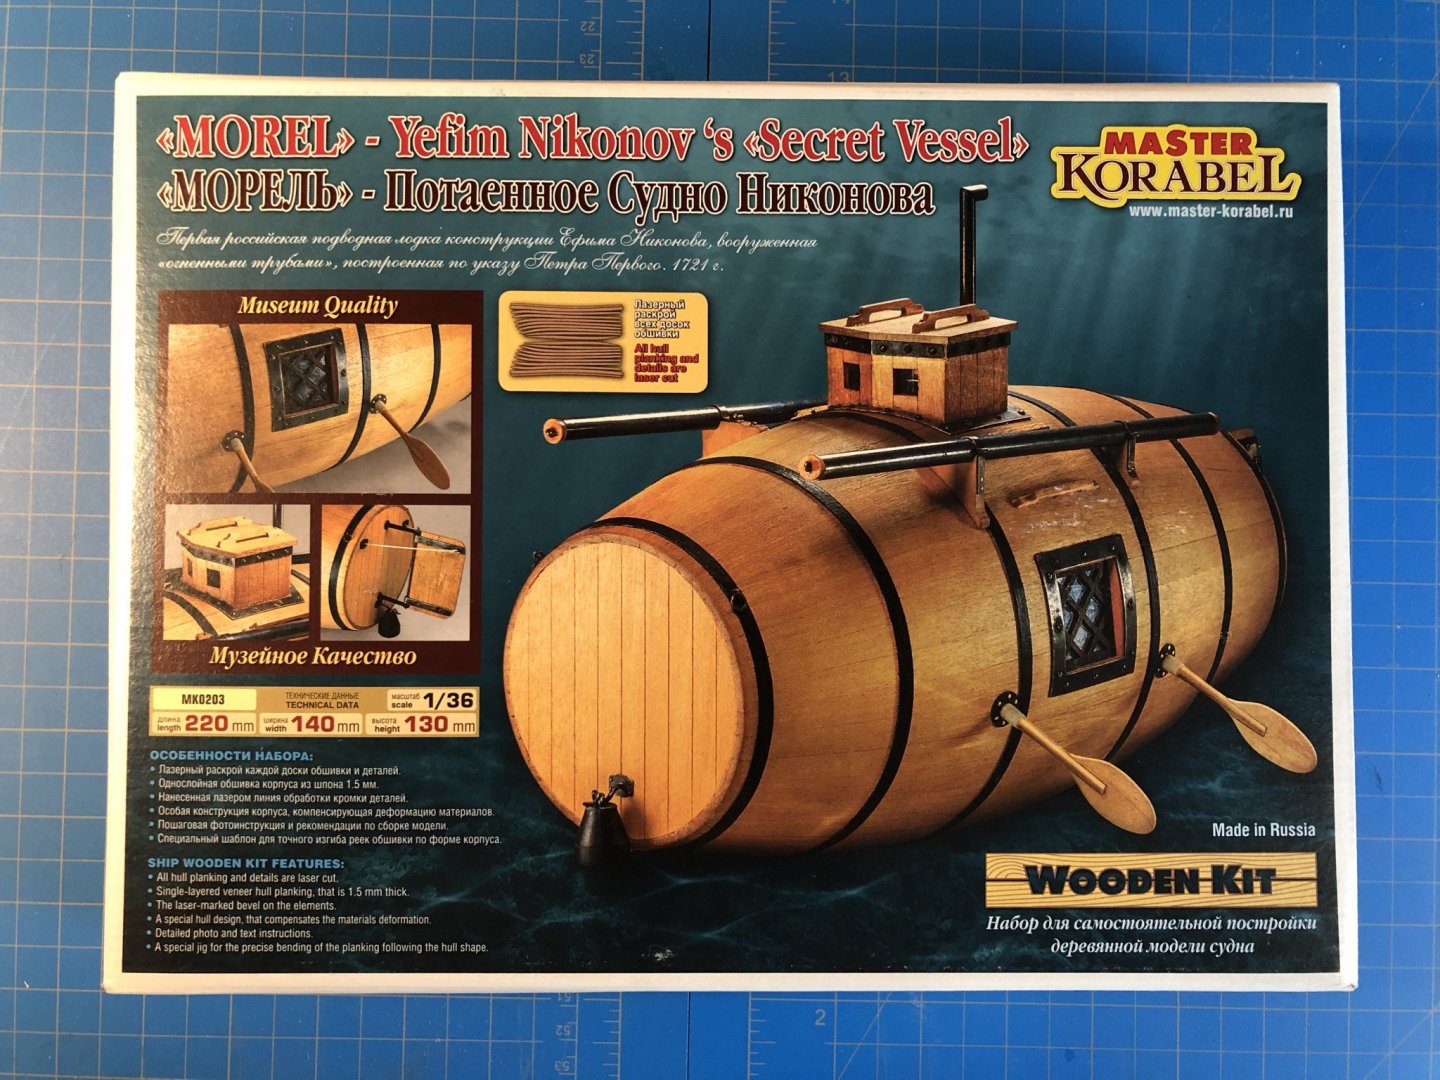
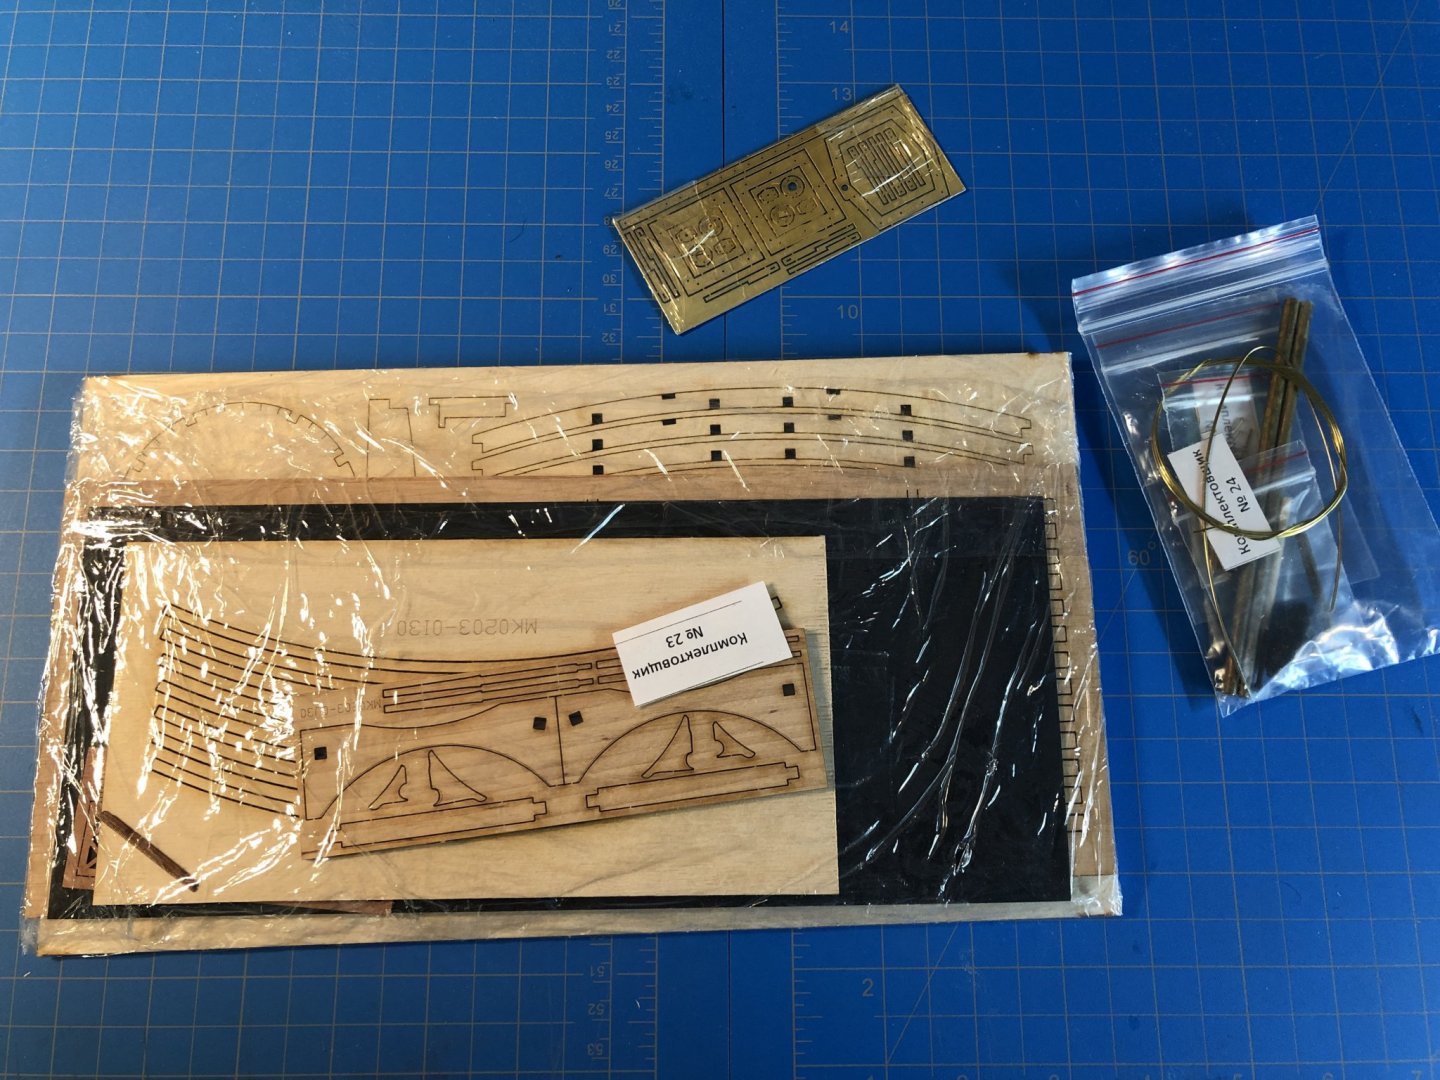
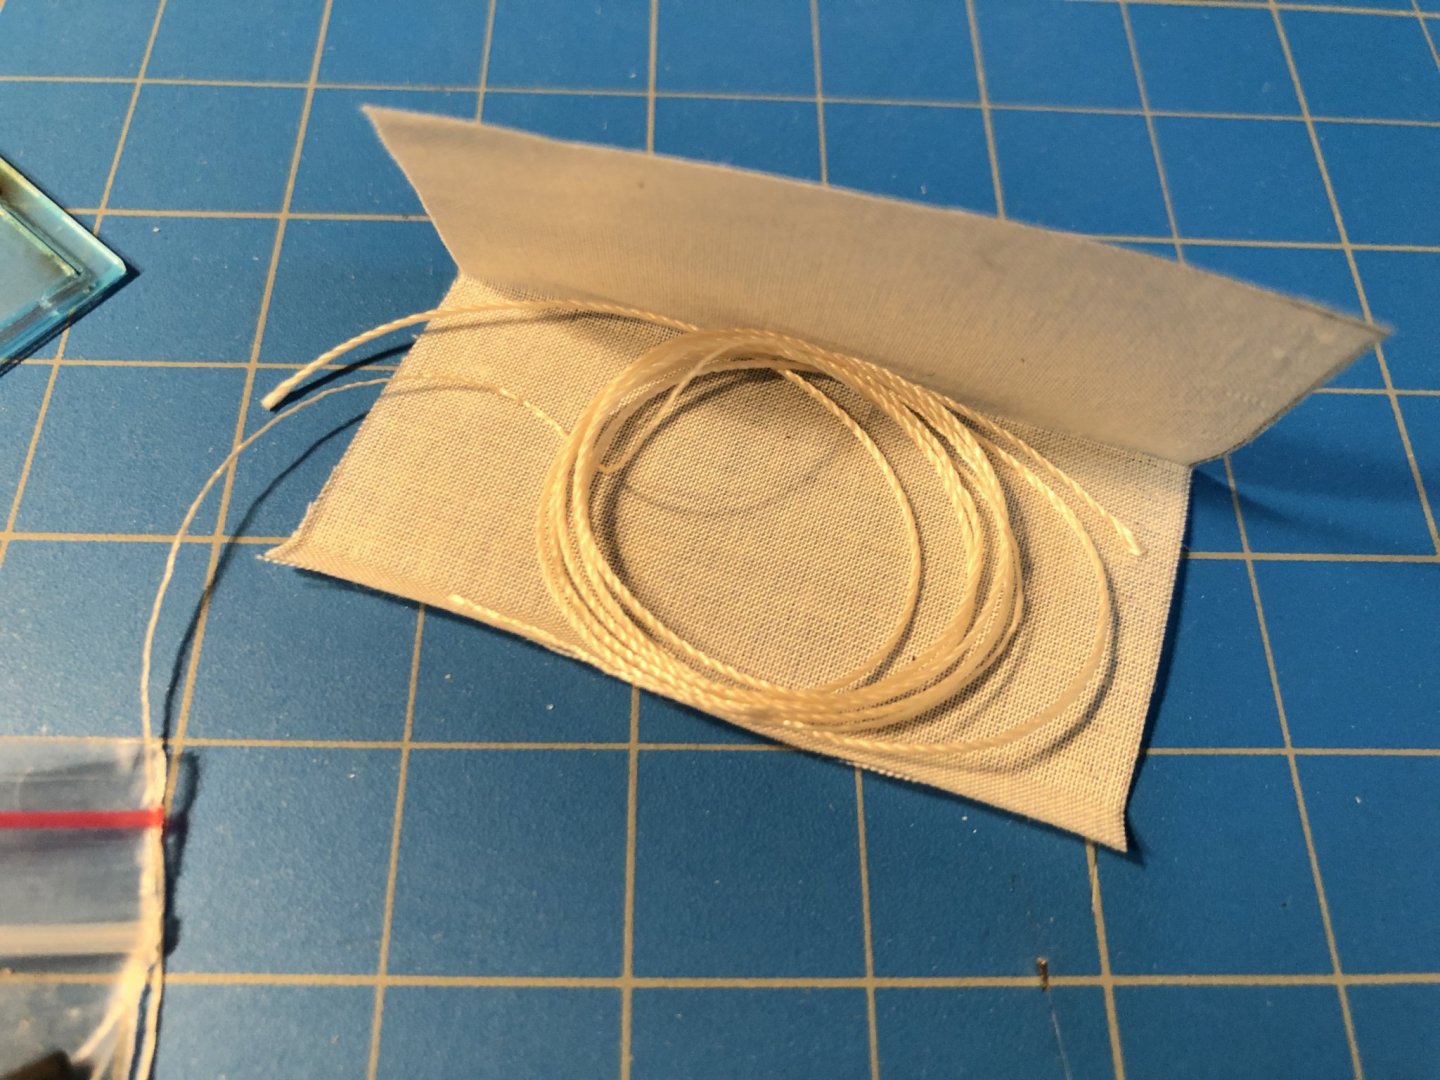
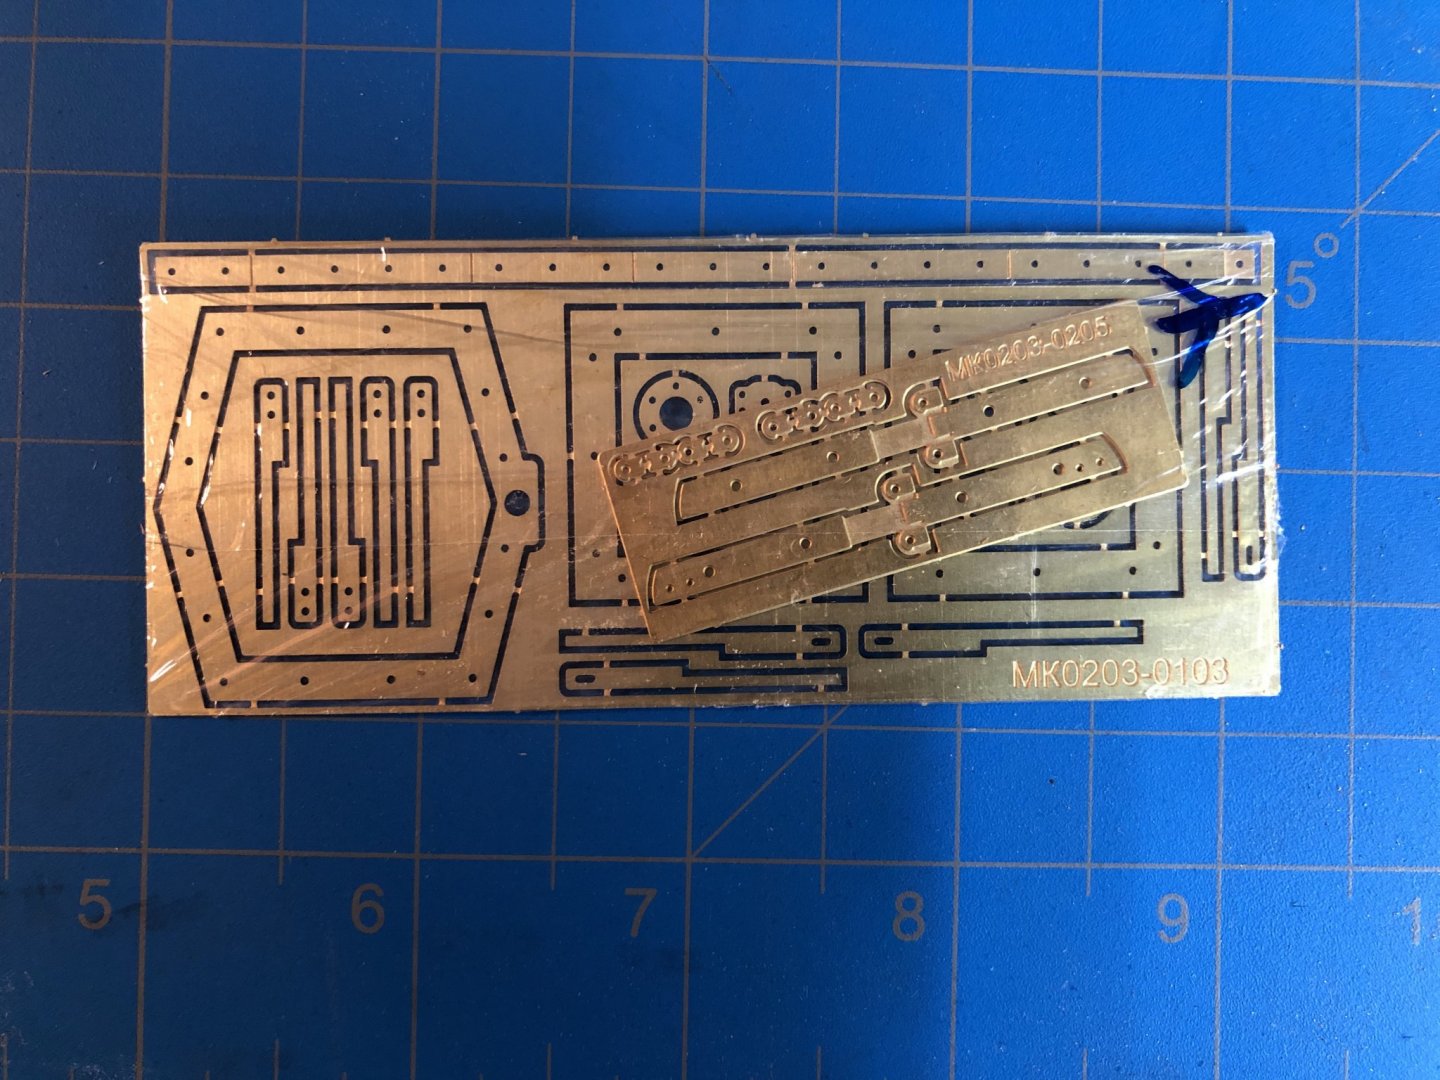
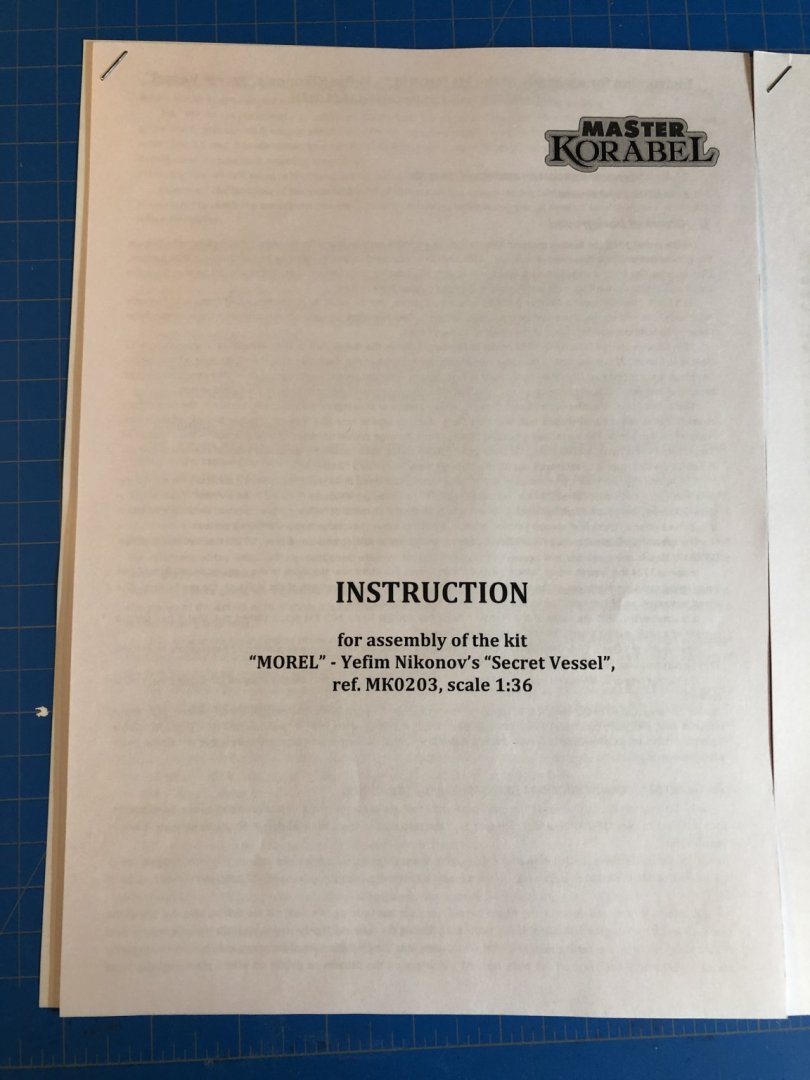
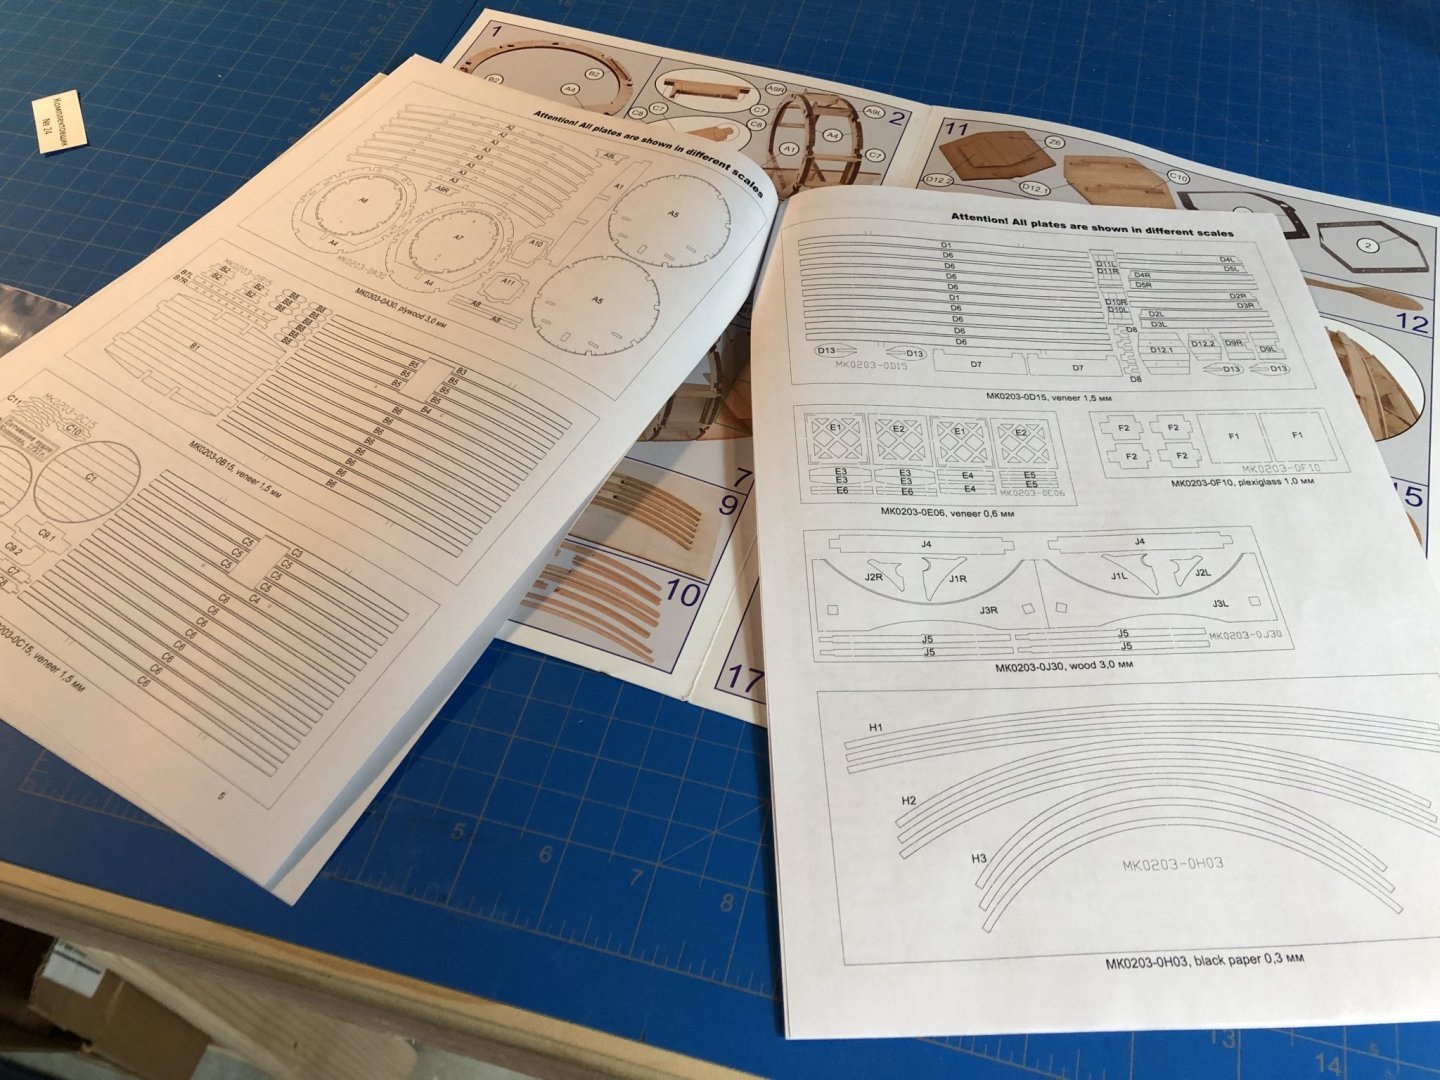
This project captured my imagination the minute I first saw it. It took some time to get my hands on it, as apparently Master Korabel released in Russian prior to developing and releasing and English version. I was in touch with them, who then put me in touch with Egor Tsinko at Crafty Sailor who after some weeks finally emailed me to let me know he received the kits in stock. I ordered mine immediately at a little over $100 with shipping, and received it in less than 5 days. On the whole, Im very pleased with the transaction and looking forward to the build, especially now that Im holed up in COVID quarantine and my other project is in a holding pattern as I await kit upgrades and tools from various vendors. This is marketed as a beginner kit, and on the surface appears to be aptly described. Its not a large model, and seems quite doable in a few weeks to a months time. Just looking at it, I would rate it somewhere just north of a Midwest small boat project on the complexity scale. The history of the vessel is included in the documents that came with the kit, and after a quick read are roughly as accurate/dubious as any history you typically find with a kit. Im hoping to update this log with more of my own research as time allows. There are some interesting links out there, but Ive not done anything as in-depth as I typically do for such things. This really is just a fun, quick build for me. Something to just enjoy... For those interested go here for a quick read. The kit itself is well made, and with an cursory inspection only found a few bits that I think might need replacement or upgrading. It was well packaged for the long trip from Russia, and seems overall to be a quality kit. The provided line for instance is a nylon, which Ill likely replace for sure, but otherwise the metal bits are all quality. There does seem to be a bit of a limited allotment for error, so knowing myself Ill likely need to source some additional materials to cover mistake. The instructions are really great "looking." Provided in separate English and Russian pamphlets. Ive not read through them completely, but on the surface the pictorial version and narrative format both seem thorough and well translated. Not like other foreign kits *cough* Mamoli *cough* that are mostly unintelligible in my experience. I even road tested a digital translator and found it both a novelty, but also pretty accurate. Below is a screenshot from the Google Translate app, which does a real-time overlay of the English over the Russian: In any case, I look forward to building this little kit in the next few weeks just as soon as I have more time to read and look over the instructions in a bit more detail. Now that its bedtime, Ill put my little ones to sleep with a weird tale of a bizarre 18th century Russian Carpenter and his wine barrel submarine!


- 77 replies
-
- 16
-
-
- morel
- master korabel
- (and 1 more)
-
Man, you are either backdating these posts or you are not sleeping and have a team working in shifts! That plank job looks great.
-
Nova, If you edit your post then delete the offending photos from the attachment inventory at the bottom they should go away. If you delete them from the post alone they will continue to pop up. Otherwise your progressing right along, looks great!
-
SYREN is my next project. Mind if I follow along? Looks great so far.
-
Interested in the review. Curious about which parts are the 3d printed parts.
-
Miniature Desk-Top Laser-Cutter
Justin P. replied to wefalck's topic in Modeling tools and Workshop Equipment
Fantastic information and well structured for future updates! Thanks for taking the time. -
Amazon sent me two copies by mistake. Im happy to forward one to someone for the cost of shipping. Brand New. PM me.
-
Making Wood "Non-Stick"?
Justin P. replied to Osmosis's topic in Painting, finishing and weathering products and techniques
I used wax on the frames myself. -
I’ve been in the market for a new bandsaw myself and can’t decide to go with the 10” WEN or the 9”. They both have many great reviews.
-
Can someone please comment on how you typically dispose of the blackening solution and the spares once your done? Ive used it (Jax specifically) several times and have been reluctant to send it down the drain. Ive mostly just used it sparingly and then soaked it up into used shop towels and then hang outside to evaporate. How is the Sparex disposed of? How are you cleaning the crock pot for storage?
-
And another from the Great Pacific Northwest
Justin P. replied to Egilman's topic in New member Introductions
Welcome from Kitsap County. -
I'm glad you guys got yours first. Mine has been on backorder for about 5 weeks as well. It shipped last week but hit some kind of weather and has been delayed until Monday. I had no plans to coat it with anything, but as you both are mentioning it, I'm certainly going to re think it.
-
James Cook: The Story Behind the Man Who Mapped the World by Peter Fitzsimons Hatchett Australia, 2019 ISBN: 073364127X 528 Pages Review Ive probably read 4 or 5 Cook biographies over the years, and with 2020 marking 250 years since his first voyage on Endeavor, I thought "why not take in one more." Ive been a fan of Fitzsimons work for some time, and thoroughly enjoyed his treatments of other maritime and Australian histories. HIs style is often well researched, though presented in such a way that makes for light reading and immersive and enjoyable stories. I also find his subtle yet poignant contrasts to modern world issues and their connection to the histories he is exploring to be timely and spot on. He can also be quite funny in a quiet, dignified sort of way. In this new biography, Cooks story is told from much more equal footing to that of the men he sailed with. A unique and interesting figure for sure, but also just another person dealing with the pressures and social structures of the time. The title of the book is misleading as the author (one of the first Ive read) acknowledges that Cook wasn't the first to map the world, but someone who also mapped the world. Any fan of the golden age of discovery will now just how much Cook relied on his Portuguese and Dutch predecessors, and frankly just how much LUCK may have been a part of his legacy. The book also explores Cook's shipmate and benefactor, Joseph Banks. The author gives near equal treatment to his background without too much of the bias that is so often found in Cook stories. While likely a bit of a pompous, classist and elitist aristocrat, he was also a genuinely interested and ambitious man of science, who shed many of the trappings of his background to pursue something greater. Though he is often portrayed as an antagonist to Cook, Fitzsimons places him with more care and gives credit the vast impact the man had on science AND the first voyage. The story overall only covers the first voyage in detail, and is as much a history of Endeavor as it is a story of Cook. With both the ship and mans later life covered in a brief summary chapters at the end. However the focus on this one voyage is what I think makes it all the more unique, especially when paired with the many anecdotes and contemporary correspondence of those people involved or peripherally involved in his life, the voyage or the aftermath. Particularly enjoyable were those parts that told of Lord Sandwich. Finally, the author attempts to acknowledge and comment on the larger historical impact of Cooks voyage and the fallout of his interactions with populations of Natives across the South Pacific. Perhaps as historians are starting to reevaluate the man and his legacy, Fitzsmons here tries to weigh in on a subject that, as an Australian, he is uniquely positioned to do. Im not in a position to say wether he is right or wrong in his comments, but I did appreciate his near irrefutable proof that at some point in the mans life, Cook did feel that European contact with native populations would enivatably lead to forced assimilation and the obliteration of their culture. Something he, at the time, deeply regretted. While his actions in later life don't necessarily show a continued sensitivity to these issues, it is helpful to have the available primary sources and a focused commentary, that give some balance in our evolving judgement of him. All in all, I really enjoyed this book and was sorry it didn't continue on with the same detail to treat the second the third voyages. That book would have been too immense to hold comfortably but Fitzsimons style would have kept me plodding along to the end, even if it took a year to get there.

-
- 1
-
-
Bob, I found a few copies on Amazon for around $12. Thanks for the recommendation, my copy is on its way.
-
...but we can do quite a lot about HOW they age.
-
We might be getting our wires crossed, Im not saying its bad. Just that in the context of coating rigging I probably wouldnt do it. All my available literature on the qualities of Shellac as a sealant and finish show it be an unreliable moisture barrier or sealant (from a purely conservation perspective). One quick quote: "Shellac, a soft coating, is highly susceptible to water damage, best known for the white rings left by drinking glasses." This would be the moisture wicking quality Im speaking of, it will absorb moisture from the air and degrade over time as well as it will absorb moisture it is in contact with. 9/10 scenarios its perfectly fine and does the job well, but for its application on cotton rigging - meh. In order to get a truly protective finish, you'd have to apply two or three good coats and to me the scale and detail of models just don't support that. While it can resist the occasional splash or spill, its long-term ability to protect diminishes with age. With so many other alternatives out there, Im simply saying that it wouldn't be my first choice. Thats an interesting point about the electrical though. Makes me wonder if it was used as moisture barrier or as an electrical insulator.
-
One way to knock down that sheen is to not use Shellac at all, but that's another conversation. Nothing wrong with it, but if you don't like the finish try something else.
-
A similar spray-on fixative used in creating didactic materials, labels, etc, similar to how you describe with the Medway is this. It has a good reputation, with derivatives and other solutions used for various conservation applications. For those friezes it is perfect, I won't comment on its use in pastels or other artwork.
-
I recommend you check out the threaders I linked above. They are by-far the thinnest Ive ever seen and sewing is a big part of my life. I would say (without the benefit of measuring them) that they are no more than .5mm in diameter.