HOLIDAY DONATION DRIVE - SUPPORT MSW - DO YOUR PART TO KEEP THIS GREAT FORUM GOING! (Only 27 donations so far out of 49,000 members - C'mon guys!)
×


Justin P.
-
Posts
1,008 -
Joined
Content Type
Profiles
Forums
Gallery
Events
Everything posted by Justin P.
-
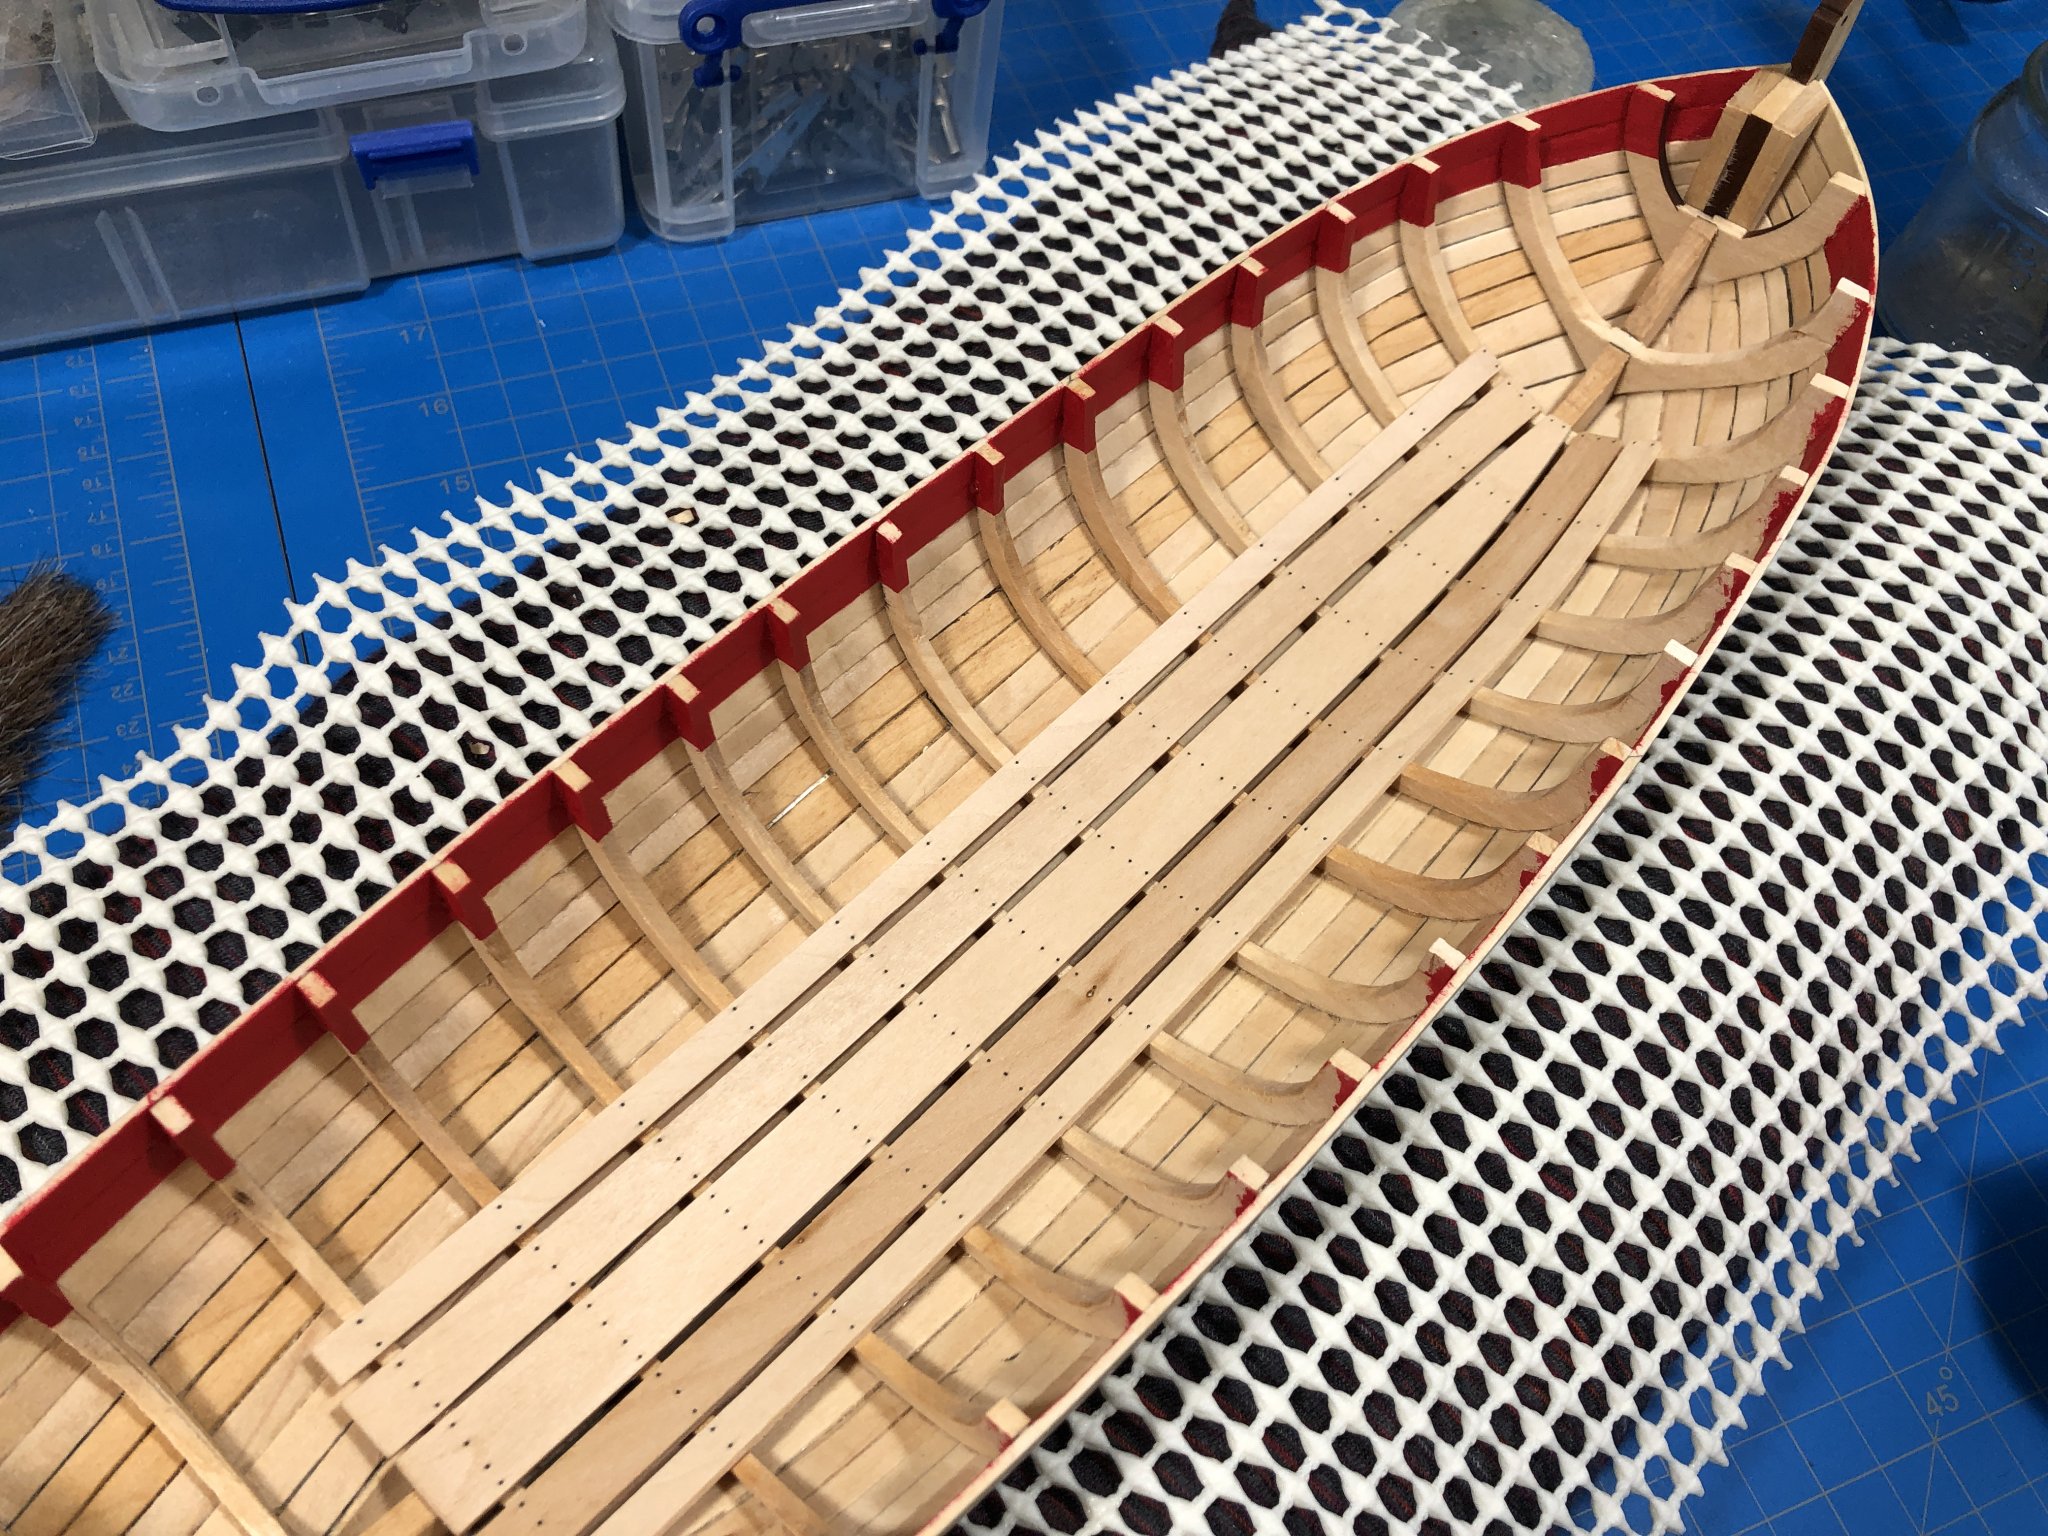
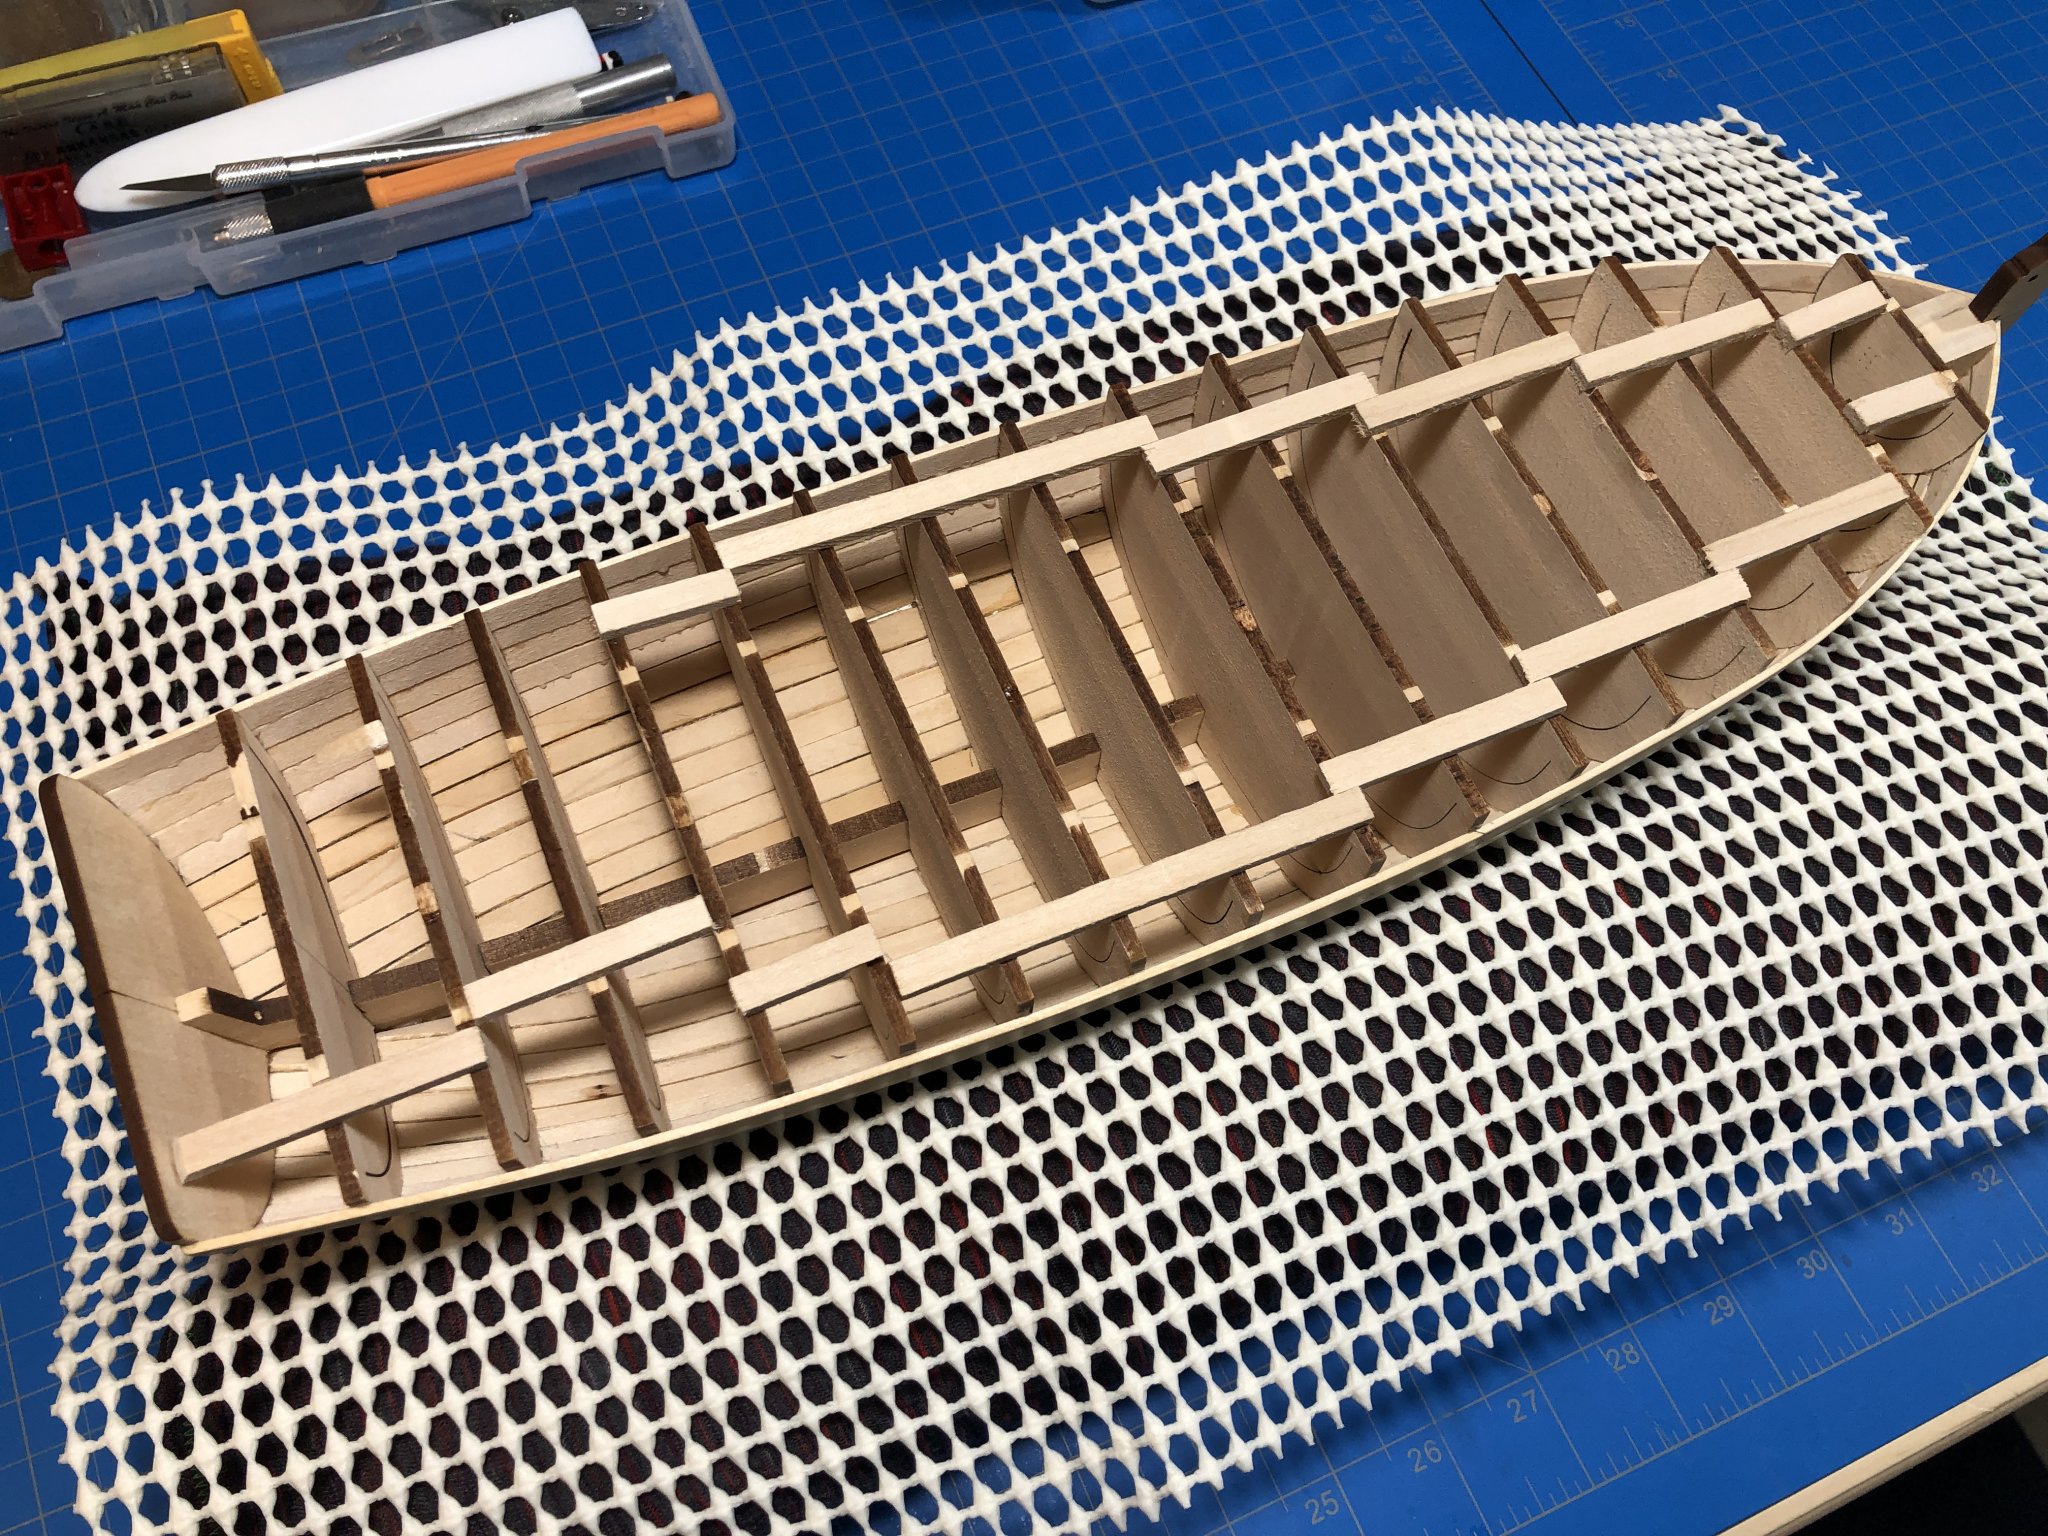
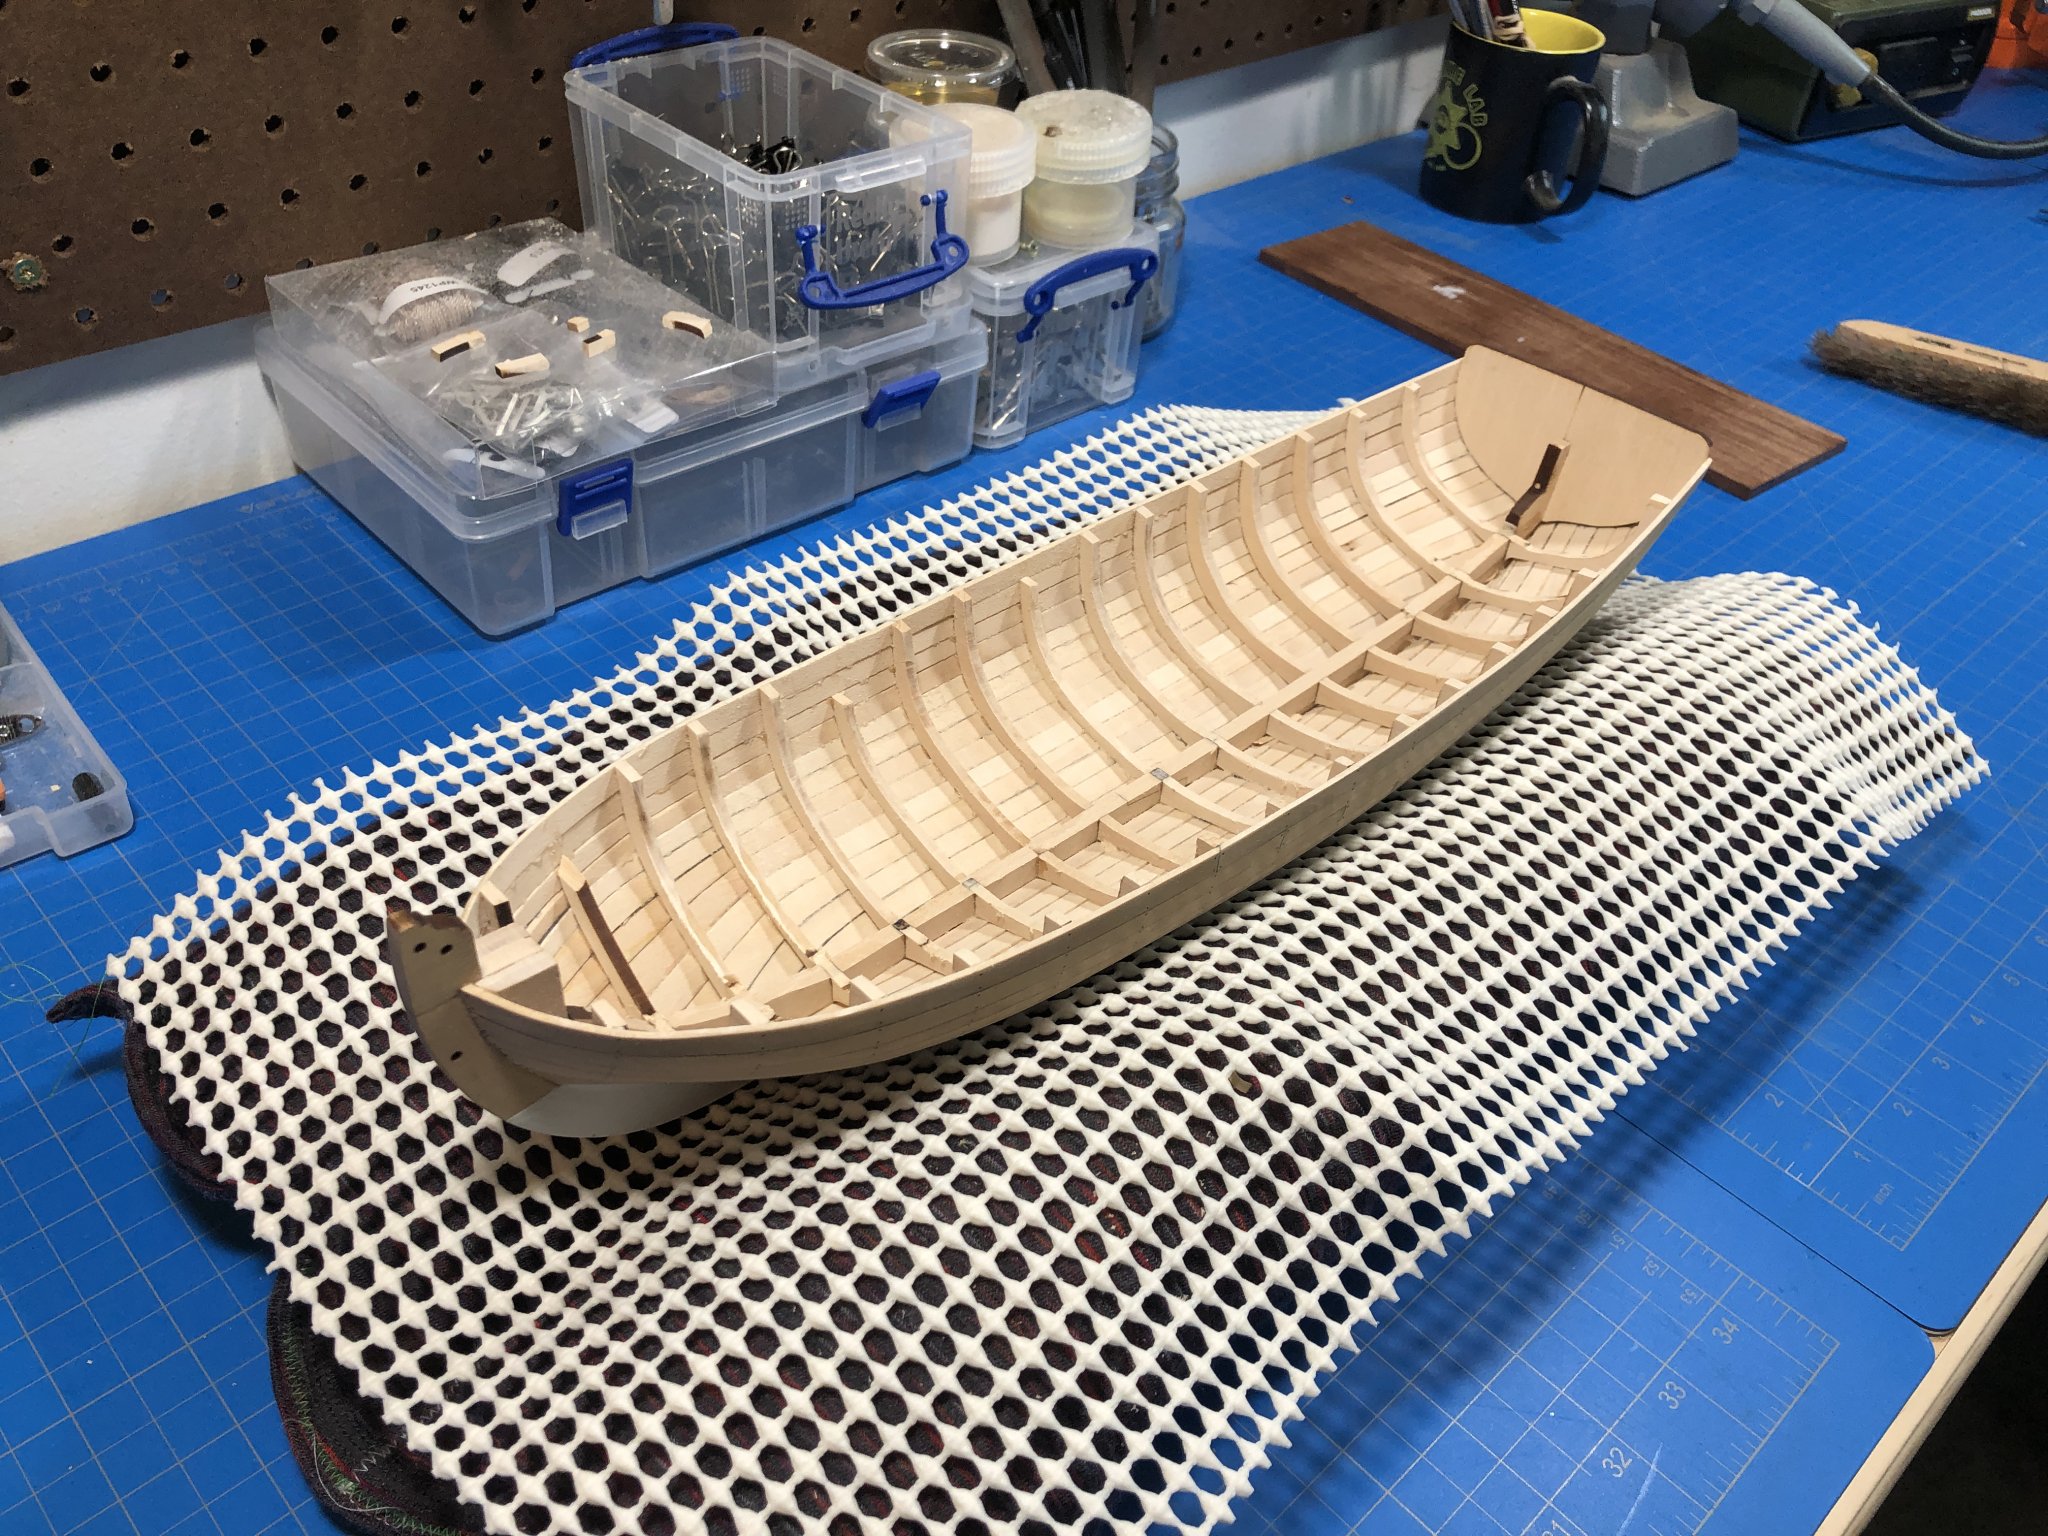
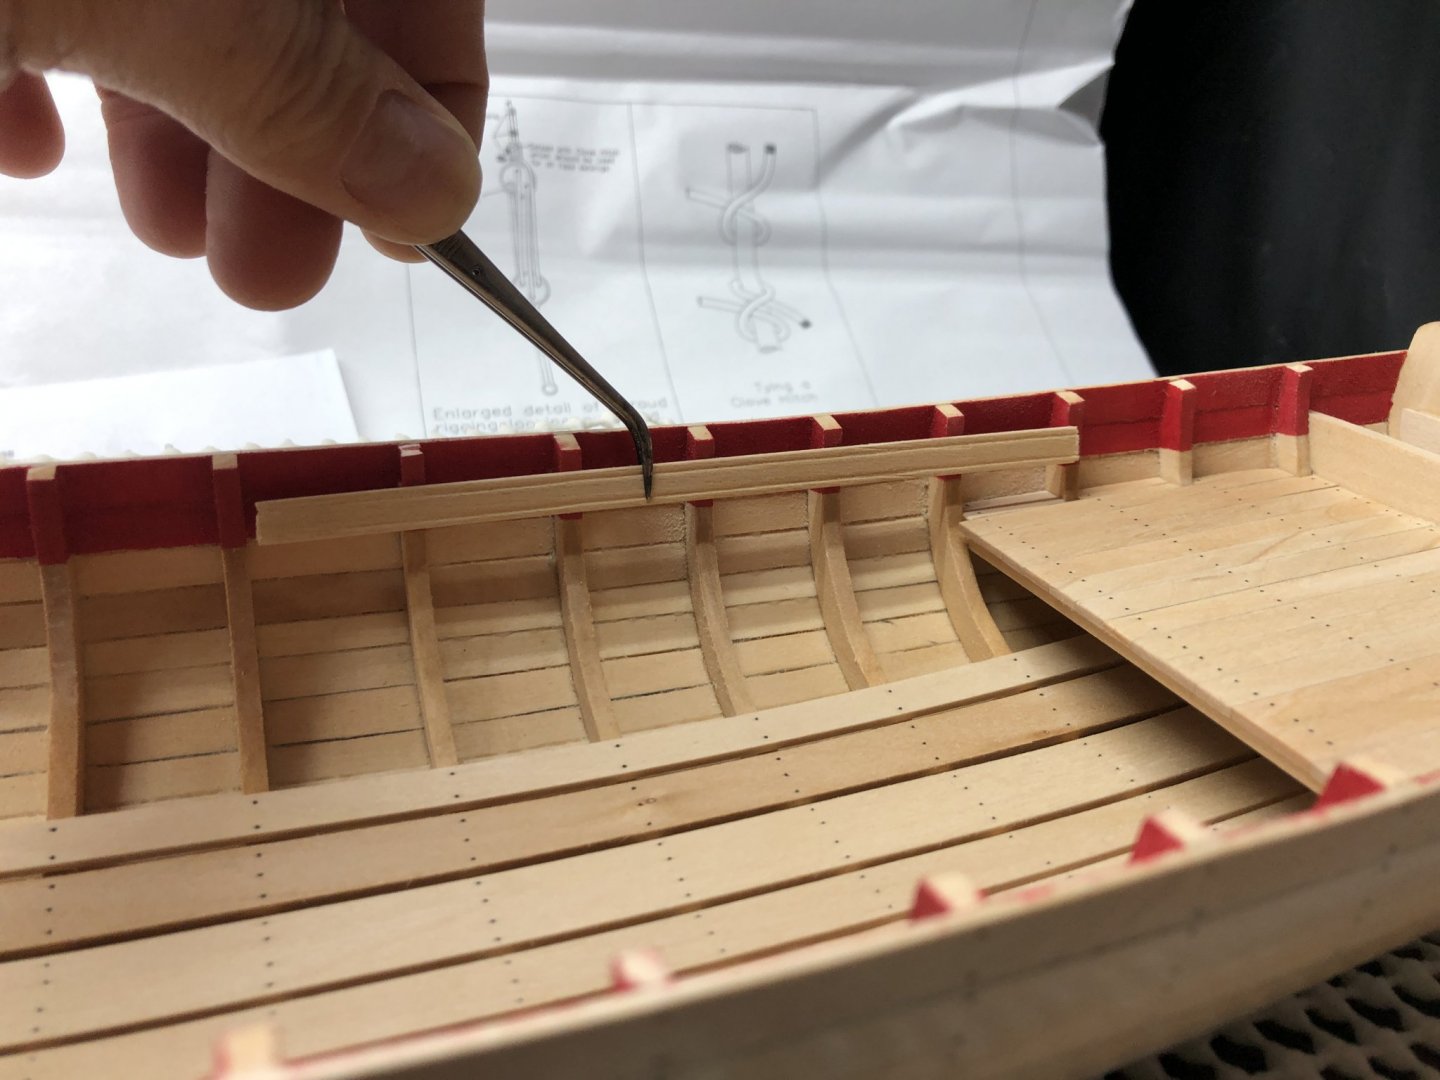
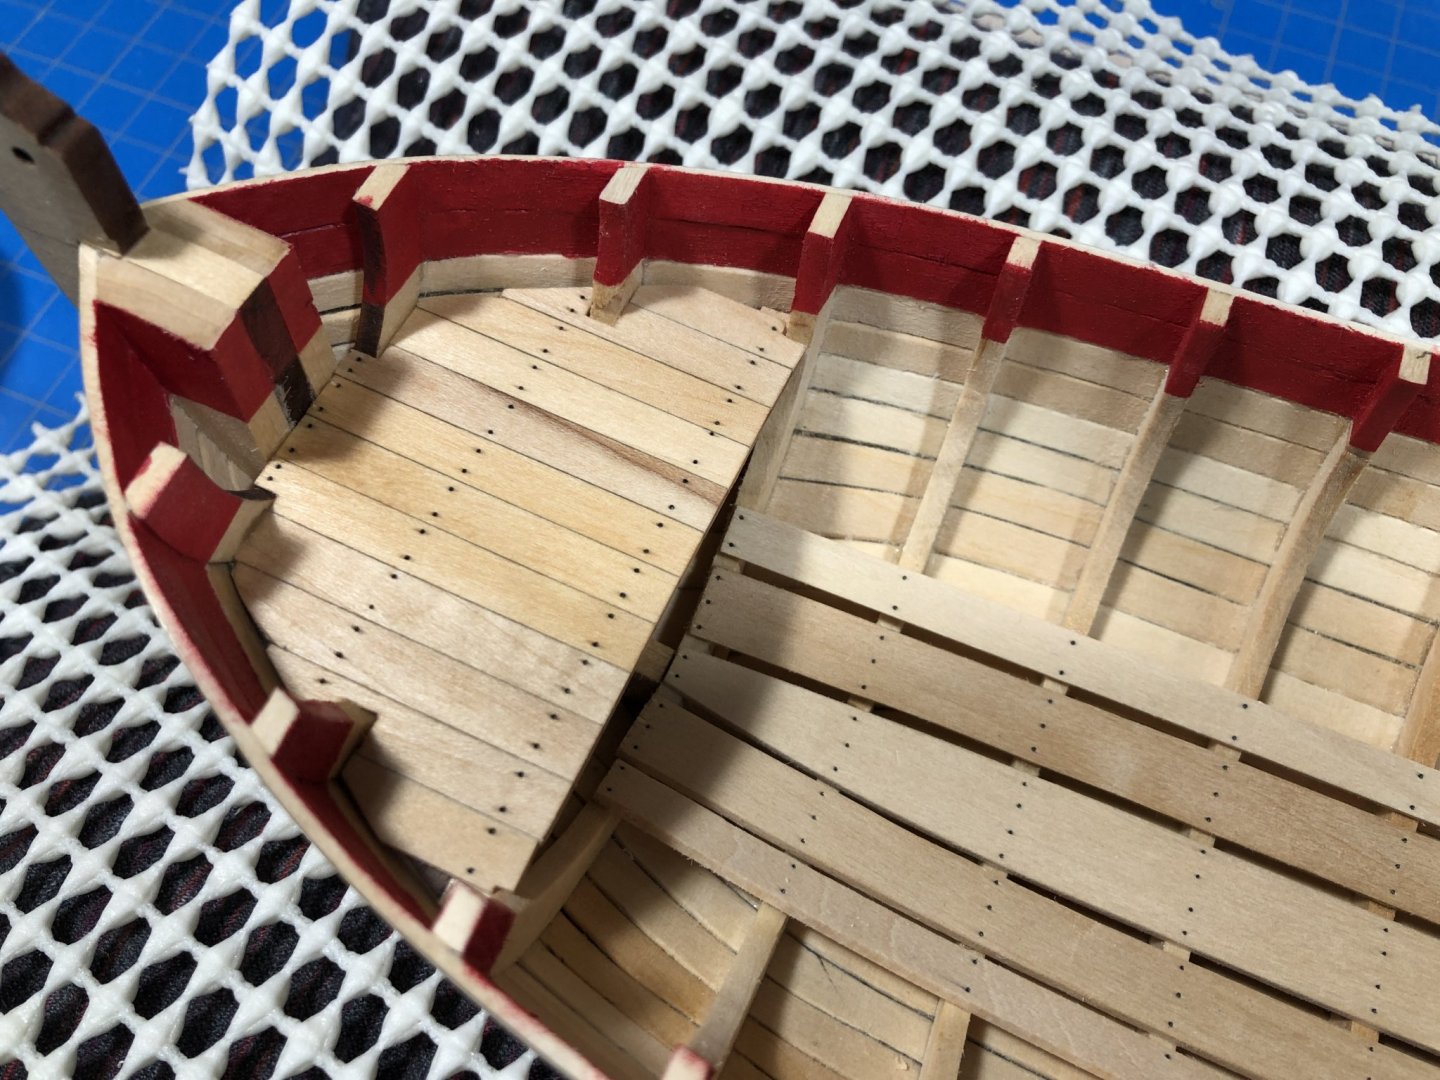
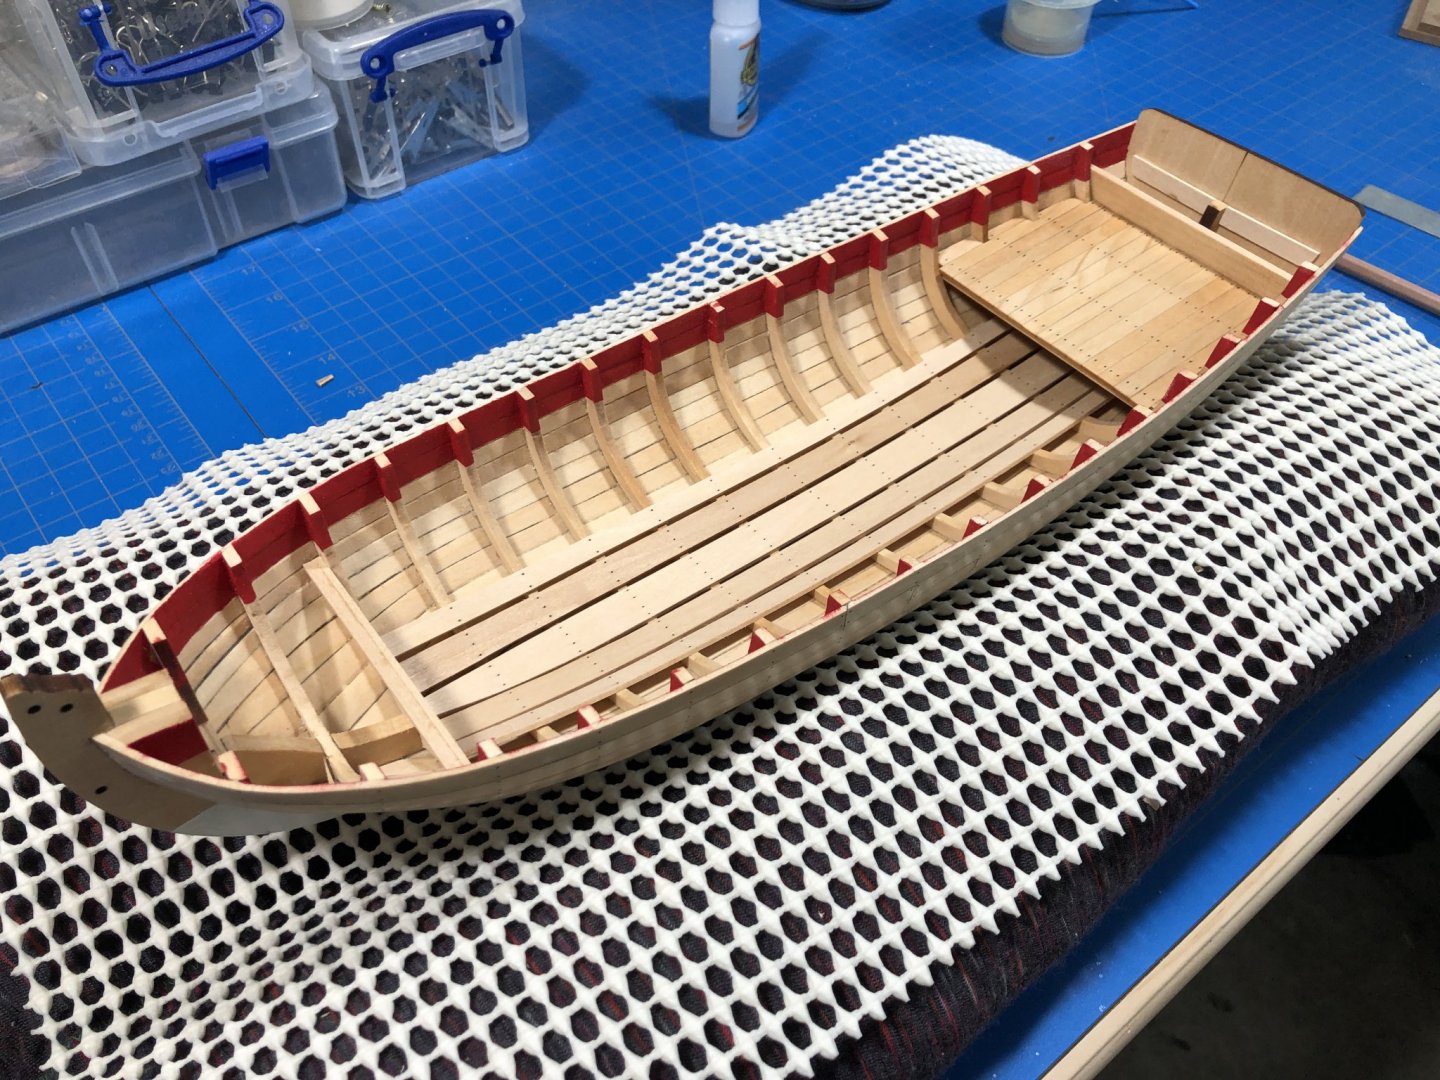
 Last update for the weekend, it'll be a few days before I get back to this build, but am definitely in that grace period after planking and prior to rigging where it can feel deceptively like I know what Im doing. Parts are coming together and I am enjoying just popping out to the workshop to take another look at my progress. Thwart risers are installed and thwarts are fashioned and ready for install. I haven't glued them in yet as I think I should take a step back and read ahead here. There is some complicated sequencing ahead and Id like to have a firmer grip on what Im to do before moving forward. I also need to give some attention to more fiscally rewarding activities for a bit.
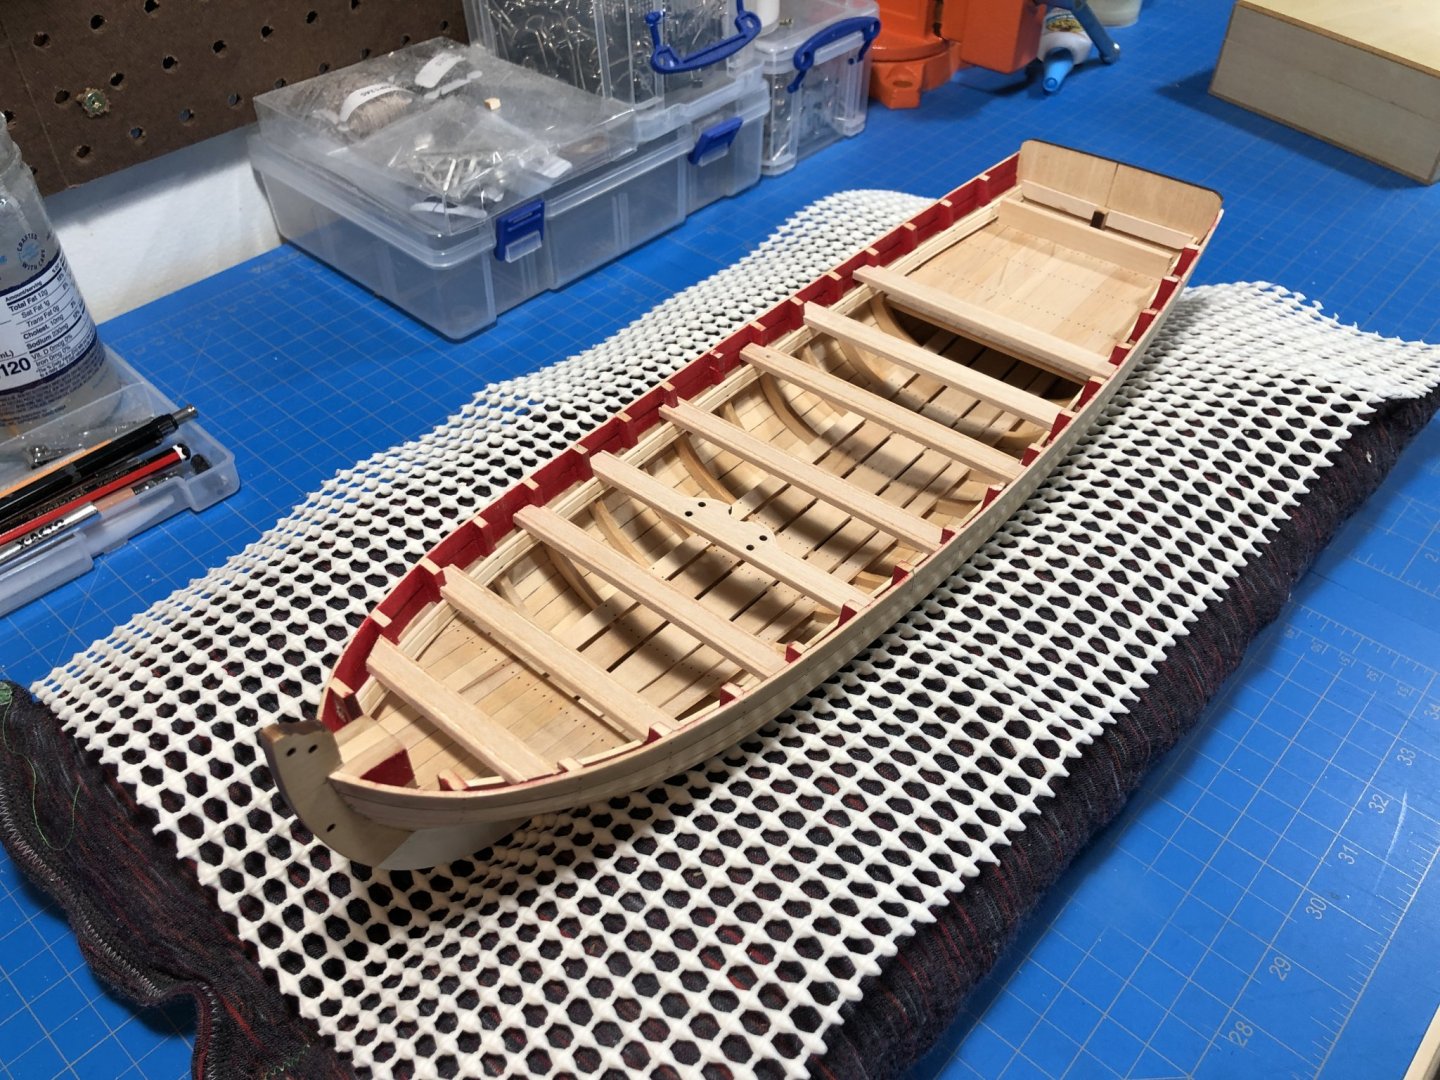

- 66 replies
-
- 9
-

-
- Finished
- Model Shipways
- (and 1 more)
-
Great project, and a nice change of pace Im sure. Looking forward to watching her come together!
-
It is a undeserved compliment, but I’ll take it Looking forward to your next project!
-
Thanks for checking it out, it is appreciated.
-
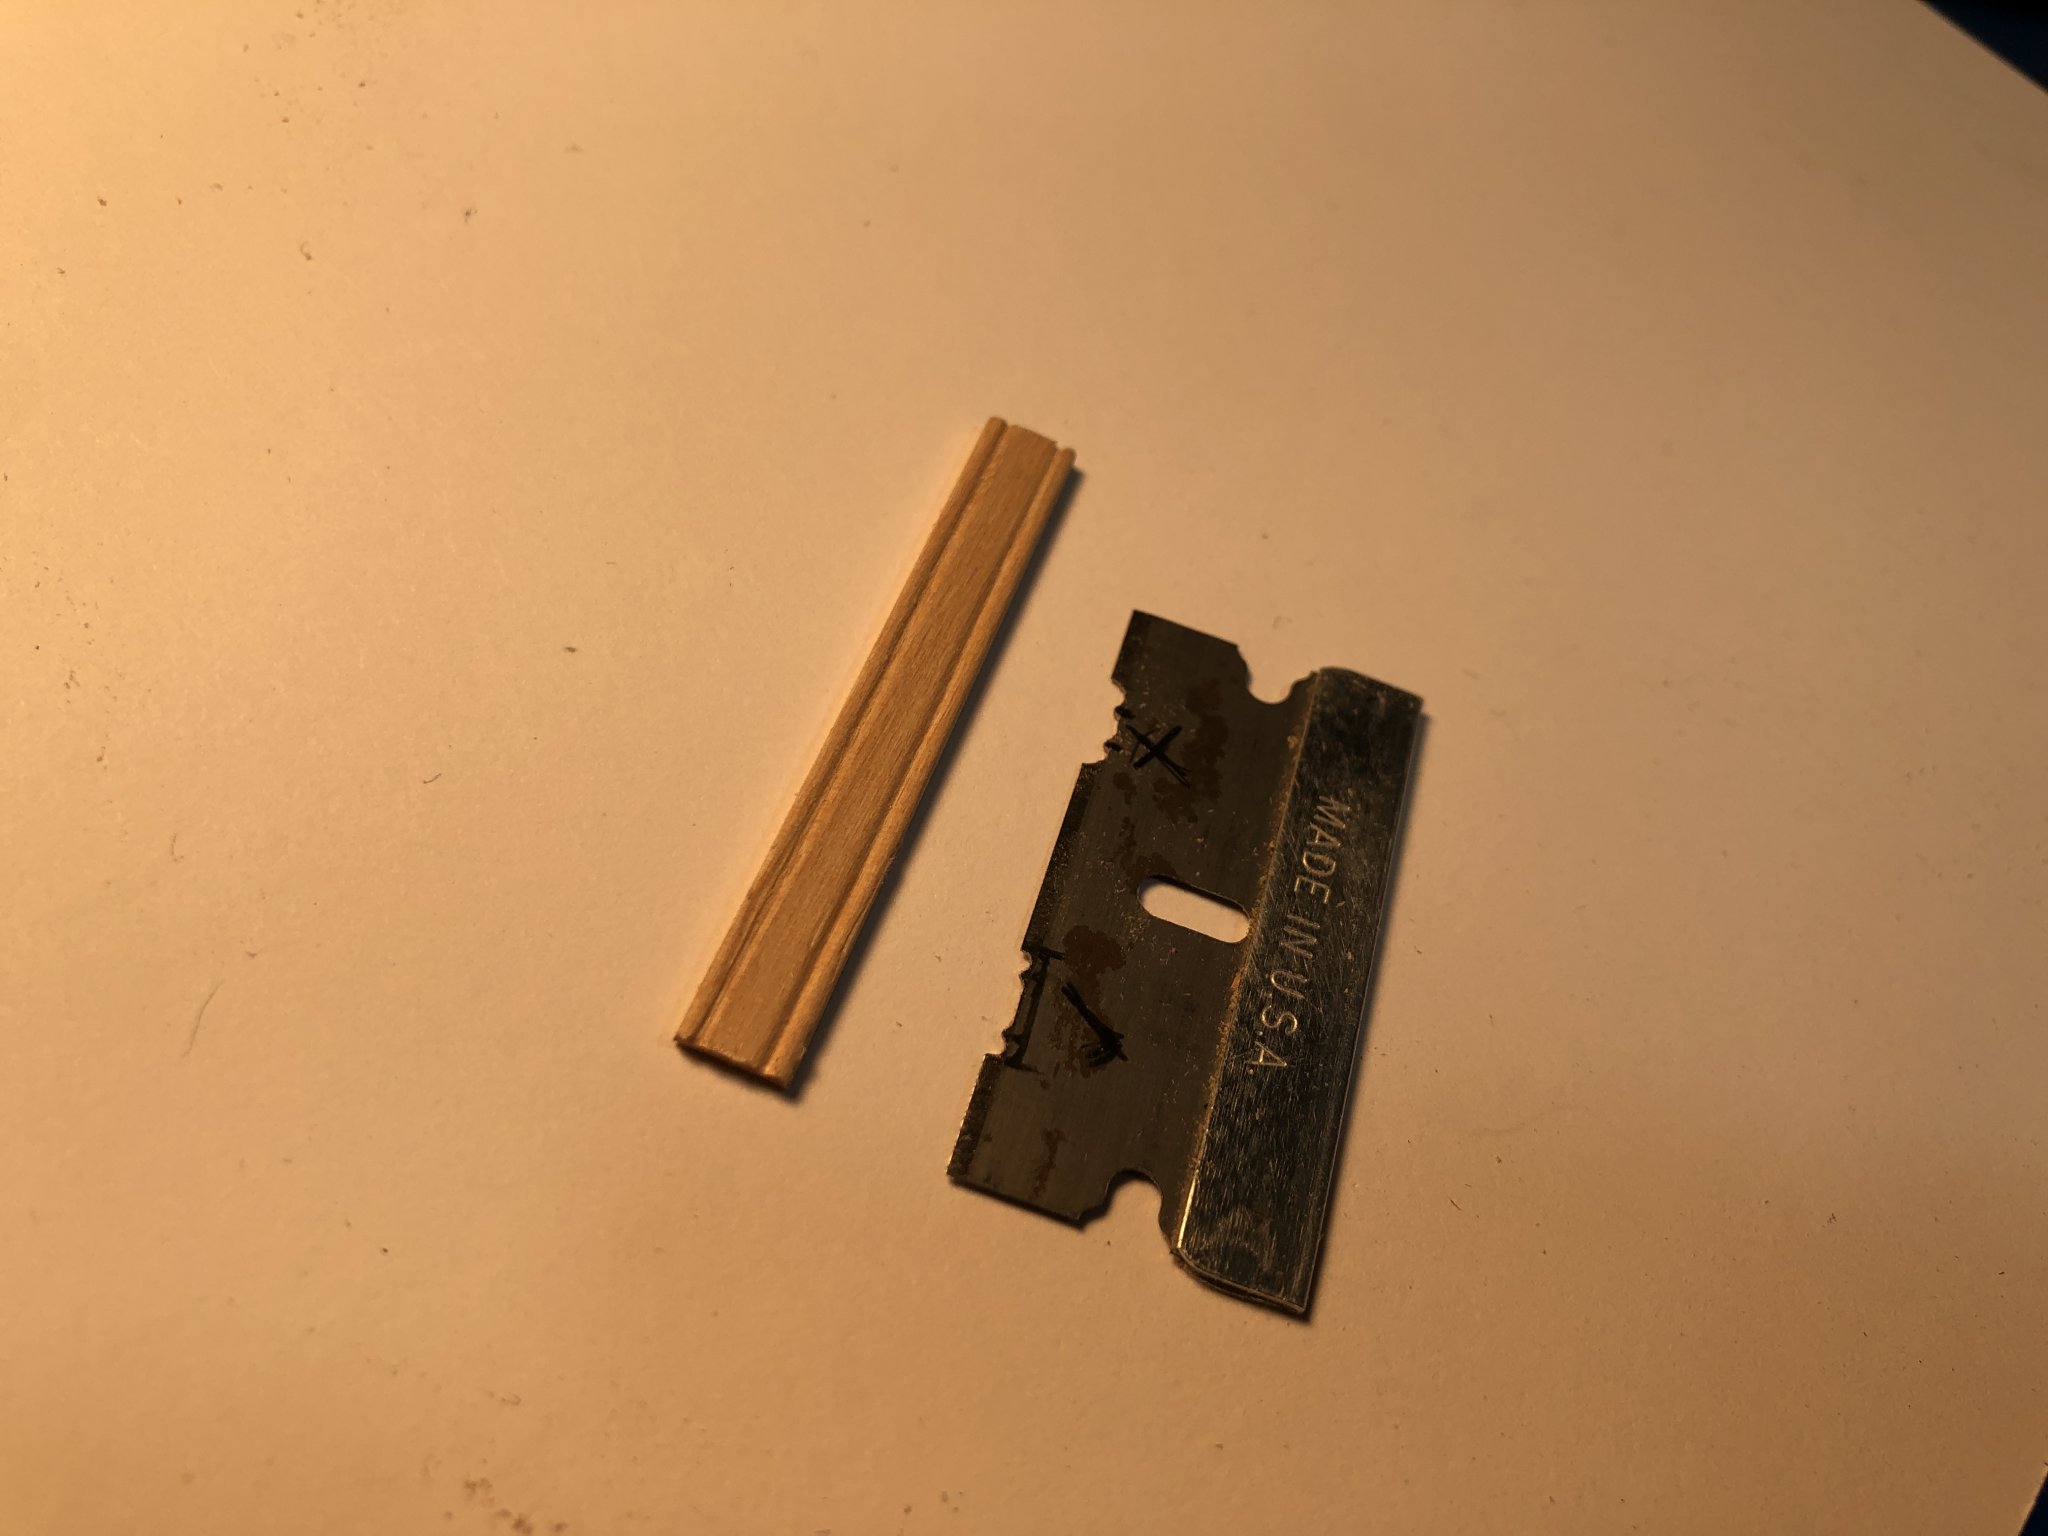
Hi Bob, Thanks! Im using a .5mm drafting pencil and just poking little holes. I was going to go the filament route but decided that's for another project as well, the pencil works well enough on its own. I have looked for a long time for a complete set of those AL scrapers but can only find half of the set. Even when the razor blade is made specifically for a certain size piece its still tricky to get the motion right so it doesn't stray. I did many rehearsals, and will do a few more before committing to the final piece.
- 66 replies
-
- 2
-
-
- Finished
- Model Shipways
- (and 1 more)
-
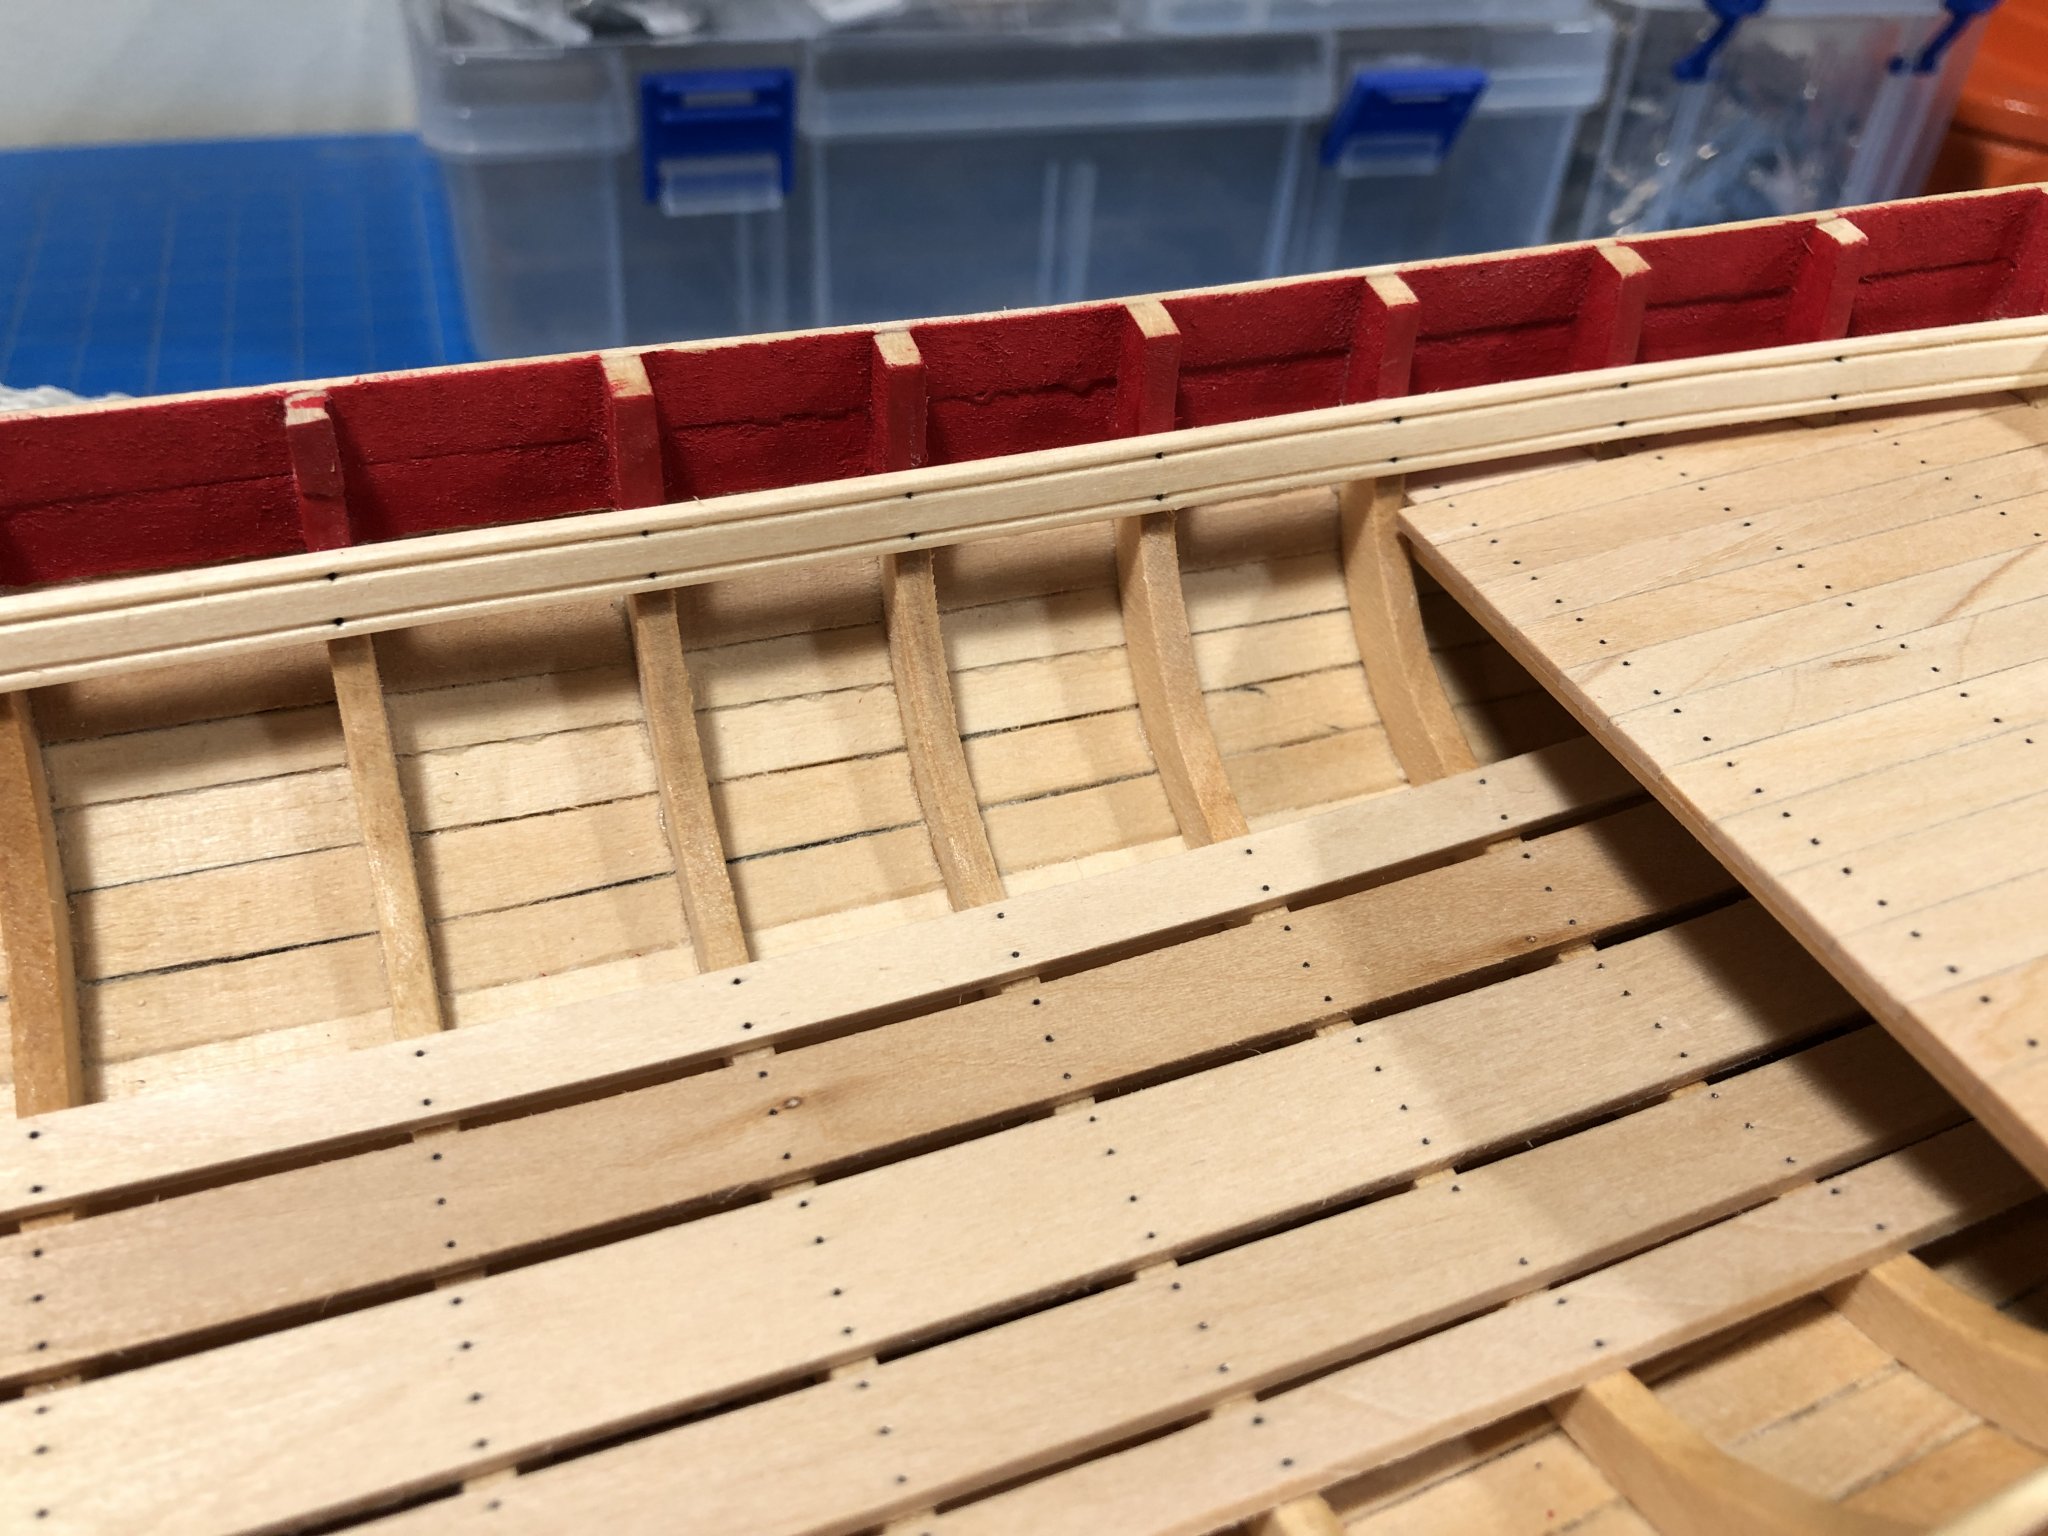
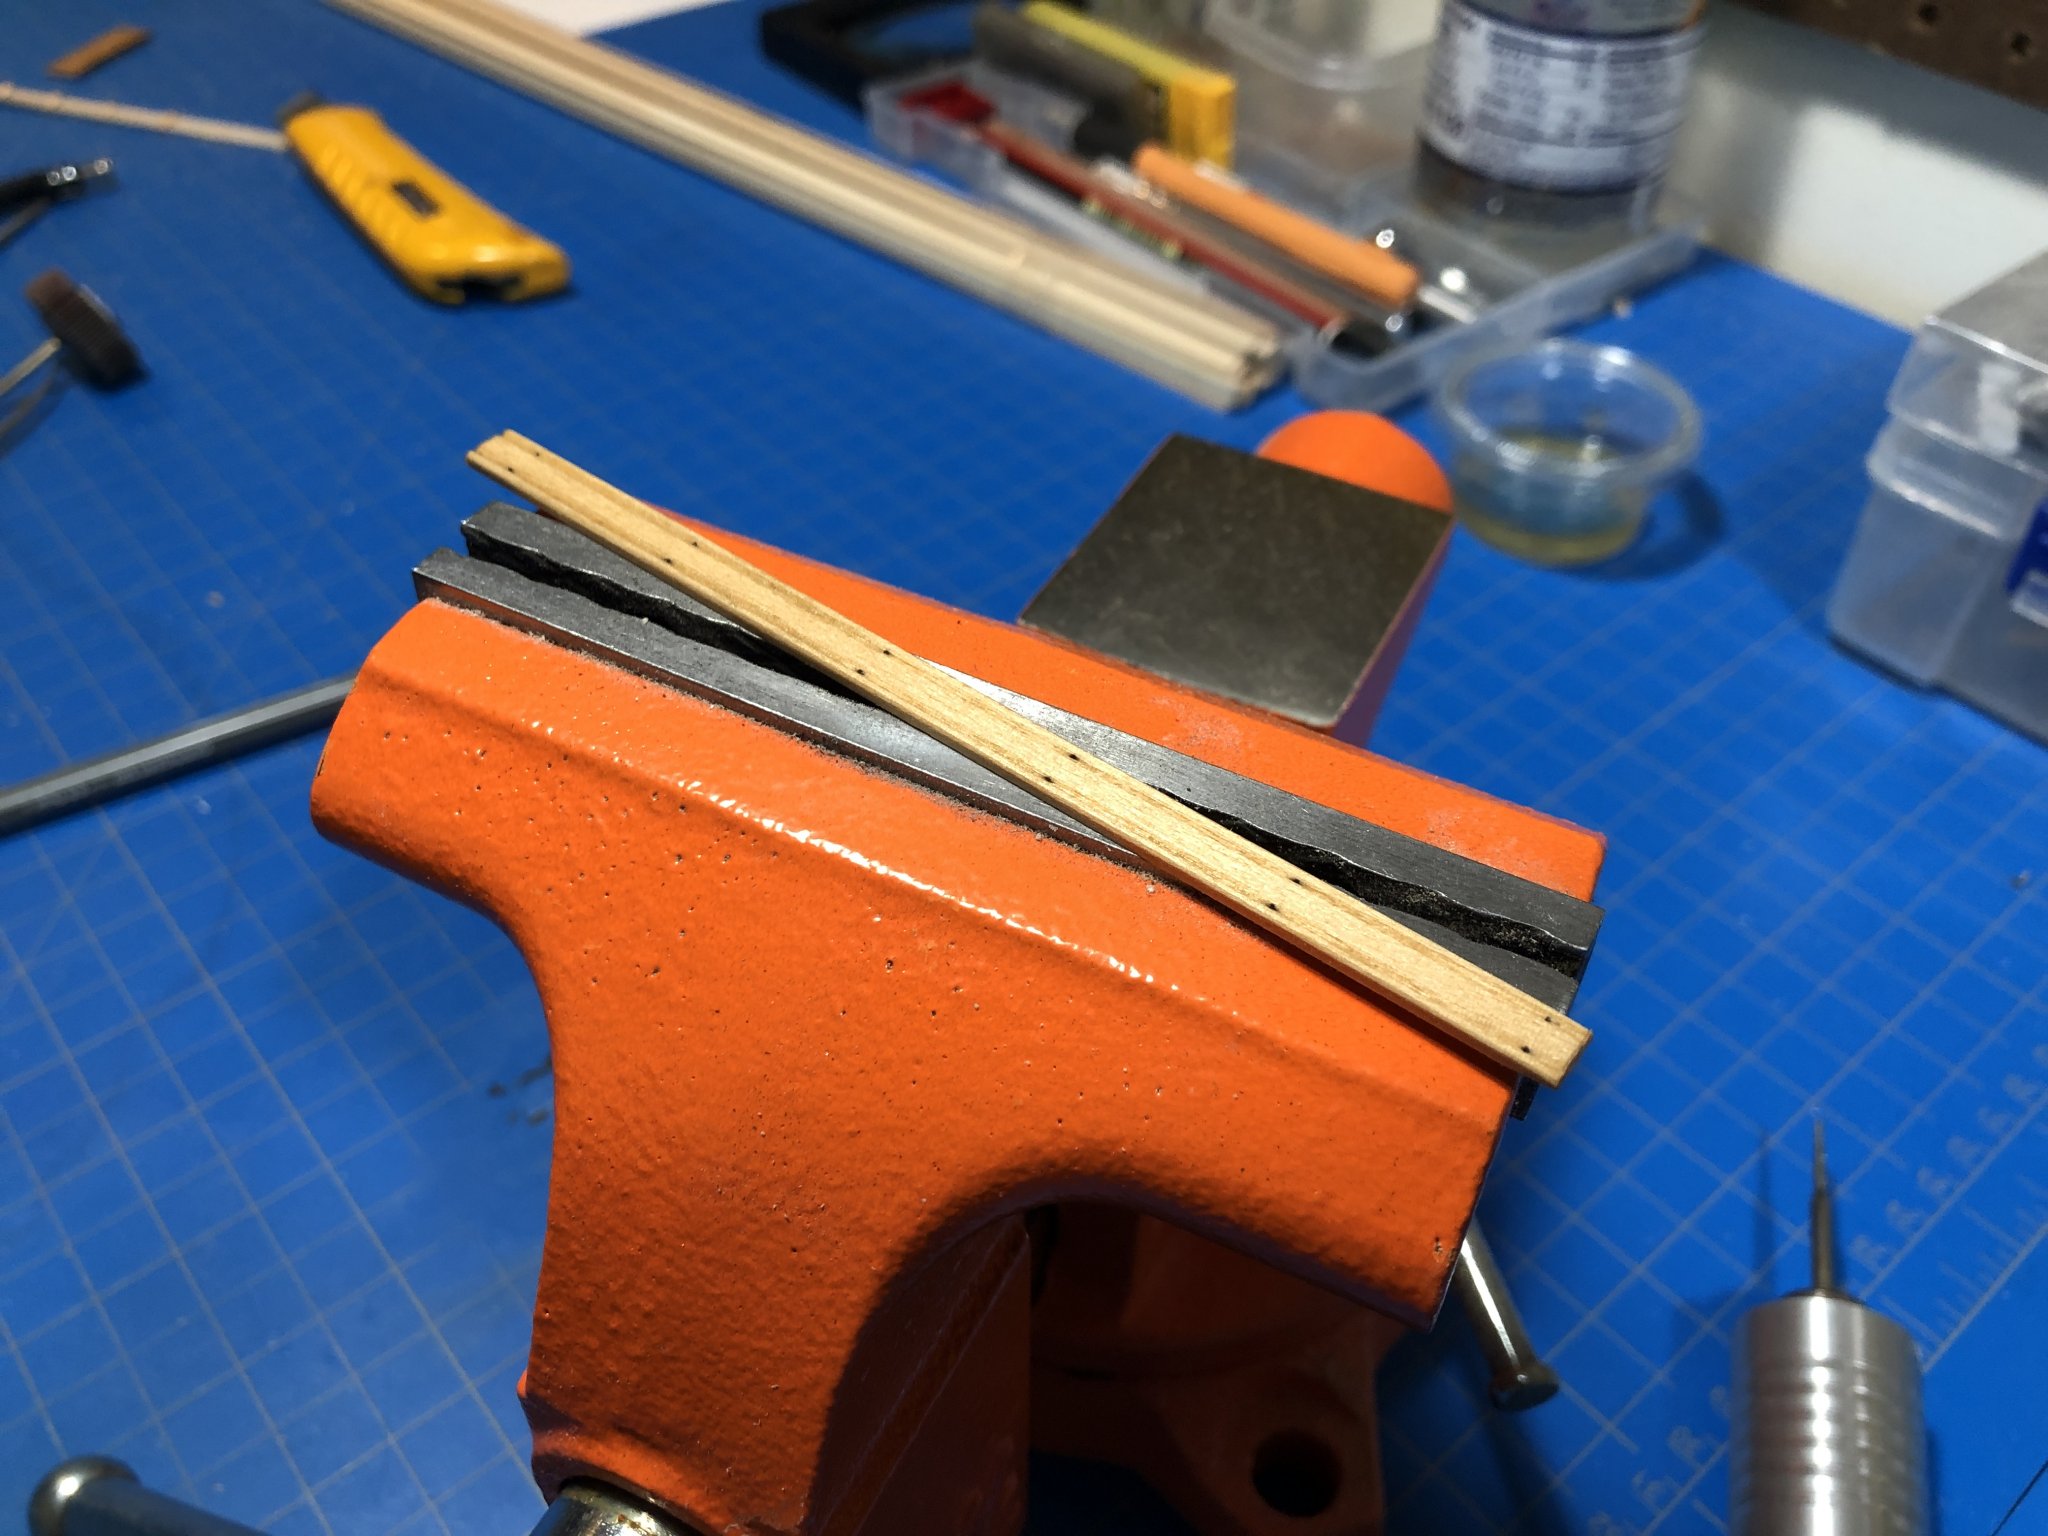
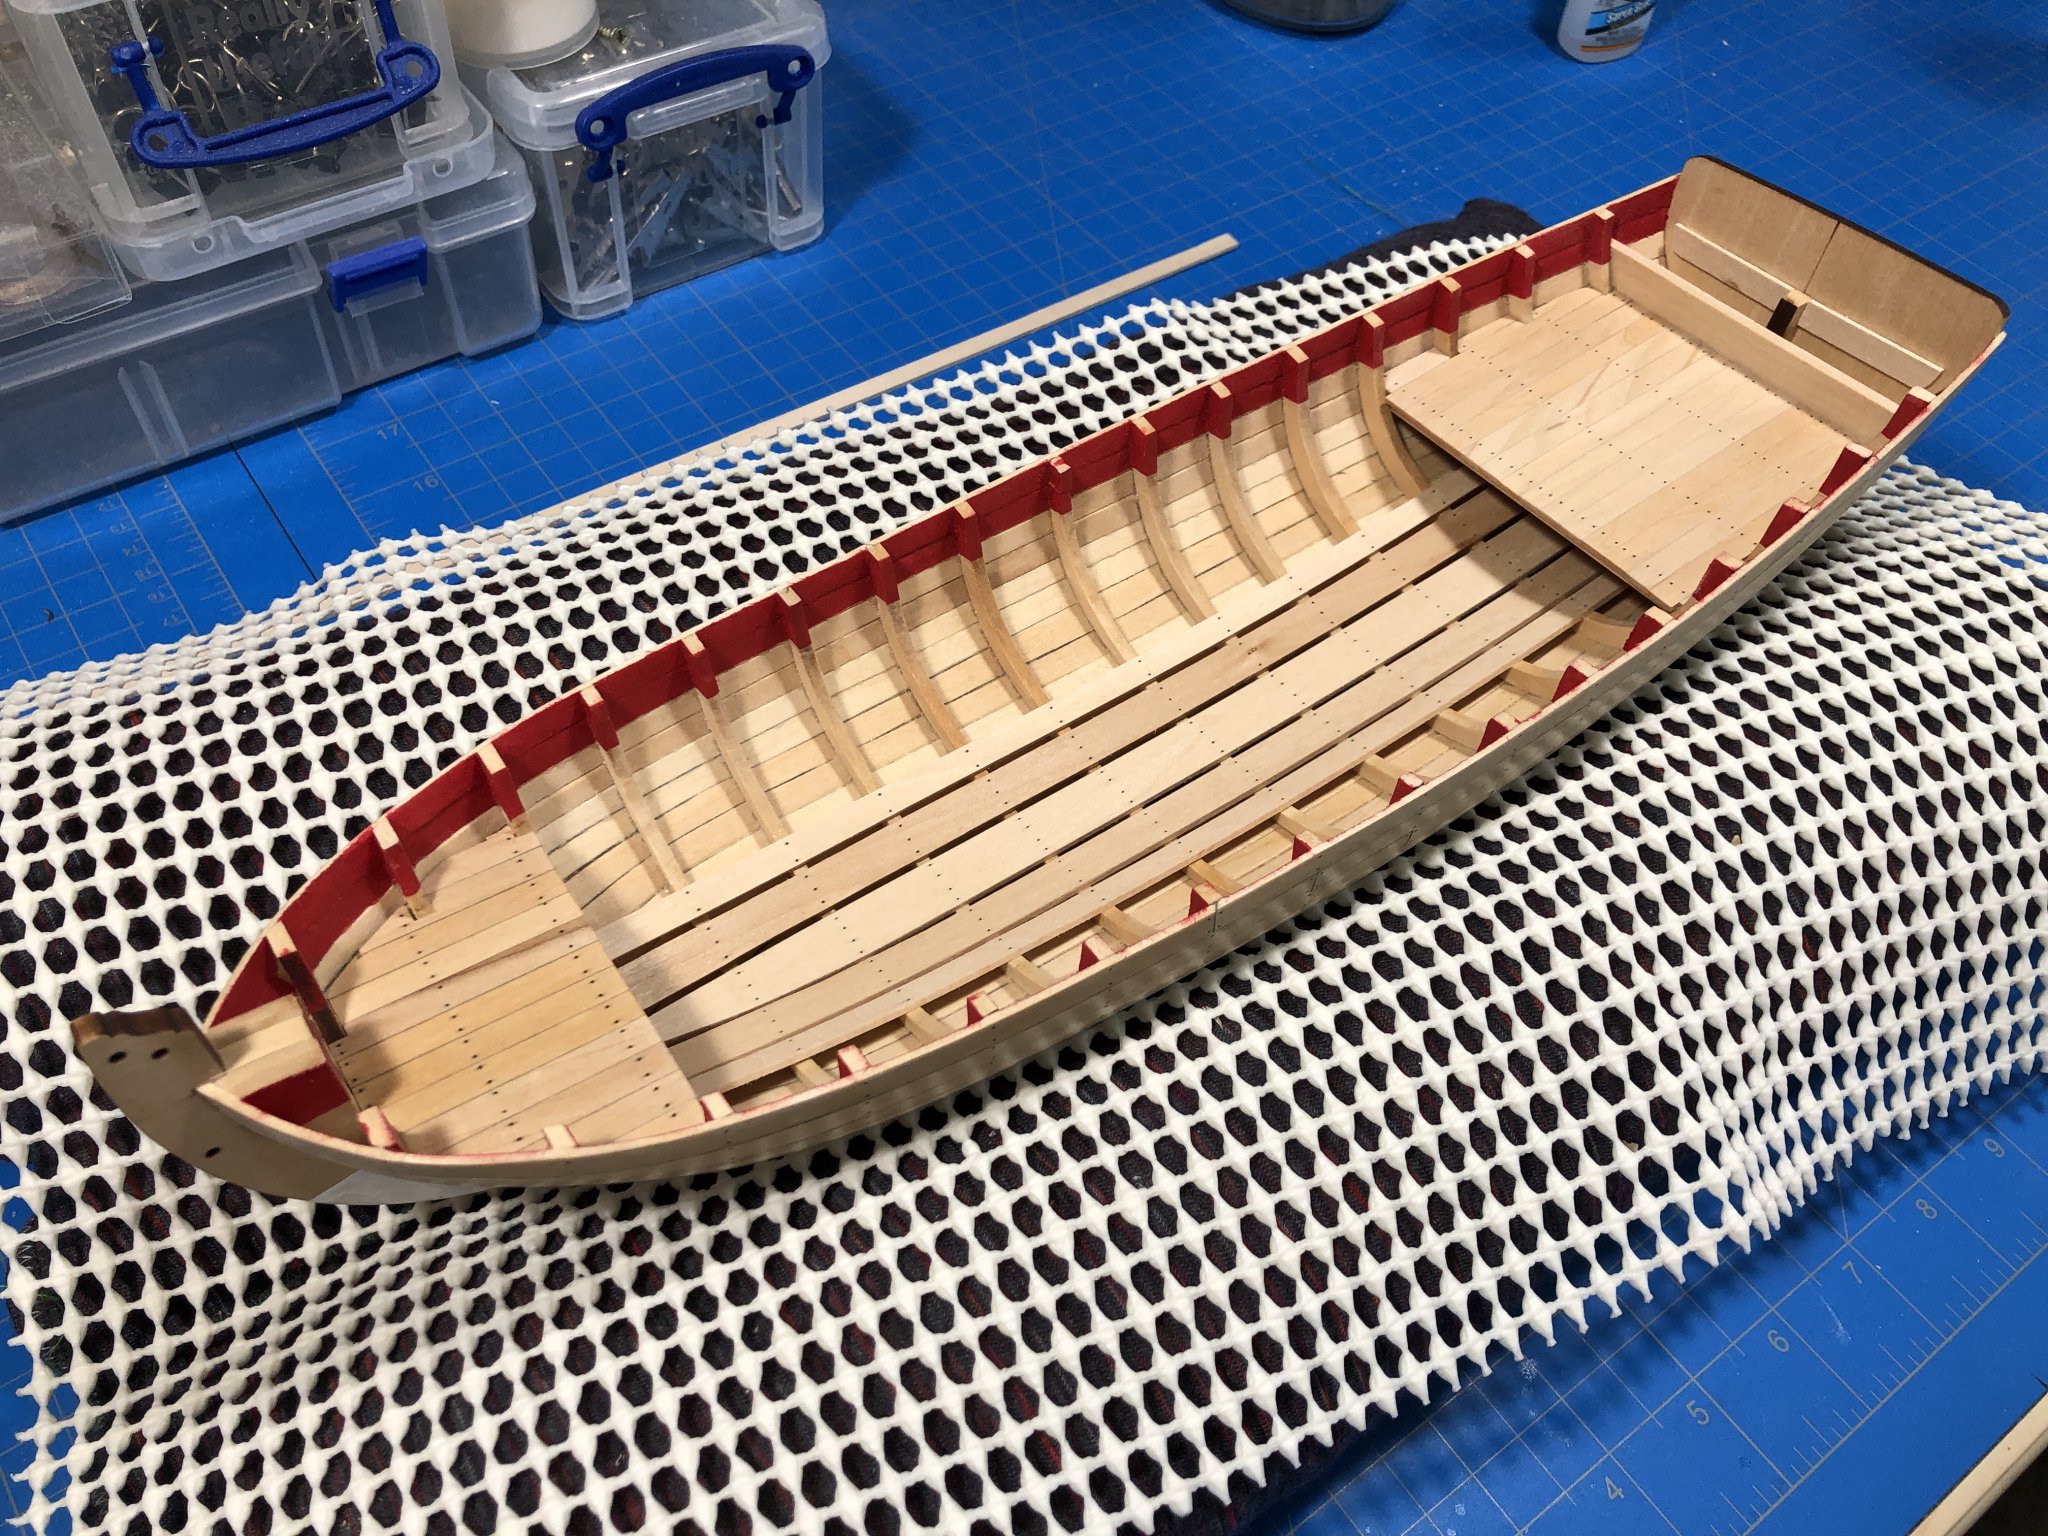
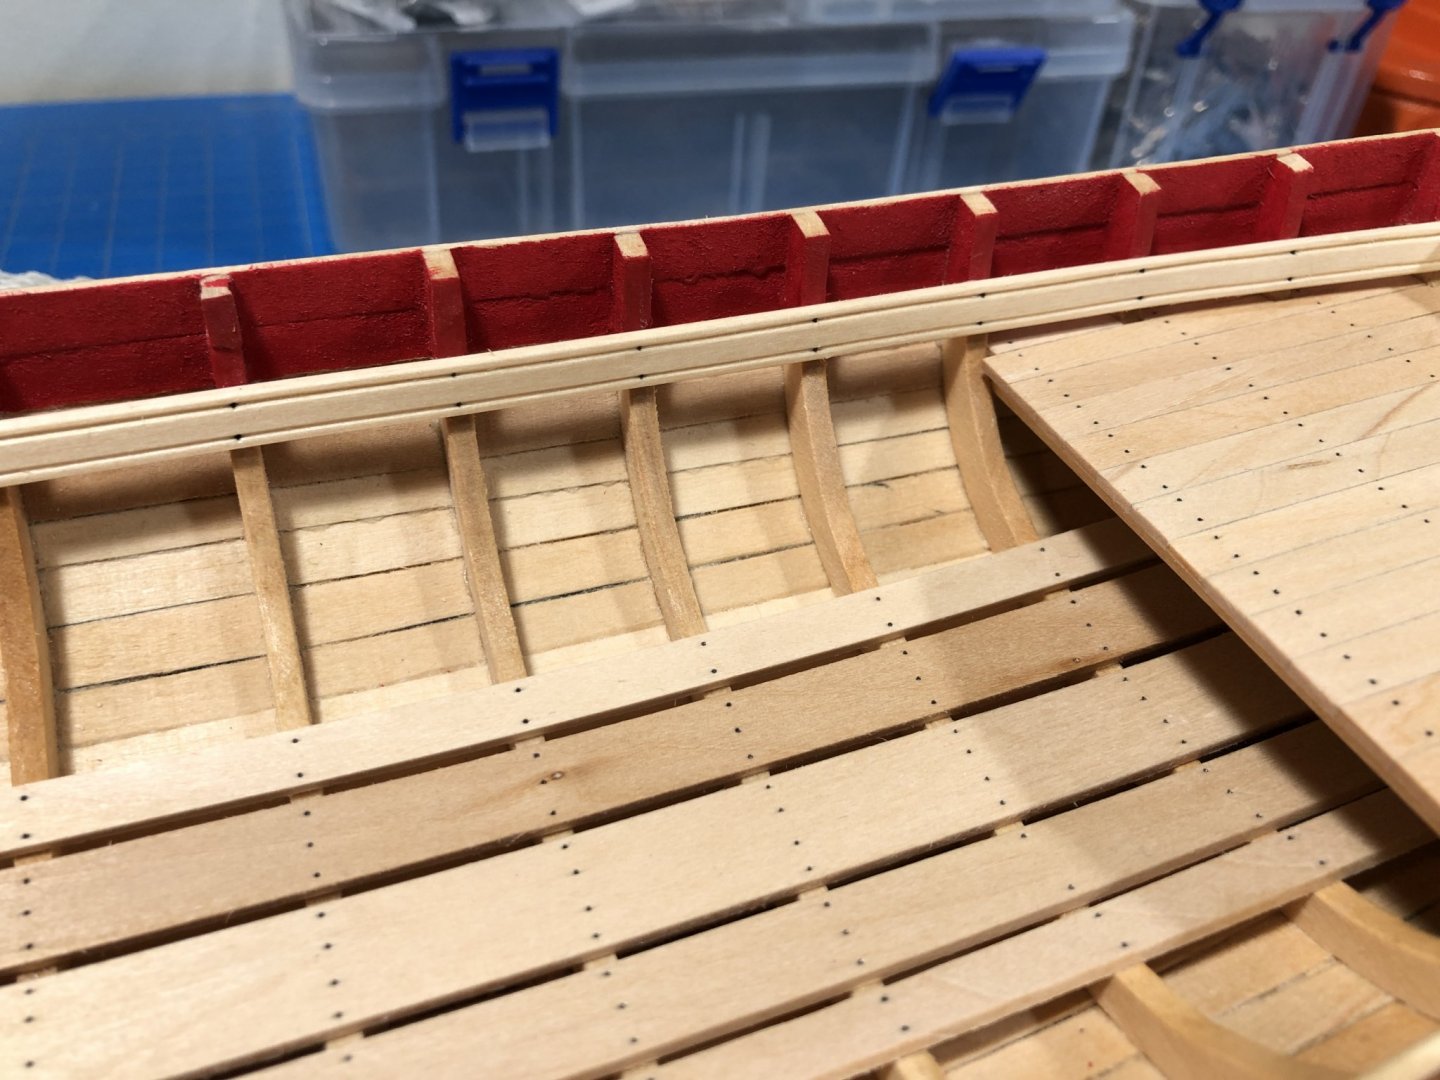
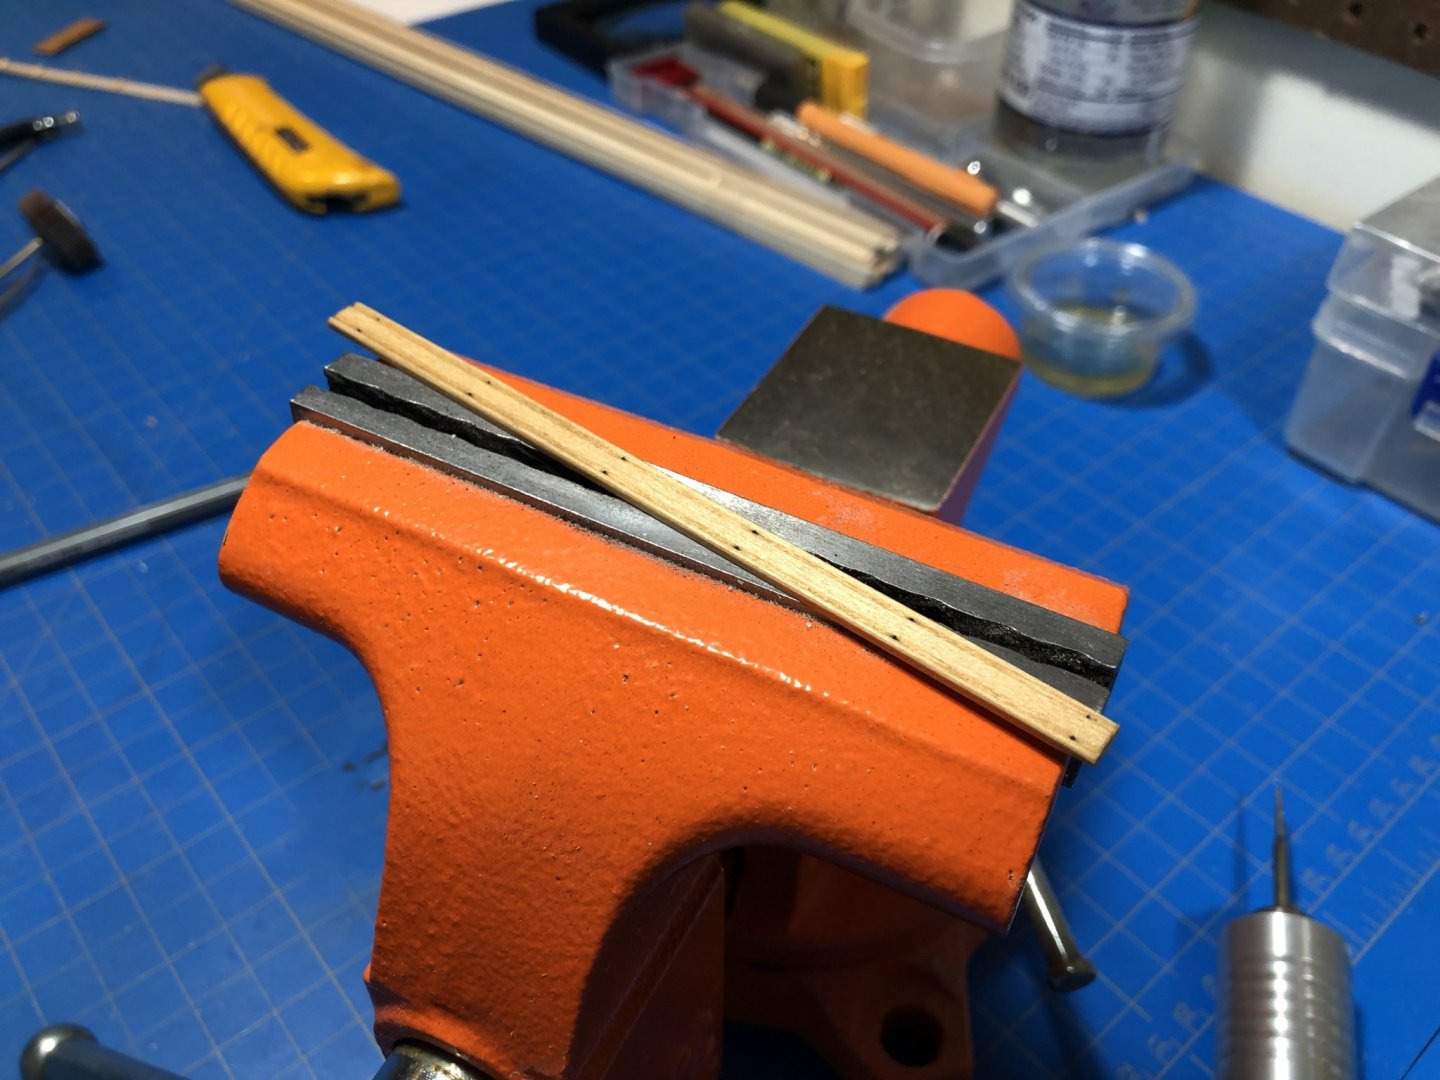
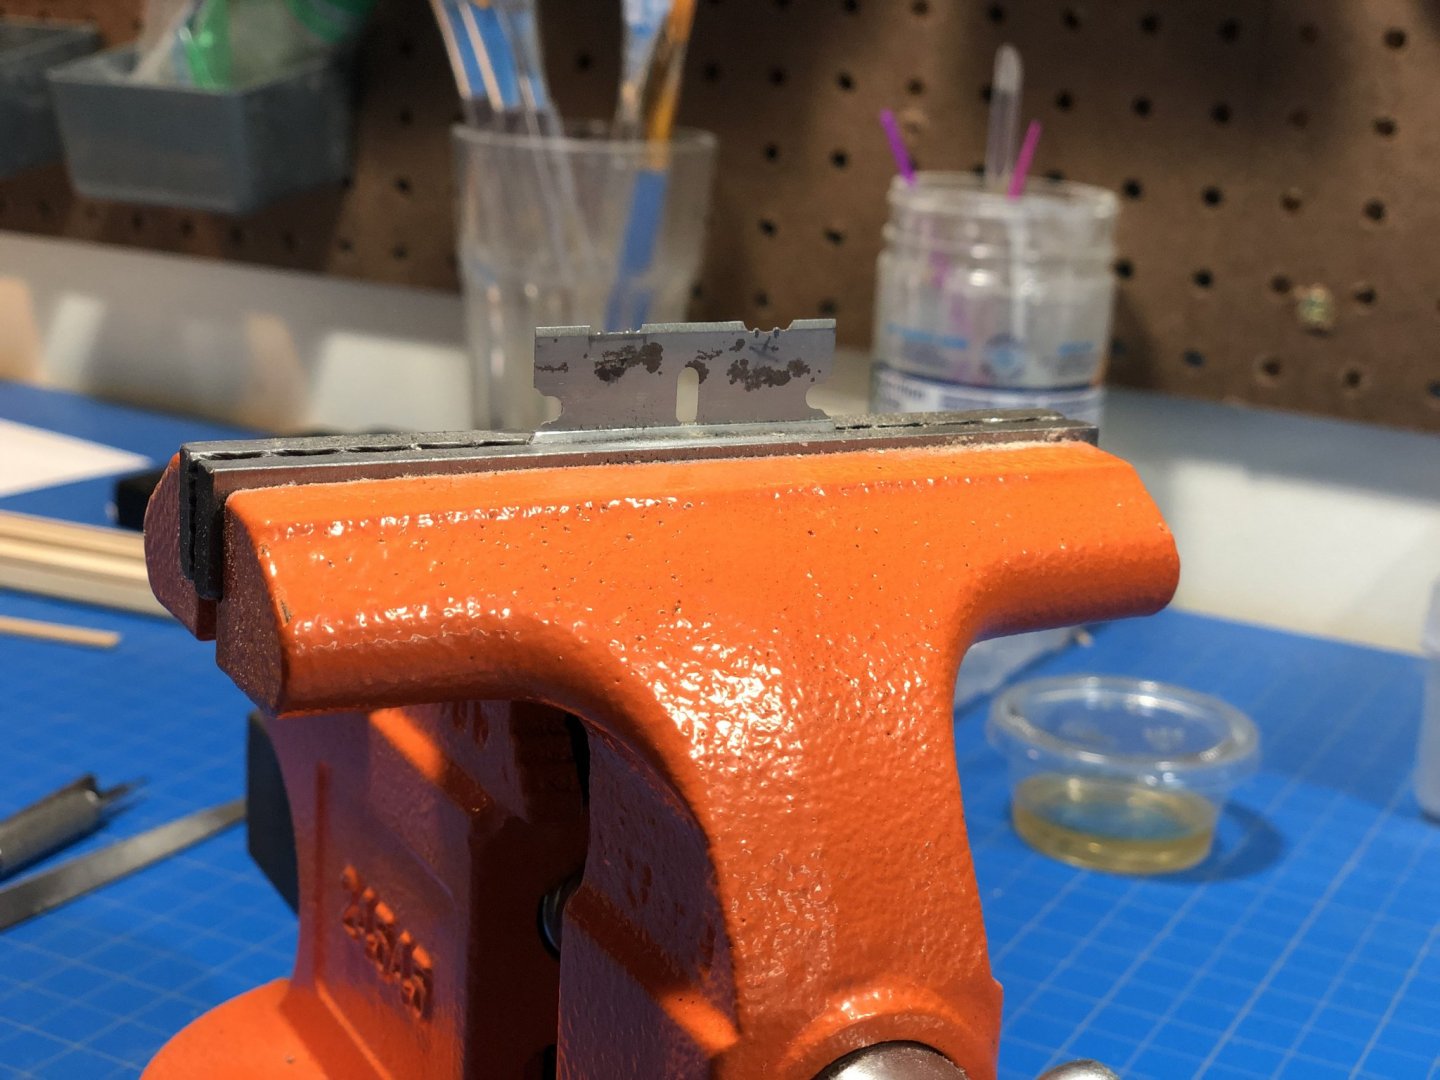
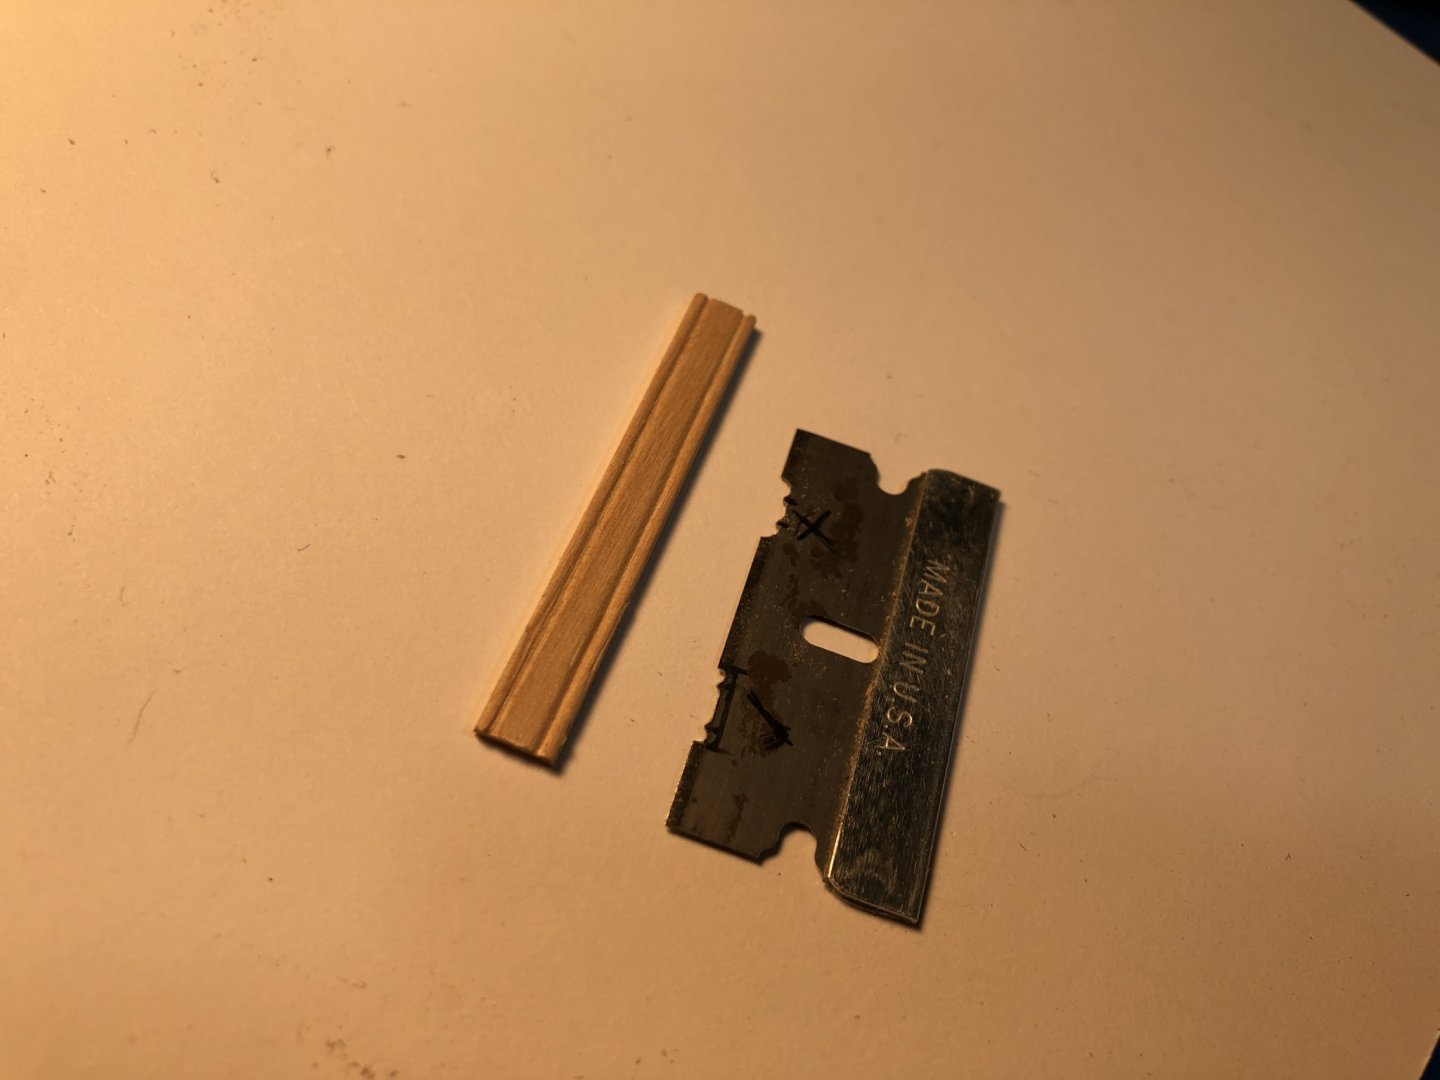
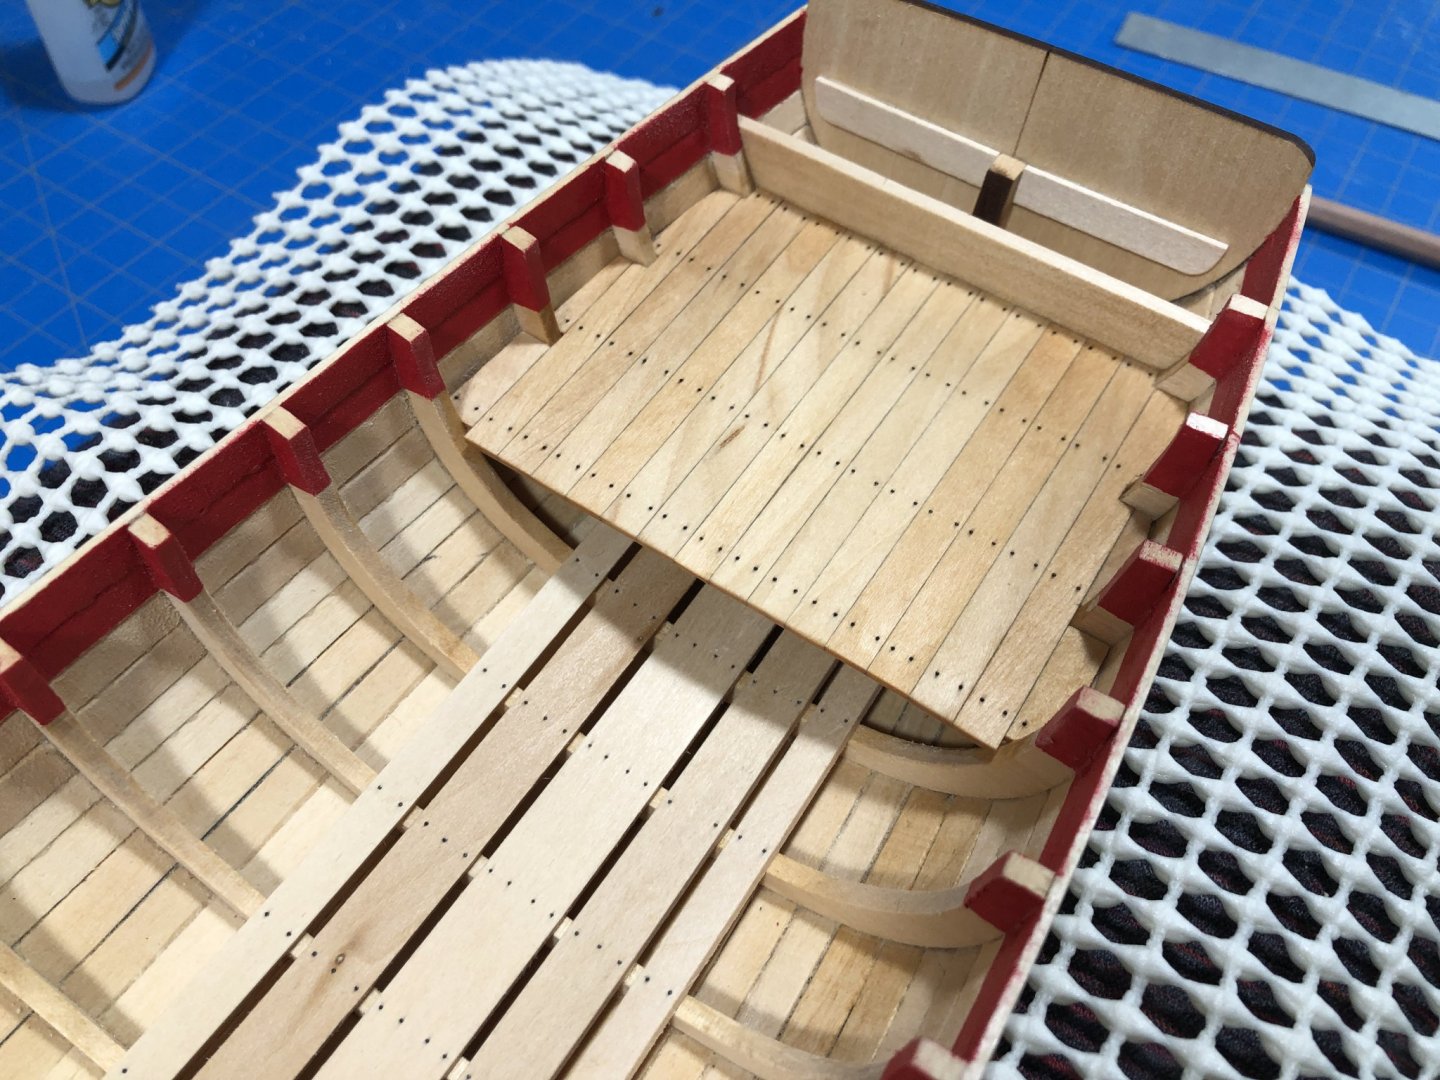
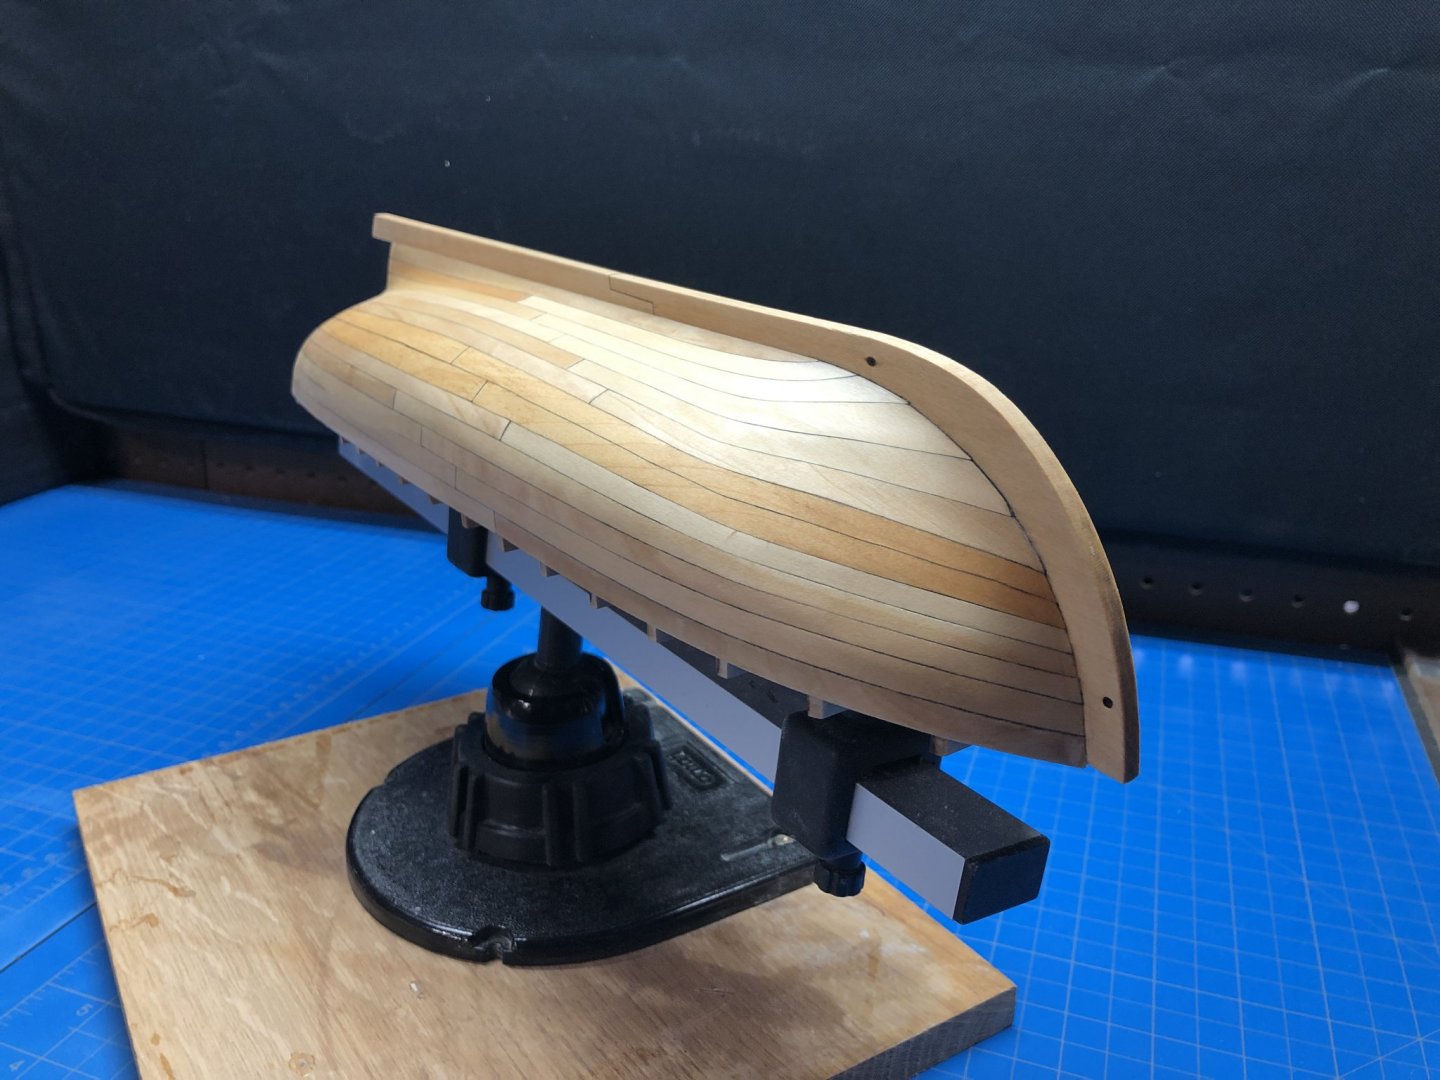
Another update, over the hump. Sanding the frames was not my favorite activity, and spending days looking at the absolute mess of a planking job I did (on the inside) really had me down for awhile. It is certainly easy to make it look nice on the outside by trying to get it right both inboard and out is going to be a goal for another project. After talking myself into the next steps here are the results. I painted the sheer planks as stipulated and frankly made a mess of that too. Ultimately this comes down to not properly sanding the frames before installing them and not realizing the consequences until I went to apply paint. The end result is that the finish is fuzzy and not all-together neat. With that disappointment I spent a couple days mulling it over and again decided to push on with the thought that if I make sure to do the absolute best job on the rest then the overall might overcome the result of a single part. Hence my approach to the floorboards and decking, which I am quite happy with. I also started work on a custom scraper for the thwart riser detail. Using a razor blade and a rotary tool (an idea I picked from Arthur Wayne in his log of the same kit) I made a couple attempts and finally landed on one that I liked. After a lot of testing and rehearsing my method I finally got a test piece that confirms that everything will work.


- 66 replies
-
- 10
-
-
- Finished
- Model Shipways
- (and 1 more)
-
Does the shellac ever create a tendency for dust to stick more than otherwise?
-
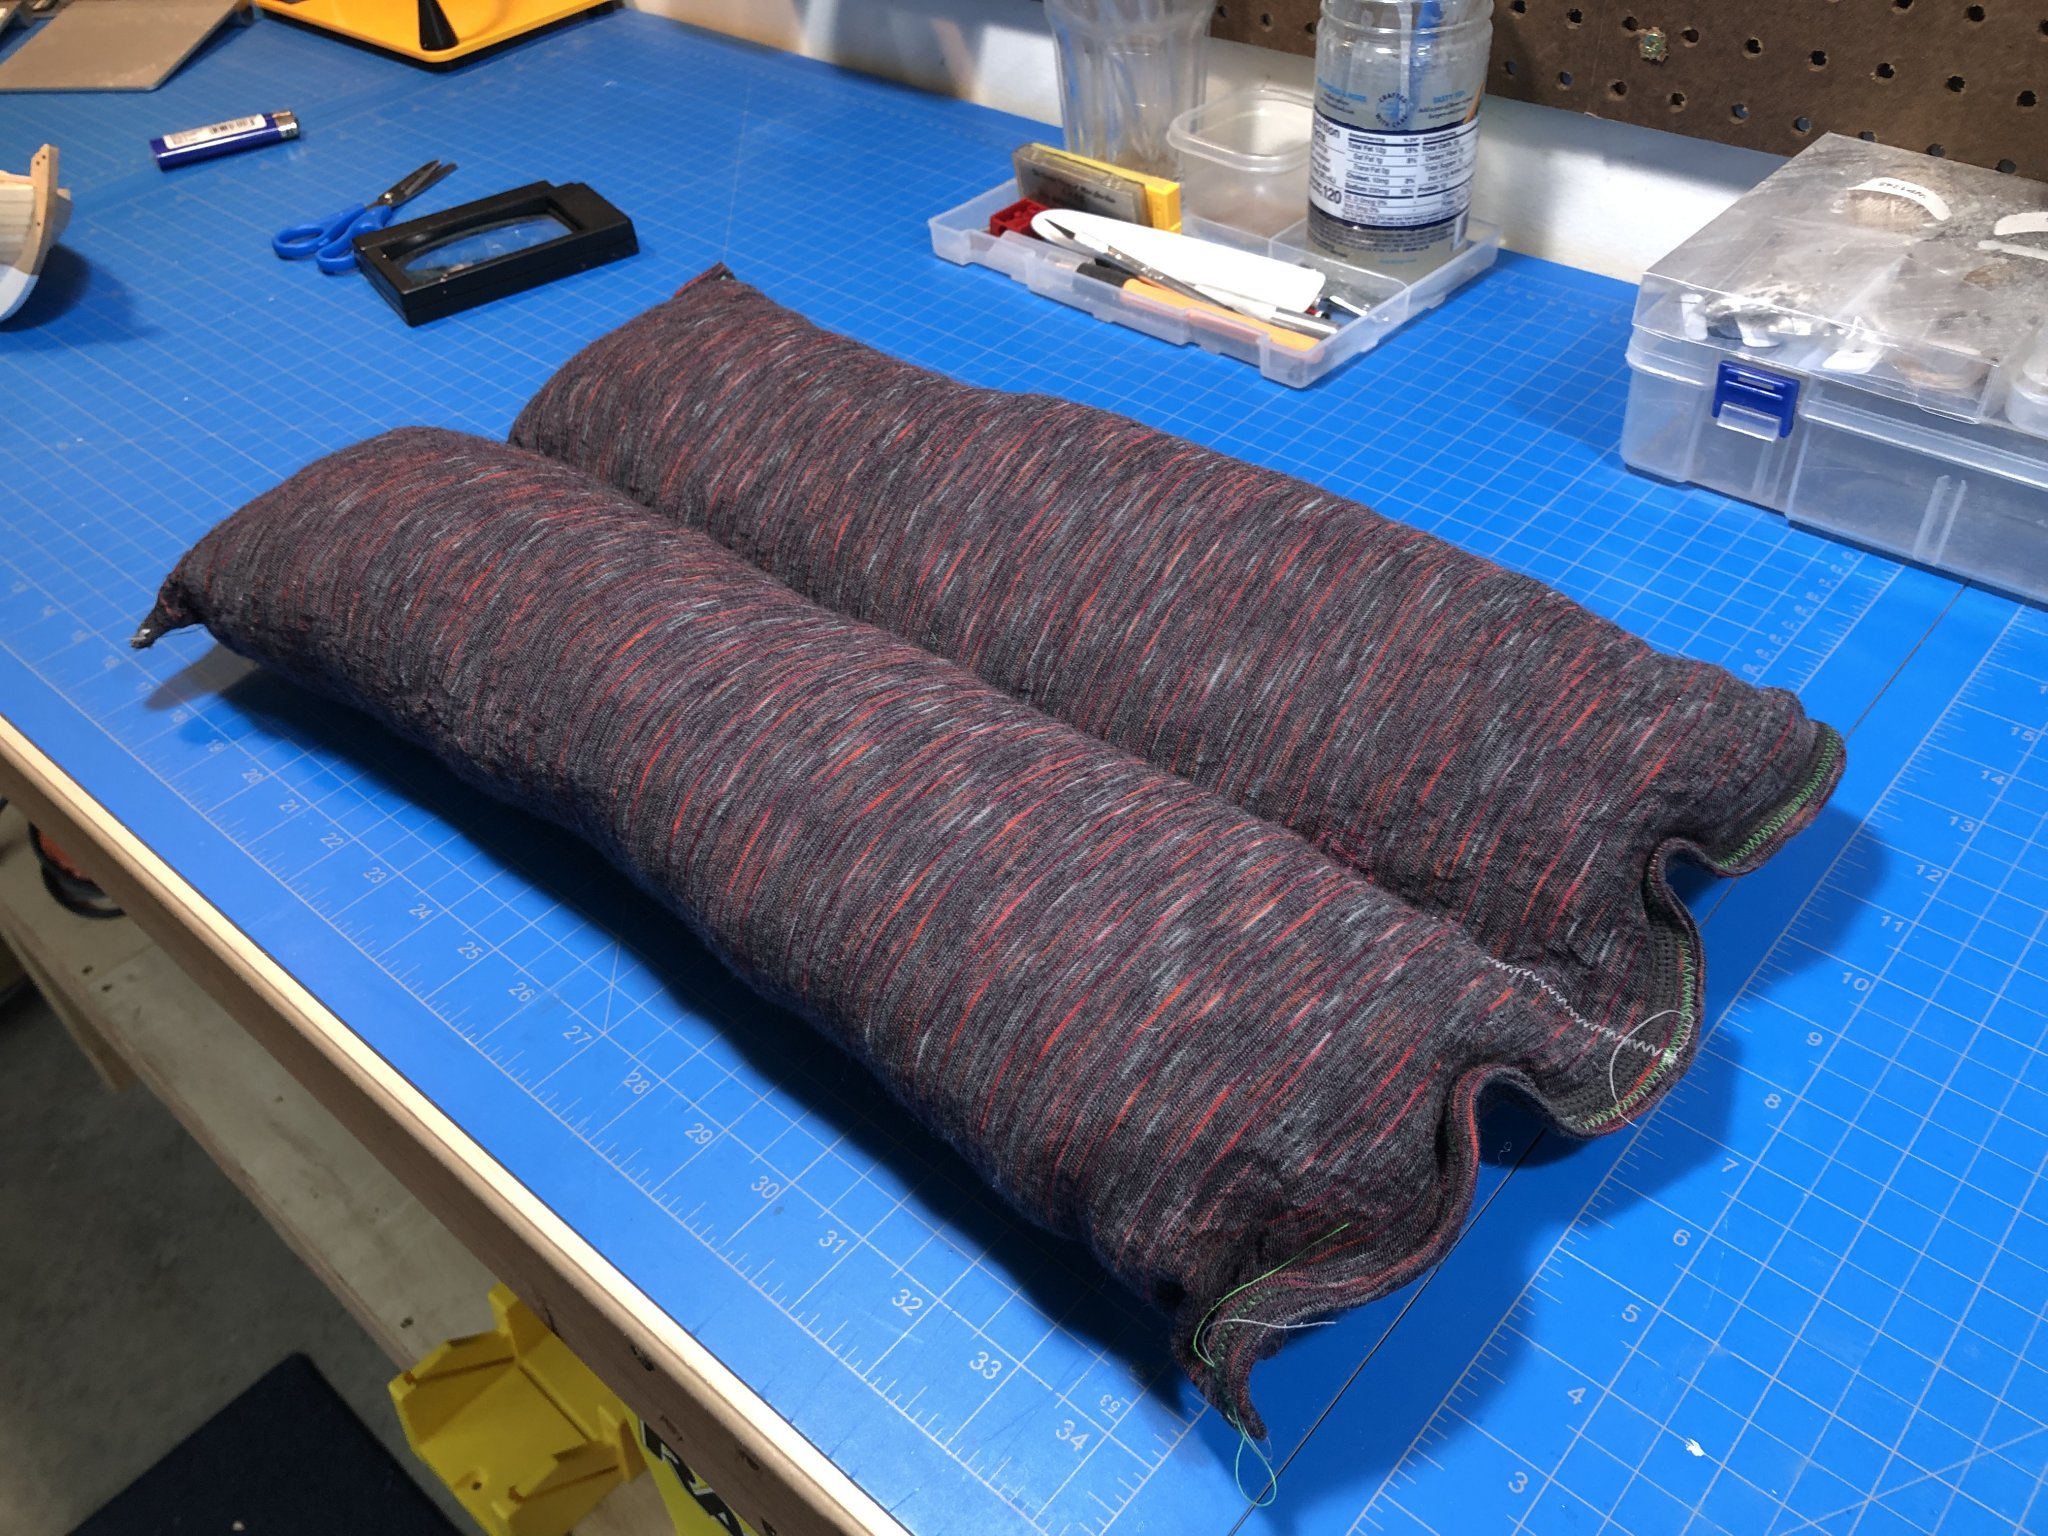
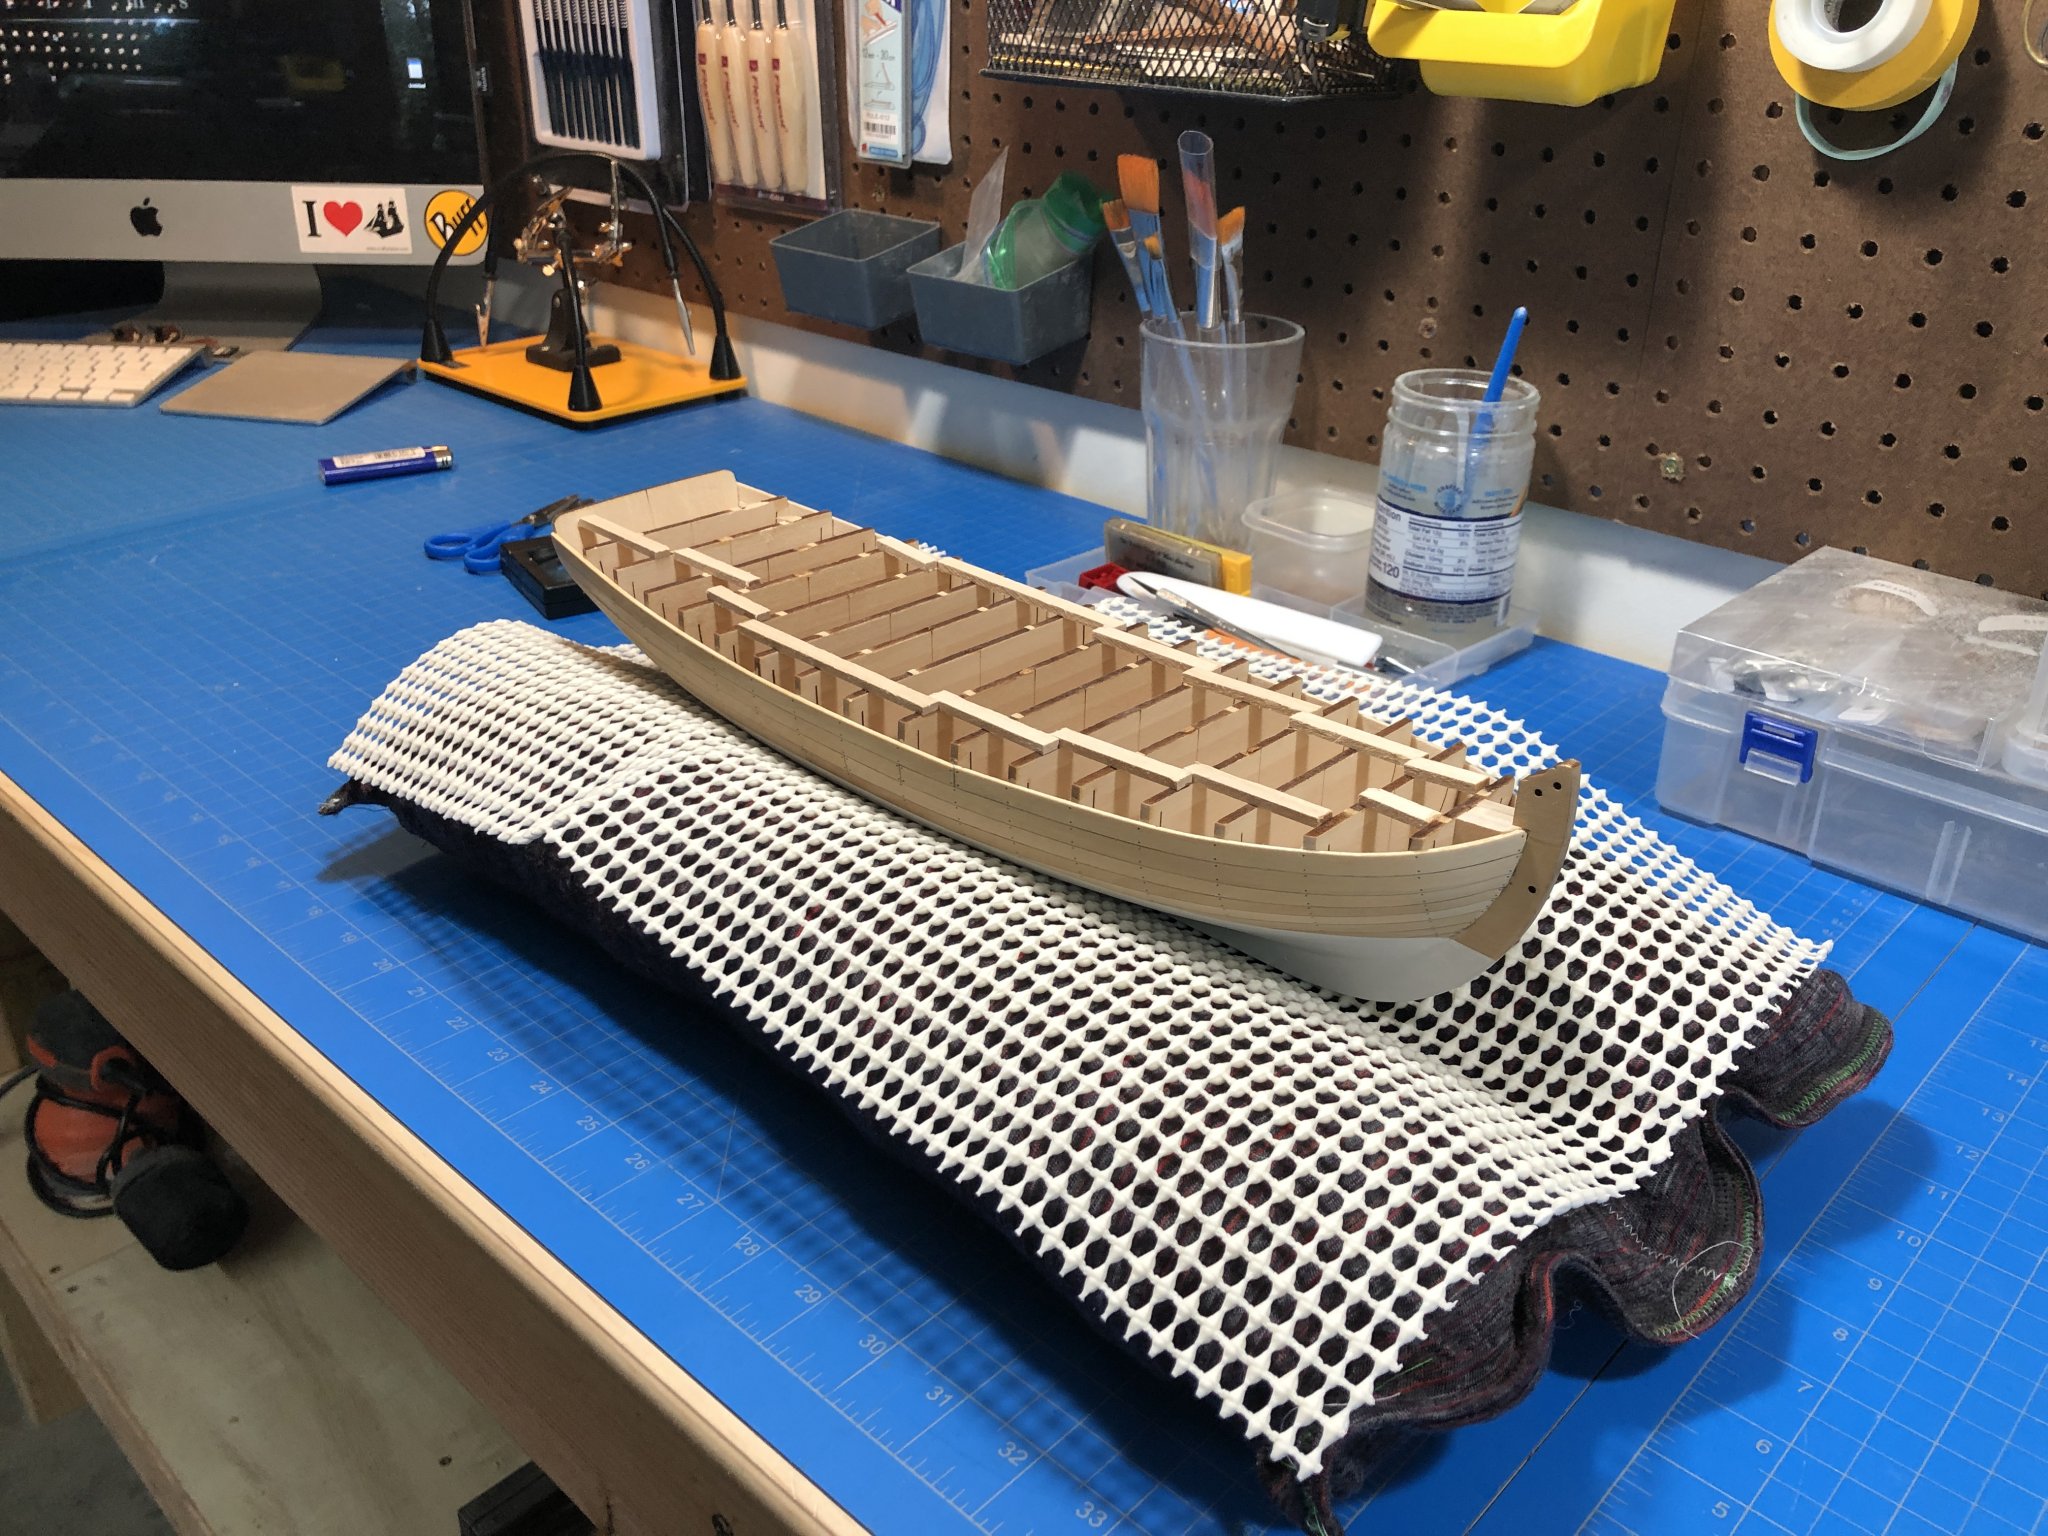
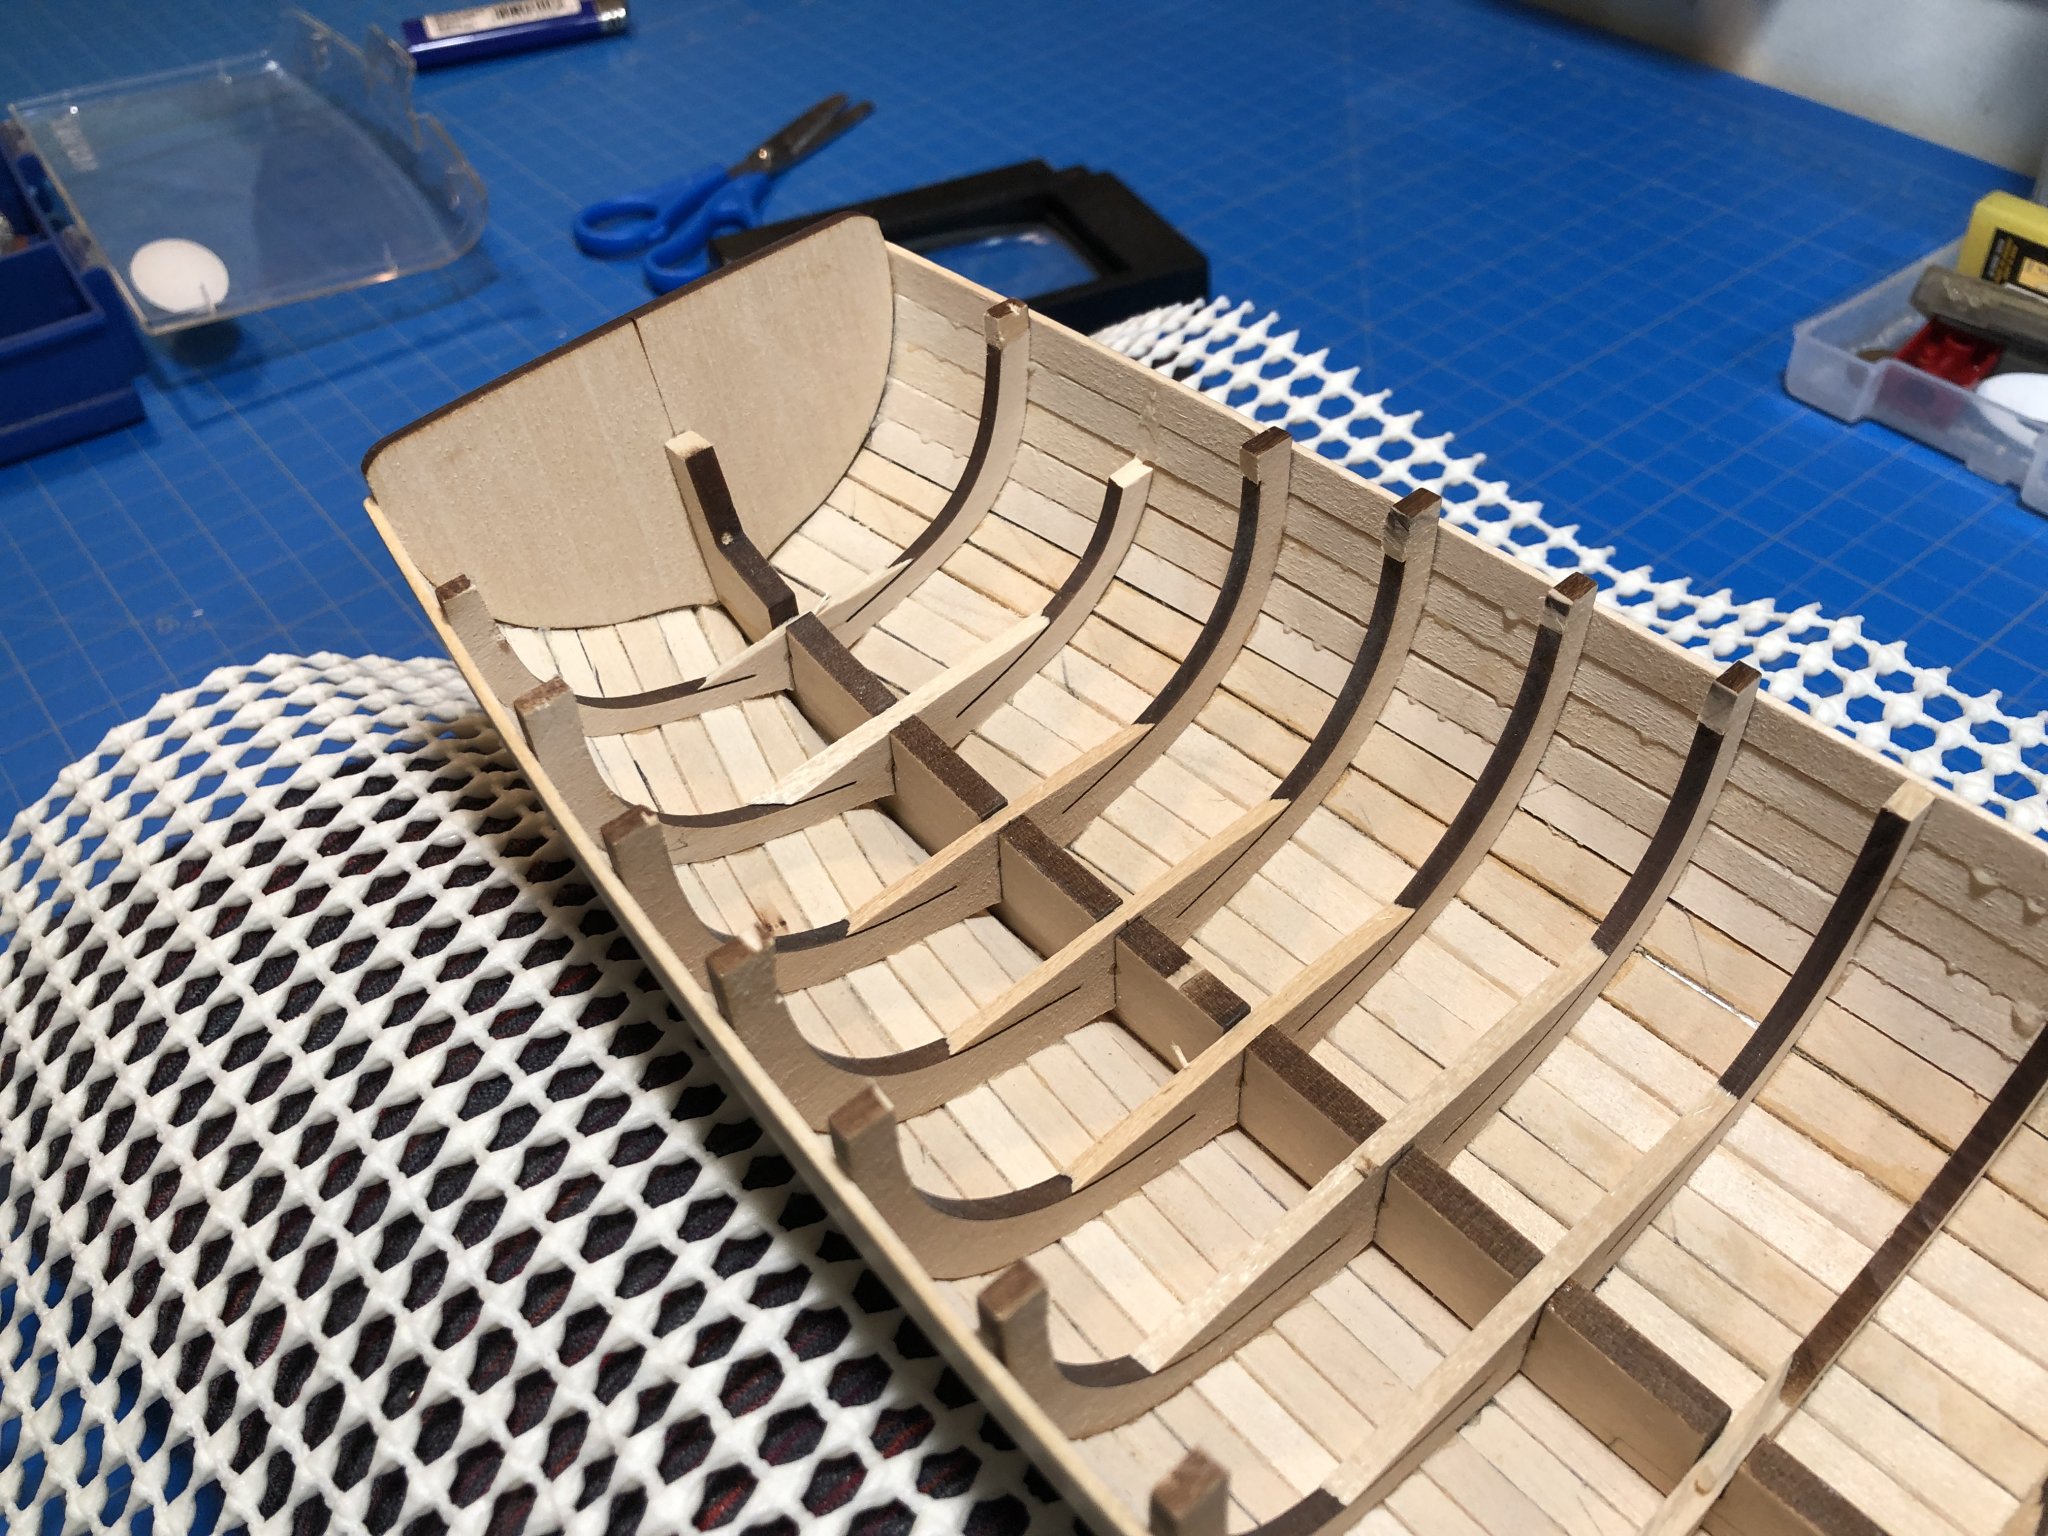
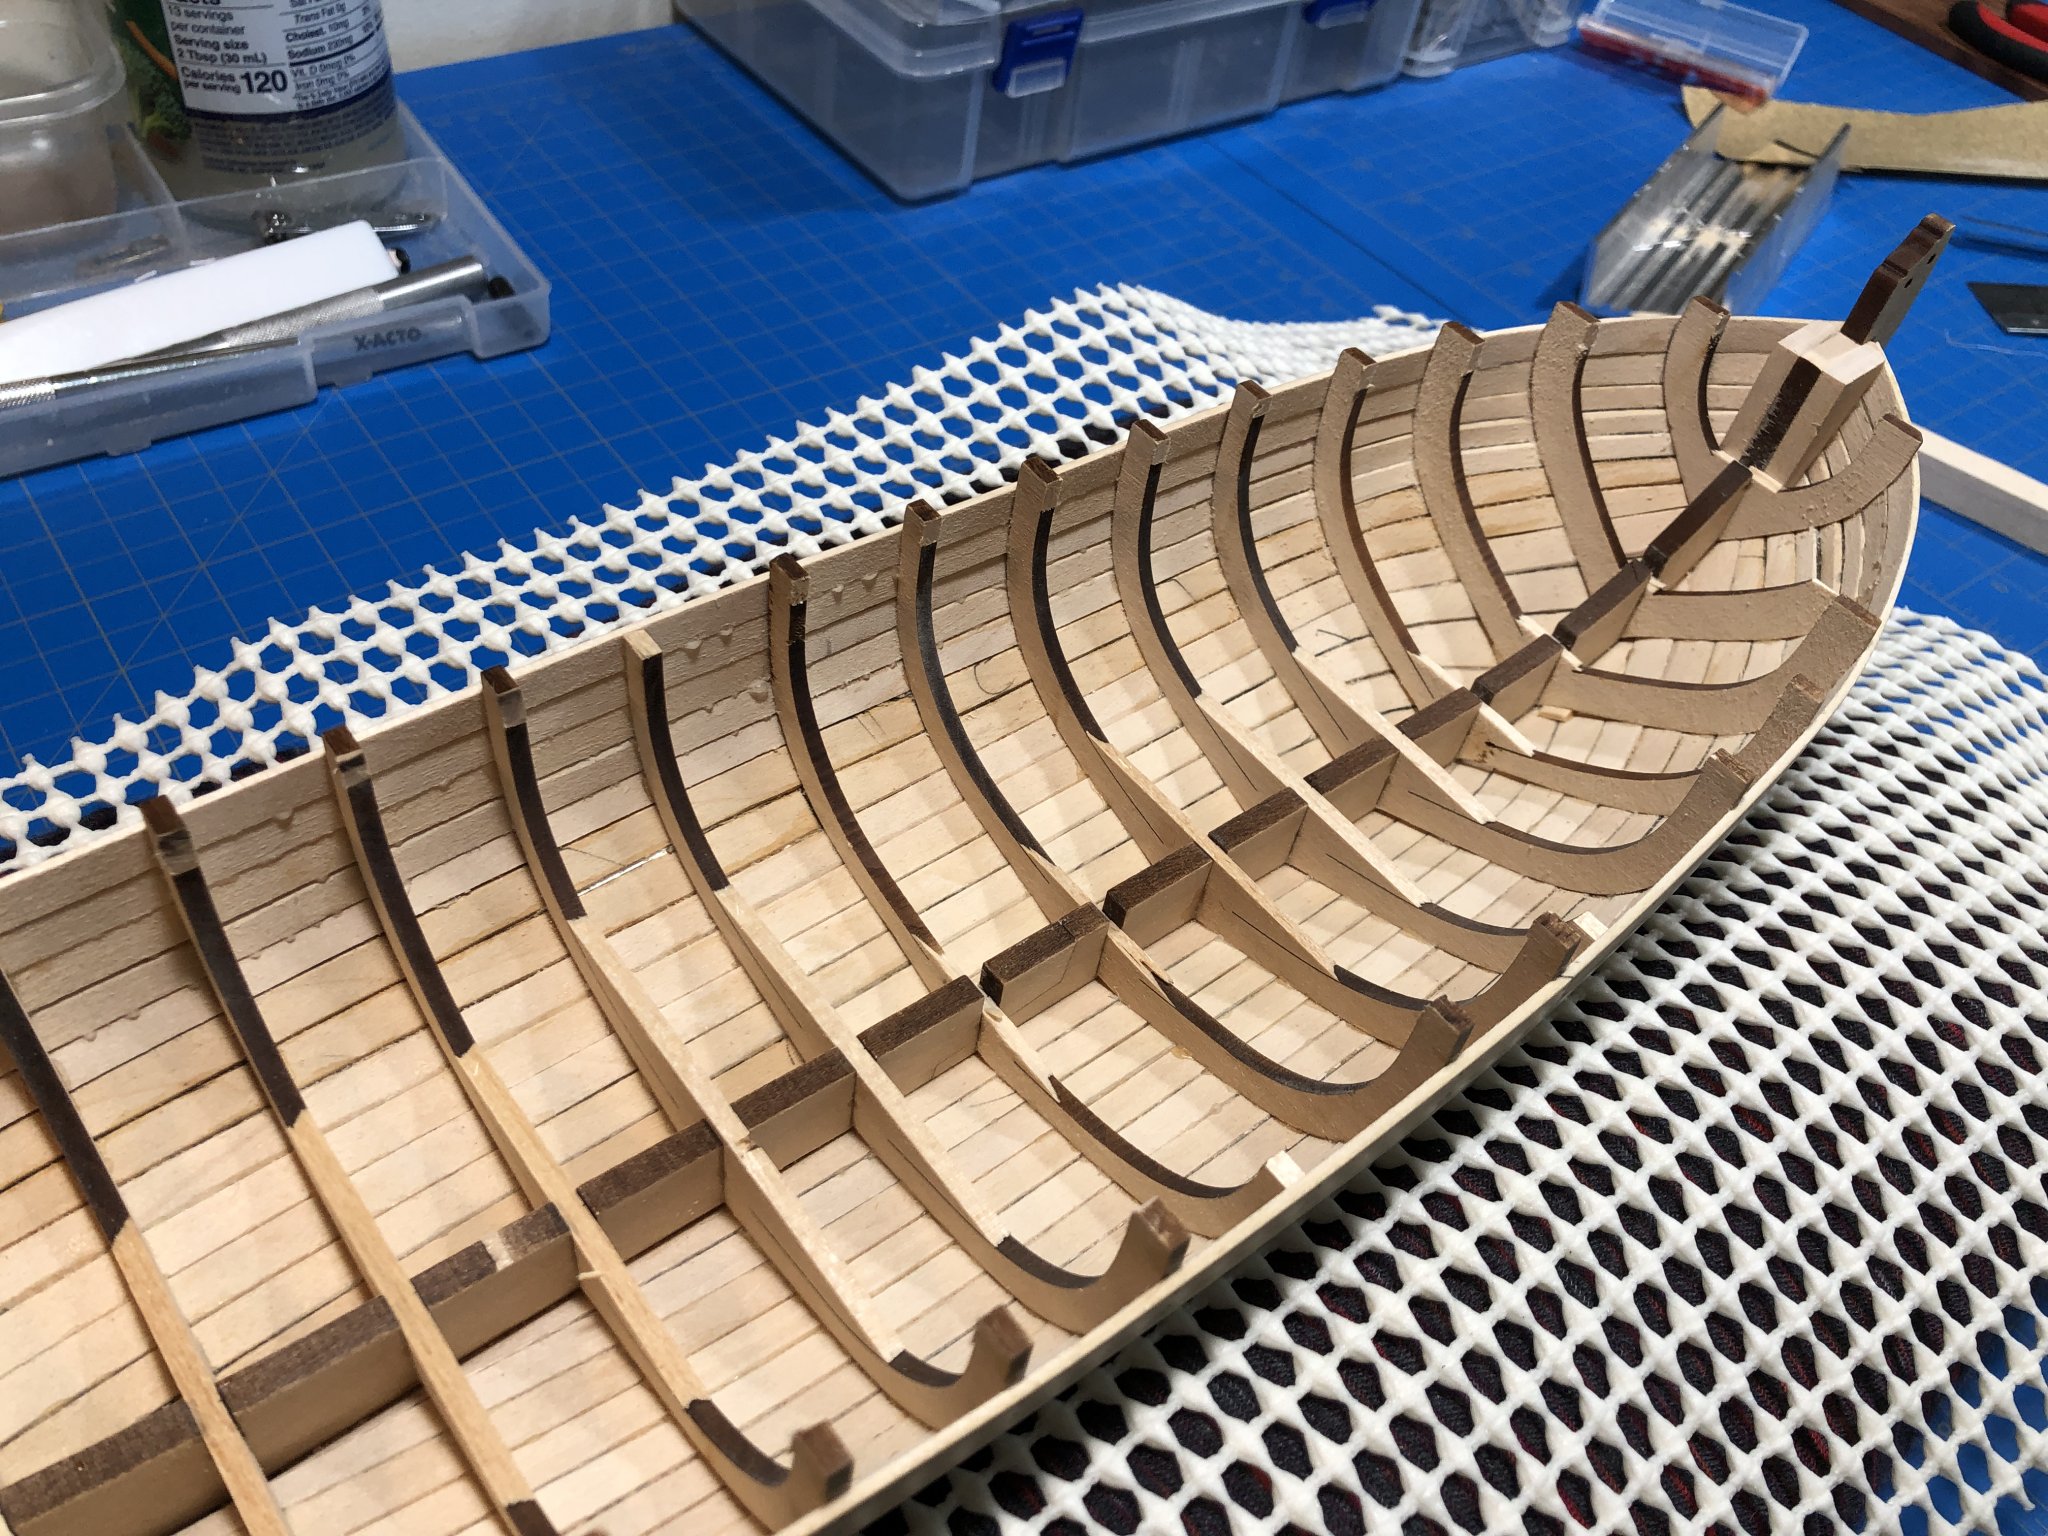
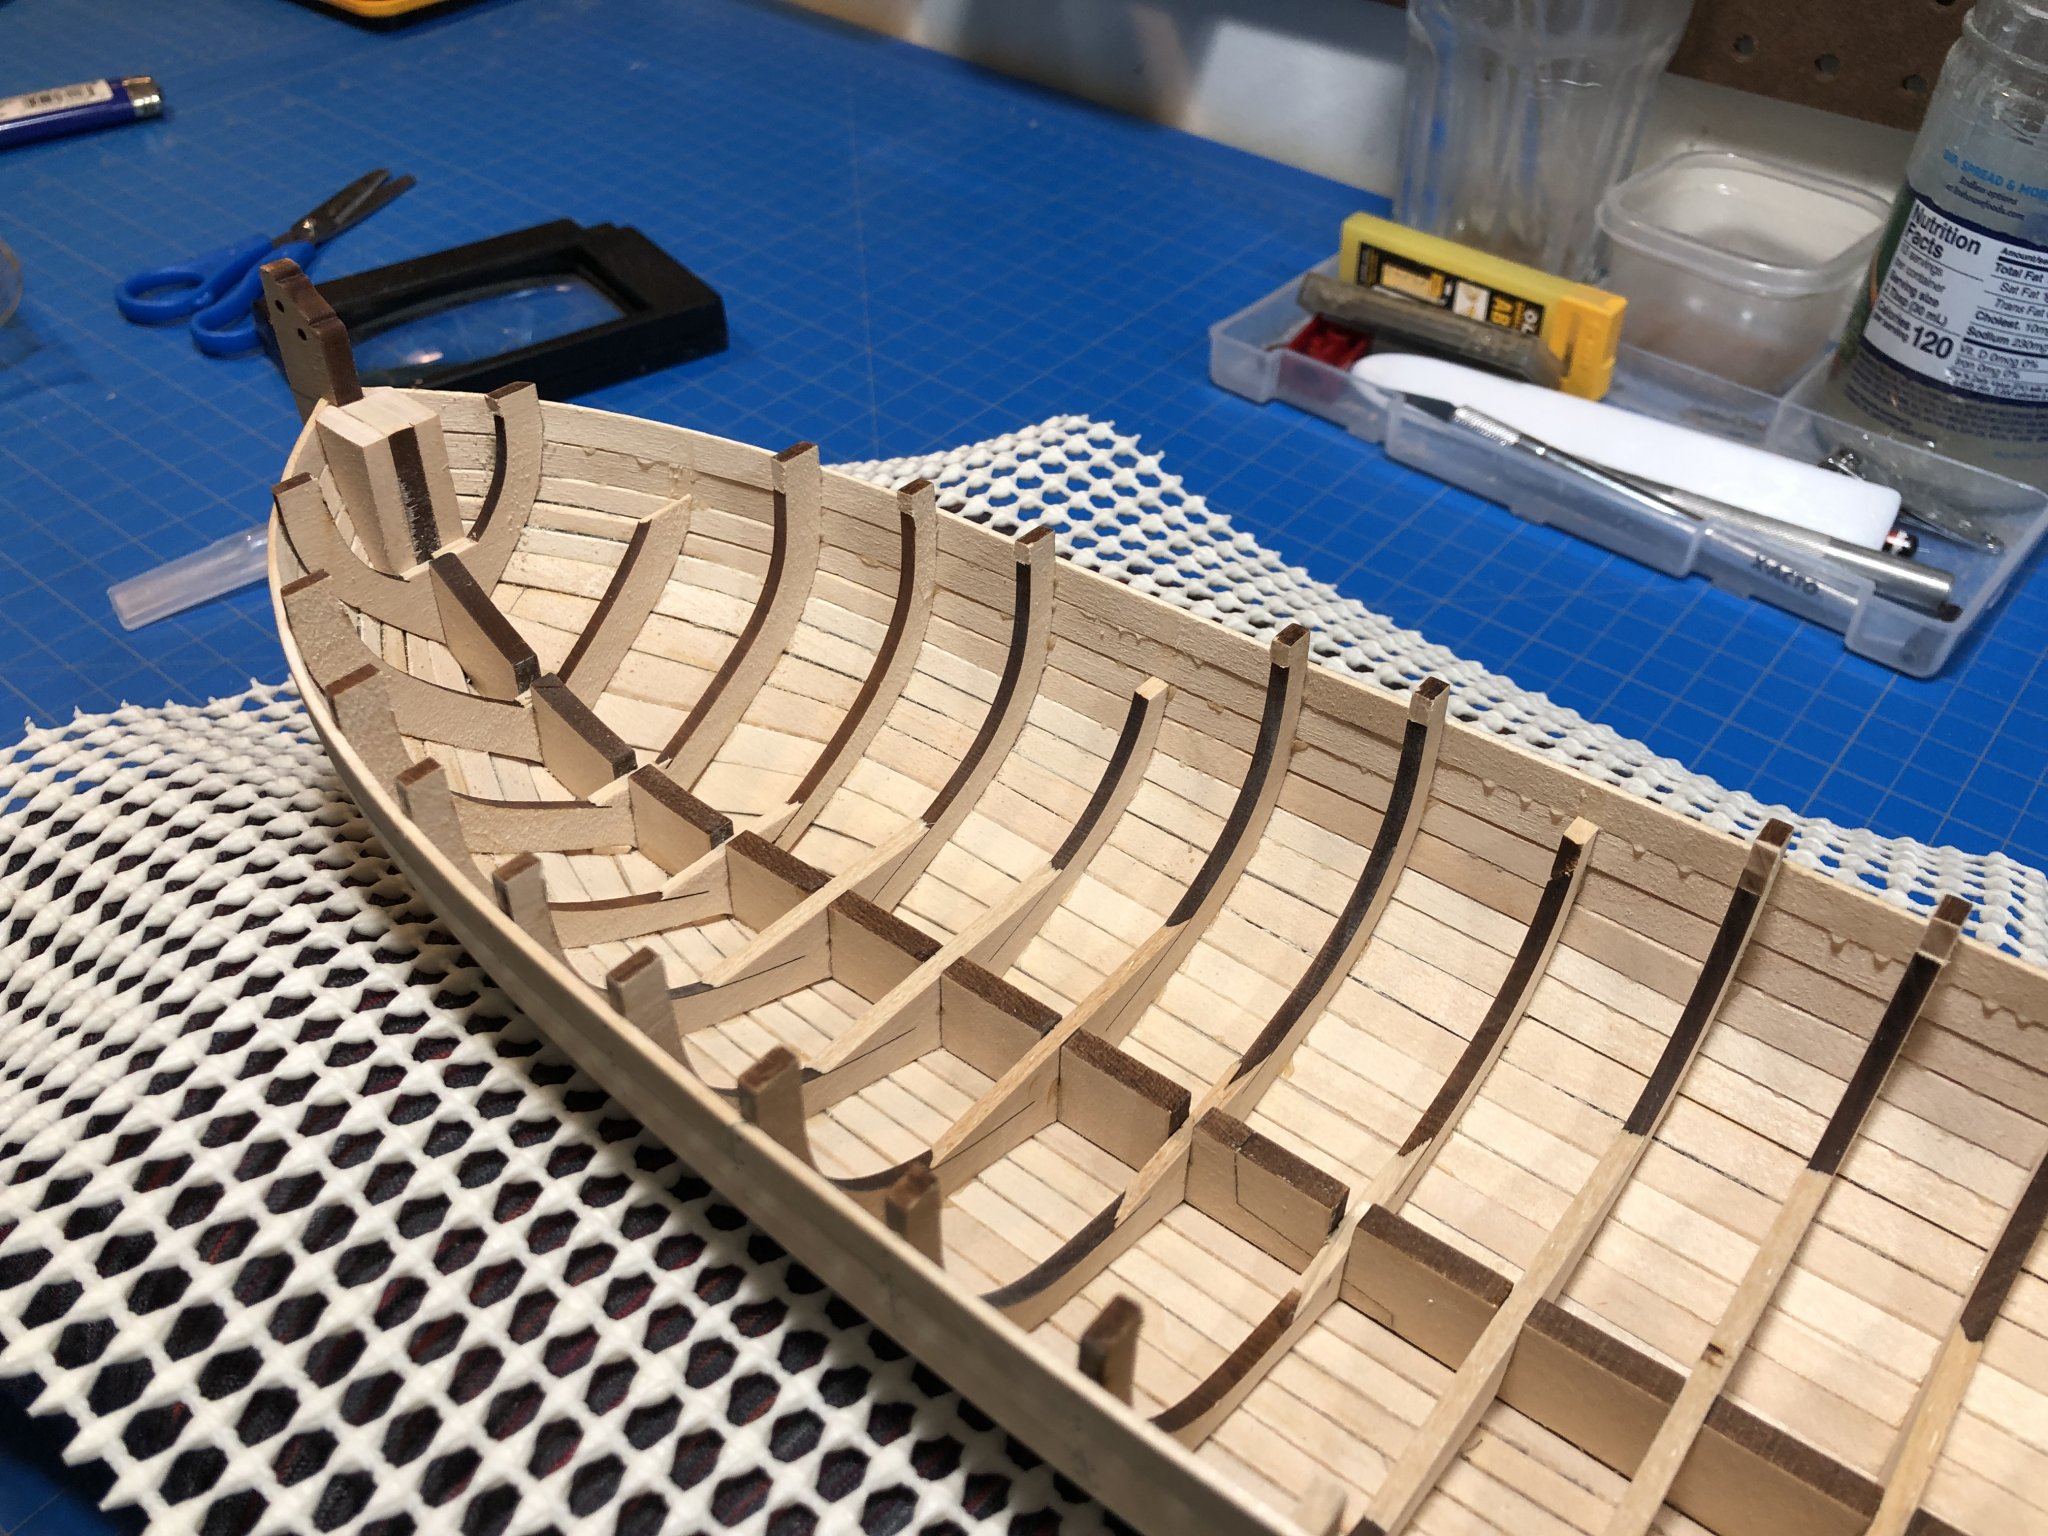
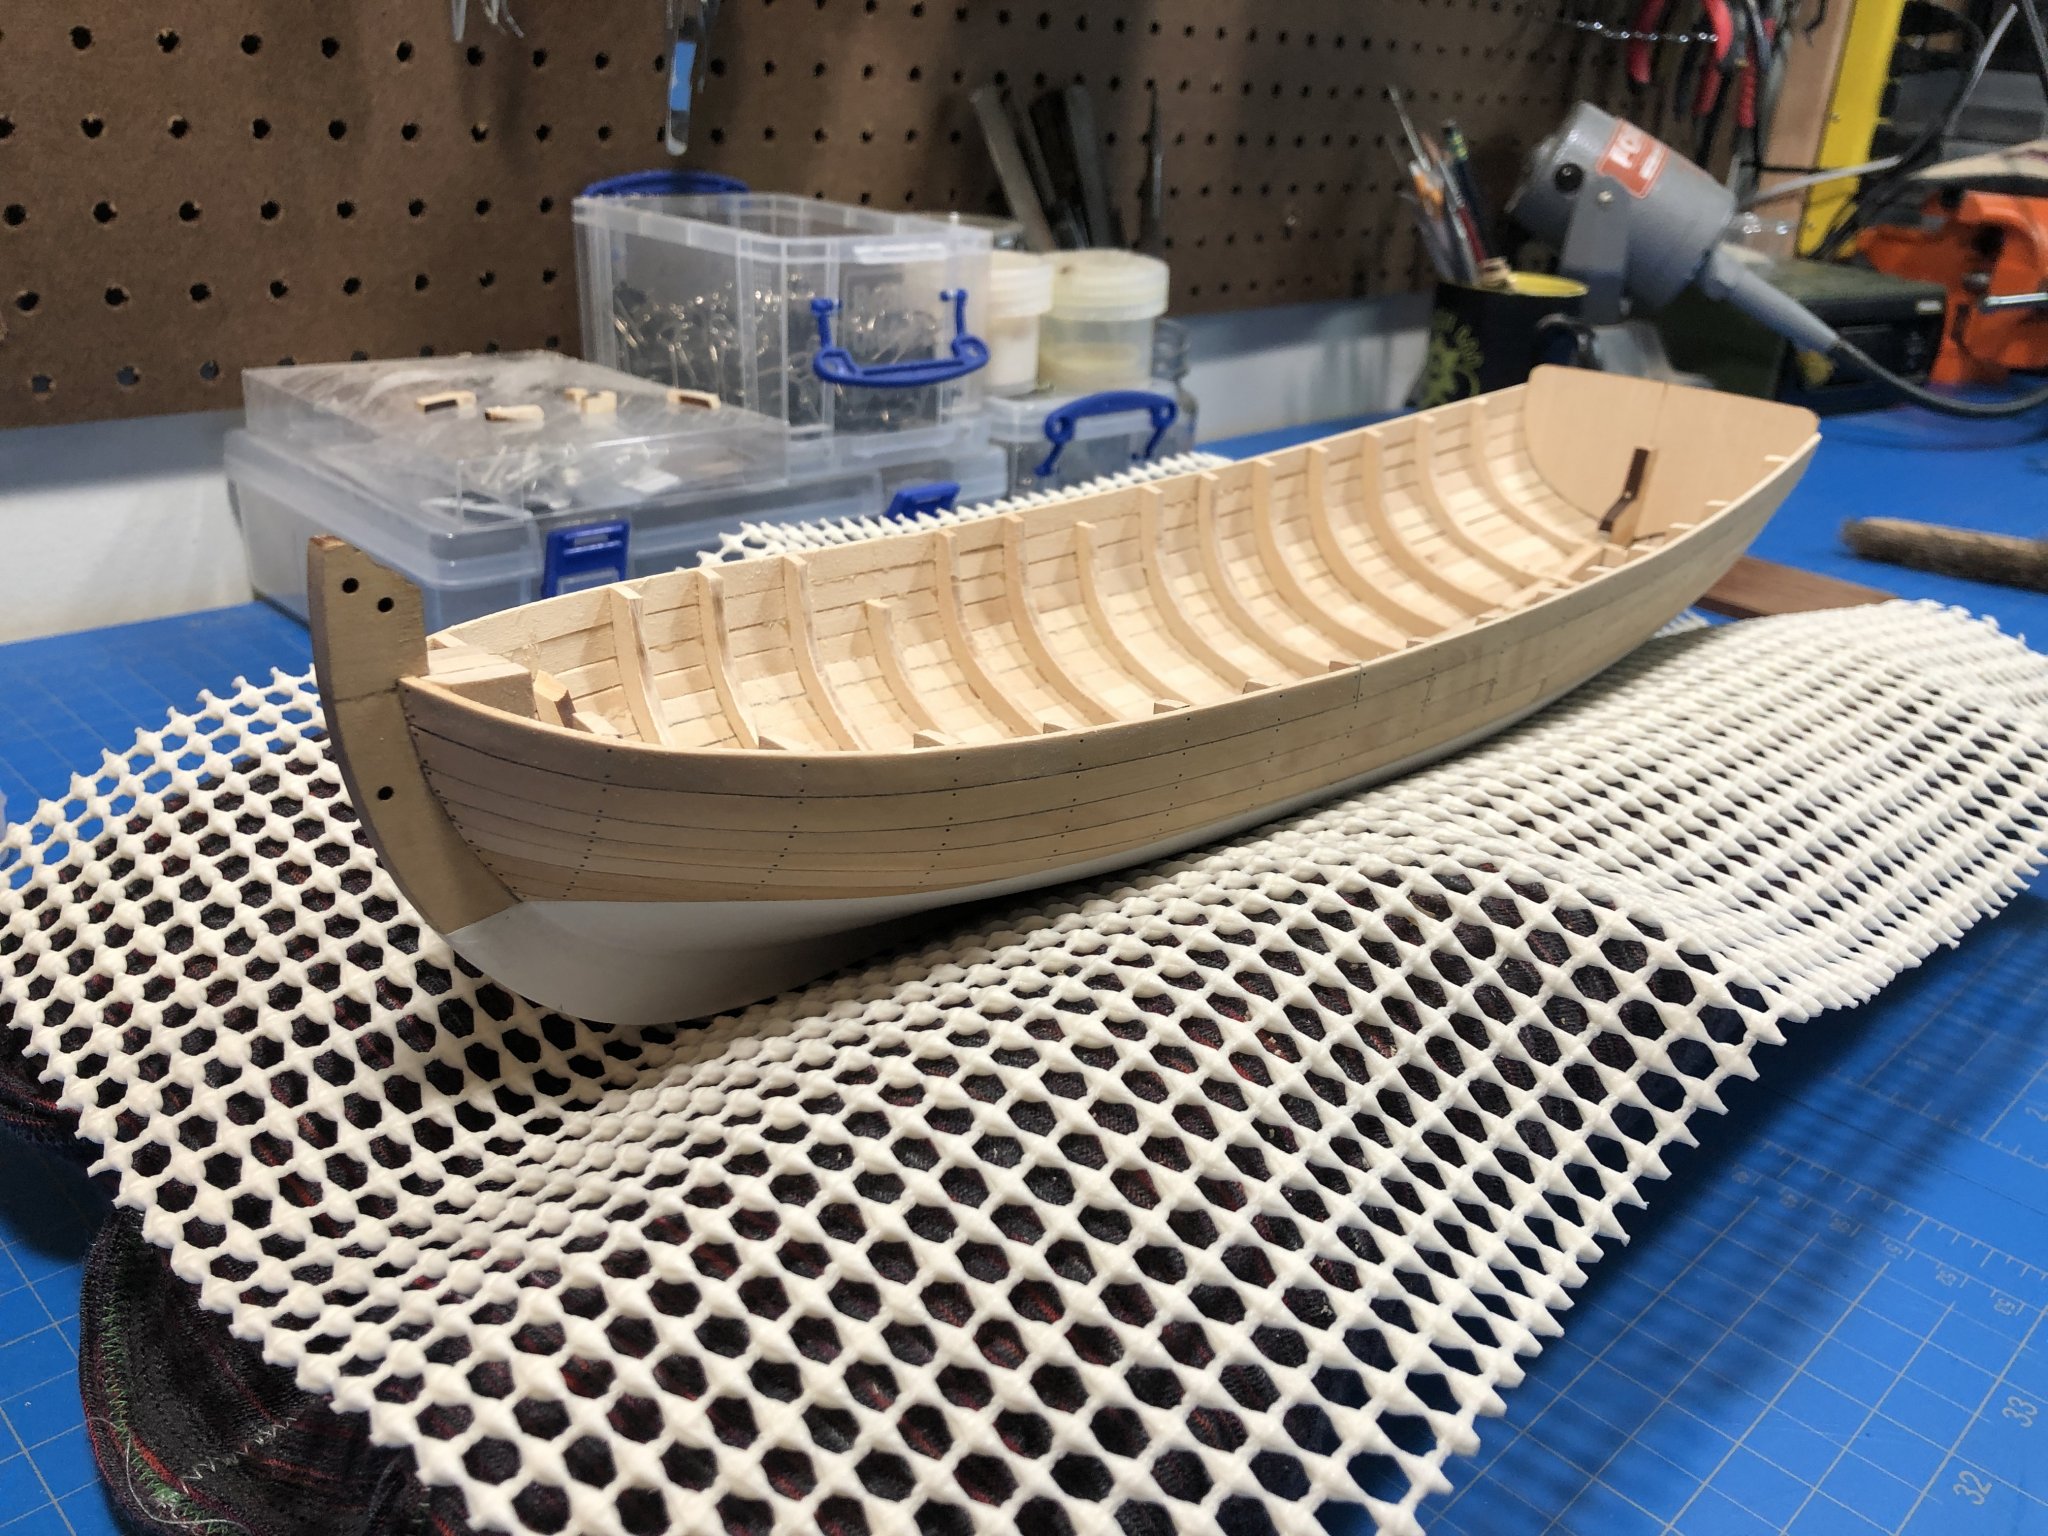
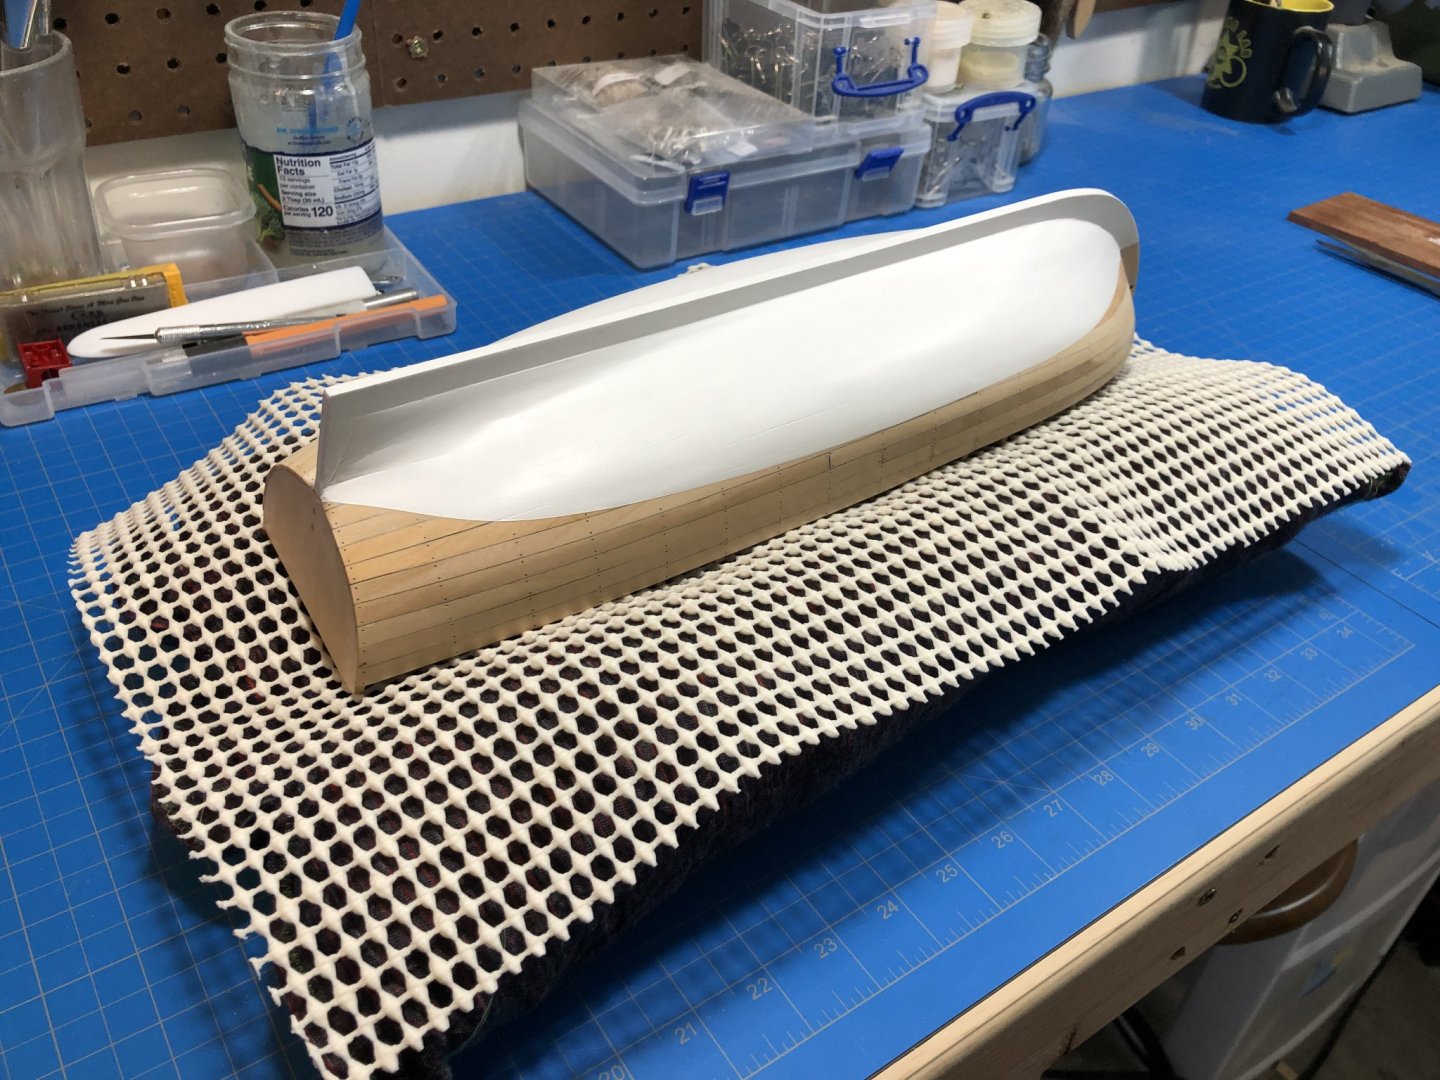
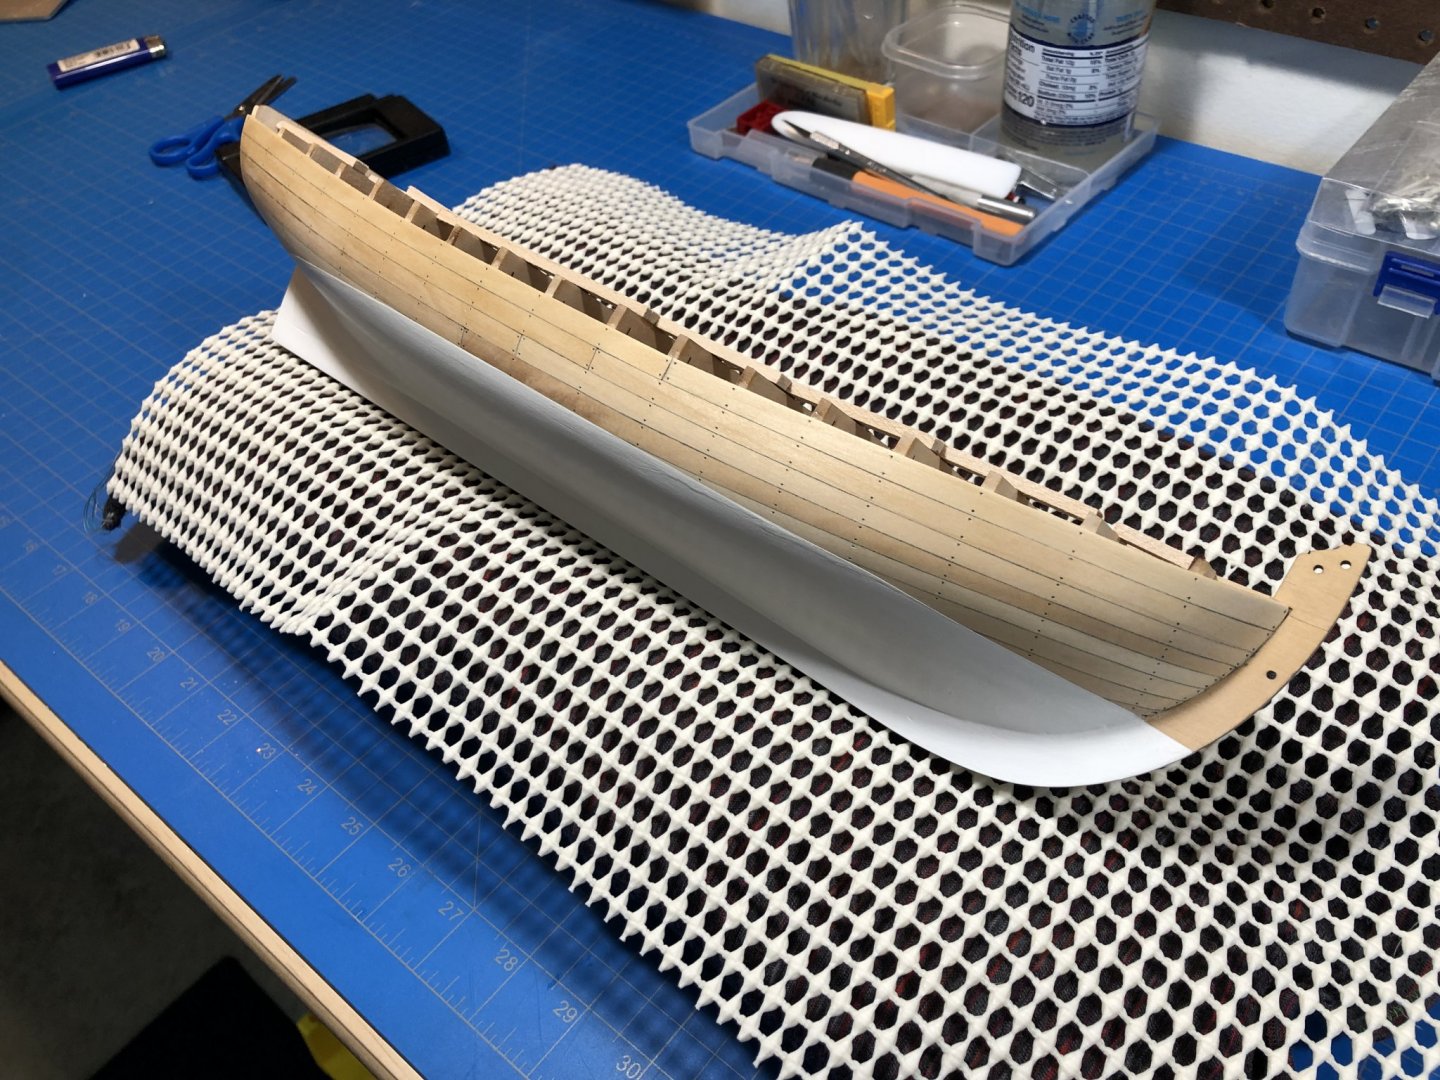
The last week went fast with work and such, but was able too squeeze in a few more hours on the Longboat. After satisfying myself with the outer finish, I went ahead and marked out the water line and painted. Not the best paint job ever but overall happy with how it turned out. I think anytime I am anticipated an unmitigated disaster, and manage to avoid it I tend to be likely to settle with the end result. Flaws and all, Ill keep it and move on. I also went ahead with nails with by detailing with a pencil tip as stipulated in the kit instructions. It turned out ok. This morning I turned it over and started in on taking out the bulkheads and shaping the frames. The kit instructions are bit weak when it comes to this part, so Im more or less working from what looks right and what material I can safely remove. I did manage to break more frames during this process than I did during the fairing, but oh well. After a few hours sawing, sanding and chiseling Ive gotten maybe halfway. I hope to finish this step up in the next few days. Ive really got to figure out what to do with the crack at the tip of the bow where I broke off the stem. Hopefully some sanding will do the trick, looking at these photos now its sticking out to me more than Ive noticed. If anyone is curious about the cradle, I was in desperate need for "just the right thing." And after rummaging around the house and tearing through junk for some inspiration I came across an old fishing buff that's well past its useful date. I put in a sewing request with the war department and accepted delivery of a finely stuffed and sewn pillow type thing that actually works quite well. Topped with a sheet of anti-slip material from the household fabrics stash and Ive a great surface on which to carry on work.


- 66 replies
-
- 10
-
-
- Finished
- Model Shipways
- (and 1 more)
-
I ordered them through ULINE, they are Dahl Vantage brand.
- 66 replies
-
- 1
-
-
- Finished
- Model Shipways
- (and 1 more)
-
While holding the tension with one hand Ill use a micro-applicator (modified sewing needle) and CA to end as others have described. Some use Shellac or White Glue for this. Either way the Serv-o-matic will make the job easy, just follow his assembly instructions carefully. Speaking from experience, it is critical to get those gears perfectly aligned when putting them together. Download his instructions for use from the website and you'll get a sense for how it works. Basically, one hand holds the serving line while the other cranks, the tension from the serving hand keeps everything neat and clean, when you reach your desired end, use the crank hand to reach over and grab some CA while you maintain tension with the serving hand. It works well, but you'll want to make sure you've got what you need handy because letting go of that serving line will result in some unravelling.
-
Are we saying here that Chuck and Ryland aren't using any tape or stencil at all? Amazing. Im approaching a step in my Armed Longboat build which has a similar red inboard painted detail as is used in many of Chucks designs and Im still not sure how to get that painted cleanly without taping it off. Which, when one considers the tight turns of running over all the frames, sounds like a nightmare!
-
Just what I need. Thank you for posting.
-
Yes, that eraser setup is very clever. Definitely going to borrow it.
- 950 replies
-
- 2
-
-
- syren
- model shipways
- (and 1 more)
-
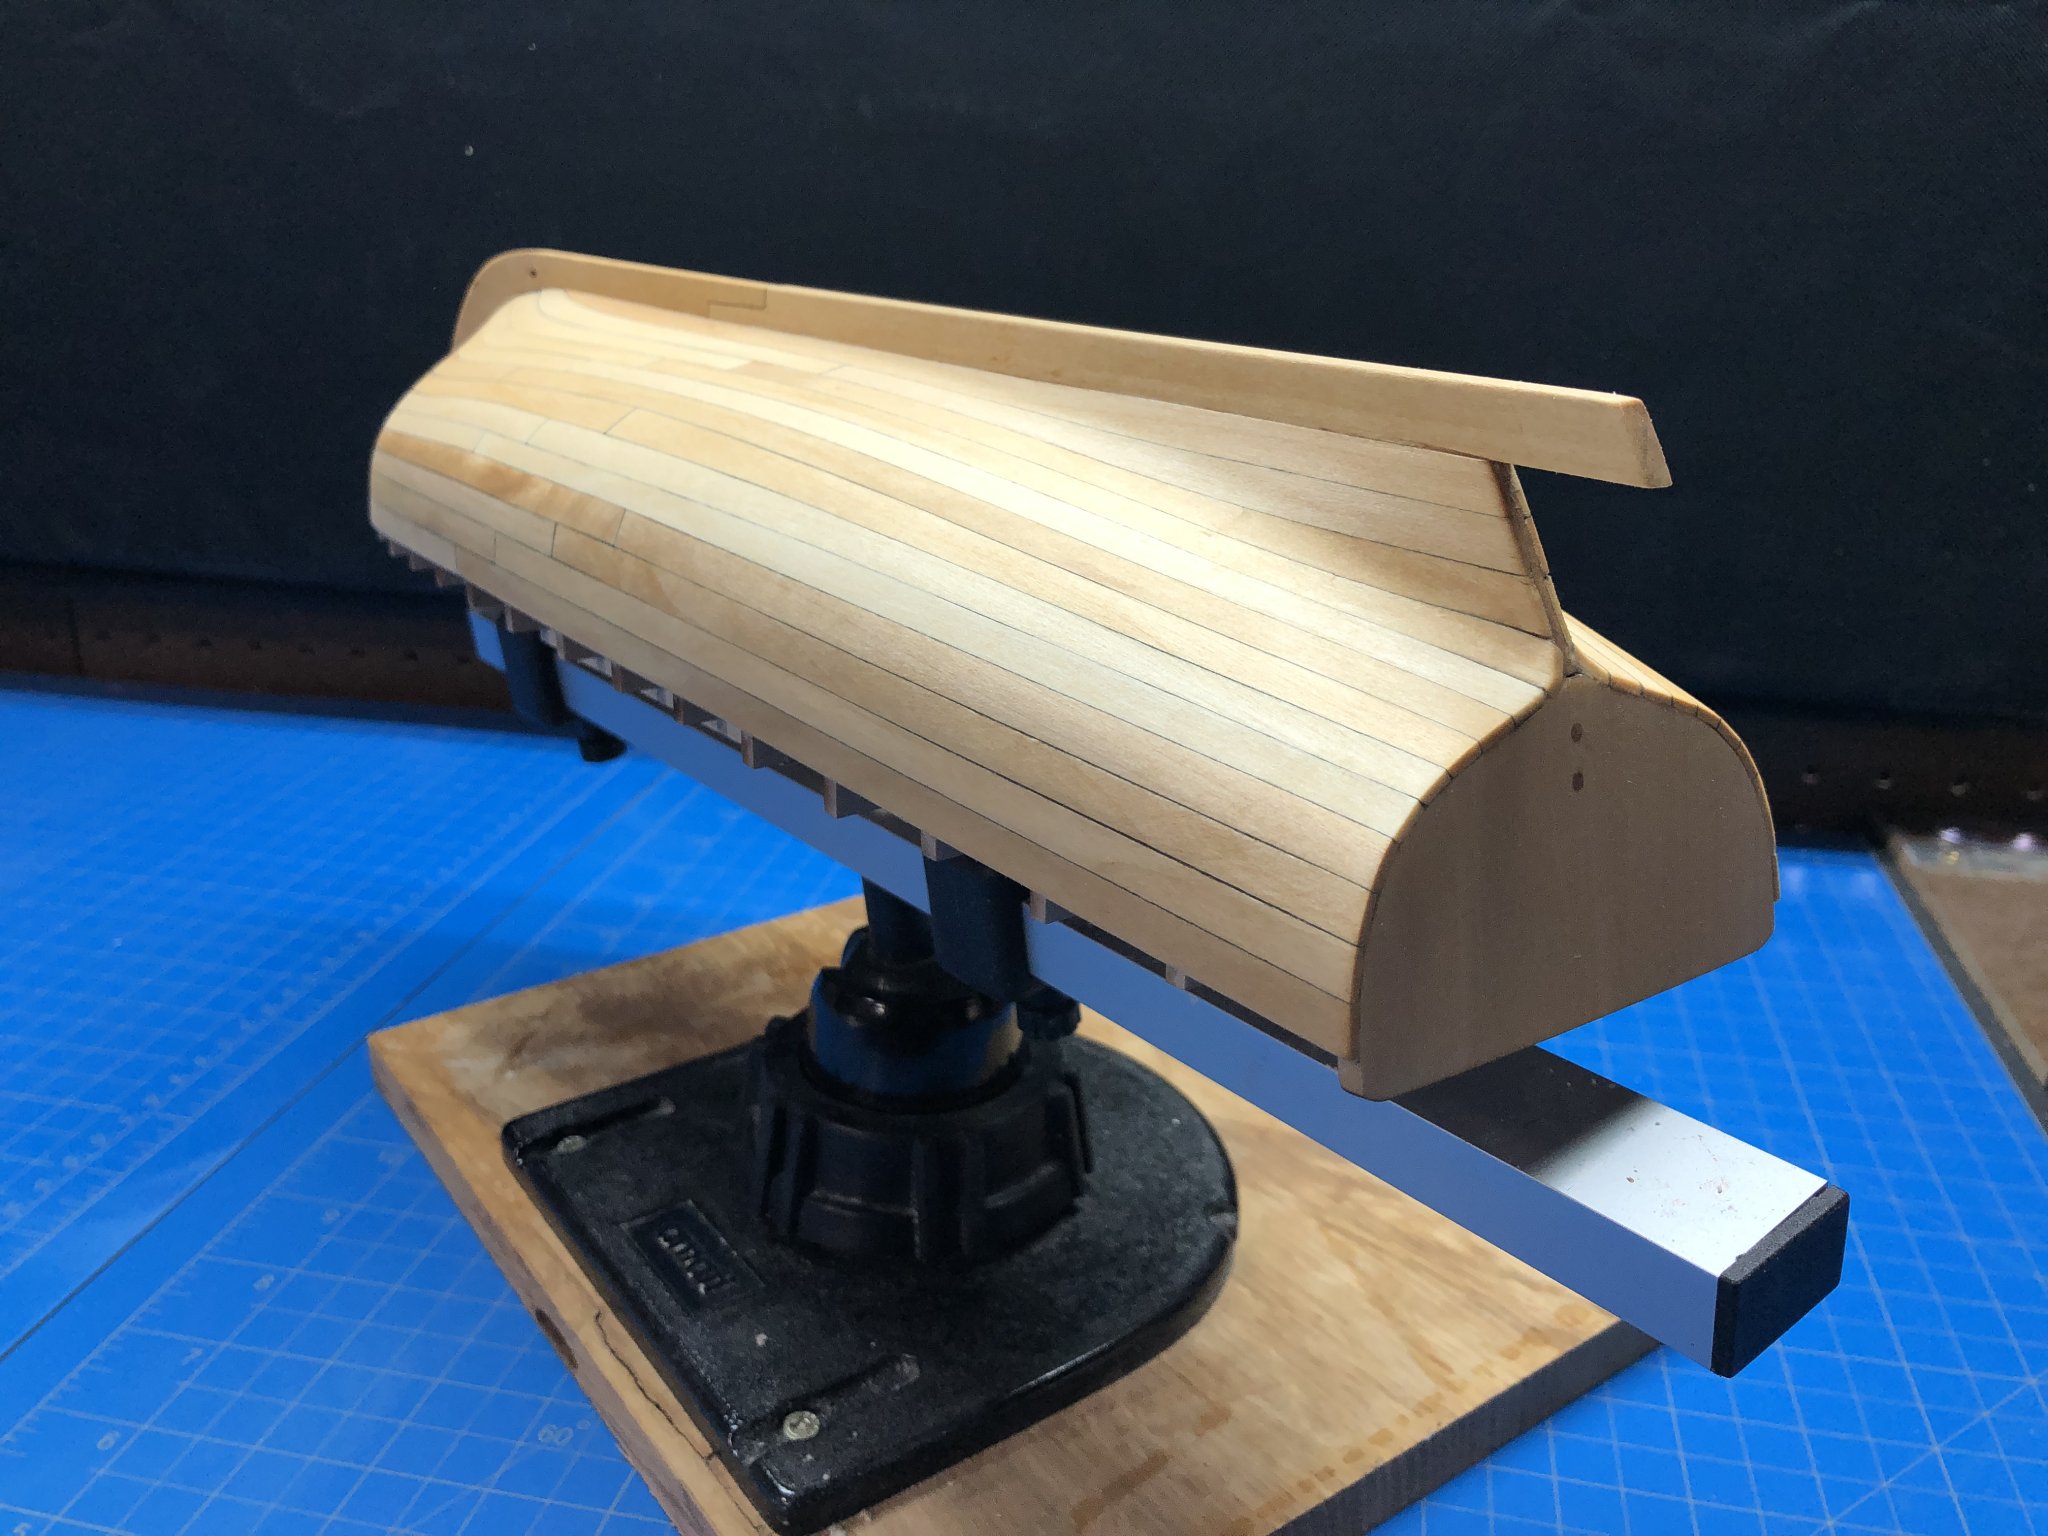
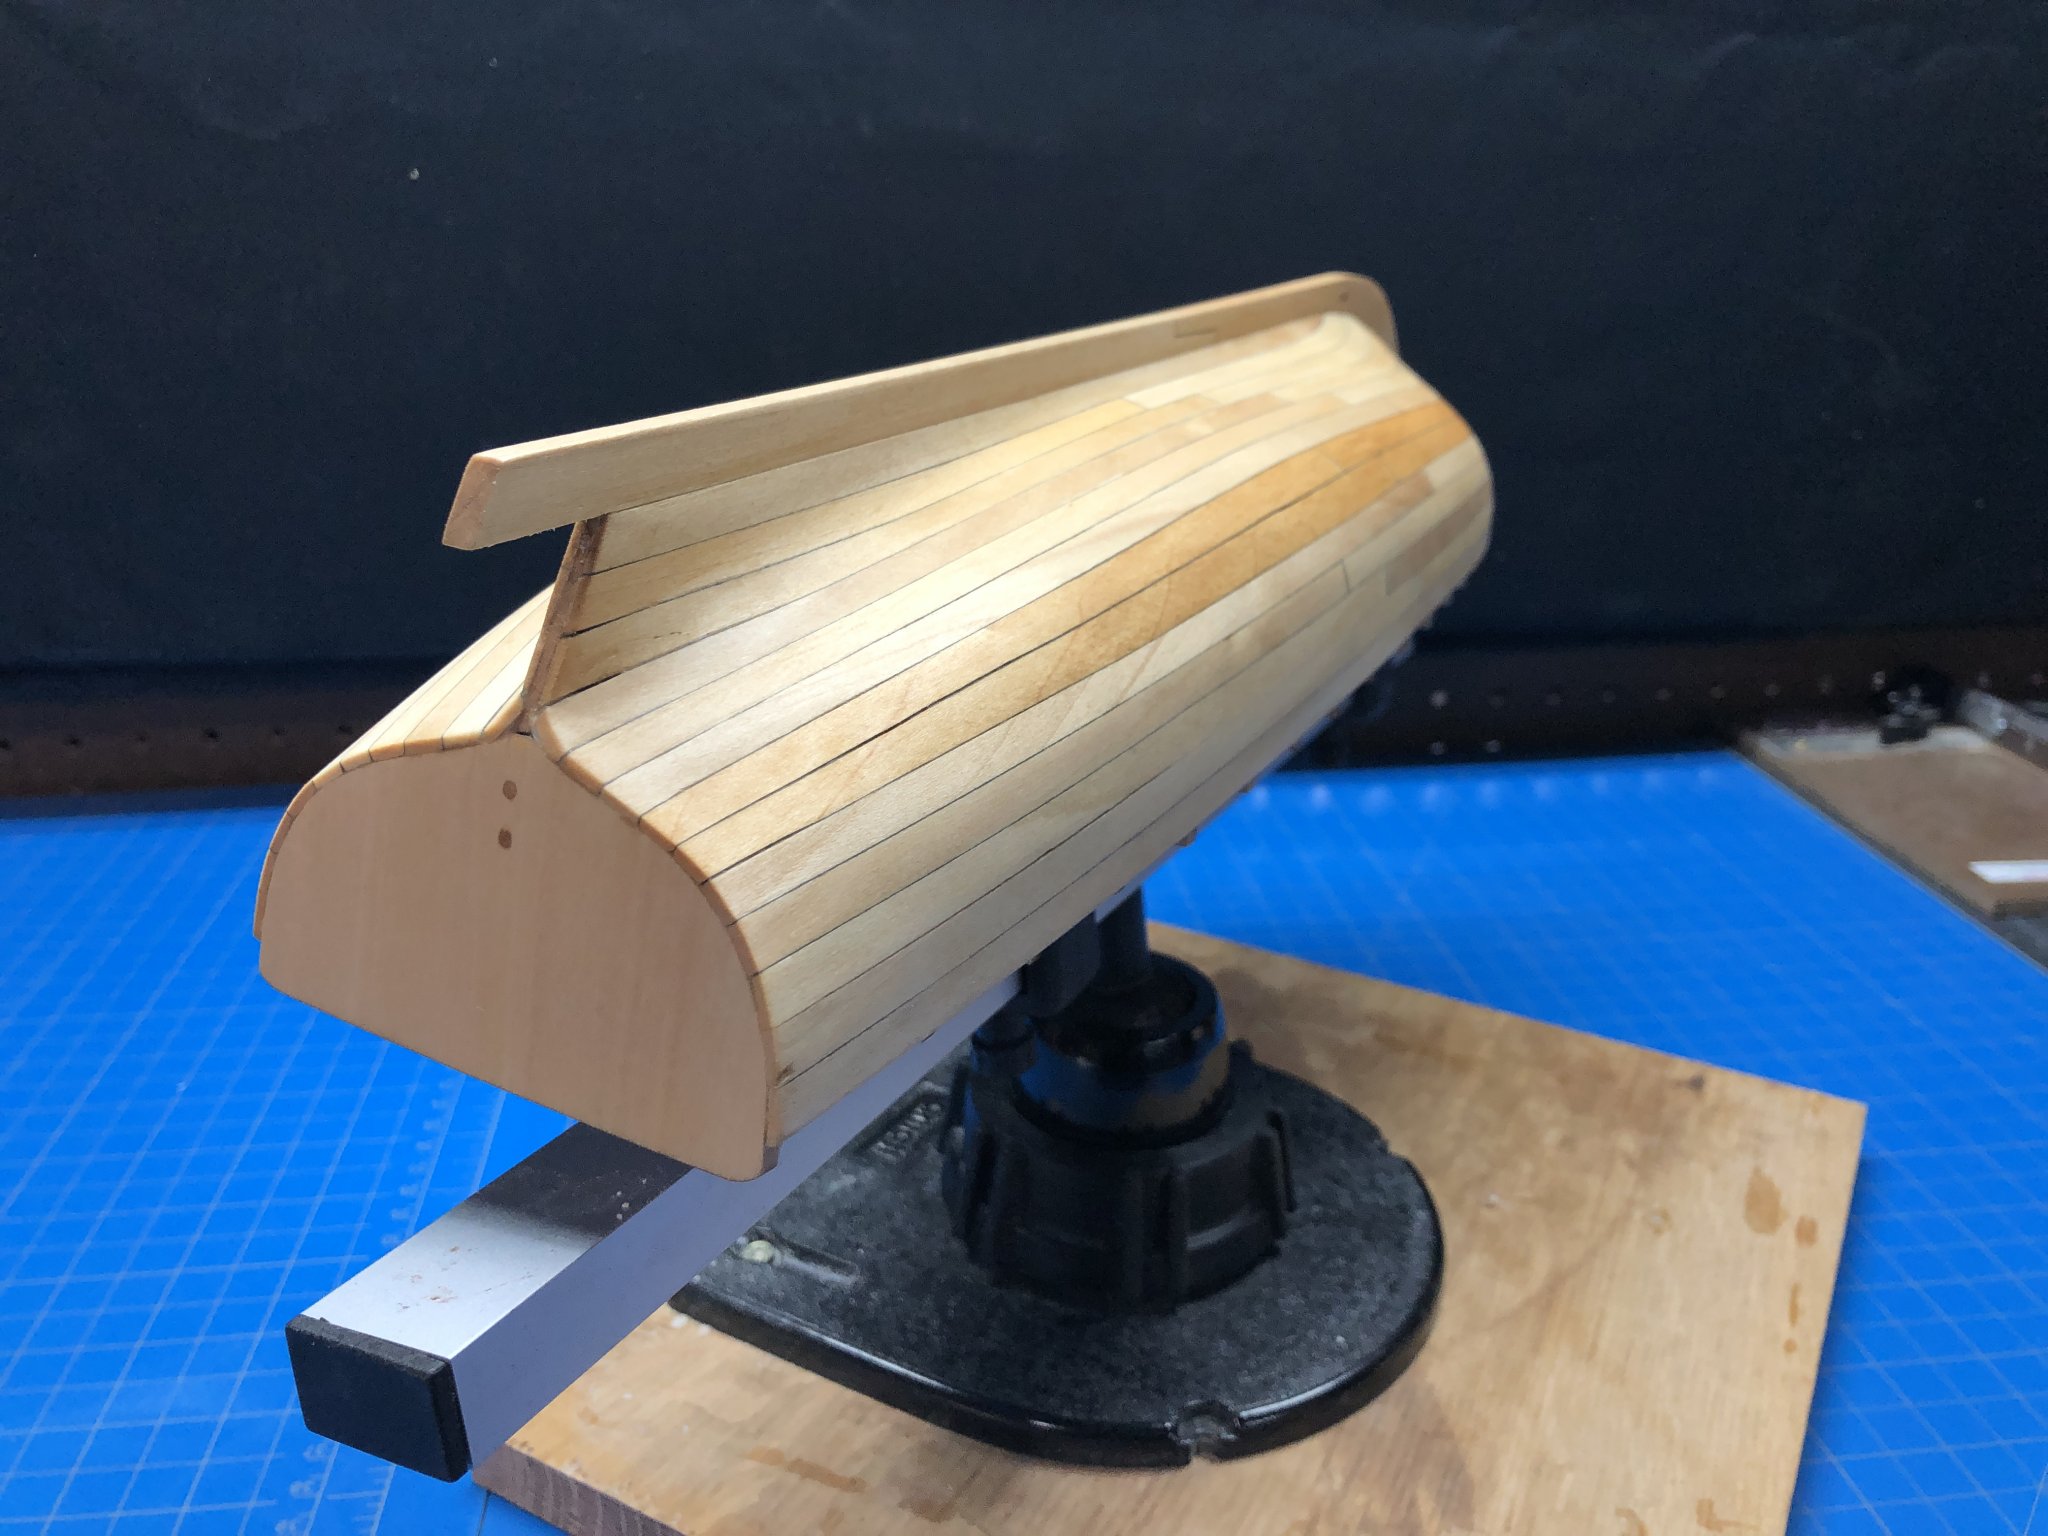
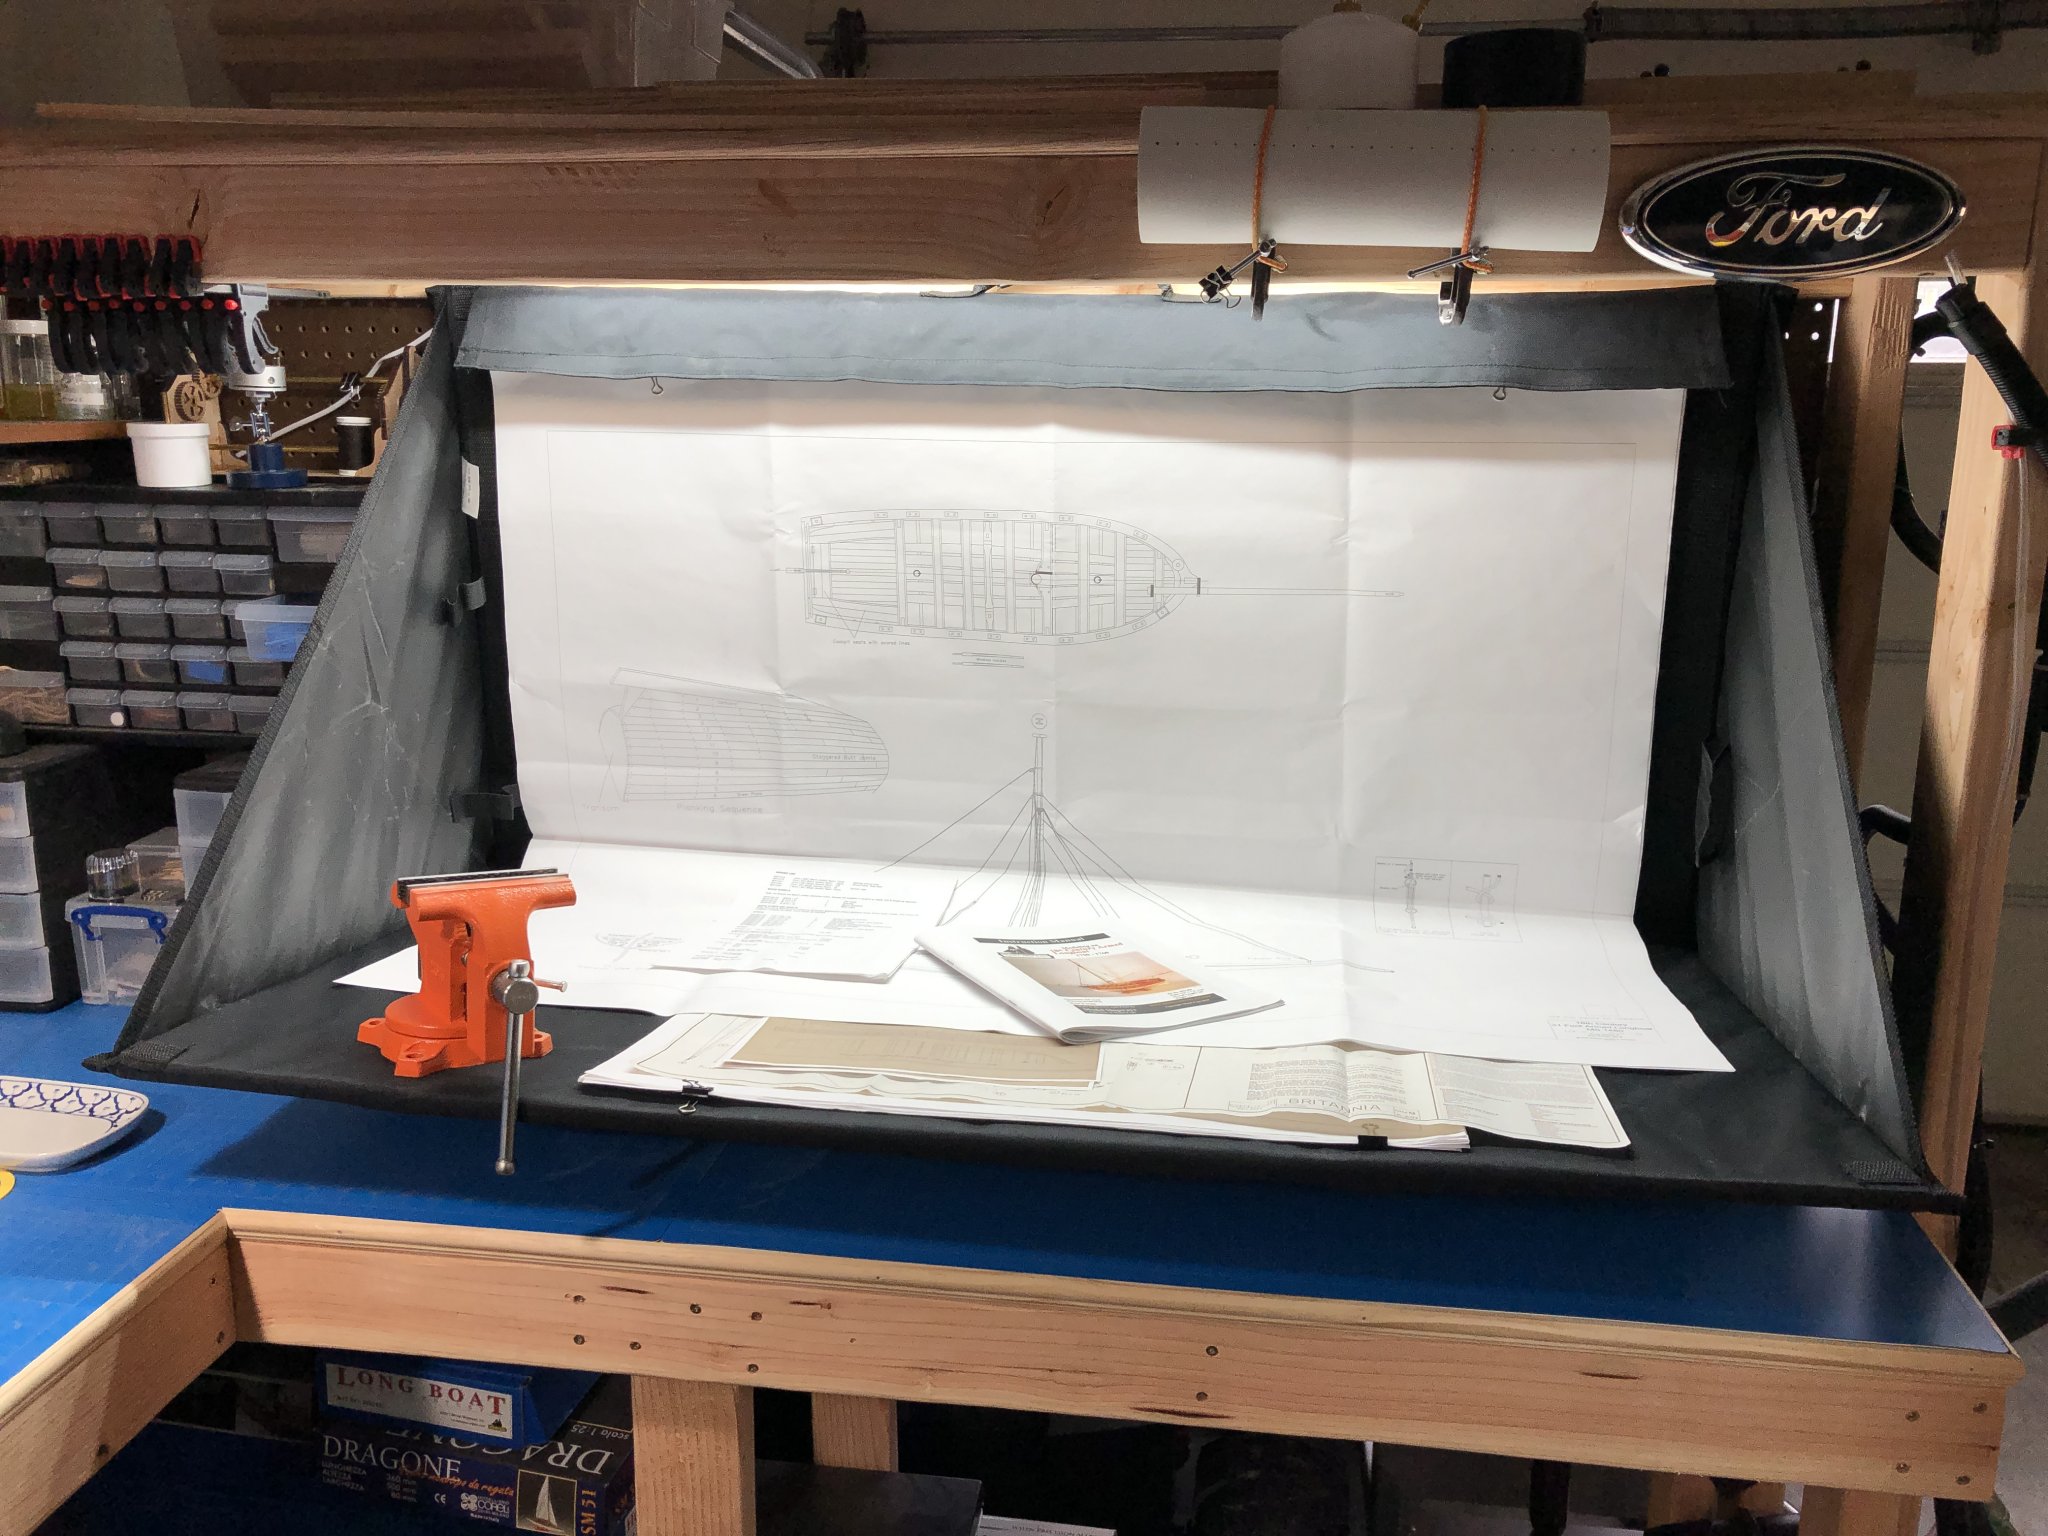
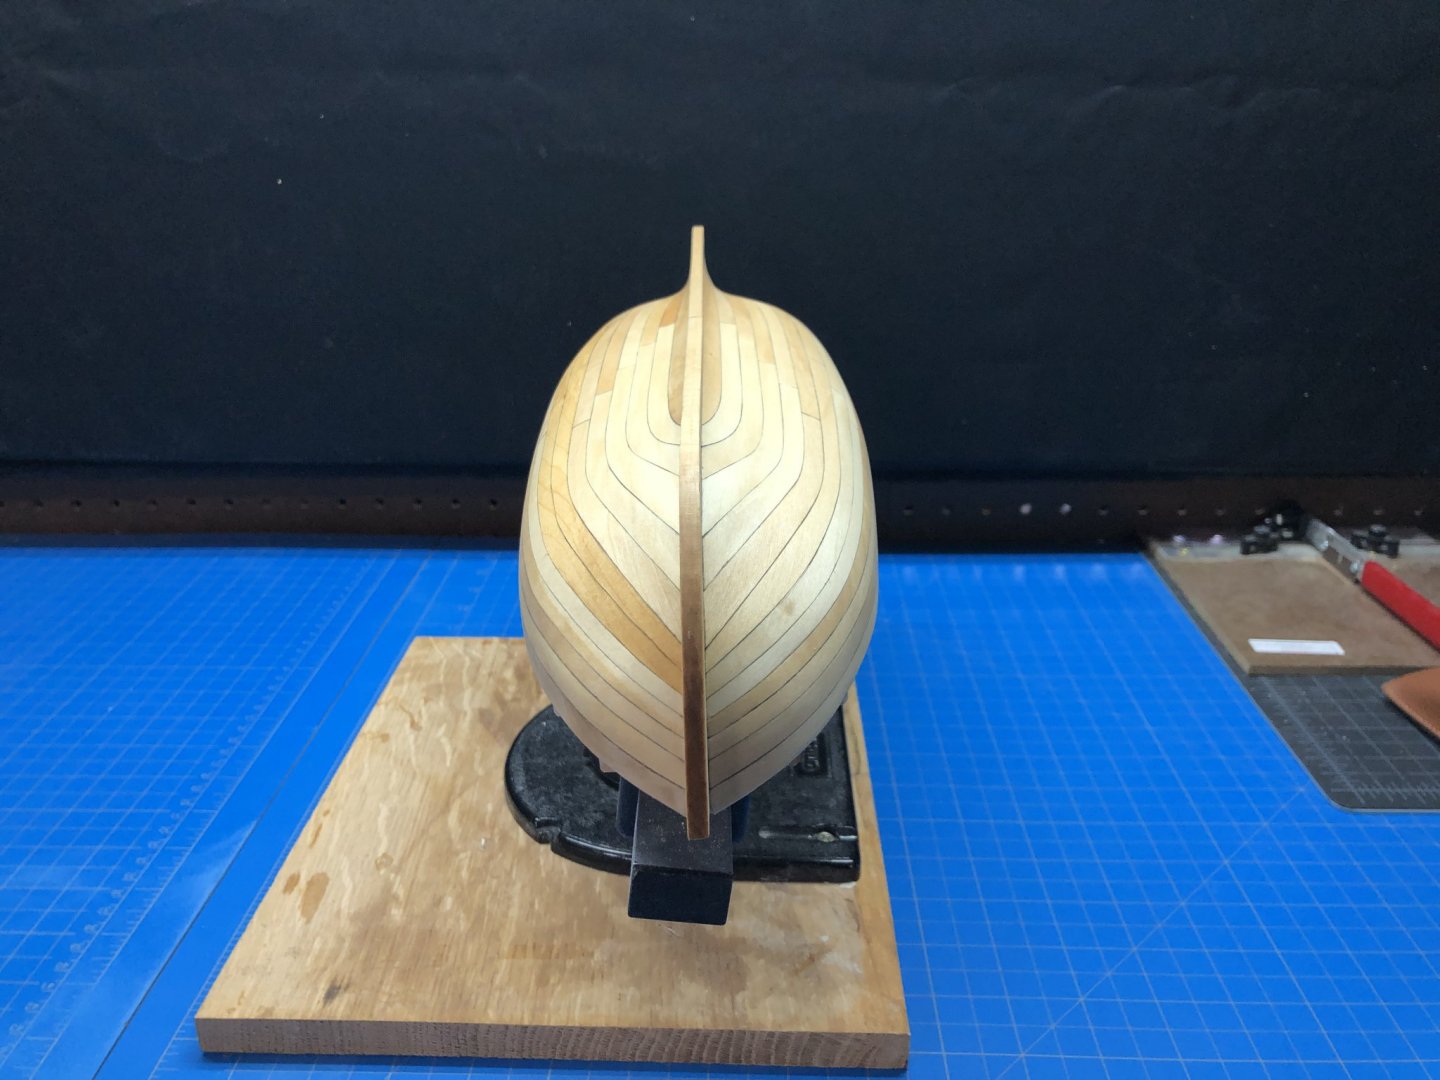
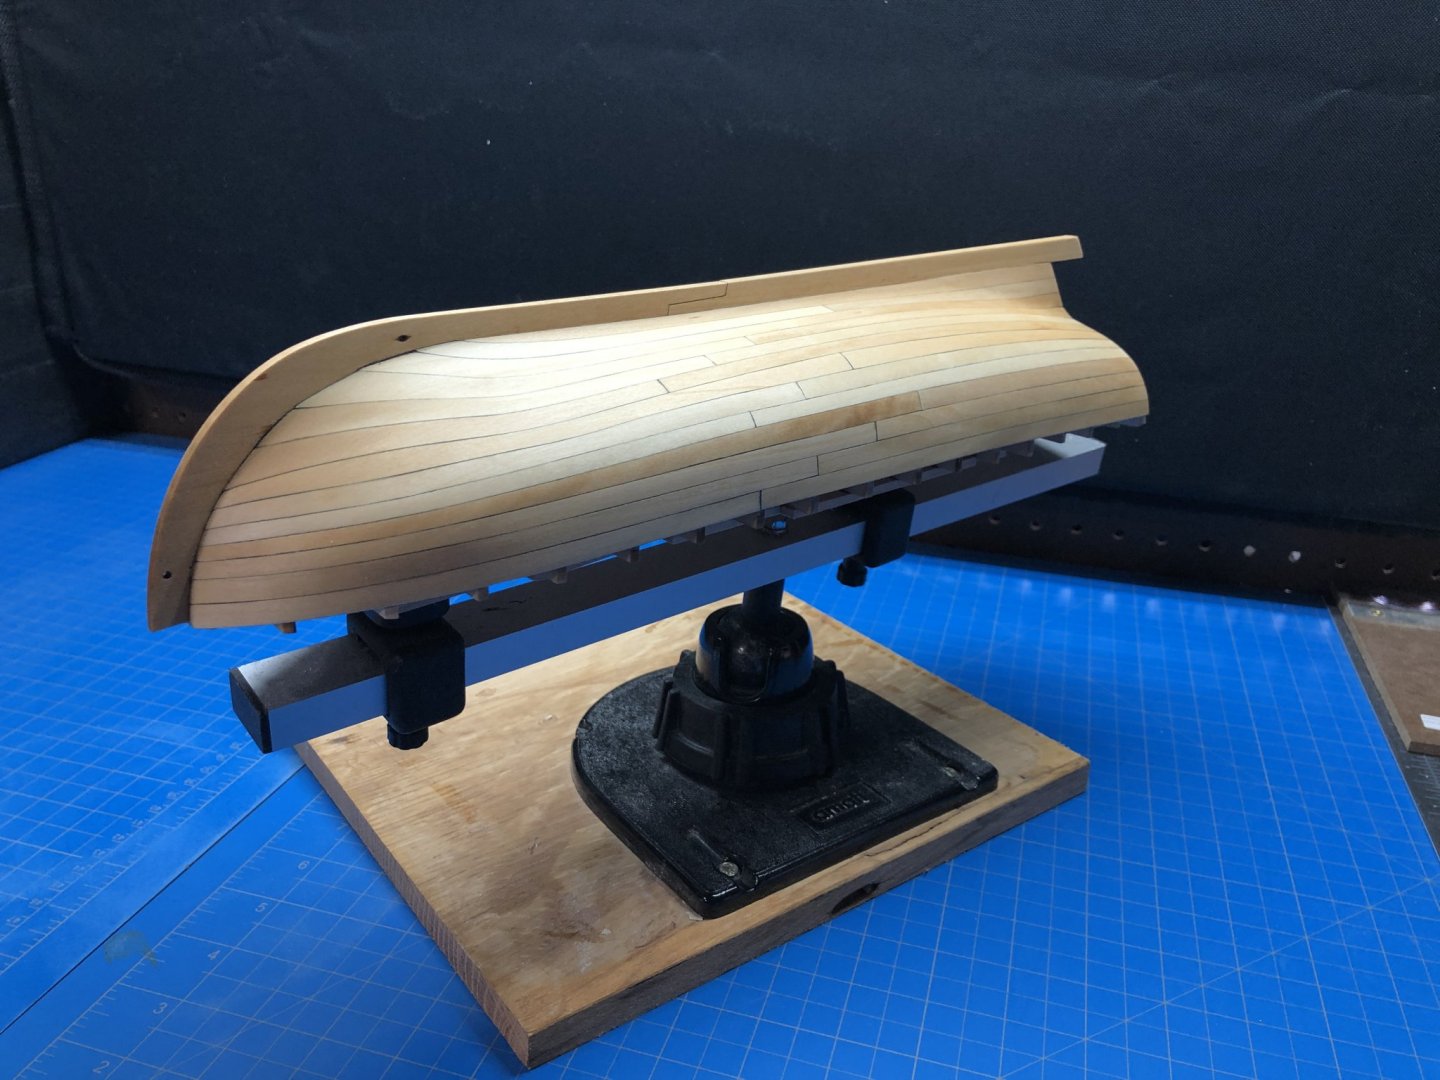
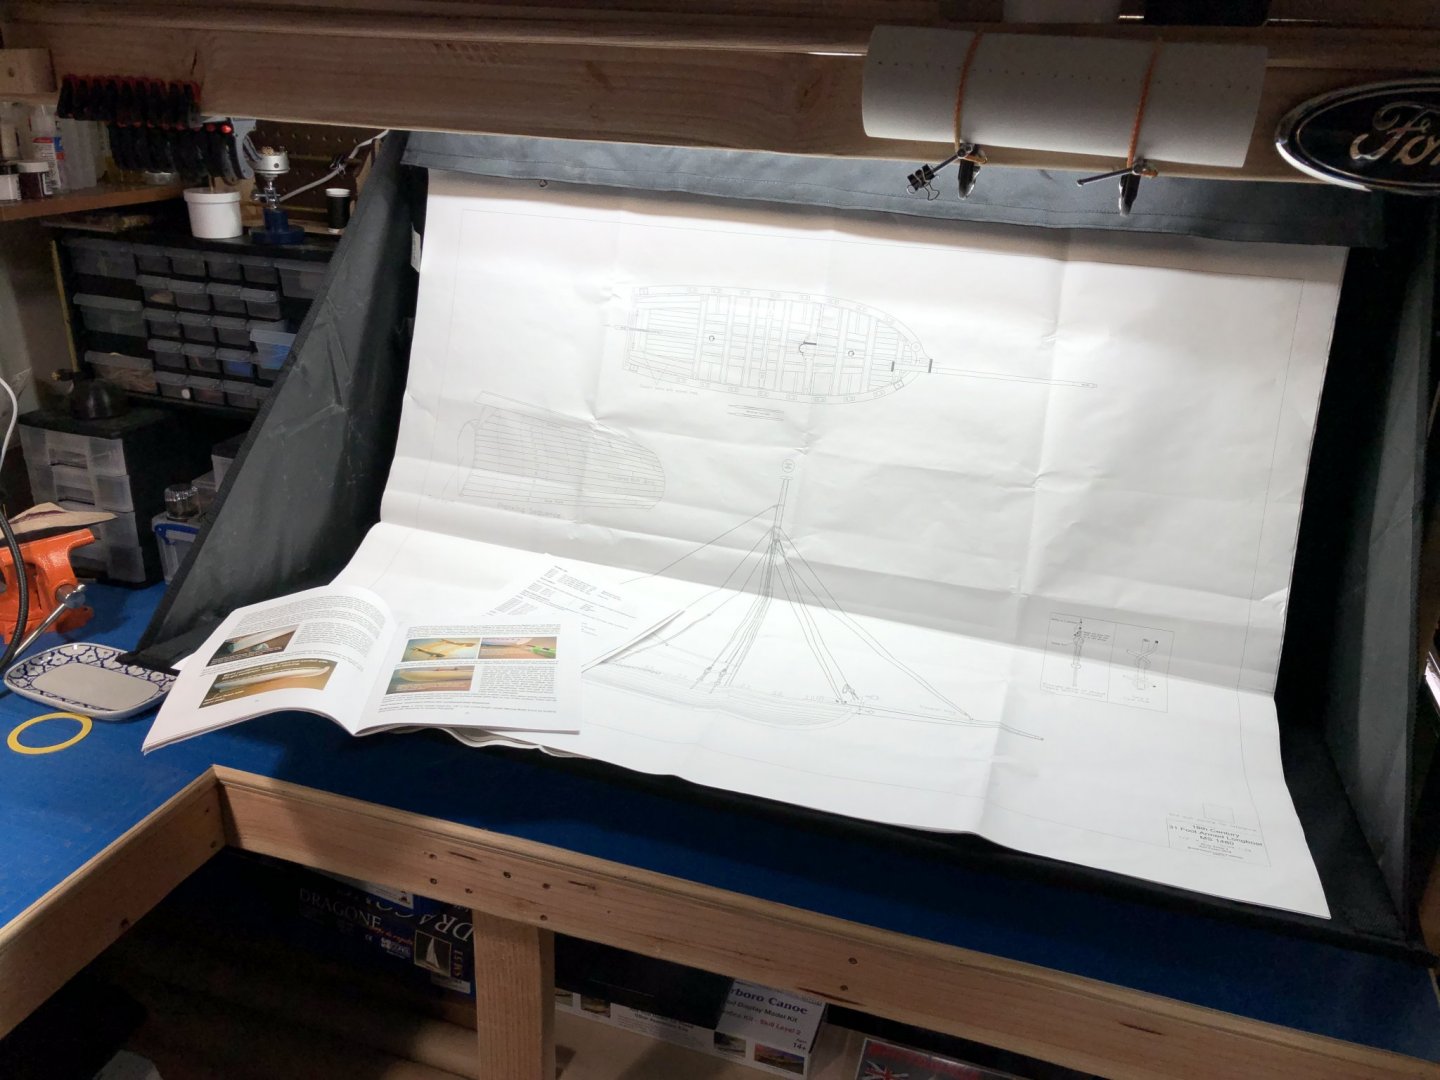
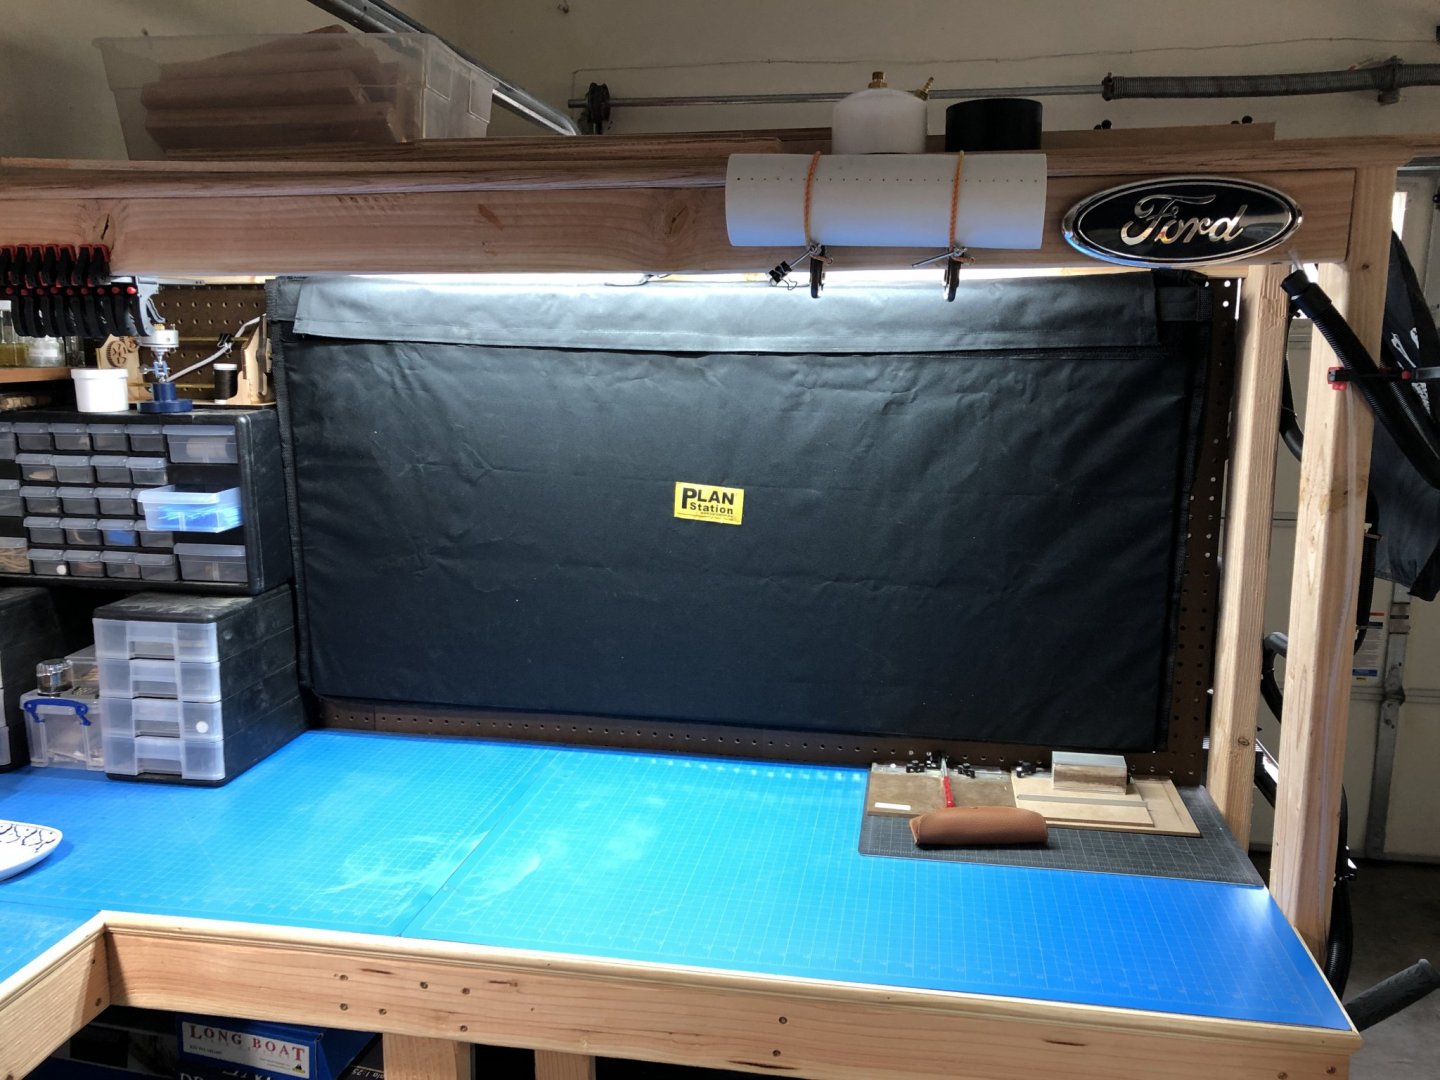
Planking complete. Its a bit of odd looking mix of grained sheet wood and the kit provided planks so not much matches. I personally like the mismatched colors, but the grain isn't my favorite detail. Luckily much will be painted over. Definitely some odd looking runs of plank, but who looks at the underside anyway right? Im just pleased I managed to get away without gaps. The next kit Ill focus on a more natural shape and run of planks... Ill take it as is and chalk up the rest to lessons to be learned. I also received my Plan Station which I had been eager to get. As part of my workshop upgrades I had been looking for solutions for the plan problem. I refer to the plans often and like having them handy, but I also very much dislike having them out all the time or otherwise taking up valuable space when Im not using them. I had looked at many solutions implemented here on MSW until a construction friend of mine suggested one of these stations. It works extremely well for me. It keeps everything together and buttons up nicely, thereby eliminating a need to really handle or shift around with plans. I can drop the station lay parts out on the plans and not have to rearrange anything in my workspace. It provides its own desk space so anyone without an extra table might find this useful by simply mounting it to a nearby wall. Its mounted with only two screw hooks into a stud and is very sturdy. Comes right off the hooks for easy travel or storage. Note the picture with the vice.. All that is required is the station ($45) and a couple of sheets of 1/2", 2 x 4' plywood. Not seen are the myriad of little pockets and so forth behind the plans. Im very excited to have this.


- 66 replies
-
- 7
-
-
- Finished
- Model Shipways
- (and 1 more)
-
Mine didn't have noticeable smell... if they did they dissipated rather quickly. I bought a pack of 12, 36 x 24" mats and used maybe 7 or 8. Two went onto my dining room table for the kids projects and I gave a couple to some friends. No one has complained yet.
- 66 replies
-
- 1
-
-
- Finished
- Model Shipways
- (and 1 more)
-
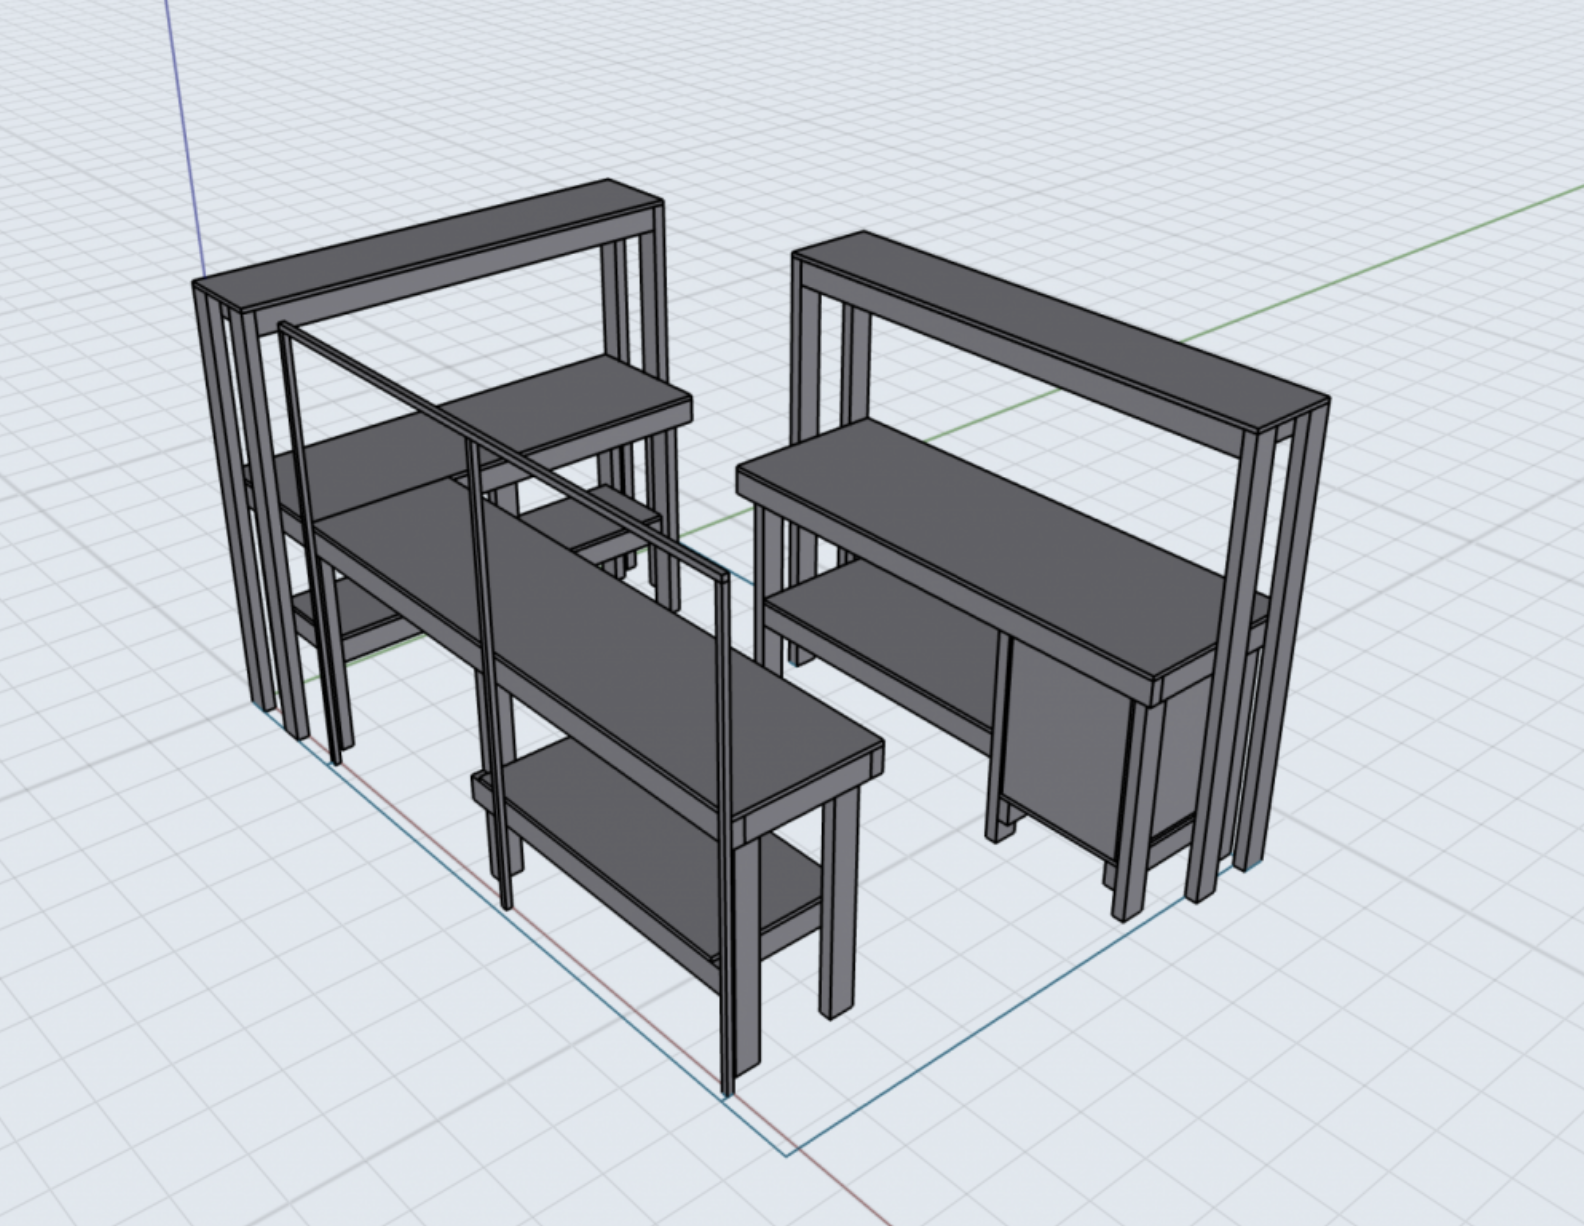
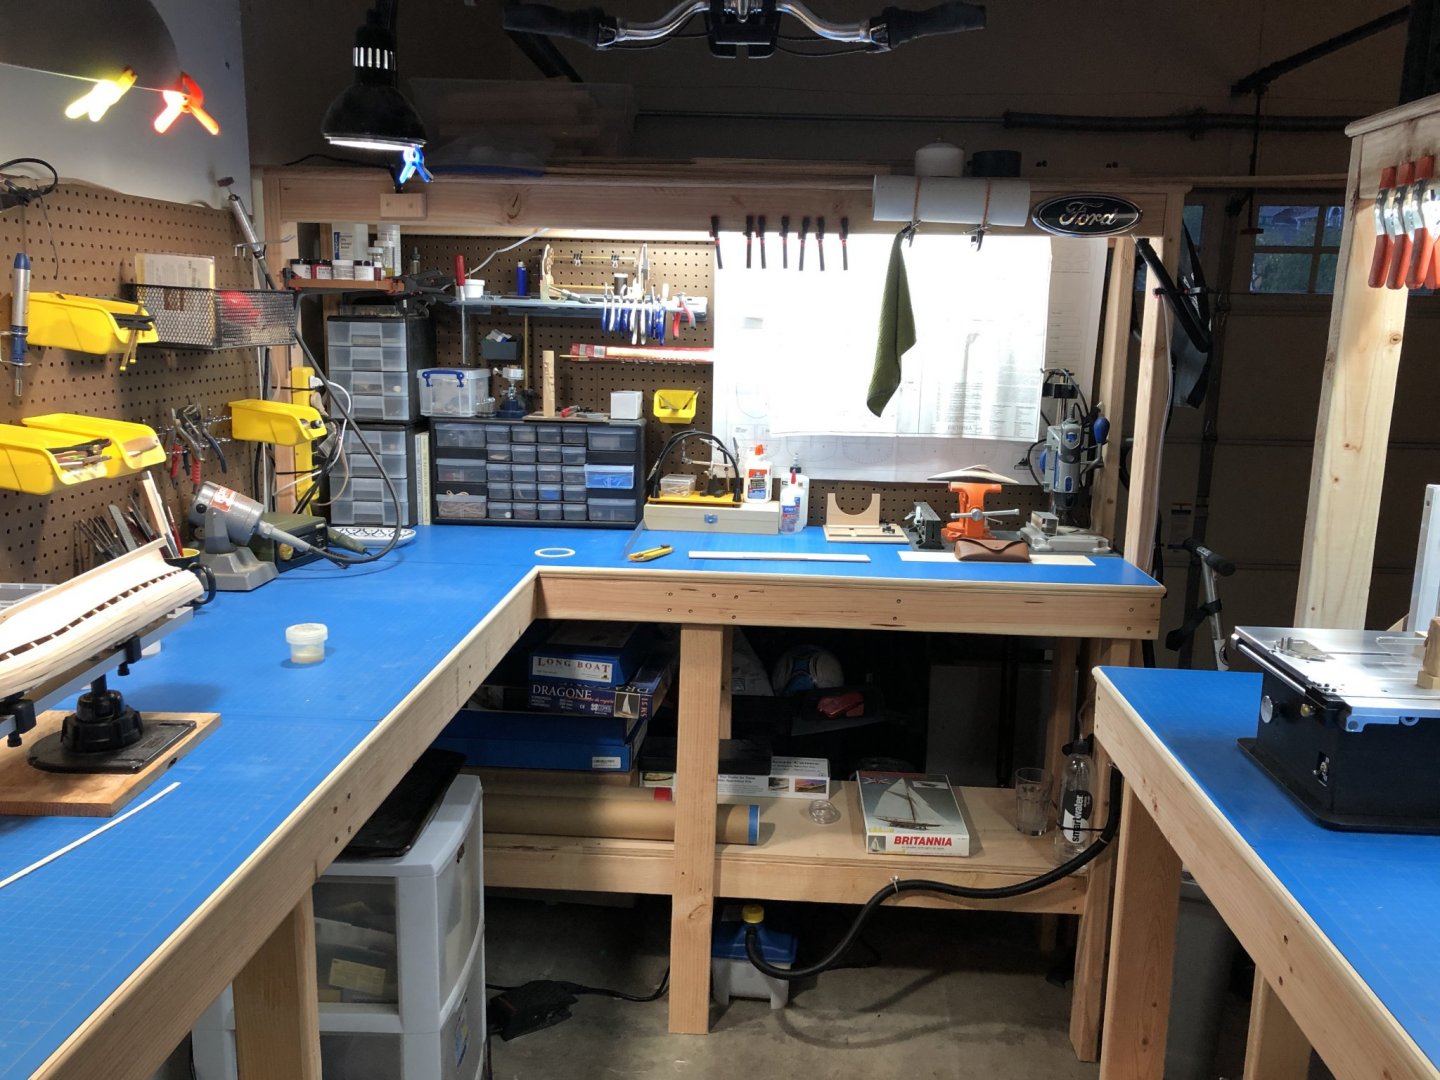
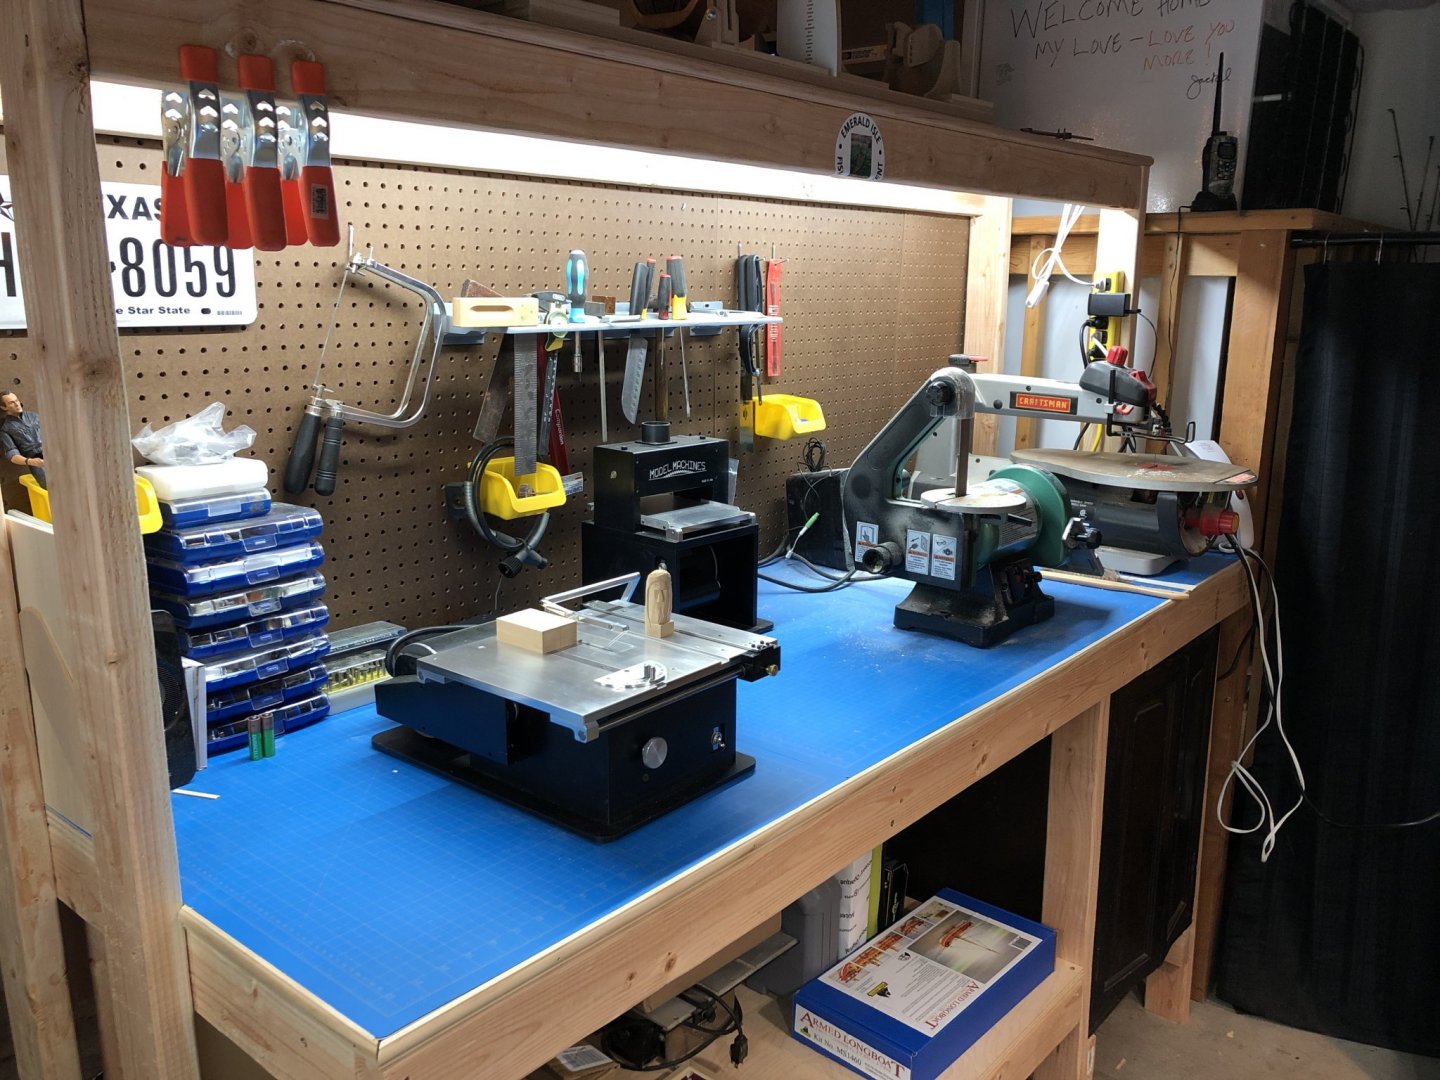
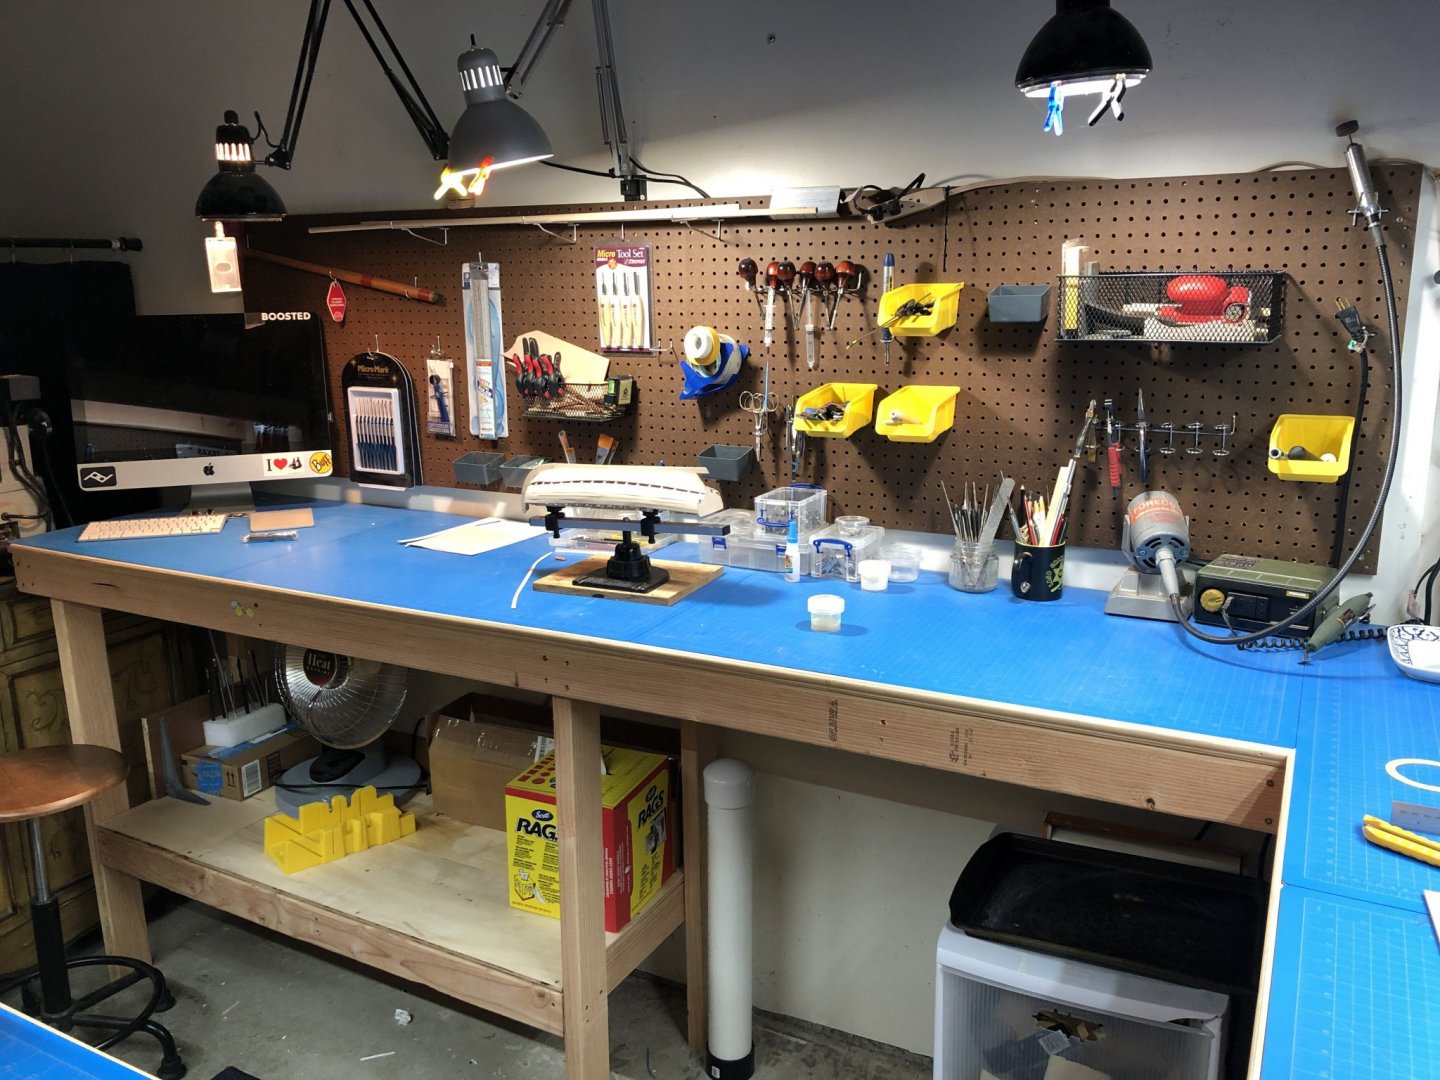
Indeed. I know about those summers! I used to live in an non-air conditioned farmhouse up in Auburn and those summer months were just awful. Up here in the PNW we have the opposite problem. Mild and nice summers, with cold winters. My new space replaces a smaller hodge-podge space I had built into the garage. With kids and the wife, building in the house was never going to work. My "investment" did not include any sort of environmental upgrades, so Ill continue to get through the winters with a parabolic heater which works well enough. We have a two-car garage which makes heating it with anything other than this style laughably inefficient and ineffective. My wife takes the kids in the morning so in the winter we like to keep her car in the garage so it doesn't freeze, so my space options were limited and I had power tools and so forth to accommodate. I also needed it be sort of all-inclusive and to segregate access to the saws and stuff from the kids so its a sort of room in a room. I wired all the tools through a powered master switch so they can't accidentally be turned on. Overall I gained a great deal of extra space with minimal investment, I think I spent under $600 on materials and designed it up on an iPad app that output a cut-list. It takes up just a corner of the garage and still has lots of growth potential. Probably the single best detail is the blue self-healing mat top that I installed. It took about ten sheets of the stuff to cover all the surfaces, but bought in bulk they were quite cheap.

- 66 replies
-
- 7
-
-
- Finished
- Model Shipways
- (and 1 more)
-
Who knows... if it helps, use it. There are many things to consider if trying to decide whether this stuff would be better than something else, especially when the list of variables is so long. I think the best qualifier should be whether you like using it and if it makes your work easier or more successful. You can mitigate the other factors easily enough after the fact. Use quality line, make sure you are running it through clean holes and don't subject your model to an overabundance of UV exposure and it will last for a LONG time, beeswax or not. When I can get back to my lab, I'll take a few samples of line, run them through our artificial aging system and see what happens - just to satisfy my own curiosity.
-
Thanks for this too! I have made a pretty significant investment in workspace in the last year, something that was outlined a bit here: Im realizing now that I never did go back and update this with the finished build photos. Which I should do soon. Im still growing into it and figuring out tool placement and layout of essential functions.
- 66 replies
-
- 2
-
-
- Finished
- Model Shipways
- (and 1 more)
-
Thanks Bob, kind words. I am using wood glue for the most part. The CA/PVA debate rages on, and I have been burned by CA many times. I have found that the overwhelming recommendations out there tend to be with wood glue, particularly if you are a modeler of middling ability like myself ;). I have studied the Chuck method in his tutorials and videos many, many times and the one thing he often leaves out is the experience quotient. I have no doubt the CA method works, but does rely rather heavily on the correct execution of all the other steps - something I am still working on! Even when I think I could not go any slower or more methodically, I find I'm still moving too quickly or not checking one last aspect or discovering some overlooked detail which is now rearing its ugly consequence. Im just not confident enough for CA as I tend to rip off planks more than I tend to accept them. As I reflect on my progress on this build, I can already list 10 things I would do differently. Its the journey not the destination right? ha.
- 66 replies
-
- 4
-
-
- Finished
- Model Shipways
- (and 1 more)
-
That’s what I thought. I guess I misunderstood what you were saying.
-
Do you mean for planks?
-
I think we might have the same scroll saw. Ive been looking to replace mine too, but haven't yet really needed to. Mine is OLD, and was a hand-me-down. I use it mainly to remove material quickly and roughly, not doing anything precise at all. I actually think there is a place for both a band saw and a scroll saw, but if I had to pick - and I mean HAD TO - I would get the band saw and get by with a coping saw. The band saw has so many other uses than the scroll saw. But both are pretty cheap, unless you want the very best. You can probably find a decent model of each for a grand total of $5-600. Ive been looking at the 9 or 10" WEN Band Saw personally. I don't work with large wood, so a bench top model is perfect for me.