-
Posts
1,008 -
Joined
Content Type
Profiles
Forums
Gallery
Events
Everything posted by Justin P.
-
Thanks guys! Glad to hear it, I love these kits but am well aware that small changes can throw builds out of wack. Was just thinking in my head how badly it could go for me if I got in over my head going to far afield from the instructions! Just skipping the installation of the scribed deck makes perfect sense and wouldn't add layers that complicate things later.
-
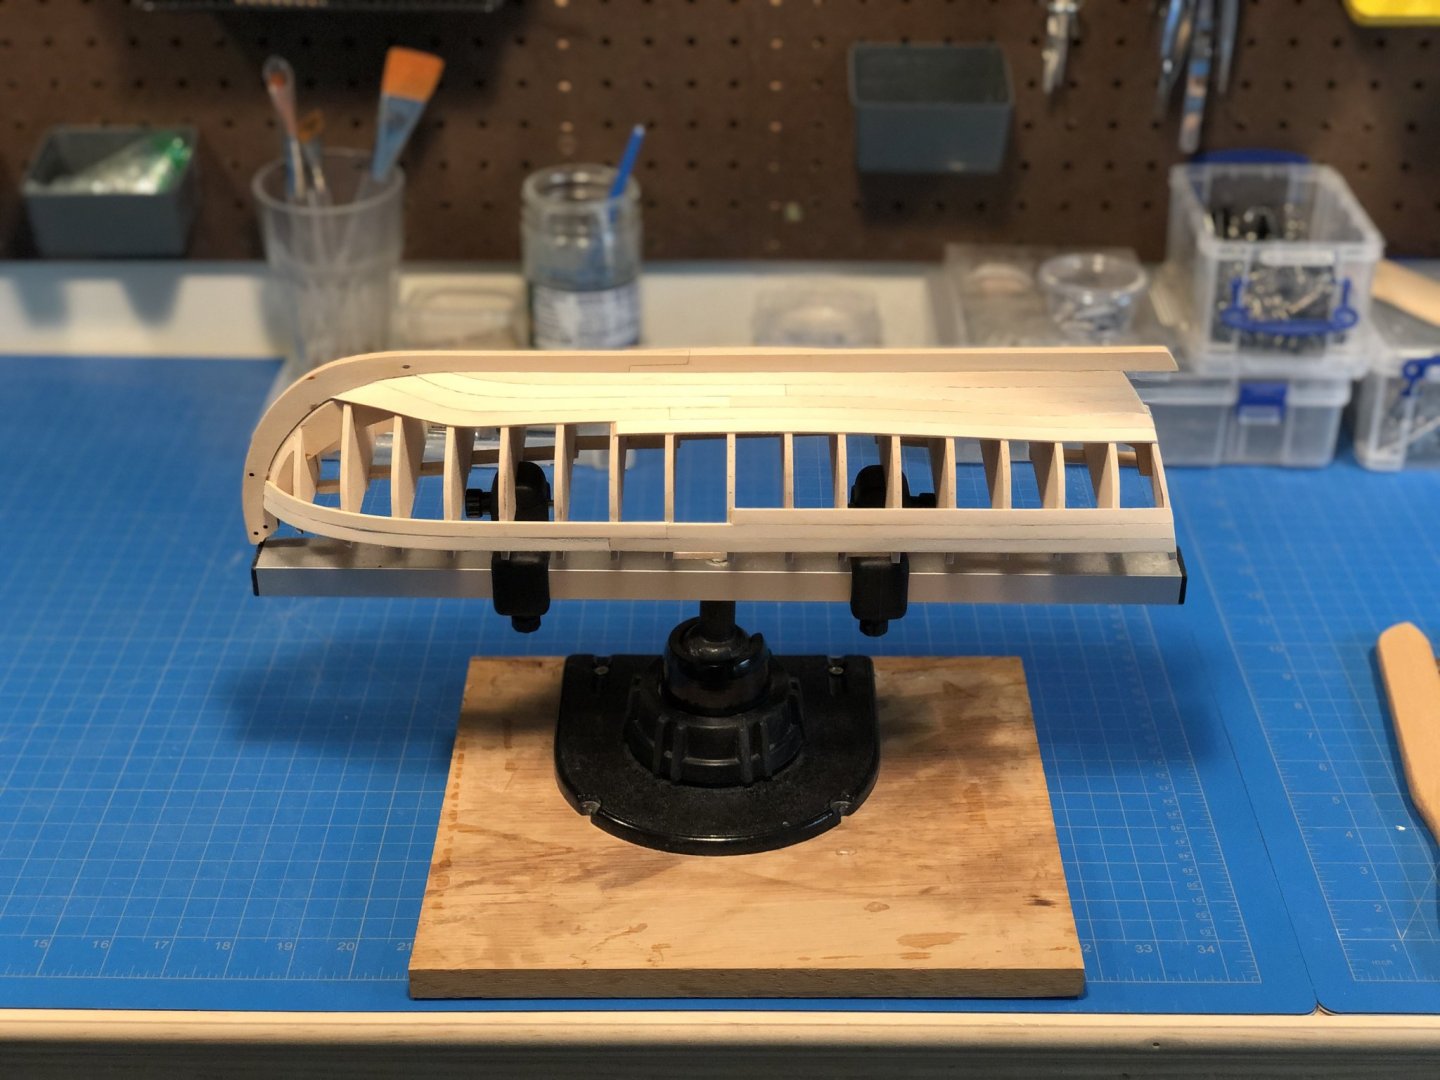
Planking is coming along, and so far Im still learning a lot. I think I learn a lot every time I go through this. One big thing Im thinking about now to remembering every step... I find I get going along only to realize I forgot to pencil in a caulking line, or taper an edge or this or that. I should remember to make a checklist... the first step of which is to remember to make a checklist. I also had a minor (I think) slip with my butt-joints. I went one strake too far and got off pattern a bit, so instead of 4 strake pattern, Ive got 5 from the garboard, then 3, then 4 again... oh well, no one will know but me - and you guys. Im also having a hell of time with clamps. Nothing is more frustrating than having ten types of clamp and none of them being quite right. If someone has the perfect clamp secret, Im all ears. I also got my Wagner steam bending kit. Its awesome. It comes with plans for building your own box/tank for larger wood work but I used a small tank and boy does it work. The most important aspect is probably temp, the planks come out mildly moist but the steam is very hot so the basswood comes out feeling like a wet noodle. So much easier to bend and work with then my previous methods. It takes a bit more time, but the result are well worth it, and if Im timing things right I can be doing something else as planks steam.
- 66 replies
-
- Finished
- Model Shipways
-
(and 1 more)
Tagged with:
-
FULL DISCLAIMER: This question may have been asked somewhere else, or the answer is obvious to all but me. BUT... Is the laser cut deck planking a template or is intended to be the final finish? I think I might prefer to have planked decks, and if so is this something these kits can easily be adapted to accept? Just curious about tolerances...
-

kit review 1:32 Fifie – The Scottish Motor Fishing Vessel by Amati
Justin P. replied to James H's topic in REVIEWS: Model kits
This looks gorgeous! -
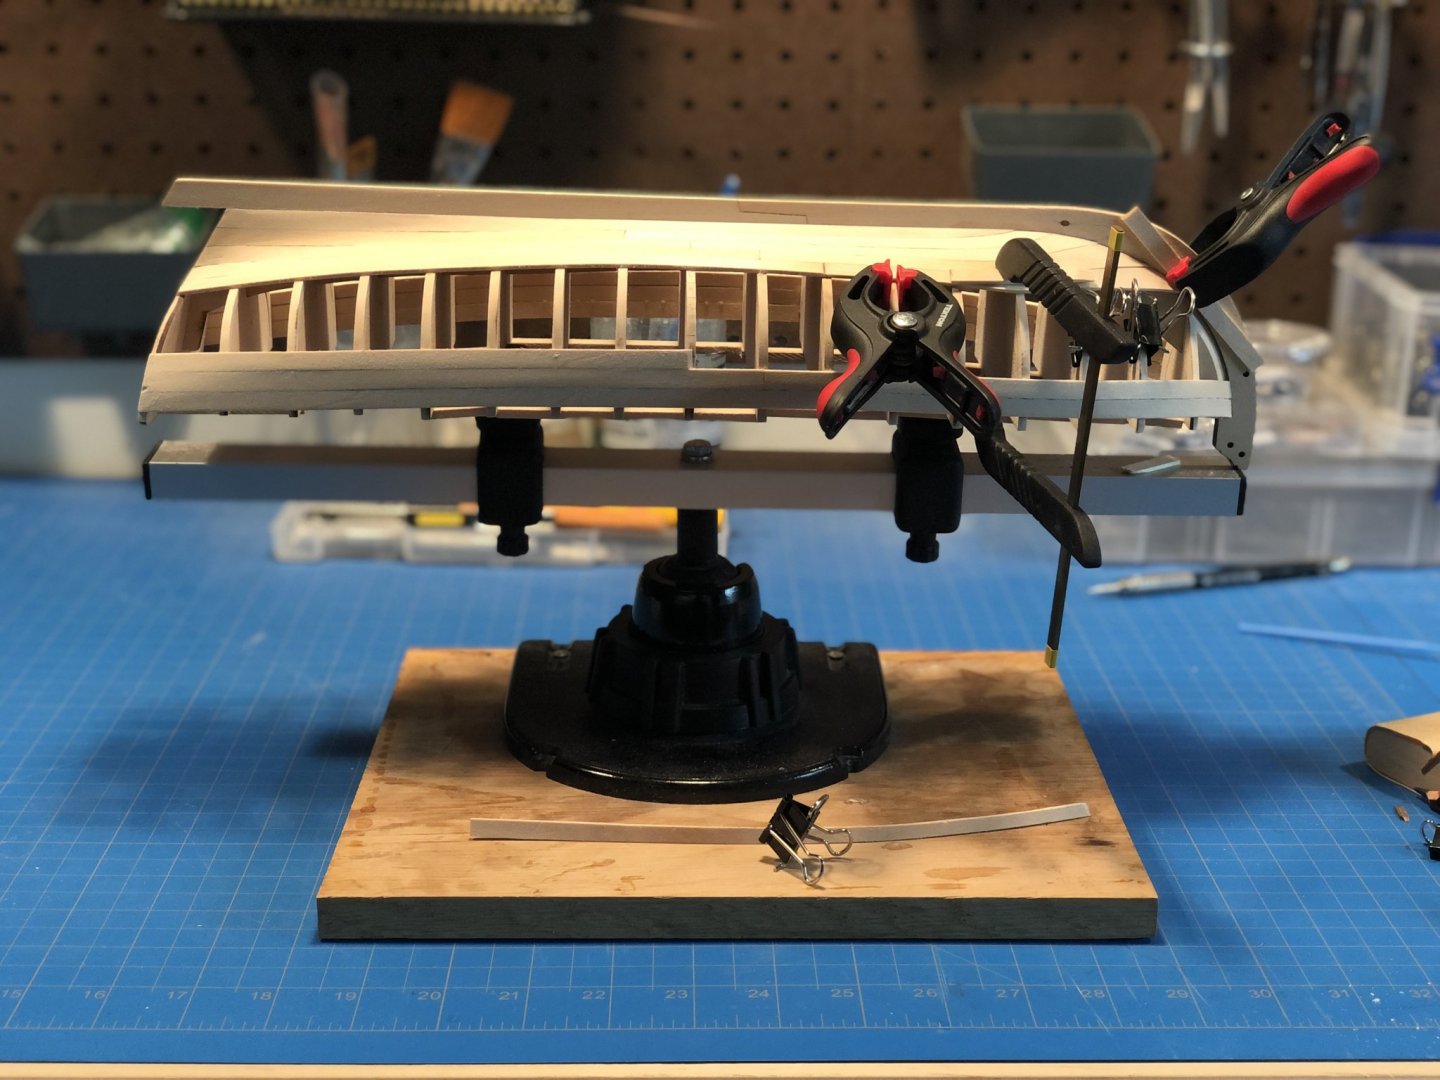
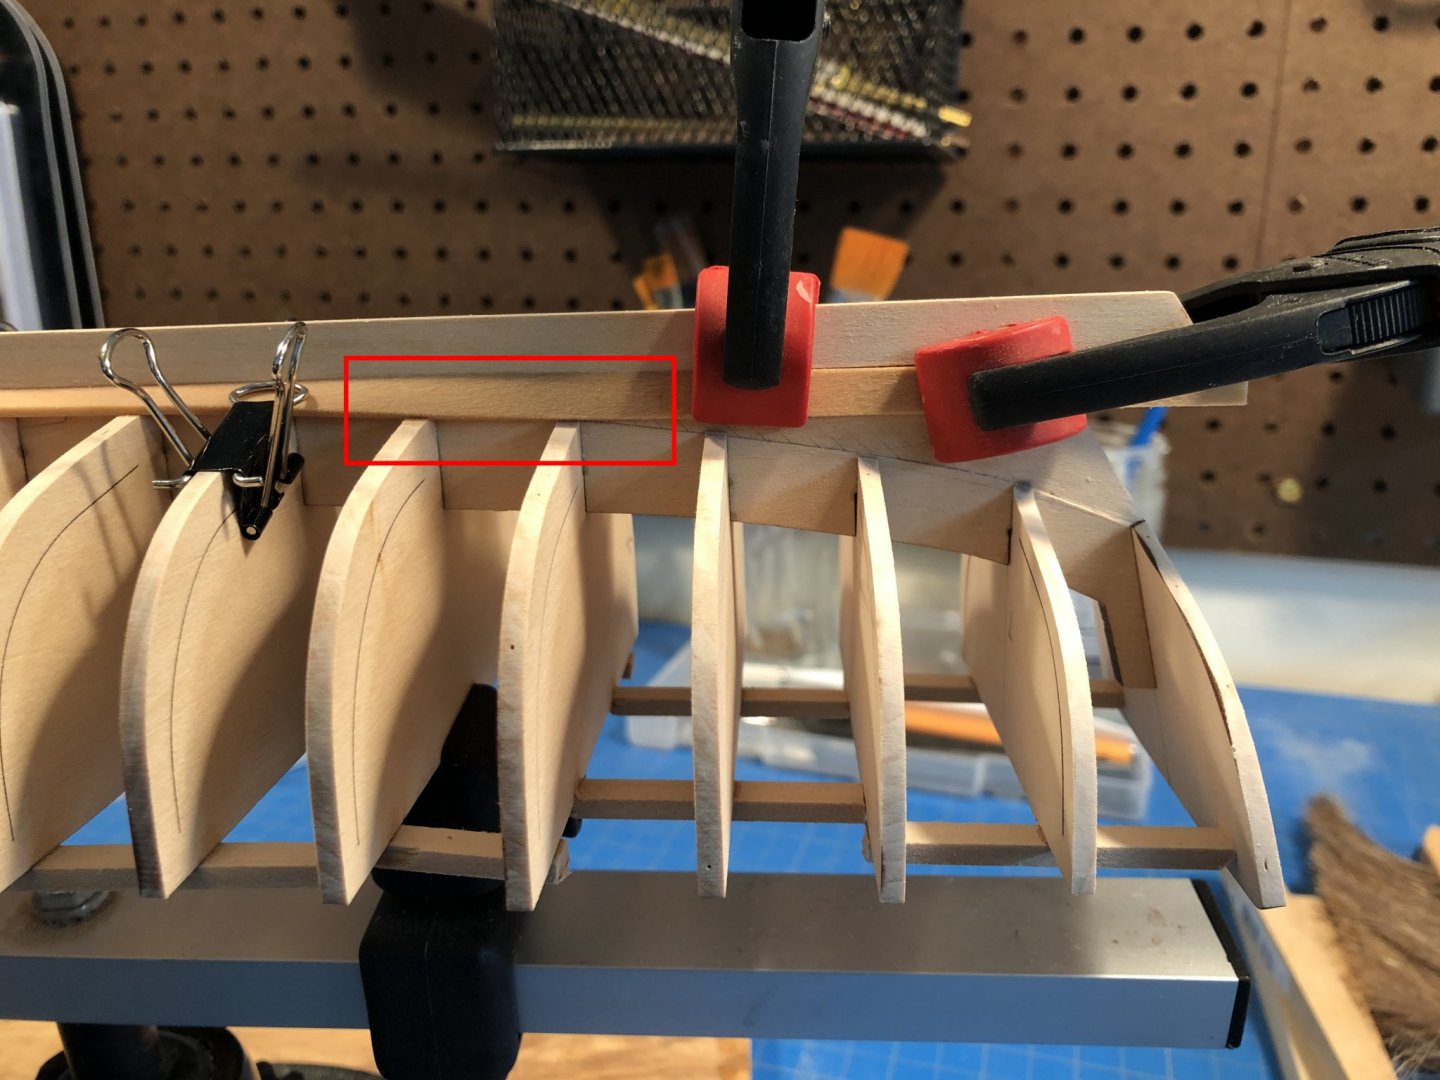
Some more progress on planking. I can tell Ill need to spend some significant time sanding when all is said and done, but am happy with my progress. Really frustrated - as usual - by my variety of clamps and the near constant need for some type of clamp that I don't seem to have, ha. I also added a few components to the steam tank, which may end up being completed shortly after the time when I need it, the implication of which Im not ready to discuss . I added a cradle to provide a slight angle for the condensation to drain easily and a drain port to the lower cap. There will be a second port added to this cap for the steam input just as soon as my Wagner arrives.
- 66 replies
-
- Finished
- Model Shipways
-
(and 1 more)
Tagged with:
-
This is probably the most common approach, maybe even some filler here and there to finish.
-
Beautiful job Bob, really great detail! I hope you are proud of it. That stand looks really great too... Loved seeing a new use for that Quadhands too!
- 170 replies
-
- medway longboat
- Syren Ship Model Company
-
(and 1 more)
Tagged with:
-
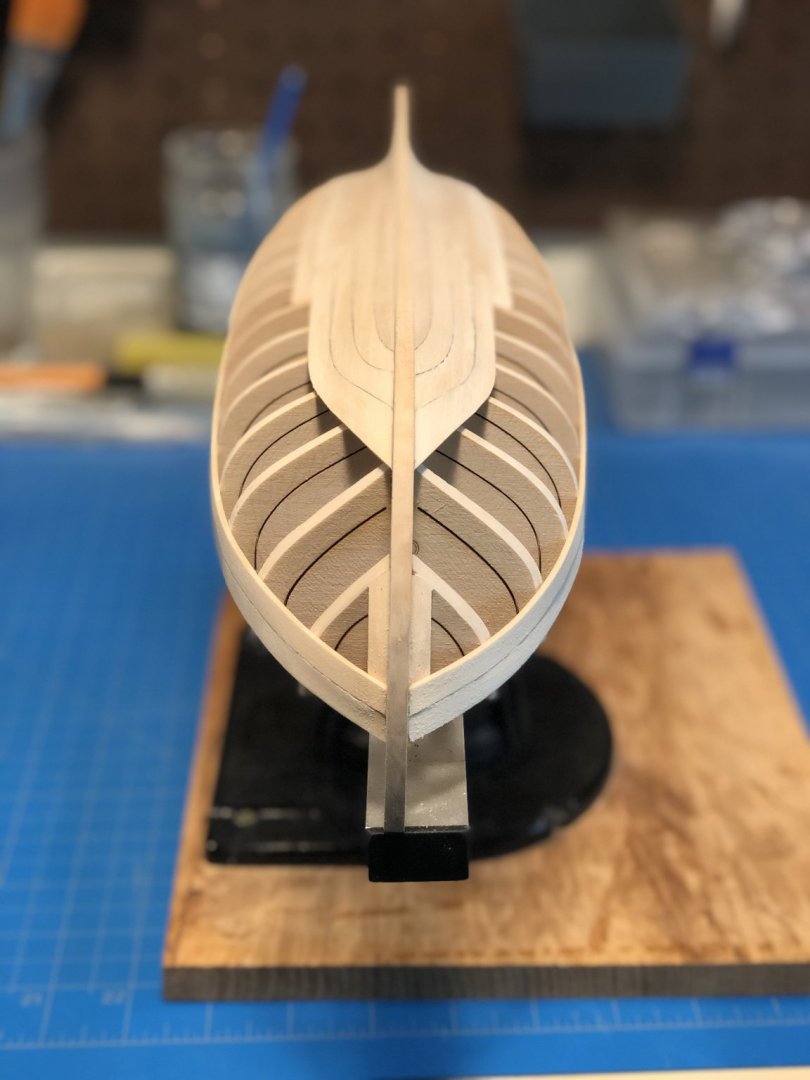
Right well, back at it. I spent a few honest days doing my actual job and gave myself permission to return to the shipyard. First thing was to remake the garboard planks, steam and fit them. These, again, went fairly well. Thankfully I had previously used glue sparingly so there wasn't too much clean-up to worry about. As I wait for the steamer parts to come in, Im still getting by with the war department's portable garment steamer. The little thing works pretty well but steams for about 45 seconds before needing to pause, and can only steam for about 2 mins before needing a refill - so, annoying. I decided to forget trying to edge bend those foremost planks as earlier mentioned and decided to spile them in a similar fashion to Arthur Wayne in his A+ build log. Using the scotch-tape method, I took the shape off the garboard and marked them out on 1/16" basswood sheet. With a scroll saw, standing belt sander and some files I was able to make quick work of them. I carried on using the supplied stock for the remaining run of each strake. Overall this method proved MUCH easier even if it did take more time. Far less fussing around and far less frustration with ugly bent planks that just didn't fit right. Ill admit that the shape and arrangement does strike a bit odd if youre used to staring at beautifully and properly shaped hulls, however my hope is that as the strakes move up the keel at the bow the foremost planks will begin to take on a more traditional appearance and shape. In this way the somewhat odd looking lower planks may go largely unnoticed. In the course of a day I was able to complete the three lower strakes as the kit instructions suggest. Tomorrow Ill start work on the sheer planks and then plan to use the tick-method to fit out the rest of the planks. And for those with a keen eye, yes I did manage to snap of the damn transom despite the clever reinforcement. One poorly placed hand while clamping, the wrong squeeze and it popped right off just below the mounting area. Installing the sheer planks should shore this thing up once installed. Until then, some glue and clamp and all is right again in the world. I also began construction of my steamer tank that will be the companion to the Wagner I have coming in the mail. I use 3" PVC cut to 12" and drilled 1/16" holes every half-inch along the lower half of the pipe. I used 1/16" brass rod to create a nice rack for planks or other bits to lay and be evenly steamed. Ive got two end caps for the steam input and drain hose. I'll update as this comes together, but Im excited for the prospect of it and should it work look forward to building a few different length tanks for assorted sized projects. So far, Im about $60 into it.
- 66 replies
-
- Finished
- Model Shipways
-
(and 1 more)
Tagged with:
-
Ron, Yes. I think your simple and elegant solution reveals that I may be over-complicating this! I think that is the perfect strategy. I think I had the garboard down pretty well as the cuts there arent all that complicated, but figuring out that angle cut on the second plank is muddling my brain.
- 66 replies
-
- Finished
- Model Shipways
-
(and 1 more)
Tagged with:
-
So last night, after writing my last post, I went back out to the shipyard to evaluate things. I do this often just before turning-in for the night to wrap my head around next steps and make a list of topics to read up on in the interim. After playing around a bit with planks and testing fit I decided my garboard just wasn't as great as I previously thought and ripped them both off. I instantly felt better. There is so much nuance and subtle complexity in planking, I think I simultaneously love it and hate it. While the planks themselves fit the rabbet nicely and were made well, I think I ultimately was too strict in their twist, particularly where the plank begins the twist into the deadwood. The twist was just too severe to make a nice transition to the next plank, which abutted at almost a right angle. It would take a great deal of sanding to get to a smooth transition. While this is a result of attempting to get the plank to make contact in all areas, I think the better compromise is too accept that it might only be adhered into the rabbet and may float over that frame a bit. Im pretty sure I over-clamped in this area causing it be overly flat against the keel. In other nightly pondering, Im also questioning my method for bending. Ive tried using plank benders in the past and it wasn't as precise a method for me. Soaking in boiling water works pretty well, but the planks end up taking forever to fully dry and Ive noted discoloring and dimensional shifts due to uneven expansion and over-saturation with water. I think at this point Ill experiment a bit more with steaming and plan to build a steam tank which seems to work to great success for others. My initial experiments with a handheld clothing steamer worked well, but I do not relish the idea of steaming on the hull, or the imperfect steam delivery process that those devices use. They do work very well for others, but I require a bit more control even if the result is absolutely the same. For now I wait for my Wagner system to arrive, which Ill build out with PVC tube as Jack Panzeca described (post #10) (though my plan is at a much smaller scale). This is a similar setup to what others use around MSW with garment steamers, but the Wagner is designed to integrate into all manners of steam boxes and is purpose built, which I like. The price point is roughly the same. Ive also gone ahead and stocked-up in the event I decide to go ahead and spile planks from sheet wood, something I was hoping to avoid only because I wanted to see if I could get on as the instructions seem to think I should. Till next time...
- 66 replies
-
- Finished
- Model Shipways
-
(and 1 more)
Tagged with:
-
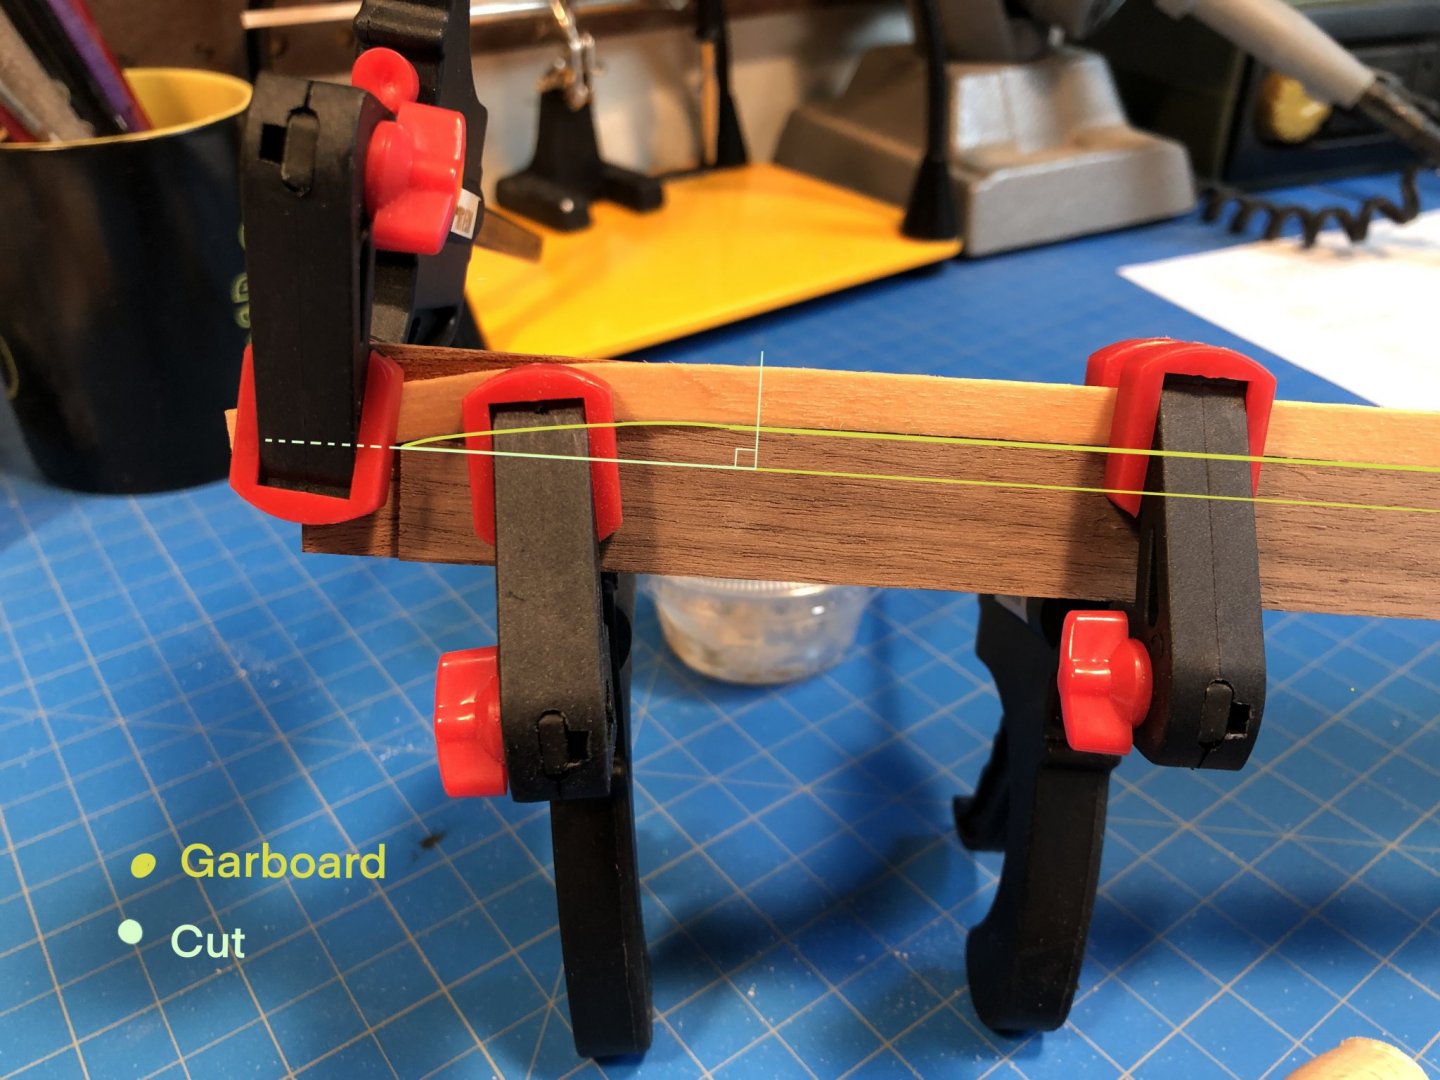
Fairing started a bit yesterday and today. Everything was going very well, with me feeling quite happy that I hadn't managed to break any bulkheads until - snap! I had to laugh a bit as not things transpired at almost the same moment. Luckily it was a small break and easily fixed. I was so close! Ha! Another few hours finishing here and there, and then fitting the bow filler/reinforcements and I called it done. Nothing close to aforementioned 20 hour point, but at least a good 8-10. I then fit some battens to check the lines and was happy to find only a single high spot, which took at least 2 hours more to get right. Honestly at this working very conservatively to get it right without breaking something. I have to say it is a real pleasure/curse to work with proper wood sheet for bulkheads rather than ply, especially during things stages. I then started shaping and fitting the garboard and subsequent planks. The garboard went relatively well and after smoking in boiling water for about 10 minutes, I found the plank material malleable and easily to shape. I used the garboard to make a jig for edge bending the second strake which Im happy to say went well. ... and this is where things went sideways. While I found the planks malleable enough to edge bend without collapsing or otherwise being damaged I did have significant trouble working out in what sequence I should be trying to work out the right angle required to end cut the bent plank to register cleanly in the rabbet. I first tried to bend an uncut plank and then sort of eyeball the angle which left me with the wrong angle completely and thus a plank now much to short at the bow end for the edge bend to align comfortably. I then tried working out the right fit prior to bending and then bending at the point the lower edge meets the tip of the garboard. This left me with a bend that I just couldn't really control as it was a bit to sharp and I had no leverage typically had when bending a longer plank. Im sort at a loss now. I have two more planks on the bending jig now and Im thinking I may try to cut the plank on the jig using a right angle aligned with the curve of the garboard tip (as pictured below). I did a rough version of this using something stuff from the new boneyard and it seemed reasonably successful and gave me enough confidence to move forward with a new plank... which Im quickly running short on. Ill happily listen and consider any tips anyone has out there in figuring this cut out. It seems a detail often left out or taken for granted in the various planking tutorials and for whatever reason Ive always struggled with this, particularly the sequence for when to make this cut.
- 66 replies
-
- Finished
- Model Shipways
-
(and 1 more)
Tagged with:
-
Beeswax, Beeswax, Beeswax! Conservator here, and without explaining in detail I’ll just say that Renaissance Wax has no business on rigging line of any kind. It barely belongs on the type of finishes commonly found on ship models. The quote from Don Pruel on their use of beeswax is the absolute best advice from a non-conservator on line/thread treatment. Personally, I’d “dress” the line by just running it through a wad of purified beeswax and make a loose coil and hit it with a blow dryer. I’m not sure why anyone would need to dilute it, especially with turpentine, but I’m curious. This dressing is widely done by conservators who use cellulosic thread or line and has been done by craftspeople and tradesmen for hundreds if not thousands of years. I cannot think of a reason to introduce any solvents. There is almost no point in doing it for synthetics other then to give the line a little more bite when making knots.
-
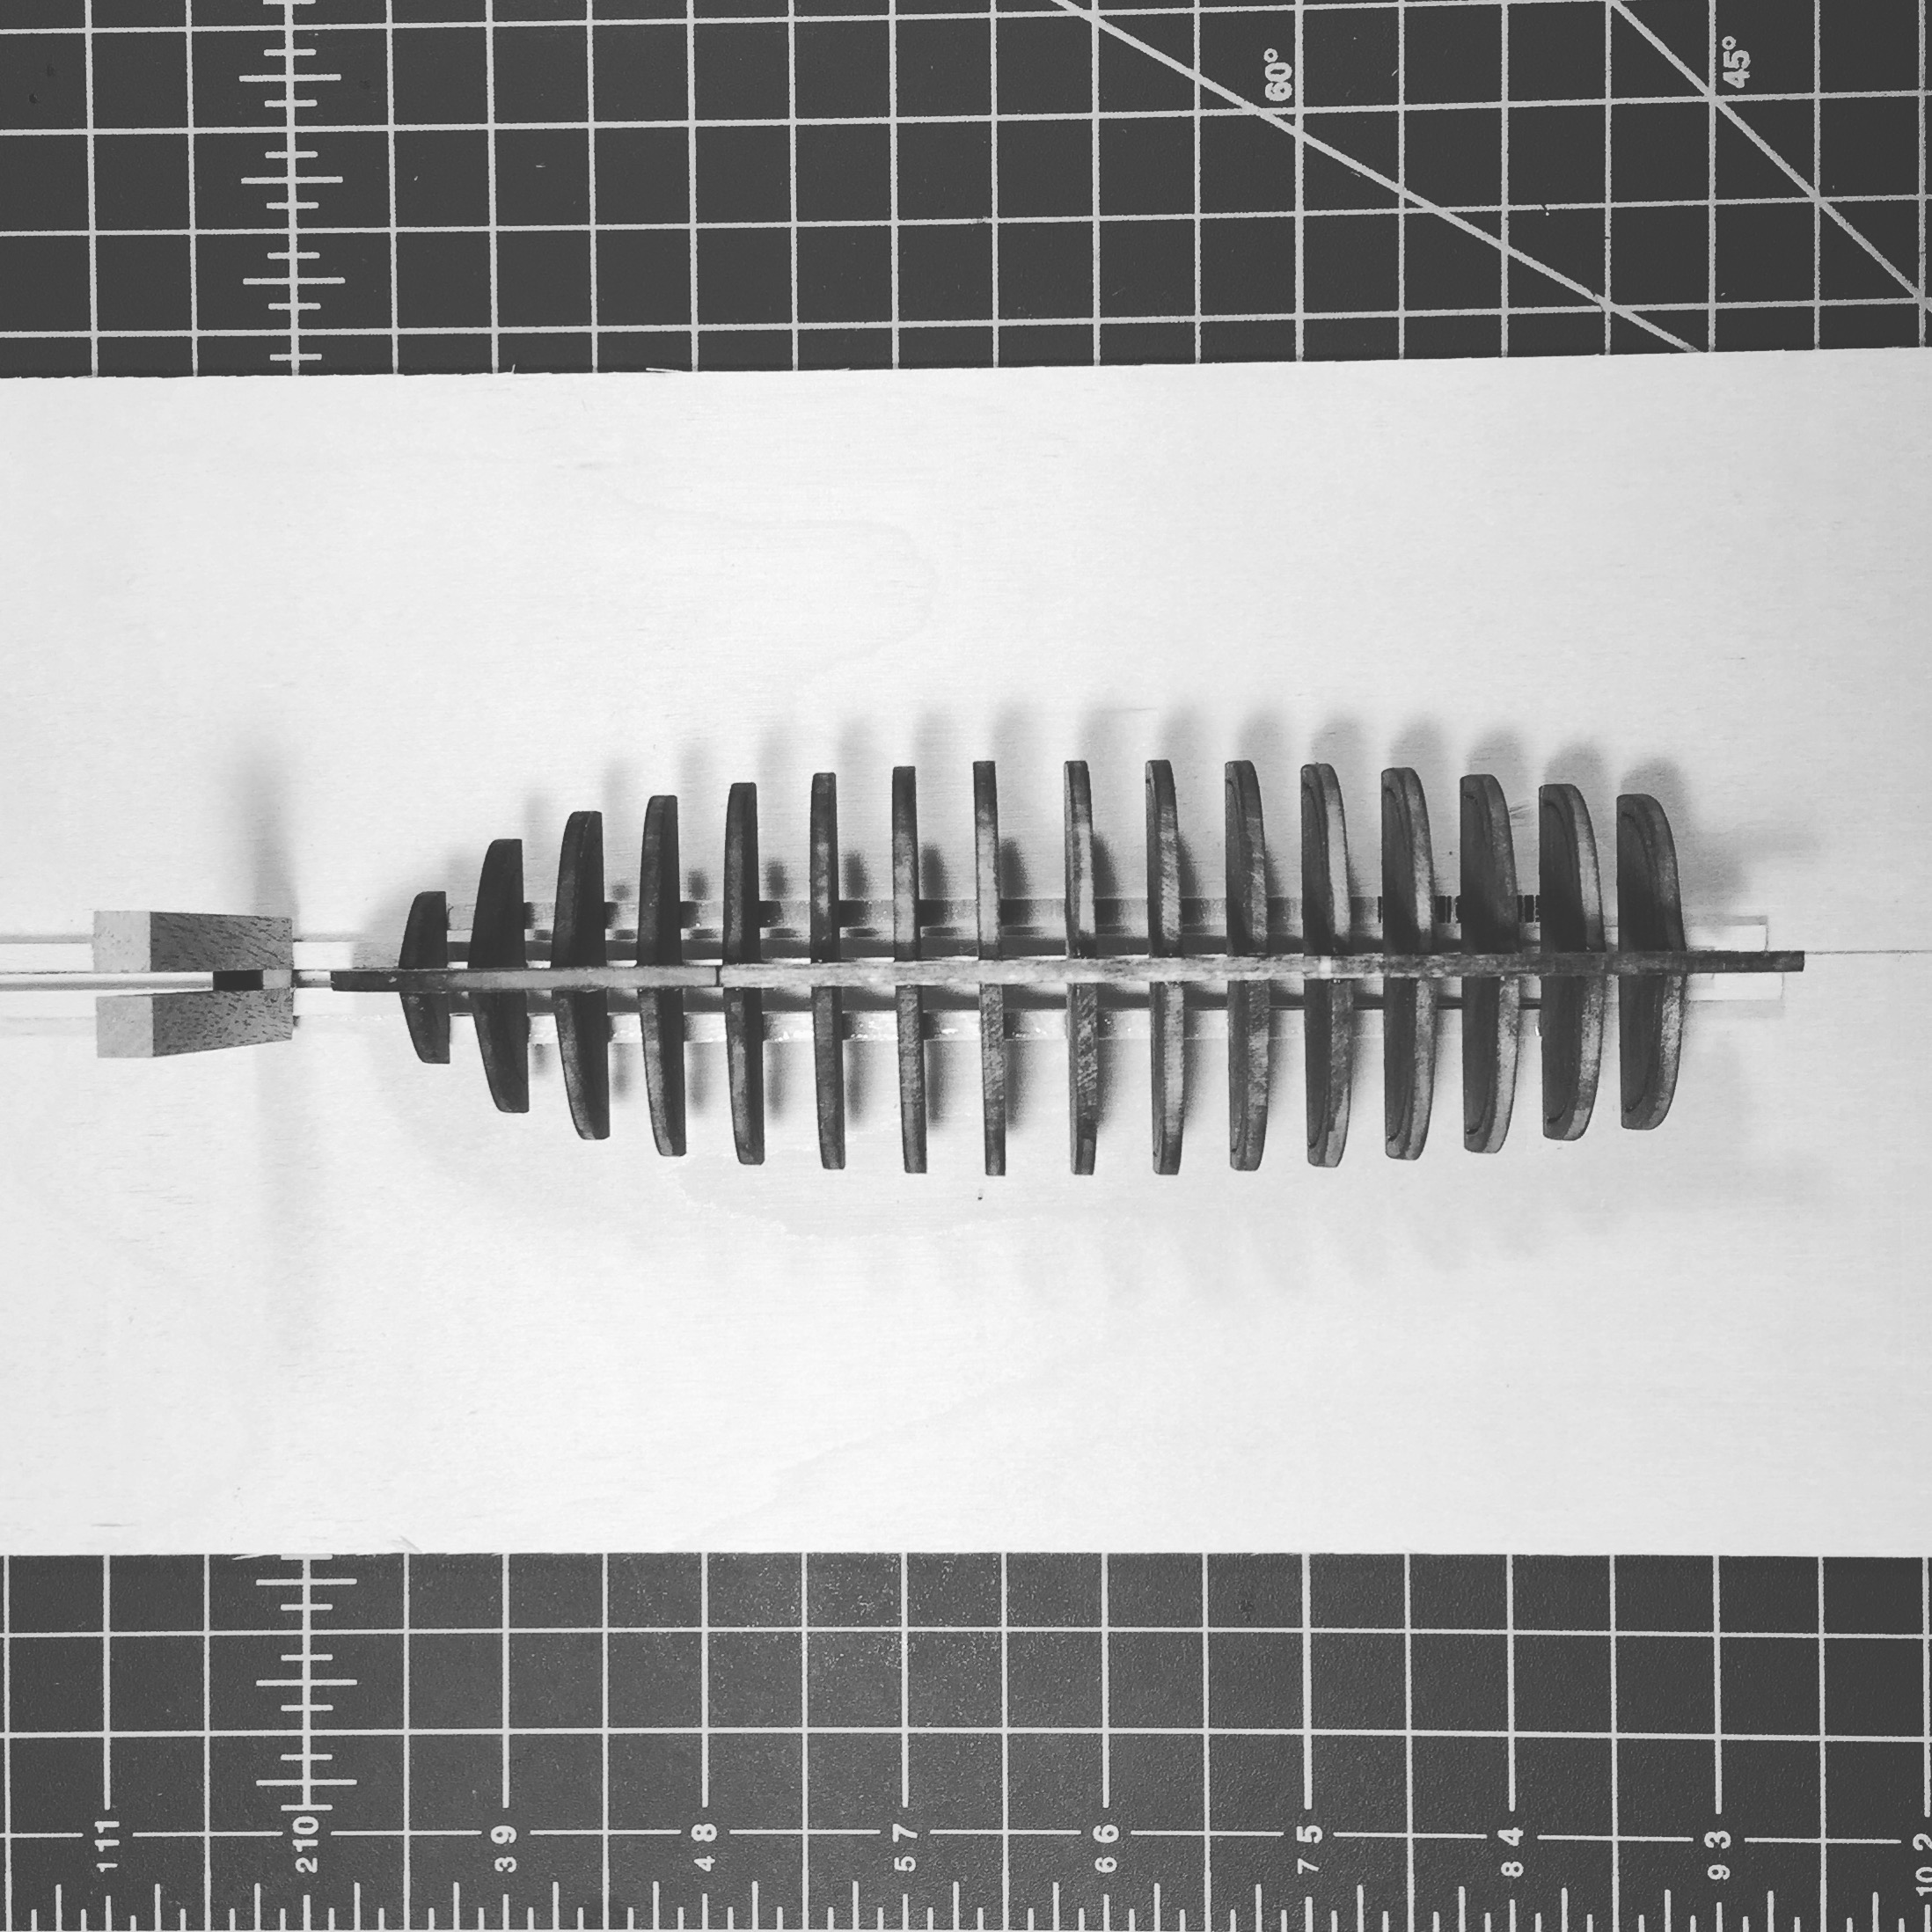
Started this morning on the deadwood as well as doing a final scrape along the rabbet with an exacto blade. Scraping really finished the edge and allowed me to dial it just right on both sides of the keel assembly. I *may* have removed too much material, not sure. Im never sure. I never know exactly how its supposed to look, and its difficult to tell what the right way is from photos. I suspect there isn't supposed to be a hard edge following off the rabbet up the deadwood, but so far as I can tell I don't think it will show. I also started separating the bulkheads from the stock sheet. The instructions say to go ahead and remove the char, but I never do this. I find the char a nice way to gauge fairing equity as I begin. I also went ahead and pulled out my building slip from HobbyZone. Its probably overkill for a build this size, in fact this build is probably about as small as one should go for this building slip to be practicable. That said, I do like presence it adds on the bench, and feel it gives me a bit more confidence when dry fitting bulkheads and moving about. It has adjustable vertical supports which provide a sturdy grip without getting in the way. The presence helps keep me mindful not to knock things about and prevent my arms from sweeping across the stem in the wrong way! This process also went fairly well with everything only needing minor adjustments here and there to sit properly aligned and along the rabbet. I also took a page out of Arthur Wayne's build and placed dowels through the transom into the sternpost. After knocking enough of these transoms off in the past, I found this a clever and very strong reinforcement well worth the 15 minutes or so to work out. I ended the day adding the strong back, though I chose to forgo the straight single spine piece as stipulated in the instructions as I just couldn't see how a single piece could provide the necessary lateral support the bulkheads would require during fairing. Its not very rigid and ready to start fairing, which is a seriously anxiety provoking step for me. I deal somewhere in a thread on fairing where Mike Y stated fairing should and could take up to 20 hours! Gulp! Ive never taken it that slowly, or been that careful.... that should be my clue! Please, if anyone see's something alarming or that looks off please let me know. Im thinking right now that where my aft most bulkheads are running towards the rabbet there might be some error in how they should be blending and to hitting my possibly over-carved deadwood.
- 66 replies
-
- Finished
- Model Shipways
-
(and 1 more)
Tagged with:
-
I do know that, and have taken advantage of it in the past. Thankfully, Im not there yet!
- 66 replies
-
- Finished
- Model Shipways
-
(and 1 more)
Tagged with:
-
Well its taken me a few days to look through my kit backlog to decide where I wanted to go next and ultimately decided on the MS 18th C. Armed Longboat. Hoping that with the continued "shelter at home" order in place I might get another one of these smaller projects finished, or at least make some decent headway. Ive enjoyed reading the other build logs, but especially appreciated the two by Dr PS and Arthur Wayne (the only two completed logs that I know of). Im also grateful to Ken Foran in advance, should he decide to weigh-in as he has elsewhere. I won't belabor the details of the kit, as I think those are well covered in the great review by Dubz, here. For my own copy of the kit, I found all the required parts accounted for and the plans printed at the right scale. Others found the plans printed a few percentage points off, but after measuring the 1" reference, my copies were spot-on. A pet-peeve of mine has always been creases in paper, all paper. I typically take my fresh plans into my lab for proper flattening, but given the situation Im stuck without this luxury. I tried a few ways to deal with this at home but none worked quite right, and I'd rather wait and do it the right way then muck about doing it a less right way. So creases and all, they hang at the ready. I'll just jump right in at this point as many of the preliminaries are well covered in the previously mentioned logs. Ill note one thing I do miss though, after reading through the instructions I didn't really find any sort of mention of source material or bibliography (did I miss this?). Usually found is some sort of history or contextual bit. Part of the joy in building for me has been the background pleasure reading that can go along with the modeling subject. I would have liked a short list of books or other materials that might capture the period or use of these vessels to better paint the picture as I turn my focus to them. If anyone has anything in particular to recommend, Id be very thankful. The build commenced with the all-to familiar assembly of the keel and false keel components. I almost always get this wrong, though it is probably - or should be, the easiest step. I generally sand too much or not enough or round things off so with this build I was extra careful and slow. I never seem to be that successful getting these things as well as some of more accomplished builders out there. I feel Im always chasing the air-tight joint and never able to get there. Some one doing a short tutorial on their edge prep methods would likely earn a LOT of kudos for the time spent - *hint, hint* Not having a good example of how this is done is maddening, as learning how to sand off the scorch marks, while not taking too much off and keeping everything square shouldn't be this hard! I marked everything out with pencil first, including guidelines for carving the rabbet along the narrow edge and the opposing side of the deadwood. Anyway, Ive done what I could.. As I said before, I went extremely slowly here, as Ive learned its very easy to remove too much material. One peculiar thing in my kit were these curious stains in the wood which I can only guess are drops of oil or something that may have fallen off the laser machine? Im not sure how much they bother me at this point as Im not sure how much they'll really show once the whole thing is together. I may follow Arthur Wayne's approach and only tack-glue the keel to the false-keel just in case it becomes something I can't live with and needs replacing. Ill whittle out the deadwood tomorrow as I wanted rest and a good cup of coffee before tackling that bit. Its likely not as big of a deal as Ive made it, but as Ive said Im always shooting for the kind of tolerances I see on some the builds around here so I planning to be as deliberate with each thing here as I can.
- 66 replies
-
- Finished
- Model Shipways
-
(and 1 more)
Tagged with:
-
Fantastic, I love the driftwood cradle! Great job, something that will look very handsome on the shelf.
- 84 replies
-
- peterboro canoe
- Finished
-
(and 1 more)
Tagged with:
-
I figured it was some sort of jig and I guess I can see what you're describing. Thanks for deciphering that for me
-
What is it? How is it used?
About us
Modelshipworld - Advancing Ship Modeling through Research
SSL Secured
Your security is important for us so this Website is SSL-Secured
NRG Mailing Address
Nautical Research Guild
237 South Lincoln Street
Westmont IL, 60559-1917
Model Ship World ® and the MSW logo are Registered Trademarks, and belong to the Nautical Research Guild (United States Patent and Trademark Office: No. 6,929,264 & No. 6,929,274, registered Dec. 20, 2022)
Helpful Links
About the NRG
If you enjoy building ship models that are historically accurate as well as beautiful, then The Nautical Research Guild (NRG) is just right for you.
The Guild is a non-profit educational organization whose mission is to “Advance Ship Modeling Through Research”. We provide support to our members in their efforts to raise the quality of their model ships.
The Nautical Research Guild has published our world-renowned quarterly magazine, The Nautical Research Journal, since 1955. The pages of the Journal are full of articles by accomplished ship modelers who show you how they create those exquisite details on their models, and by maritime historians who show you the correct details to build. The Journal is available in both print and digital editions. Go to the NRG web site (www.thenrg.org) to download a complimentary digital copy of the Journal. The NRG also publishes plan sets, books and compilations of back issues of the Journal and the former Ships in Scale and Model Ship Builder magazines.

