HOLIDAY DONATION DRIVE - SUPPORT MSW - DO YOUR PART TO KEEP THIS GREAT FORUM GOING!
×


Justin P.
-
Posts
1,008 -
Joined
Content Type
Profiles
Forums
Gallery
Events
Everything posted by Justin P.
-
 Looks really great. Love that planking and those timbers. You've really got me thinking about my build...
 -
You are not the only one...
-
Which parts are those? My list says basswood unless otherwise noted and the only thing "otherwise noted" is plywood. Maybe I have the amateur version, lol!
- 950 replies
-
- 1
-

-
- syren
- model shipways
- (and 1 more)
-
Looks like a really great start! I imagine working with those fiddly bits is frustrating, ha. I think your approach of working with each element like a layer cake is probably optimal for me too - I'd probably do the same. I think even as is they are much better than the castings.
- 950 replies
-
- 1
-
-
- syren
- model shipways
- (and 1 more)
-
I think the time and effort in remaking these will be well worth it. As is obvious in Gahms build, the upgrade is truly remarkable when the time is put in to do it right. If done half as well, it’ll still be 10x better than the castings. I would encourage you to keep working on it, or wait and get the material you need rather than settling. No reason you can’t make this the last step, if you need to move on out of sheer frustration. Make 20 of them if you have to! This detail I think is one of those critical ones. I intend to do the same on my own build... good luck!
- 950 replies
-
- 3
-
-
- syren
- model shipways
- (and 1 more)
-
Looks great. Pulling up a chair! Jealous of you guys with active clubs in your area.
- 54 replies
-
- 1
-
-
- cheerful
- Syren Ship Model Company
- (and 1 more)
-
They are, though intended to be solid blocks. I didn't have any, so I just built them up with sheets.
-
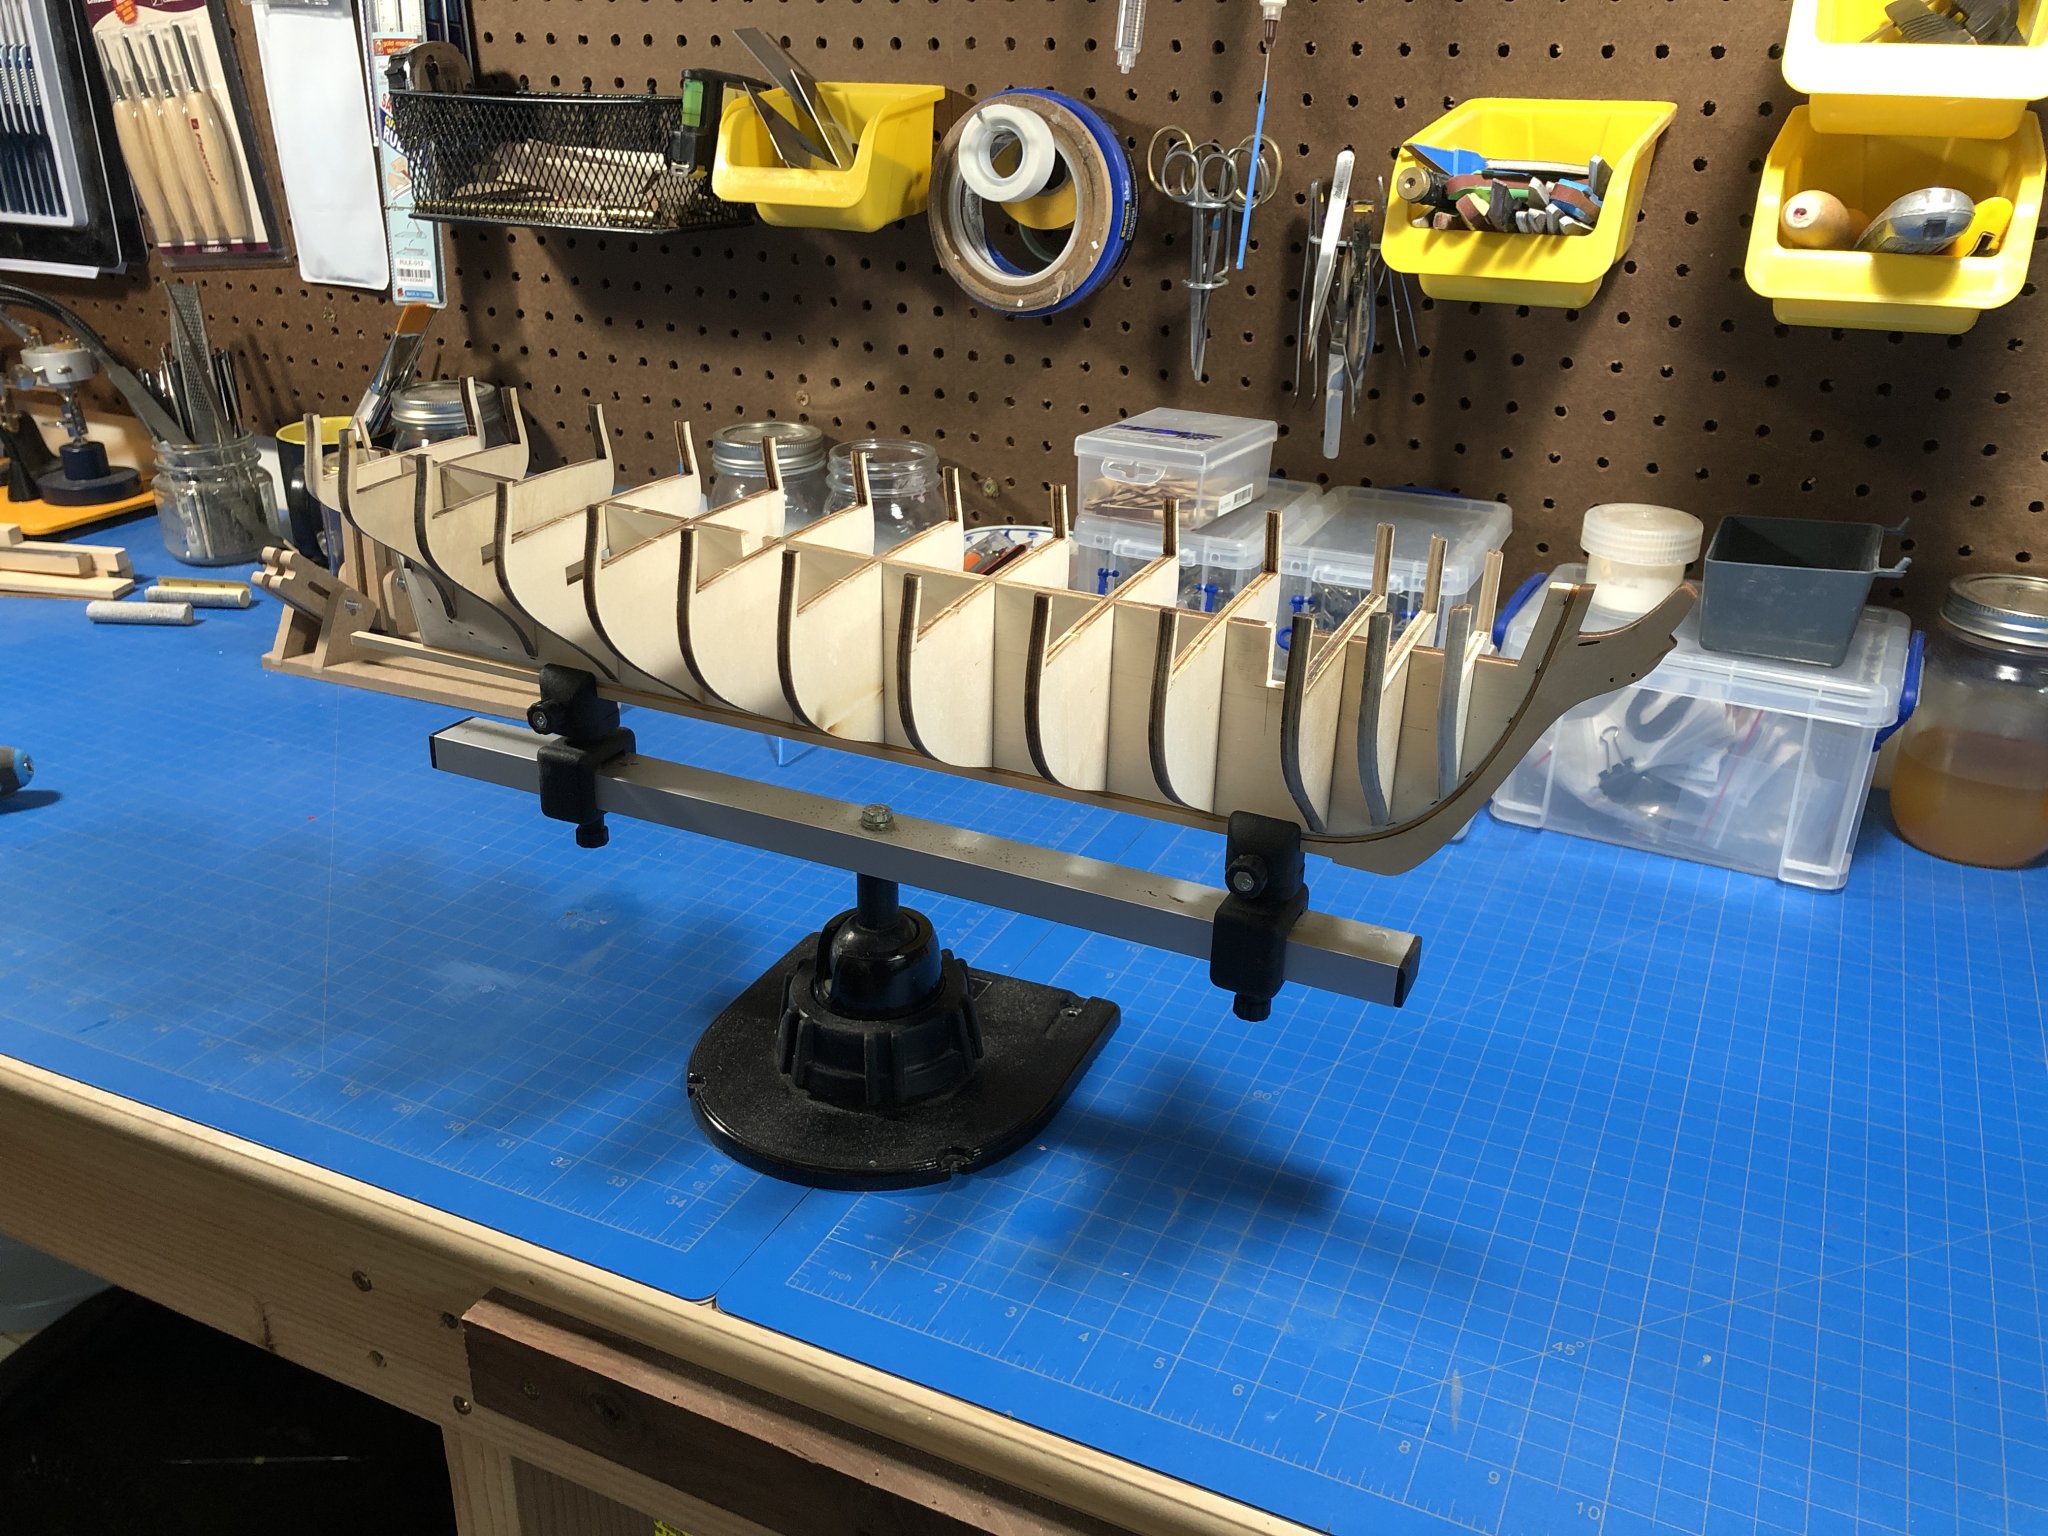
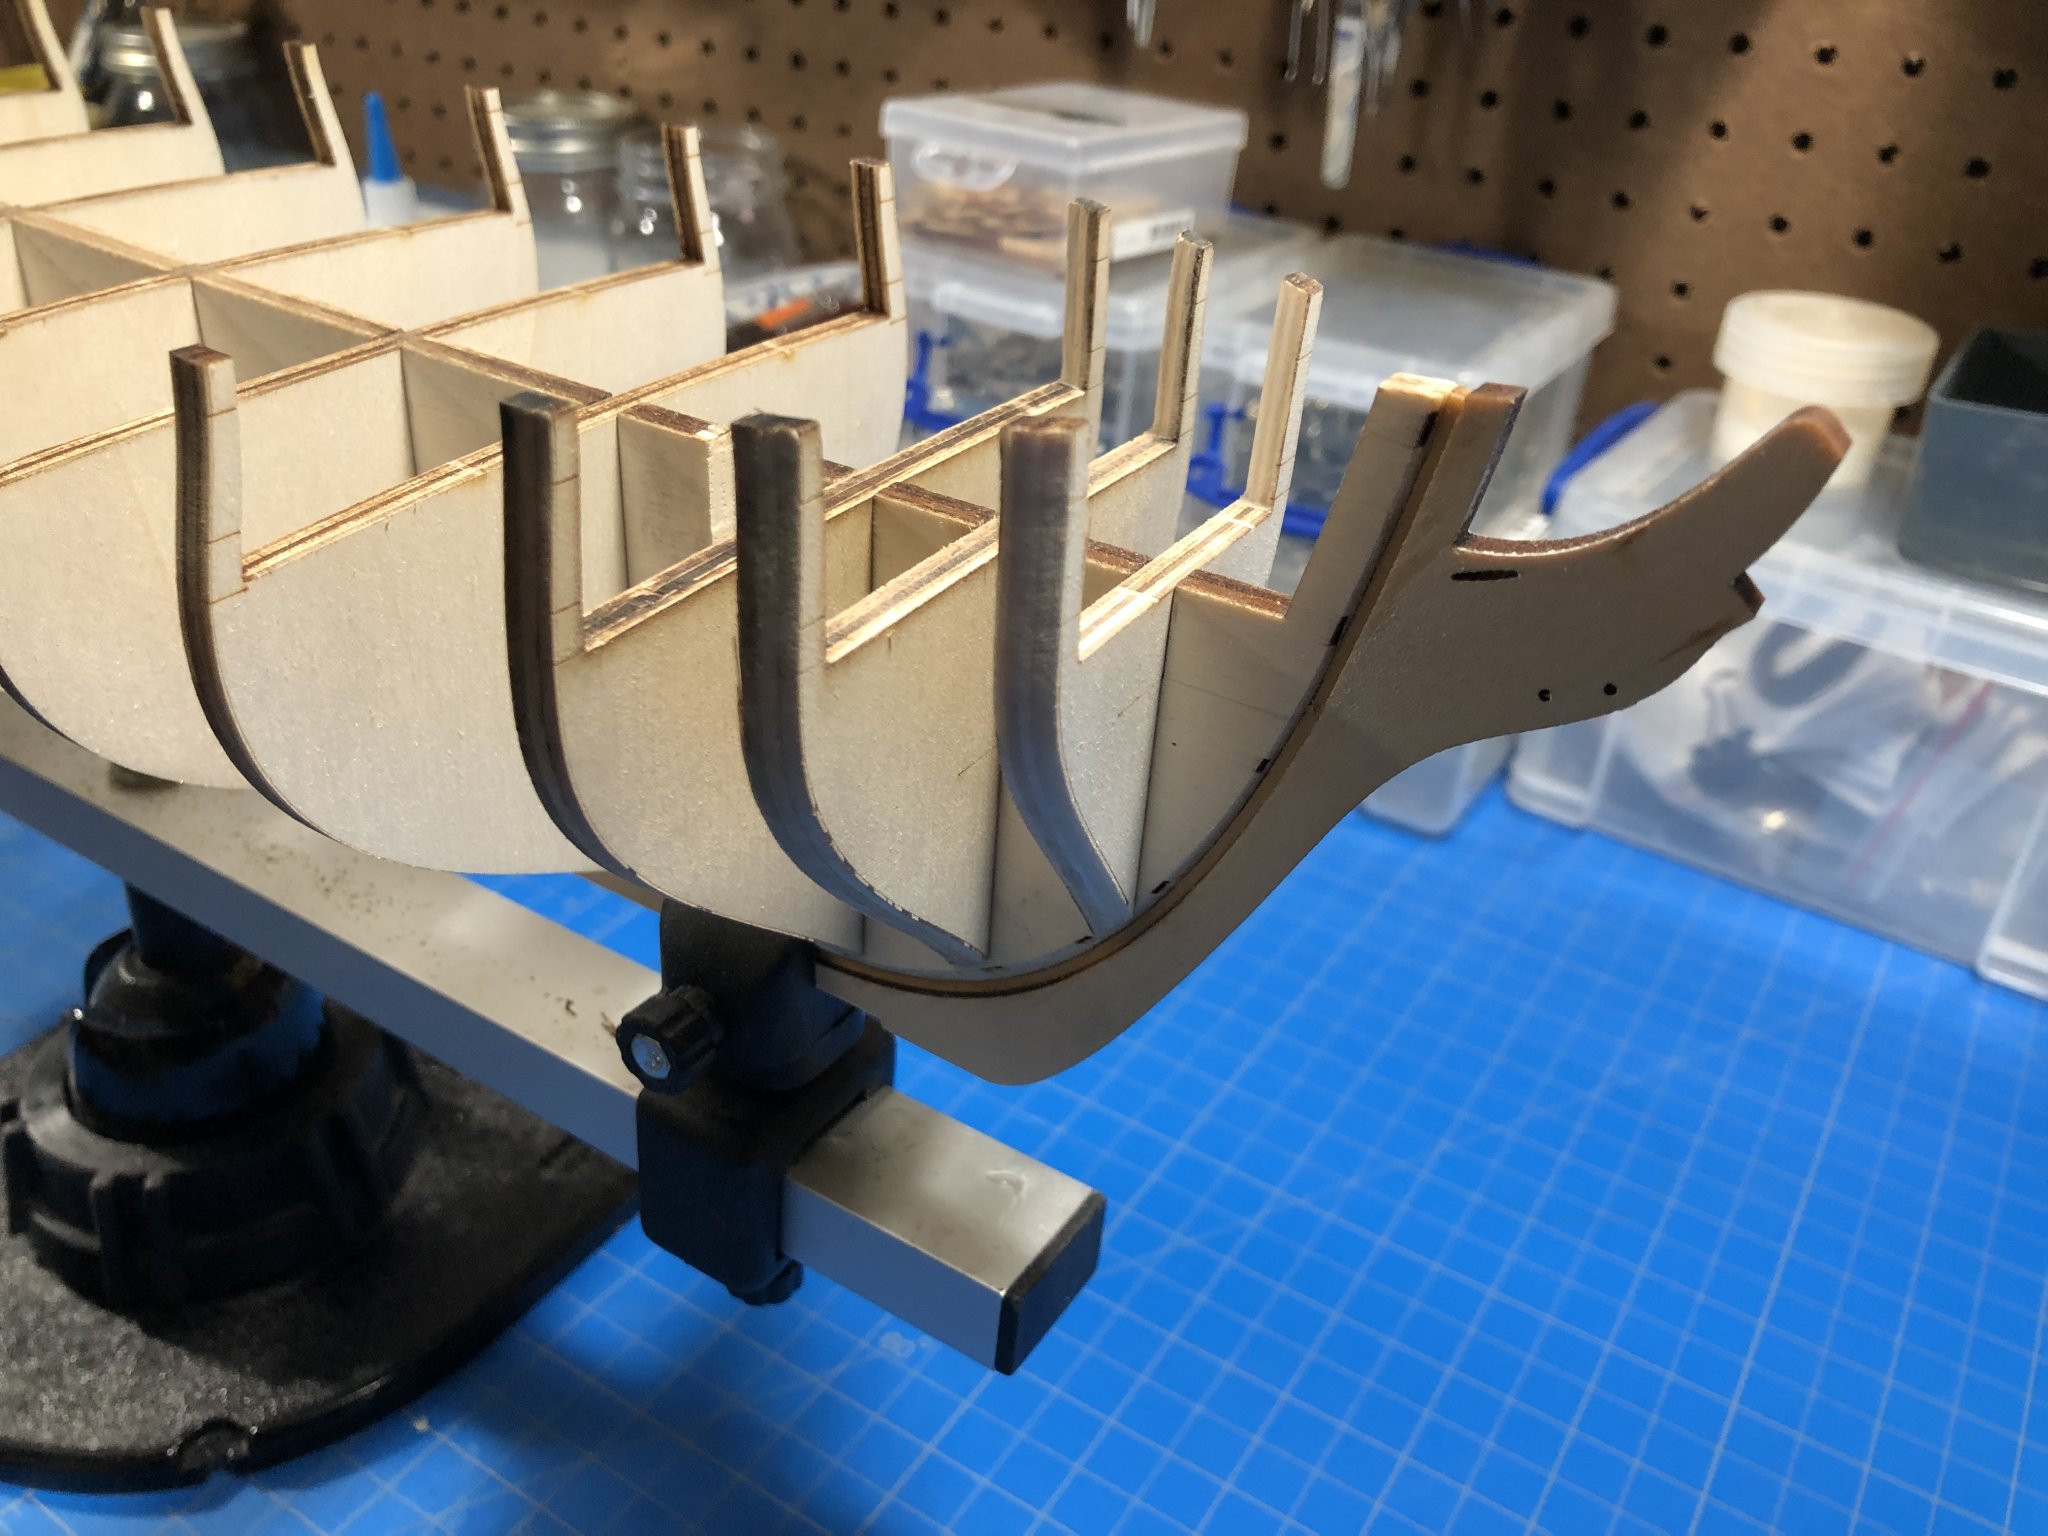
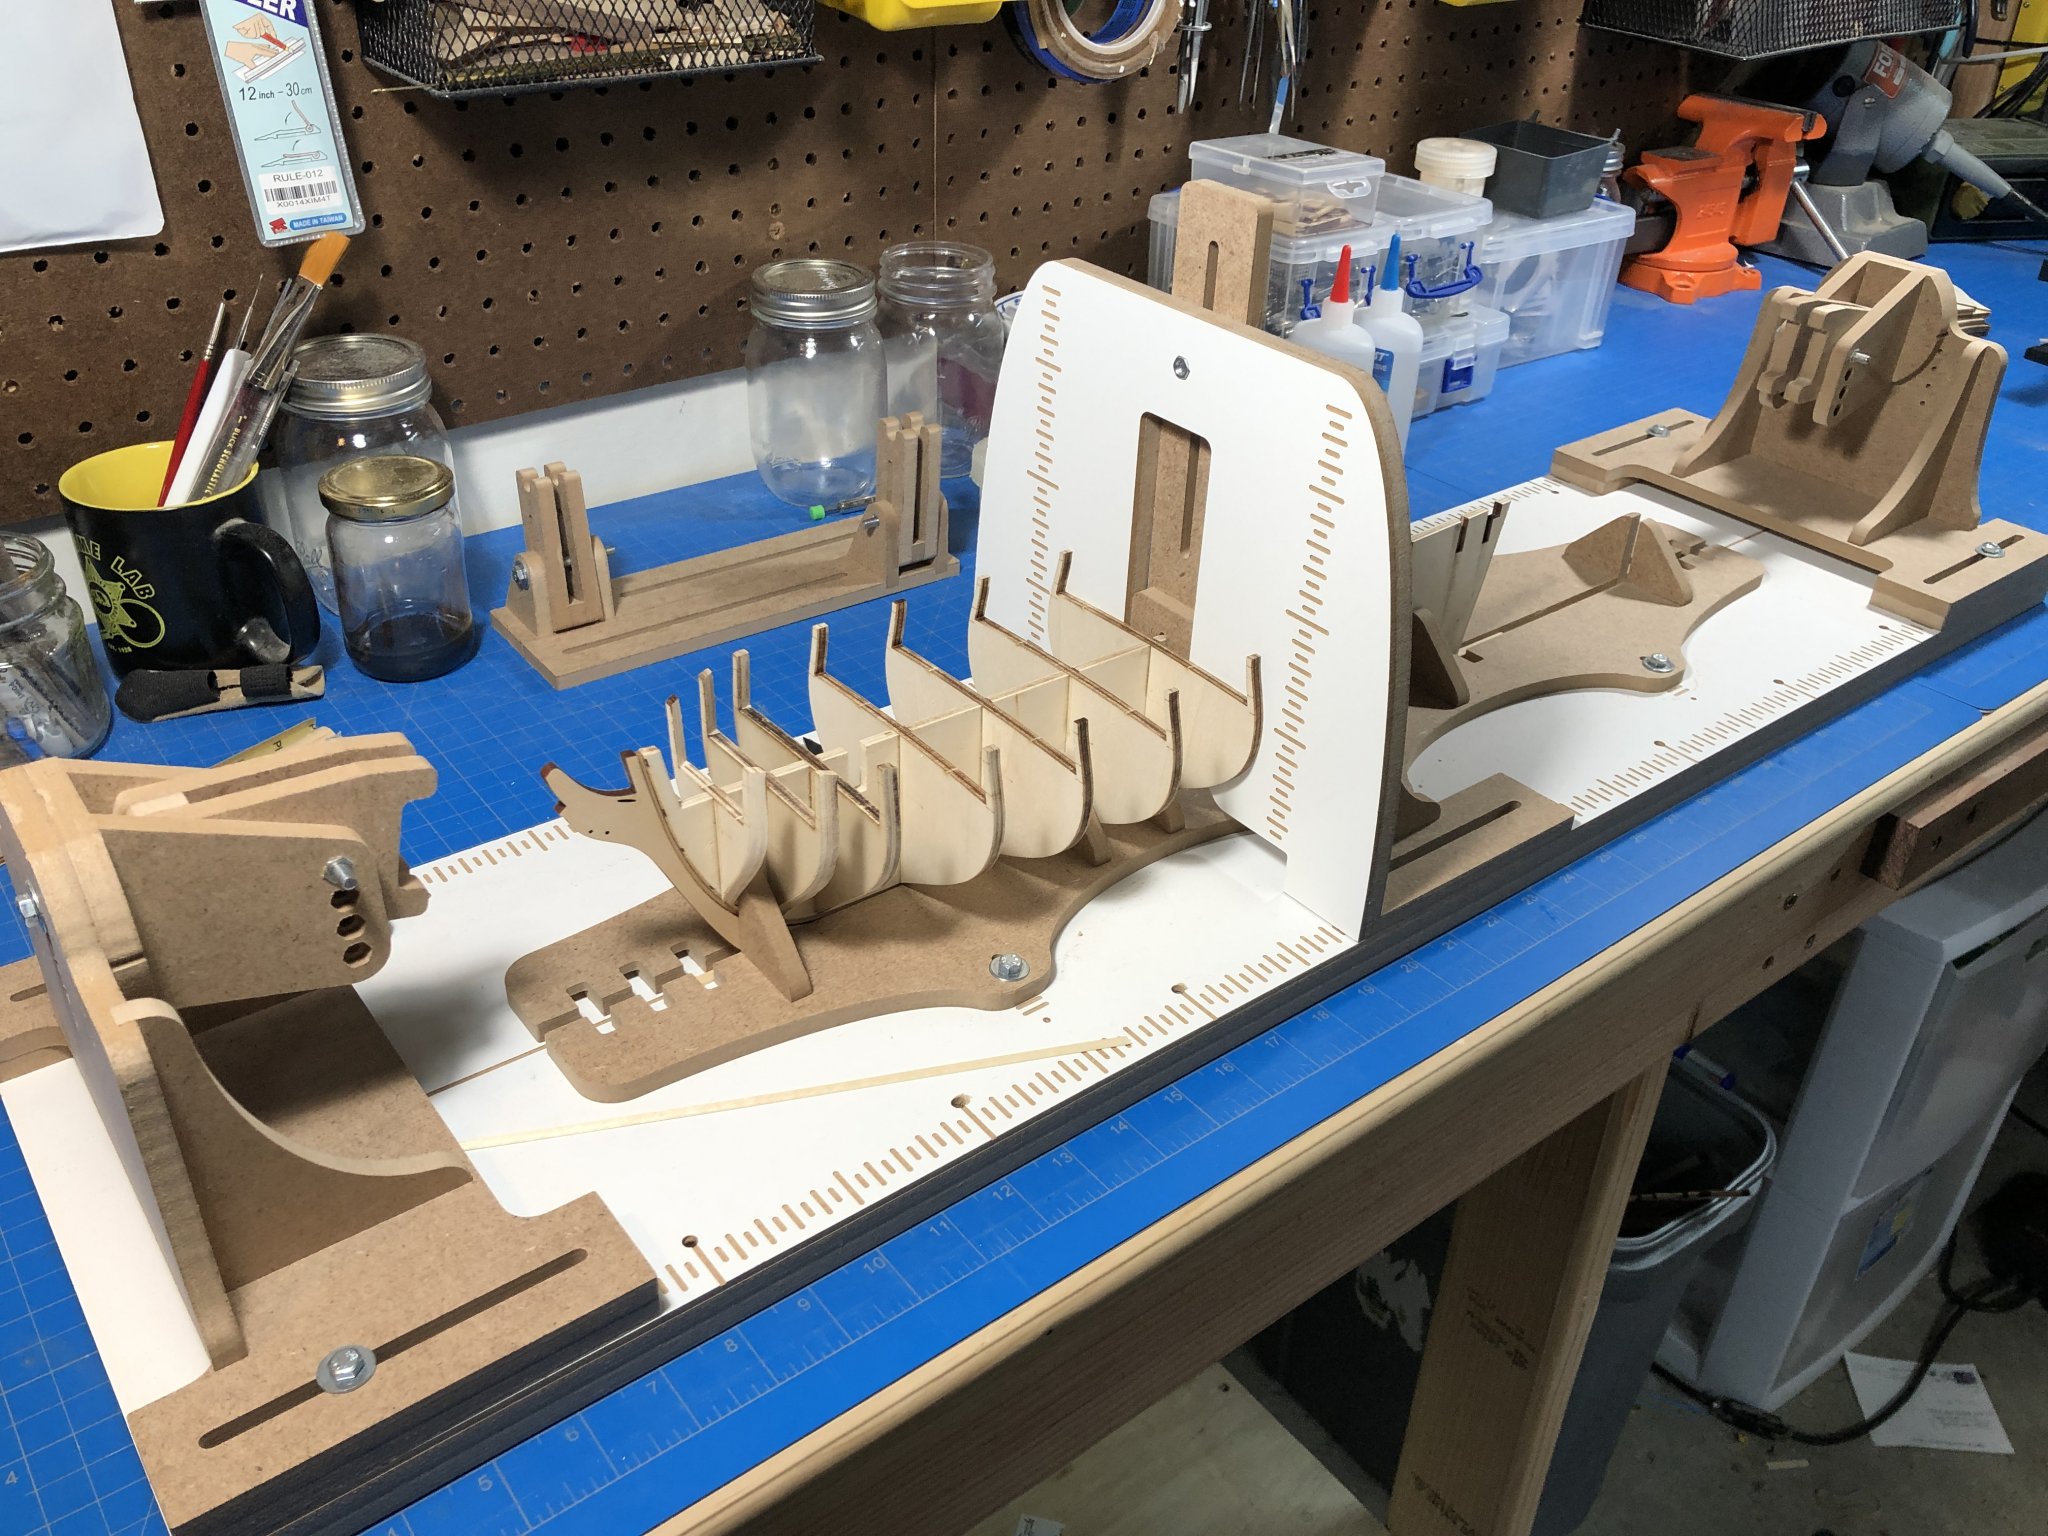
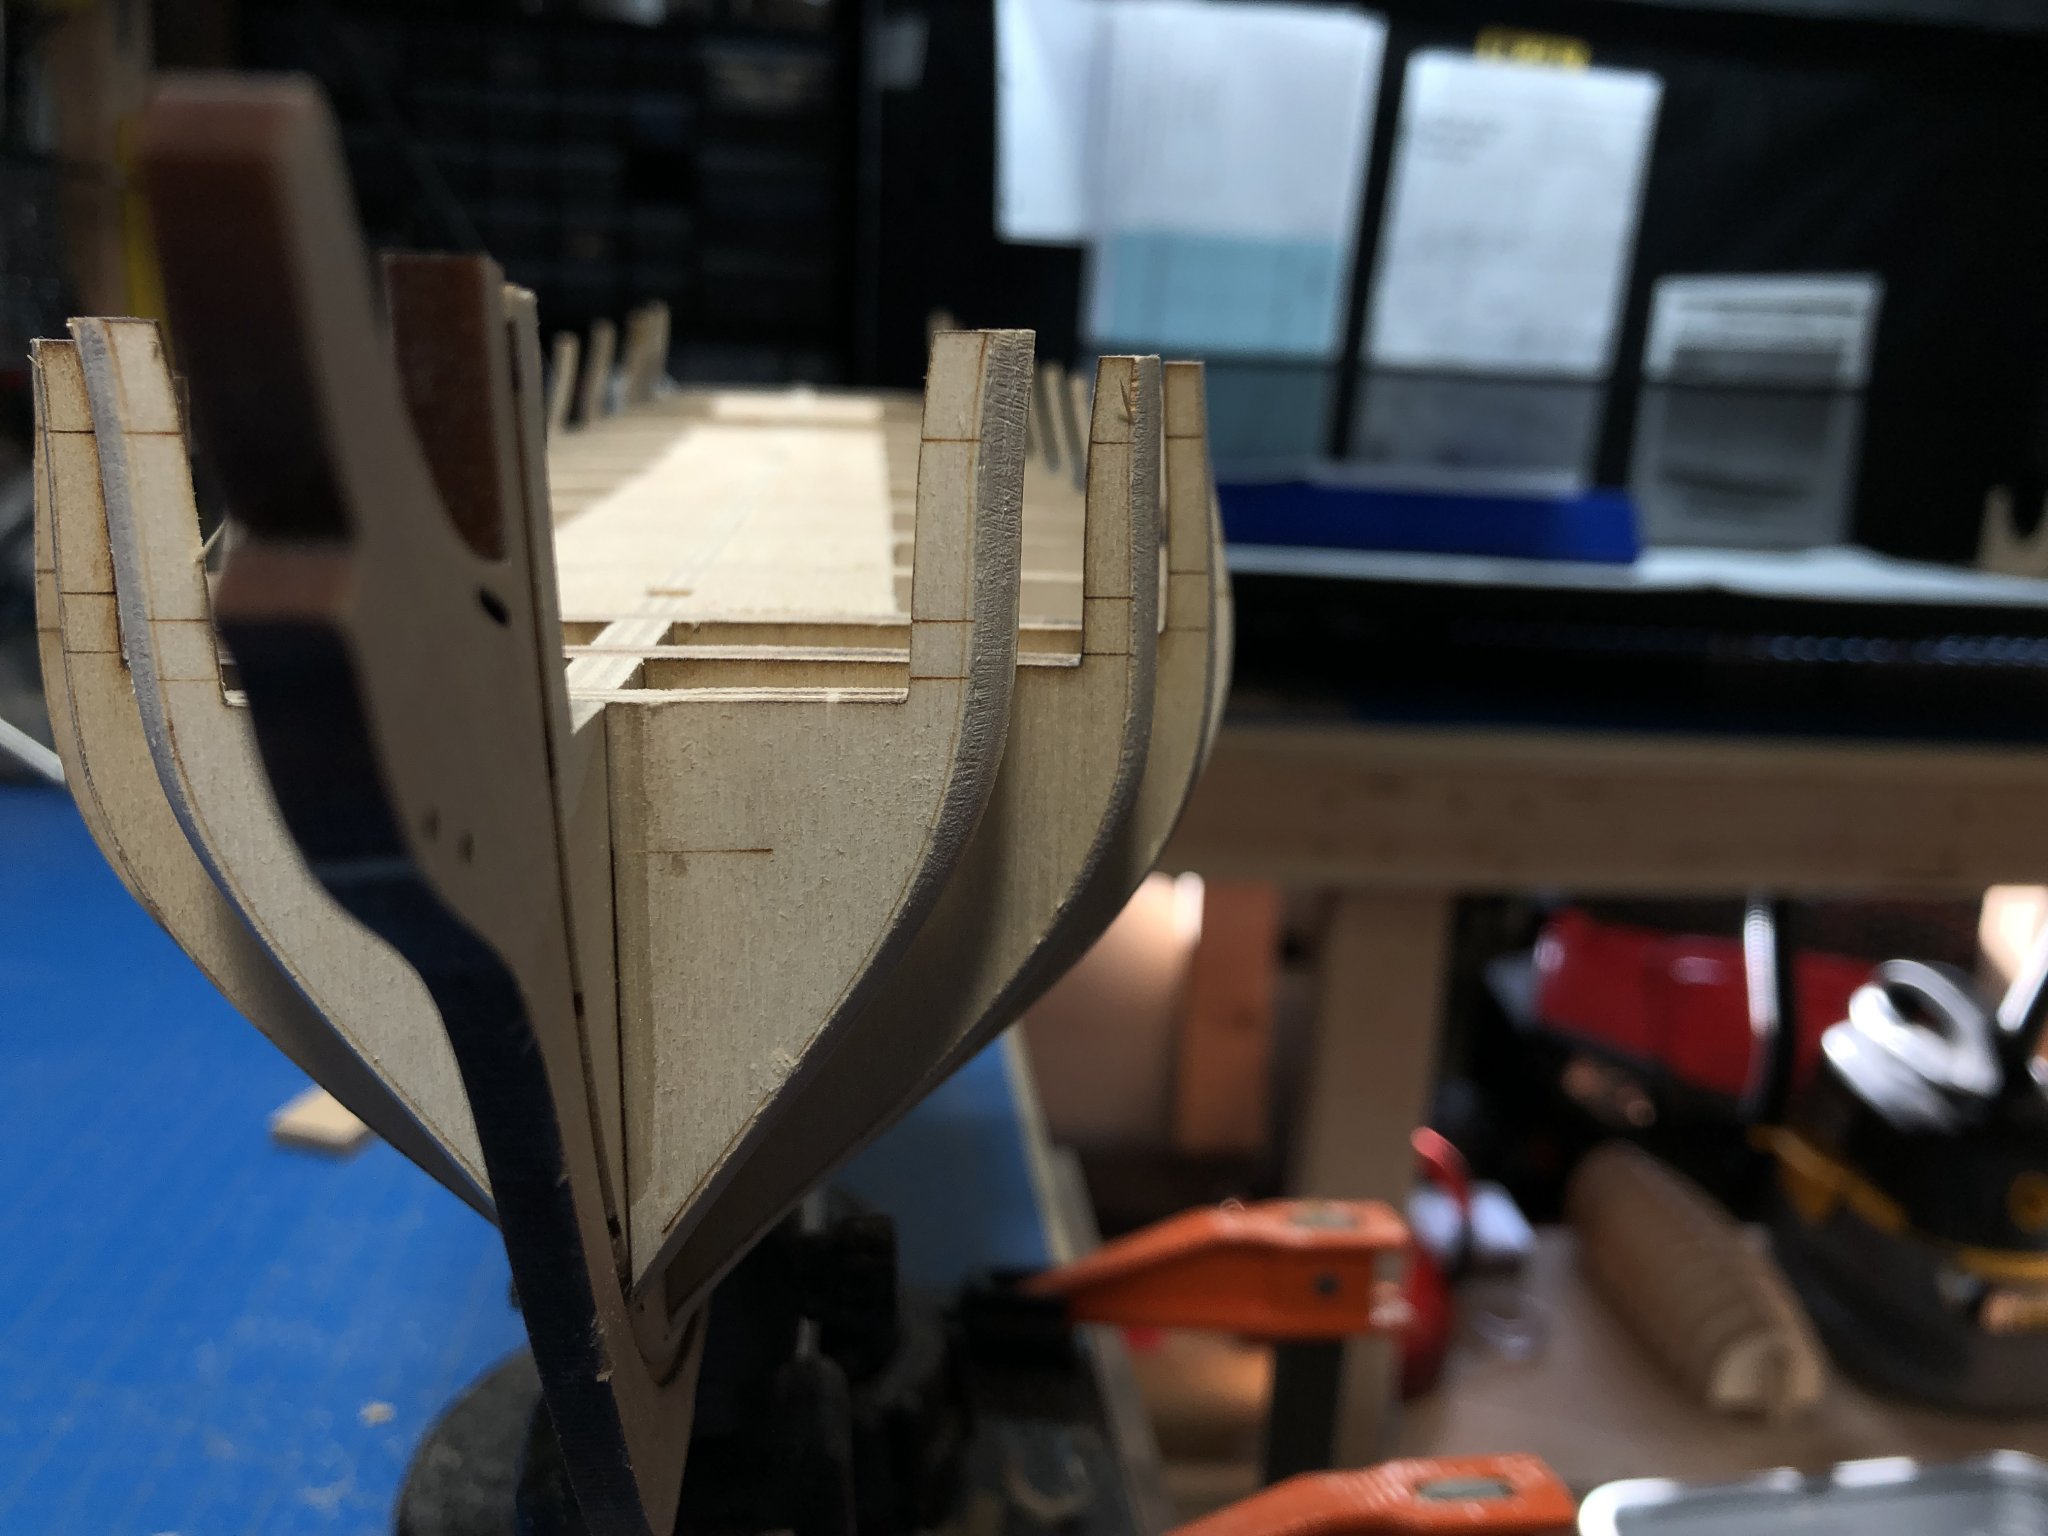
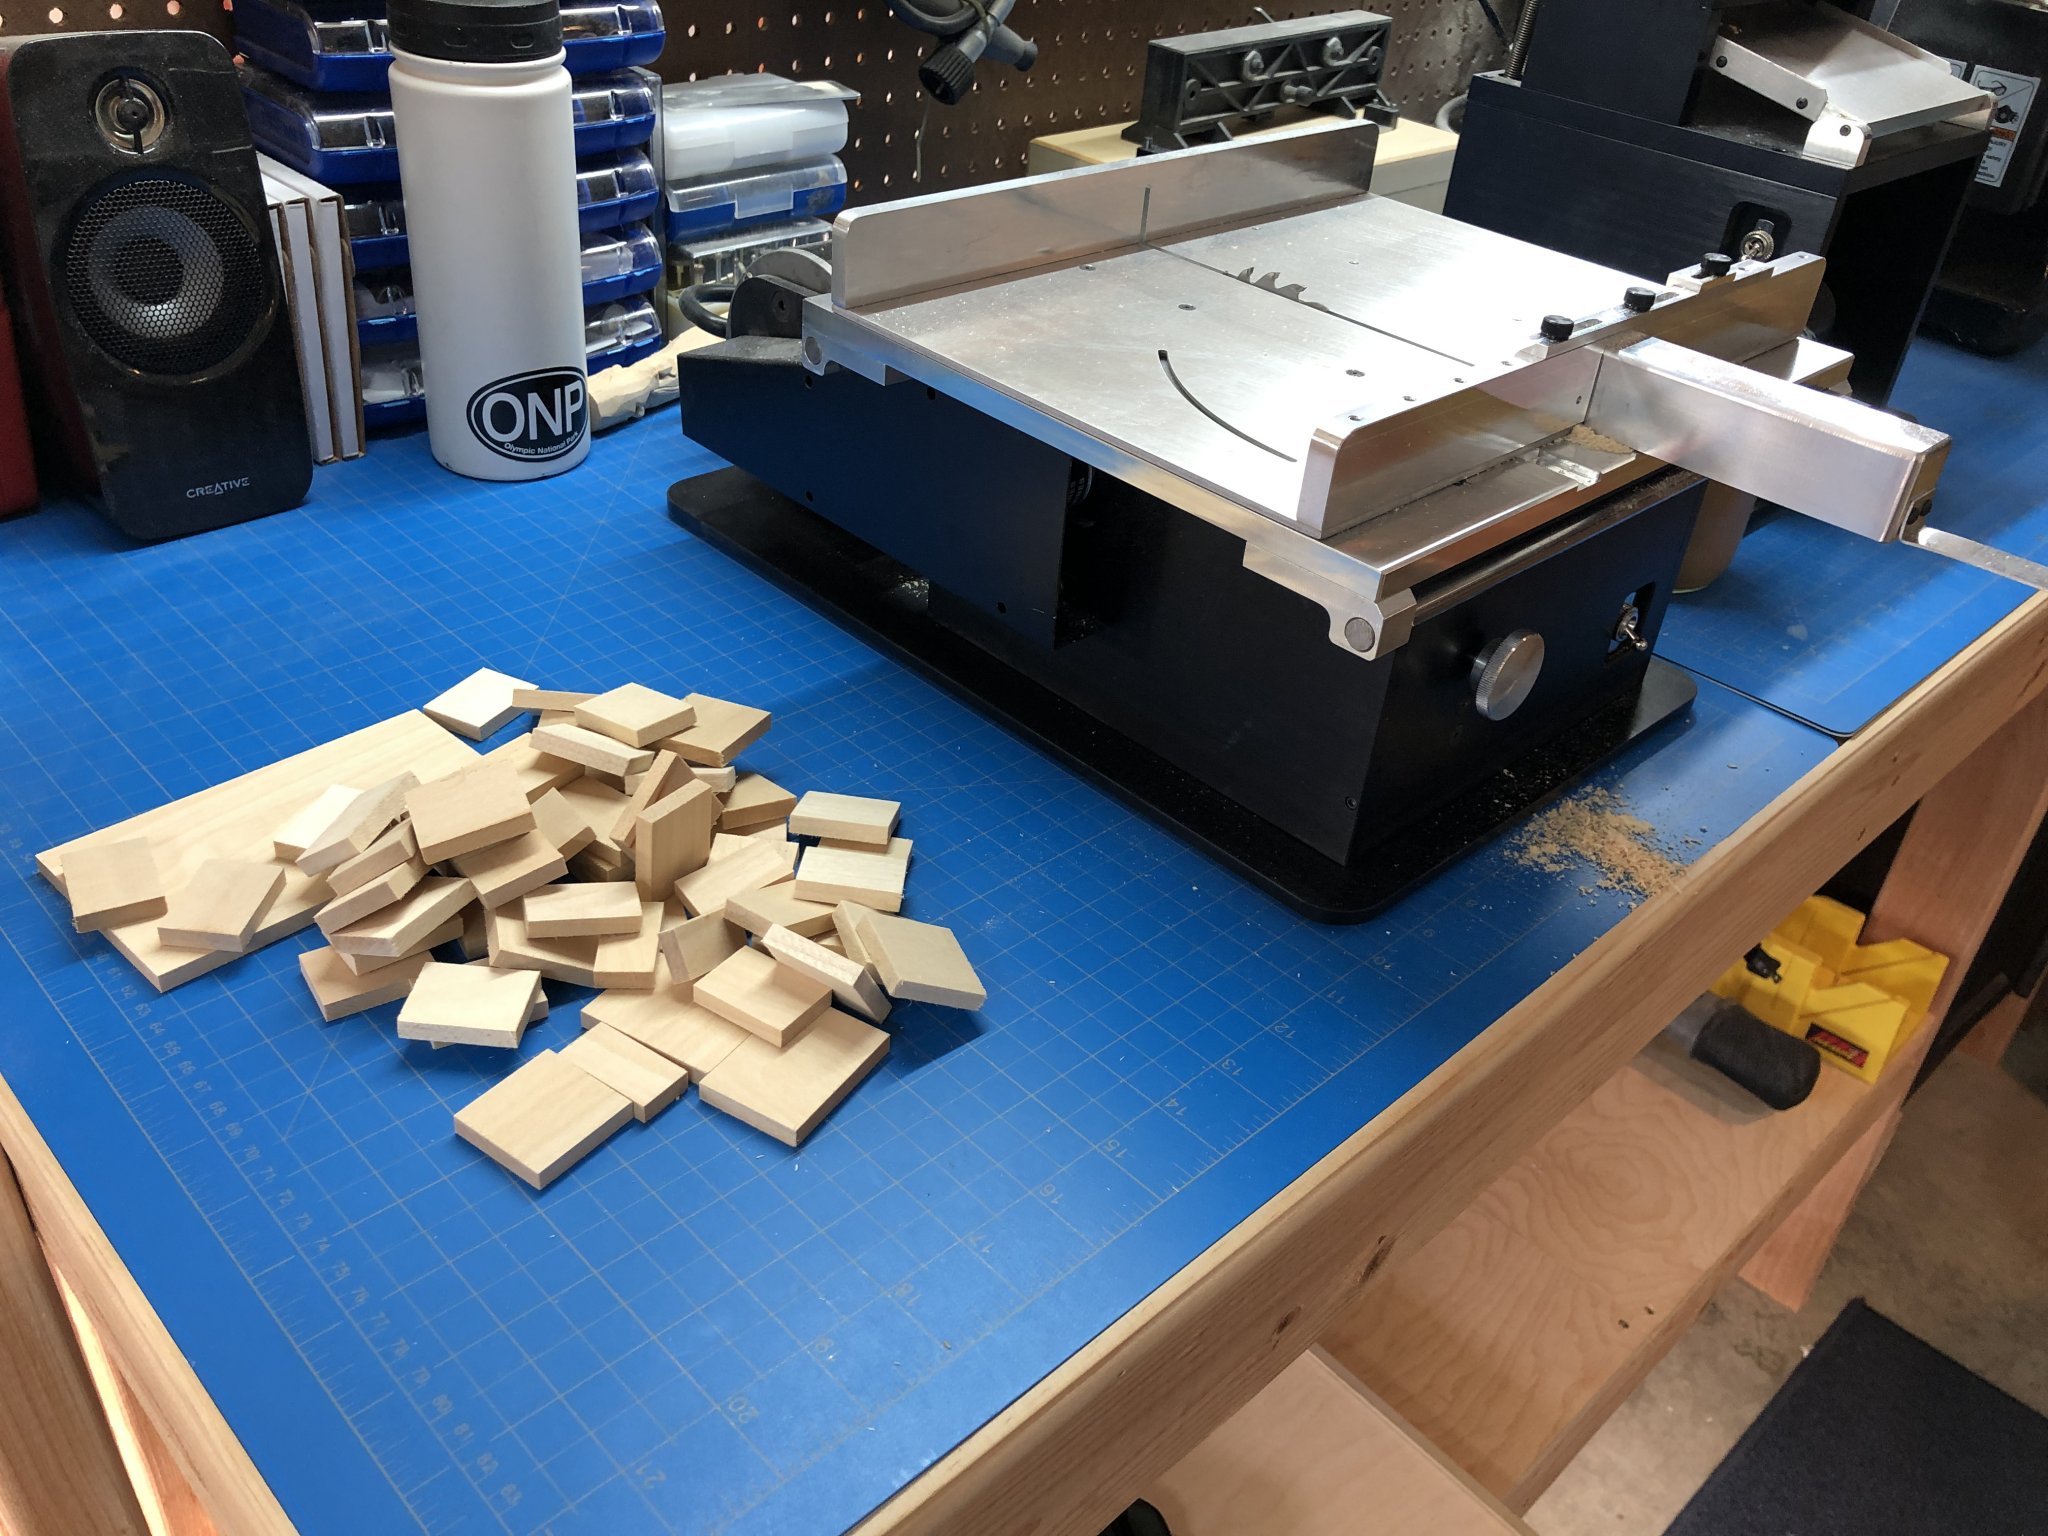
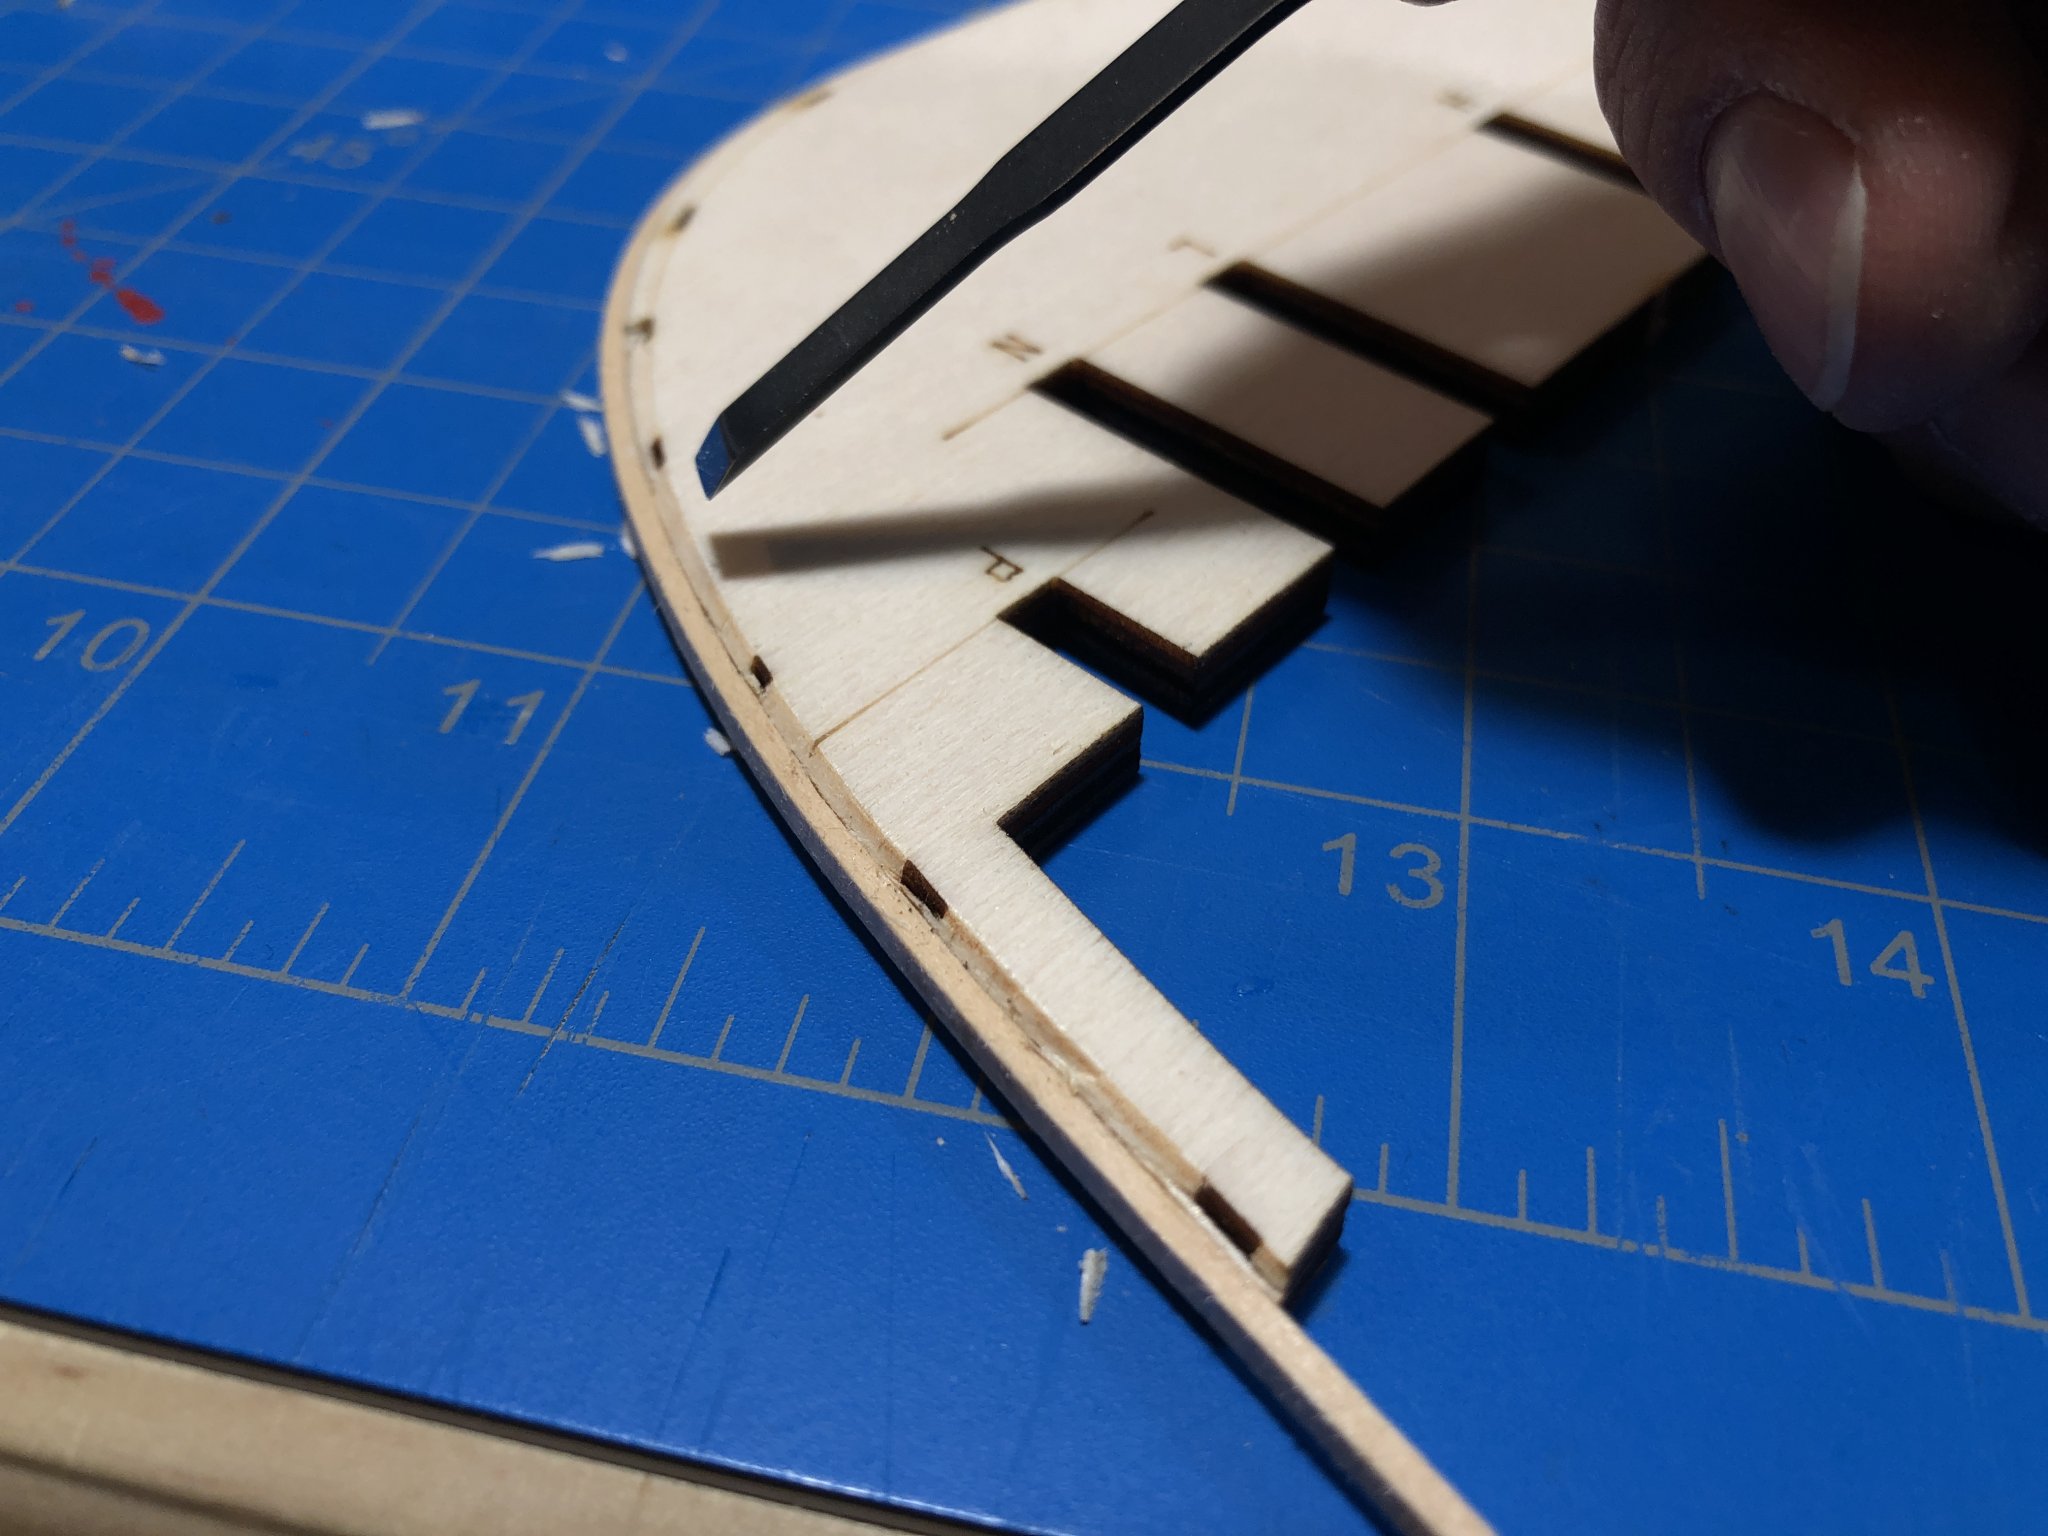
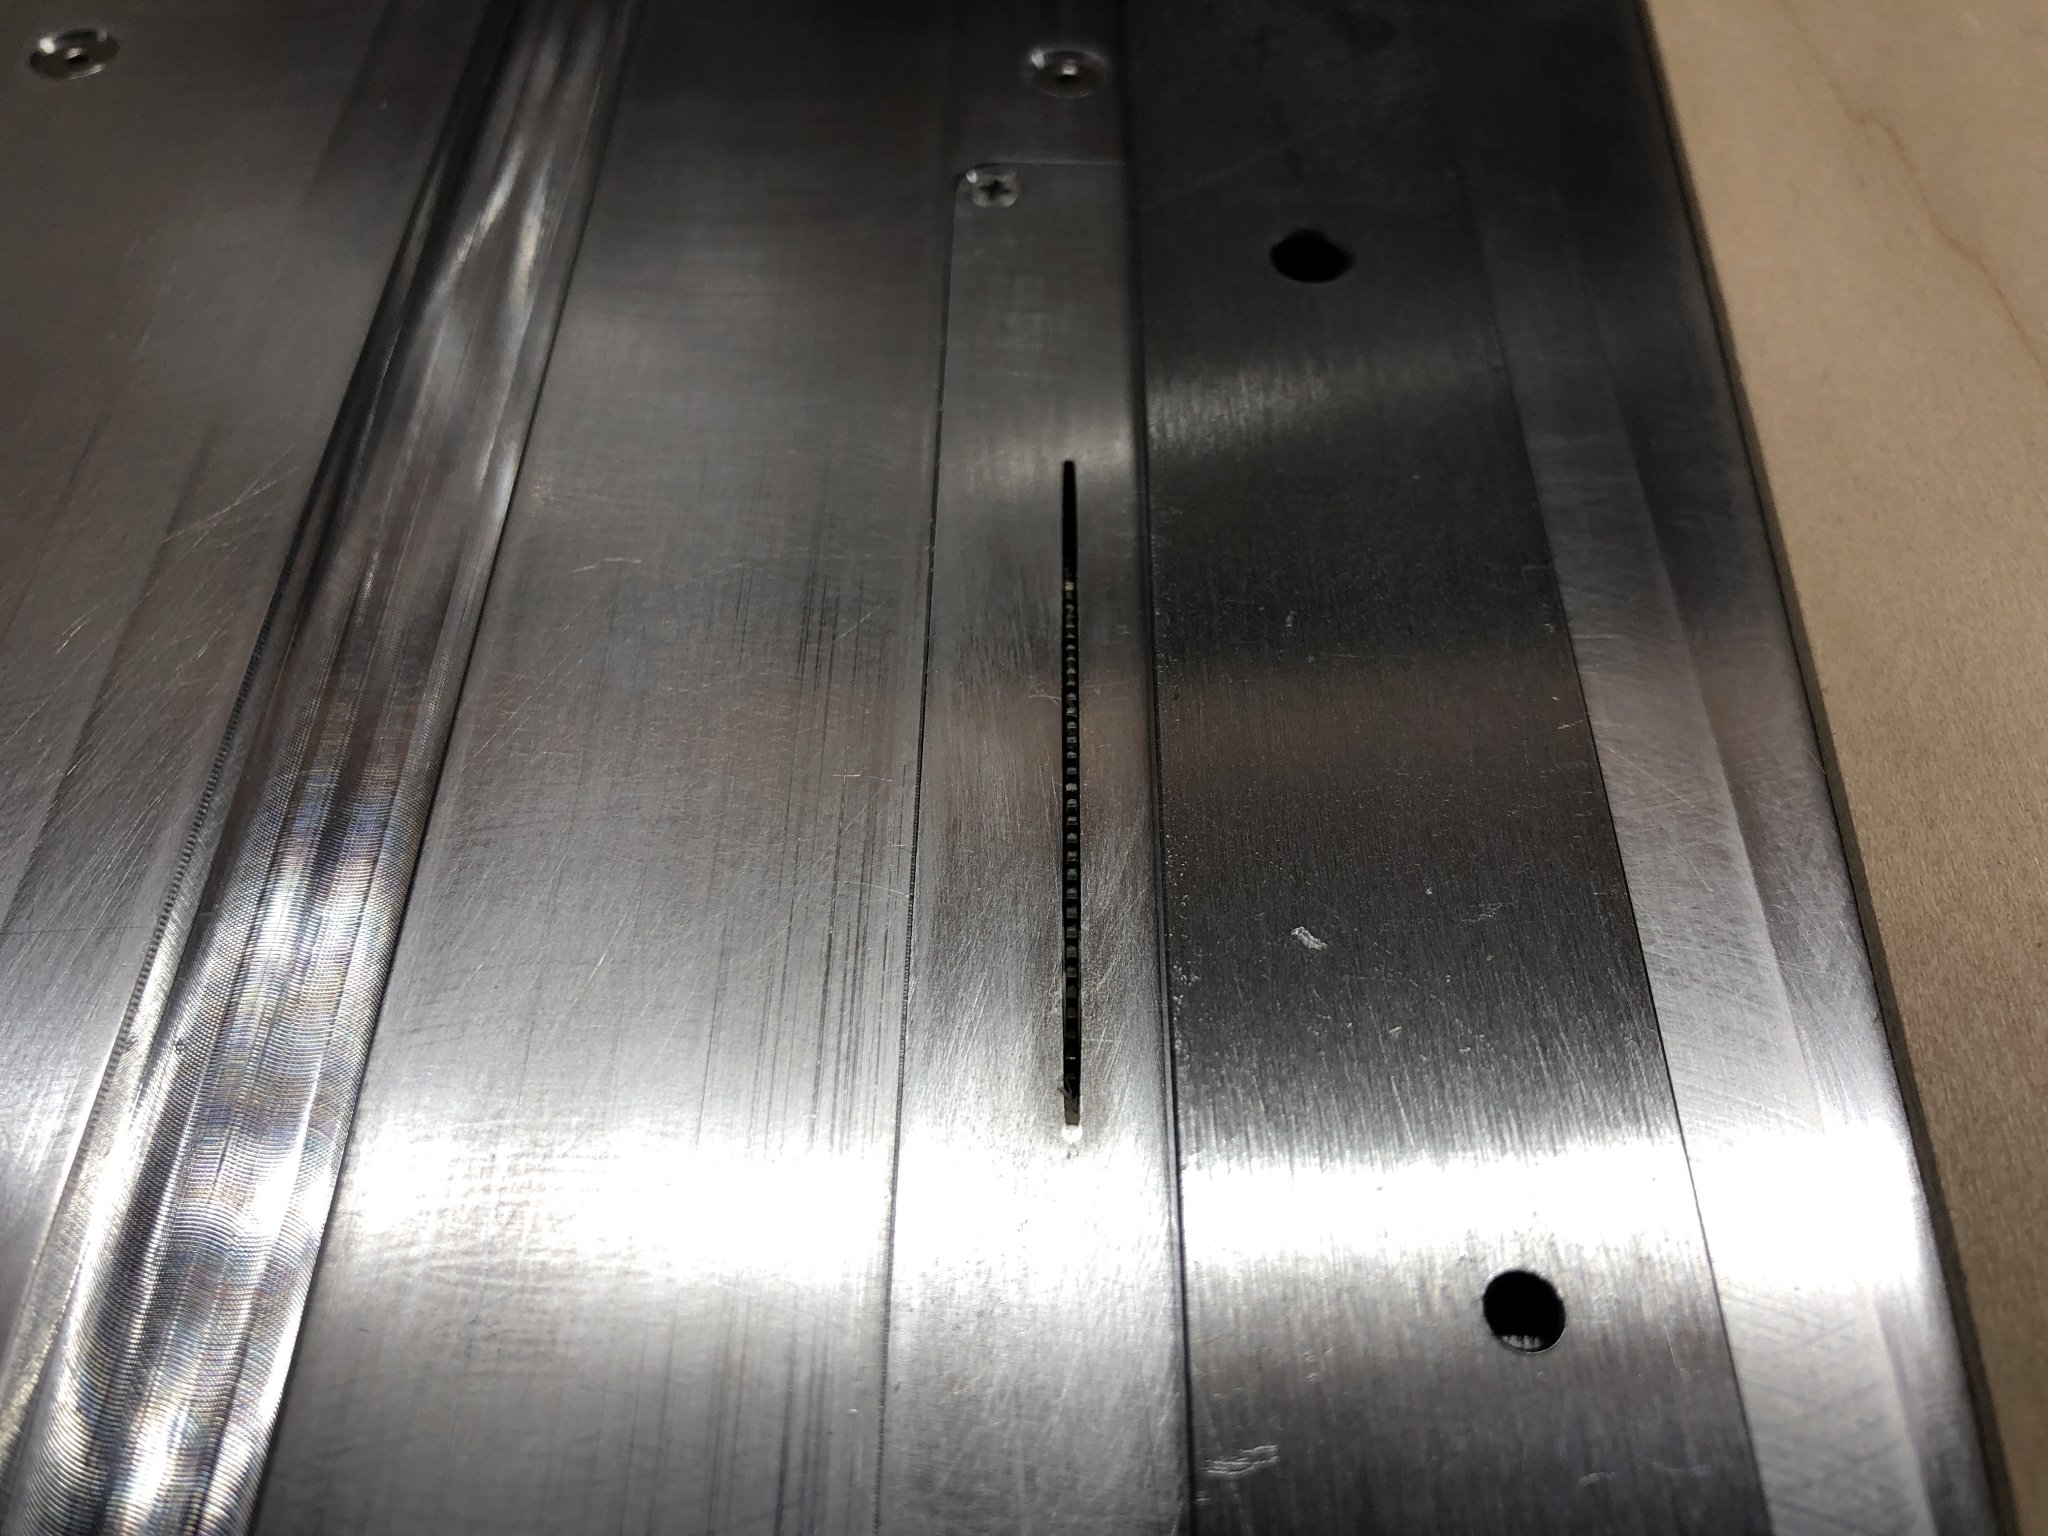
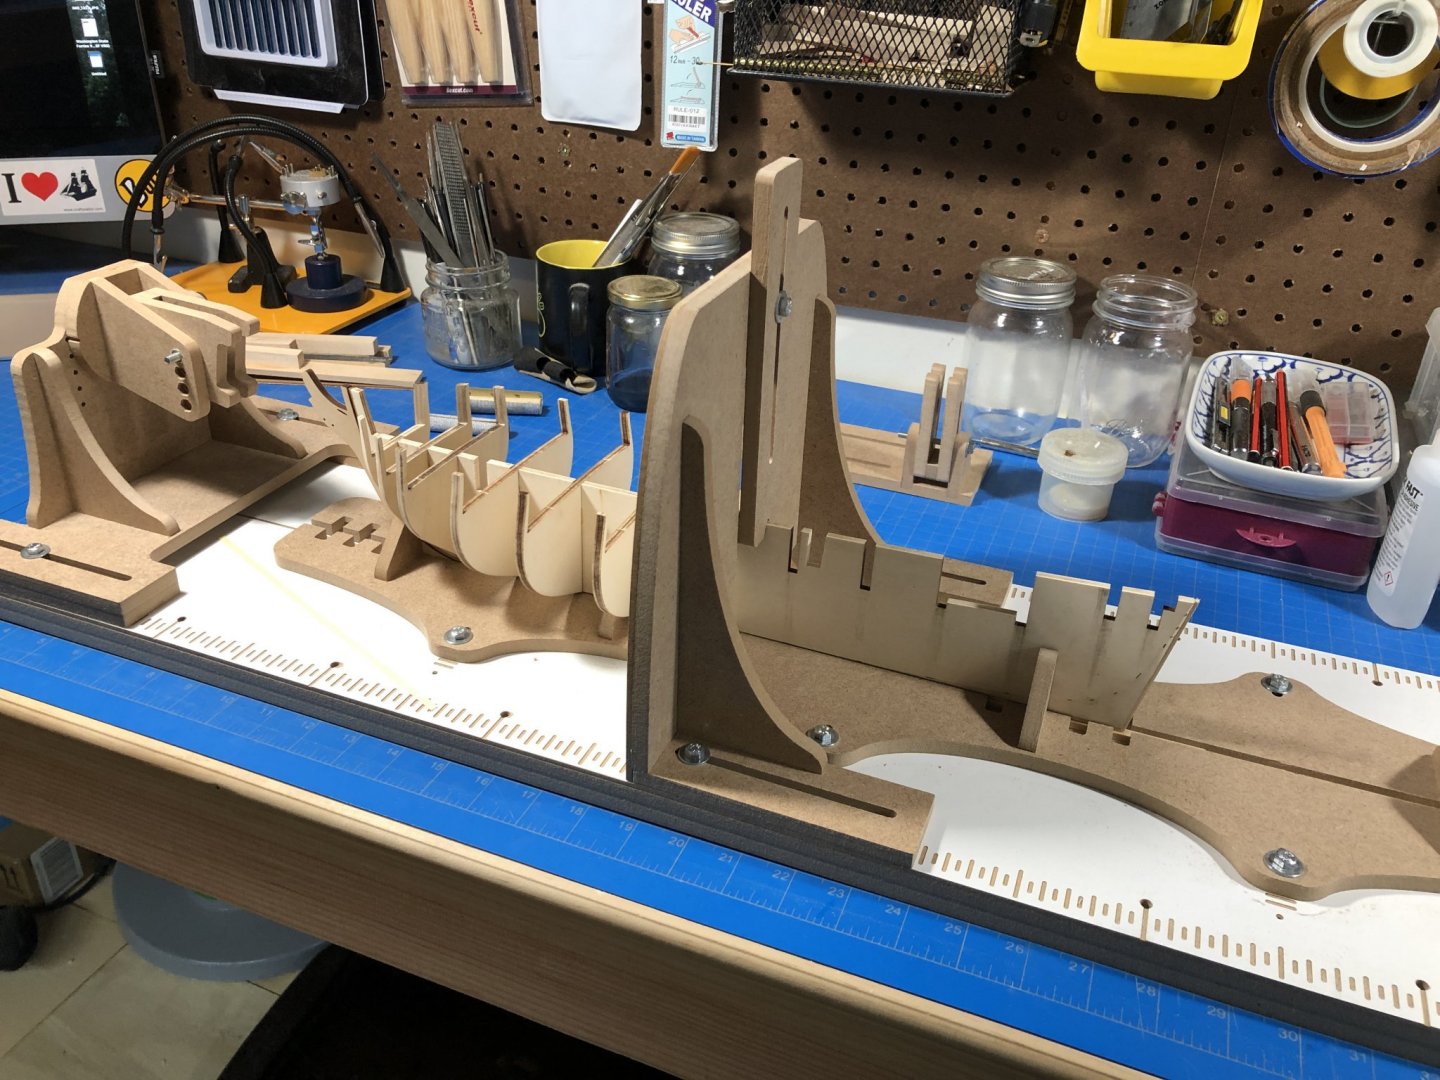
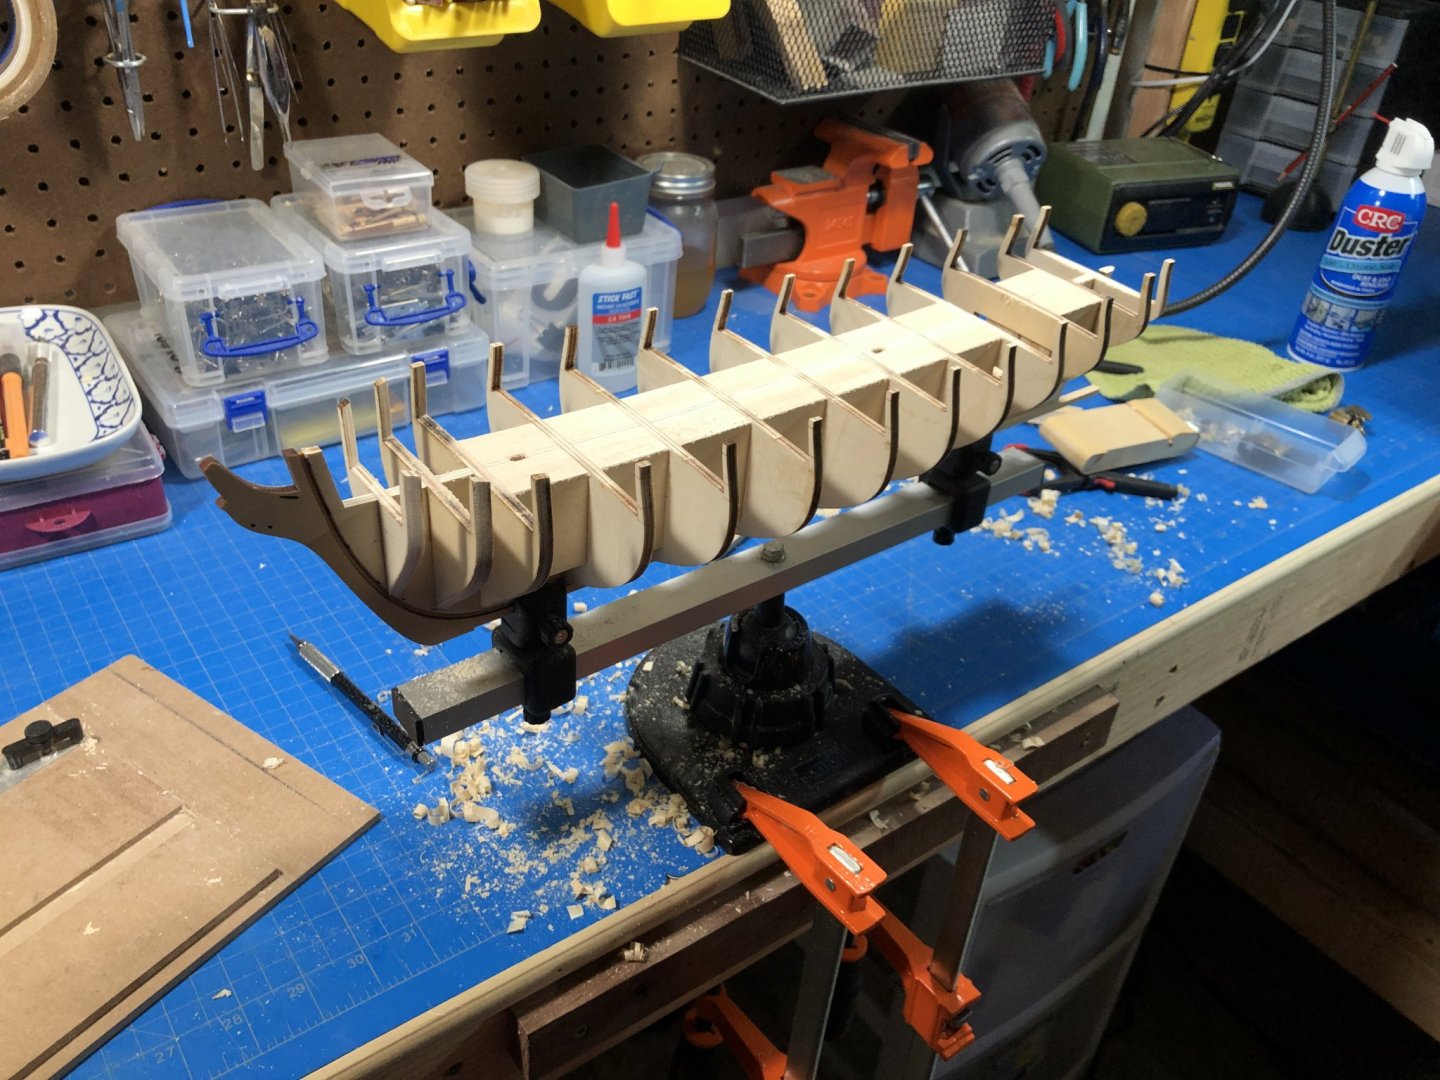
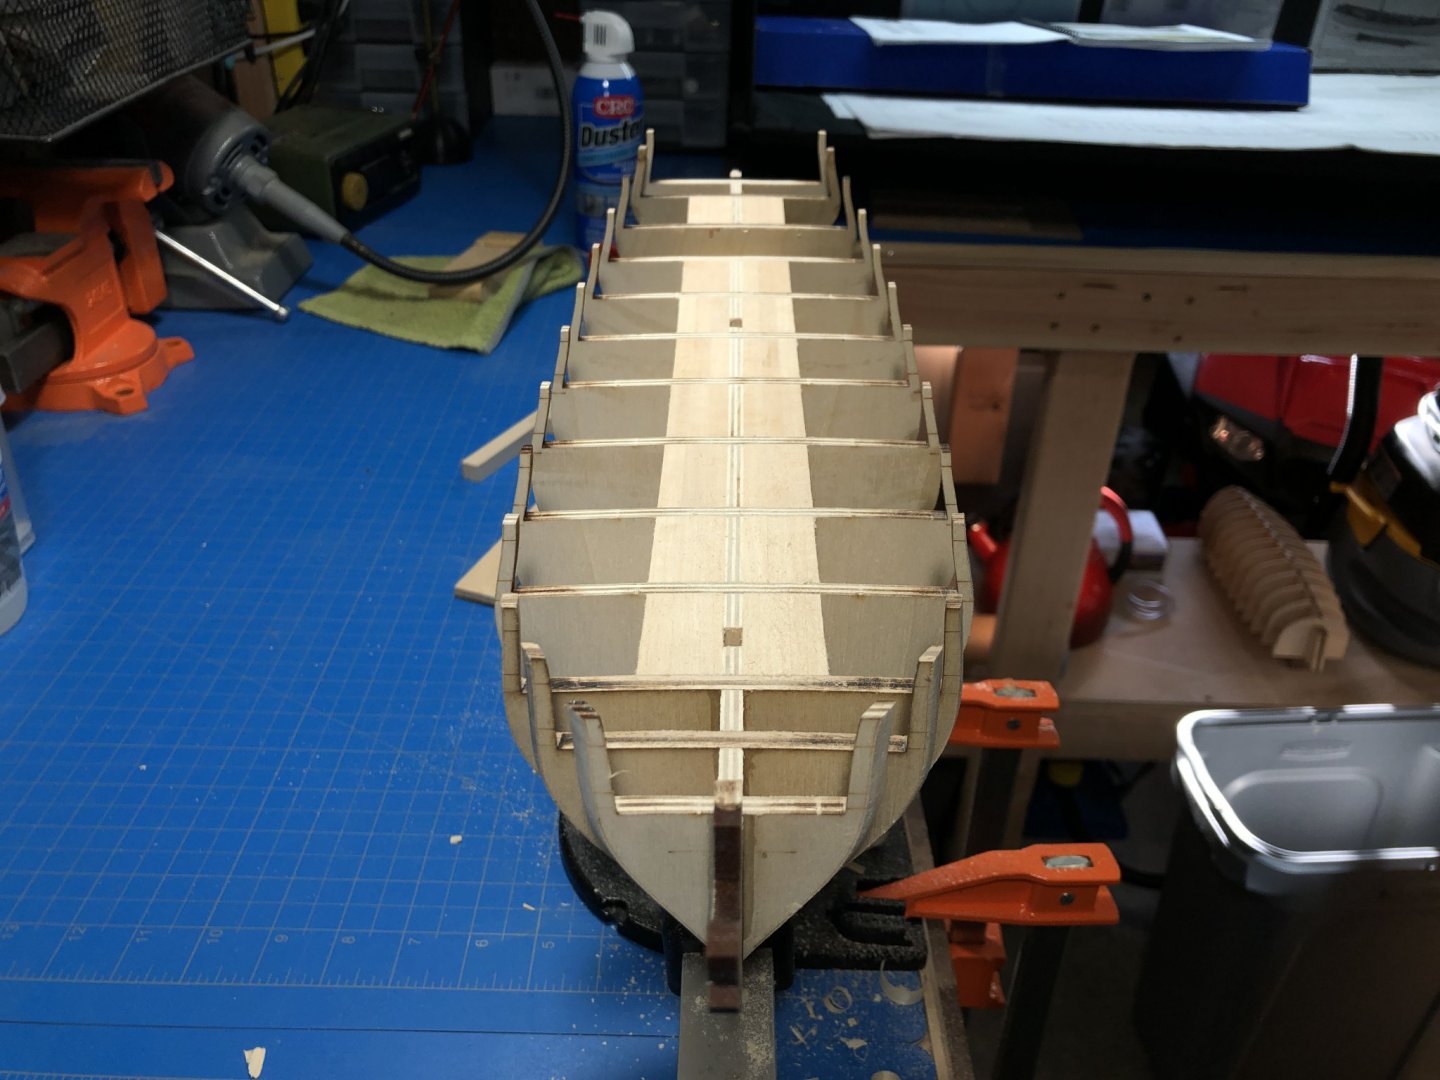
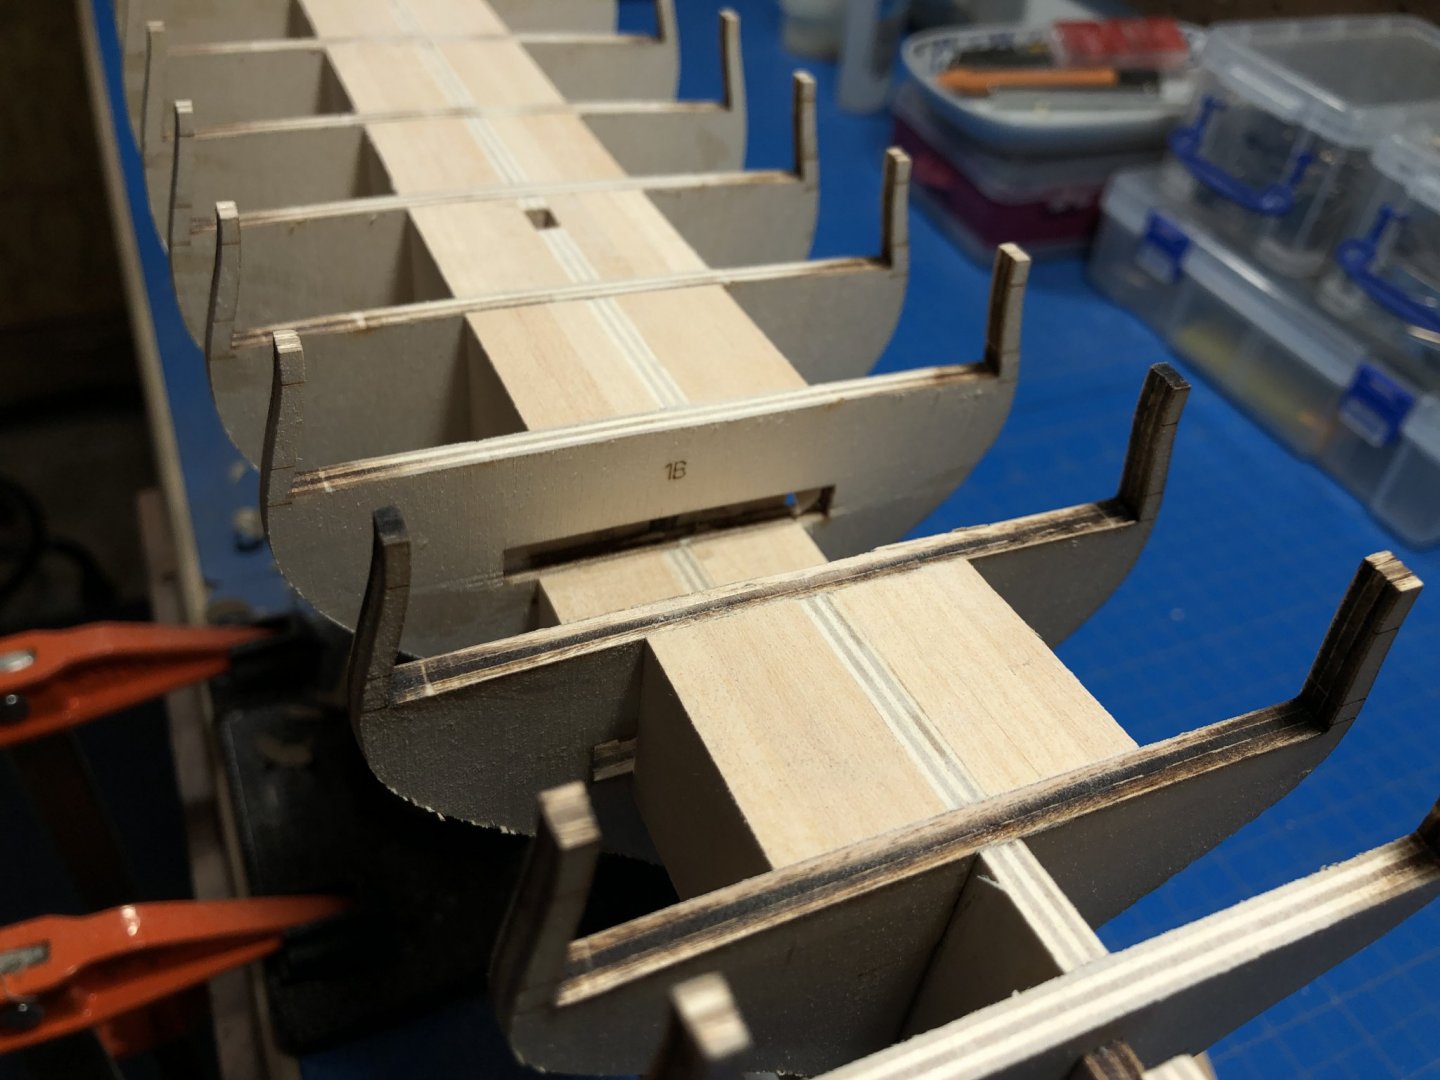
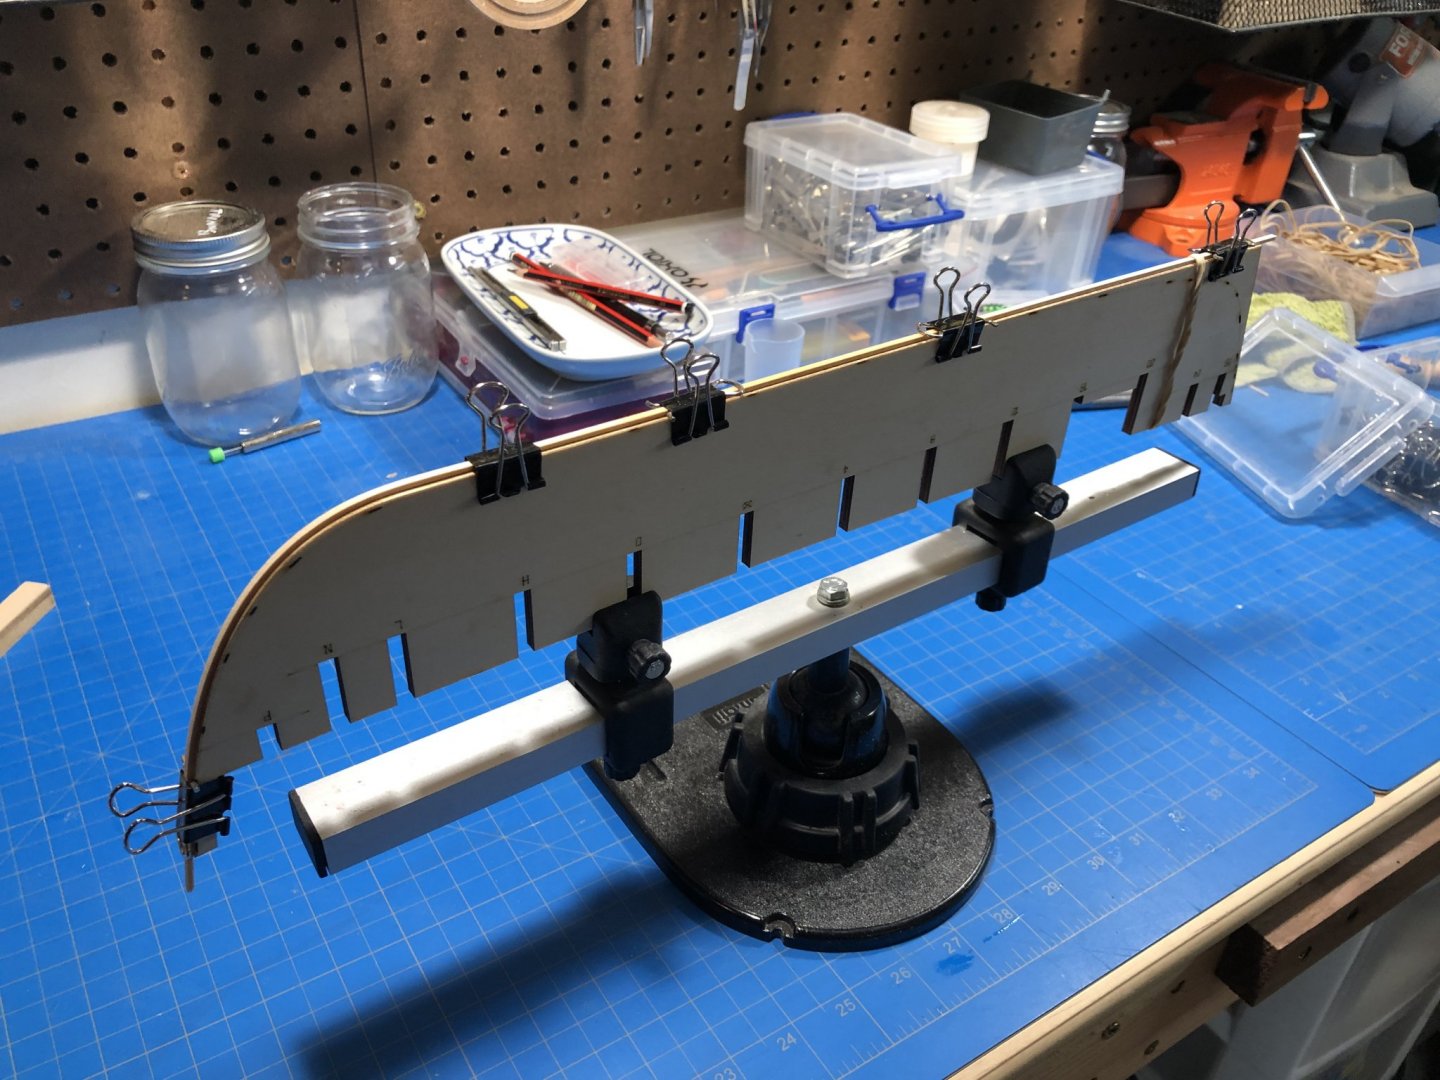
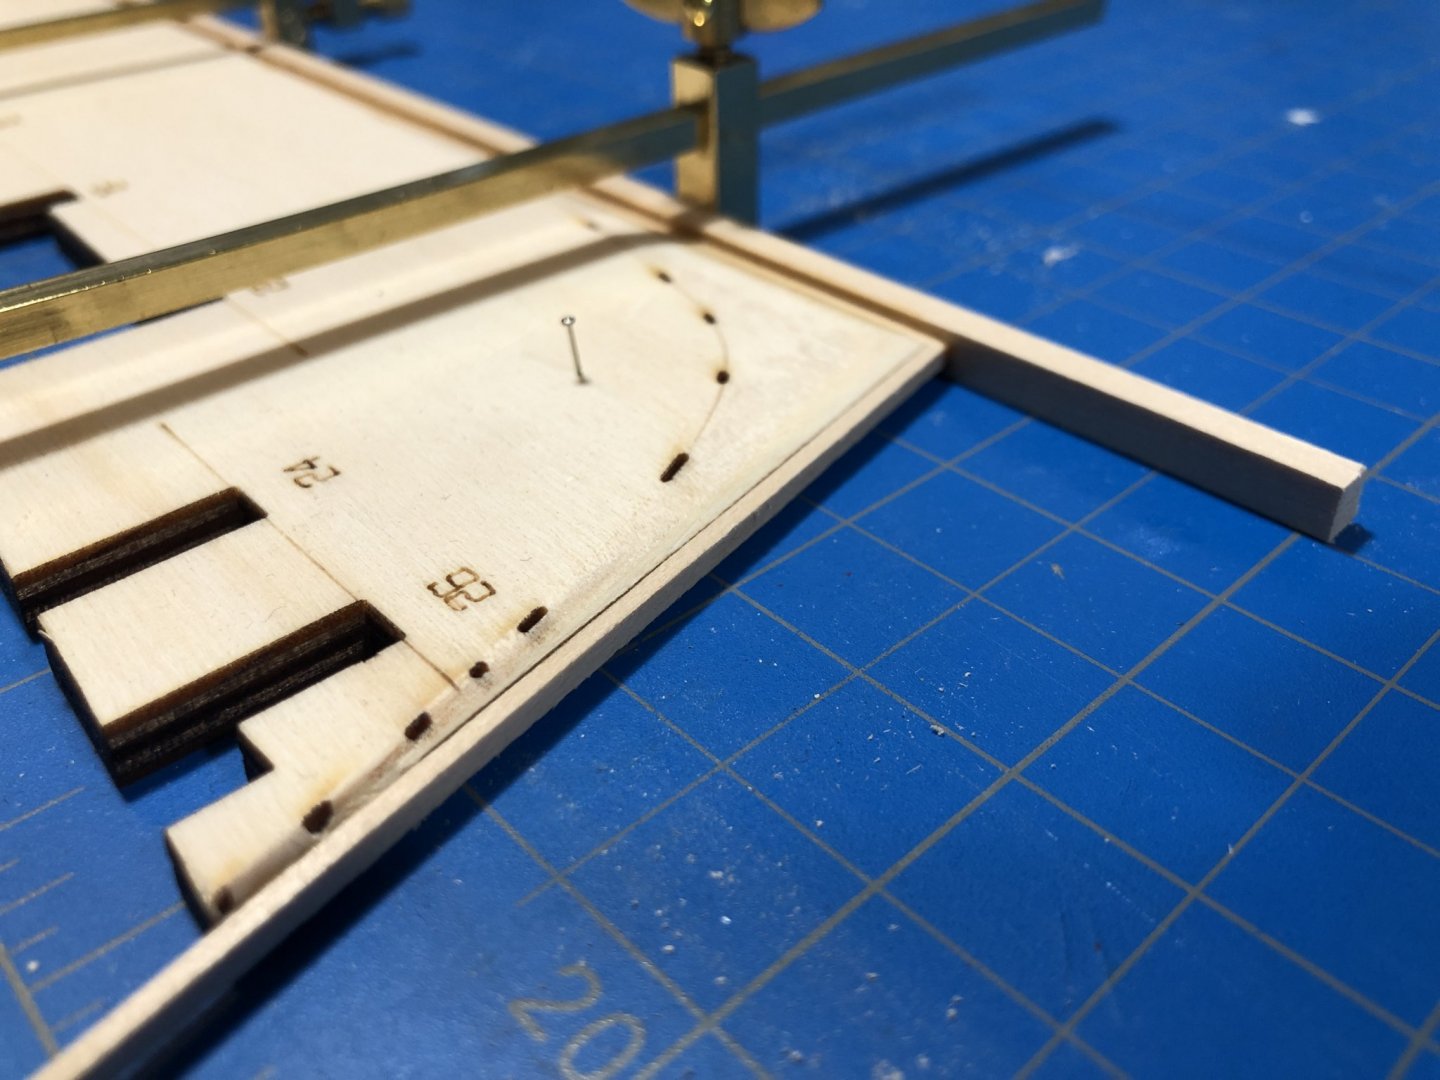
Not a lot to report thus far. Taking my sweet time on this one as I'd really like apply the "each step is a mini-model" concept. HOWEVER, right away I had to adjust the sequence a bit. Not a criticism of the instructions at all, I just couldn't seem my way to success as written. Particularly the step early in Ch.2 where one is meant to fair the hull prior to gluing or securing the frames to the bulkhead former (BF). I wound up shaping them individually down to the guidelines as suggested and then test fitting them to the BF several times, before pulling out the model-building slip for gluing. I did try to fair without securing them and whole thing just felt to flimsy and some breakage in my future. My local shop was plum out of basswood blocks of any significant size so I opted to go with 1/4" sheets cut down and laminated together. My new sliding table on the Byrnes made quick and very precise work of this process. Great addition to an already great tool. Spent some time cleaning up the deck to make sure things are nice and flush and Ill move onto final fairing. The hull is, of course, much more sturdy now so as long as don't really make any huge mistakes it should fair up nicely. Realized pretty quick some sandpapers are just crap when it comes to sanding ply (a process that I hate), but have good luck with a new type (Gator Zip) I haven't tried. Something about the grit type or something seems to work a lot better. Next are the bow filler pieces and battens... updates to come on that. Happy Fathers Day to all the dads out there.


-
Thanks Bob, good to have a familiar face :). Yeah, the commute is no joke. You get used to it, and if you use your time well it can have some good side effects. Luckily I don’t drive more than 1 mile of it, otherwise I might lose it. Ship modeling for me happens very slowly, Friday evenings and weekends when my duties are not otherwise assigned by Household Admin.
-
Looks great. What is the ship in the background?
-
They sell them at Micromark, but you can also find them at Rocklers or even Amazon. Not cheap, but really nice for what they do.
-
I’m dreading this step, you make it look so easy :). Really looking beautiful, as always.
- 950 replies
-
- 1
-
-
- syren
- model shipways
- (and 1 more)
-
Looking absolutely beautiful Bob. Great job with the rudder. You are really tempting me to pick one of these up.
-
Cheers - and continued luck with yours!
-
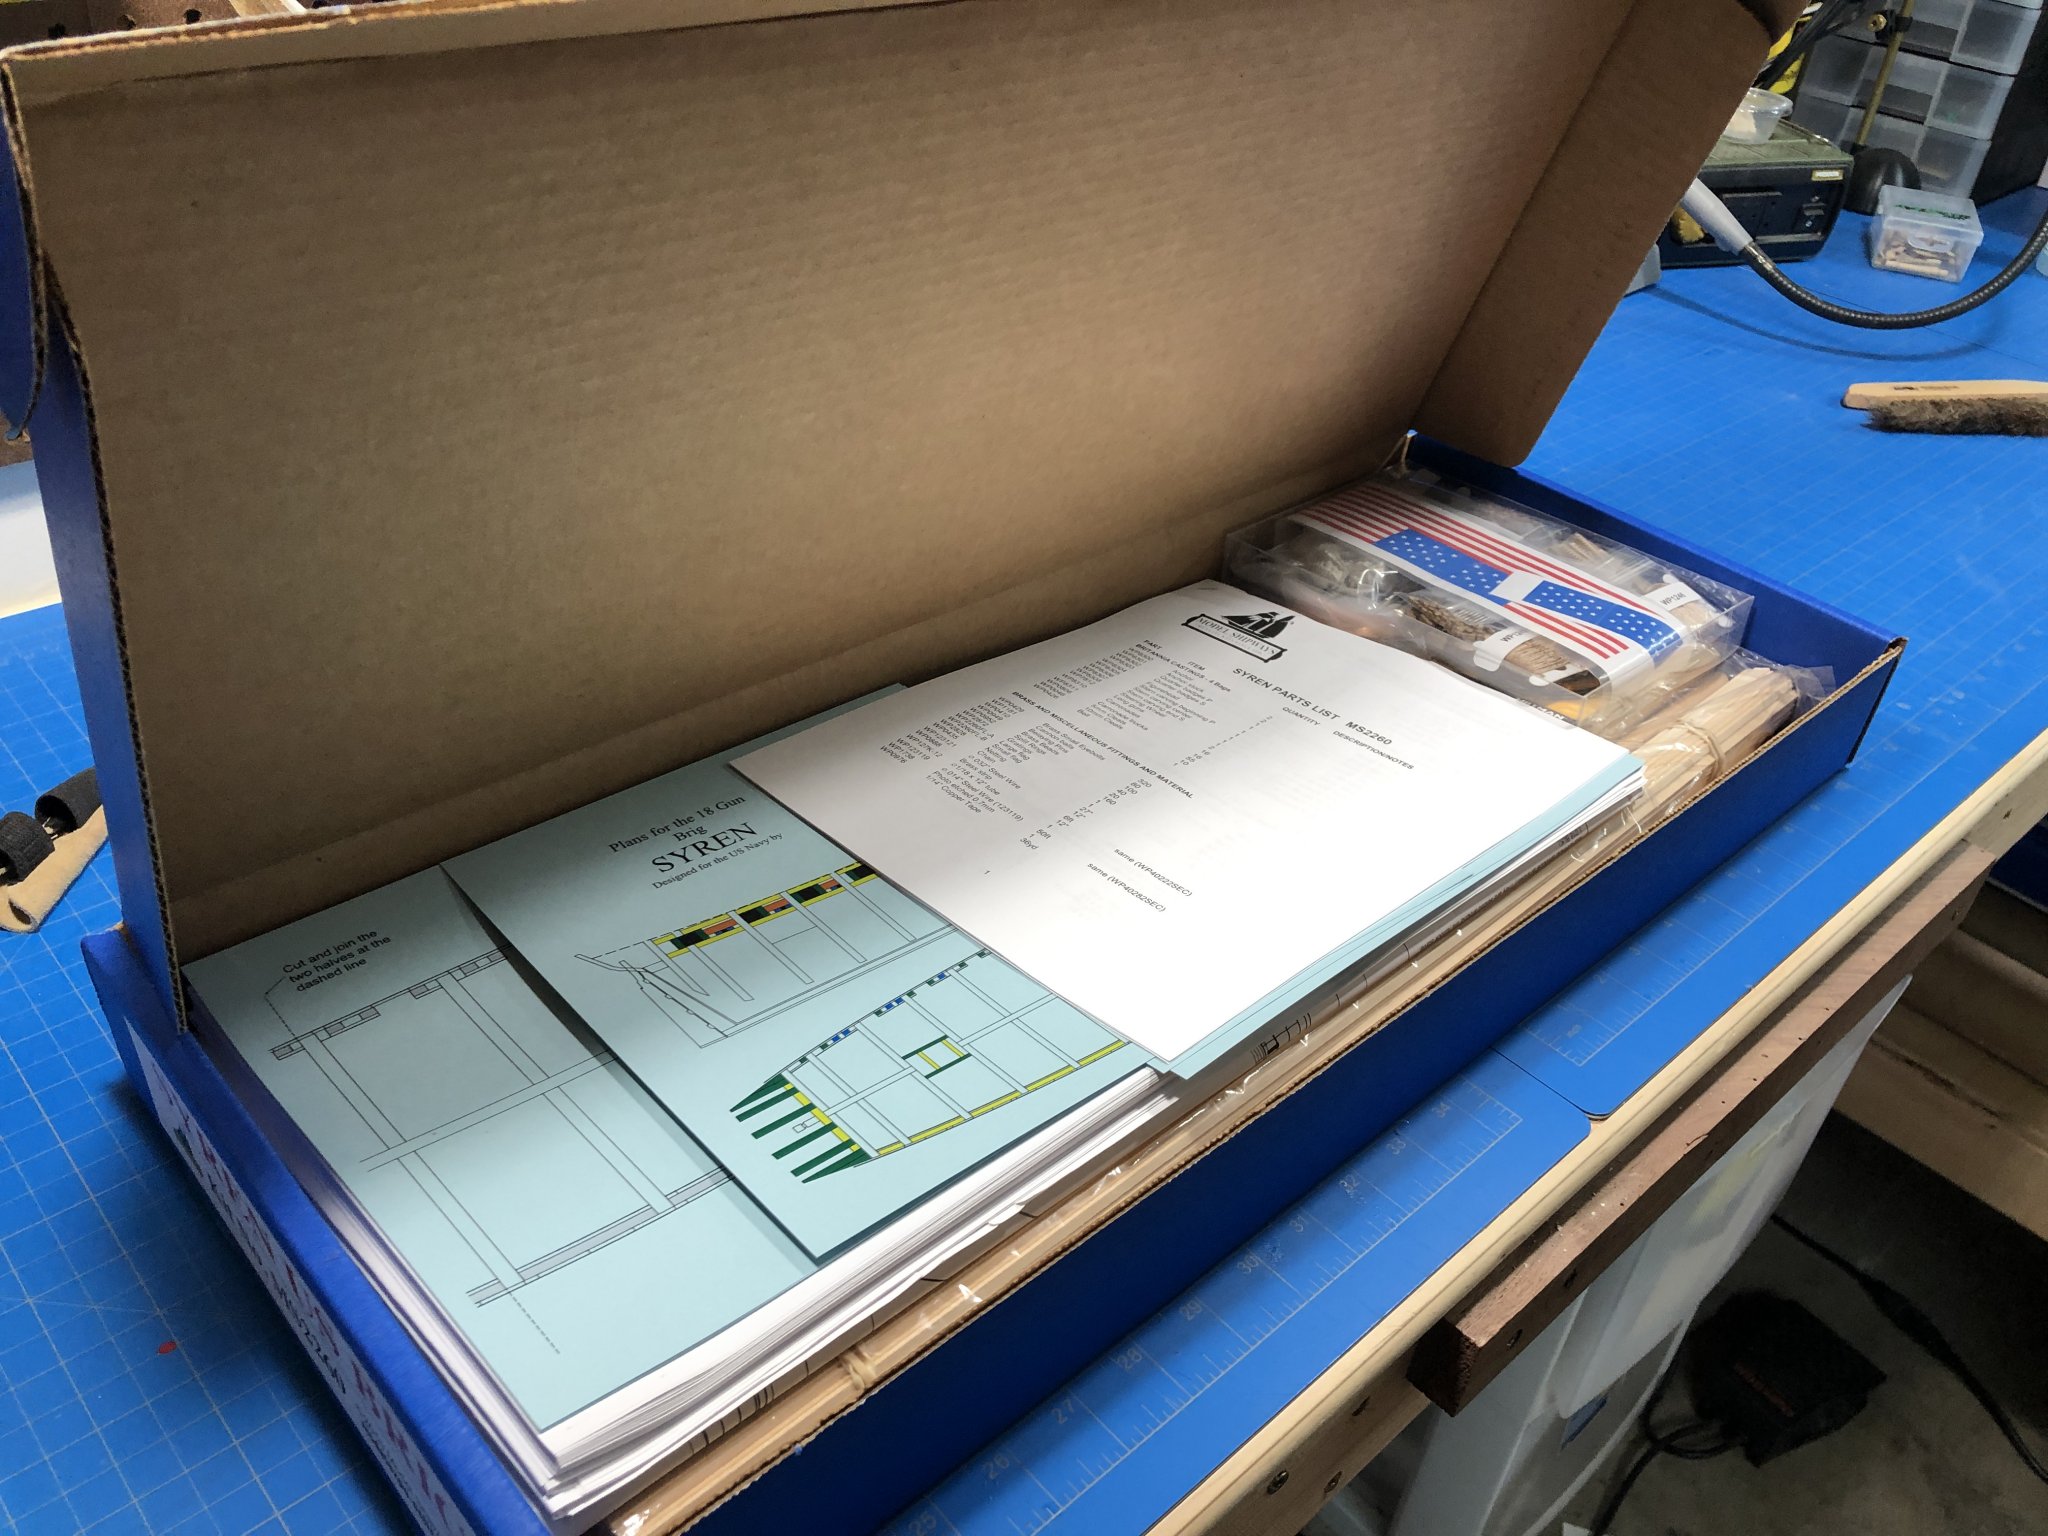
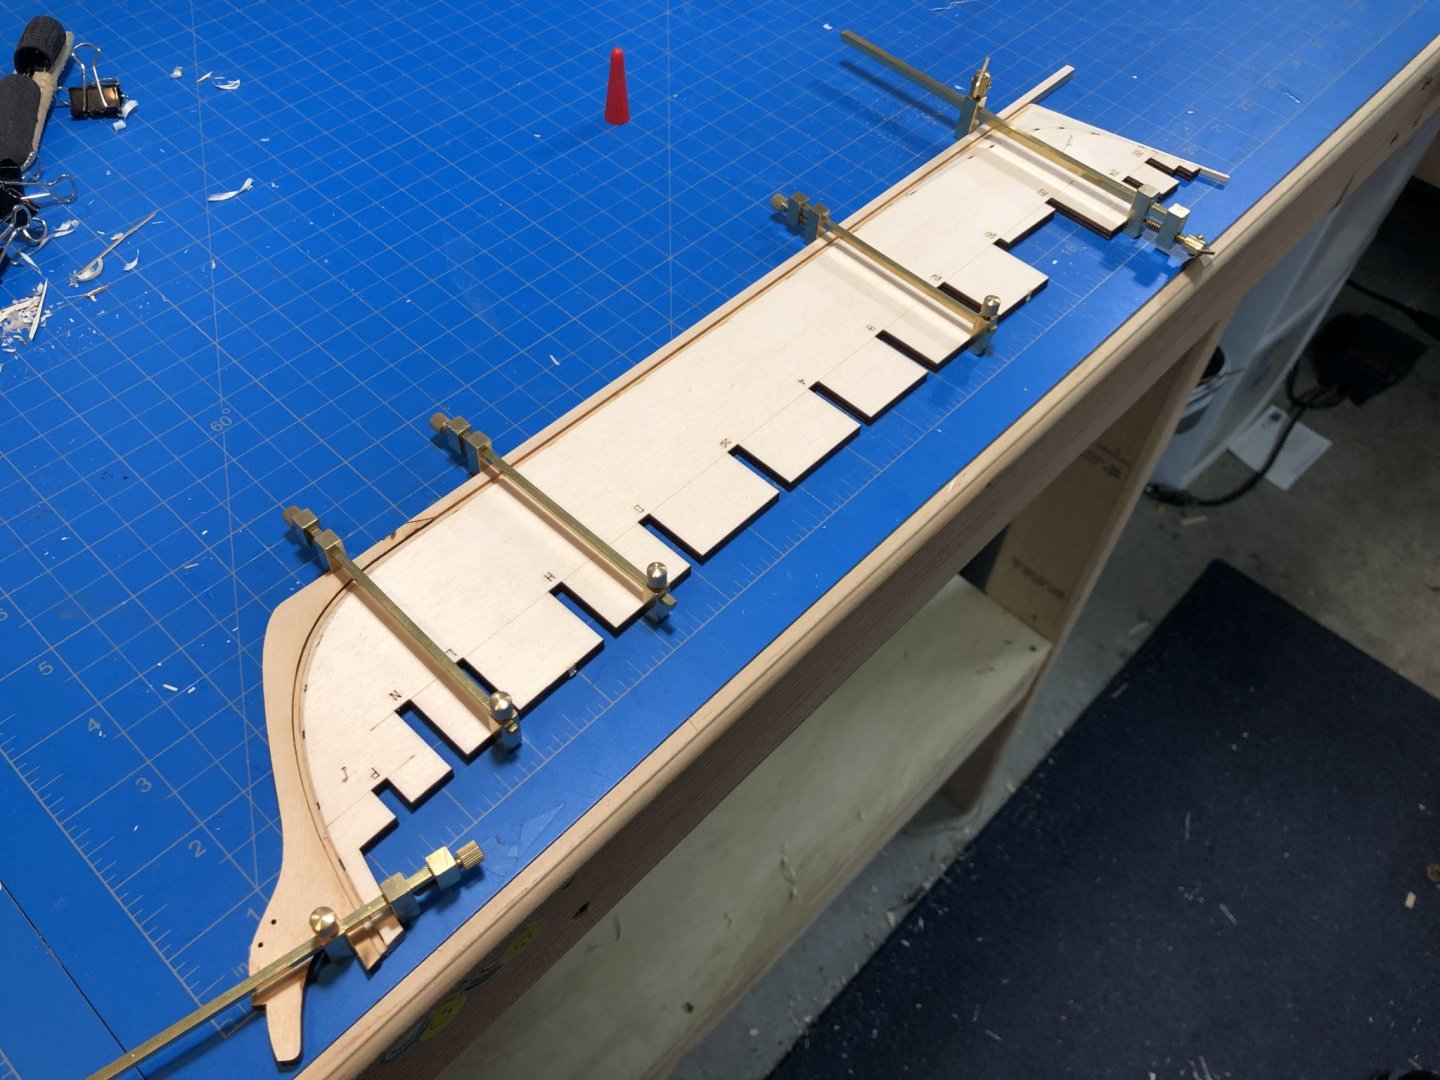
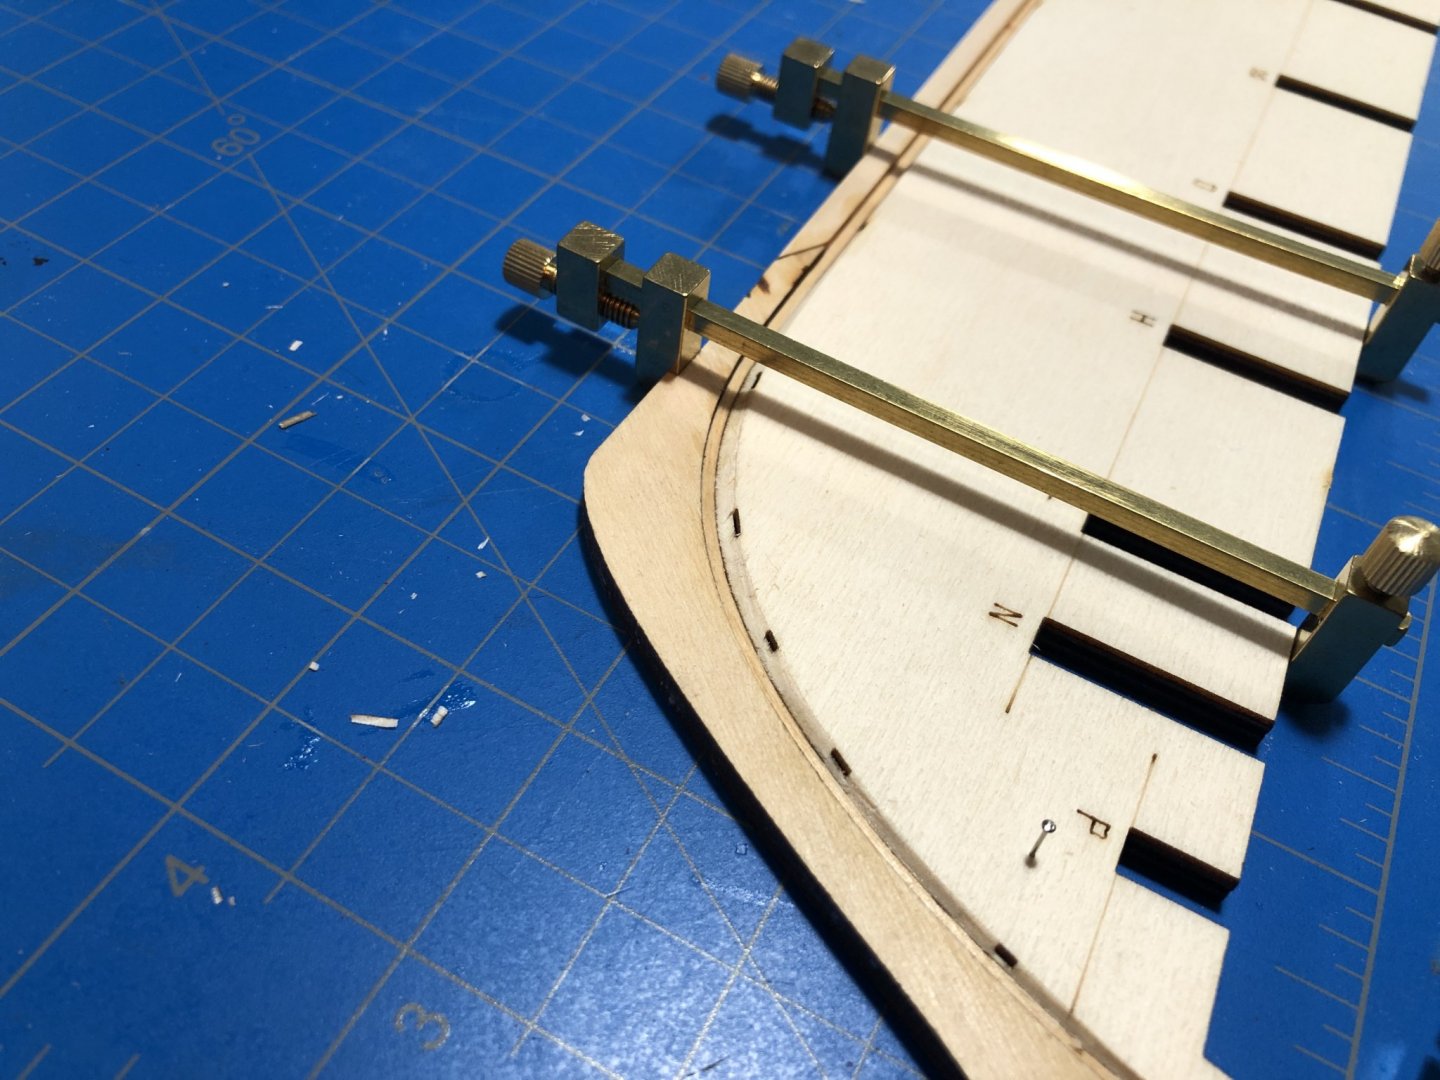
I decided to jump into the deep end. Wish me luck. Ive spent countless hours reading through logs of this build, staring at my own kit and going through bits and working out a plan and knowing that it would be a long, likely arduous project. I had intended on procrastinating further with other projects, but given the continued COVID related time at home I decided to go ahead. I had planned that Medway Longboat would be my next build log, and it may yet become one of two ongoing projects but until I can get my hands on one of those I really only have this sitting around and a long abandoned Bounty Launch build to focus on. So, with being fully aware that I might come and go from this over time I decided I might as well get started. My kit came like all the rest - in the ubiquitous blue box, filled with random bits and sticks. I was a little disappointed as others have been, that some of the castings and other parts are not nearly as nice as the design, planning and instructions that were created for it. I was pleasantly surprised to discover that I have none of the warping in the plywood parts that others have observed. Everything appears flat and ready to go. The manual is hearty, but not made from the best paper so I'll likely transition that to a three-ring binder as it will never survive intact in my workspace over the time it will take to finish this build. I do a lot of highlighting and marking up, which means it goes with me to work (2.5 hour commute by boat and train, each way) and will need something a little more conducive to travel. I don't know about you guys, but with these manuals, I don't really fully grasp what Im reading until the third time through - so to say it gets used would be an understatement. Today I started in on Chapter 1. The only issues I noted were that none of the various keel and bulkhead former (BF) parts were the same dimensions, though they were definitely intended to be. Everything seemed off by a 1/64" between the BF, stem knee and keel. Finally, the timber provided for the false-keel is also off by 1/64". No big deal. In order for the stem knee to properly transition into the keel, I had to run the 3/16" x 3/16" timber through the thickness sander to take it down to match the thickness of the pairing end of the stem knee and provide a flush and completely flat surface with which to mate the false keel which also happens to be a hair shy. I tried all 10 provided sticks and found they were all shy. That is to say, the 3/16" was taken as a suggestion in the production of my kit and not a rule. Forming, gluing and carving the rabbet. I found the design and construction process of this rabbet far more pleasurable than past projects. The bearding line was a little confusing, but I think will work in the end. The laser bearding line cuts right through the center of the much heavier bearding guide holes so I followed as well as I could despite the fact that I wasn't sure If the guide holes should have been better accommodated in the carving. Assembling the stem knee and keel went by easily enough. After determining where I needed to intervene to correct the dimensional issues everything came together very nicely. Next Ill probably go ahead and notch out the BF for masts as was originally suggested by Novastorm here whose also got an ingenious sanding violin bow (post #3) thing I intend to experiment with, and whose mast alteration step was seconded by Walrusguy here. Both of whom Ive been following closely. Ive also been following Patricks build here, whose hand skills are evident in his careful and clean construction. I hope to learn much during this build from them, and the rest of various SYREN builds in the archives.


-
They have a store near Sac or is it in the Bay? Im flying into Sac in September to attend a professional conference up in Tahoe (along with some visits to old friends in the Nevada City area and might squeeze in a visit if I can! Congrats to Chris and Wife for making a dream come true, Ill be doing my part to support the cause. Really want to do Speedy, Alert and now of course, Flirt.
-
Thats great news Chuck! I was hoping to do that one before graduating up to a larger project. Cutting my teeth on the small boats has really helped with a lot skill progression. Perhaps better for me to hold off on SYREN. Ill watch the shop for them to go on sale. Thanks for the heads up.
- 66 replies
-
- 1
-
-
- Finished
- Model Shipways
- (and 1 more)
-
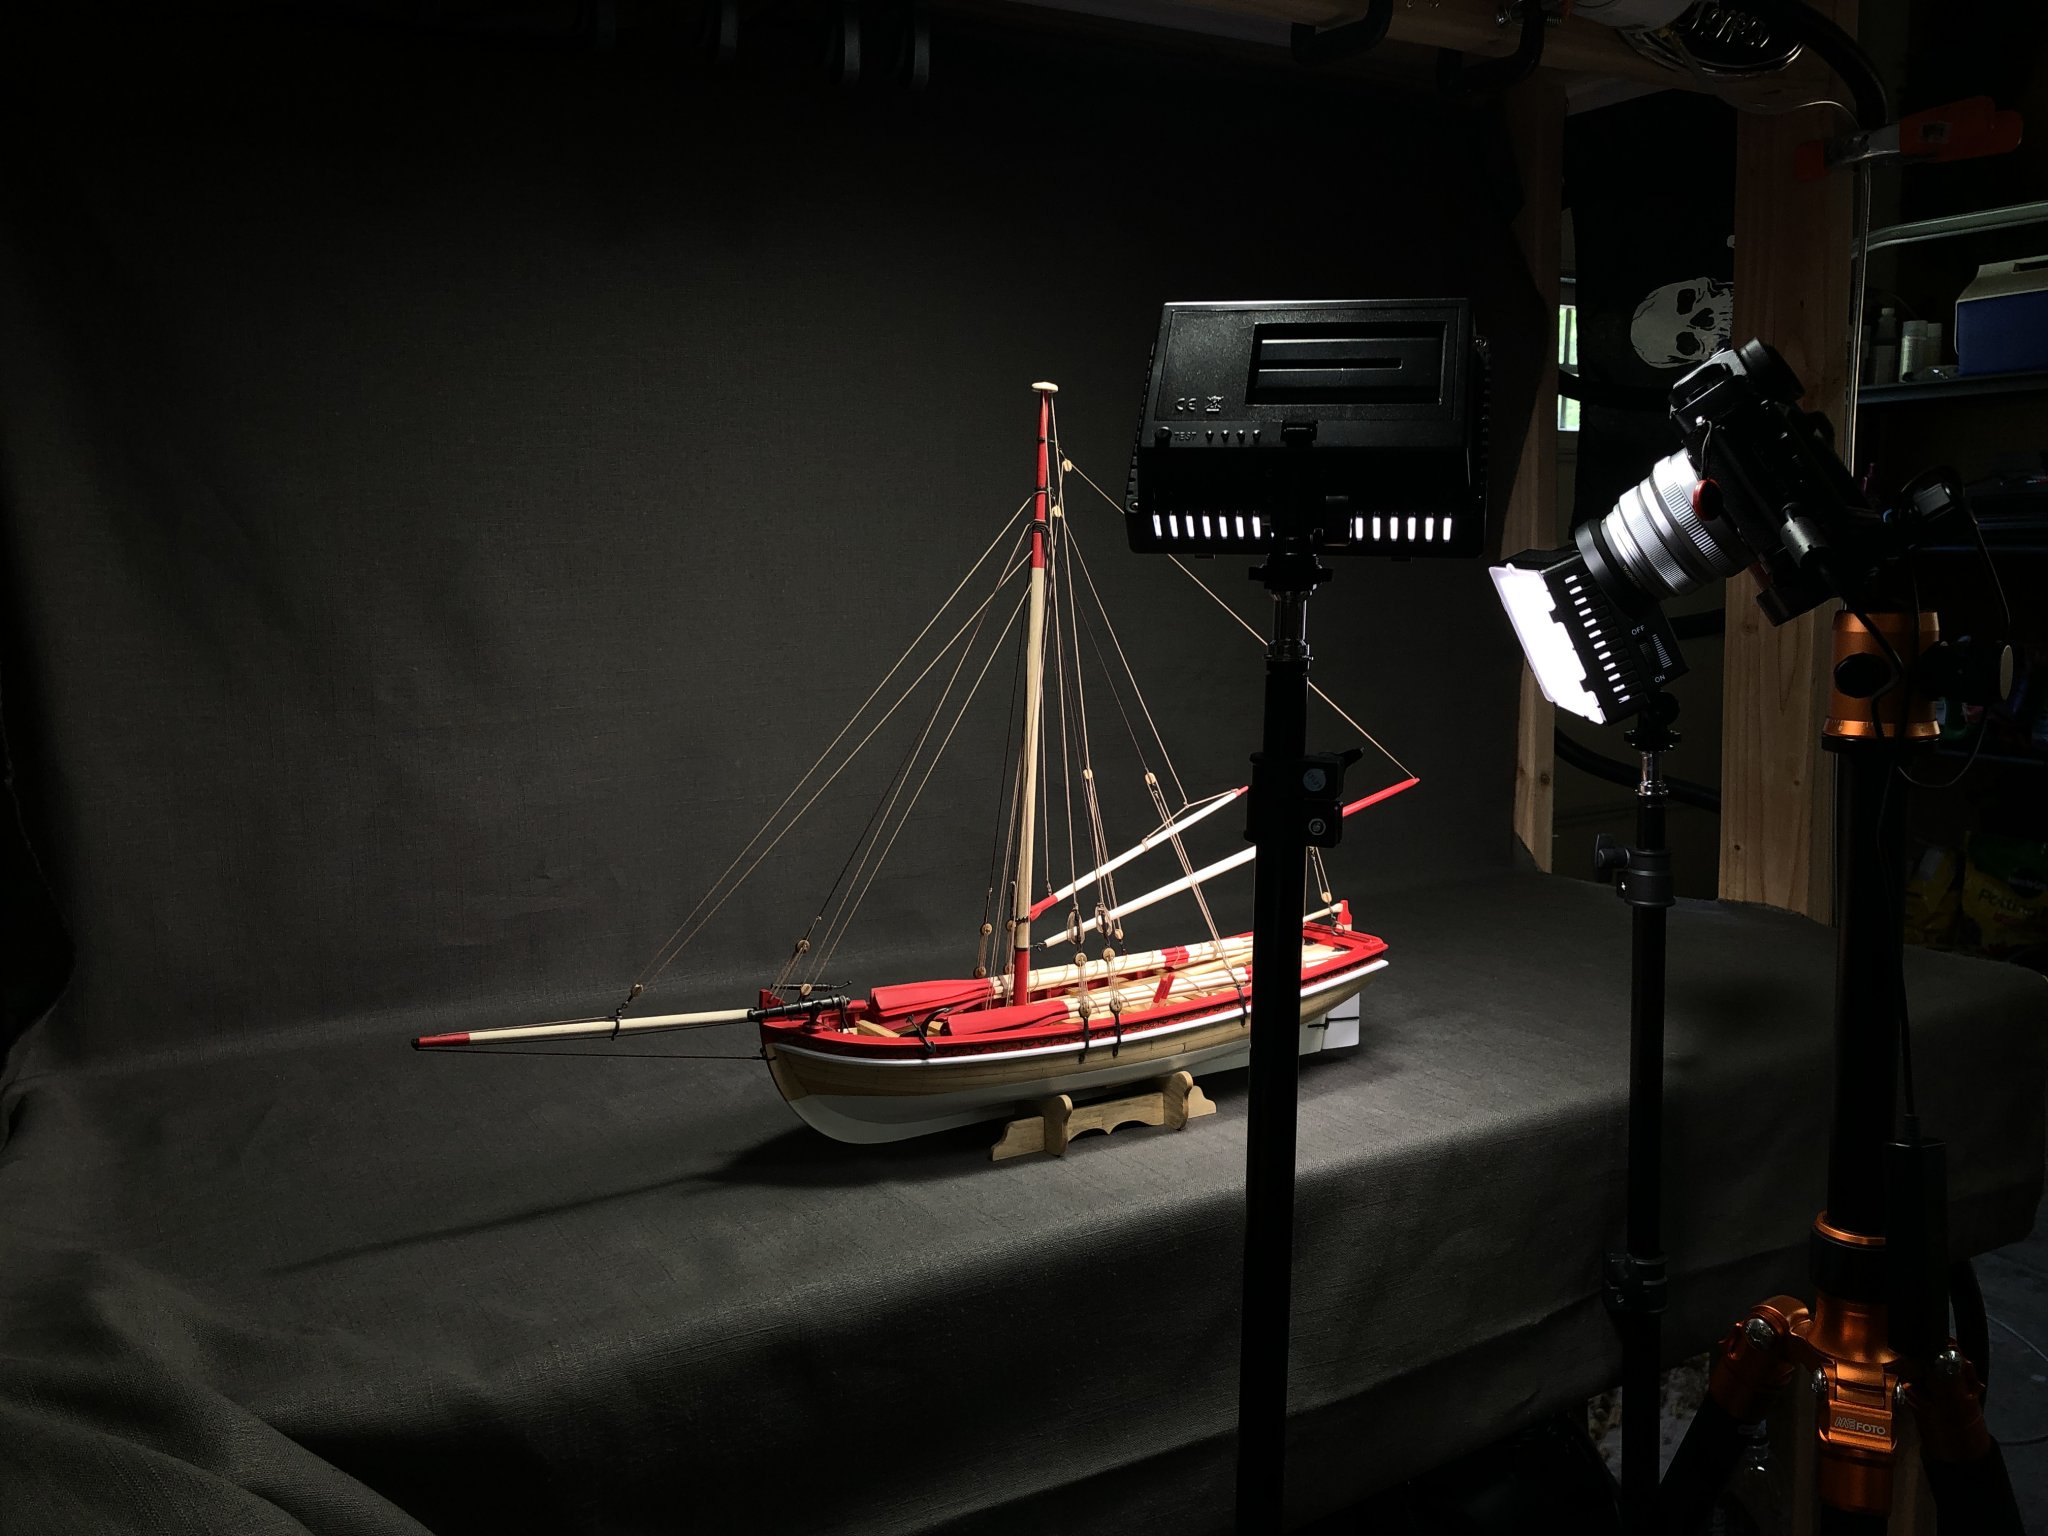
Yep, Ive only ever used wipe-on-poly. I know other folks use different things, but Poly seems to have that non-bulky character that I like. I only use my DSLR for final shots, iPhone for everything else. Although they are getting so good, Im not sure I need to use the dslr anymore.
-
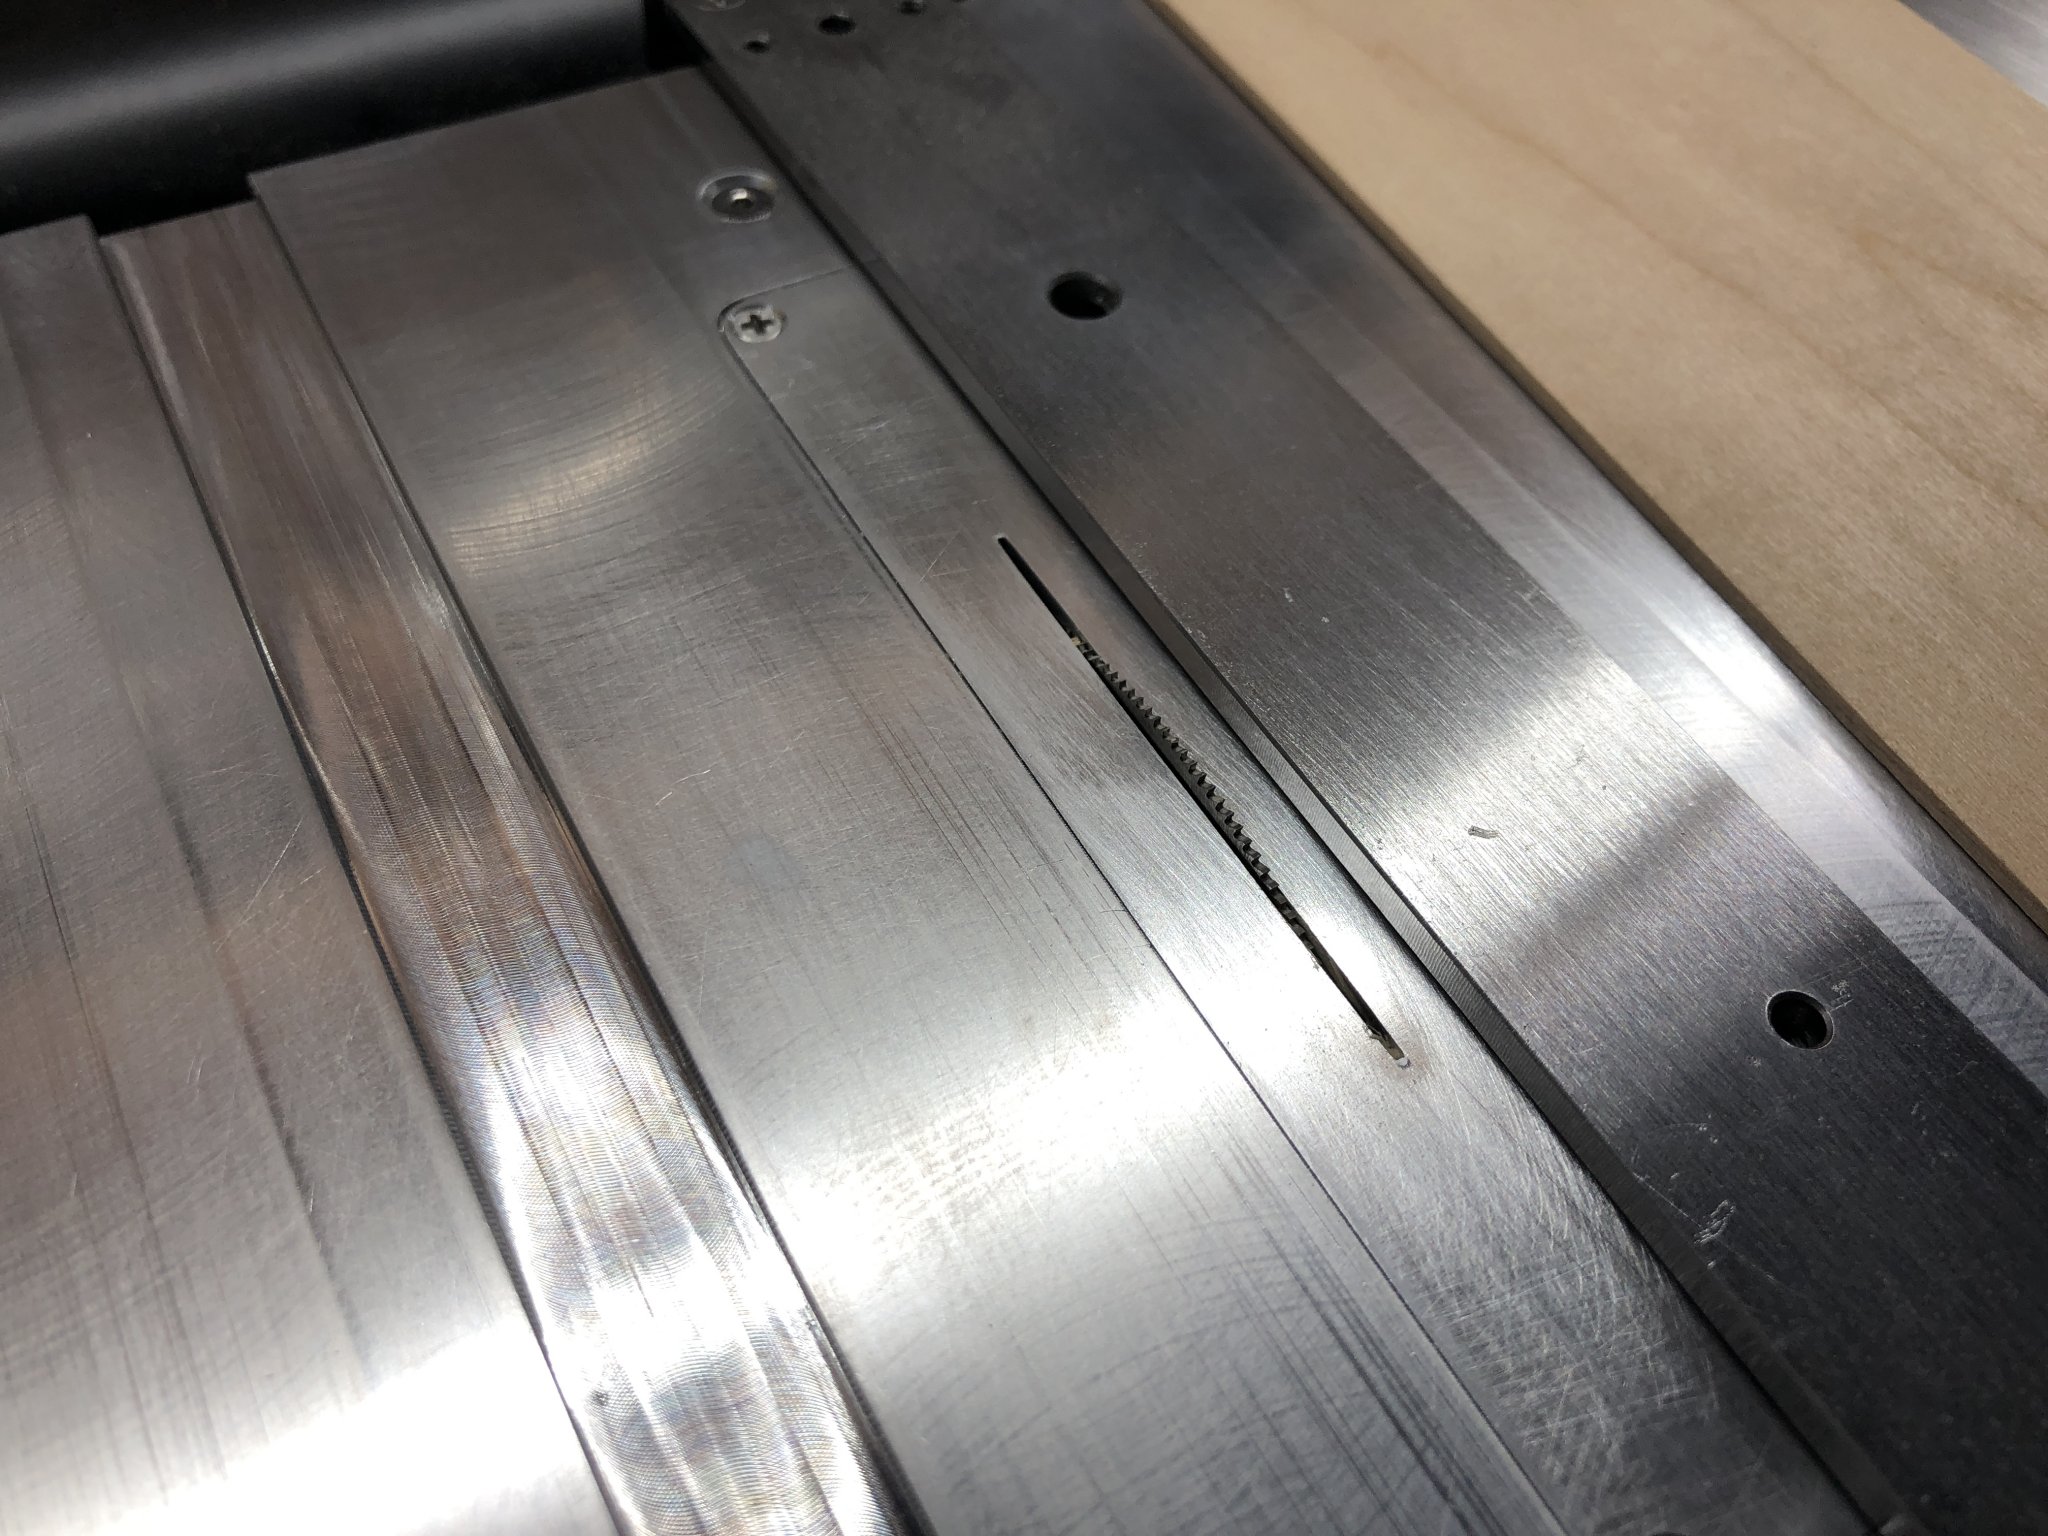
Byrnes saw blade biting...update with pic
Justin P. replied to bigcreekdad's topic in Modeling tools and Workshop Equipment
I bought inserts supplied by Jim and have cut each for use with specific blades. Well worth it, and according to Model Machines, no damage the blade during this process (to my surprise). After the initial cut I run some sandpaper through the slot as advised and it came out great, with no contact between the blade and the insert.

-
Byrnes saw blade biting...update with pic
Justin P. replied to bigcreekdad's topic in Modeling tools and Workshop Equipment
Yep. Me too. -
She's looking beautiful. That deck is going to pop if you decide to put a finish down. What were you using to take those photos (of the deck)? Such an unusually and beautiful little vessel.
-
Thanks! Yeah it went by fast. Trying to take advantage of all this COVID time before I have to return to work full-time. The sinker is gone now, my gaff still floats around, I was using the weight to take out the slackness of the line and straighten out. Having it on there for a little over a week did the job really well. I am actually. Next build log will be SYREN, but as I work through preparations for that I have an ongoing Bounty Launch project that has been haunting me for awhile. Ill be returning to that in the interim. I have no plans for a build log on that one, as I tried before and I ended up shelving it. I wanted to do Medway next, but Chuck reports that the availability of those kits are a while off yet. I appreciate the comment, thank you.
- 66 replies
-
- 2
-
-
- Finished
- Model Shipways
- (and 1 more)
-
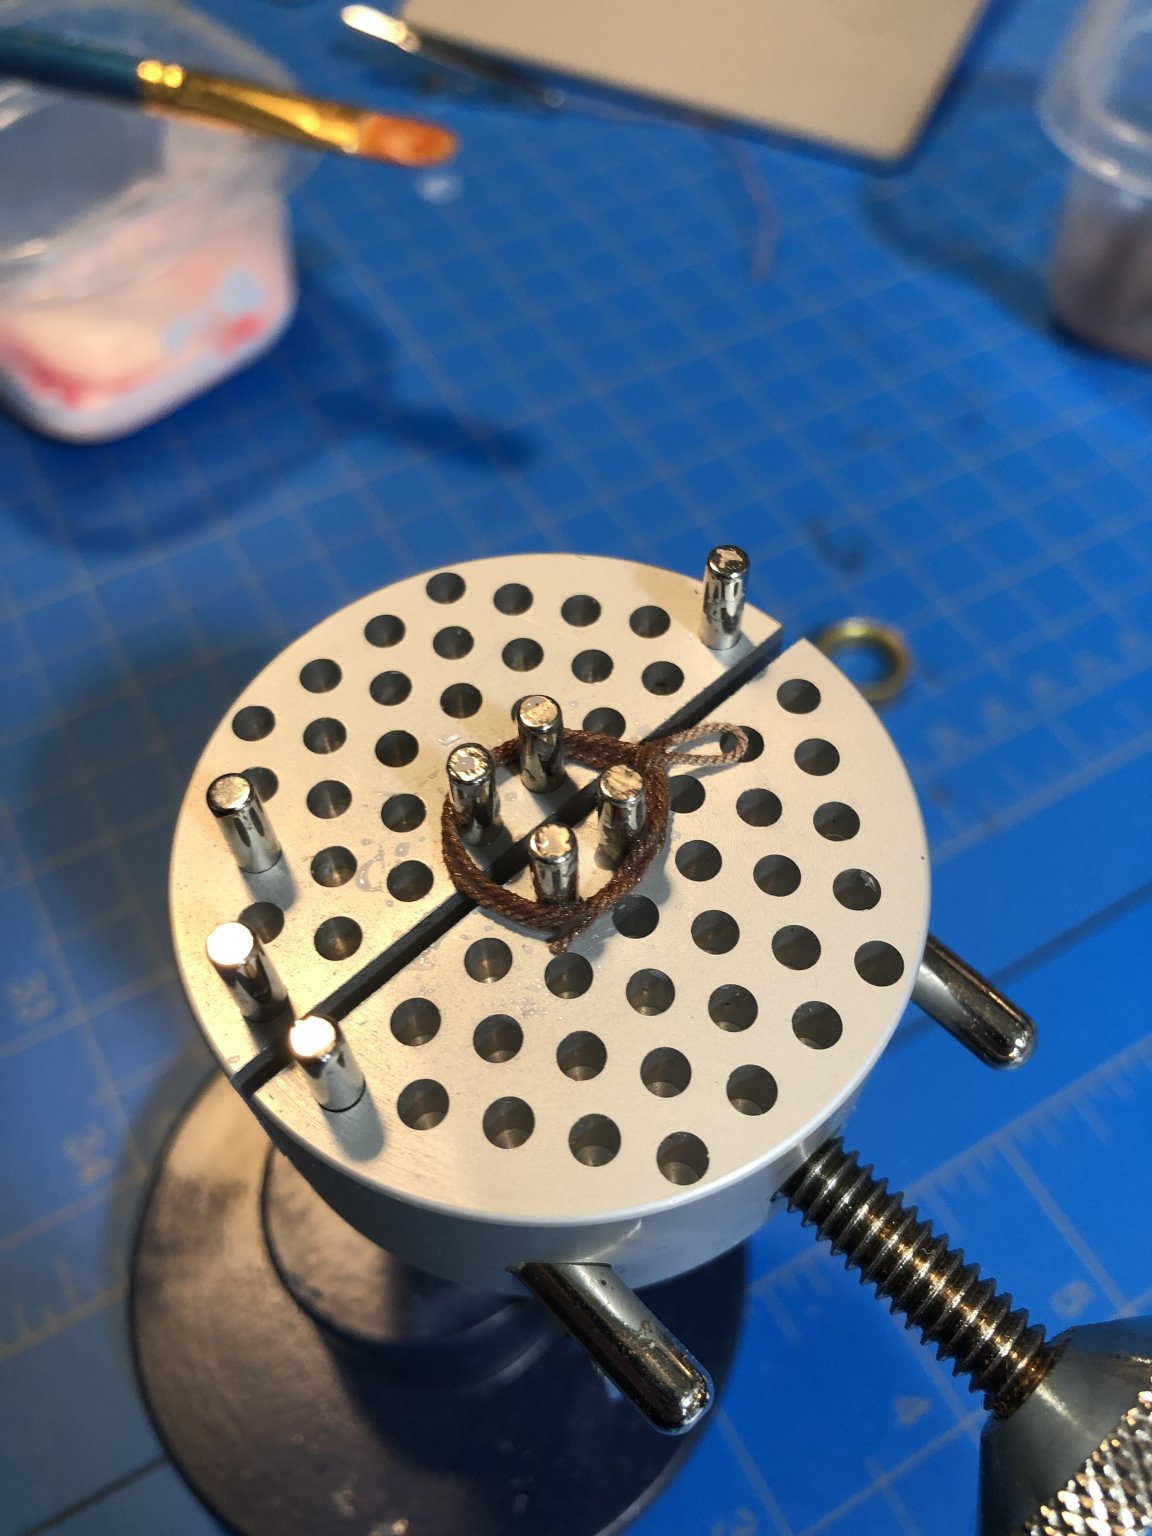
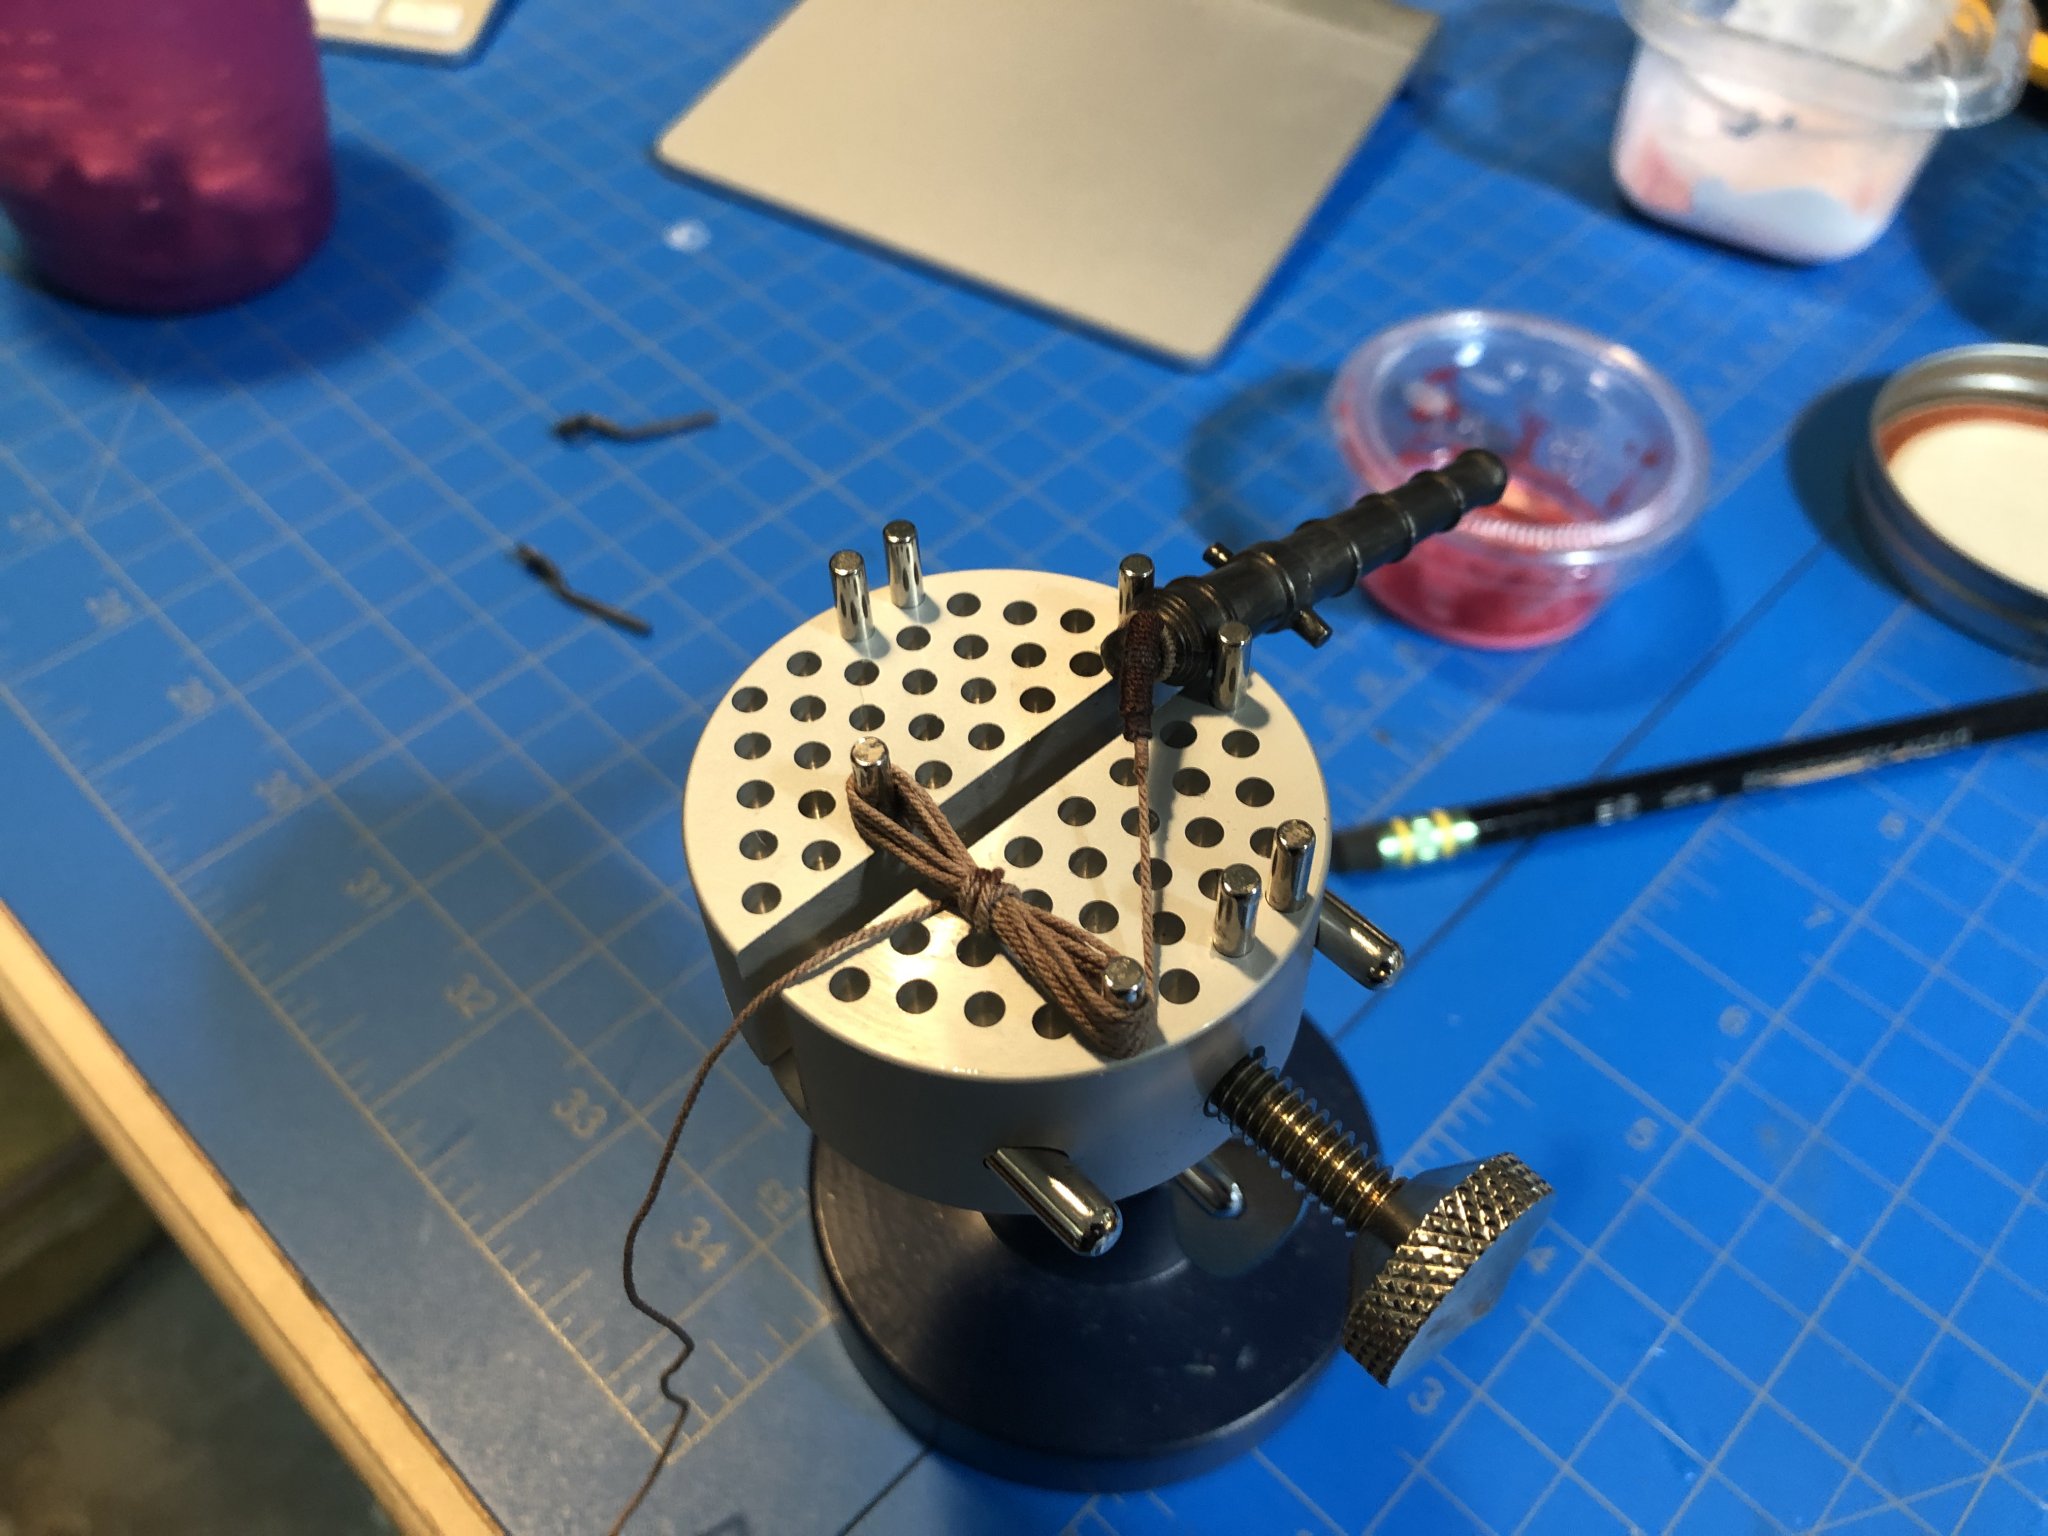
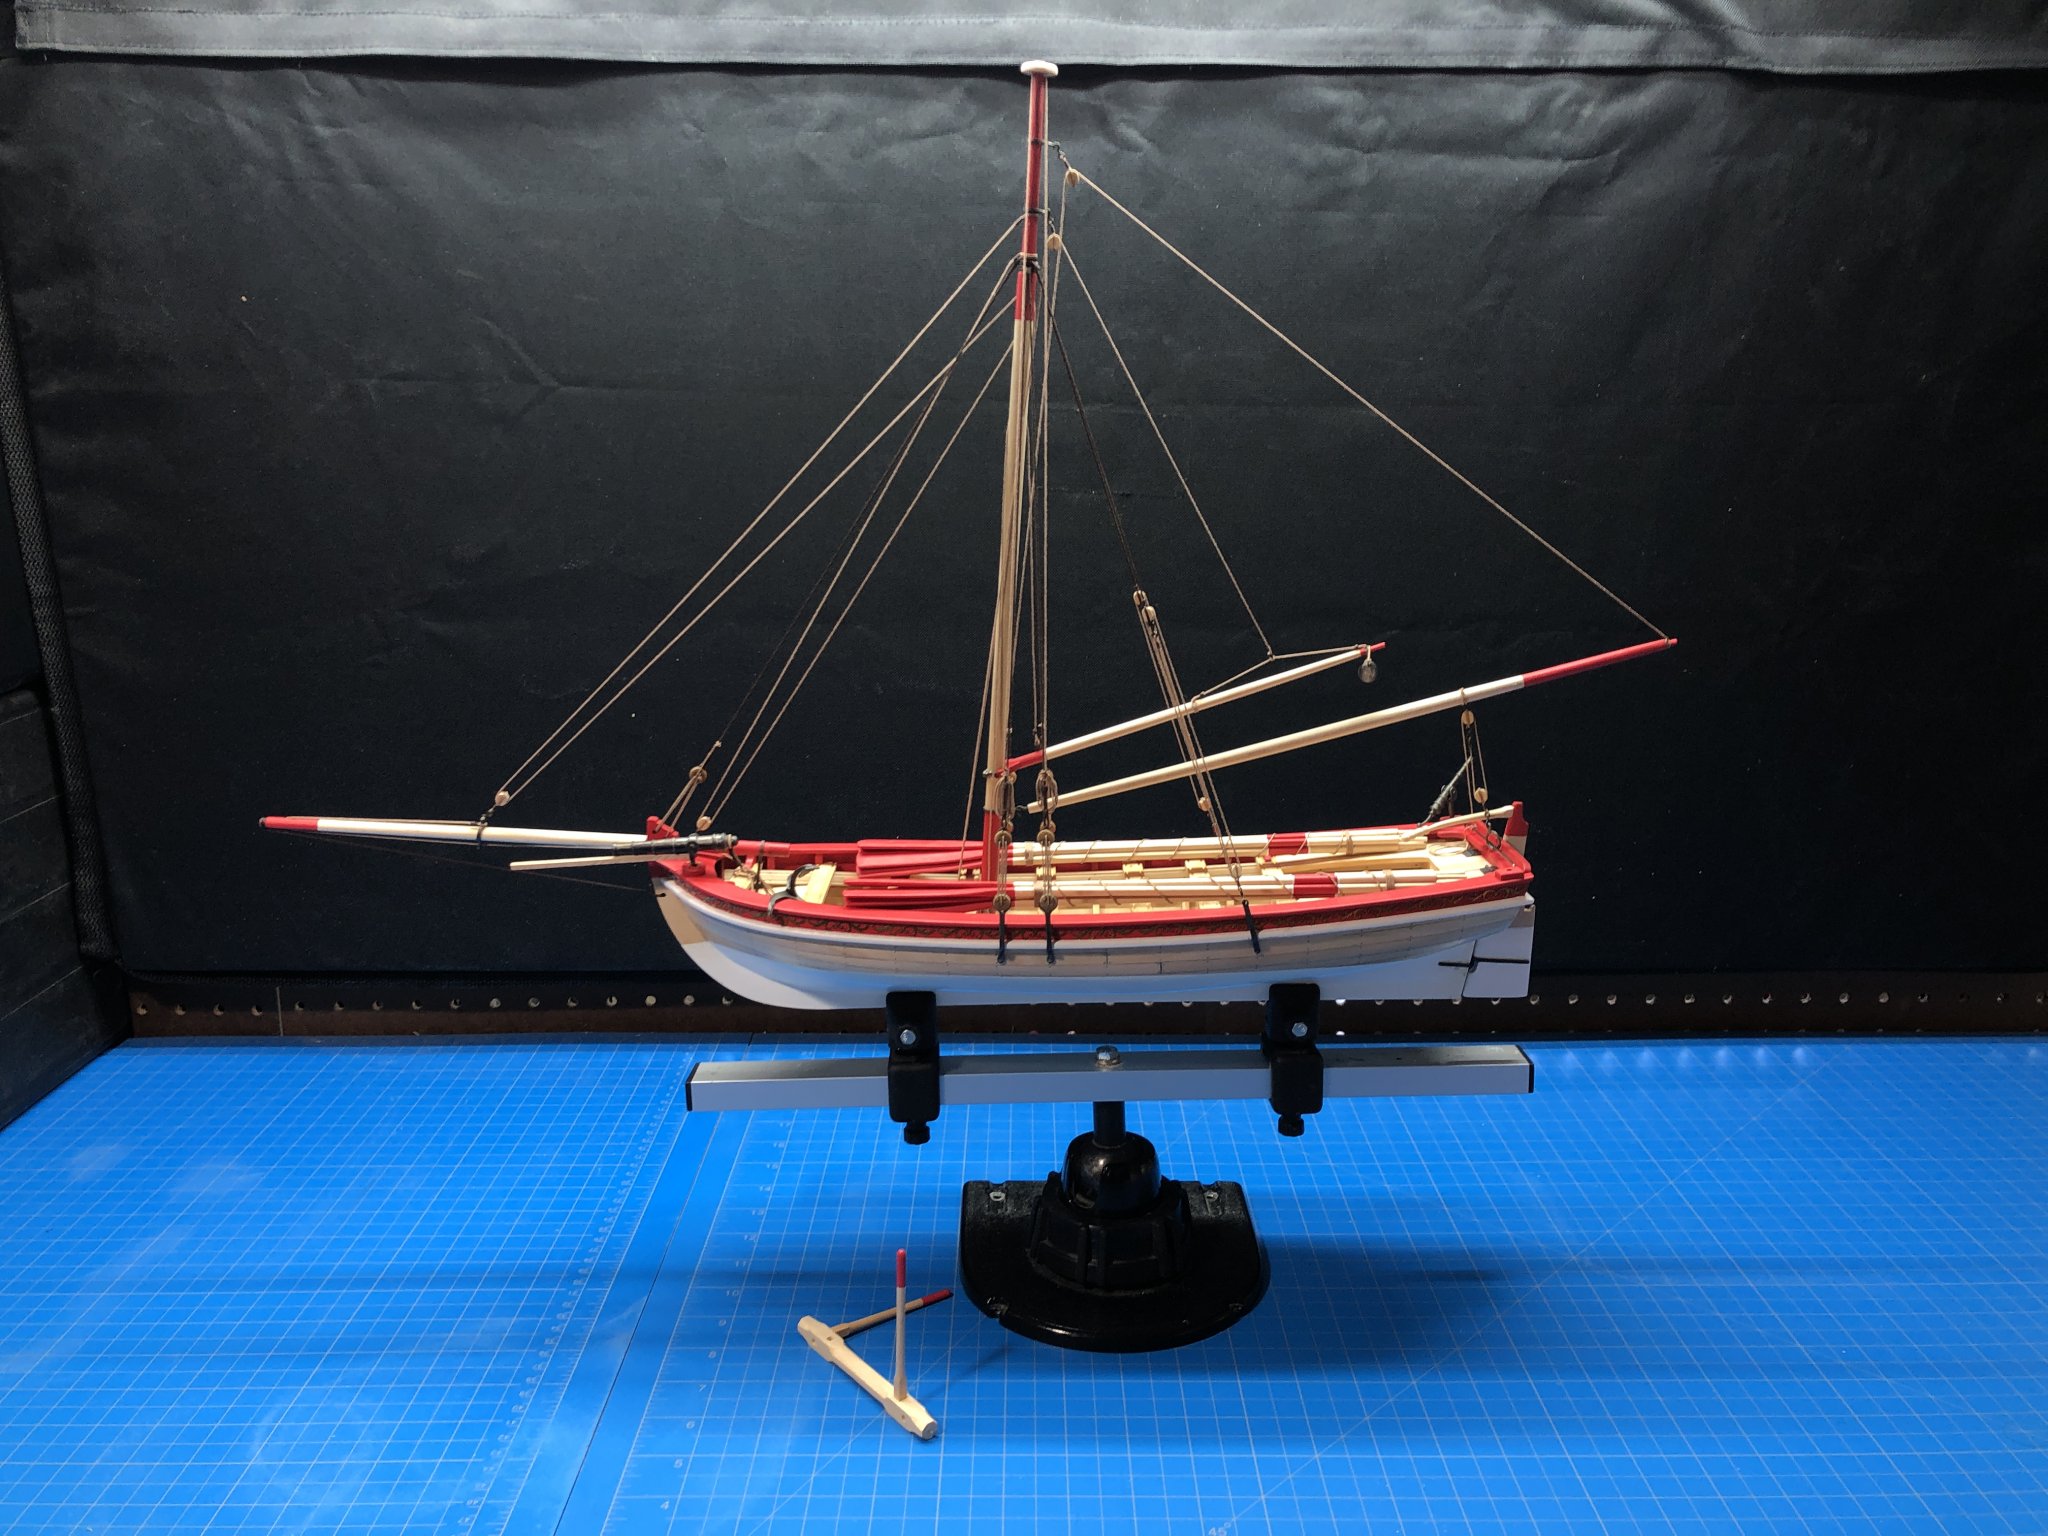
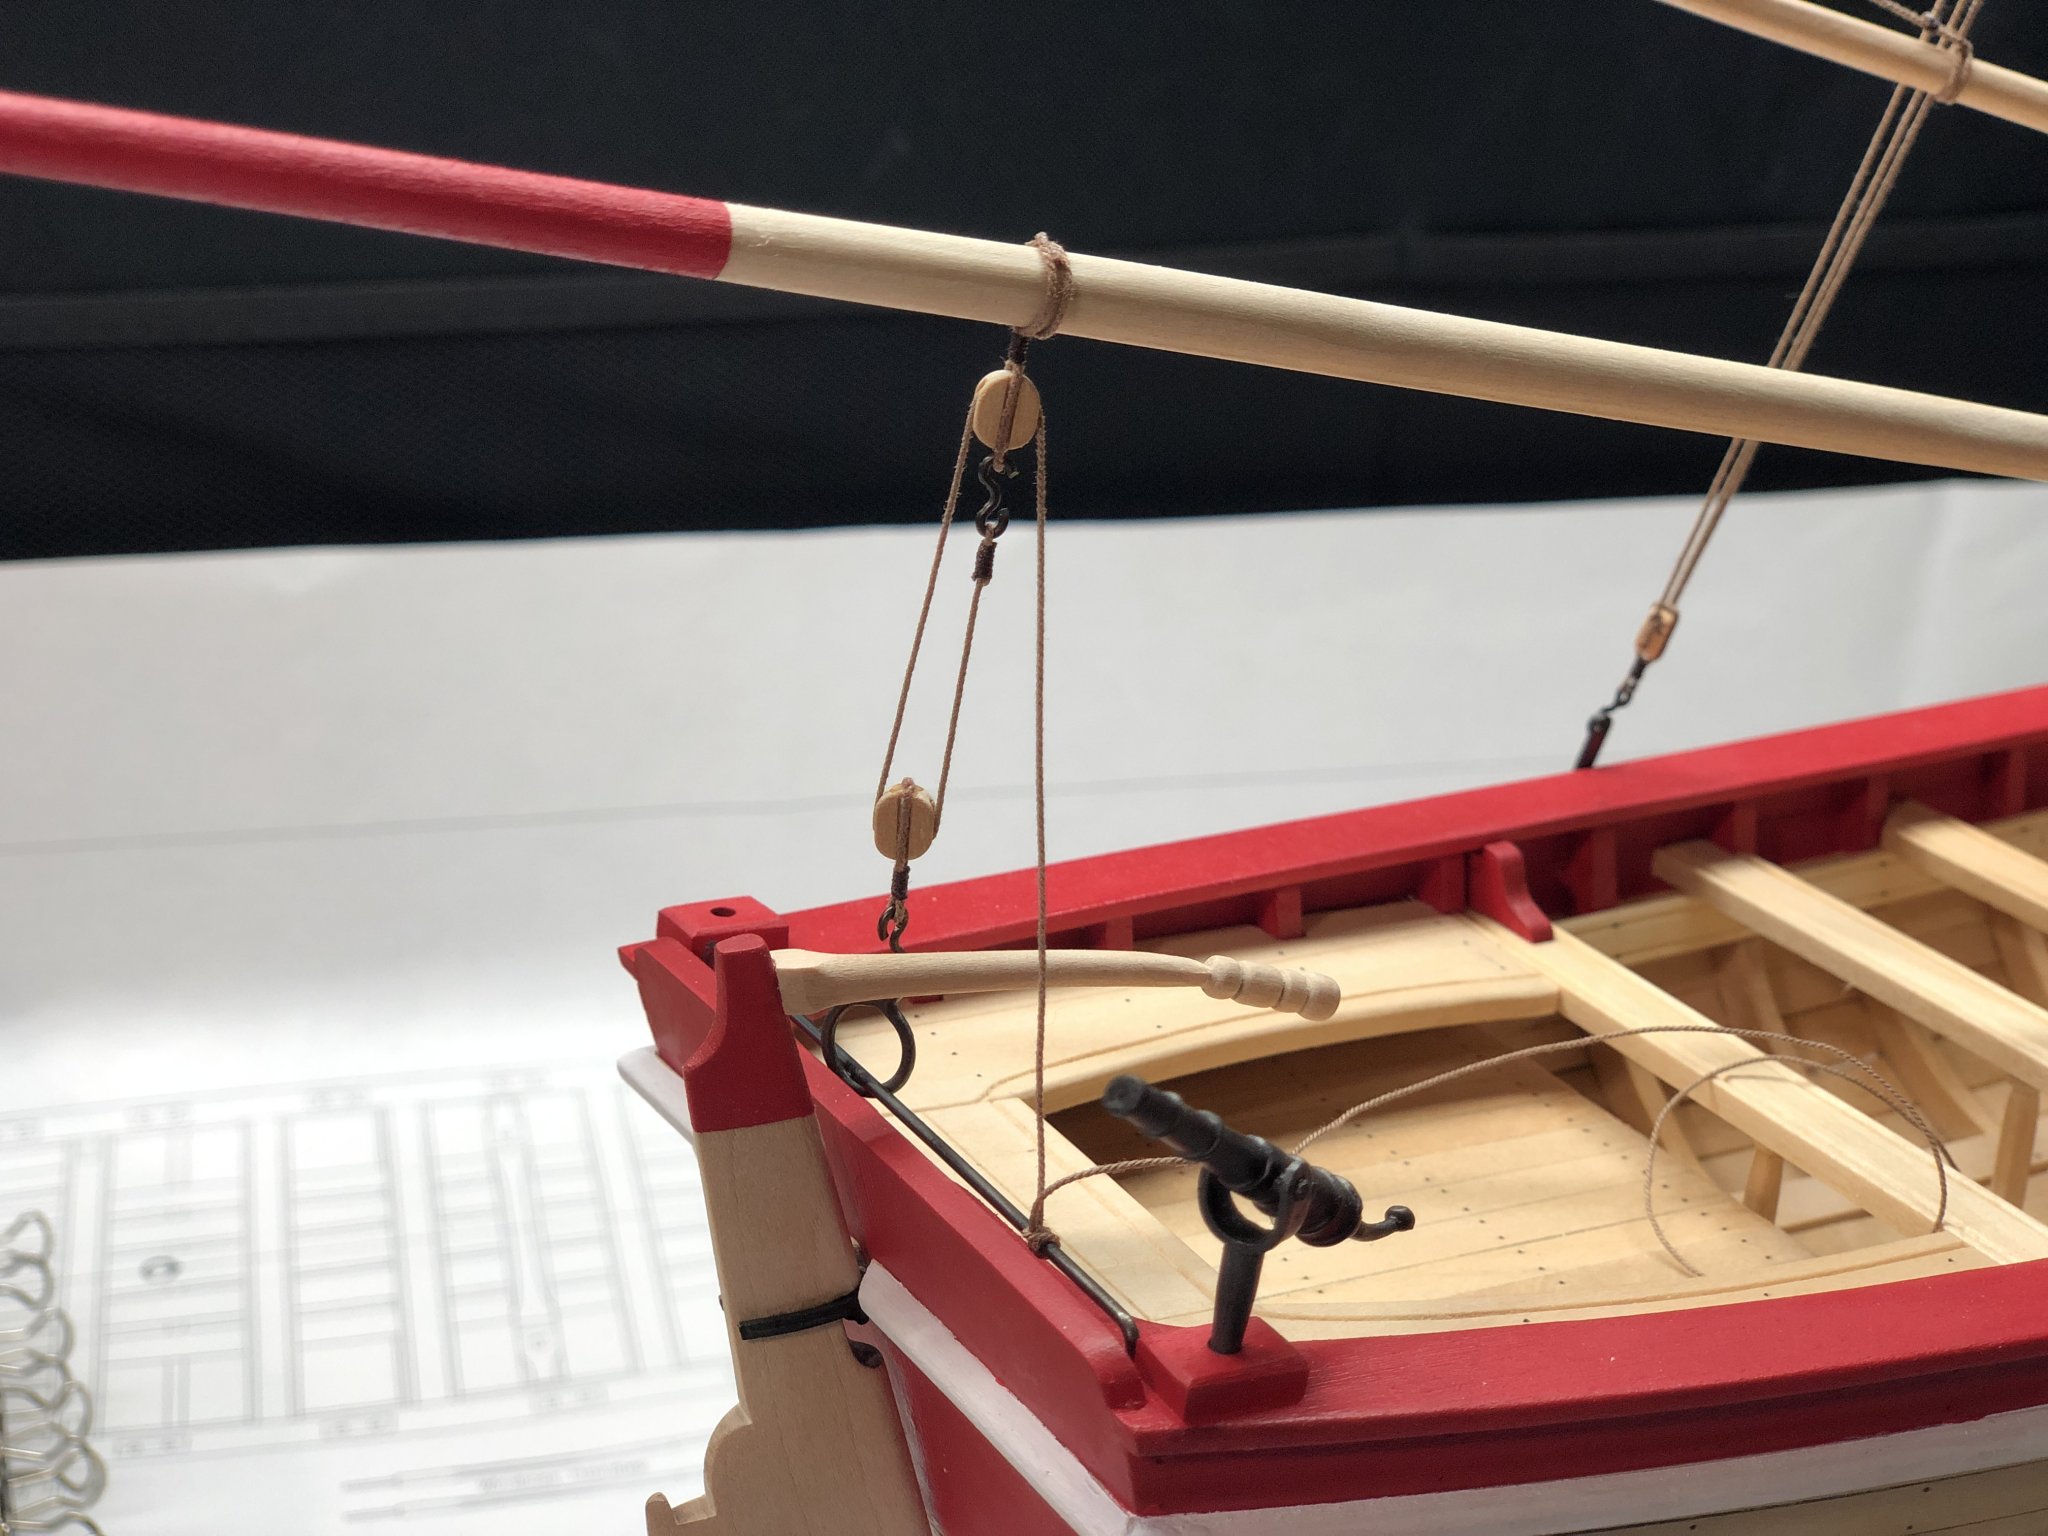
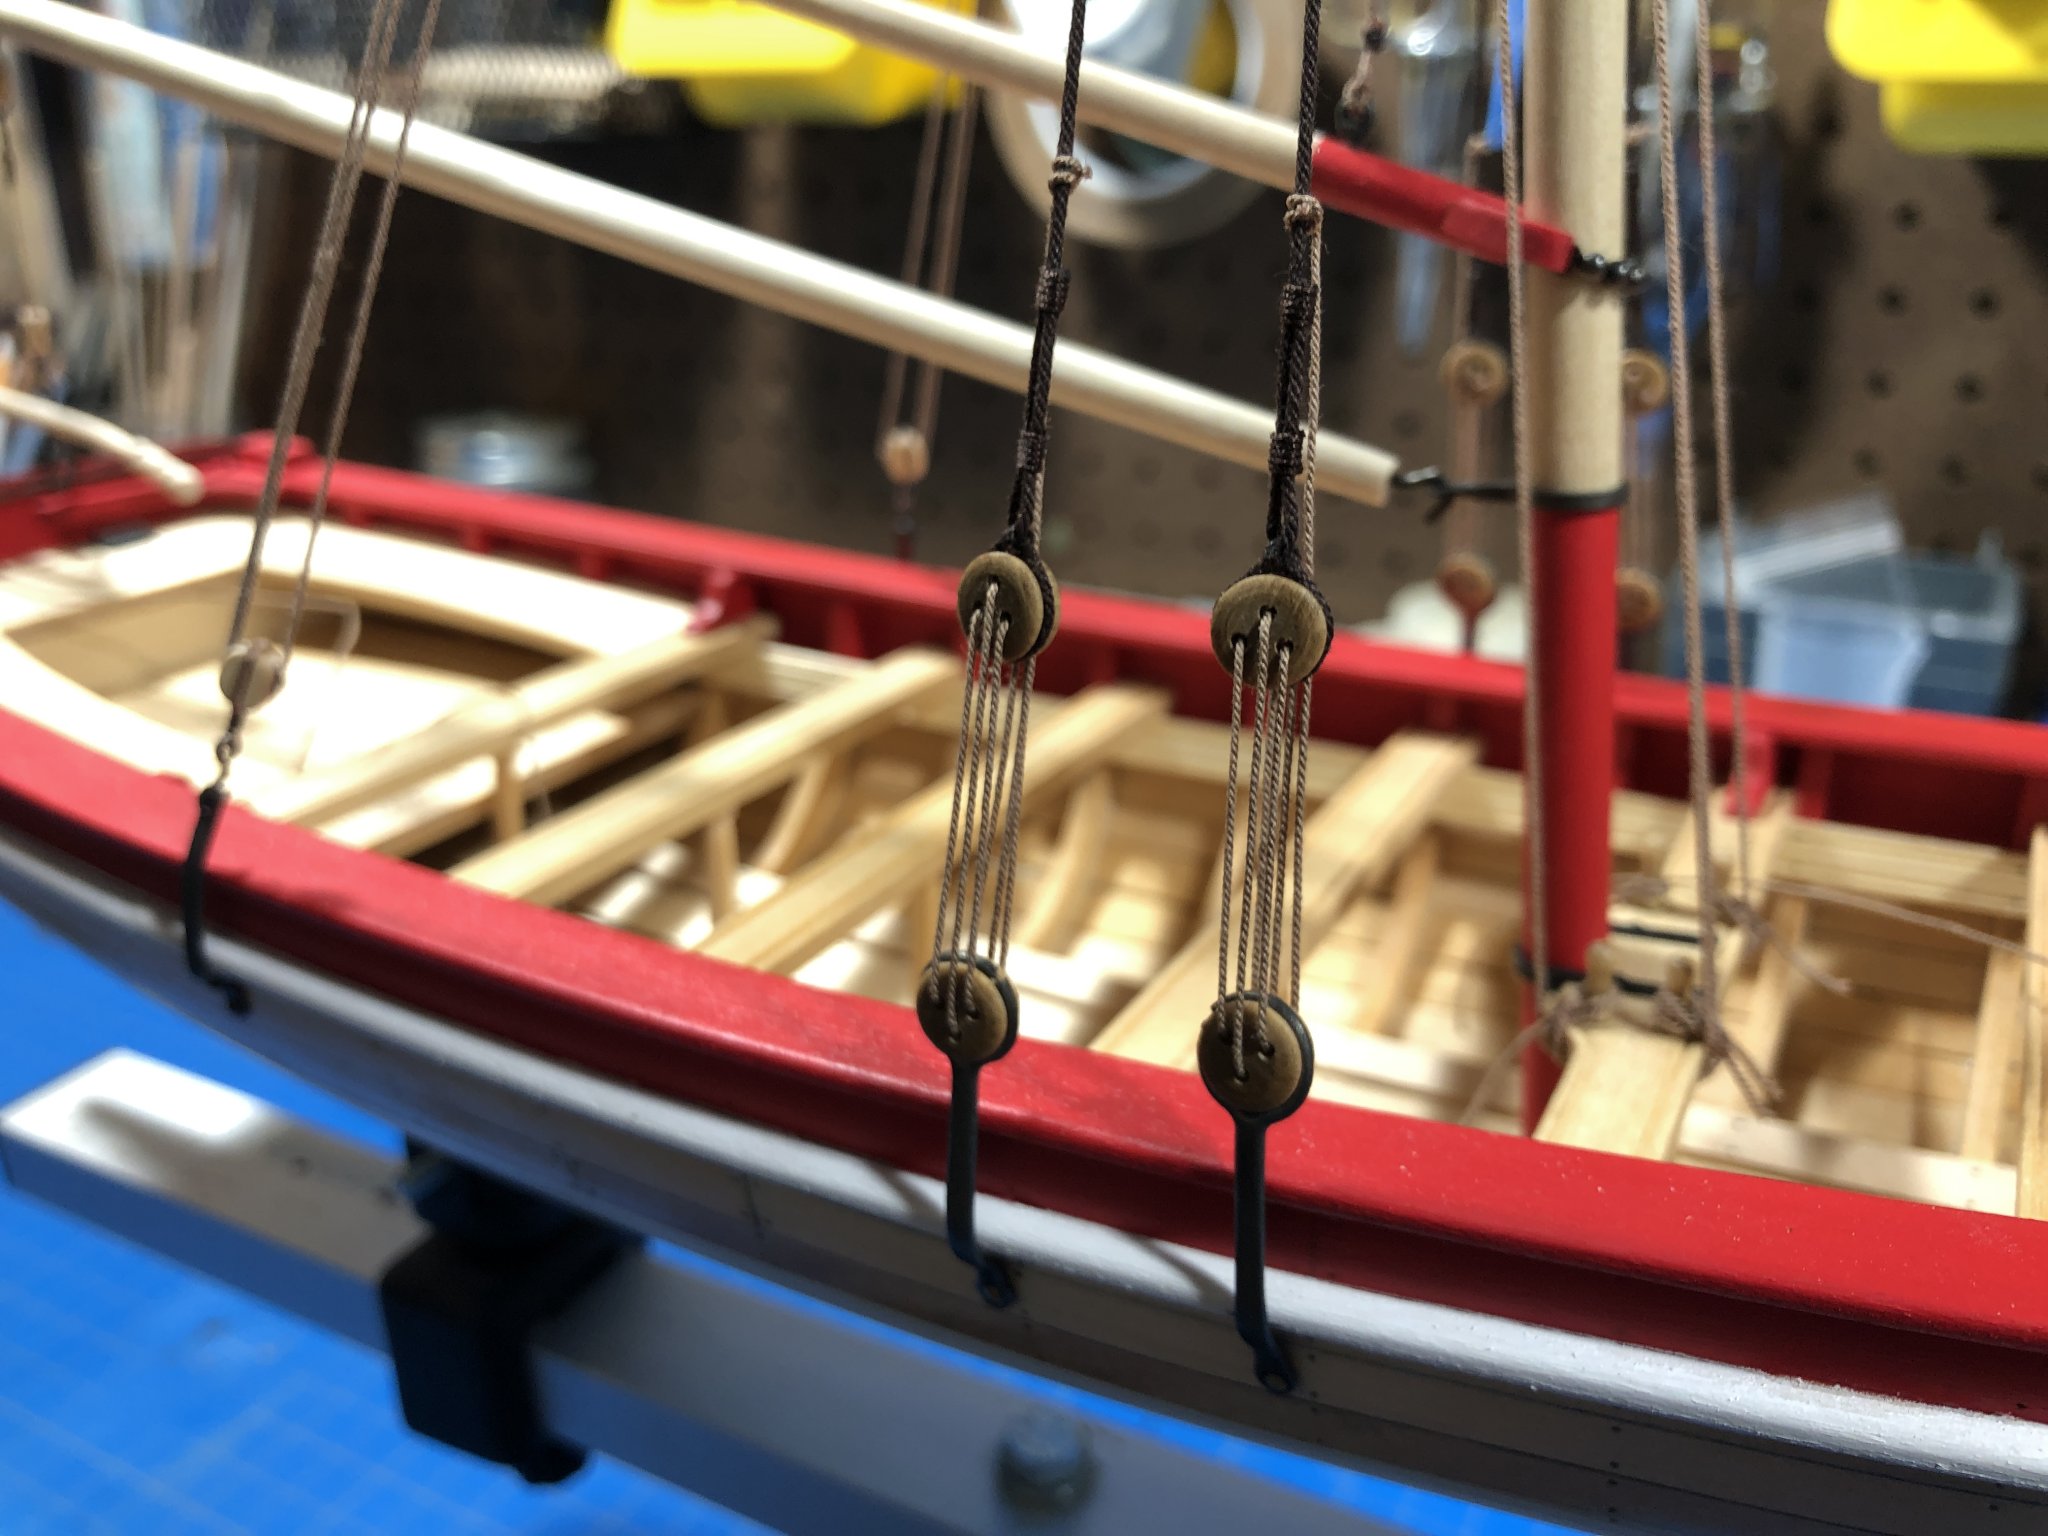
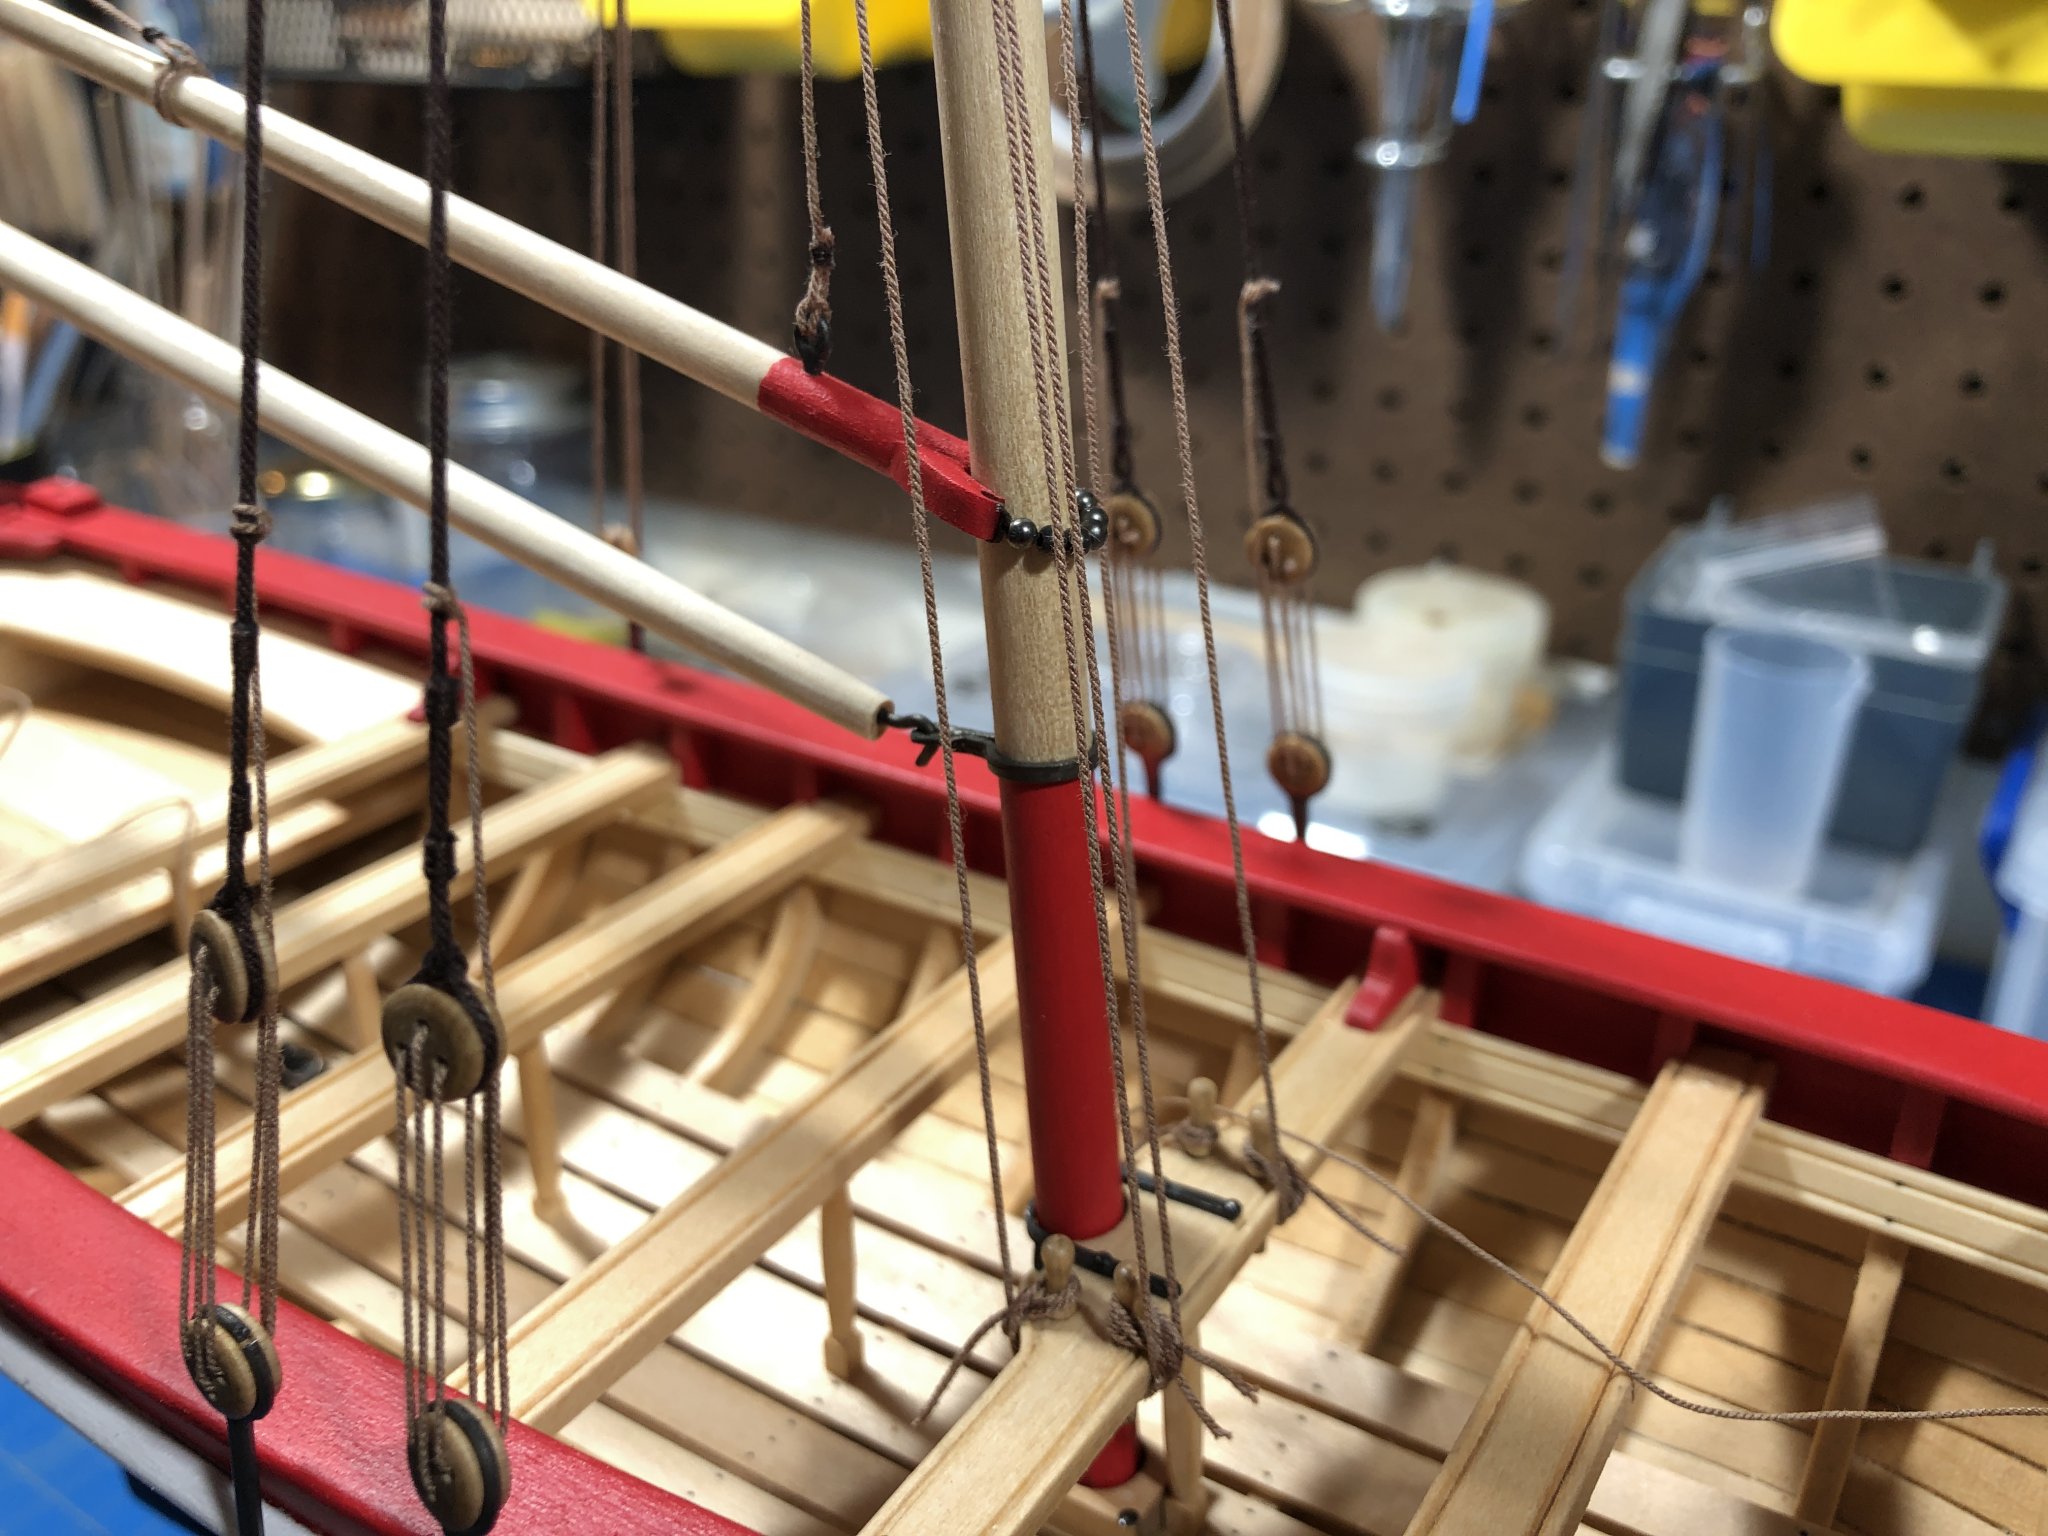
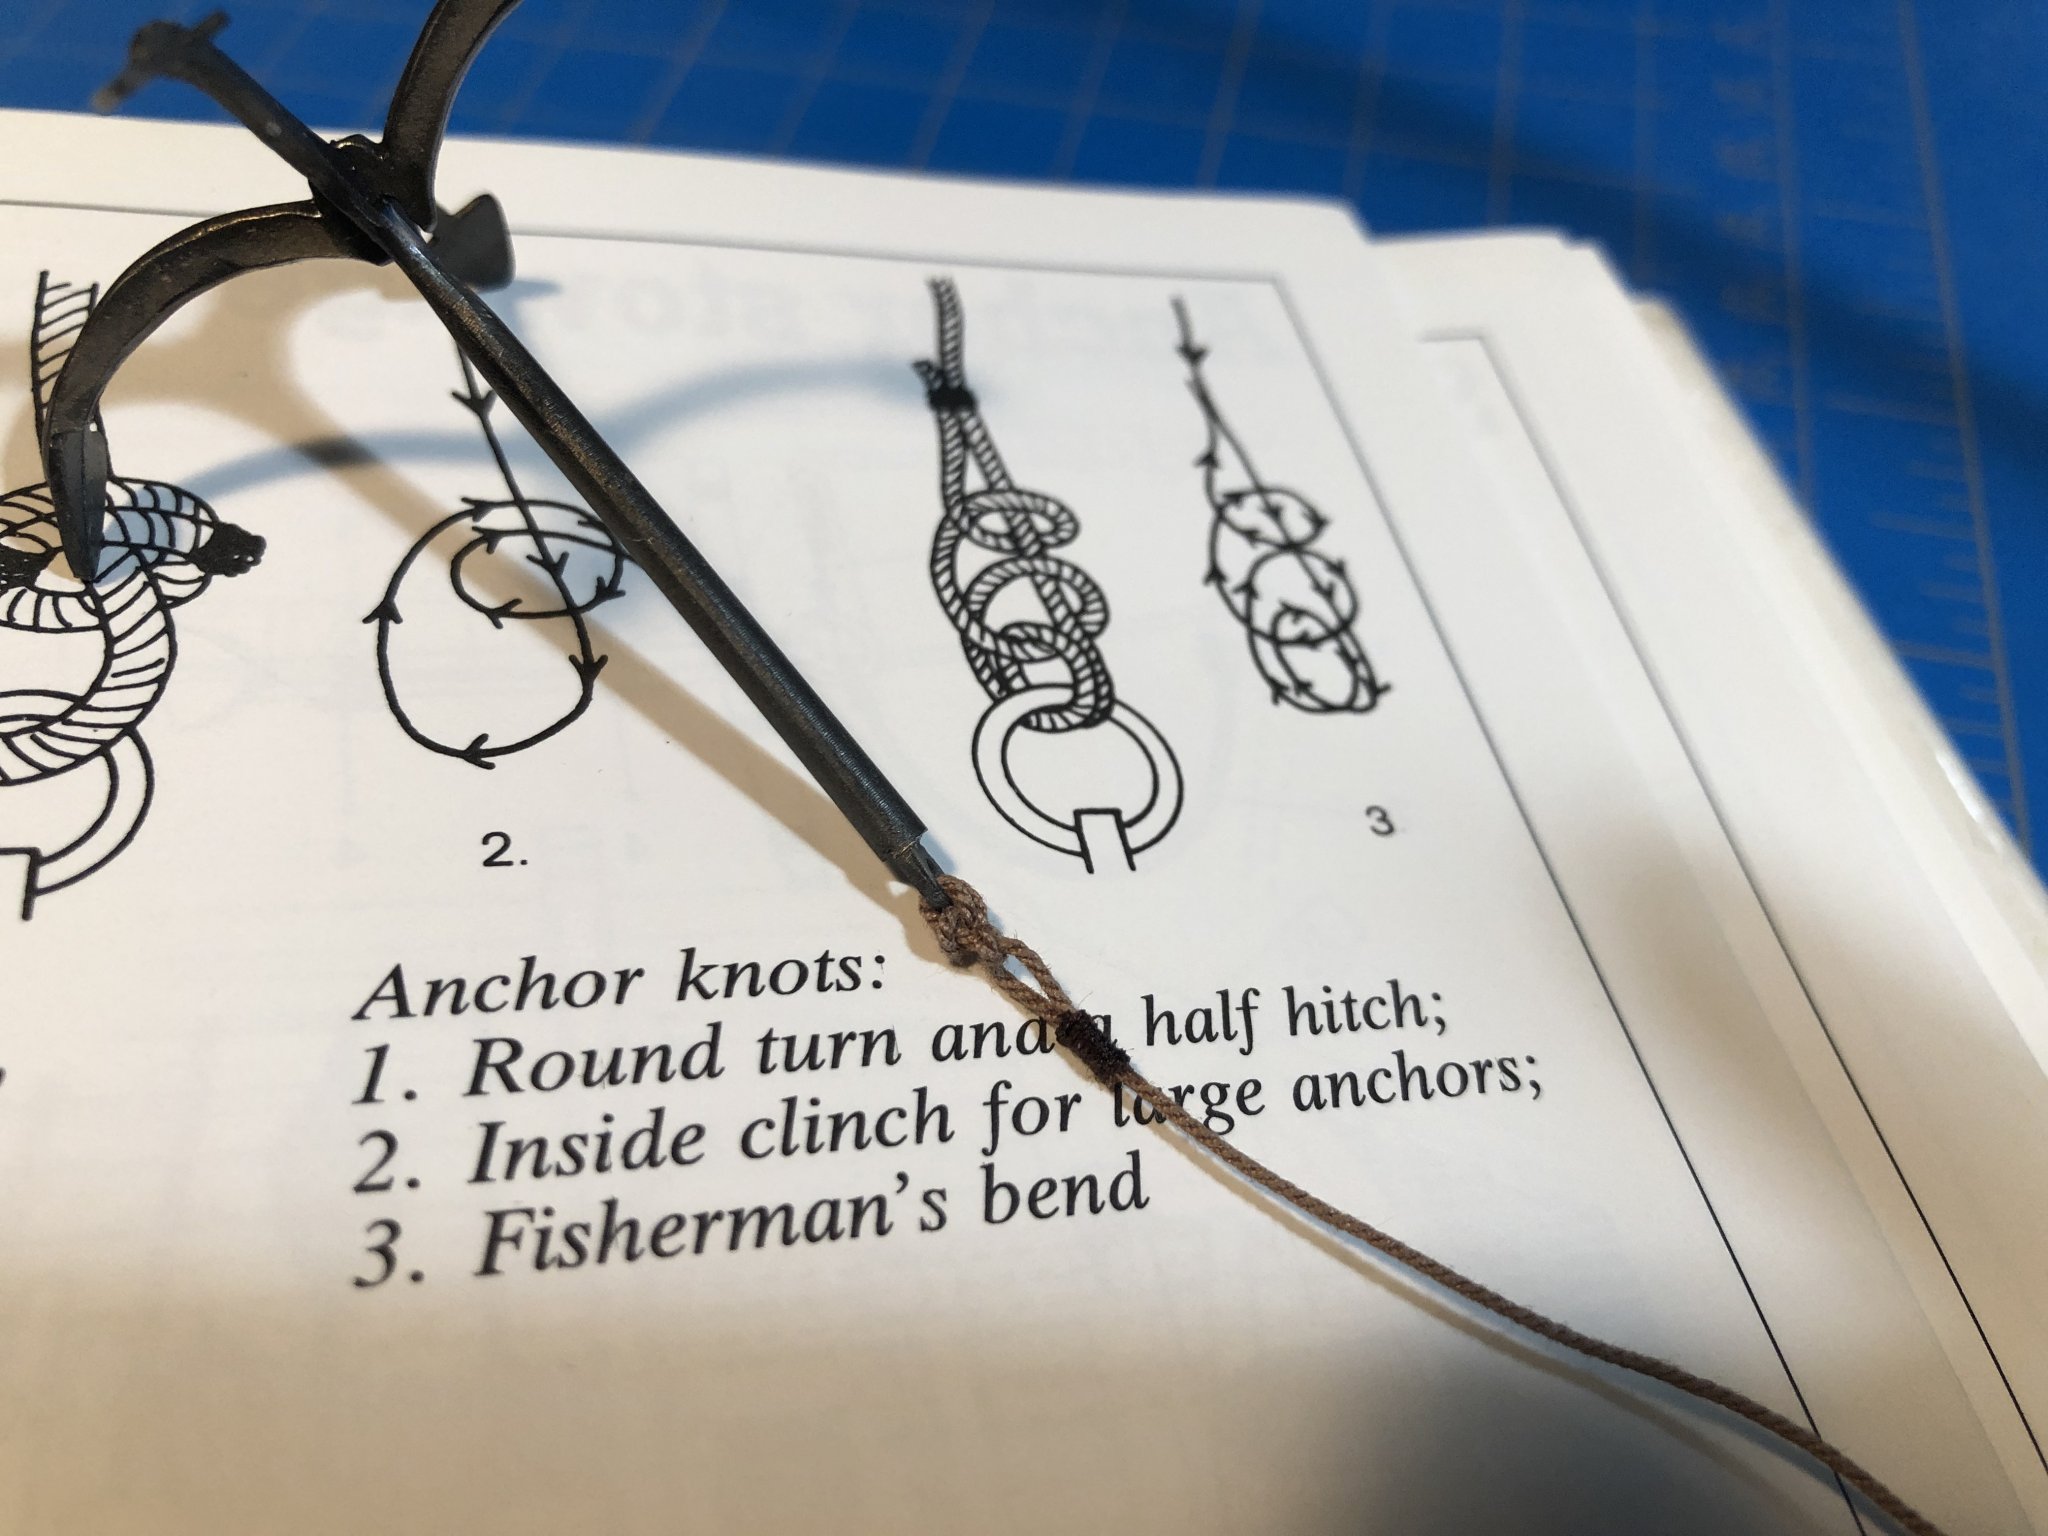
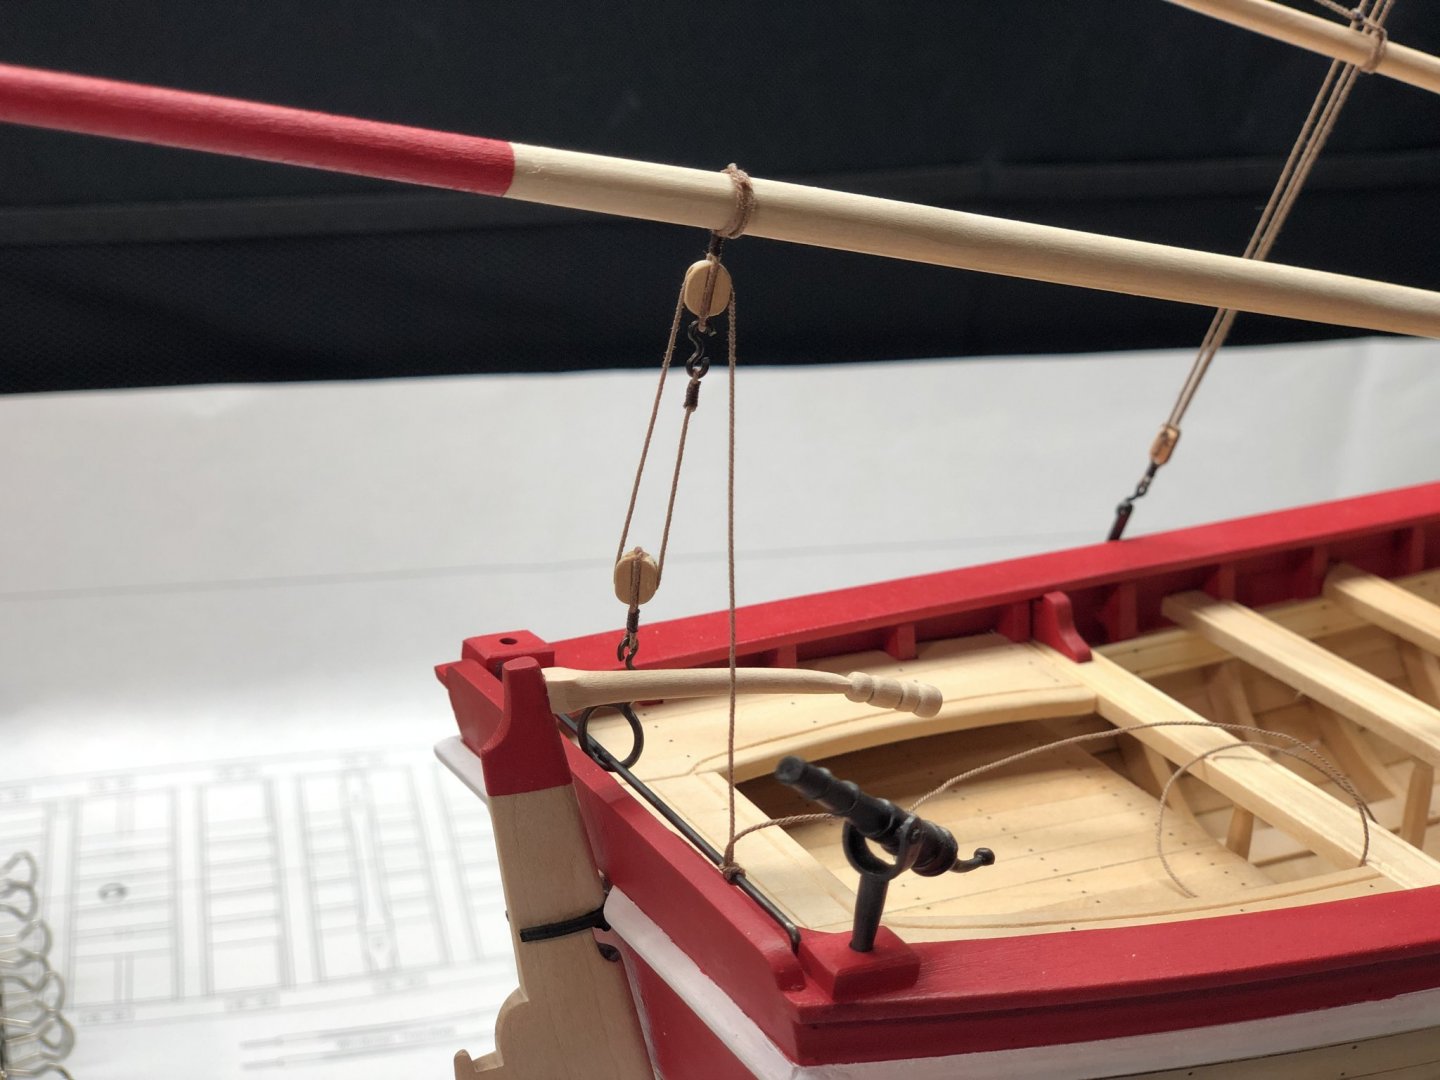
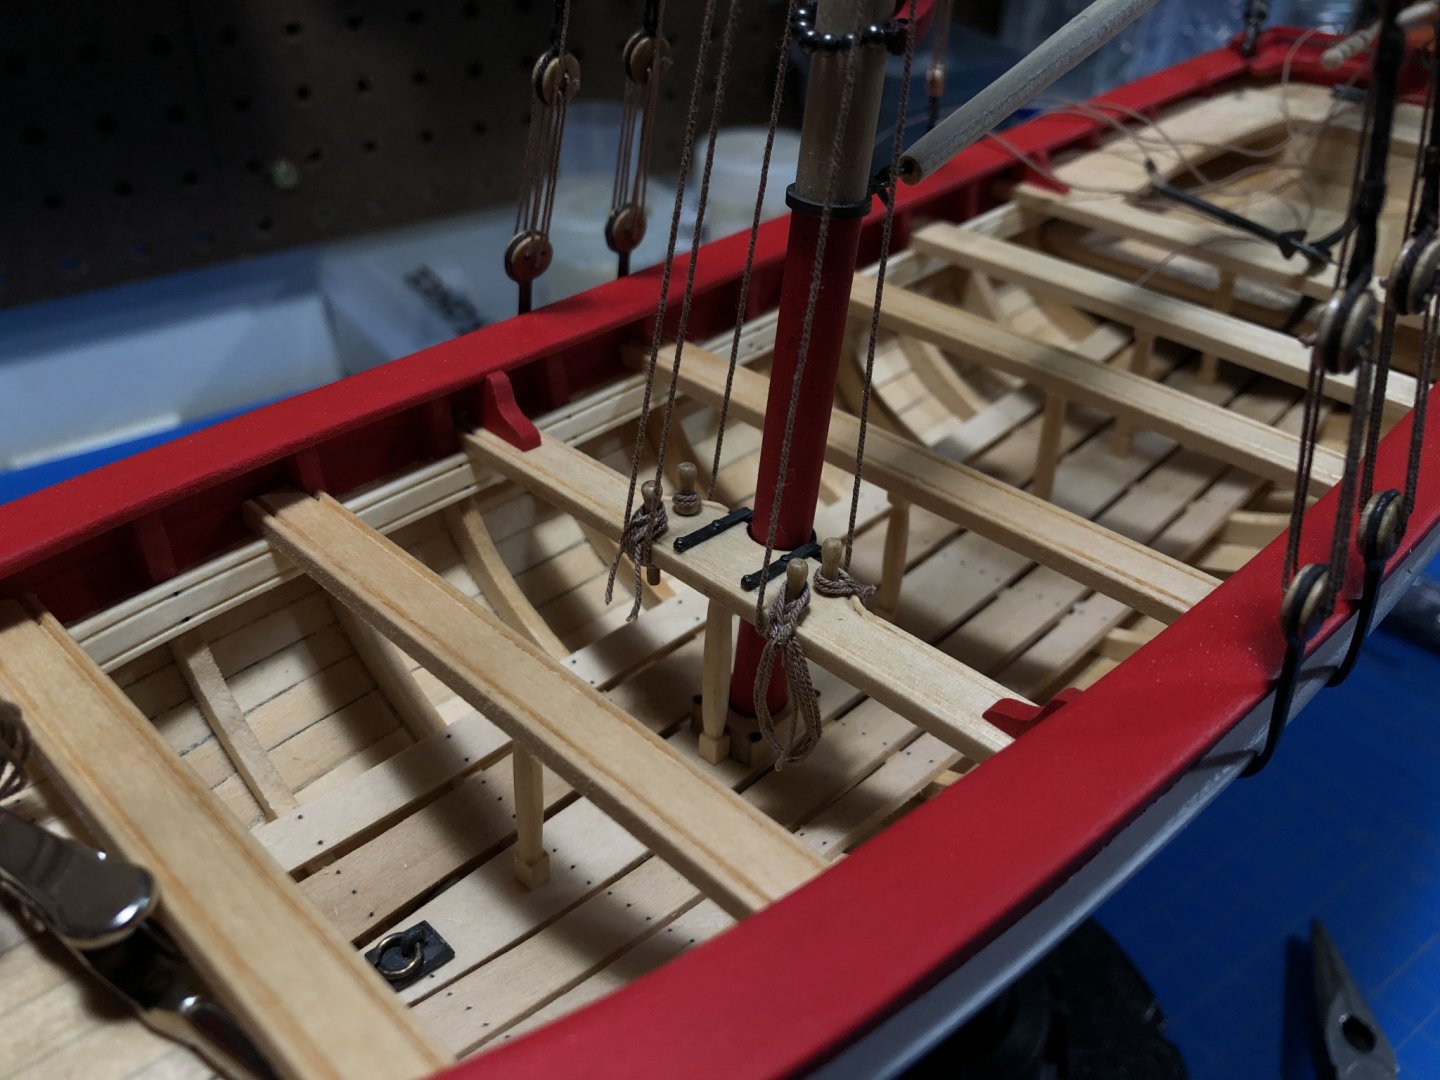
So I ended up wrapping it up this weekend. I got the last few bits sorted out, including the brass ornamentation and the fix with the rudder gudgeons. I decided to omit the oar locks. It seems stupid to have model with oars but no oar locks but they are just so ugly (in my opinion) that I just couldn't bear putting them on. Ultimately, Ill accept it as is and explain to whomever asks that I just exercised some executive decision making - right or wrong. I managed to get some coils I was happy with combining the ccoyle method I mentioned earlier and my own adaptation using the parts holder. Shown below wet with diluted white glue for setting the coil, and on the right rigging a gasket coil as I could think of no other way a seaman might have dealt with rope that was only meant for use while the gun is stored under heavy swell. I used the same for the anchor for similar reason. I suppose when the anchor is stored, they might have used a gasket coil for the line. I don't know. I neglected to take a lot of photos during the last stages as is was just a lot of fiddling with details but much can be seen in the gallery I created using more formal photographs.


- 66 replies
-
- 7
-
-
- Finished
- Model Shipways
- (and 1 more)
-
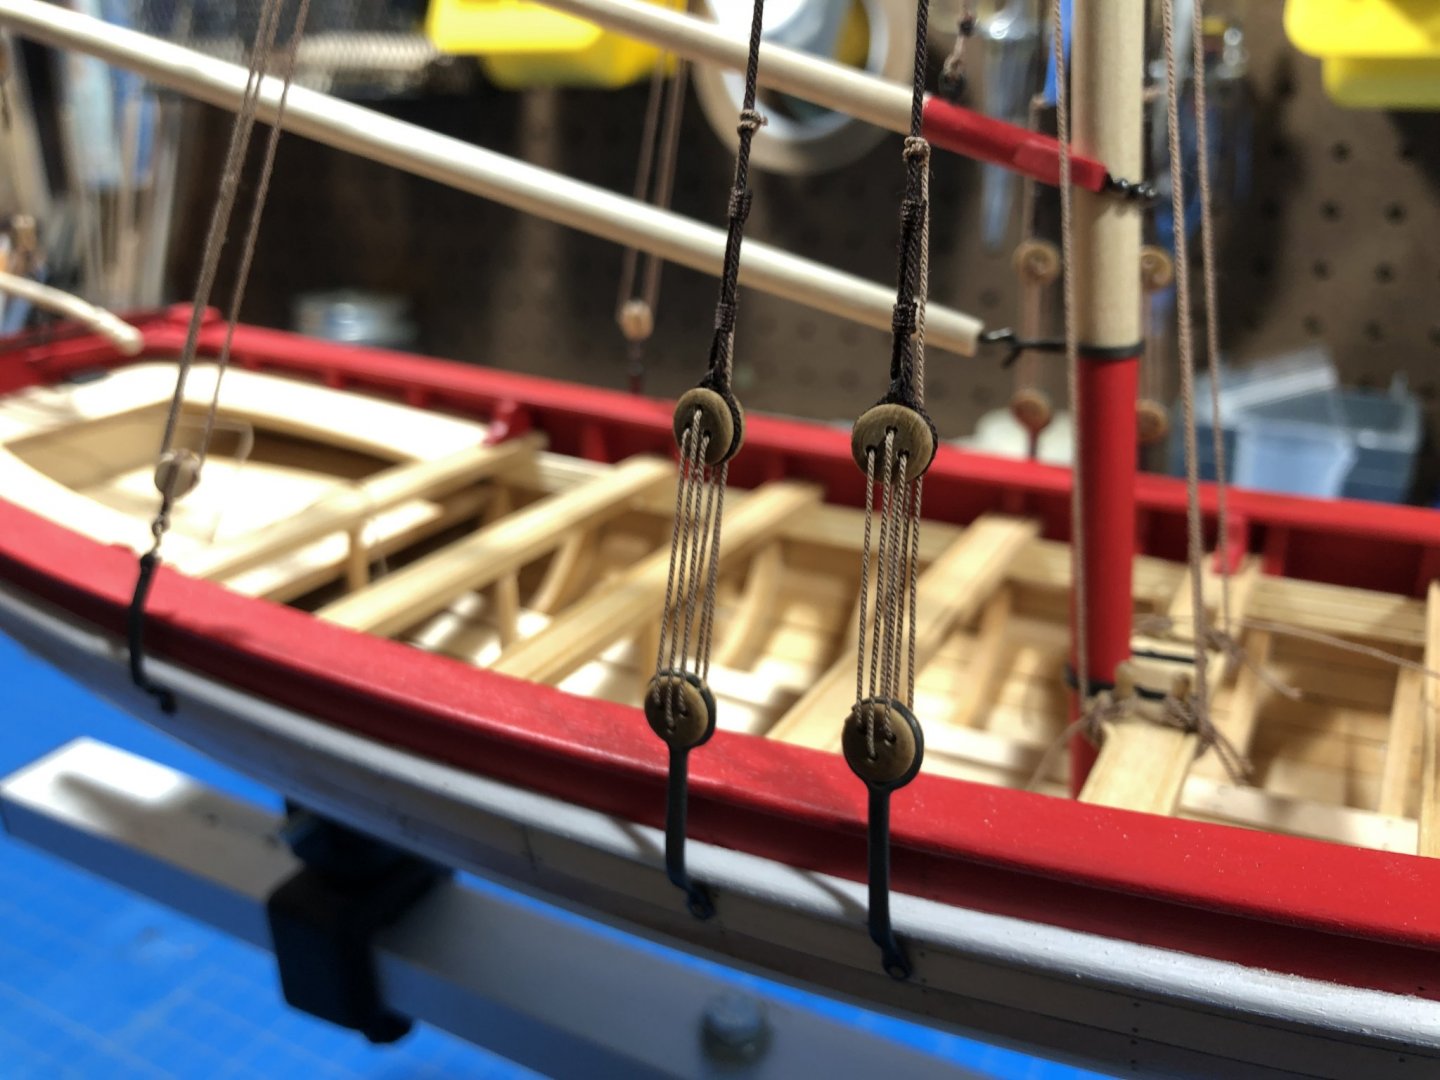
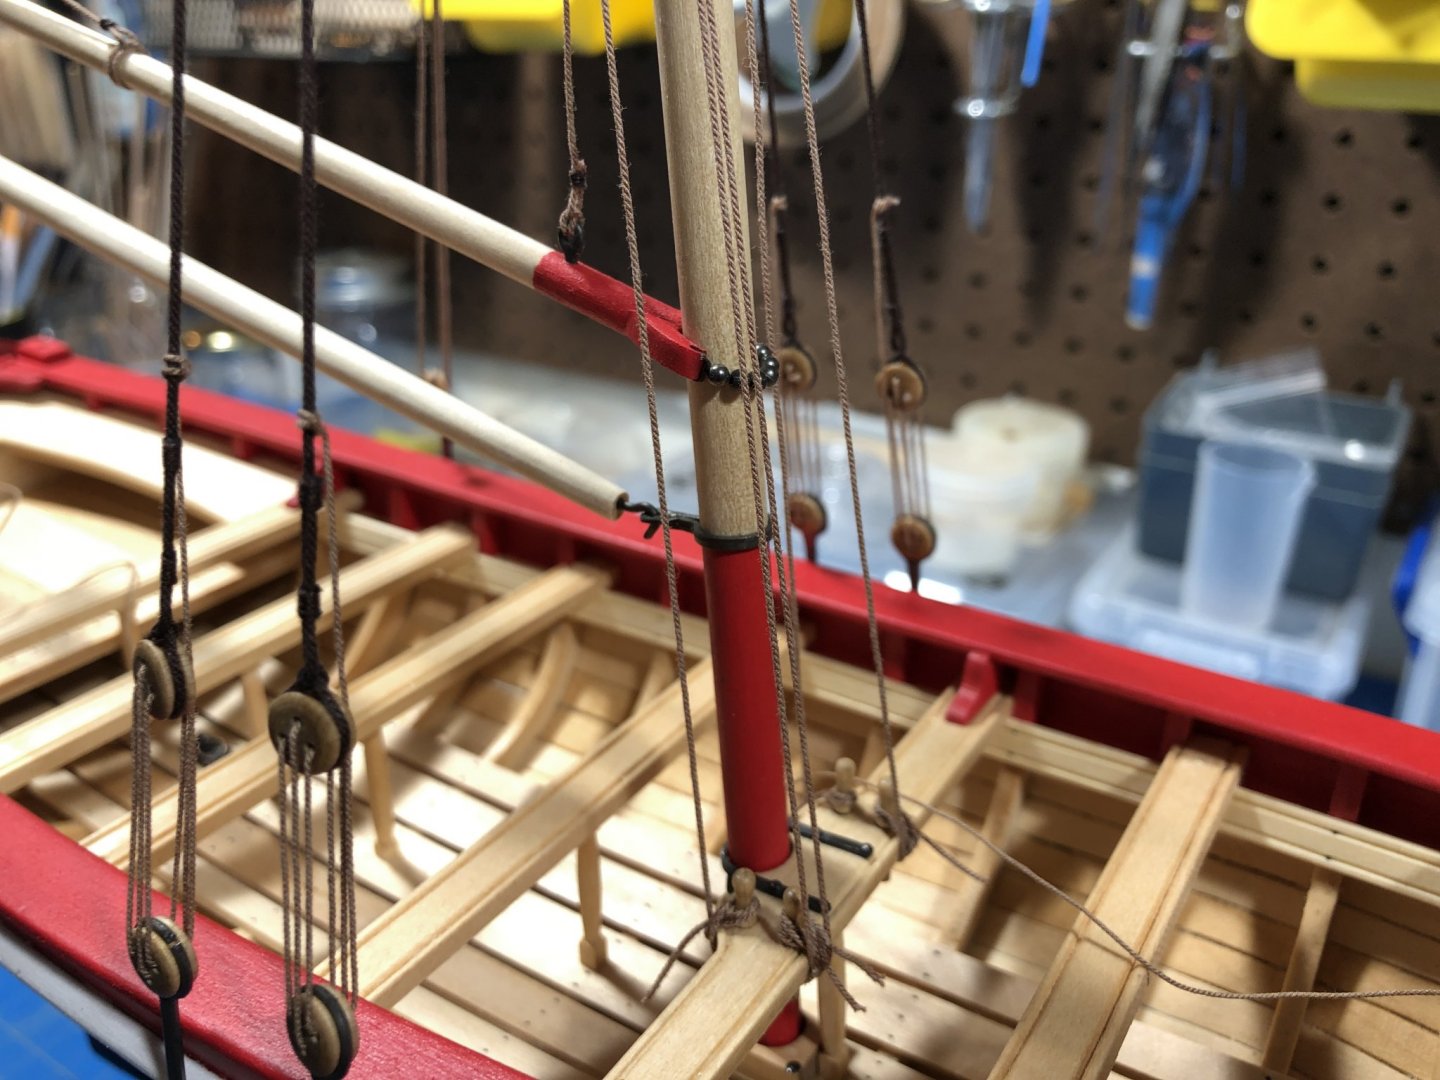
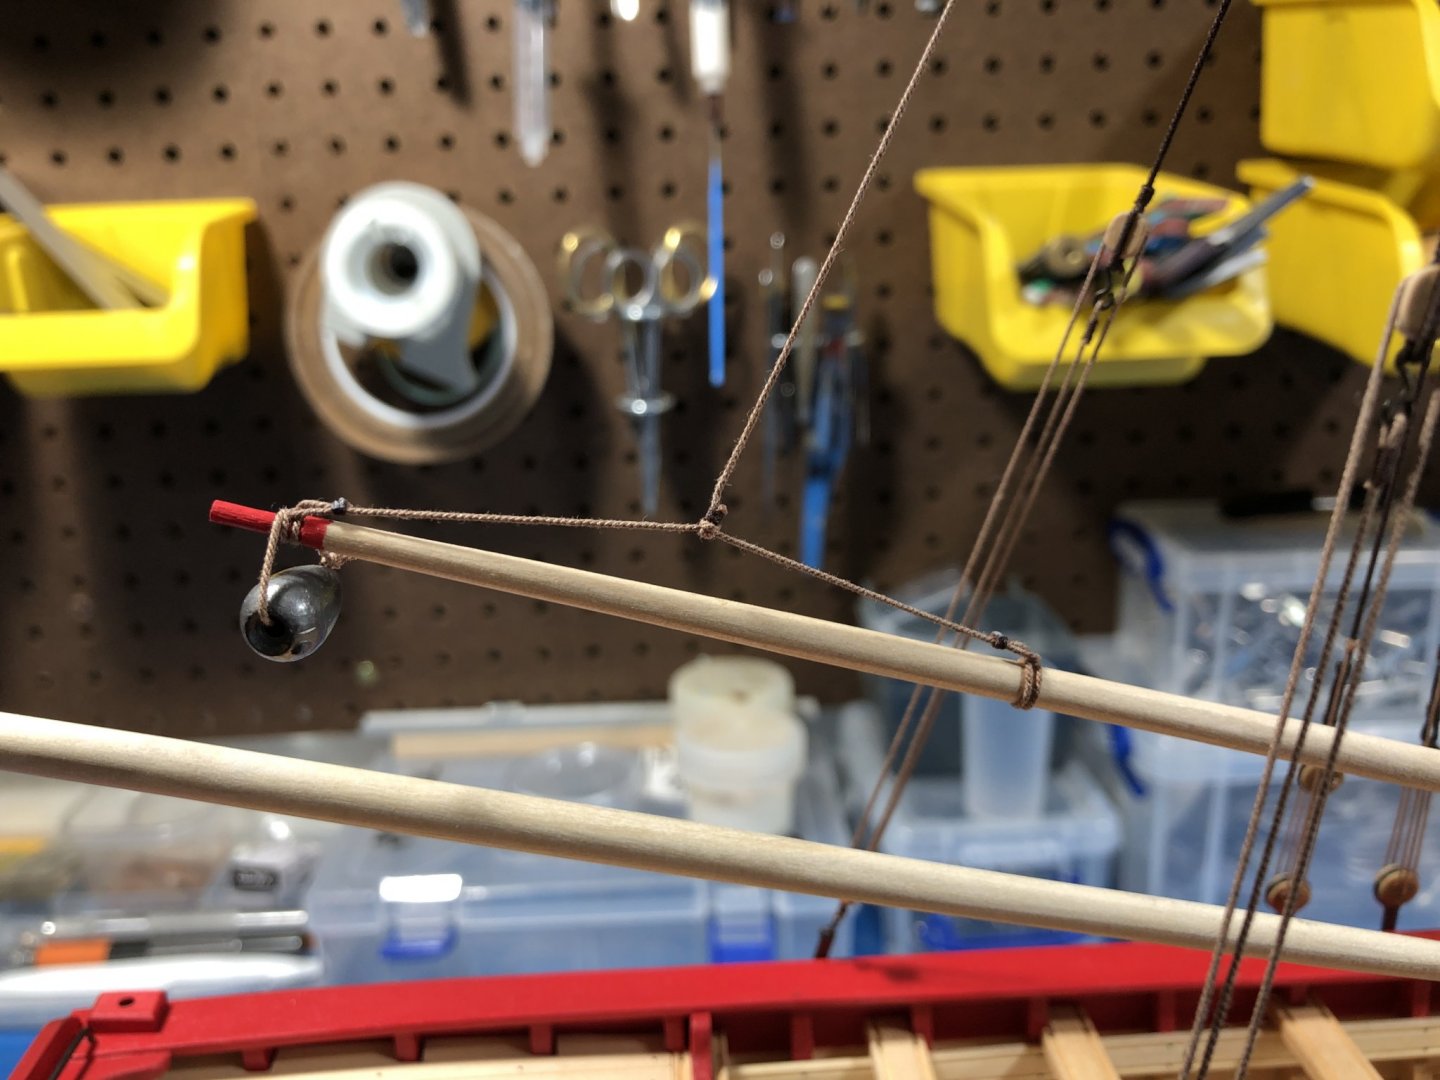
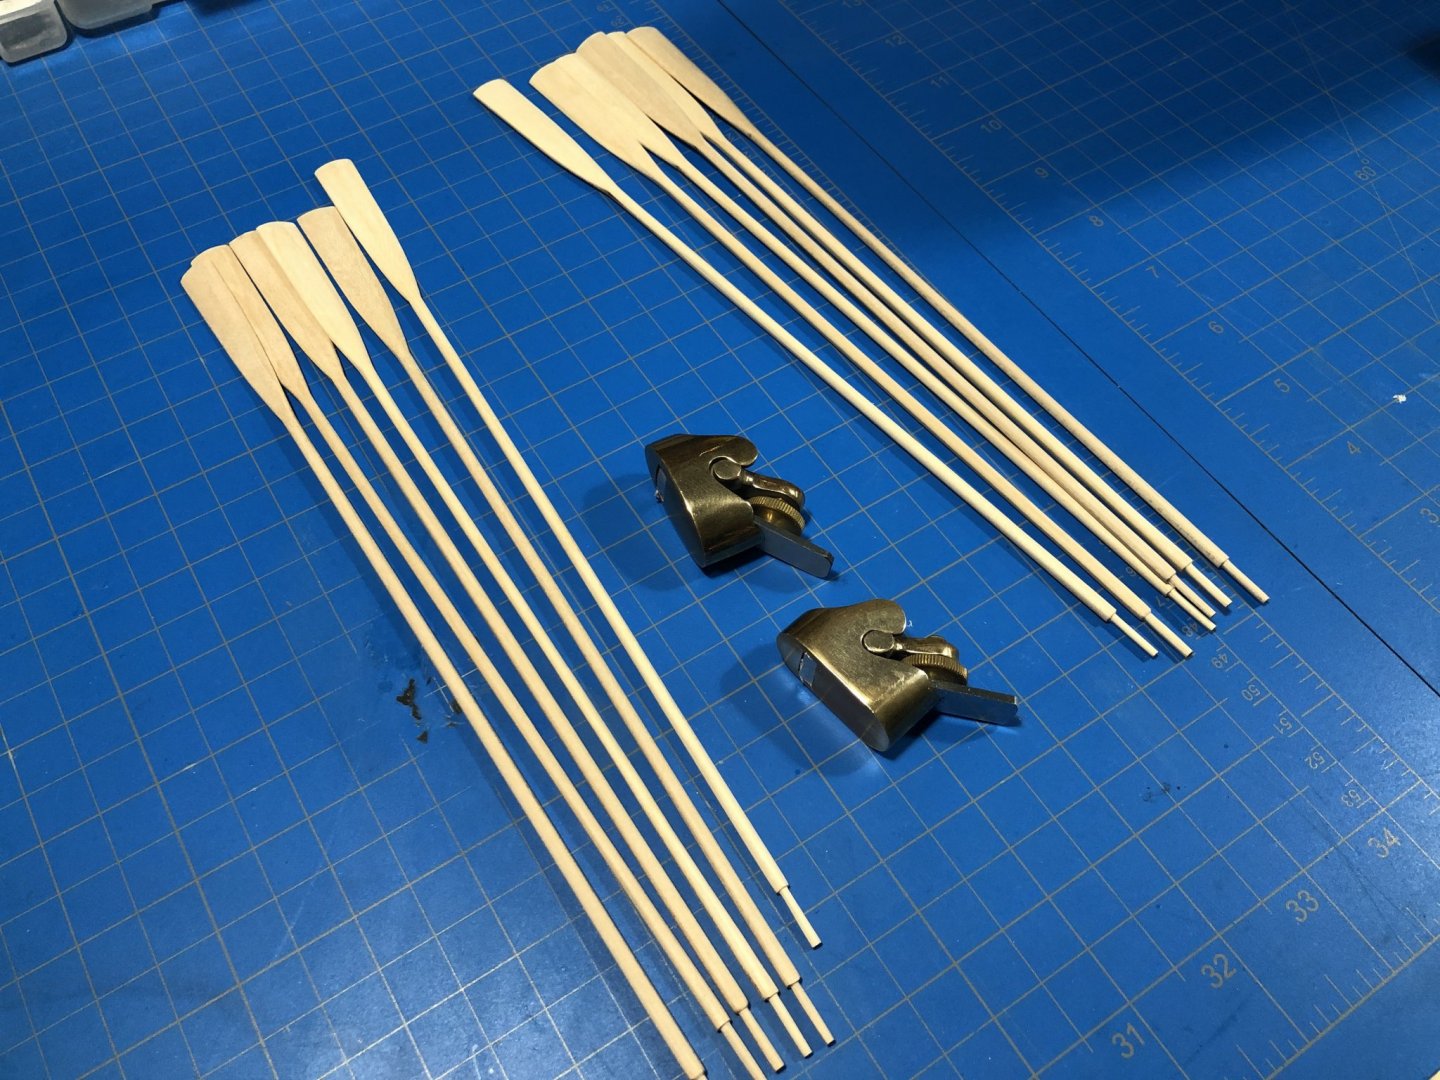
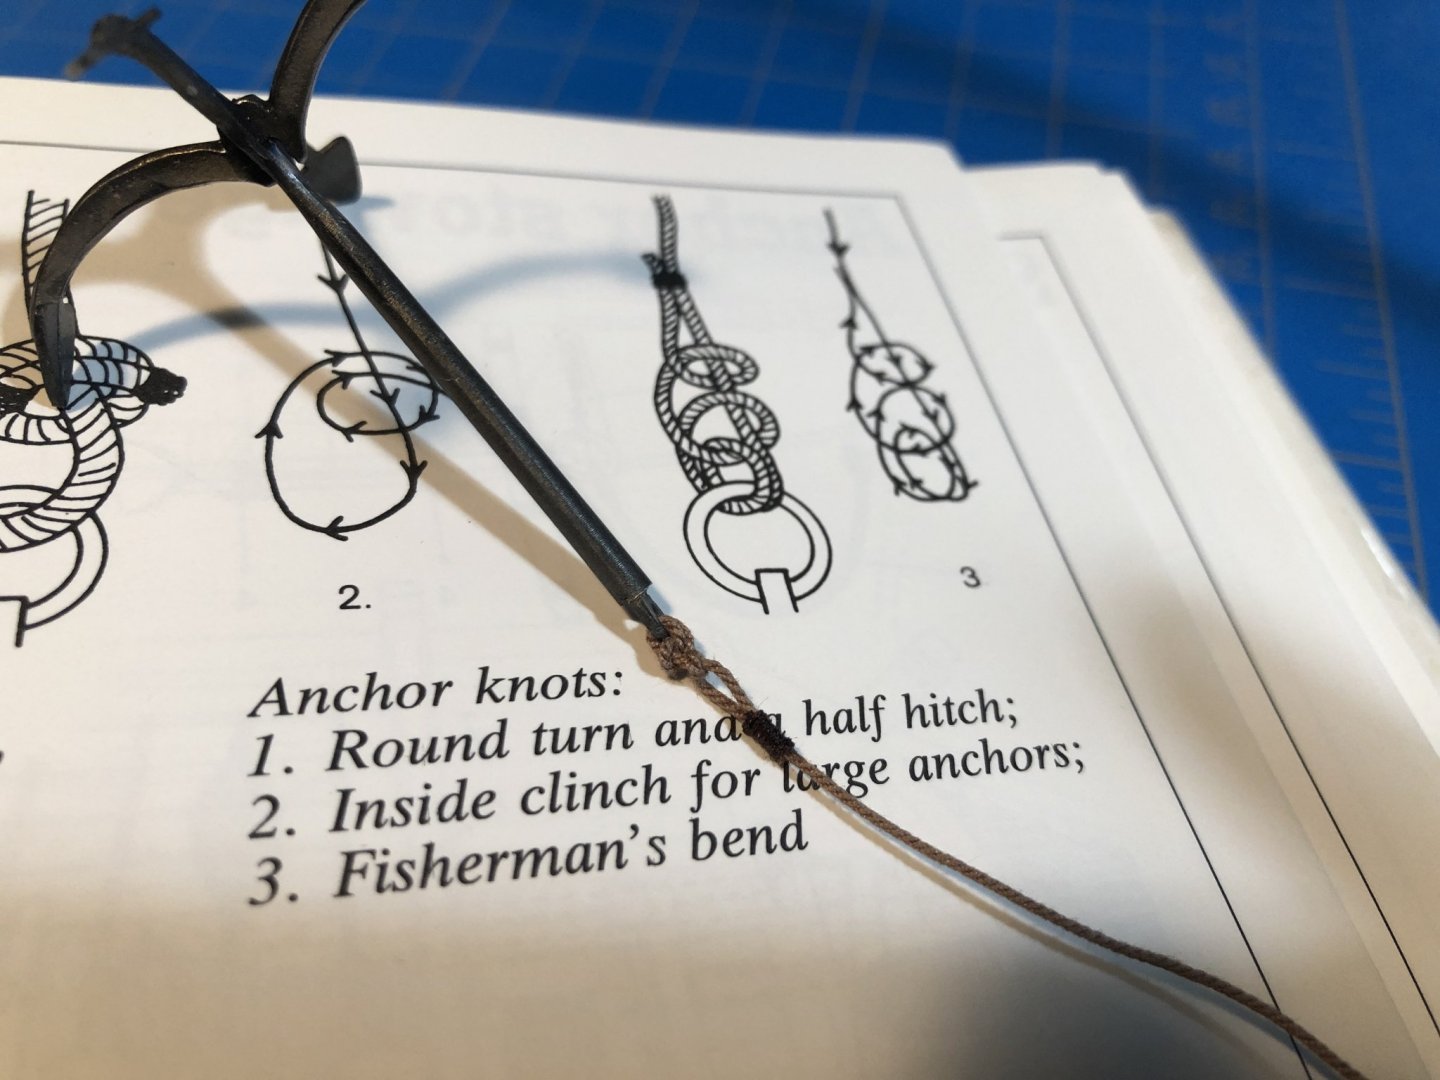
Not much more to update, just some more shots of the rigging as Ive been cleaning things up and finalizing tension. You'll likely note the funky sinker I added to the end of the gaff. The gaff has no opposing attachment so floats, and the line has some memory Id like to remove so this is my solution. This is temporary and meant to take some of the loose character out of the line. I hit the line with hot steam using a tube and fine tip nozzle and let it dry under weight and it will straighten out nicely. Some oar work is coming along thanks to my Ibex planes, which are just a pleasure to use. I played around with sanding sticks, and lathes and ultimately found a plane and sandpaper did the job the best, the most consistent and the fastest. Getting the anchor tied up properly thanks to some reference material and away I go. Ive spent the end of yesterday and some today working on coils. Ive made many, and have been satisfied with none of them. Unfortunately this photo is dark, but pictured on the forward-port belay pin is the best one Ive come up with following a process ccoyle outlines here.
- 66 replies
-
- 5
-
-
- Finished
- Model Shipways
- (and 1 more)