HOLIDAY DONATION DRIVE - SUPPORT MSW - DO YOUR PART TO KEEP THIS GREAT FORUM GOING! (Only 75 donations so far out of 49,000 members - C'mon guys!)
×


Justin P.
-
Posts
1,008 -
Joined
Content Type
Profiles
Forums
Gallery
Events
Everything posted by Justin P.
-
 Hey I appreciate the compliment, but must admit that I use a combination of suggestions and methods I've gathered from correspondence with @Gahm, and through reading tutorials and build logs of @Chuck. One thing I have experimented with this time around has been the use of sanding sealer. After sanding thoroughly smooth, I apply the sanding sealer and sand back to smooth (it will raise the grain of the wood). This has the benefit of sealing the wood so it wont expand or absorb the moisture from the paint. Without it I was always battling the wood grain raising and fibers popping up. With the sealer the finish or "smoothness" of the fine finish sanding is preserved. For paint I use the Model Shipways, heavily diluted with water and apply many, many layers. After each layer dries I sand it with 1000+ sand paper. Essentially, I paint and then sand about half of it off and then paint again so on and so forth... eventually the color becomes saturated without being bulky or looking plastic (i.e glossy).
 -
Really impressive work with carronade wheels! As well, great sourcing of the 3d printed carronades themselves... I suspect 3d printing is going to take up more and more space in our lives going into the future.
-
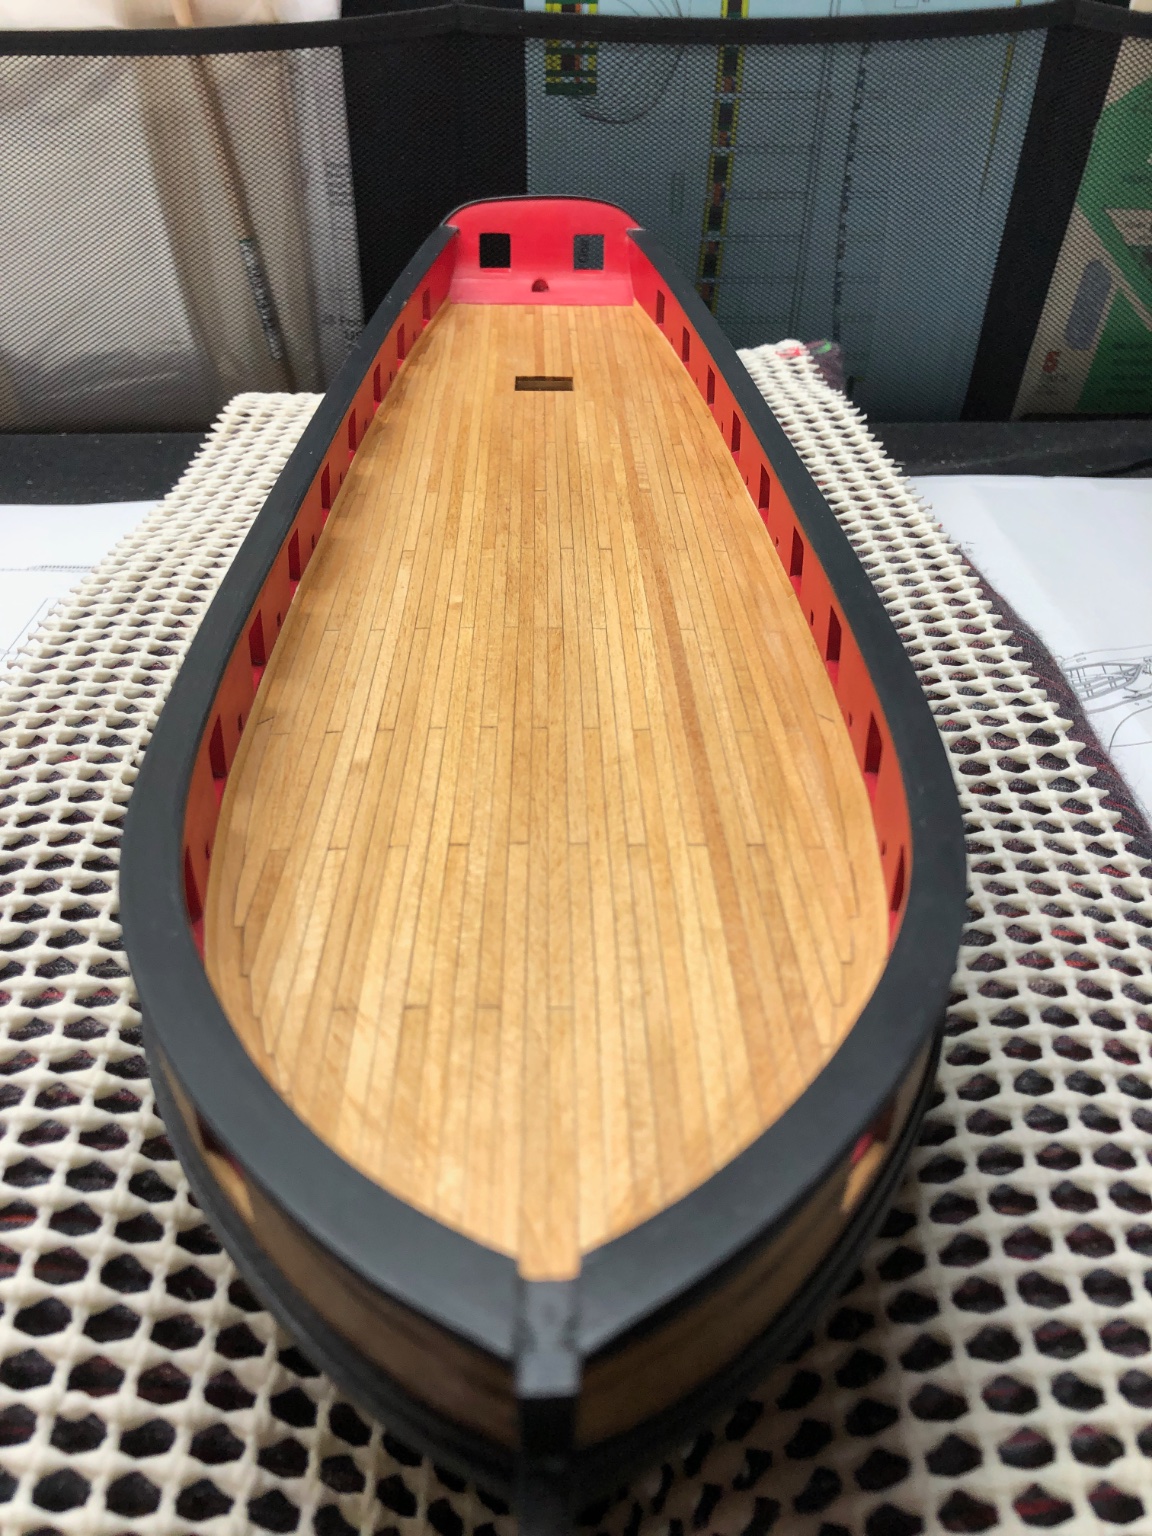
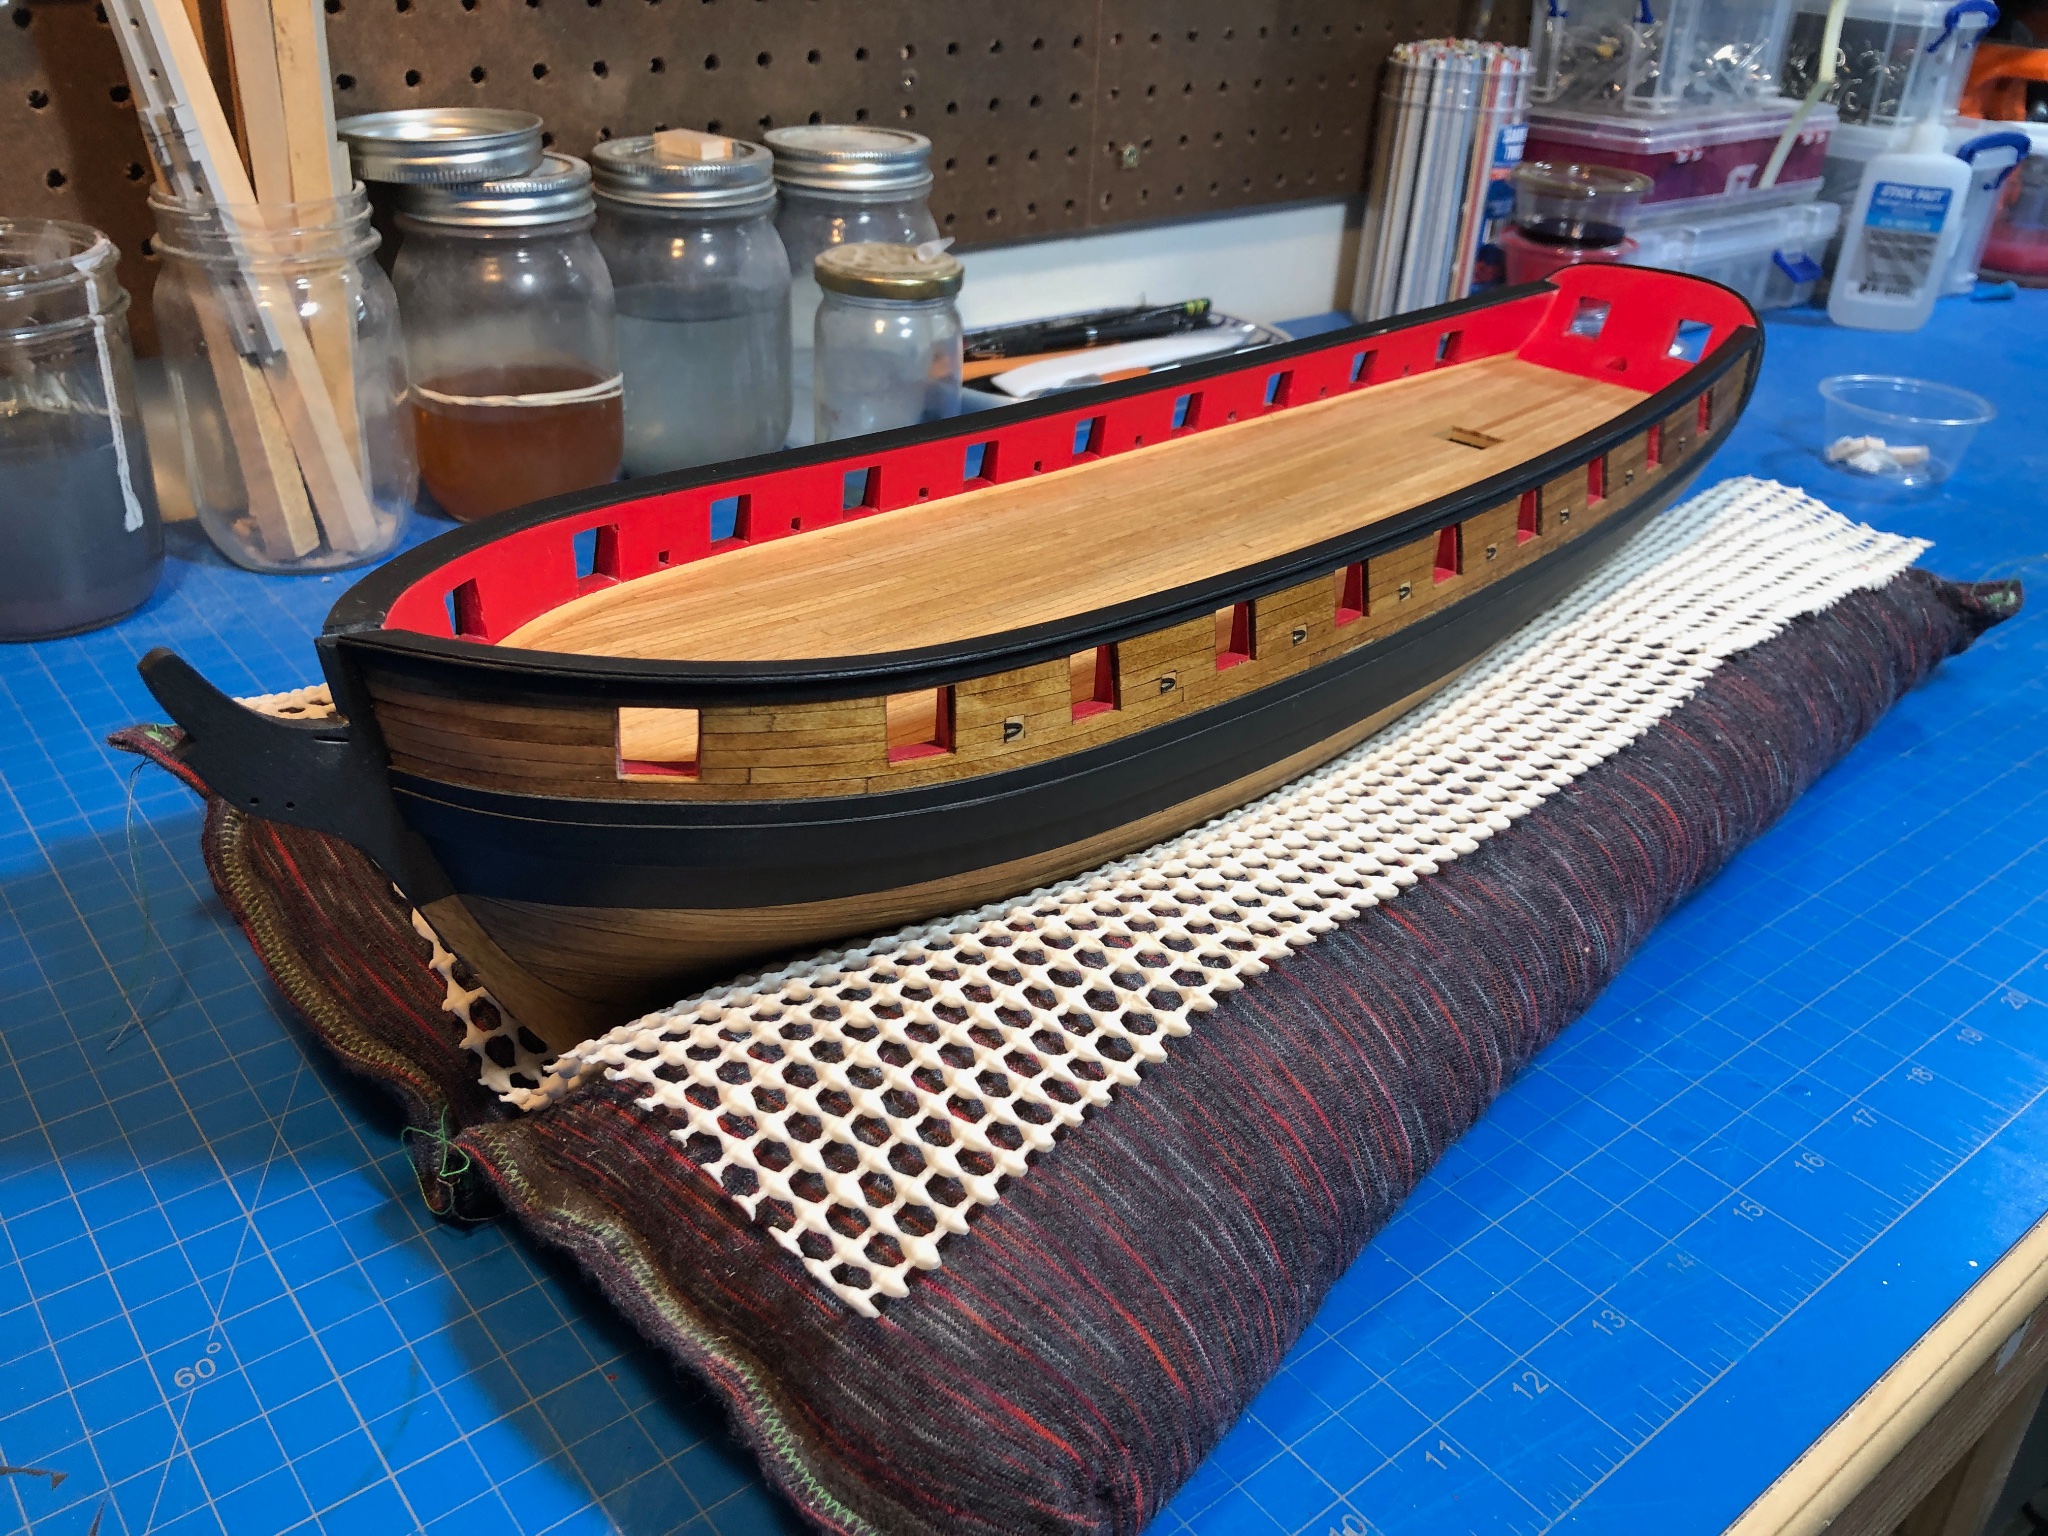
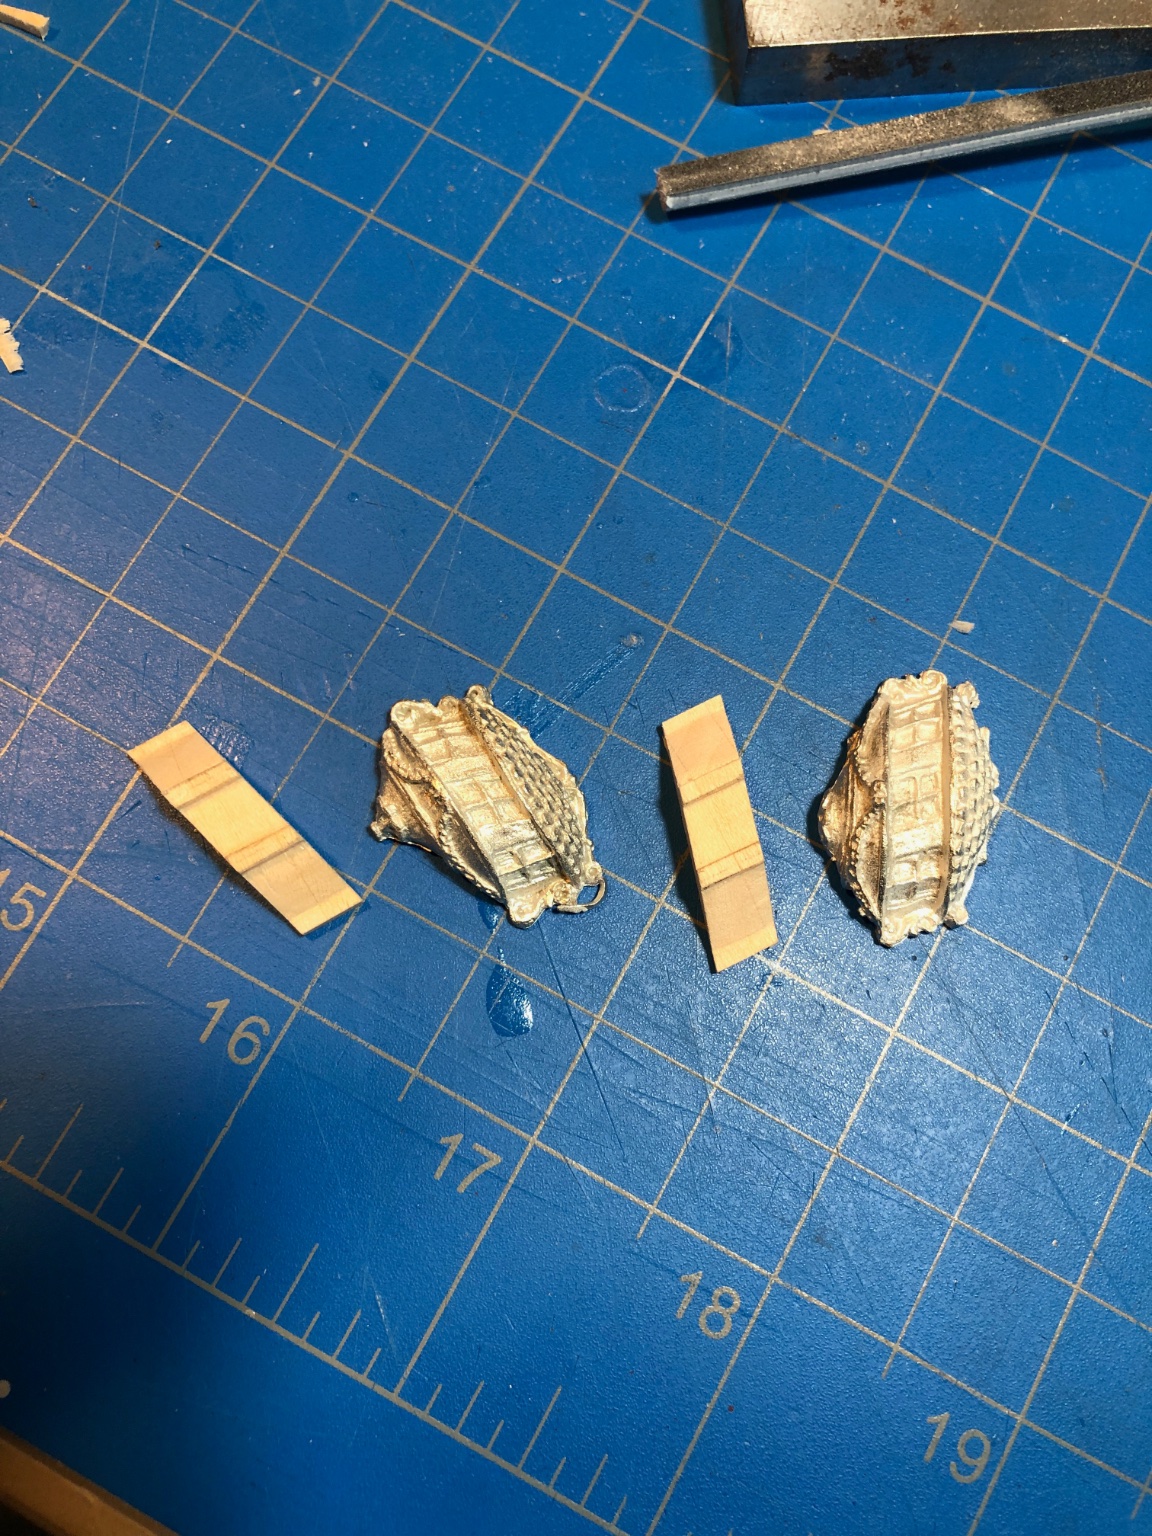
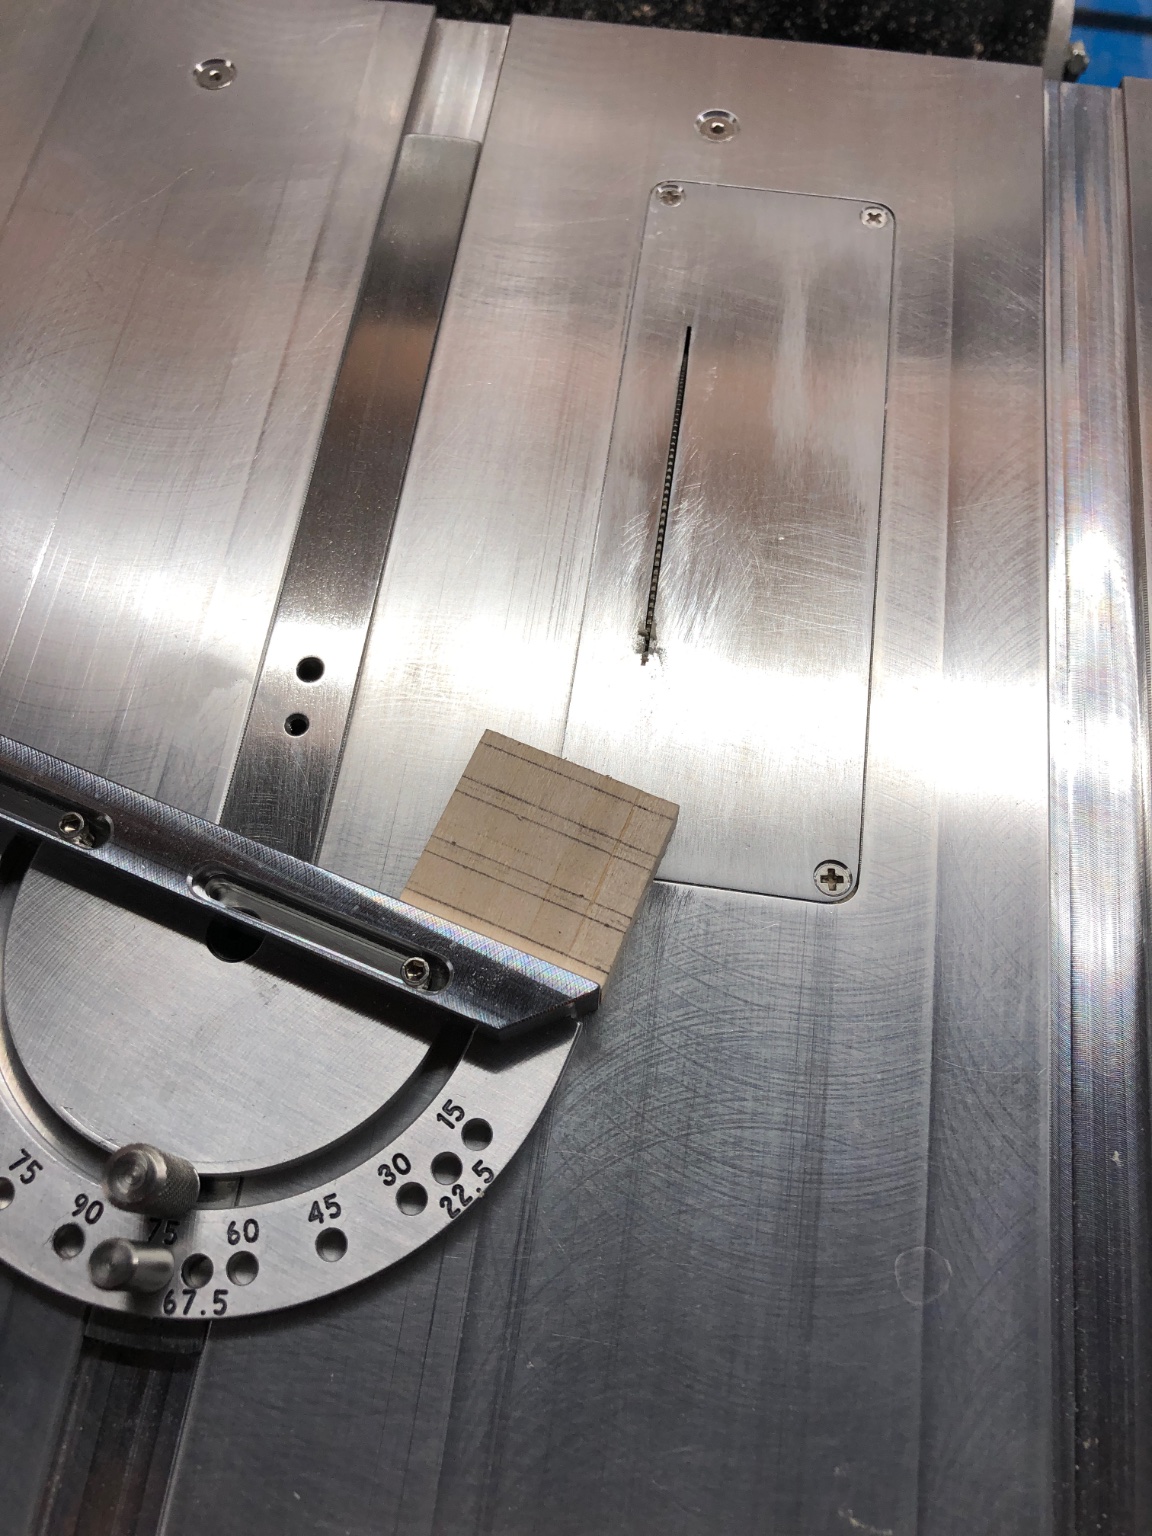
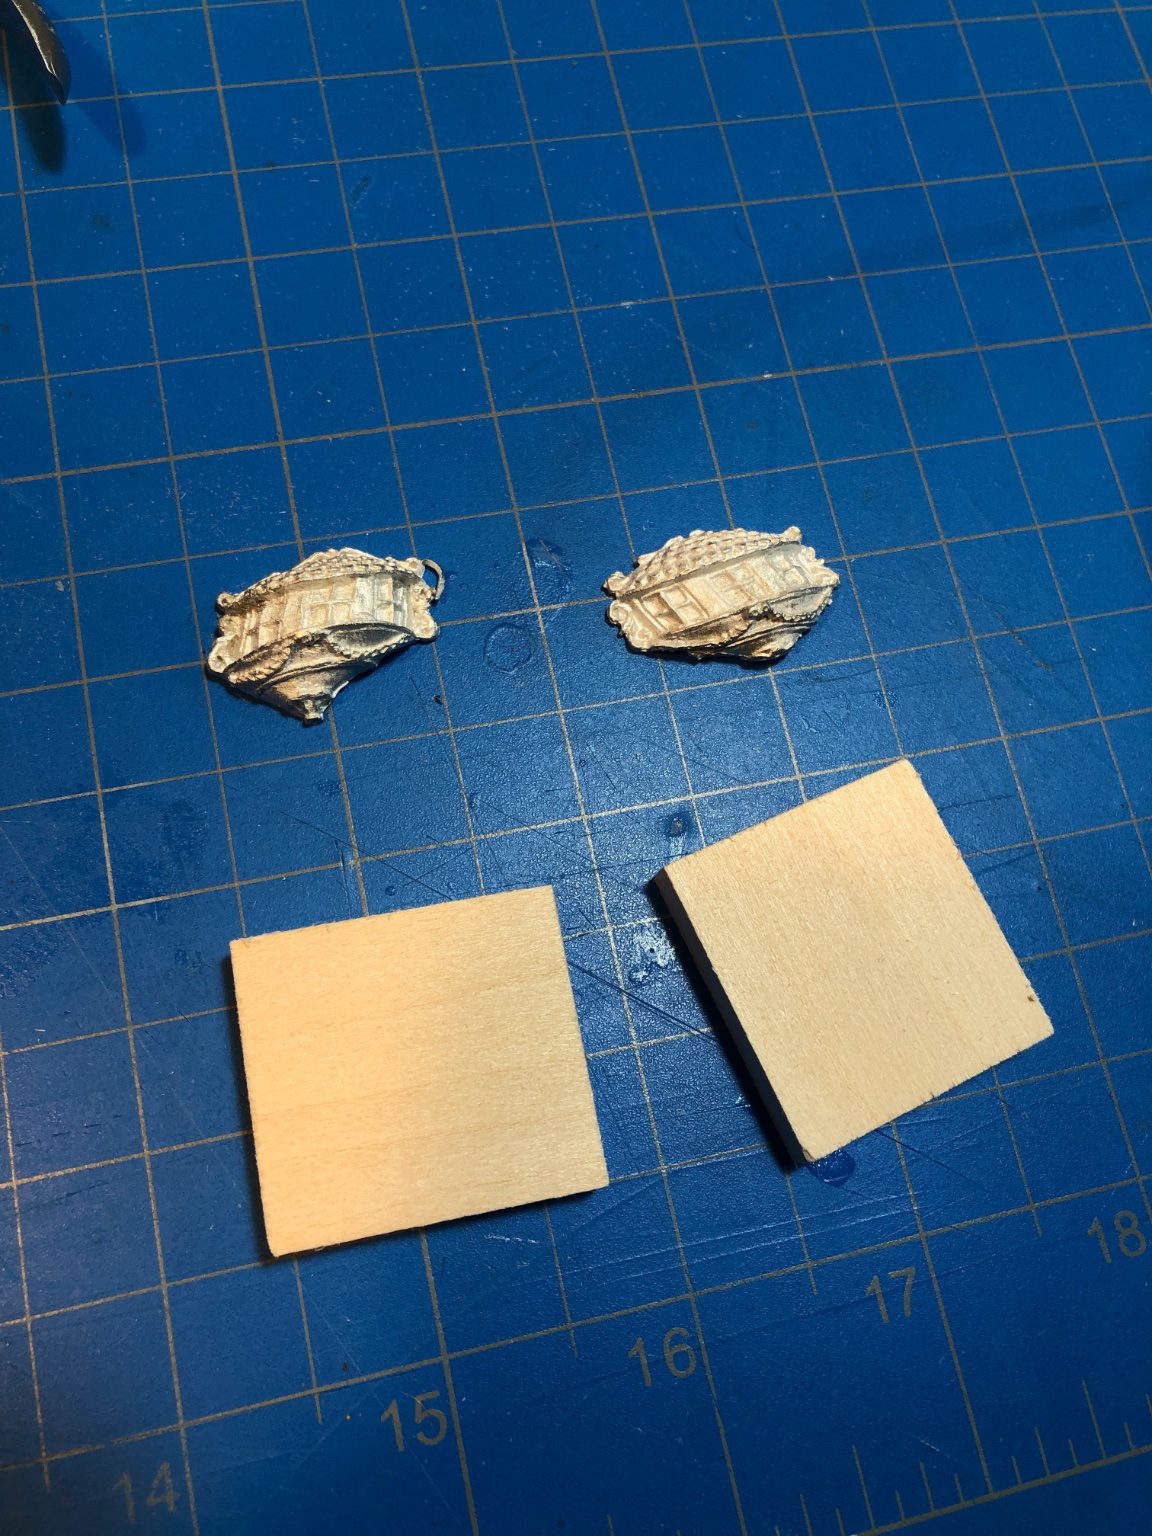
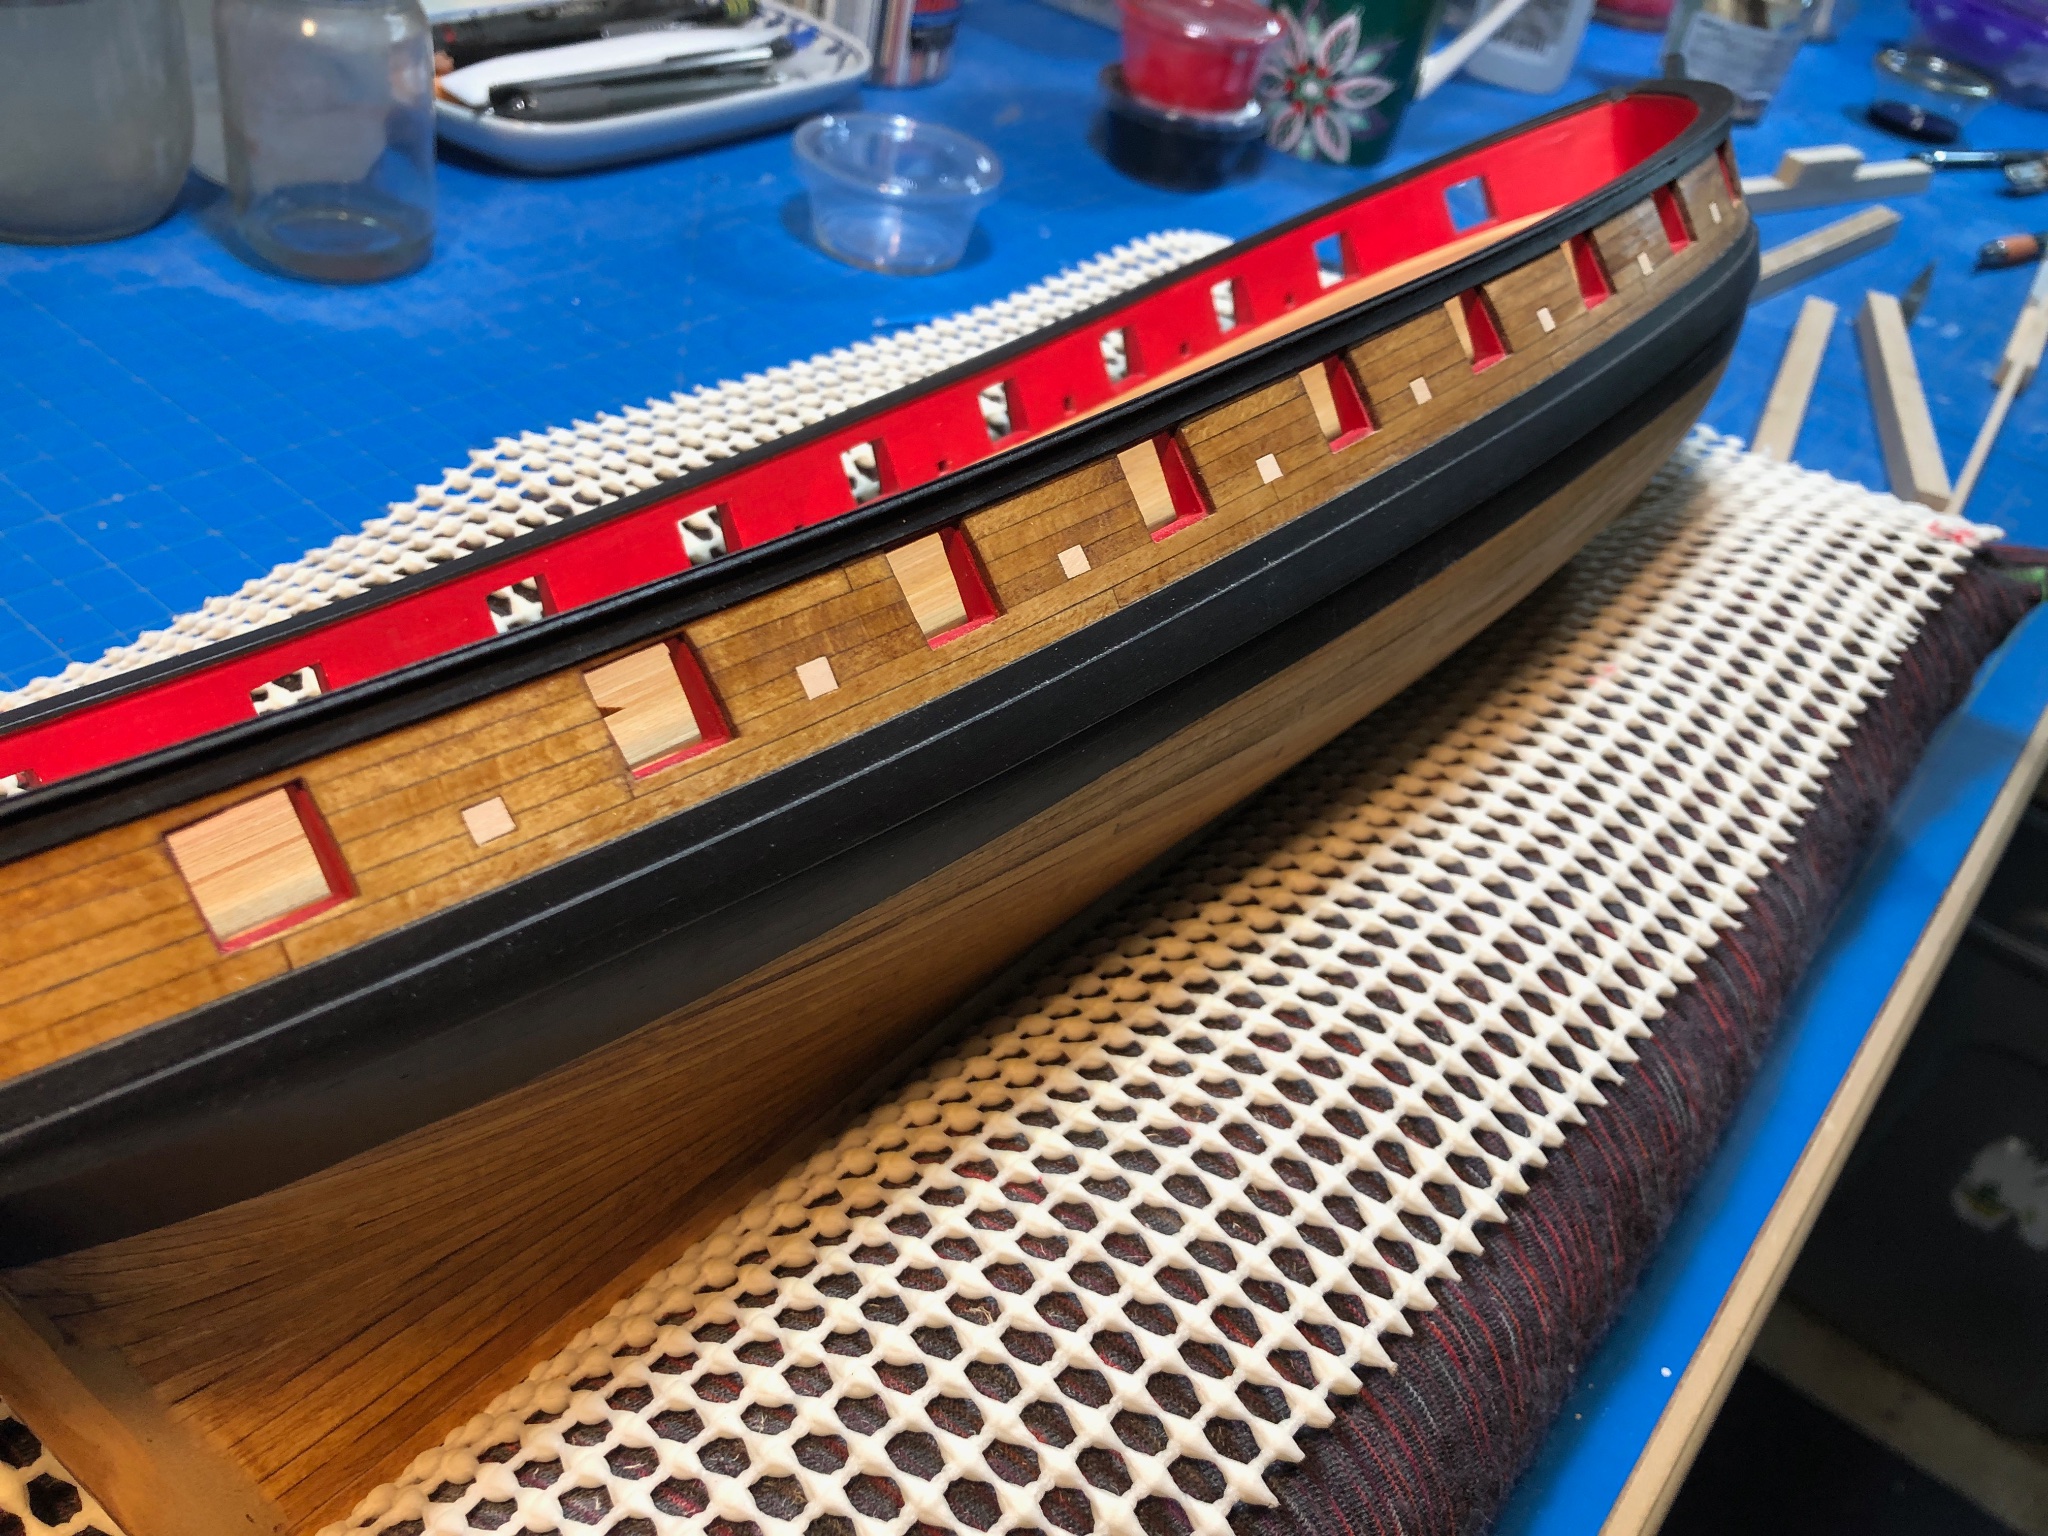
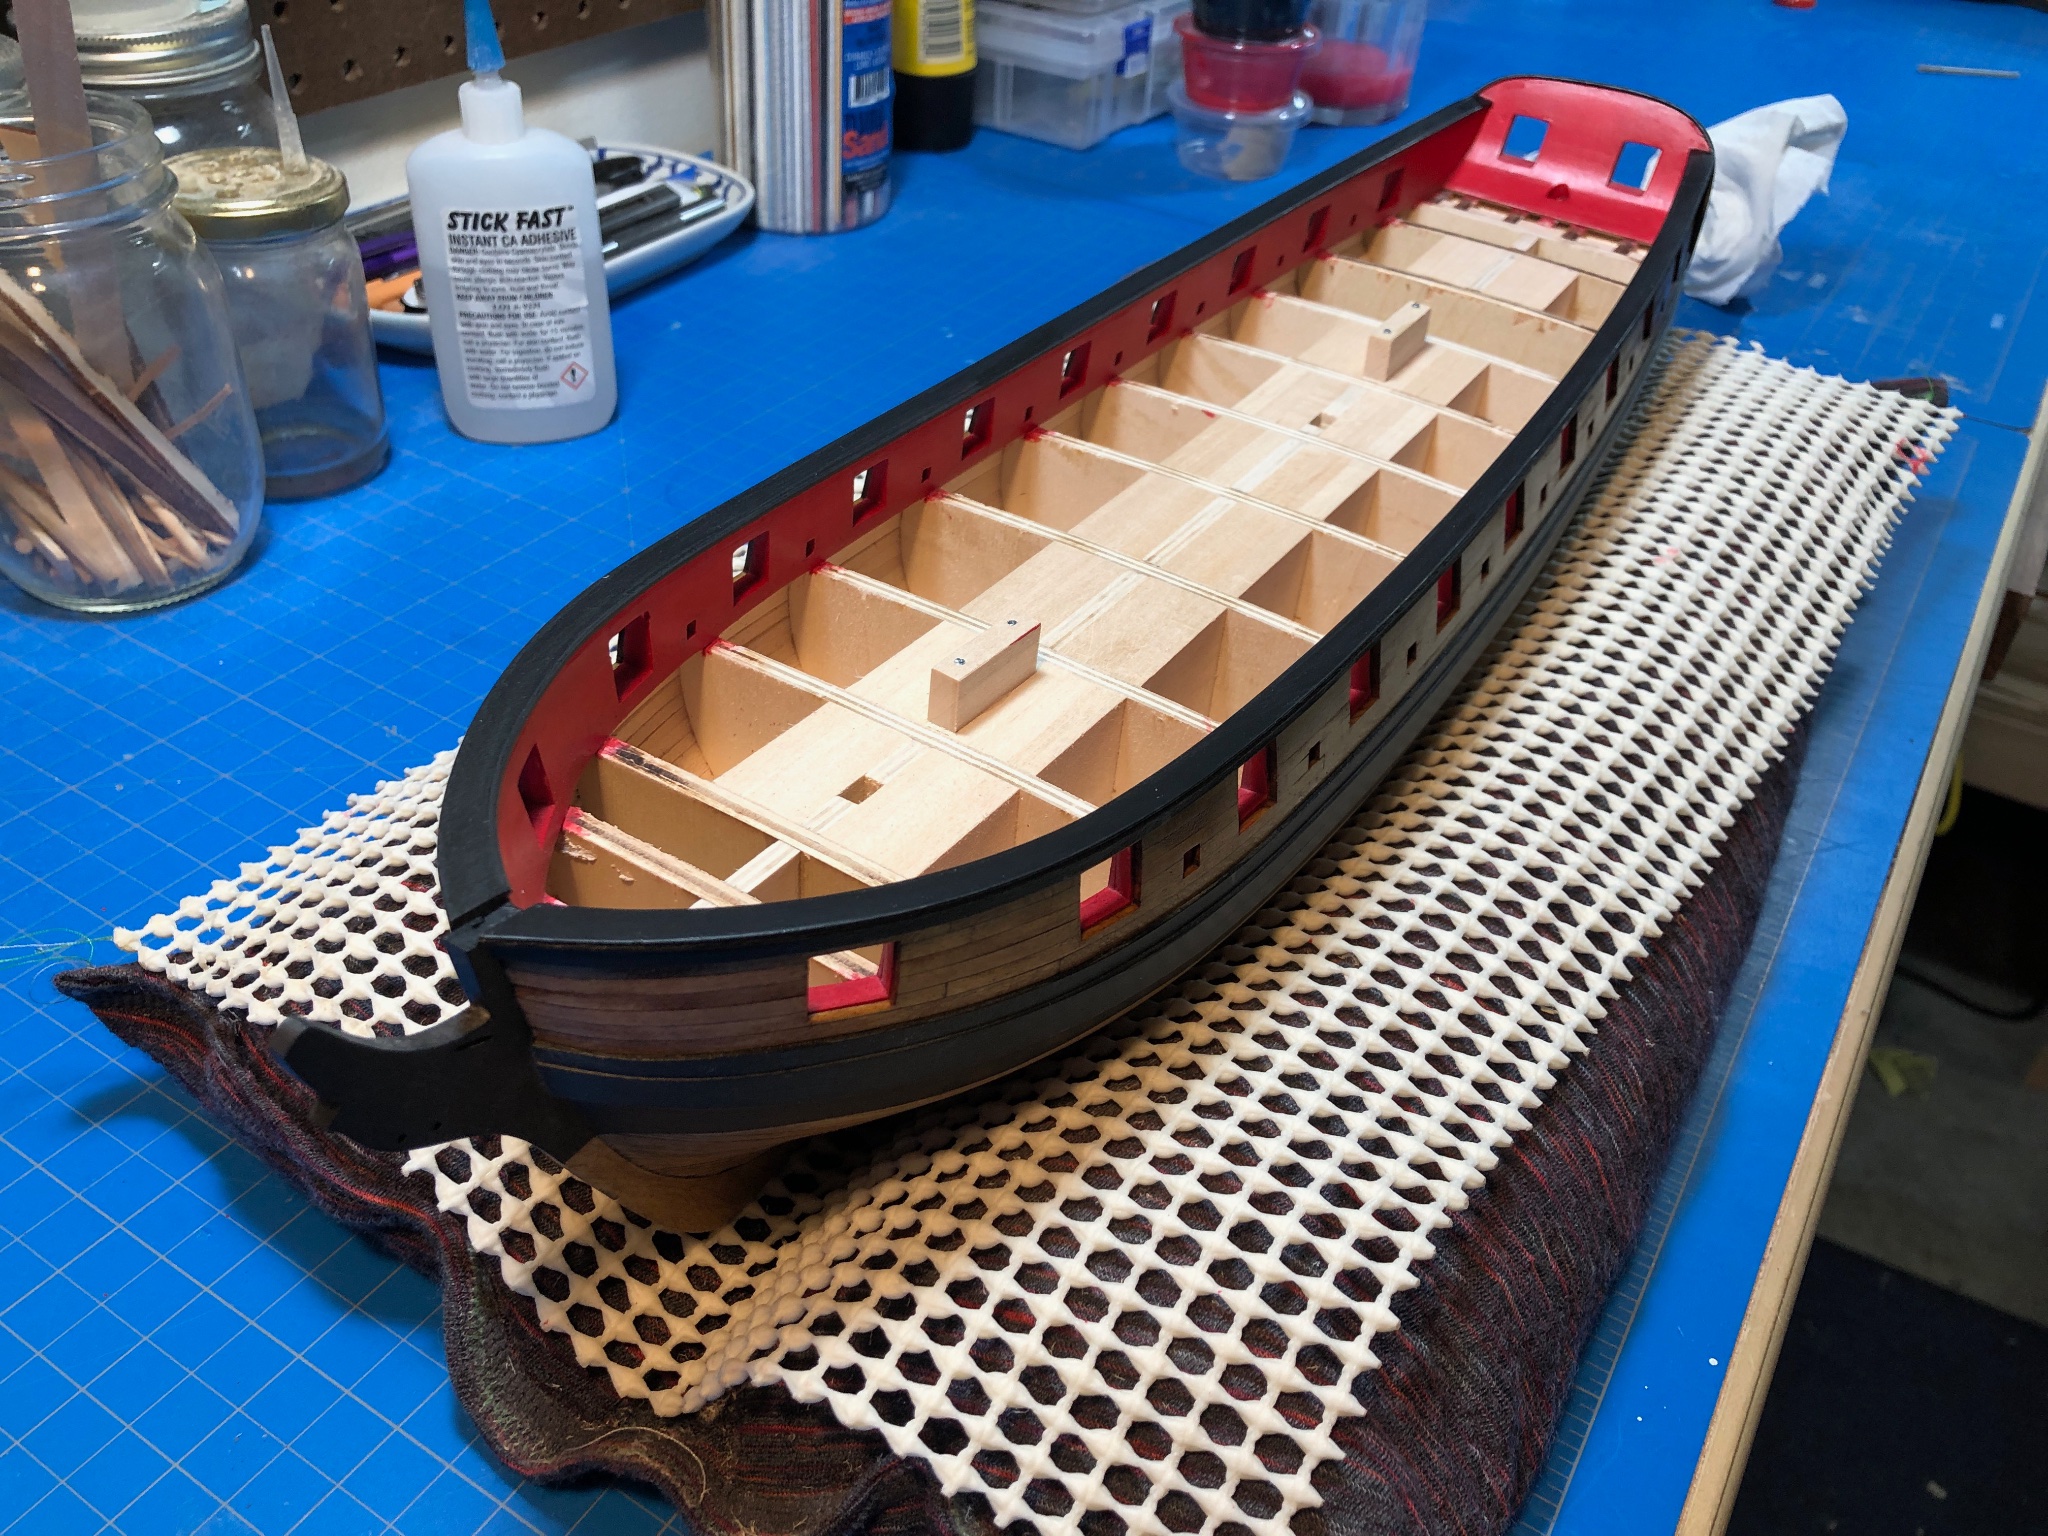
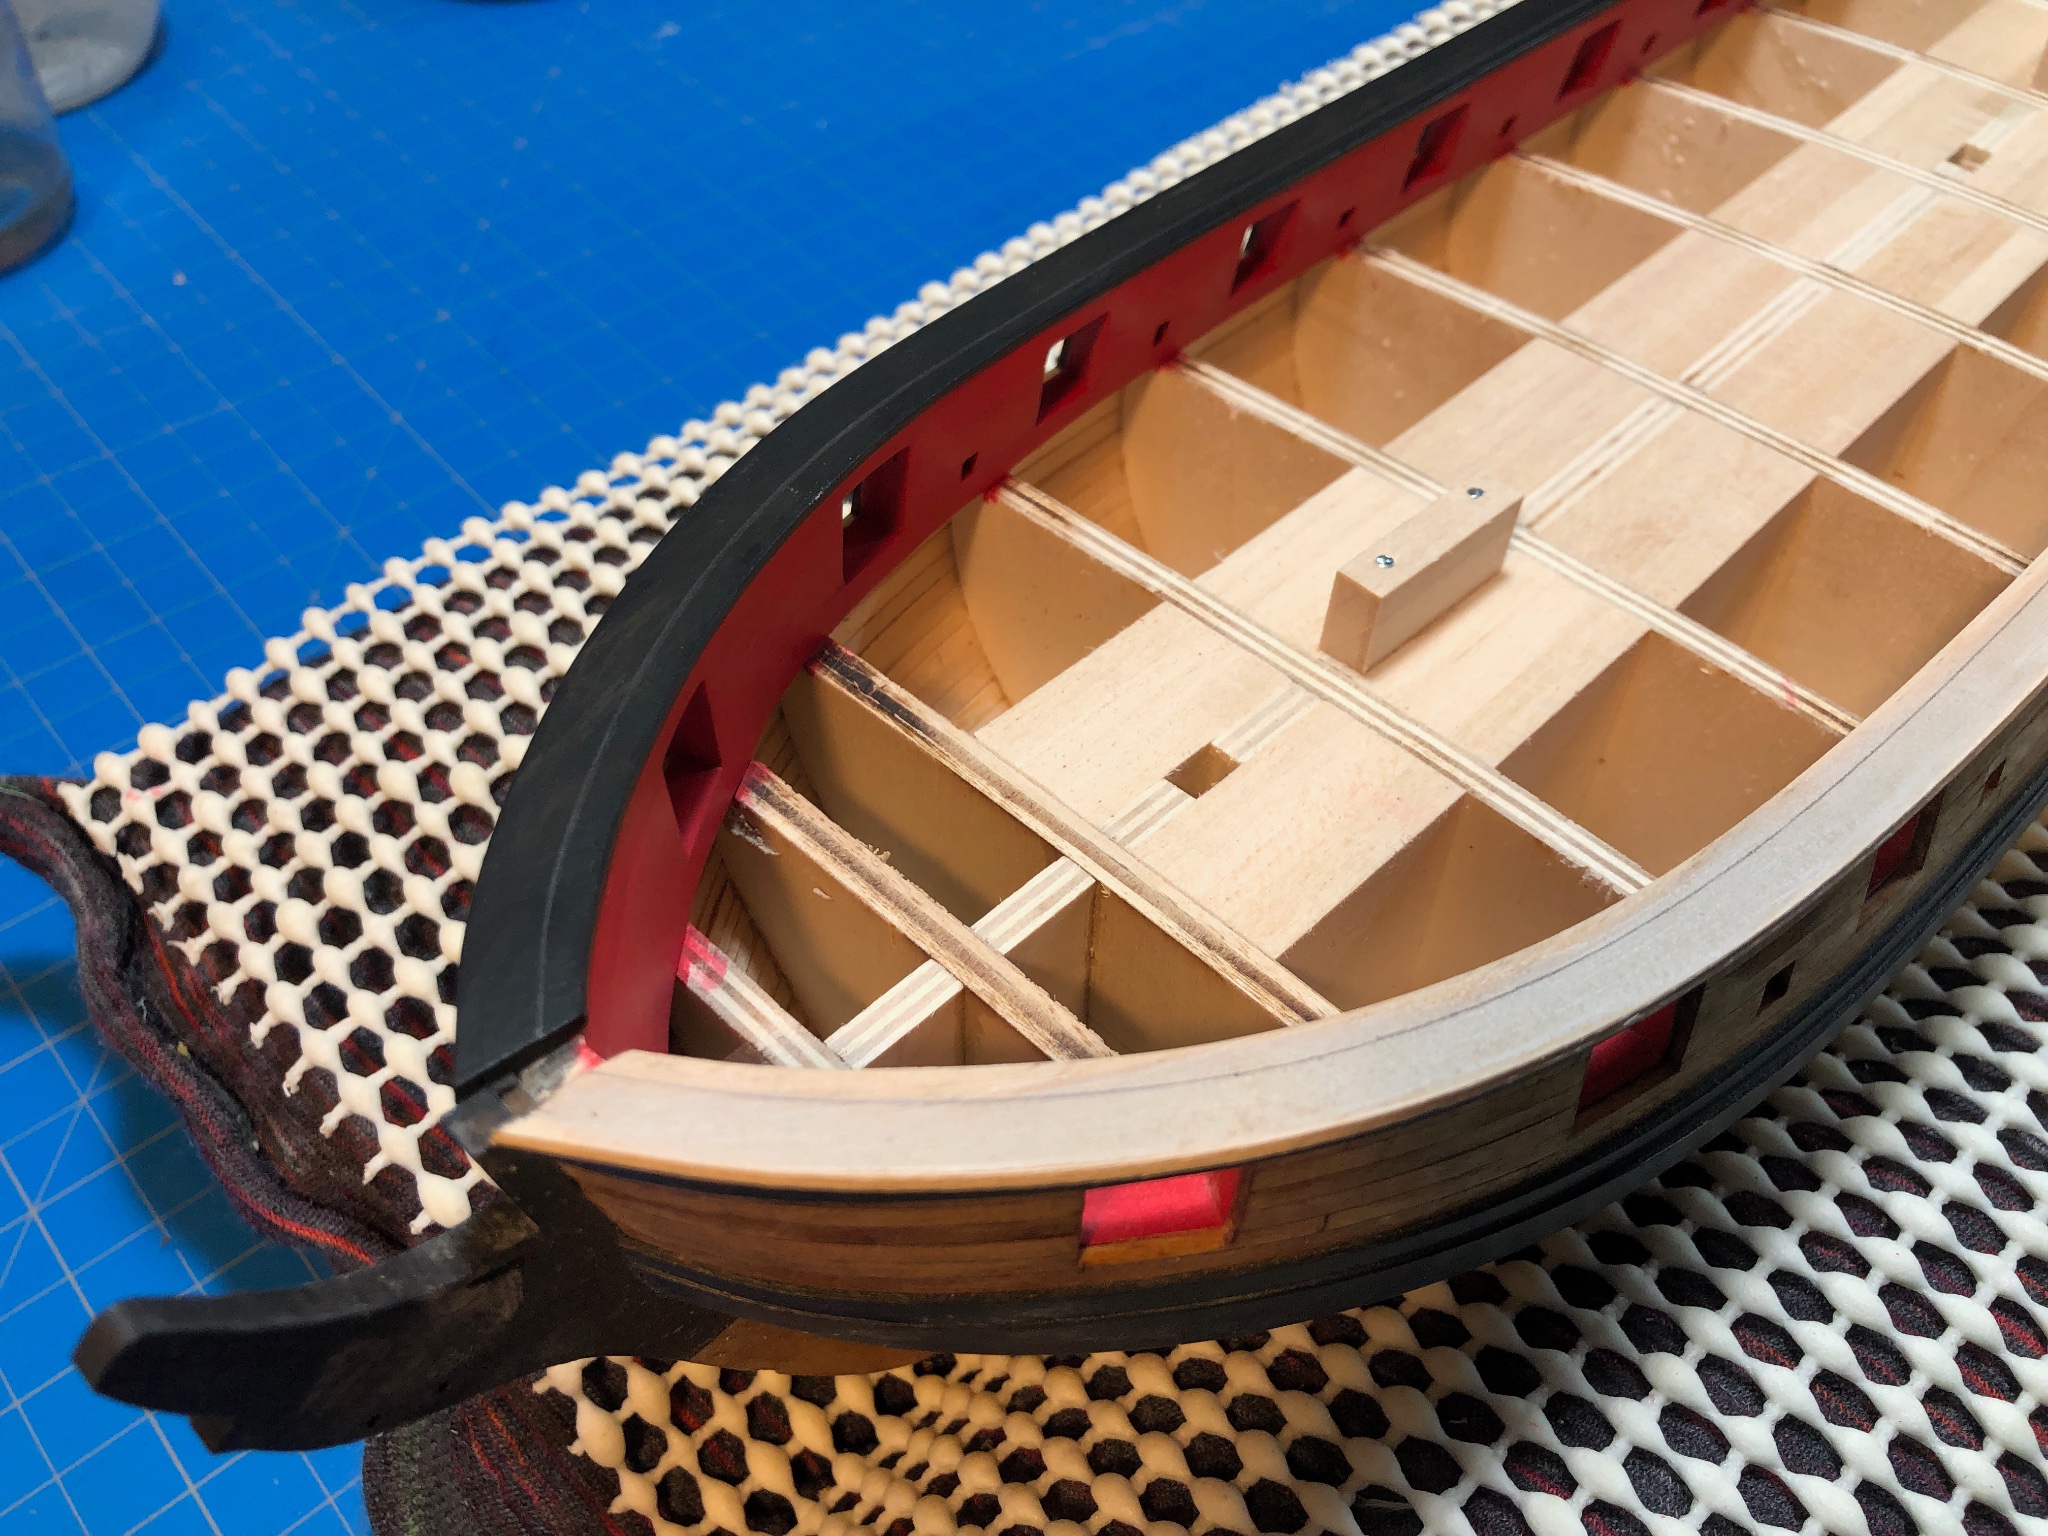
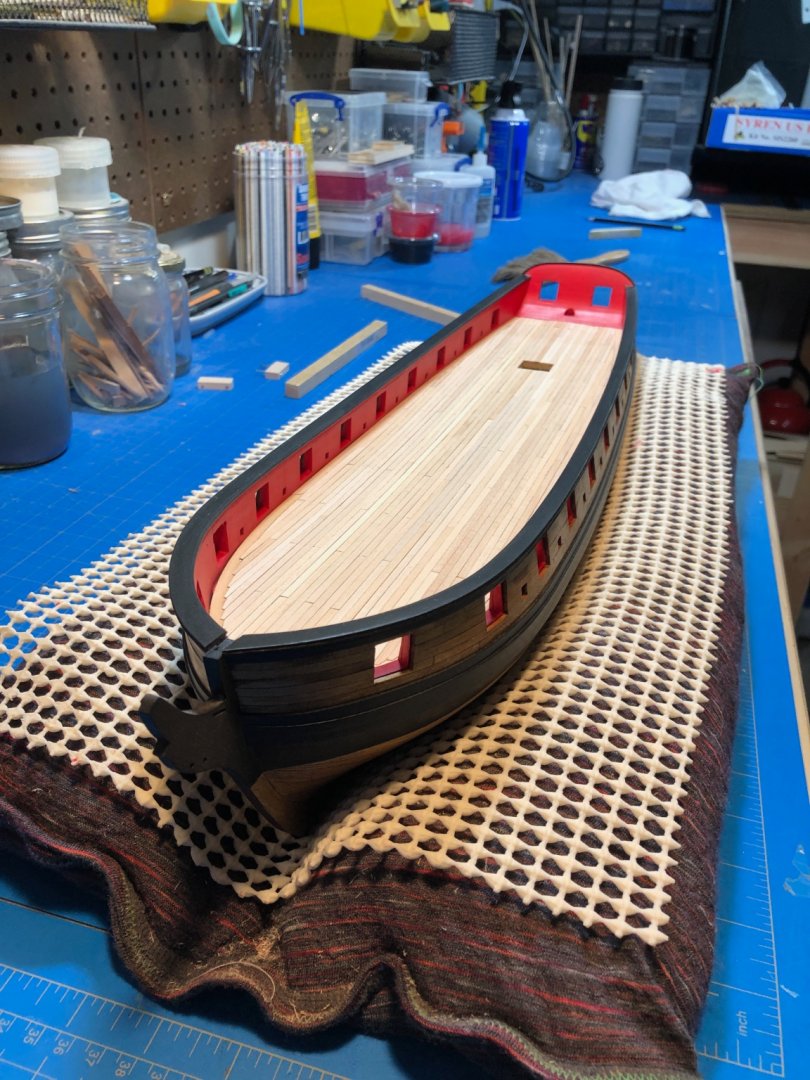
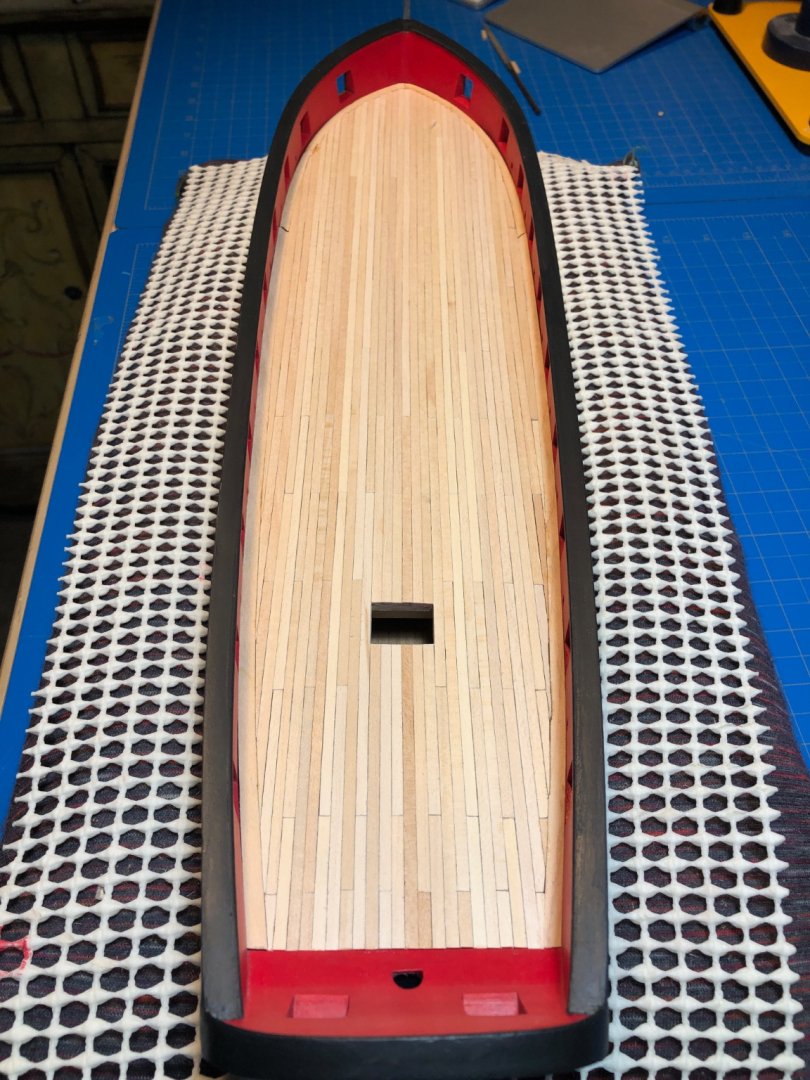
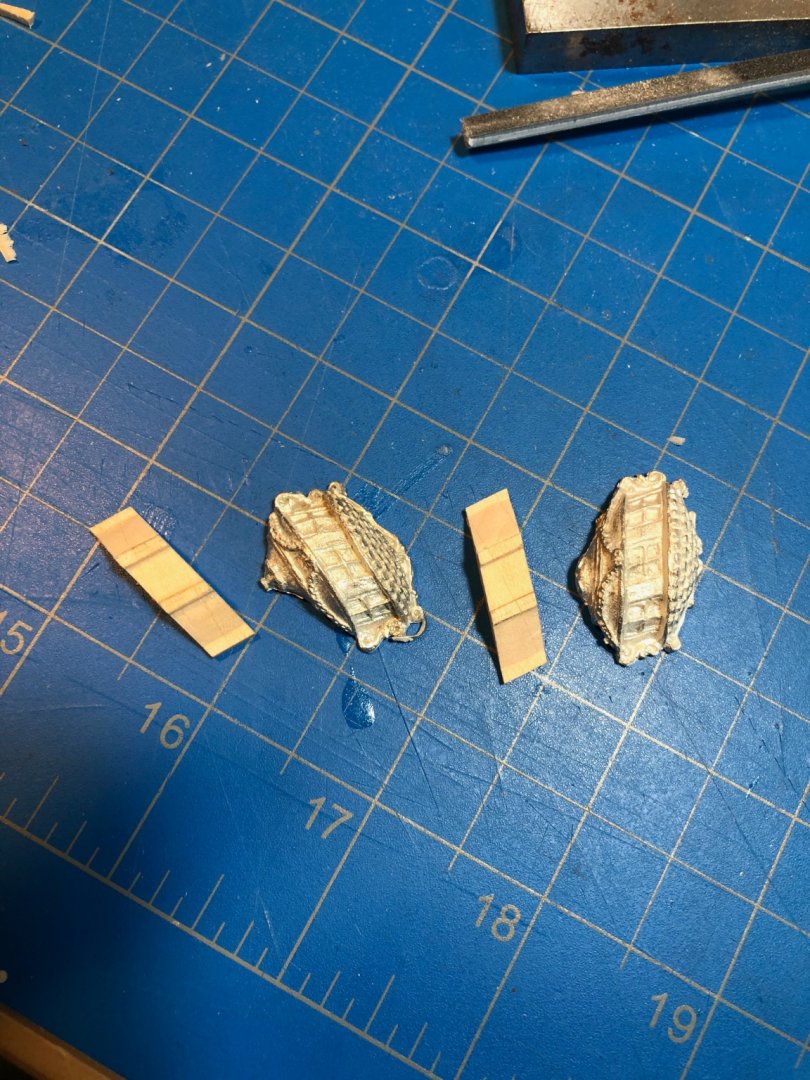
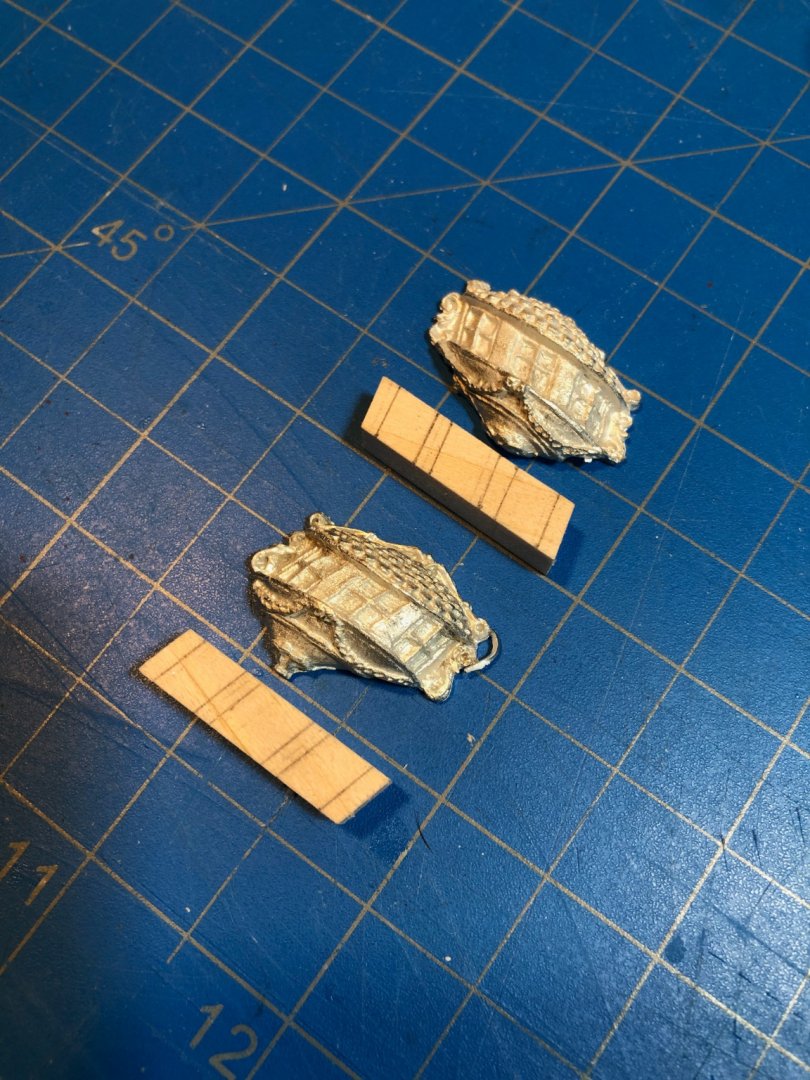
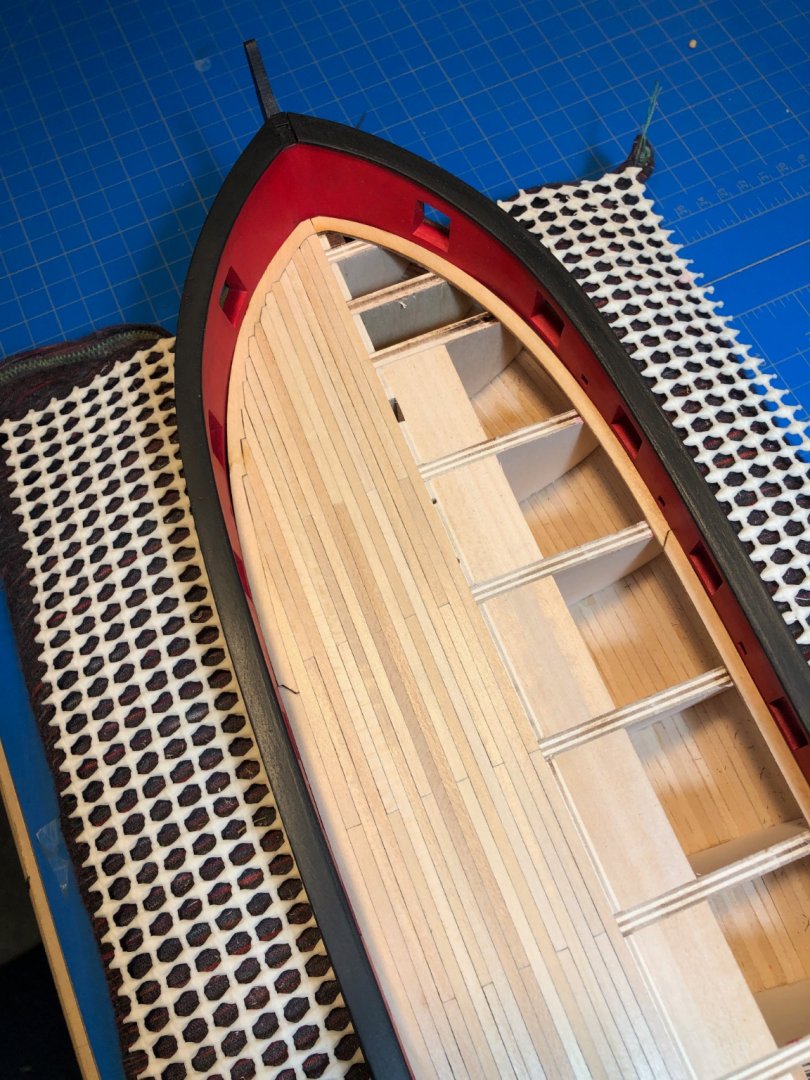
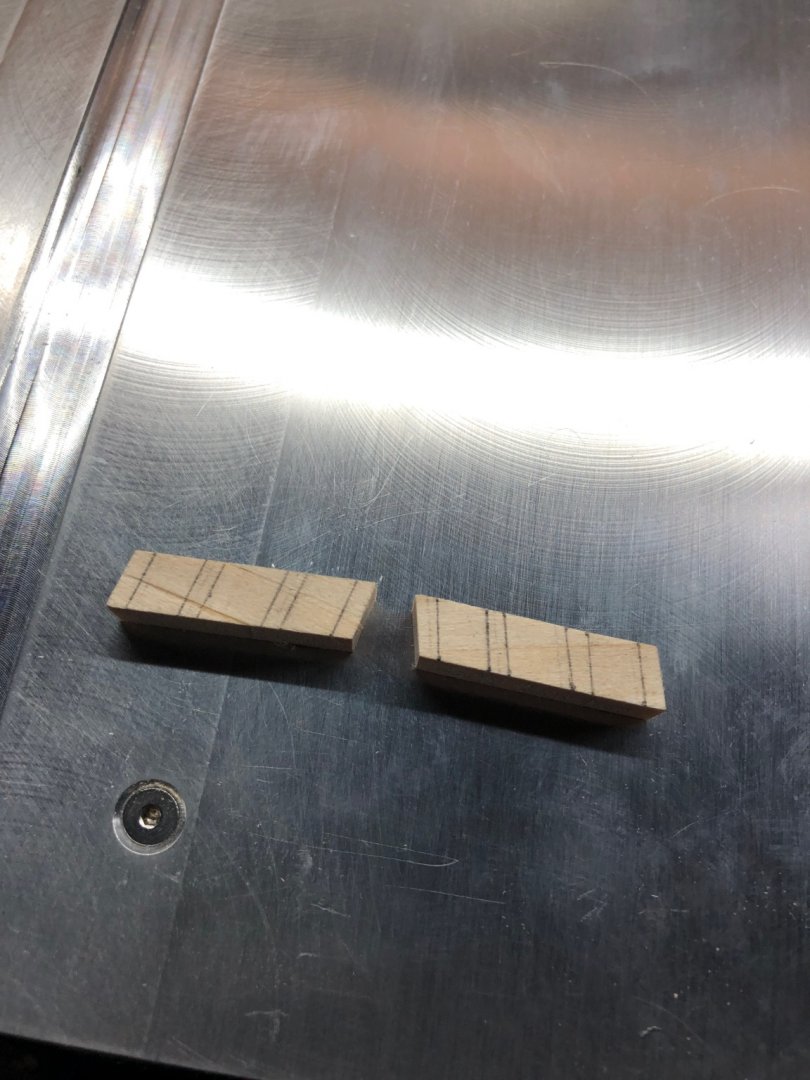
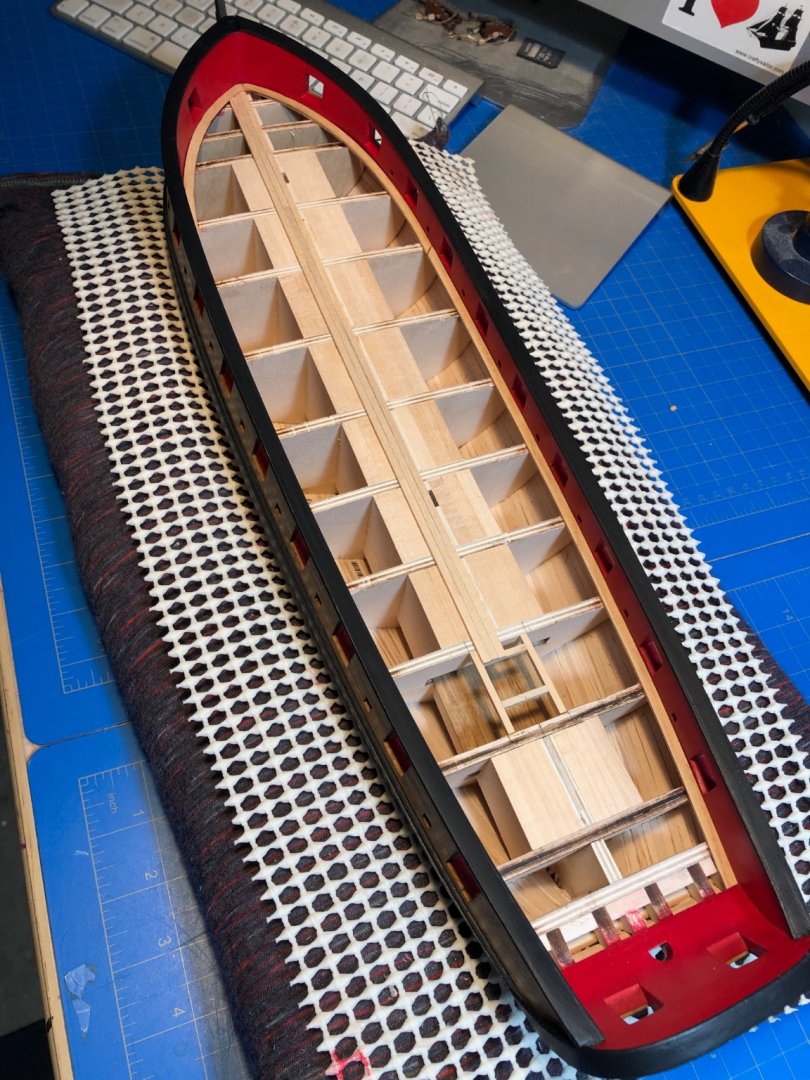
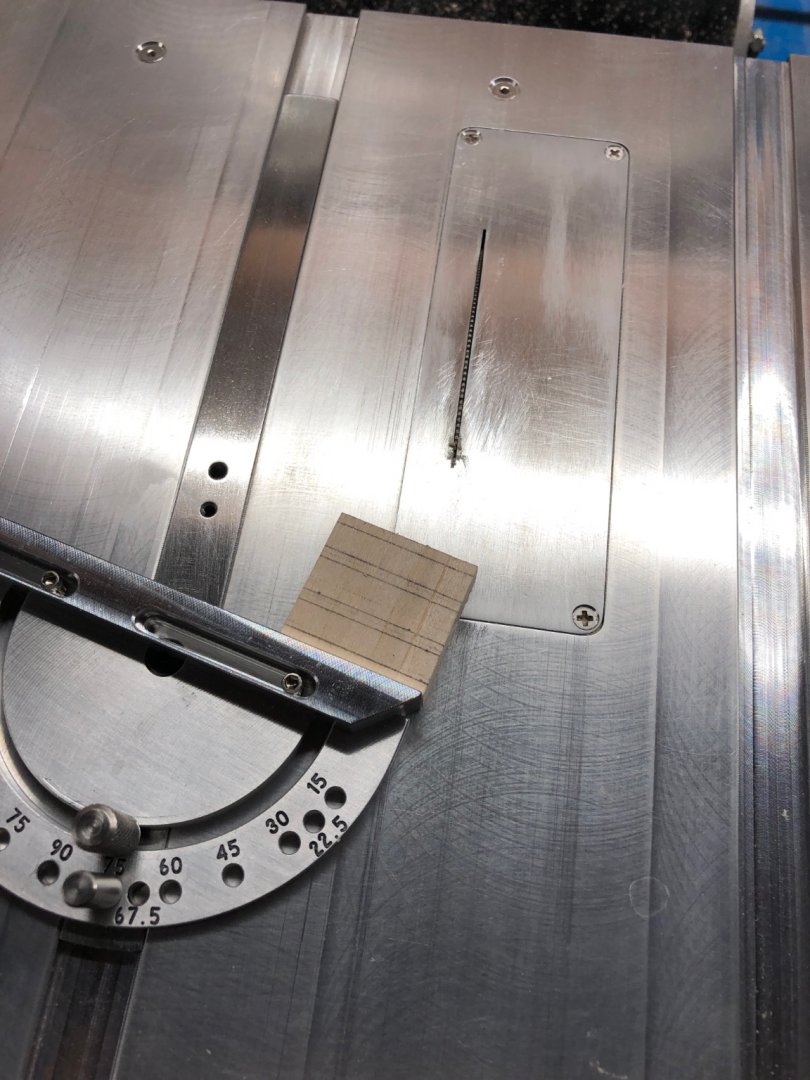
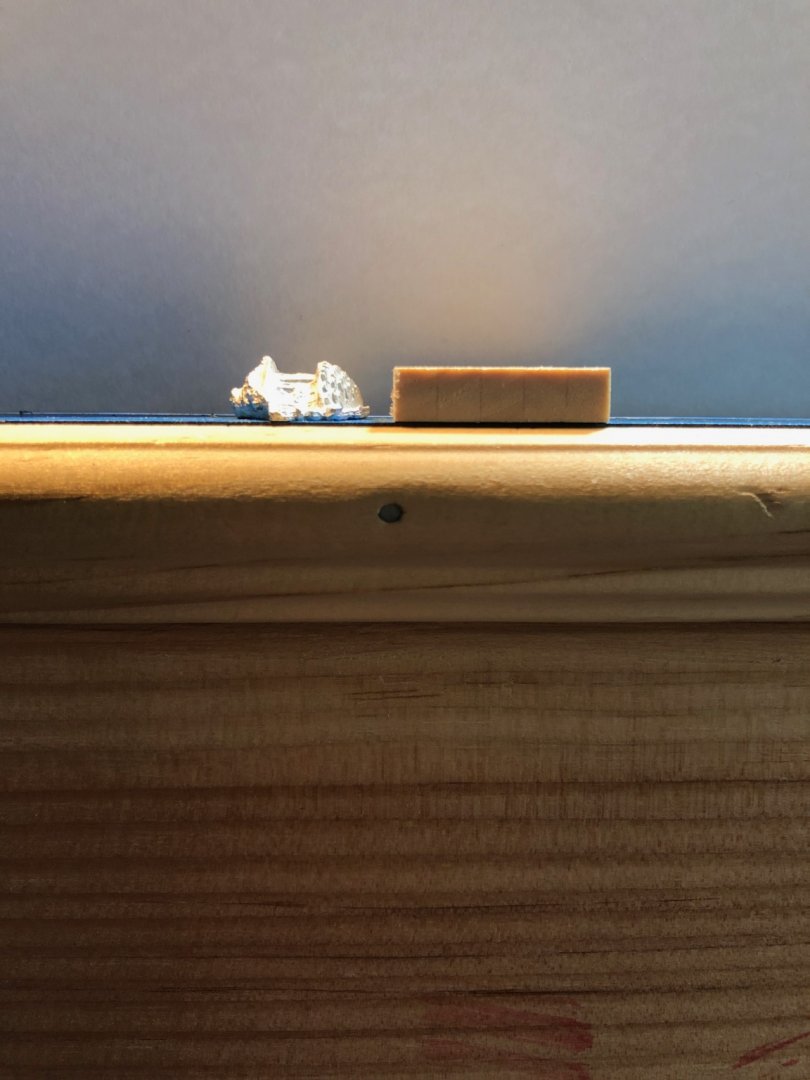
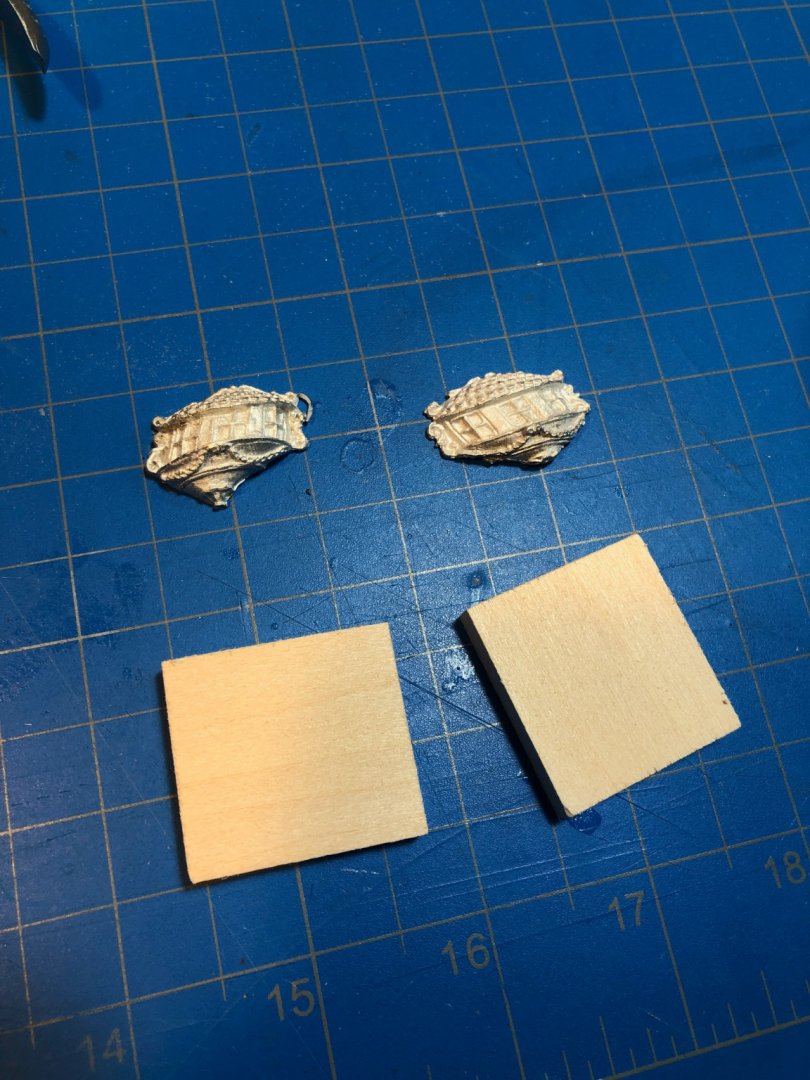
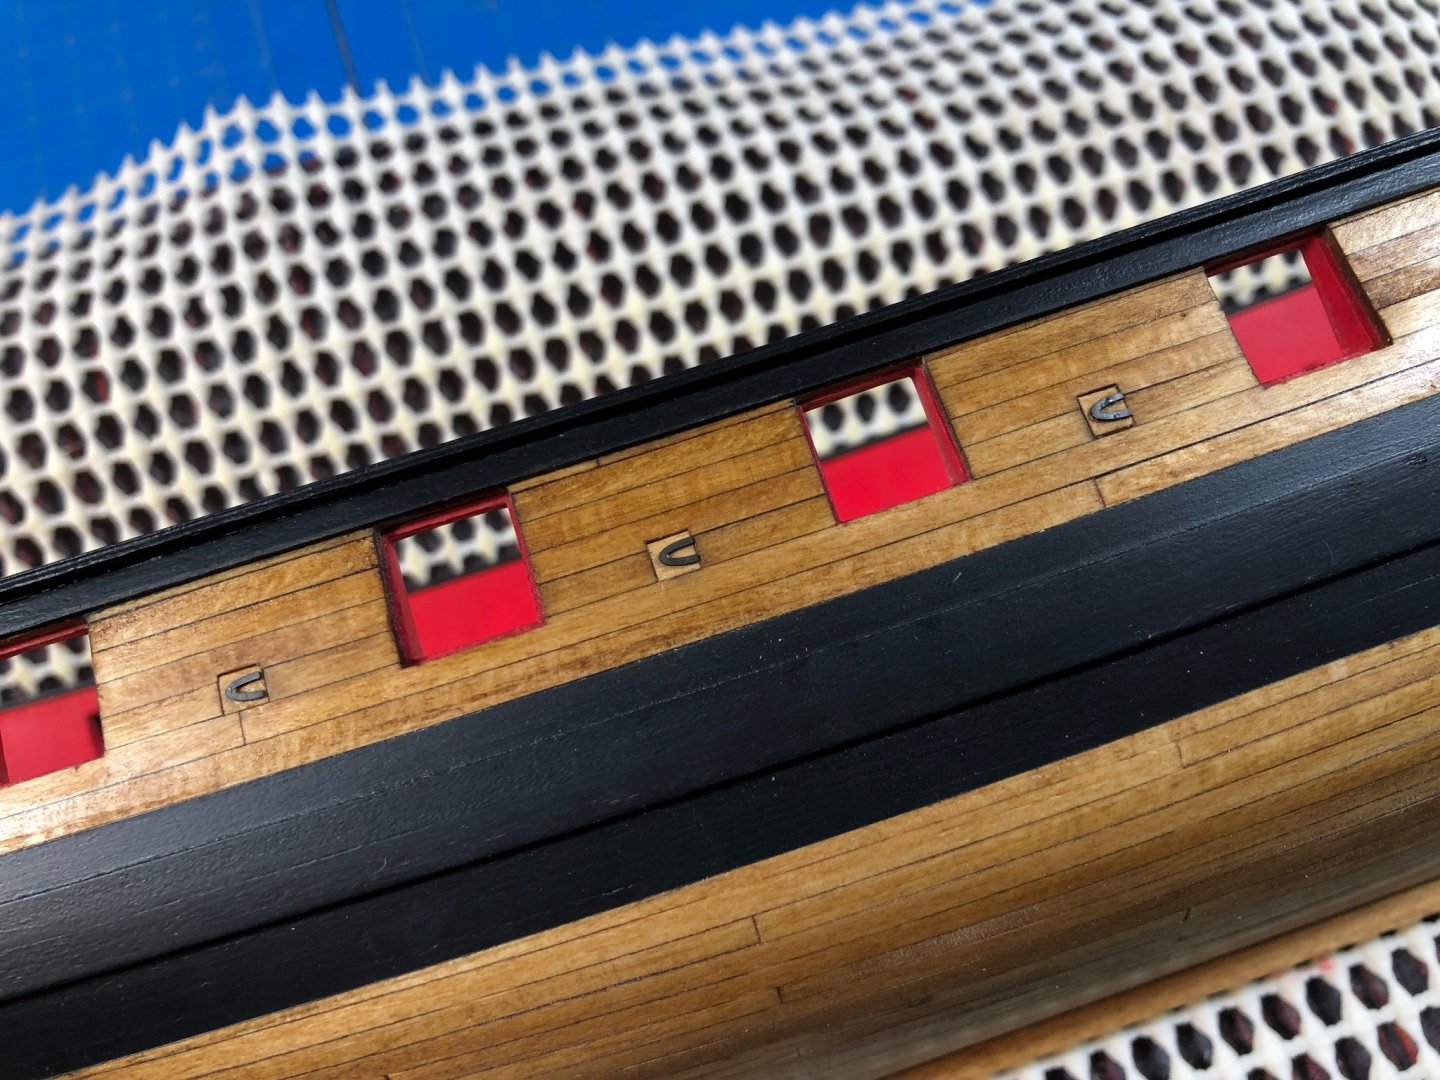
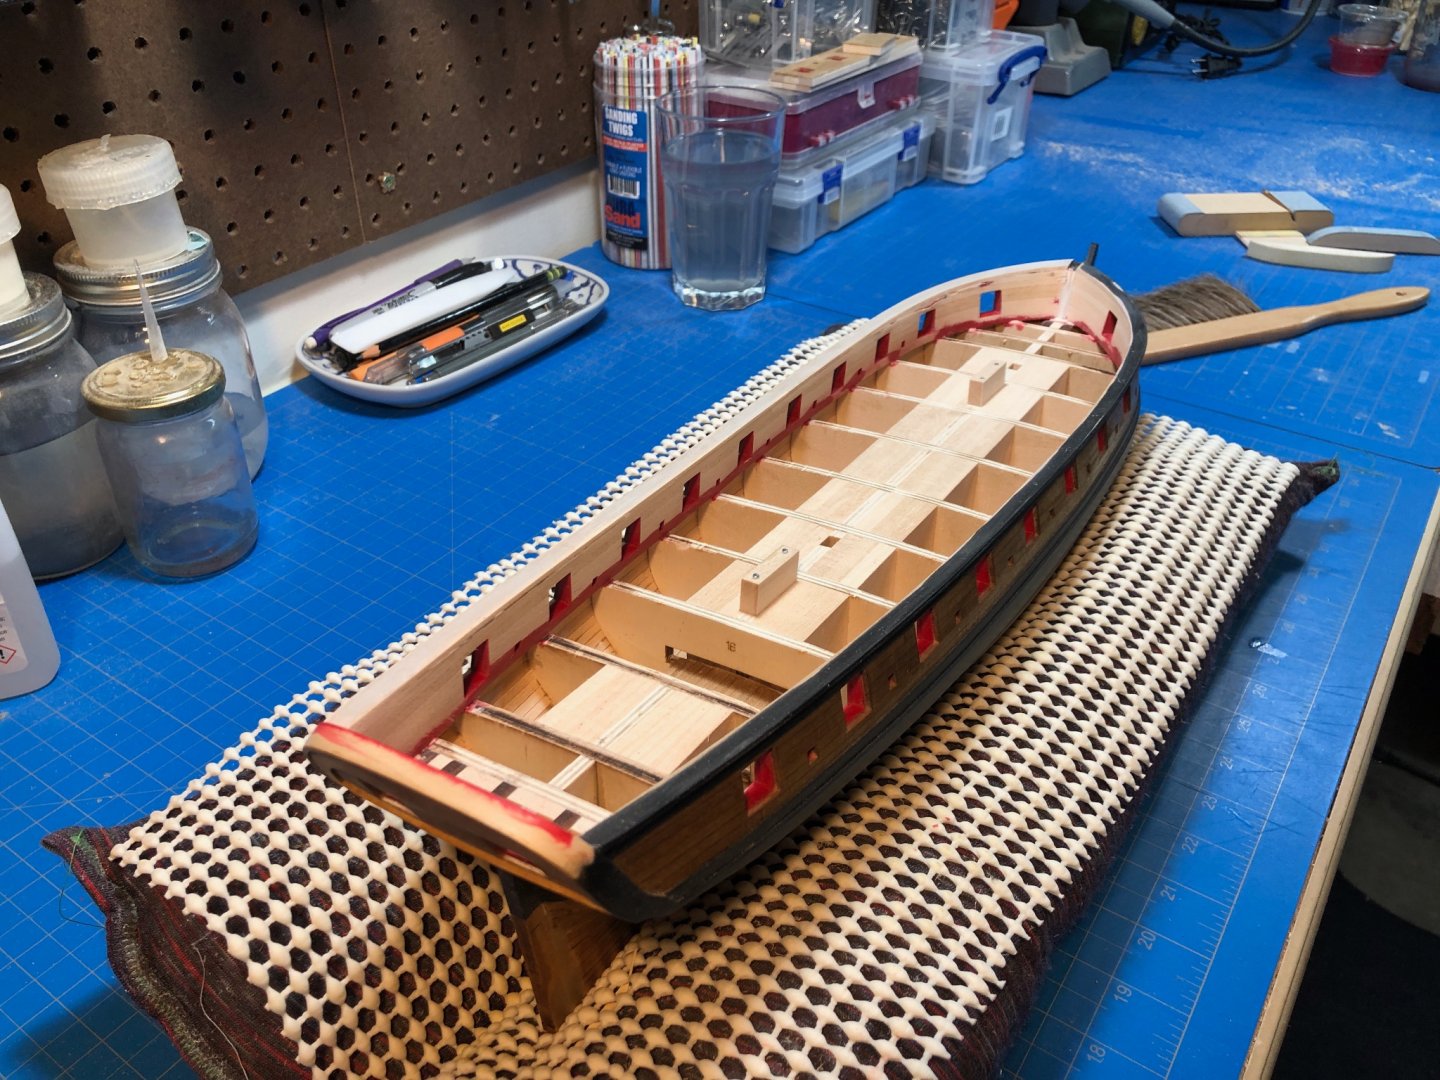
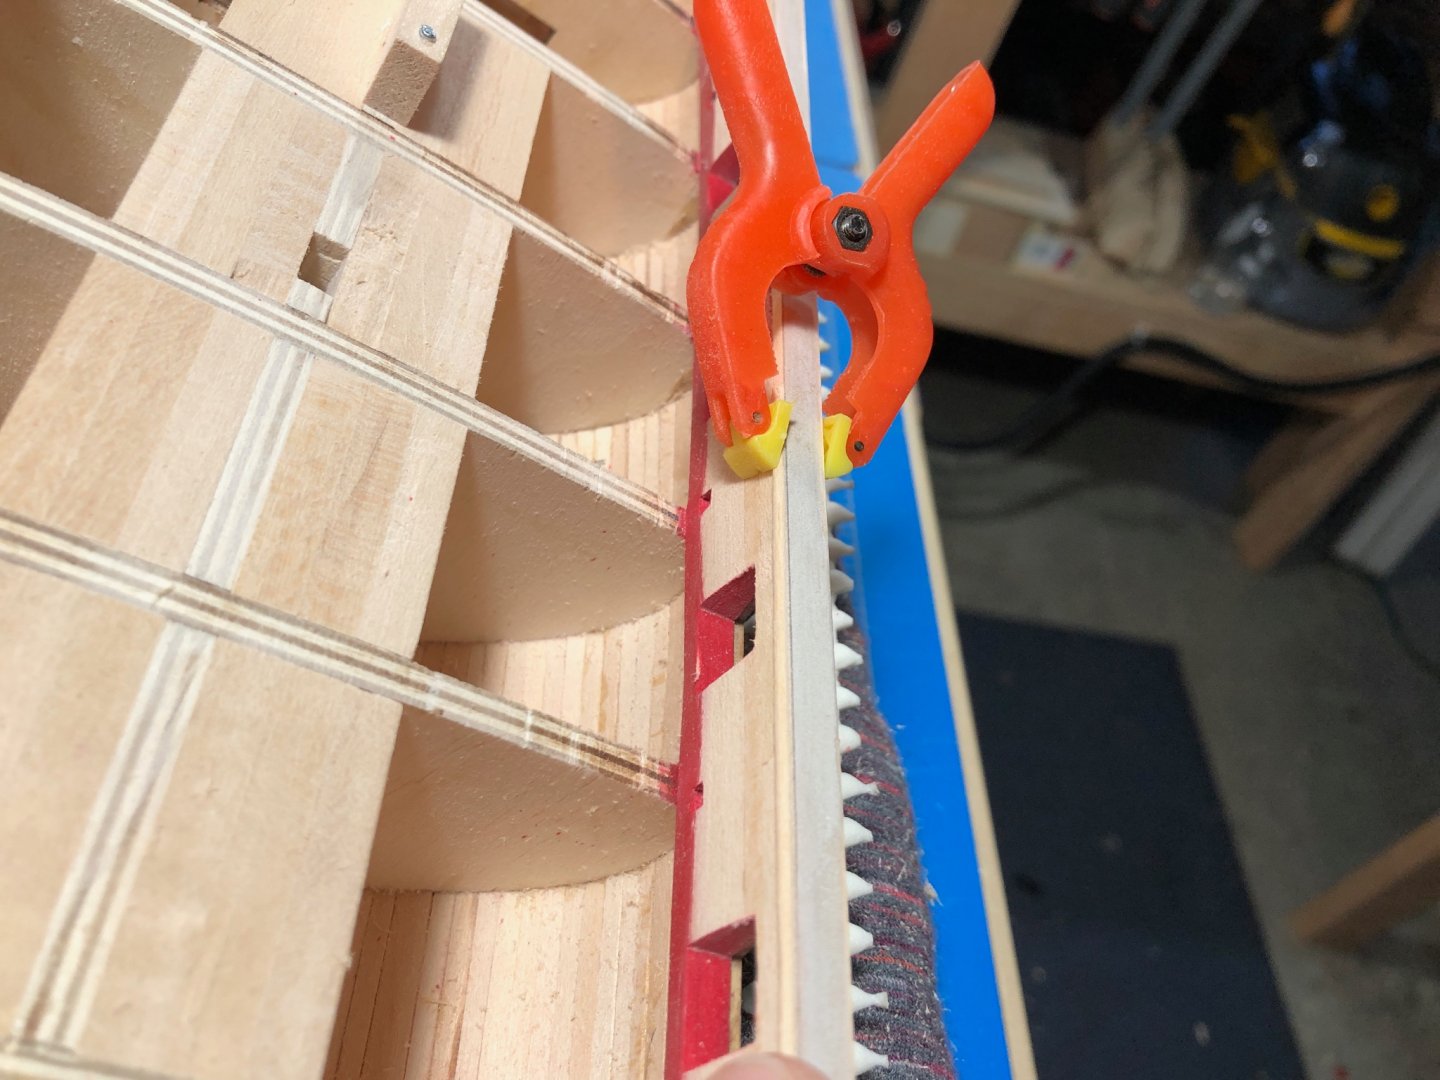
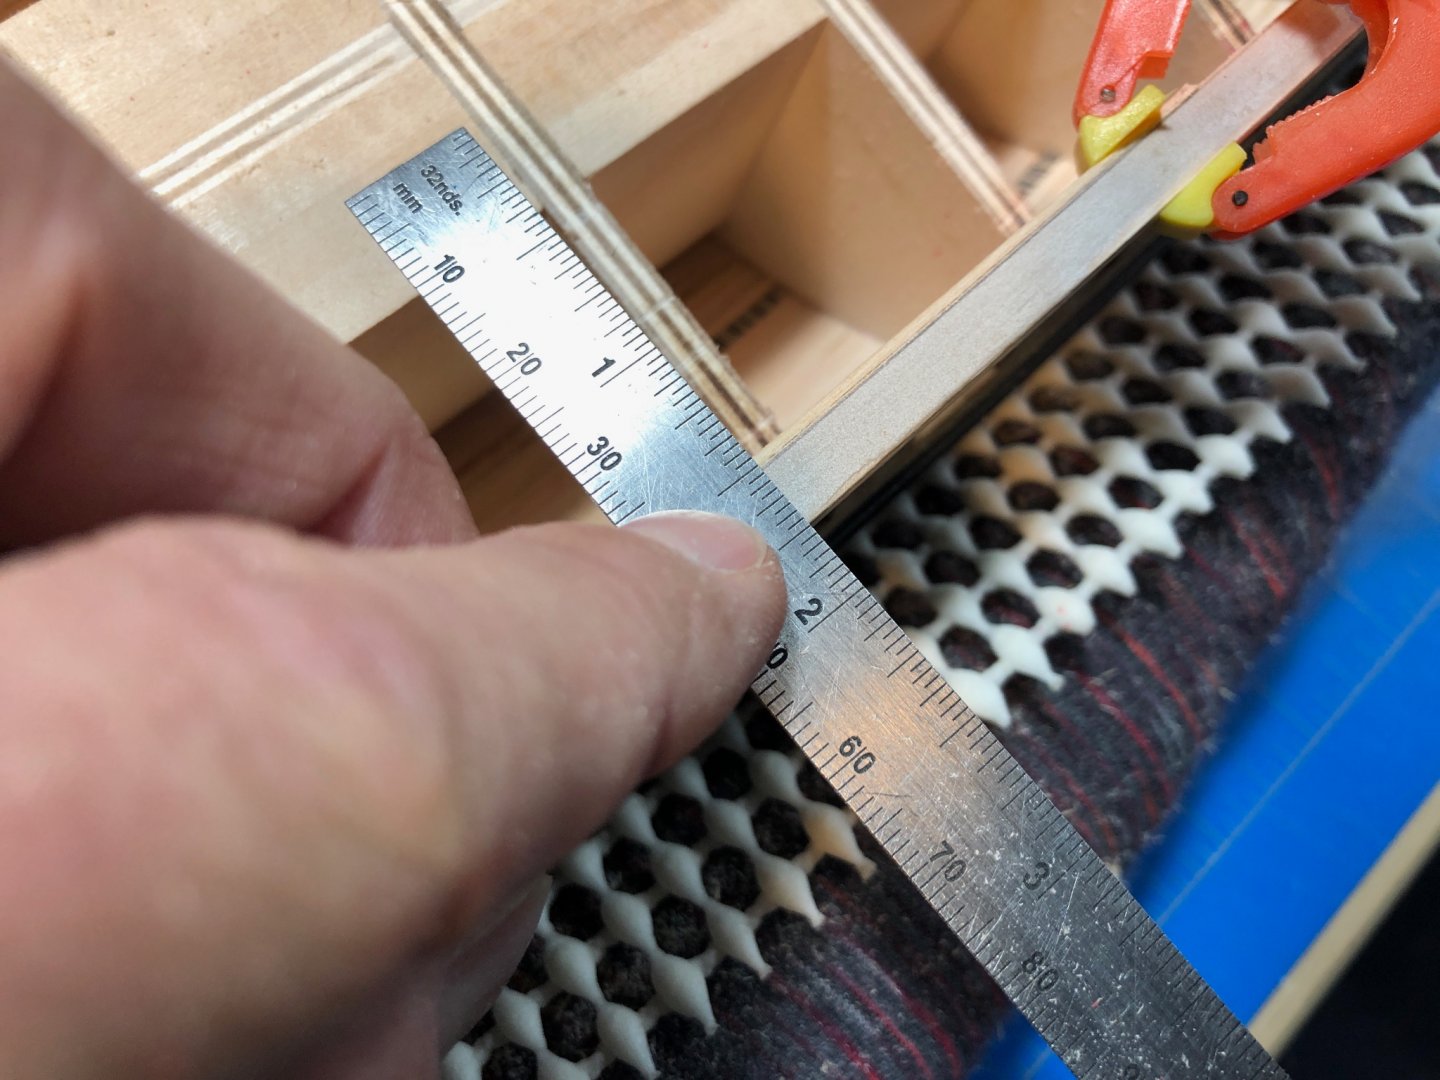
Phew, almost month since my last update. Apologies to those friends whose own build logs Ive not caught up on but who take the time to check in on my own. Ive been keeping my head down lately just trying to recover from this last debacle, trying to manage family during a COVID Christmas and making time for some paid work as well. I hope to catch up on everyone's builds soon! Correcting the error in my bulwarks has taken a lot more time than I initially thought. Sanding the thickness down inboard resulted in some very think inboard planking as was expected, what I didn't anticipate was that as I started to repaint the moisture would cause some expansion of those thinned planks. The result was a very cockled look and not at all acceptable. What transpired since first starting this correction has been a long sequence of filling, sanding, repairing, painting, etc, etc, etc... it has taken a long time to get where I I could progress forward again. After all was said and done, I came out a good 1/8" or more narrower at the caprail. After the endless cleanup, touching-up and checking and rechecking I finally decided it was ok to lay in the decking which I completed with the supplied basswood strip stained with a diluted Golden Oak to give it a distinctly lighter tone than the outer hull planking. I made a mini mistake in the shift pattern, but I don't think anyone will catch it unless they are looking for it. After installing the waterways I then moved on to exterior hull details. The first thing I tackled were the sweep ports which went well. I used the supplied brass bits, blackened in the usual way and later added the wire hinges (not pictured). Im currently thinking about copper plates and the badge as I wait for some items in the mail that may make some or all of that process a bit easier. Until then Ive been working on the side badges. Ill be *trying* the layered cake approach used by others to reconstruct these. The first thing I did was laminate some quarter inch basswood to meet the required dimensions for making two sides of the middle or window portion. Seen below is a relative comparison, I cut two pieces per side to account for error. Once roughly laid out I could set the gauge on the Byrnes to roughly 75 degrees and cut my 1/4" high window section. This gives me the appropriate sweep to carve by. Im not sure how the rest of this will go, but I feel good about progress so far and will update as I move ahead.


-
This is a great idea, I was thinking about trying something like that myself.
- 950 replies
-
- 1
-

-
- syren
- model shipways
- (and 1 more)
-
Each step out does the last, great progress! I like the hammocks.
- 950 replies
-
- 1
-
-
- syren
- model shipways
- (and 1 more)
-
There are a few solutions for the odd numbered shroud, the only common thing being that the odd one goes aft and is the last one rigged, with the port side being the final. Typically the first two are starboard (2), then port (2), then starboard, then port. This being only one way to do it, I think the very best thing you can do to answer these questions is buy a book or two on the subject. It can be difficult to get a clear picture of some of the more complex rigging structures by weeding through build logs. Not only are the structures a bit puzzling, but details can get even more complex depending on how "accurate" you want to be. My best recommendation would be: Historic Ship Models - Wolfram Mondfeld For actually completing these steps, then yes the build logs can help. There are a lot of ways people work these things out, Ive tried many of them - on one model I must have rigged shrouds a dozen or more times until I figured out which technique worked for me. Getting those deadeyes taught, of level distance along the channel and not twisting all over took a lot of patience - not mentioning how to get them seized onto the shroud where I wanted them, etc. etc.
-
MicroMark Titanium Chisels
Justin P. replied to josh0526's topic in Modeling tools and Workshop Equipment
I actually think the only thing titanium is the handle, but don't know enough about it. According to the website: "Expertly crafted from premium Japanese and French stainless steels and combined with titanium..." The blade stock feels like stainless, no different than their earlier series - just now with an upgraded handle. I had assumed the handle was what made them "Titanium." I, too, prefer a high-carbon steel which is why I often reach for my flexcut stuff or make what I need from hacksaw steel. -
It does! Ive done a similar thing with razor blades, but those carbon disks look like they make a much cleaner result. Ive only used thicker Dremel discs and diamond cutters for this task and have found them imprecise. Ill be investing in some of these.
-
Wow! Gulp... that's an ambitious undertaking, can't wait to see it come together as Im sure you'll knock it out well!
- 950 replies
-
- 3
-
-
- syren
- model shipways
- (and 1 more)
-
That cap rail looks extra good, how did you cut the molding in? Scraper?
-
MicroMark Titanium Chisels
Justin P. replied to josh0526's topic in Modeling tools and Workshop Equipment
Ive got a complete set as a gift earlier in the year. They are good, but I think perhaps a bit overpriced. They do come very sharp, have good build quality but I do not trust the steel as it seems run of the mill and I would not expect the edge to hold long, especially if working something harder than basswood. As small as they are it might be nothing to hone them up from time to time, but will need to be extra careful when sharpening. There really isn't much to them at the cutting edge, so one could easily go too far if they were inexperienced on sharpening stones. I use mine very occasionally for when no other tool can be used or if I need to just trim somewhere delicate. Though I do find that I reach for my flexcut micro chisels more often, and these if I need longer reach. These are not heavy use tools in my opinion. -
Electric sword or reciprocating saw
Justin P. replied to stuglo's topic in Modeling tools and Workshop Equipment
Unless you have some reason to need a power saw for the type of work this thing targets, I would say invest in a nice manual alternative. There are some very good razor saws out there that will do the work this thing does in half the time, half the clean up and twice the accuracy. -
That looks so good. Great little kit!
-
Reducing mast circumference without a lathe
Justin P. replied to Charlie pal's topic in Masting, rigging and sails
And a tiny one at that! -
This is the most articulate and concise breakdown I’ve read. I didn’t mean to come off contrarian and agree, I just think that unfortunately the most vocal critics tend to be his most ardent fans. For the uninitiated, I would still advocate reading them, starting from E&M on through...
-
Reducing mast circumference without a lathe
Justin P. replied to Charlie pal's topic in Masting, rigging and sails
Do you use the full size cabinet scrapers for this? -
Meh... none of his books are really accurate perse, but they’re still pretty good. After reading the other three, I felt obligated to read the new prequel, though after a few chapters it was clearly his least notable entry in the series. I enjoyed it overall, but not nearly as much as Pillars or the other entries.
-
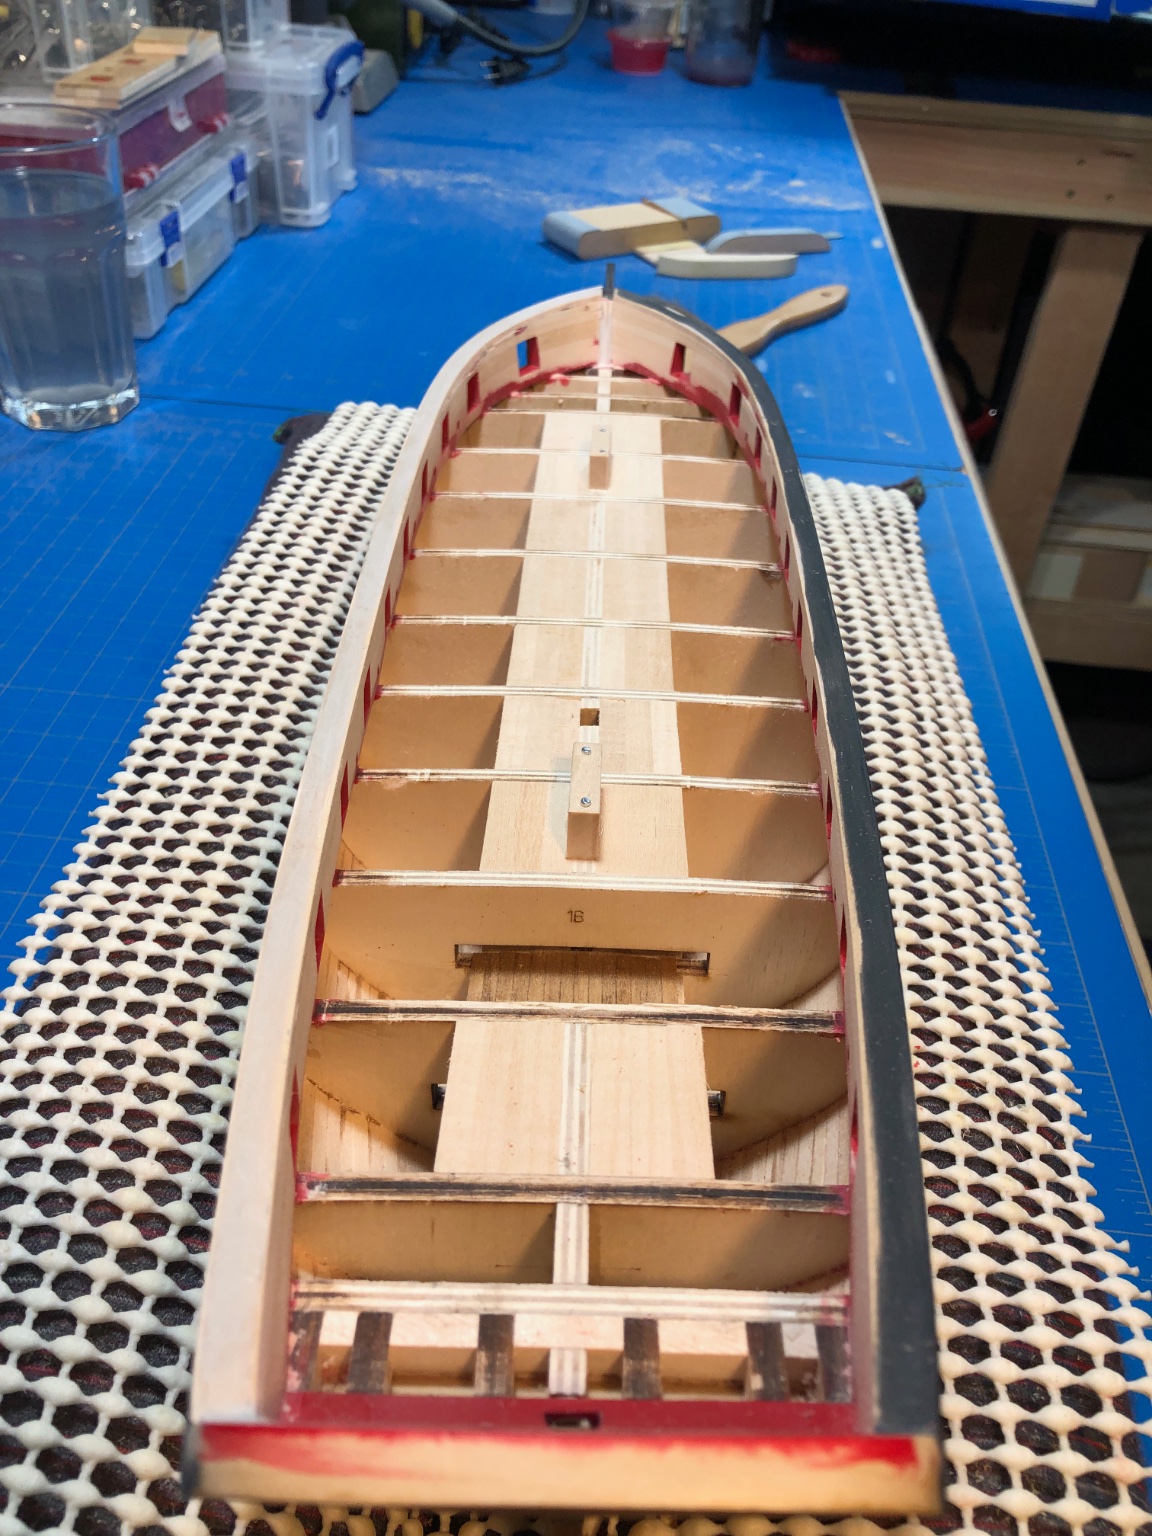
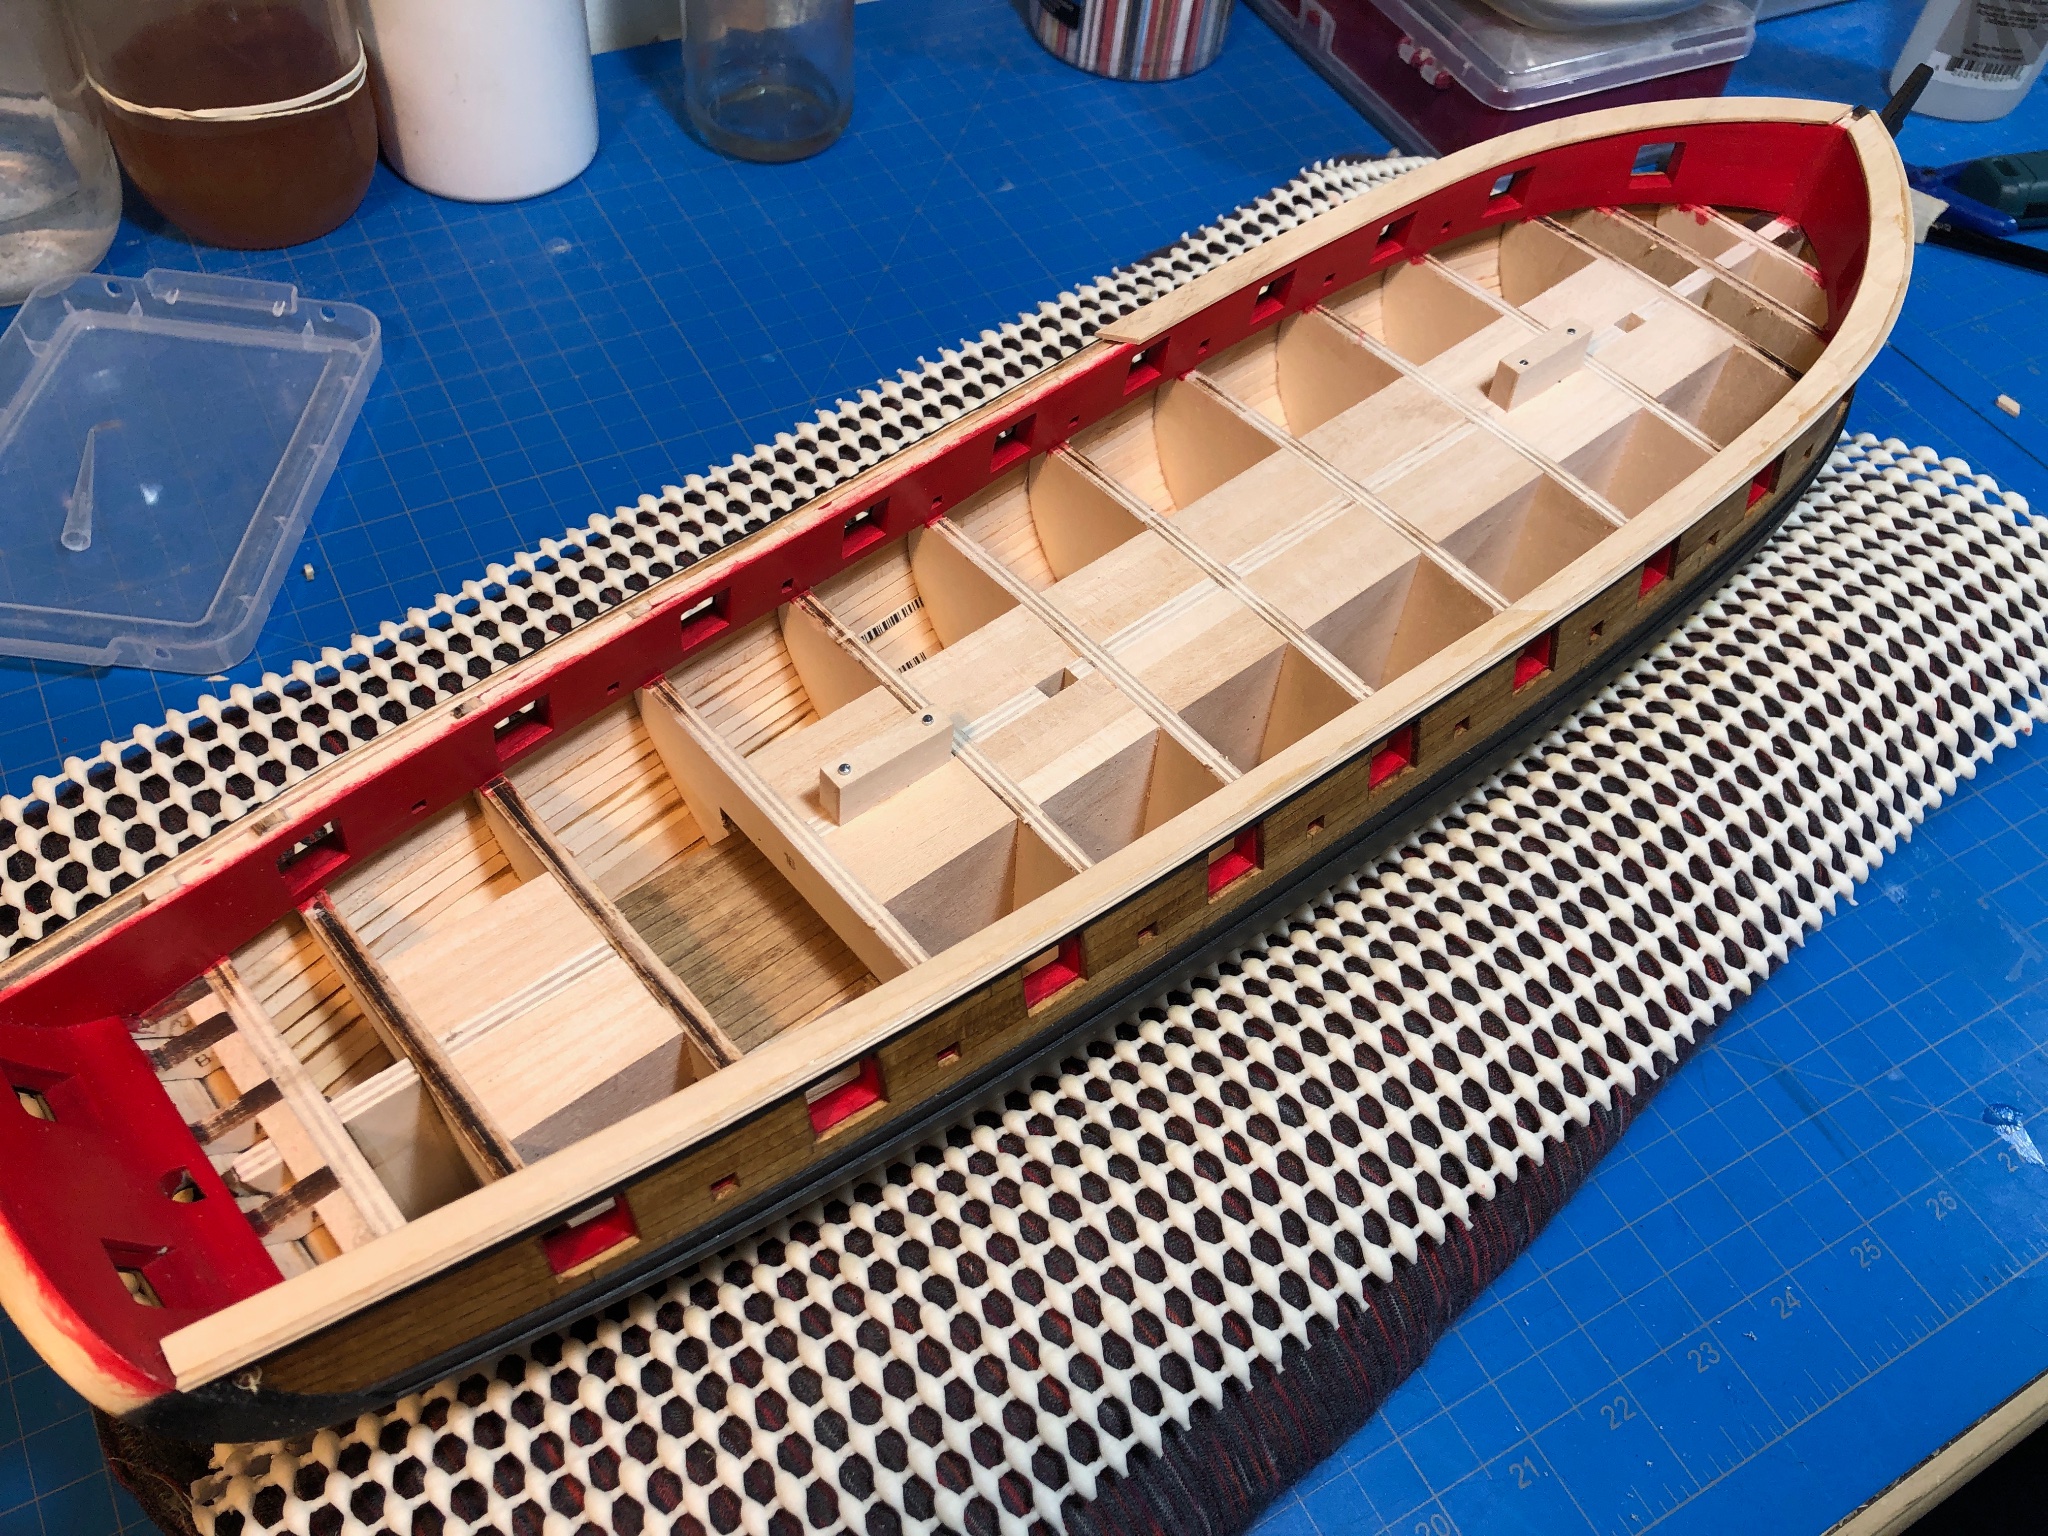
Ok, so sanding out the inner bulwarks was the way to go. I don't know quite what I was thinking with ripping everything out, though I was a bit saddened as the result till now was pretty good... I spent a couple hours this afternoon working on it, and I think with a few more hours finishing everything again and cleaning up it will be ok. Very happy with that outcome, thanks again to @Chuck and @glbarlow for saving the day with their very practical fix. For anyone in a similar predicament, here is how I tackled it: Set my compass to just under 1/4" and take a line off the outer edge of the molding and began sanding with a low grit paper mounted to a sleigh shaped block: I was able to remove quite a bit of material very quickly this way while the shape of my block slide over the gunport with relative ease. You can see the progress here: Now Im playing with the idea of recovering my overhang with a very thin strip brought through a half-dome scraper. The width now is 1/32" over 1/4" and that includes the outer molding...


-
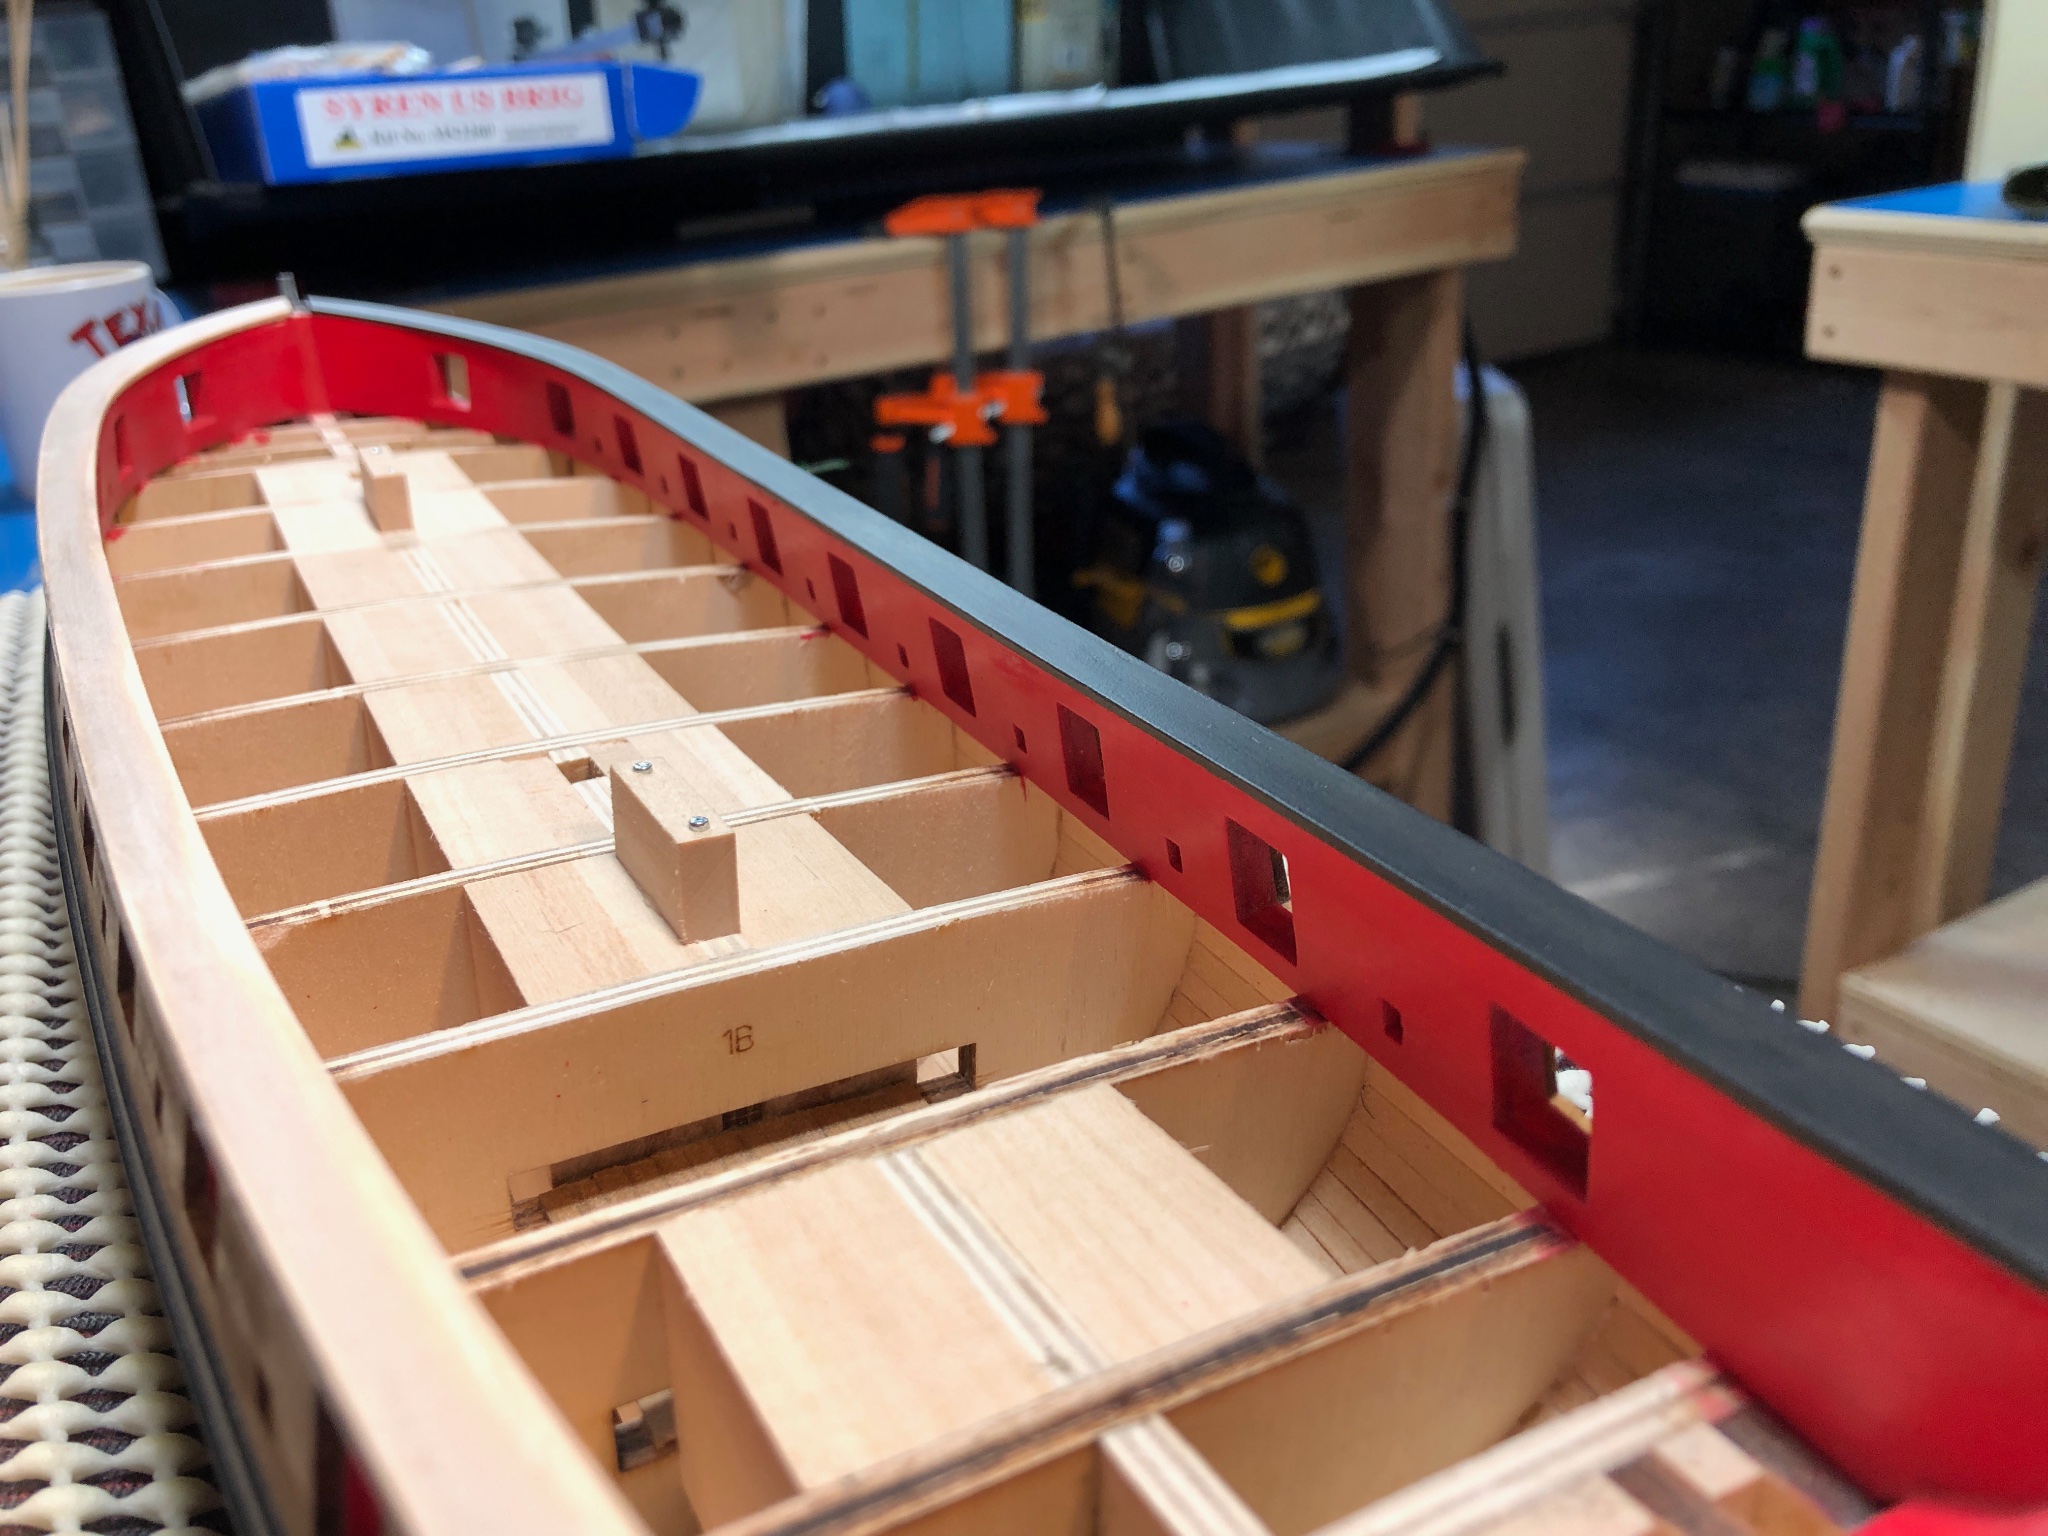
How did you account for the required overhang of the rail over the inner bulwarks? Your idea is intriguing but would leave me with interior bulwarks that run right up to the rail with no obvious segway between components... EDIT: I see in your build log that your rail runs flush with the inner bulwarks, perhaps I can sand it back beyond and add a thin piece in the same way the outer molding is installed... Good idea. I like this better than I do ripping it apart!
-
Reducing mast circumference without a lathe
Justin P. replied to Charlie pal's topic in Masting, rigging and sails
I use a small finger plane to take it down in an octagon shape and then sand... works a treat and is quite fast. -
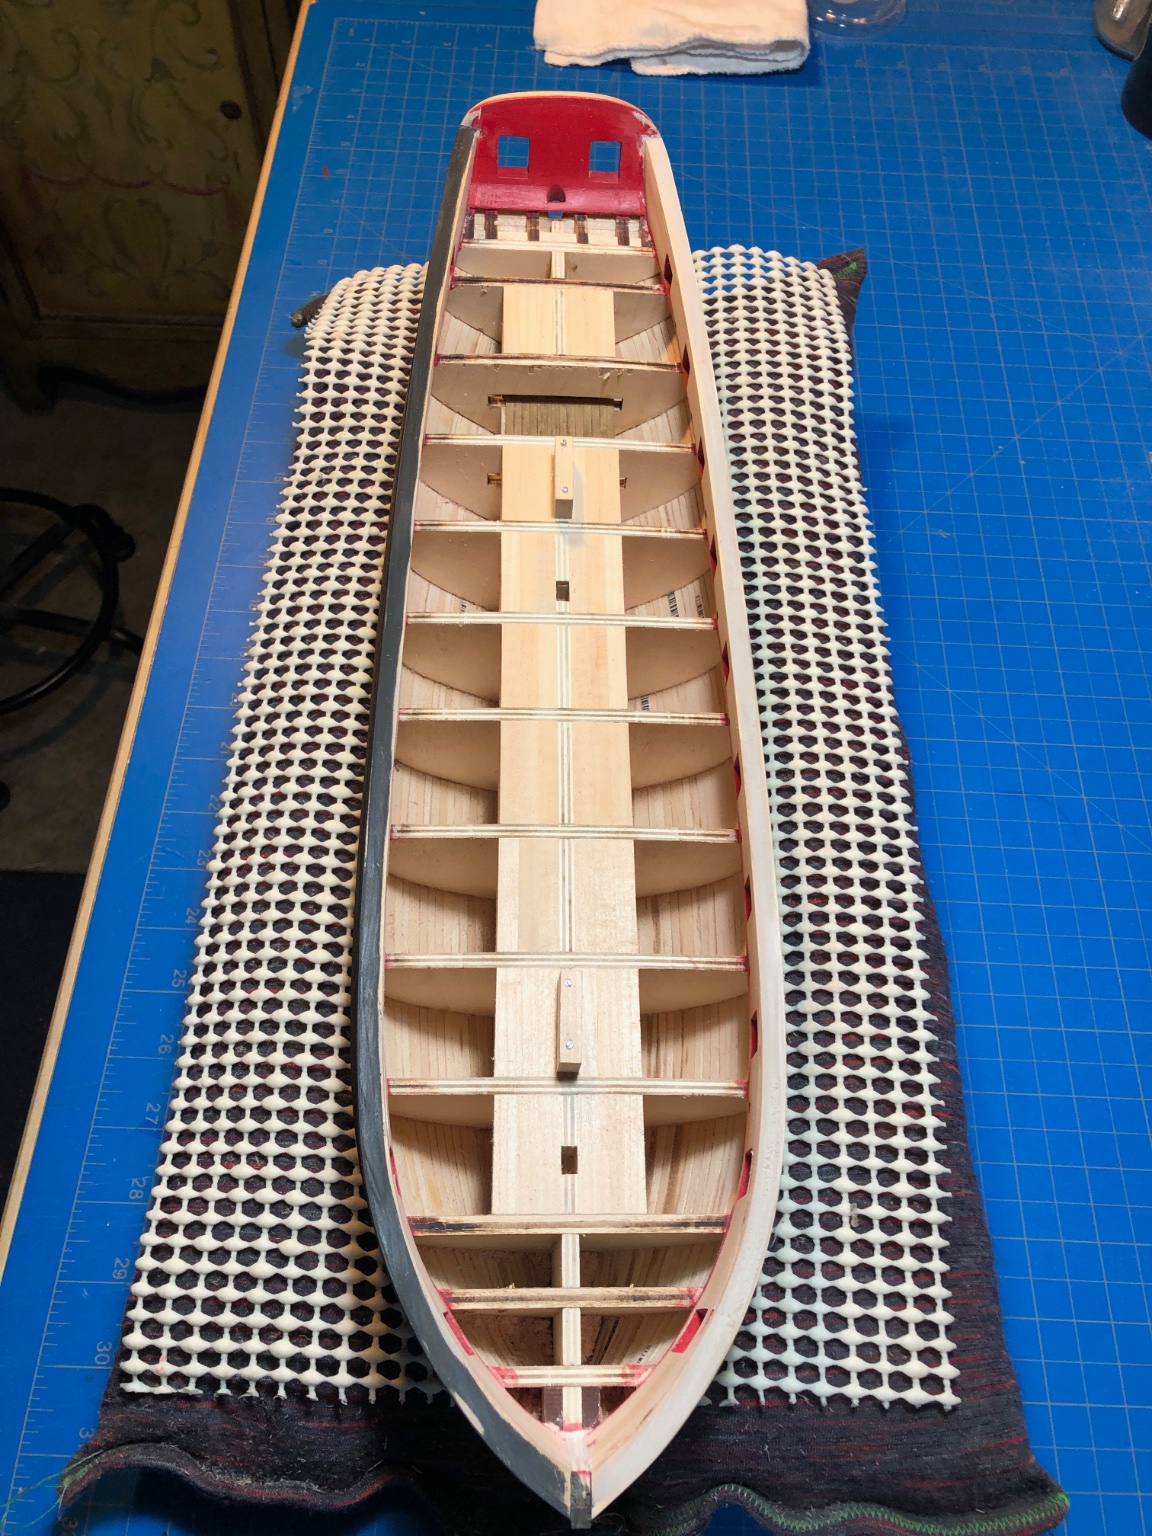
I think good advice overall. While Im tempted to leave it, the amount of work invested already has made me want to make it as good as I can and Im not generally one to settle on a big detail like this. I did go back and review a lot of builds to gauge the effect and I think @Chuck and @glbarlow are right about the end result. I also can see how much of difference in overall scale look it can have when looking at the result @Gahm achieved in his build. Its a big hiccup, but one that will hopefully cement the lesson learned... also a lot of redo work... Ugh, Now Ive got to think about how to do this... What Im thinking is Ill rip out all the interior planking rather than just sand it back, and sand the framing more back from the inside. I should be able to do this with minimal damage to existing built up components - keyword here: "should." Thanks all for chiming in... wish me luck.
-
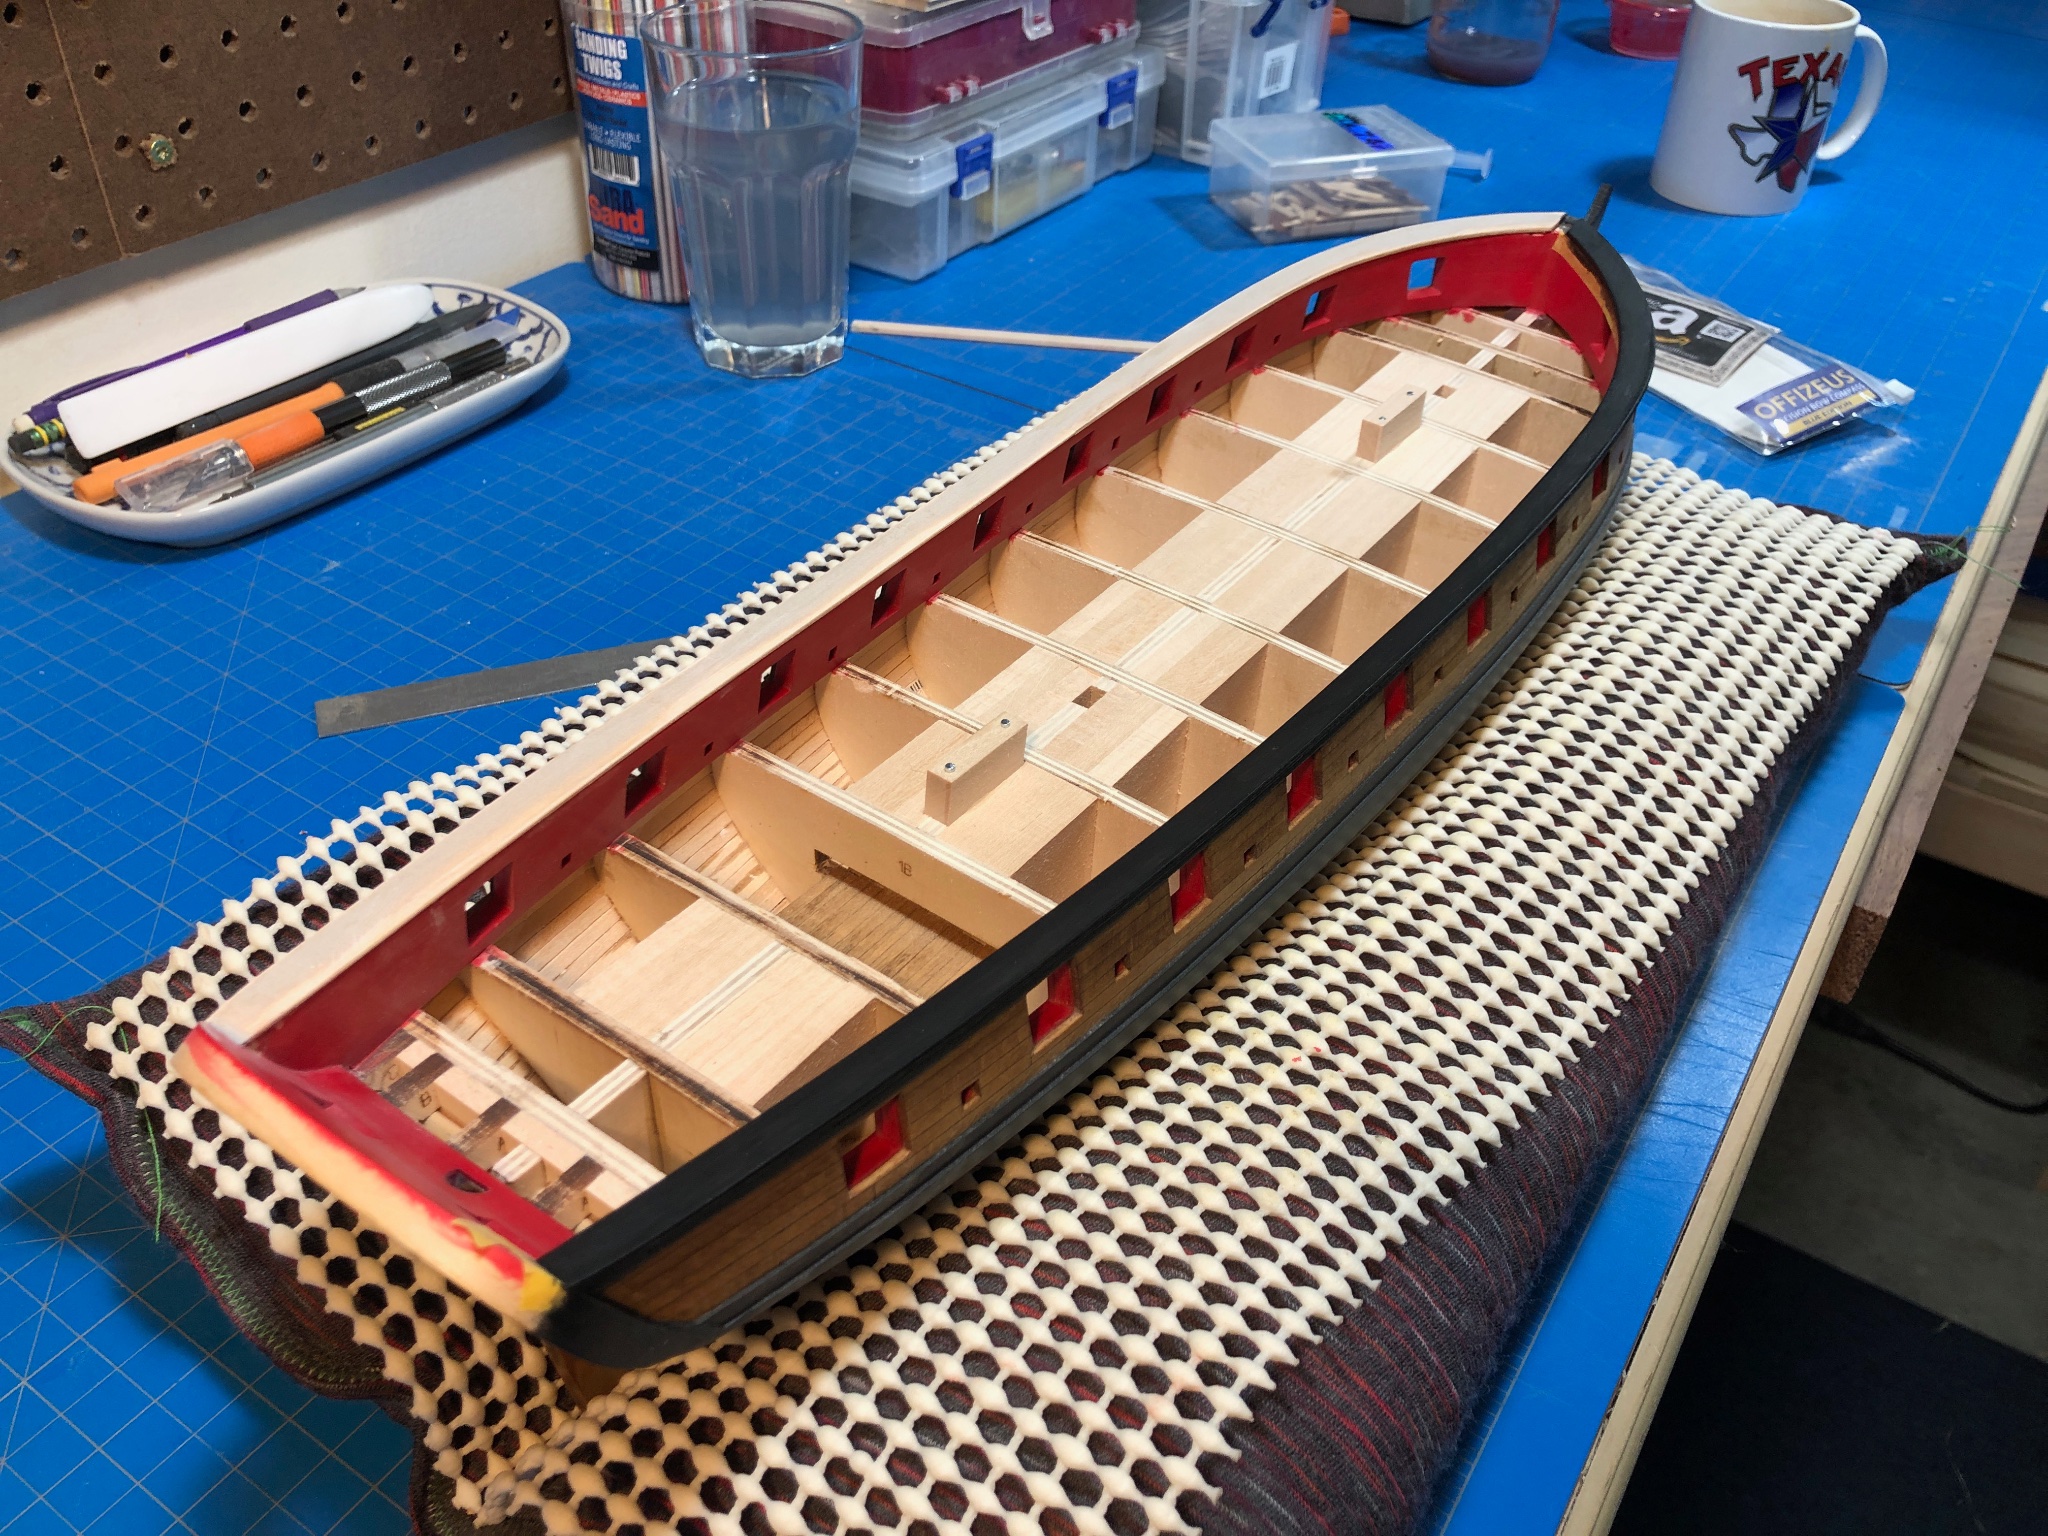
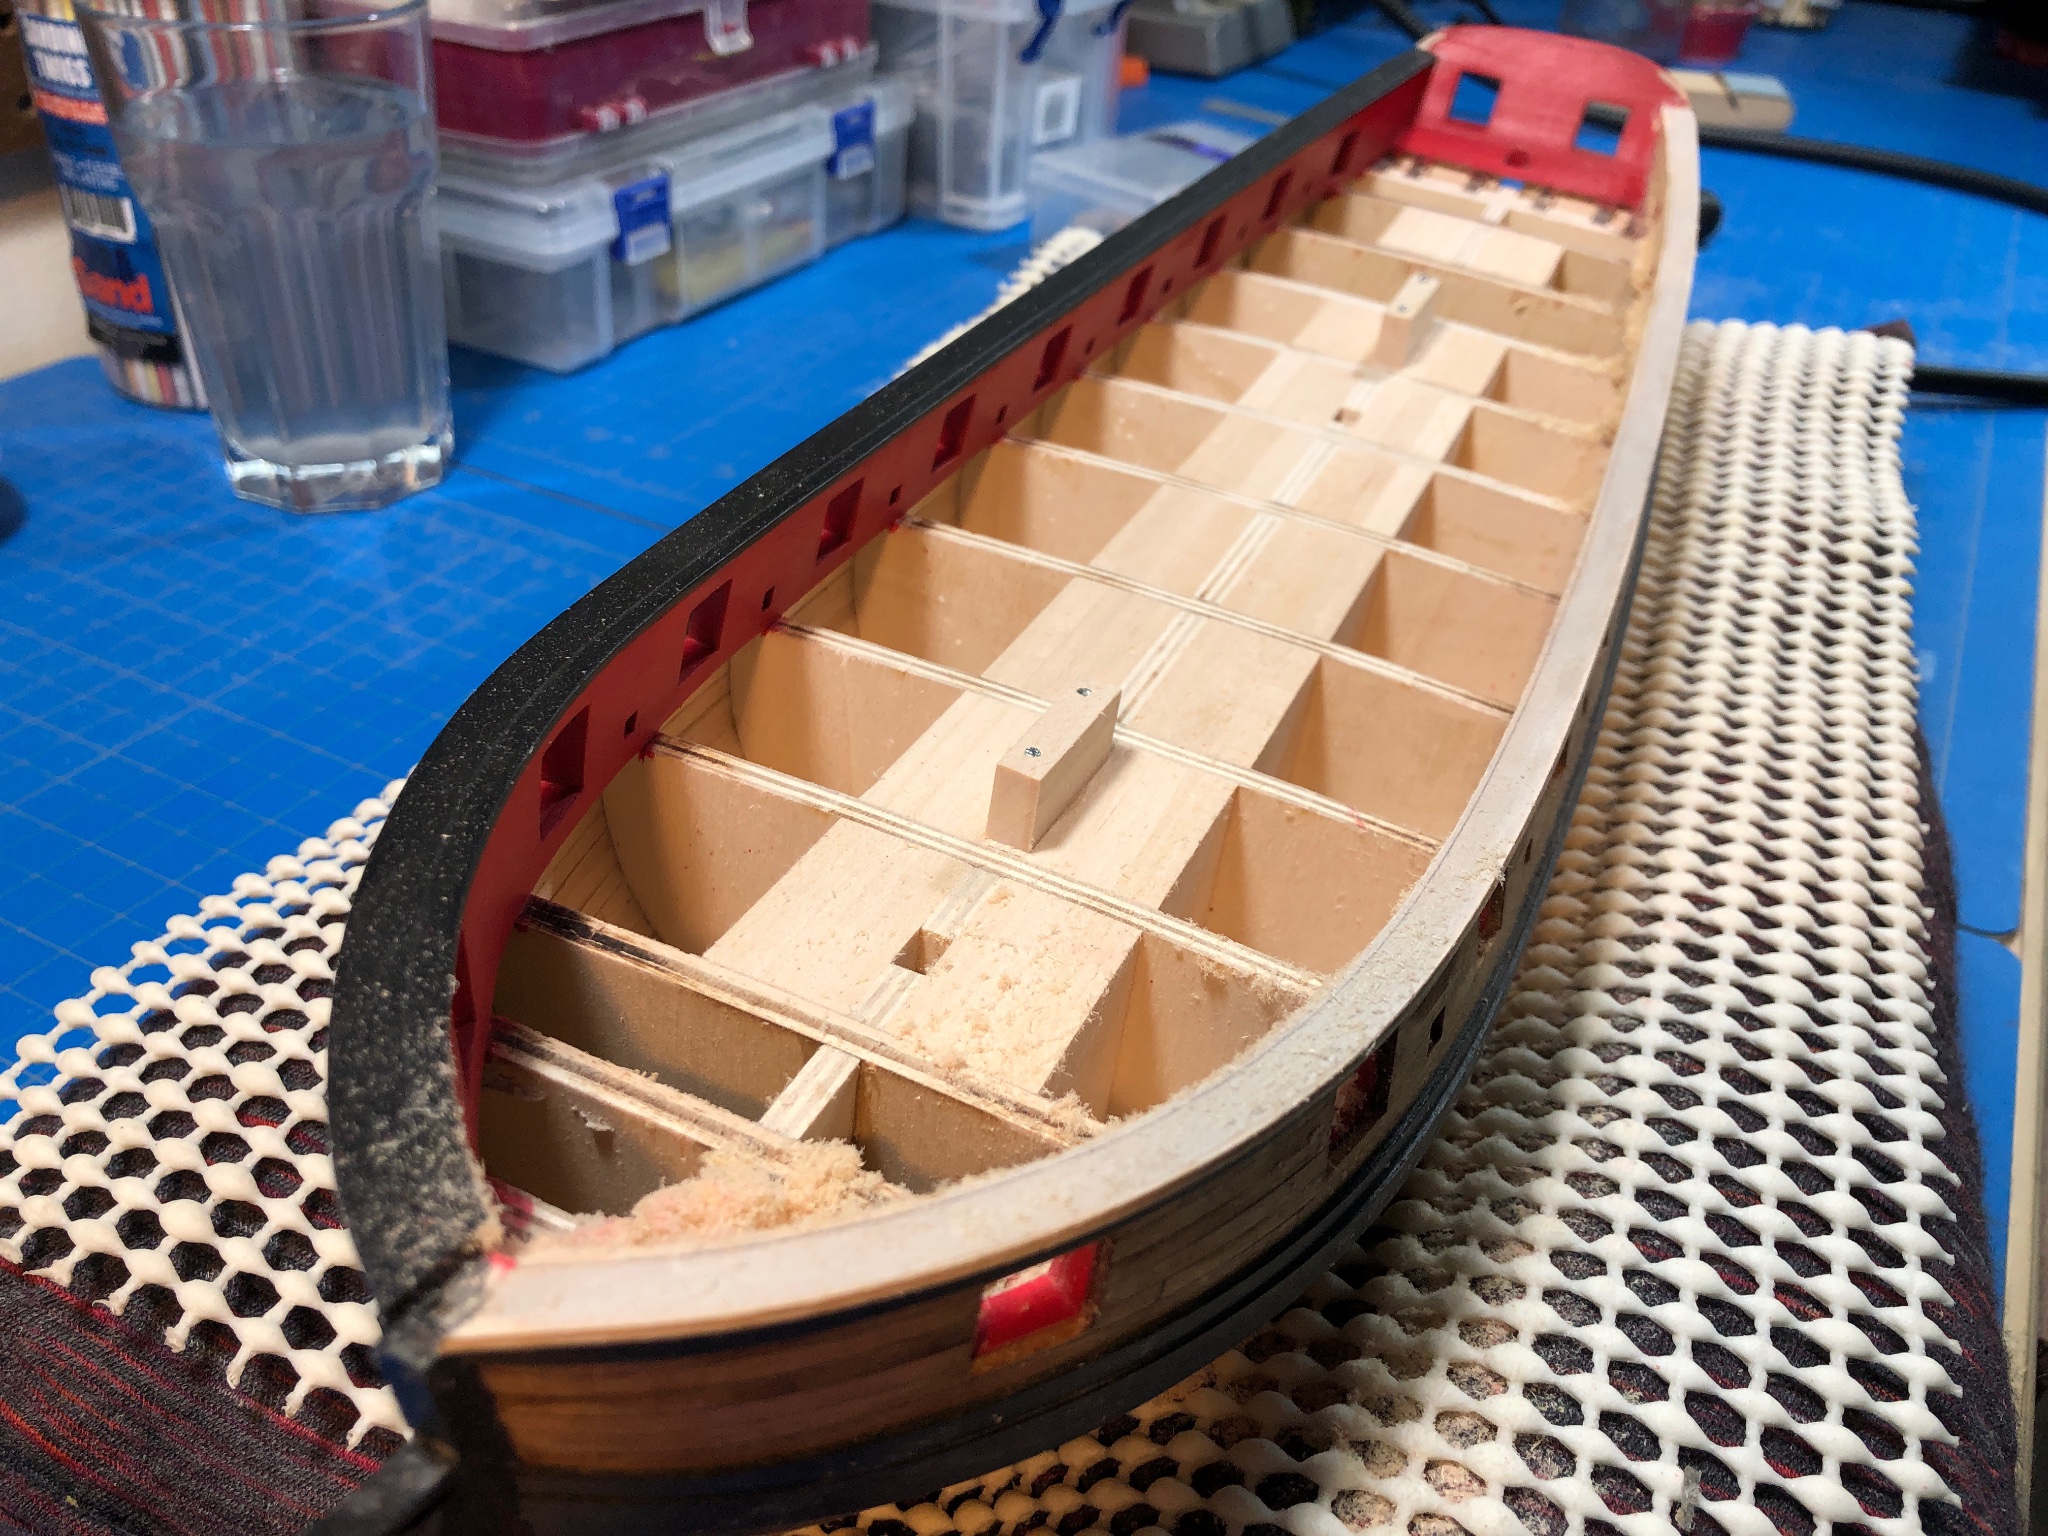
Ugh... having a bit of a crisis of commitment. I started building out the cap rails and am realizing I have overlooked the importance paying particular attention to the overall thickness of my bulwarks. In order to achieve the desire slight overhand inboard and out, as well as fit a decorative molding Ive come out with a rail that is, to my eye, entirely too wide. The instructions call for a finished cap rail that is no more than a 1/4" wide, which is exactly the width of my bulwarks at their narrowest.... Following the instructions, and accounting for as little additional width possible has left me with a cap rail that is just shy of 3/8"... and while the finished product came out well Im now agonizing... Do I step back far enough to fix this or plunge on hoping this one (really out of scale detail) doesn't ruin the look of the whole... Thoughts? See a unpainted but complete starboard rail.

-
Just found your build! Apologies for the late welcome to what seems to have become the 2020 (and beyond) COVID Syren build group. Love your ships boat and plank shaping jig you put together, looks like you made it to fit the complex curvature of the bow... Ill shall remember that move.
-
Perhaps now you now which side of the ship will be displayed? Great recovery though. Now dont mind me as I fret over this in addition to every other upcoming step
-
Tough task - Ill try, ha.