Louie da fly
-
Posts
7,973 -
Joined
-
Last visited
Content Type
Profiles
Forums
Gallery
Events
Everything posted by Louie da fly
-

New here, checking the place out
Louie da fly replied to jbassett's topic in New member Introductions
Hi John, and welcome to MSW. You've made a good start. As you improve your skills you'll be able to take on more and more advanced builds, but don't be upset if you continue making the odd mistake. Everybody does - it's one way to learn. Preferably to learn so you don't make the same mistake again (though of course even that's not a given). The main difference is that the more experienced modellers make much more interesting mistakes. And enjoy the journey. It's something between a whole new exciting adventure and a whole new exciting can of worms. Depends on the day . . . And I'd recommend you start a build log for your next one. A great way to get feedback and advice from people who've been there before - the people here are very helpful and friendly - and we get to see your model under construction. Always a good thing. Steven -
looking very good. I like the tackles particularly. That mesh you're using for the boarding netting - it's a shame you couldn't get something that was just net with no decoration. I was lucky to get plain mesh. Regarding the colour, keep in mind that the netting could well have been tarred and might have been black or something approaching it. The other thing is that white mesh would very likely be distracting to the eye and would hide the detail below. I'd be going for black or dark brown, myself. Does your local store have anything in those colours? Steven
-
Yes, but I may decide it's all too much. We'll see. Maybe only 44 instead . . . That would leave only 30 to make. I'm doing an average of about one a day - so that would mean 74 days (well, 73 now - I just made another one) - just about two and a half months. That's not too bad. Steven
-
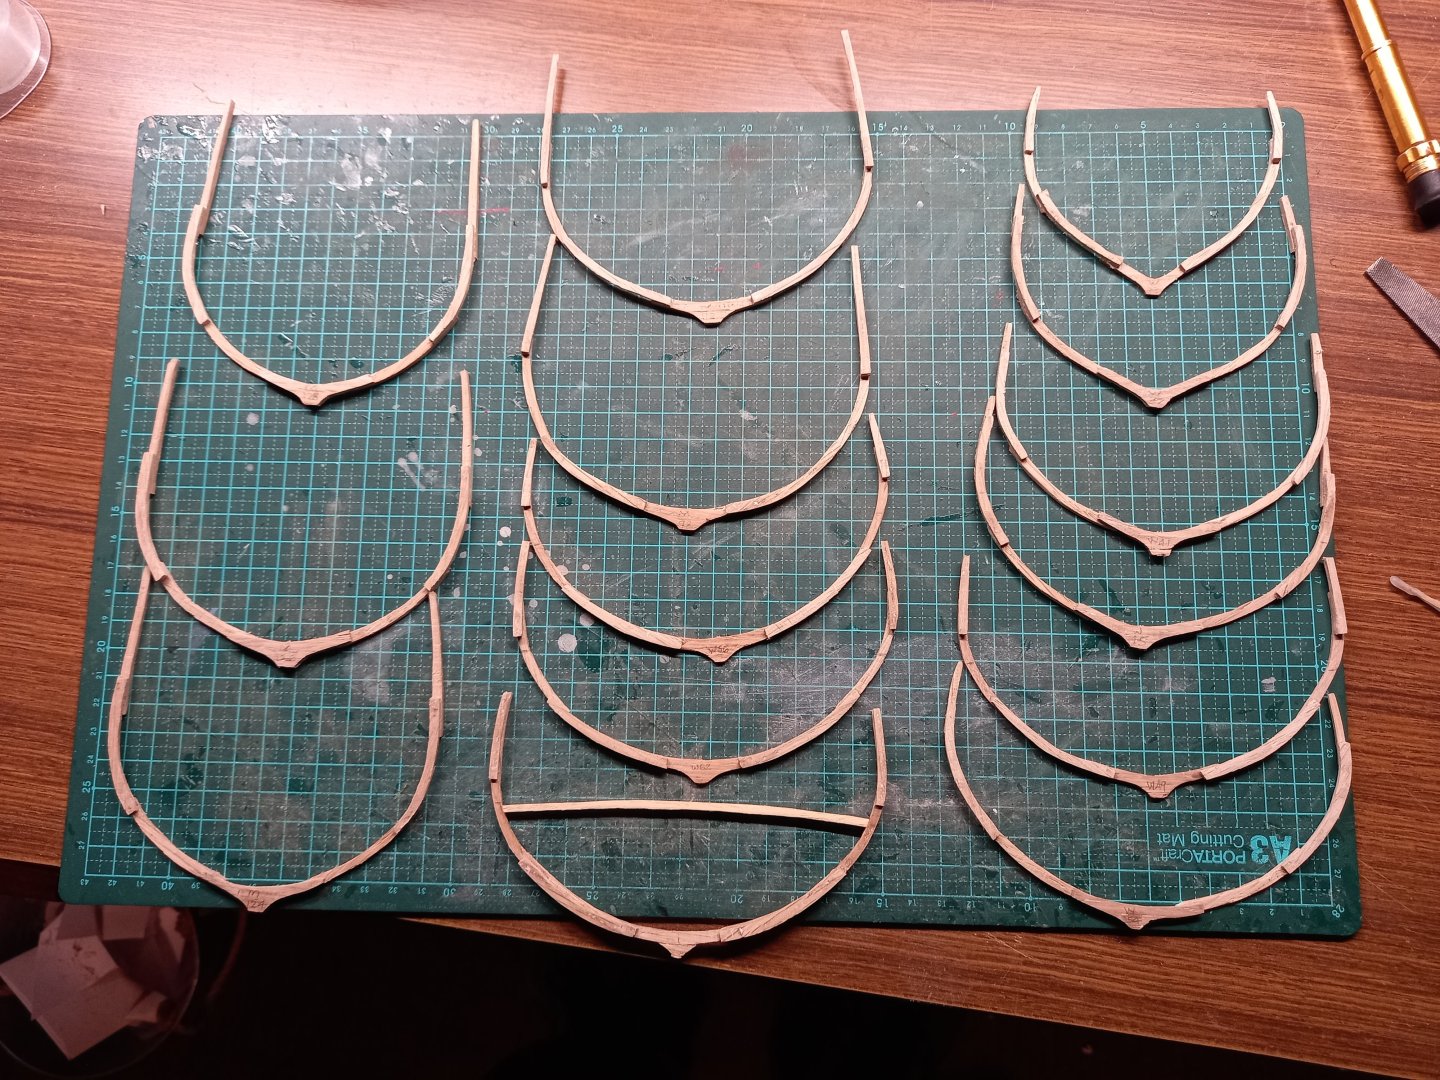
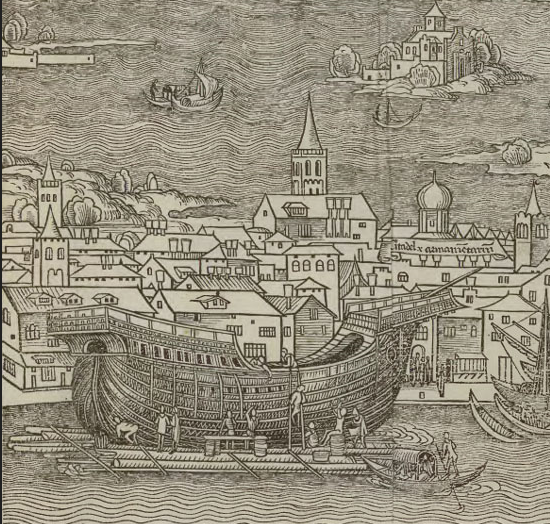
14 frames complete. The shape of the vessel is starting to make itself known. I'm currently agonising over the cannons (yes, I know its a bit previous to be doing that at this stage, but that's me.) So 15 guns were found associated with the wreck, but only two will be behind gunports (as that appears to have been the way it was in the very early days of gunports - see earlier posts). So what happens with the other 13? Are they on big wheels so they reach over the gunwale? And then there are several guns retrieved in 1531, one of which was a large bronze perrier (meaning the balls it shot were of stone), and there were a number of swivels. Also several wrought iron guns of different types, one type very long compared with its calibre. Unless I much mistake, except for swivels, all the wrought iron guns needed to be deck-mounted because they weren't structurally strong enough to support themselves. But that would presuppose gunports unless they had big wheels. There were a number of big wheels found on board, some of 120 cm diameter, some of 148. This would mean a gunwale of somewhere between 60 and 80 cm high if they were to poke out above it. That's 2 feet to about 2 ft 7 in. Not terribly high. Sigh. I'm in a bit of a quandary. It's assumed that between 1516 when she sank and the retrieval of 1531 the citizens of Nice may well have plundered the wreck for cannons, but there's no written record of that. Swivels could be in arched openings shown to the forecastle in Carpaccio's paintings, or even in the aftercastle as shown in others. It's a matter of deciding what goes where. Though she was a merchant ship, it looks like the Lomellina was upgunned when she was hired by the King of France to transport munitions. And perhaps some (or all?) of the guns were cargo rather than armament? Oh, and they recovered two bronze arquebuses (precursor of the musket, but considerably heavier construction.) It's a problem at the moment, and any solution I come up with is going to involve a tremendous amount of speculation and guesswork. I'm trying to make it educated guesswork. Steven Steven
-
Report of 24 October 2024: "STS Leeuwin II is back on the water! After the August dismasting - and the delicate process of cutting away the destroyed masts and rigging - this is the first time the ship has moved since the accident. Today’s hour-long shakedown voyage is a crucial step in testing vital systems like steering and propulsion, as they assess the full extent of the damage before moving forward with repairs. The ultimate goal is to return Leeuwin to service, benefitting the young people of Western Australia. A small professional crew was onboard today, joined by a few dedicated volunteers to assist with line handling. A huge thanks to @jetwavemarine_ for providing a support tug, and to @svitzerau for offering a gangway after the original was destroyed in the incident. Follow @sailleeuwin for more updates! 🌊" And for a definitive and informative article from November 2024 on the future of the Leeuwin and possible replacement, see https://fremantleshippingnews.com.au/2024/11/11/what-to-do-with-sts-leeuwin-part-2-a-new-vessel/ - only one bit of criticism - Leeuwin is a Dutch name, not French. That's the most recent stuff I can find. Steven
- 1 reply
-
- 5
-

-

-
OR you could copy your replies and paste them into your build and then delete them from where they don't belong . . . Steven
-
Nice work, Dick. Steven
-
Sorry, Alvb. I do understand your pain. I've experienced the same problem myself - in fact I'm currently on a very long process of translating the annual archaeological reports (about ten of them) of the Lomellina from their original French. I speak a little of the language, but not enough for fluent reading of technical maritime papers, so I'm making great use of Google Translate, plus a French-English dictionary of maritime terminology. Despite Google's many faults, it's a great help. Oh, and seven frames now complete. Unfortunately the main delay is waiting for the glue to dry between putting on one futtock and the next. Putting two on at the same time is a recipe for disaster - you generally end up with both out of alignment. Steven

-
There's a very interesting paper that has a section on interpreting artistic representations of ships and where that can go wrong (see pp. 28-31). Very informative, as is the rest of the paper itself. Maritime_Technological_Change_in_the_Anc.pdf
-
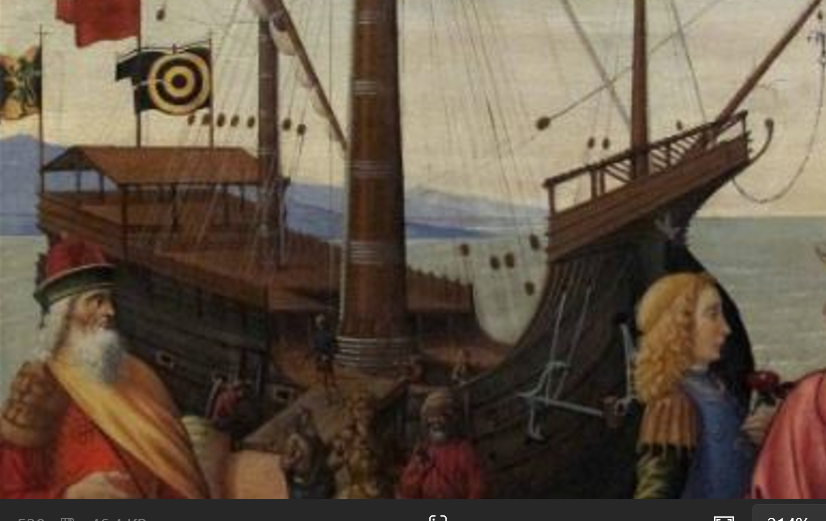
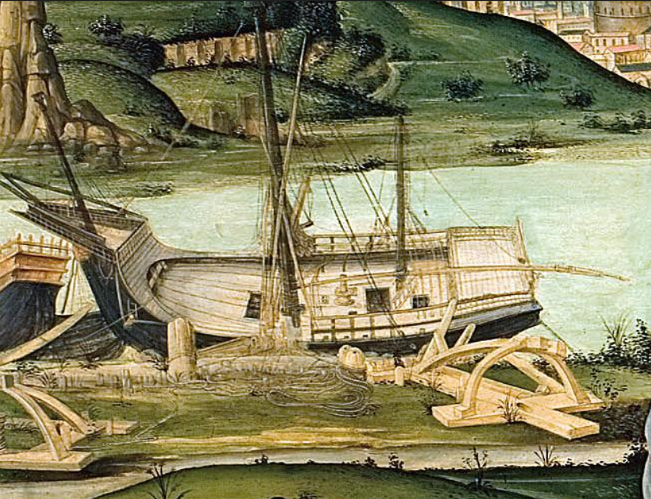
Yes, wonderful artist though Botticelli was, I'm not sure he was au fait with the intricacies of ship design. I know of only one other painting of his that incorporates a ship, and it's identical to this one - obviously working off the same sketch. I'm not so sure about the crosswise planking on the poop. It is within the bounds of possibility that this is correct. The poop is a separate structure from the rest of the hull. Though it does seem to make sense that the deck beams would go from side to side, in fact if they went fore and aft they would be spanning a smaller distance and so they could be made of lighter timber. The only heavy timber needed then would be the one that supported their ends, at the break of the poop. Agreed. It's very difficult to interpret. I'll be looking at other pictures of carracks and see if I can make sense of it. If not, I'll go with what the majority show. It's a judgment call, I'm afraid, as are so many other things in this build. Here's a picture that might explain the configuration. The rail seems to be almost continuous but not quite, and there are definite breaks at the quarter deck and the poop. And another where the railing is definitely continuous, but perhaps there's no poop. I think there was a fair bit of variation in the configurations in use. Still thinking about it all. Steven
-
I've been thinking about whether or not the ship should have a poop deck. Botticelli's Judgment of Paris is one of the very few images that show a carrack from a viewpoint that shows the decks, and he shows one. It's also a good guide to where the hatches are and various other interesting details. But I think he's made a mistake with the location of the ladder to the poop - it seems to be in a completely illogical place - with the bottom at an open hatch and the top at a set of crossbeams you'd have to clamber over to get to the poop. Perhaps he did his sketch a bit wrong? He's not noted for his maritime pictures and may not have thought through what he was painting. It's hard to make out if there's a separate quarterdeck or the "main" deck continues all the way from the forecastle to the poop deck. Those railings to the main deck are unusual, as well, apparently continuing the same line as the railing at the poop. Needs some thought. Steven
-
Hi Vivian, I just saw your reaction to my Winchelsea nef. Nice to see you back on the forum! Steven
-
Oh, yes! I'm duplicating the frame spacing on the original. The distance between centres is about 500mm (a bit over 1 ft 6 in). The planking is actually fairly thin in the grand scheme of things. Ten to 12 cm ( 3 to 5 inches) except on the upper works, where they are about 4 cm (about one and a half inches) thick. That translates at 1:100 scale as 1.0 to 1.2 mm (1/25 to 1/20 inch) and 0.4mm (1/60 inch). Steven
-
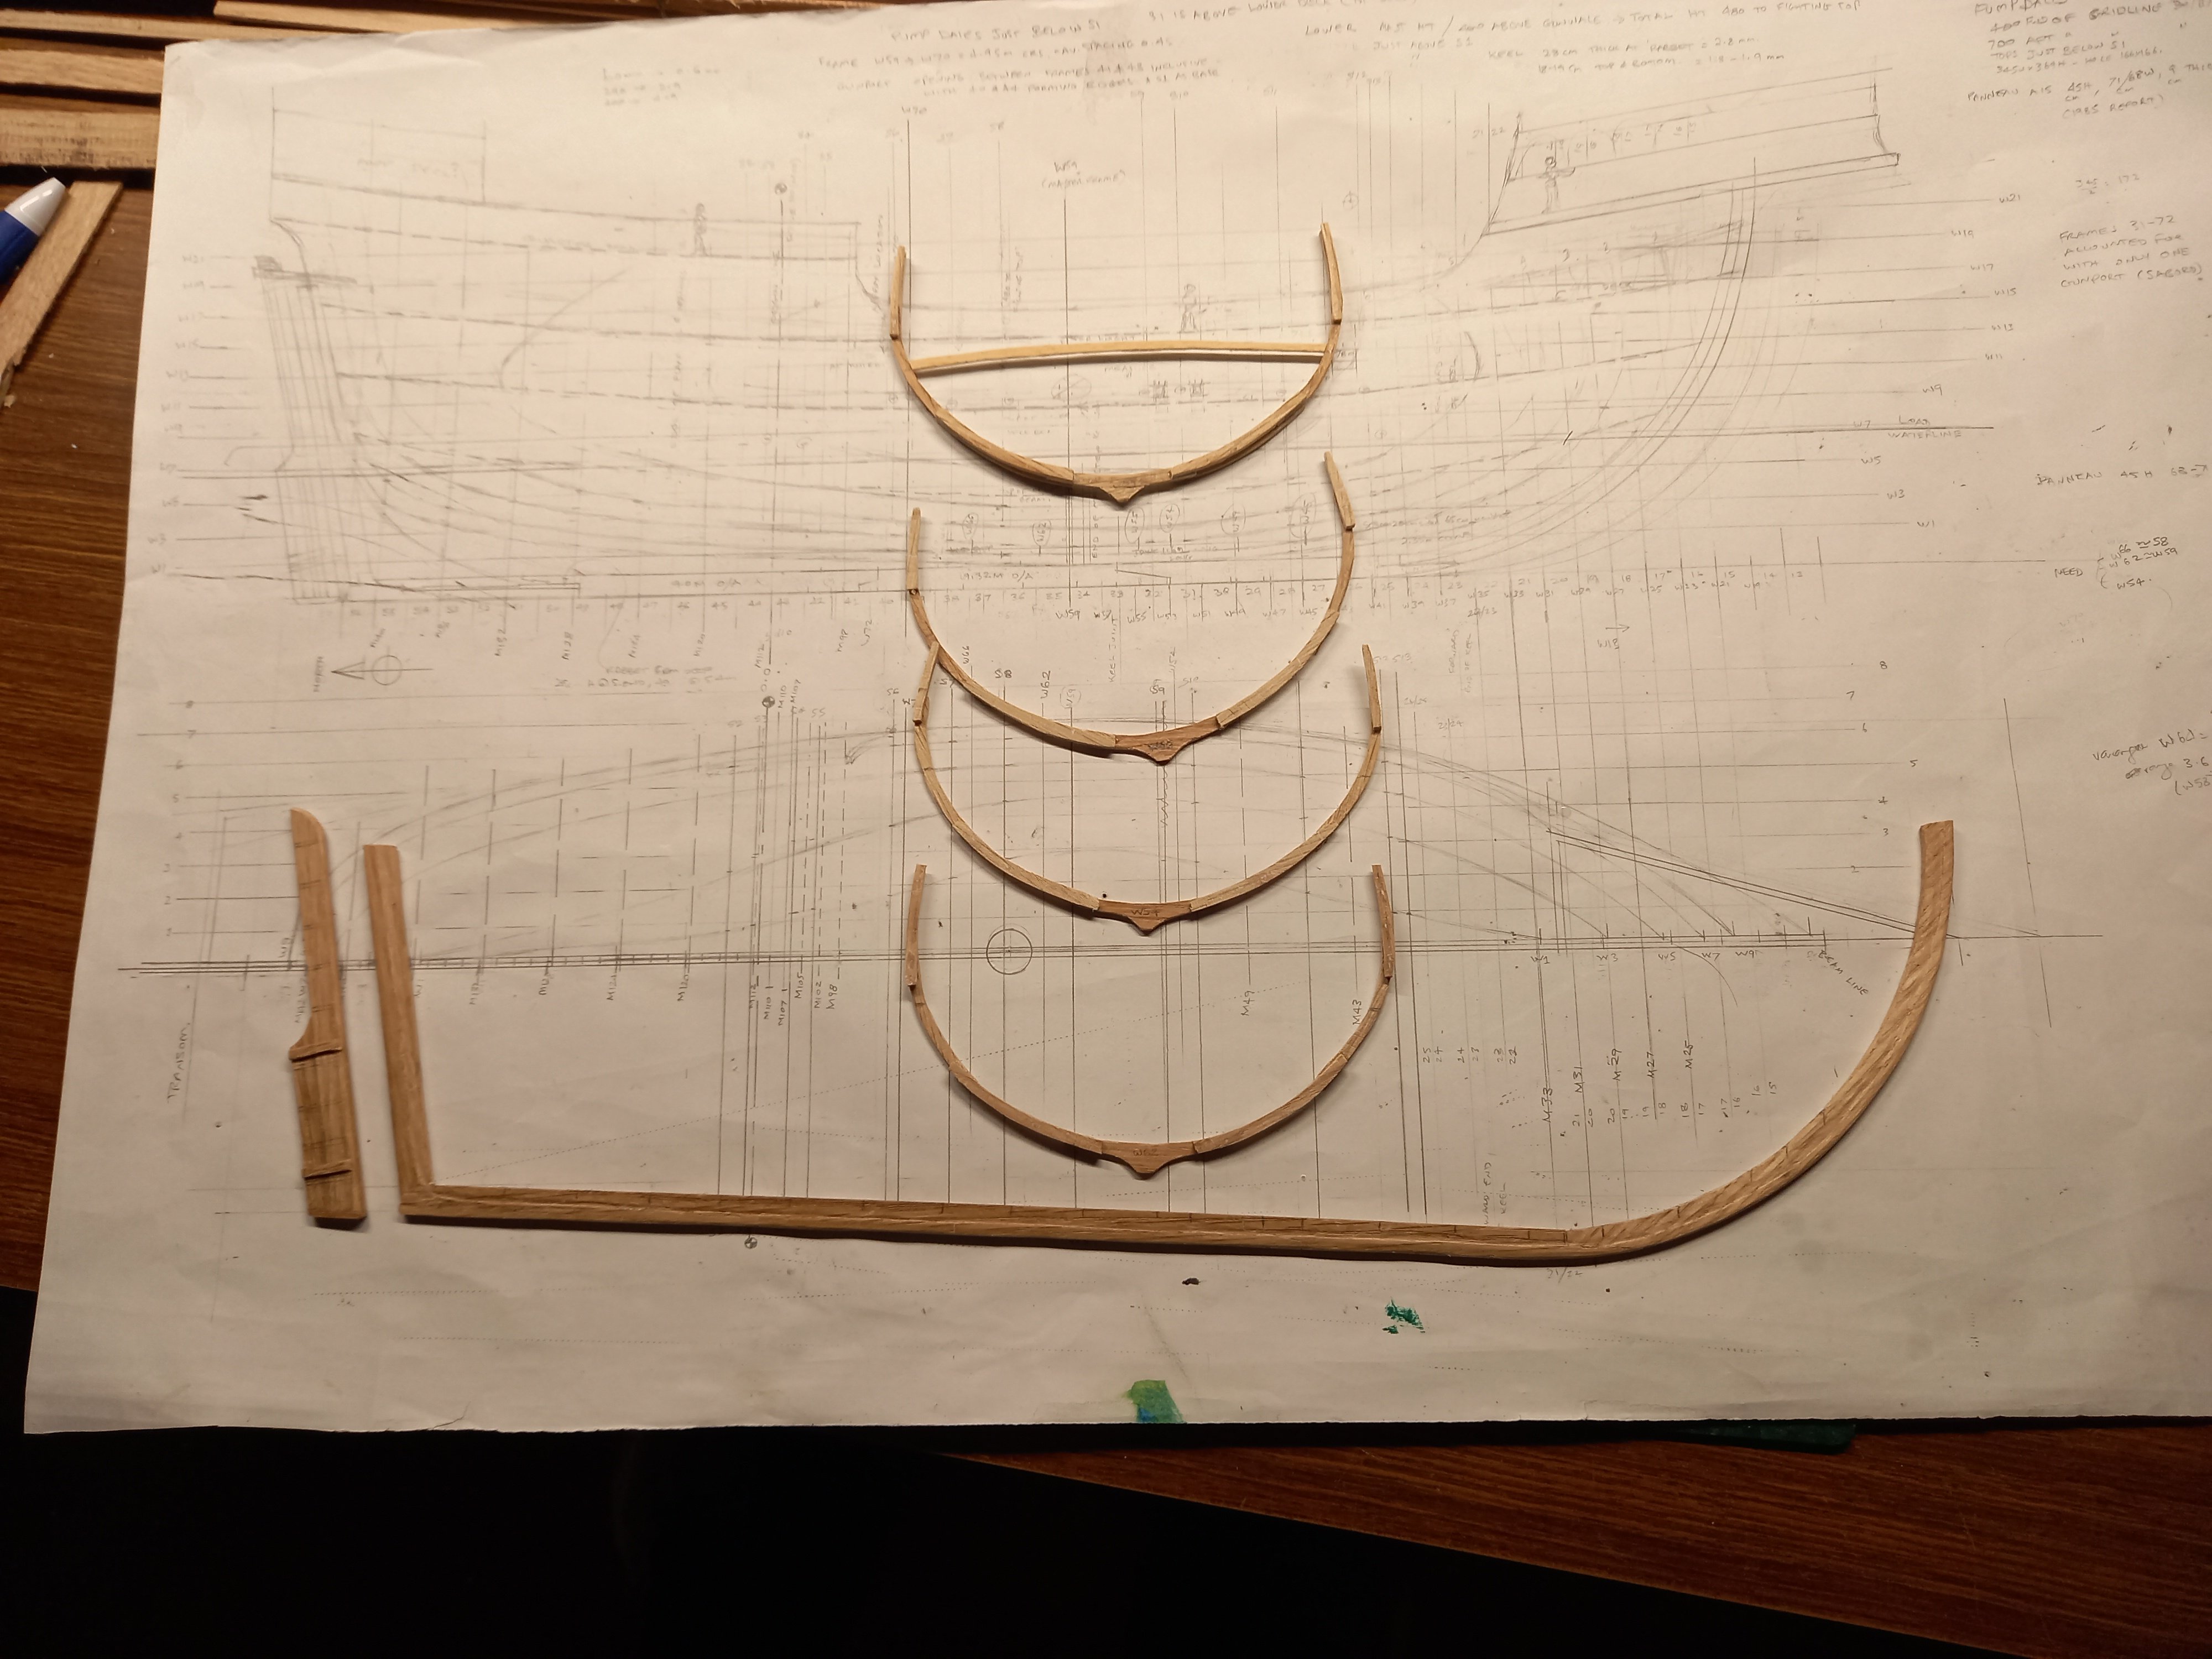
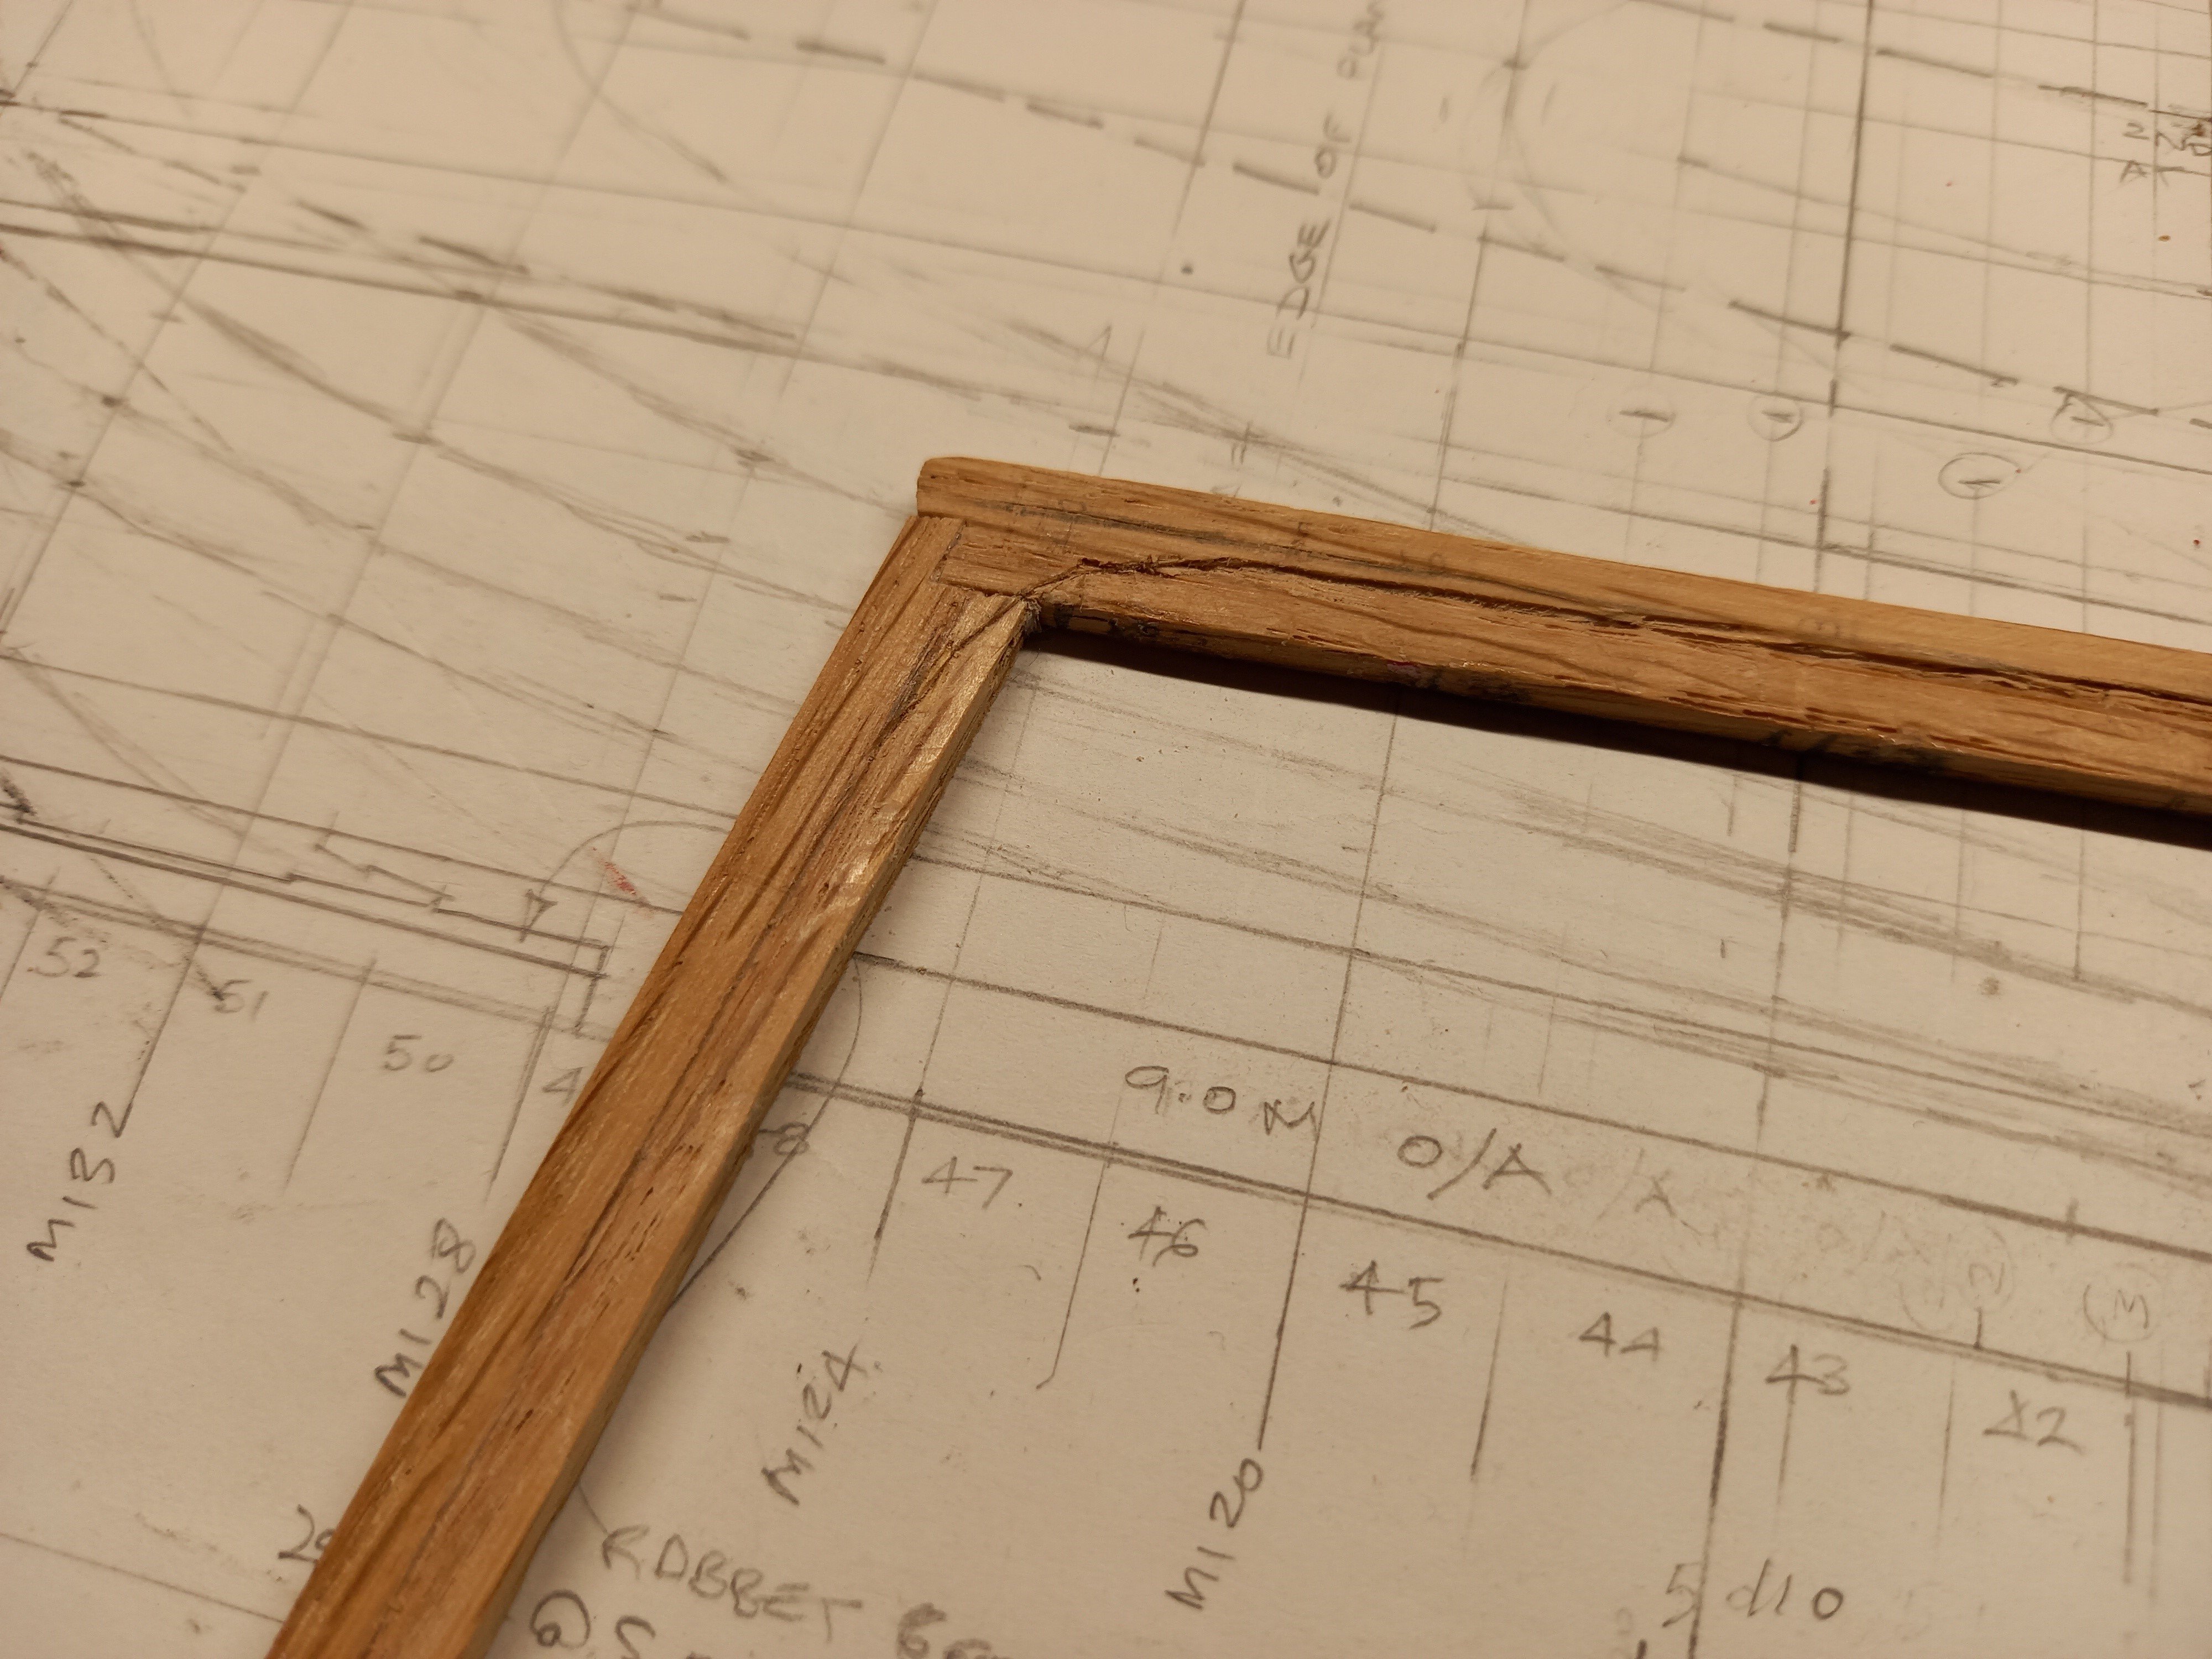
More on the Lomellina - The rabbet carved into the keel, curved at the corner where the keel joins the sternpost. Oak really isn't a terribly suitable wood for this work. And the keel with rudder and four frames. Only 84 frames to go! Because of a design conflict between the archaeological finds and the recent theoretical reconstruction, I'd thought I needed to move the lower deck downwards , but as it turned out I had the height correct in relation to the frames. But I did have to adjust the deck heights on the sheer plan, and consequently the heights of the gunport and the pump lands, the gunwale etc. All good. Steven


-
Latest update - Sutton Hoo Ships Company January Newsletter - https://mailchi.mp/saxonship/the-sutton-hoo-ships-company-17986272?fbclid=IwY2xjawIKOzhleHRuA2FlbQIxMAABHWz-OYAyJMsA7OzXjhr-CdILiPbR8rD7INDiQXeIdwaQ5P14Vd_O7y7Ybw_aem_p0ziokhDskwNc-IYwqiPow Steven
-
Very true, very true. I've often come across this in my own research, not only relating to ships. I remember a 'fact' bandied about among Anglo-Saxon re-enactors (when I was doing re-enacting) , that King Knut had decreed that all his housecarls (bodyguard) were required to have gold-hilted swords, and another that Anglo-Saxon women liked the Vikings better than their own men because they washed more often and looked after their personal grooming. I tracked these statements down and ended up finding that the source in both cases was something like 200 years after the events were supposed to have happened. Hardly eye-witness accounts. Plenty of other examples. And yes, we also have to take into account the politics involved. People alter the facts to suit their own narrative or push a political agenda. Yes, it happened back then, too. It requires great care not to be led astray, and even then we must usually hedge our conclusions around with so many qualifications that sometimes we feel that we are certain of nothing. In the long run, it's largely educated guesswork, based upon nebulous factoids that may or may not be reliable. But in the long run we have to decide something and go with that. Steven
-
Great opera. Lots of fun. I played violin in a youth orchestra for some years when I was a nipper. Too many years ago to be comfortable 😁 Steven
-
You've done a very nice job, and I'm sure you're right about the decoration on Spanish ships - perhaps it might have been even more ornate than the others! Steven
-
The heat sink would also keep the peg from getting glued to the piece you're working on. Steven
-
Nice. Better than carving by hand (which is how I've been doing it). Steven
-
I know this is a bit off-topic, but I'm curious. When you say you've "played it", you mean played an instrument in an orchestra for the opera? Steven
-
I always felt that way about Italian. Look at the way "non piu andrai" from Mozart's Marriage of Figaro is sung . . . sounds like 'non pyandrai' https://www.youtube.com/watch?v=e1-FKyOTvto And just relax and enjoy the music. Love it. Steven
-
Nice one. You might also consider an additional banner - a long triangular pendant being a simplified version with the three main "field" colours of the coat of arms; white, green and gold/yellow - so perhaps green and gold together as two halves of a square by the flagpole, and a long white triangle as the 'fly'. That seems to have been a 'thing' with these flags. Steven
-
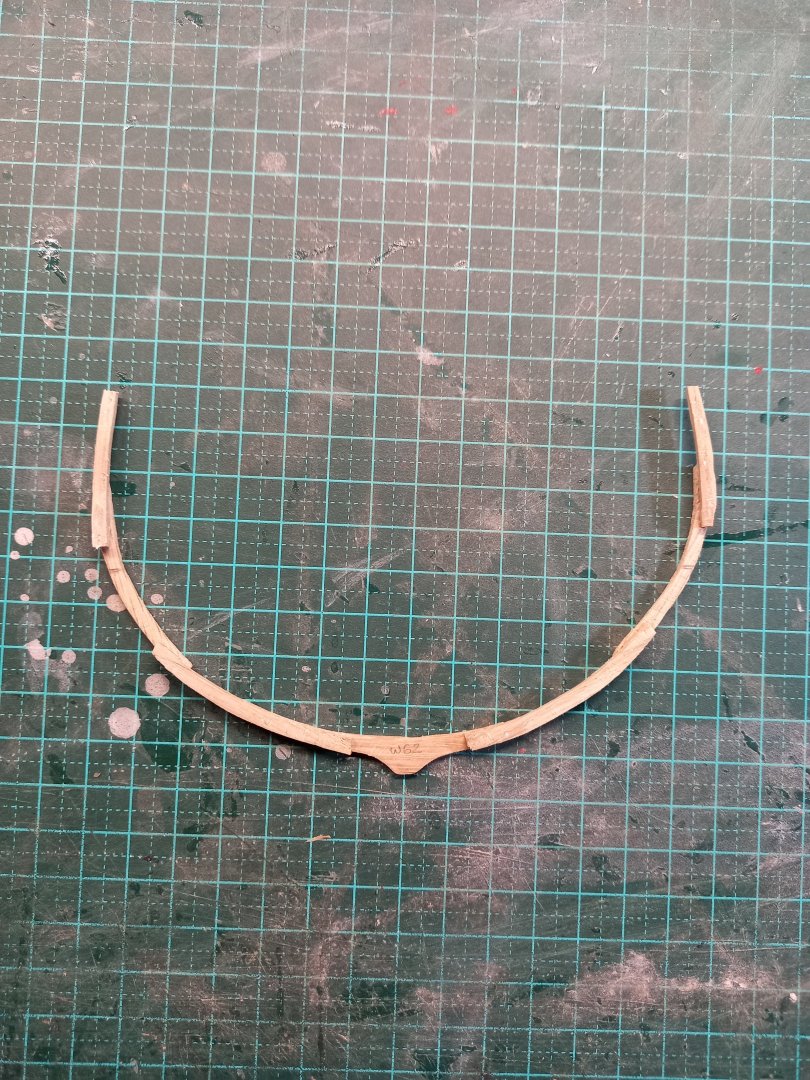
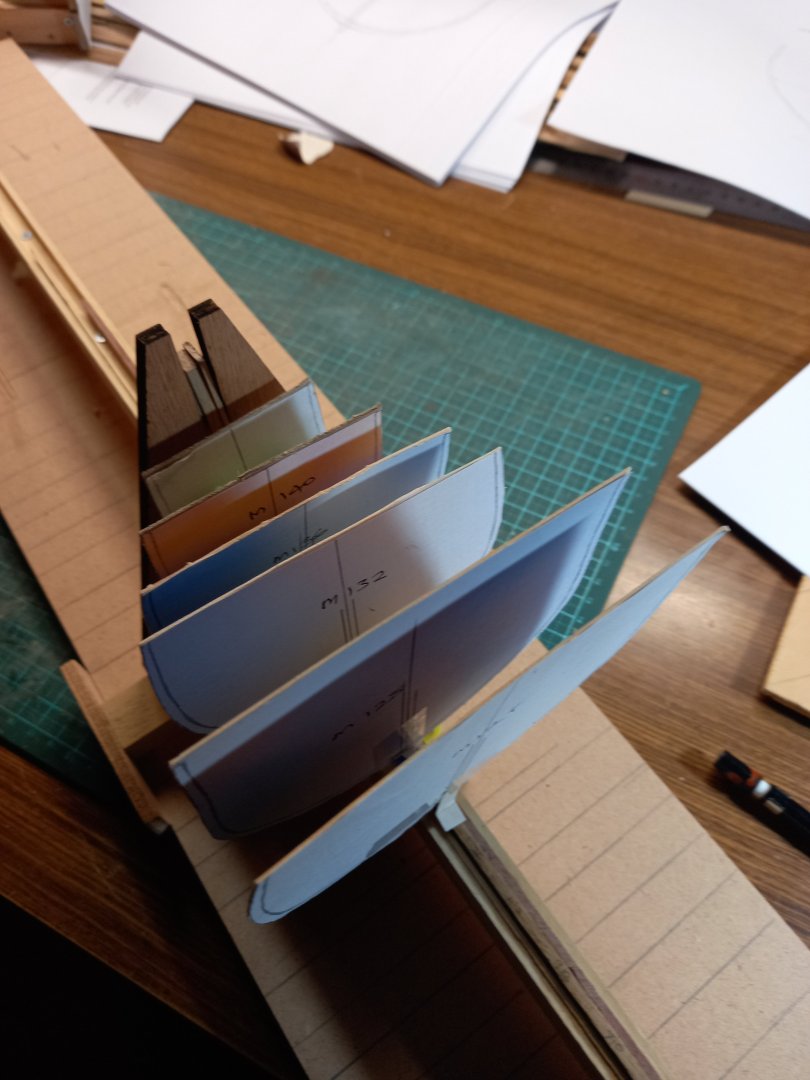
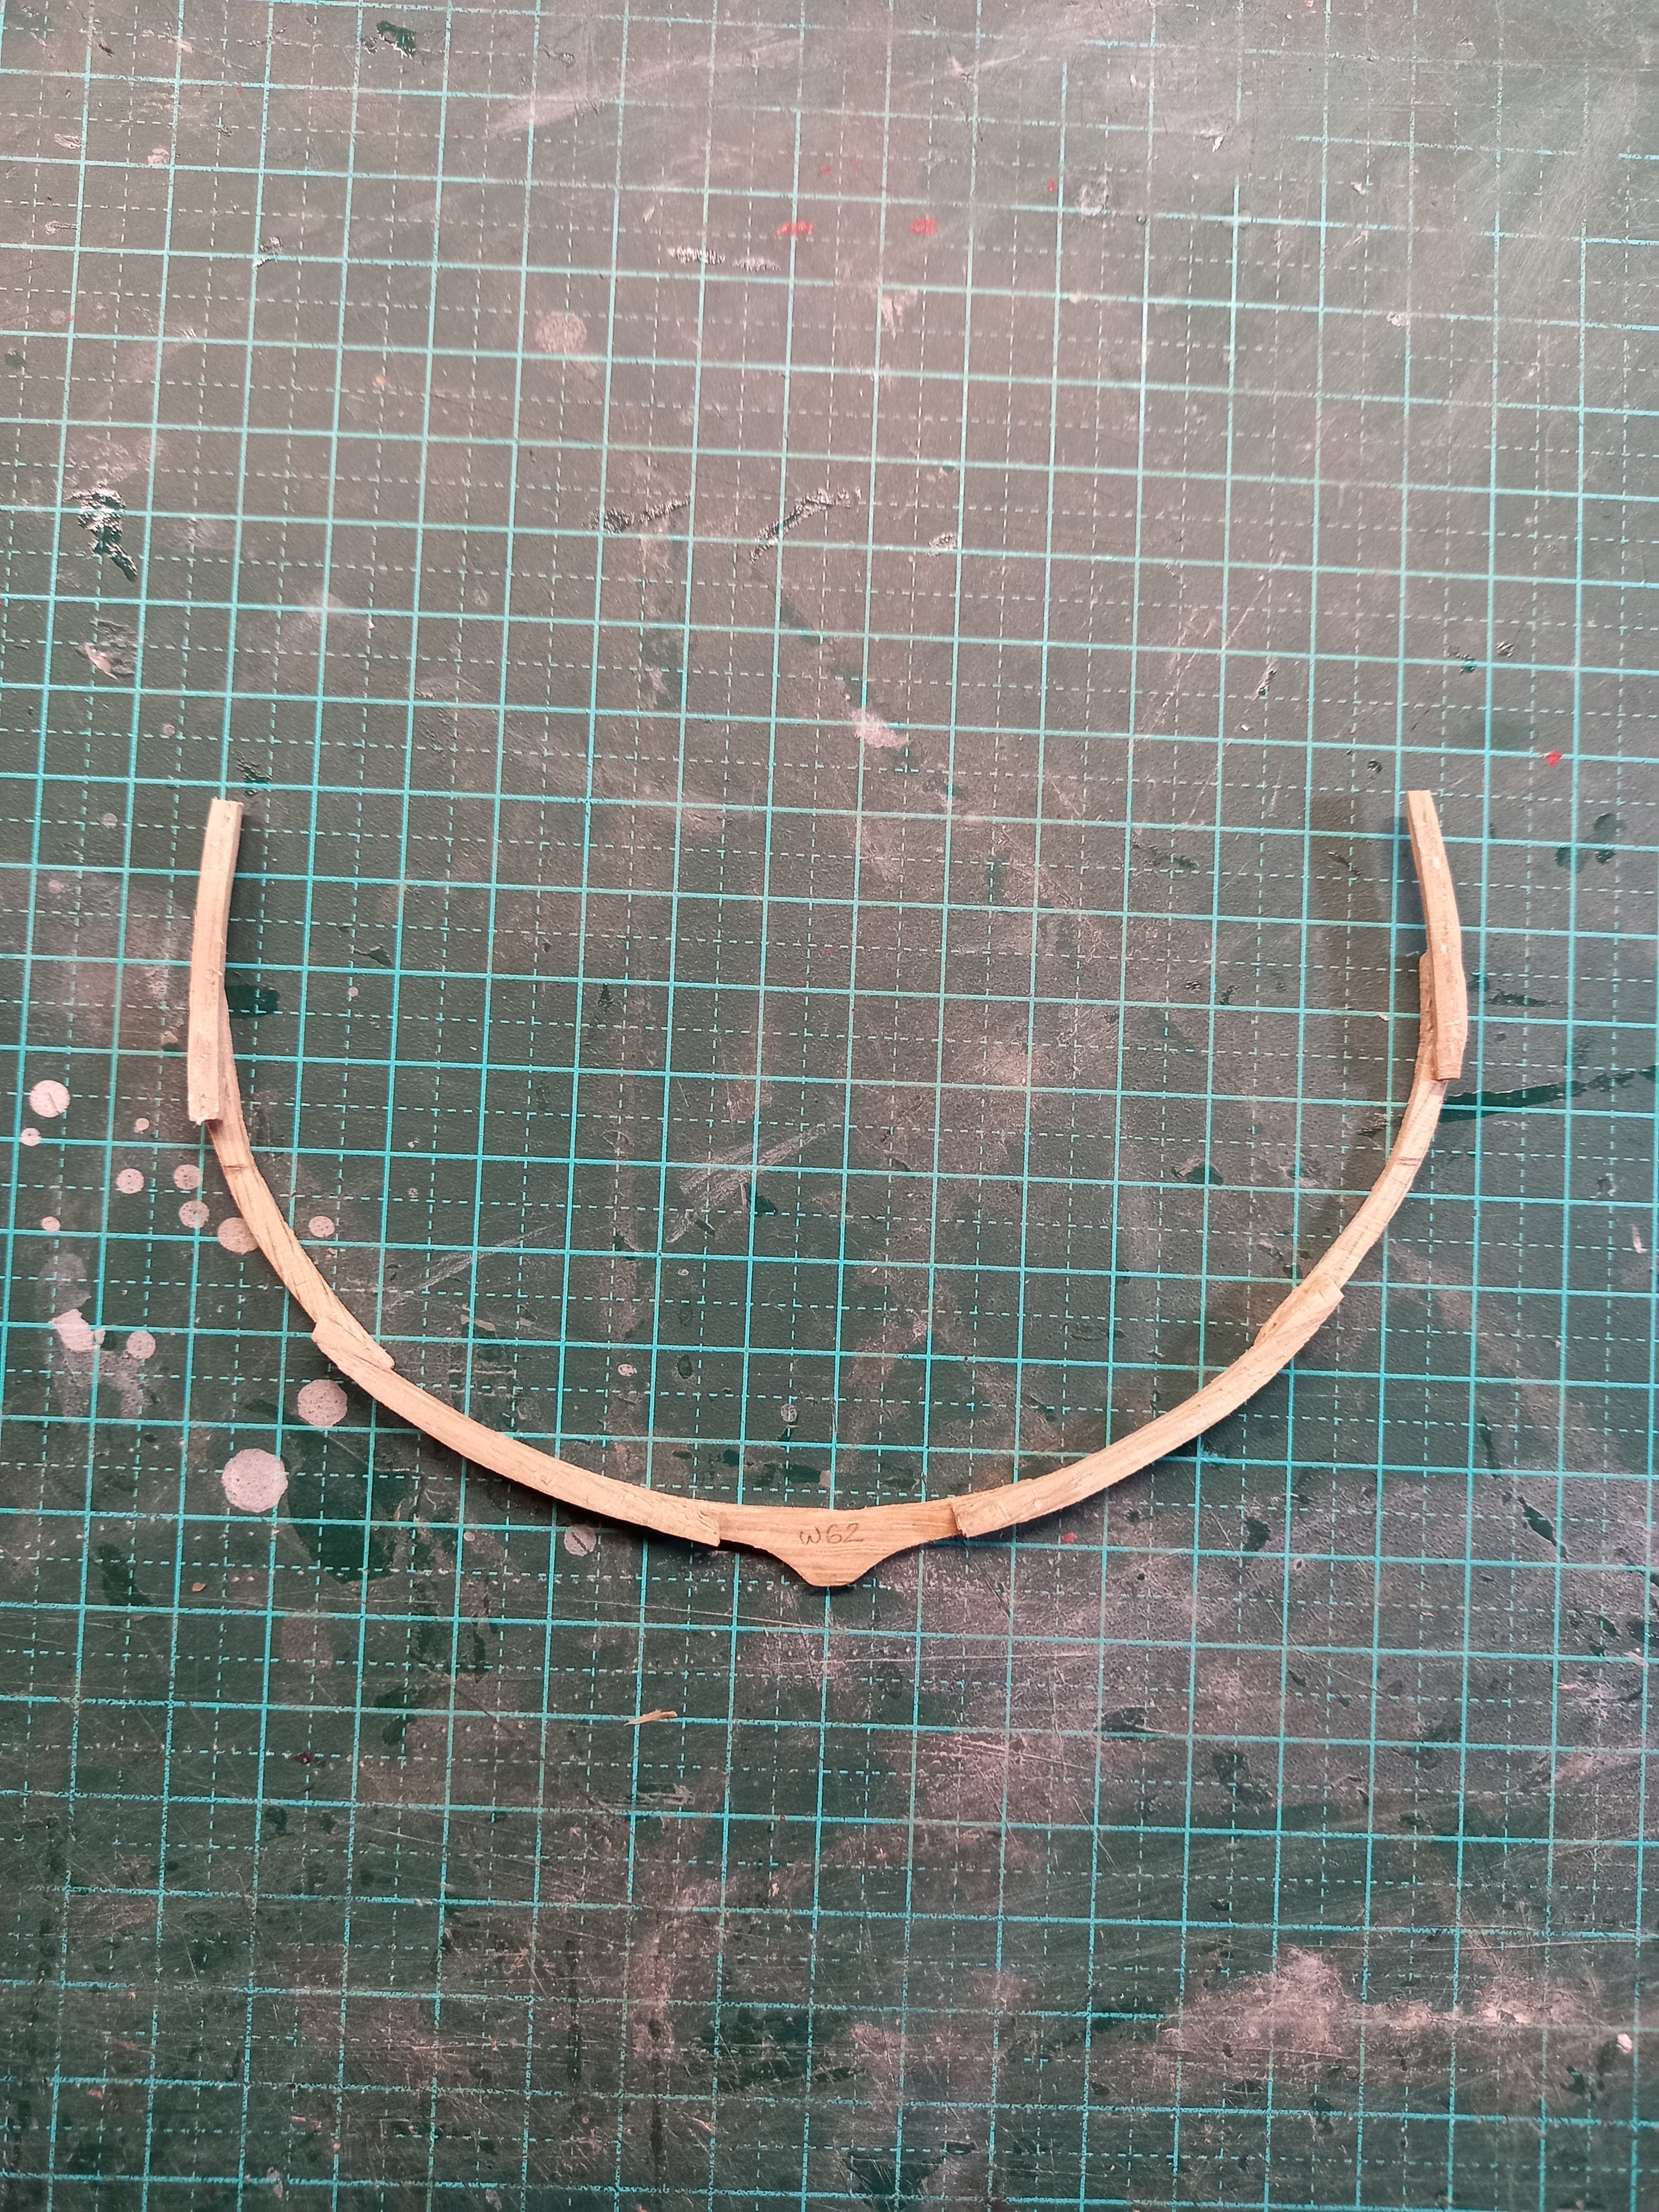
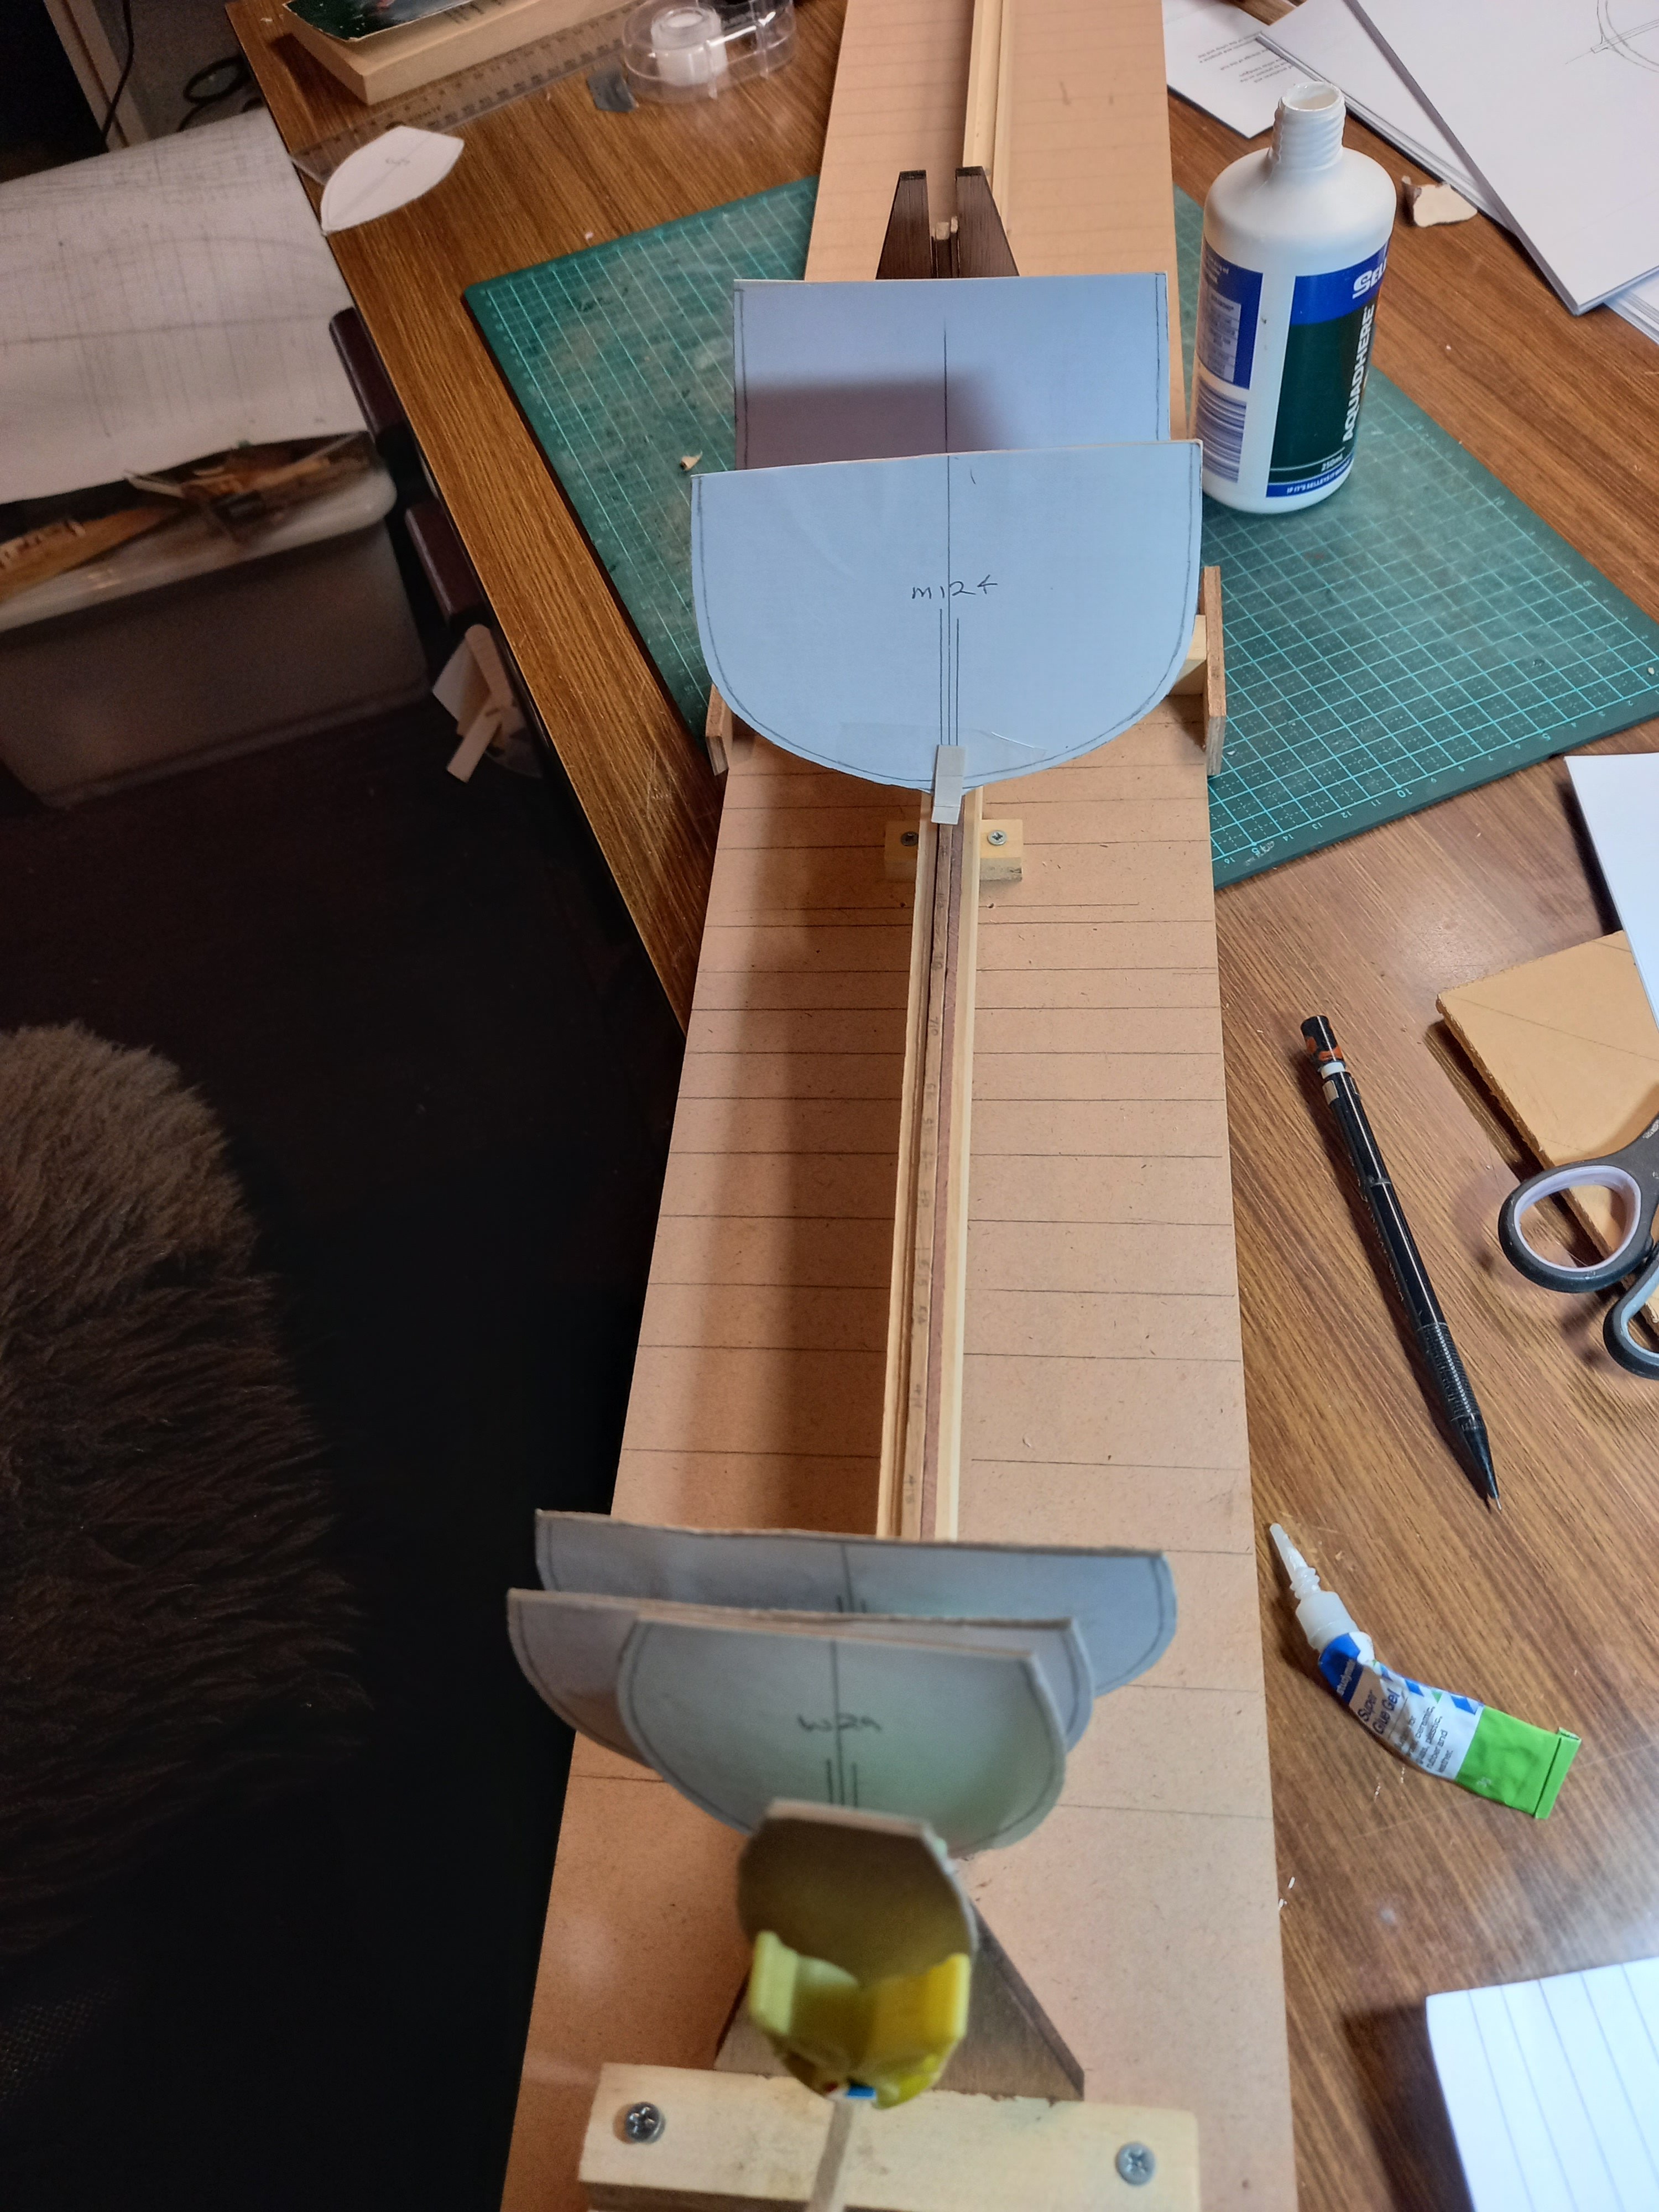
Made another frame. They don't take as long to do as I'd feared. I've been concerned about the shapes of the frames at the bow and stern. Because the model is based on a wreck which is very far from complete I'd had to generate its lines from the remnants and from the lines of other ships of the same general time-frame (notably the Mary Rose, God bless 'er), and then use those lines to work out the shapes of the frames, and all this the first time I'd ever tried it, there was a fair bit of uncertainty. What if I've got the shapes wrong? Do all that work making them, waste all that wood - only to find they're wrong? So I cut out their shapes from card and put them (very!) roughly in place on the keel. They seem to work, so I feel better about going ahead with them when the time comes. Steven