


GuntherMT
-
Posts
2,213 -
Joined
-
Last visited
Content Type
Profiles
Forums
Gallery
Events
Posts posted by GuntherMT
-
-
Jeff, both of my models so far have had a false deck, but for pretty much all my planking (both hull and deck) I just used regular wood glue and held the planks in place by hand for 60 seconds or so until they would stay on their own.
The trick (for me anyway) is to put a very thin coat of glue on the back of the plank, then let that tack up slightly while I'm applying the glue to the surface the plank will bond to. Then put the plank on and apply firm pressure, and it grabs almost like fast CA, although without the permanence, in that I could pull it off and relocate it if I didn't wait too long.
Not sure that will work for you on your bulkheads, but that's the system I used for my first planking of the hull, everywhere except where the most extreme bends were, and for every single plank on the deck.
-
I used a method somewhat similar to that link, except without the fancy tools.

What I did was leave the ropes from the blocks long, then I would hold the long end of the rope between my fingers so that I could 'twist' it. While doing that, I used a paint-brush and 'painted' the rope into position with 50/50 white glue/water mixture. It's sort of hard to explain, but once I got the trick of it down, I was able to complete my coils pretty quickly and with a minimum of fuss. After the coils are complete and trimmed, they can easily be moved around for final positioning in the wet glue/water mixture on the deck, and then shaped if needed. Then dab with a soft cloth to remove excess glue, and let dry.
You would obviously want to do a test run or three on a sample deck section to make sure that it would not look bad on whatever decking you have. On my holly deck, there is no sign of the glue/water mixture around the ropes, even though it was wet all around the coils.
-
Here they are completely dried overnight and the test looks successful. I now for the rest I will add starch to the water to work as a binder to hopefully hold the coils together and maintain the natural color of the rope. CA will darken the rope considerably. If someone else has a suggestion for a binder please share with me.
I also coiled mine in place on the deck, but instead of using water, I used a 50/50 water/white glue (Elmers school glue!) mix. Once it dried, it's also glued and stiffened. It does slightly darken the rope, but it's very minimal, and I used a paint brush to 'paint' the same mixture on the rest of the tackle to keep it from loosening over time, so there is no variation in the line color visible.
After completing the coils, I just dabbed the extra glue/water mix with a soft cloth and tweezers, and you can't see any sign of the mixture on the deck, it doesn't discolor it at all, or show any sort of 'lines' like CA would (the deck was coated with Minwax Wipe on Poly first).
-
I've got some 5 minute epoxy Frank, but I hate using it because it smells awful and the odor permeates the entire house even if I'm only mixing up a tiny bit. I may give it a shot anyway if I have problems though. Thanks for the suggestion.
Also, I've been making jigs all along for various bits and pieces, although mostly just wood stuff up to this point.
- Canute, zoly99sask, JesseLee and 1 other
-
 4
4
-
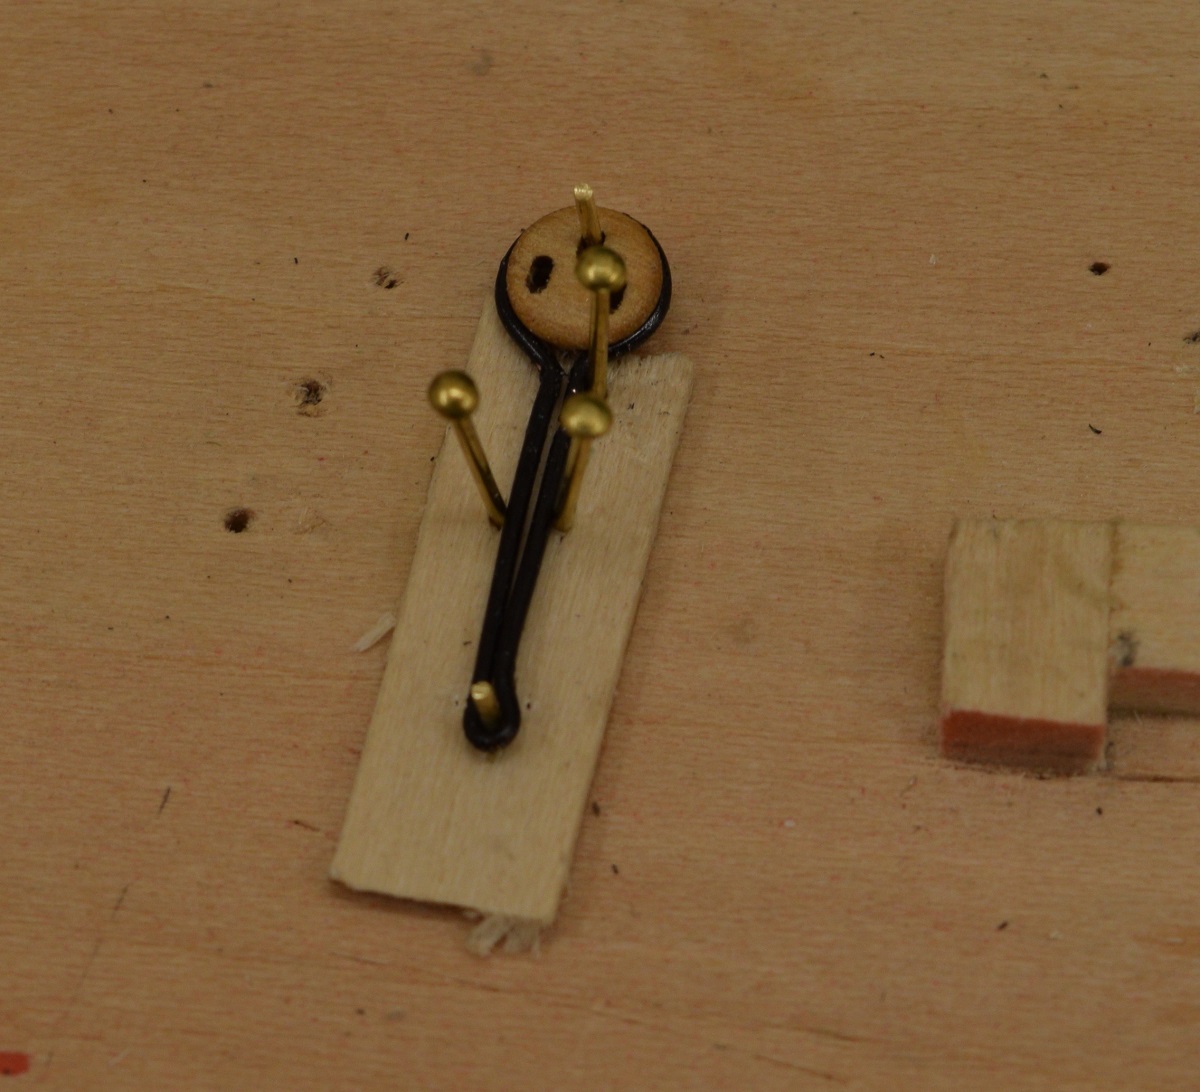
So I'm learning that I really dislike working with the metal bits. I'm not really equipped yet to do soldering on very fine parts yet (need one of those pinnable soldering mats of some kind), so I went with black coated copper wire to make the chain plates.
I made a simple jig after getting the length figured out on a very rough not-pretty hand made piece.
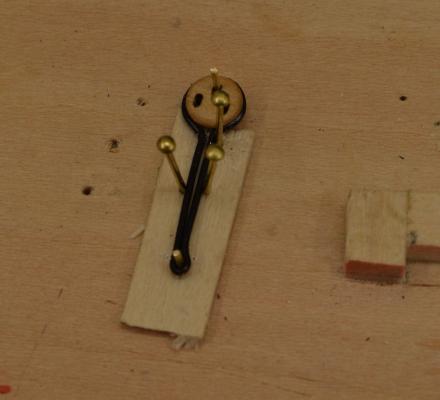
I test fit the first one and it was fairly decent, so I made all 4 for one side.

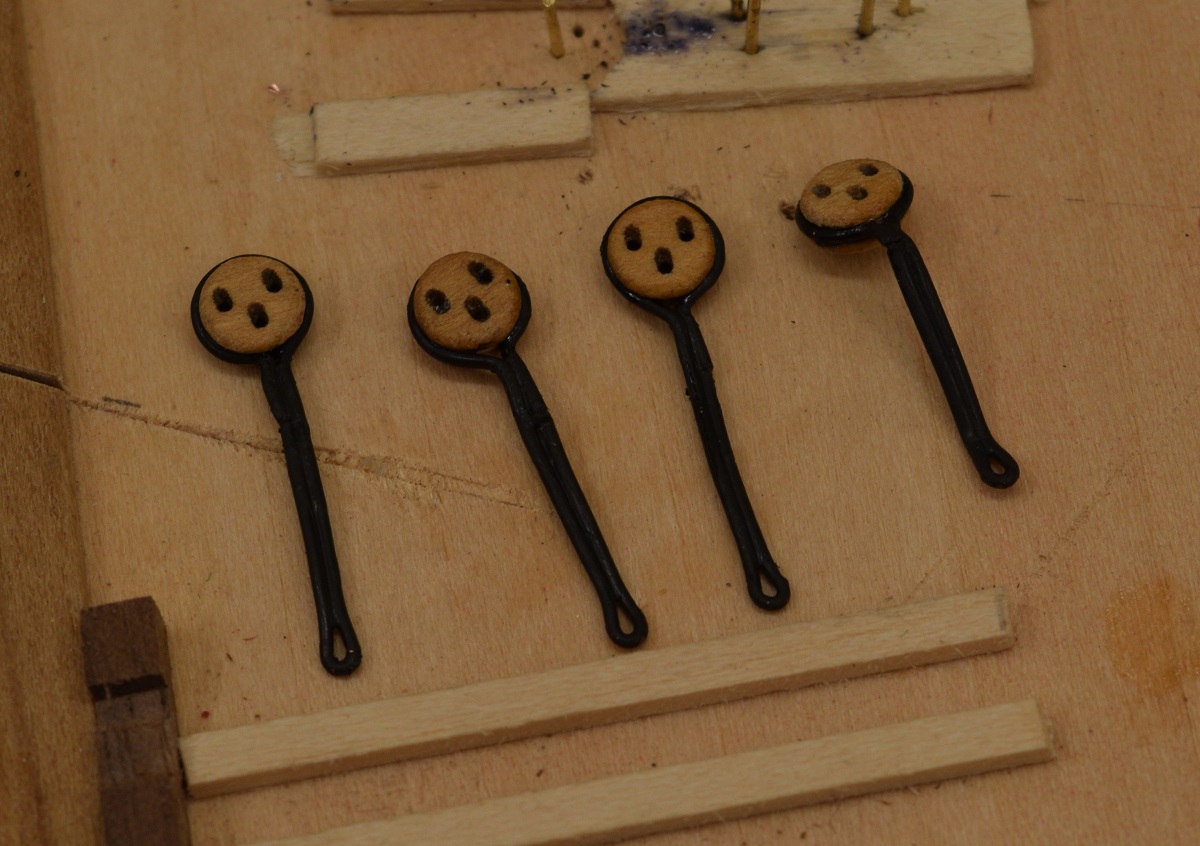
Then I bent them to fit the ship and.. I managed to flip the dead-eye in the jig on all but the first one, making them too long. I'll remake all 4 after adjusting the jig slightly and adding side pieces so that it's not possible to flip the dead-eye the wrong way.
My system for these is quite simple, I'm making the joint where the cap of the channel will cover it, so the fact that it's not perfectly mated and soldered doesn't matter, and just joining the thing together with CA glue. This seems like it is going to work just fine, but I'll end up having to re-glue them all to keep them aligned after bending them to fit, as the brittle glue joint between the two sides tends to fail when I'm bending them into the channels.
They'll also be painted matte black so they aren't shiny. If it doesn't work out, then I'll revert to doing something in brass, but I'm hoping this will work, as they seem to look just fine and once they are fixed in place with the nail/glue at the bottom and the channel cap at the top, they shouldn't be moving enough to be a problem.
- BareHook, Dimitris71, gerty and 18 others
-
21
-
-
-
-
Thanks for all the likes. Thanks for stopping by Bob, are you ever going to finish the Carmen?
Alistair, good to see you drop in! I've referenced your photo's several times during this build, but I had completely forgotten about your straps, I'll have to consider that, it's a nice detail. I considered leaving the post on the channels off for now, but ultimately, I decided that trying to get the paint off the hull for a clean fit and then re-painting while the shrouds were on would be quite difficult and possibly make a huge mess, so I decided to go with the plan location in relation to the shrouds. I guess I'll find out down the road if that one bites me. I don't plan to actually fit the swivel guns until near the very end of the build so that I'm not breaking them off constantly (I know I would).
- Canute, thomaslambo and GLakie
-
3
-
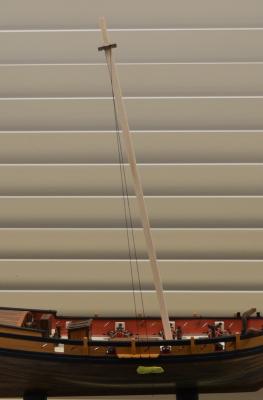
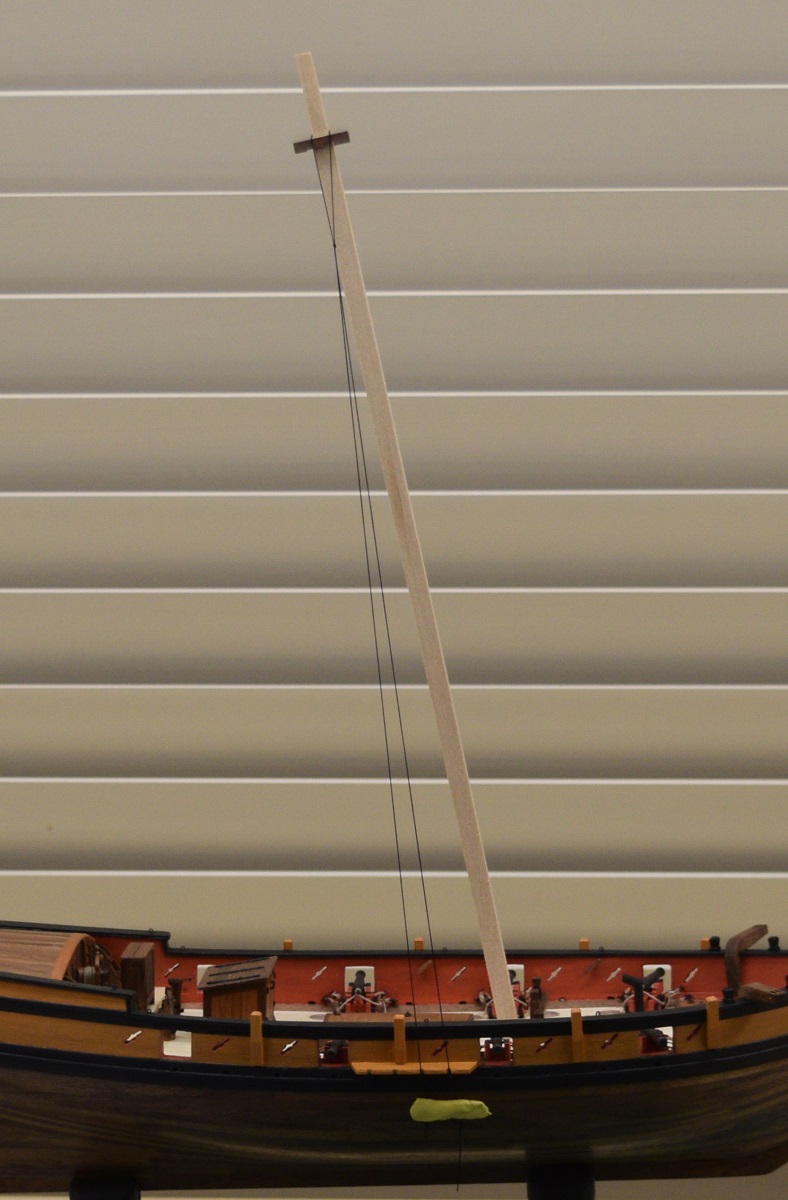
In order to get the angle for the chain-plates right, I cut a piece of basswood to the proper length for the main mast, then cut the bottom to fit at the correct angle, and built a step into the top at the height of the cross-trees. Using this false-mast, I could run rope around the mast to get the angle correct (hopefully!).
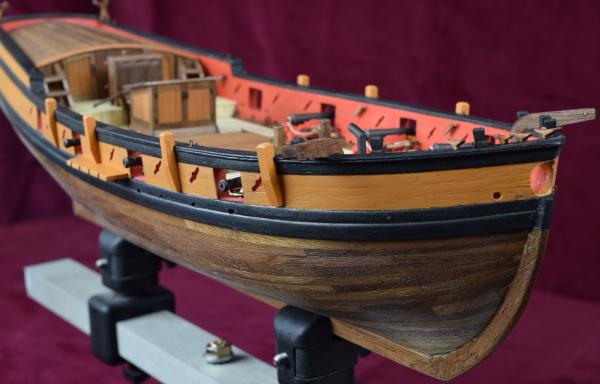
Yesterday, I spent a large chunk of the day doing touch-up painting, getting an extra coat of paint on all the new stuff I've added, so that I can put some poly on it after it's all dried. I then made bowsprit mark II.
For the re-made bowsprit, I started with 3/8" square boxwood from Crown Timberyard, and first shaped it to a slightly oversized octagon using a lovely little jig that Frank loaned me on Saturday. Once I had that done, I shaped the base of the bowsprit, cheating heavily by using the mill, and then using the lathe, turned the round portion down to size at half-inch intervals, and then used 220 grit sandpaper, still in the lathe, to finish it to a smooth taper. I then used the cut-off tool to cut off the tip, which I then sanded to shape by hand. Finally, I cut off the larger square piece where it was chucked into the lathe, and completed shaping the base to the correct angle to sit on the fore-deck.
Much happier with the improved mark II version. It's sort of hard to see in the photo's, but the edges of the octagon are much sharper, it's much more uniform, and the square foot is much sharper and better shaped in general. It's a very tight fit through the bow. In the photo's the original bowsprit I made from the kit basswood is the lighter one on top.


Edit: Fixed dimension of the wood stock.
-
-
-
This may be a dumb idea, and I don't know that anyone has ever done it (I certainly haven't), but I was working with some piano wire the other day, and it comes in very small sizes, yet it is extremely stiff and hard - could you possibly use piano wire, either just glued to the bottom of the stay (painted black the small size would make it almost invisible) or actually inserted into the stay to stiffen it?
If you try it, just be aware, piano wire is ridiculously hard, don't try to use any cutters that you value on it, as it will just dent the edges. The wire pretty much has to be cut with a saw or cut-off wheel, even in silly small sizes.
-
-
Ship update!
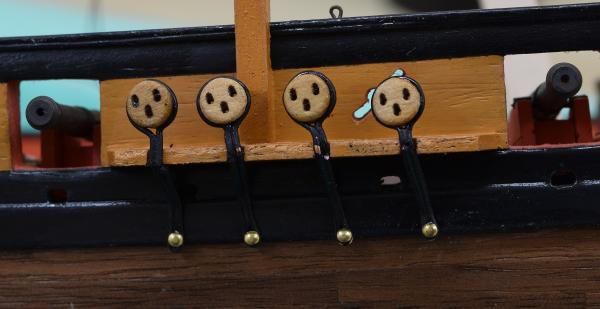
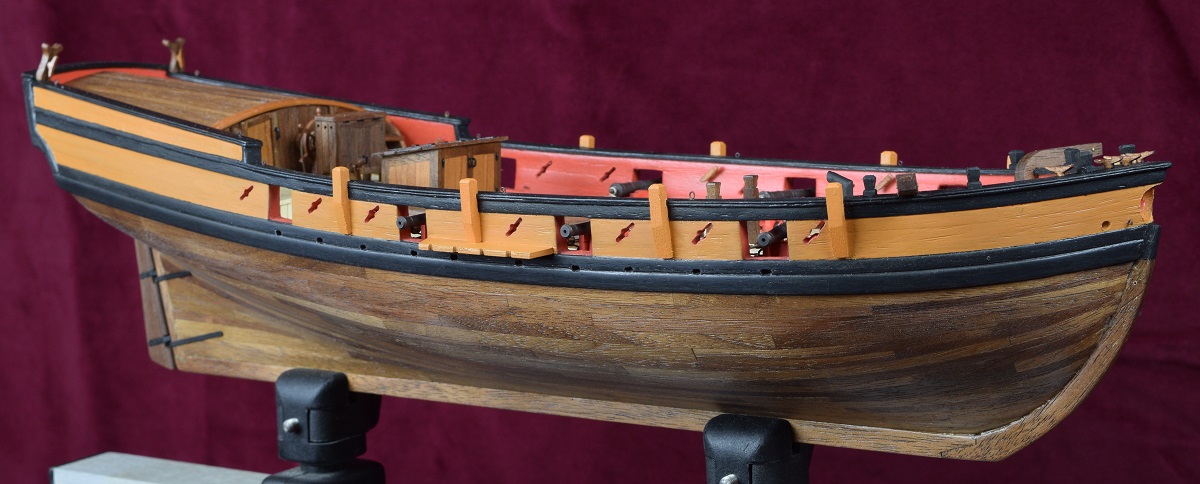
After redoing the workshop, I got back to the final deck details prior to starting to work my way forward and upward!
I completed the timberheads, swivel gun support posts, and the channels in preparation to begin the chain-plate fabrication next.


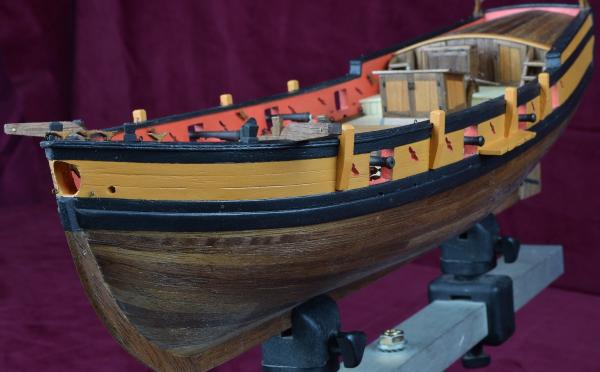
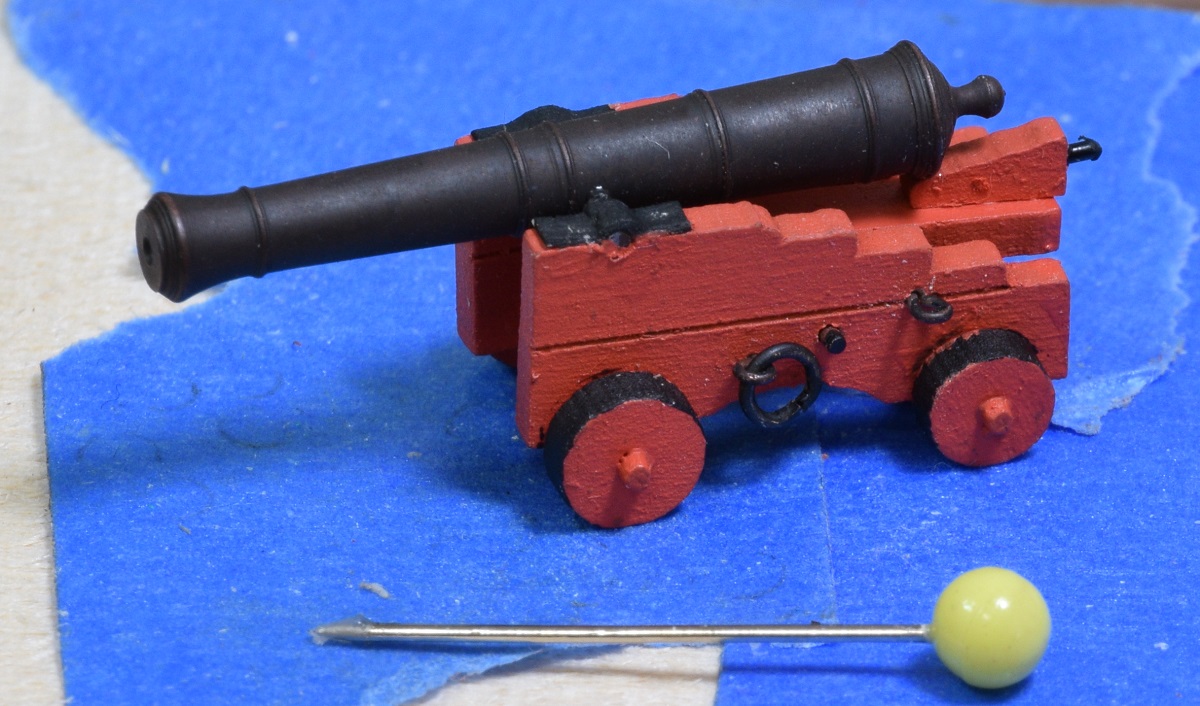
I think I'll make a dummy mast so that I can attach rope to get the angle on the chain-plates correct, and then make some sort of a jig (I've got some ideas from other build logs here) for positioning the upper dead-eyes later. I've decided to replace the kit dead-eyes with Syren ones, and I've got them assembled but not sanded yet. Also, after messing around again with the kit brittania cast swivel guns, decided to throw them out, and ordered brass swivel guns which I'll need to fabricate a yoke and handles for.
- Mahuna, GLakie, Dimitris71 and 20 others
-
23
-
I tested toothpicks for nails in my decking, and when applying clear satin wipe-on poly they got much darker. You can just make a quick test off the ship to see what they'll look like before investing too much time on the ship itself to make sure you'll be happy with the results.
-
Some good work, but a bit of critique on the end result - In the other ships where I've seen the crowsfoot, the stay which they are connected to is not pulled out of alignment by the crowsfoot. I think you need to relax the tension in the crowsfoot and tighten the stay to prevent the stay being bent out of alignment by the crowsfoot which should not be holding the load which the stay is designed to be doing.
-
Hi Keith!
Bob's AVS is not technically out of production, but he won't manufacture a kit unless he has a lot of 8 orders and business has been slow.
Actually I believe he most recently said he can do batches of 4, but I could be mistaken about that. Regardless, he does have one in stock and needs 'hard' orders for at least 4 before starting the next batch.
-
Thanks, that site might be useful if I want replacement parts; I'm assuming that you have ordered from them, but are they trustworthy? and do you have any idea what the international shipping rates might be like?
No, I've never dealt with them, I just did a Google search for images of chainplates & deadeyes, and that page worked quite nicely to show multiple types.
-
Click this link, and scroll down a bit past those single-hole things at the top and you'll see quite a few different types of chainplates used in kits. These are all from Amati.
-
Next was the clump blocks. The manual said to use the wire for this but I didn't like the way it looked so I instead used brown thread:
To attach the thread I just twisted it around the pin and the block and carefully applied a small amount of super glue to the back, then trimmed the extra thread.
The manual never specified how they should be attached to the hull so I used the brass nails.
To add to your lexicon of ship stuff - the round blocks with the 3 holes are called "Dead eyes", and the wire (or rope) that connects them to the hull are the "Chain Plates". In some models they are wire, in some they are actual chain, and in some they are iron (usually brass in the models) bands.
Your rope solution looks quite good actually, and connecting them with the brass nails is a very common way of attaching them. Nicely done.
-
I thought it looked way too nice to be basswood!
-
Looking great. What wood are you using for the lower hull?
-
Simply stunning work Keith, thank you for sharing.


Fair American 1778 by jdbradford - Model Shipways - scale 1:48 - 14-gun Privateer
in - Kit build logs for subjects built from 1751 - 1800
Posted
You could also try using the pin collar clamp things that I got from MicroMark - http://www.micromark.com/pin-collar-set,9549.html
They should work right up to the next to last plank. I haven't yet found them anywhere else, but they are quite useful in my opinion.