


GuntherMT
-
Posts
2,213 -
Joined
-
Last visited
Content Type
Profiles
Forums
Gallery
Events
Posts posted by GuntherMT
-
-
Hello MaryO,
Actually bought this kit on sale a while back and have it on the shelf to do one of these days, so it's good to see one being built so I can follow along and see what is in store for me! Looks to be a nice little kit, and quite a bit different construction technique to anything I've done so far.
-
Very nice looking little boat you've made there. Look forward to the next one!
-
-
Hi Hekk!
Sorry I missed this log earlier, work has been crazy for the last few weeks, and only getting crazier for the next few weeks I think.
In any case, I really like following the small kit builds, I think they are pretty cool. I'm working on a MidWest canoe myself (link in my signature). To search for these small kits, you can try using the keyword "SMALL" in the search and you'll find quite a few of them, but unfortunately not everyone titles their builds properly for that to work.
Look forward to seeing you finish this one!
-
Just chiming in to say that while Micro-Mark does seem a bit overpriced on some things, they are just a 'store', and they carry a lot of things that are difficult to find elsewhere, and as long as you do your own research on what to source from them, they are a good place to get quite a number of things.
I'd never buy any of their power tools though, because they are more expensive than the same tool elsewhere.
-
Ammonia breaks down the fibers inside of the wood which does allow it to bend easier, but those fibers never return to original condition when dry, so the wood quality is degraded.
I've never had a problem using just heat, or for extreme bends heat and soaking in distilled water to bend planks. Don't want to deal with the fumes of ammonia even if it wasn't harmful to the wood.
-
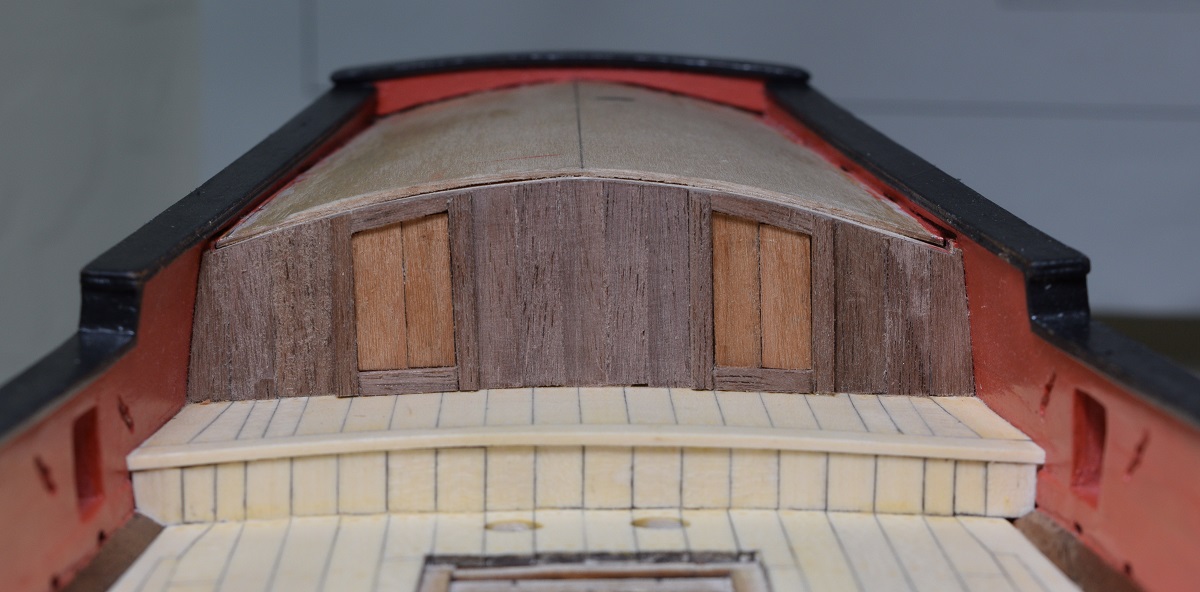
Few more details added as I continue to put off cutting the tapered planks for the poop deck.
Added the bottom molding and the door handles and hinges for the quarterdeck wall.
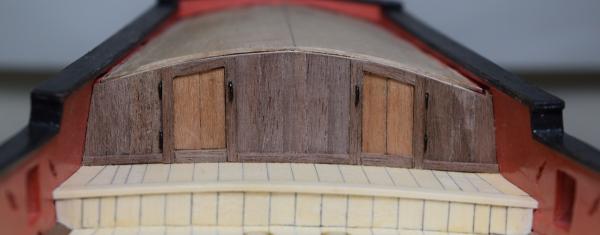
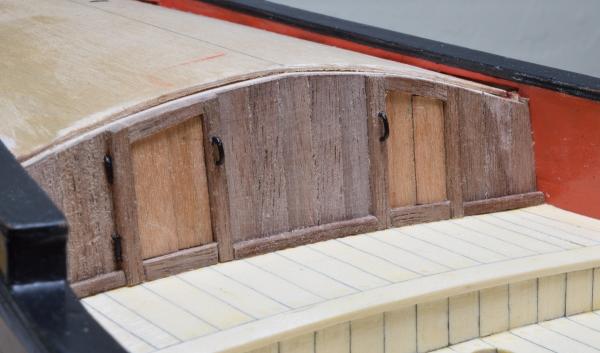
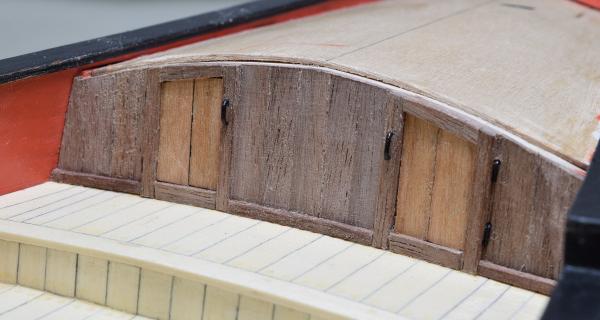
It's amazing how terrible the unfinished wood can look in macro photographs.
-
Thanks for the likes everyone.
Gunther,
What an excellent model. I built this a couple of years ago and painted the hull to look like red, stretched, canvas. I do agree that making those gunnels was a challenge.
Do you know where I could find these canoe kits? They seem so hard to find, I am contemplating making some new kits myself.
Cheers,
Rick
Hi Rick, I answered previously in post #8, with links to three different sources. See all the links there.
-
-
And so it continues. I was working from home today, as work is sort of a mess right now, but the nice thing about working from home is that I can pretty much keep my own schedule, and I can go do a bit on the boat, and then go work while I'm waiting for something to dry for the next step. Working like that is sort of a pain, but it does allow me to make slow progress even when I don't have time to sit down and plank the poop-deck of the AVS.
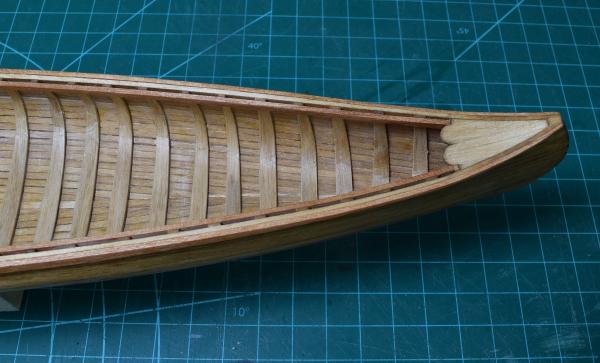
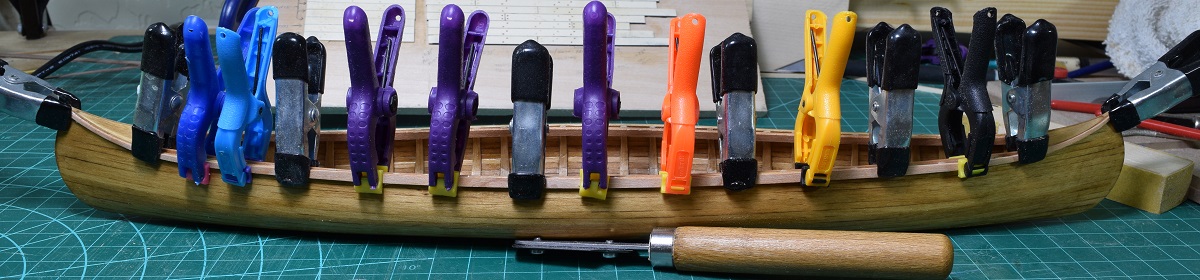
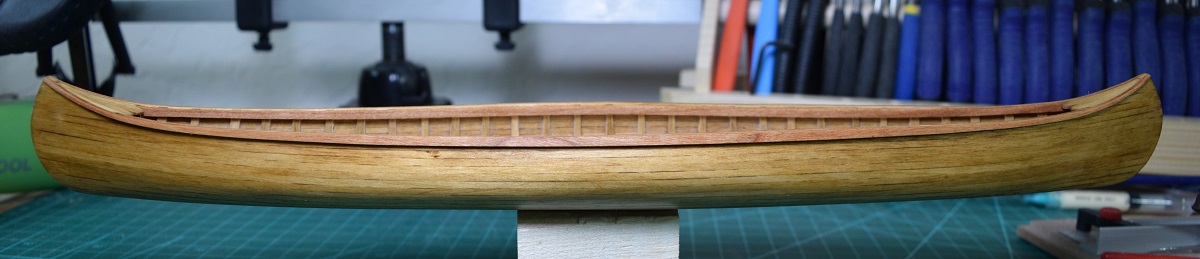
After cleaning up the ribs a bit, the next items on the agenda are the in-wale and gun-wale. These are made with cherry strips in the kit. The in-wale is pretty straight forward, trim the strip to length and glue it along the top of the ribs between the two end decks. No particular issues other than accidentally cutting one a bit too short and having to insert a shim. Oops. Only 1 spare strip of cherry, so I didn't use it since the gun-wales would be the real challenge (this turned out to be the right decision).
Here the in-wales are both placed and glued up. I went back to the white PVA glue for this.
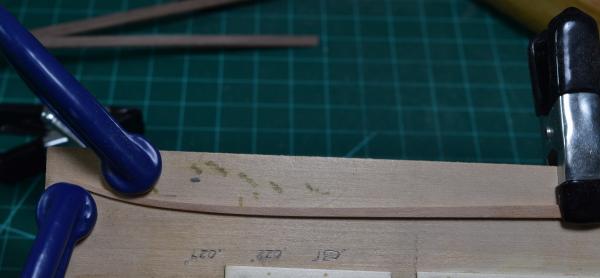
The next step was the gun-wales, which turned out to be what is likely the most challenging part of this kit for a new modeler, as it certainly was for me. The cherry strips are 1/8" x 1/16", and they need to be tapered for the final 3-1/2" of the ends of the gun-wale to a 1/32" square. So they need to taper in both dimensions, to an extremely fine point, and then they have to be bent to fit the curve of the deck! Cherry isn't nearly as flexible as basswood.
The instructions say to soak the planks in a 50/50 ammonia/water mix and then super glue one end, follow the curve of the hull, and then at some nebulous point, trim the other end to length and taper it. Umm.. yea, sure, that will work great! Or maybe not.
I chose to taper one end of the plank, then use the "Chuck" bending system to get it shaped to follow one end of the hull. Chuck's system is pretty simple, using 3 clamps and a board, you apply heat to the bent plank (I use a heat gun, Chuck demonstrated with a hair dryer), and then let it cool. When you un-clamp it, there is very little spring-back.
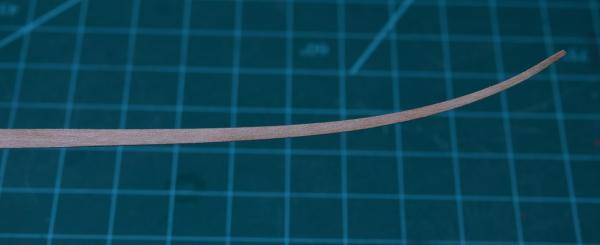
After getting one end shaped, I clamped it in place, all the way along the edge of the hull, and then marked where to cut the other end off, tapered the other end, and then bent it to shape. After I was happy with the curve at both ends, I glued the plank in place and clamped it.
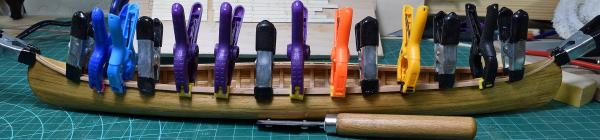
While sanding the taper on one end, I managed to snap one of the planks in two about 1/3 of the way down. So much for a spare plank!
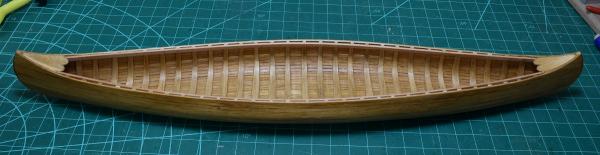
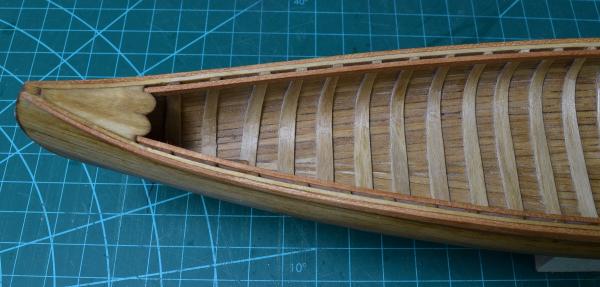
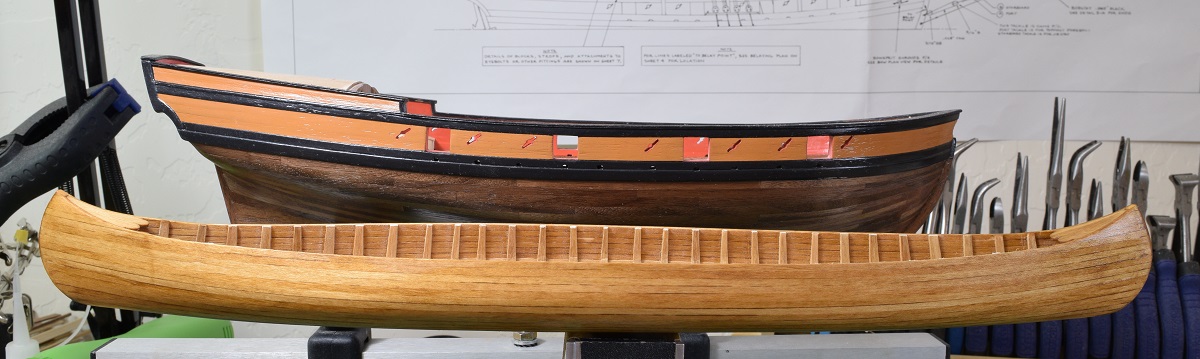
Luckily I managed to get two of them done without breaking another one, and got them in place. Once they are glued in place, I sanded down the top of the wales to be even with the hull from end to end. And that's where it is now.


The next items in the kit are the thwarts, and the seats. After that comes the paddles and it's finished. I'm going to play some finishing games though, and I think I'll do that prior to placing anything else into the canoe, so it will probably be a bit before there is another update, as the finish will take a week or more to complete due to drying between layers.
Hopefully I'll have the 'finish reveal' by next weekend.
In the meantime, I'll get to planking the poop-deck of the AVS tomorrow I think. Just need to figure out a good way to make a jig to cut 26 identical tapered planks for that.
Cheers!
-
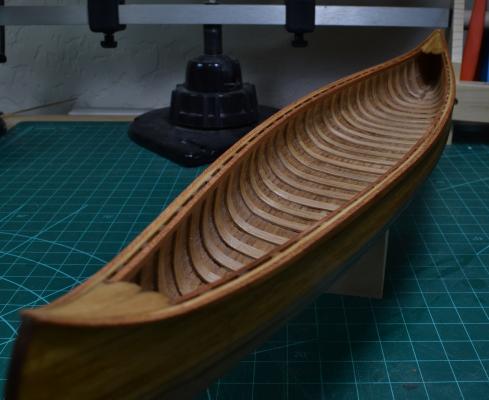
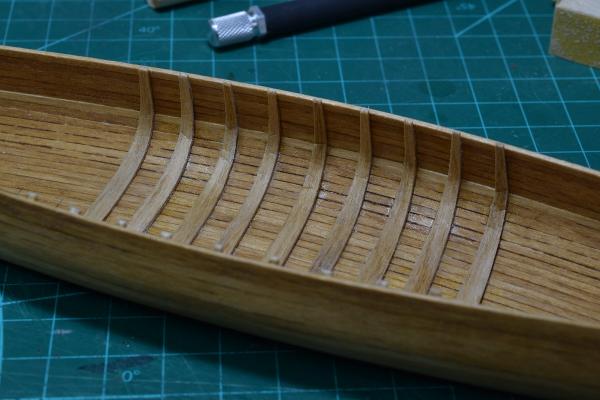
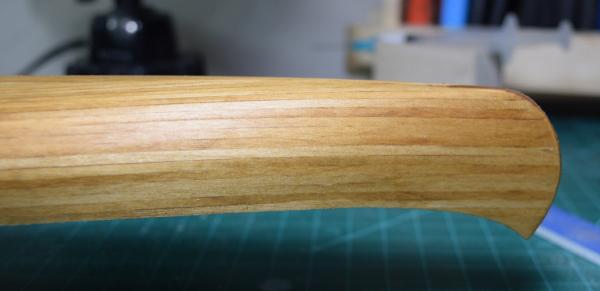
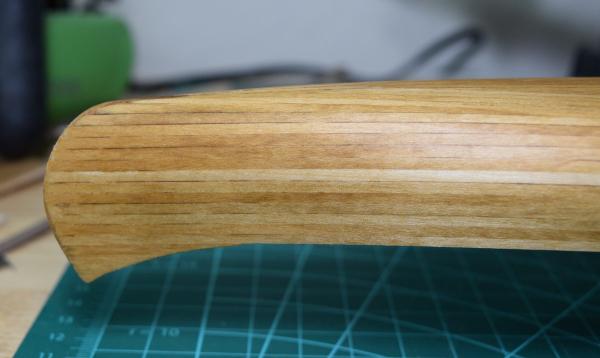
I spent some time today between working and cleaned up the remains of the super glue a bit. It had reacted with the water to form white crystals (or fogging) so I went outside and used acetone with q-tips to clean that up, and then I sanded and buffed the insides a bit to smooth out the worst of the visible glue areas. I'll follow the advise of Augie and apply a matte finish to get rid of the shine at some point in the future.
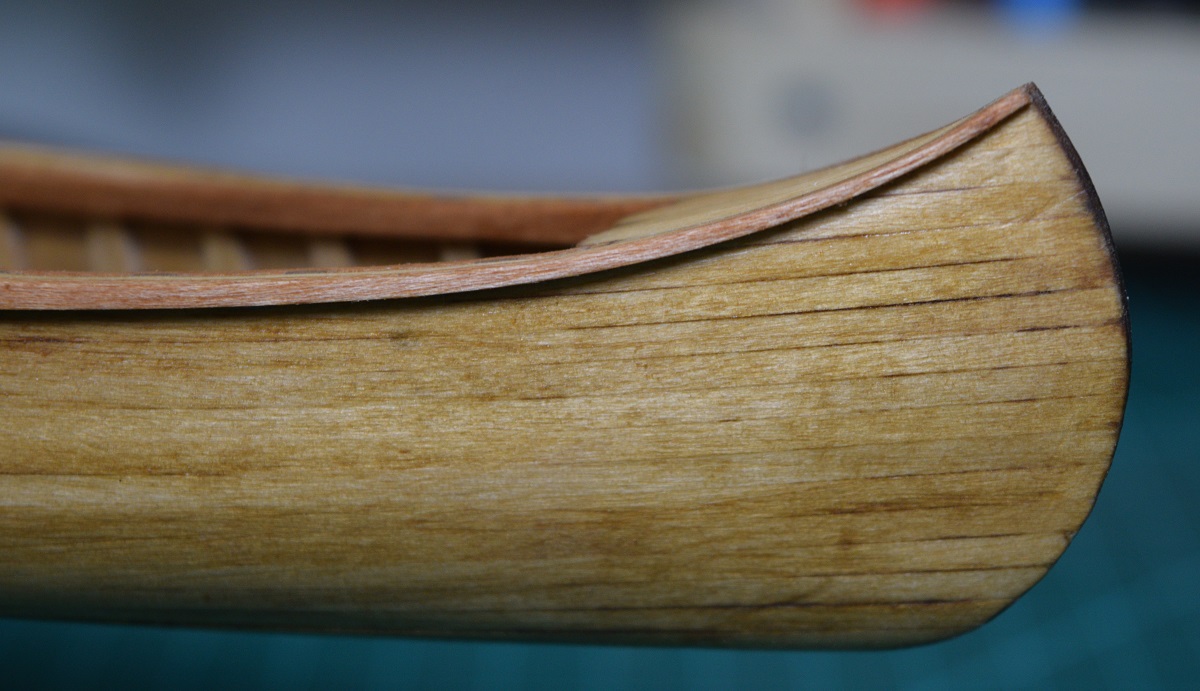
The next step is to trim down the ribs and sand them even with the top of the hull. After doing that the end 'decks' are placed. This requires soaking the deck pieces in order to get them to bend to follow the contour of the hull at the stems. I placed a 'wedge' in the hull to hold it while these were drying in place, as they spread the hull and the wet basswood doesn't have the strength to keep the hull from squeezing it and collapsing the deck pieces. If I was to do it over again (Note to future builders!) I would have cut several pieces of the planking and glued side to side reinforcements to the bottom of the deck pieces to add lateral strength to them. This would not be seen since it's on the underside of the deck pieces and I think it would have helped a lot.
They turned out ok in any case. After sanding down to 320 grit and re-staining.
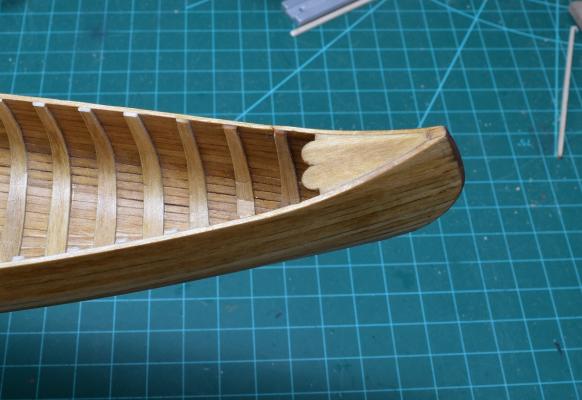

And a shot just because.


Edit: Augie, this kit does not have floorboards.
- RonaldB, ccoyle, CaptainSteve and 7 others
-
 10
10
-
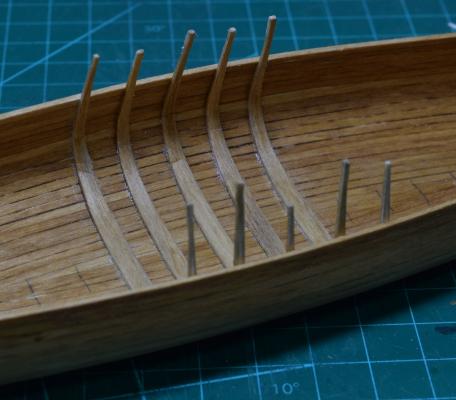
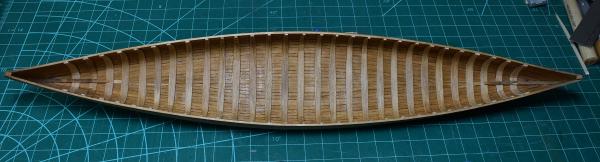
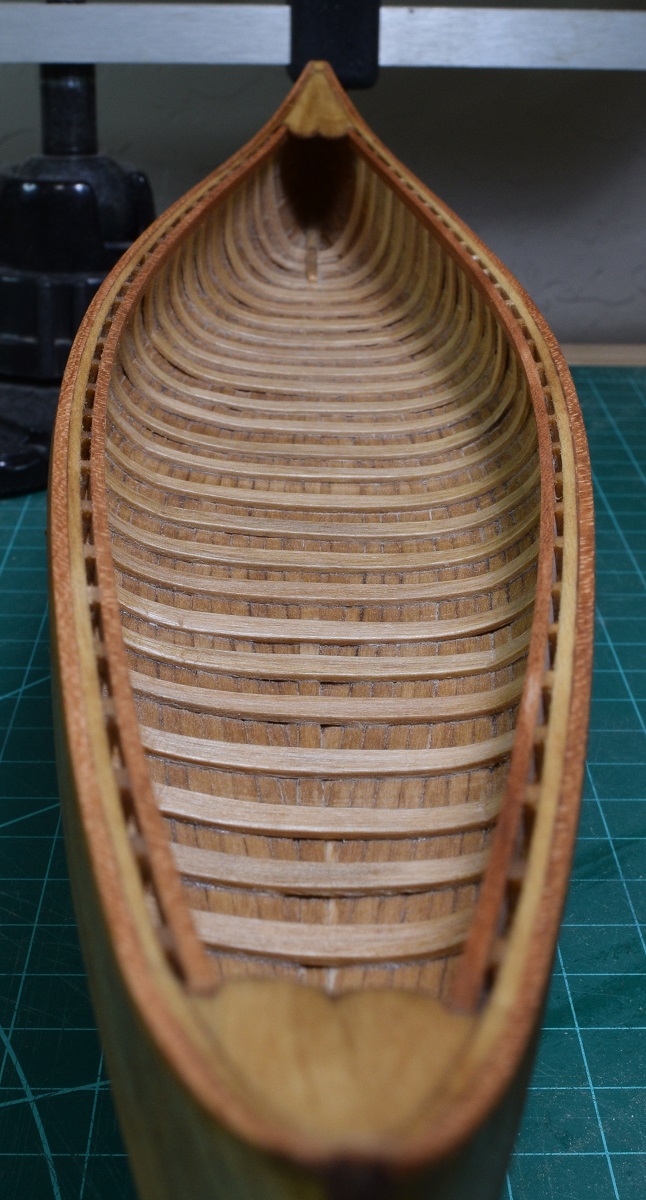
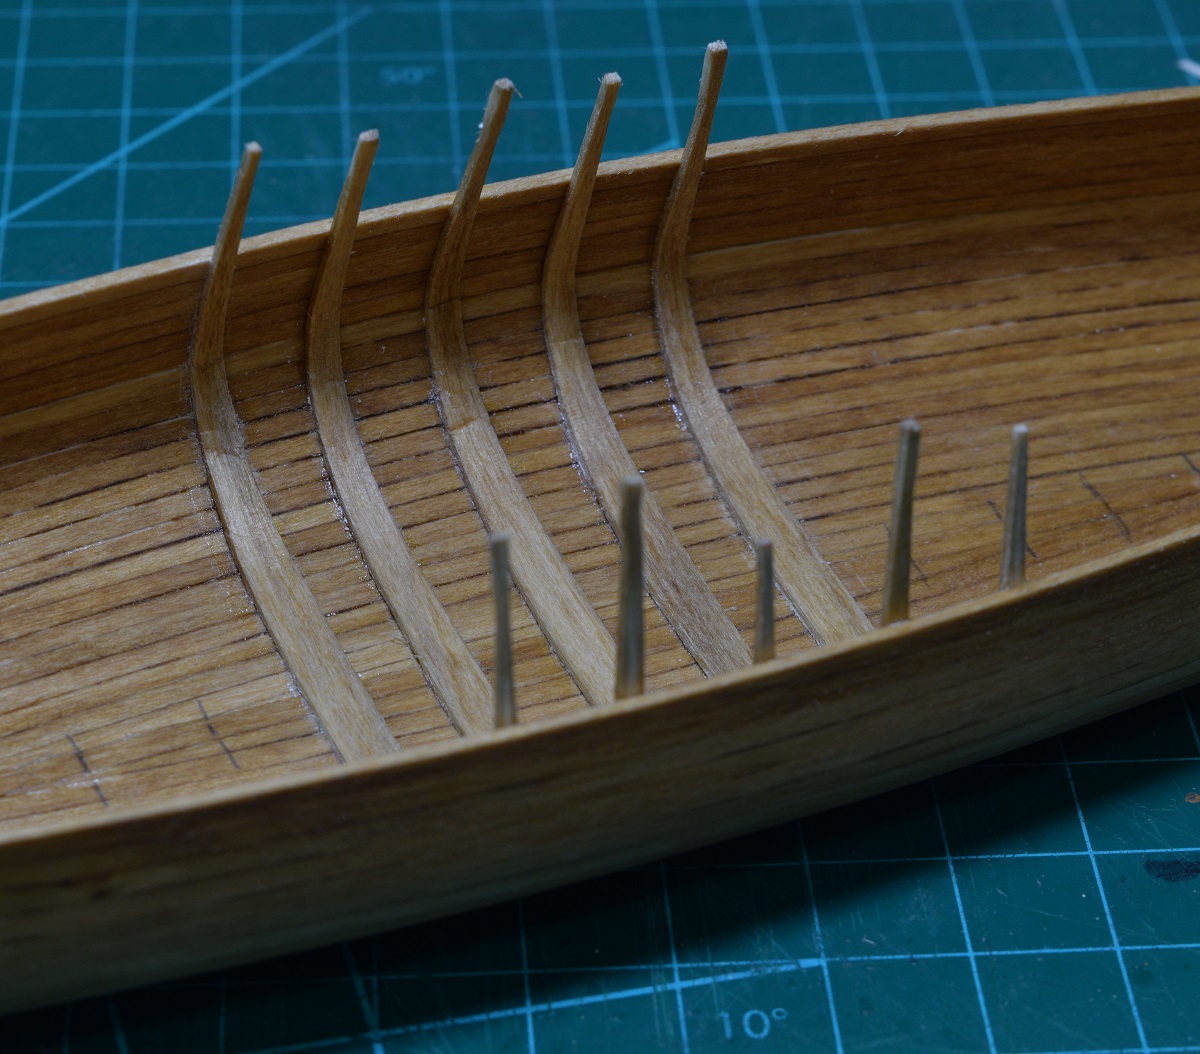
Soaking didn't seem to do much to the stain, possibly lightened it a bit, but no splotching or bleeding. Even after soaking for the entire work-day, the ribs were quite difficult to get bent into place without breaking, and I really couldn't figure out a good way to clamp them. Given that they were being placed 'wet', I gave up on using my white PVA, as it would have required I hold each rib in place for a good 30 minutes or more, and this is supposed to be a quick 'side project', so I gave in and used CA to place the ribs. I'll have a good bit of inside cleanup to do in order to get rid of the CA shine and fogging, but should still be much less time than individually clamping the ribs long enough to set with PVA.
It's not perfect by any stretch of the imagination, as I did all the placement by eye-ball, instead of carefully measuring and marking where each end should be to keep them all perfectly perpendicular and straight. It came out well enough I think.
- Canute, jct, CaptainSteve and 12 others
-
15
-
Welcome aboard Thomas.
I think you'll be glad you started the log, as I get not only assistance and tips in my logs, but also encouragement and motivation to progress from the community here.
It looks like you've got a nice start on this one, and I'll look forward to watching your progress, even if I don't have any particular tips as someone new to this hobby myself.
- mattsayers148 and zoly99sask
-
2
-
Welcome aboard!
I still consider myself a newbie, since I just started last August. I think the biggest help to me was spending as much time reading all the build logs on this forum, as I spent building! Even if the kit isn't the same as you are working on, many of the techniques and tips used by others will apply to your build as well, even if it's not the same ship.
For this kit, search the logs for other viking type ships, I know there have been a few of them on here during the last 6-8 months that I've enjoyed following.
Second tip - don't be afraid to disassemble stuff and re-do it. As I've seen repeated here often, "it's just wood", and almost anything can be torn apart and redone if you are patient and willing.
Most important - have fun!
- Salty Sea Dog and michael20
-
2
-
Looking great. I love the look/lines of the Baltimore Clippers. I'm leaning towards the Pride of Baltimore II as my next build.
-
Thanks for all the likes!
Just a thought, when you plank the poop deck, make sure you bevel the planks or you will end up with wide gaps due to the radius of the deck arc.
Thanks Ken - I'm sort of bevel happy - I beveled every plank everywhere, but that's a good reminder, as the poop has more radius than anywhere except the curve of the hull.
-
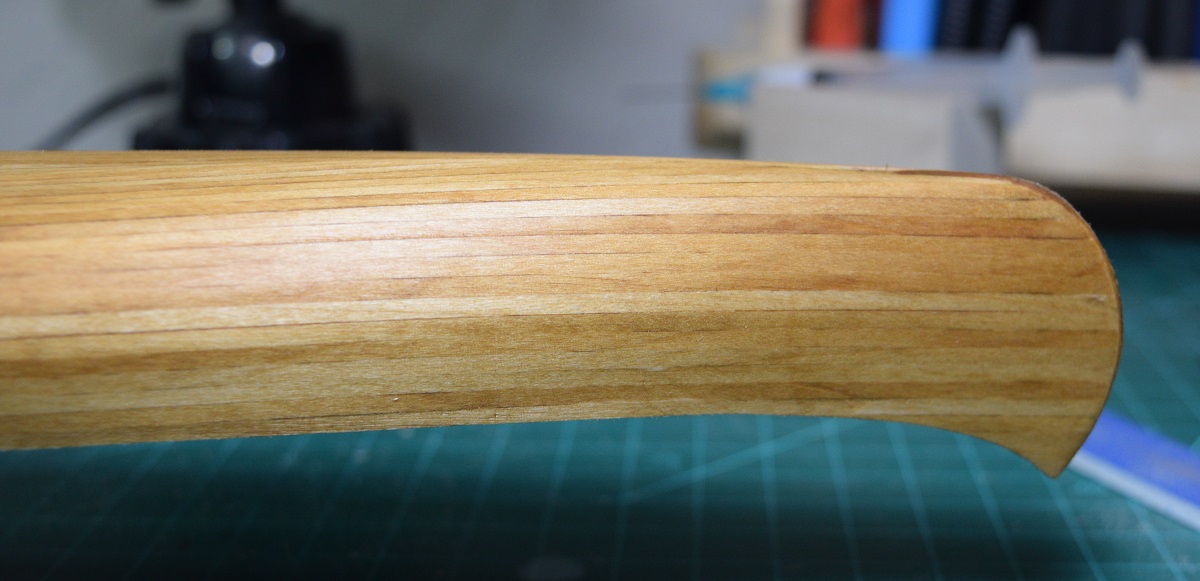
Got back to the canoe the other day, and roughed in the other end above the gunwale.
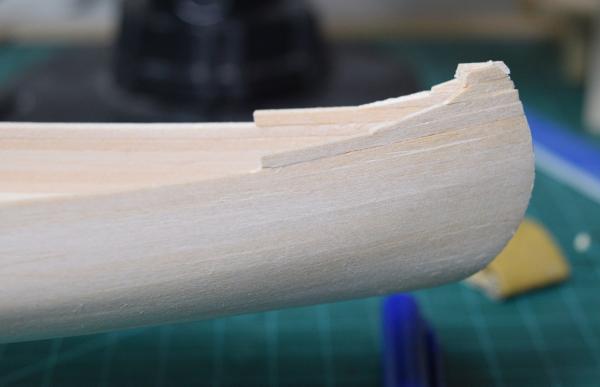
And then finished it and sanded the entire thing - 120 -> 220 -> 320
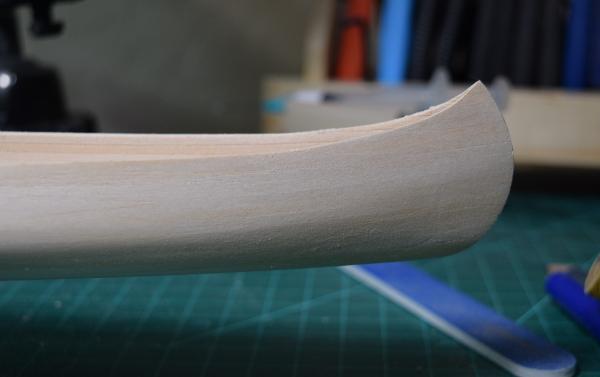
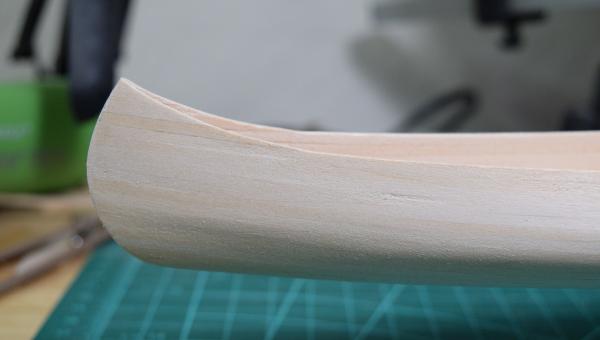
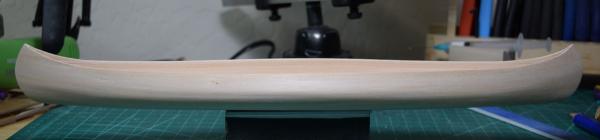
Then after some experimenting on scraps, I took the first big plunge towards my eventual finish plans.
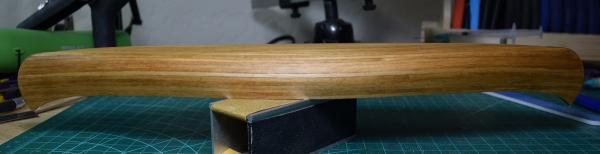
I chose to stain it prior to putting the ribs in (which are also stained, but no pictures) in order to alleviate worry about glue around the edges of the ribs showing up as glaring spots where the stain didn't go. I think it will be very difficult to do any good clean-up around the ribs internally after they are placed. I guess I'll find out later if that was a huge mistake, as the one thing I forgot to test was the effect of soaking on a stained piece of wood, and I think the ribs will have to be soaked in order to make the crazy bends inside the canoe. I will try doing it with jigs and heat first (on scrap), but I really don't think I'll be able to get away without soaking for this.
- UpstateNY, yvesvidal, Angarfather and 14 others
-
17
-
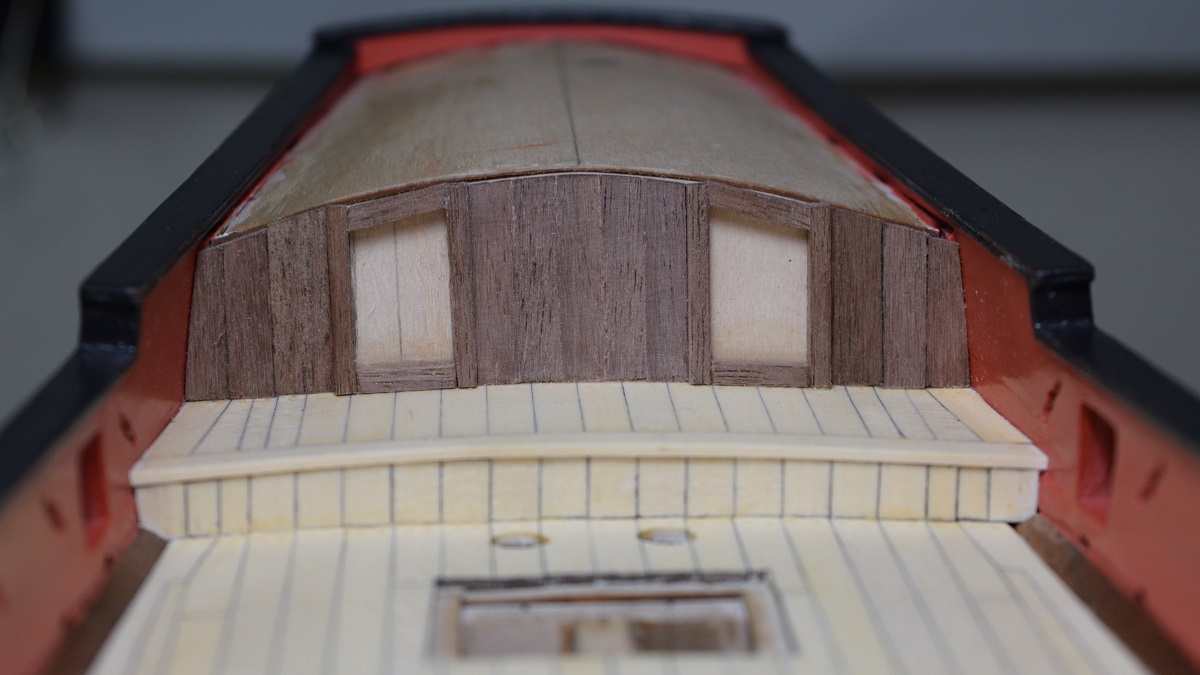
Small update. As most of you have seen, I got a bit distracted by a canoe, and also lots of work, so I haven't had much time to sit down and do any sort of real work on the AVS, but tonight I did get the quarterdeck wall mostly done. It still needs to be finished and have details added, but the wood is in.
I am again using cherry for the door paneling. I do not have the base trim in yet either.


- Dimitris71, Canute, UpstateNY and 11 others
-
14
-
-
-
Hi Joshua,
What kit is this? You don't mention it in your post or title.
It looks like you've gotten a good start on whatever it is though!
-
Hi Andy,
From your pictures, it looks like you may have rounded the trailing edge of the bulkheads as you faired them. A faired bulkhead should allow a plank placed anywhere along it to make complete contact with the plank and 'flow' into the next bulkhead. It looks like your bulkhead is 'rounded', and will allow only part of the plank to touch it on the way to the next bulkhead.
This isn't insurmountable, as you can probably make it work that way. If you do end up deciding that the fairing is just wrong to make the wales and other planks work, you could carefully sand them 'flat', and then shim them back out using basswood strips, and then re-fair them again. I don't think I'd go down that route unless you just can't make it work the way they are now - obviously that would be your judgement to make.
I've looked around at other examples of this hull being built, and it does appear that the wales are supposed to both twist and narrow as they approach the stern. Think of the wales as a single wide plank, and you have to twist them to make the entire plank width to lie flat against the bulkheads. All three pieces of the wale should lay flat against the bulkhead and making that happen would require the bevel between them as described by Mark.
If you are using wood glue it shouldn't be too difficult to debond the wales using water, and allow you to re-lay them with all the parts lying flat against the bulkheads.
Best of luck whatever route you decide to go with, I'm sure you can make it work, and in the end no matter how you achieve it, much can be done with filler and sanding, especially when paint is going to go over it, which I think is the way the Pride gets finished.
-
Thanks Jack,
I actually have a plan, but I'm going to reveal it later, because I'm a big meanie.
- Foultide, CaptainSteve and Jack12477
-
3
-
Thanks again all,
Now comes the moment to decide how to finish this beautiful canoe?
Yves
So there are two questions, not only how, but when!
The kit suggests at this point to coat the entire outside of the canoe with CA glue... !! Then again the kit is actually supposed to represent a type of canoe that was covered in canvas (they filled the space between the canvas and wood with something to prevent leaks I guess), so the entire outside of the hull gets painted black per the instructions.
I think I am going to try just staining the wood and giving it a clear finish. Worst case if it turns out terrible I can always paint it black (or some other color) like the kit instructs, but I really would like to keep the wood finish, and I'm not going to use the CA coating regardless.


Bismarck by Dawie van Rensburg - Trumpeter - Scale 1/200 - PLASTIC - with Pontos 27001F1 advanced upgrade kit
in - Kit build logs for subjects built from 1901 - Present Day
Posted
Coming along beautifully. Thanks for all the photo's!