


GuntherMT
-
Posts
2,213 -
Joined
-
Last visited
Content Type
Profiles
Forums
Gallery
Events
Posts posted by GuntherMT
-
-
-
Hi Rick,
I got the kit from Model Expo while it was 41% off http://www.modelexpo-online.com/product.asp?ITEMNO=MID981 .
Normally they are a bit high on Midwest kits, and I would go with HobbyLinc for Midwest kits - http://www.hobbylinc.com/cgi-bin/s8.cgi?cat_s=B&str_s=Midwest
You can also get them directly from Midwest's online store - http://midwestproducts.com/collections/boats
As far as why I am avoiding CA - I just don't like it, for a few reasons.
1) It doesn't seem to like to bond basswood quickly unless you introduce water or an accelerant, and both are just added complications that I don't really feel are needed. I have several different types of CA and they all seem to be finicky when gluing basswood together - goes from super slippery causing the pieces to slide easily on each other making placement difficult to suddenly glued permanently in the wrong spot.
2) It stinks.
3) It gets on everything and leaves stains - I'm not sure if I am going to paint the model or use a stain, and I didn't want to deal with the CA on everything.
4) Related to above, since it gets on everything, I always end up with it on my hands/fingers which annoys me, even if I don't glue myself to something.
5) Harder to remove/deal with if you make a mistake and need to de-bond a part.
6) I'm sure I could find more things I don't like about it.

At the end of the day, why not just use wood glue? It works well, bonds reasonably quick if you apply in thin coats to both work pieces, allows you to move stuff around until you are happy with the fitment, it doesn't stain everything, and when you get it on your hands you just rub it off with a bit of friction. It's also easy to sand where you get too much on a joint and it leaks out onto the surface of the planking.
I chose to try Weldbond on this kit instead of the Tite-Bond I'm using on the AVS because it's a clear white glue instead of yellow, so I figured that any 'mistakes' would be less visible (since both the inside and outside of the planking will be seen on this model). I accidentally used a syringe of just plain old Elmer's white school glue (that I thought was Weldbond) for quite a bit of this, and it worked just fine also.
-
The little canoe continues to progress in my spare moments. Work has been crazy this last couple of weeks, so the canoe has been nice to have, as I can pop into the work room, do a couple of planks in 30 minutes, and then go back to work or take care of other things around the house. When I'm working on the AVS I tend to want to have at least an hour or two in a solid block to work on it, and I just haven't had that lately, so if I didn't have the canoe going I probably wouldn't be doing any ship work at all.
In any case, progress update.
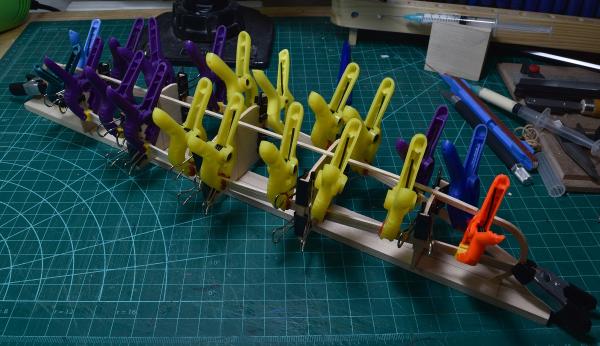
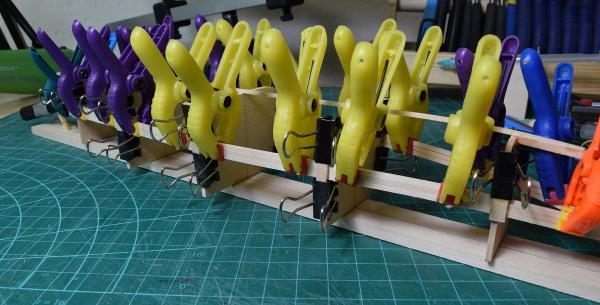
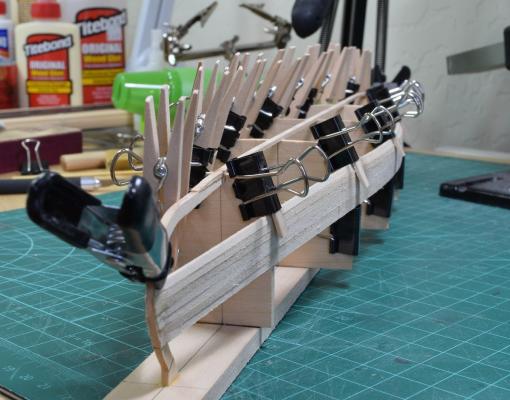
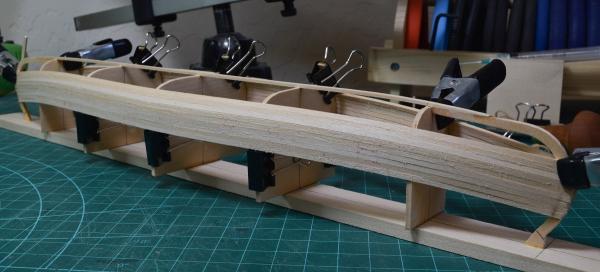
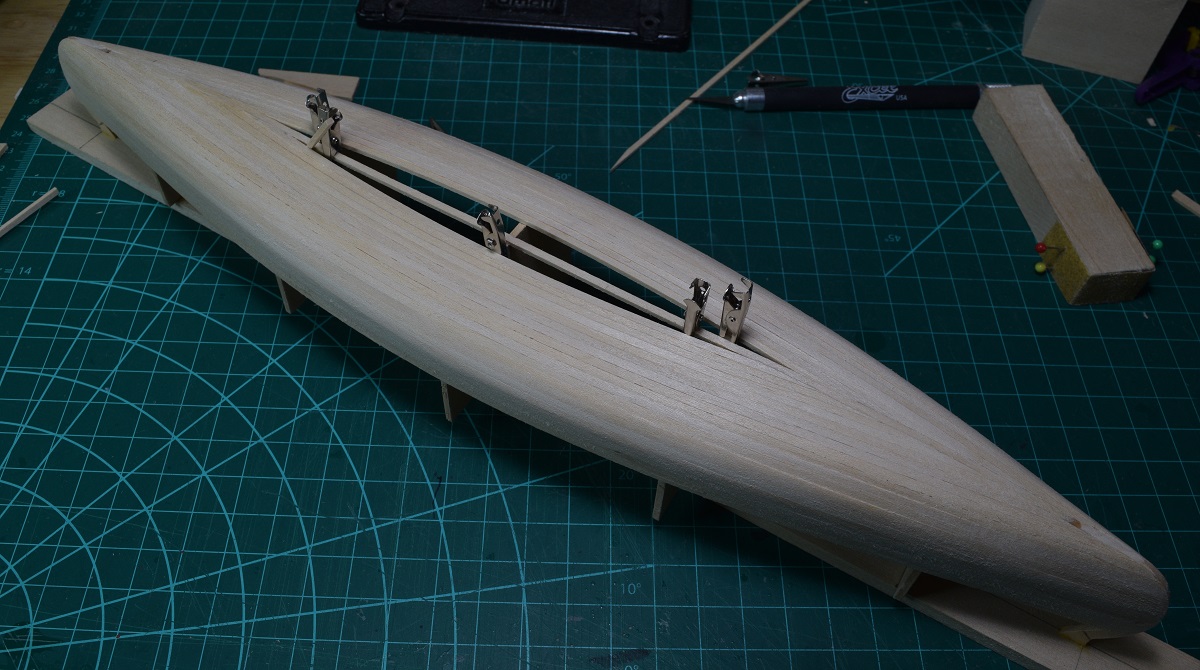
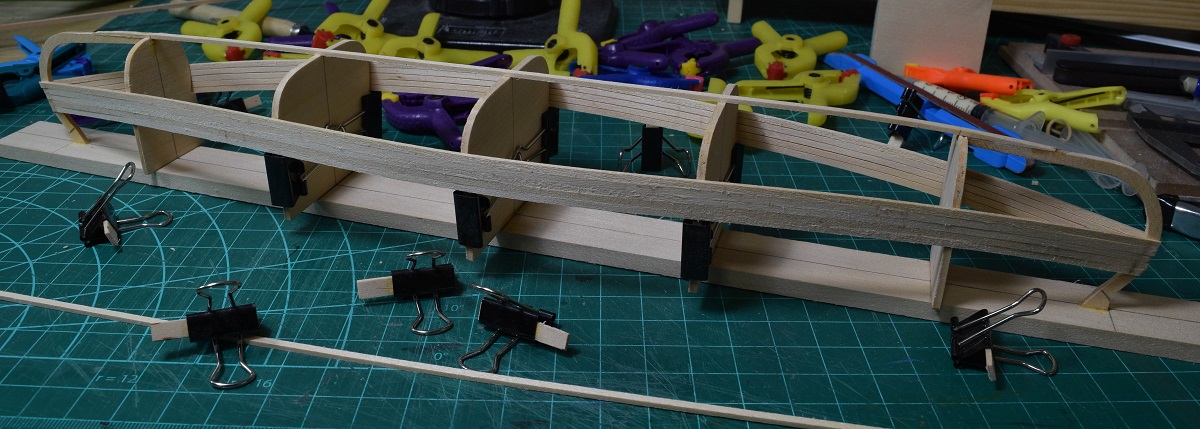
The more planks I got on, the simpler the clamping arrangements became, as there just isn't that much room left to put planks on as the remaining area to be planked shrinks. The little alligator clamps worked great, since the 'bulkheads' are not going to be part of the finished model, so it's no big deal if their sharp teeth tear up that wood a little bit.
I also used a lot of little spare pieces of planking material to act as wedges.
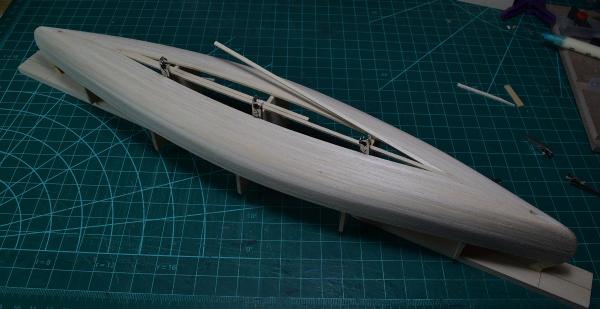


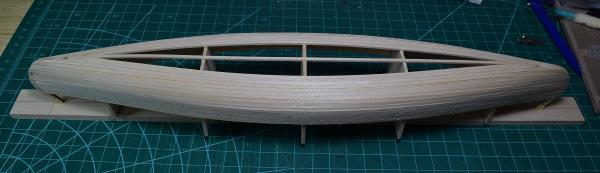
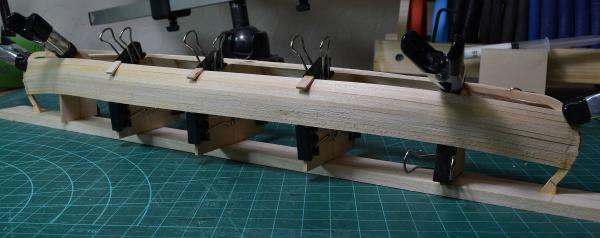
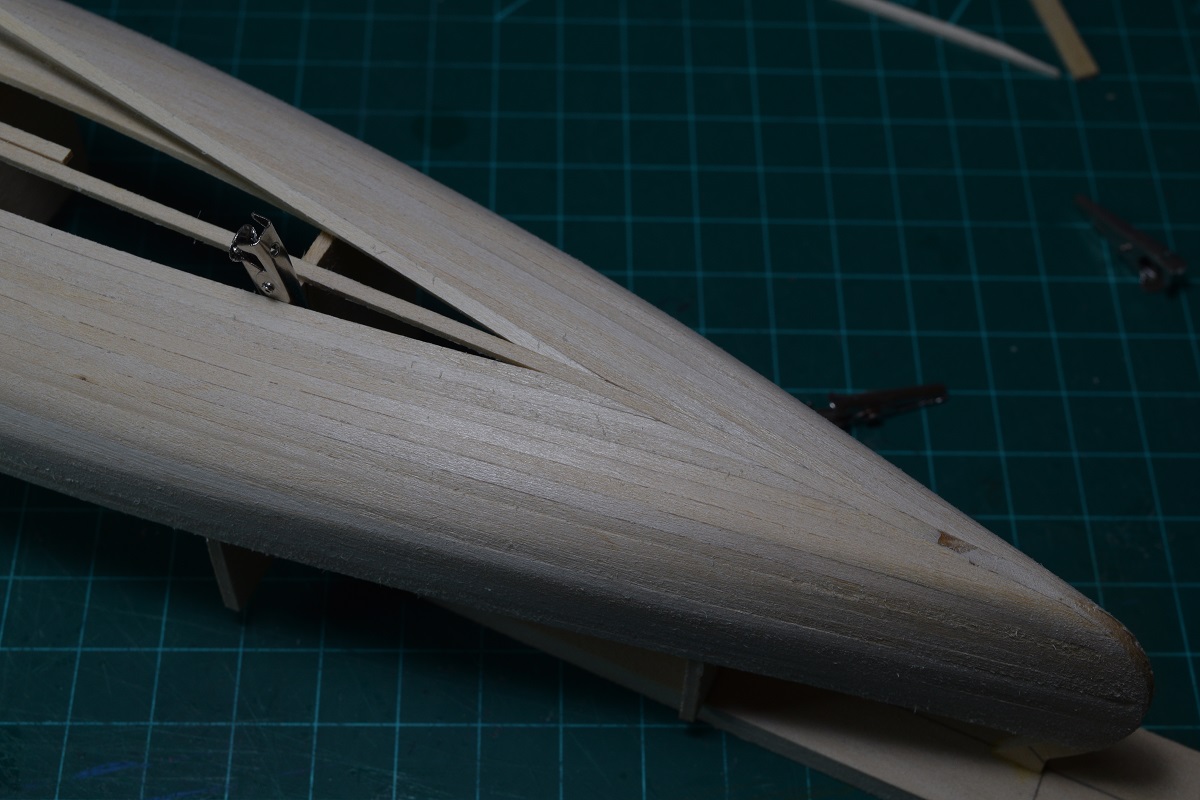
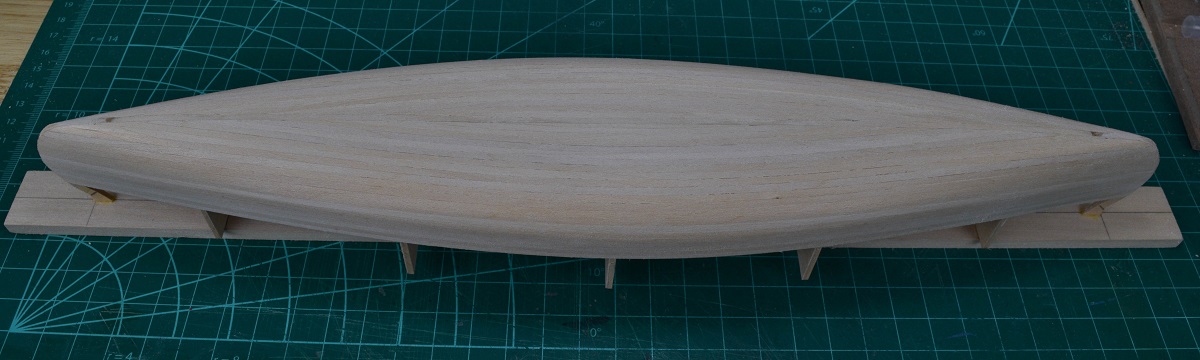
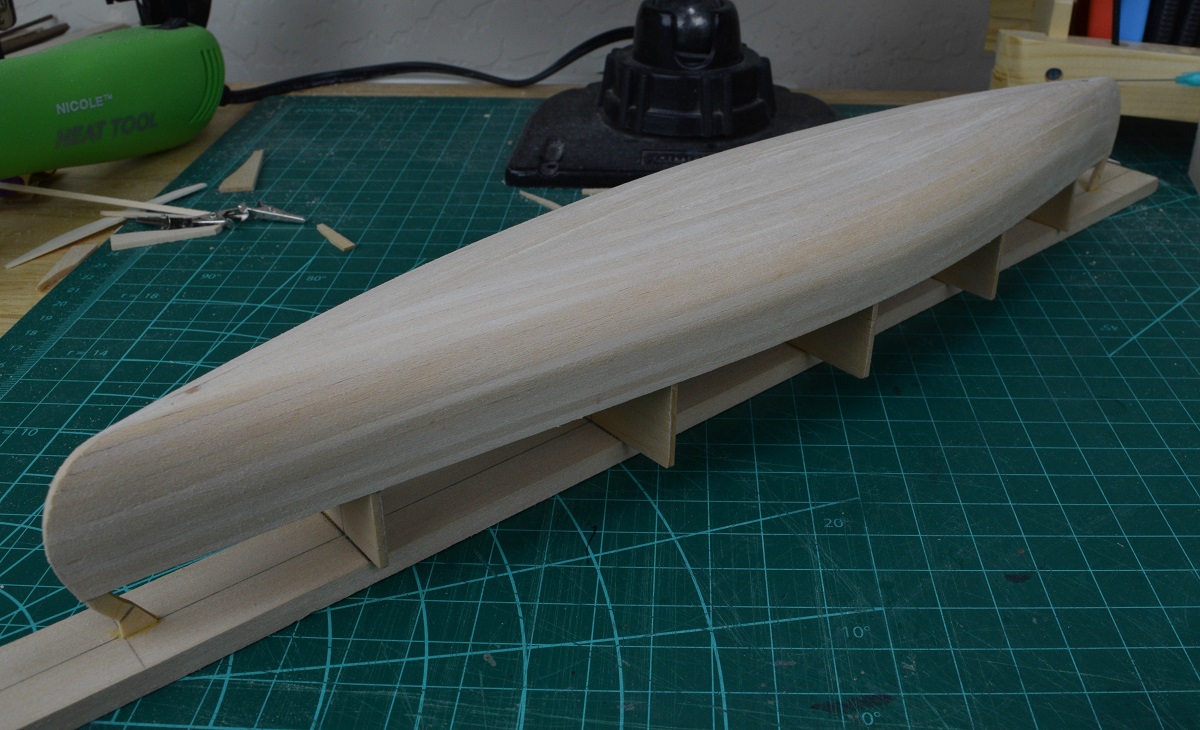
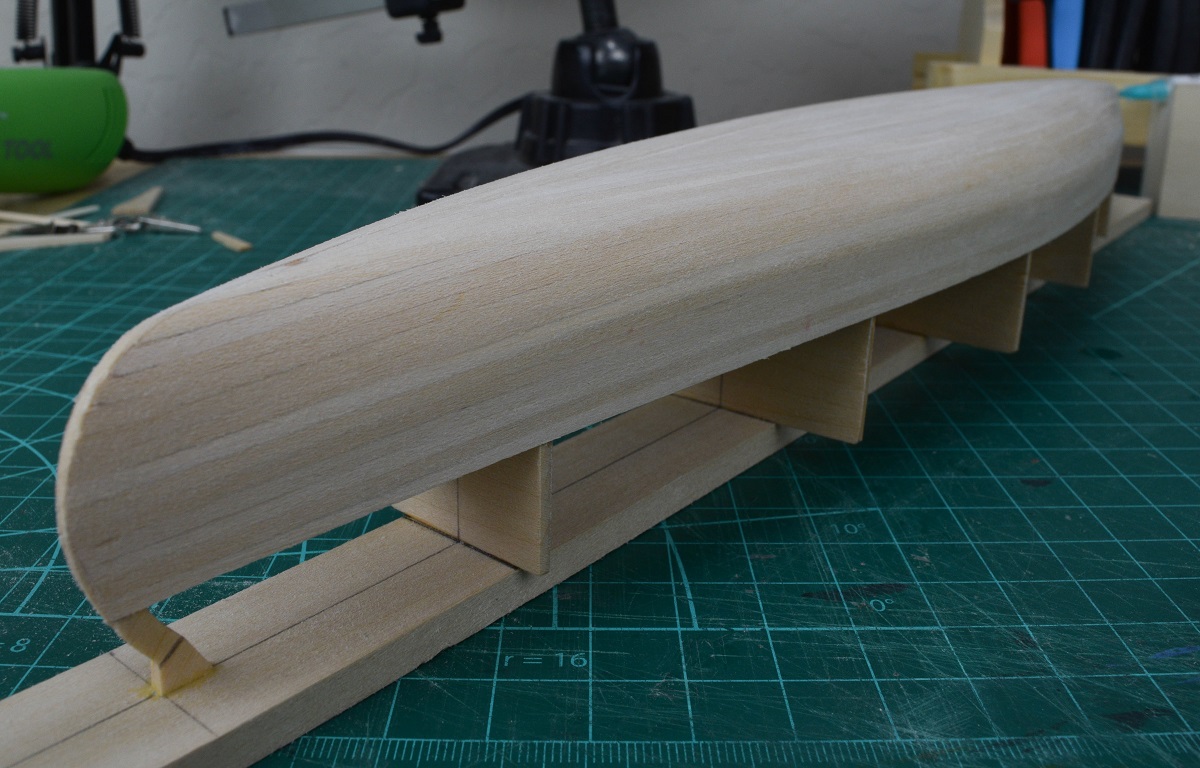
And.. then it was done. The last plank in place, and rough sanded.


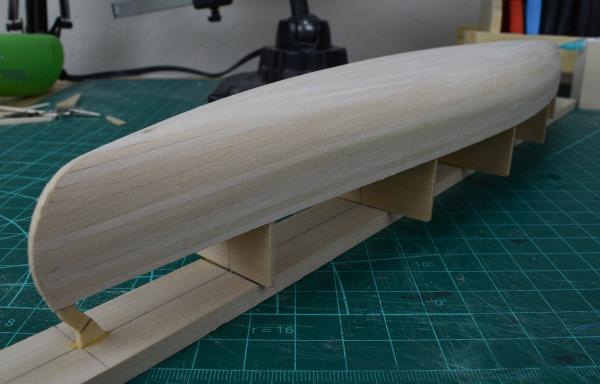
After work tonight I'll do a final sanding to smooth the wood out a bit and remove any fuzzies, and then pull it from the strong-back to complete the planks at the stems which extend above the gunwale and aren't supported by the strong-back.
- Tadeusz43, hexnut, CaptainSteve and 13 others
-
 16
16
-
-
Thanks Augie.
So far I think that this little canoe would make a great planking primer for anyone new to this hobby. The planks are very small, so very easy to work with, while still teaching the basics of things like how much better the fit is when you bevel the edge.
Didn't get much time to work on either ship today, but I did make some progress after spending the first half of the day romping around in the desert. Temps in the low 80's, everything is green now.. just beautiful.
This evening I continued planking the canoe, and also made a bit of progress on the quarter-deck wall of the AVS, while waiting for planks to dry.
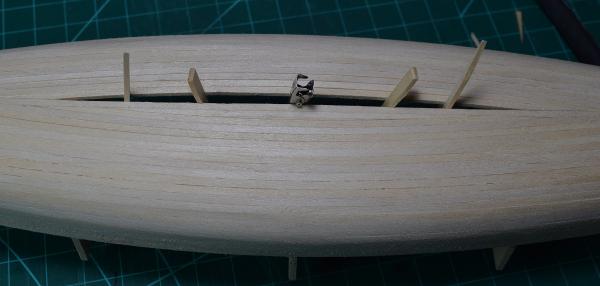
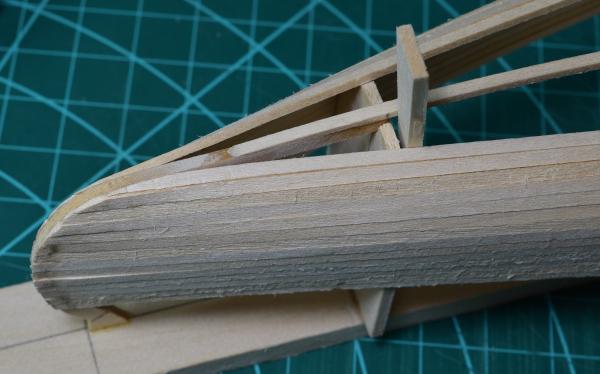
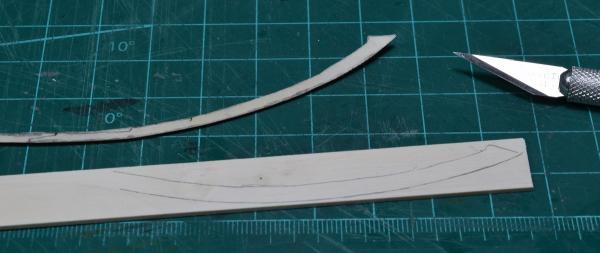
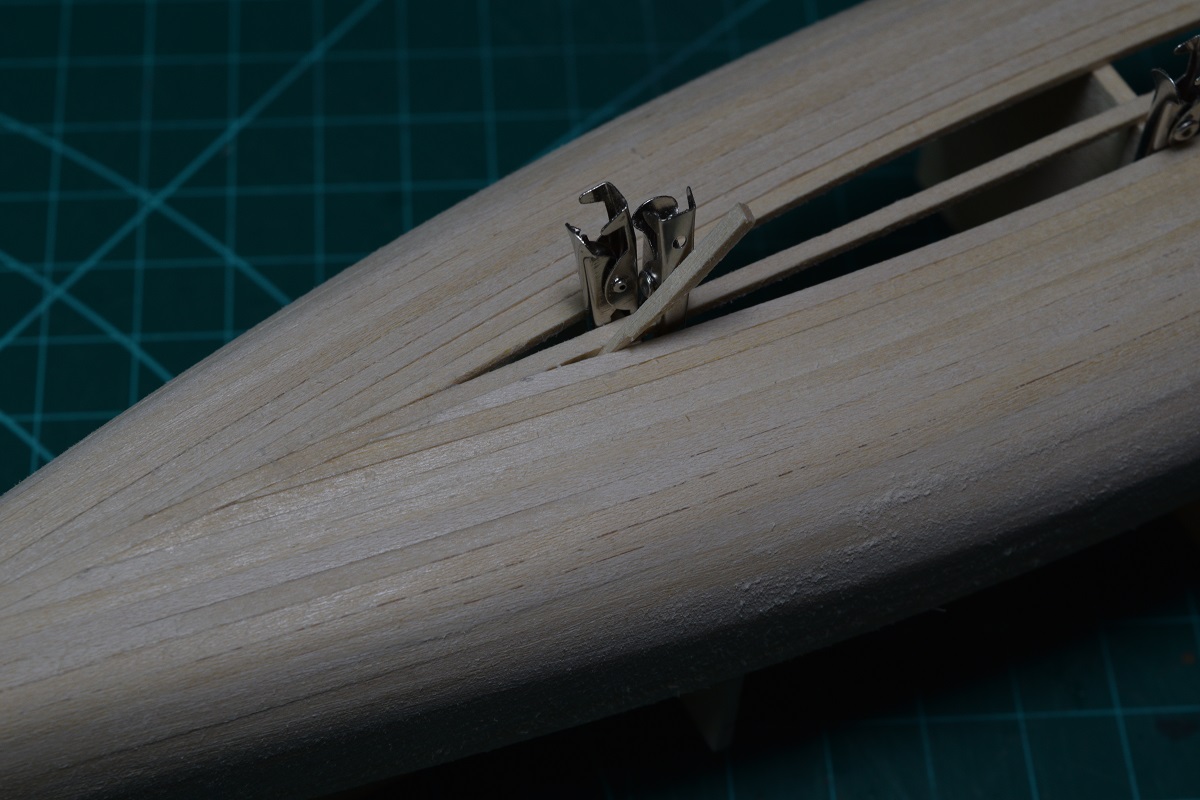
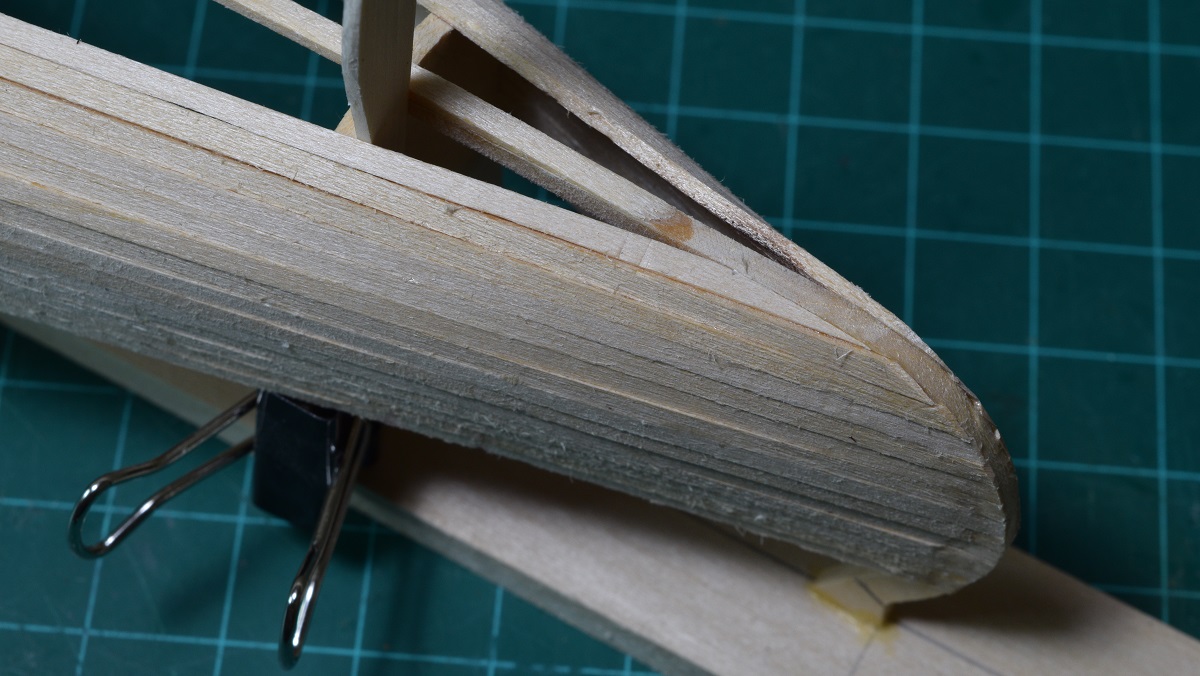
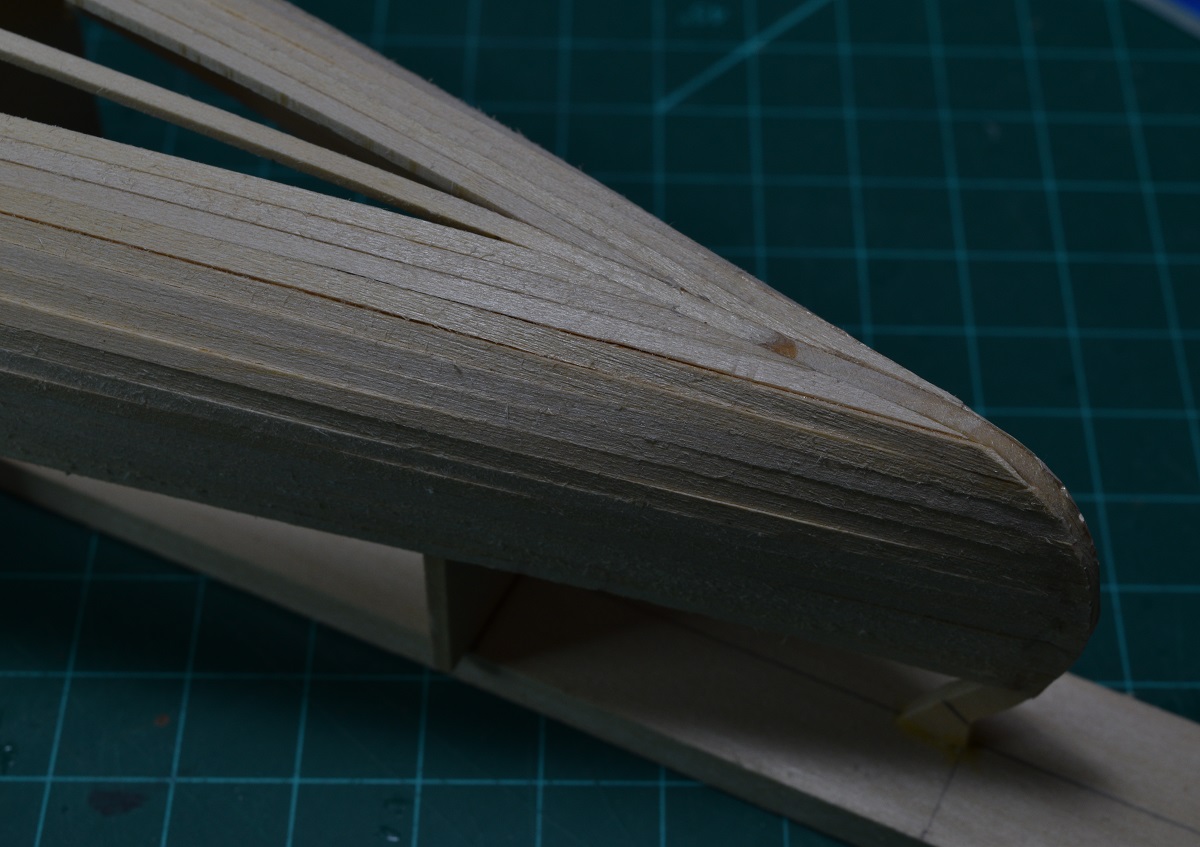
The one point where I ran into difficulty was the plank where the angle to the stem changes as we roll from the sides to the bottom. Up to this point the wide edge of each plank is landing on the stem, but towards the center of the hull, the planking has begun rolling to the bottom, so each plank is making a 90 degree twist as it leaves the stern. On this transition plank, you somehow have to match a plank that has no twist, with the last plank that has the full twist in it. The rather simple instructions give no tips or hints on how to make this transition look right, I do think that this is an area where the kit could be improved, especially since it's marketed for beginners.
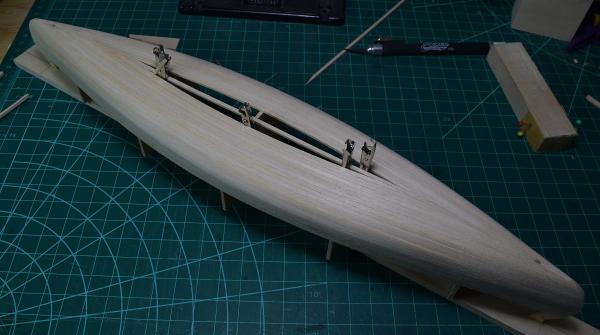
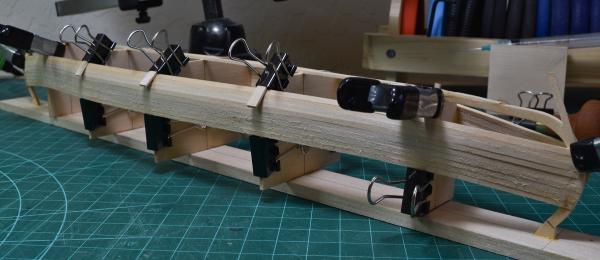
I ended up just cutting some really odd bevels into the transition plank to get it to match as closely as possible to the plank, and the stem, and while it came out ok, I'm not sure it was the right approach, and I hope that after it's finished that things will look ok. Here are the completed transitions on the first side. You can see how the prior plank has a twist, but this one doesn't.
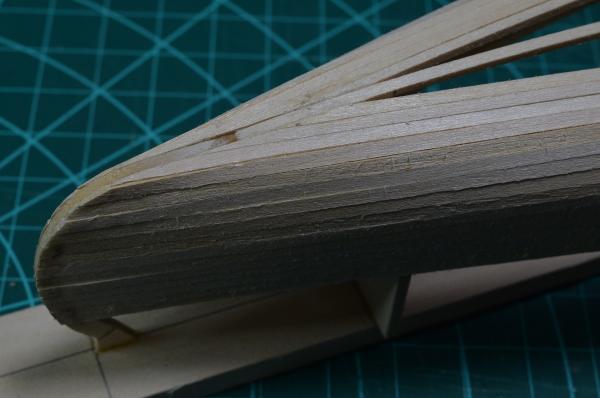
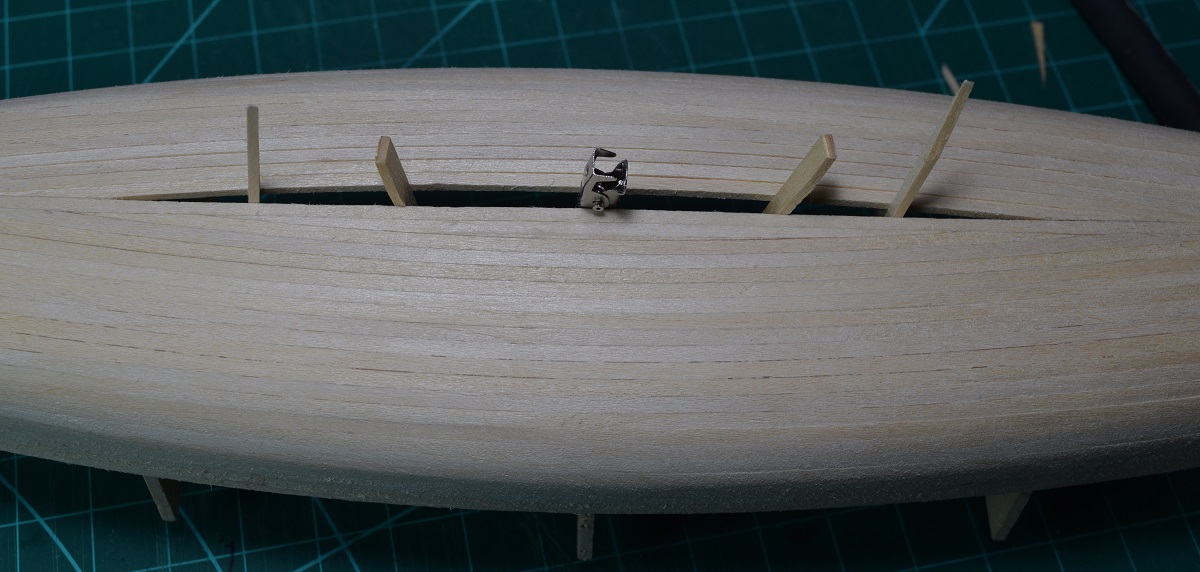
After I made the transition and started working on the bottom planks, things are coming along quite nicely, here is where I leave things tonight.

Overall I think things are progressing nicely, and if I was using CA like the instructions say, I'd probably be a lot further along. The Weldbond needs to be clamped for a while after laying each plank, it doesn't tack and hold as fast as Tite Bond, let alone CA, but since I started the project with it, I'm going to stick with it through the entire build.
Tomorrow if I don't work too late, I'd like to finish the hull planking and remove it from the strong-back. Might even finish the quarter-deck wall on the AVS too!
- Canute, augie, Rao A.L.G. and 10 others
-
13
-
So I'm pretty active on some other message forums that are not ship related, and one of them has a fairly active single thread for scale modeling. I've been posting compressed build-log updates there and a number of people have expressed interest in wooden ship modeling. Some have asked for recommendations to get into the hobby 'cheaply' to see if they like it, and I've been recommending the small boats by Midwest, but of course I've never built one.
I've had the itch to do a smaller project while I continue working on the AVS, so I decided that I should put my money where my mouth is (so to speak) and actually build some of the kits I've been recommending to other folks. A couple of weeks ago I ordered a couple Midwest kits. The Dinghy ended up being backordered, but I got the Indian Girl Canoe early this week, and I put the strong back together Thursday, and put the first few planks on last night after work.
This will be my build log for this little canoe. Little is relative I guess, seeing how the canoe is 16" long, and the AVS hull is only 14-3/4" long.
I originally decided to do this build to show the folks on that other forum how it went, and of course stupidly didn't take any pictures of the box contents, or anything else until I'd already placed the first couple of planks. Sometimes I'm kind of goofy.
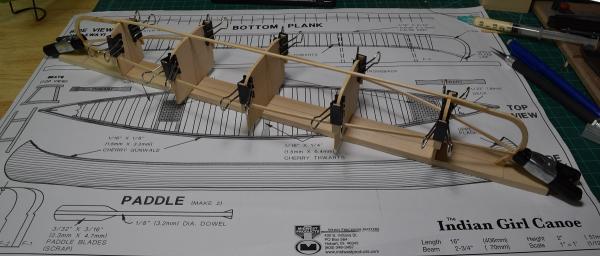
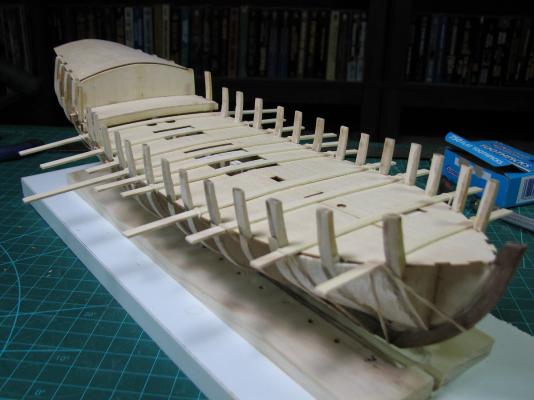
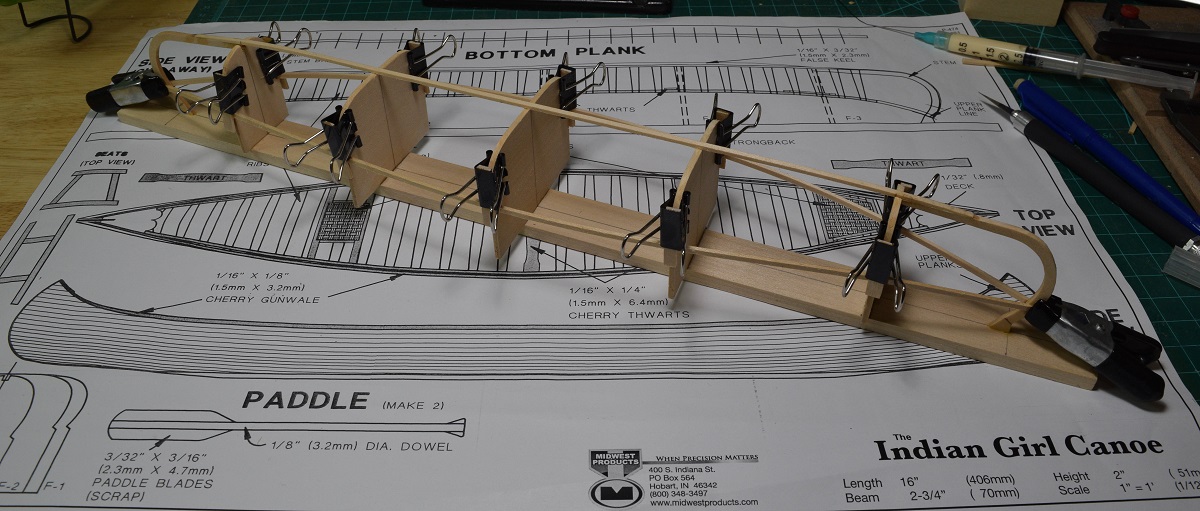
In any case, if you are unfamiliar with these kits, you start by cutting several template parts from a sheet and assembling them to a long piece of wood. This assembly becomes the 'strong back', and it acts as the form for the hull, which is constructed upside down on this jig.
You mark the centerline on the long piece of wood and the templates, transfer the locations for each template from the plans onto the long piece of wood, and then glue the templates onto it, using fast CA and a square to keep them aligned.
Next up, you cut out the two stem pieces, and transfer the top plank locations from the plans to the stems. A single piece of planking is then cut to length from the plans, and glued to the stems to make a 'keel' of sorts. The keel is then glued to the strong back over the templates. Once that's secure, the planking begins. The first plank is glued only to the stem at each end, and then the 2nd (and subsequent) planks are glued to the stem and the previous plank. None of the planks are glued to the template pieces (at least not intentionally!).
The plans call for using CA for all of the construction, but with the exception of the strong-back assembly, which will not be part of the final model, I am using only white wood-glue (Weld Bond) for this project.
I've been attaching a plank or two, and then going and moving laundry and other projects around the house (or watching basketball), then going back and adding another plank or two. So while the progress isn't going super fast, the actual time investment so far is probably quite low.
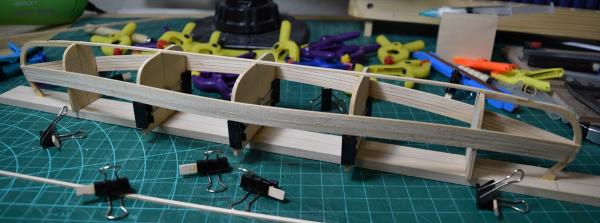
The first picture I remembered to take, first plank in place on both sides, sitting on the single plan sheet that is in the kit.
As the shape of the hull changes as the planking progresses, my clamping system keeps changing.

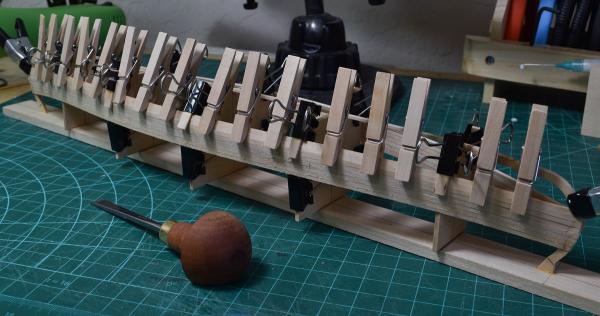
Last night I went to Woodcrafters and purchased my first 'real' (i.e. not cheap hobby shop specials) chisels. At $40 a piece, they've always seemed crazy expensive to me, but I've been using the one pictured here to do the beveling of the planks instead of sanding, and it's an amazing tool, and I'll probably never touch those cheap chisels again if I can help it. I also picked up a leather strop with some compound to keep them sharp.
Here you can see the Swedish Made palm chisel I've been using for the beveling.
That's where it is now. I'll probably get a few more planks on tonight. Tomorrow I'll be running around in the desert with my brother who bought a side-by-side toy, so no idea if I'll accomplish anything on either boat project!
-
Thanks!
I did start at the top (below the black strake), but I placed the first plank mid-ships with the end right behind a gun port, where a frame would be in the real ship, and then laid everything else off of that one, until I had 8 full rows in. I then placed the garboard plank (first plank above the keel) and then worked from there up, as it's a lot easier to make adjustments for that last row if it's somewhere near the middle of the ship, rather than at the bottom.
If you read the planking tutorials where the 'lining off' is explained, you should also see how to break the planking into 'bands' (I used 4 bands) to make for manageable sections to work with. I did the top two bands, then switched to the bottom.
-
I actually started my planks in the center and worked towards the ends. I'm new to this, so even though it worked good in my case, I don't know that it's the preferred way to do it.
I know some people go all the way to having a complete planking 'plan', and know exactly where every plank will be, prior to putting the first plank down. I'm way too impatient for that.
-
You won't get a notification of posting in your own log/thread as far as I know, so see if this post notifies you.
-
-
I have a Chopper II, and has been said, if you work within it's limits (not super hard wood or very large pieces) it works great for making a lot of repetitive length cuts (or even just for quick trimming of one-off's).
It's great for 3/64 basswood planking, slices right through them. Blades (single edge razors) are dirt cheap if you buy boxes of 100 so just change the blade regularly.
-
-
Dowel's can be had cheaply at your local hardware store or home-improvement box store, I'd just get a new dowel or use square stock and cut it down instead of trying to use wood as brittle as your mast seems to be from the description.
Beautiful work on this boat, love to see these small boats come together.
-
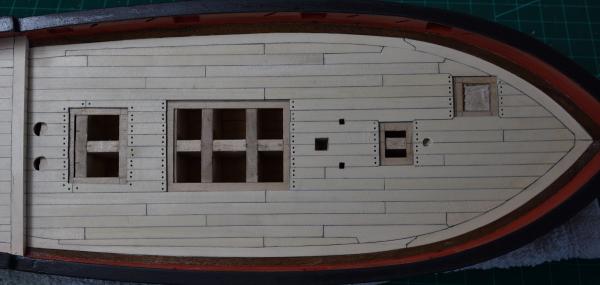
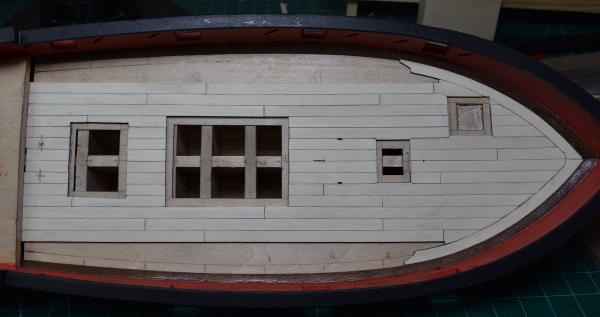
So I've actually accomplished some more things on the AVS over the last few days, in the form of completing most of the quarter-deck. Today I completed the quarter-deck, and then began drilling holes. Ended up with 510 holes (I think), and only after it was completed and I was editing the photo's to upload did I notice that I missed a pair of holes on a butt joint. Oops. I also managed to knock one out on the quarter deck, so after the poly has dried I'll have to add the 2 missing ones and repair the one that came out.
I got going on things and didn't take any in-progress photo's of the quarter deck, or the tree-nailing except for the first shot.


- Dimitris71, egkb, drtrap and 18 others
-
21
-
No idea if the kit is a good representative of the ship, but the HMS President certainly did exist - several times actually, but the year on the kit box (1760) wouldn't cover any of them.
- HMS President (1646) was a 26-gun ship purchased in 1646, known as Old President after 1650, and sold in 1656.
- HMS President (1650) was a 42-gun fourth-rate ship launched in 1650, renamed Bonaventure in 1660, rebuilt 1666, and broken up 1711.
- HMS President (1806) was a 38-gun fifth-rate, originally the French Président, captured in 1806, renamed Piedmontaise in 1815 and broken up the same year.
- HMS President (1815) was a 44-gun fifth-rate, originally the American frigate USS President, captured in 1815 and broken up June 1818.
- HMS President (1829) was a 52-gun fourth-rate launched in 1829, used as a drill ship of the Royal Naval Reserve after 1862 and sold in 1903. She was briefly known as Old President for part of 1903.
-
As a side note....I added the drop plank and the first two strakes in the first belt before I lined off the hull. It just made it easier to do the lining off. Thats why you can see them in the picture while I lined out the hull.
Thanks for all the details Chuck. The only thing that I'm left unclear on - was the drop plank and it's buddy (i.e. the first two strakes in the first belt) included in the 20, or extra? I think if I understand everything they are included, so there are 20 planks including these and the garboard, correct?
-
Greetings, yet another Brian, and welcome.
Looks like you have a nice start, but wanted to give you a word of caution that I learned the hard way myself. When you are using water to soak the wood to get various bends to work nicely, keep in mind that the water is soaking into the wood and expanding it. When that wood dries out, it will shrink. In the case of hull planking this means the gaps will appear between the planks if they are glued in place while still having excess moisture in them (one guess how I know this).
Good luck and have fun!
-
The colors look pretty good in that last picture. Nice work Brian.
-
-
Thanks for the feedback all.
I am not focused on what is wrong with the work, but I do want to learn and improve, so I need to note for myself what went wrong and what went right as I go along.
I could certainly rip things out and redo them, but if I start down that road for things that are not terribly wrong, I imagine that I'll never actually finish the ship. If I don't have a complete model to display at some point, I'm afraid my motivation to continue would dwindle.
- egkb, Dimitris71 and fmodajr
-
3
-
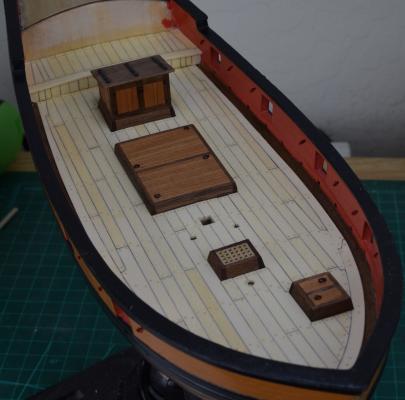
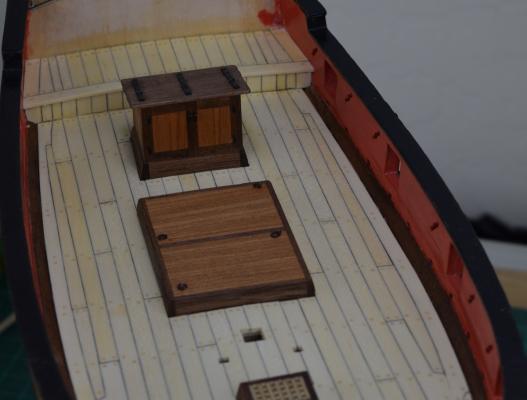
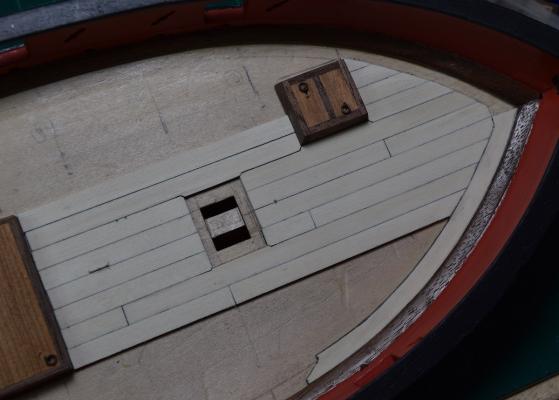
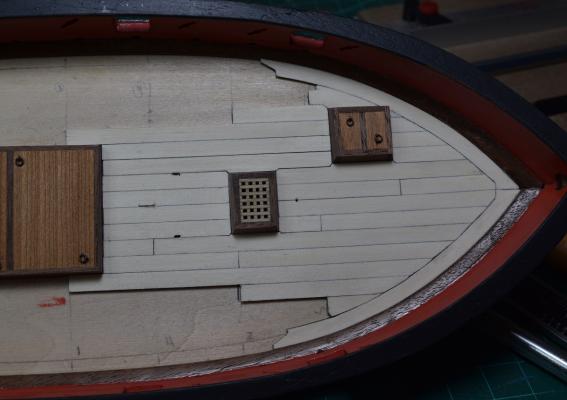
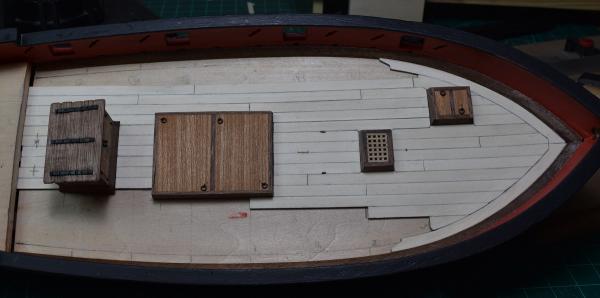
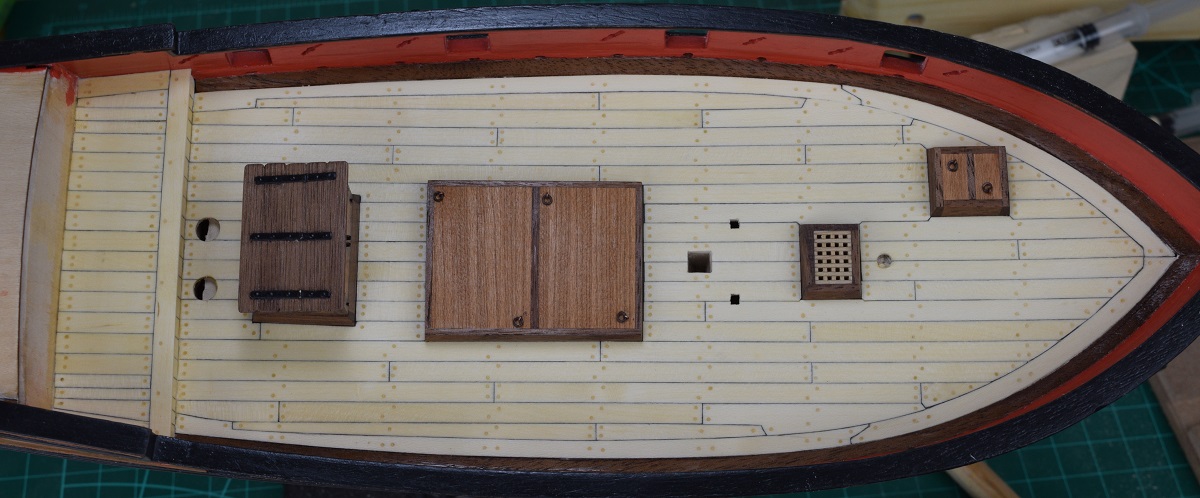
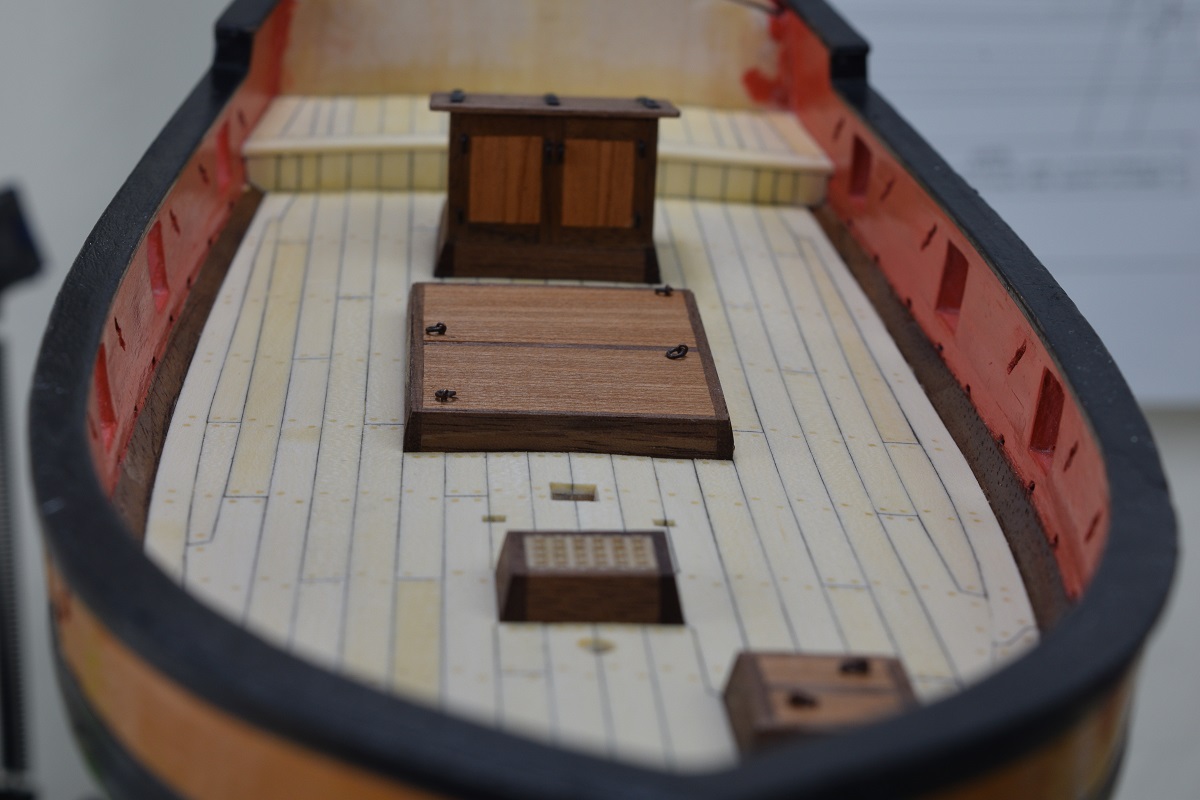
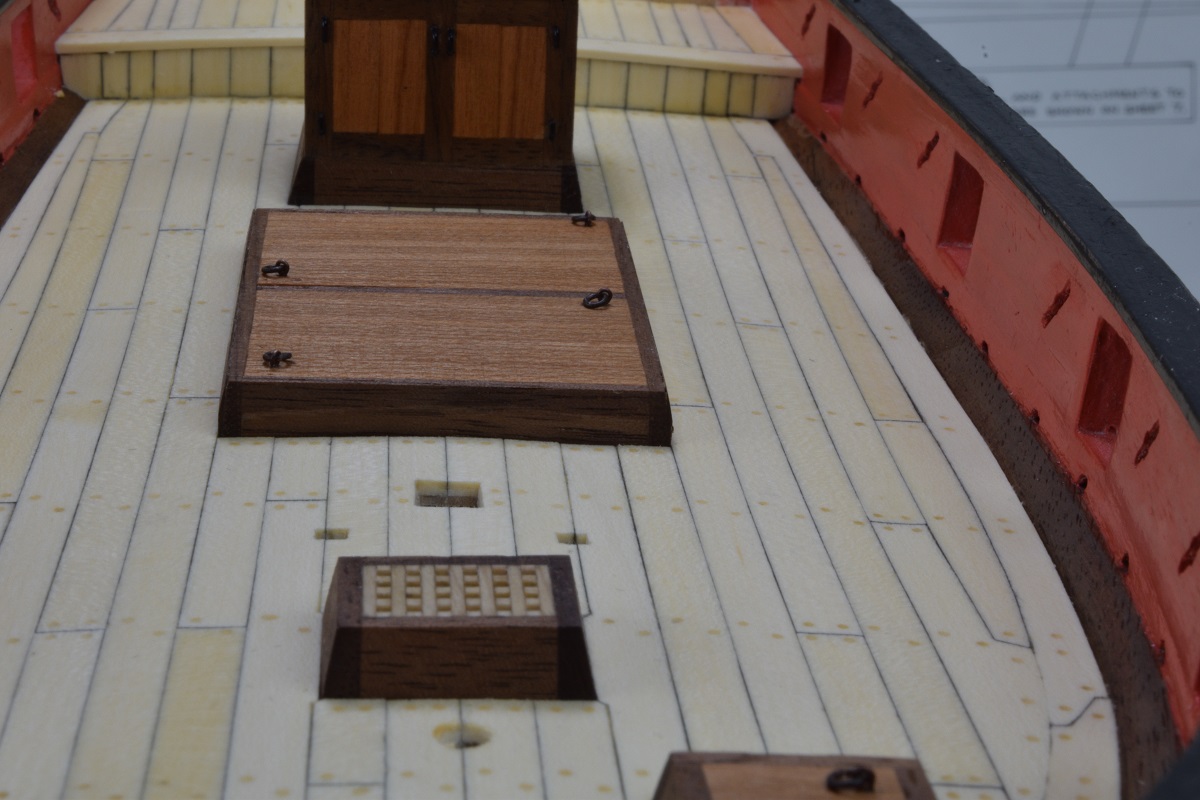
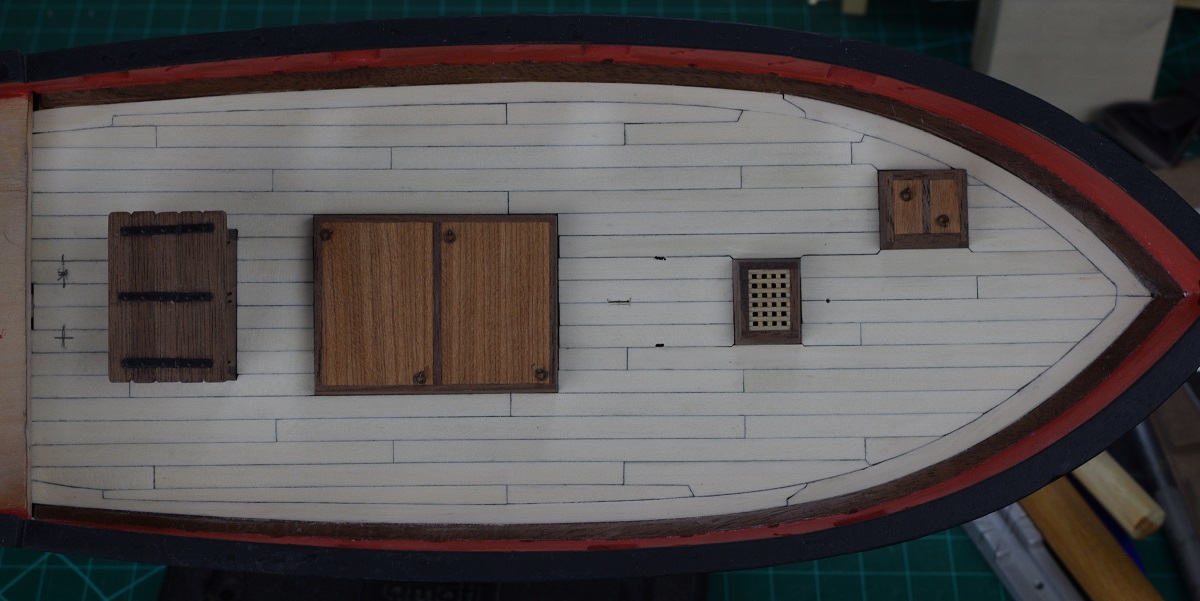
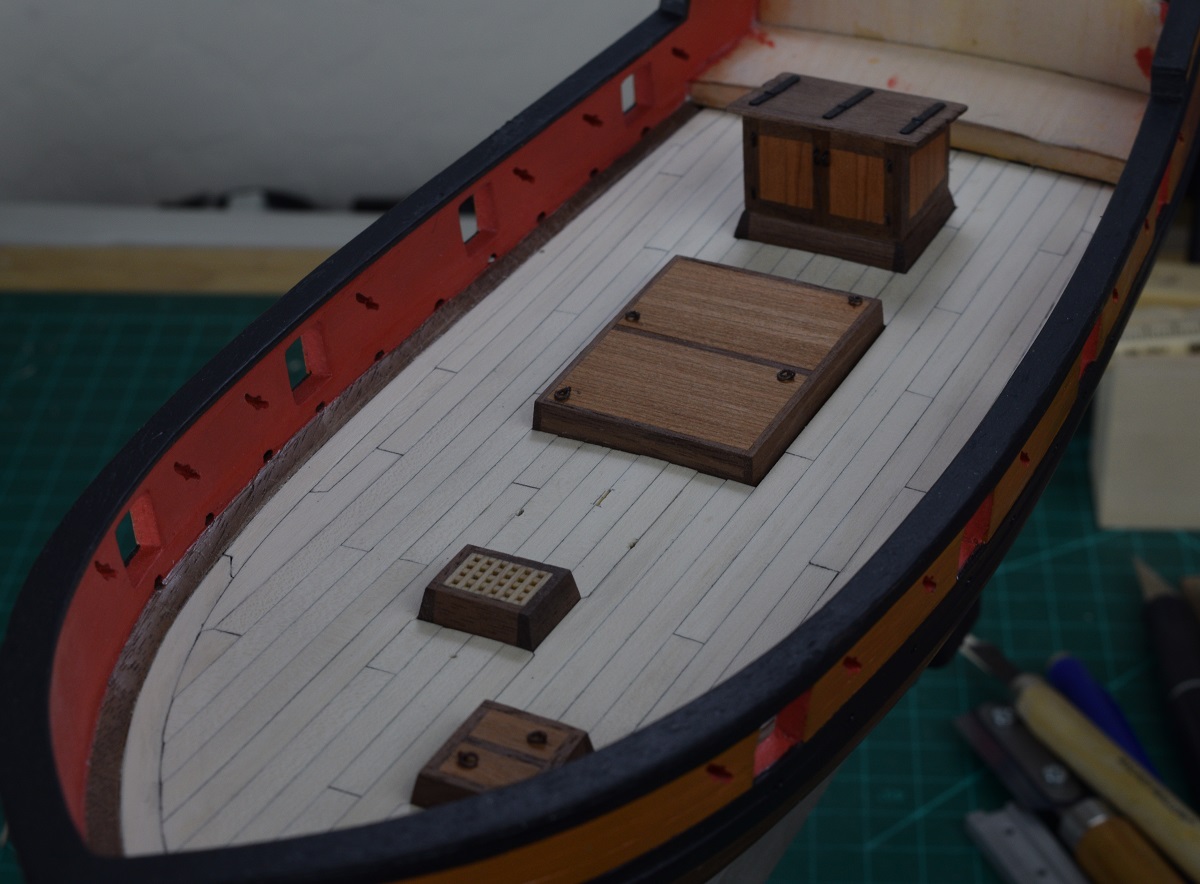
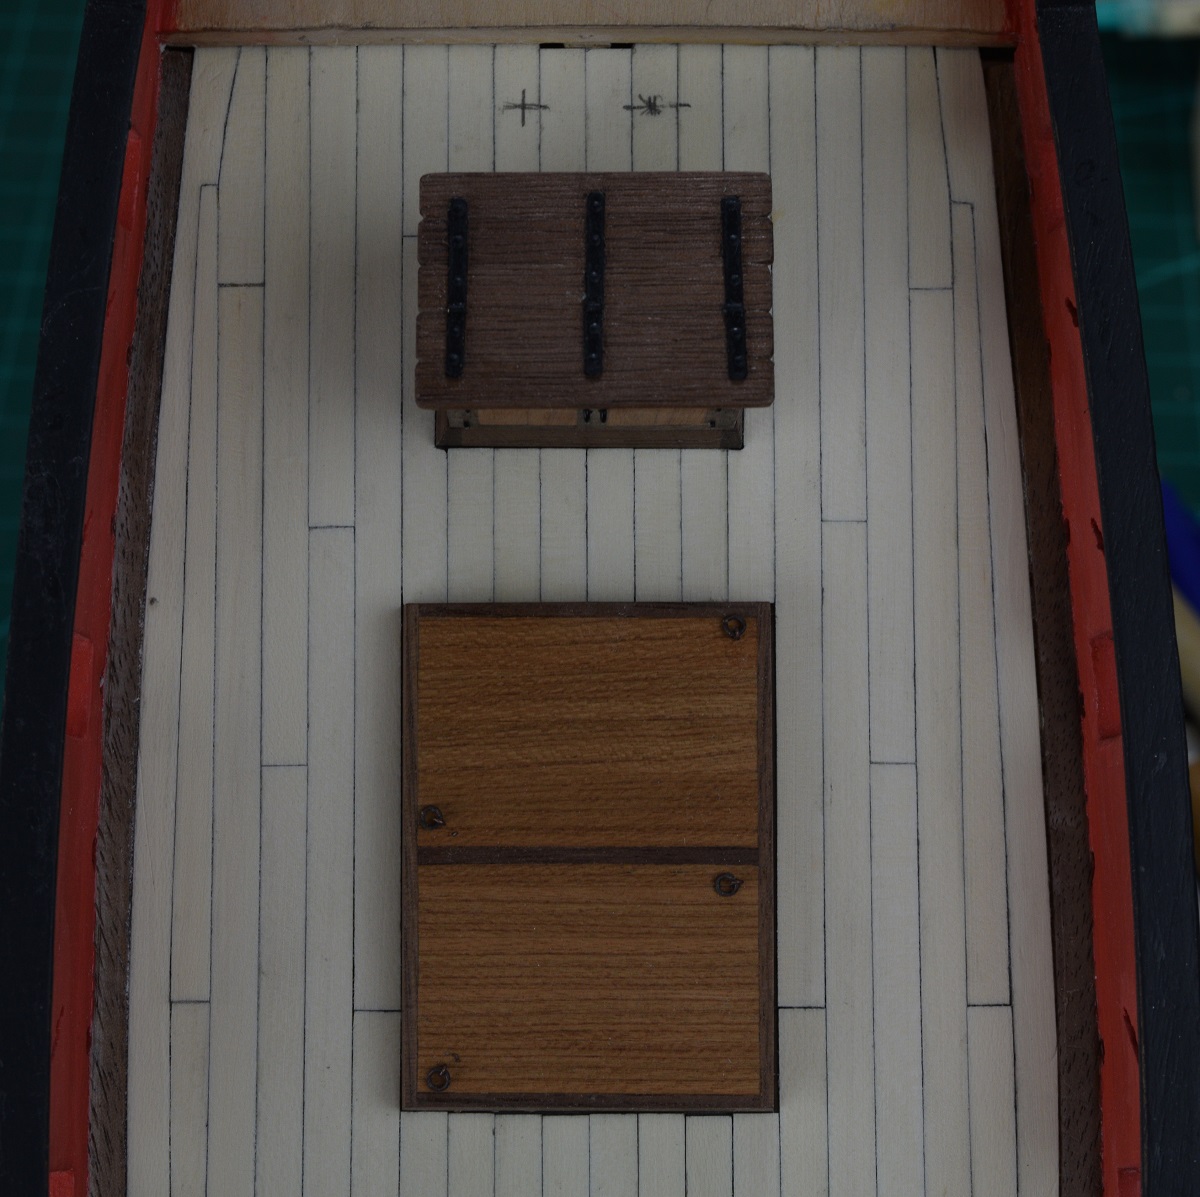
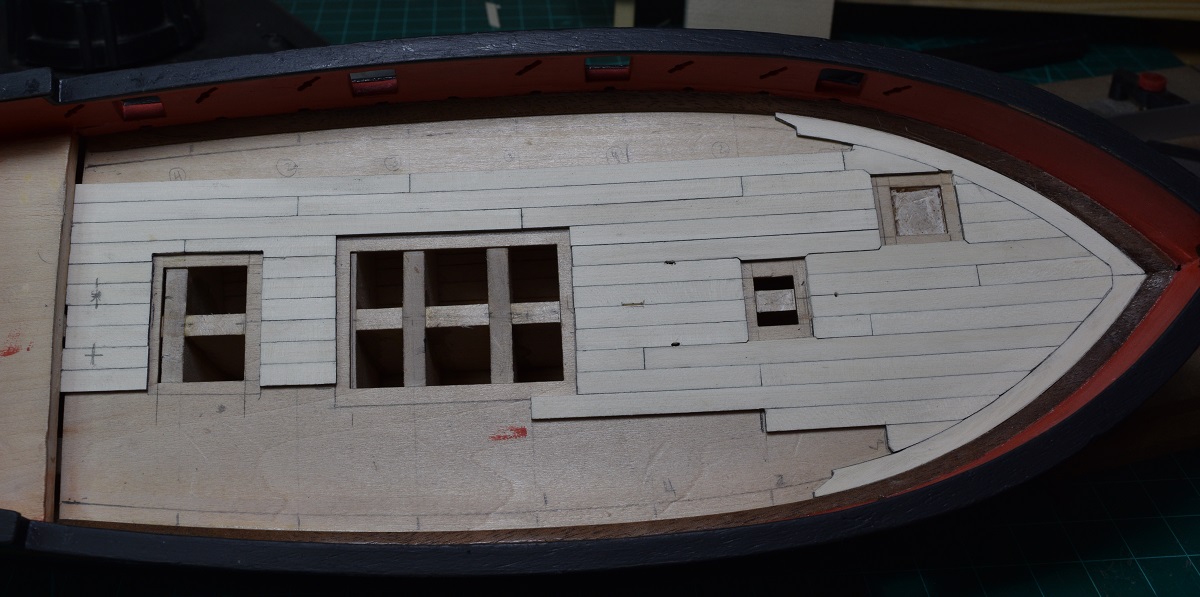
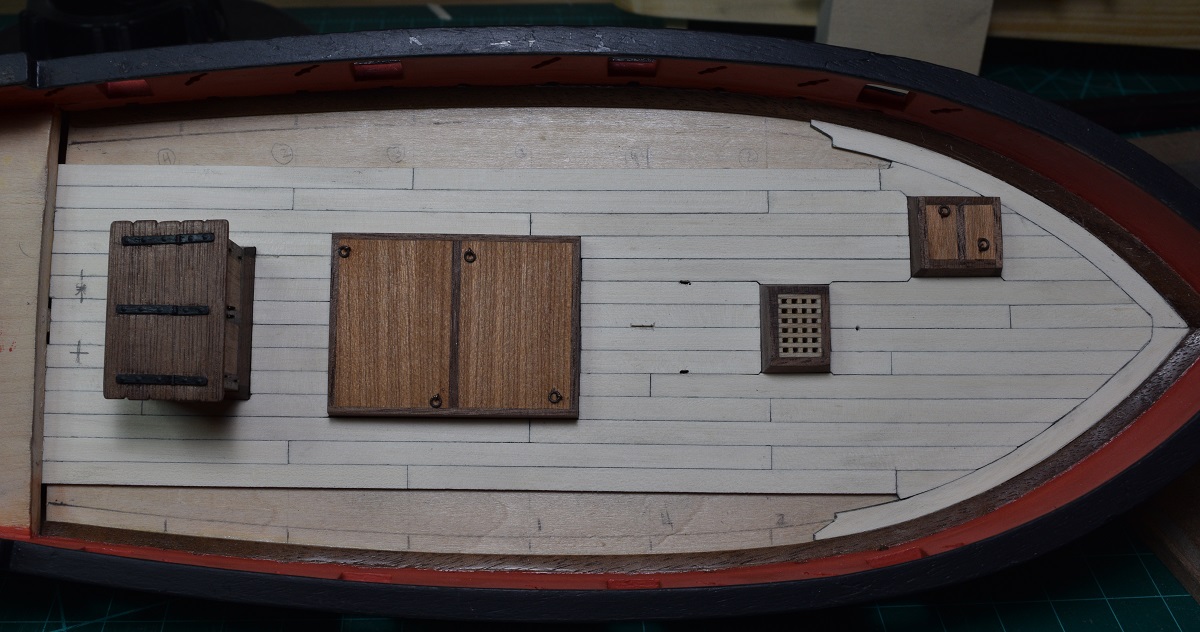
Thanks everyone for the kind words and likes.The main deck planking is all placed. I learned a number of things doing this, and in retrospect I would have done a few things differently (where the butt-ends landed, I should have started the hook & scarf at least one, and probably 2 planks earlier), but overall I'm fairly happy with the final results.Now I need to plank the quarter-deck, and then do a full scraping and get a couple coats of poly down (oh, and open up the holes for mast, stove pipe, etc.) before drilling a bunch of little holes! I also need to make some small adjustments to the main hatch, and re-poly all the deck furniture which is all still just sitting in place, not glued.


-
I'm not familiar with that model/ship, but I wouldn't think that the dipping fore/aft would be right. There should be camber where the center is high and the sides are lower, and there may even be a fore/aft 'sweep' where it goes up fore and aft, but I would not expect it to go up and down or be 'wavy' like that.
Just going off of the pictures it doesn't look to me like you have the top of your bulkheads faired properly to allow the deck to lay correctly.
Is there a good side-view in your plan sheets where you can see the deck-line to compare it to what you have?
-
Is your deck really thick, or is that just an illusion from the photo?
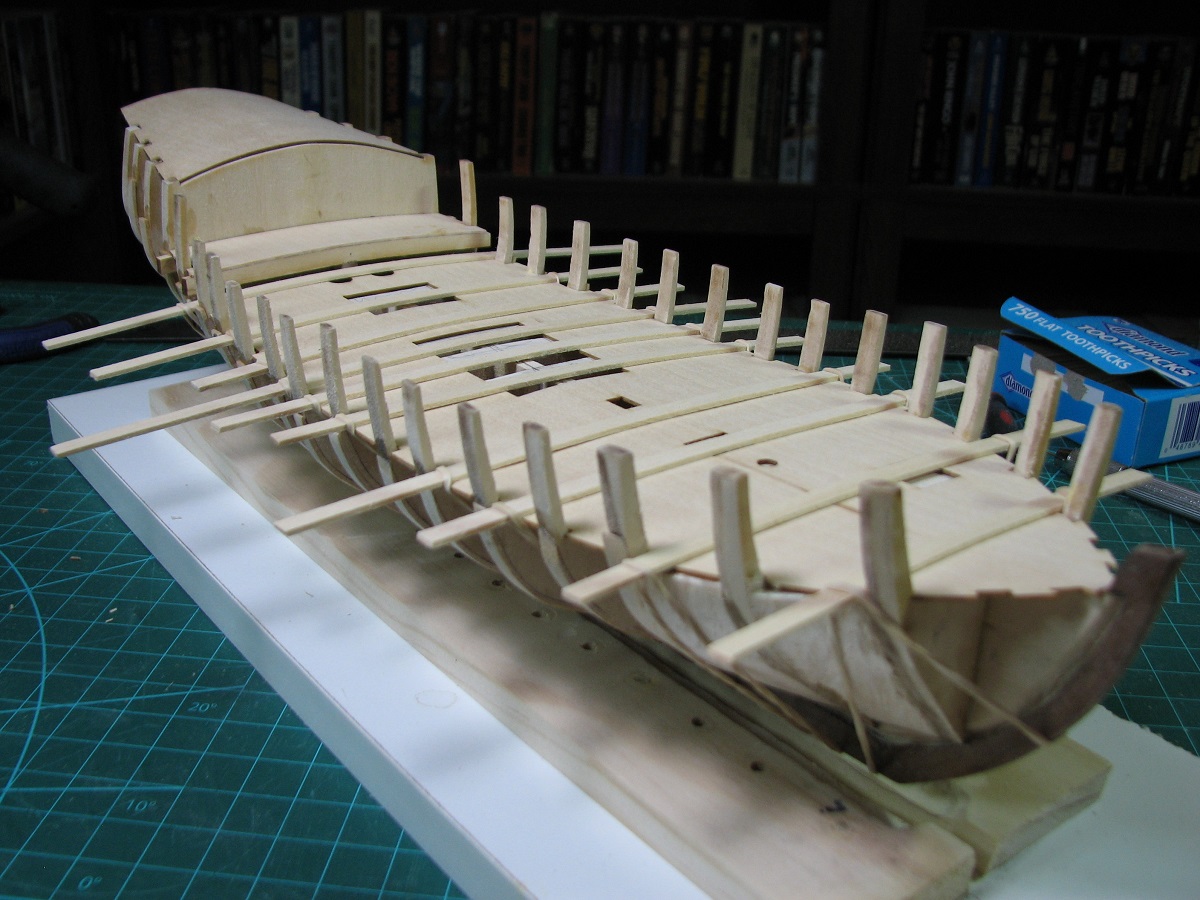
I used a simple system of rubber bands and planks to hold my false-deck in place for gluing, it gets planked much later (it's what I'm working on now actually).
Depending on how thick your deck actually is, and how much force it takes, this might work for you also:
-
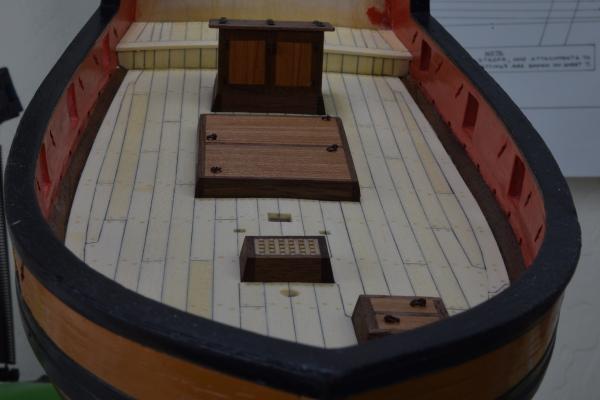
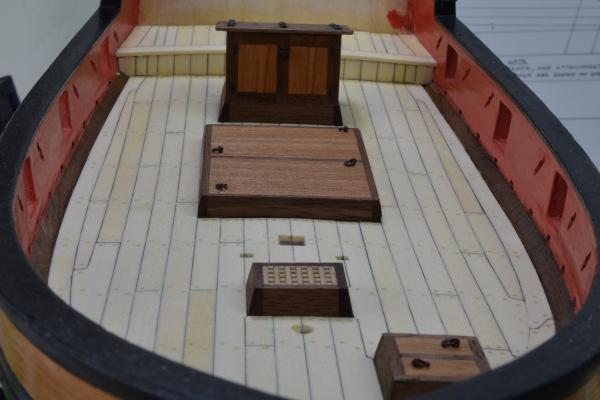
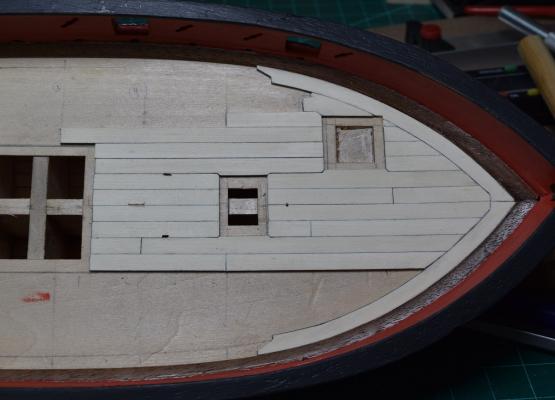
The planking continues at a fairly slow pace as I've only had a few hours to work on it a couple nights this week due to work and other draws on my time.
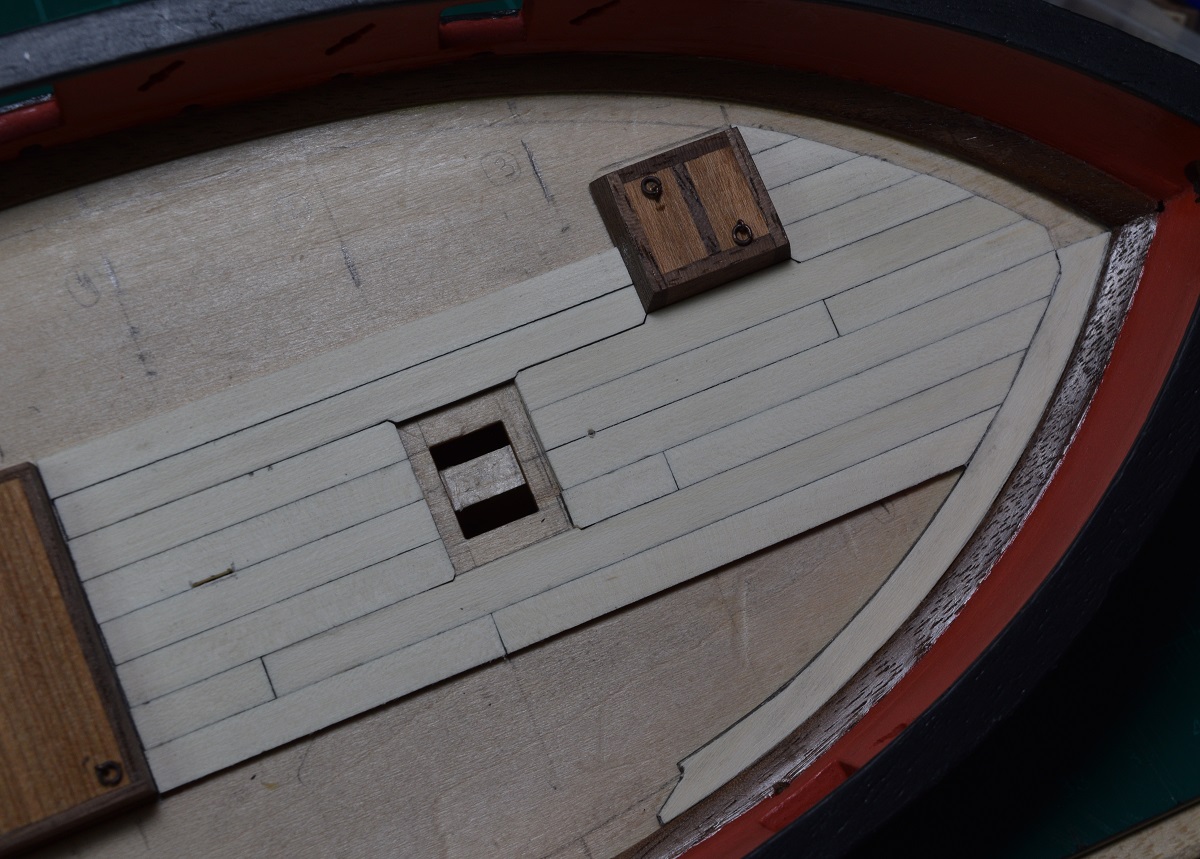
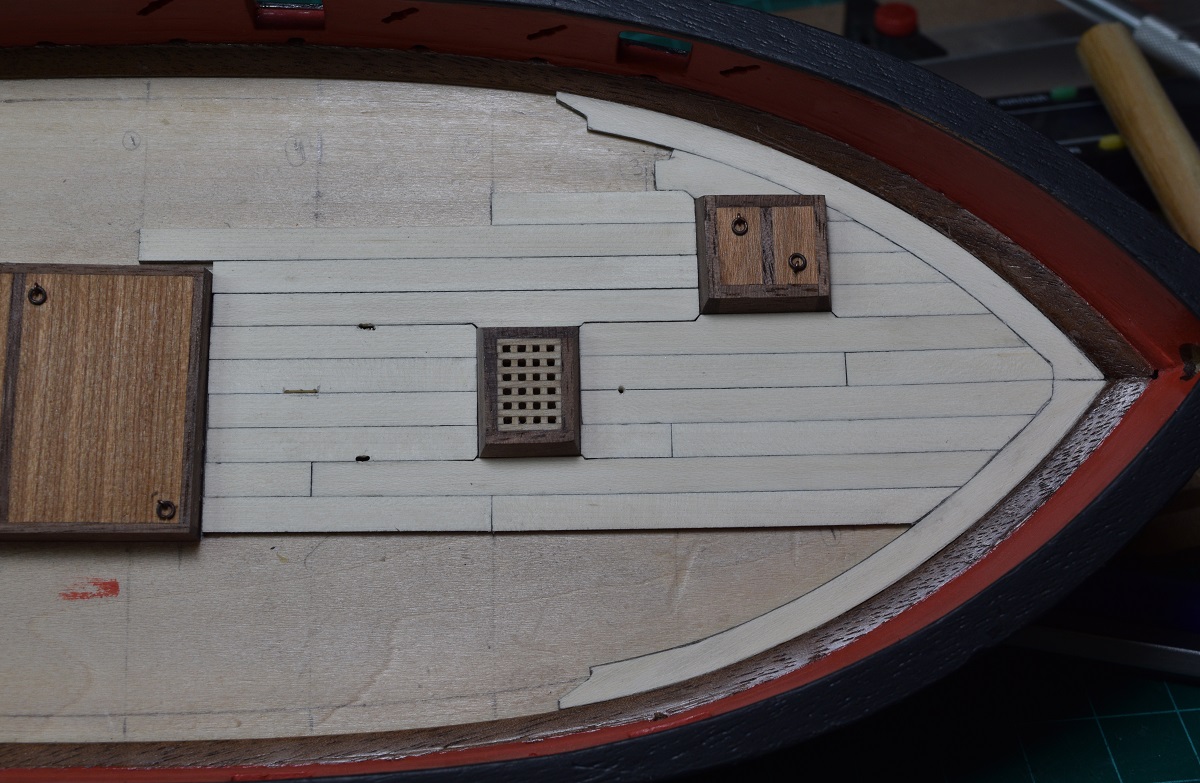
Still pleased with the results, and haven't had to remake too many things (yet), but from here on out almost every plank will be hand cut from wider stock, so the potential for terrible results will increase greatly!
I hope to cut the margin strakes, and maybe even finish the main deck planking tomorrow, but we'll have to see how slowly it goes as I cut all the custom fit edge planks.
Photo's!


- riverboat, GTM, Captain Slog and 14 others
-
17


Indian Girl Canoe by GuntherMT - FINISHED - Midwest Products - Scale 1:12 - SMALL
in - Kit build logs for subjects built from 1901 - Present Day
Posted
Thanks everyone for the likes, and thank you to those who are providing commentary and feedback in this thread, it's appreciated. Always feel free to let me know if you see that I'm doing something stupid.
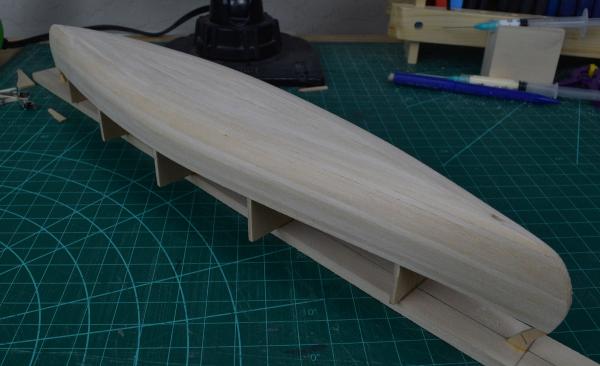
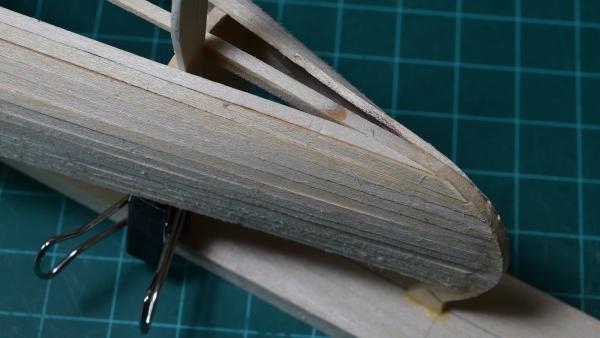
Tonight, the little canoe was removed from the strongback. Freedom!
I then did some sanding, taking it down from 120 to 220, and then to 320 grit. I then built up one of the stems over the gunwale, and sanded that area.
I also sanded down the roughest stuff in the interior, using the incredibly fancy sanding tool pictured here:
Yes, it's just a strip of 120 grit sandpaper rolled up.
I'll do the other stem tomorrow or Saturday (have dinner out tomorrow, so don't know if I'll get to make any sawdust at all).