


GuntherMT
-
Posts
2,213 -
Joined
-
Last visited
Content Type
Profiles
Forums
Gallery
Events
Posts posted by GuntherMT
-
-
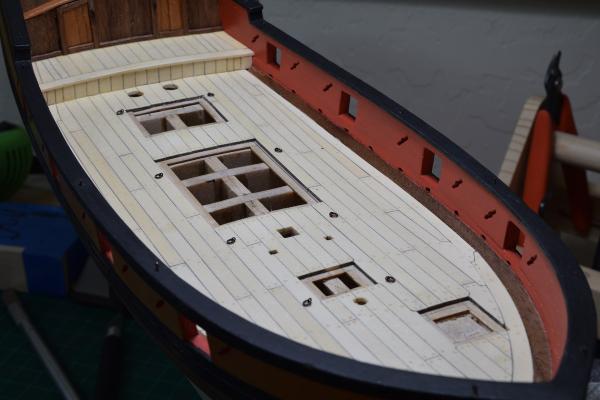
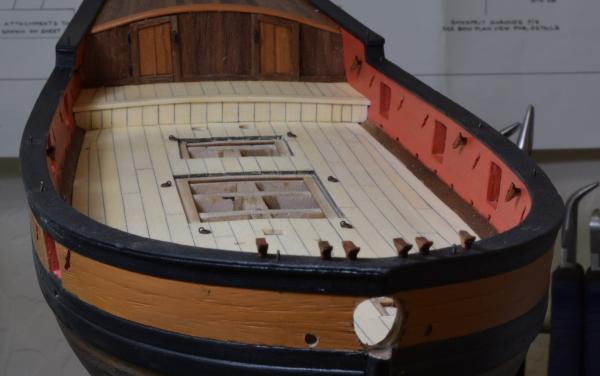
Making more progress, although it's small stuff.
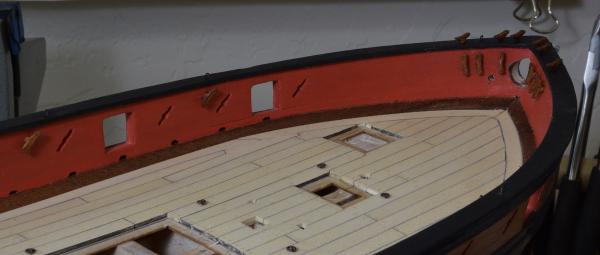
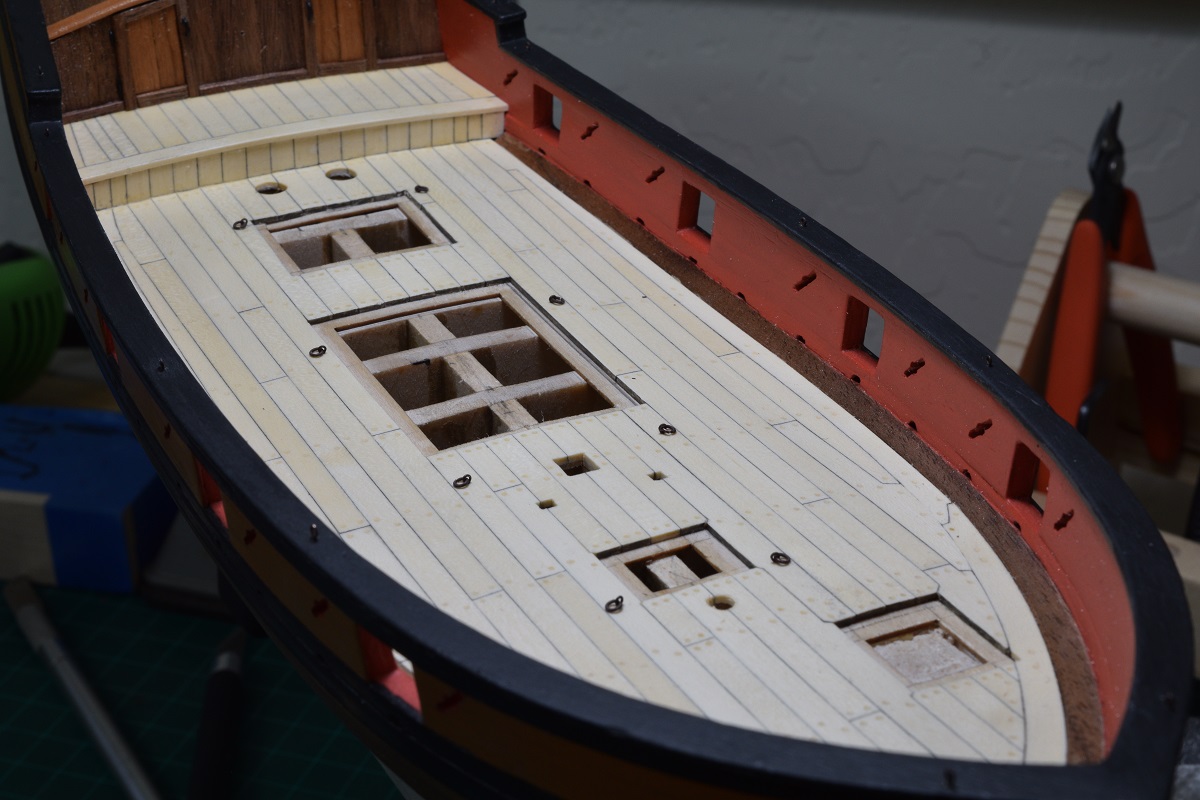
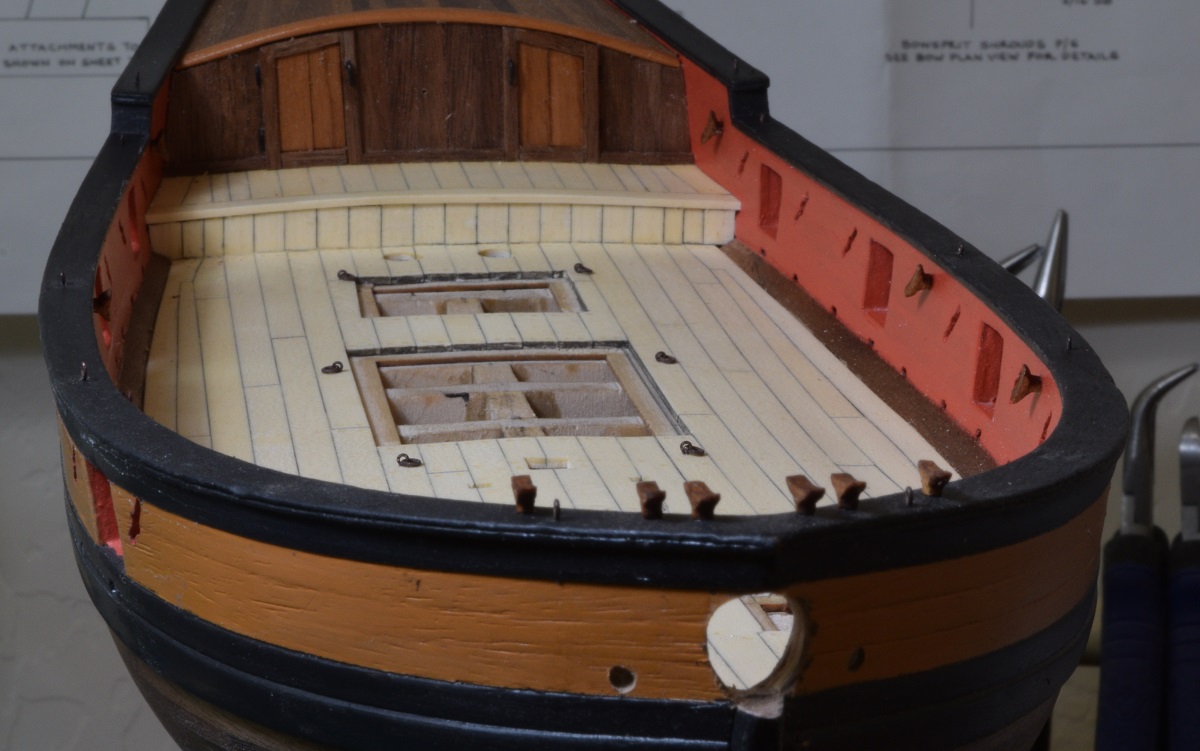
I got the holes drilled for the eye-bolts in the cap rail, and trimmed them to size and placed them. They are chemically blackened, so don't show up in the pictures very well at all, so I didn't bother why photo's specific to them. I still have the eye-bolts in the outside the the hull to place, and the ones around the base of the mast. I am going to wait on those until I have the mast made and can test fit it so that I get the bolts placed correctly rather than relying on the plan location.
I permanently place the eye-bolt with rings on the deck for the gun haul-in tackle.
I stained the cleats with red oak stain, and placed 18 of them on the bulwarks and bow cap-rail.
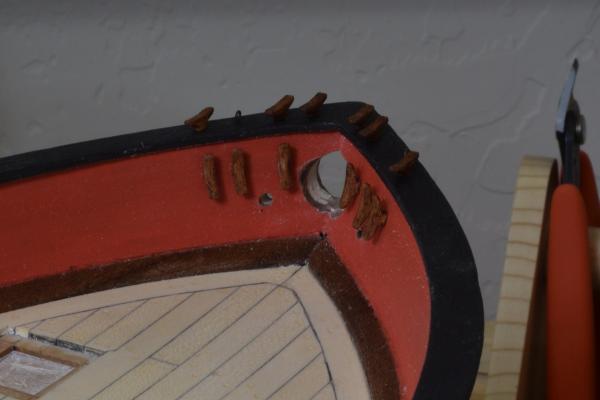
I opened up the bow-sprit opening to fit the bow-sprit, and to do that, I cut down the dowel for the bow-sprit to the proper maximum diameter where it goes through the hull.
I cut the hawse holes, but still need to paint them.
- russ, Landlubber Mike, Canute and 19 others
-
 22
22
-
Hi Brian
If you glue in the rod with epoxy before you start shaping you could hold the cleat by the rod - might make the shaping work go a little faster.
Hope you can make the next meeting on 6/20 - can't wait to see your progress in person.
Frank
That's a most excellent idea, now that I've gotten all 30 of them done. Hahaha..
The best part is, that I just spent the better part of a day making cleats that when the ship is done, will almost all be mostly hidden under rope coils.

I plan to stain these a darker color so they don't stand out as such light wood against the walnut, black, and red.
- Dimitris71, Dubz, jwvolz and 9 others
-
12
-
The boat progress continues to be very slow, I've been spending way too much time playing Fallout: New Vegas again after watching the FO:4 trailer.
 I may be old, but I guess I'm still a computer nerd at heart.Finished all the pintles & gudgeons to mount the rudder, and then glued them into the rabbet's I cut for them in the rudder.Then I used a small drill and drilled indents into the brass to put tiny drops of glue to simulate bolt heads.
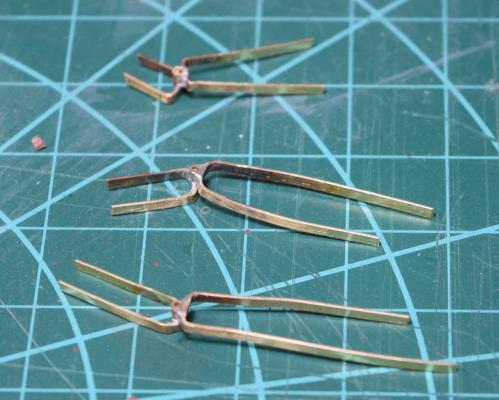
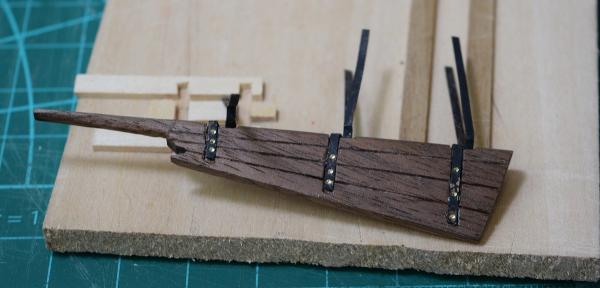 I forgot to take pictures of the in progress of that part, but it's not very interesting anyway. Today I mounted the rudder to the hull. It actually turns!
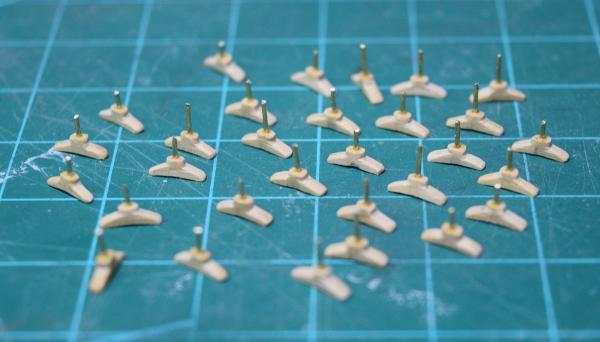
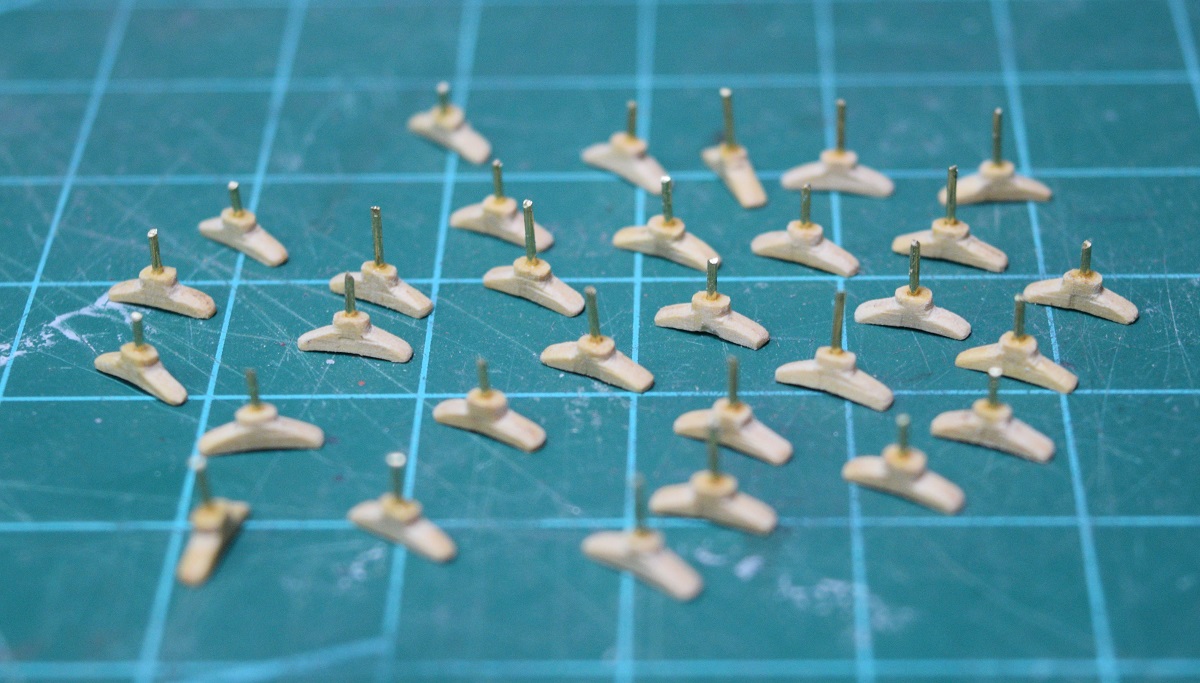
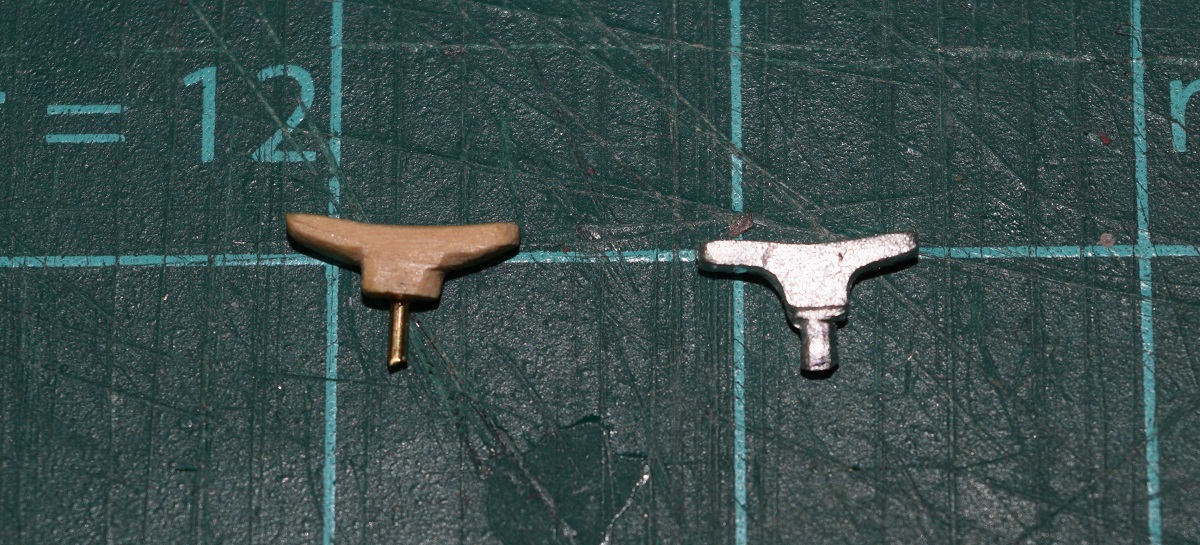
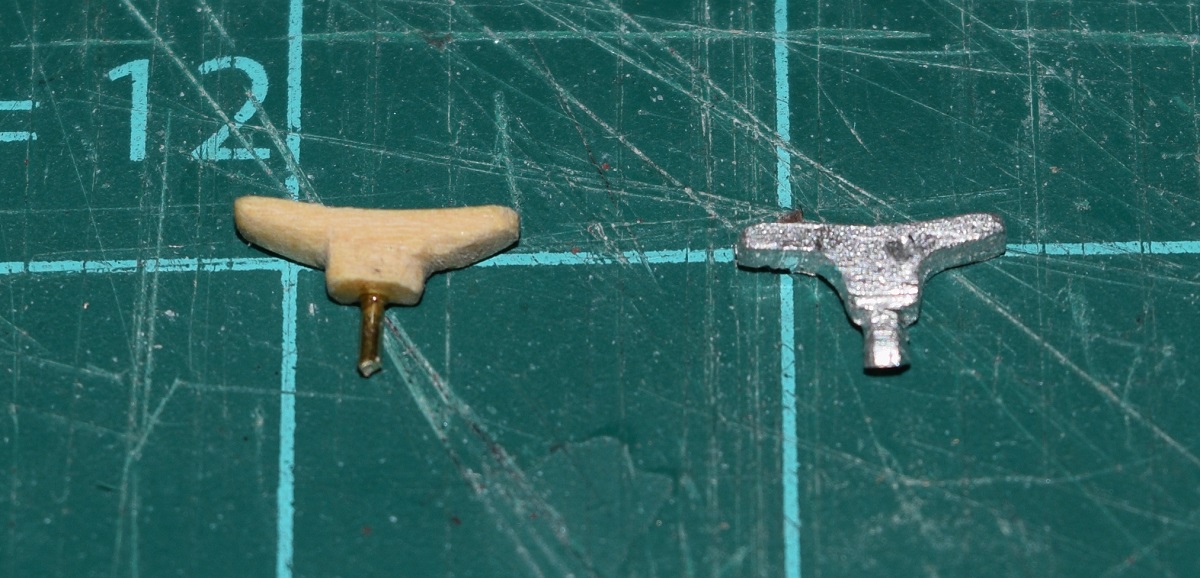
 Next I move back to the deck, but before I can finish up all the various things that go on the deck, I need to mount all the eye-bolts and cleats while there is nothing in the way. The kit supplies white-metal casting cleats, and they are kind of ugly and I hate working with them, so I decided replace the cleats with the boxwood ones from Syren.I have finished one of them, and I haven't counted, but I think I need 30+, so this will take a while. They aren't terribly difficult, just time consuming. Each one has to be filed to final shape, then have a tiny hole drilled into it to place a short brass rod to make them stay in place on the ship, since glue alone wouldn't work and they'd get knocked off the instant I started tying off rigging to them.
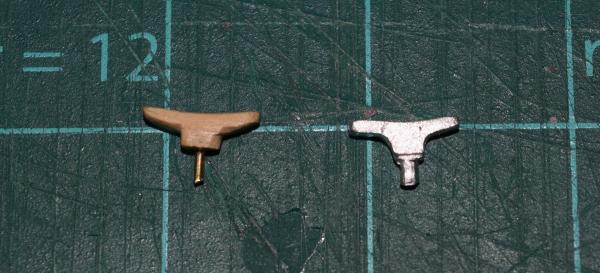
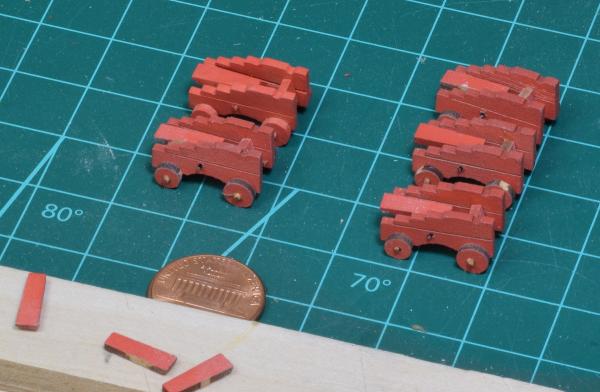
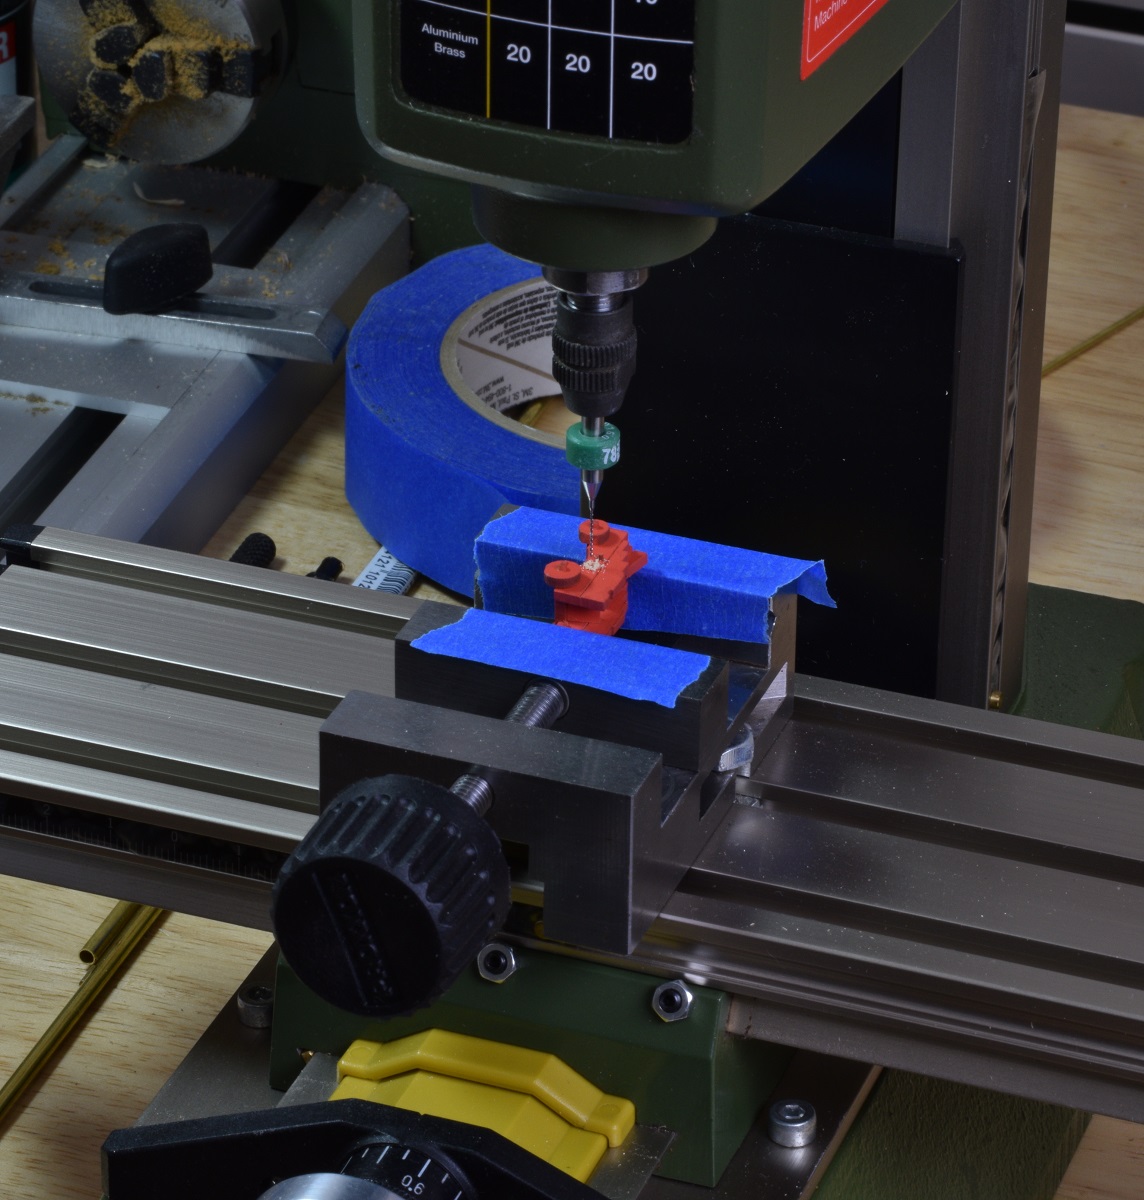
 These things are pretty small, those squares on the cutting mat are 1/2". I hold them with jewelers needle nose pliers and use a small file to shape them. I then use a #72 drill in the mill to drill the tiny hole, and I'm using the small brass nails that I used for nailing the planking on the Carmen for the brass rod. I can get two of these out of each of those little nails, and I have a bunch of them left over.The mill is pretty great for this, since the top to bottom thickness of the cleat is only 2.3mm, so the mill lets me get a very nicely centered hole and not accidentally drill all the way through the cleat when working with such a small piece.
- Ryland Craze, UpstateNY, egkb and 15 others
-
18
-
-
-
I had the same problem Bob. I cheated and just glued the ratlines on in the end. The small scale coupled with only a pair of shrouds made the ratlines a fair challenge to do properly, and the end result of gluing them worked well enough for me. Nobody has ever even mentioned that when I asked for criticism, even when I entered it into a fairly large model competition.
-
Also, attaching your photos interspersed with text is really quite easy.
First, use the full editor and upload all your pictures. I keep mine numbered in order so it's easy to figure out which one I want next.
Once you have all your photos at the bottom of the editor, start typing until you get to the point where you want the first photo. Place your cursor under the text where you want the photo to appear, then scroll down, find the photo, and click on the 'add to post' text for that picture. The editor will place the required code for the photo in that spot.
Next, put your cursor after the photo, hit enter (a couple times if you want to make a space after the picture), and then continue typing. Each time you want to add a photo just go down to the list of attached photo's, after making sure your cursor is in the right spot, and click on 'add to post', until you are done and run out of photos or things to type!
-
As long as you are happy with it Jerry, ultimately that is all that really matters!
I think it's looking great, and look forward to seeing you progress and what interesting things you do.
-
Thanks Ken, Russ, and all the likes.
Ken - Yes, in theory this will let the rudder swing. In practice, I'll see how it goes when it's assembled to the ship and decide whether to use glue to 'fix' the rudder or not. Since the ship doesn't have a through tiller, and I didn't build it to allow the ships wheel to actually turn the rudder, it really isn't of much importance to me whether it will end up movable or not, but I was interested in building it this way because I've seen other logs here done this way and I think it just looks much neater than simply dropping the pintles into the brass band of the gudgeon without any sort of receiver for it (that's how the kit is designed).
-
This wooden boat hobby has changed my definitions of what is a 'productive day', as the time frame for finishing a project is so long. I consider today to be a productive day, and I may actually go back and do more before it's over.First I finished up the rest of the guns, and did some touch up painting on all of them.
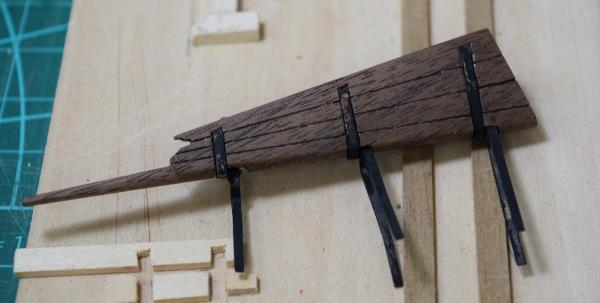
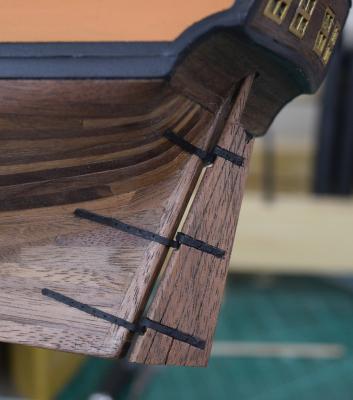
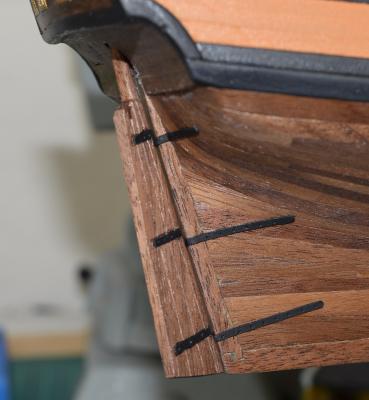
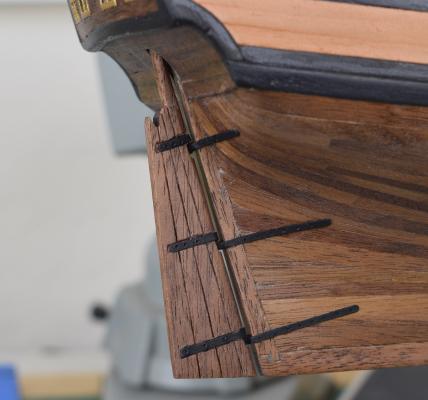
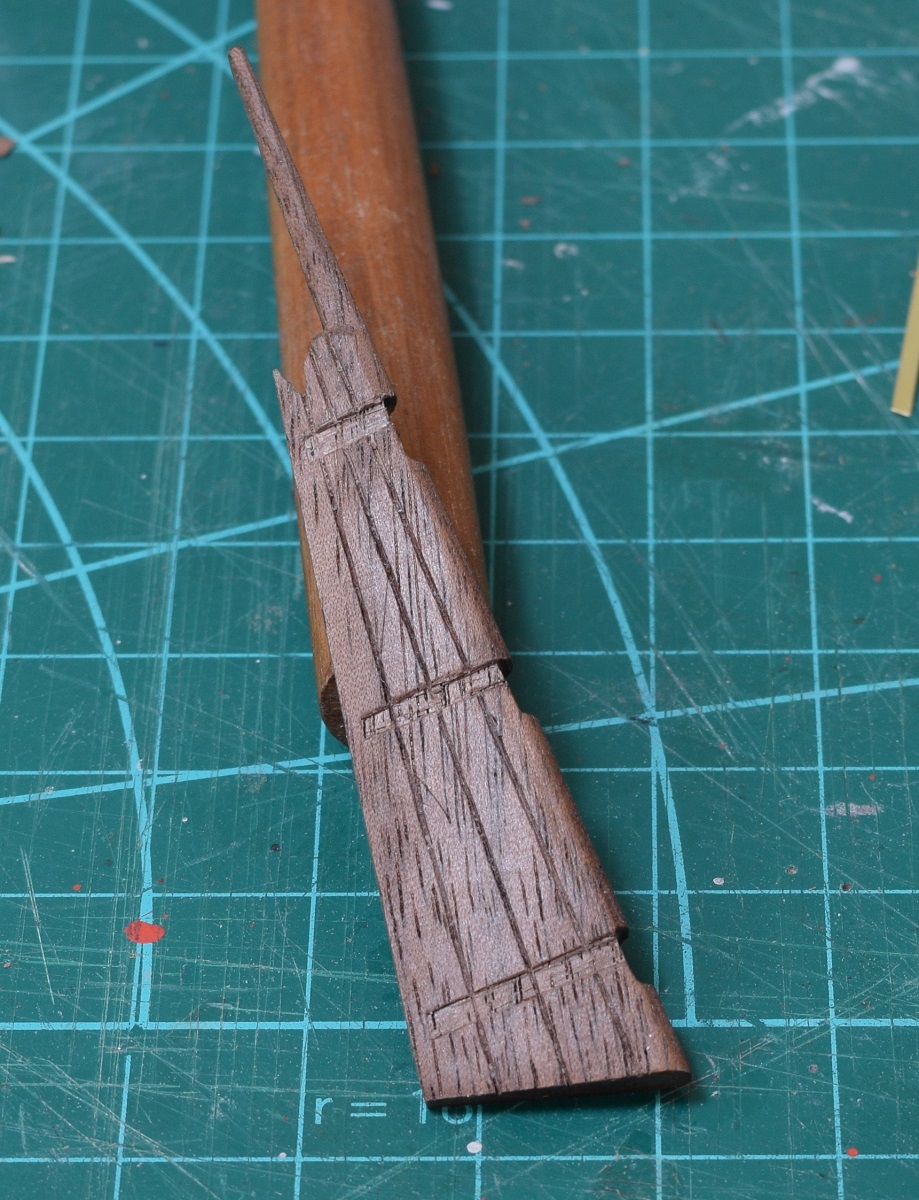
 Next I tackled the rudder. I completely forgot to take any pictures of this in progress, but it starts out as a laser cut walnut piece with no taper. To make it into a proper rudder, first it has to be tapered front to rear (it's about 1/2 the thickness along the back edge as it is at the front), and rounded at the front. Then the lines have to be measured out and etched. This is to simulate the fact that a real rudder wasn't a single piece of wood, it's built up out of multiple timbers. In this case 4 pieces. Next I have to cut recesses for the pintles. This was accomplished with a very sharp, small chisel.
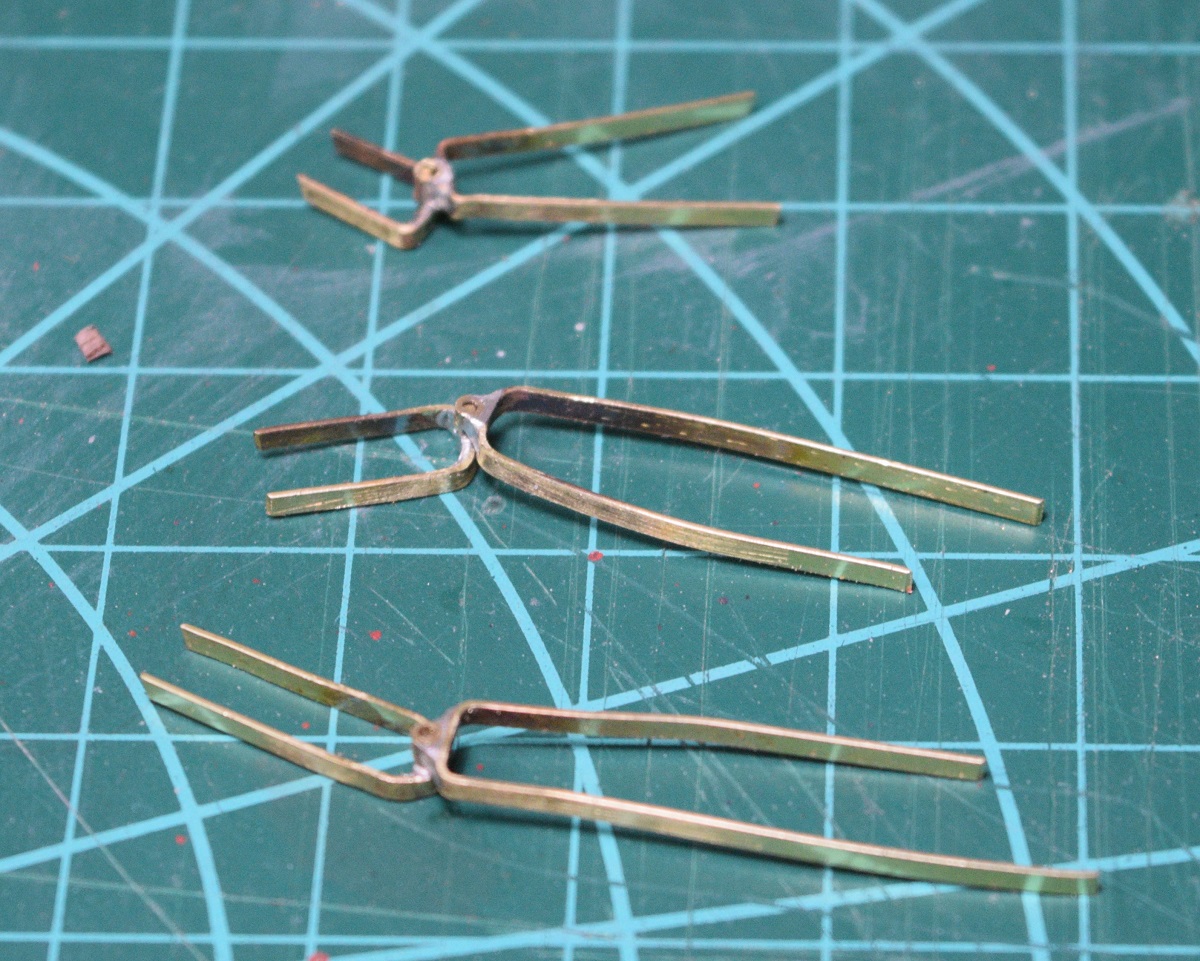
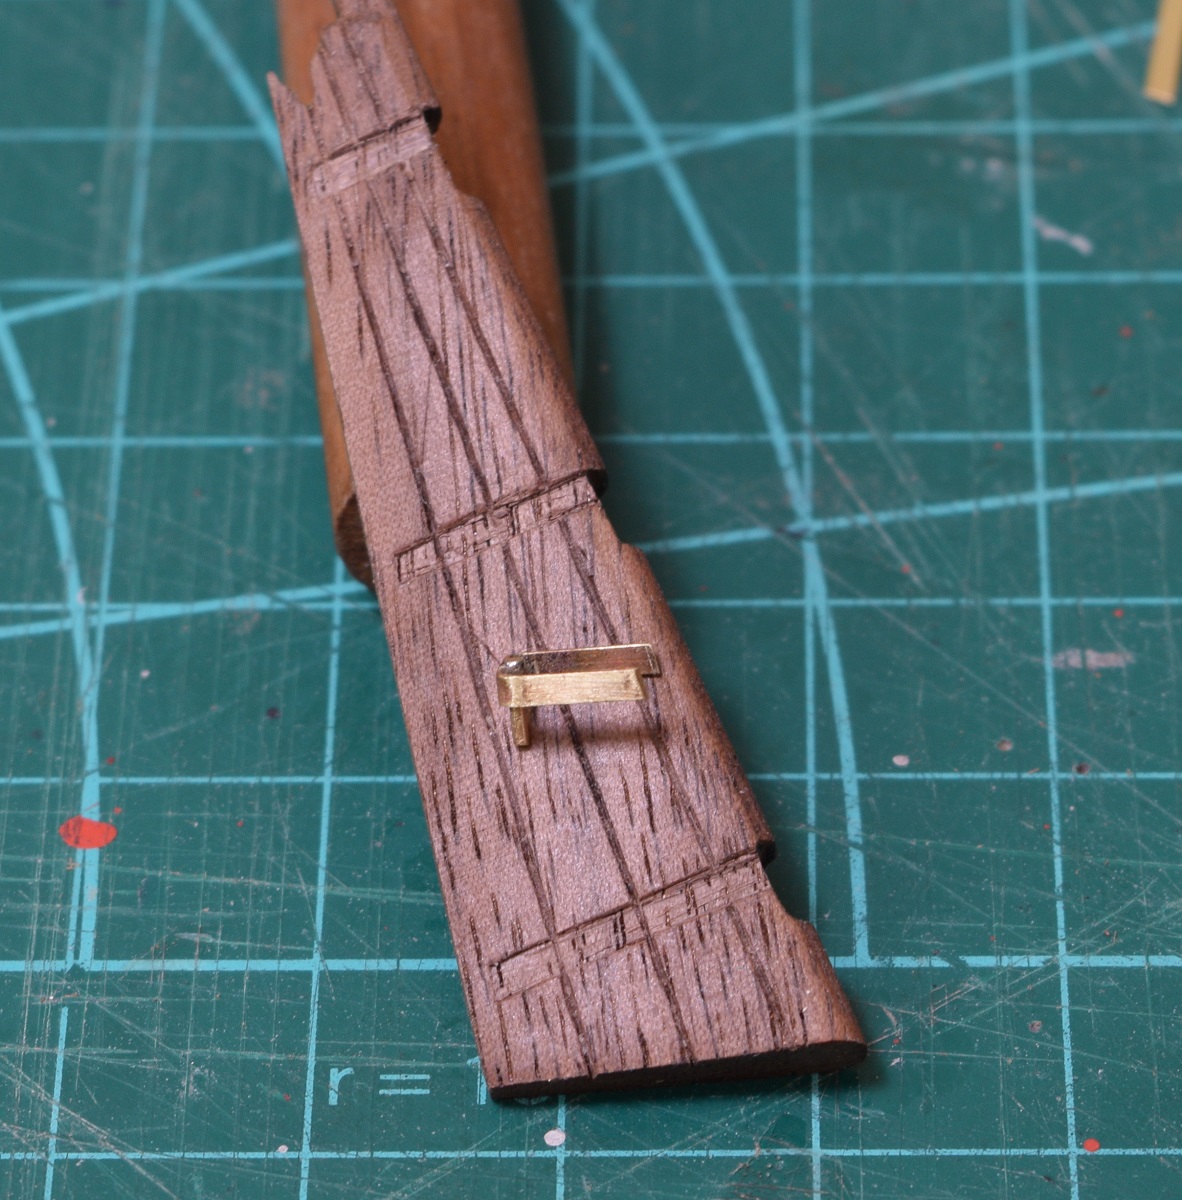
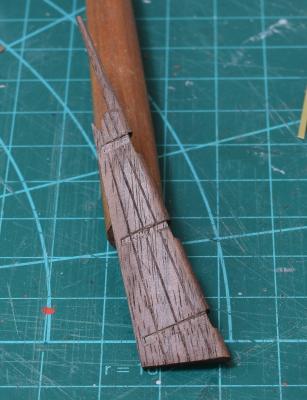 Next up, I got to learn something new! Soldering. I've soldered a lot of electronics before, but by before I mean 30+ years ago. Soldering brass using flux, silver solder, and a torch is all new, but for my first effort I think it came out ok.I made the pintle - brass pin soldered to the strap that will go into that recess I cut into the rudder.
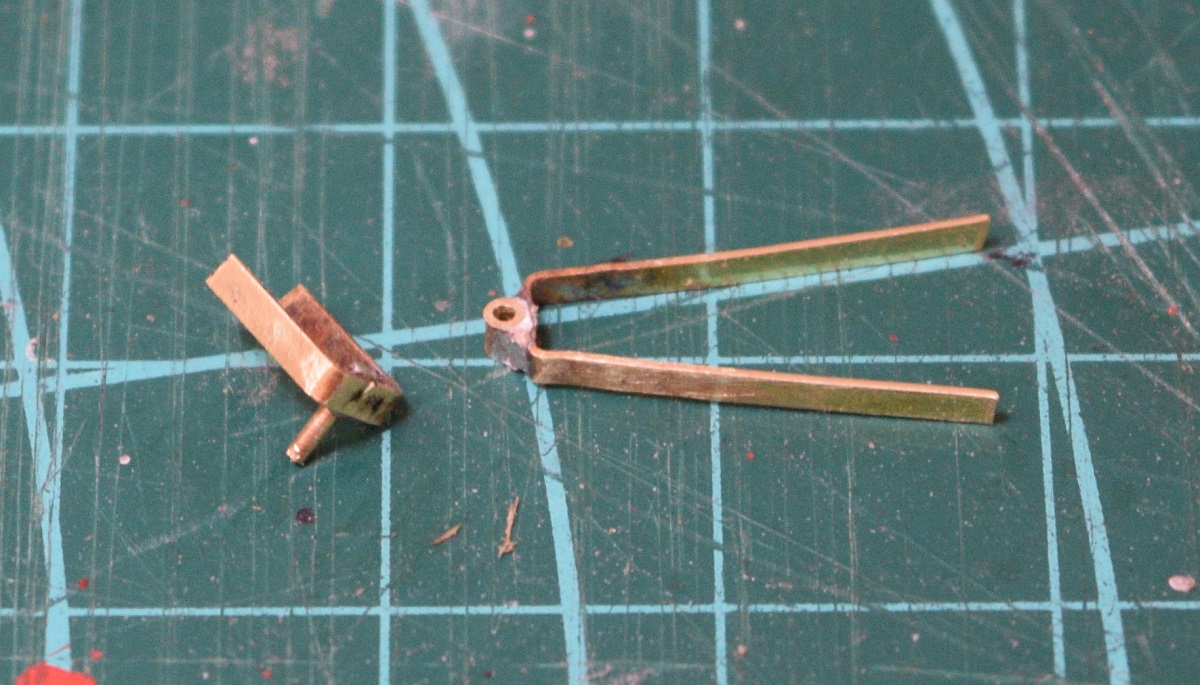
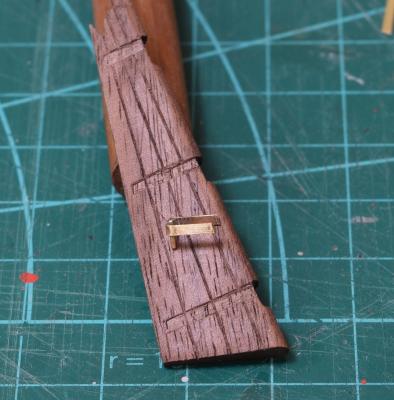
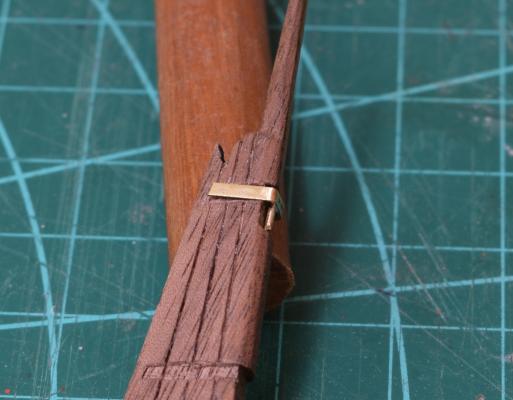 The plans make the gudgeon (the strap that the pintles drop into on the ship side) by simply using the brass strap, and letting the pintle drop into it. I decided to solder a tiny brass tube onto the gudgeon to make them work like a real one would.
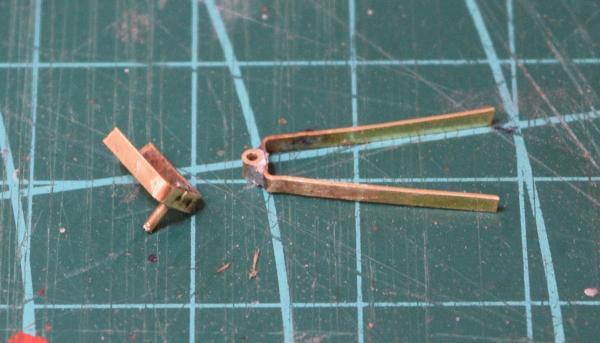
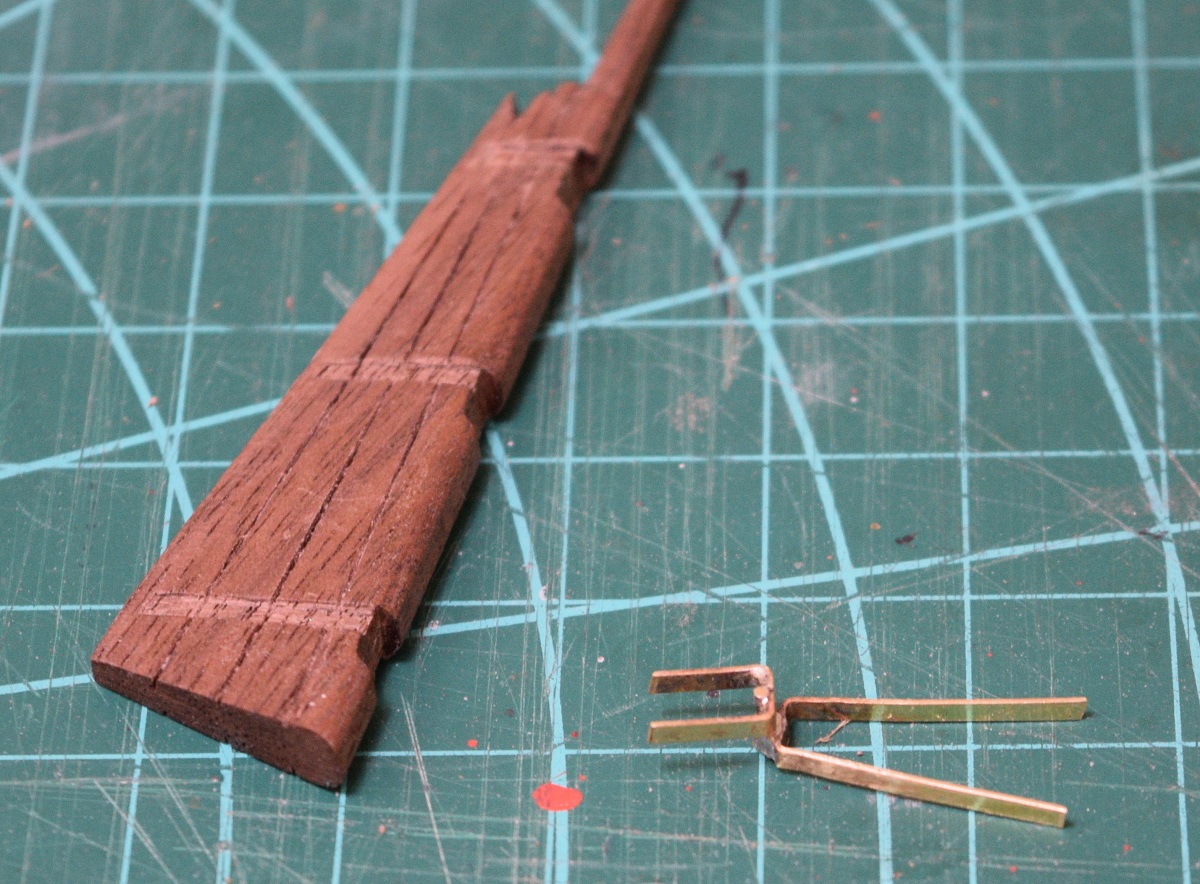
 Tthe pintle is too long currently, it will be trimmed later.
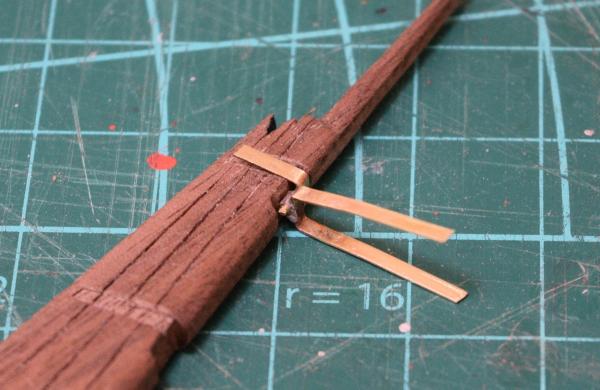 Now i just need to make two more sets of pintles and gudgeons, but my eyes are bugging me so not sure I'll get back to it today or not.
-
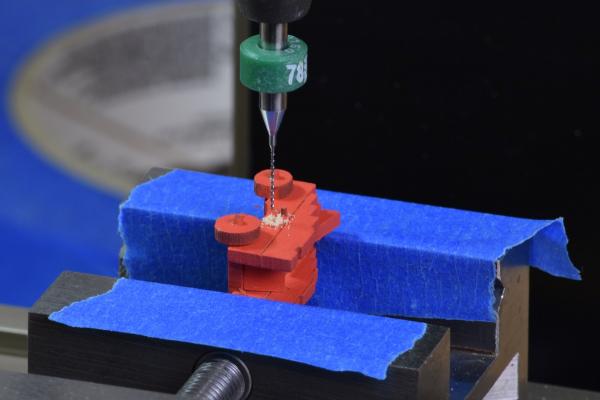
Thanks for the comments and likes! SalD - I will be taking most of my vacation this year by going to the conference at Mystic. Really looking forward to that. In the mean time, I'll take a few days off here and there.The learning trials of ship-building continue. Each little gun carriage gets 5 eye-bolts, which means I have to drill 5 little tiny holes (#78 drill). I started with a pin-vise and I discovered rapidly that the boxwood which these carriages are made out of is a LOT harder than the basswood I've been drilling before, and it took 10 minutes to drill one hole through the side of a carriage, and I had 29 more holes to drill. Ugh. Then a lightbulb went off and I remembered that Mahuna had gotten me this really awesome collection of little drill-bits that were very sharp but needed to be used in a press, since they are very hard/brittle. Well, I don't have a drill press yet, but I did just recently get a little Proxxon mill, so I chucked up the #78 bit, and then clamped the first carriage in the tool-bed vise. So awesome, got the 29 holes done in less time than the first one, and they are much more precisely located than they would have been.

 Next up, I cut down the eye-bolts and glued 3 of them into each carriage. The other two for each carriage get a ring that the breech line will go through later on when they are rigged to the deck. These eye-bolts and rings are tiny and I ended up doing all this work wearing an optivisor magnifier thing.
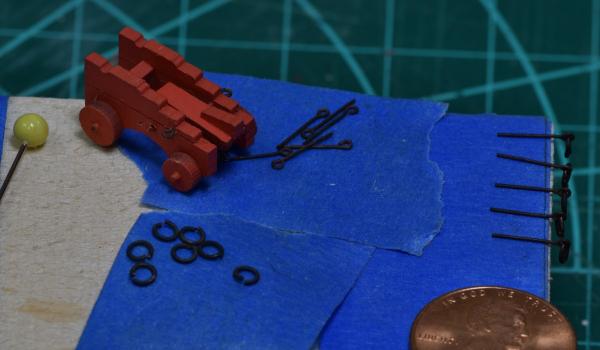
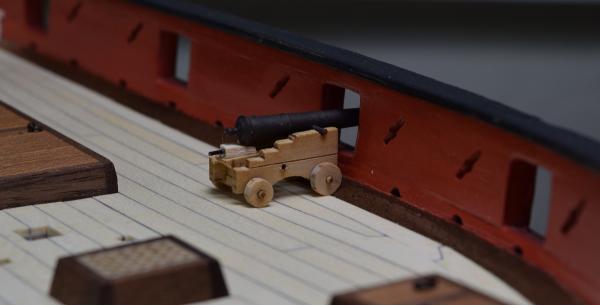
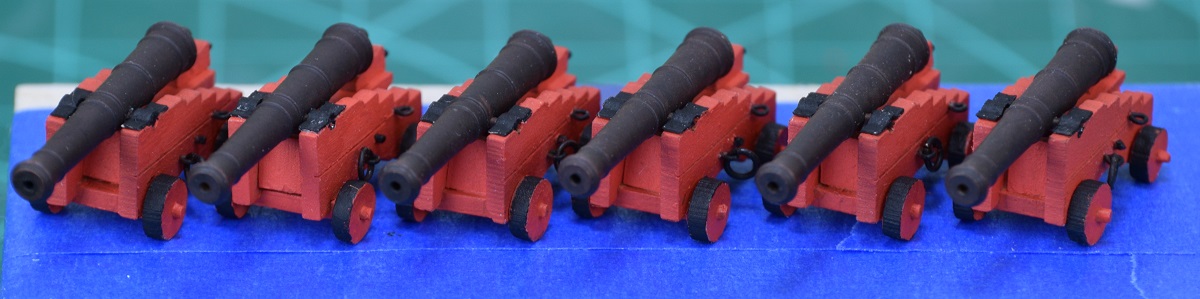
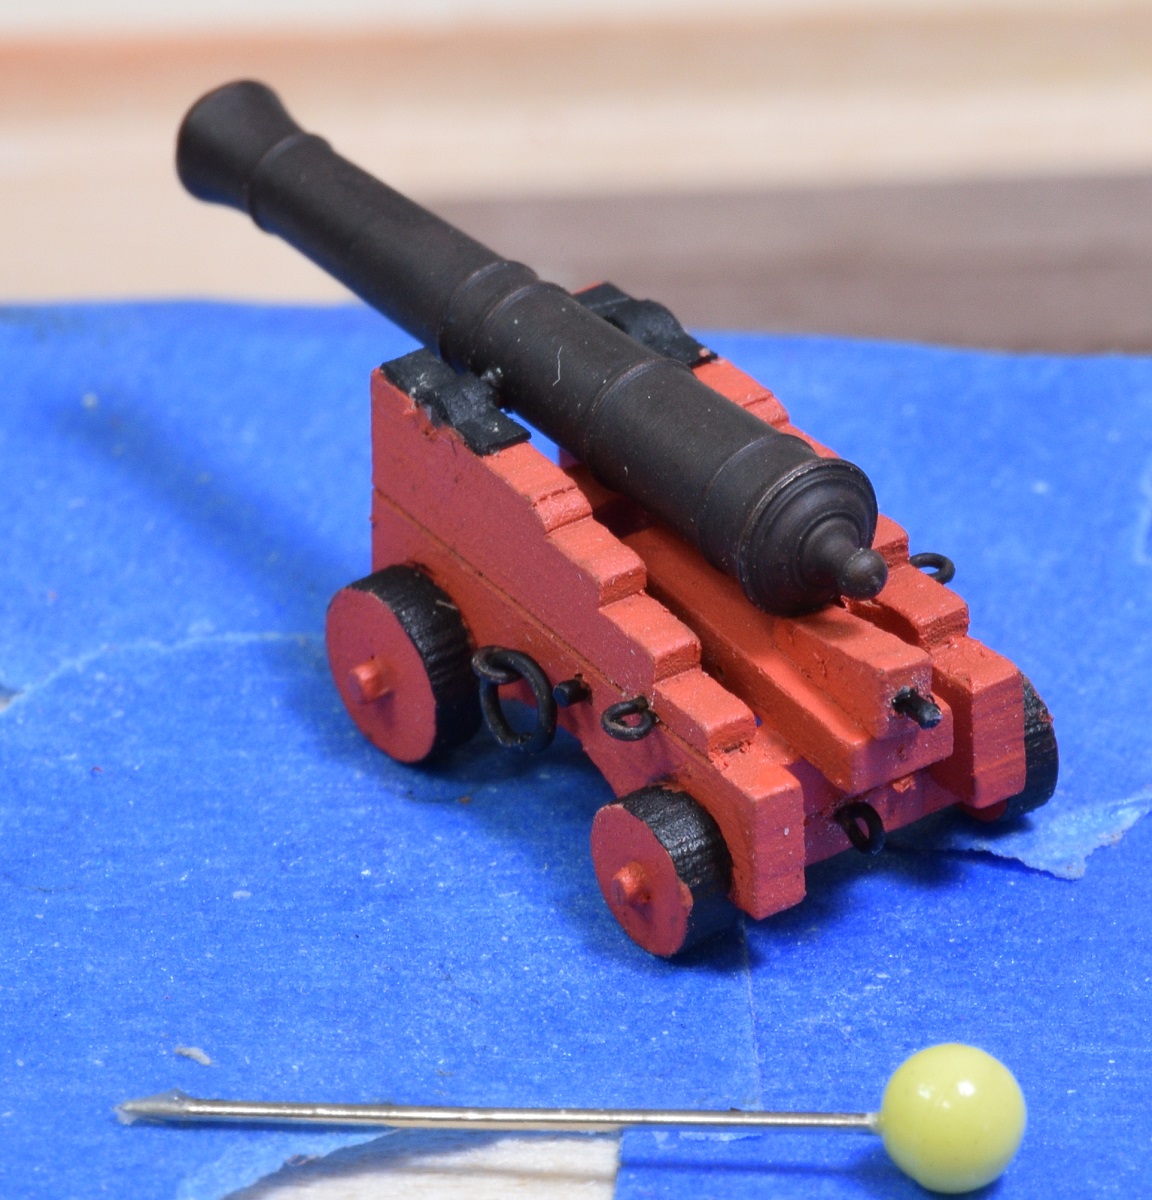
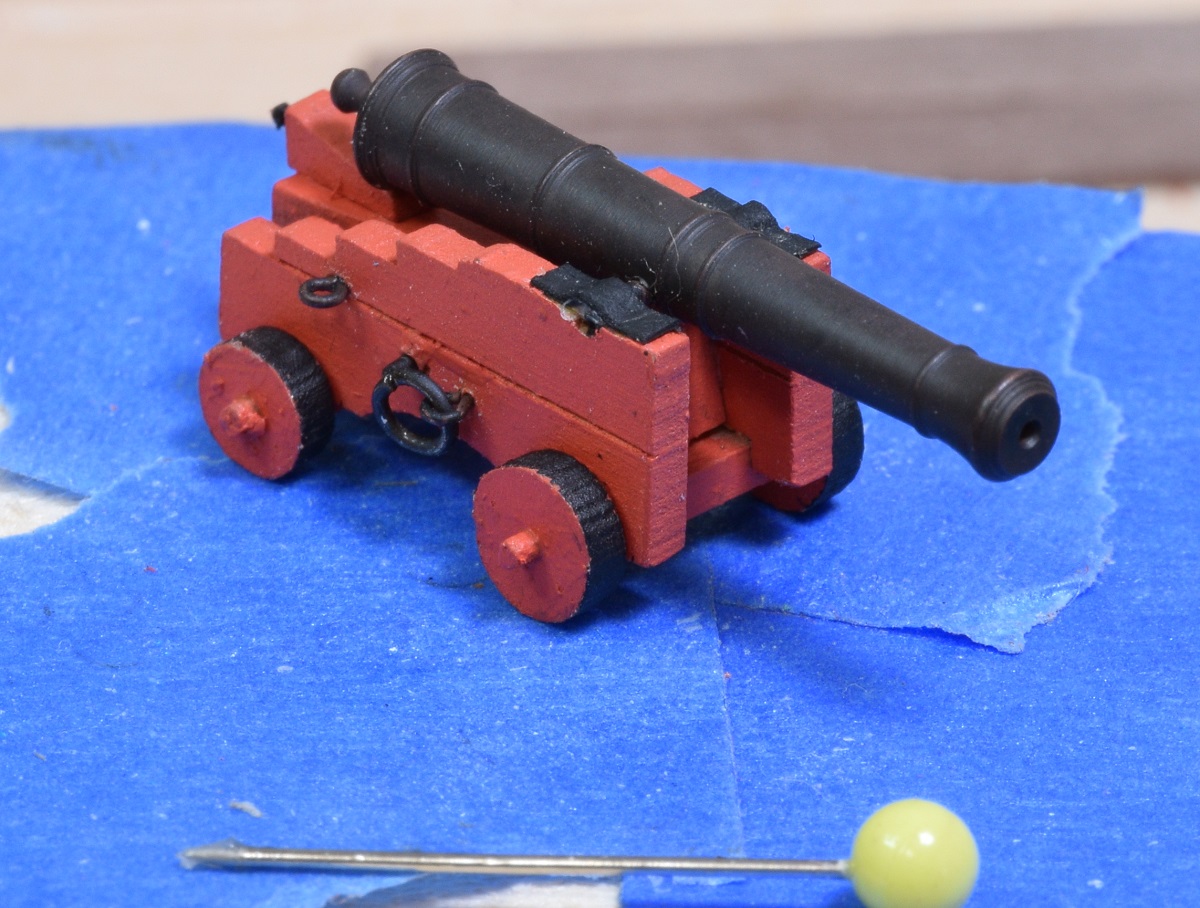
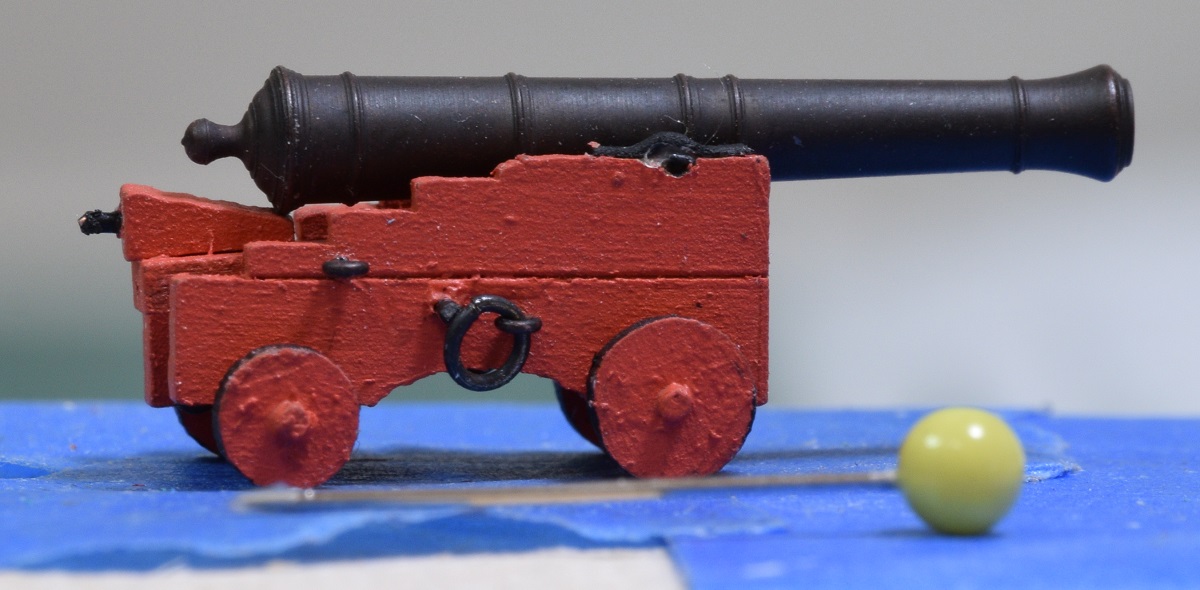
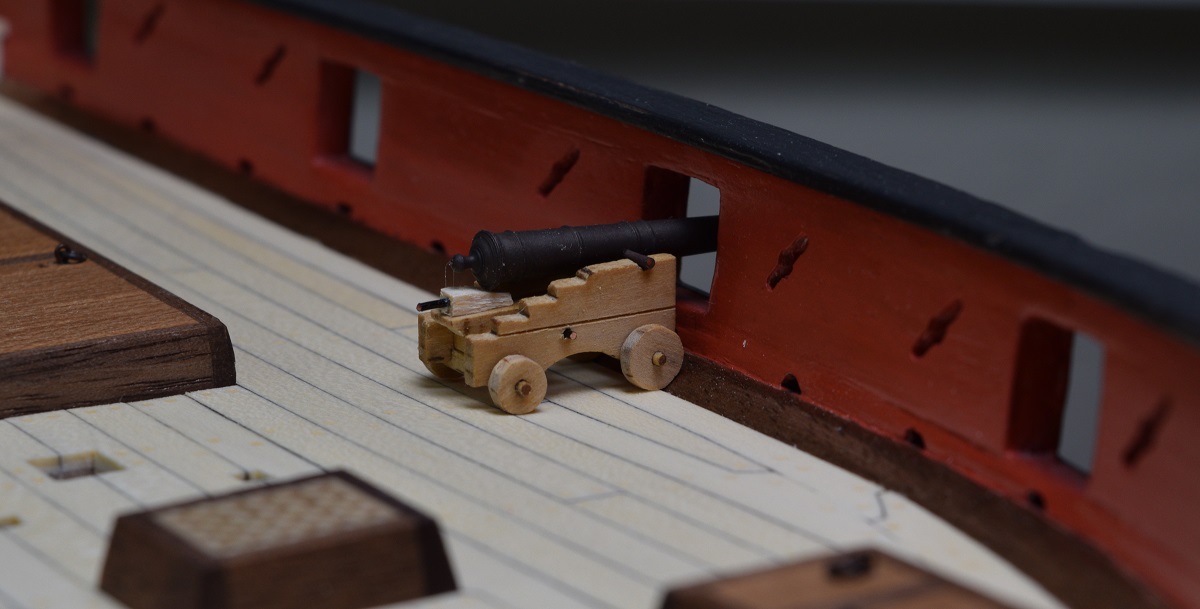
 I assembled all of the rings to their eye-bolts and used a tiny drop of CA glue to join the ends of the ring. Probably didn't need to do that. Then I decided to just finish one gun assembly because I wanted to see it done. I used very small strips of manila folder to form the trunion caps. These were supposed to be made out of brass, but I made both brass and the paper ones, and the paper look better as I can't seem to get a nice smooth curve out of brass at this small scale. I put in the eye-bolt / rings on each side, added a handle to the quoin, and painted the rims of the wheels black to simulate iron bands. I was planning to add some more bolts and other details, like the retaining pins on each axle, but these things are so small that I decided I wasn't up to the task, so I think this is how the guns will all be completed, other than some clean up and touch up painting later on.
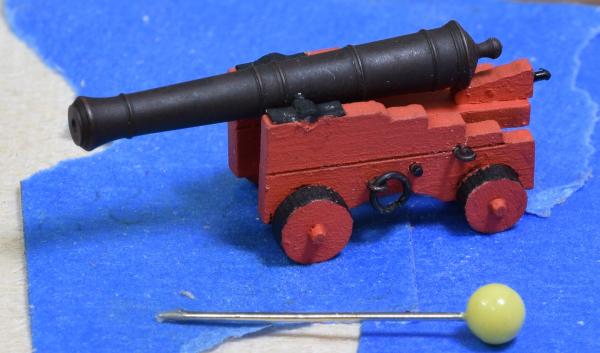


 The paint looks really rough zoomed in this close, but even 6" away with my naked eye it looks smooth. Macro photography is both a blessing and a curse.
-
Ahoy mates!
I know it's difficult to believe, but I really didn't fall off the face of the earth, rather life just sometimes gets in the way of hobbies, and I had a stretch of work where I was working 70+ hours per week (went 6 weeks straight without even a day off), and then I went on a short vacation/road trip to a track event at Miller Motorsports Park.
I thought the work stuff was behind me for a while, but then my manager announced that I was in charge of the June release and oh, by the way, she was off to India for a month+ so not only was I in charge, but surprise, she wasn't going to be here to show me all the stuff I needed to do (none of which she has documented of course), so I was sort of muddling through on my own. Then, her boss says "Oh, by the way, I'm on vacation for the next two weeks".
Cool. So the person who normally does it is in India, and the person who used to do it is gone on vacation. Wee..
In any case, I've actually gotten back to a little bit of ship-work in the last couple weeks, but it's been rather slow going. Slow as in I've been working on gun carriages, and getting one of them done every few days. So really really slow.
First I assembled one to make sure that the slightly larger than the kit carriages from Syren would work ok.
Looks fine to me! Of course after this it occurred to me that a smart person would have painted the parts before assembly.
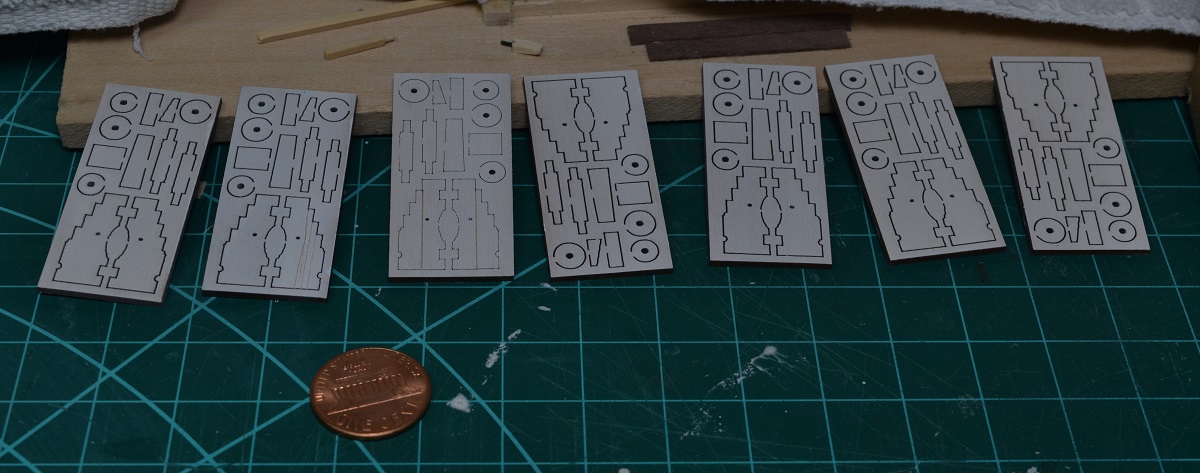
I finally got an air compressor, so I laid out the rest of the parts and primed them.

I then painted them all, but didn't take any photo's, and began assembly. Late in the assembly process I did snap a couple pictures, but they are mostly pretty boring.
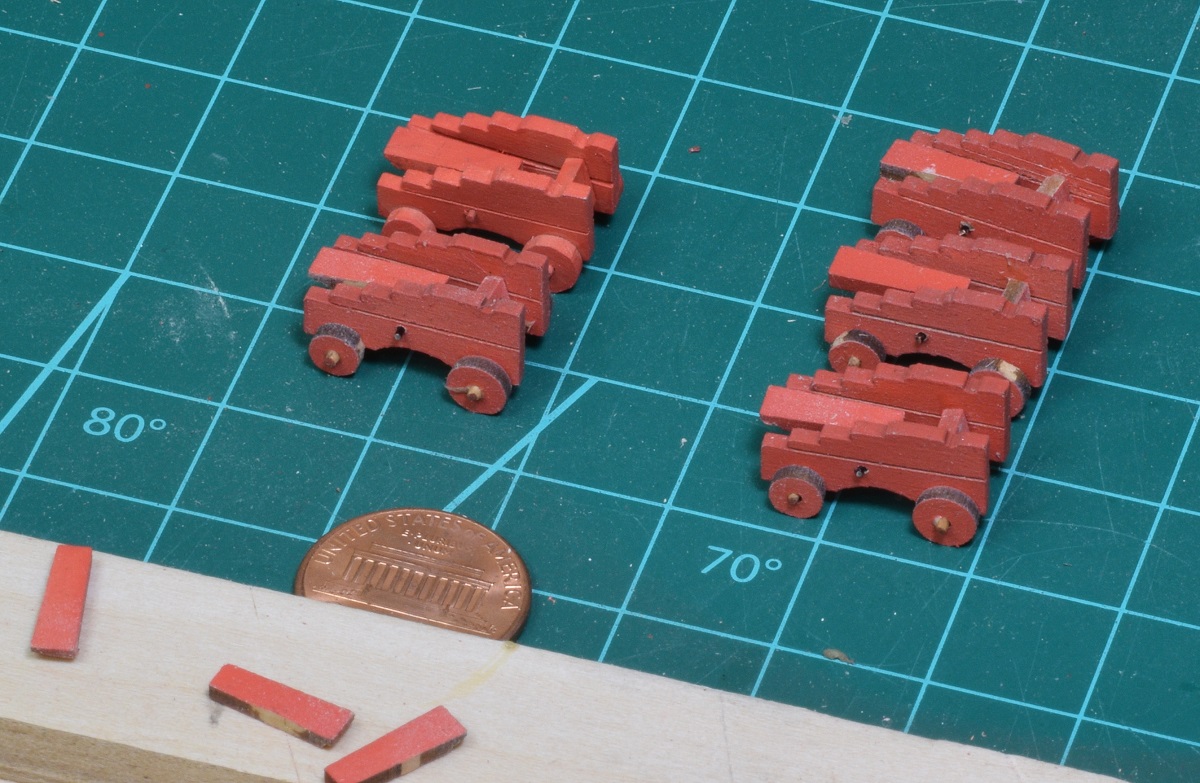
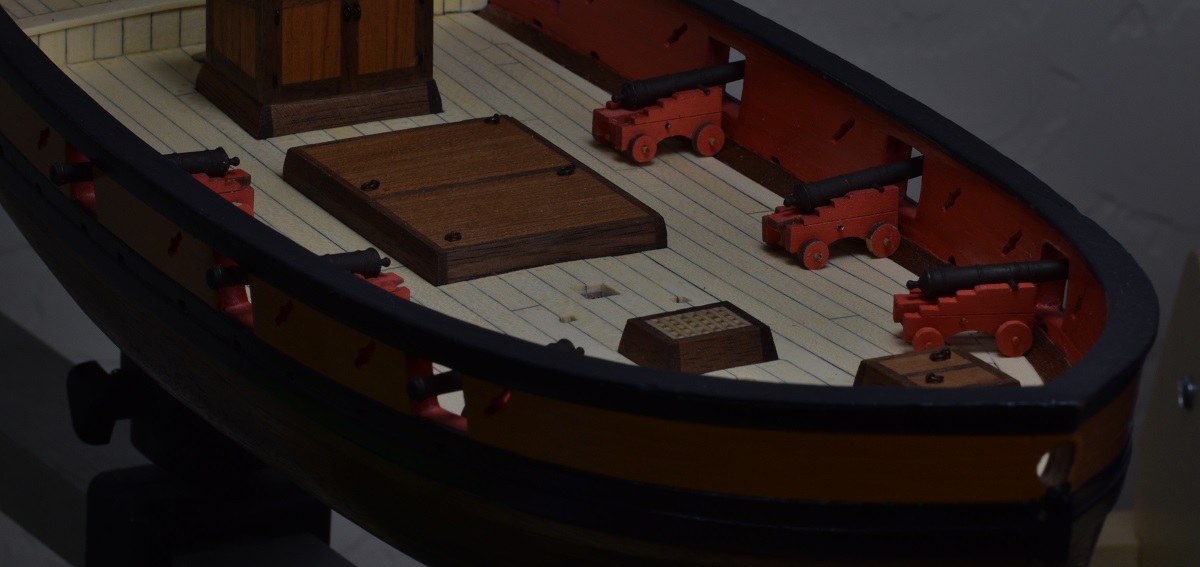
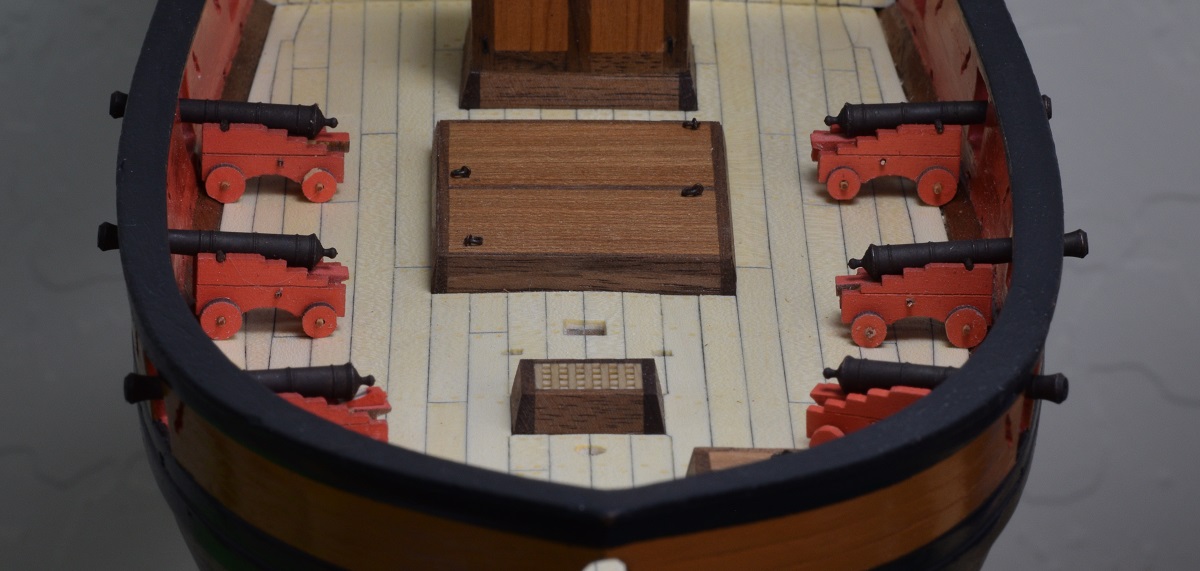
Tonight I got carriage #6 done finally, so I figured I'd stick them on deck and see how they look. No quoins, so the barrels are a bit high in the gun ports.


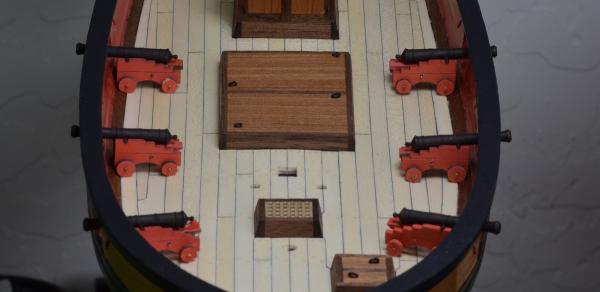
Lots of work still to do on these, I have to respray them to get the parts without paint covered, make the quoins, add all the eye-bolts, then make the caps to hold the guns on, glue all the various bits in place and do paint touch-ups, etc.
Oh, and I also need to complete the finish on the hull & deck, right now there is only a single coat of poly on everything, and I need to buff that and add another couple of coats before I start putting stuff on the deck that will make it difficult/impossible to do later on.
But, it's good to see at least a tiny bit of progress after the almost 2 months since I finished the poop deck.
- BareHook, Captain Slog, Mahuna and 22 others
-
25
-
Looking good.
For what it's worth, I had no issue with the masts strength and I tapered them to match the plans by chucking the dowels in a drill (protect the dowel with masking tape!) and using sand paper. I think the mast taper adds to the overall look quite a bit, but ultimately, if you are happy with the way it looks, then that's all that really matters, and chances are that outside of this forum, nobody that looks at it will have any idea that they aren't tapered to plan.
-
-
Hi Bob,
Nice to see another Carmen coming together, this was my first build as well. You can find a link to my log in my signature, maybe there is something there that might help you out.
I like the effect of blackening your brass, that is something that I did not do in my build, I just built it out of the box, except that I replaced all the kit rigging line with Syren line.
I've been working crazy hours lately so haven't been keeping up with all the logs on here, but I'll follow this one and if you have any questions that you think I might be able to help with, fire away and I'll do my best!
-
Nicely done Doc. Great addition to your growing collection!
-
if we are going to an IPMS or NMRA event, when you have to categorize the models for a contest.
IPMS really only has three categories.
Scratch
Out of Box
Not out of box (which most people at IPMS stuff call Kit Bashed).
Out of Box is quite strict, with only a very limited list of things you can do that aren't from the kit, and kit plans.
Scratch is of course, scratch - not using a kit in the build.
Which means that for an IPMS competition, anything else falls into that 'Kit Bashed' category. If you use the wood in the kit, and scratch build a capstan instead of using the kit provided capstan, then it is no longer an 'Out of Box' legal build. Likewise, if you replace the kit guns with Syren guns, or super-detail your Missouri model with a photo-etch kit, it's in that middle category as well.
Really though, except for entering into competitions, I don't see why it really matters if you call it a 'super-detail', or a 'kit-bash', and I'm sure that groups other than IPMS have completely different rules.
-
You can see it varies a bit under different light, but you should be able to come close. It's not just yellow, though. I think the Model Expo yellow ochre is not a bad choice, there are a lot of people here who will disagree.
The ME yellow ochre is not bad, but it's not the same yellow. Here is a link to my build log showing what the ME yellow ochre looks like on my AVS - Click me!
Your build is moving quite rapidly, and you are doing great (in my opinion) Ken!
-
Looking good MaryO. I have this same MidWest kit on the shelf (I may have already mentioned that?), so watching this assembly has been quite informative for me.
-
Crossing my fingers that work won't prevent me from coming Saturday, look forward to meeting you, and I'll bring some stuff to show you how I use wood glue with very minimal clamping (and some of the different clamps that I use too).
Edit - Oh, and your boat is looking just fine too!
-
Good to see this started up Don! If you are the Don that I think you are, hopefully I'll get to say hello in person in a couple of weeks as well.
-
-
Been a little while, thank you for all of the kind words and likes.
Work has been extremely busy, so I have only spent a very small amount of time here and there on the AVS lately, but this morning I decided to make a few hours of time to put the poop deck to rest. I started trimming the planks for this part weeks ago, and just couldn't seem to get the time to finish.
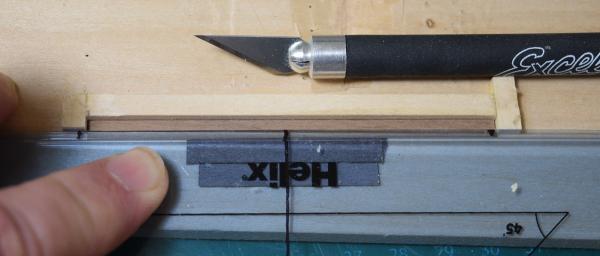
For anyone else building a model with tapered planks like the poop deck of the AVS, I found a very simple jig in another AVS build log that works quite well for making the planks so they don't have to be done completely by hand, 26 times.
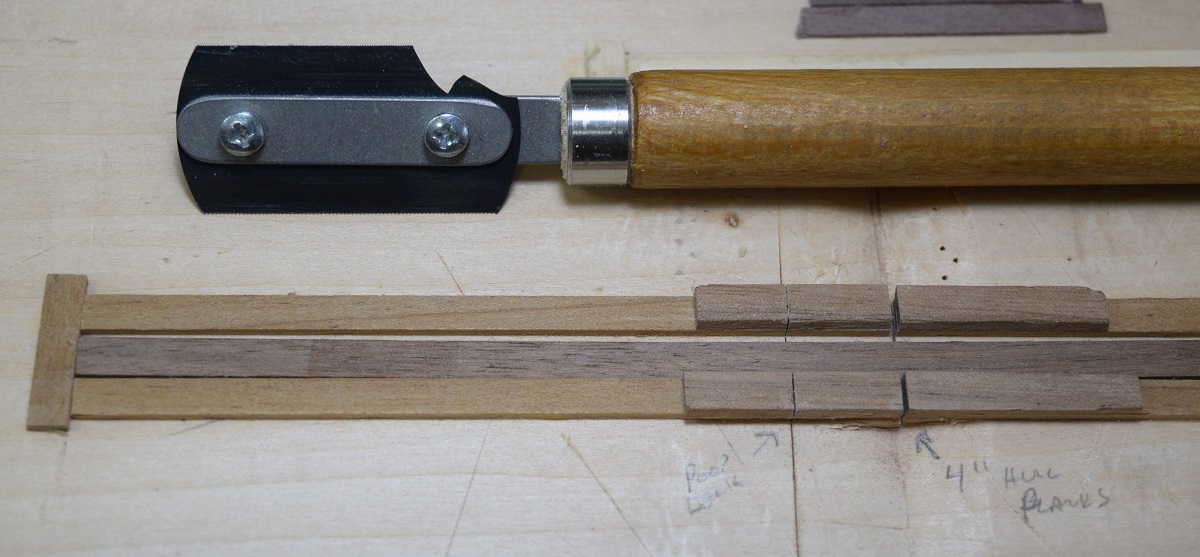
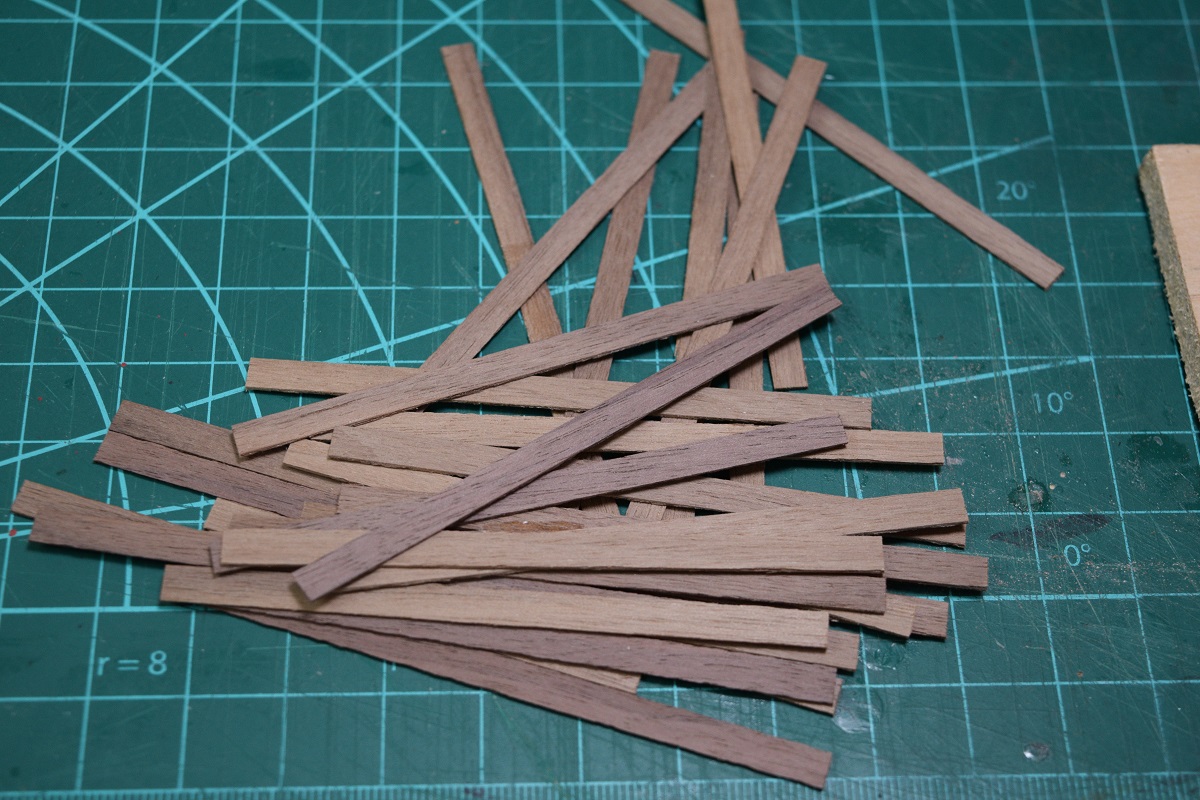
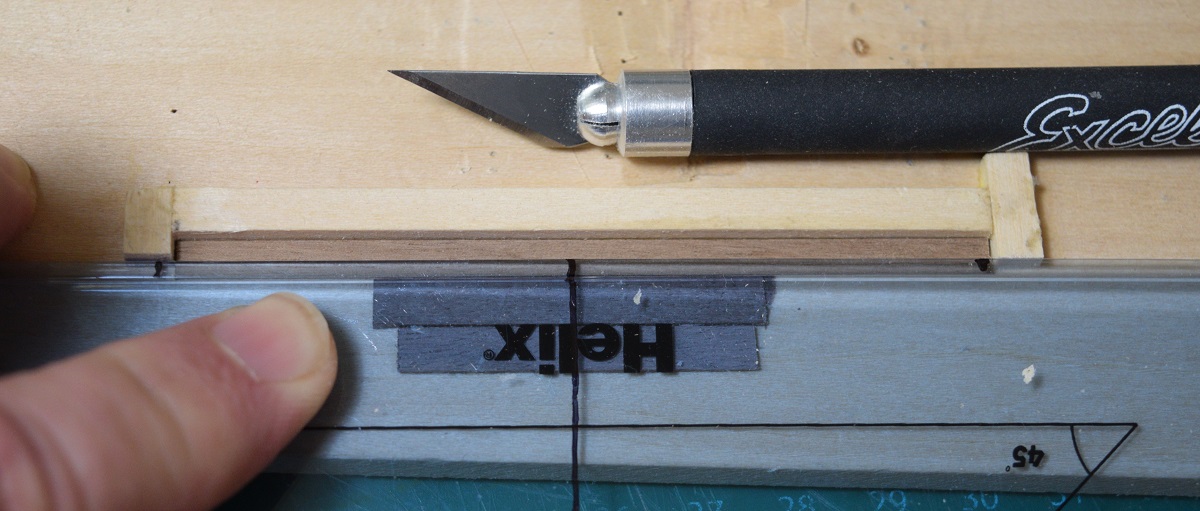
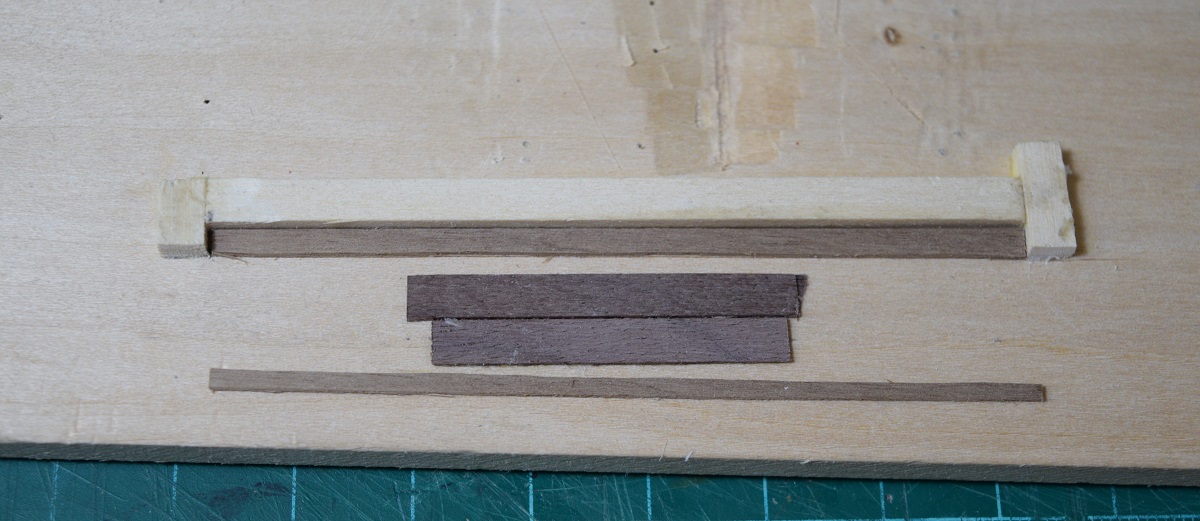
First up, I cut 28 pieces of plank to the appropriate length. I use a simple jig that I made to cut the hull planks to 4", and just measured and cut a new slot for cutting these planks:


The angle jig is surprisingly simple, but I don't think I would have thought of it if I hadn't seen it in another build log. I apologize for not giving proper credit, but I can't seem to locate it again right now.
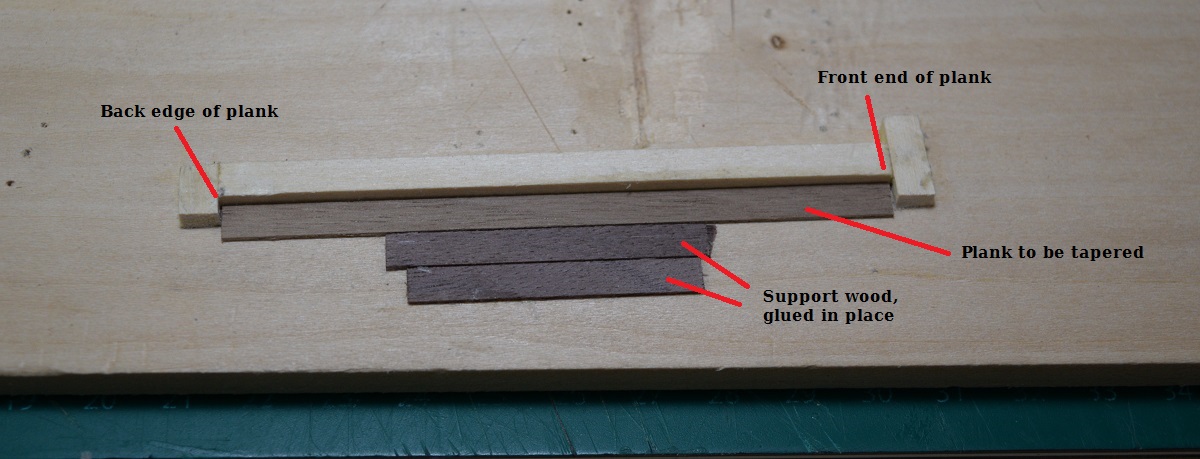
The jig is made up of a 1/4" piece of wood that the deck plank lays against, 2 x 1/4" end pieces which are cut to length (sanded to final length after glue is dried) to give the proper taper, and a couple pieces of .030" (deck plank thickness) of planking placed to hold the deck plank in place, and also to support the straight edge used for cutting.
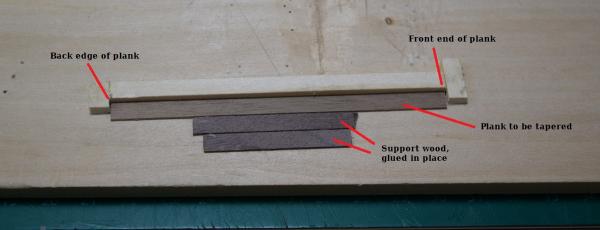
Place the plank into the jig, hold a straight edge up against the end 'stop' pieces, and then using very light pressure on the blade, simply cut along the straight edge to make tapered planks. I used a very thin steel straight edge for the actual cuts, the clear plastic one is for the photo only to show how it rests on the support planks.

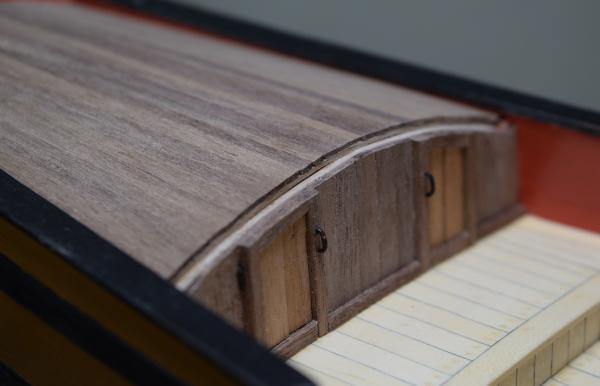
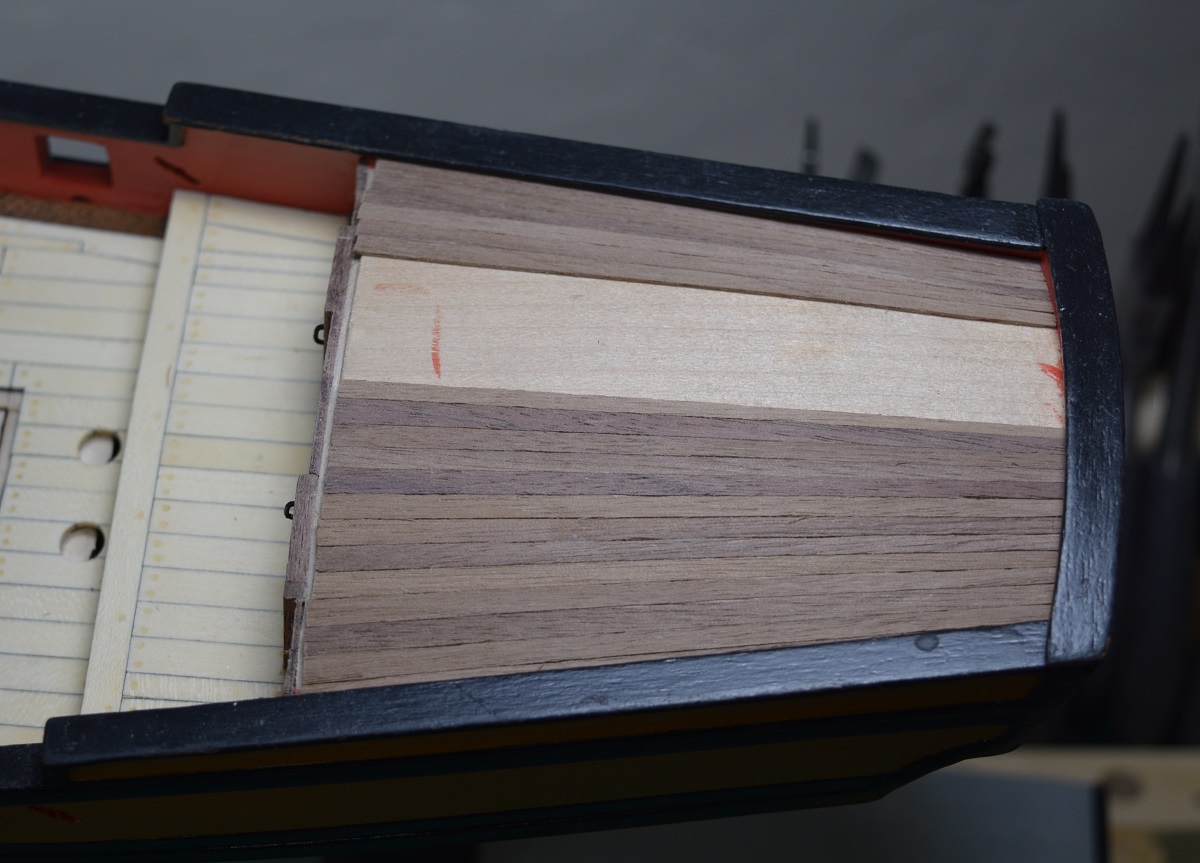
Then, start placing planks!

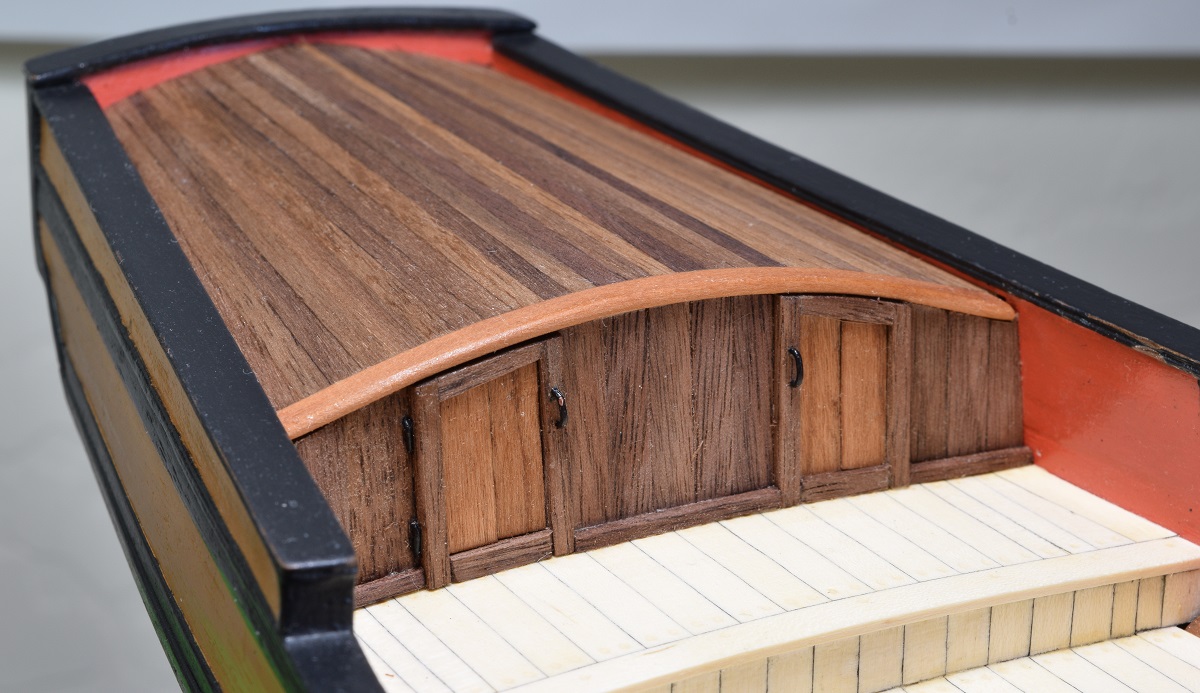
Didn't take any other in-progress shots, it's just normal planking, but care must be taken to bevel the edges, as the curve of this deck will cause significant gapping if the planks are left straight edged.
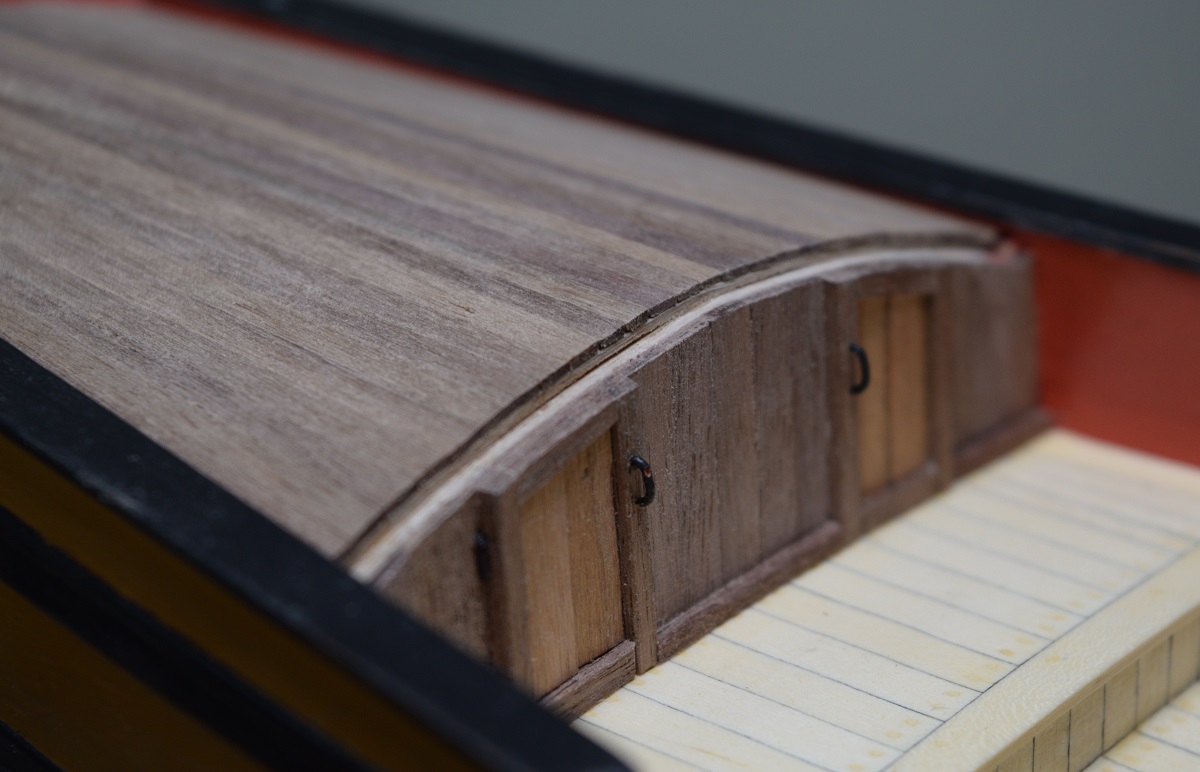
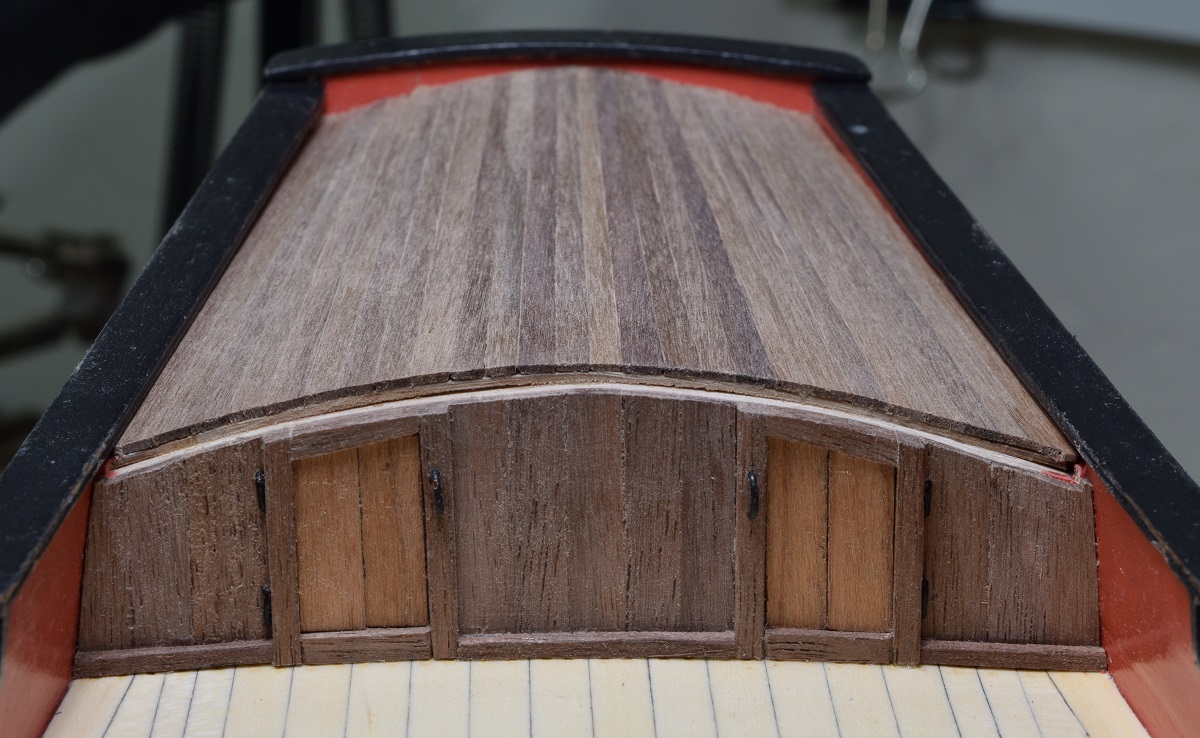
Once complete there is a ledge left at the front end of the deck.
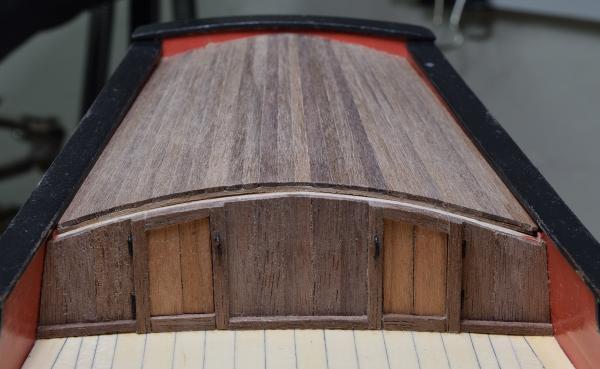
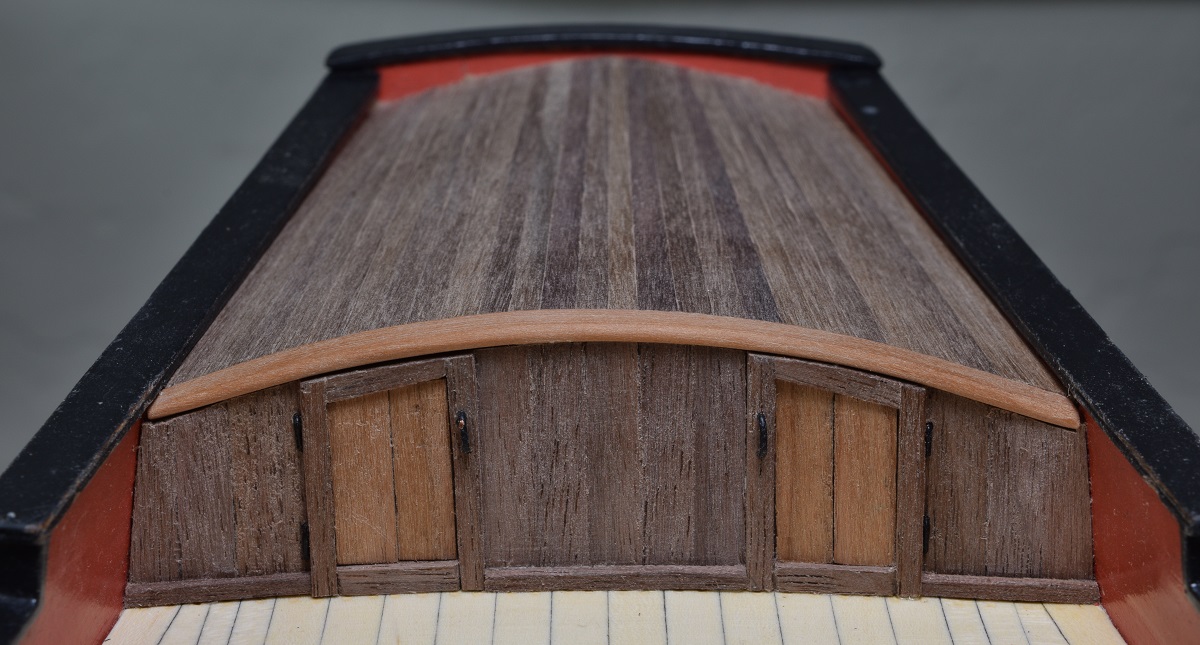
This ledge is a place for a moulding to go, which is supposed to be made out of walnut. However, I happened to have a piece of swiss pear that was almost exactly the right dimensions to make this moulding, so of course, I had to try it. I used a heat gun and pre-bent the curve into the wood so that it laid evenly all along the top edge of the deck, and then I beveled the back, and rounded the front. I also used a very sharp 2mm chisel to fine tune the front edge of the deck until I was happy with the fit along the edge.
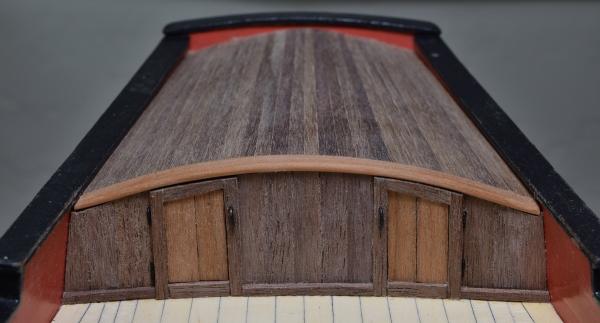
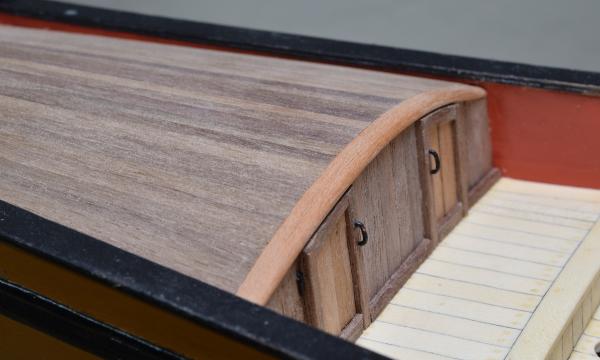
And finally, I sanded to 320 grit, and applied a coat of wipe-on poly which is currently drying.

There are some fitment/gap issues along the top edges on both ends of the quarter deck wall, but I don't really see any way to fix them as they are built into the ship from mistakes made earlier in the contruction, so I'm just going to move on and hopefully they won't be very noticeable after the ship is finished with so much other stuff to catch the attention of the observer.
Next I think I need to assemble the cannon carriages.
-
Hi Darrell,
Most decks have a curve built into them, and will be higher in the center than on the outside edges. You should pull the deck down to meet the bulkheads to get this curve into the deck. Depending on how stiff your false deck is, you may need to soak it in order for it to take this bend.
You should use a strong wood glue, and clamp the deck down to allow it to dry solidly to the bulkheads. You can do this by using a combination of the tacks that I see you are using, as well as liberal use of rubber bands.
If you scan through the early pages of other build logs on the site, you should see how other people have attached their false decks. Some kits use very thin false decks and are quite easy to get to conform to the bend (like my AVS), while yours appears to be quite thick, and may be something of a challenge and require the soaking.
Good luck!


Armed Virginia Sloop by GuntherMT - FINISHED - Model Shipways - scale 1:48
in - Kit build logs for subjects built from 1751 - 1800
Posted
Pretty sure I'm going to like the results of replacing the kit blocks with hooks, blocks, and rope from Syren. If working with these doesn't make me go blind first.
The two on the far right were stropped with 28 gauge wire. The wire was a pain to work with and the block are so small that they are quite easy to crush, so I switched to stropping them with .08" rope. I think they look better, and it lets the hooks 'float' much better as well. Very time consuming though, I'll be working on these for a while, and will probably work on other stuff rather than just sit down and try to finish all the blocks at once. The single blocks are barely more than half this size, so they should prove pretty interesting, since I also have to attach a rope to them!