


GuntherMT
-
Posts
2,213 -
Joined
-
Last visited
Content Type
Profiles
Forums
Gallery
Events
Posts posted by GuntherMT
-
-
To be fair, that log started over a year before I started building model ships, and there is simply no way that I could go through and read every single build log posted since this site began if I ever actually wanted to do anything except read (I do have a full time job).
Thanks for the link though, I'll have to look through that one now.
-
I'm absolutely biased towards natural finish, I love the look of the planking without paint.
- alan baker, mrshanks and mtaylor
-
 3
3
-
Looking good!
For the last couple of day I have been setting the bulkheads and blocks. I had an issue with the blocks at first because I couldn't find large balsa blocks (or other soft wood) so I had to improvise. I ended up finding strips of balsa and making blocks that were the sizes I needed.
Probably a bit late now, and this is purely a novices opinion, but I used balsa for filler blocks on my first build, and found that I wished I hadn't used it. I know that some people like it because it's so easy to form, but I found that it was very difficult to keep shaped properly because it sanded so much faster than the surrounding bulkheads, and it hasn't got enough strength (hardness?) to hold pins.
On my second (current) build I only used basswood for filler and reinforcement blocks, and I'm much happier with both how the wood works (bulkheads are also basswood), as the hull faired evenly when sanding, and the basswood holds pins very well while planking. The cost of basswood carving blocks at the hobby shop is comparable, or even cheaper than balsa blocks.
The only downside is that the basswood is obviously harder to cut to rough size and shape compared to the balsa wood.
Edit: Basswood carving blocks can be found at most hobby stores (I know Hobby Lobby carries them as does my local hobby shop), and you can also buy them in larger quantities at wood workers shops like Woodworkers Source and Woodcraft (http://www.woodcraft.com/Product/149262/Basswood-Grab-Box.aspx)
-
Thanks for all the likes!
Looking good Brian what did you use for the boom?
David BAll the masting is boxwood.
Hi Brian
I'm impressed, particularly with the sheaves you've been putting in. Are the sheaves wood or brass?
I've done them both ways as experiments Frank. The 'axle' on all of them is brass. The larger sheaves (catsheads, bowsprit, boom) I used .032" brass rod with a brass tube that fit perfectly over it or a small piece of drilled dowel for the pulley. The smaller sheaves (jib-boom, top mast) I used the brass nails from the Carmen kit which are about .020", and nothing for pulleys to keep the slots smaller.
The axles are secured by applying a small drop of CA on the brass axle and then pulling it into the sheave. Once it's dried for a while I trim the brass with end cutters and then file it smooth with a #4 barret file.
- thomaslambo, Canute, dgbot and 1 other
-
4
-
In non-picture news, I got some actual ship progress done today.
I have completed the main-mast.

And the Gaff.
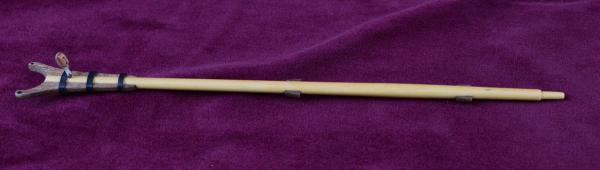
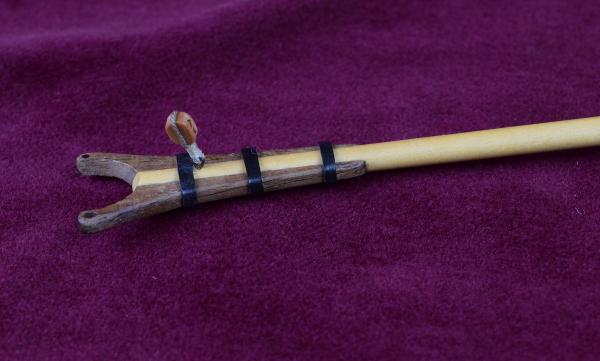


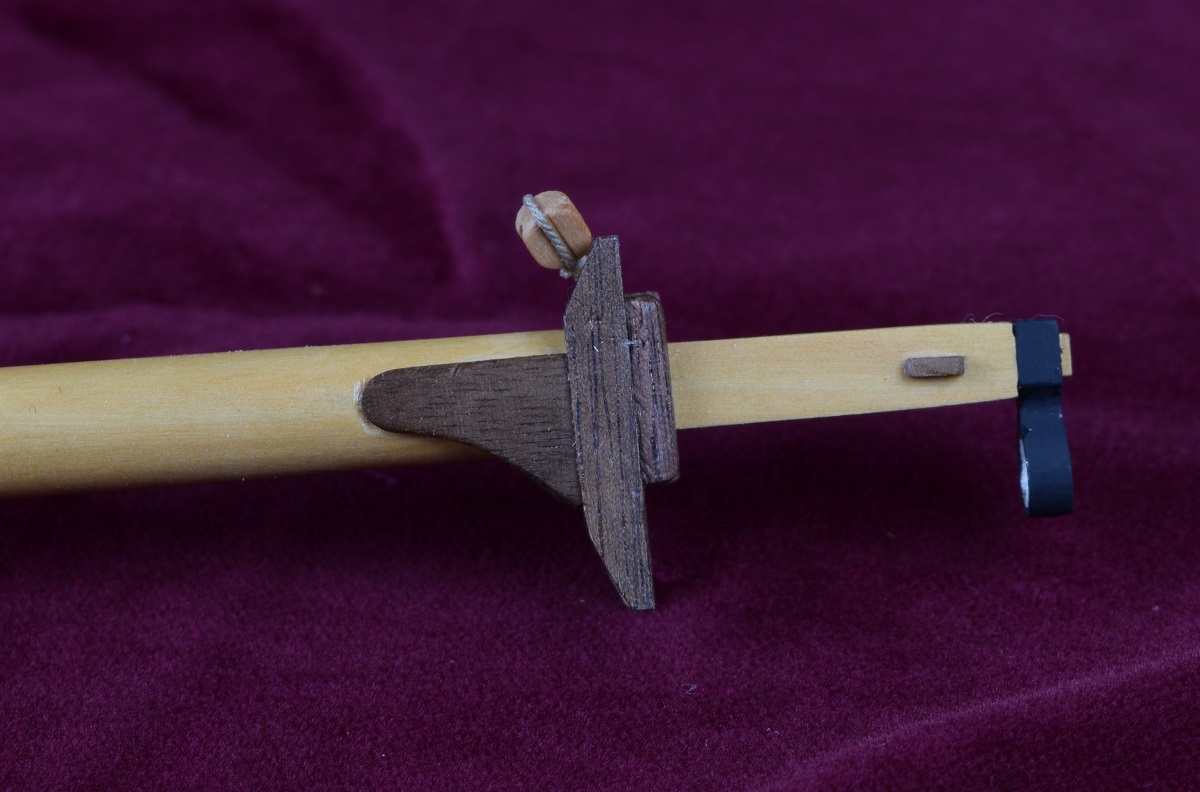
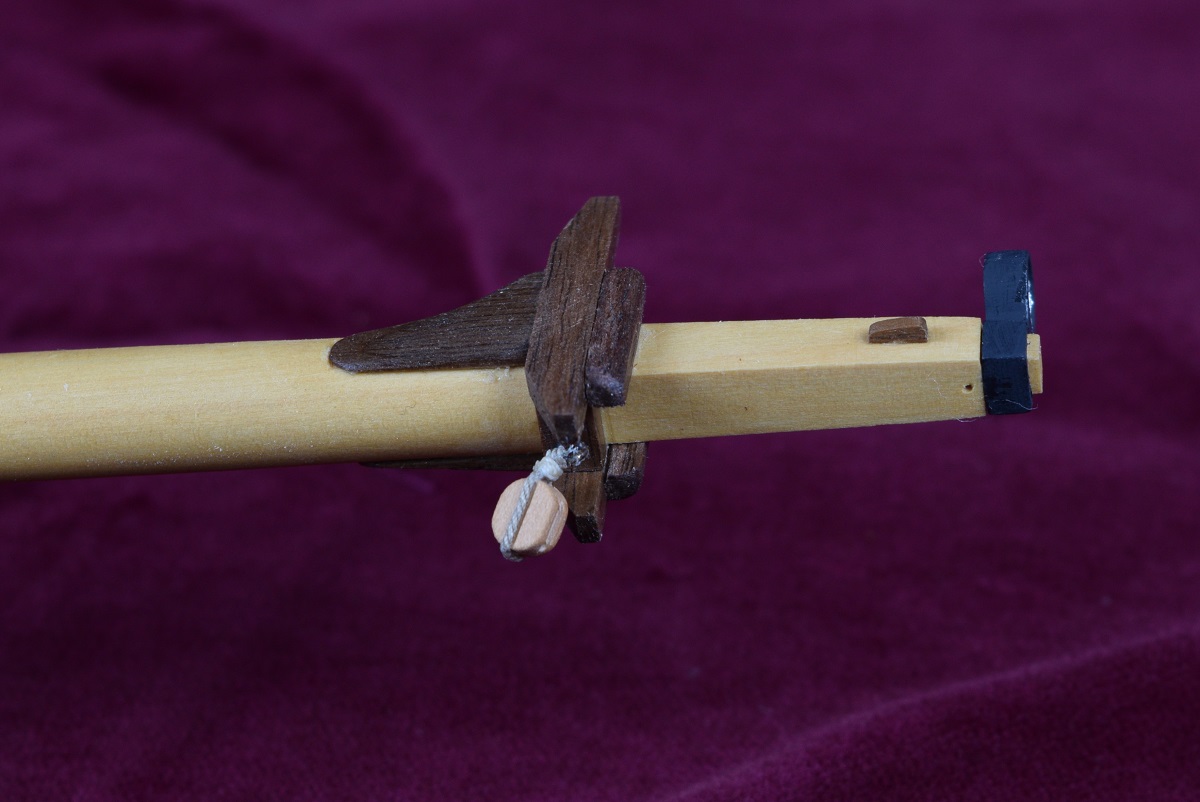
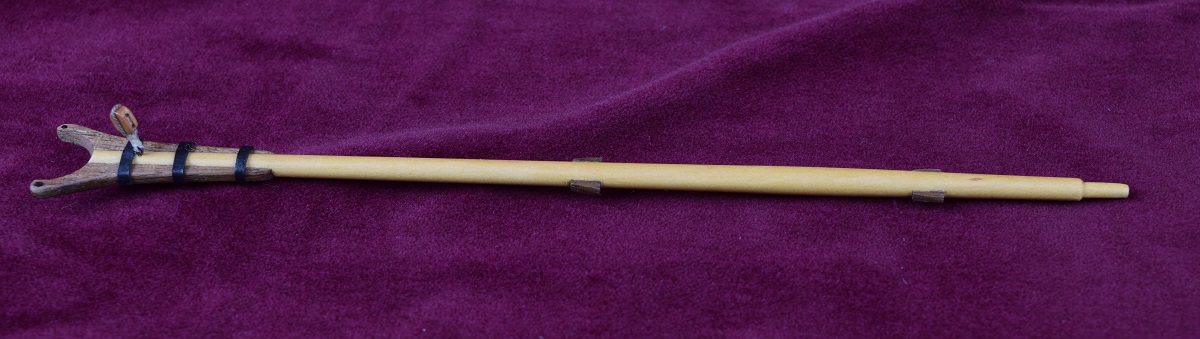
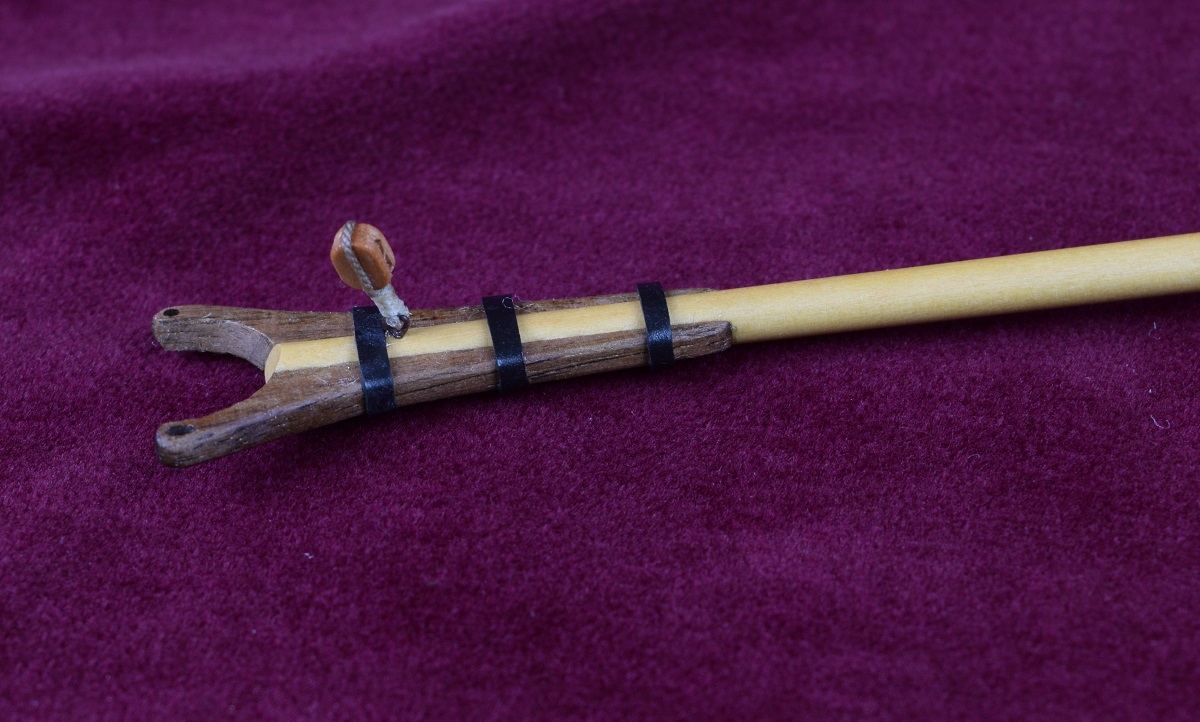
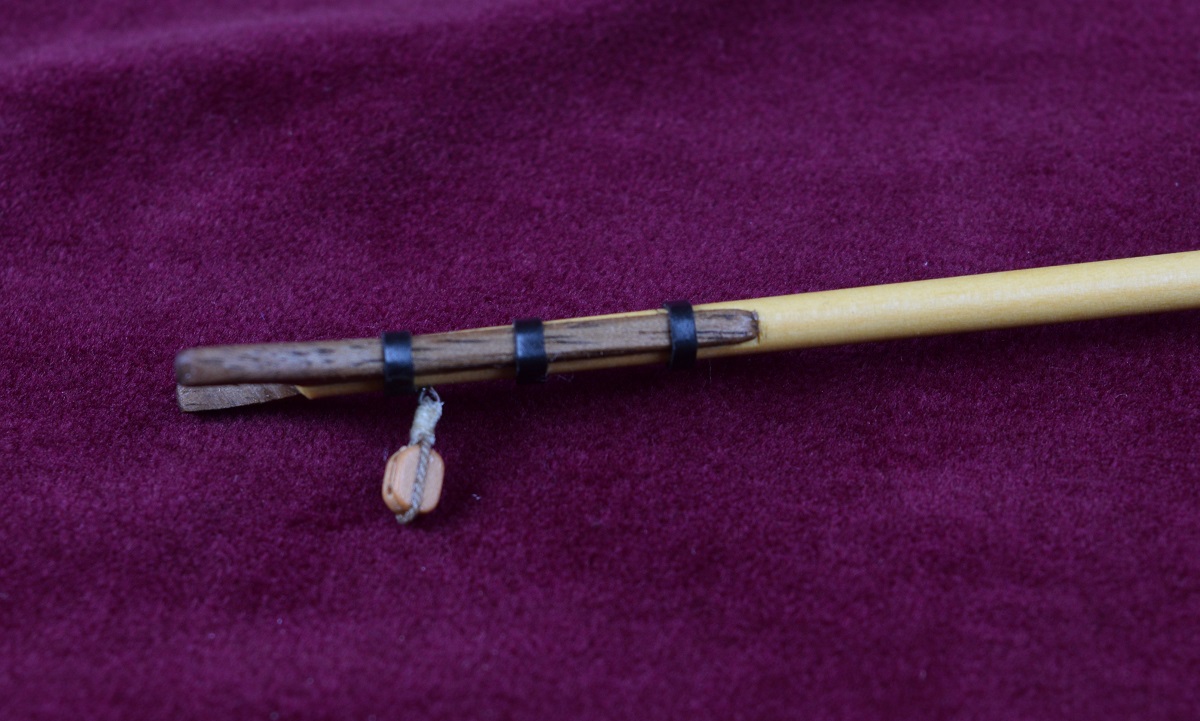
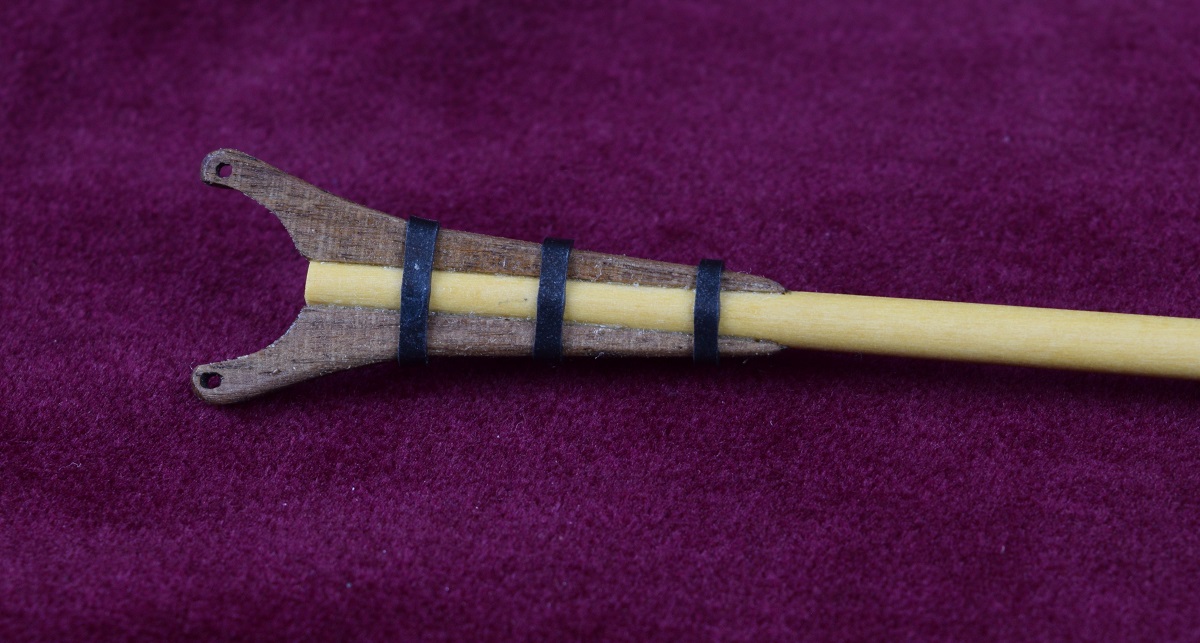
I've got the Main boom shaped, with a working sheave installed instead of the 'hole' the instructions say to use, the jaws mounted and strapped. Tomorrow I'll get the chocks and cleats installed and hopefully get both the yards made and fitted out, and then I'll be ready to start rigging!
-
That shot with you holding it really shows the scale well. I sort of thought this was a much larger model, makes the details you are putting into it that much mroe amazing to me.
- popeye the sailor, Omega1234, ccoyle and 1 other
-
4
-
-
I was looking for the rest of your pictures at magetower.com but can't find anything,do you have link for them?
Thanks, Zoltan
Not really, they are all in the same directory, but they are all linked to my build log here. If for some reason you wanted to look at them there instead of the log, you could pull the file names from the build-log here and append them to the same path name as the one I provided the link for. I don't have an html index set up, nor do I have the directory open for ftp browsing.
If there is some particular file that you wanted to see in giant size, I could probably get it for you, but I'd have to go back and find the original DSC image from the camera in the RAW directory and then put it up and give you a link. I've got 760 photo's from the Nikon in 6000x4000 and another 408 photo's from the prior POS Canon in 2816x2112. Of those, over 600 have been copied, cropped, sized to 1200x and uploaded to this build log.
Many of them that aren't uploaded were the same images with different exposure settings, or just shots I didn't like for some reason (focus, exposure, bad composition, etc.).
- GLakie and thomaslambo
-
2
-
hello Brian ,you can reduce the file size without affecting the picture quality here
http://www.simpleimageresizer.com/
I have no re-sizing issues, I have a number of different image manipulation programs depending no how much quality I want, but thanks for that tip.
The problem I was having way back in that post in November that you are quoting was that the forum was doing some sort of compression after I uploaded the images, it wasn't my source images. This hasn't been happening in a long time, it seemed to be a fairly short-term issue with the forum. All images that I have checked recently are the same size here as they are in my source.
I crop and re-size all my images for the forum, since the forum would choke on 6000x4000 RAW format images and even a HQ Jpeg is 8-12mb.

I reduce everything to 1200x on the long side, and use fairly high quality settings on Jpeg. As with any form of image format that uses compression, there is some quality loss whenever an image is manipulated, as that is the nature of image compression. However, said image compression allows a site like MSW to store huge numbers of photo's without needing a Peta-byte storage array to keep them all!
- zoly99sask, GLakie and Canute
-
3
-
-
For paint bleed prevention - first, use good tape, I prefer the Tamiya masking tape. Second, after you have it masked off, spray along the tape edge with the color that you are masking off (clear if you have no color being masked off). That way any bleed that occurs will be the same color as what the masking is covering, and that coat seals the edge and prevents further bleeding.
Great looking planking by the way!
- mrshanks, Dubz, CaptainSteve and 3 others
-
6
-
Looking good Ed. I see you got all the stuns'l booms on as well!
-
Looks like it is progressing nicely Jerry. One thing I noticed, and it could just be a photography thing - it looks like you might be getting some gapping at the bow where the curve is the tightest. Are you beveling the edge of the planks where they lay up against each other? If not, you should consider trying that, as if the edge is properly beveled you can eliminate most or all of the gapping caused when two planks are butting against each other at an angle.
Bevel just the one side of the plank you are placing so that the bevel is tight against a non-beveled plank edge to make a nice close joint.
- Canute, jdbradford and rafine
-
3
-
Thanks Lawrence.
It's not installed (neither is the mast), I just stuck it on and held the base with yellow tack to take the picture. I'm not going to actually mount it until I have to. The jib boom isn't actually affixed to the bowsprit yet either.
I'm going to make the yards, boom and gaff, and rig as much as possible before I start the assembly to the hull. Currently working on an actual display stand, and sidetracked a bit on a very small, cheap plastic tank kit that I'm doing as part of a group build (first plastic model in 30 years, should be hilarious).
-
-
-
-
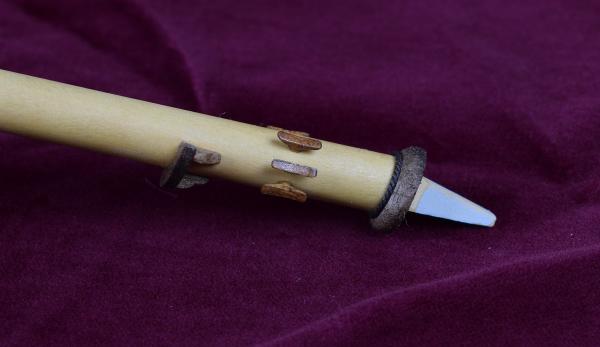
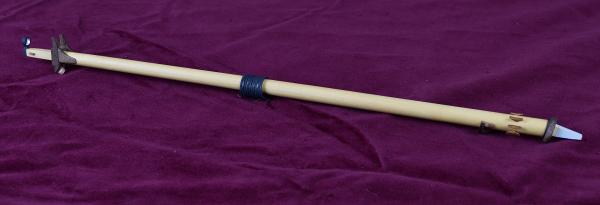
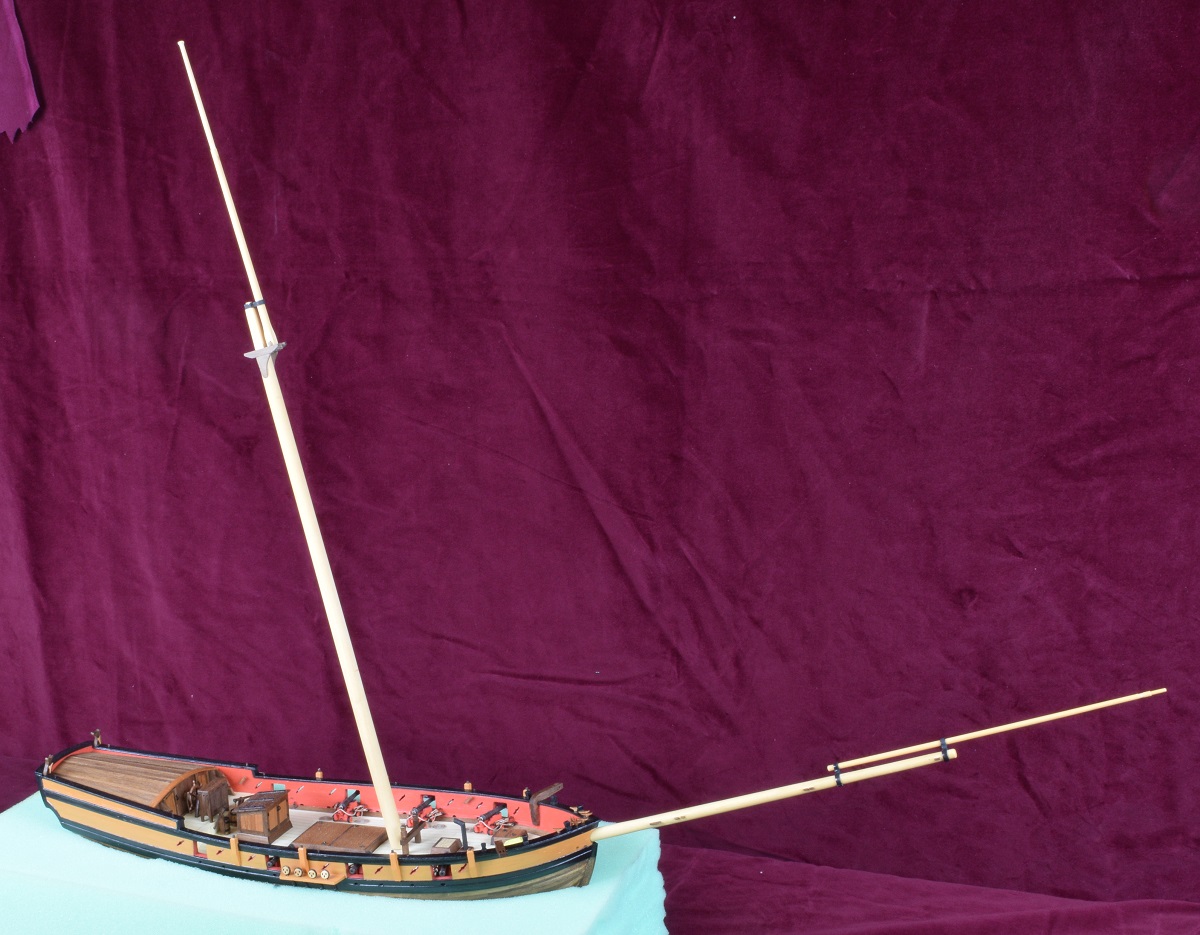
Finally at a point where I am getting to 'visually' see how big this little (not so little) boat is going to be when it's completed.First I finished up the bowsprit by affixing a bunch of little cleats and sanding them to shape, and affixing the rings that support the jib boom.Bowsprit & Jib Boom:
 Next I mounted the cheeks and cross-trees on the main-mast, then put two of the chocks in, and made the third chock. After playing with the fitment of the third chock, and looking at the plans, I realized that the base of the topmast wouldn't fit through the round fitting at the top of the main-mast, so I removed the third chock and will place it after the topmast is placed permanently later on. I then made the topmast and cut the little hole in the base where a piece of wood called a 'fid' goes through it to rest on the cross-trees. I drilled a sheave slot in the top-mast, but haven't drilled the hole and placed the sheave yet.Here is how the main-mast and top-mast will fit together. Really happy with how this came out.
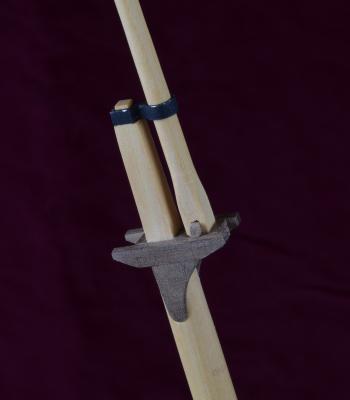 And finally, dry fitting the complete bowsprit and mast assemblies to see the overall size (minus the main boom which will extend behind the ship by several inches too).
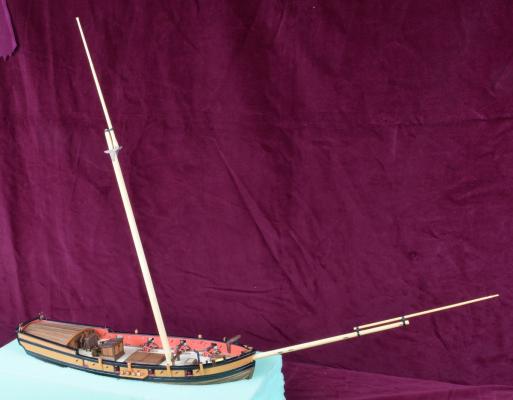 It got big all of a sudden!
- NMBROOK, antanasp, Dimitris71 and 22 others
-
25
-
While on the topic of paint, I'm using Model Expos acrylics which I've used in the past with little issue, but am having some trouble here with both coverage and worse part warping, spending a lot of time back painting and weighting parts down. To those planning to build this kit I would recommend a coat of sanding sealer prior to using acrylics.
Hi Bob...did you experience any issues when you painted? What paints did you use?
Model Expo paints have a pretty terrible reputation. I got quite a bit of it when I purchased my kits, and it's a very mixed bag. The thickness of the same exact color paint is very inconsistent between bottles, and all of it is terribly thick and requires a huge amount of thinning. I've gotten pretty decent results with it, but I've thinned it probably more than 1:1 with distilled water, and then further thin it when doing the painting of various features and then use multiple coats.
Both the bulwark red, and yellow ochre on my AVS are MS paint, but once I'm through with this kit I doubt I'll ever use ME paint again. I've switched to using Vallejo Model Air paint (also an acrylic) and primers and it's simply a much better quality product. As a bonus they have white, grey, and black primer depending on what color you are going to use over it.
-
-
Excellent rigging, especially for your first go at it. I agree with you though on the seizing thread, I use some very fine thread I found, not the .008 thread, and I find that it looks much more 'to scale' for the seizing.
For the future, you might consider down-sizing the blocks, as most blocks specified by kits are considerably over-size, especially the ones provided by most kits for the gun tackle.
-
-
-
hello guys,hopefully mine is correct

You did yours the same way I did my first one. Notice how Grayarea's grating has a solid edge (or border) of grating material all the way around inside the frame, and yours has no 'border'? It was pointed out to me when I did mine the way that yours is, that it was incorrect, and should have been done the way Grayarea's is.
Assuming your kit has the same materials as mine did, there is sufficient grating material to re-make that one without any problem.
Edit - You can see in this post in my log how I made mine the same way yours is made the first time - http://modelshipworld.com/index.php/topic/8085-armed-virginia-sloop-by-gunthermt-model-shipways-scale-148/?p=288772
If you read the feedback following that post you'll see what I was told, and then this post is where I re-did it - http://modelshipworld.com/index.php/topic/8085-armed-virginia-sloop-by-gunthermt-model-shipways-scale-148/?p=289602
If it's good to your eye though, then it's good!


Armed Virginia Sloop by GuntherMT - FINISHED - Model Shipways - scale 1:48
in - Kit build logs for subjects built from 1751 - 1800
Posted
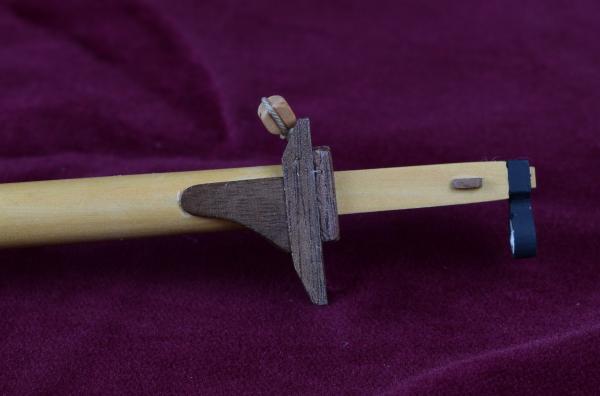
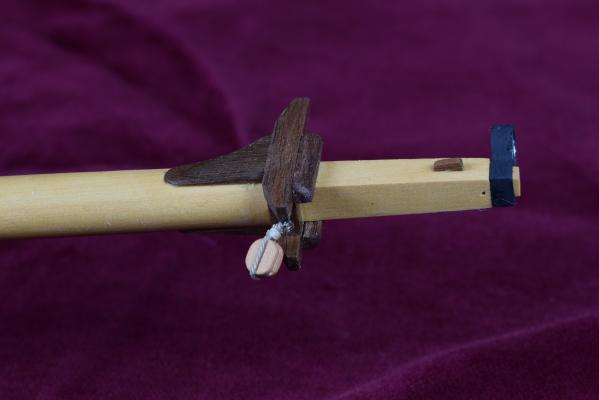
Masting is done! Well, I still need to attach one side of the parrels to the gaff and boom, but I'll just call that part of rigging.
The main boom with sheave.
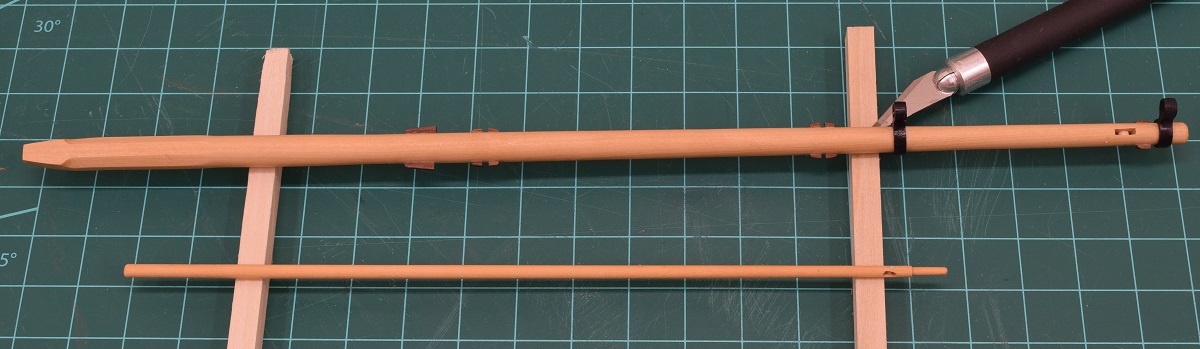
The topsail yard and spreader yard. I did have a do-over on the topsail yard when I cut too deeply into it after I was all but finished. Oops. Oh well, only 1 do-over for all the masting (not counting the multiple bowsprits I made prior to switching to boxwood), I'll call that a win!
And everything all lined up together ready to start getting rigging.