


GuntherMT
-
Posts
2,213 -
Joined
-
Last visited
Content Type
Profiles
Forums
Gallery
Events
Posts posted by GuntherMT
-
-
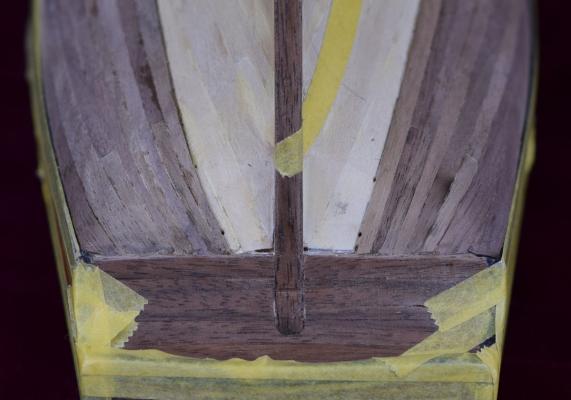
If you don't want to plank over the 'trans', why can't you just flip the piece over and make the word be on the inside, or is that visible as well on this model?
If it's visible on both sides, then I'd just plank or veneer over it as Keith suggested.
-
-
Wipe on Poly works fine over acrylic. In fact many modelers on a 'plastic' forum I've perused, will intentionally change paint types for the clear as it has less chance of affecting the underlying paints. Since the WoP doesn't have a water base, it won't have as much chance of softening the acrylic and causing the colors to smear across paint lines.
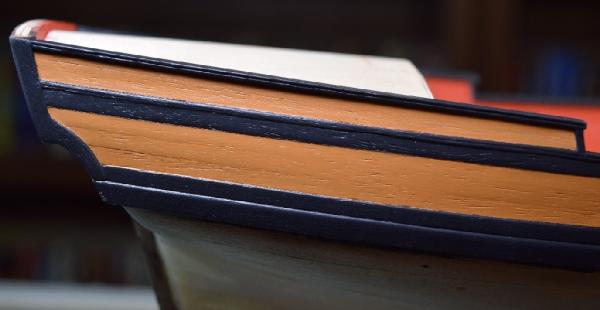
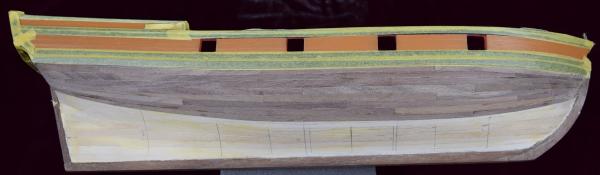
I used WoP over my bulwark paint to protect it (I used Model Shipways acrylic paint for the yellow ochre, black, and red), and as you can see here, it came out fine:
-
Bit late to this party (I'm way behind on my forums browsing during the holidays), but I ran across a great tip that worked great for me to prevent paint bleeding.
First - as already mentioned, I used Tamiya masking tape.
Second - After your first color is laid down, and dried - after you mask it off, use a small brush and run a line of the same paint that you just masked off (i.e. if you are covering the white waterline stripe, use that same white paint) along the edge of the masking tape and let it dry. The effect of this is that any paint that actually does bleed under the tape is the same color as the paint you masked off, and in effect it 'seals' the mask with the same color. Makes for incredibly crisp lines along the mask.
Cheers, and happy holidays!
-
Bravo, she looks fantastic!
- george and mort stoll
-
 2
2
-
Another thing to consider - the big rope that takes the recoil (the name eludes me at the moment) should be long enough that the gun can be pulled back far enough to load it. It's hard for me to tell from the latest photo if it's that long, but in the earlier one it looks a bit short. On the other hand, it's one of those things where you probably want to adjust it to 'look good' as if there is too much loose rope and it's too stiff it can look bad on the model.
On the block size, it's very difficult to see them in that picture due to focus and angle (at least for me), so can't really judge the appearance. I'd try to find good photo's of the real ship, and compare them for myself to decide how they look to me, if it were my model. I would assume that there are lots of photo's of the real thing available for the Victory.
-
Looks much better I think. I agree that the in-haul tackle rope could be smaller. Models (for whatever reason) tend to have the rope oversized, but I think erring on the side of smaller looks better overall.
I have no idea what the correct size (real or in scale) is for the Victory. I imagine it's somewhere on this forum though!
-
-
Looks great Mike, those weirdly shaped planks sure look like they'd be a huge pain, but you pulled them off nicely. Do you (or anyone) know what the reason for doing the edge planking that way as opposed to just having a margin plank that the other planks butted into?
-
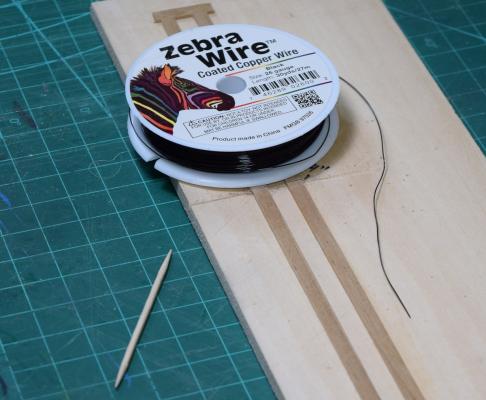
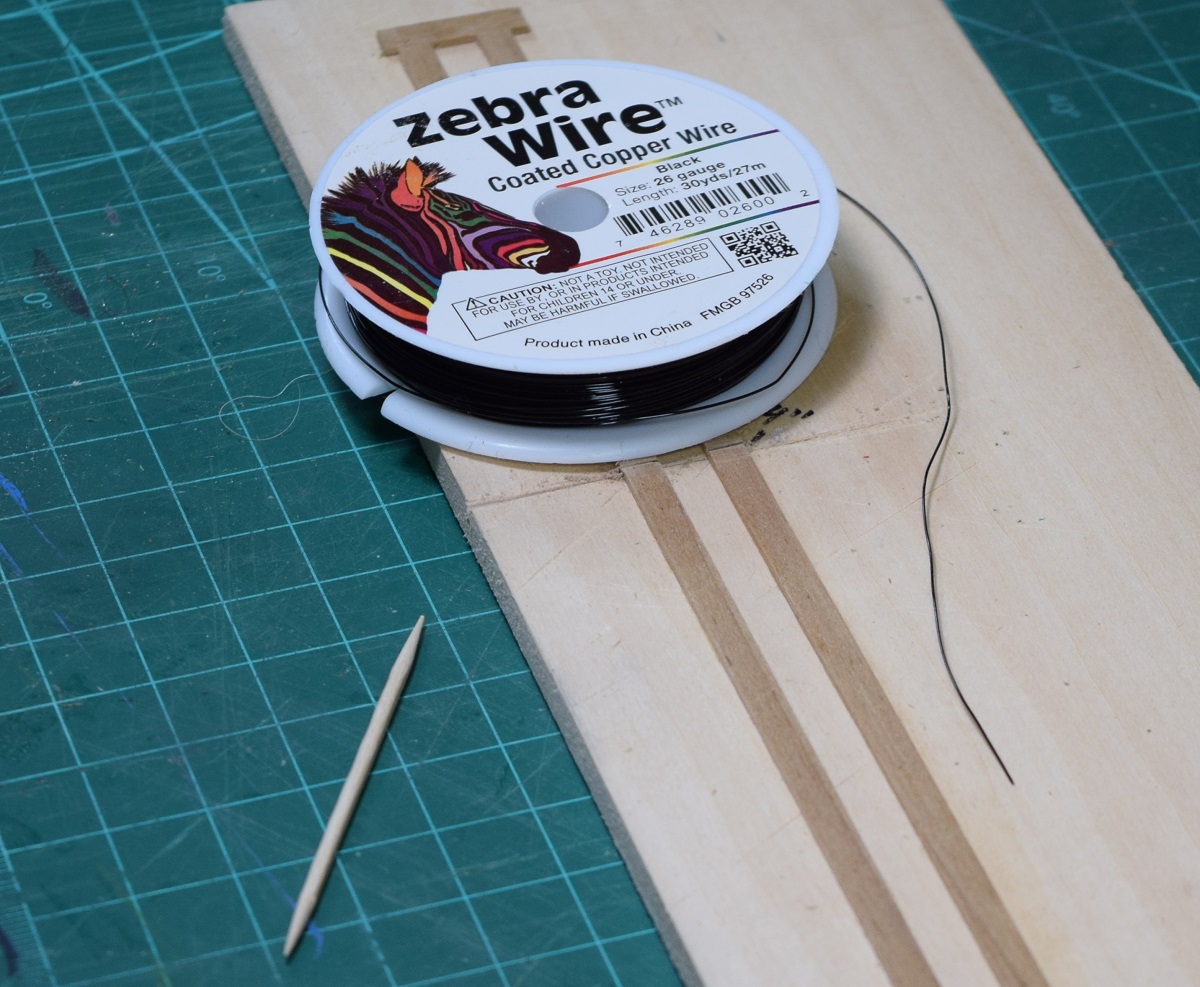
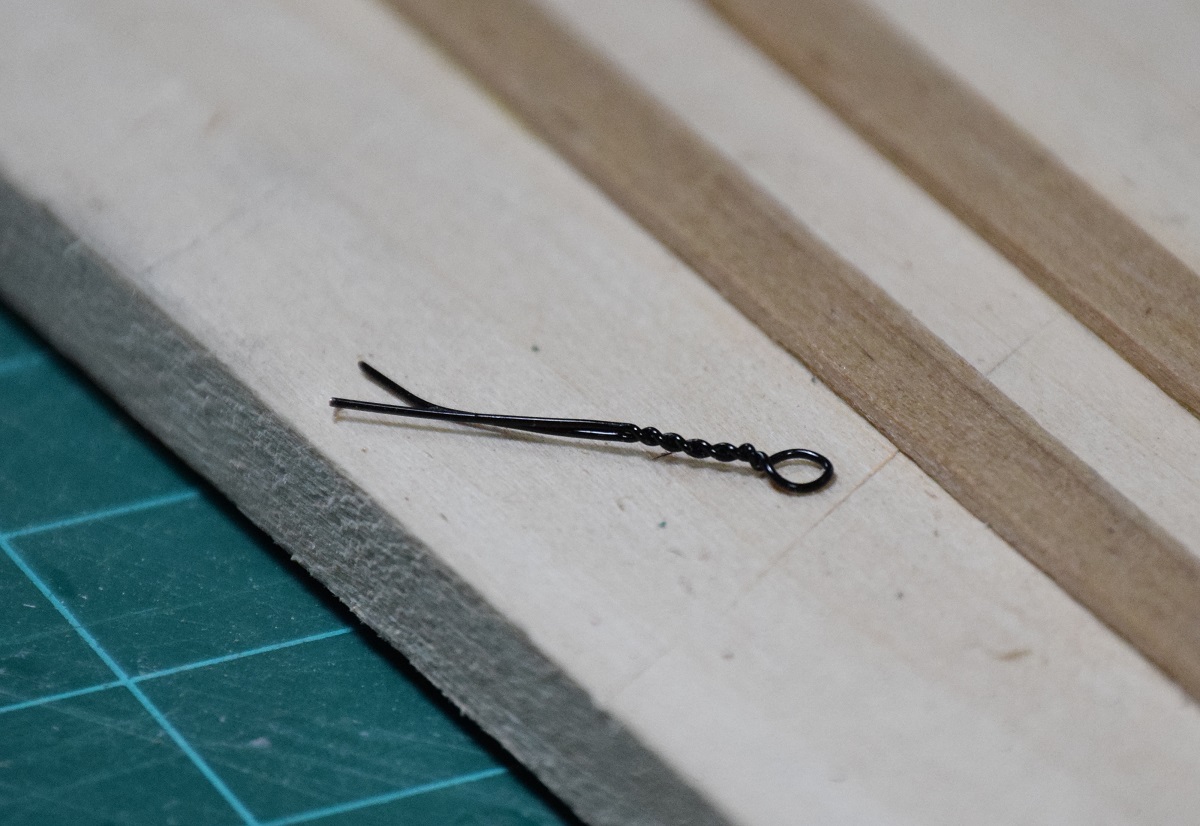
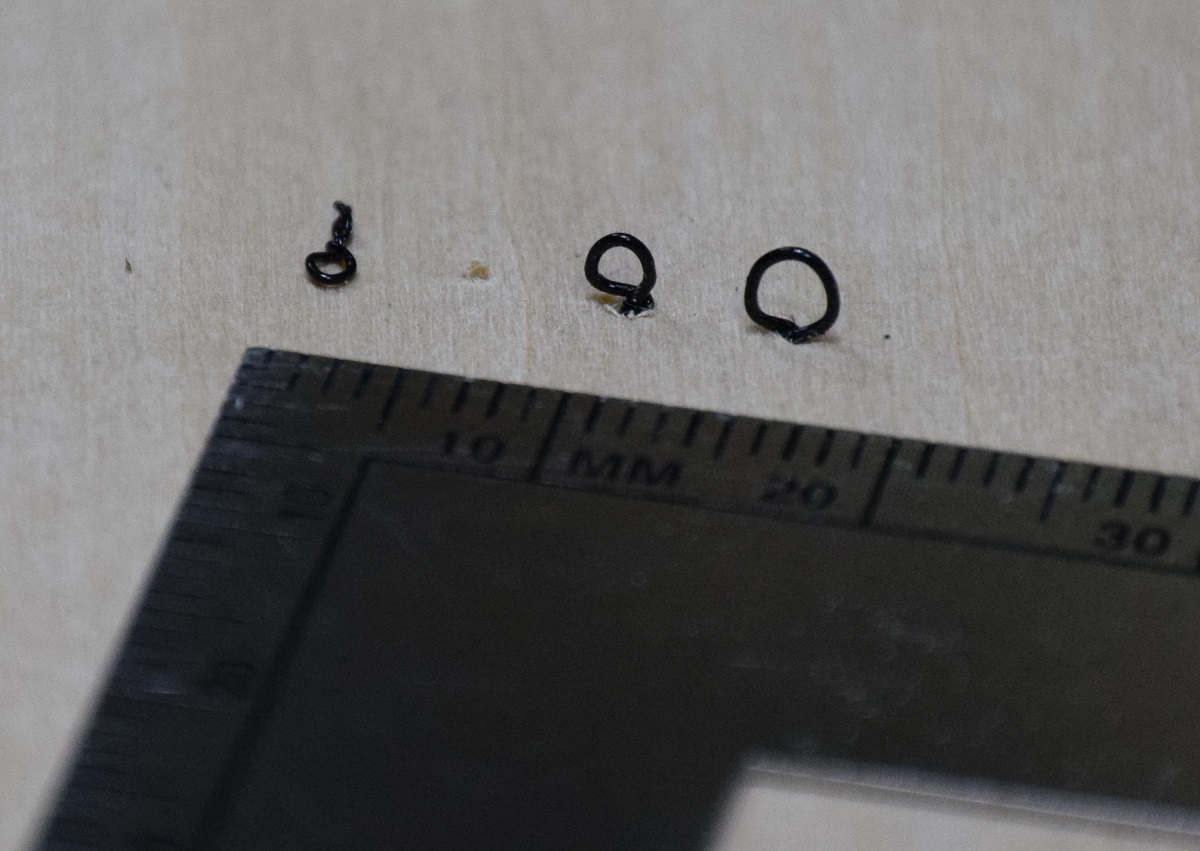
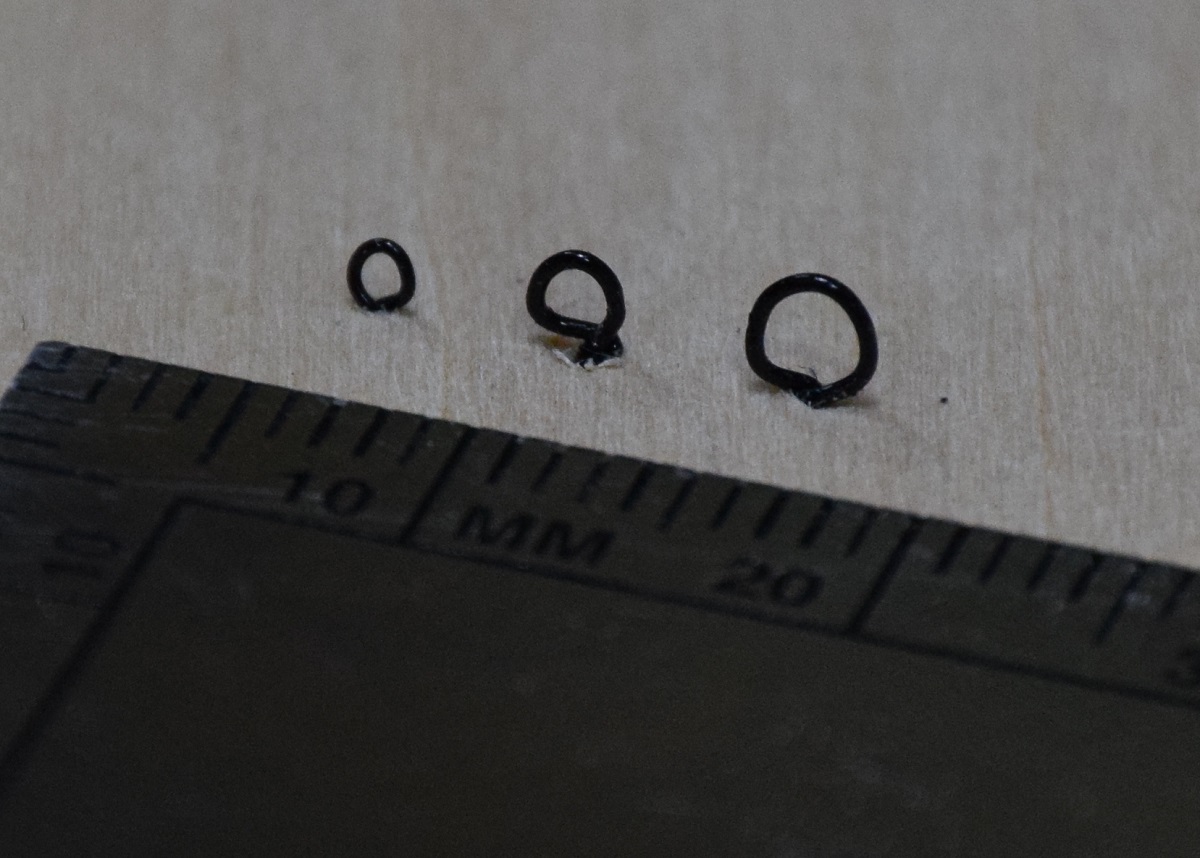
On the eyebolts, they are extremely easy to make (even I can do them!). As they generally don't really need to hold a 'real' load, I am using copper wire here to demonstrate, but you could do the same thing with steel or brass (but then you'd need to blacken it somehow).
Get the appropriate sized wire and a 'round thing' the size you want for the internal diameter of the ringbolt. Here I've got a toothpick and some 26 ga. blackened copper wire.
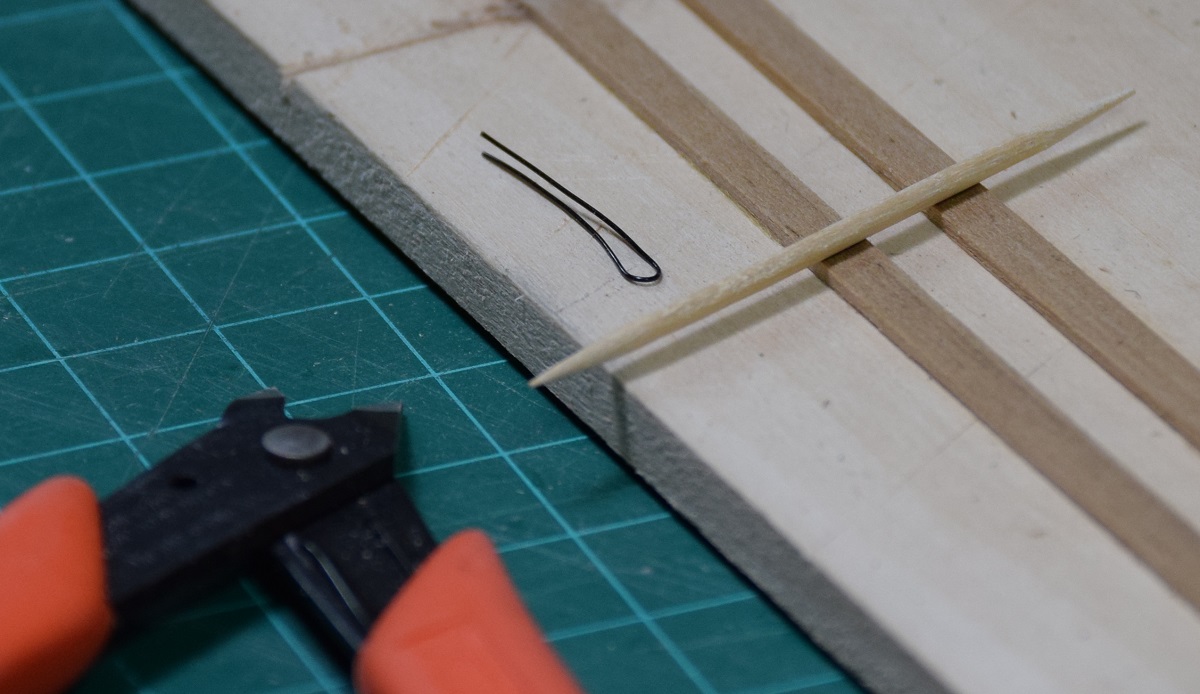
Trim off a short bit of wire and make it into a loop about the same diameter as the 'round thing'.
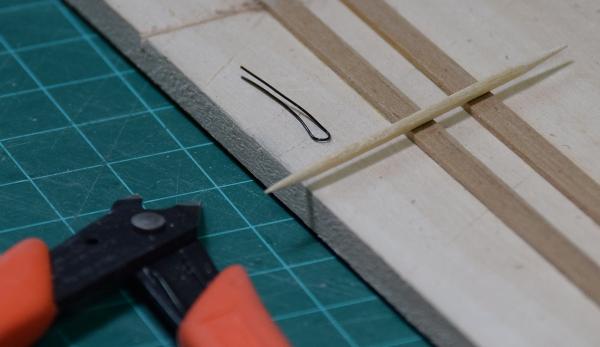
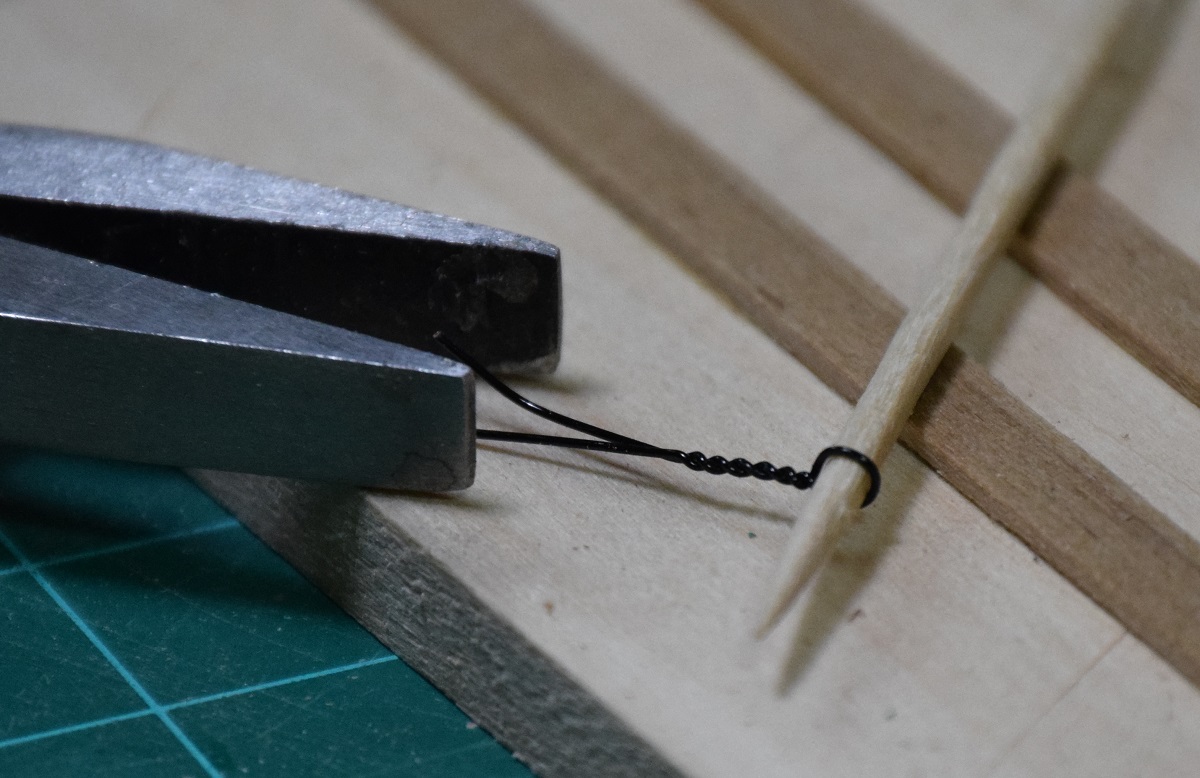
Put the loop over the 'round thing' and using some pliers, twist the ends of the wire together, like so:

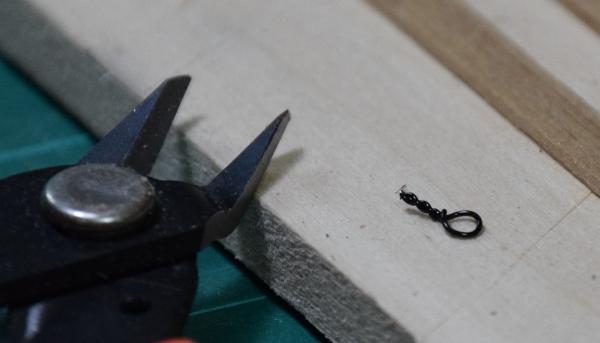
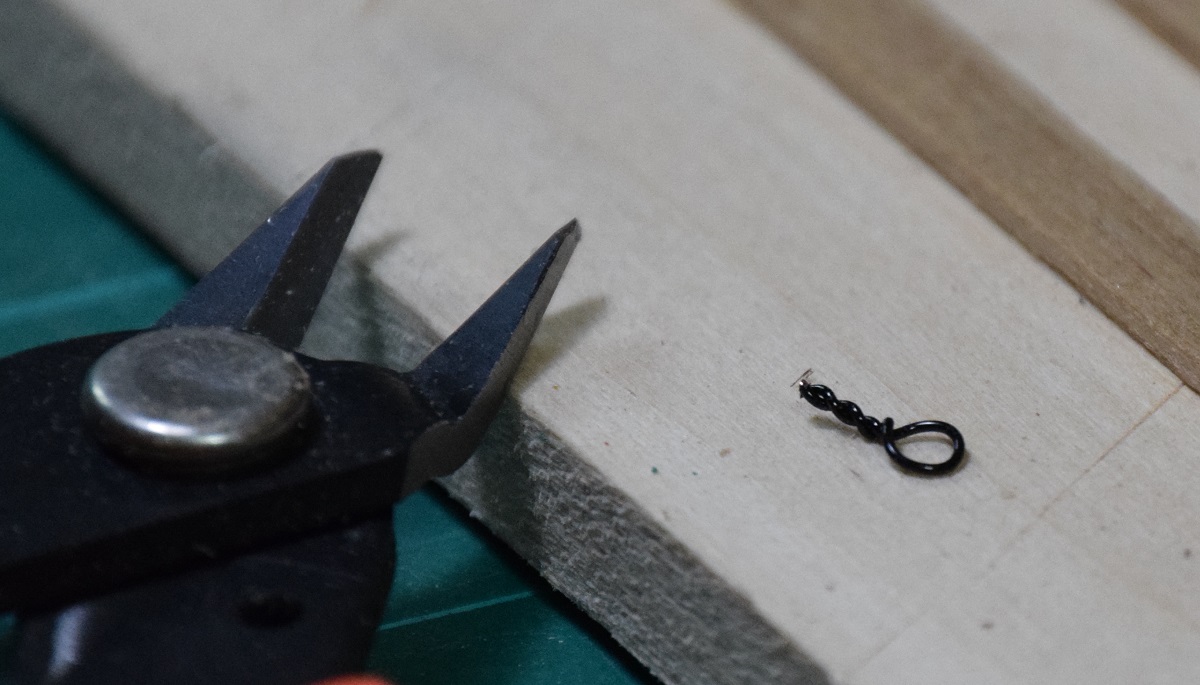
Remove the newly formed ringbolt from the 'round thing'.

Trim the stem to an appropriate length for whatever you need to stick it into. This can be as short as you want, but if you get too short you'll want to secure the twist with a drop of CA or something so it doesn't come loose when you trim it.
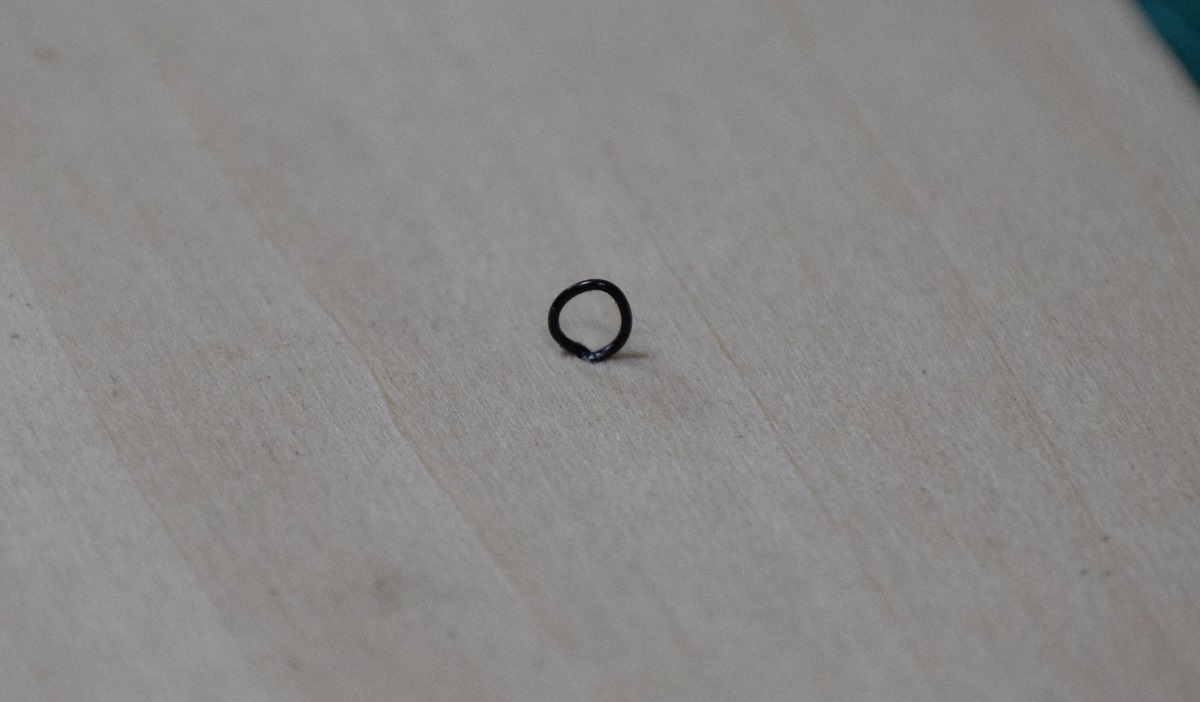
Insert the new eyebolt into a hole drilled into the wood. If it's good, use glue!

Here I made another smaller one with the same 26 ga. wire.

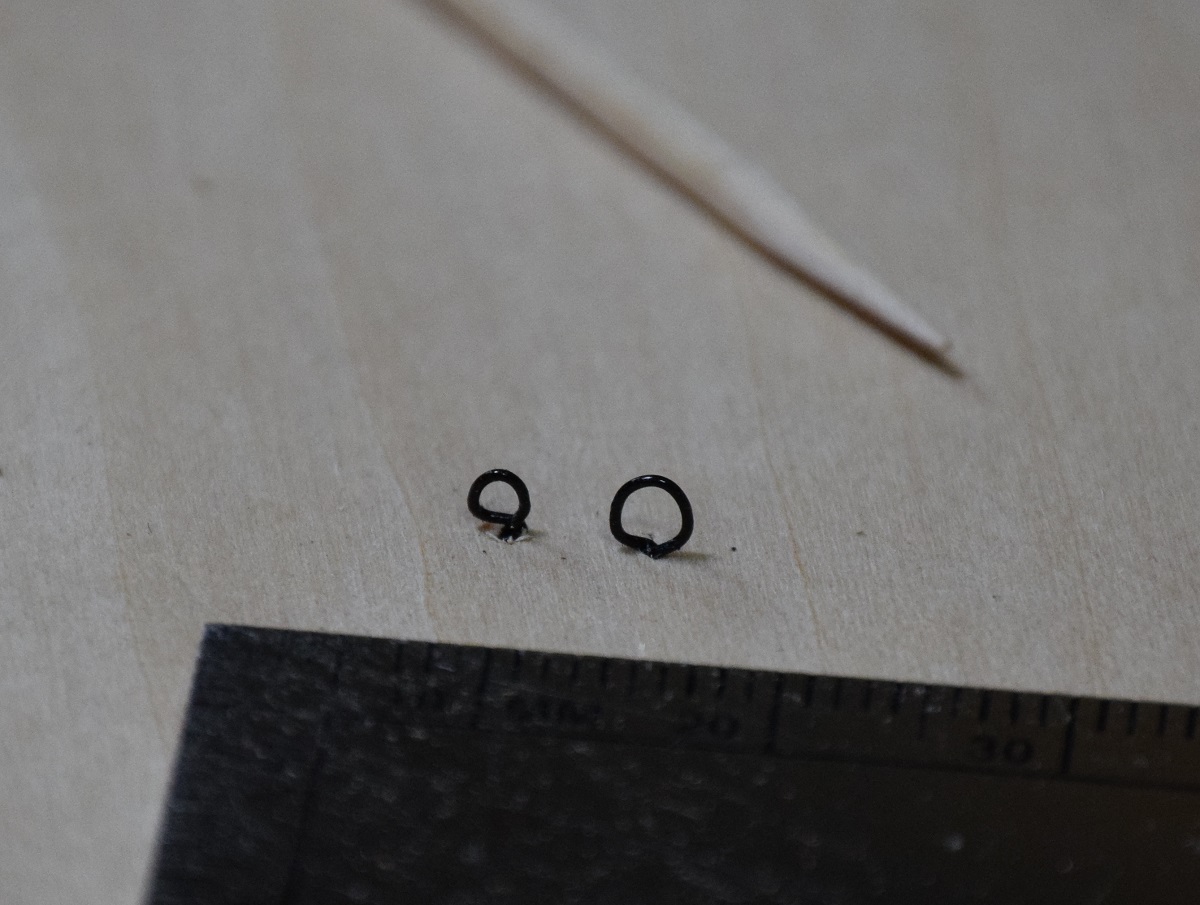
And then just to show how flexible this is, using all the same tools and some 30 ga. wire I made a tiny one.

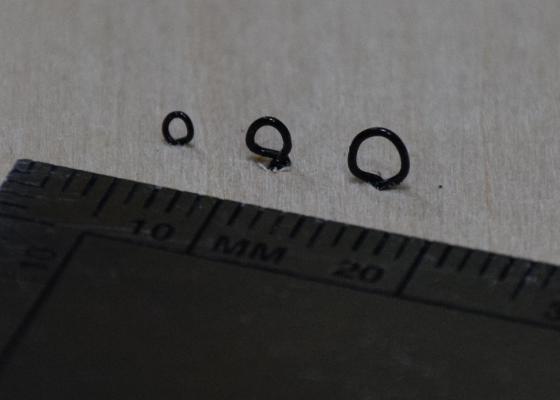
With a slight bit of practice and some care you can make them look really nice, and once they are glued in place, nobody will know that they aren't the perfect little brass eyebolts that come in kits that have been blackened.
Happy ship building!
-
I haven't actually done any cannons yet, so take this with a grain of salt, but it looks to me like the ring bolts on the carriages are over-sized, which is contributing to your clearance issues with the tackle. Might see if you can make some much smaller ring bolts.
I also agree that the haul-in tackle should be able to pull the gun back far enough inside to reload.
-
Wat do you use to prepare the surface for painting? Any primers or other preparations to fill the grain?
I'm on my first wooden kit with paint, and I was told that you should prime with primer of the same brand/type as you plan to paint with. In my case I'm using mostly Model Shipways paint (acrylic) so I used Model Shipways primer, sanded it down, re-primed and sanded again (320 grit) before applying the first coat of paint.
Edit: I've seen others use wood sealant, and I've also seen where people will use a wipe-on poly to seal/prep the wood prior to paint. Seems like there are numerous ways to approach this, but that it's important to seal the wood with *something* before painting.
-
Thanks Alistair. I may combine your suggestion for the tape and process along with making up a small jig for marking so that they are all exactly the same.
I'm off to do some family stuff today, and attend a memorial service so unlikely to get anything accomplished today. I have gotten one of the garboard strakes in, and I'm pretty happy with how it came out. Hopefully I calculated the number of strakes left correctly so that the butts of the garboard are in the right place!
-
Thank you. I thought that the first three pictures were of various stages of the same thing, with the 'loops' added at the end. I see now that you've explained the construction that the first two pictures are of the futtock staves that run through the ends of the catharpins. Light bulb - lit.

-
Thank you Alistair,
I'd be more than happy to hear your input on the sweep ports, as I honestly haven't really done any real planning or investigation into how to do them yet. I know I've seen in someone else's build log that they built a little jig to locate the holes the same each time, but I haven't gone past reading that. My guess is that I'm going to have to tackle that sometime fairly soon though!
-
-
I'm pretty sure I'm going to need quite a few stealers in the lower stern section, maybe your wider approach (which, now that I'm looking at it, is far closer to the plan sheet than mine is) will avoid that.

-
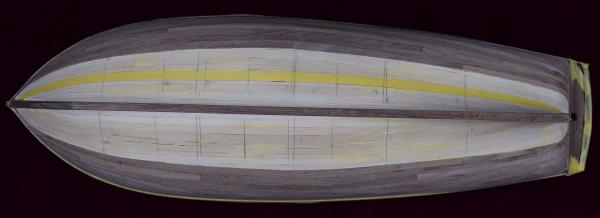
Not making your strakes narrower at the bow and stern? I'm interested in seeing how you make it work as you do the lower half after all the work I went to making my strakes so narrow at both ends (hell, I'm interested in how it will work out for me!).
Looks like you are chugging right along though, about the same point as I am (on one side), but attacking it differently.
-
Thank you gentlemen as well as for all those who have dropped in and clicked the like button.
Ken - I am doing garboard and starting up from the bottom next - there was some discussion on the last page about that and how to open up the rabbet a bit.
Frank - I'll try to remember to bring her with me the next time I'm headed out your way. If I don't get in touch about maybe next Monday or Tuesday, then things are a bit full for the following week and it will likely be the new year before the schedule works out.
-
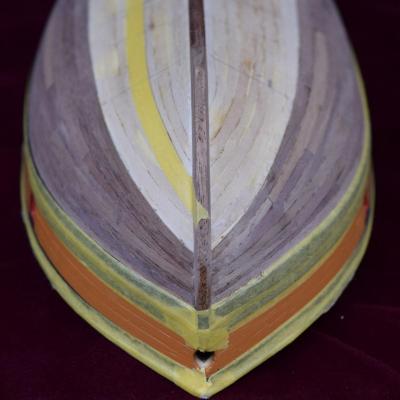
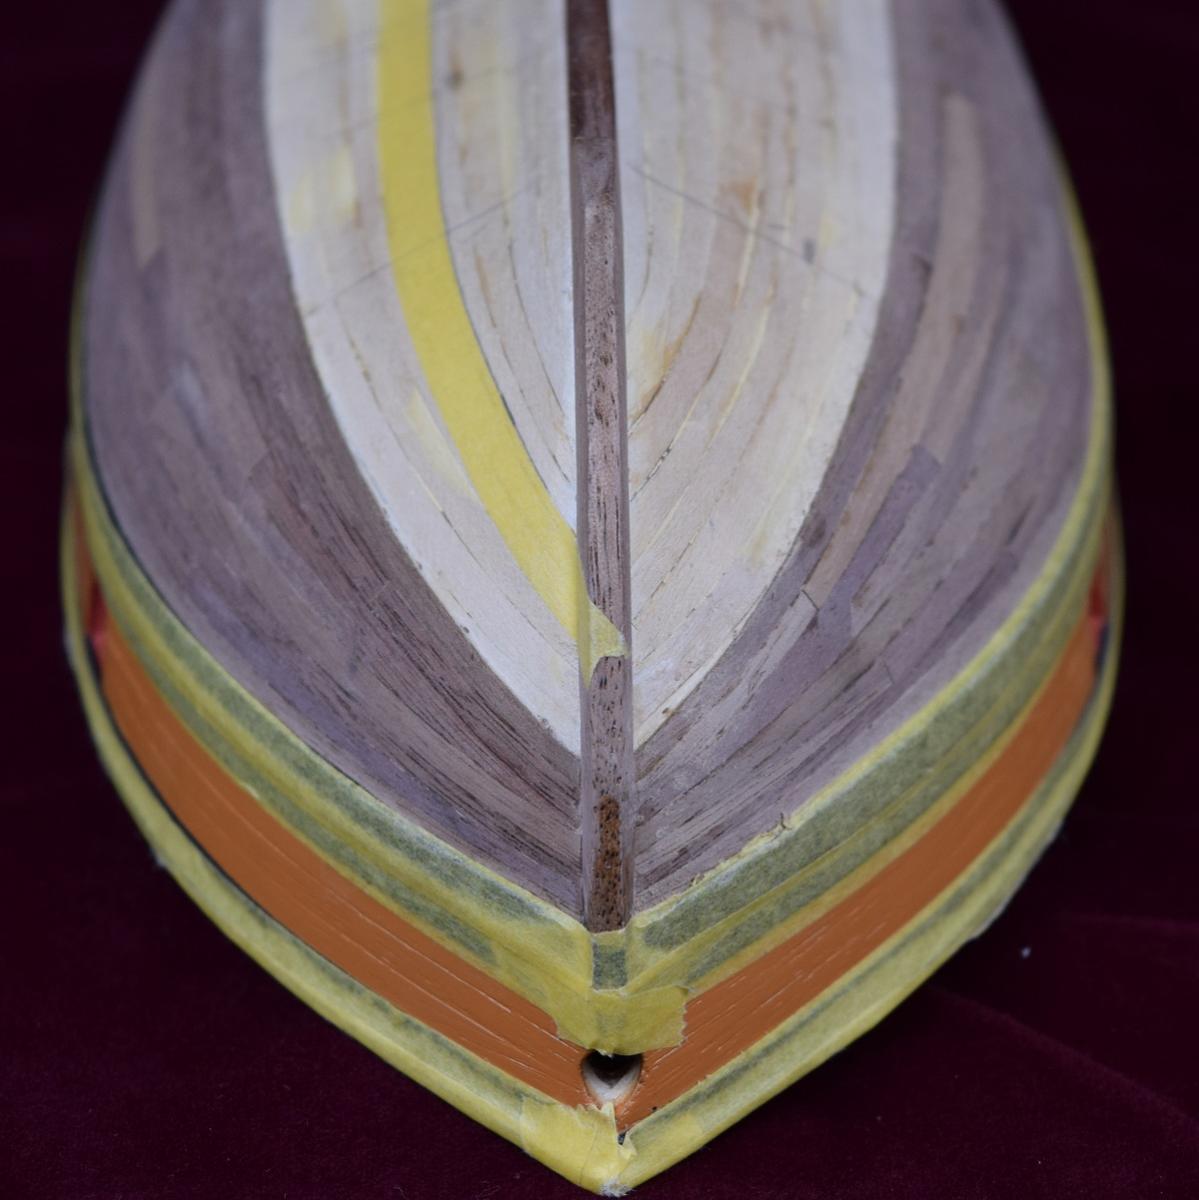
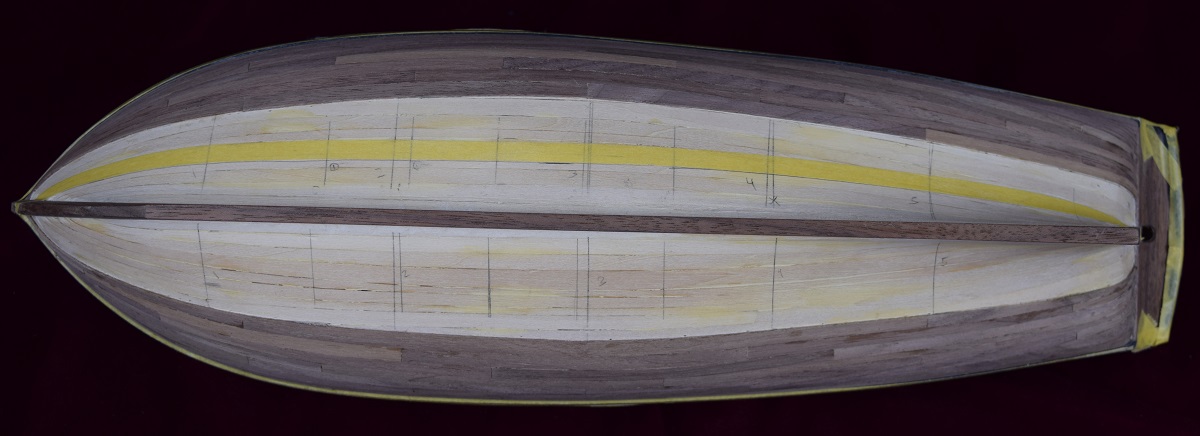
Less done than I would have liked in the last couple days, but finished the 2nd band of planking tonight.
The pictures make the bow look more out of symmetry than the stern, but when measured the bow is actually within 1mm of even, and the stern is off by about 2x that much. I think it will blend in with how narrow the planks are where they bend over the transom, but I'll try to get it adjusted across the next few planks.
-
How did you form the loops on the ends of those served pieces?
-
I've been looking for something like that 2nd one. Looking forward to what other options folks come up with in this thread before ordering.
-
Not directly related, but a lot of MS prices changed - the AVS was $169 in September, went up to $189/$199 depending on when you looked in October/November, and in the new catalog is $249.
Maybe they just decided that they can ask more for these kits, or they are testing the waters to see how high they can get the margins before sales fall off.
-
Hi Brian:
For close sanding, as in the rabbet, I use a sanding stick made by gluing sandpaper onto a popsicle stick, then trim the end of the stick to the shape and size I need.
Frank
Thanks Frank,
I have several different popsicle stick sanding sticks, but for some odd reason it never occurred to me that I could thin and/or shape the end. Sometimes it's the simplest things that elude my brain.


Maine Peapod by JesseLee - FINISHED - Midwest Products - 1:14 - Early 1900's
in - Kit build logs for subjects built from 1901 - Present Day
Posted
Great job, that's a fine looking boat.