


GuntherMT
-
Posts
2,213 -
Joined
-
Last visited
Content Type
Profiles
Forums
Gallery
Events
Posts posted by GuntherMT
-
-
It's Amati's Contour Sander. Here's a link:
http://amatimodel.com/it/attrezzi/attrezzi-per-modellismo/pulitore-contour-sander
Here're Amati's contacts in US, if you need them (I see, that you're from Arizona):
Knowing exactly what it's called and who makes it helps greatly. Thank you!
-
Thanks Jim and wq3296.
As to the letters on the stern - I cheated. I created a PaintShop Pro file with the lettering curved and with, what I thought was, the appropriate font. I then made a 'negative image' and sized it. Then it was just a matter of printing and gluing it in place.
I did the same with the painted scroll work (which was a scanned image from the plans). The red curtain was painted, however.
Cheers.
That's not cheating, that's being smart and using all your available tools!
-
The coils look good to me Doc. Nicely done all around.
As far as the fuzzies, I've read that running the flame from a lighter over them quickly can burn them off nicely without showing, but I think I'd try that off the ship first!
Coating them with dilute white glue or beeswax or something once the fuzzies are gone might help prevent their return over time, I'd personally try the white glue before beeswax, as I can't help but think that waxed lines would be a great dust attractor.
-
I've been unable to find this tool searching the internet. Do you have a specific name for it, or a link or where you got it?
Thanks
- maurizio18 and mattsayers148
-
 2
2
-
So I said I was going to try something with the final band, and while it didn't come out perfectly, some people might find it interesting. I made a time-lapse of the planking.
First attempt at any sort of time-lapse stuff, and I didn't get the positioning exact between shots, and I'm far too lazy to properly crop this and do positioning in post.
")
It has music just for fill, you won't miss anything if you mute it. -
I've gone to using a heat gun and doing almost all my plank bending with just heat. For the more severe curves at the stem and stern, I'll soak and then use heat, which depending on how long you soak will allow crazy tight bends without breaking basswood or walnut. For moderate bends I don't even let the wood soak, just dip it into the water and go to the heat gun. Just don't apply too much force, just let the heat work and you'll feel the wood soften and start to bend. Of course you need to be careful not to burn the wood!
-
Thanks for the kind comments all. If you look close, one of the errors is actually sort of obvious - I managed to miscalculate when I started from the bottom with the garboard strake, and the 4th plank up and the 5th plank up have the butt joints at the same spot. Woops!
I've finished the bottom band on the starboard side now, and have begun work on the final band. I'm trying something with this final band that might come out pretty neat, but I'm not going to reveal it until I'm done, because I'm a jerk that way.

-
Welcome to MSW Chuck!
It will be interesting to watch this build, as to my knowledge it appears to be the only 'kit' that includes frames like this for a true PoF type build (other than longboats and other small craft). Nice large scale too.
Looking forward to seeing more!
-
Congratulations Ken, she looks beautiful.
-
I've found that I regular wood glue - Tite-bond original to be specific - for almost everything now. There is a technique that you can use to get it to bond nearly as quickly as CA, but without the fumes and potential wood staining of the CA.
1) Put a very thin coat of glue on the piece to be added (plank) and set it aside.
2) Apply a slightly thicker coat of glue to the hull (or wherever piece 1 is going to go).
3) Usually by the time I'm done with step 2, the glue on piece 1 is almost completely dry due to the super thin coat.
4) Place the first piece in place and apply with as much pressure as possible without breaking something.
Not sure how the science behind this bonding works, but doing it this way my planks almost immediately stick in place and set enough to remain in position without clamping after only a minute or two of pressure. When possible to do so without marring the appearance, I tend to still use clamps to hold the piece in place while I'm working on shaping the next piece, but it's often not needed at all except near the bow where the bend tends to make life a bit more difficult.
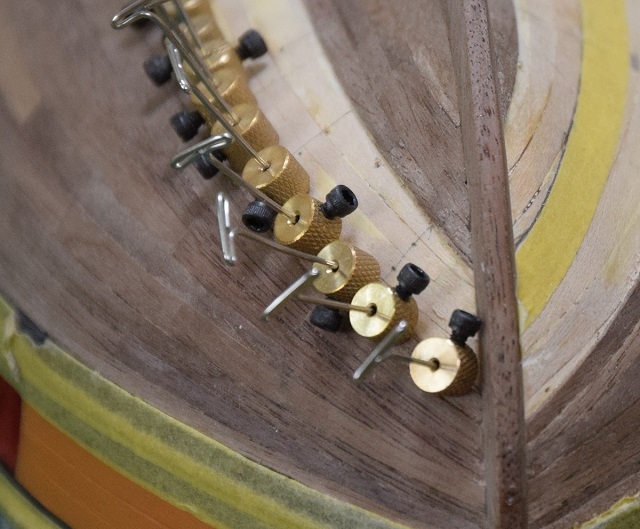
I also have not put a single hole into my final planking layer using this technique, I'll use little pins with collars on them to hold planks into position without putting them through the final plank layer, only next to them.
Here is a picture of the pins/clamps I mostly use for the hull planking (I also have some regular 'plank clamps' you can buy from MicroMark or ME for really difficult planks that require longer term clamping with more pressure).

- UpstateNY, Carmelo5150, tarbrush and 1 other
-
4
-
I used both on the AVS, and I will not use balsa in the future, as I find it did very little to help me. The basswood offers a very nice base for pinning to when planking, whereas the balsa was about the same as the areas without anything between the bulkheads. It does give you a 'shape' of course, so if that's all you want then balsa is fine, but I found the basswood easier to work with all around.
I did not use any power tools to shape the basswood, just hand saw to rough shape, X-acto type blades and sandpaper.
-
-
In a strange turn of events, I actually worked on the AVS for a few hours today, and got stuff done!
Started working on the lower band of planking on the starboard side, got the garboard strake plus the next one in...

And worked on the final band of planking on the port side...

Last plank on the port side!
And the final plank glued in place...
And then cleaned it up with a damp cloth for a few photo's.


I made a number of mistakes on the planking, and I'm sure the eagle eyed amongst you can spot at least a couple of them, but outside of the ship-building community, I doubt anyone will notice, and the overall effect is quite nice, and I think it will really look nice after some final sanding and coating with poly.
Tomorrow I'm off to the track to play with my new car, so the other side probably won't get touched until Monday, but hopefully I can finish up the planking and get a coat of poly on it by next weekend, then I can finally move on to other stuff (and re-mask and paint the black that I damaged while planking before I covered it with tape).
Cheers!
- russ, Mahuna, Ol' Pine Tar and 18 others
-
21
-
It's probably a bit late now Rich, but for the Carmen I used the wood from the sheet the bulkheads came out of to start my cradle for the ship. I simply chopped two of the sections out and then sanded them until they fit (since the planking and keel were not part of the bulkhead shapes obviously).
Edit: George typed faster than me, darnit.

-
My first build was designed like that, where the keel was glued on after the planking. I did not use a build board, or any sort of keel clamp for the build, I just used regular clamps that would hold up the model as 'feet'. I may have had a lot of luck in keeping the keel straight, because I didn't know anything about it!
I think you should be able to do it the same way, and if there is any keel bend, straighten it out using reinforcement blocks between the bulkheads to force it back straight.
You could build a build-board, and after laying down the two strips for the keel and securing it along the entire length, cut out notches where the bulkheads go, but I'm not sure how helpful that would be since you couldn't do much work on it other than the deck with it held that way.
Good luck!
-
Brian:
The planking looks good so far.
As for the stealer, some filler made from sawdust and glue should take care of it. If you are going to paint the underbody, it will not really matter.
Russ
Russ - that's what I meant by 'sanding/white glue' fill. If everything turns out well, I plan to leave it natural below the wales.
-
-
For planking, look here - http://modelshipworld.com/index.php/topic/439-planking-tutorials/
Can't help on your other question, I don't have this model.
-
Now it's time to go to Ikea and get some storage cabinets to organize the small stuff.
Frank
Went and looked at various furniture Friday, and they definitely have some stuff that I'll probably use. Big issue is transport, the shelf unit I'd like won't fit in my car! I'll have to bug a friend and borrow a truck one of these days when I'm ready to grab some of it.
Oh look - a ship building update!
I finished the lower band of planking on the port side of the AVS.


I'm pretty annoyed at that last stealer. When I placed it the fitment was absolutely perfect, and the piece would just barely fit into the spot for it, yet after letting it dry and removing the clamp.. there is a big ol' gap there (not terribly apparent in 'life', but the macro shot sure shows it up ugly as can be).

Ah well.. I'll do some sanding/white glue fill and hopefully it will cover it up pretty well.
- HIPEXEC, dgbot, Dimitris71 and 12 others
-
15
-
I've heard great things about the Iwata, but as you noted, they are fairly expensive (but appear to be cheaper than the Silent-air, and since they are a Euro company you wouldn't get hit with all the extra charges). The big key I've read to getting smooth airflow for air brushes is that you need to get one with a tank, so you don't get the pulsing from the compressor.
I'm in the early shopping stages for one myself, so will be most interested in seeing other suggestions in this thread, will be taking a look at those Silent-air compressors that Frank linked now.
-
Still a lot of stuff to move, and will take a while to figure out where I want to put everything, but I'm up and running for doing work again!
Of course, no computer, no stereo, but all in due time I suppose.
- Dimitris71, dgbot, Salty Sea Dog and 5 others
-
8
-
Off topic, post-Christmas update.
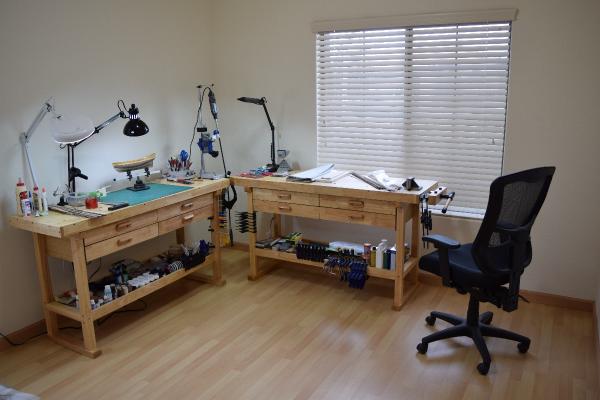
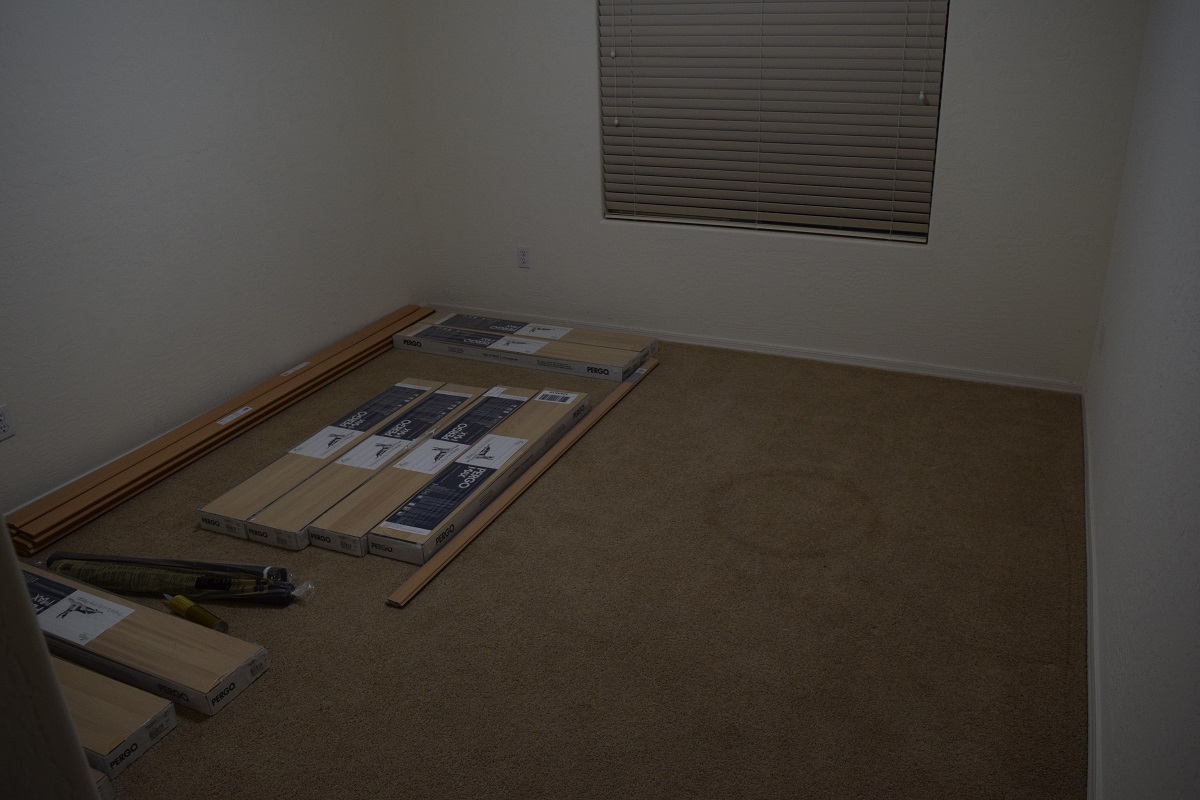
Not much has changed on the AVS, as I have spent very little time on it during the holidays so far, been crazy busy with lots of other stuff. One of the big 'other stuff' is the progress on a dedicated ship-building room.
The status of the room as of yesterday:

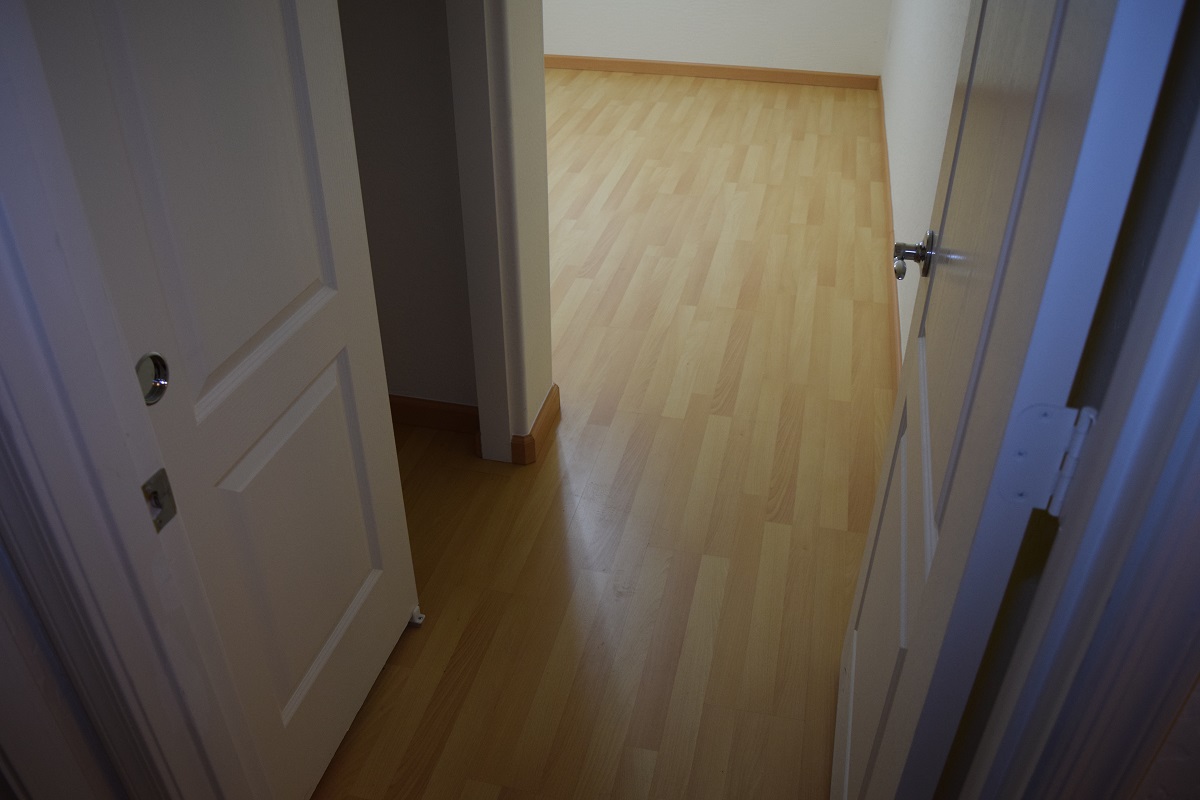
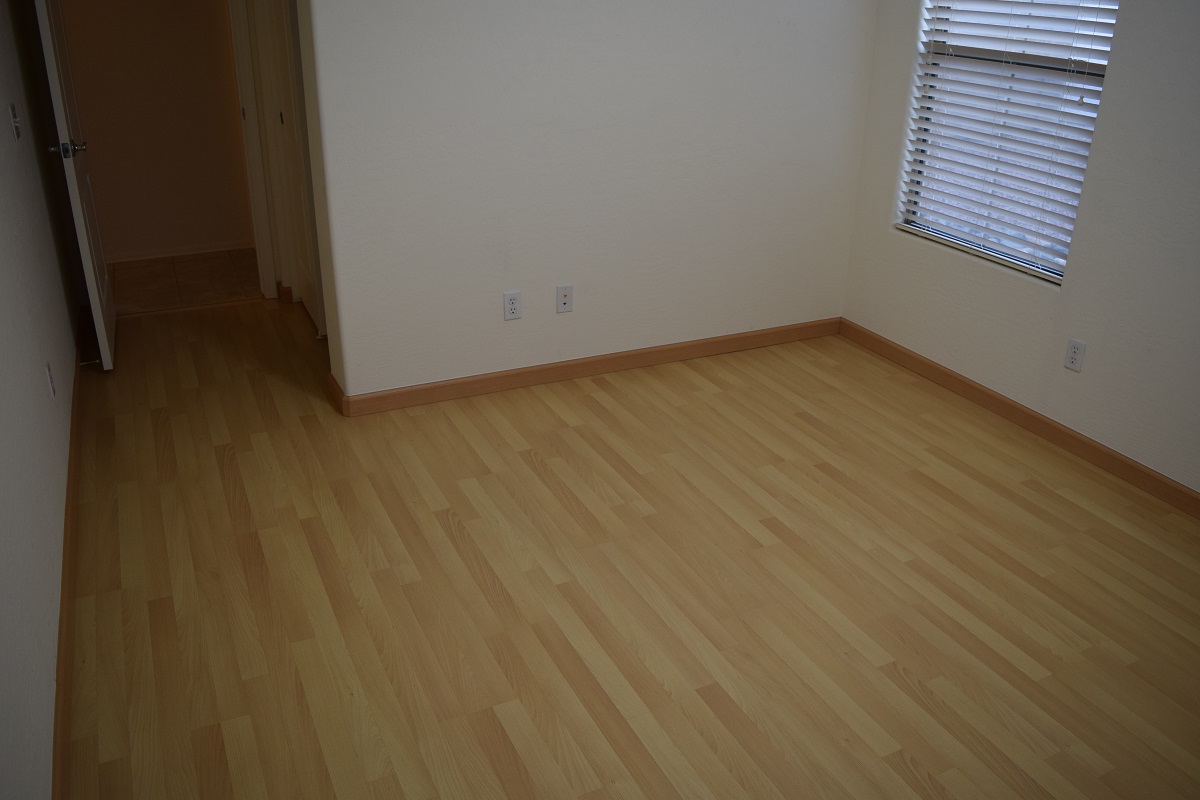
And the status of the room as of a few minutes ago:


Now I've got to assemble a new workbench, and unload and move my existing workbench, and I can start figuring out the long-term arrangements!
-
Simply gorgeous. I'm going to have to figure out a way to include different types of wood like that in some of my deck furniture.
- Eddie and Mike Dowling
-
2
-


Armed Virginia Sloop by GuntherMT - FINISHED - Model Shipways - scale 1:48
in - Kit build logs for subjects built from 1751 - 1800
Posted
Thanks Ken,
The video was kind of fun, but I don't think I'll do more of that, as stopping to get the photo between every little step is sort of annoying, and the result really isn't as cool as I was hoping for since even though I had the tripod location marked on the floor, and the hull location taped off on the bench, there was still quite a bit of movement between shots. I'm sure that could be adjusted in post by careful cropping, but I'm not a post-processing guru by any stretch, and the time and effort to learn how to do that wasn't something I was willing to do for this.
As far a spiling, I guess it depends on how you define that word. The planks aren't truly spiled, in the sense that they are not individually cut from wider stock in a curved shape like true spiling. I used the kit .030 supplied planks strips. I'll see if I can describe my system.
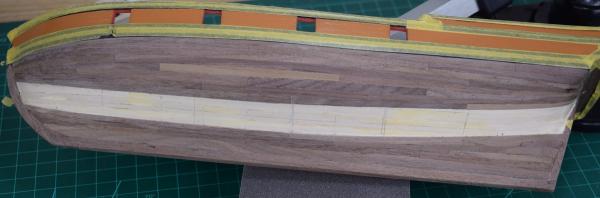
First, the hull was done in 4 'bands' which are approximately 4 planks wide at the widest point (not counting the stern). After masking off the band with tape, I used card stock (manila folders) cut into narrow strips and used the cards to transfer tick-marks from a planking fan to give myself a bunch of reference points for the plank widths needed at various spots along the hull.
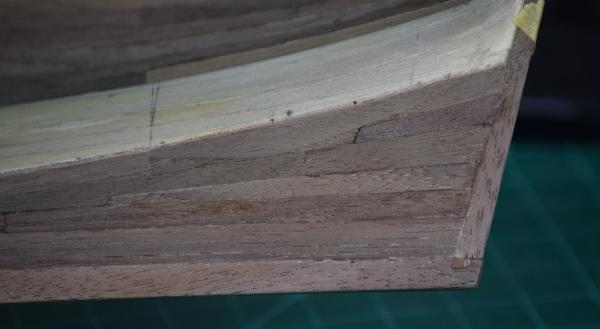
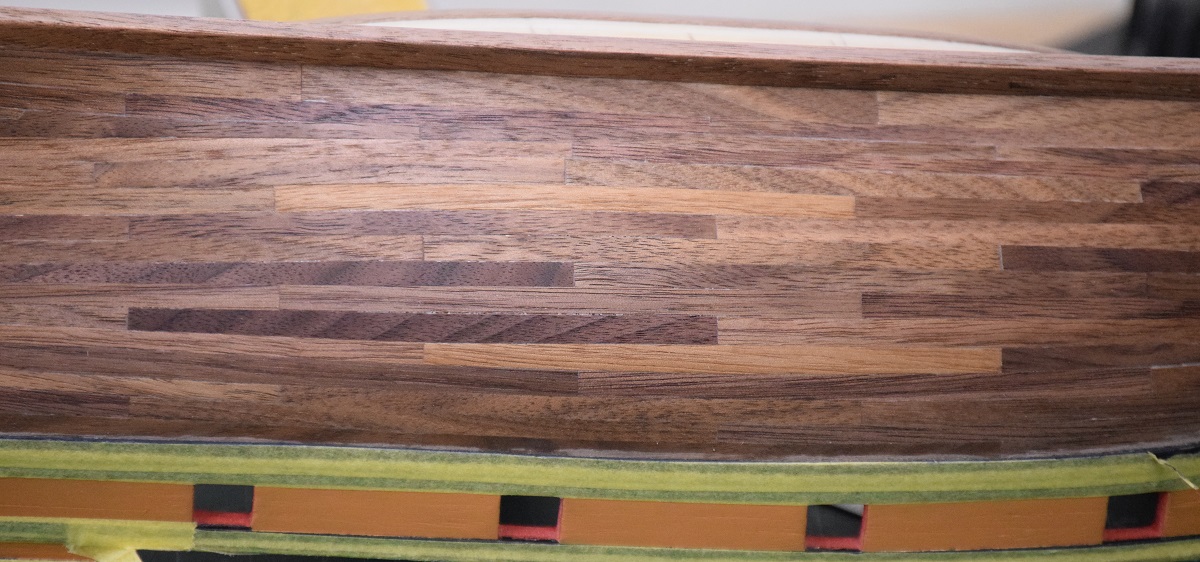
Here is a zoomed in image which corresponds to the first image in the video showing part of the middle section of the final band marked off.
You can see the tick marks that I've transferred to the first layer of planking. You can also see some lines marked 1 through 4, which are where I planned the locations for the butt-ends to fall for this band. I plotted them on this band because I shifted them from the previous band so that they would not end up with the same issue I had on the other side where I had a pair of rows where the butts were in the same spot.
Except for the stem and stern planks, I use pre-cut 4" plank lengths that I cut in a little jig I made up. As I got towards the end I ran out of pre-cut pieces, and would just cut another 4" plank length as I went. Starting with the 4" x 3/16" plank piece, I would lay it on the hull and mark both ends with the nearest tick-mark to get the required taper. I then trimmed the plank using a straight edge and razor knife and laid it back onto the hull to see how it fit. If it was reasonably close I would then bevel the trimmed edge to fit up tight against the existing planks using a sanding block with 320 grit sandpaper. I would sand as needed until the plank edge matched up with all the tick marks along the edge, and then glue it in place.
In the middle I had a few planks that needed to be wider somewhere in the middle than on the ends. For those I marked the wide spot, and then marked the tick marks at each end. I would trim with the razor knife from the tick mark to the edge of the plank at the middle mark, from both ends, giving me a plank that was wider in the middle at the mark, and then repeat the beveling/sanding process until it fit nicely to the existing planks, and matched up with the tick marks fairly close.
Hopefully that's understandable. I didn't really photo-document that process very well, since it's mostly lifted from planking tutorials here, or practicums like Bob Hunts that give various methods of doing this. I think my personal system is something of a hybrid between all the stuff I've read, but it seemed to mostly work out fairly well for me.
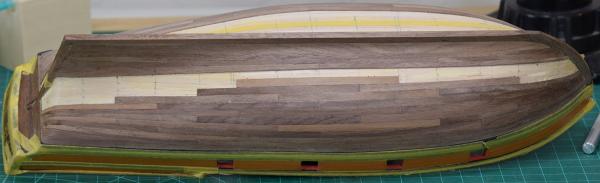
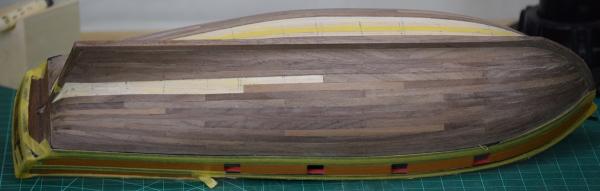
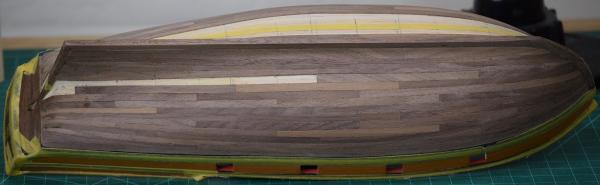
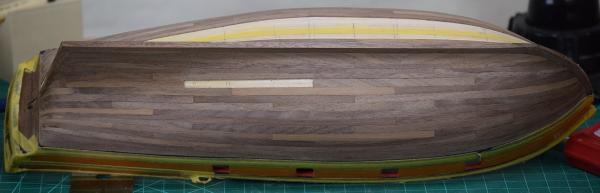
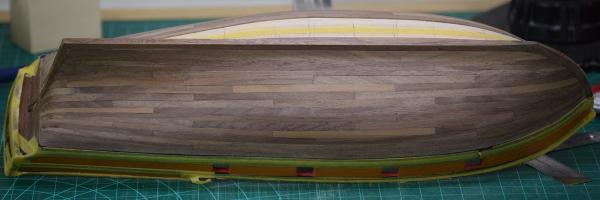
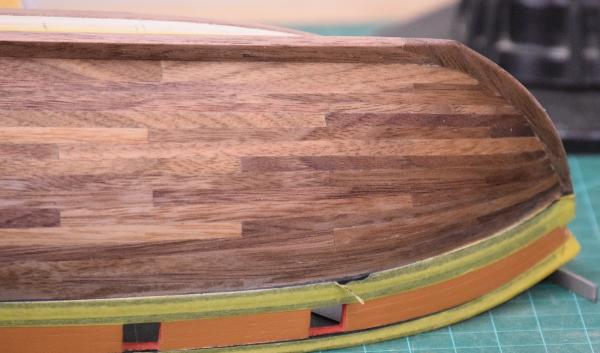
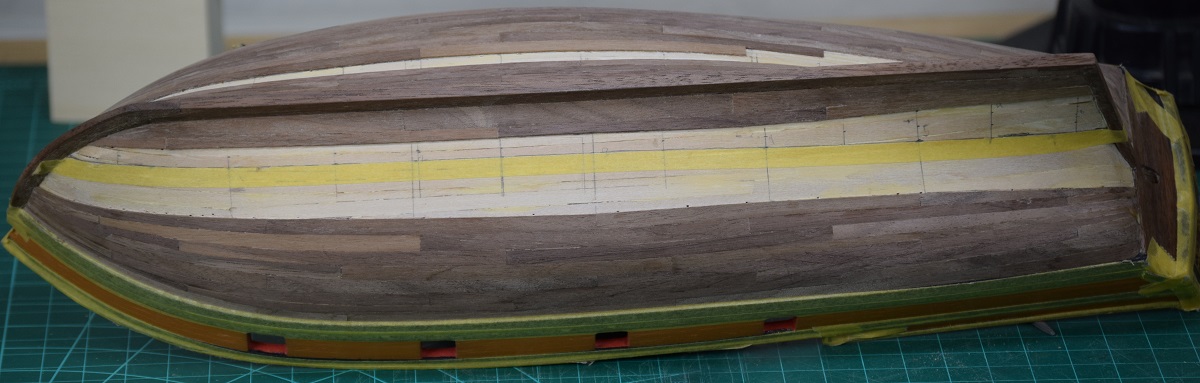
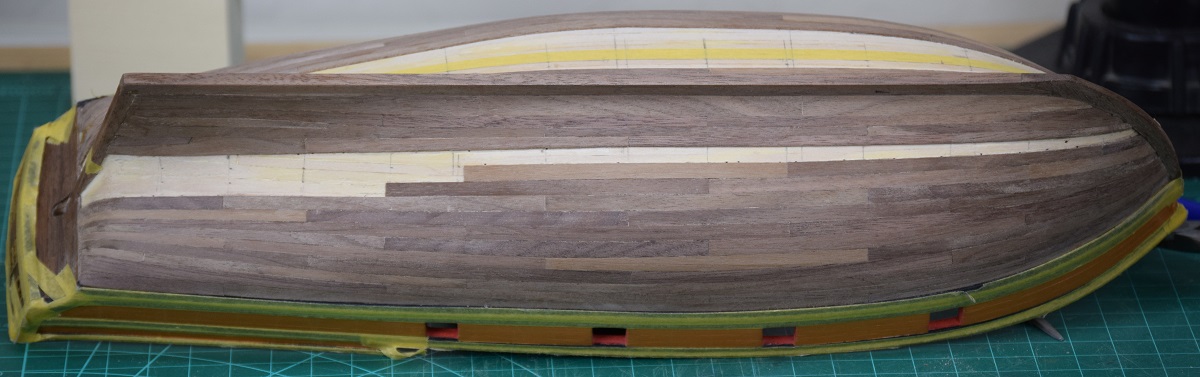
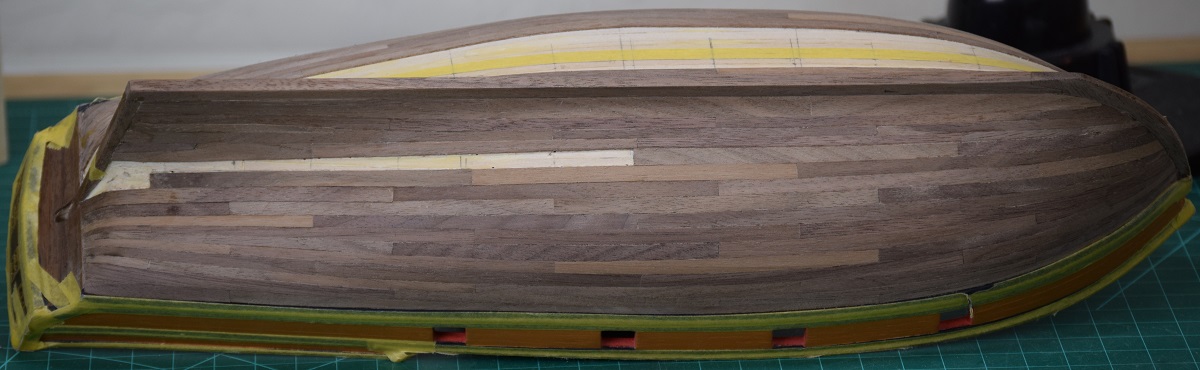
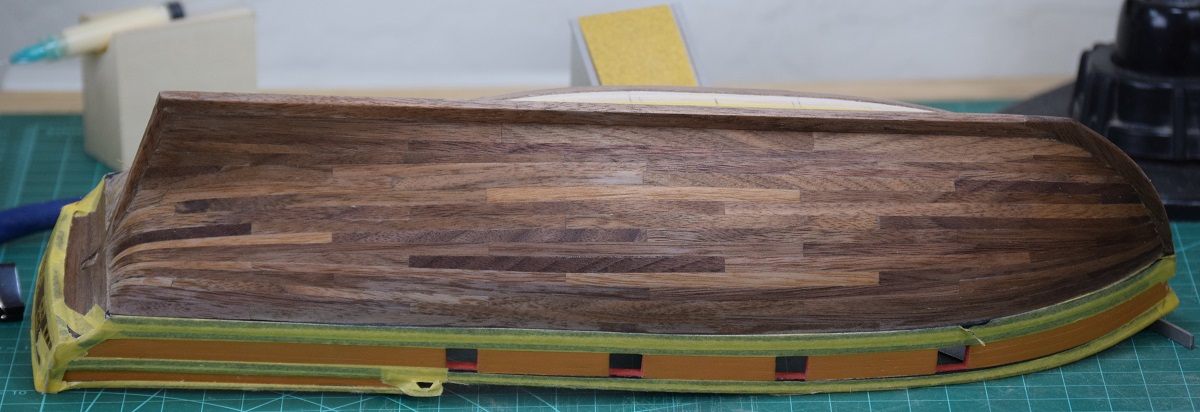
Yesterday I sanded down the final planking until I was reasonably happy with the final finish, and applied a coat of wipe-on poly and let it dry for about 6 hours. I then buffed that and applied a 2nd coat to let it dry overnight. This morning I buffed that coat, and after looking at the new photo's, I'll need to re-sand with a very fine paper to remove the light scratches left from using the wrong buffing material, and refinish, but that can be done down the road.
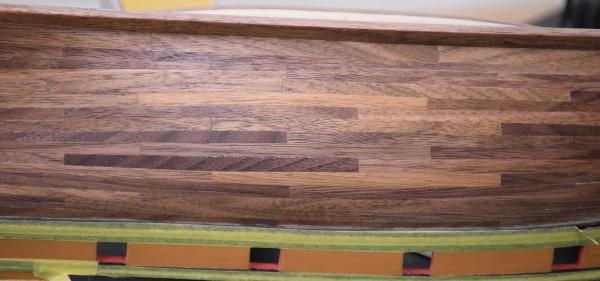
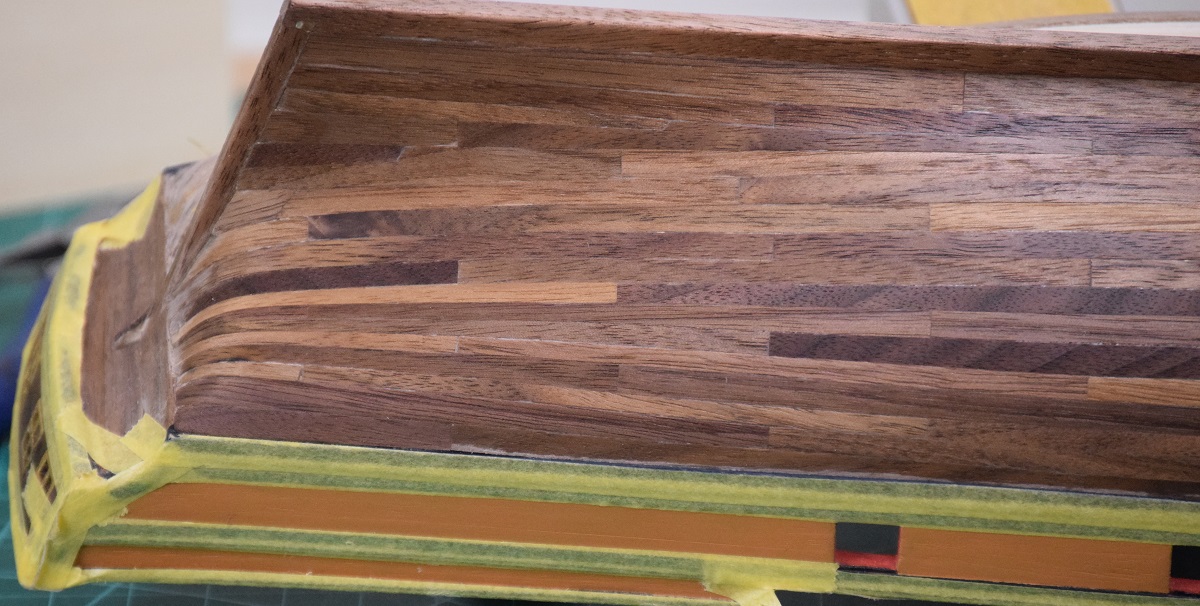
For now, here is what it looks like with the 2 coats of poly and a buffing (or scratching in some photos!).
As you can see, I failed at the symmetry at the stern, which I'm not terribly happy about, but the rest looks pretty good to me, and I am not going to cover it with paint as I really like the way the different colors of walnut came out. I'm also happy that I mis-read an instruction and used 4" planks instead of 5", as even though they are fairly short in scale (16'), I think they make the hull look quite nice. I also used a 4-butt shift pattern for the planking, which came out quite well except for the aforementioned mistake when I laid the garboard strake at the wrong shift point.
I've now got it all re-masked for touching up the black paint, and am about to start working on marking the locations for the sweep ports, and making a jig for drilling them.