


GuntherMT
-
Posts
2,213 -
Joined
-
Last visited
Content Type
Profiles
Forums
Gallery
Events
Posts posted by GuntherMT
-
-
Thanks gents,
Grimber - everything above the black strake ends up getting painted, so the color differences won't be seen in the end anyway.

-
I ordered enough deck planks for my next three builds. I just looked at the plans for the deck and counted the number of each size of plank, and ordered that many strips of that size plus a package. This will likely leave me with a *bunch* of extra planks, since the decks are nowhere near 22-24" long, but that's ok, it's not like I won't be able to use it in the future on other builds, and since I plan to do butt-shift planking on everything I do going forward (unless I do a more modern build where that isn't correct), I can use it all more efficiently as well.
Being able to do my own strips is certainly something I hope to do in the future, but for now I wanted to make sure I was set, at least for the Holly which seems incredibly hard to source, for the next year or so.
-
-
Good thinking......and nice work!
Not an original idea, it's the way Bob Hunt solved the same problem. I had sort of test fitted the rails much earlier in the build and thought they were ok and I wouldn't need to do that, but it turned out I was wrong.
- lamarvalley and egkb
-
 2
2
-
So it's been a few days, and I haven't accomplished nearly as much as I expected to this weekend, as I caved in and bought a new video game (Dragon Age) so wasted most of the weekend camped in front of the computer like the giant nerd that I am.

I have accomplished a bit though since the last update, including some new 'firsts' for me today, so I figured I'd give an update since I'm inordinately proud of myself for the latest bit.

To start off with, over the last several days I finished up the aft outer bulkhead planking, and then put on the sheer strake. For the sheer strake I used 4" sections (16' scale planks). This is the first 'scale' planking on the model, although I meant to do that for the black strake and simply got ahead of myself and forgot.


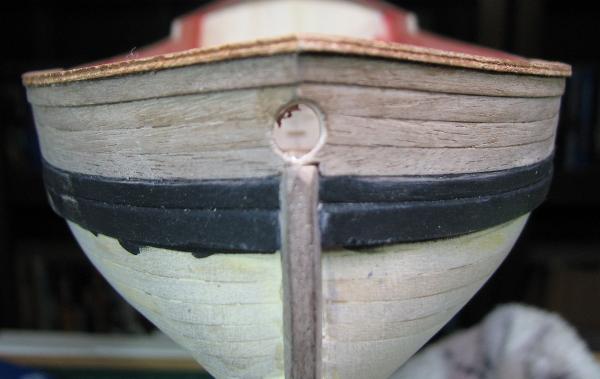
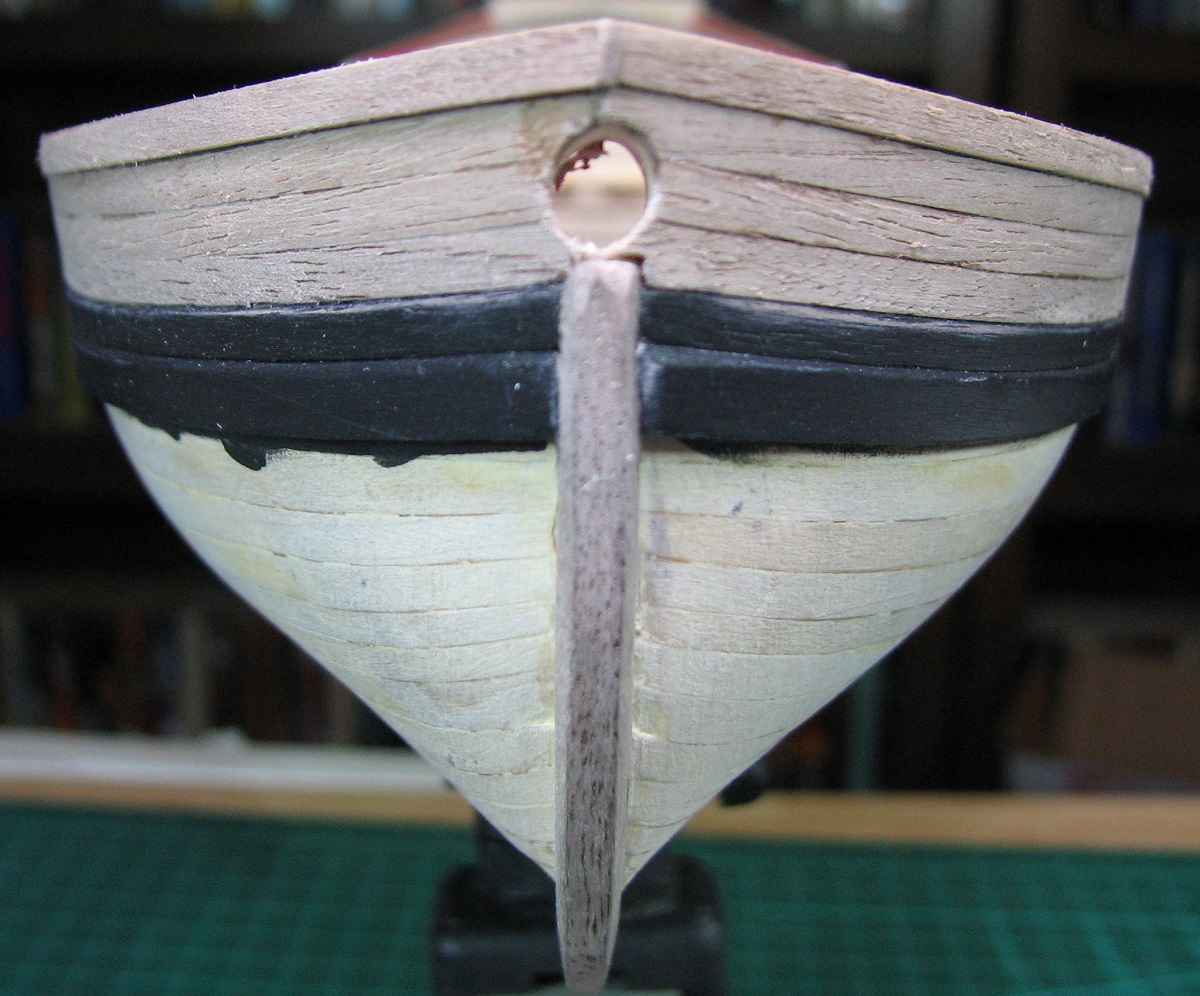
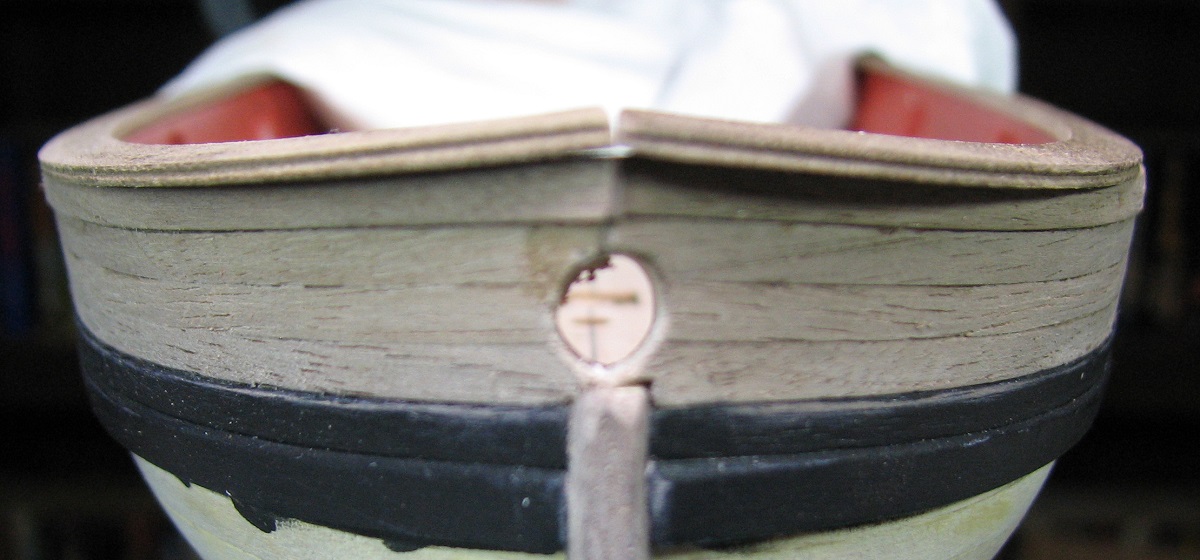
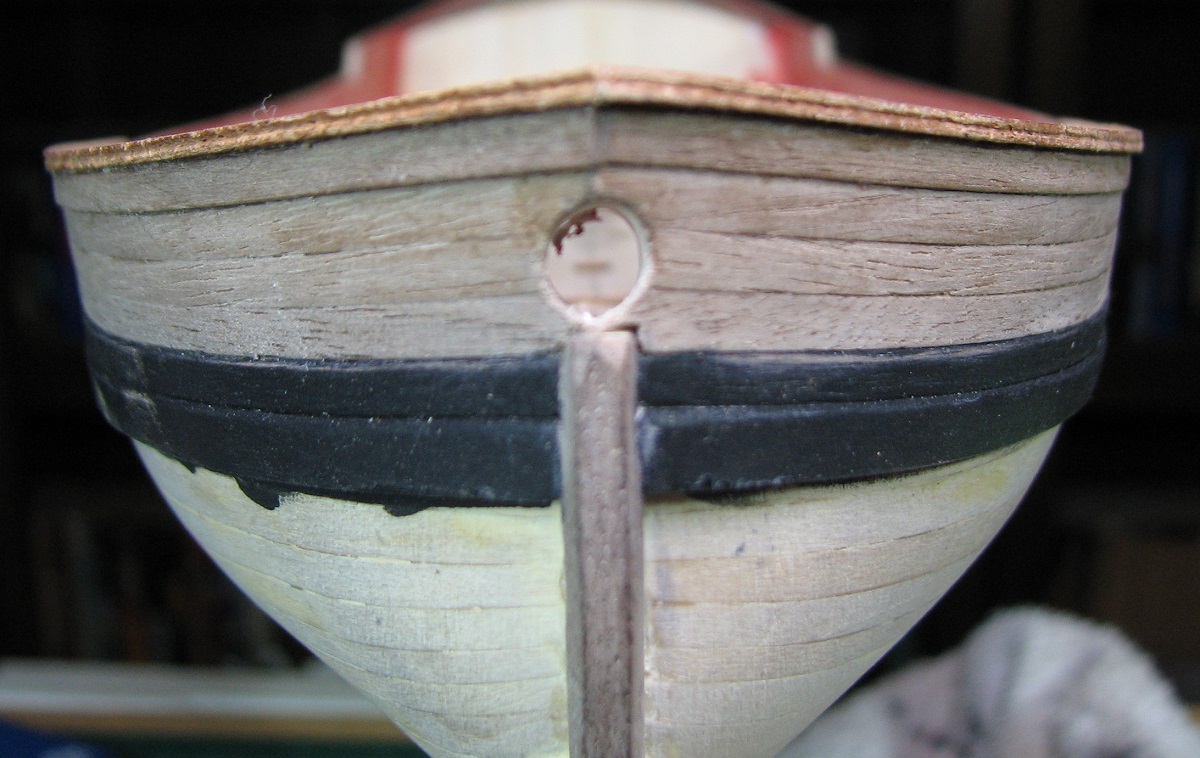
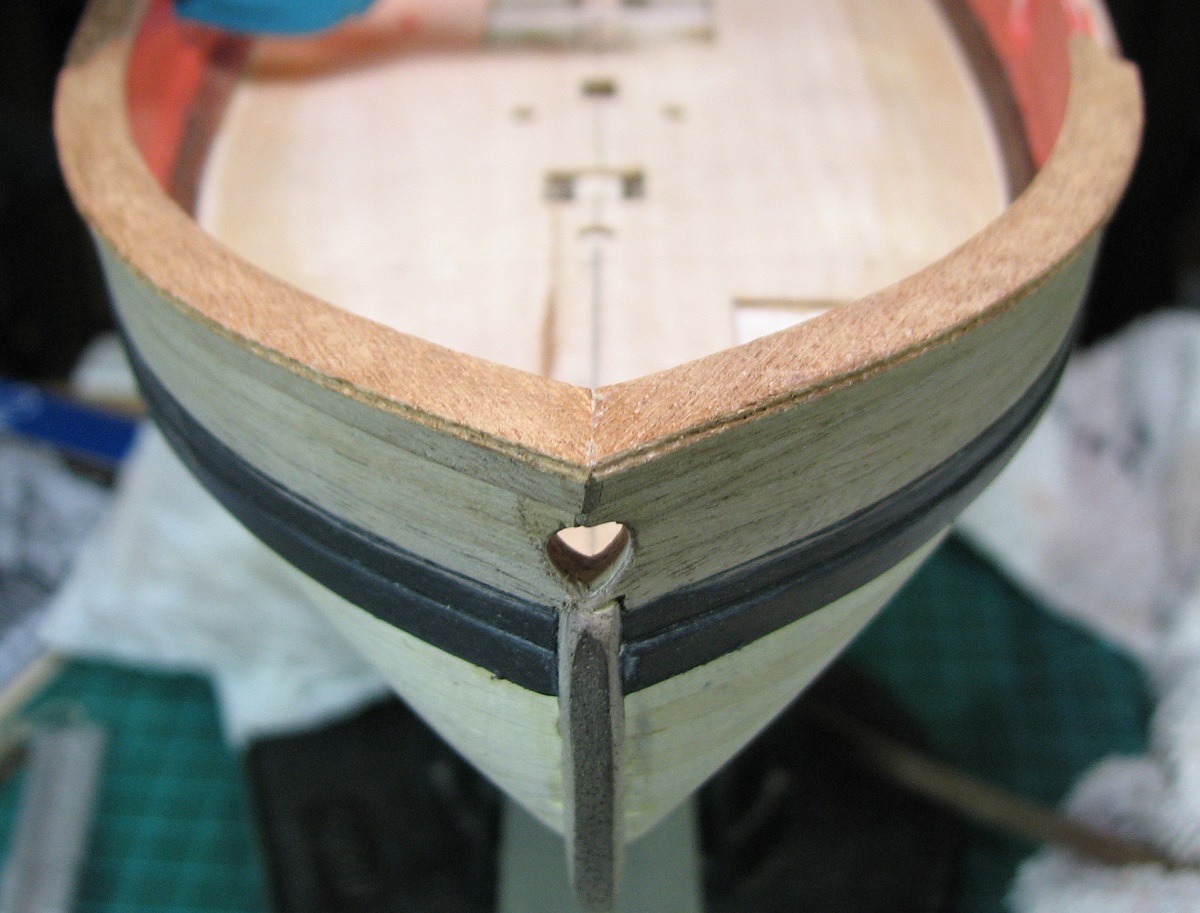
I also got the hole for the bowsprit drilled, but it is left undersized for now. I'll open it up the rest of the way later when I've got the bowsprit shaped for best fitment.
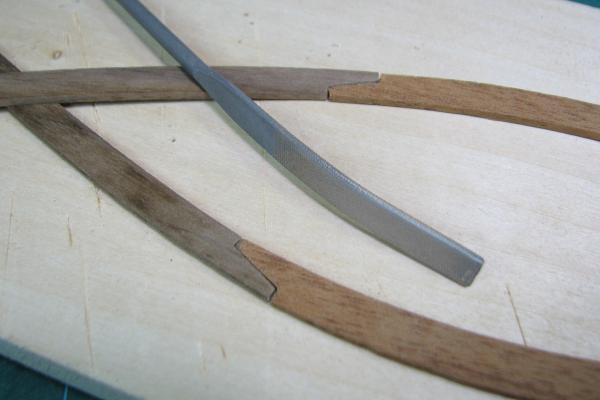
The next 'first time' thing I did, was I ground a simple trim form into a razor blade, and cut a 'line' into the outside edge of the cap rail pieces for 'fashion'. I am reasonably pleased with out it came out for my first try at this sort of thing.
Unfortunately, when I went to actually fit the cap rails onto the bulkheads I ran into the problem that lead to my other 'first'. The curve of the cap rails as they approach the bow was completely different than the actual curve of the bulkheads. If I'd used the kit cap rails, the very tip would have actually ended up just behind the bulkheads where they meet above the stem, instead of extending beyond it slightly. If I moved them far enough forward to meet where they should, the curve completely didn't work for the rest, and they also came up very short at the aft end.
So, I scrounged around in the box of wood that I got from Reno, and low and behold, there was a small sheet of 1/16" wood. I'm not honestly sure if it's walnut or not, but it's wood, and close enough! So I used the curve of the bulkheads, along with the width/shape from the kit cap rails, and made forward cap rail pieces from this new sheet of wood. The sheet of wood I have wasn't large enough to make the entire rails over, so I just made the forward sections.

To join them with the kit rails, I made my first ever scarf joints, and cut back the original cap rails to match up with the new pieces. I used my little shaped razor blade and cut my line into these new parts, and placed them. This part is where I was really happy that I didn't try to use the kit pieces. These came out great.


I clamped the kit cap rail into place on the starboard side, and then measured and cut a 1/16 x 1/16 piece and cut the 'line' into it and placed it at the stern, and then I glued the kit piece into place. I haven't completed these steps on the port side yet.


My 'trim' line isn't aligned perfectly where the scarf joint is, but I think I can make it look somewhat better with a bit of work using the sharp edge of a riffler file.
Hope everyone had a great weekend, cheers!

- themadchemist, dgbot, aliluke and 9 others
-
12
-
The kit says to drill holes for all of these.
Could be worse, the Carmen instructions not only didn't say how to do it, they didn't provide a picture or drawing either!
When I came upon that, the advice I got here was that either way was 'normal', so it apparently varies from ship to ship. As you have a photo of how it's actually done on the Niagara, you could just do it that way instead of following the instructions if it makes you happier!
The 'notch' might be easier actually, as you won't have to thread the line through the tiny hole, and if you need to adjust things, it would be easier to redo rigging with the 'notch'. Of course it would not hold the line like a hole, so might actually be more difficult to rig initially since it could slip out on you.
-
I went to the workshop today to begin my outer layer of planking. I found I had suddenly lost the ability to identify 1/16 x 3/16 walnut stock - even with a digital caliper.
I accept that as the Universe suggesting I take the day off.
Your excuse is better than mine, I've been lazy and playing video games.
-
Dale,
The first two pictures are of the fore or main top, while the final picture is the fore topmast crosstree. The topmast crosstree doesn't have deadeyes for the topgallant mast like the lower two mast sections.
The topgallant shrouds go through the ends of the crosstrees (you can use a slot or drill a hole for this) and then they wrap around a wooden stave which is seized to the top of the topmast shrouds. Look on plan sheet 5, detail 5-E.
-
Sounds like a plan Frank. I'd have responded to the emails, but apparently Cox email servers are down now, so I can't! I'll bring over some stuff for the seizings too.
Hope you had a wonderful vacation. I'm off now until the 2nd, although I don't plan on going anywhere.
-
Thanks Alistair, and yes, the next plank up is a 3/64" thick plank instead of the .030.
I may order an airbrush myself probably from http://www.tcpglobal.com/
Harbor freight does carry a couple also
The reason I don't have an airbrush at the moment Grimber, is that I've experienced cheap airbrushes (like Harbor Freight type) and I have had unpleasant results with them. When I do pull the trigger on one it will likely be a good dual-action Iwata, and I'll also get a good silent compressor with tank at the same time with all the proper regulators and water traps, and that will add up to a fair penny or two. Since my actual need for an air-brush right now is really fairly limited (no paint at all on the Carmen, and somewhat limited painting on the AVS), it's just not high up on my spending priority list at the moment.
David - I had a nice dual action Badger the last time that I had an airbrush (i.e. 25 or so years ago), and I was pretty happy with it, but the research I've done so far (admittedly not exhaustive at this point) is pointing me towards Iwata as the 'top dog' in the field at the moment. Whenever the airbrush percolates to the top of my 'buy' list, I'll take another look and Badger will certainly be in the mix for the research.
No work on the AVS tonight, had a charity thing at work this afternoon, and afterwards a bunch of us went out for dinner & drinks, and I just got home a little bit ago. So tonight is catch up on forums and get to bed!
-
Thanks gents.
Alistair - I meant to answer that question last time and forgot, sorry about that. I tried an experiment and painted the gold line on using India ink, and it looked great, but because the wood was already sealed it never dried, and 2 days later I could just wipe it off. At that point I had already added the lower line of outer planking. I also found that the black ink I'd been using for the strakes, even after adding 3 layers of poly was still bleeding off on things when wiped, so I ended up doing a light sand and adding several layers of black acrylic when I did the scuppers (since I didn't have a way to get the ink into them, I was sort of stuck anyway). I'm not sure at this point what I'll do with that gold line. I may go ahead and add it back in later, but I have not decided for sure yet.
David, believe me, an airbrush is on my list of tools I'd like to add to my collection, but it's not in the cards for this build.
-
DanV's Boo-Boo thread is a must read.
I agree in the scuppers, they look great. Also on the gun heights, remember wood thickness will play a part. If I'm remembering correctly you upgraded to holly, which will raise the cannons if its thick. Seems I read something in Alistair's logs on this, as I've been enjoying his build logs.
Oh and BTW, you mention Hobby Lobby, if I haven't already mentioned it, there is a phone app that gets you 40% off the most expensive item and it renews daily. Hobby Lobby is a great source for materials.
I do have holly for the deck, but I got it in the same size as the kit decking, so should make no difference in height. I've never really shopped at Hobby Lobby before, as I always thought it was more about 'craft' stuff (which honestly, it really is). However, there are no traditional hobby stores at all on this side of town, and Hobby Lobby at about 30 minutes from my house is the closest place to get really anything hobby related that I can't get at a Lowes or Home Depot.
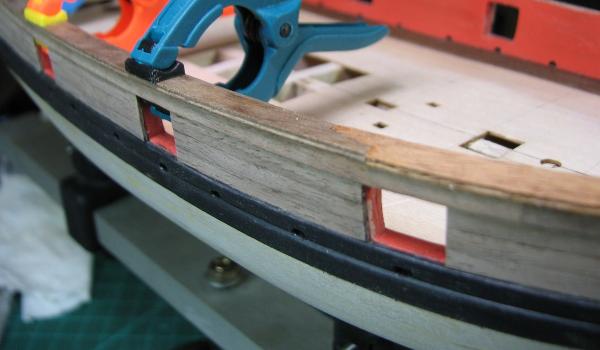
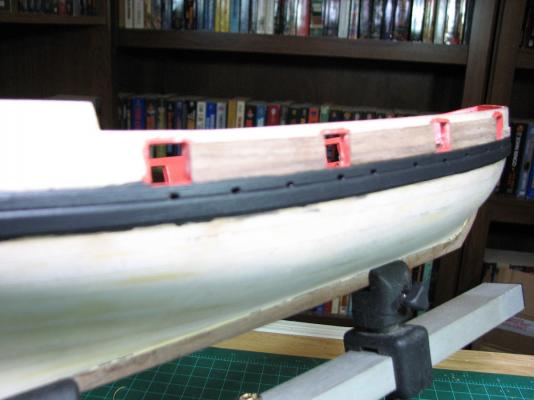
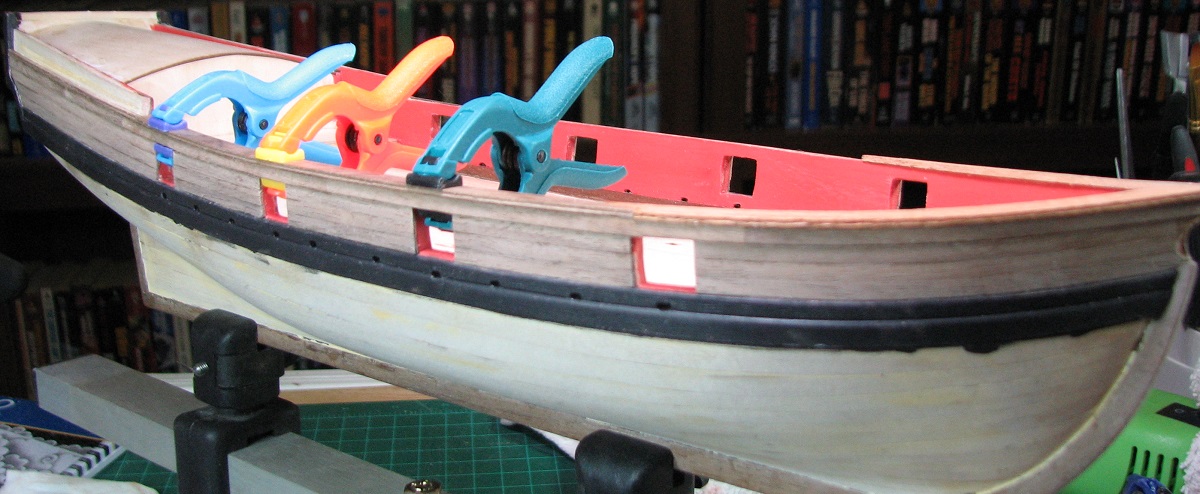
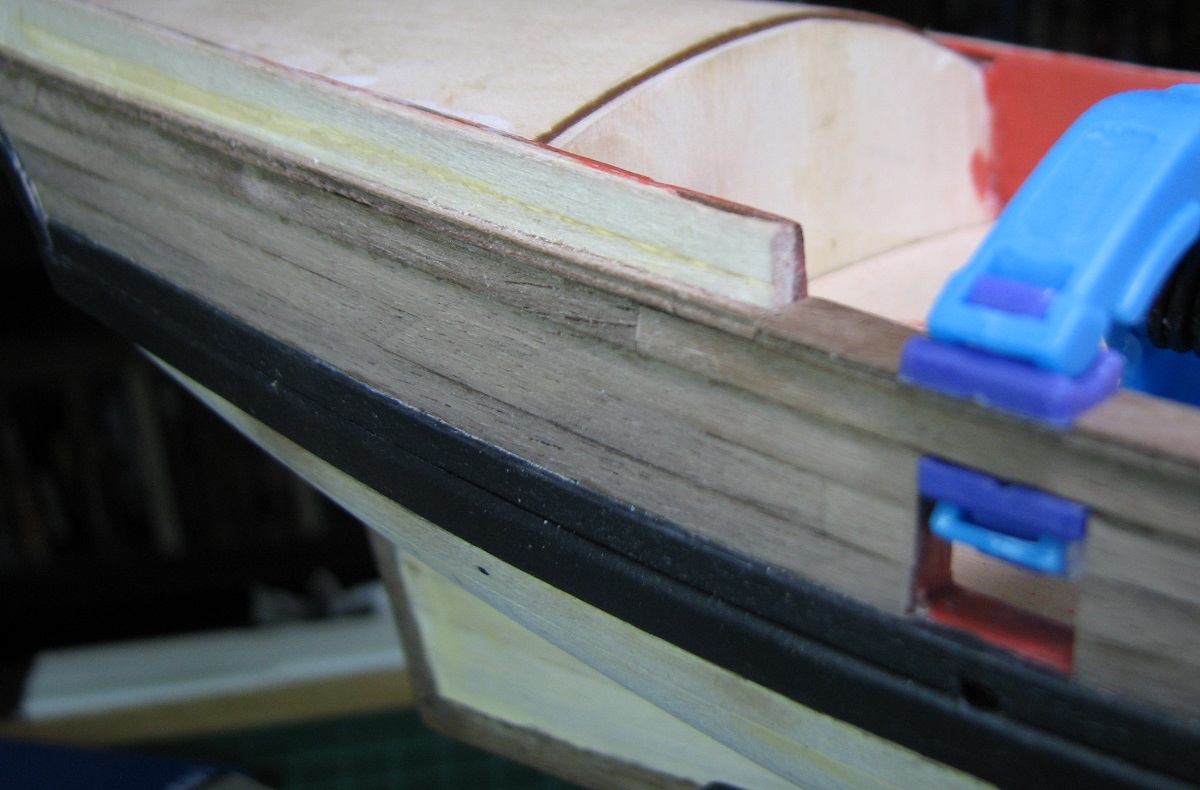
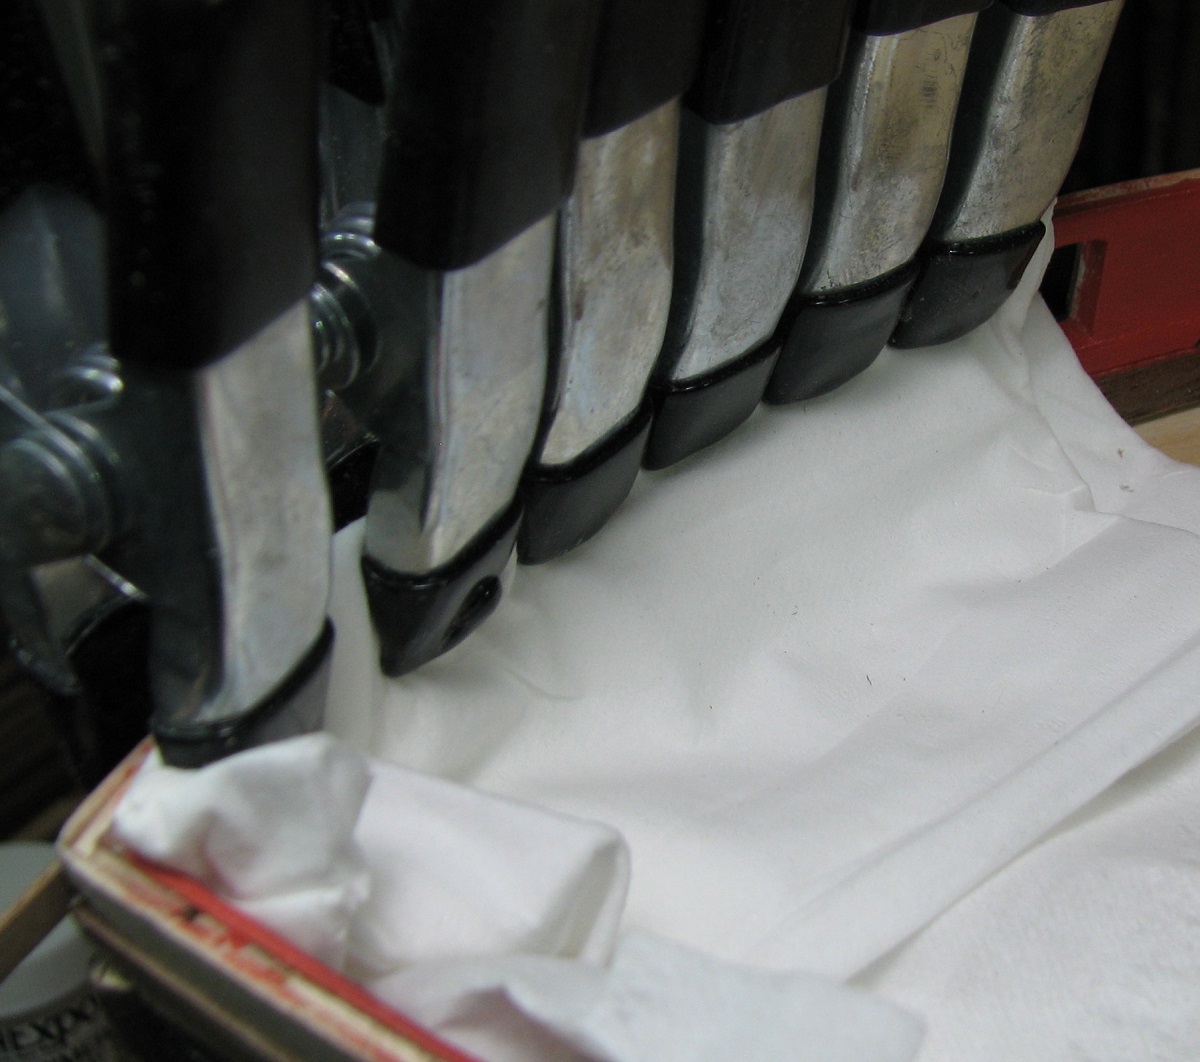
Made a little bit of progress since my last update, and learned another lesson about using clamps on painted surfaces (the lesson is - "don't do that you idiot"). I ended up having to do quite a bit of cleanup work on the inner bulkheads after leaving some divots and black marks on my nicely finished red bulkheads, so now I'm doing this when I need to clamp the outer planks:
I've got the three .030 planks on the outer bulwarks now from the aft gun port to the stem. I need to trim them off at the gun ports now, and then paint the gunports again.


I also got a serving machine from Alexey and played with it a little bit this afternoon.
 It will allow me to properly serve the rigging whenever I get to it - pretty slick machine, and the ability to fully serve the shrouds where needed in just a couple minutes will be amazing and awesome. I need to find some slightly thicker thread though, the regular sewing thread I have is so fine that the 'serving' is sort of lost unless you are looking at it with a magnifying glass.
- themadchemist, Ol' Pine Tar, ccoyle and 4 others
-
7
-
those tiny holes, air bubbles in the lower paint coats that eventually pop as the paint dries
I get my brushs from McGills Warehouse
allot less money than retail for professional paint brushs
Air bubbles. Huh. The more you know.
Hobby Lobby had single brushes for 50% off that day, so I didn't do too terribly on the brush price, but thanks for that link, saved for the future.
-
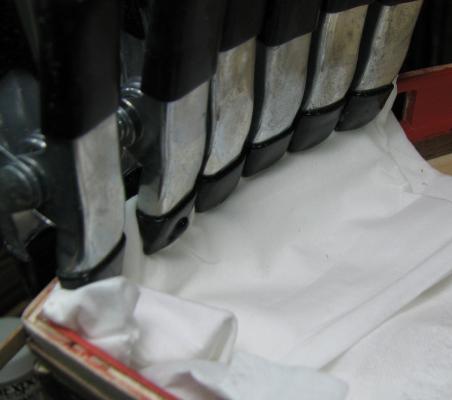
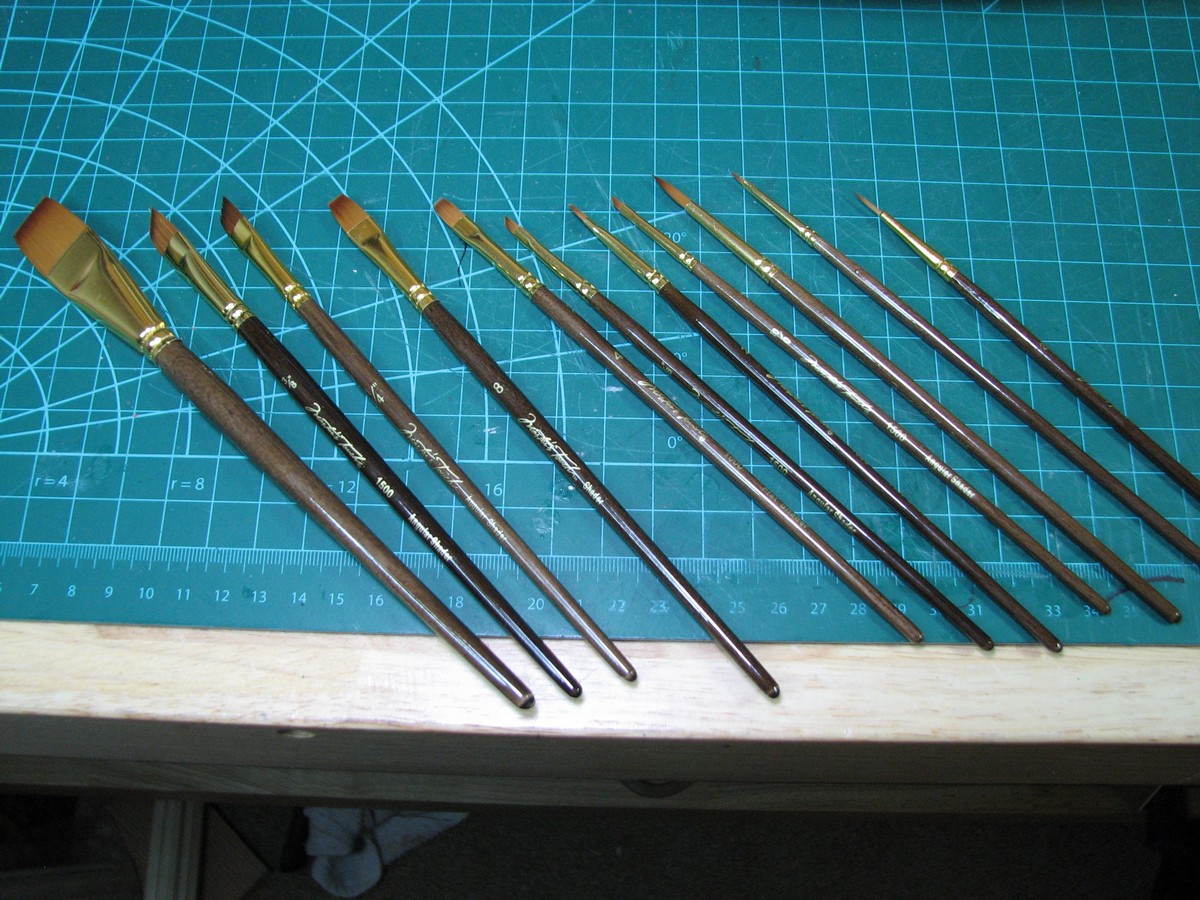
Photo update. Went out this weekend and got some 'real' paint brushes instead of the cheapo's I've been using.

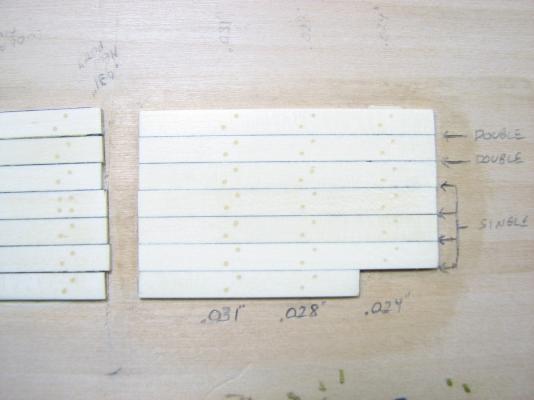
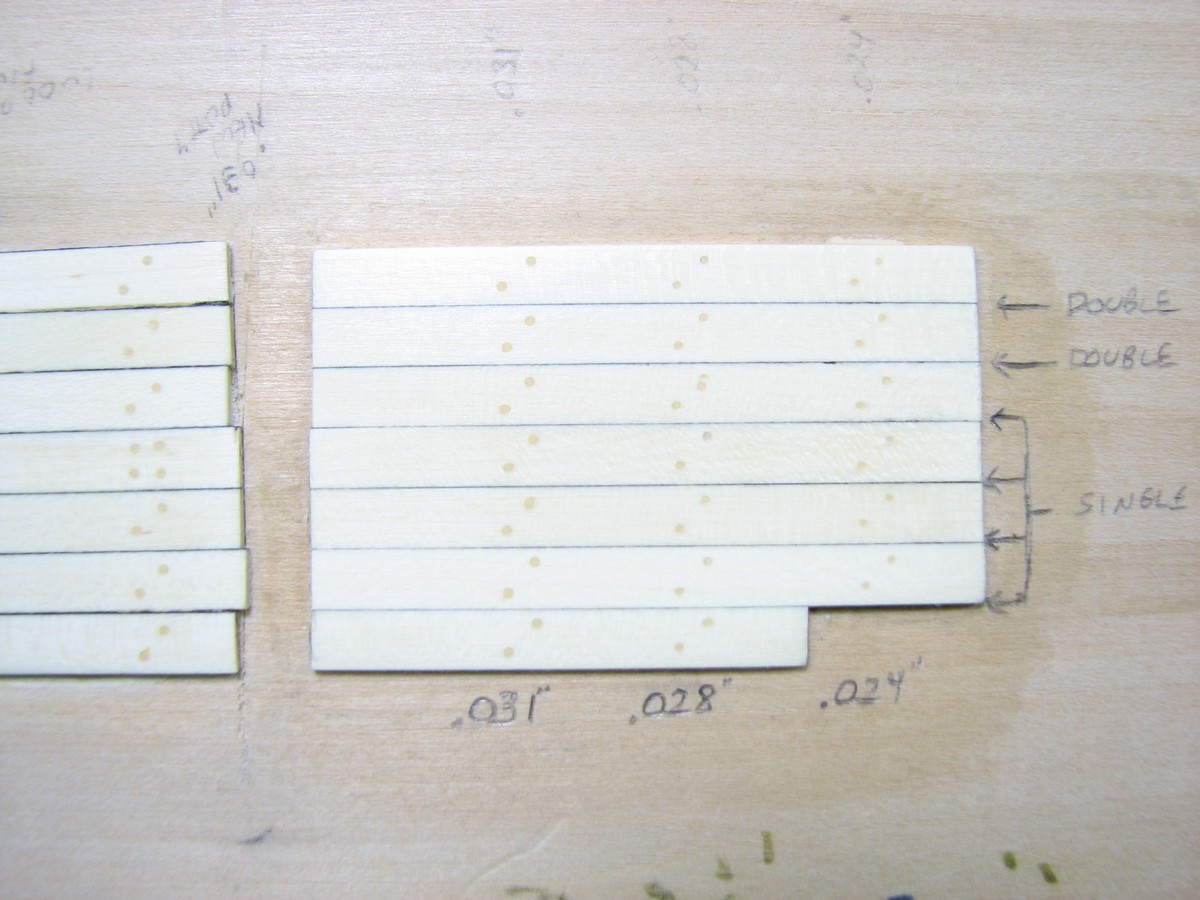
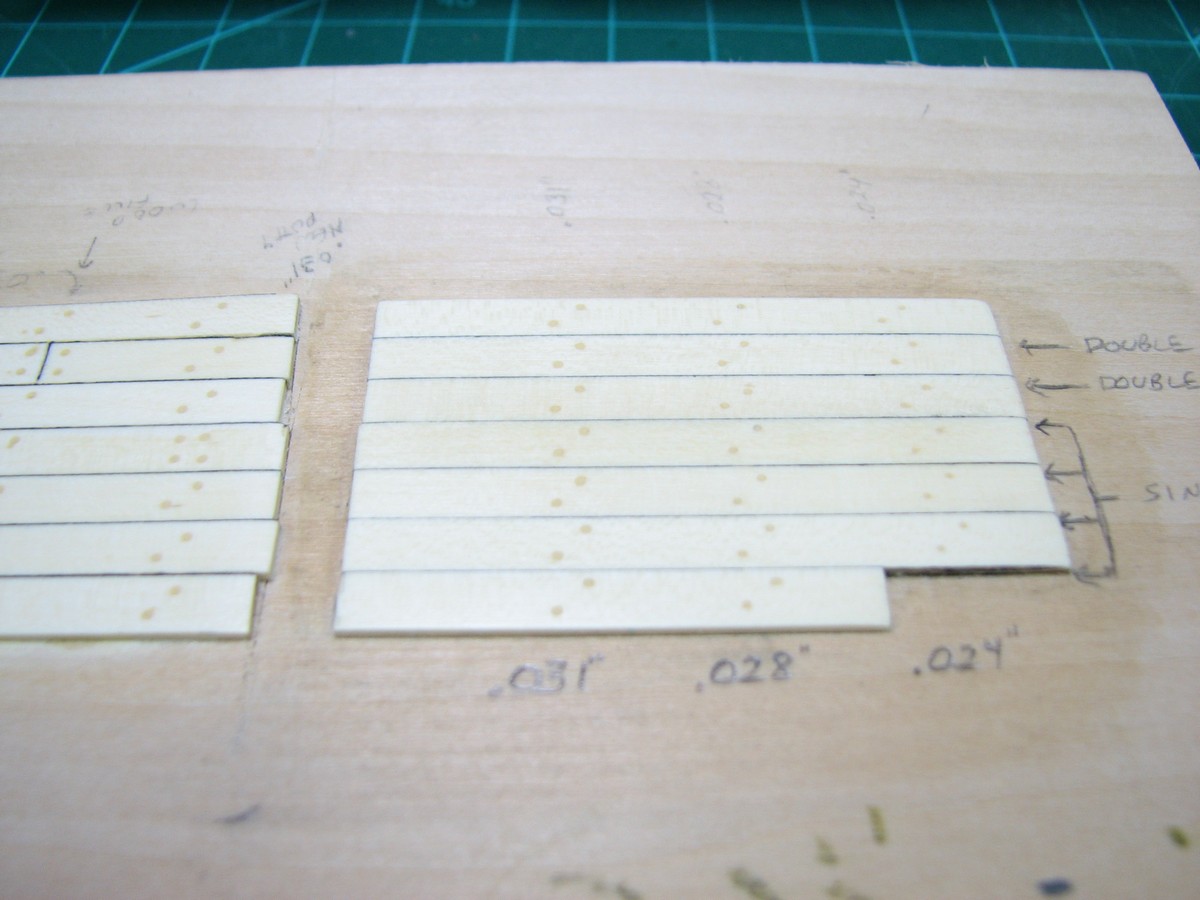
Did one last holly planking test. This test was for two things - when I bought the brushes I also got some artists pencils, so I wanted to test the caulking with the pencils instead of the tissue. The top two caulk lines have 4B pencil on both sides of the joint (i.e. I penciled both planks on the facing side). The bottom four have pencil only on the upper plank. Before doing any sanding, the top two were more pronounced, but after sanding down the filler for the nails, I can't tell the difference. The pencil caulking is not as sharp or dark as the tissue paper (old sample to the left).
The three rows of tree nails are using the 'new' filler, and .031, .028, and .024 holes side by side, all applied at the same time, so they have the same finishing treatment (scraped and sanded, 2 layers of Poly applied and buffed).
I'm likely to go with the 4B caulking (single side) and .028 filler tree nails on the final deck.
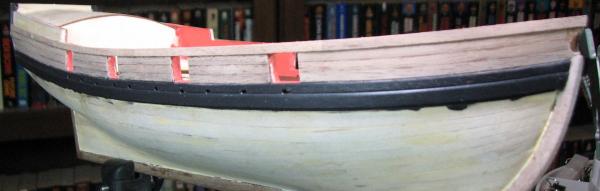
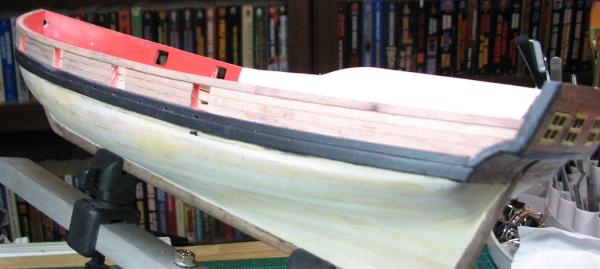
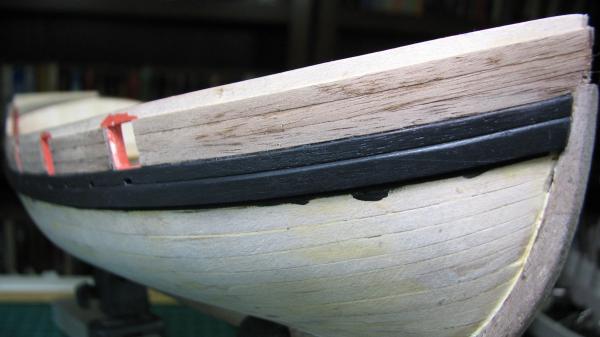
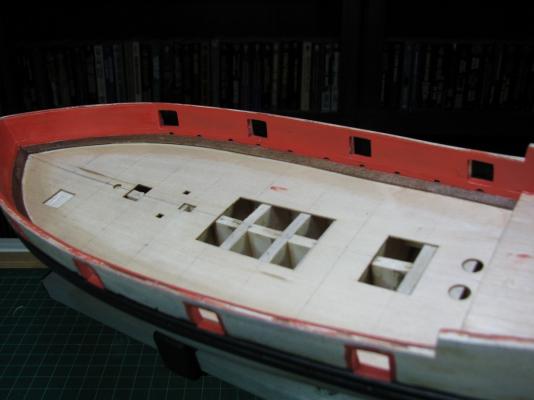
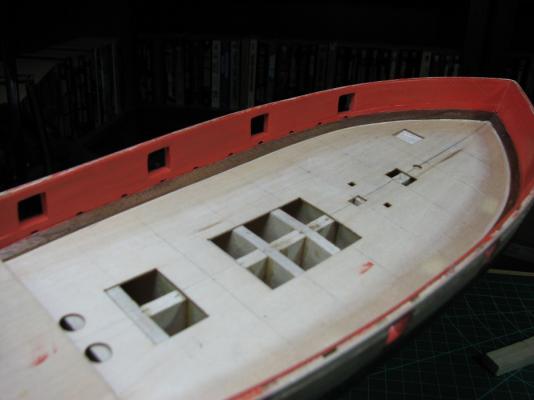
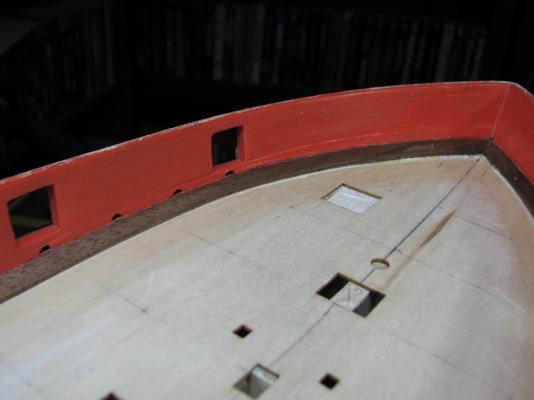
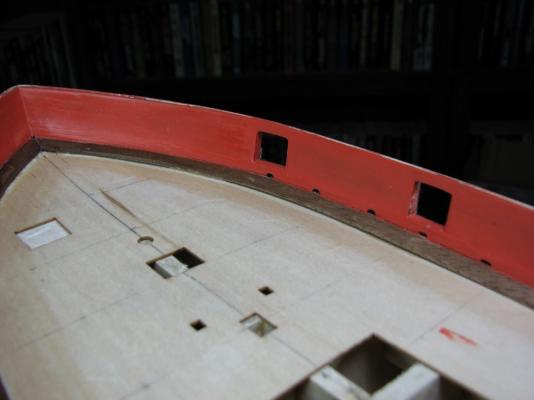
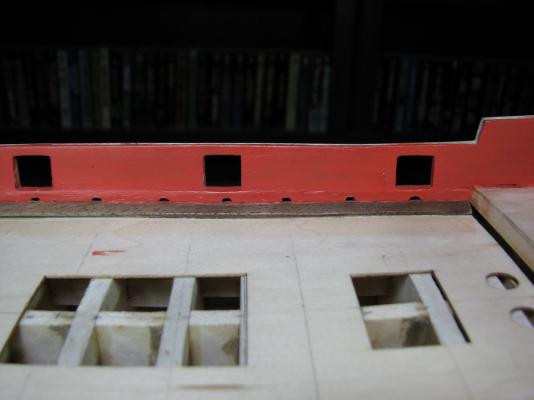
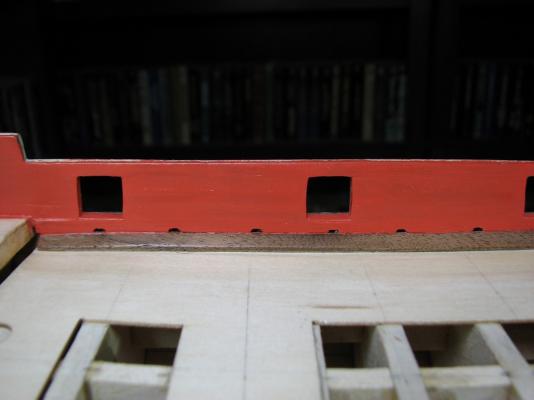
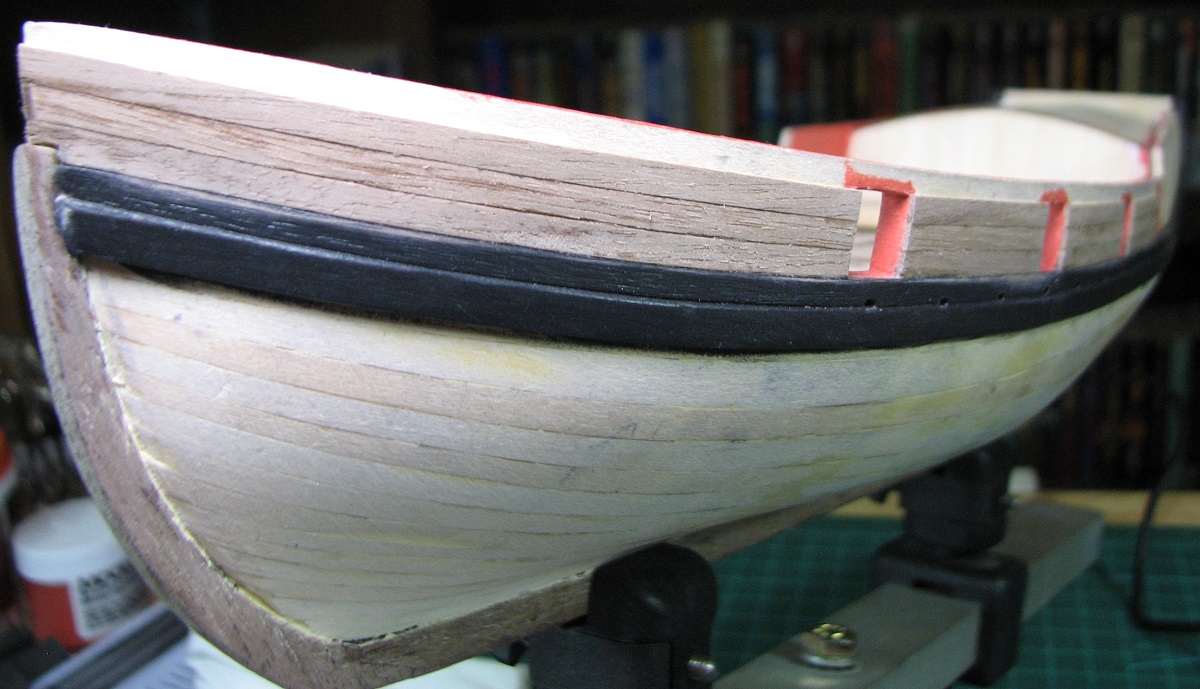
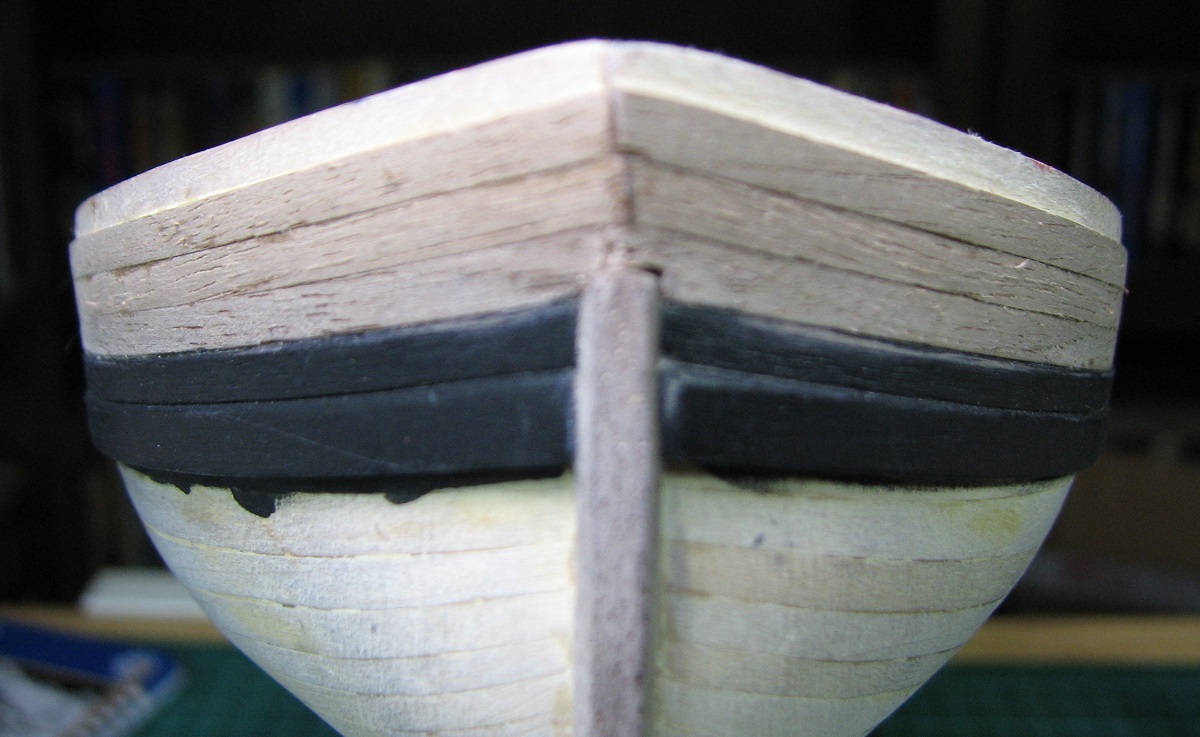
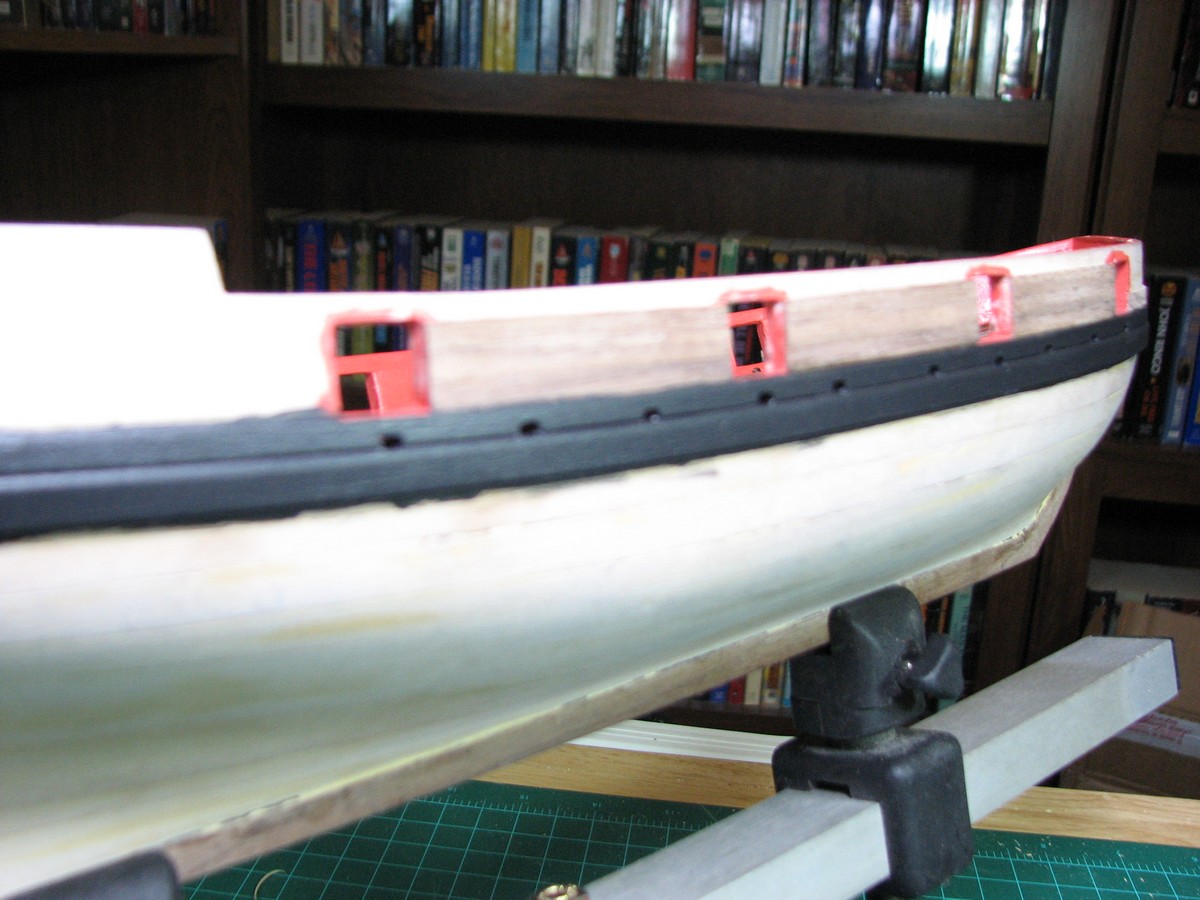
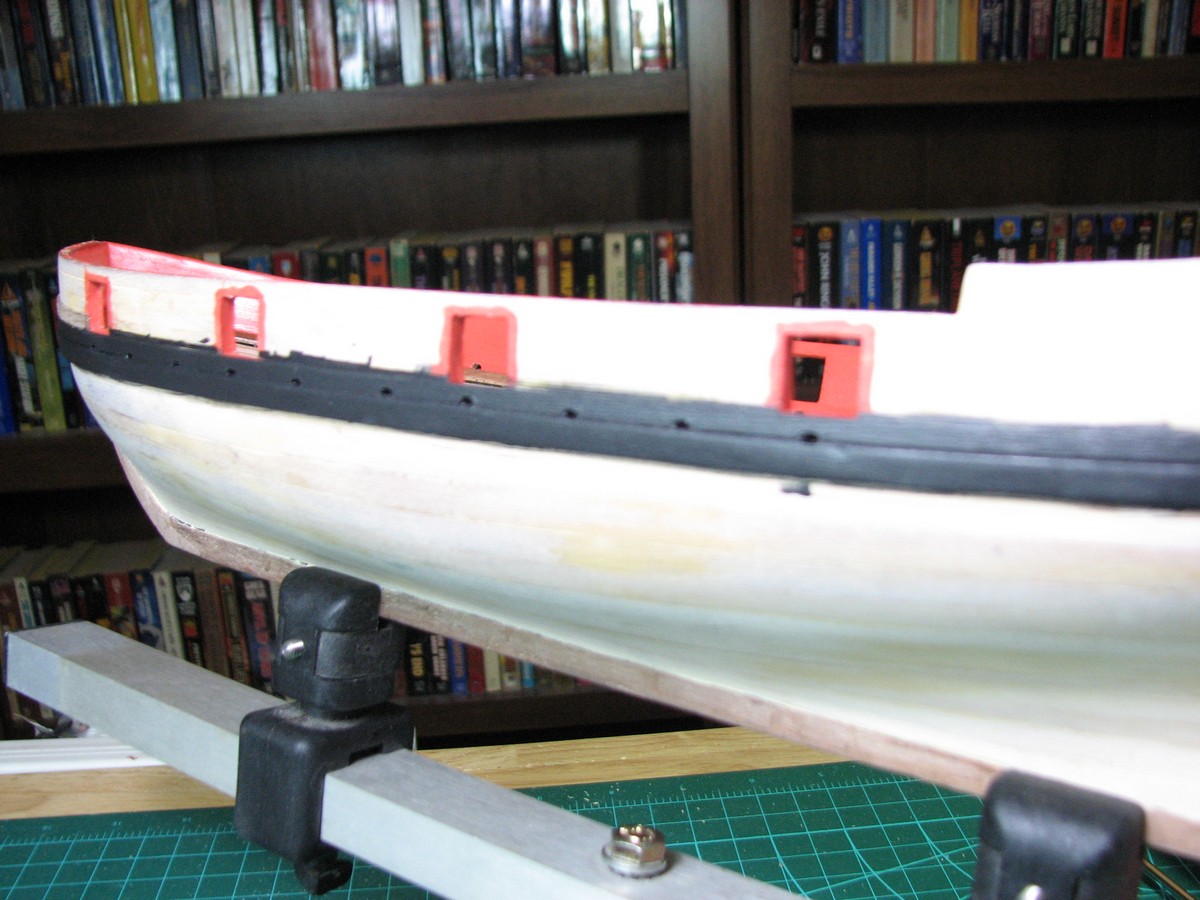
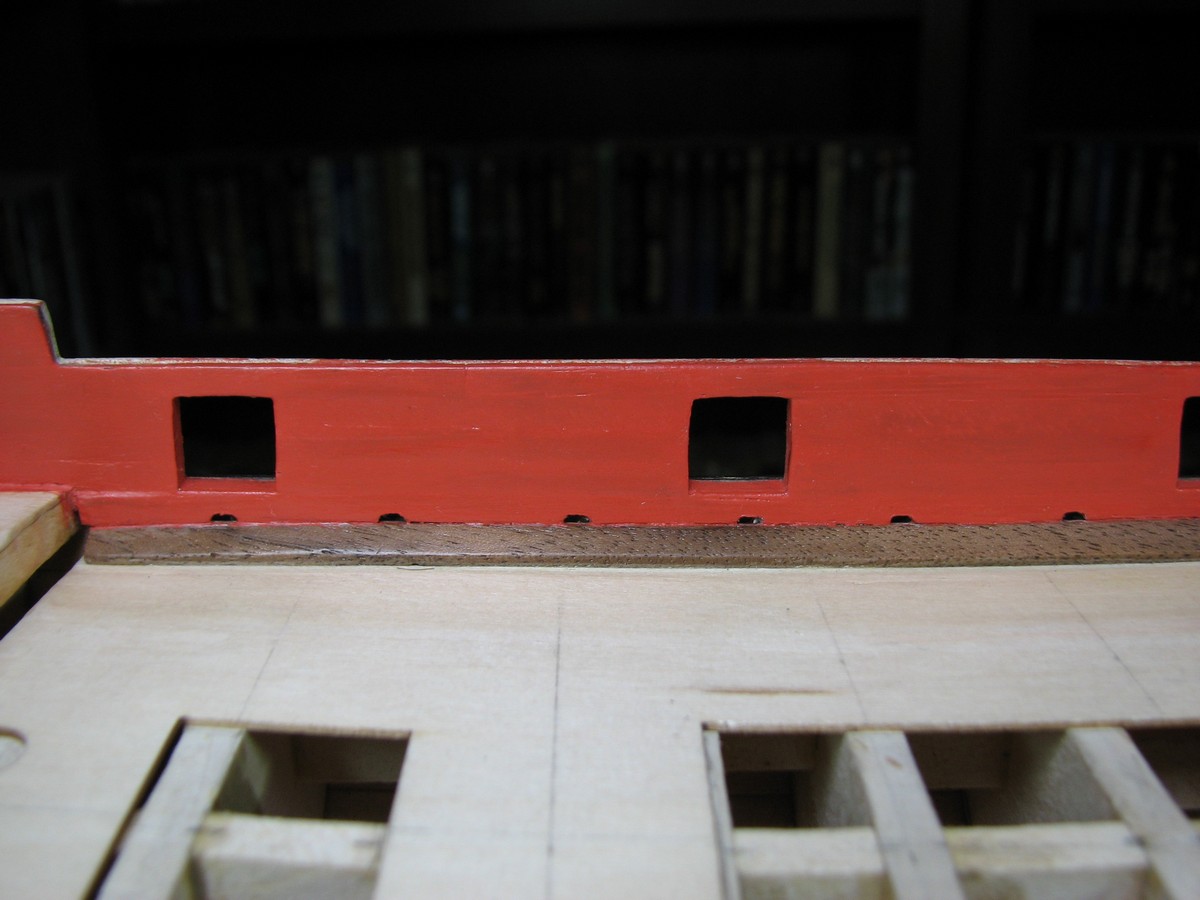
My camera refused to get a good focus on the black strake showing my post-installation scuppers, but hopefully you can get an idea. The first picture is the 'bad' side, where they are larger and more uneven. The second is of the 'better' side. If I could do it over again, I'd place some sort of filler block between the outer planking and the spirketing plank, and then be very careful not to drill all the way through, as it's quite clear that my inner and outer scuppers don't line up in several places when you line up and look through them.

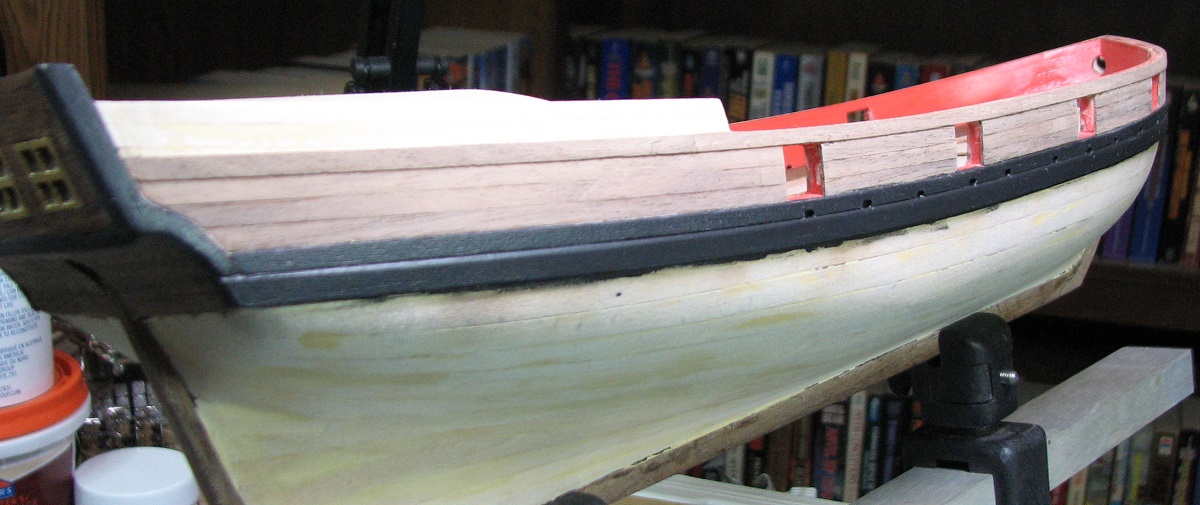
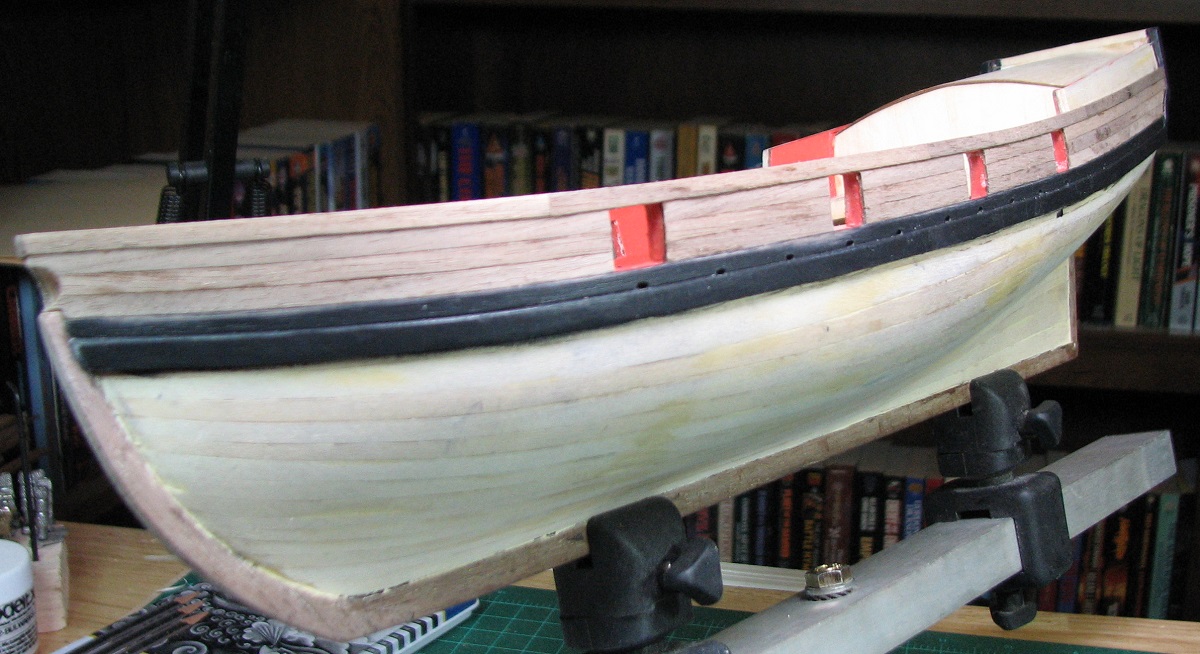
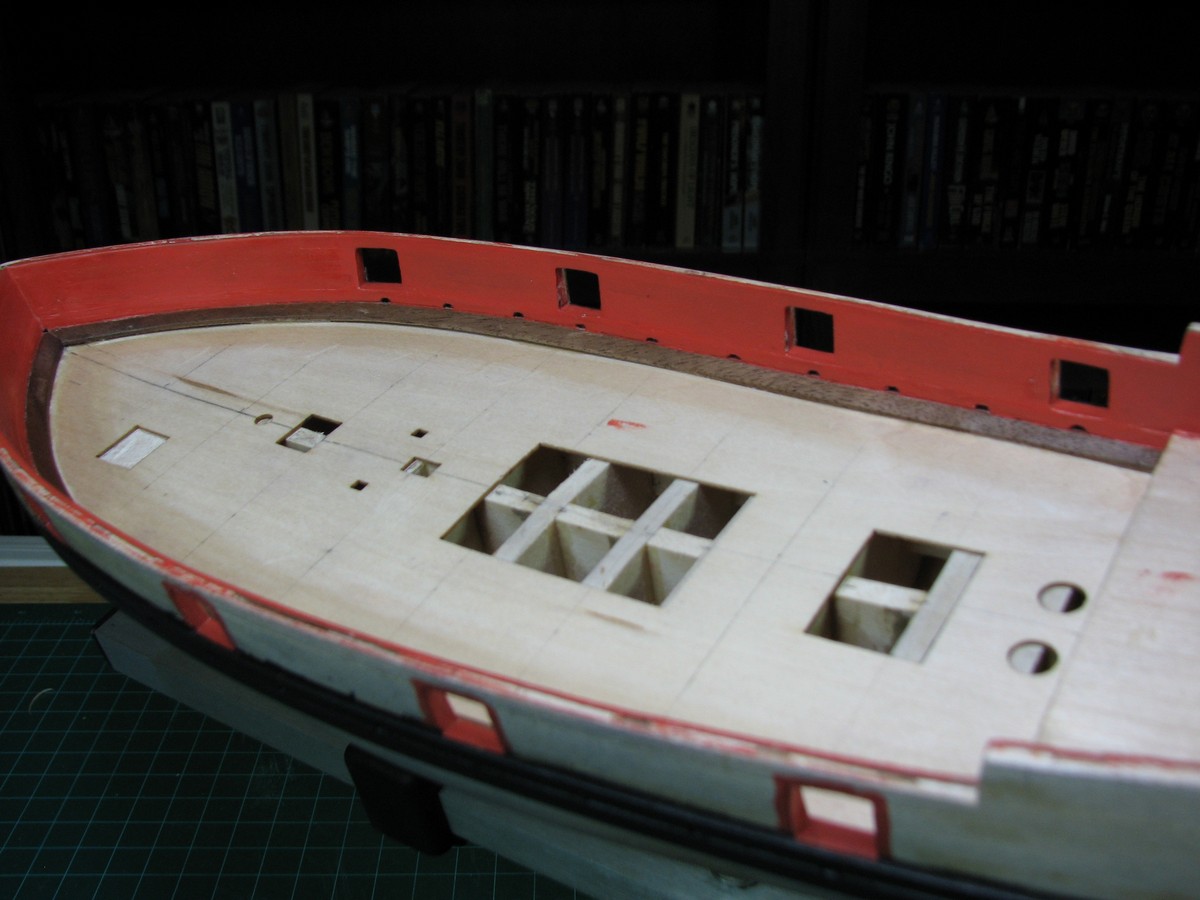
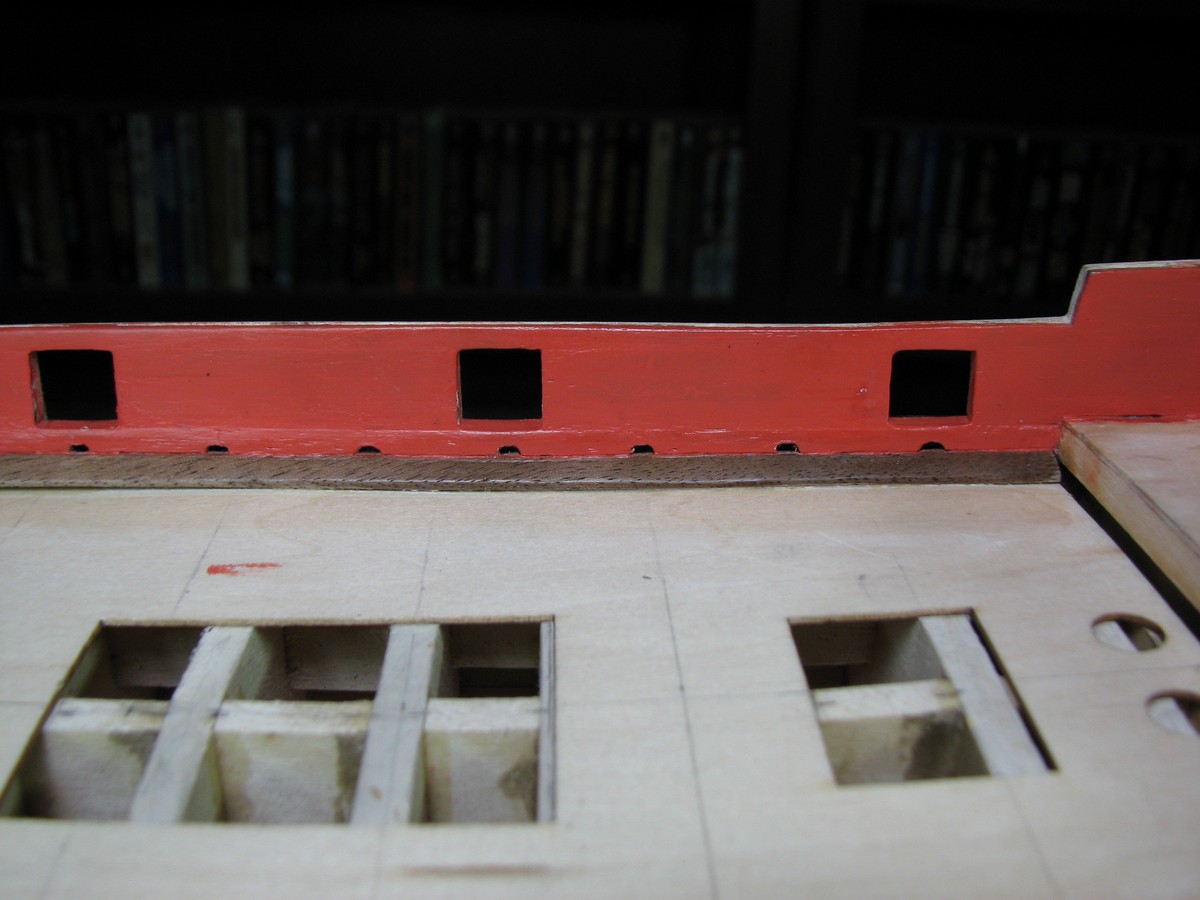
And a few photo's of the current status of the inner bulwarks. I somehow have a few tiny spots that the red paint appears to have a 'hole'. No idea how that happened, but I may go back and try to touch that up when I do the final painting of the gunport sills, which I'll need to do after I get the outer planking on because of final trimming/sanding of that layer of walnut.
- dgbot, NMBROOK, Dimitris71 and 5 others
-
8
-
Indeed.. I'm seriously jealous here.
-
-
Hi,
The mini planner I use is from Stanley, all metal, very robust, made in USA. Model number is 12-101. I don't recall where I purchased it.
StephanPerfect Stephan - $6.57 from Amazon.
-
Thanks for the pictures Alistair. After the filling and sanding, I added paint, and I think I will be able to salvage this without removing the strakes. I am not completely happy with the outside scuppers, as they aren't terribly consistent, but oh well. I'll try to get a photo or two up tonight. Got home very late from work so we'll see how it goes.
Unlike you, I'm not thinking very far ahead about processes like treenails and decking material. My brain power is fully occupied just to make sure I'm taking things in the right order to make each subsequent step as easy as possible.
If I was thinking ahead, I probably wouldn't have put the black strakes on without cutting the scuppers! I really should do more thinking and planning ahead, and I really should have built at least one gun carriage to test the height of the gun ports, but I didn't, so I'm just crossing my fingers there.
David - I think you are probably referring to the lovely photo's in Alistair's post. Those are from his AVS build, not mine, and yes, he did a great job on that build, it's one that I reference quite a lot while messing with mine.
-
It's bright!
Bit too late to matter on this build, but I don't think that red paint was used below the waterline in the 1800's. Red anti-fouling paint wasn't actually invented until the early 1900's, and prior to copper hull plating I think the white/cream color bottom paint was the most common.
I could be entirely wrong, but in my short time reading up on ship building since I started this, that's what I've seen. On the other hand, it looks nice, so if that's what you did this for, regardless of 'accuracy', then more power to ya!
-
Looking good. I didn't even try to use 'authentic' planking on my first layer, I used full length strakes, with much trimming, mostly as they approached the bow.
-
The rabbet really does look nice. Can you provide any more information about your mini planer? The only one's I've found appeared to be complete junk (super cheap Chinese made stuff), so I haven't gotten one, but based on your pictures, it's a tool I should have!
-
I'm working on that Alistair, so far with mixed results. I plan to finish them all, then do some repair work around them from my clumsiness and see how they look before making the final decision on complete removal or not. Thanks for the suggestion.
-
I'm getting pretty good at making mistakes! I realized this morning that I forgot to cut the scuppers into the black strake. I've done a bit of work trying to cut the scuppers in after the fact, but I think I may end up just ripping the black strake out and re-doing it correctly as shorter planks with the scuppers cut into them in advance.
Oh well, it's a two steps backwards day I suppose. I did get a couple more coats of red on the inner bulwarks and have now put on the first coat of clear. I had already begun the outer bulwark planking when I figured out that I'd forgotten the scuppers in the black strakes, so that will complicate the removal and replacement of those pieces.
-
It's simply beautiful. Thank you for sharing it with us Jack.


Armed Virginia Sloop by GuntherMT - FINISHED - Model Shipways - scale 1:48
in - Kit build logs for subjects built from 1751 - 1800
Posted · Edited by GuntherMT
Alistair - to your previous question about the trim piece on the black strake. I'm still undecided, but for now it's just black.
Update - I got a new toy today!
One final slightly out of focus (somehow appropriate) picture from the old Canon point and shoot:
On to the AVS.
I continued working on the cap rails, first placing the rest of the port side on to match the already completed starboard side. The scarf joint on this side came out great, with only a tiny gap on the inside edge (which you couldn't even see in the picture from the old camera).
I managed to trim the main kit piece of the cap rail too short, so I had to add a small shim at the back end of it, but it will pretty much be covered up (except edge on) by the vertical piece at the quarter deck step. After completing the main cap rail, I added the stern bulwark planking above the cap rail. For this I used two 1/8" x .030 strips, and left them full width at the stern, and tapered them down to about 1/2 width at the front edge.
Once those planks were done, I sanded the edges level for placement of the upper cap rail along the poop deck. This requires the placement of a vertical piece to cover the front edge of the bulwarks at the quarter deck. I decided to do my fancy edging (if a single line can be called fancy) on the upper cap rail, and I did it on all three exposed edges.
One potential downside of the new camera, it exposes all evils, even when they aren't my fault! Here you can see how much detail (and mess) I can now show by simply cropping out a piece of the 6000x4000 original image. This shows the small 'shim' I had to add at the back of the cap rail - the vertical piece is on top of the shim. I can probably get even closer/better than this by over-riding the camera and shooting manual, but it will take a while to learn the new toy. The wood itself looks pretty rough when zoomed in this close.
For the stern cap rail, I decided that edge bending the largish walnut just wasn't going to work, so I used some heavy card stock and made a pattern off the top of the stern bulkhead, measured it out to be the same width as the cap rail, and traced it onto the same piece of wood that I made the bow cap rails out of.
The stern bulkhead was too narrow in comparison with all the other bulkheads, even with an inner layer of planking, and I thought that the cap rail overhang would look too extreme, so I glued a piece of 3/64 basswood to a thick piece of walnut (1/16" instead of the .030) and 'bulked it out', so to speak.
I used a heat gun to pre-bend the new stern cap rail over the curvature of the stern bulkhead (I built a curve into the top, rather than having it flat). This is just laying in place, it's not glued yet, I want to leave it off until I'm done with the tedious priming/sanding/painting process on that bit of inner bulkhead at the stern. Should have done this piece earlier, but I don't think I could have made everything fit right without the cap rails in place so I could see how it all fit together, and trim the stern bulkhead down to the correct height.
Oh yea, and one 'artsy' shot with the new camera. It has an interesting effects mode called false color, where it will shoot black and white except for specific colors that you tell it to show.
I could see this making some really interesting photo's after there are more colors and the deck is starting to get fleshed out.
Have a great Thanksgiving everyone, even if you don't celebrate it in your part of the world!