


GuntherMT
-
Posts
2,213 -
Joined
-
Last visited
Content Type
Profiles
Forums
Gallery
Events
Posts posted by GuntherMT
-
-
If you want sapele, I know that model_ship_builder on ebay (listed in this forum on a place to source wood here in the US) lists Sapele as one of the woods he has in his planking and lumber sets for ships.
Here is a link to his ebay store if you are interested - http://www.ebay.com/usr/tallships_model_builder
Prices are in the 20-22 dollar range for 60 pieces of whatever size you like (can mix/match woods and sizes) plus shipping. I got some wood from him to test for various things and he shipped quick and sent more than asked for.
Hobbymill is great (I have both boxwood and holly on order from Jeff), but his forecast deliveries are now out to January, and for the use you have here, not sure you need his precision and finish.
-
When I got my micro-drills I ordered a set with 5 of each size, just because I knew I'd break or lose them. Nice work on the deck, looks good.
-
That's a whole bunch of little knots!

Looking great!
-
You guys are trying to make my head big.

Thank you for the kind words and feedback. I probably worded my 'failure' wrong. What I was trying to say was that I had a goal in mind for the first planking that I failed to achieve, although I came reasonably close. From the perspective of whether it's good enough to go on, certainly it's not a failure in that sense, as it's more then solid enough as a base for the next layer of planking, and practicing drop planks and stealers is probably a good thing.
I actually like the appearance that well-done drop planks and stealers give a hull that's finished well, because as you say Keith, they are quite authentic, it's simply that I was trying to achieve this first layer without them.
-
You're hard on yourself Brian.
Somebody has to keep my head from expanding to fill the room Alistair!

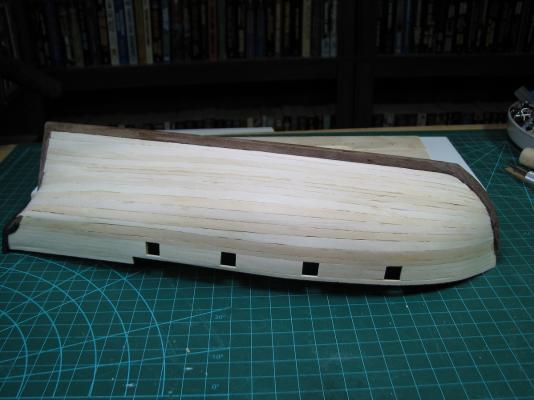
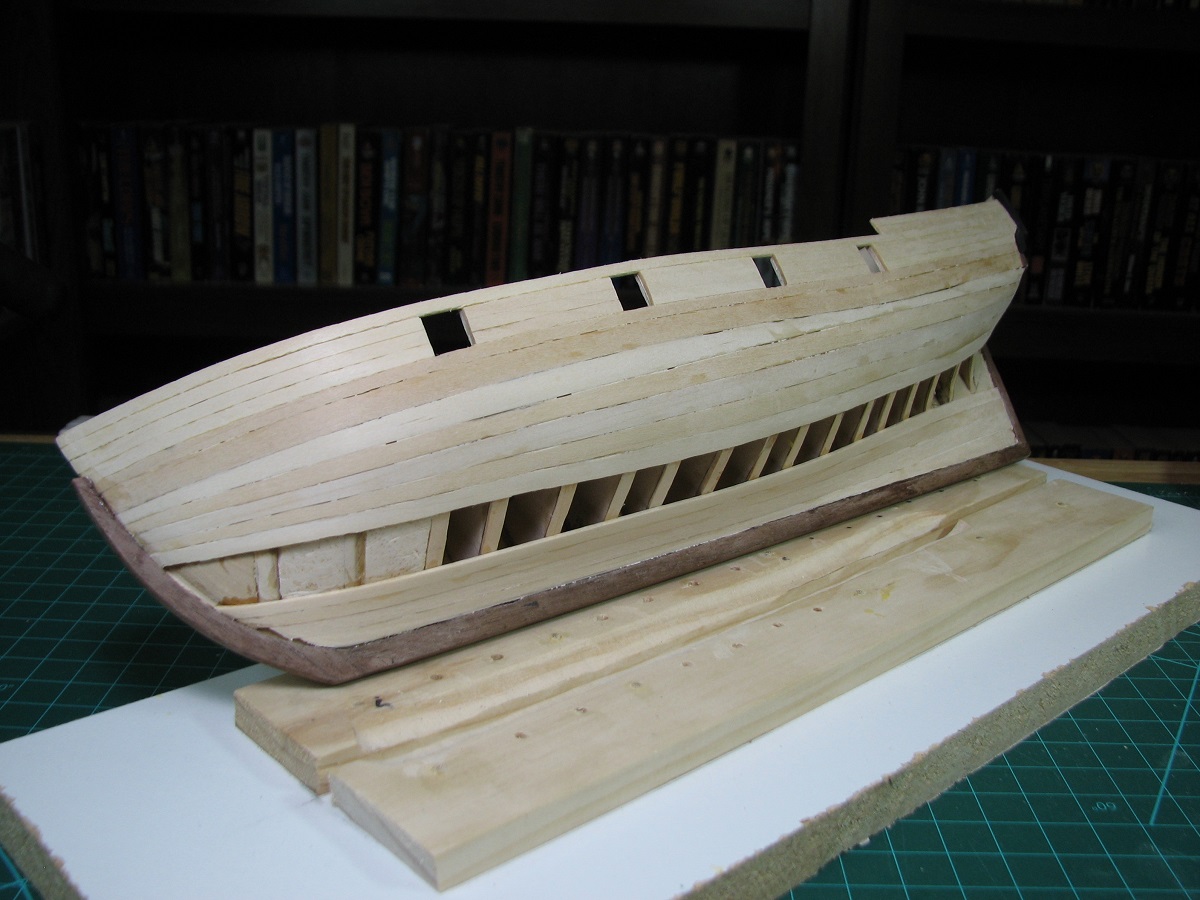
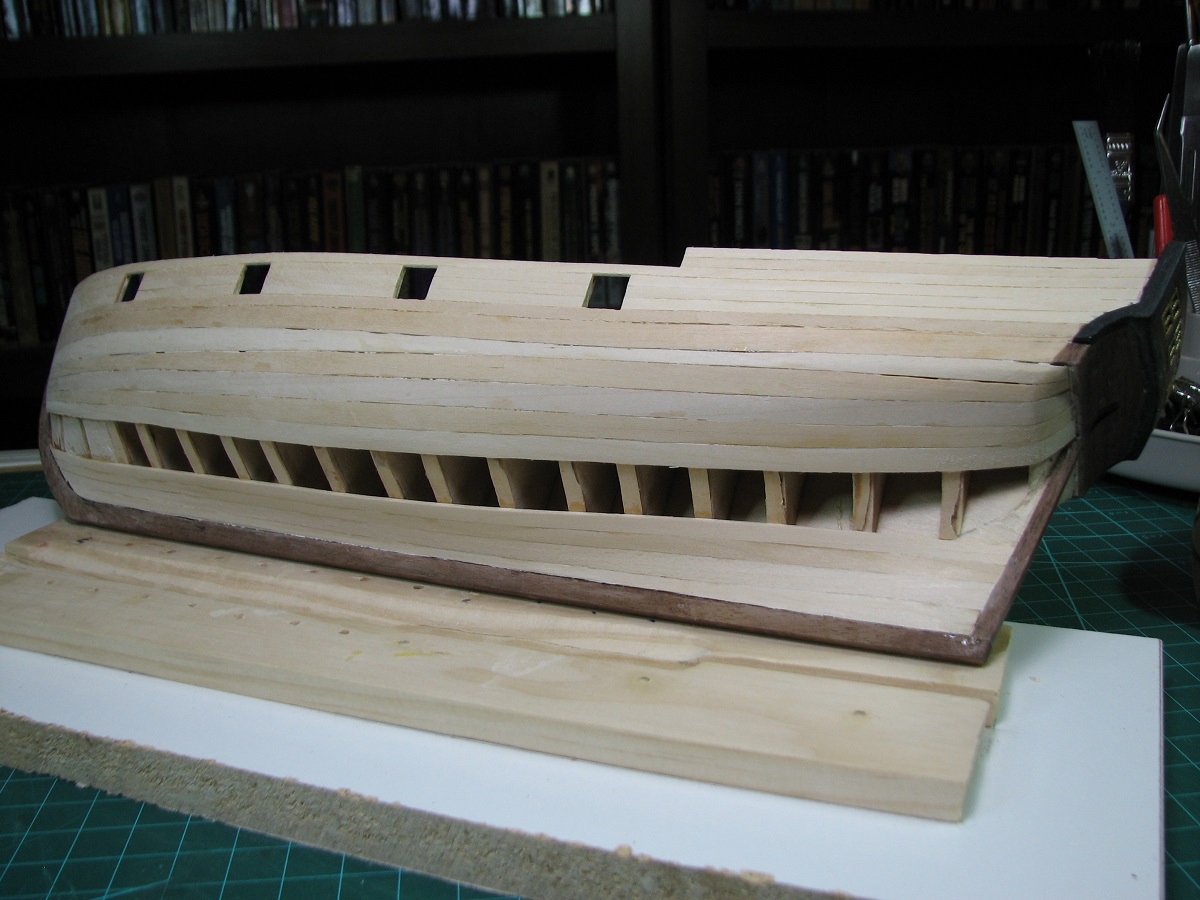
After dinner I couldn't wait until tomorrow, so I moved on to the port side. I did a much better job of keeping the planks aligned on this side, and used no stealers or drop planks at all! I probably should have used a single stealer at the stern, but even there, the only reason I needed one is the gap left because I accidentally trimmed the 2nd to last plank off too narrow - I got too aggressive shaving it and broke the full width off at the stern, and didn't feel like starting over on that plank. I thought I might be able to completely close the gap by using a section of 1/4" plank at the stern to finish, but it came up just short so there is a small triangular gap there, but I don't think it's enough to affect the second planking.
Here is the hull with only a single plank gap left, and the 1/4" plank section placed at the stern. The gap that's left is exactly the same width for the entire length (pats self on back). Well, the digital calipers could find variations, but a marked strip was on the same pencil mark for the entire length, so close enough to exact for me!

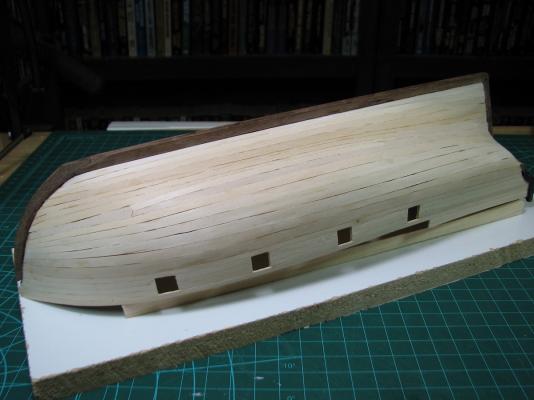
And a bunch of different shots showing the completed first planking, ready to move on to.. whatever is next!


Actually, what's next it the Wales, and inner bulkwark planking, black strake, etc., before moving on to the second planking.
I'll decide after the second planking whether it gets painted or not, but my plan is to leave it natural below the black strake if I can do a good enough job at the planking.
-
Slow progress continues on the first planking. I managed to completely mess up my planking plan where the bottom and top planking come together, and didn't figure it out until too late to be able to close it up without using any drop planks or stealers, and ended up having to use both. Not a terrible tragedy, but was completely due to my own lack of proper planning. Another lesson learned.
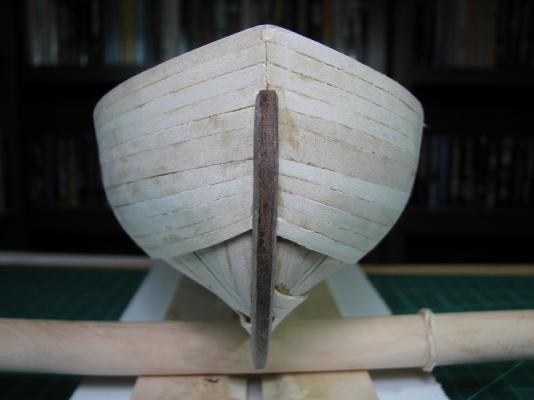
I used a single drop plank at the bow because the planks just weren't working out there and the edge bends were getting too severe as they transitioned to the bow. I did this when the first plank kinked while trying to edge bend it. Rather than just toss the entire plank, I cut it off and added the drop plank to allow me to use a single spiled plank forward from that point for two planks headed aft.

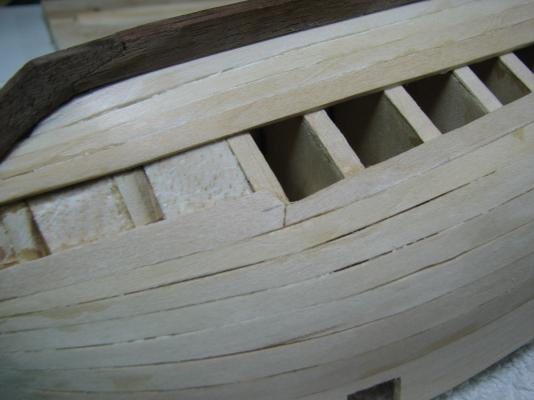
It turned out ok in the end, but was a little bit bummed that I had to use it. After that, I ended up using both drop planks and a stealer towards the stern because of how narrow my gap got before it widened out in the stern area.
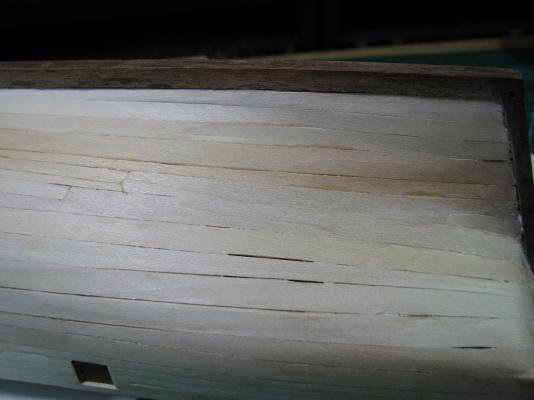
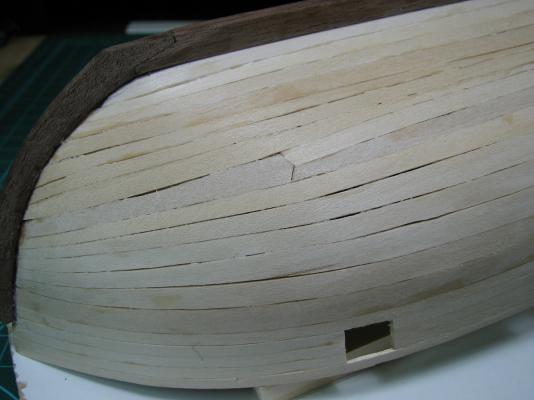
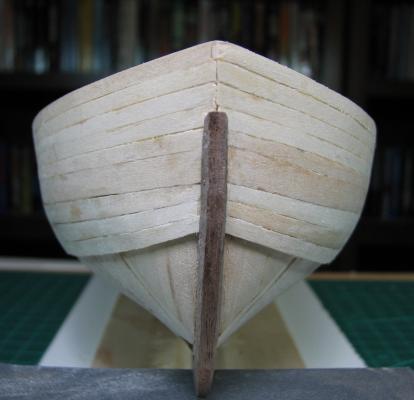
The starboard side first layer is now complete as can be seen above, and while I'm happy with the flow and believe that this will make a great foundation for the second layer, as a 'practice' run it was a bit of a failure, but taught me some lessons about basswood planking. I was being very careful to try to make no gaps, but as can be seen there are numerous noticeable gaps. I believe that I was placing the planks while they were still too wet, and the gaps were formed (mostly) by shrinkage after the planks dried out. There are also a couple planks that have some ugly gaps where I over-trimmed while spiling.
If this was the final layer of planking, I would need to fill & sand, meaning I would have to paint the hull. Luckily it's not the final layer, so I can just clean up the edges around the rabbet so that the 2nd layer will tuck into the rabbet properly, and call it good. After I finish the other side of course.
The port side is down to the final 3 (or 4) planks remaining (pictured in my last update), we'll see if I can figure out a way to do it without as much patchwork in the form of drop planks and stealers. I think the port side has a better chance of working out, as it's a much more consistent spaced gap left to fill.
- egkb, themadchemist, NMBROOK and 3 others
-
 6
6
-
Yay, another Fair American! I *ahem* might have purchased this same kit while it was on sale, so I'll be following along while continuing to work on my AVS.
Cheers!

-
-
Already taken care of Ken, I laid in some single and double blocks of every size all the way down to the tiny 2mm ones (which are just silly small), and had already planned to downsize the cannon rigging blocks based on notes from build logs here.
Thanks for bringing it up though, certainly good to know if I hadn't noticed that!
-
Check the plans for notes - on the AVS there is a note to use one size of eye-bolts for all the deck things, and to use the other size for all the rigging. My guess is that the Niagra kit only supplies the rings for the rigging, and all the deck eye-bolts are to be made per the instructions on page 21, figure 5-9. As Dale said, it looks like a simple matter of twisting a bit of wire around a drill-bit of the appropriate size to make the eye-bolts.
Looking good by the way!
-
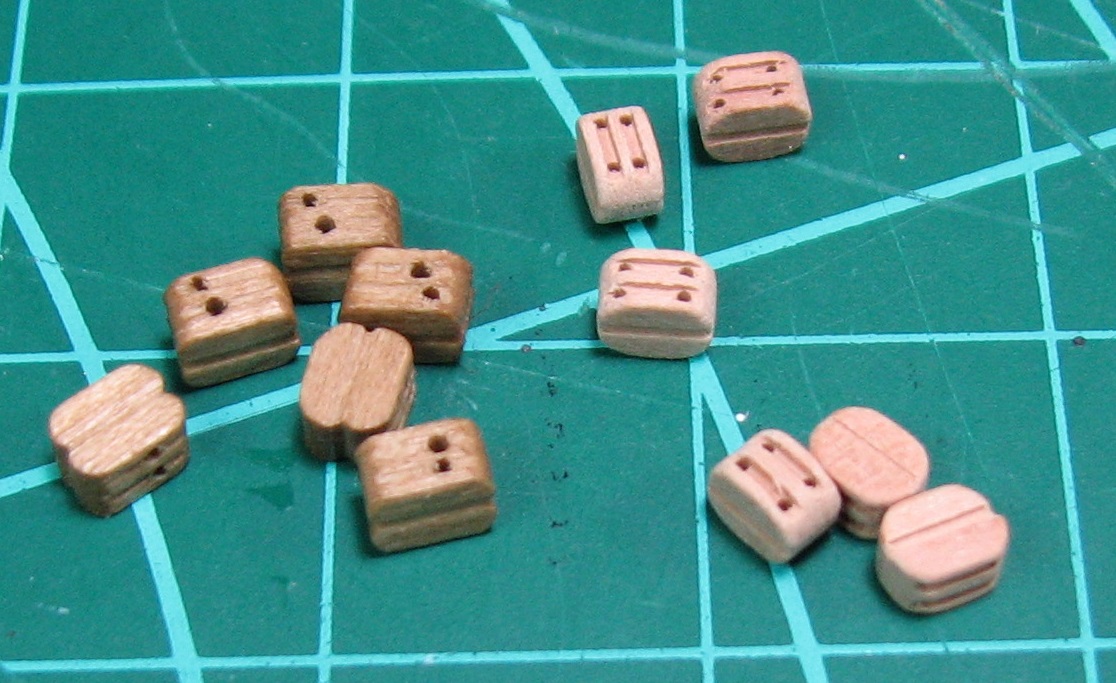
Oh, BTW, now do you see the difference between Chucks blocks and the MS ones. Night and day, just like the rope. If your talking rope walk, its over... you've committed to this hobby, but then that really become obvious as I read on.....
I completely forgot to reply to this as discussed a couple weeks ago. Yea, there is quite a difference between the blocks. These are 5/32 doubles:

No regrets, although it will be a while before I actually need to use any of these.
- canoe21, foxy and themadchemist
-
3
-
Fantastic looking ship, congratulations. I'm sure it will be admired for years to come, wherever you display it.
- Mike Dowling and Eddie
-
2
-
Bob,
I've somehow managed to miss this log before now, luckily Keith posted a link here in my log for your excellent planking techniques, so now I've spent the time to go through this entire log. Your workmanship is simply amazing to see, and the entire process has made this small little boat really a beautiful work. Thank you for posting such excellent photo's and descriptions of your work.
- themadchemist and BobF
-
2
-
-
Thanks Alistair and Lawrence,
Also thanks to the other folks for the likes.
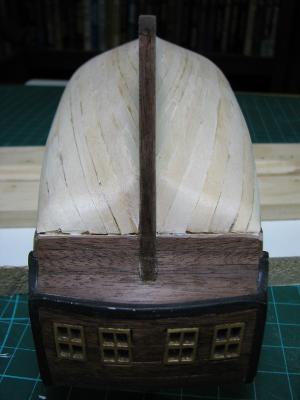
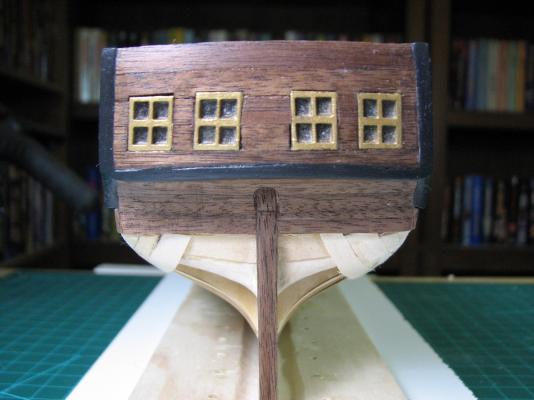
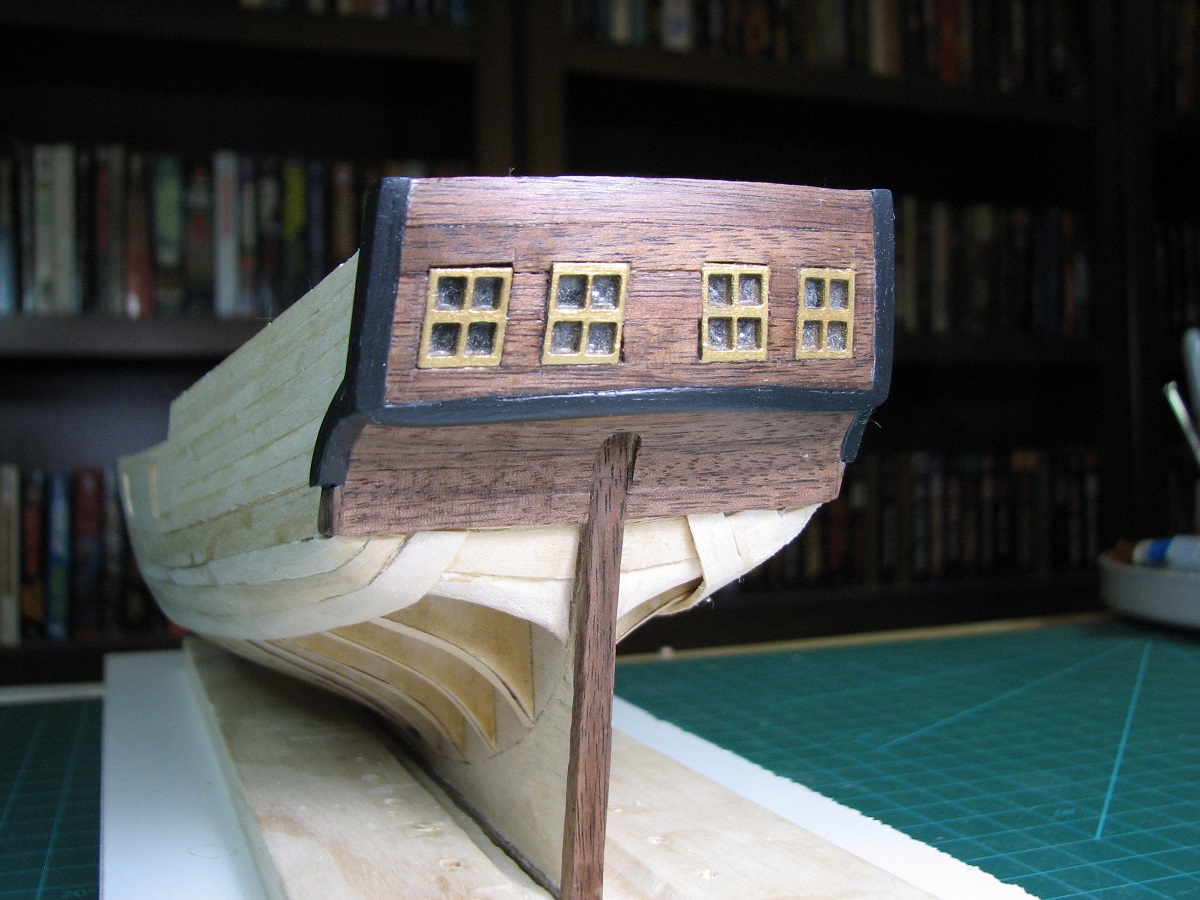
Today I made some progress with the planking, and I also have been repainting the stern fashion pieces. I sanded them down since I was unhappy with how rough the black paint looked, and then I re-primed with thinned primer, sanded with 320 grit, primed again, sanded with 320 grit, then added a coat of thinned black and sanded once more. After that I added about 6 or 7 coats of very thin (think - more of a wash than paint) black. I did this over the last few days of course, and I actually did the first two primer coats before leaving on my trip. Much happier with the smoothness of the black painted area now, although I still need to fill the gaps around the windows at some point.

The planking is progressing reasonably well, even if I'm not 100% happy with everything about it, it is after all going to be covered up later. I really need to get better at trimming the pieces to size, as whichever end I finish with isn't getting trimmed to the right size very well.


I've got the garboard plank on the other side, but none of the other lower planking there. Last day of my short little vacation is tomorrow, so maybe I'll finish up the first planking layer.
-
If there were only two rings, then they were no doubt not for this purpose. I expect there would be somewhere around a dozen hoops on each mast for the two main sails. My AVS kit has 12 hoops for a single mast (just counted them). So for your kit with two masts I expect there would be somewhere between 22 to 26 hoops provided if they are included.
You should be able to find some reference to 'mast hoops' in the instructions or plans to clarify them for you.
-
Not familiar with this kit, but if you need to put rings on the masts that the sails would be connected to, you should have done that before assembling the top sections of the masts. You could use some sort of split ring, but if you want to use solid rings, you should look at disassembling the masts to add them now, as later on after you've added a lot more things, you'll remove the option to put the correct style of rings on.
I did this on the Carmen, my first build, and it doesn't have the rings because of this.
This is from a Google search of a different model, but shows the rings I'm talking about:
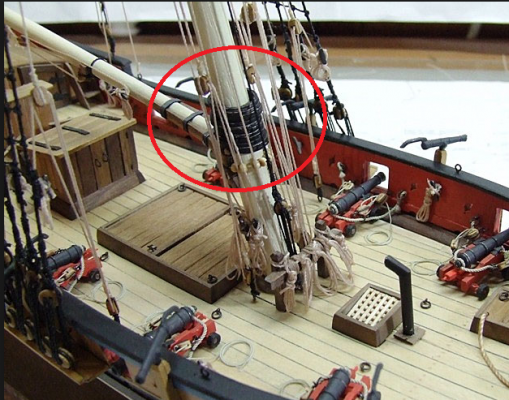
I didn't find out about these rings until the rigging was complete and I was almost done, so I did not include them, but wish I'd known earlier so that I could have added them to the model.
You should consider reading ahead in your instructions and checking out the later plan sheets that show the rigging, and see if you have these in your kit, and then decide if the effort of removing the top masts is worth it for you to add them in.
-
added mizen mast? or mast in front of the bow.
That's called the 'bowsprit', although the individual parts all have names too.
The thickest piece, closest to the hull is the 'bowsprit'. The second somewhat thinner piece is the 'jib boom'. If there was a third section, it would be the 'flying jib boom'. I think the wooden bit that holds the bowsprit and the jib boom together is the 'dolphin striker' or 'martingale'. I think it depends on the era of the ship which it is.
I think those are correct, maybe someone else can correct me if I've named any of them wrong.
-
Vossy,
You can add as many pictures to a post as you like, just keep adding them on the bottom. You can also insert the pictures anywhere in your post that you want, just position the cursor where you want the picture prior to clicking on the 'add to post' button.
Looks like you've made a good start!

-
-
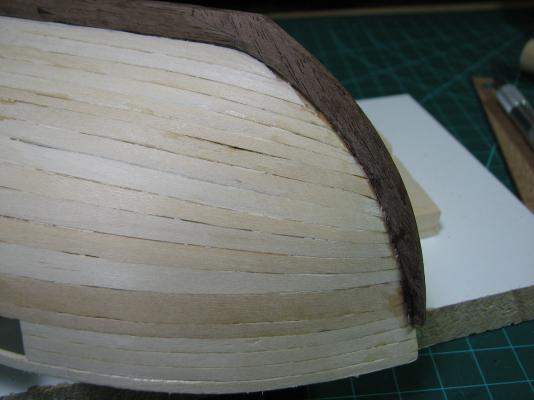
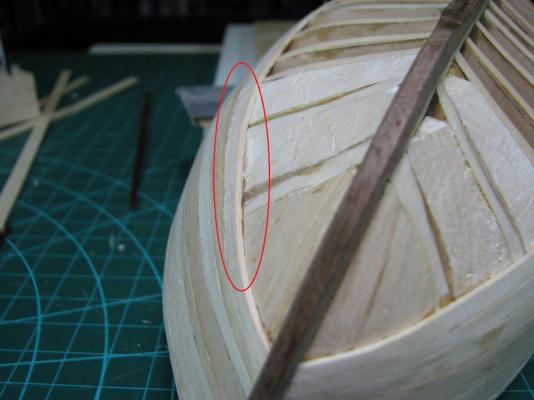
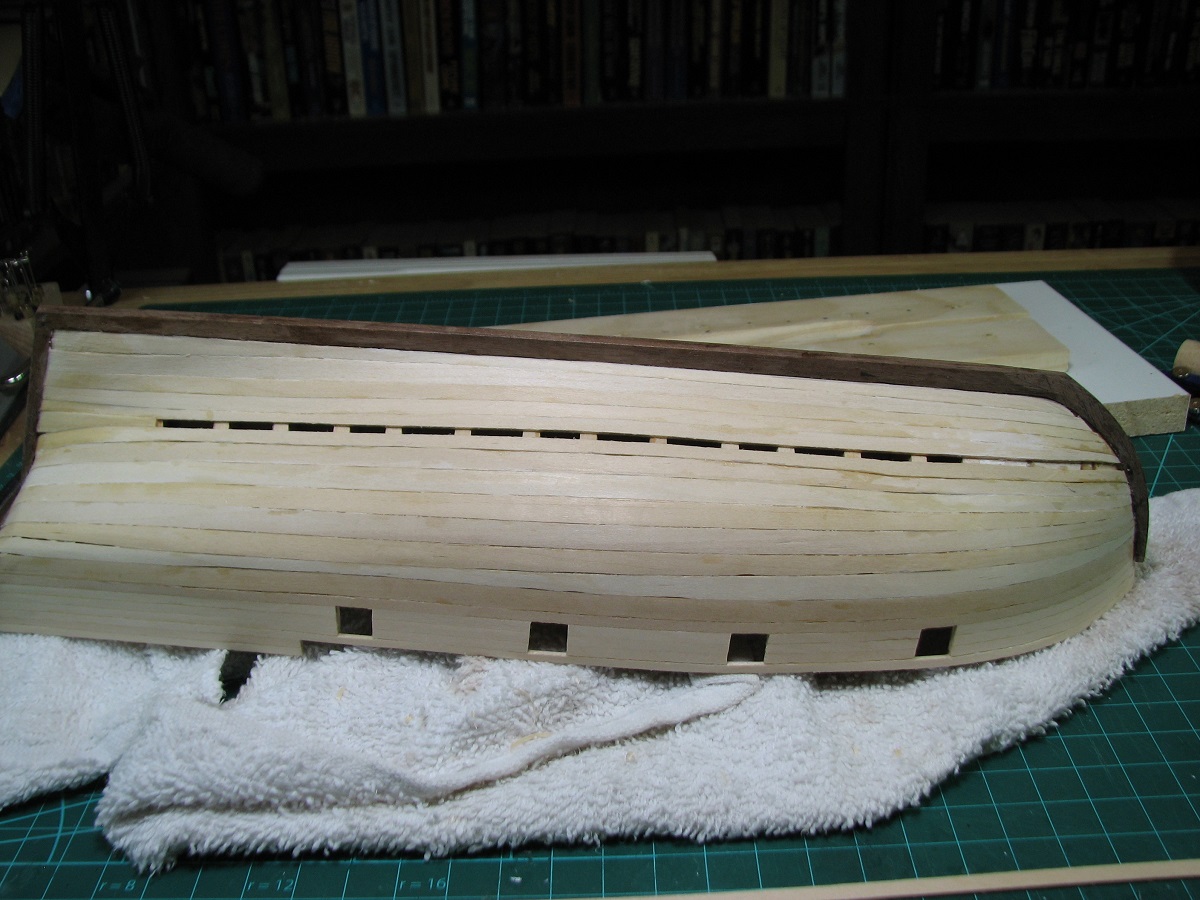
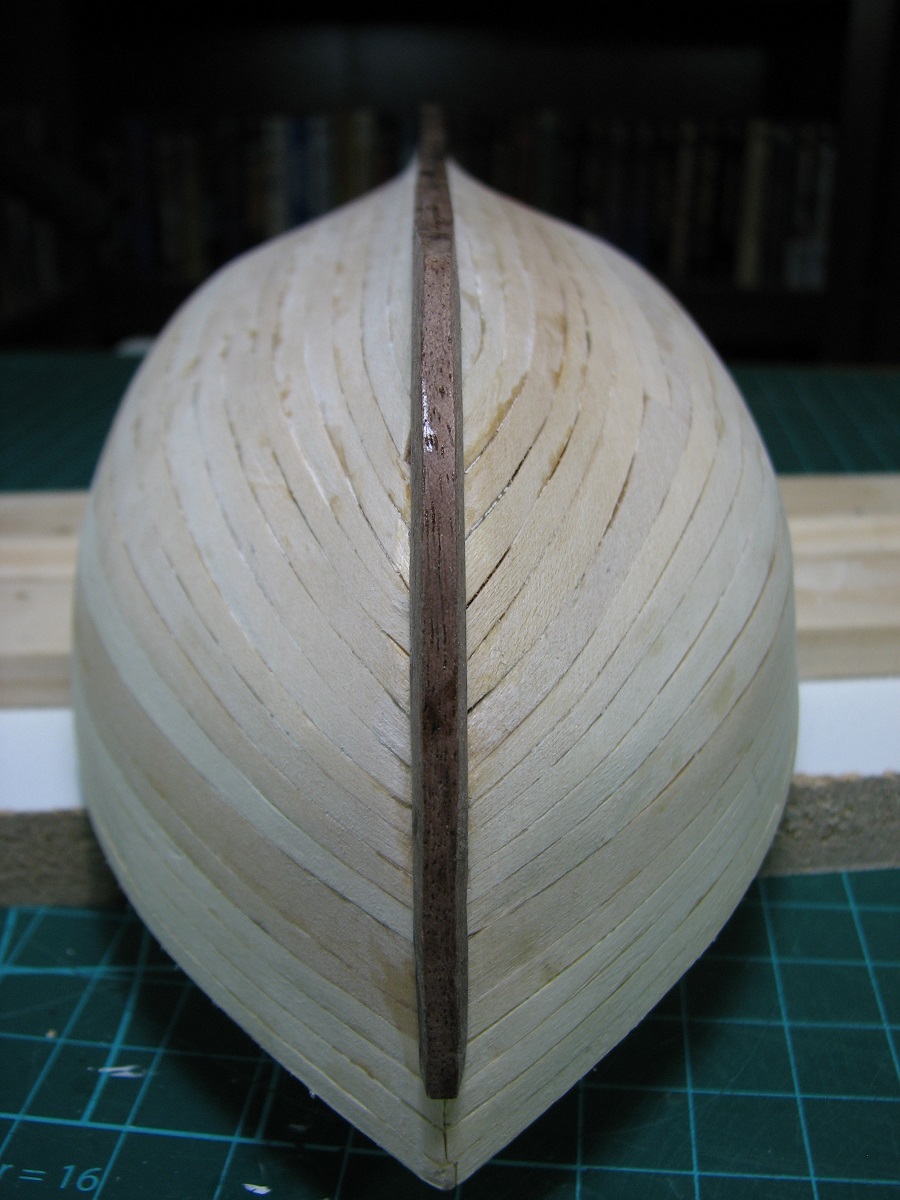
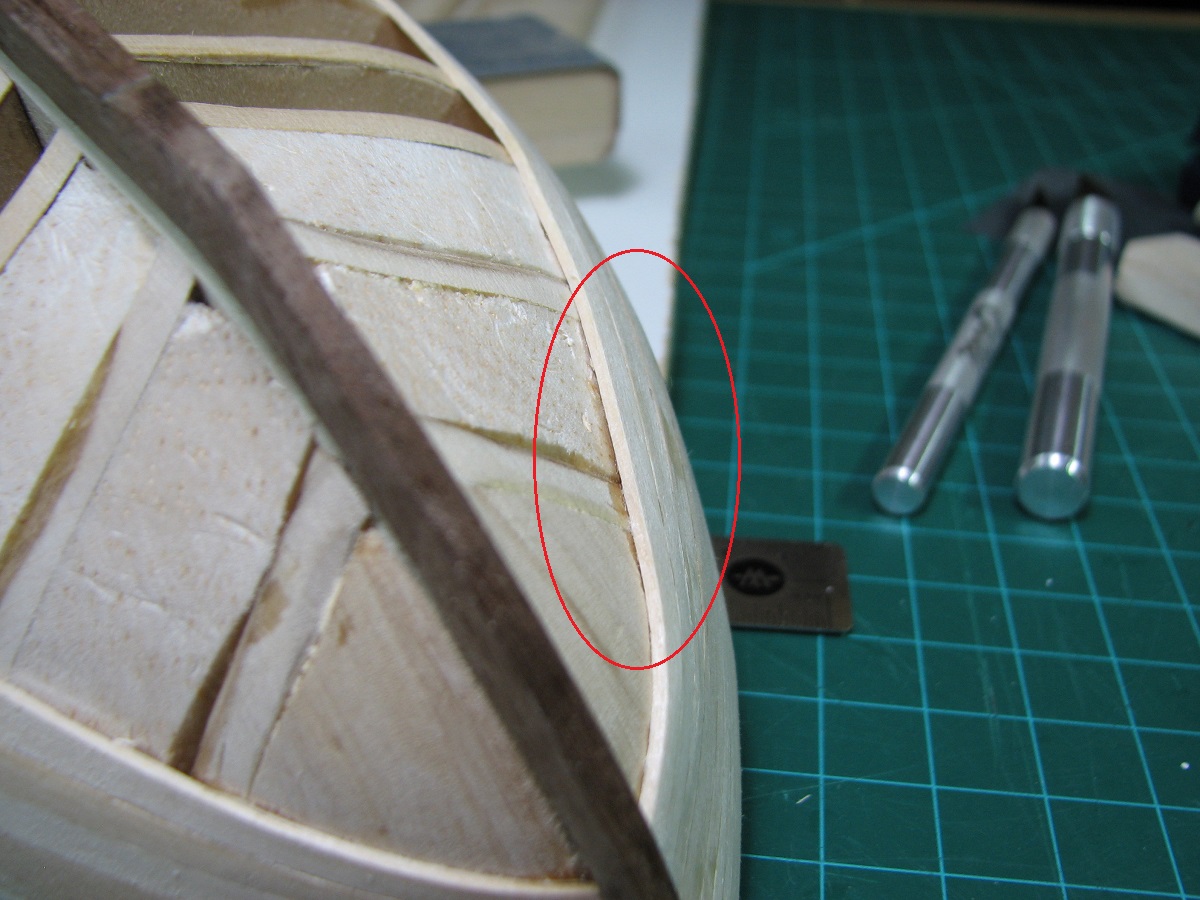
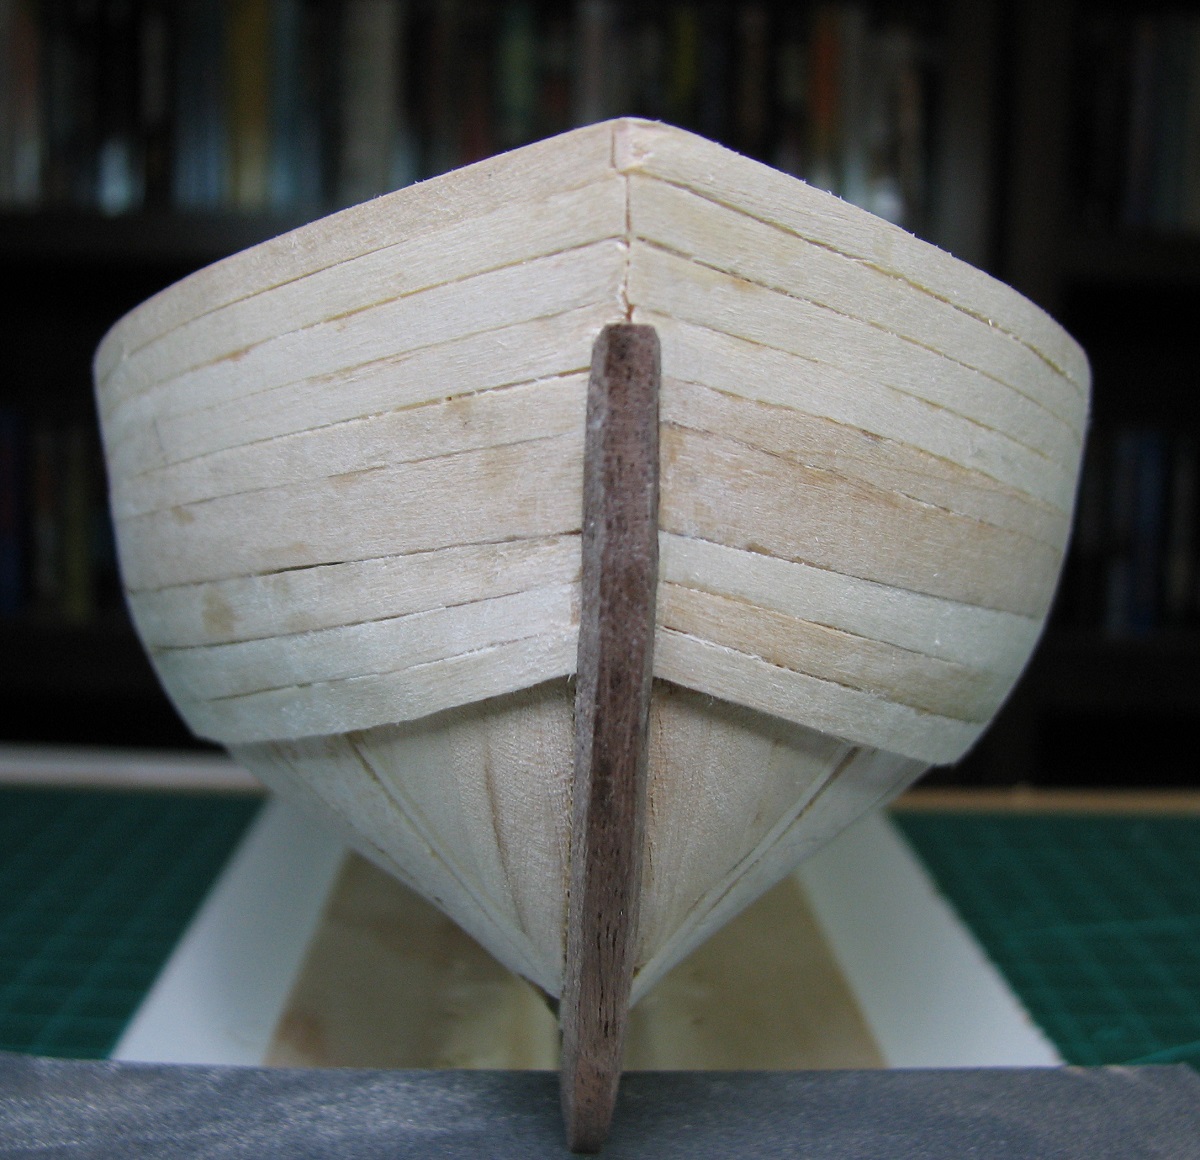
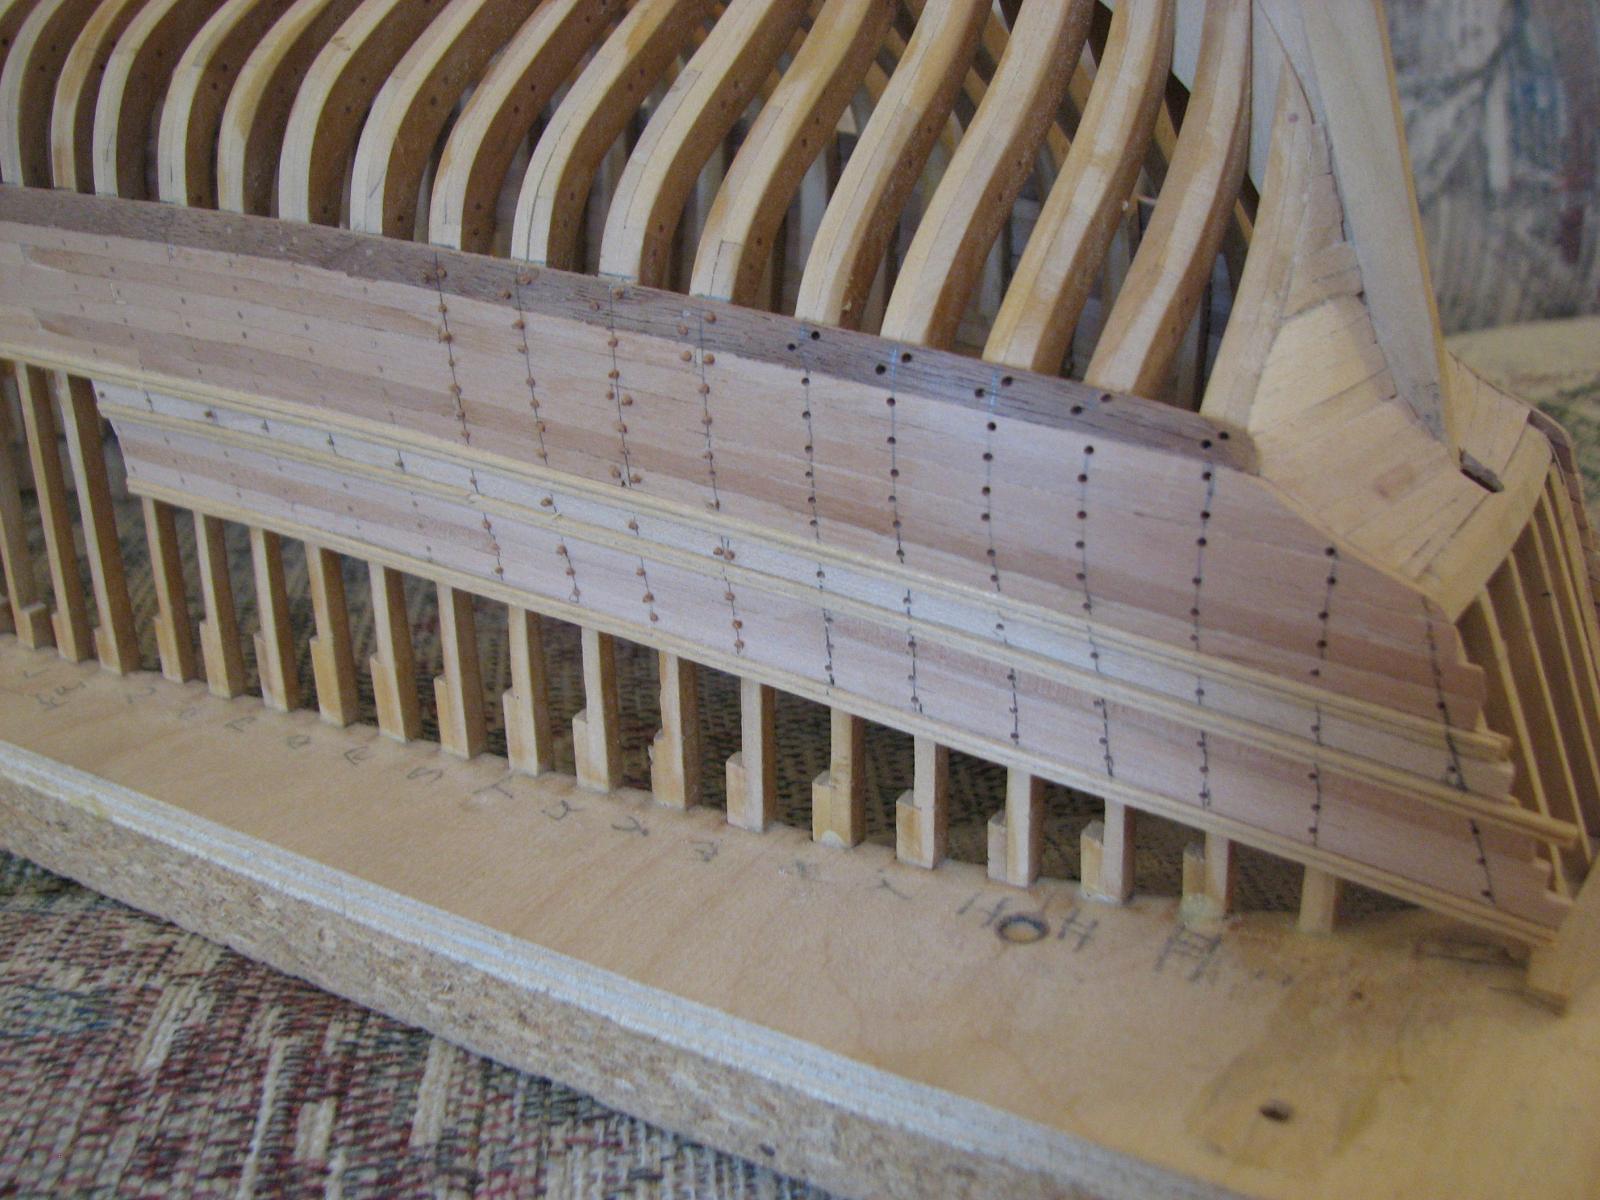
So as I get farther into the planking, it's becoming obvious that I needed to spend more time on the hull fairing, or rather, I need a better understanding of the plank flow when I'm placing test planks for the fairing, or something.
I'm getting quite a dip in the planks on both sides just aft of the bow, and the planks at the stern are nowhere near symmetrical side to side - I'll need a stealer on one side to even them out at some point.
Here you can see the dips on both sides where the fairing was done incorrectly. Luckily this is a double planked project so I'll be able to fill these, but it's a bit of a disappointment to me, as I was hoping that this first planking would have been good enough to be a final planking, as a personal goal.

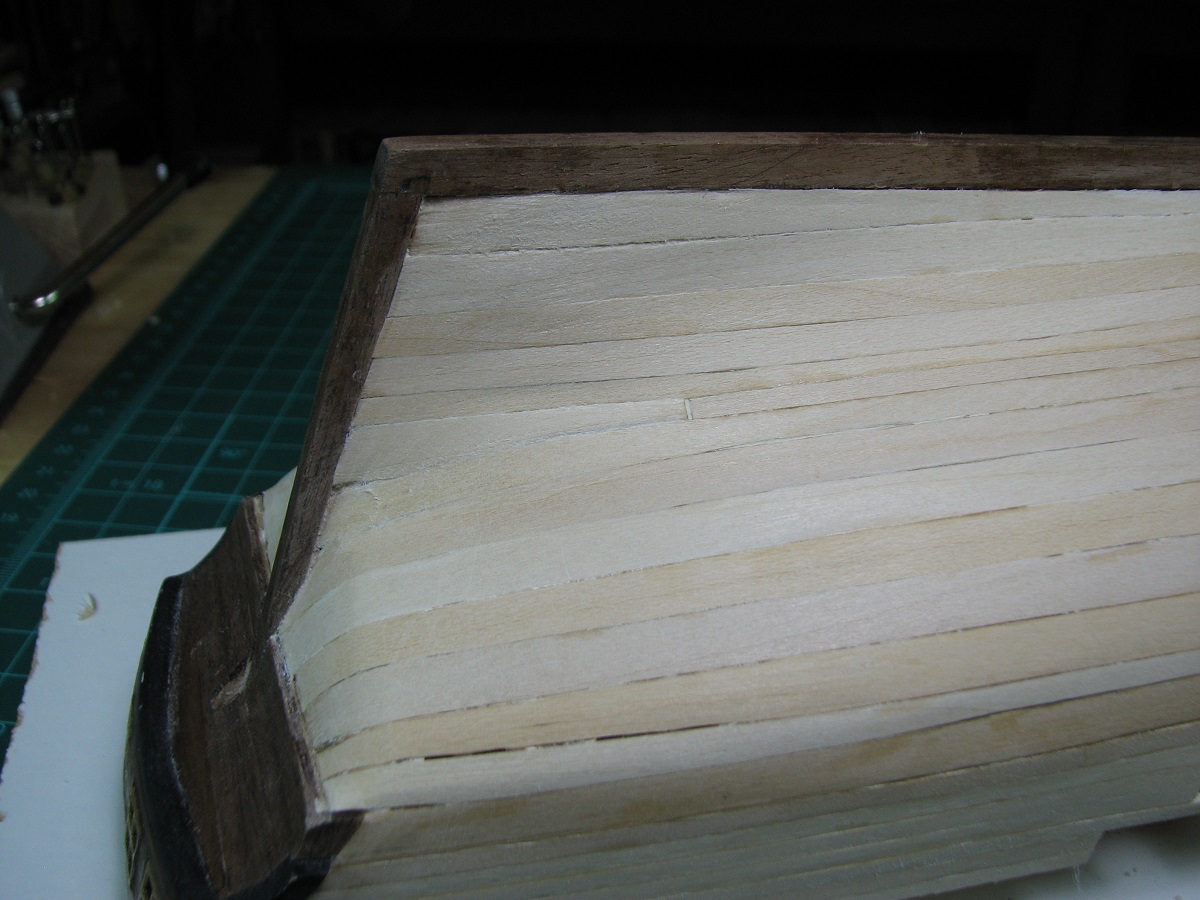
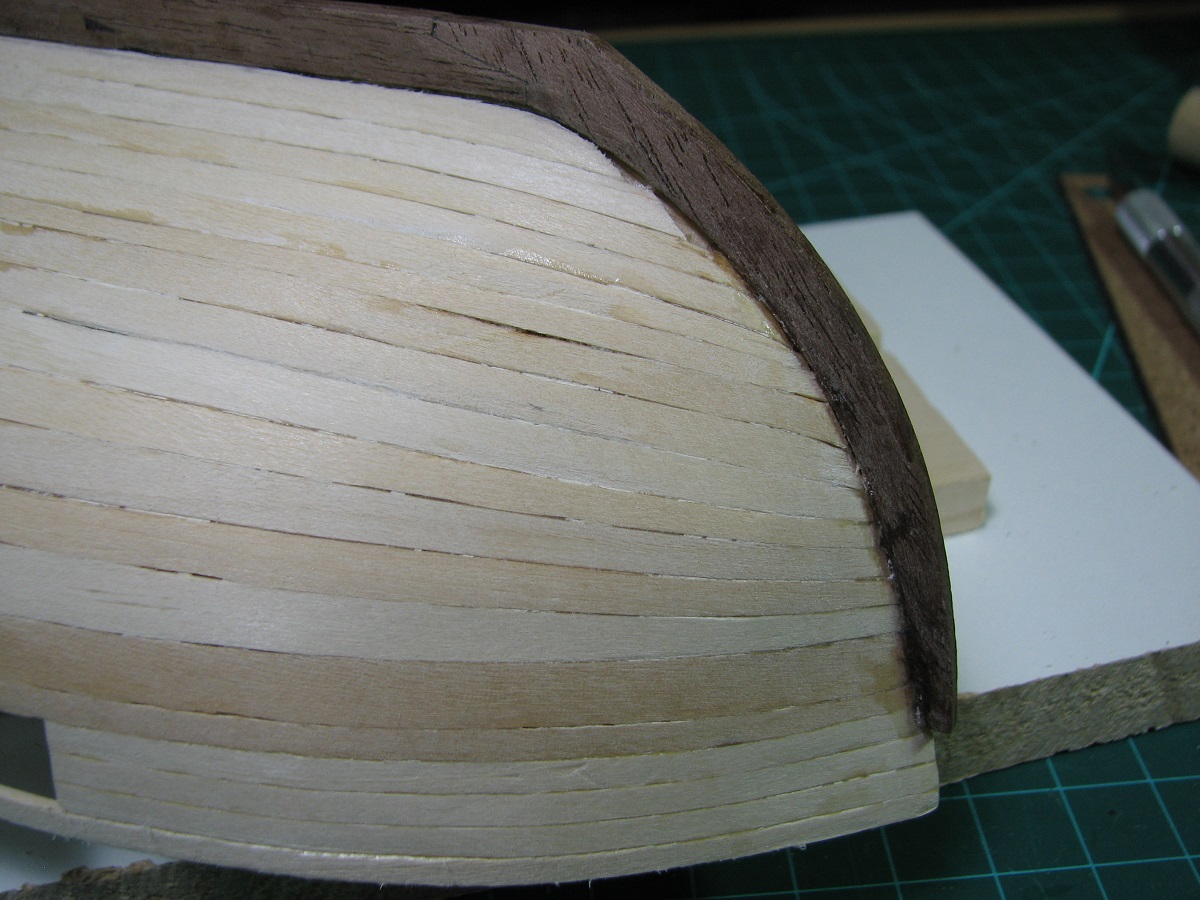
The planking if you only look at the stem area is still pretty nice though!
I'm still doing a fair amount of edge-bending to get the planks to come in at the stem, even spiling them to 1/2 a plank width on every plank so far, although it is getting less pronounced on this 3rd one. The stern would require severe edge bending to get them to stay at full width, so they are getting spiled which is why I'll need a stealer at some point on at least one side, possibly both, on this upper section.
-
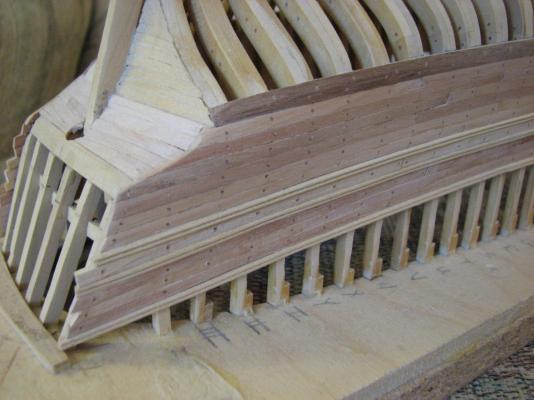
Those look fantastic.
How do you go about trimming/adjusting the completed floor board assemblies? Do you use a saw or knife or what? Seems like it would be very easy to trash the entire assembly doing the trimming.
-
Joe,
I'm undecided on the Hannah, as I feel like it will be some time before I'm comfortable tackling that build. Where there is a lot of really nice wood here, until I can figure out what is not part of the Hannah kit, most of it will not be touched, at least for now, as I want to make sure the Hannah is completable, either by myself, or someone else in the future.
On the other hand, there is a fair amount of wood that is clearly not part of the Hannah parts list (which I have), and I can use for whatever. There are various sizes of boxwood, cherry, poplar, walnut (both light and dark), ebony, and also lots of unmarked stuff that I don't know what is, but is not on the Hannah list.
In any case, I've got plenty of time to figure it out, as the AVS is obviously not going to be completed in the super-fast time that the Carmen was, and I've taken advantage of the huge Model Expo sale and now have 'other projects' waiting for when the AVS is completed. The Hannah has been mothballed for at least 10 years, so it probably isn't going to suffer any by waiting some more at this point.
Edit: Also, I'm really kicking myself for the camera thing. I'm going to have to email him and ask if he has any photo's I can share.
-
Side trip - and update not about the AVS, but my trip through the forsaken wastelands (also known as Nevada).
The gentleman who was divesting himself of his years of shipbuilding is doing so for multiple reasons. Something over 10 years ago he and his wife moved 500'ish miles to a smaller house, so all of the shipbuilding stuff was packed away. At about the same time, he took up the new hobby of writing books, and discovered that he apparently had both a taste, and talent for this, as he now has 6 books published, mostly historical biographies it appears. In retrospect, I should have planned for another day, as the length of the journey left me with very little time to visit, and he was an incredibly nice guy. Honestly I could have spent the better part of a day looking at the 4 models he had left (the rest having been sold when he moved) on display in his house.
On display he had a fully rigged semi-scratch (or heavily kit-bashed) Charles W. Morgan, a very detailed large scale model of one of the whaleboats (other than the color scheme, reminded me very much of the recently completed one here in this very forum), and two admiralty style models - the HMS Druid, and the Confederacy - both of which were from the Lumberyard plans and wood. All four of these models were simply gorgeous, and I'm the dumbest person around for not taking my camera on the trip to get some pictures. He began modeling in the early 70's, and the Morgan was his final completed model, in the late 90's. He had started on the Hannah when he moved.
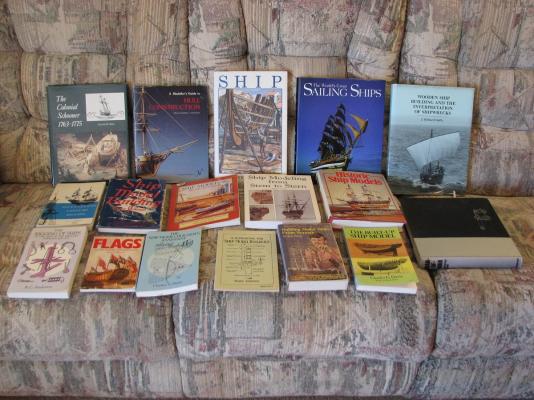
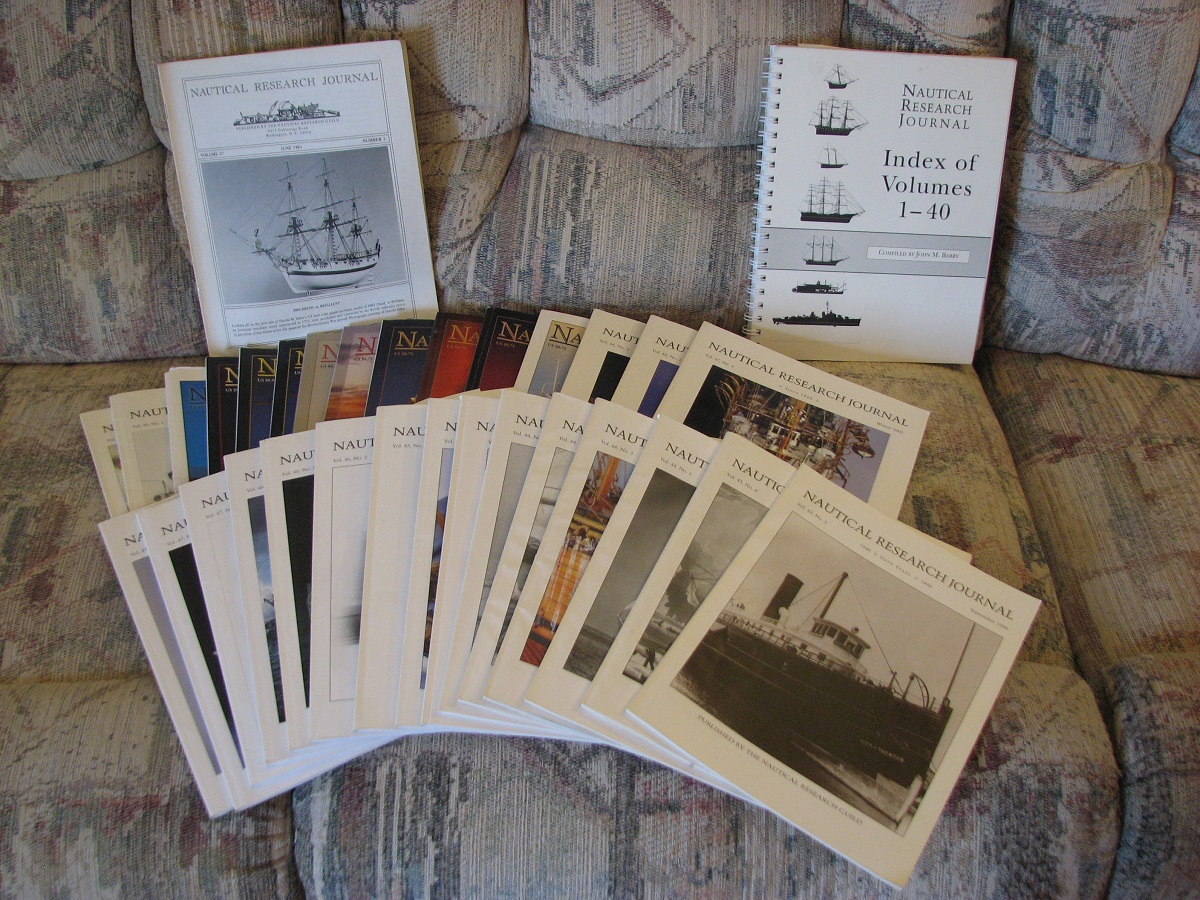
Everything you see is what I collected and packed back to Arizona, and it was all given for free, no strings attached, although on the pay-it-forward principle, I'll do my best to pass everything along if/when I decide I don't need it. I'll start this next weekend by taking several of the books that are duplicates of ones I've already purchased, to the new Arizona Shipwrights club meeting, and giving them to whoever wants them.
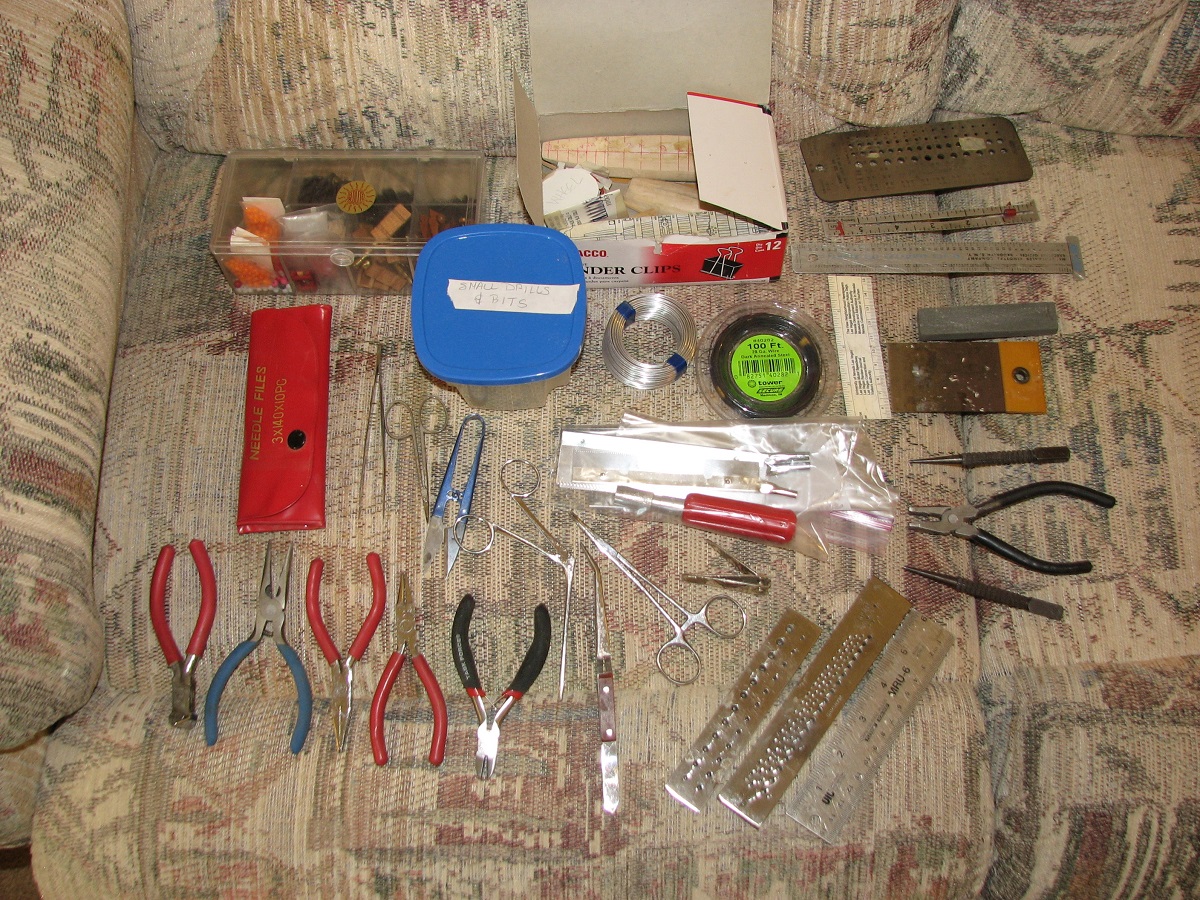
Onward to the stuff.
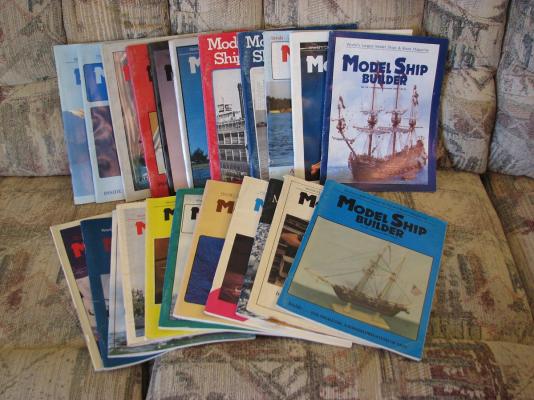
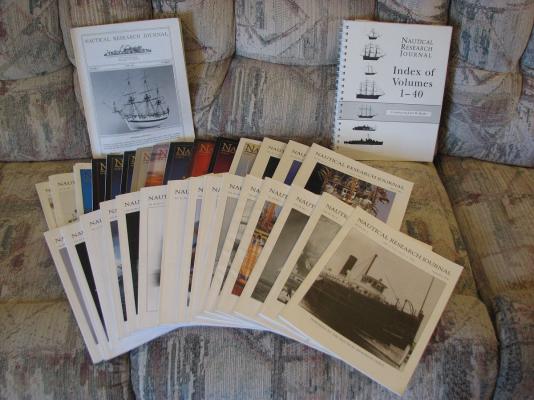
Books are always good, as well as magazines of course, especially older ones that contain so much wonderful knowledge that was used to create models back before this awesome thing called the internet.


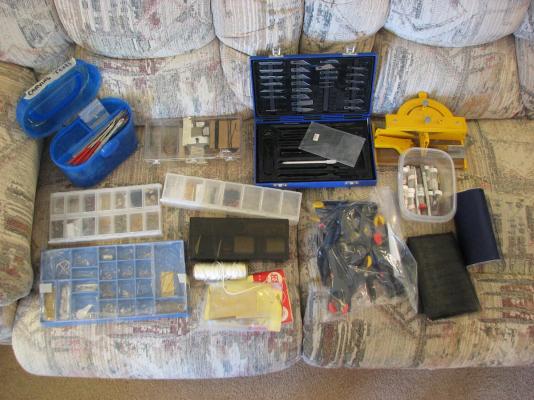
A fair assortment of miscellaneous tools, most of which will be useful, and some will replace existing tools as they are higher quality. Also included in all the little plastic containers are the left over fittings and all kinds of random parts from approximately 12 builds including cannon and carriages, eye-bolts, deadeyes, blocks, rigging, chain plates, etcs.


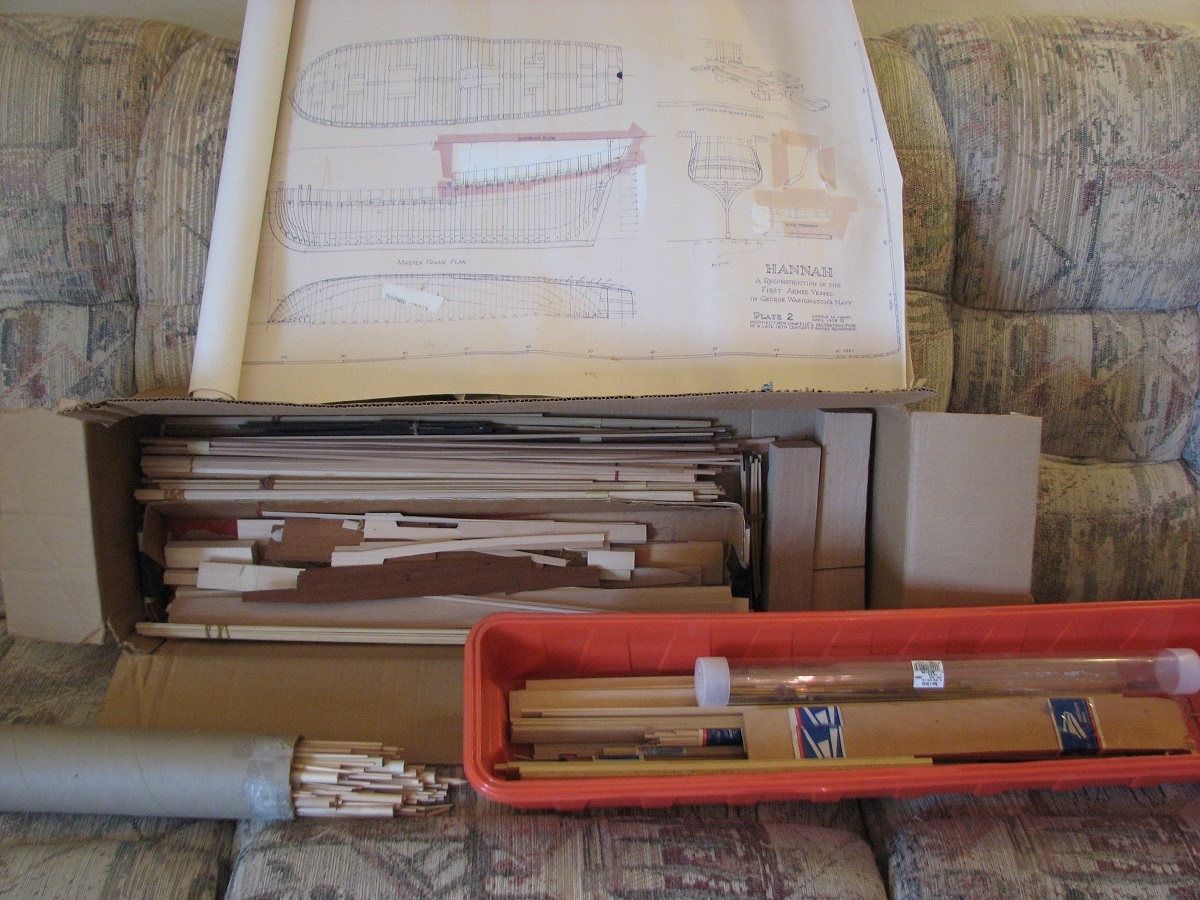
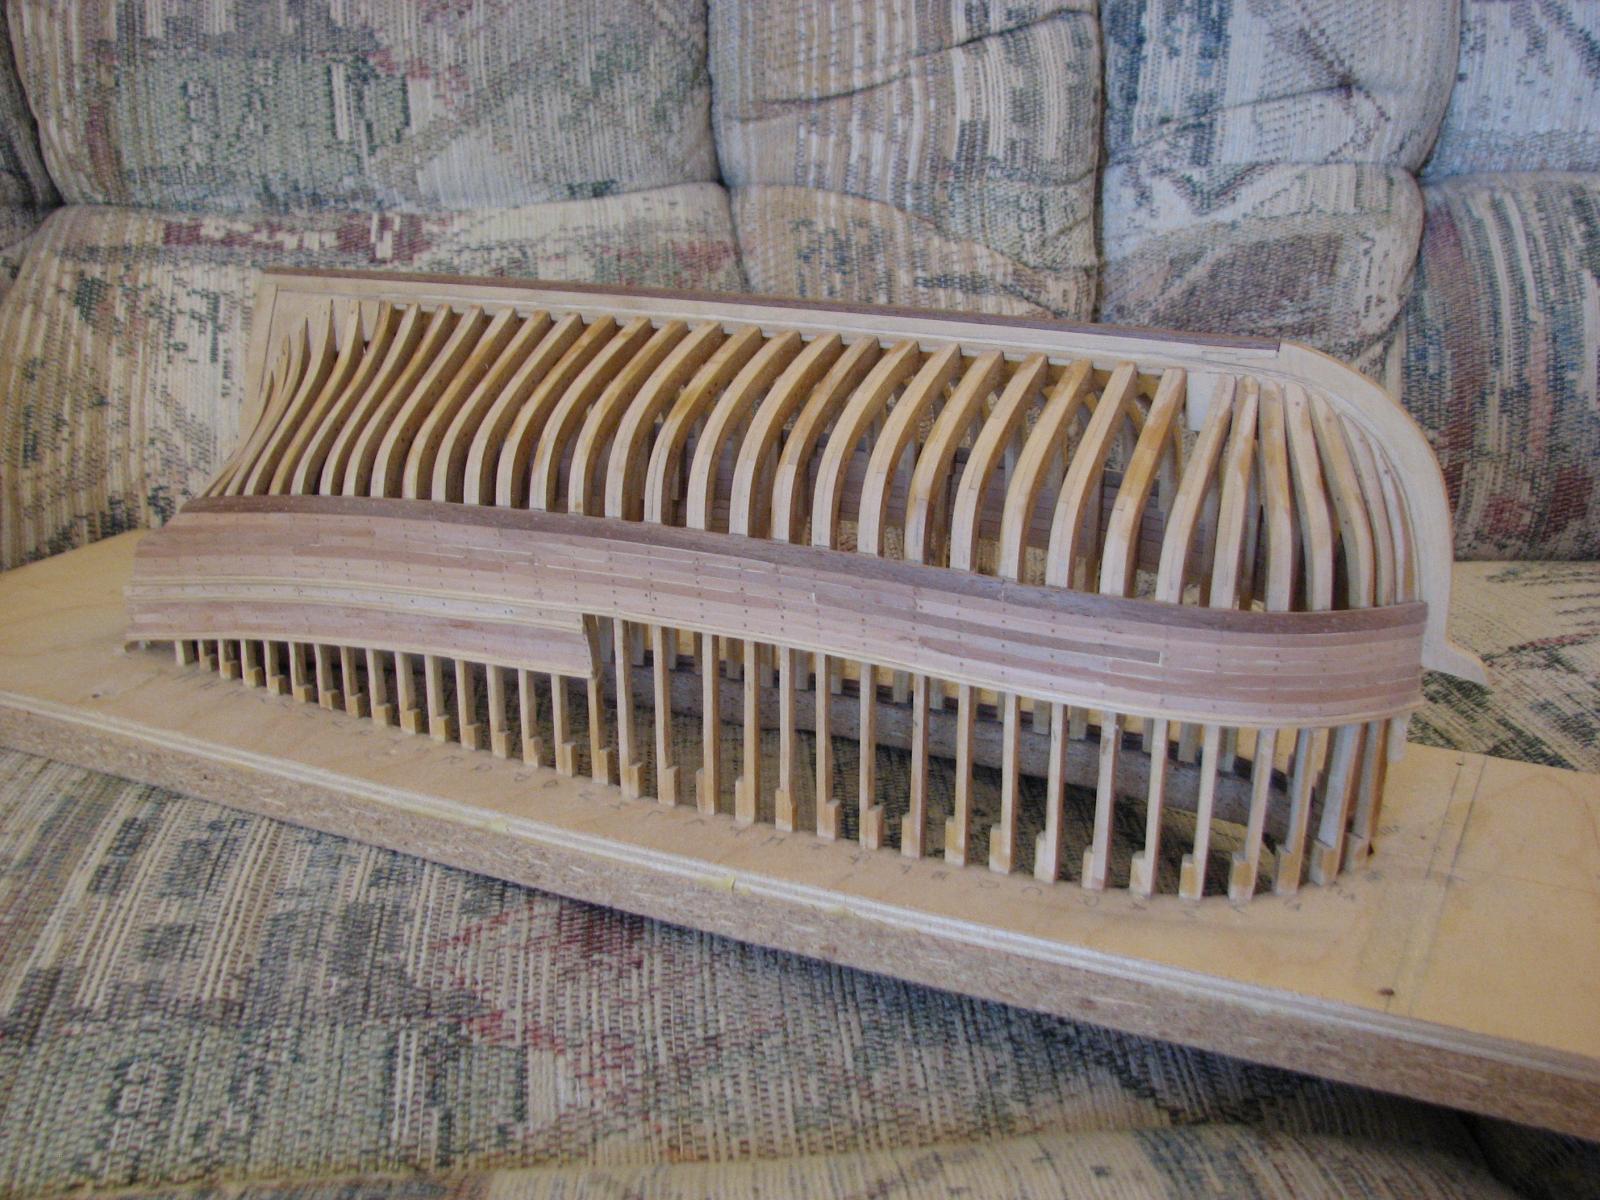
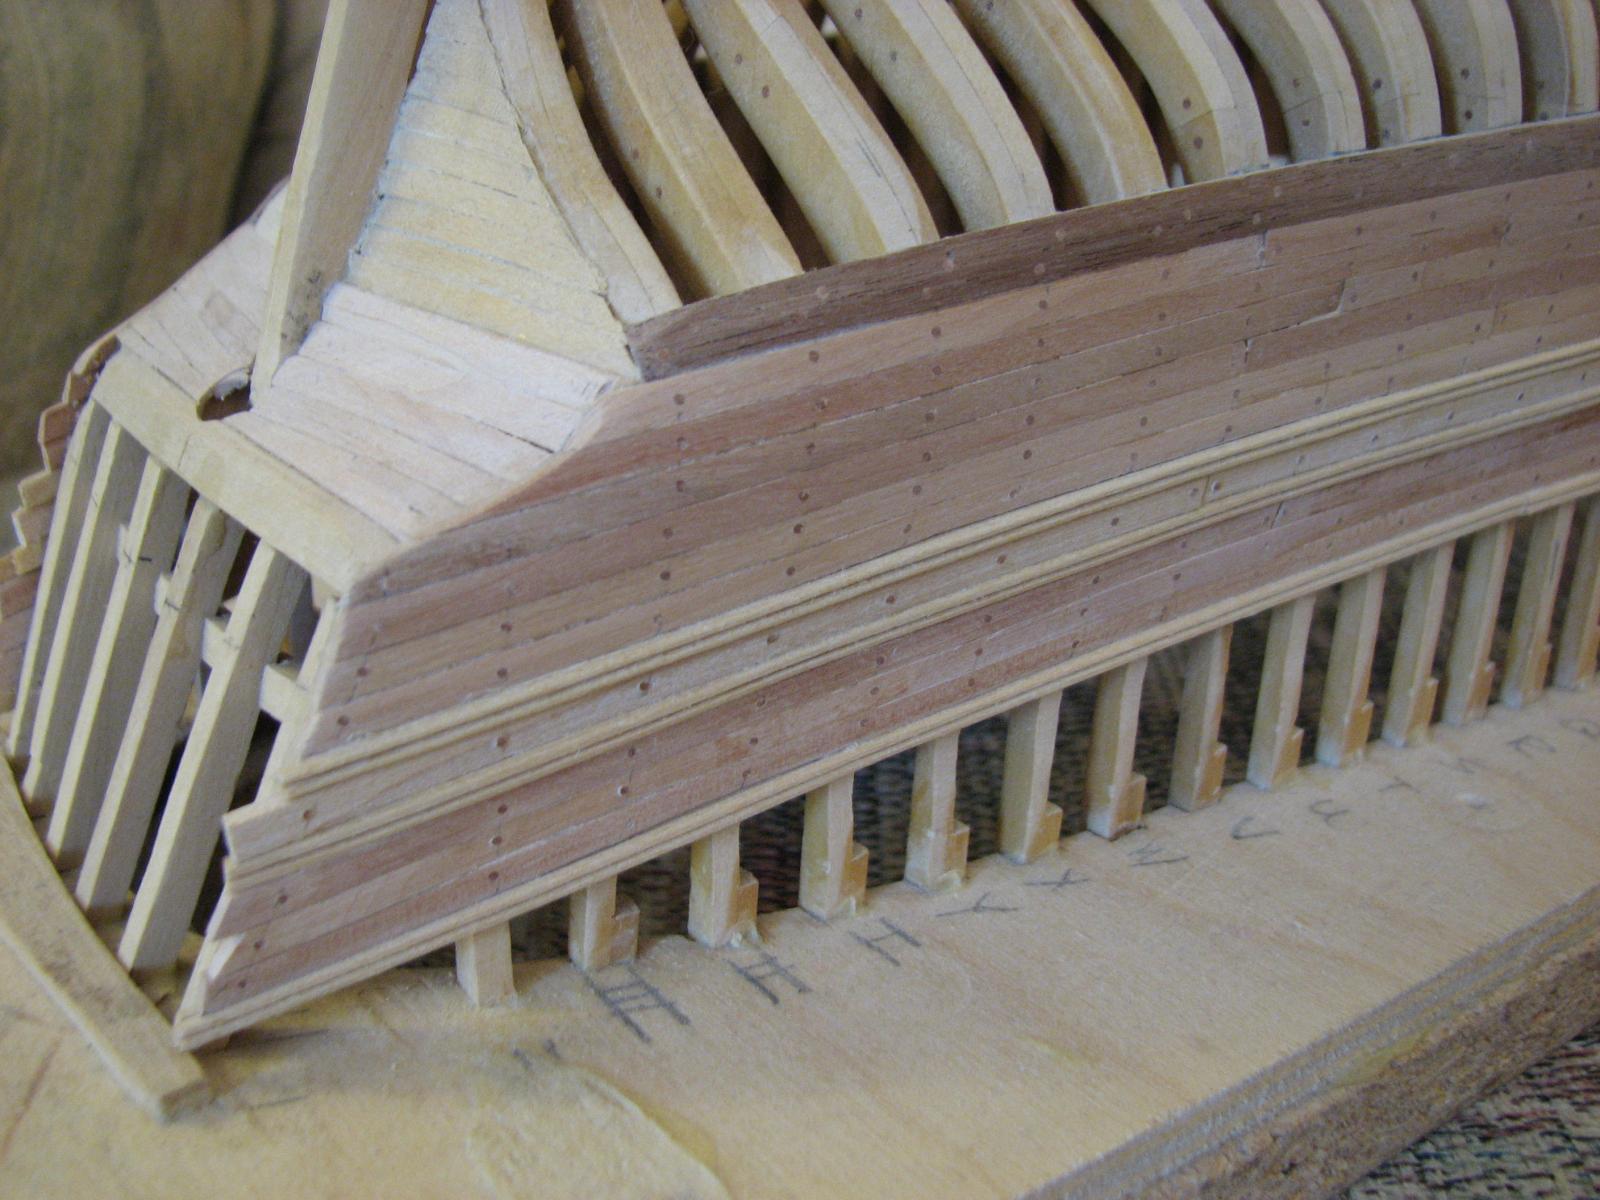
And finally, the partially completed Hannah, as well as all of the wood, plans, and instructions to finish her (in theory). Also included is all of the left-over wood from his other builds, and I have no idea what is what. There appear to be enough dowels to build masts and yards for about half a fleet.


It was certainly an interesting trip, and I'll get some use out of a lot of this stuff. From a purely financial perspective I'm not sure the trip made a lot of sense (my car went into the shop the day before I left with an engine warning light, so I had to rent a car), although the total value of everything I have pictured here is certainly higher than the cost of the trip, and I enjoyed meeting an older and very experienced ship builder. I don't regret making the trip, but it did teach me that as I'm getting older, making crazy long 14+ hour days on the road is something I should not do anymore if I can avoid it.
I started my day Thursday when I left my house around 7:45am to do a couple stops before picking up the rental car, which promptly started getting engine warning lights and shutting off the cruise control barely 50 miles out of town. I swapped the car at the airport in Vegas, which cost me about 90 minutes probably, and checked into a hotel outside of Reno just after Midnight. Trip home was fairly uneventful, but of course took about the same amount of time, after loading the car and visiting for a while, I left Reno around 10:30, and got home about Midnight. Returned the rental car yesterday morning, ran some errands, and took a long nap.

Now I need to catch up on laundry and stuff, and then I'll see about starting back in on the AVS.


Swift 1805 by Grimber - Artesania Lantina - Scale 1:50 - Virginia Pilot Boat - my first wood ship model build
in - Kit build logs for subjects built from 1801 - 1850
Posted
Interesting technique, gives the deck a very striking appearance. Looking forward to seeing what else you do with this!