


GuntherMT
-
Posts
2,213 -
Joined
-
Last visited
Content Type
Profiles
Forums
Gallery
Events
Posts posted by GuntherMT
-
-
I have no intention to buy immediately, me and mutli projects end in me doing nothing (I spend to much time wondering what bit to do next)
USF Confederacy is the build of choice
The Victory is coming along nicely.
As to not buying immediately, remember that ME has everything on sale for 40% off through the end of October. I'm not sure how often they do that kind of a discount, as I'm new to this hobby, but if it's rare, you might consider buying it now and putting it away to save $180.
-
Paint will not resize the image to fit your screen automatically. The entire image is there, you just have to scroll around to see it all.
Quick Paint tutorial for resizing.
Step 1 - Copy your original image to a folder to edit it from (you can also just do a 'save as' after editing, but if you forget and just click save, you'll over write the original).
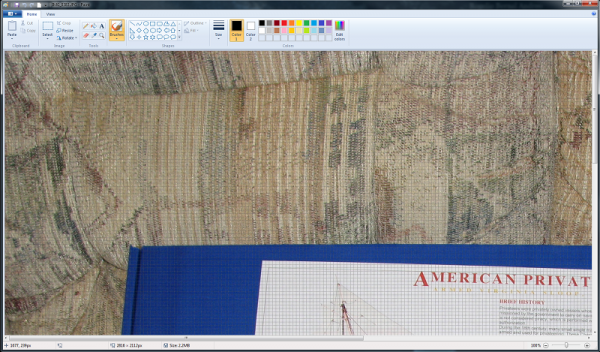
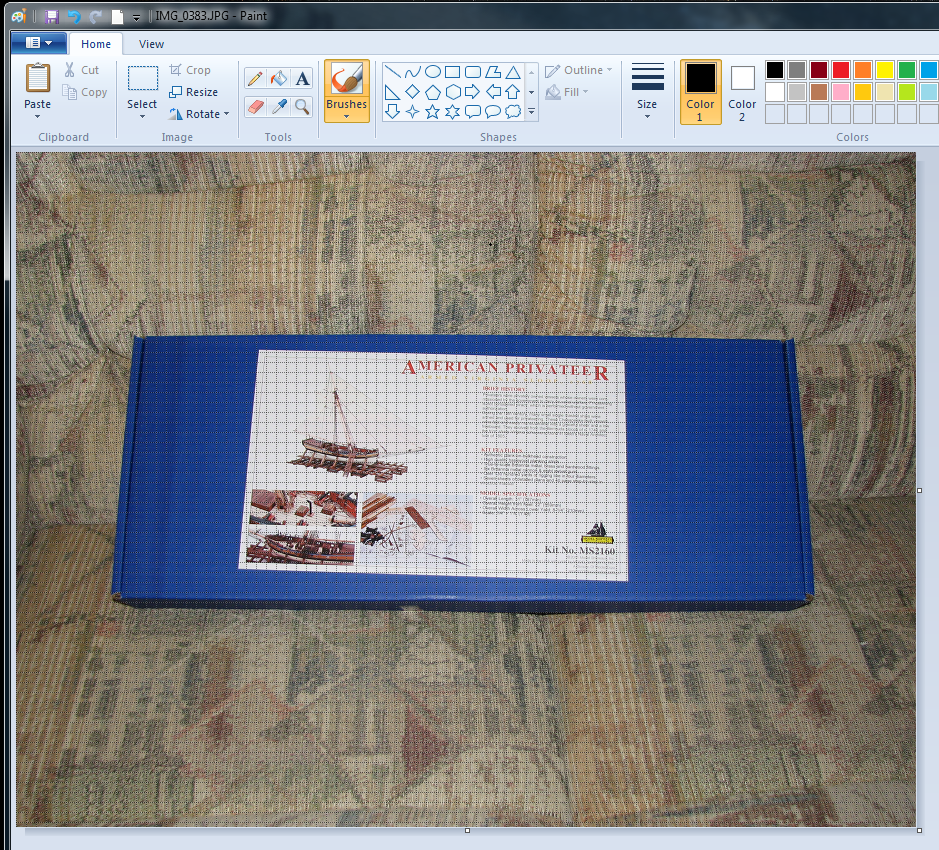
Step 2 - Open your copied image in Paint. This image will be far too large to see all at once, so it will look something like this (my Paint after opening an original sized image):
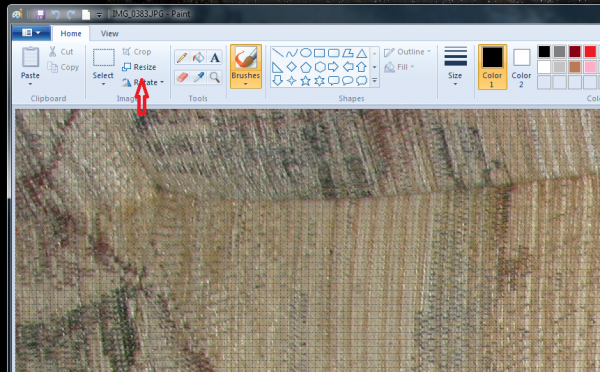
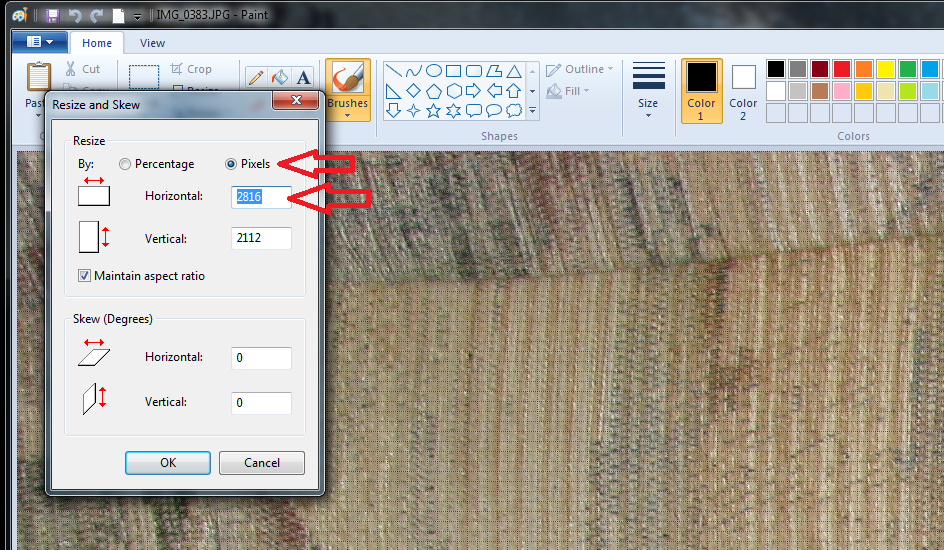
Now if you don't want to crop or rotate first, just click on the 'Resize' button:
That will bring up a pop-up menu as seen here:

Click on the little radio button for "Pixels", enter the pixel value you want in the Horizontal box (leave the Maintain Aspect Ratio check box checked), then click on OK at the bottom of the pop-up.
The result should be your image resized to the new size. If that new size is too big to fit inside the window of Paint, then you still won't be able to see it all at once.
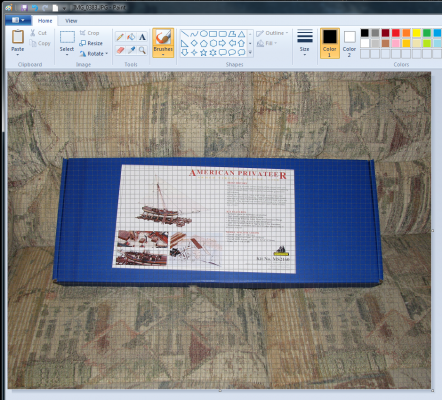
Here I've resized down to 900x horizontal, and as you can see it now all appears inside the window, whereas the original 2816x did not.
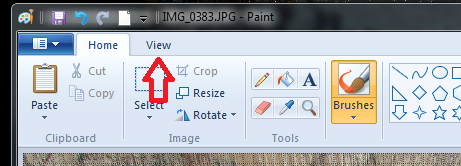
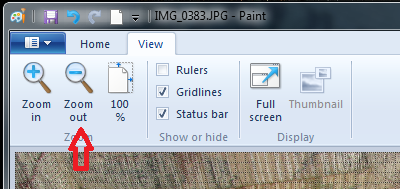
If you want to see your entire image, even if it's too big to fit in the window, change to the 'View' tab:
Once on the View tab, click on the Zoom Out button once or twice until you can see it all.
Edit: If none of this helps, or even if it does, let me know when you are done with it and I'll delete this post.
-
Thanks for the kind comments gents, and for the likes everyone.
It's been a crazy week at work, 13+ hours Tuesday and I was actually supposed to be on vacation today, but worked instead kind of crazy, so not a lot of time spent on the AVS.
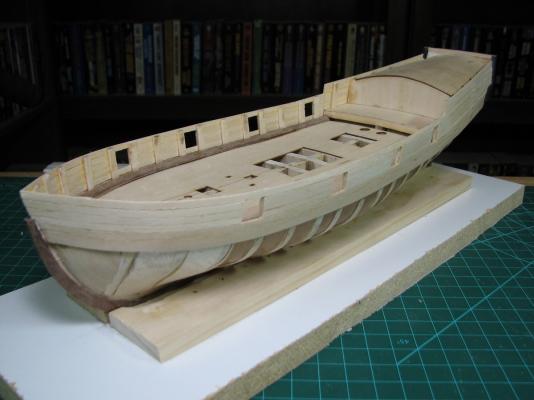
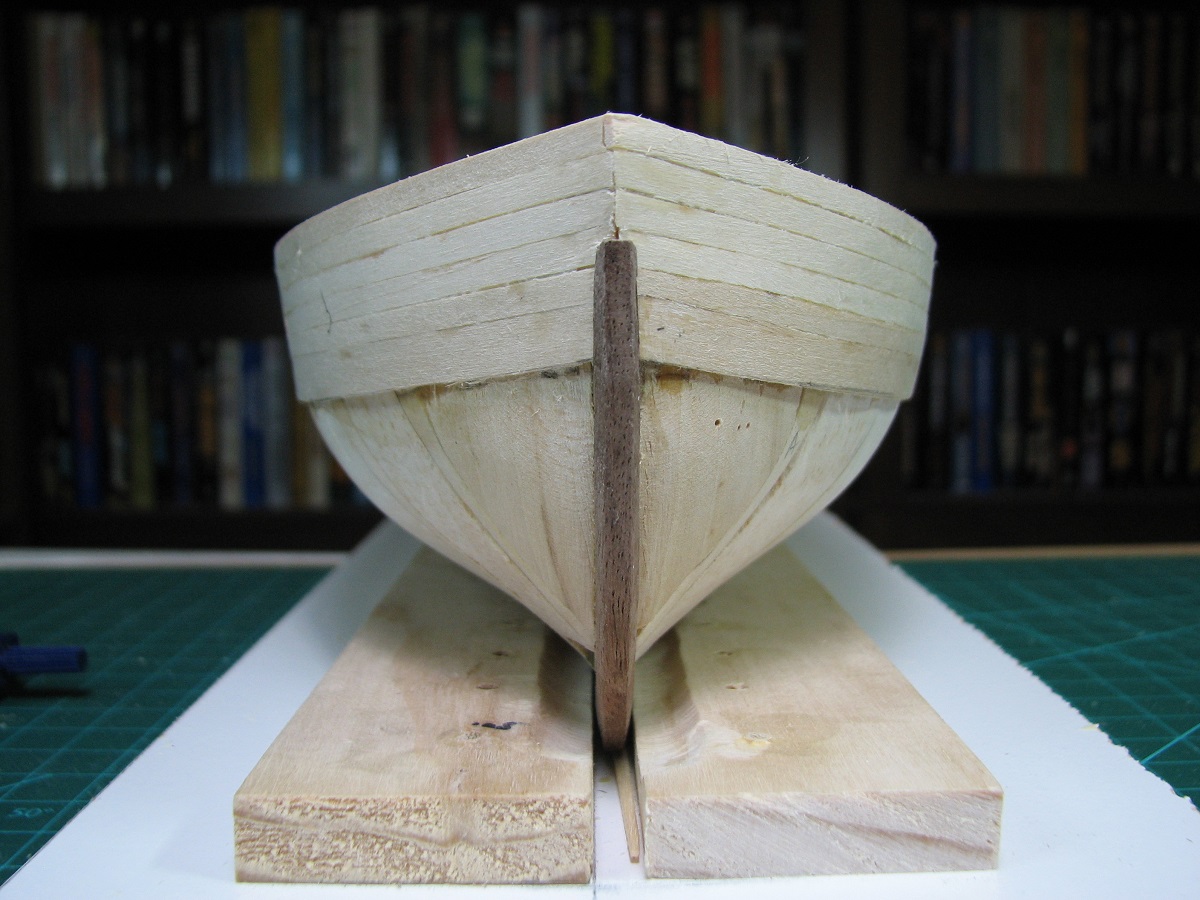
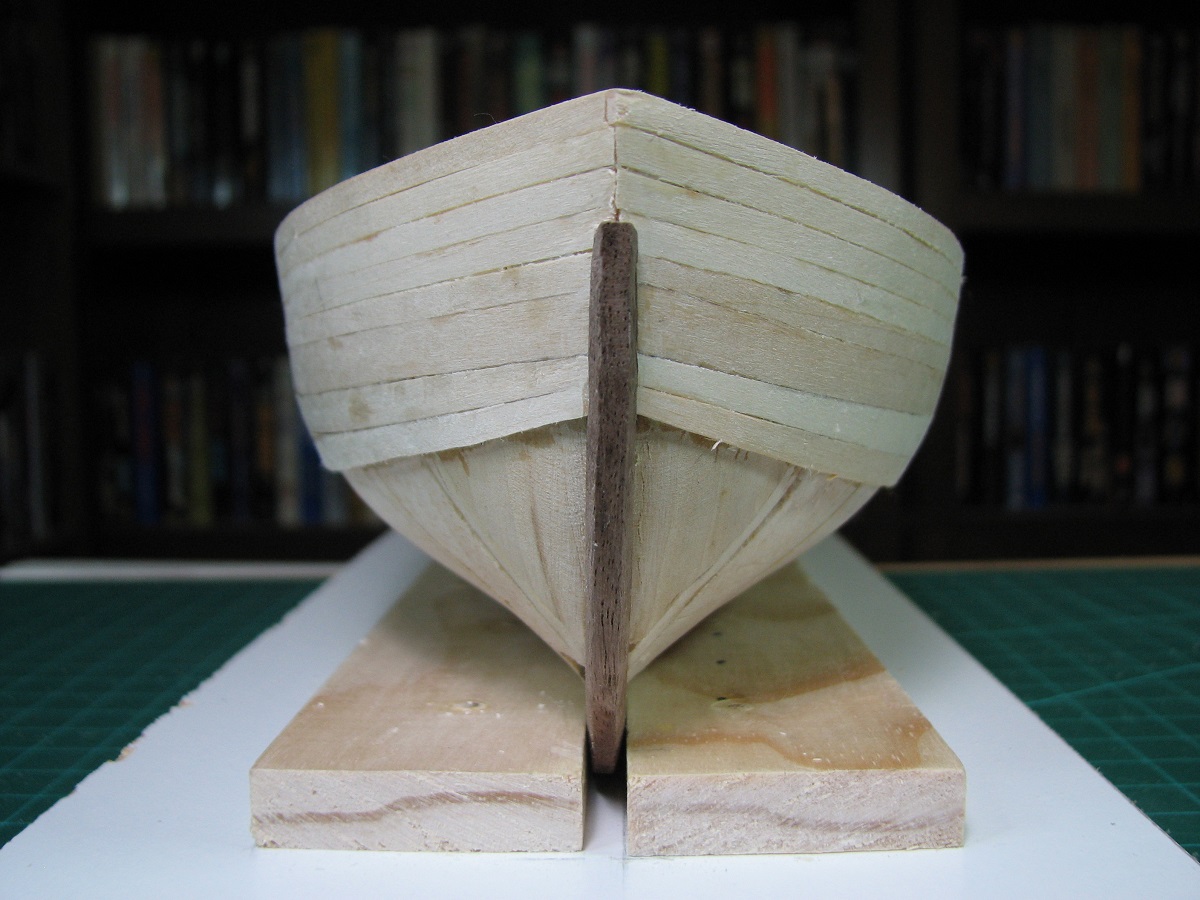
I did start doing the lower planking, and have now been introduced to the weirdness that is spiling.
I started out by evening up the existing planks at the bow. I did this by measuring all over the place to determine that the top of the 1/8" blank just above the 1/4" plank was correct along the entire top (at least as far as I could tell), and then using a compass to mark the long lower side based on the measurements from the other side, as measured from the top of that 1/8" plank. If that makes any sense at all. After marking it, I just carefully trimmed it with a razor knife.

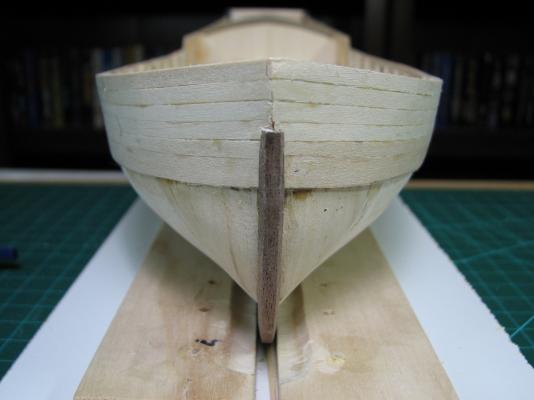
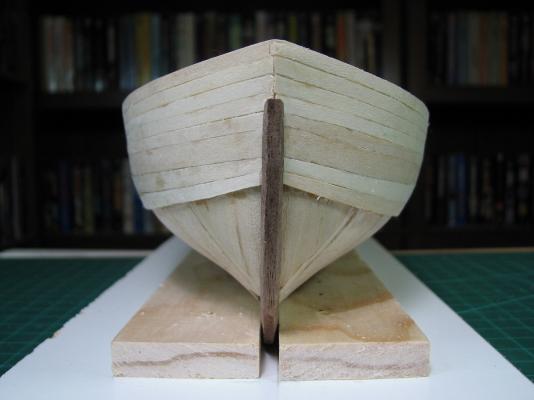
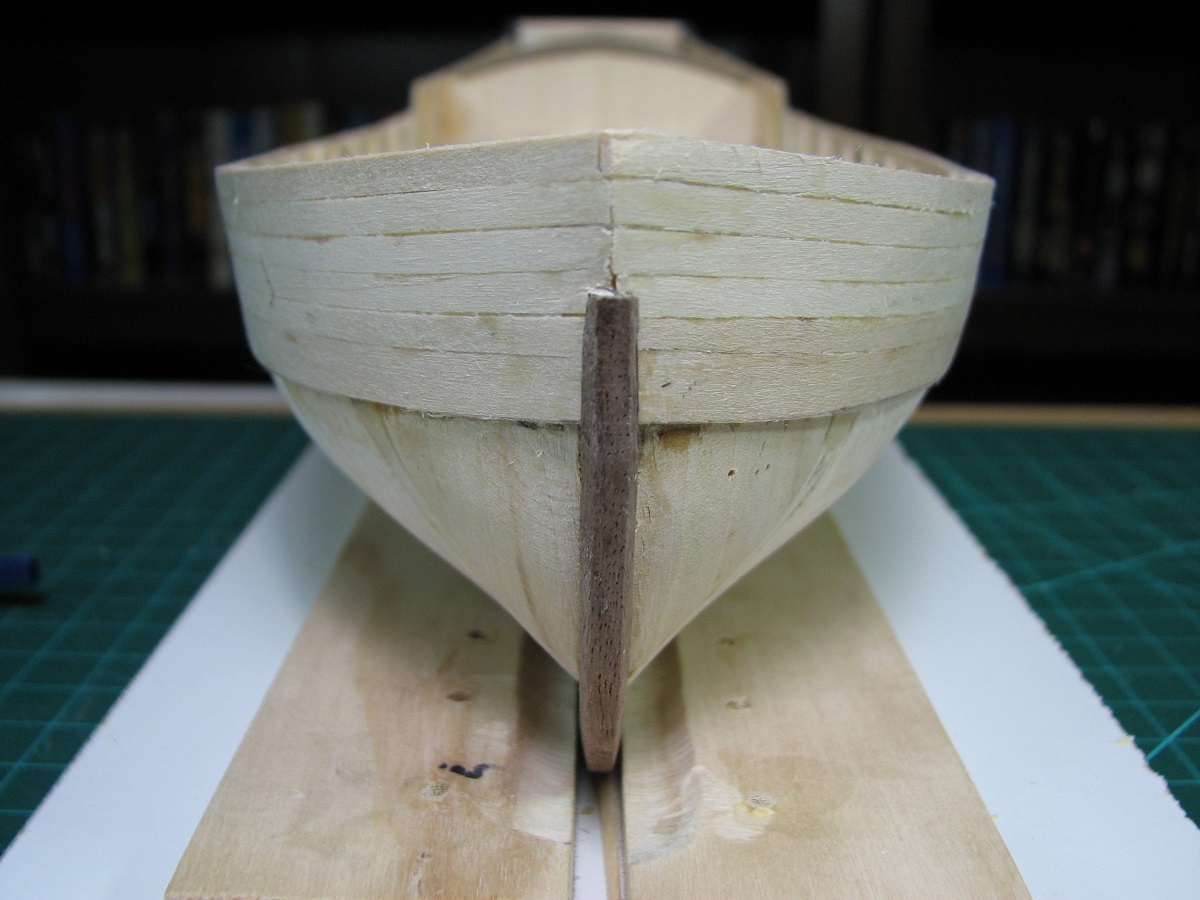
Seems to have worked out well enough. Next I added two spiled planks below this, and that was.. interesting. One side spiled completely different than the other side between those first two planks, and I think I'll have some odd cleanup to do at the stern, but the 'finished' bottom line of the two sides is oddly even, even though the spiling was completely different. Strangeness is afoot!
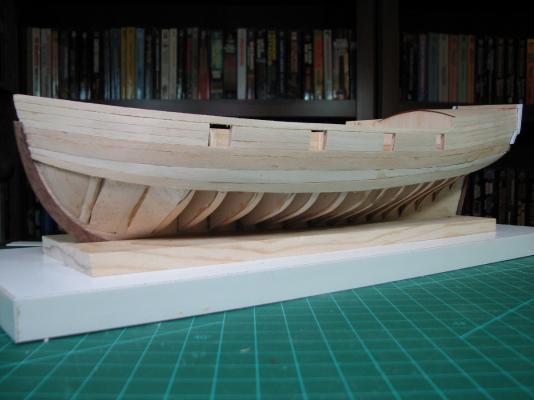

I also stripped off all the black paint from the stern fashion pieces, sanded everything again, and applied a coat of primer.

I won't be touching this again until Saturday, as I'm headed to Reno tomorrow morning where I'll be picking up the entire collection of books, magazines, fittings, wood, tools, and even a partially completed Hannah model from a gentlemen that wants to get rid of his entire 30 year accumulation of ship building stuff.
I guess I'll know sometime Friday morning what treasures (or not) I might be loading into the car for the long road trip home!
Until Saturday, happy shipbuilding!

- Captain Slog, egkb, themadchemist and 7 others
-
 10
10
-
I have no idea where the picture went to. But the 1700x1150 gave a file size of 114.42 KB so I'll work up from there.
It was there after you posted, but it's gone now.

-
Seems to work just fine. I typically use 1200x900 in my log, but I've seen others use larger like yours.
I like the 1200x size myself just because it fits nicely on the screen, but is still fairly large. Of course I'm spoiled and have 27.5" monitors, so I guess I should consider that a 1200 pixel image on my screen might be larger than a 1200 pixel image on someone's smaller screen.
I also keep all the original image files from my camera in a separate folder, so I can always get back to the original image size without any editing, which in the case of my old camera is 2816 x 2112.
-
For simple image resizing (and rotating and cropping) I just use Paint. If you have Window's, you have Paint.
For a Photoshop equivalent if you want to do more advanced stuff, check out GIMP 2 ( http://www.gimp.org/ ), it's a fantastic program that's probably at least as powerful as Photoshop (your mileage may vary, I'm not an expert) and it's free.
-
-
I like Titebond wood glue, but I'd suggest switching to the original Titebond, as when you mess up (if you are like me, it will happen), the original Titebond can be freed up by soaking with water. Titebond II like you are using is waterproof, so will be much more difficult to do any needed deconstruction, and there should be no reason to need to waterproof a static wooden model like this.
-
-
Thanks Chuck.
-
What do you use to cut such fine (small) shapes into the razor/scraper - just small files? I've not been able to find files small enough for a lot of that detail, especially in a round shape.
-
According to Wikipedia (yes, I know it's not exactly a 'research' source):
HMS Ajax was an Ajax class 74-gun third rate ship of the line of the Royal Navy. She was built by John Randall & Co of Rotherhithe and launched on the Thames on 3 March 1798.[2] Ajax participated in the Egyptian operation of 1801, the Battle of Cape Finisterre in 1805 and the Battle of Trafalgar, before she was lost to a disastrous fire in 1807 during the Dardanelles Operation.
This is corroborated by multiple sources on the web via a quick Google search, including the book -"A history of the sailing ships of the Royal Navy by Michael Phillips" and Ships of the Royal Navy: The Complete Record of All Fighting Ships of the Royal Navy From the Fifteenth Century to the Present. by Ben Warlow, Naval Institute Press, 1987. ISBN 0-87021-652-X.
Edit:
As to the question of whether there was a different ship - a frigate - bearing the name of Ajax at the same time, the book listed above by Ben Warlow from the Naval Institute Press says:
Eight ships of the Royal Navy have been named HMS Ajax after the Greek hero Ajax:
- HMS Ajax (1767) was a 74-gun third-rate ship of the line launched in 1767 and sold in 1785.
- HMS Ajax (1798) was a 74-gun third rate launched in 1798. She fought at the Battle of Trafalgar in 1805 and was burned by accident in 1807.
- HMS Ajax (1809) was a 74-gun third rate launched in 1809. She was converted to screw propulsion in 1846 and broken up in 1864.
- HMS Ajax was a 78-gun third rate launched in 1835 as HMS Vanguard. She was renamed HMS Ajax in 1867 and was broken up in 1875.
- HMS Ajax (1880) was an Ajax-class ironclad battleship launched in 1880 and sold in 1904.
- HMS Ajax (1912) was a King George V-class battleship launched in 1912 and broken up in 1926.
- HMS Ajax (22) was a Leander-class light cruiser launched in 1934. She took part in the Battle of the River Plate and was broken up in 1949.
- HMS Ajax (F114) was a Leander-class frigate launched in 1962 and broken up in 1988.
- HMS Ajax (S125) is planned as the seventh Astute-class submarine.
-
That's quite a nice scale, 1" = 1'!
Opportunity for lots of detailing, look forward to seeing this one go forward.
-
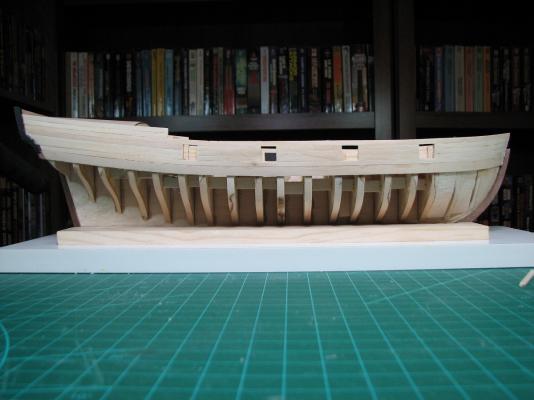
Today I moved on from the stern. I'll revisit it later once I decide what I really want to do as far as trim, paint, name, etc.
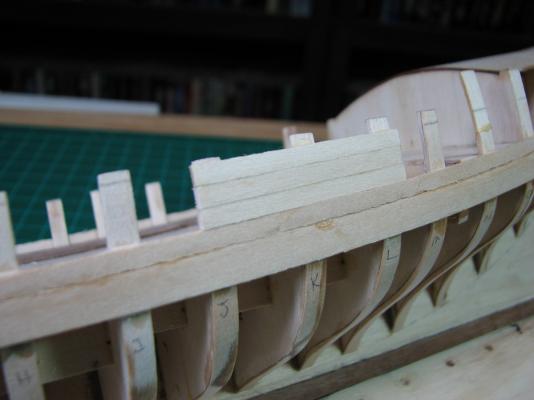
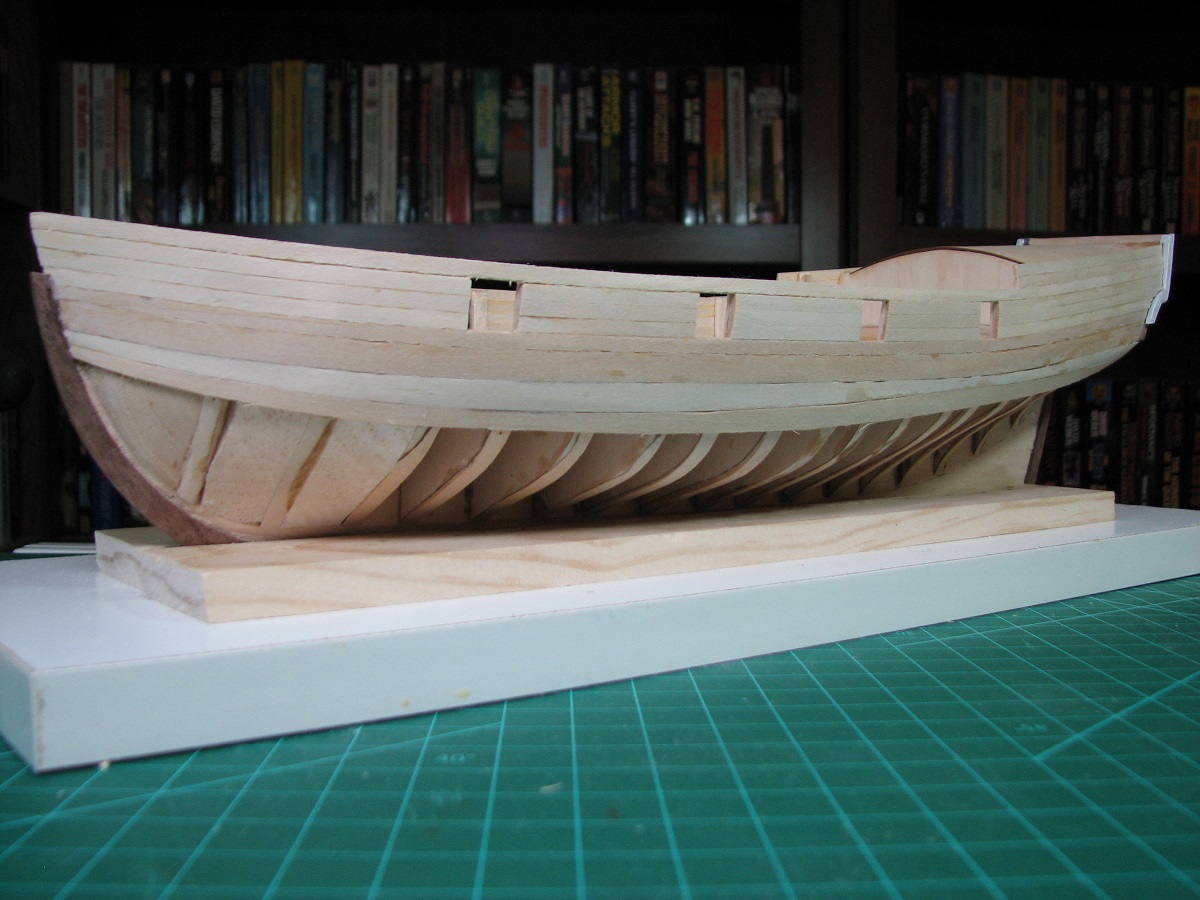
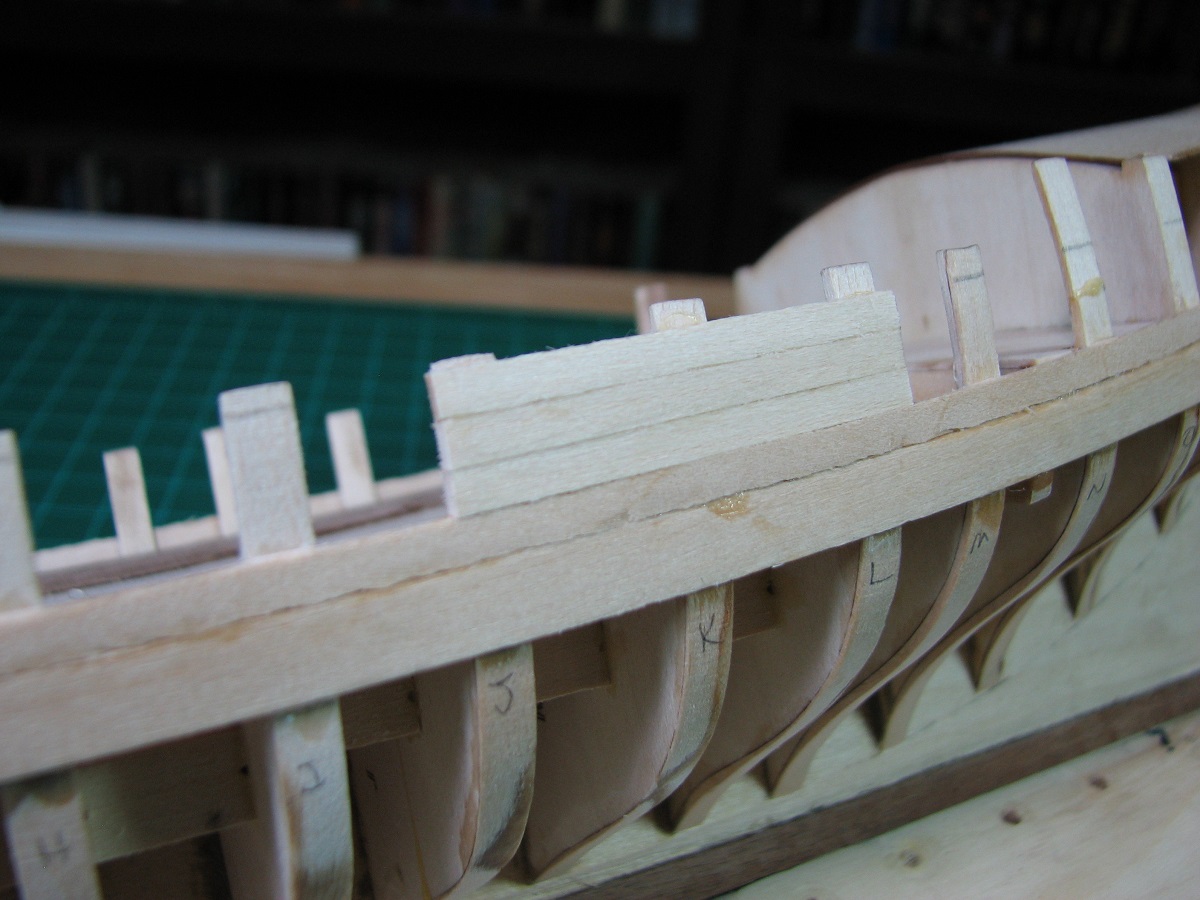
No warship is complete, not even a small sloop, without gunports! So today I did upper bulkhead outer planking, first layer. I quite enjoyed this part of the project, and other than the fact that it's apparently completely impossible to eliminate all the fuzz from basswood, I'm pretty happy with the outcome.
I took a ton of pictures, but when I started to edit them to post I realized that they are all really pretty much repeats of each other just on the next section, so I cut it down to just a few.
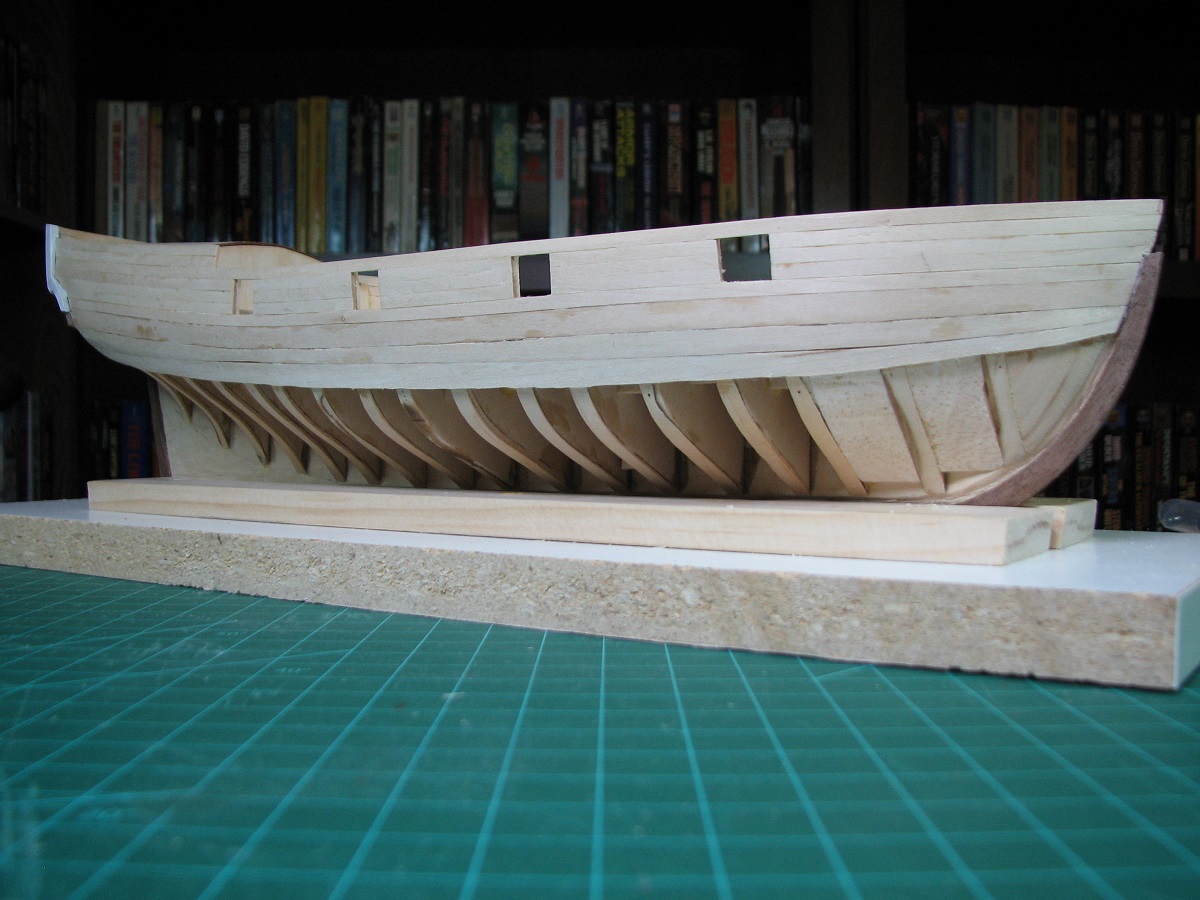
First section, and then with three sections completed:

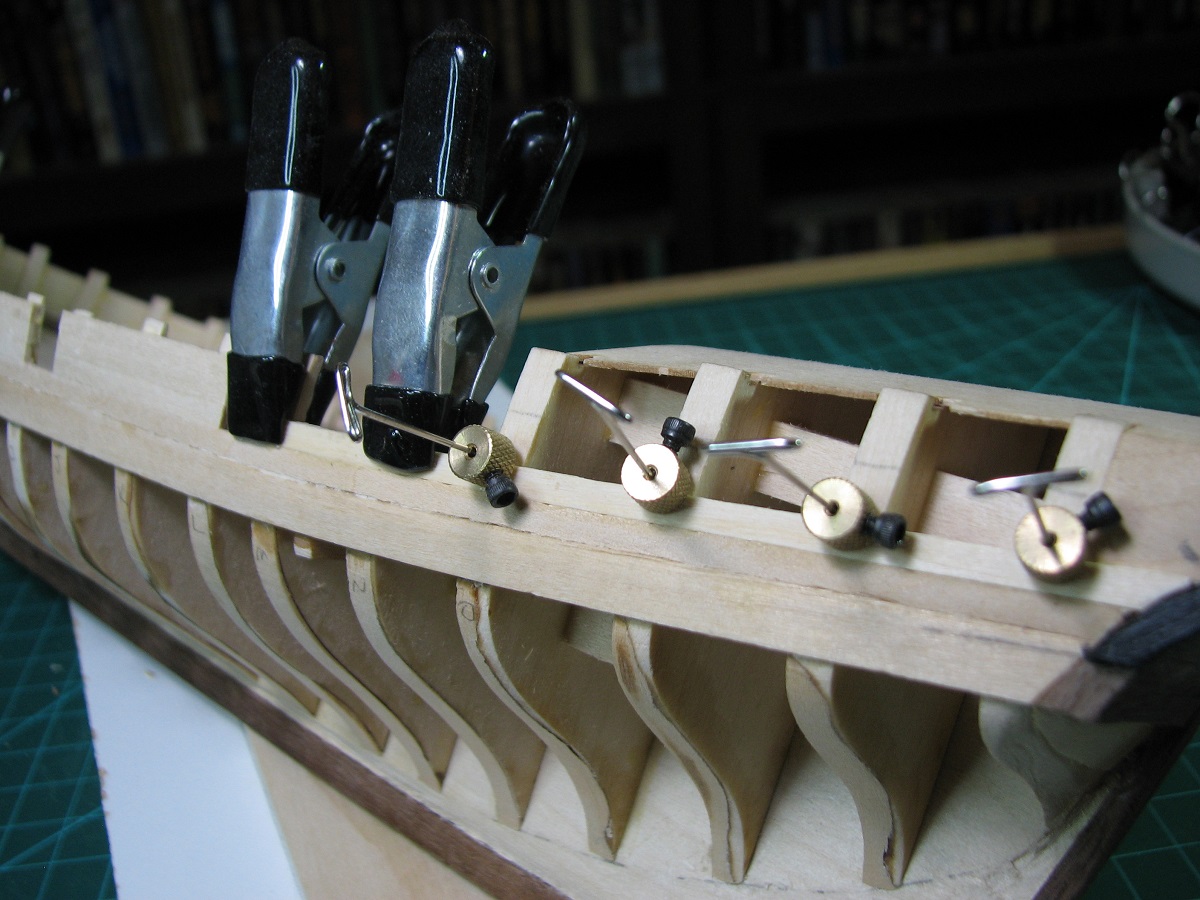
The stern required a bit different approach, as I there is no way to get clamps on the planks, so I used some pins.
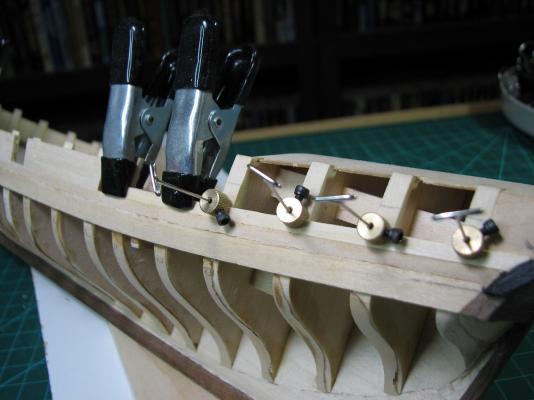
One of the things I may possibly have spent a fair chunk of that money mentioned earlier on, a little bit at a time, is clamps. For the first month I was doing this new hobby, I would grab every clamp that looked like it might possibly be useful, and that I didn't already have. Some people would say I now have far too many clamps, but I say, there is no such thing as too many clamps!

Cut to the chase, as it's past my bedtime now, and nobody likes a grouchy ship builder at work on Monday morning.
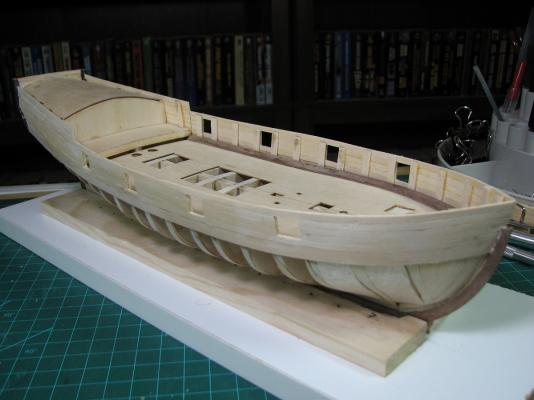
Hrmm.. looking at that last picture, I didn't get the earlier planks on quite even at the bottom. I'll have to measure and fix that before I begin lower planking.
Until the next time, happy modeling everyone, and thanks for the looks, likes, and comments!

- BareHook, kier, themadchemist and 12 others
-
15
-
Stumbled across your build thread through another. Really enjoying it. I'm about to start the Model Shipways C.W. Morgan. I am curious how your planking clamps are set up. I see they are binder clips but can't figure out what you have inside the clamp that actually holds the plank. You may have explained this somewhere but I haven't been able to locate it. Thanks.
Dave
Dave - I saw his clips somewhere in another thread I think where he explained putting them together - they use the handle from another clip inside of the intact clip to hold the planking down. You can really use anything that sticks out, I made some by using short pieces of wood super-glued into the binder clips, but I think the handle of another binder clip works better as it doesn't need to be glued as the ends hold it in.
-
I've yet to rig a gun, but I think I saw in someone else's log on here that they got the measurements for the line, then rigged it completely to the gun with the eye-bolt lose, and then put the gun into position and secured the eye-bolt with the rigging already complete.
-
-
-
Thanks Gents,
Keith, there is no window trim in the plans. I already created some very tiny trim pieces out of Brazilian Cherry and put them on one window with a very small bit of CVA, but I didn't like the look so I removed them, and either I forgot to take a picture, or just didn't bother because I didn't like it. I do think they could use "something", but I haven't decided what that is yet.
I plan to create some sort of a name plaque to go above the windows, but I'm still trying to find a source for decent rub-on type lettering (haven't really looked that hard other than skimming Amazon) to use. All the one's I've found online so far don't bother to say what size they are, which is really a fairly important bit of information that I would think they would include in the description for an online purchase!
-
Such a beautiful piece of work, always happy to see more pictures of this.
-
-
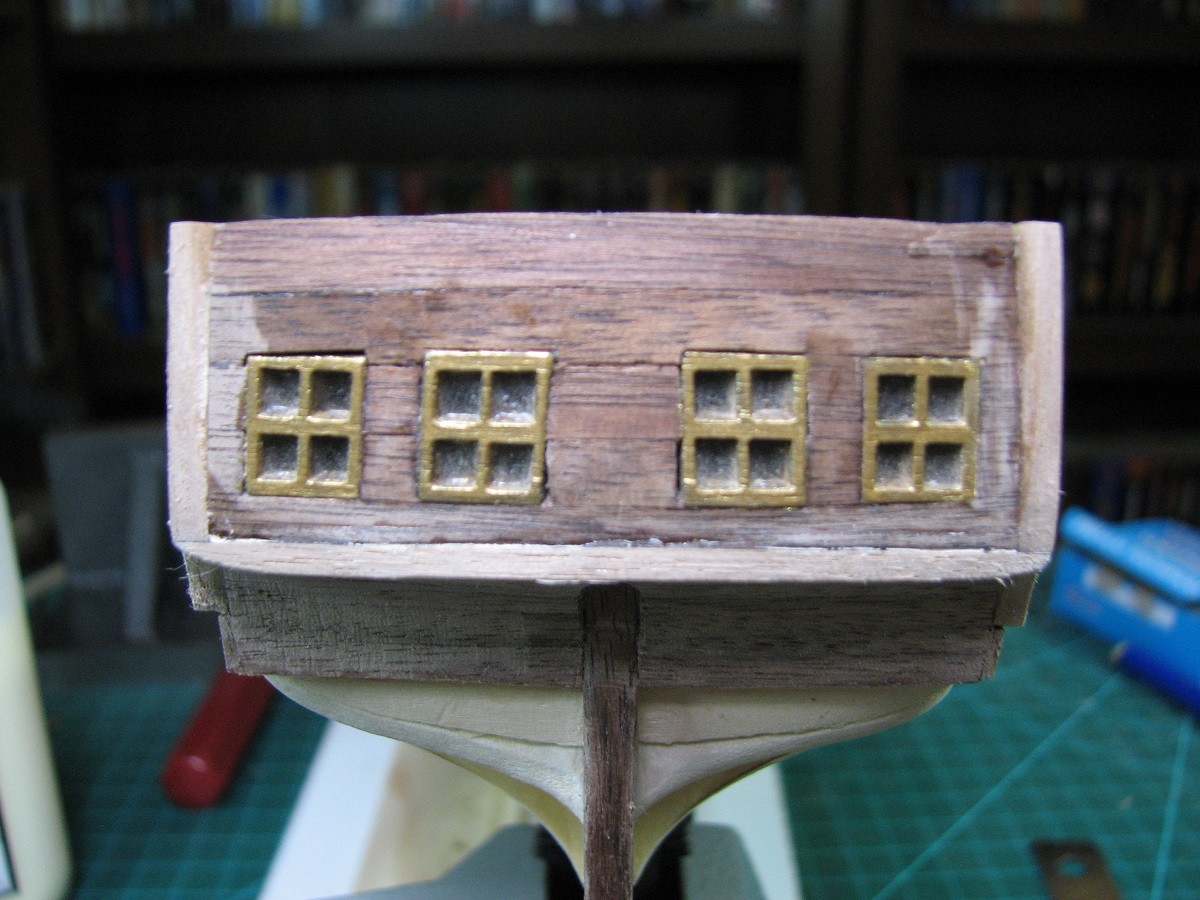
Love the windows Brian; they give a nice thick appearance kind of similar to old float glass.
Lesson I learned after seeing the final photo's in that last post - once the windows are placed, they should be covered with tape or something or they'll get filled with sawdust, which doesn't seem to want to come off since the surface is basically 'glue'. Chalk it up as another lesson learned, and it isn't a huge tragedy, just something to keep in mind the next time.
-
Oh yea, I also did a remarkably stupid thing today. For no real reason at all, I put all of the receipts I've spent on stuff since I bought the Carmen kit back in August into a spreadsheet to get a total. Boy that was dumb, that number is really quite a bit larger than I expected.

Buying random clamps, pliers, glue, tape, bits of wood, fittings, etc. adds up even when no single purchase is all that much.
- riverboat, kier, zoly99sask and 1 other
-
4
-
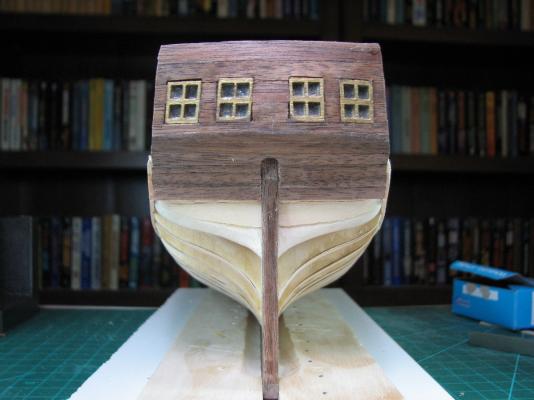
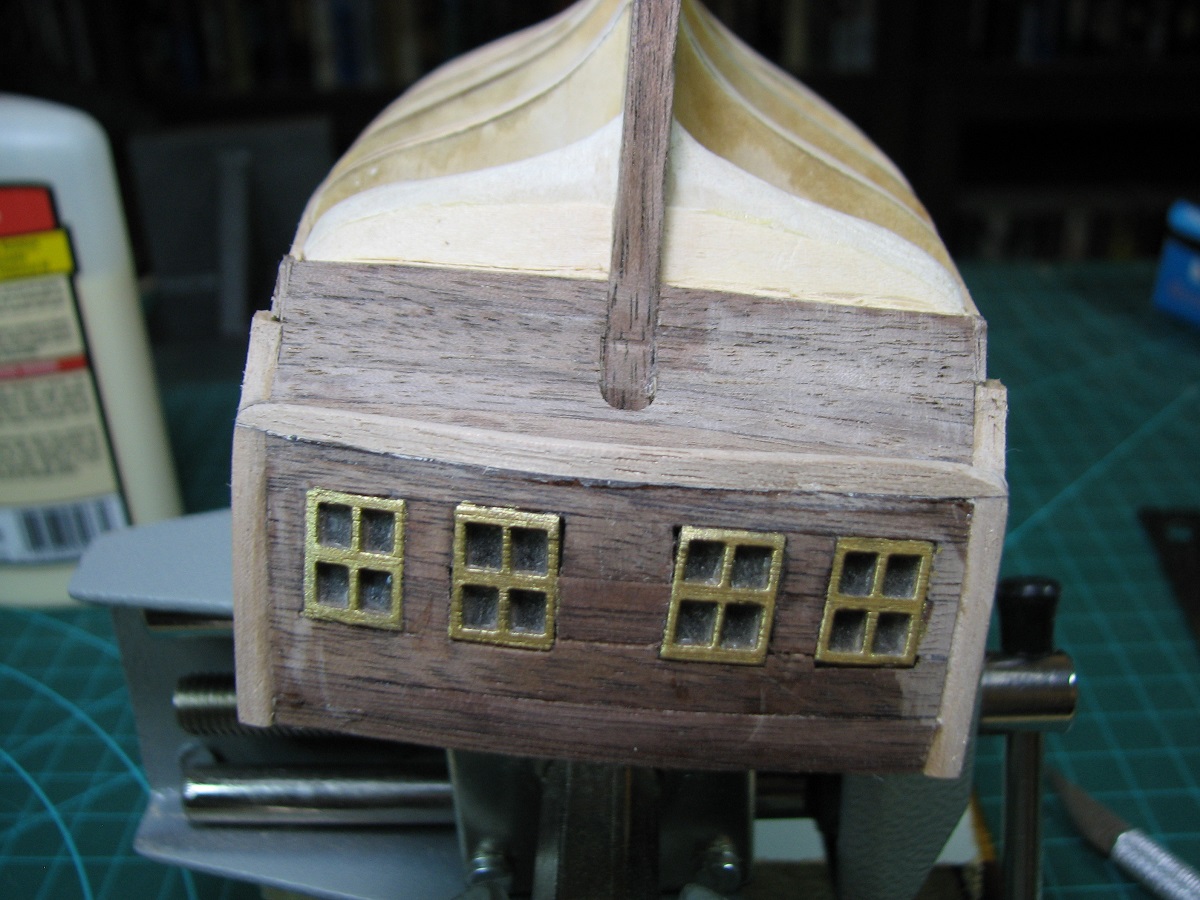
So the stern has been an interesting experience.
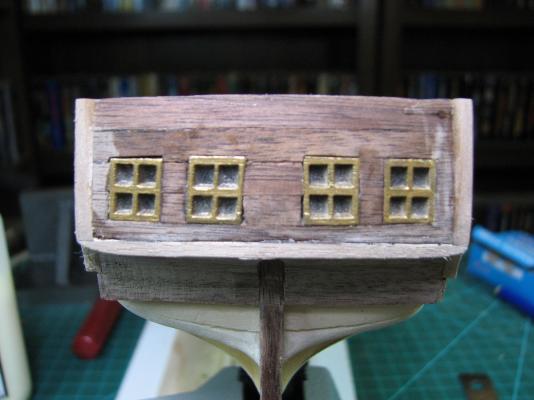
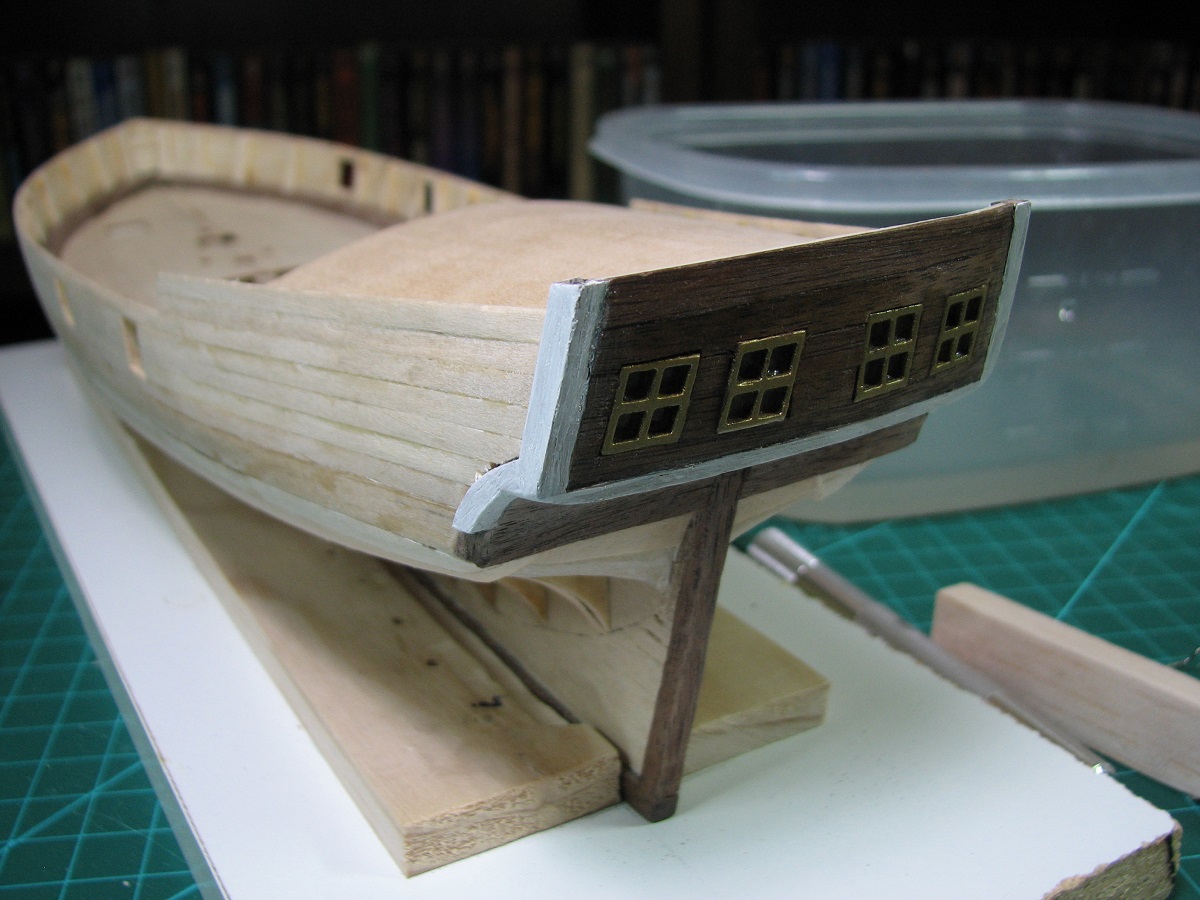
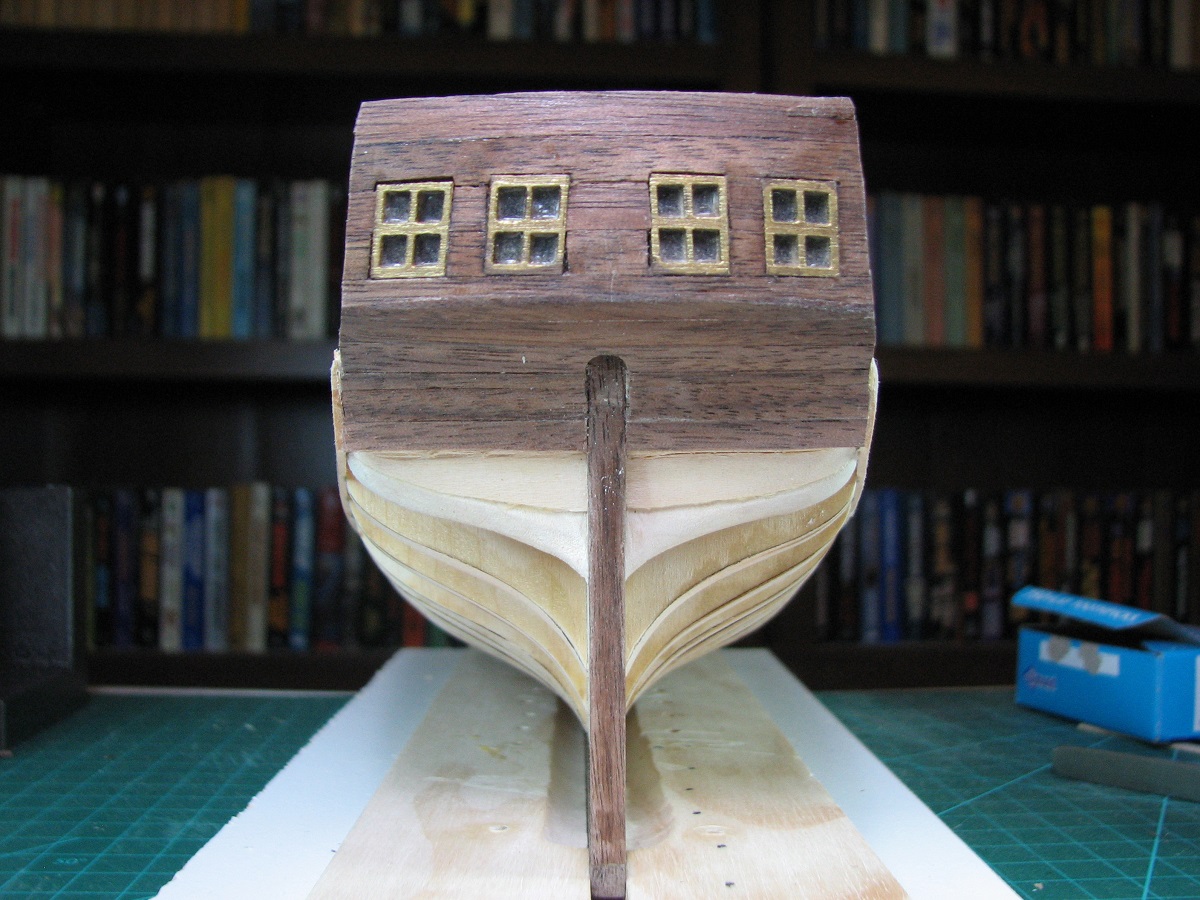
I continued by planking the transom with basswood, marking each plank where the window openings are so that I could open them up when all the planks were in place. I did not trace the windows based on the marks, but rather opened a narrow opening in the center of each, and then slowly opened them out until I was happy with the window fitment and alignment in each opening.
After joining MSW, I read in one of the threads about stuff that could be used to make window glass, and less than a week later I was in a hobby shop and saw a bottle, so I bought it. I finally got to use it!
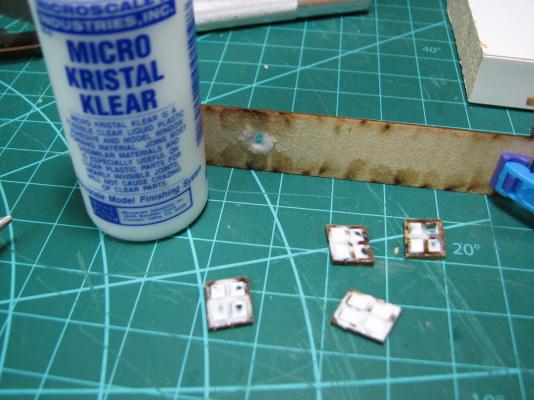

Works fantastic. As I started to try to get the windows placed, I quickly realized that it was going to be a pain in the rear to get the windows in without accidentally pushing them too far in, as the nice window glass that was now in place prevented me from holding onto the inside frames with tweezers. I cut off small bits of planking basswood and glued them into the top and bottom of the openings as window stops. Looking back I wish I'd brought them out slightly as I think the windows might look better if they protruded from the transom slightly. Oh well, next time!

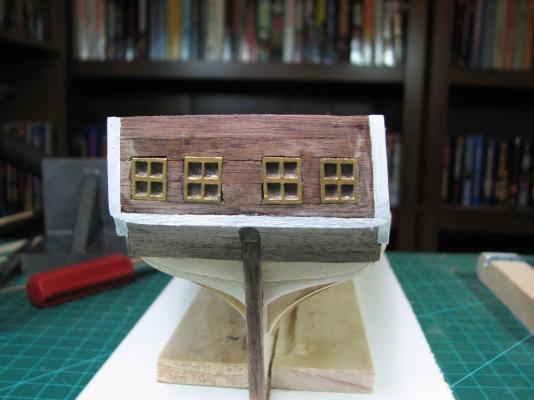
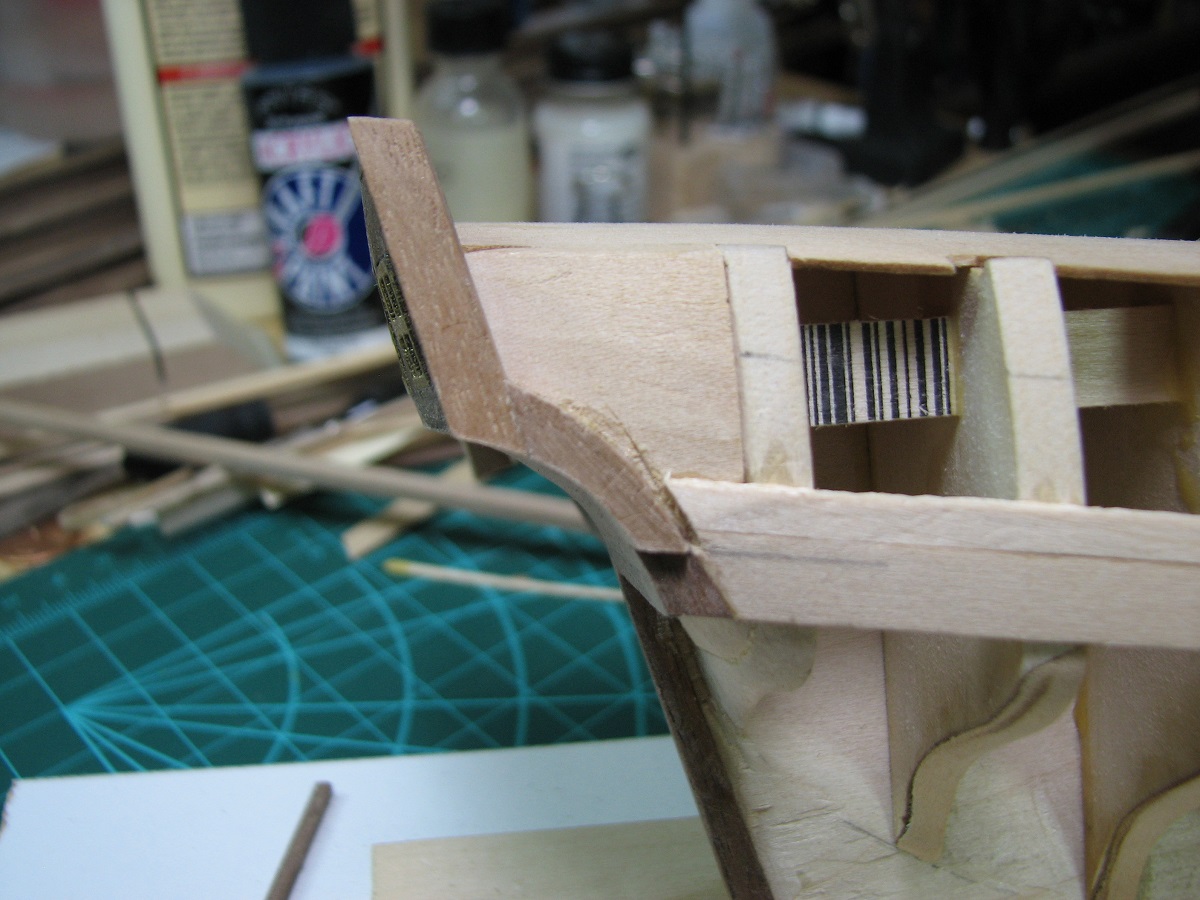
I first tried to place the walnut planks in a single piece, and then cutting in the window openings, but after breaking the narrow parts repeatedly, I gave up and glued the windows in, and then placed short planking sections between them. I am not really happy with some of the gaps I've left though. Since I used CA to place these (in retrospect, I should not have done that) because of trying to maintain the slight arch, re-doing them would be quite difficult, so I left it and will think about how to address the gaps with some kind of filler later on.
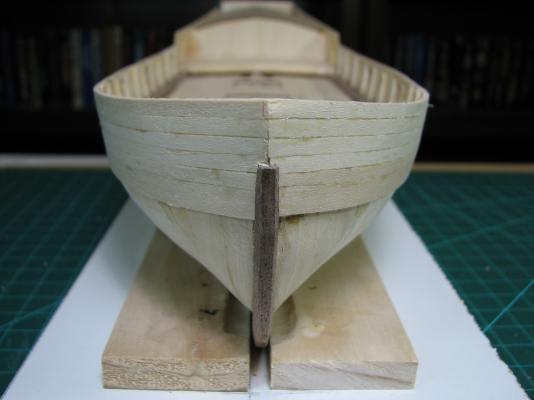
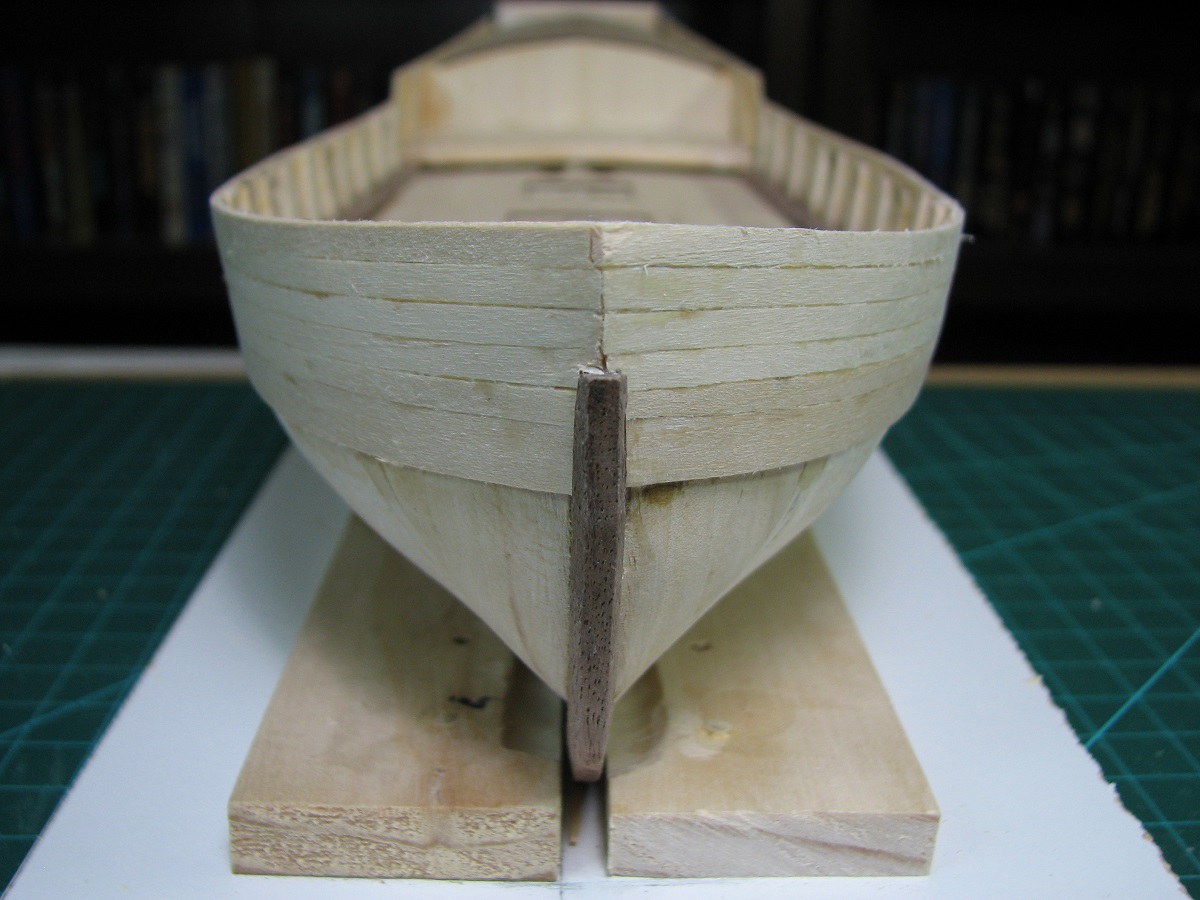
Next I added walnut filler pieces on the stern end of the currently placed hull planks, and put the transom side fashion pieces on.
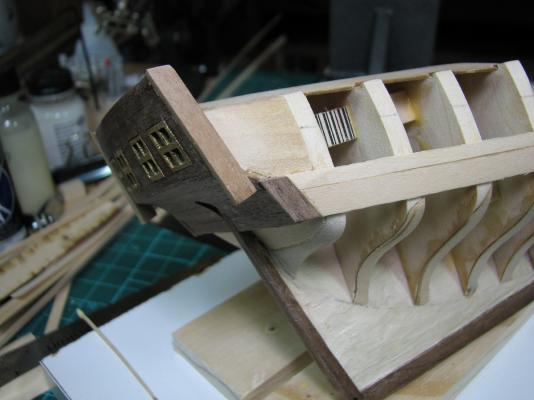
I then started working on the counter fashion pieces. My first attempt didn't make me terribly happy, it just didn't look right to me. It doesn't look all that bad in the picture now that I'm looking at it, but I tossed it. The mark on the planking is where the top of the wale should be later.
My fashion pieces seemed too short compared to the plans and photo's I've looked at, and I think I figured out what is different about my stern (or at least part of it). Somehow when I did the walnut planking on the counter, instead of grabbing another piece of .030 walnut, I picked up a full thickness walnut plank (about .048) which made the entire counter thicker than it should be, pushing the trailing edge of the fashion piece back a bit. I figured I'd just go with it this way, since it really shouldn't affect anything except make my stern shaped slightly different.

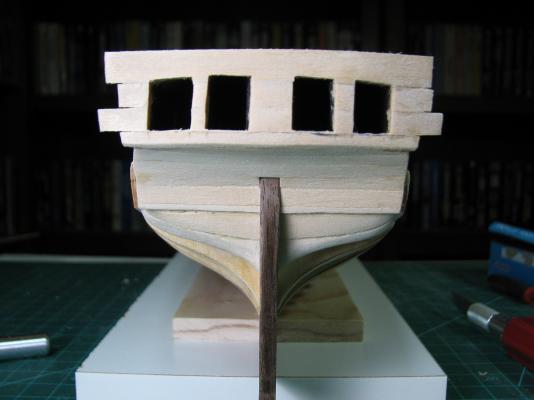
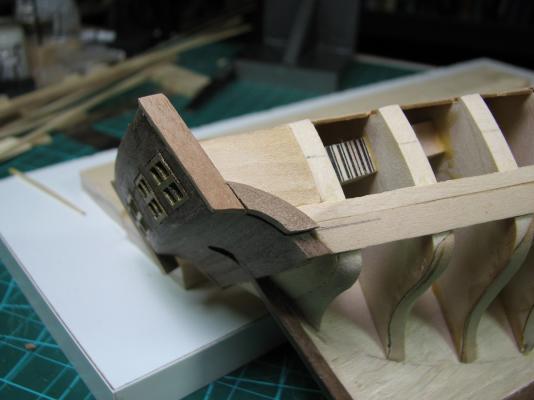
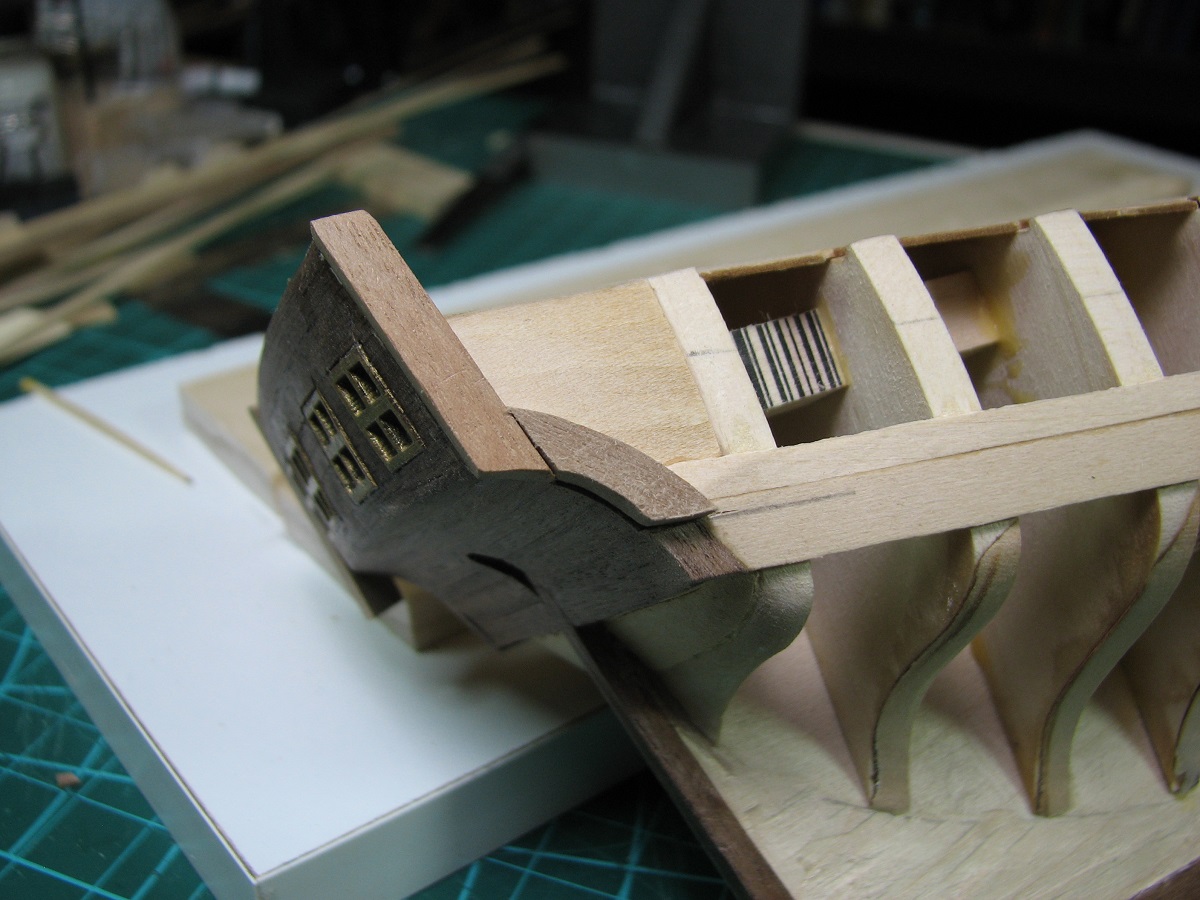
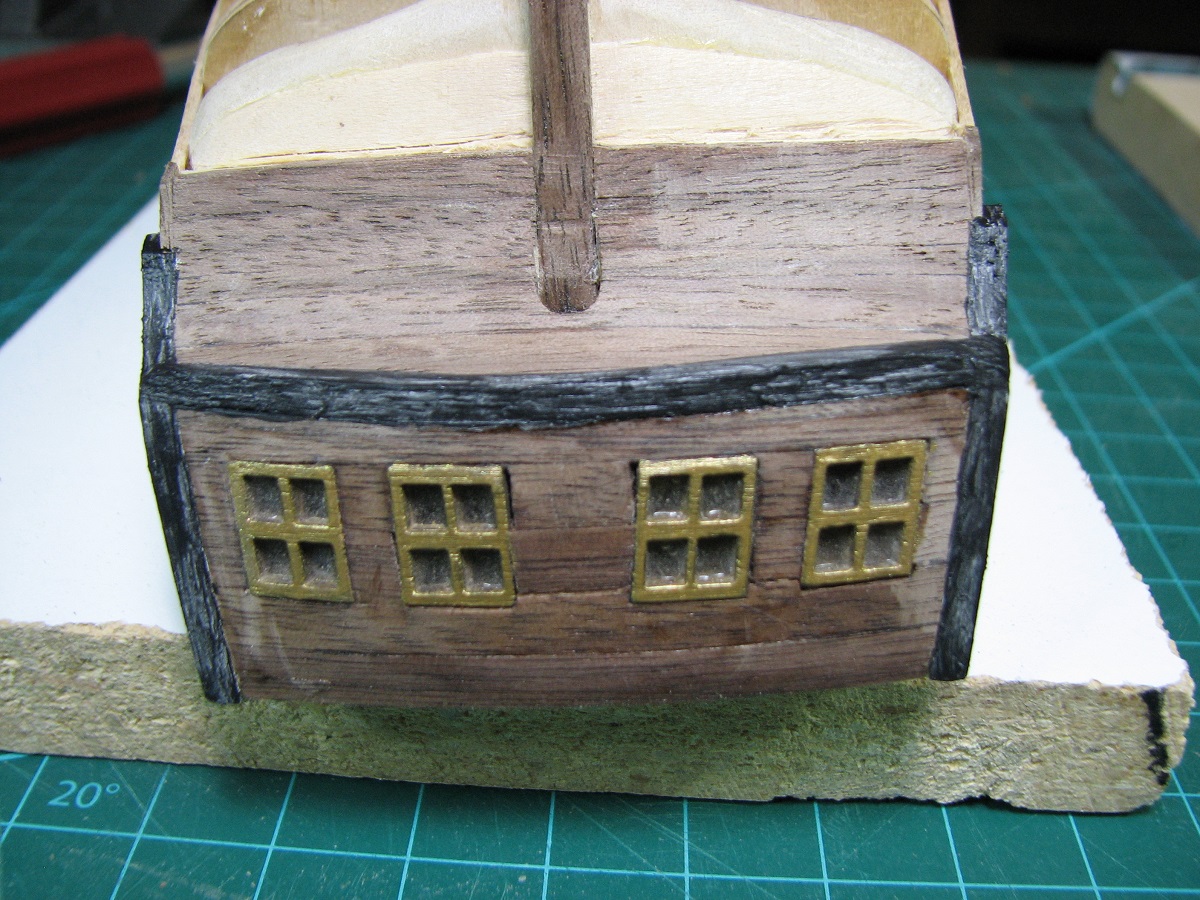
For my first 'intentional' change to a model, I've decided to 'box' the transom by adding another 'fashion piece' (for lack of knowing what it should actually be called) at the top of the counter. I had to soak this piece of walnut for about an hour, and then I sort of steamed it by placing it in the microwave for a minute wrapped in a wet washcloth. It was still pretty hard to get to take the bend, but it didn't splinter at all, so I'll take it.

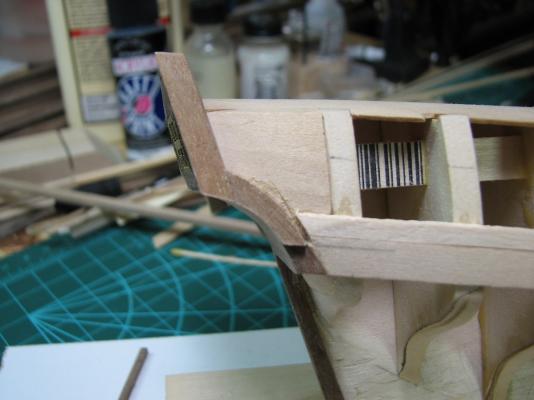
As part of my change to 'box' the transom, I intend to extend the black from the black strake to all the fashion pieces and the taff rail. I decided to paint these pieces now, prior to adding all the other planking that will butt into them, and I started with primer. I then started with the black. I think I need to do some research on prepping wood for paint, because I'm really not happy with how the paint looks, it's very rough compared to most of the painted builds I've seen here. The first coat of black didn't cover well at all.
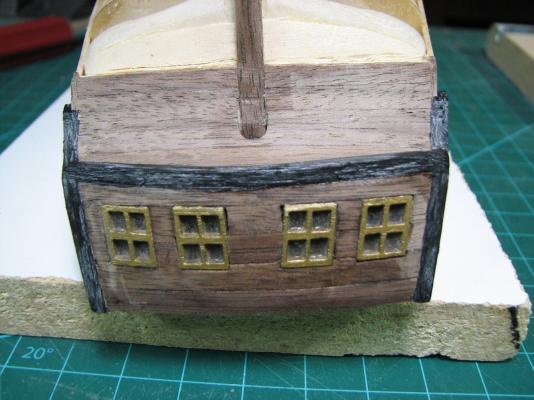
I ended up with 4 coats of black. Painting has never been a strength for me in modeling, and it showed as I managed to get paint where it shouldn't go in several places. After the black had dried, I tried to clean up the areas where I got black on the planking, but I think I screwed up and exposed more primer and fashion piece wood than I cleaned up on the planks.
Oops, hit post too soon, adding pictures.
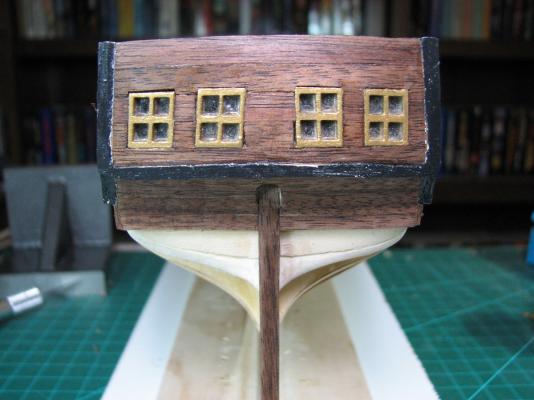
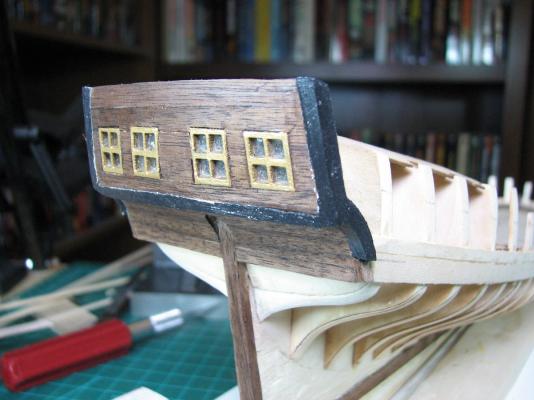
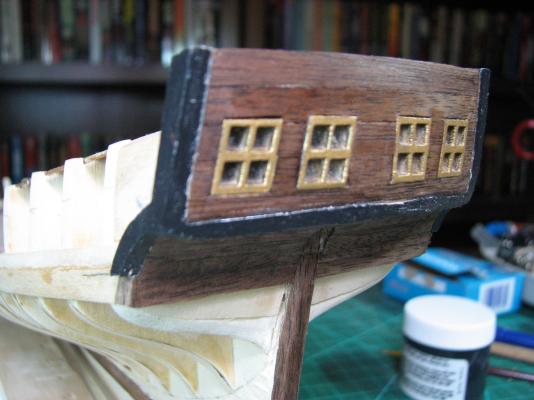
I will revisit the stern later and clean up the fashion piece painting, as well as hopefully figure out a way to do something about the gaps around the windows. I think I'll probably sand the fashion pieces all down smooth and try again.
For now though, I'm moving on, as I'm kind of tired of messing with the stern.


Sakonnet Daysailer by piperjoe - Midwest Products - SMALL
in - Kit build logs for subjects built from 1901 - Present Day
Posted
Best of luck Joe - Will miss watching your workmanship.