HOLIDAY DONATION DRIVE - SUPPORT MSW - DO YOUR PART TO KEEP THIS GREAT FORUM GOING! (89 donations so far out of 49,000 members - C'mon guys!)
×

Griphos
-
Posts
105 -
Joined
-
Last visited
Content Type
Profiles
Forums
Gallery
Events
Everything posted by Griphos
-
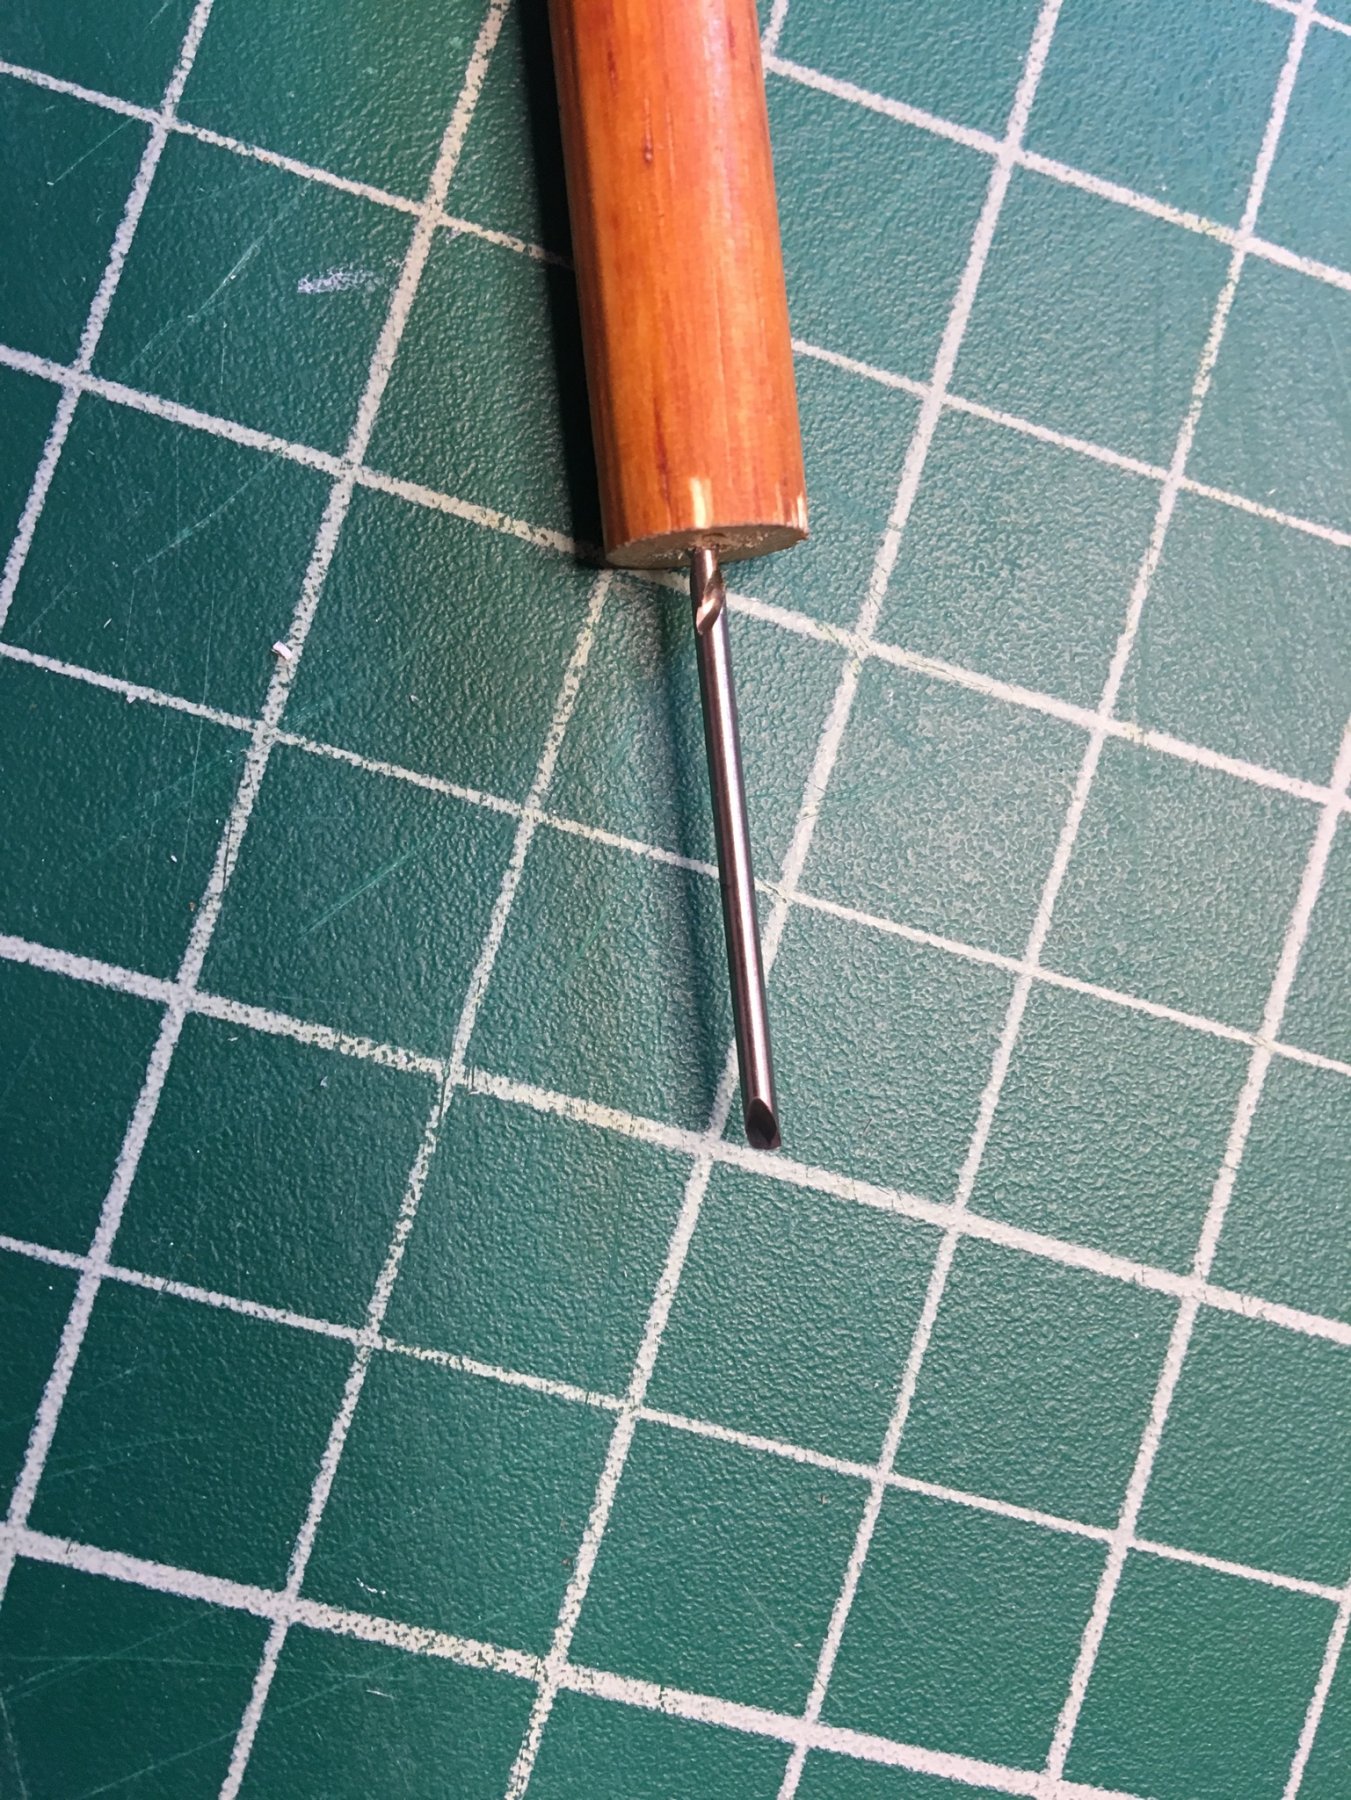
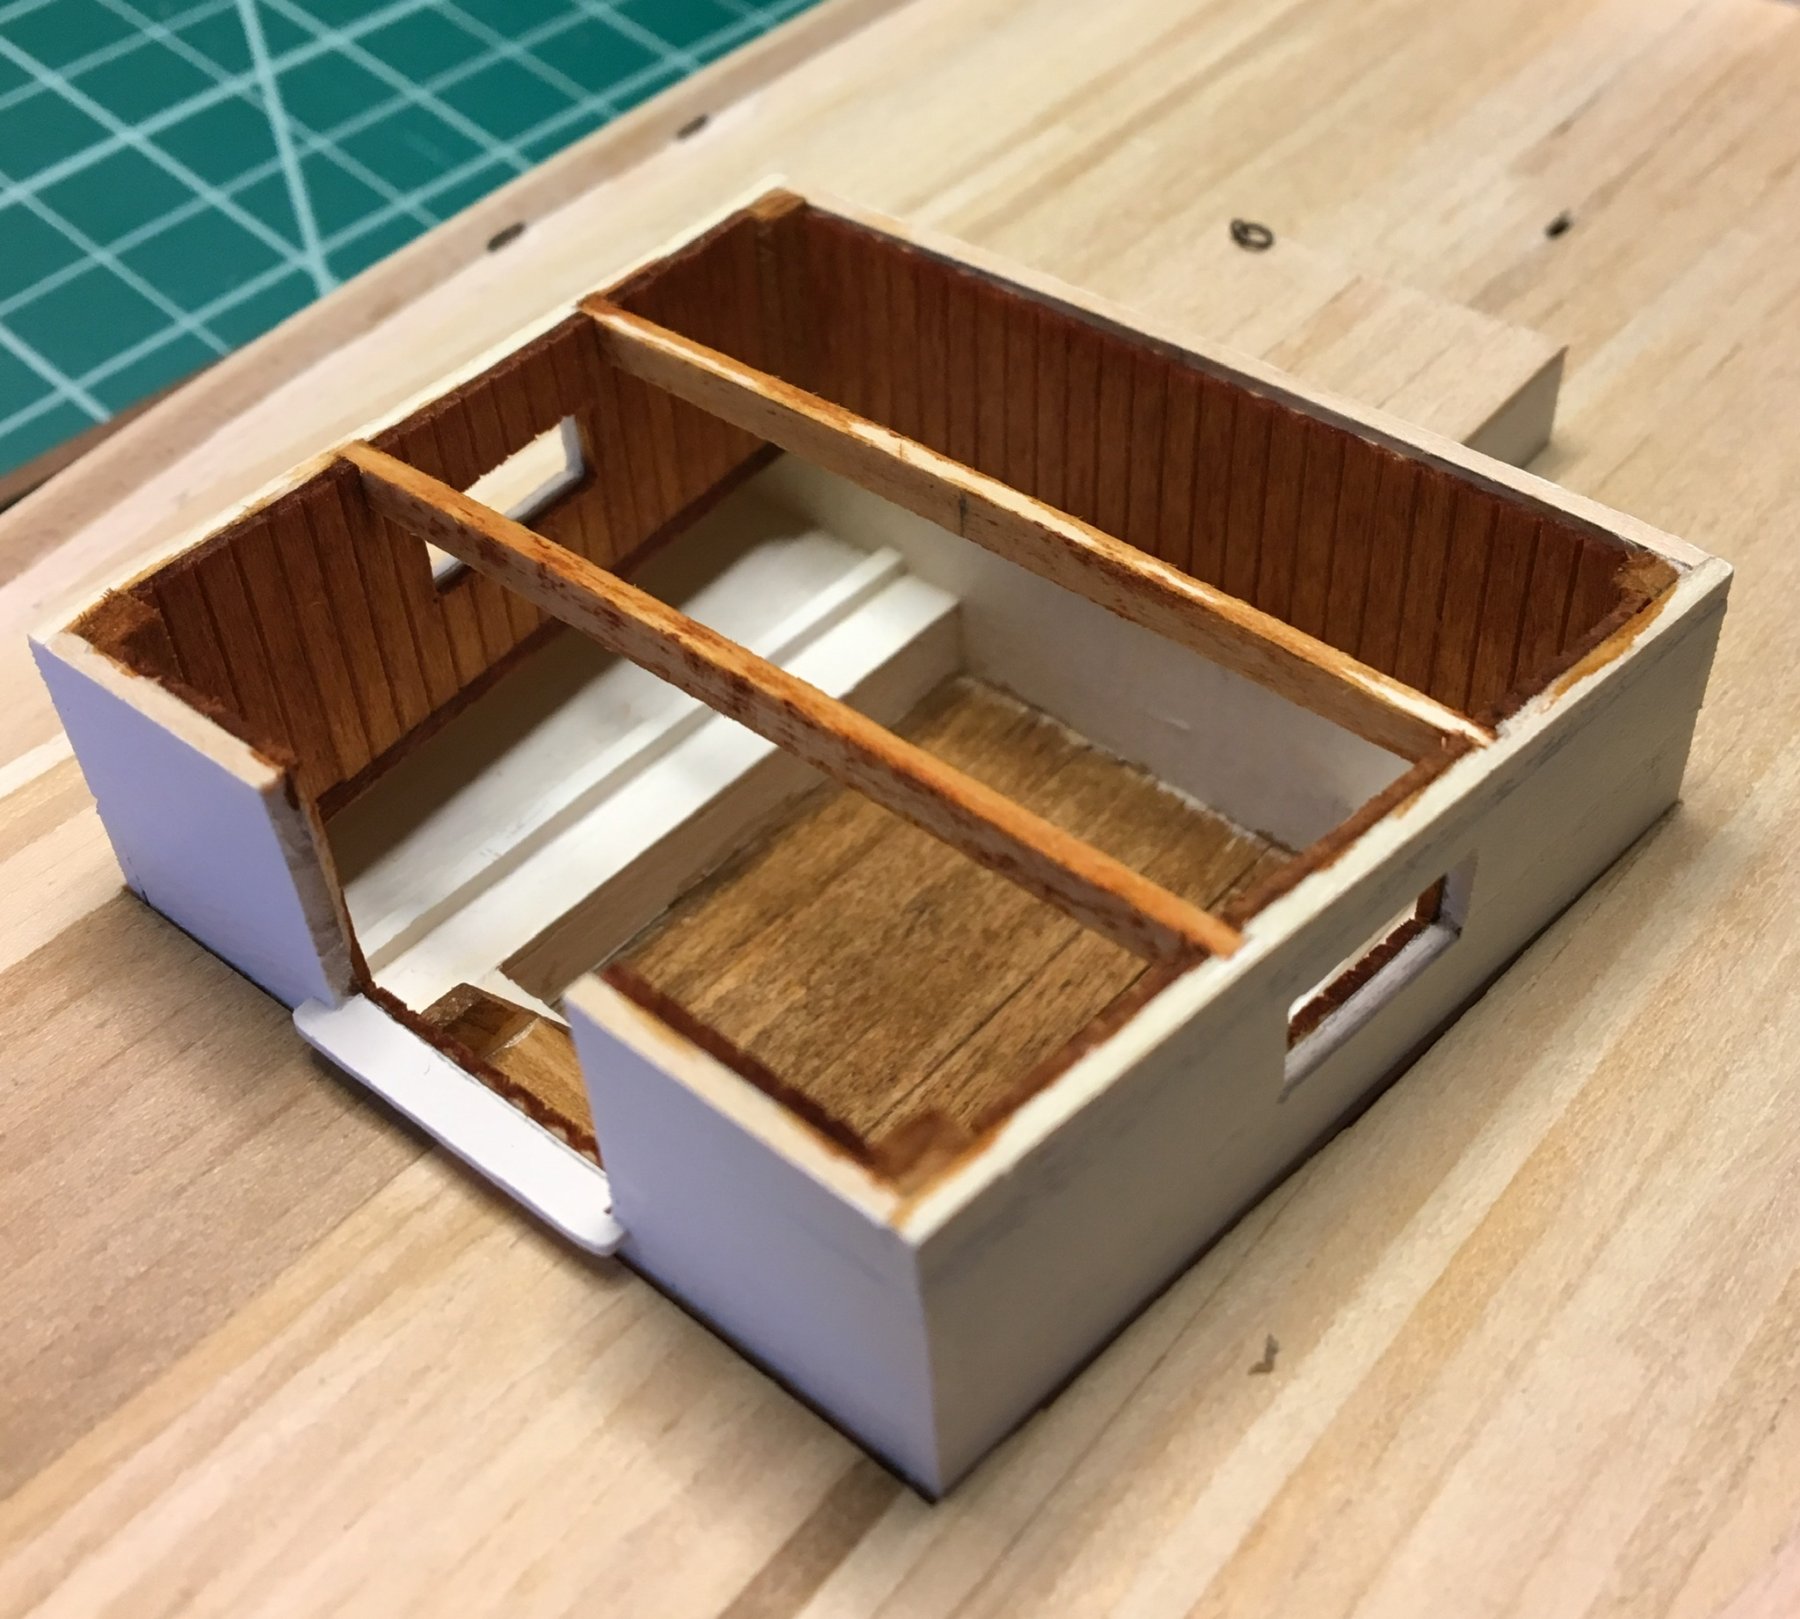
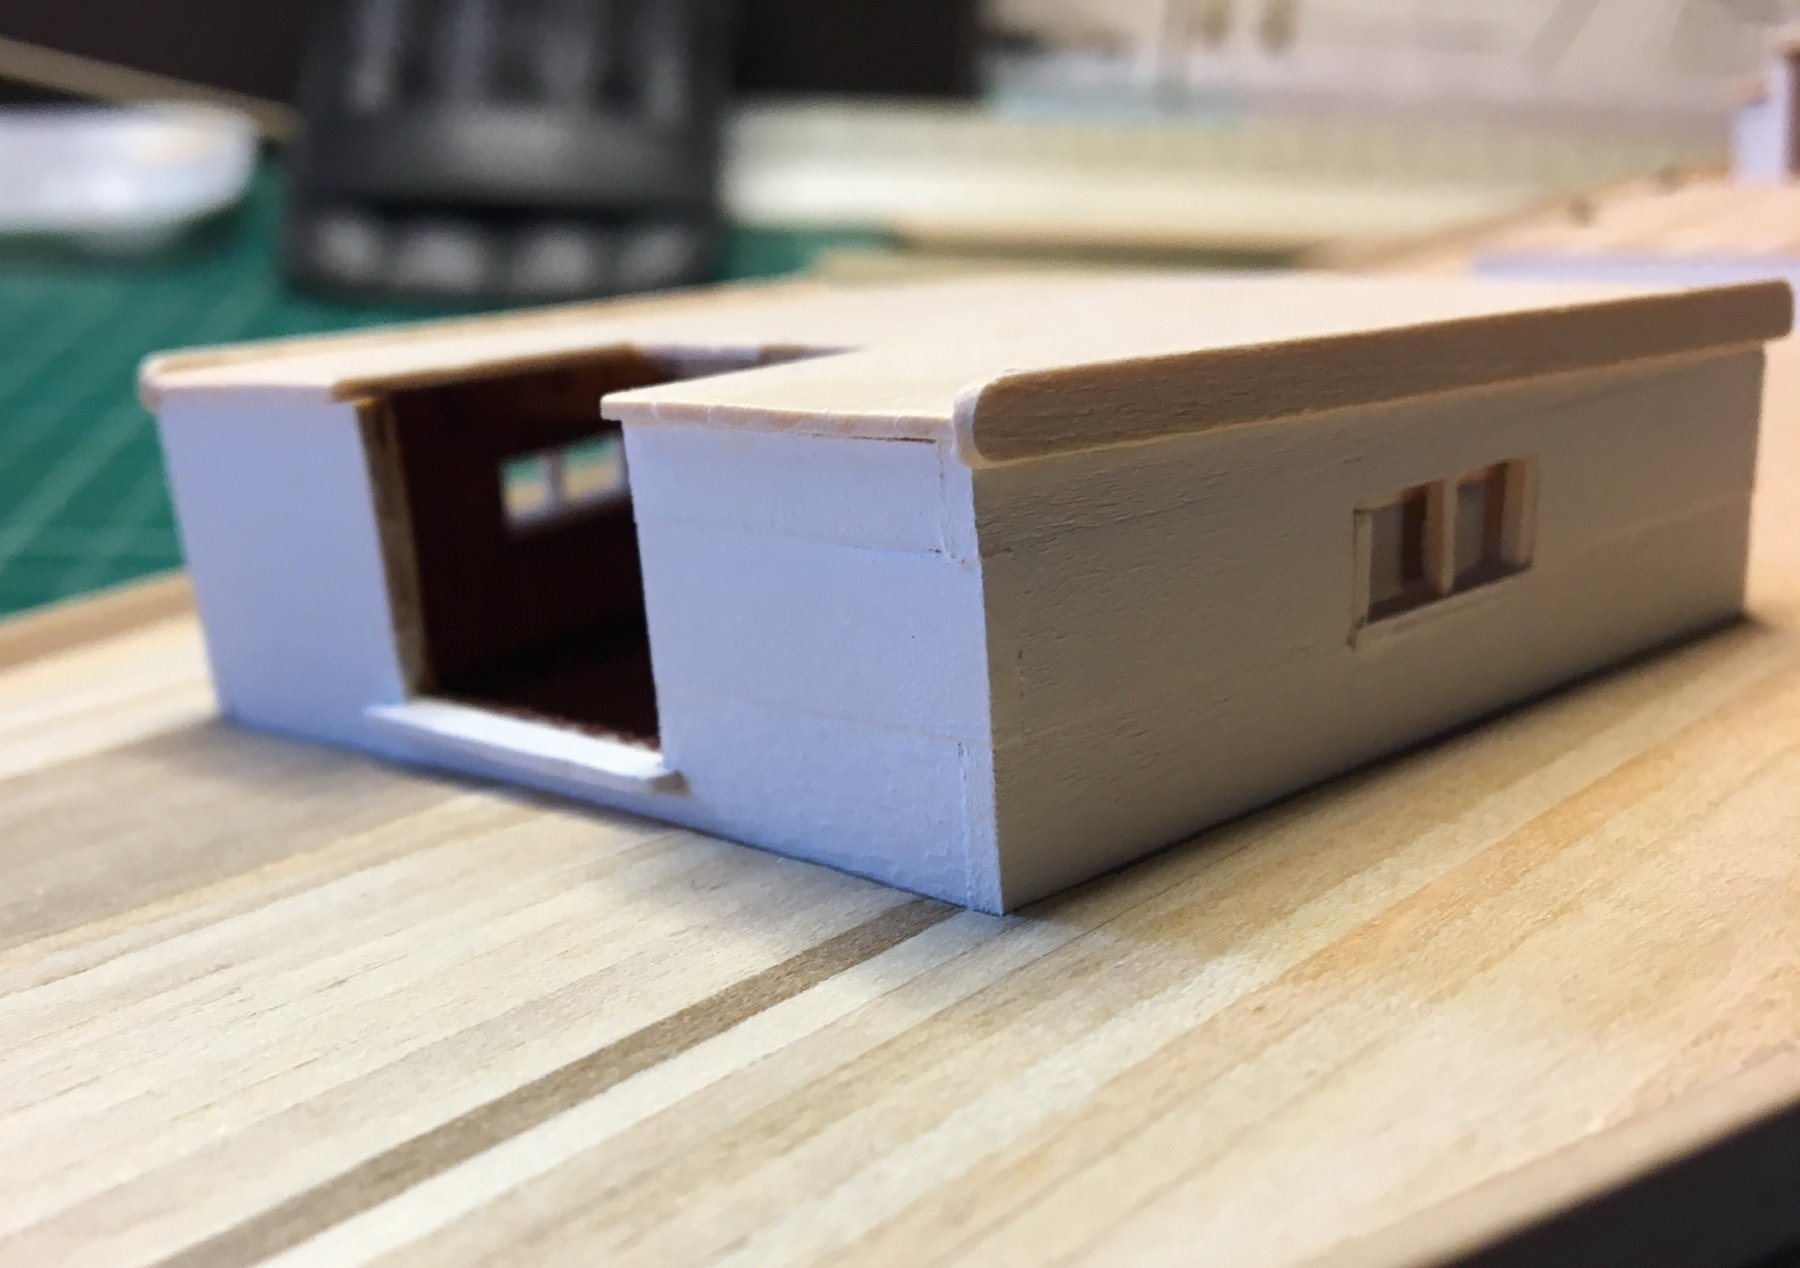
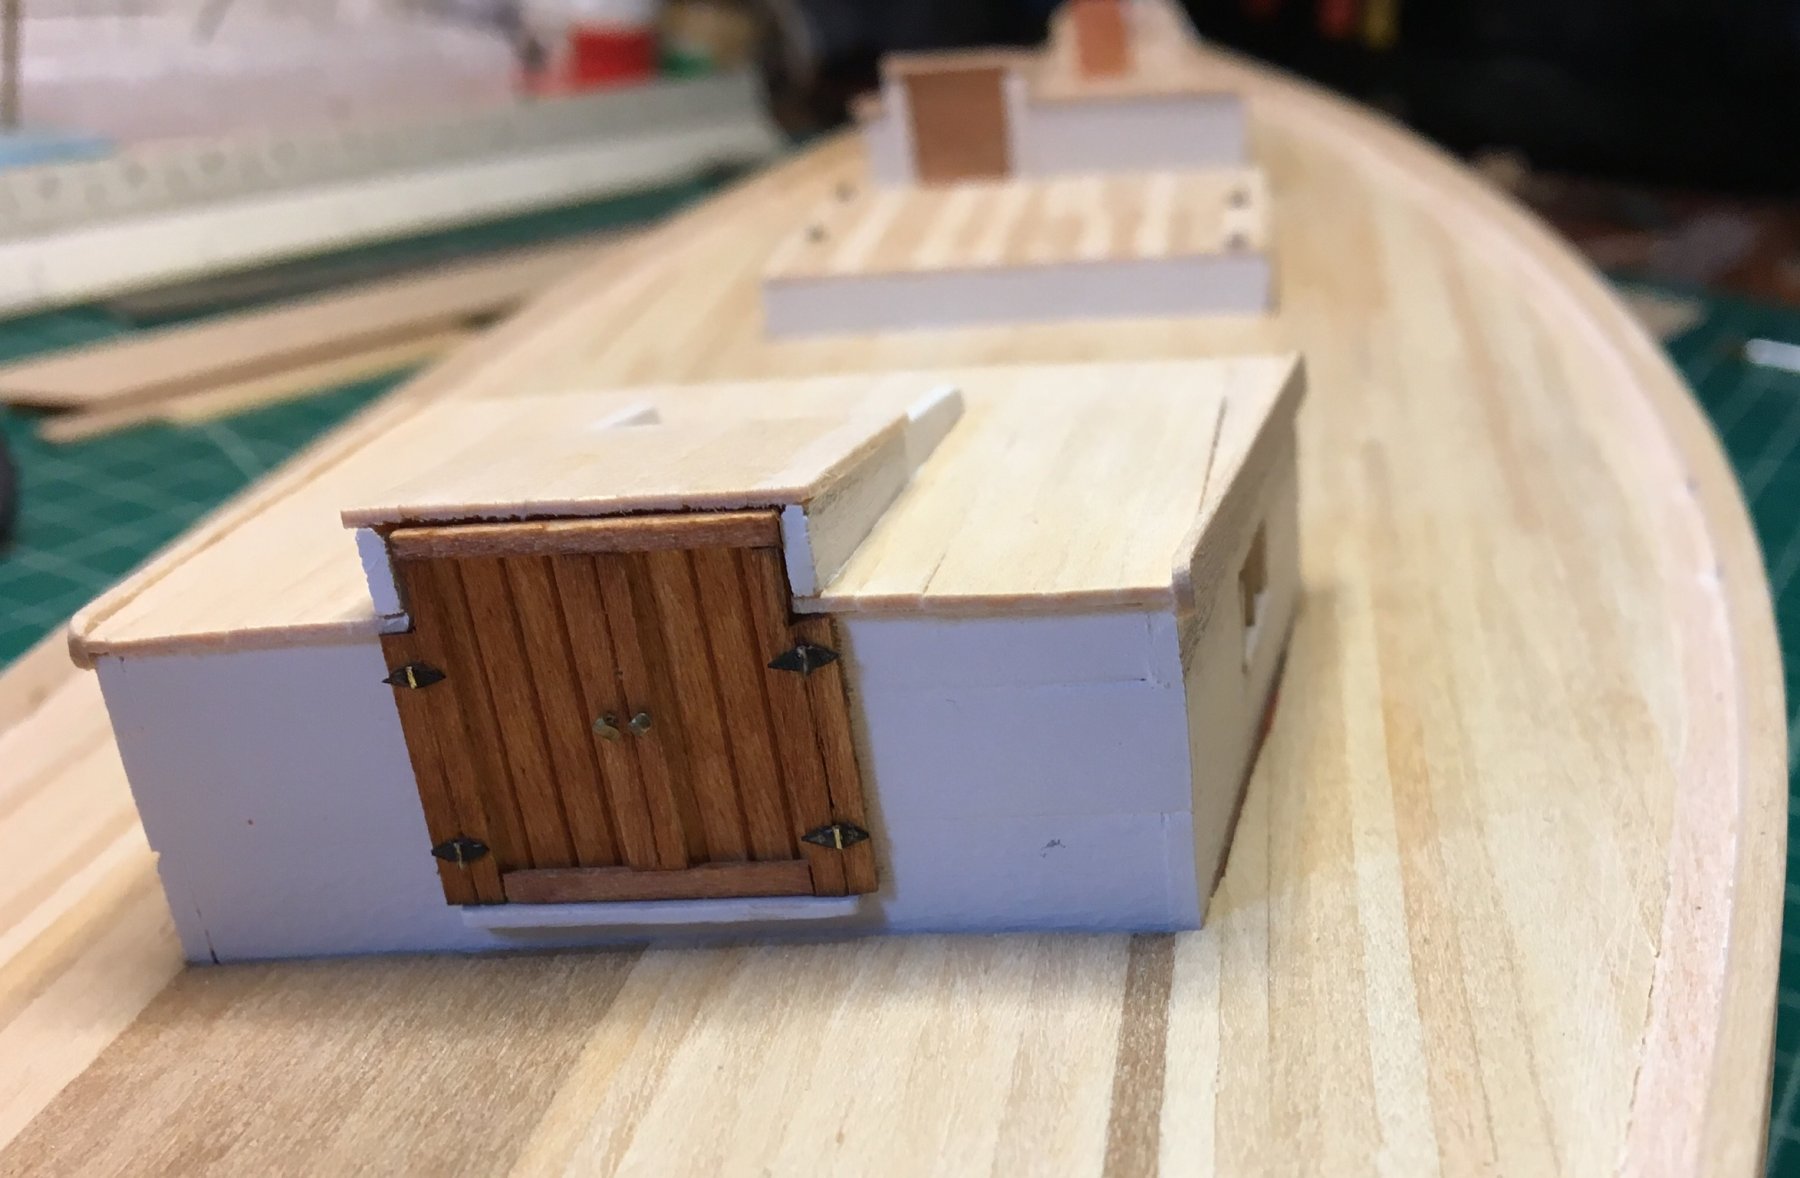
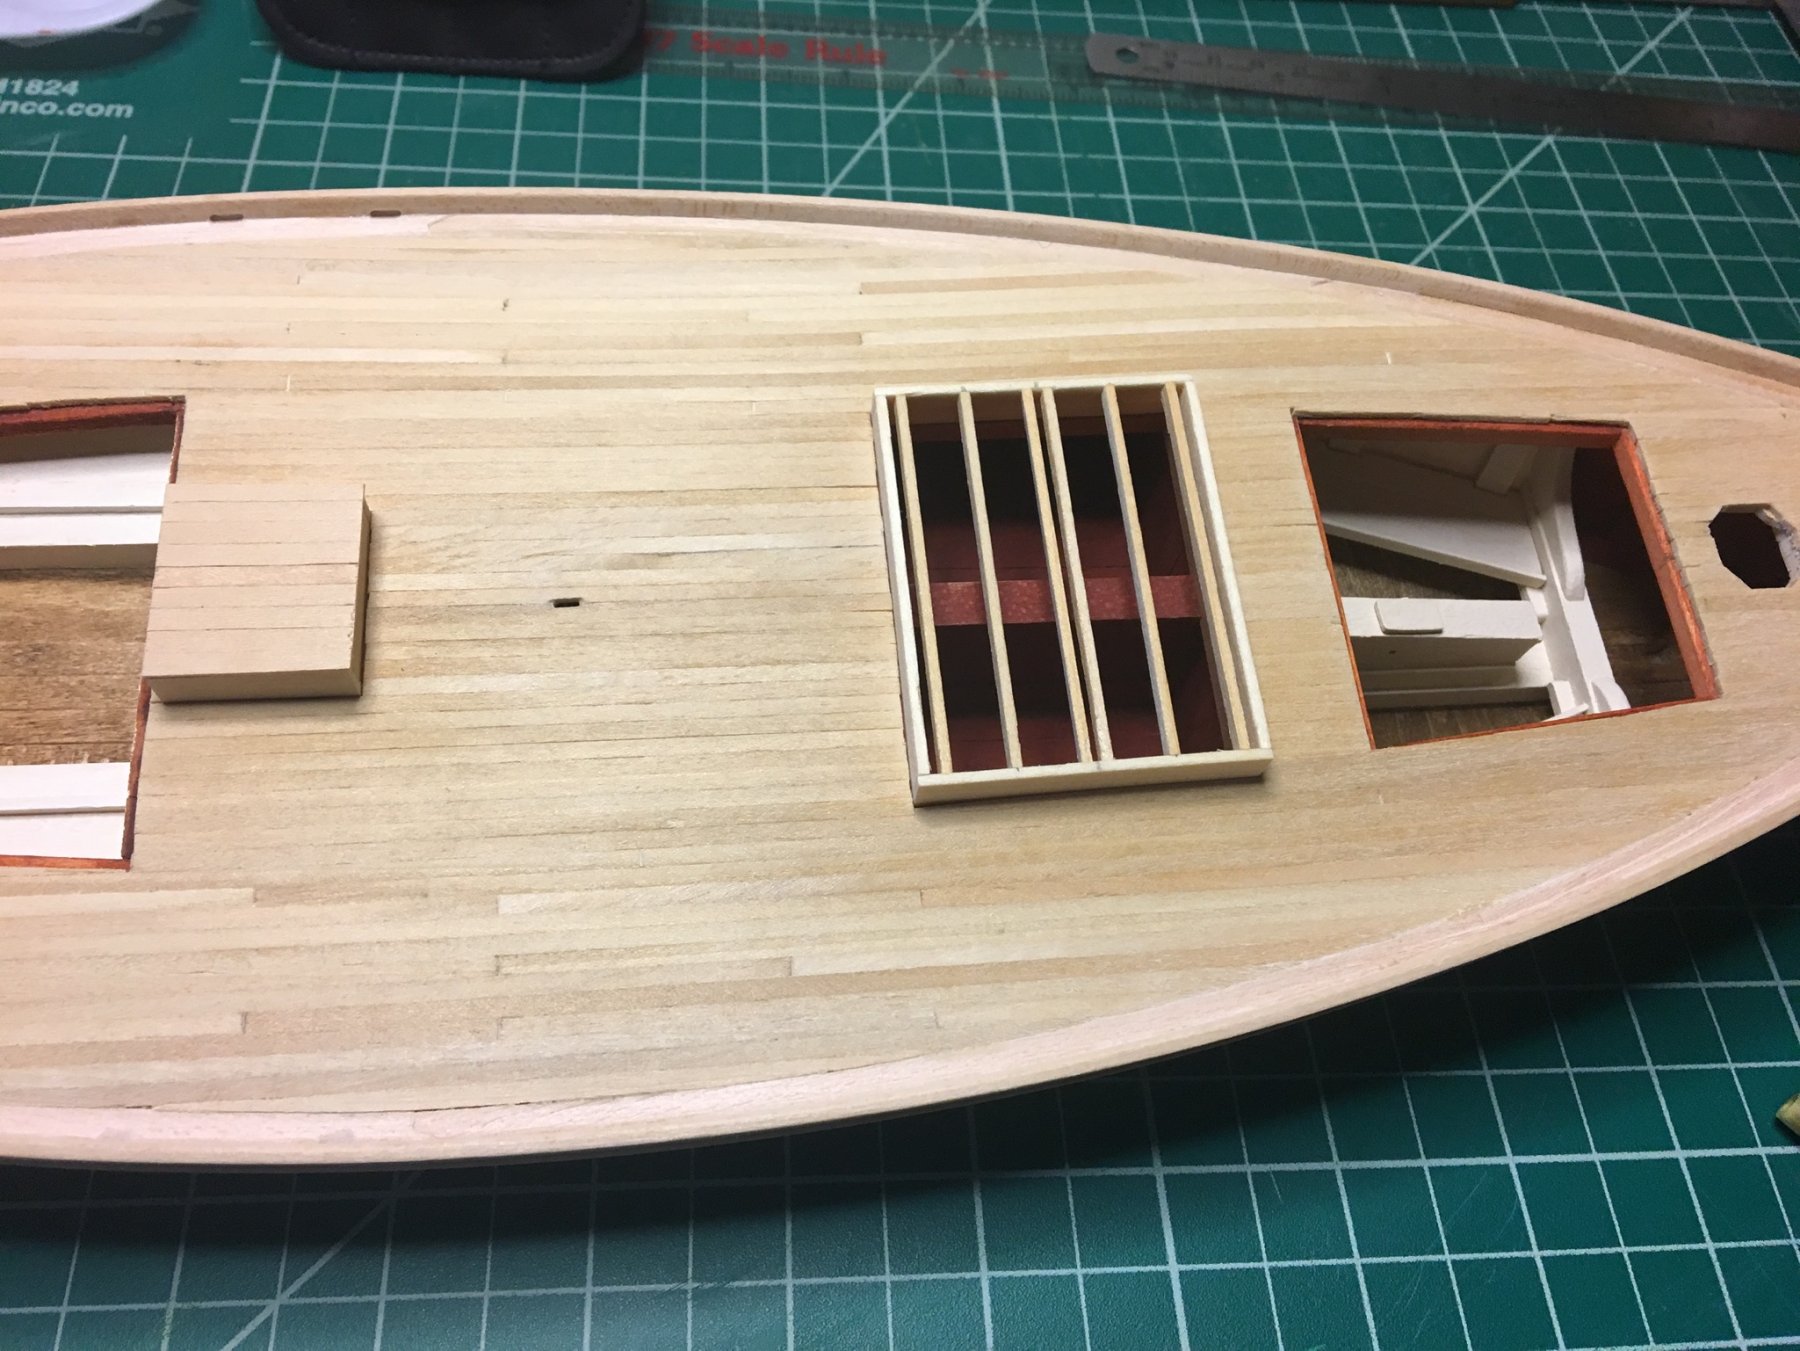
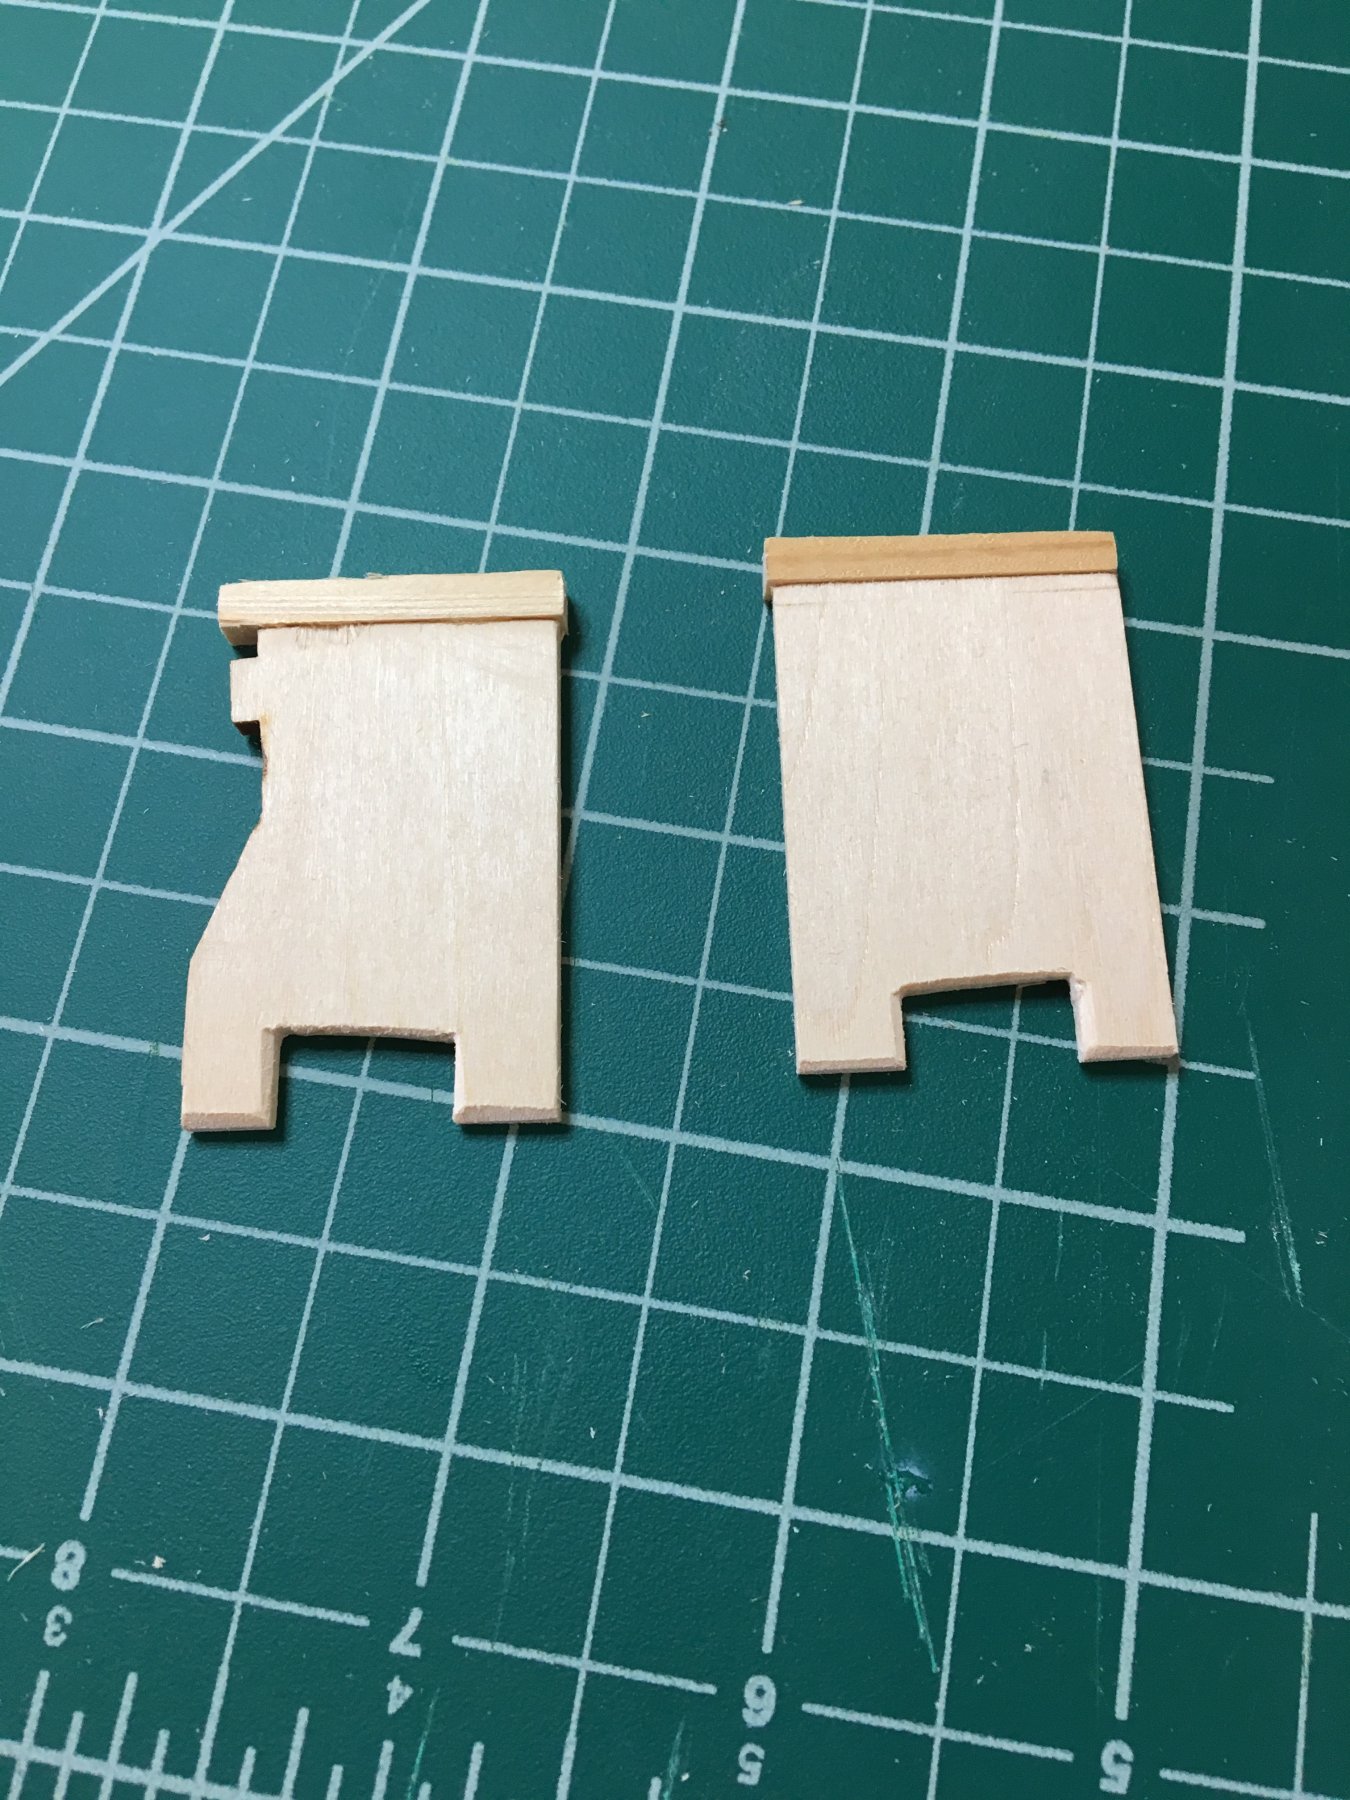
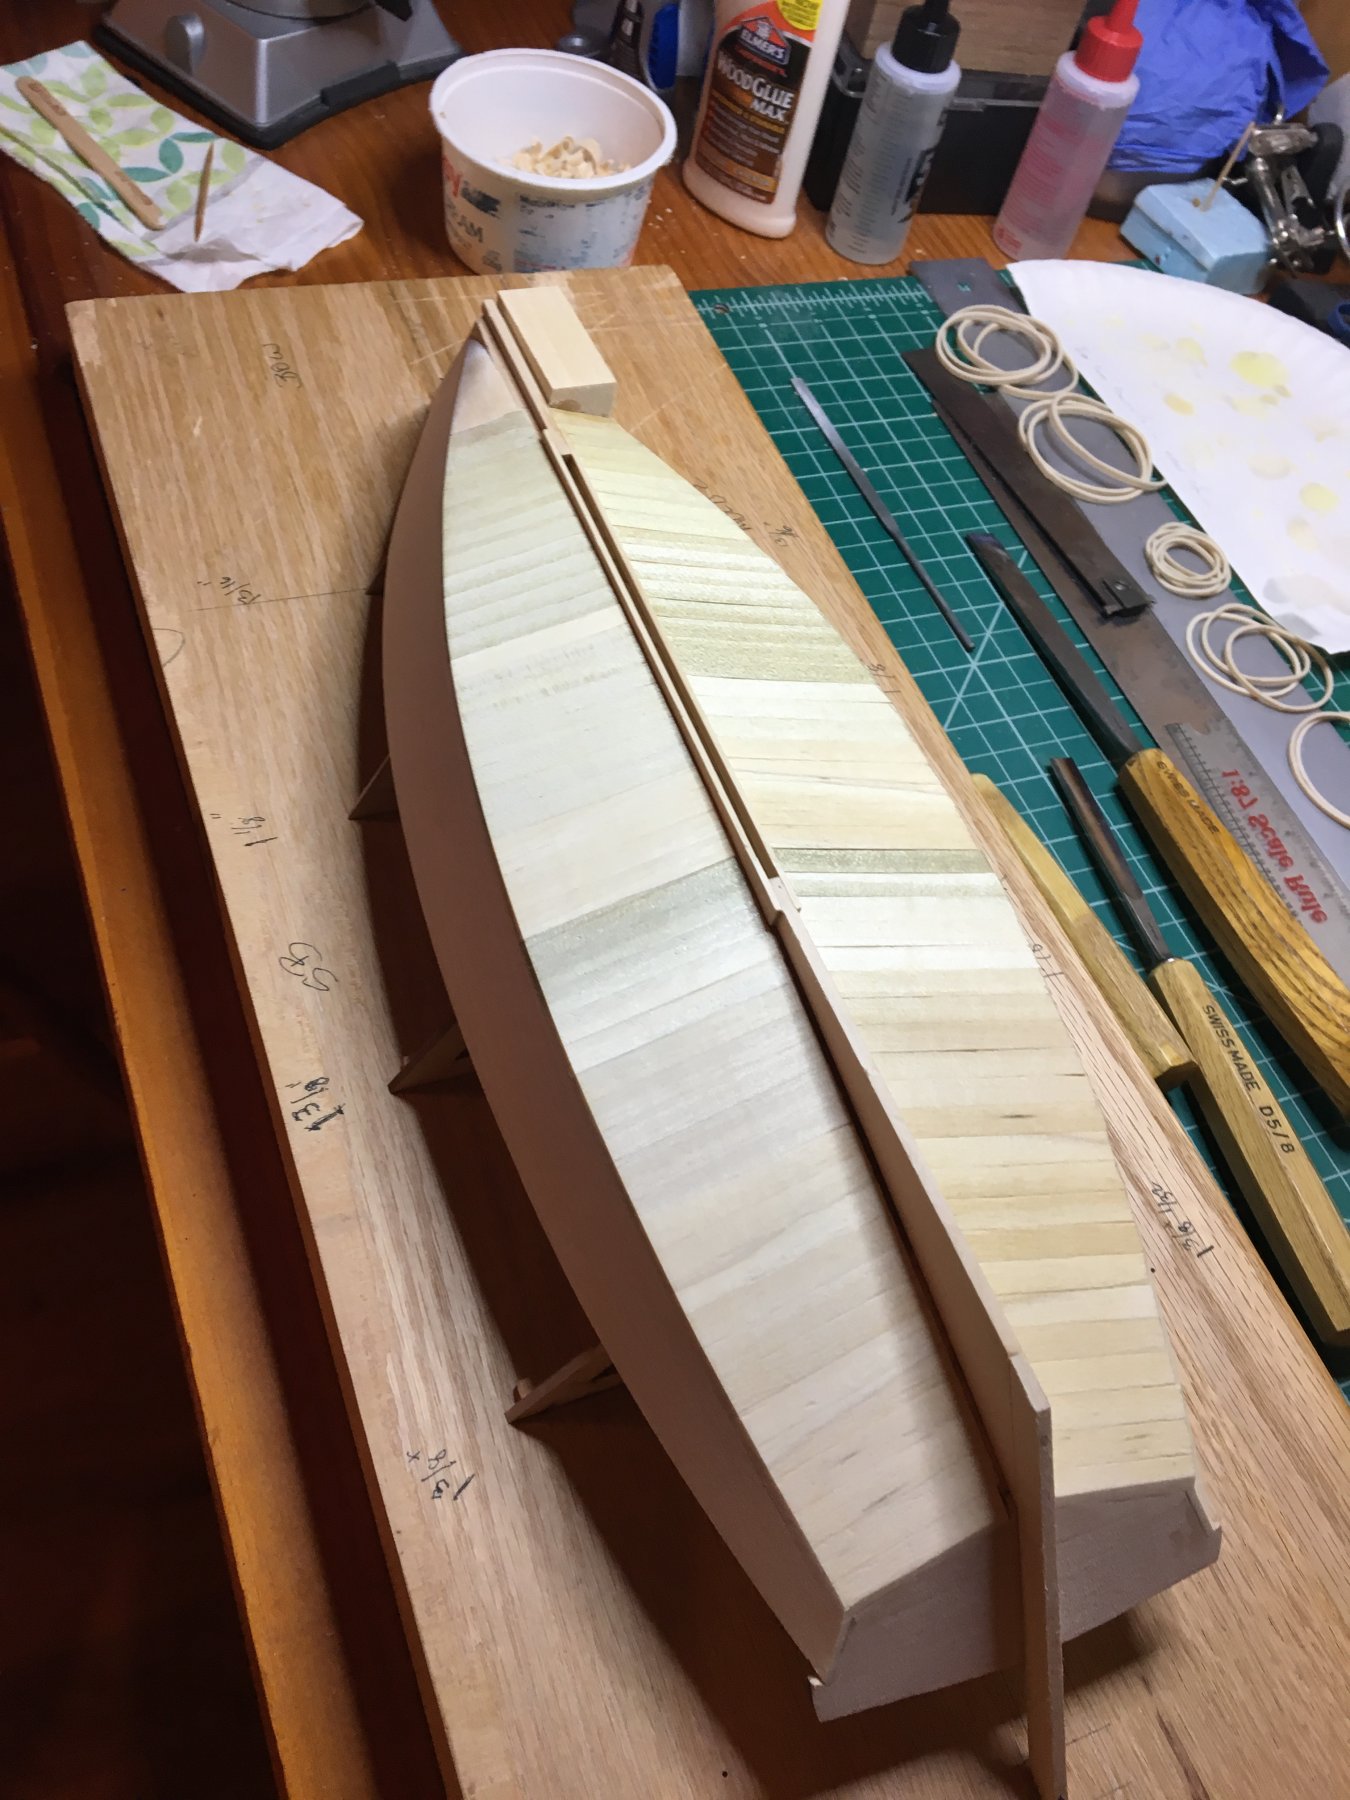
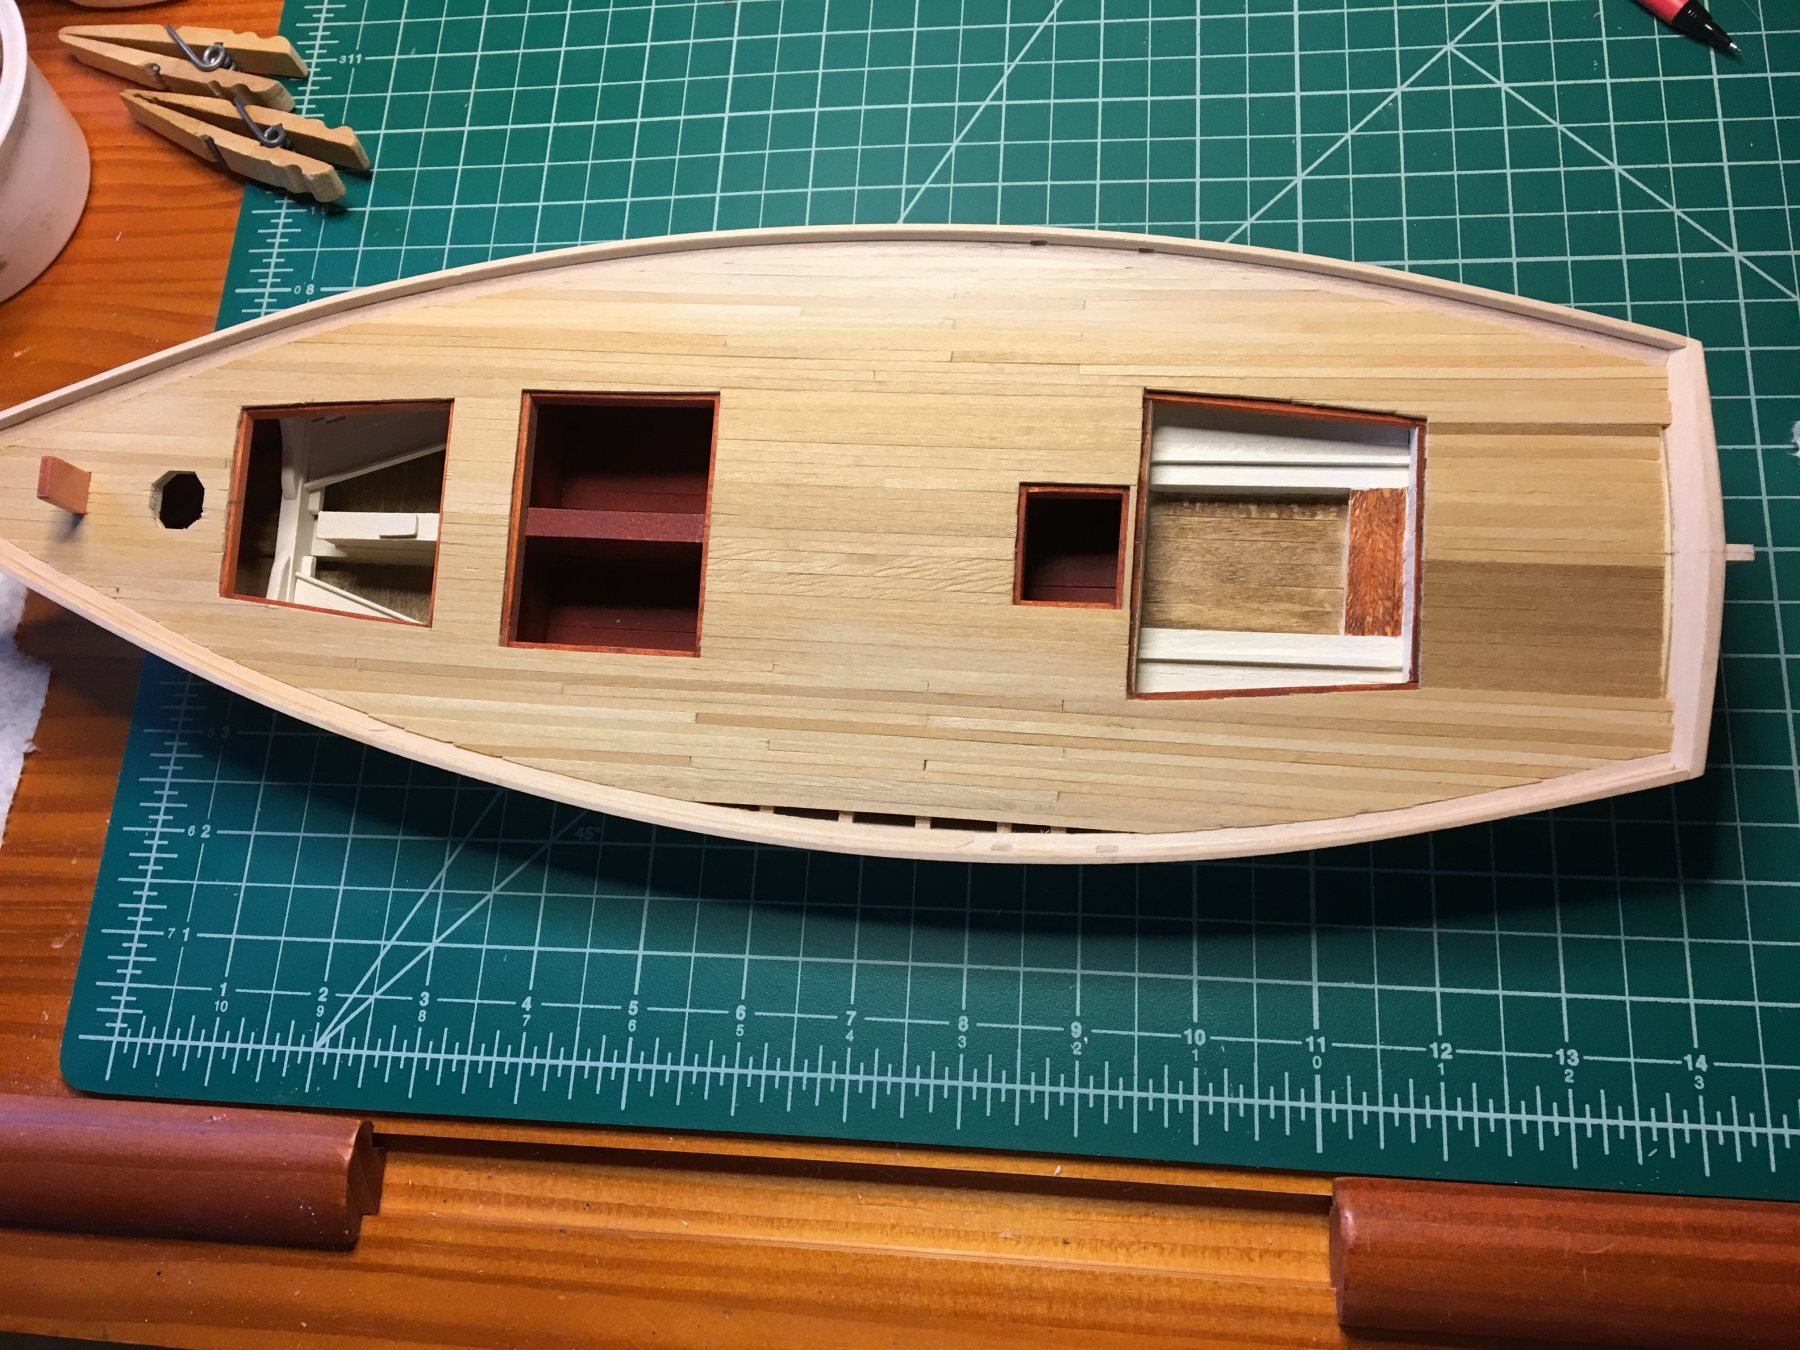
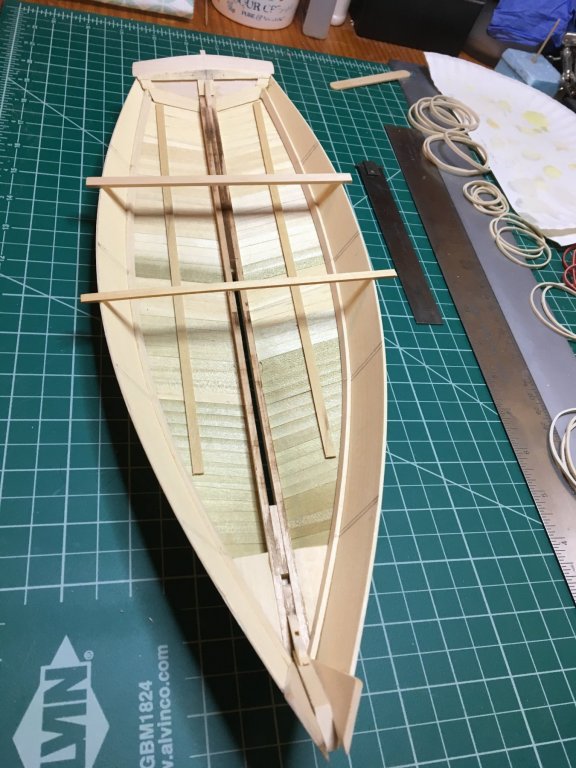
 I'm making all the cabins and hatches removable. I decided to notch the walls for the beams for this one, so I made a little chisel from a drill bit to do that job. I want the aft cabin to look nice, and pictures from the Kathryn's cabin showed a nice, richly colored paneling that I wanted to emulate. I used some scribed paneling left over from HO modeling days and some aniline dye. I'll build a little stove, and probably a book shelf for the cabin as well. I didn't like the idea of external window frame molding as the plans and SiS article called for. From the pics I've seen, the fenestration seems simpler. So I just made a sill, and then used small square stock I cut with the X-acto as molding to retain the glazing. I let the roof of the forward cabin overhang a bit on all sides. But I got to wondering why I never see grab rails on the roofs of these cabins. So, I decided to add a molding to the edge of the roof of the aft cabin that extends above the roof as a hand hold. I don't think I've ever seen this on a boat, but it seems to be practical, and I kind of liked it, so I left it for now. I'll decide later whether to keep it. I made little hinges from some spare brass, cut to shape, and glued a little brass wire to serve as the pin/hinge area. I used some brass nails for the door knobs. I used more of the paneling as the back surface for the doors. I see I need to scribe the door join all the way through the top and bottom rails of the door (ooops!). Time to make the steering box (and maybe that cabin stove) now. This is where the build stands at the moment.
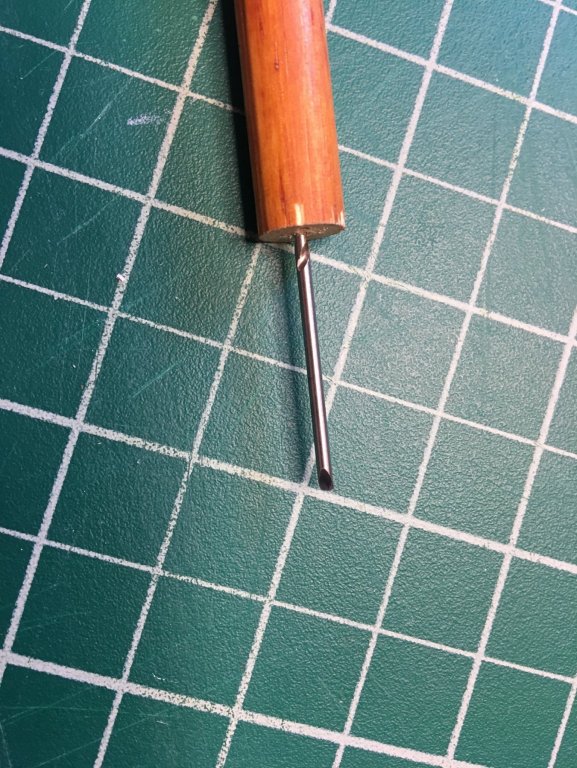


-
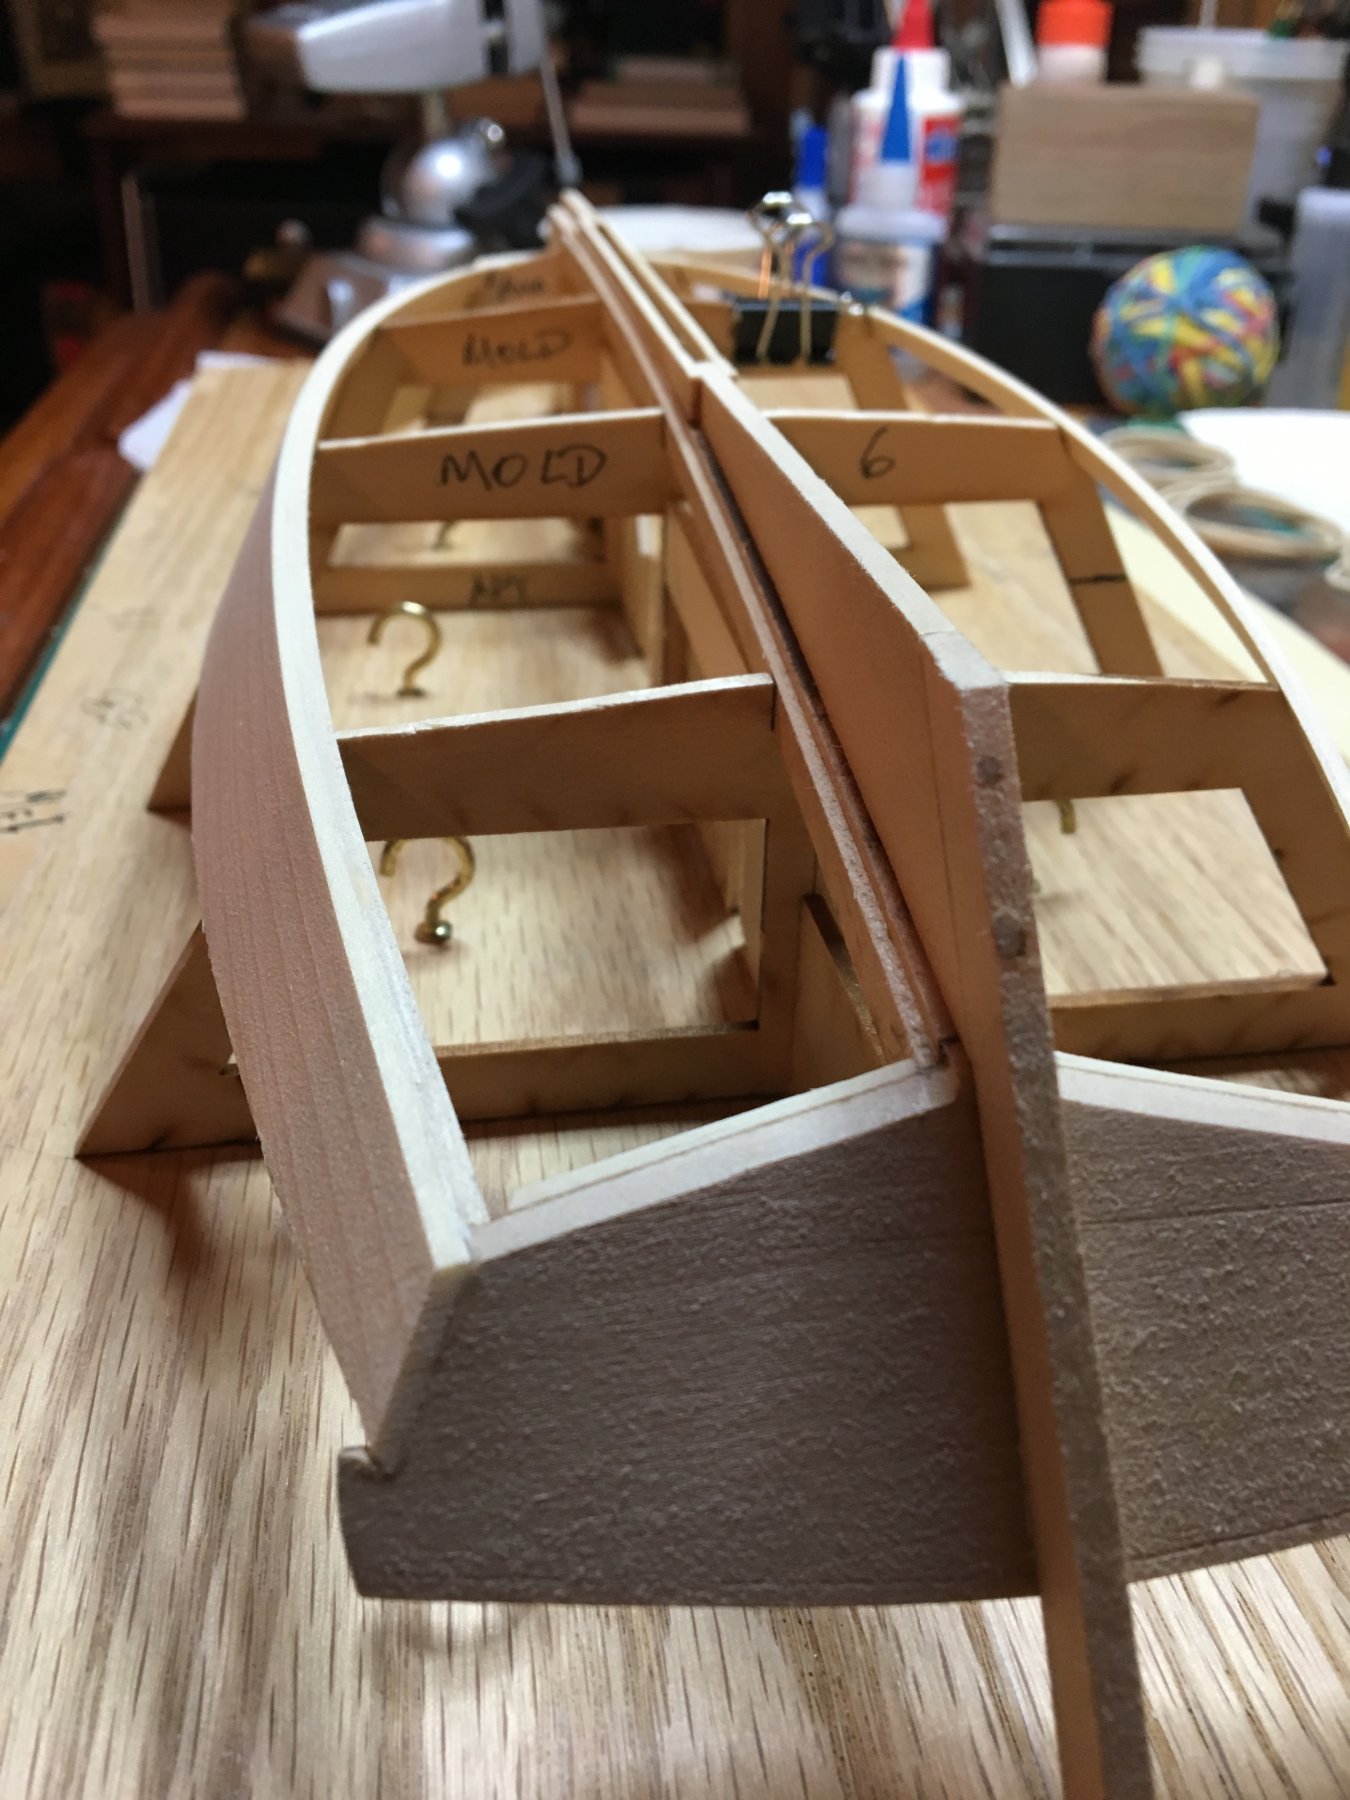
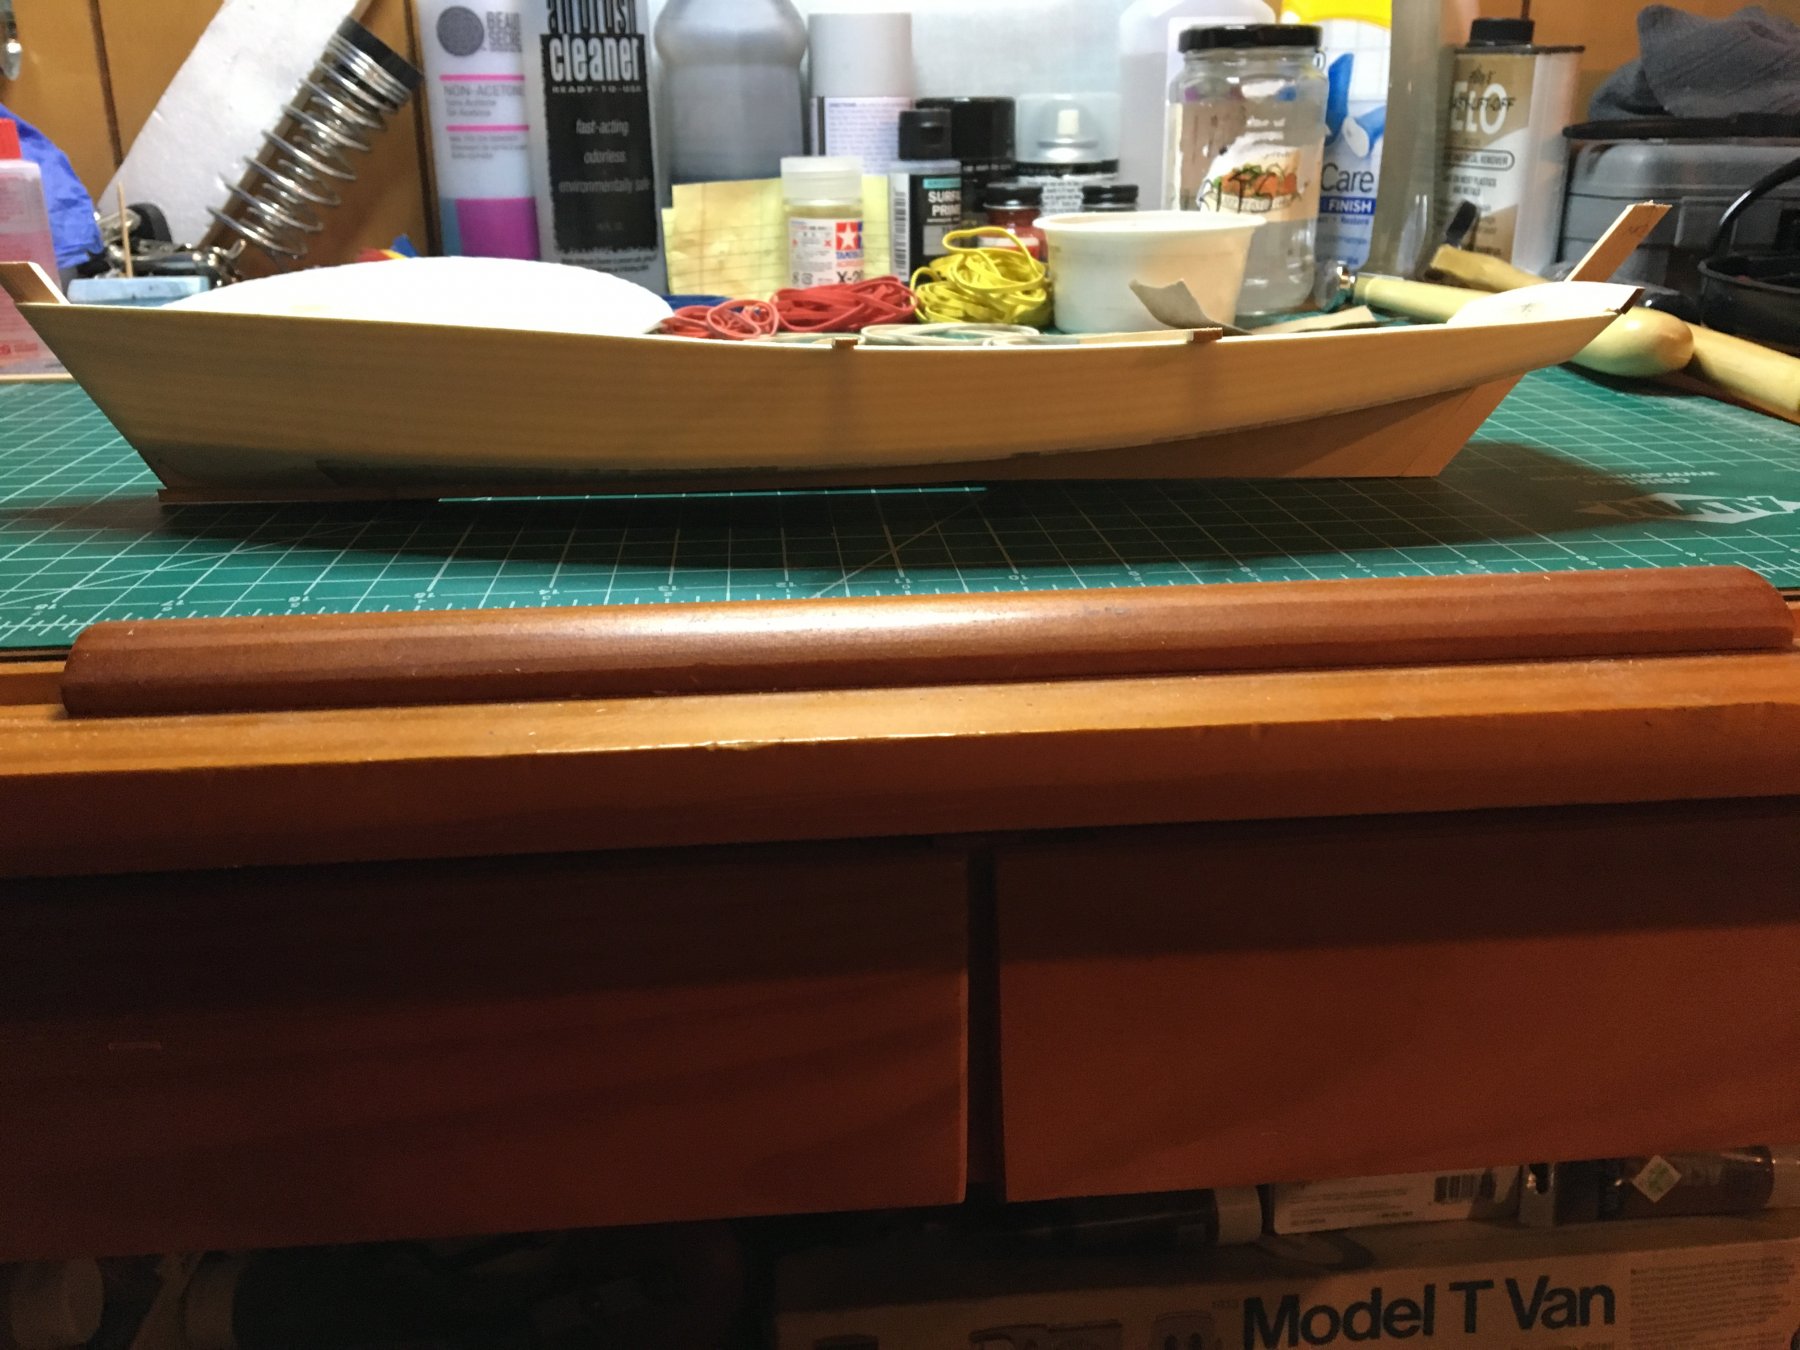
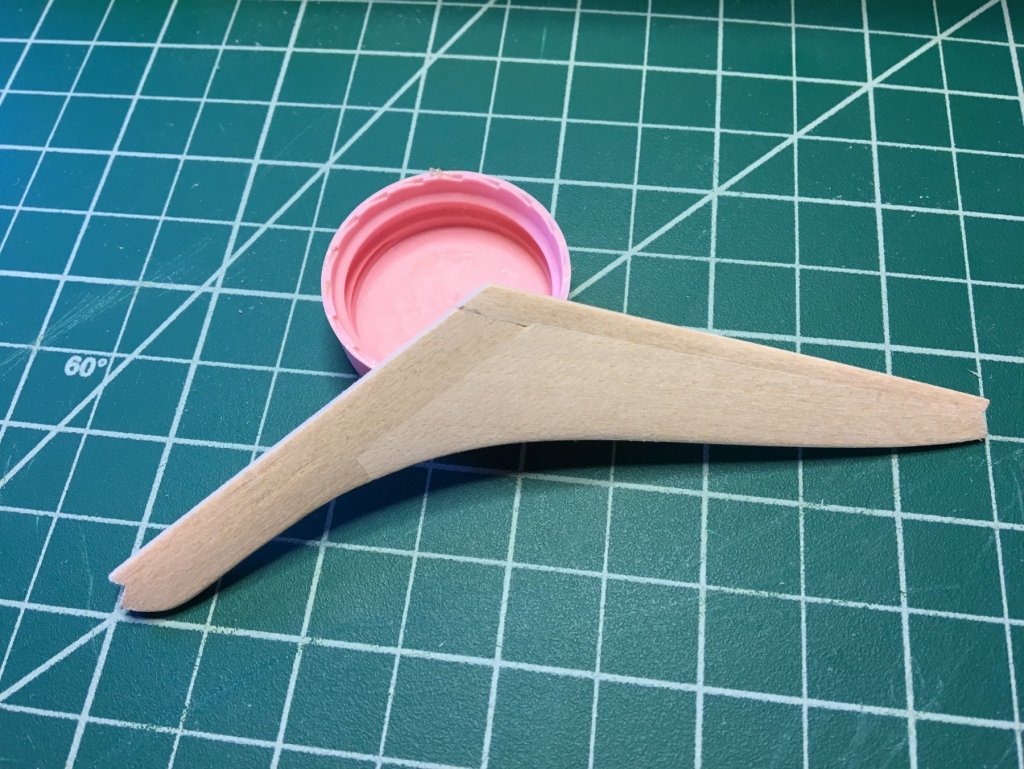
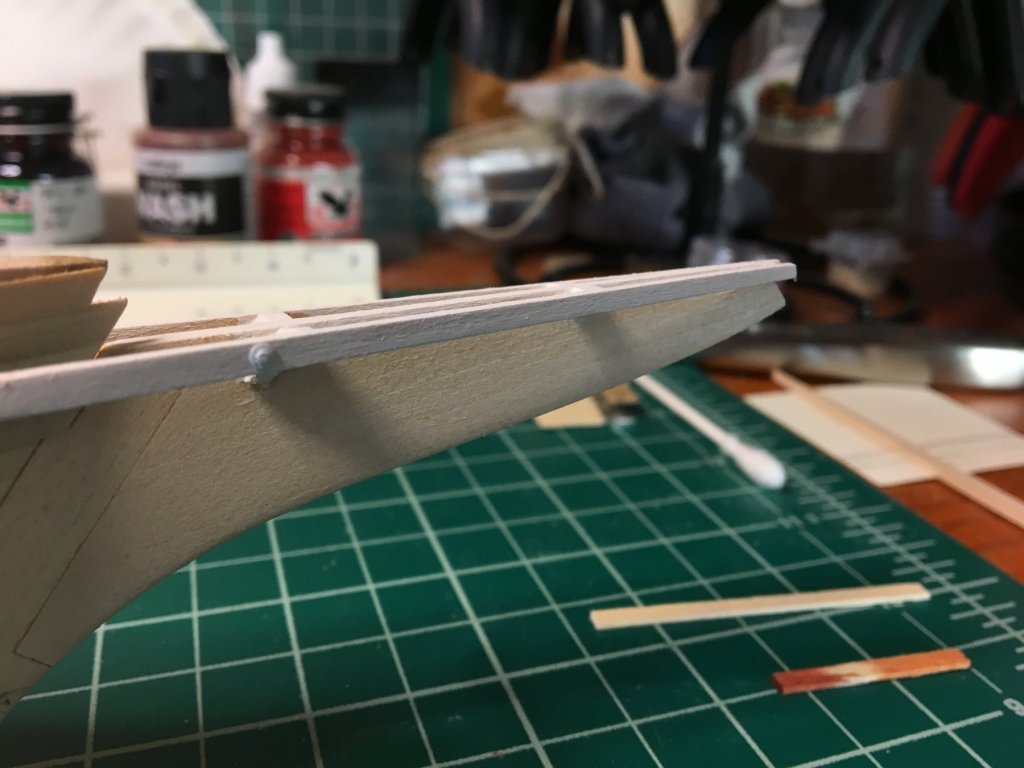
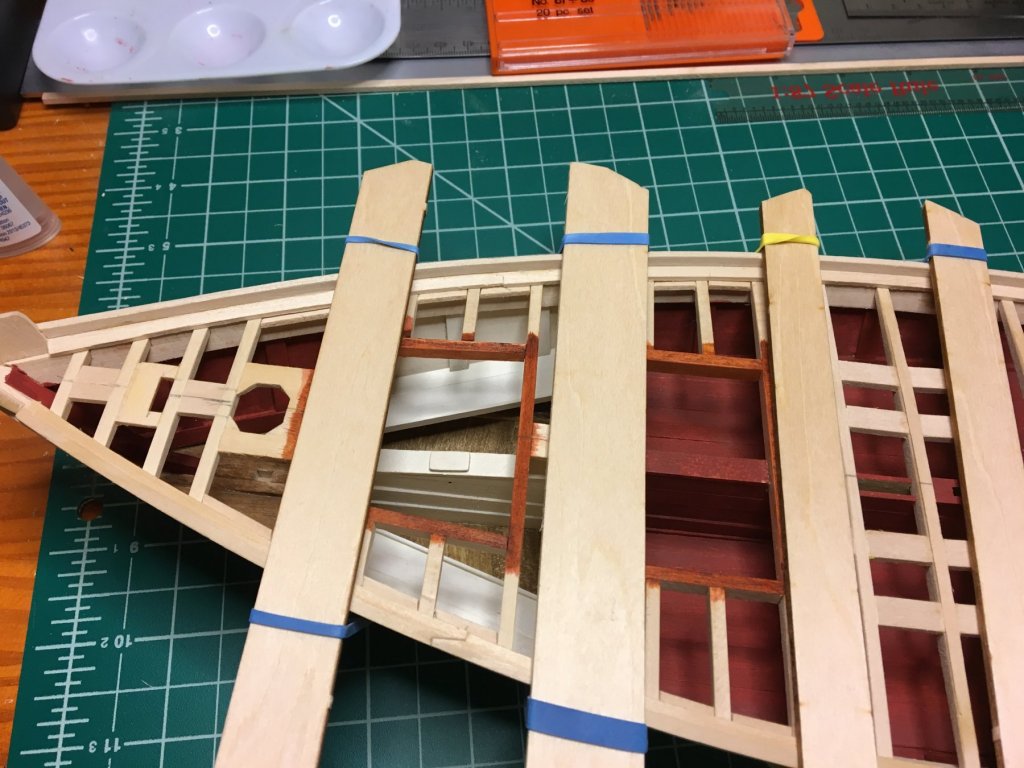
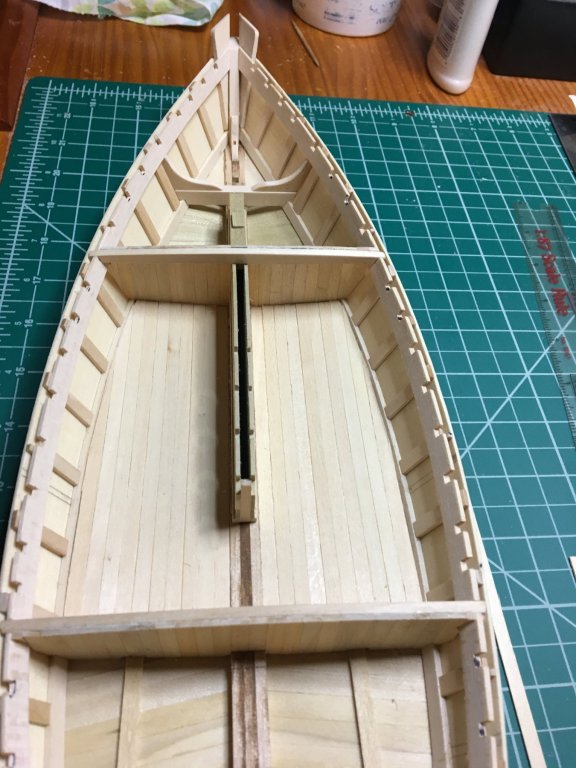
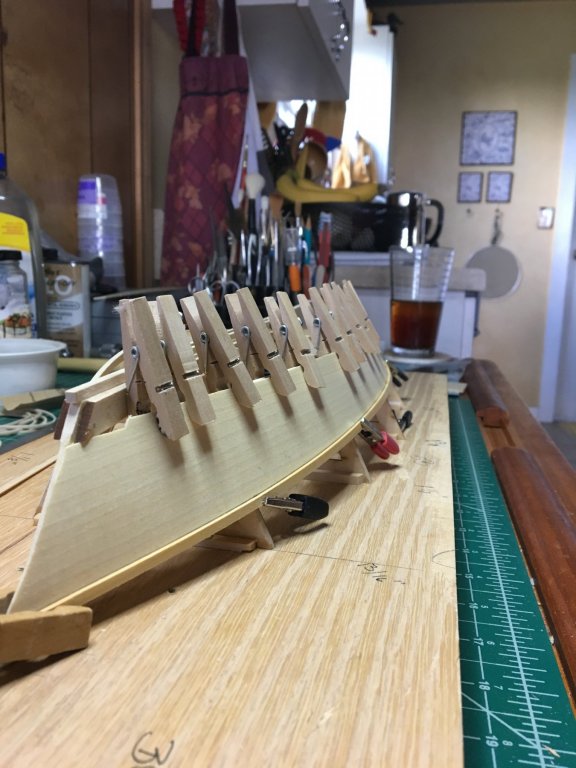
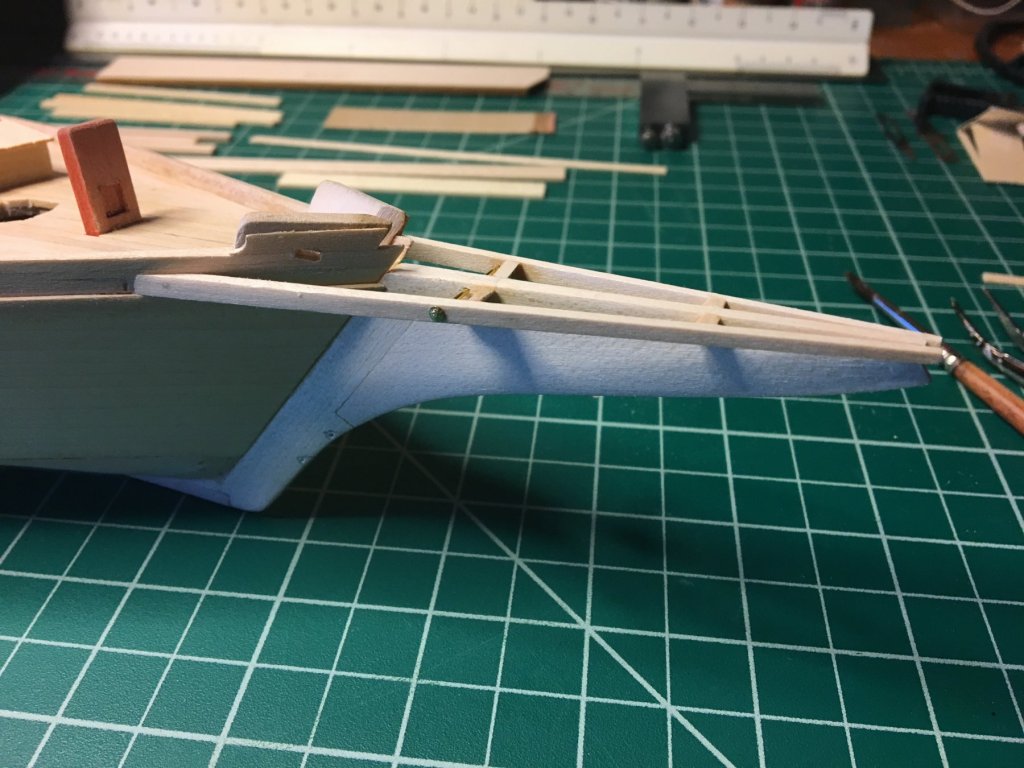
Bringing the log up to date: Time to make and fit the stem and cutwater. Attach the wales: More bow work: For the tie rod, I wanted something that looked like nuts on a threaded rod. I cut some little brass disks and dimpled them into the cutting mat. Then I drilled through the center (or as close as I could get with these old eyes of mine). Here's how they look mounted: Not bad. Then, hatches: Front cabin: Added a ladder: And some paint:


-
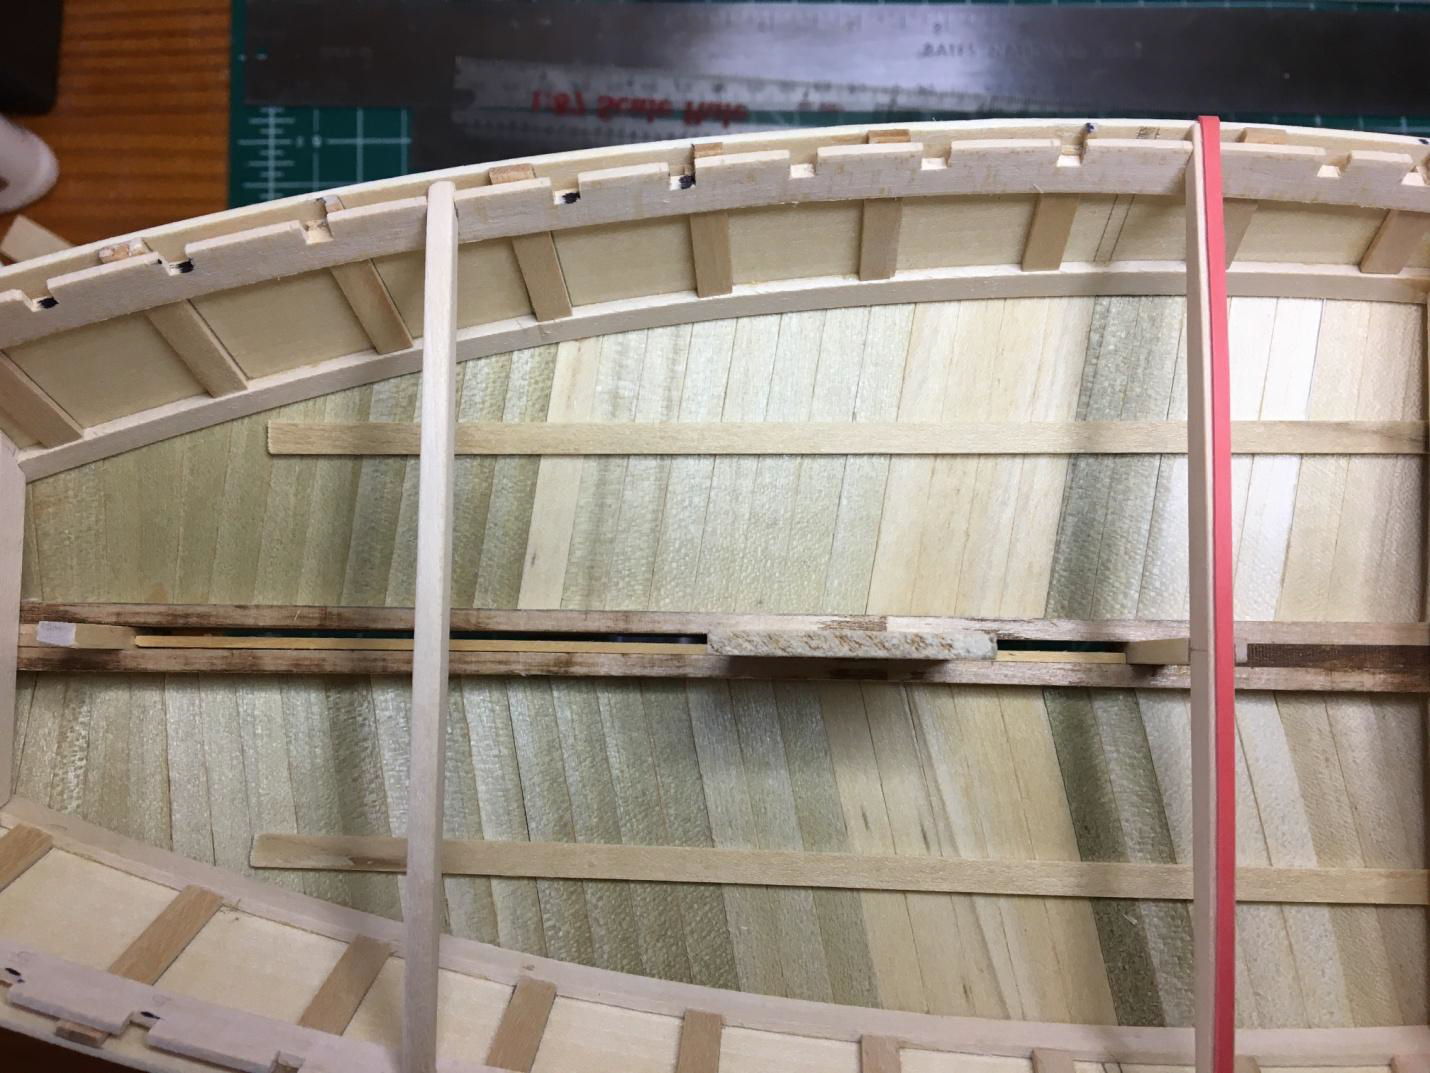
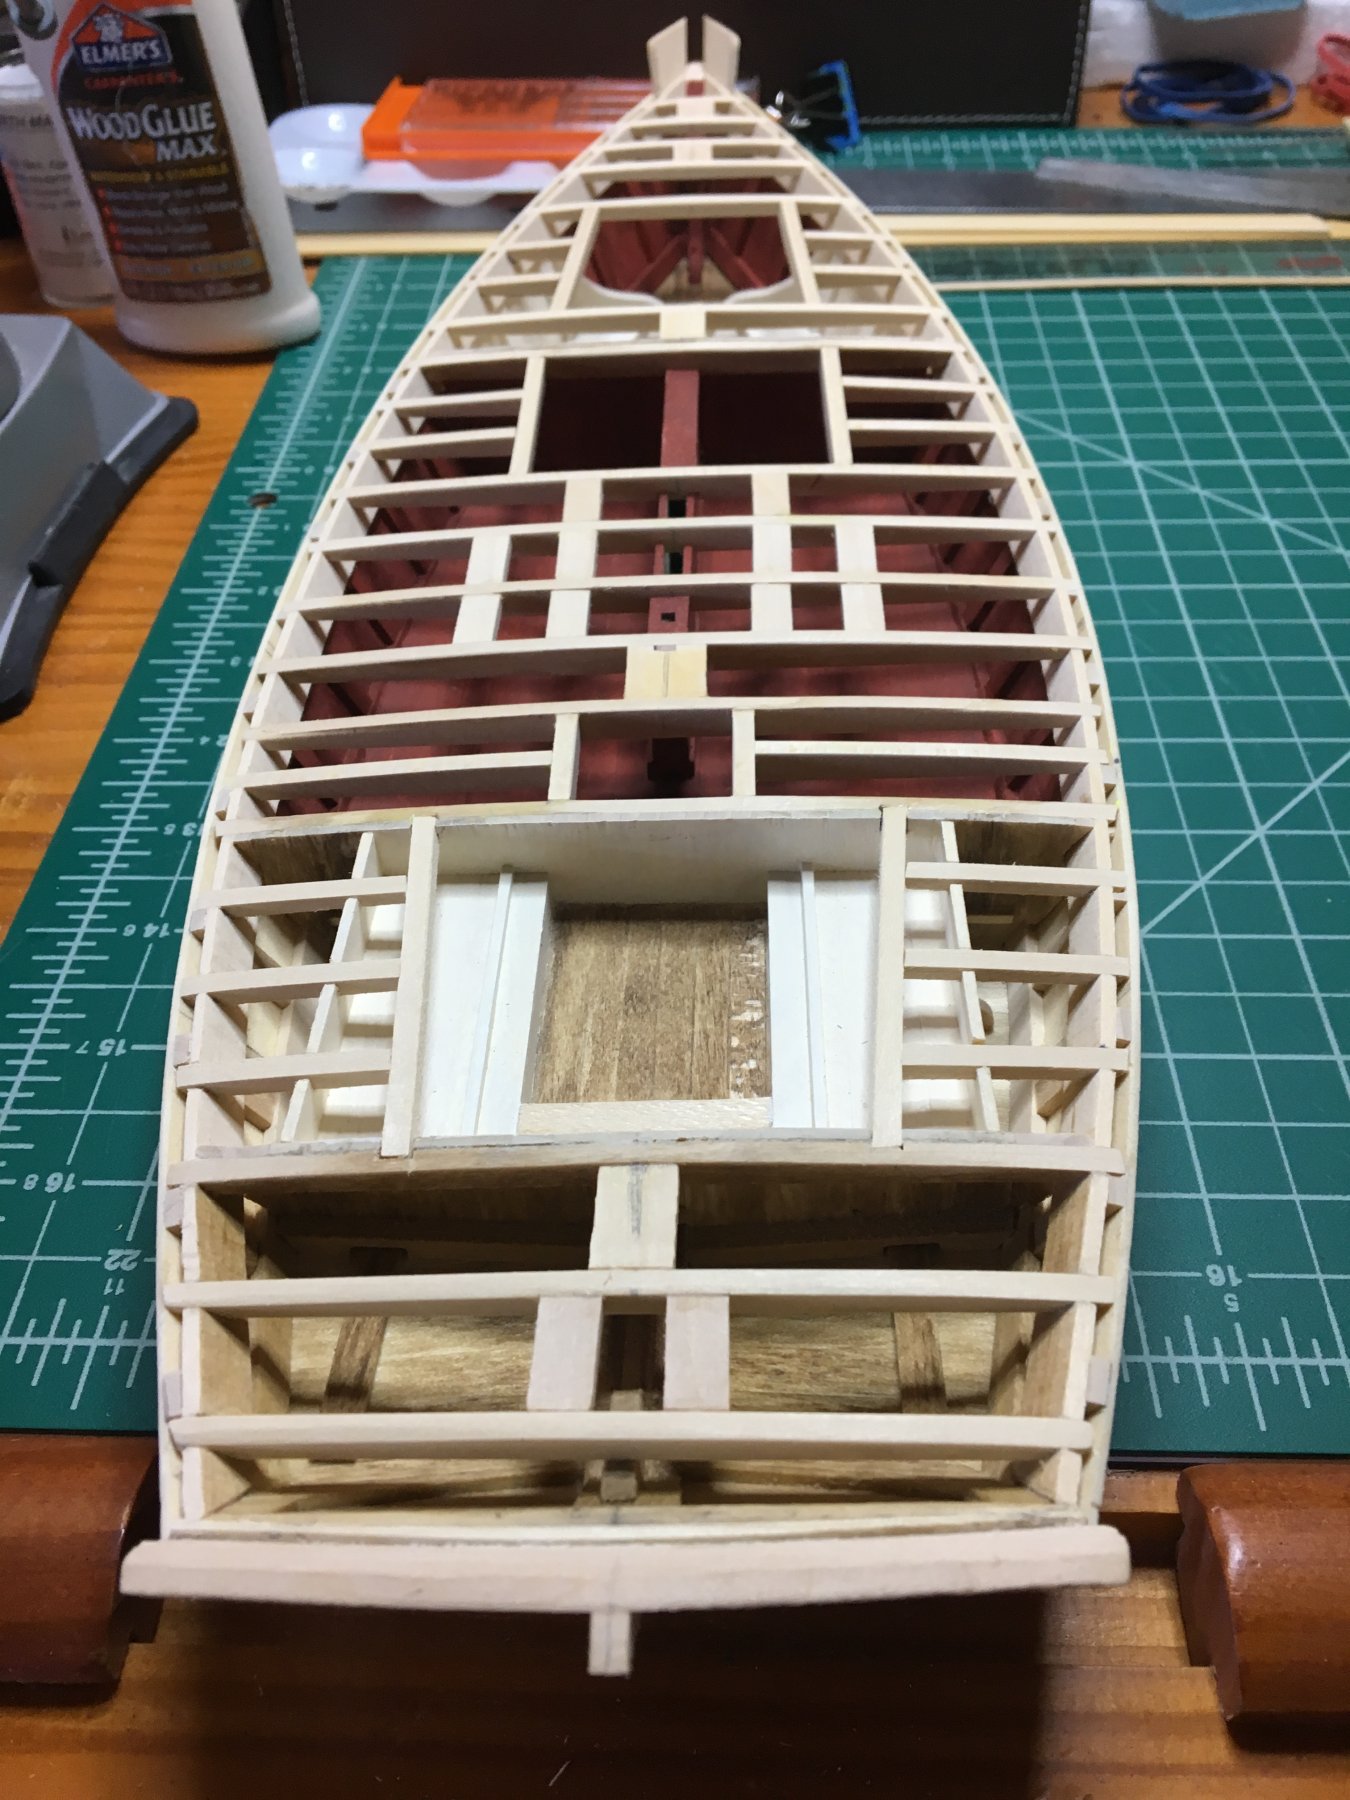
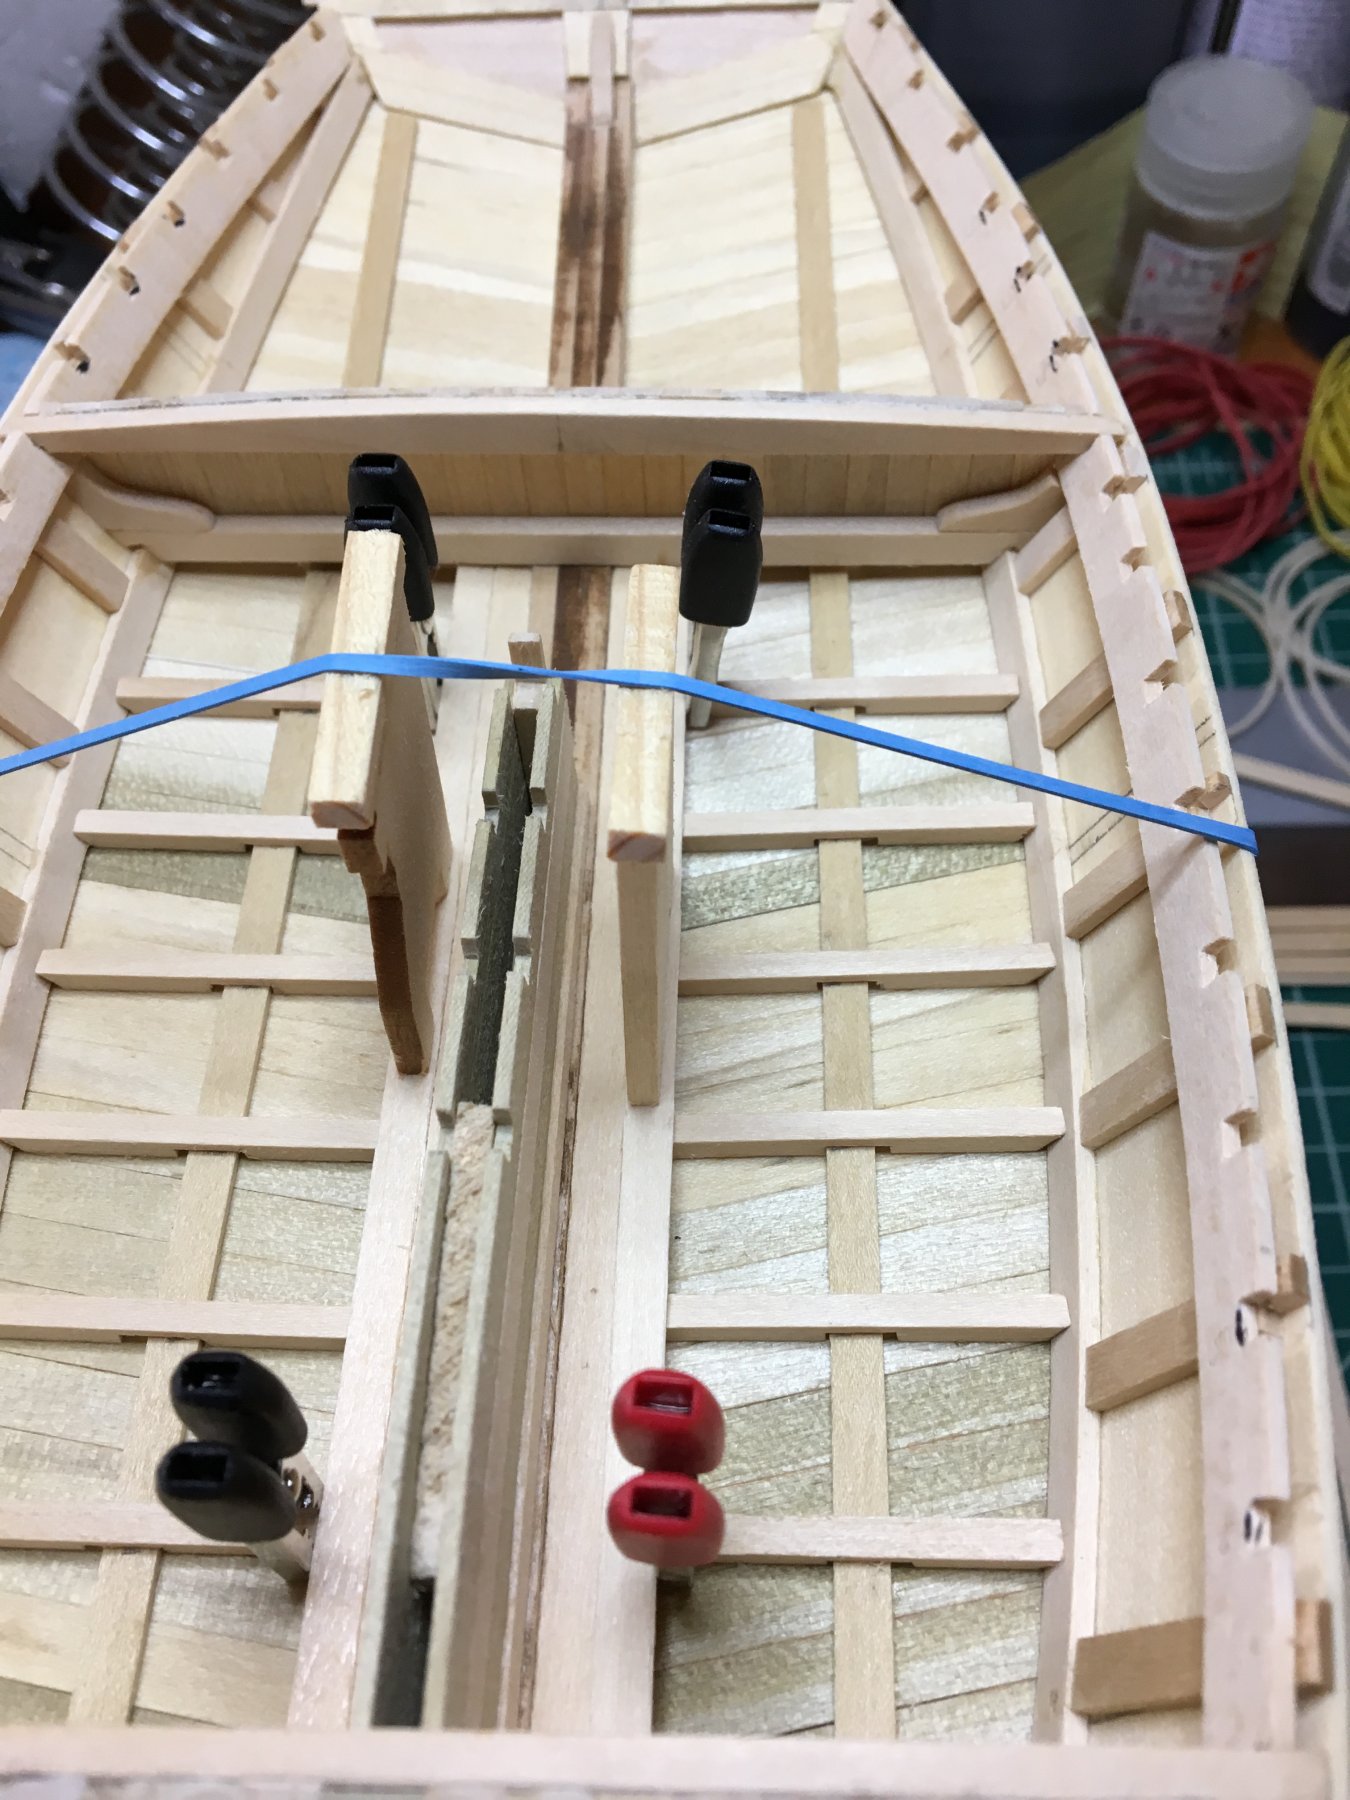
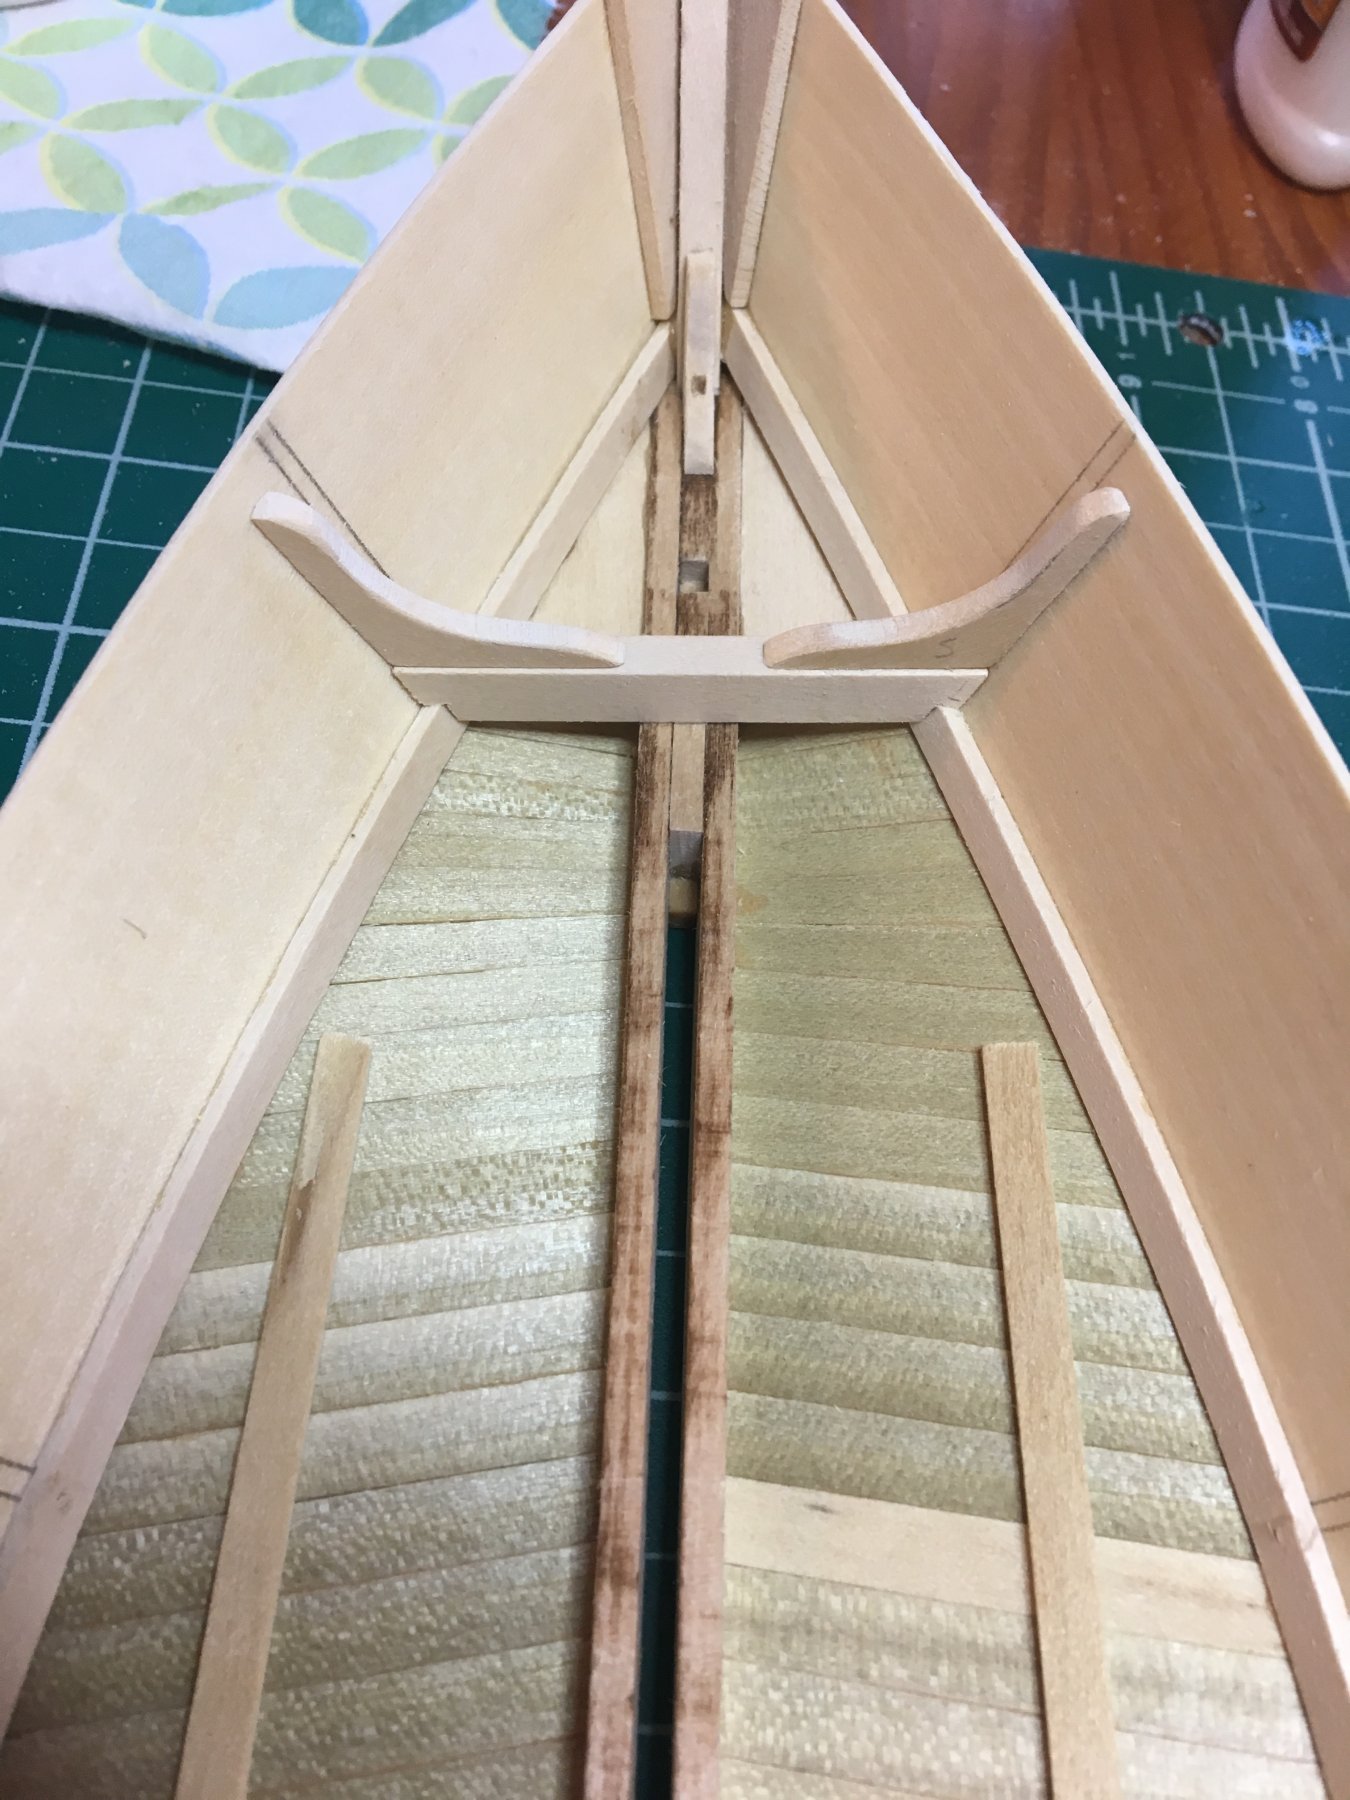
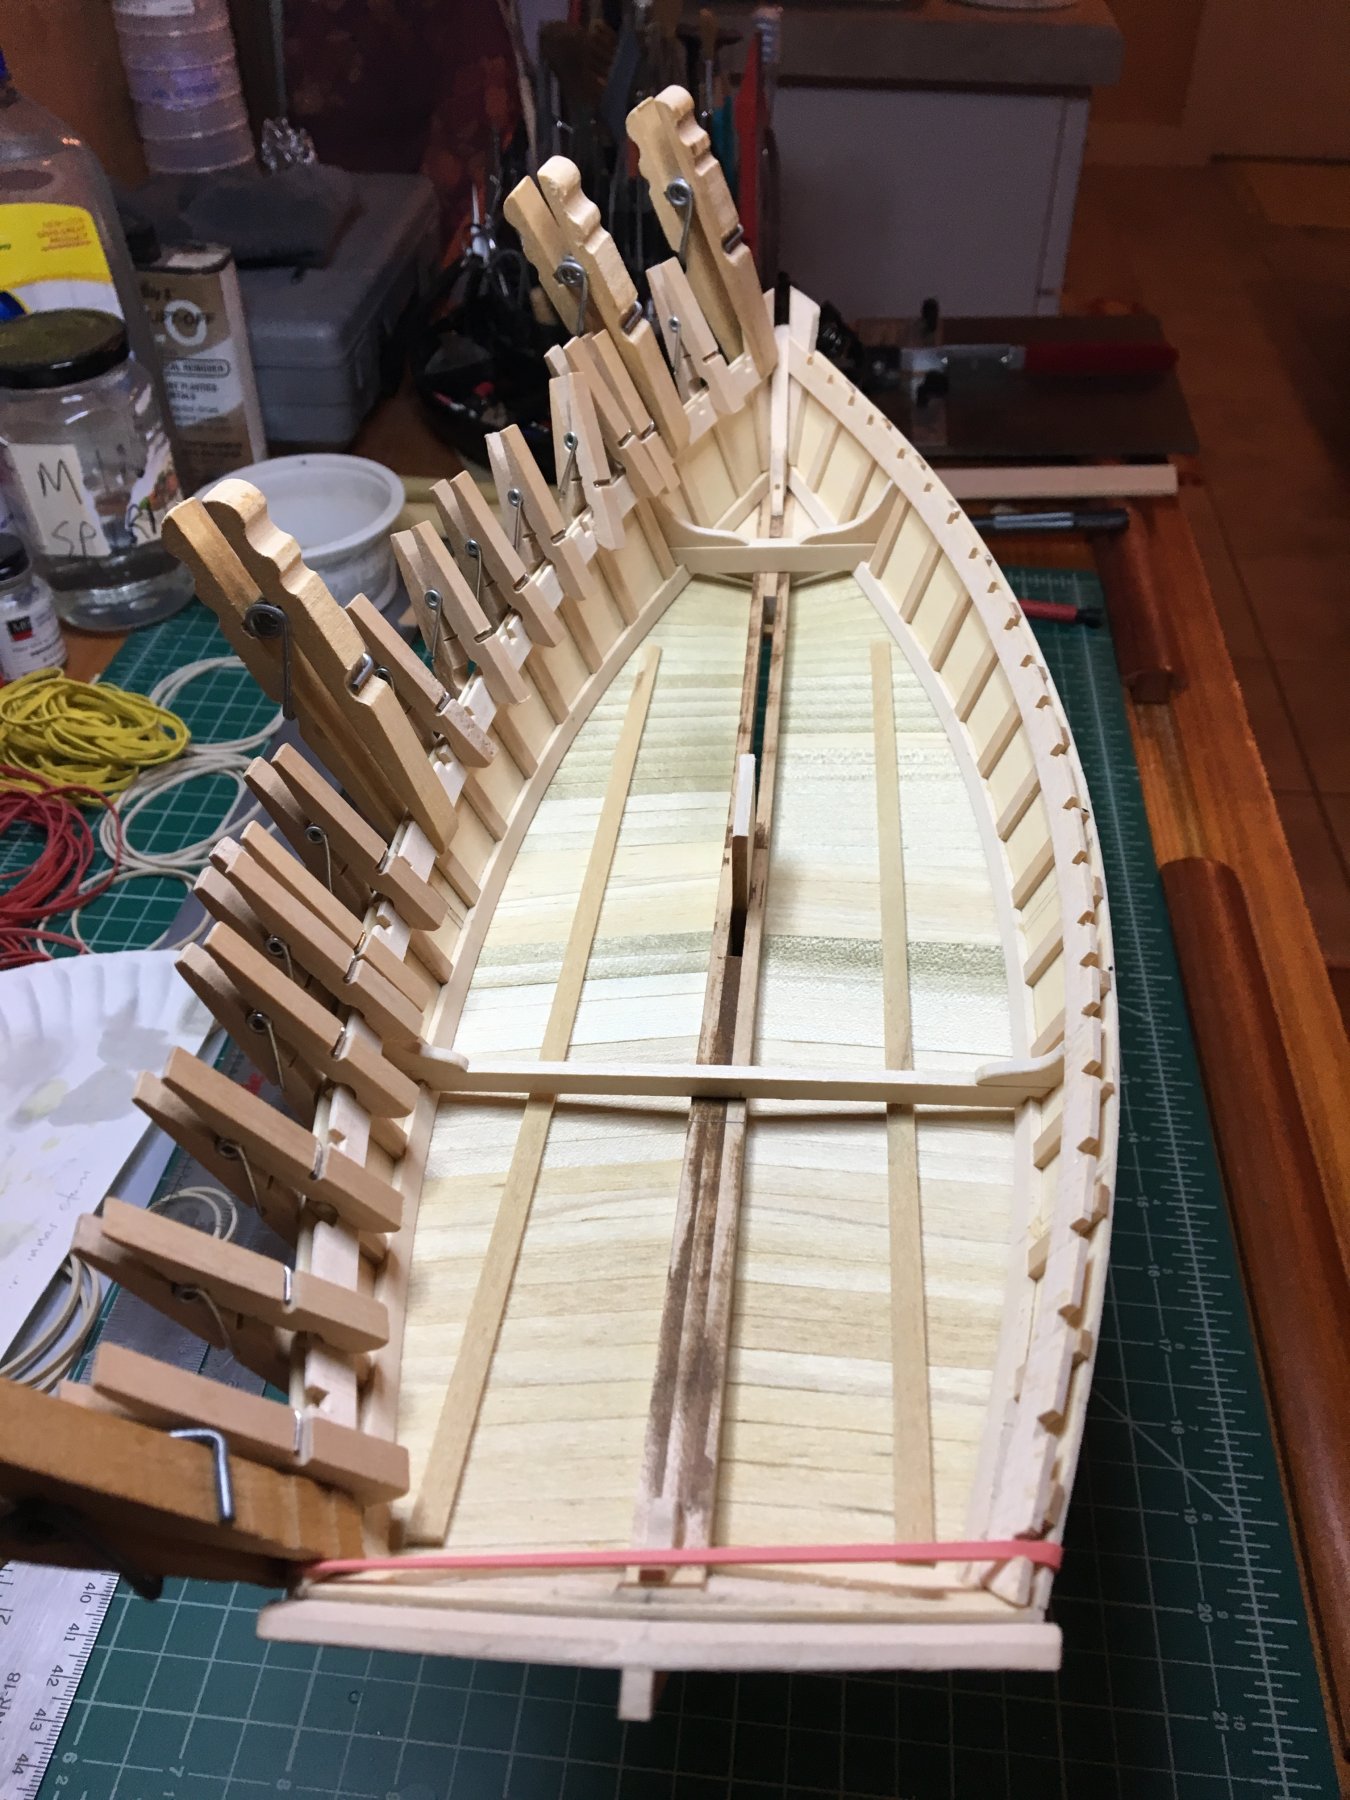
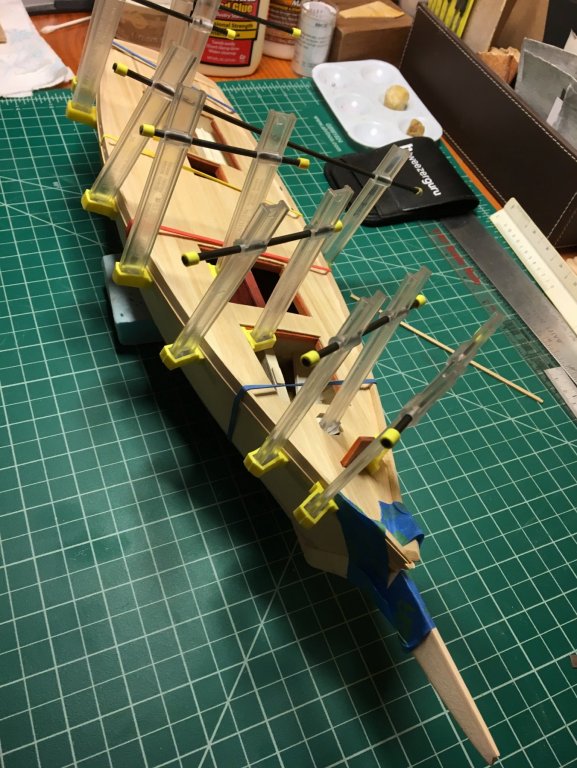
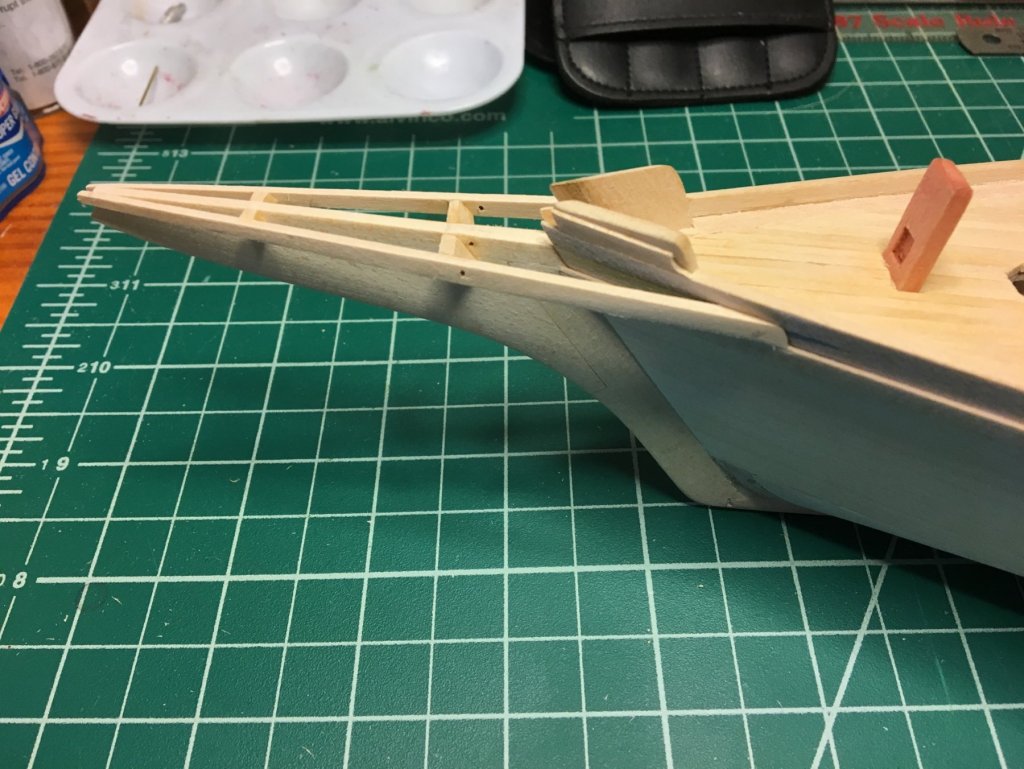
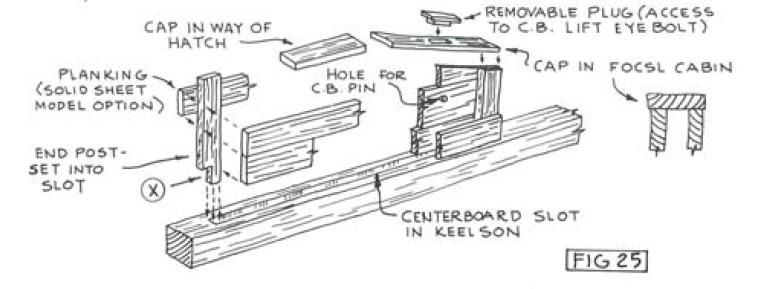
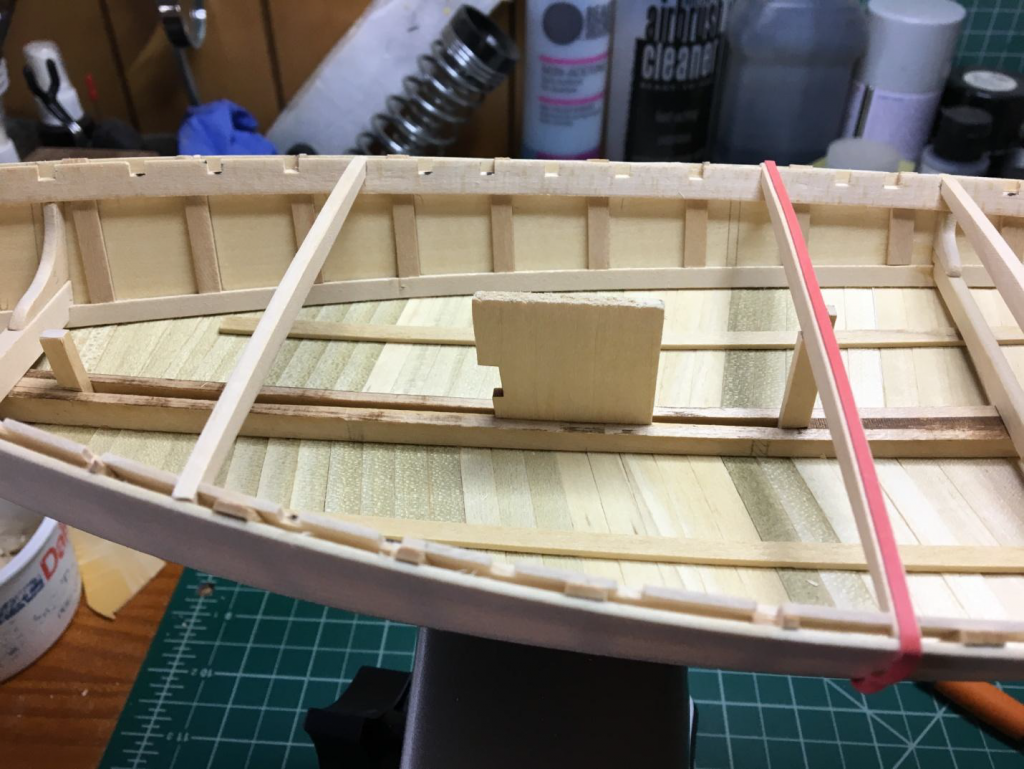
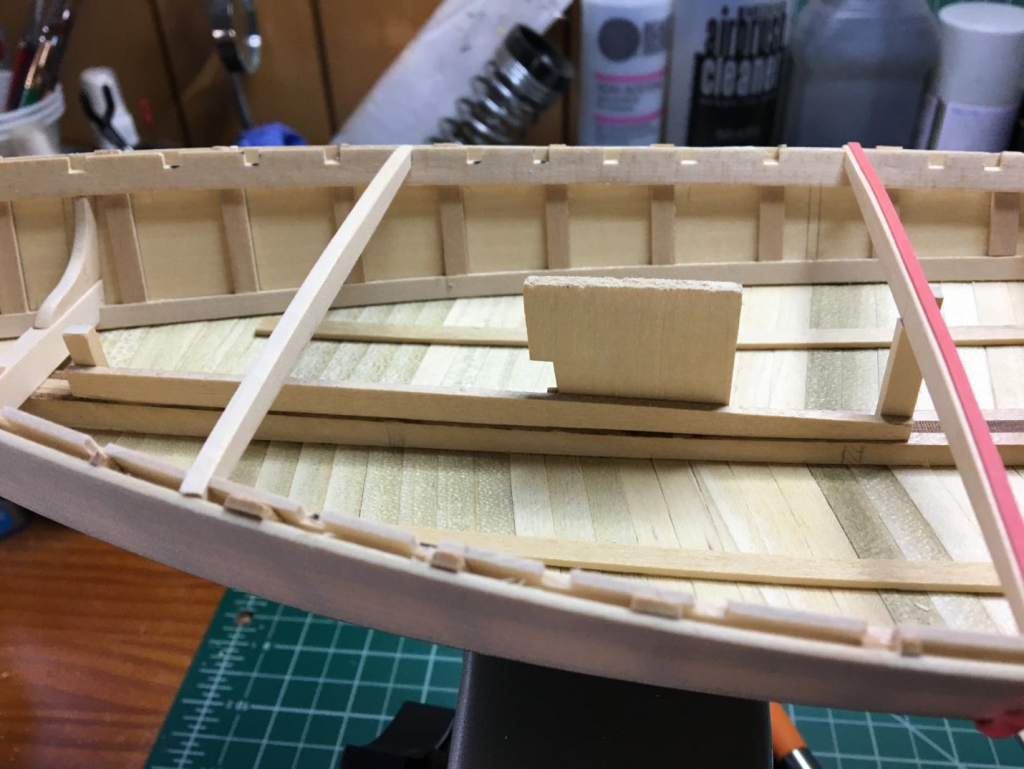
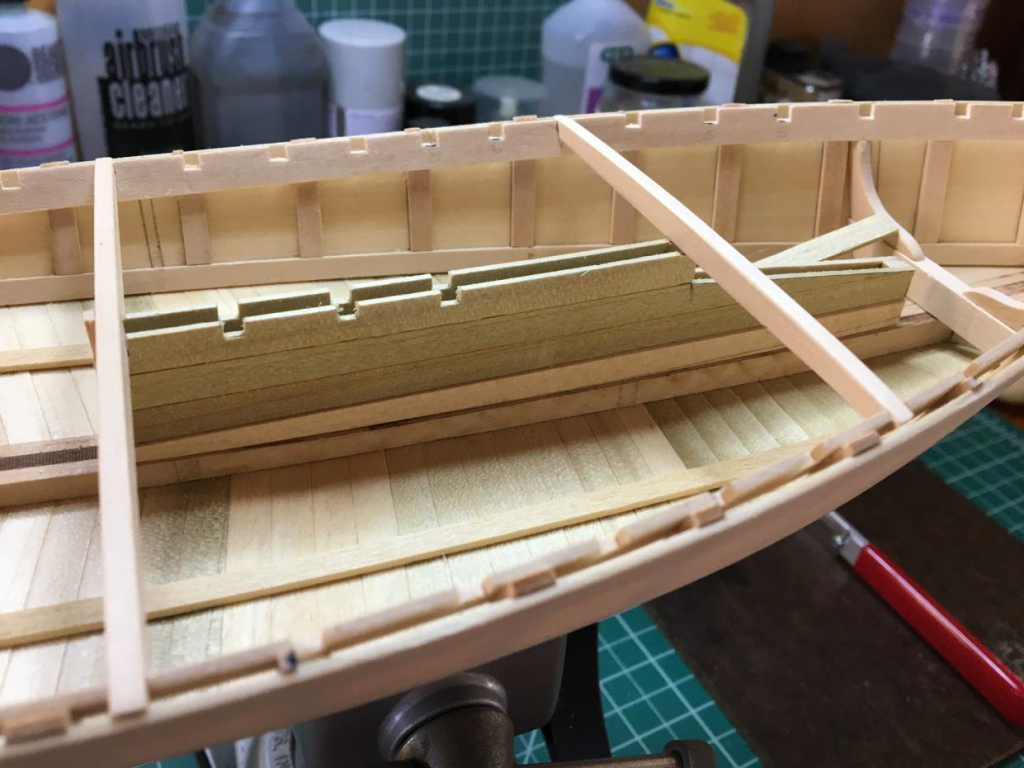
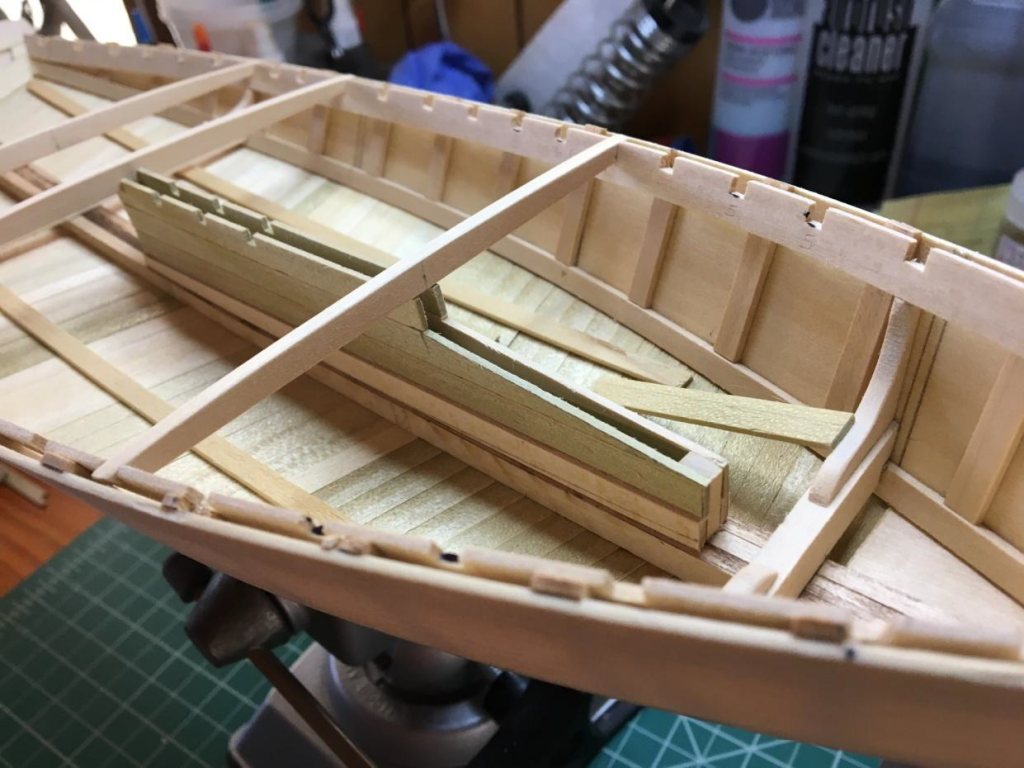
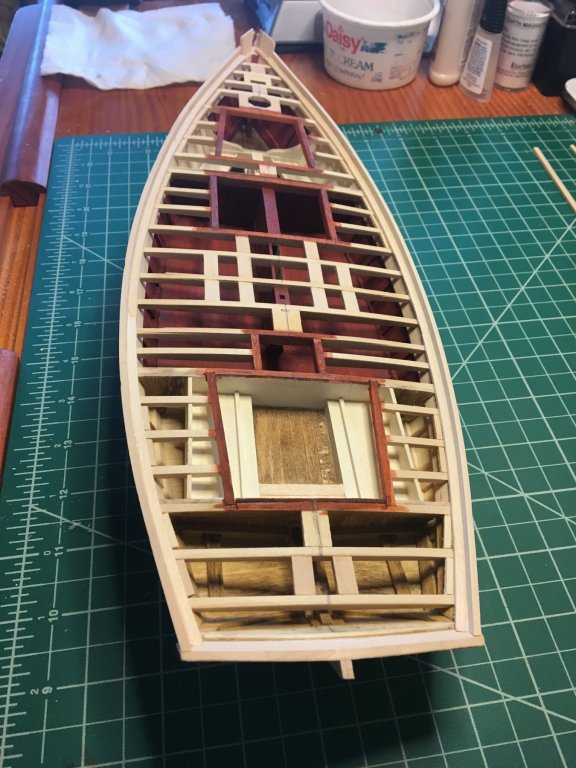
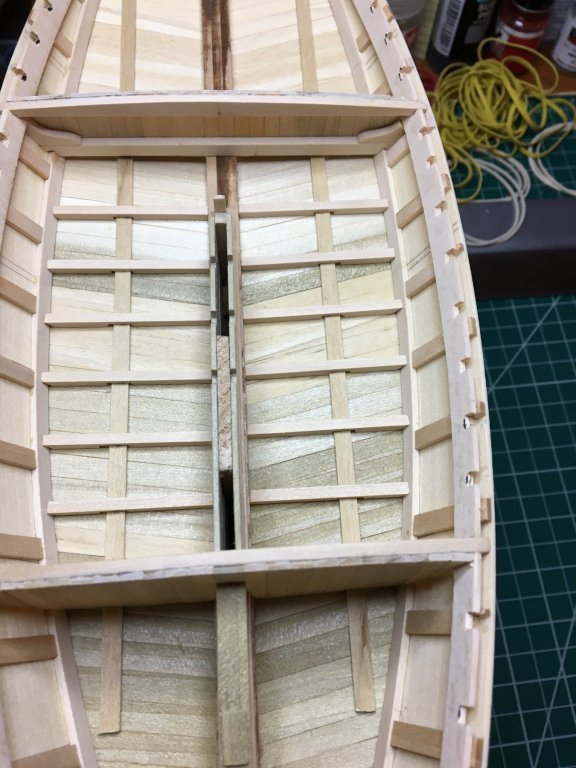
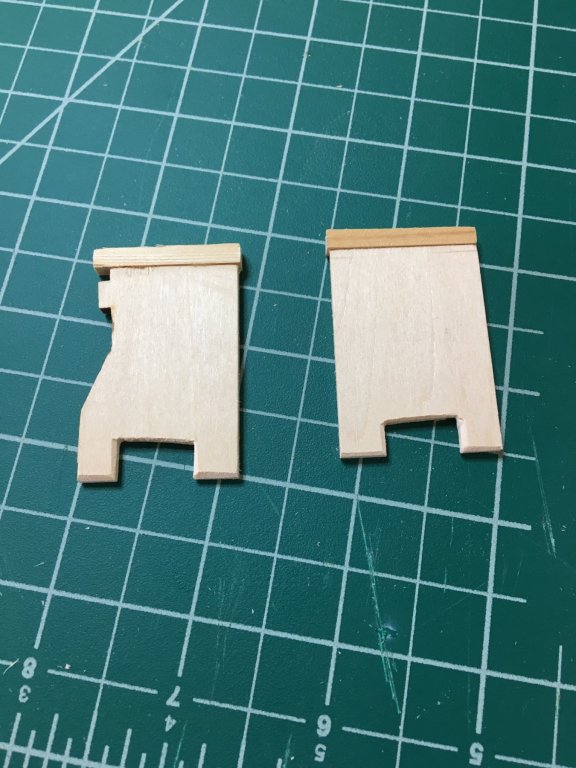
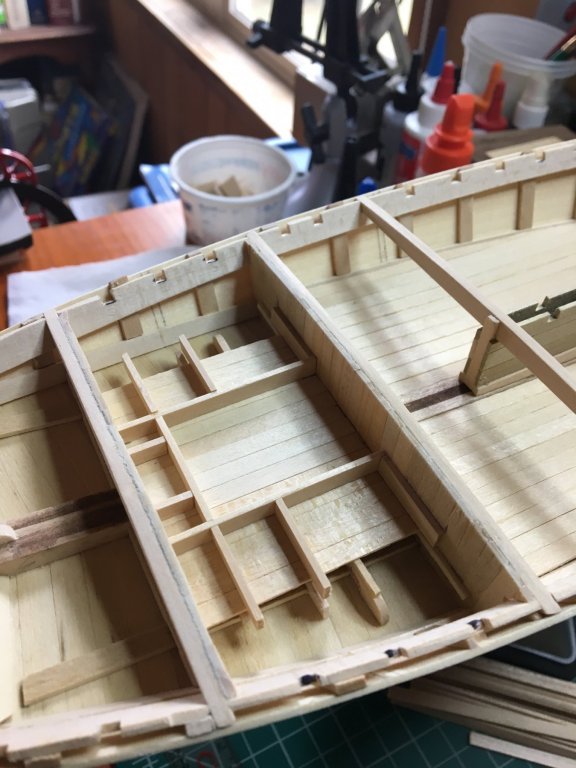
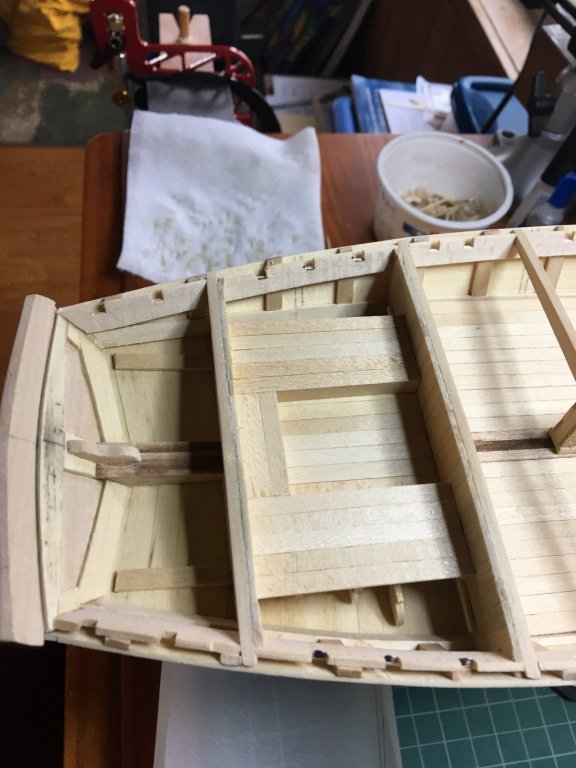
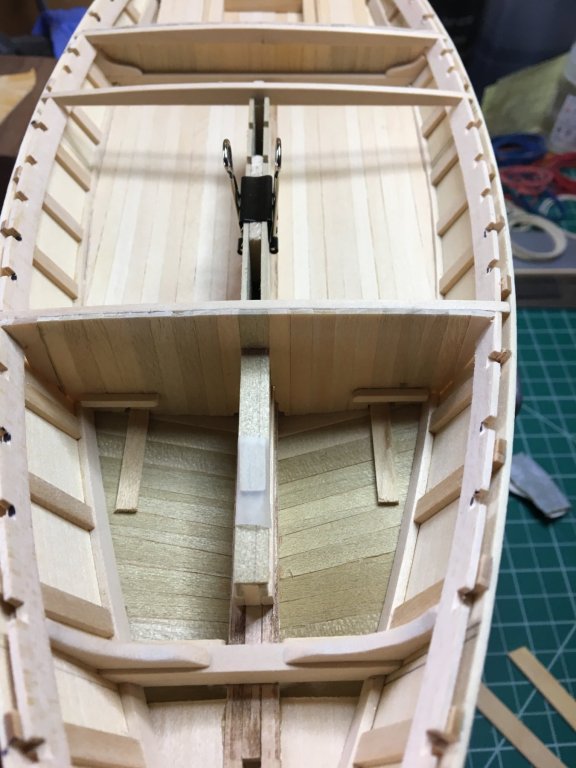
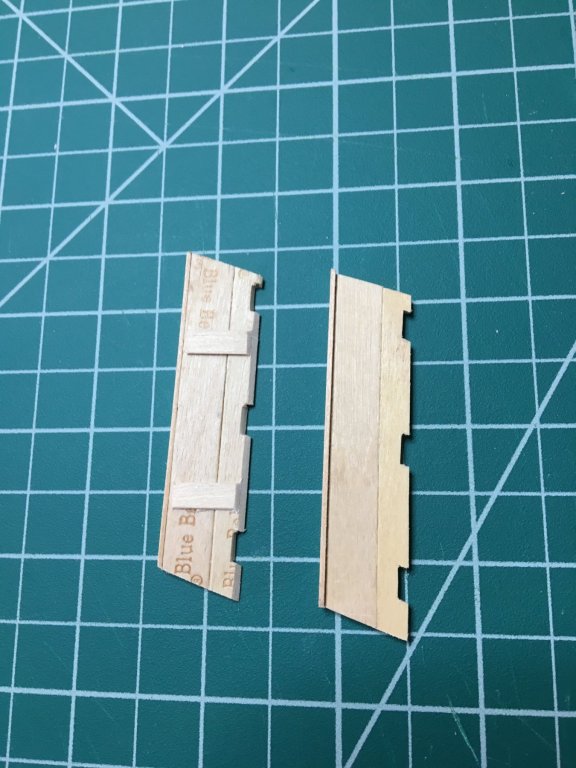
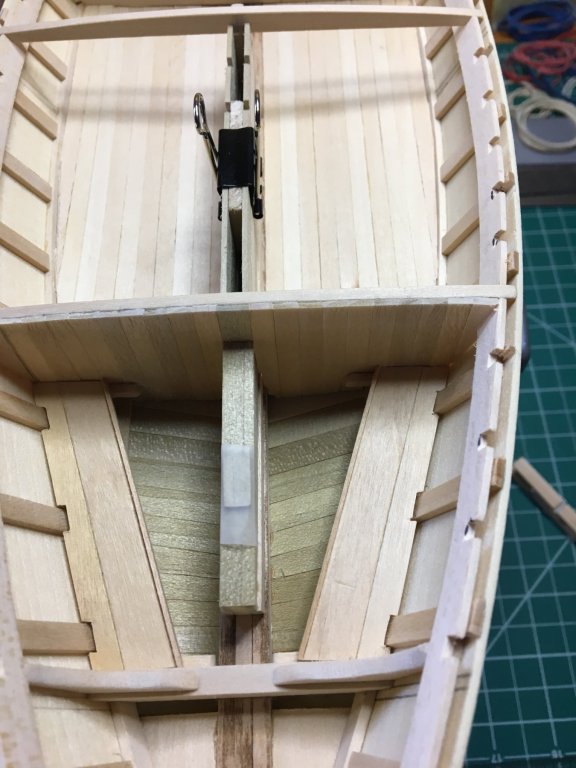
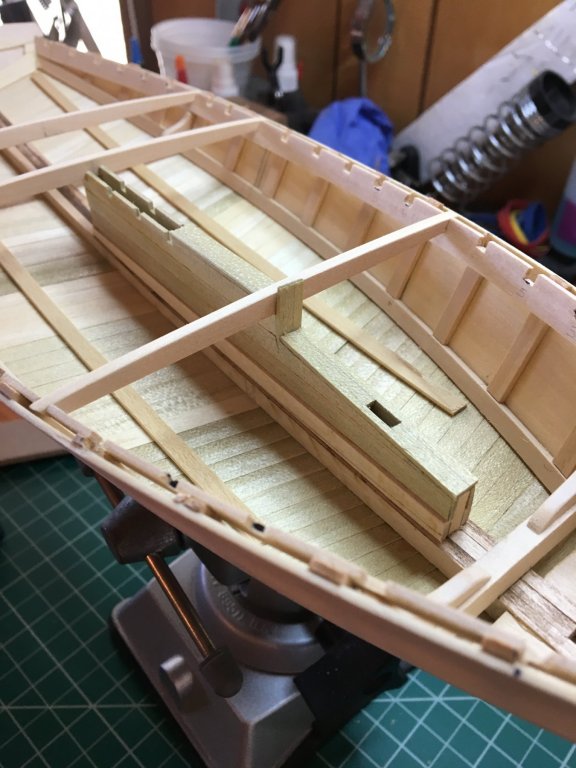
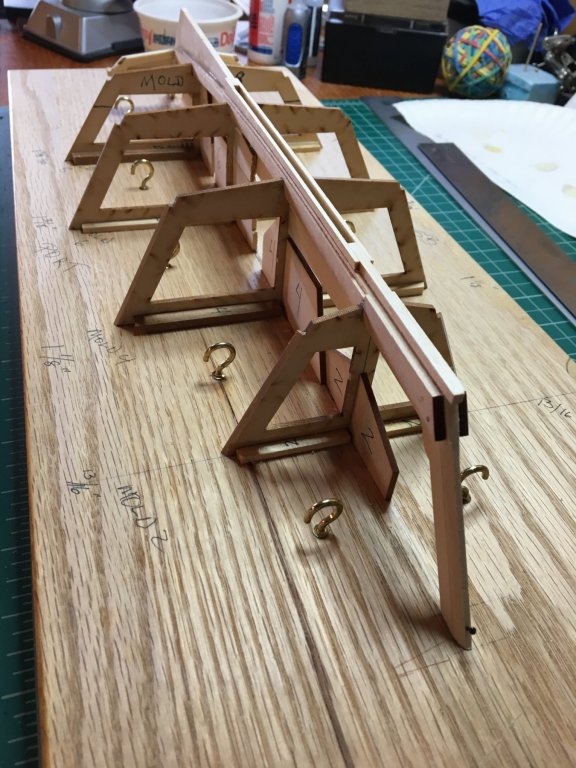
I said I'd explain any bits that puzzled me. The centerboard case was such a bit. So here's a kind of tutorial of what I did on that: Building the Centerboard Case The kit instructions, and the articles in Ships in Scale both basically just say “build the centerboard case.” The plans are not as clear as they might be on this detail either, with no separate detailed drawing. You have to basically look through a lot of other detail clutter on the side drawing to see the centerboard case, and it’s not drawn particularly accurately. I wanted to build the case on the ship, as one would in a full scale boat, but not have it attached permanently so I can take it off to do the finishing touches and drill the centerboard pin hole. Once the bottom side plank is on, building in the ship would be easy, but getting everything square to glue that first side plank on would be tricky without a jig. I made a jig. First steps: I cut the two vertical end posts out of 1/8” by 3/16” stock. I had some laying around, but I think the kit has some. That’s about a scale 3 ½” by 6” which the plans call for. I did cut the rabbets in the end to fit down into the centerboard slot as the instructions show as an option (marked at X in the drawing below) and as done on the actual ship. I measured by sticking the post down into the slot until it bottomed on the shoes and marked the length. A little saw cut half way through the width and a slice or two with the knife and I had the rabbet. Then I measured the height of the aft post by cutting and fitting the deck beam right above the aft post. Once fitted, I had the max height and could mark the rabbet for the top piece. It’s not quite square to the floor this way, but close, and that’s how the plans show it. You could just cut it to fit under the deck beam if you wanted. You can see the fit of the posts in the following picture. I cut the front post to the height indicated on the plans, and just held the stock to the plans to measure and mark it for length after cutting the rabbet to fit in the keelson. The jig: Now, what I needed was a way to hold both those posts in place tightly up against the keelson vertical edges. I was using the piece of scrap you see in the picture for clamping the boat to my vice. So, I found a piece of 1/16” scrap long enough to stretch from the inside faces of both posts in the centerboard slot and cut it to a snug fit. Then I marked the width of that board on the clamping scrap in the centerboard slot with my knife. Using the knife, I cut 1/16” deep on the lines I marked. Then, with some careful knife work, I levered out the waste. I finished the slot with a small flat needle file. I checked that the board fit in the slot without sticking out at all and slid freely. Then I slid the clamping scrap back into the centerboard slot far enough to fit the board between the two posts. That locked that board in place snugging both posts up against the keelson vertical edges and straight. No need to glue the board to the scrap. Letting it slide in the dado allows for easier fitting in the ship. Here’s a top down look at the jig in place. Notice I have both deck beams that are located at the ends of the higher part of the centerboard case. This will allow me to build the planks up to fit just under all the beams in between. You’ll still need to notch the top board for the beams. I cut 1/8” notches in both top planks at the same time (ganging them together), which I located by placing a deck beam (doesn’t have to be the exact beam for that spot, just one that spans enough) across at each slot. I clamped the aft beam with a rubber band to help hold the aft post in place and straight. Notice the post is centered on the center mark of the beam. Building the case: The bottom board of the case is both a bit thicker than the other planks (3/32” rather than 1/16”) and must be curved to fit the curved keelson. In order for the upper planks to be as straight as possible relative to the deck line, I wanted to shape the curve so most of the excess removed is from the aft part of the board. If I had kept the piece of the keelson I had cut out for the centerboard slot when gluing the three parts of the keelson together, then I would have had a template. I didn’t, so I laid a piece of wide enough scrap (a properly sized piece of the leftover board that had the laser cut parts is good for this) on the floor of the boat and traced the upper surface of the keelson onto the scrap. I cut this out and had a template. Then I cut the bottom board. Here it is placed into the boat: Once the bottom boards are glued onto the posts (and not glued to anything else!), the jig is no longer necessary, but it doesn’t hurt to leave it in. The scrap sticking up like I have it registers the upper boards nicely as I edge glue them to the lower planks. It's possible to clamp to it as well (but make sure you don’t glue to it!). I cut and glued the remaining side planks to the posts, and then the jig and also the case was removed. It can slide back in anytime wanted to fit something in situ. The top plank needed to be rabbeted (notched) to fit under the aft beam and there may need to be a little bit of a rabbet for the front beam, as you can see in the pics. Here’s how it looks with all the side planks done: Once ready to glue it in finally, I glued it to the keelson at the bottom plank edge and both post rabbets. I made sure I'd cut the centerboard pin hole and made the slot for the front cover plug first (that’s the front cover sitting inside the boat ready for me to cut the slot and glue in. Easier to do that off the boat. Once in permanently, I put in a shoe and planked the bulkhead on the forward side of the beam. I used a plank to locate the shoes in this part of the floor so the bulkhead is straight. A little piece of planking material will close off the vertical part of the upper case to the top of the beam and complete the bulkhead.


-
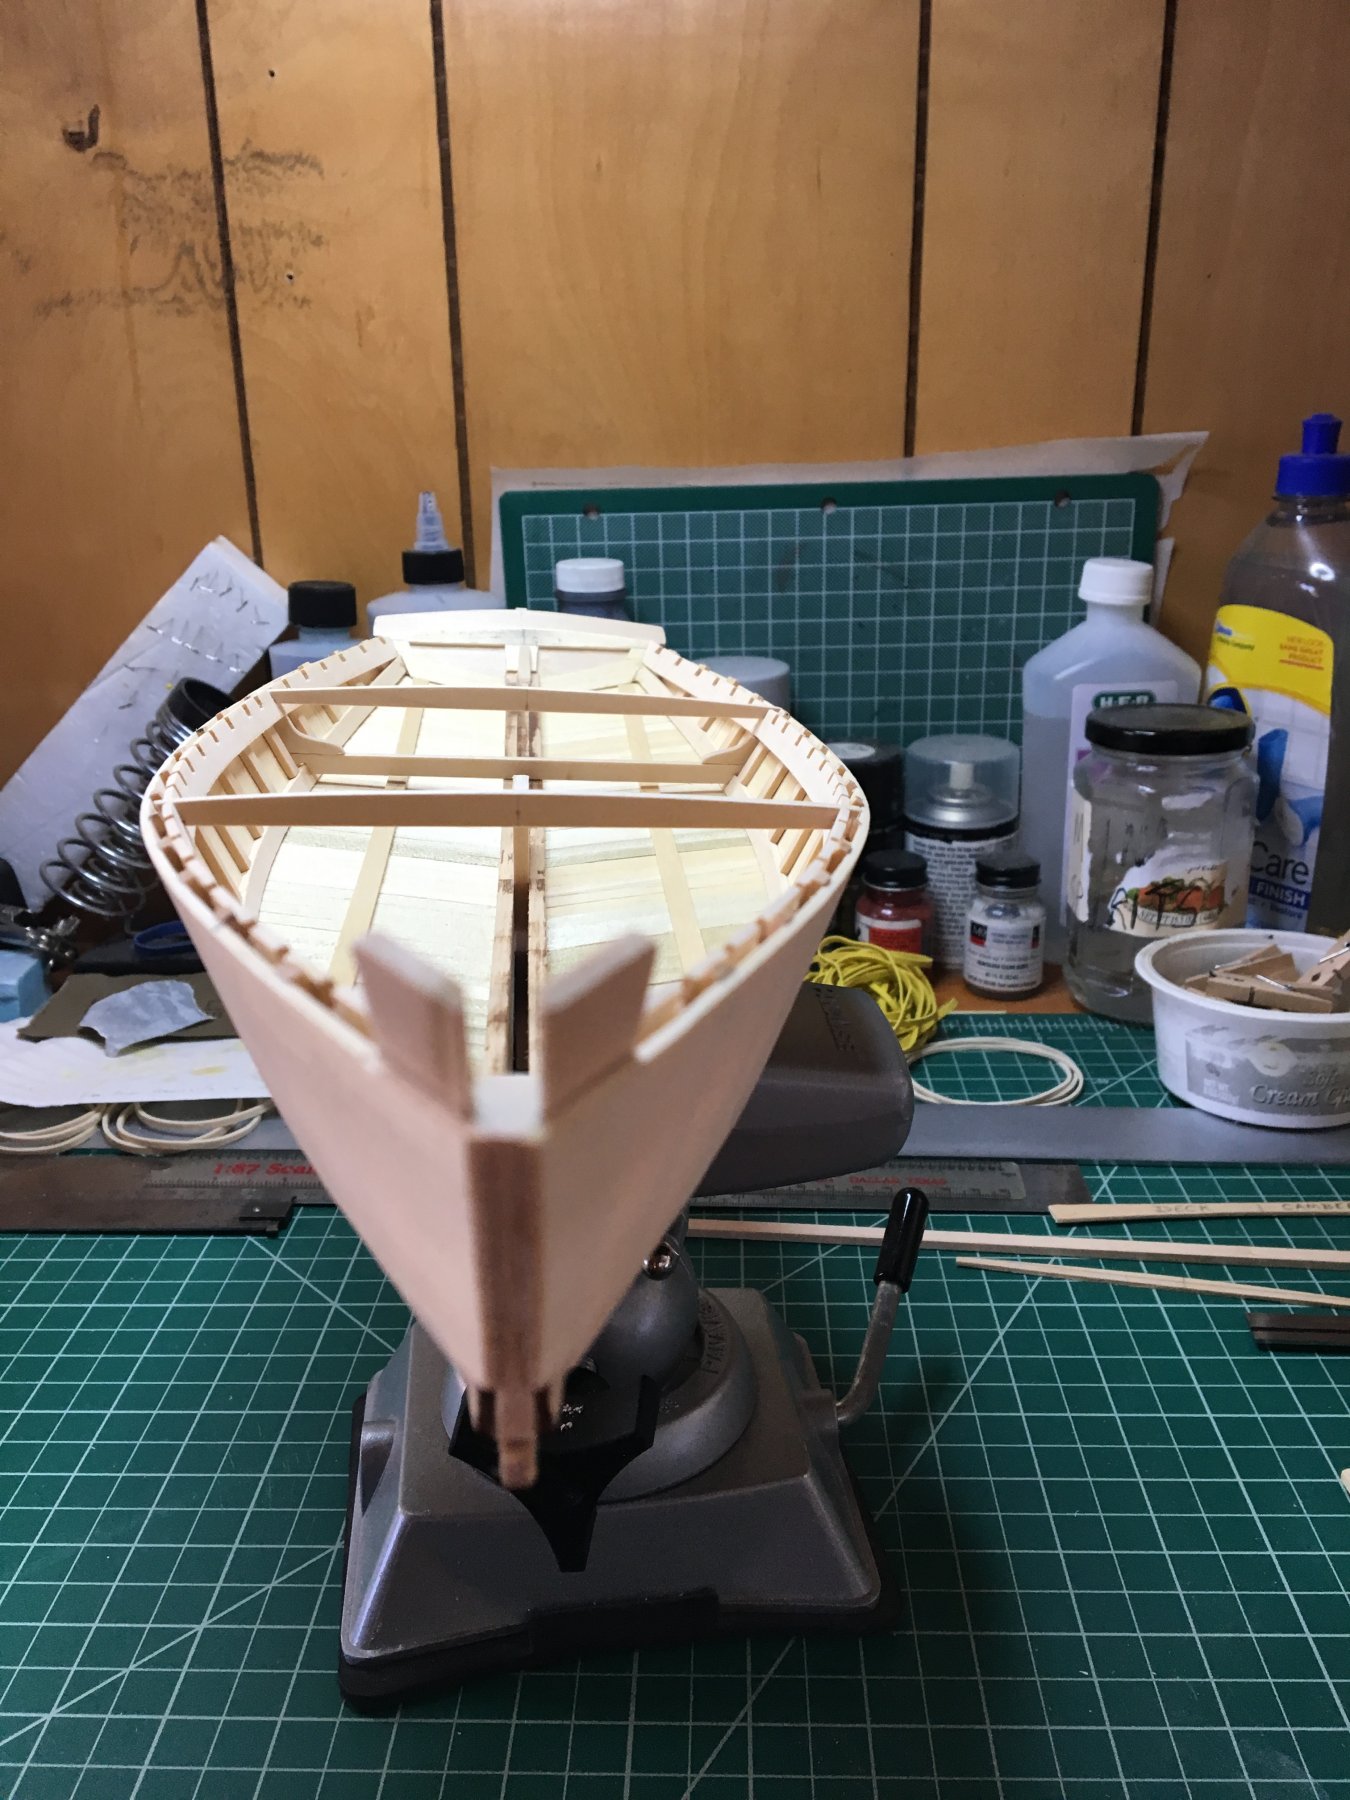
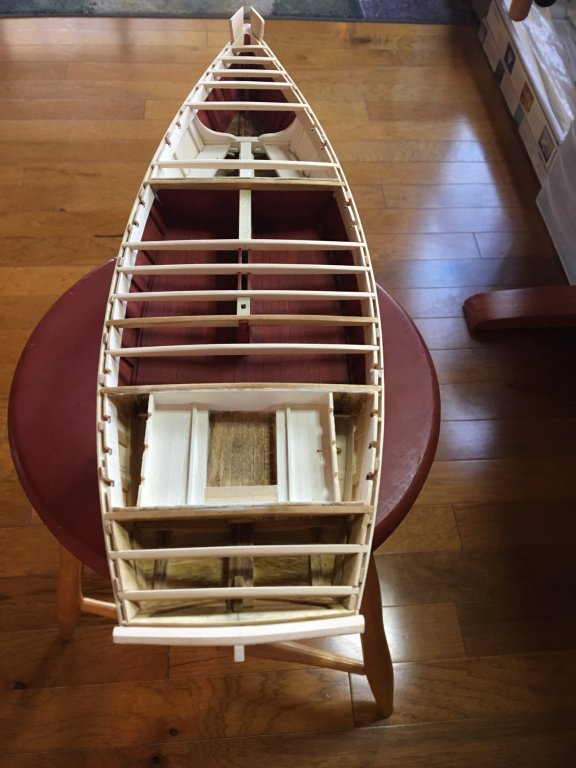
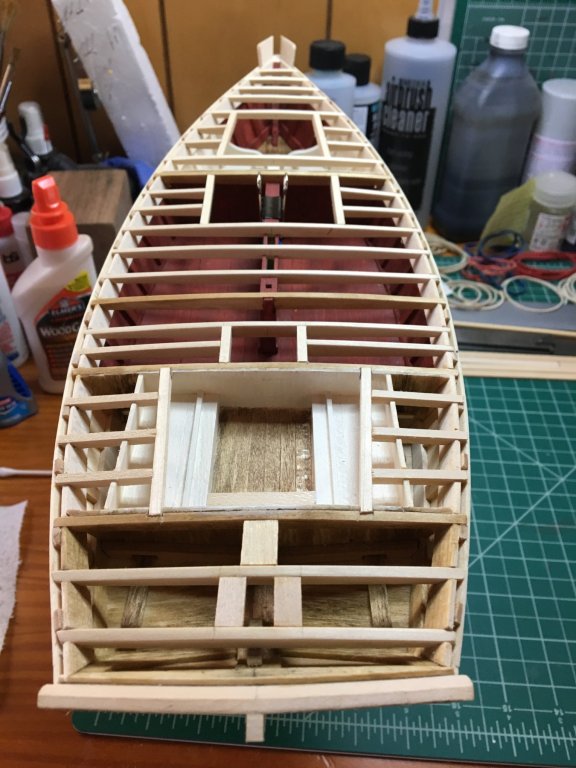
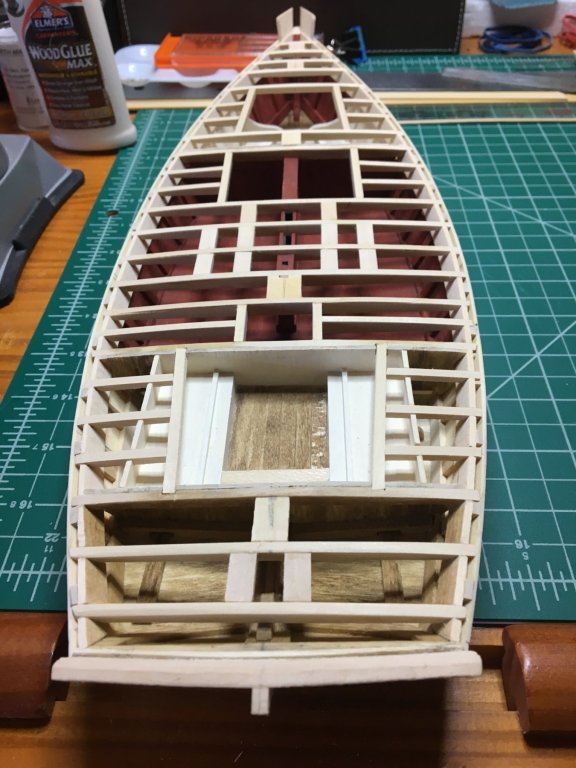
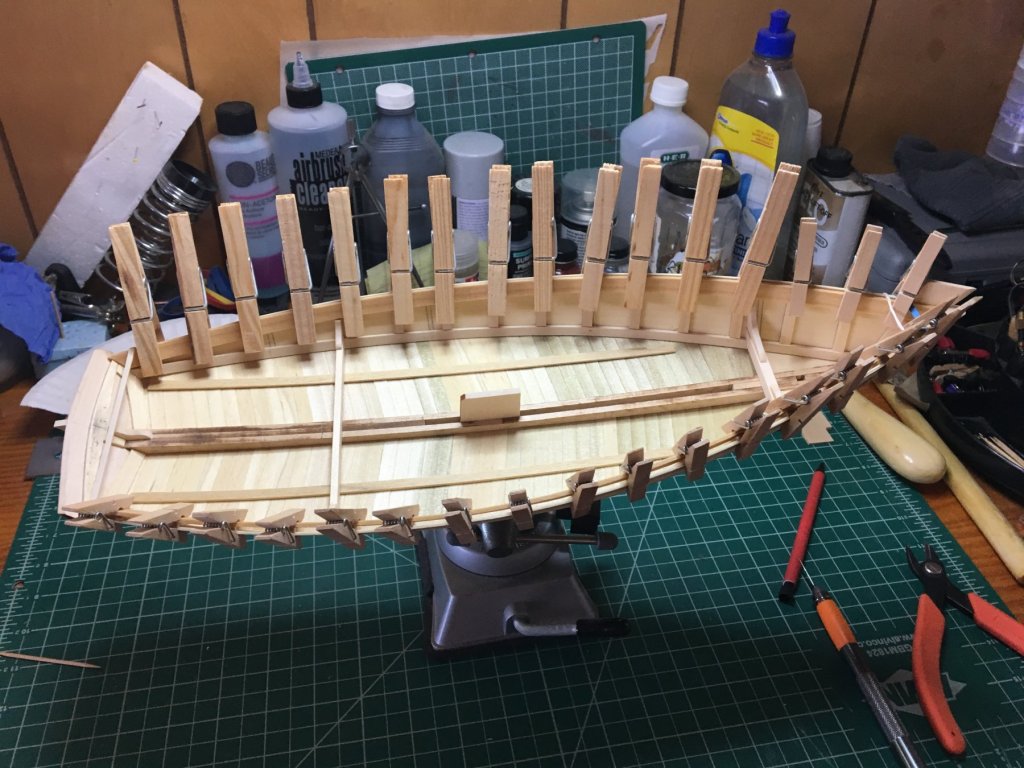
Putting in the deck beams. And cap and log rails. I decided to stain the beams that will be visible when hatches or cabins are removed. See what I mean about the beauty of functional lines?! Deck completed.
-
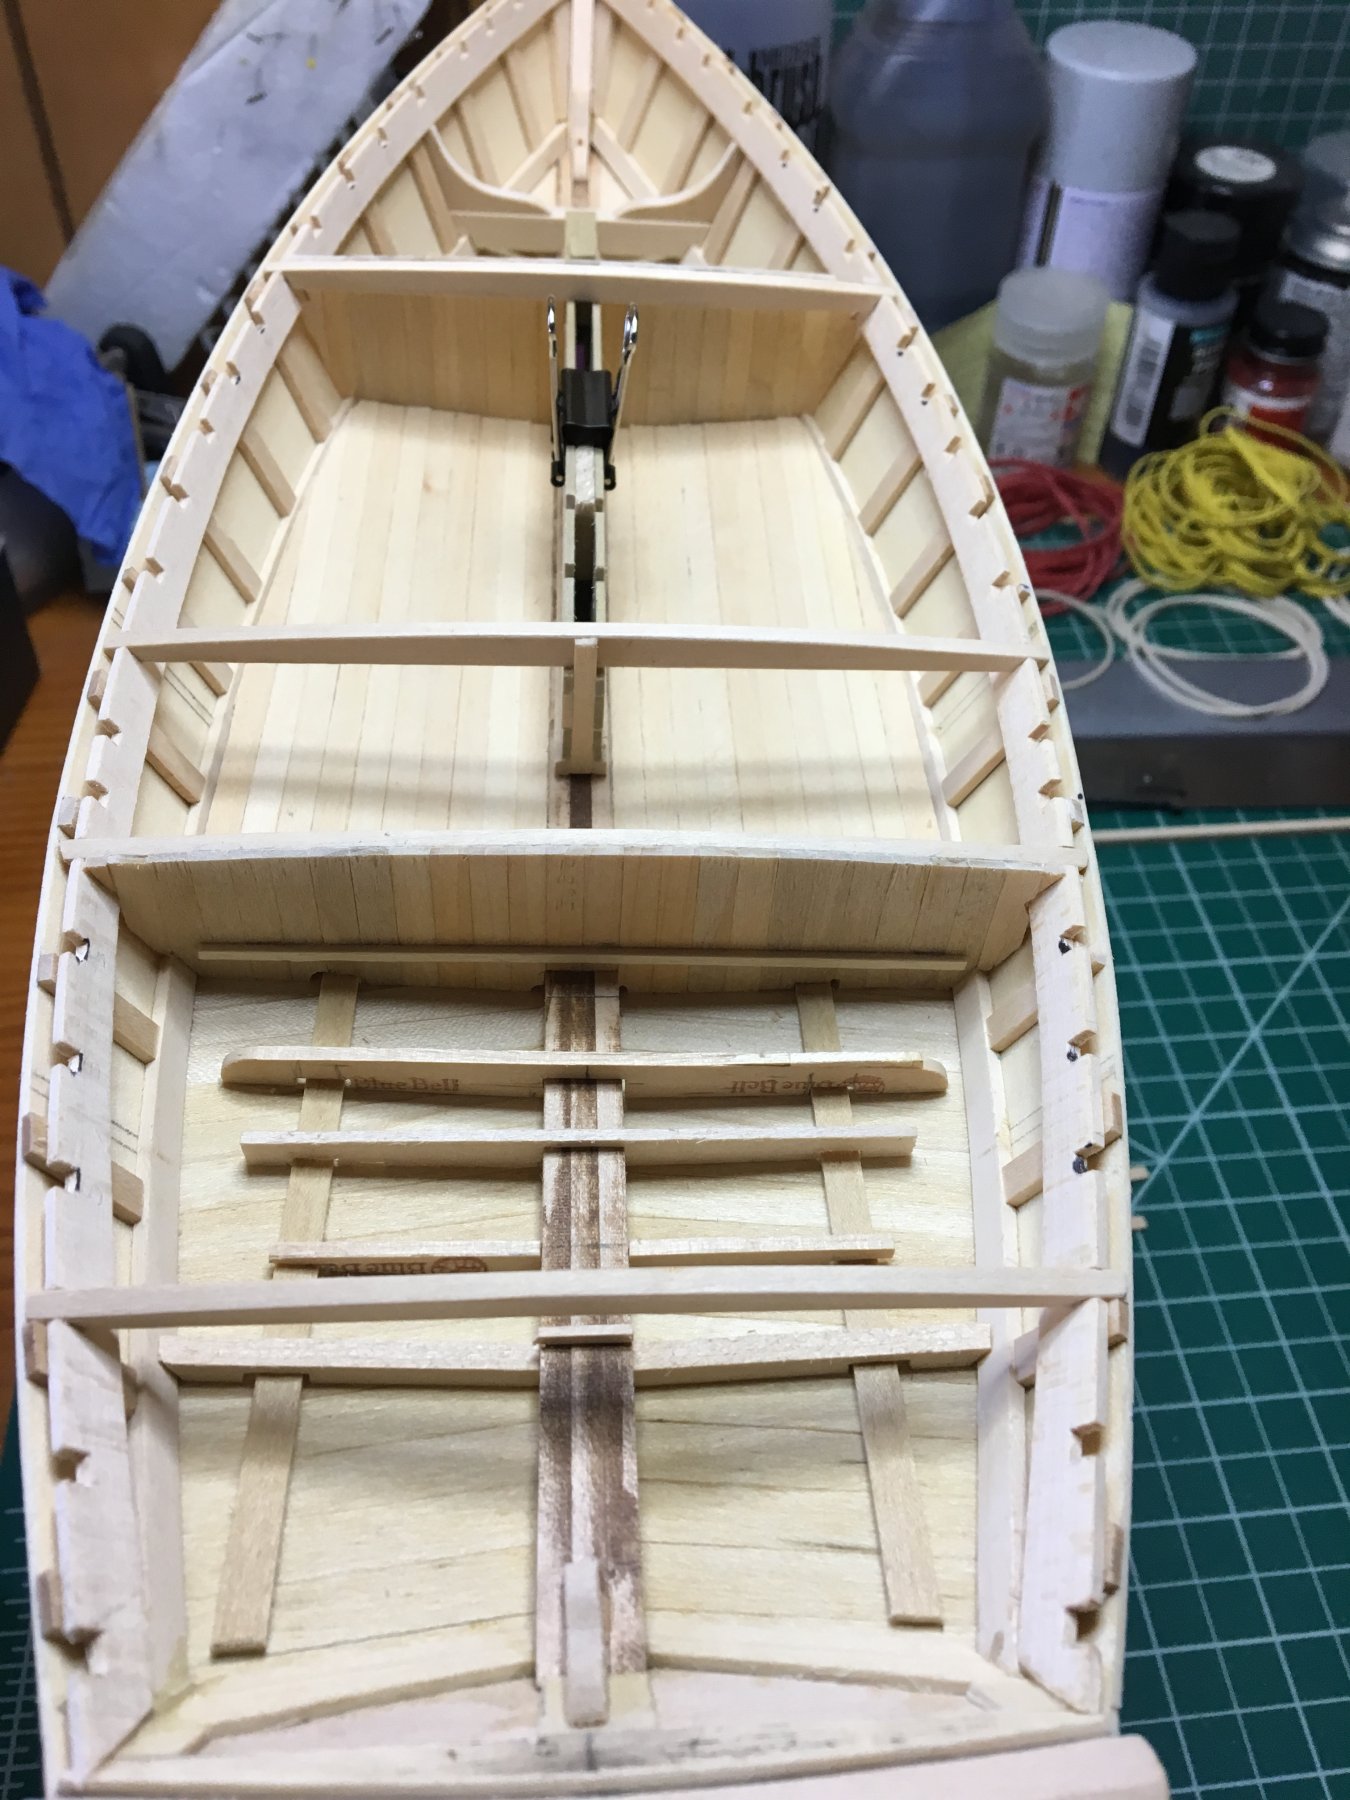
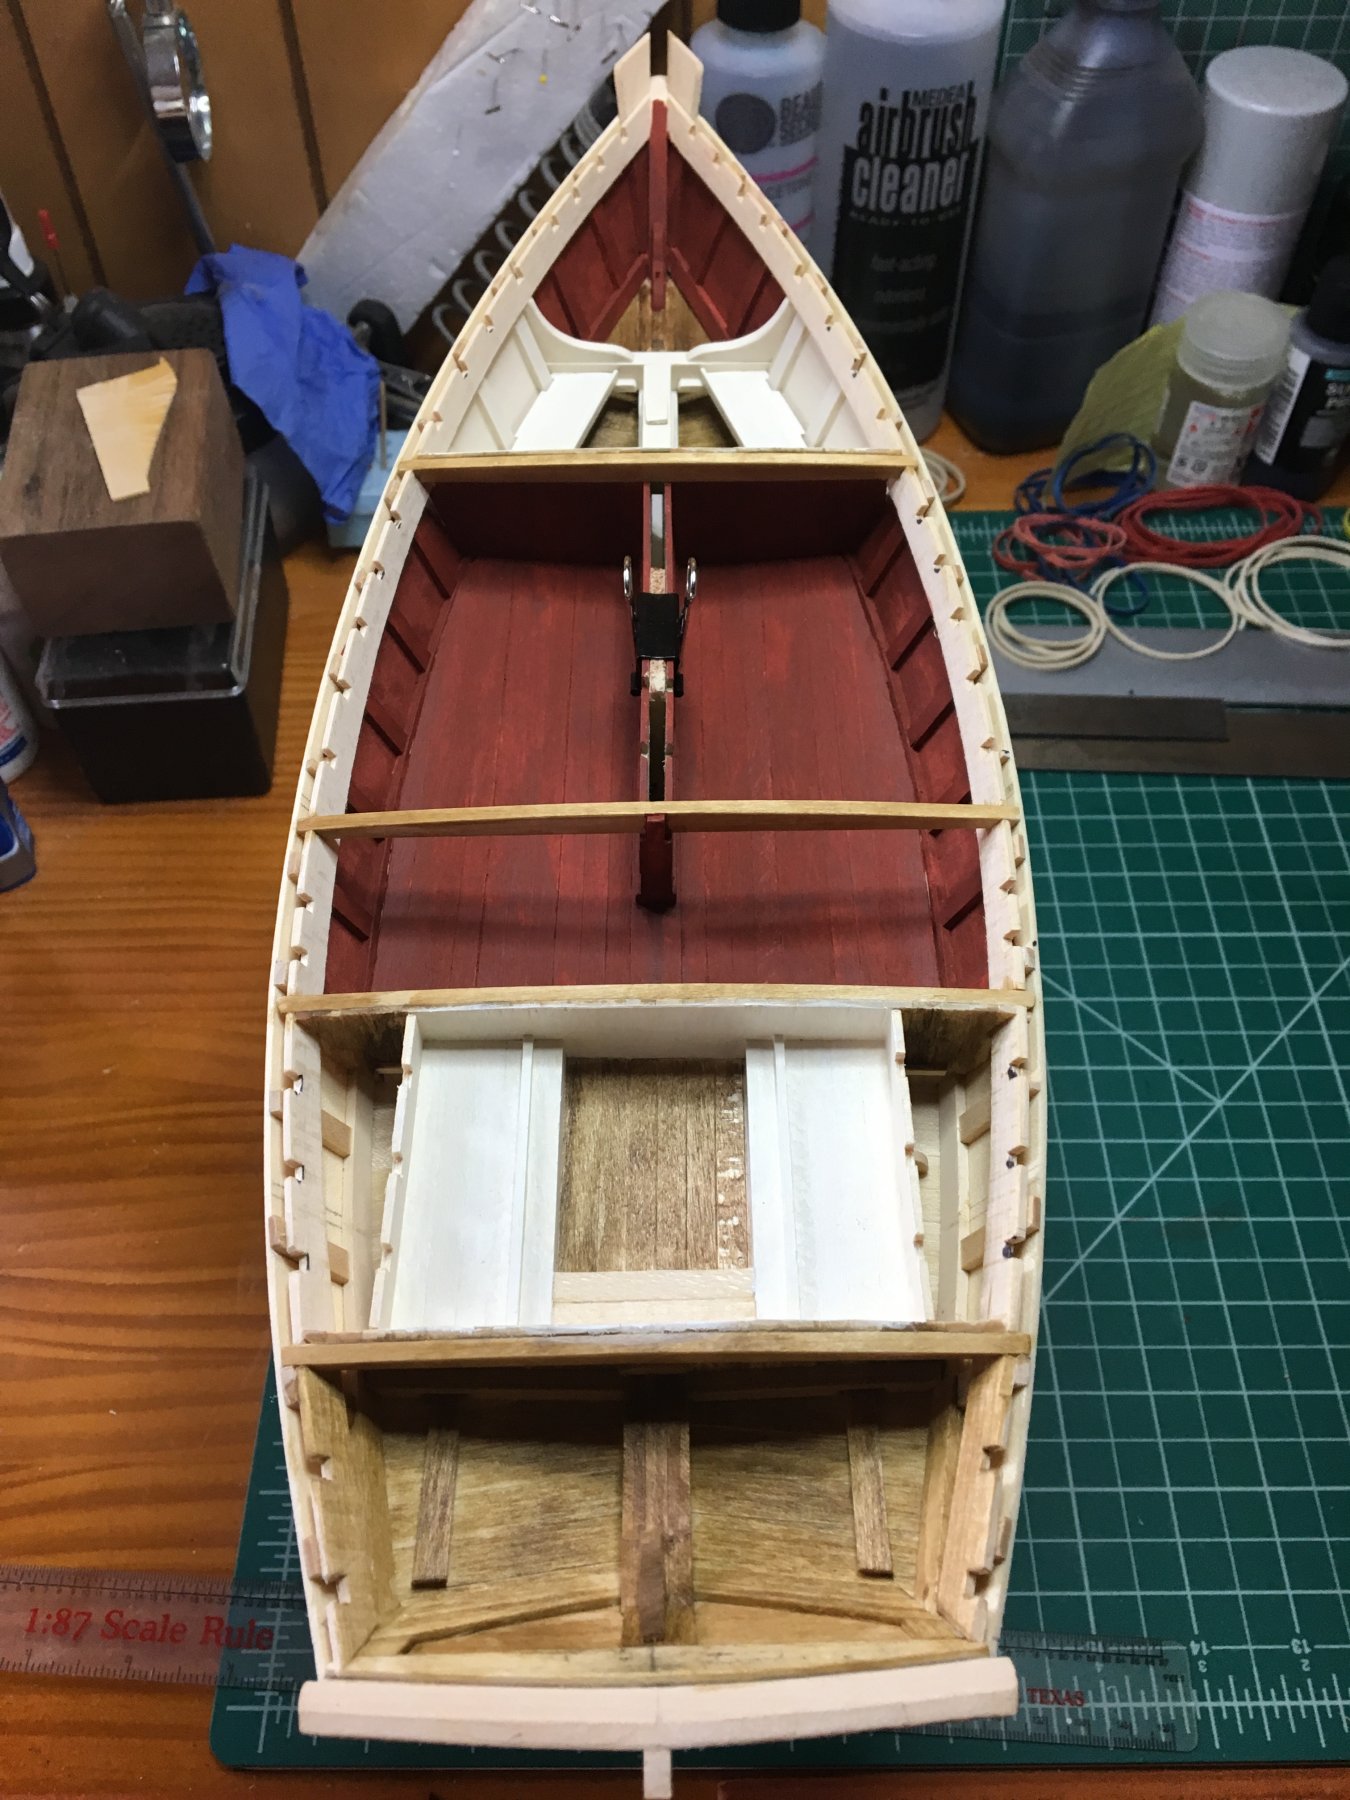
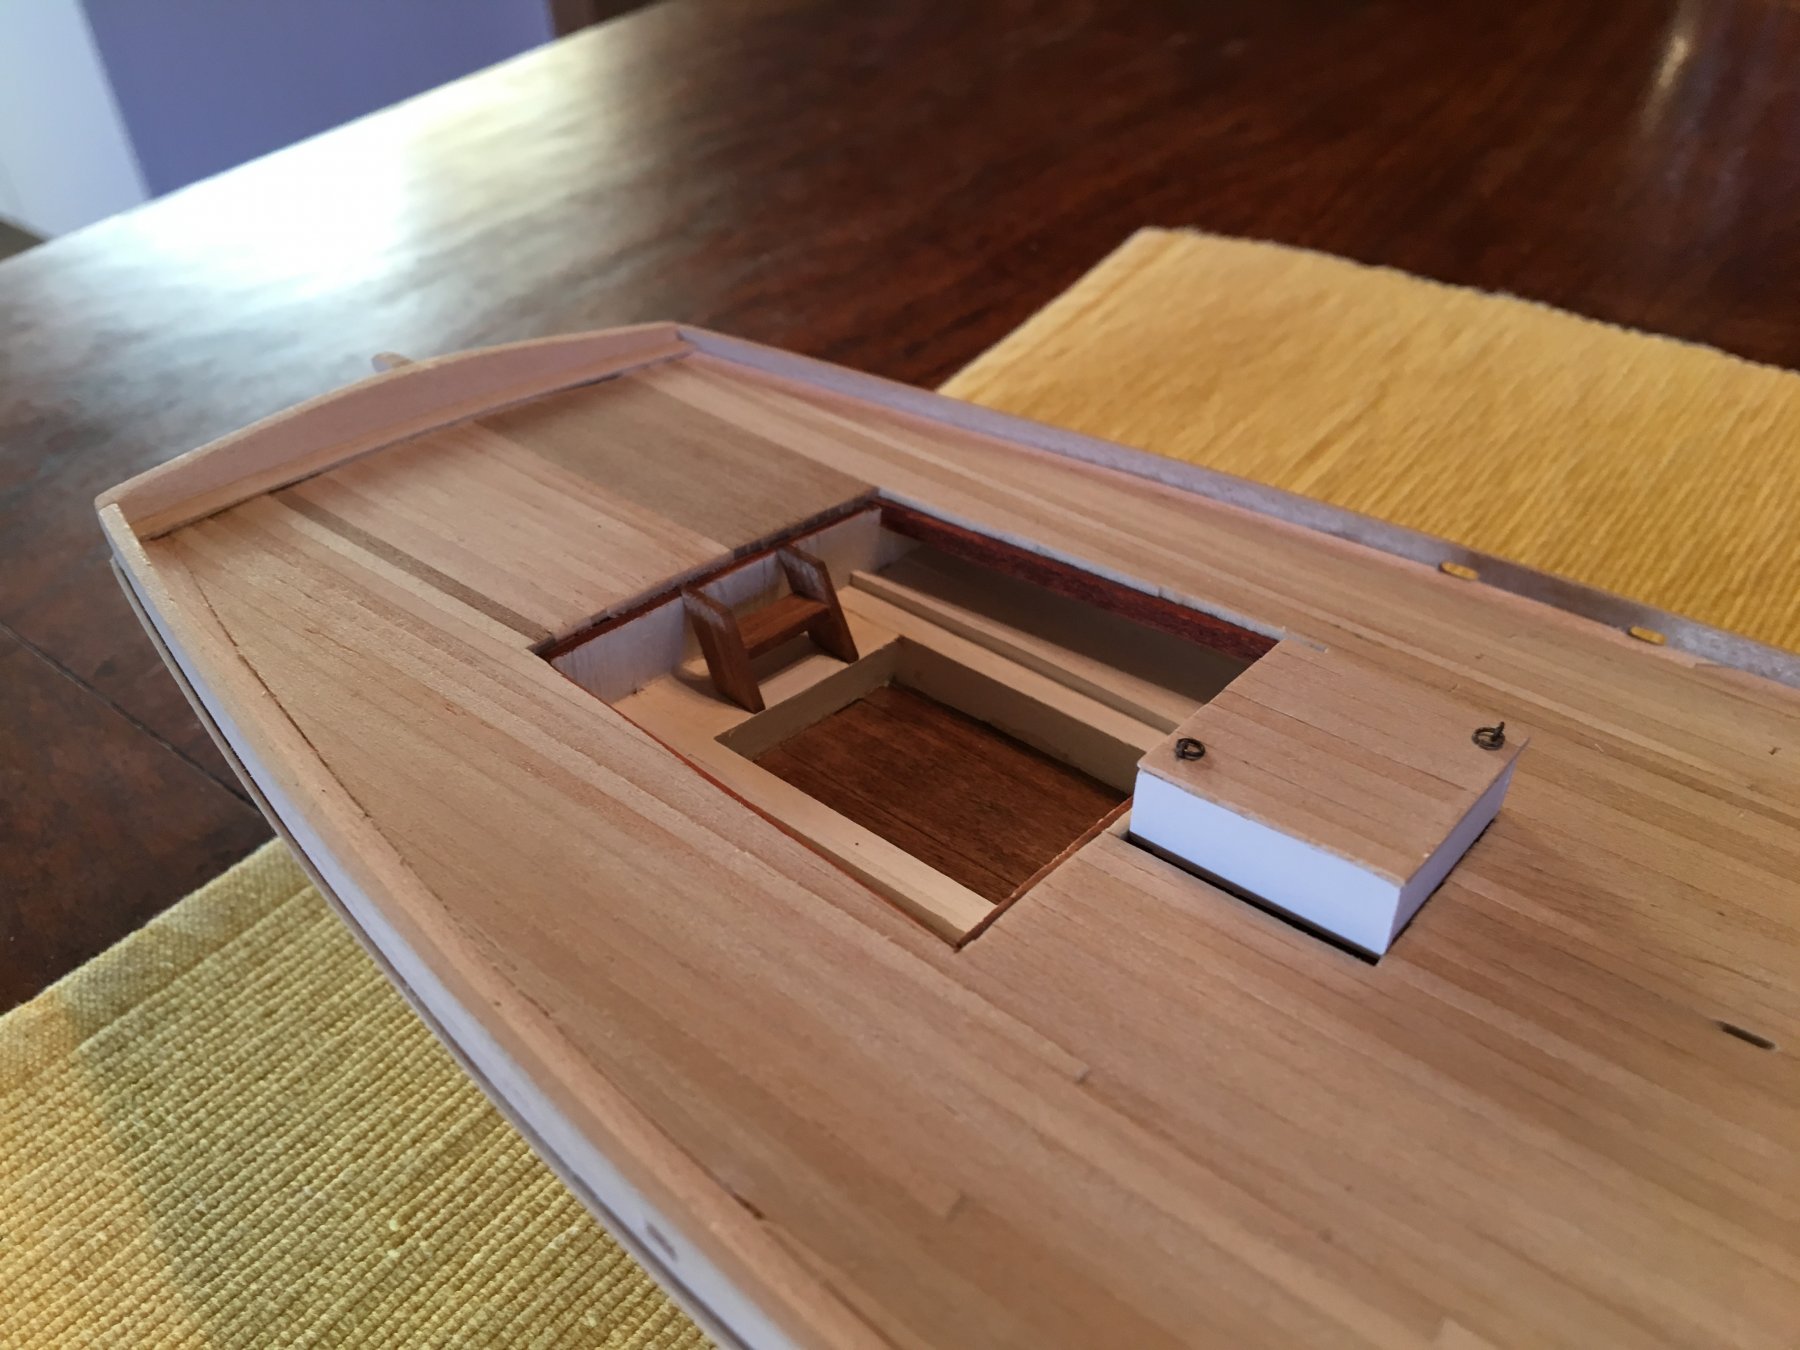
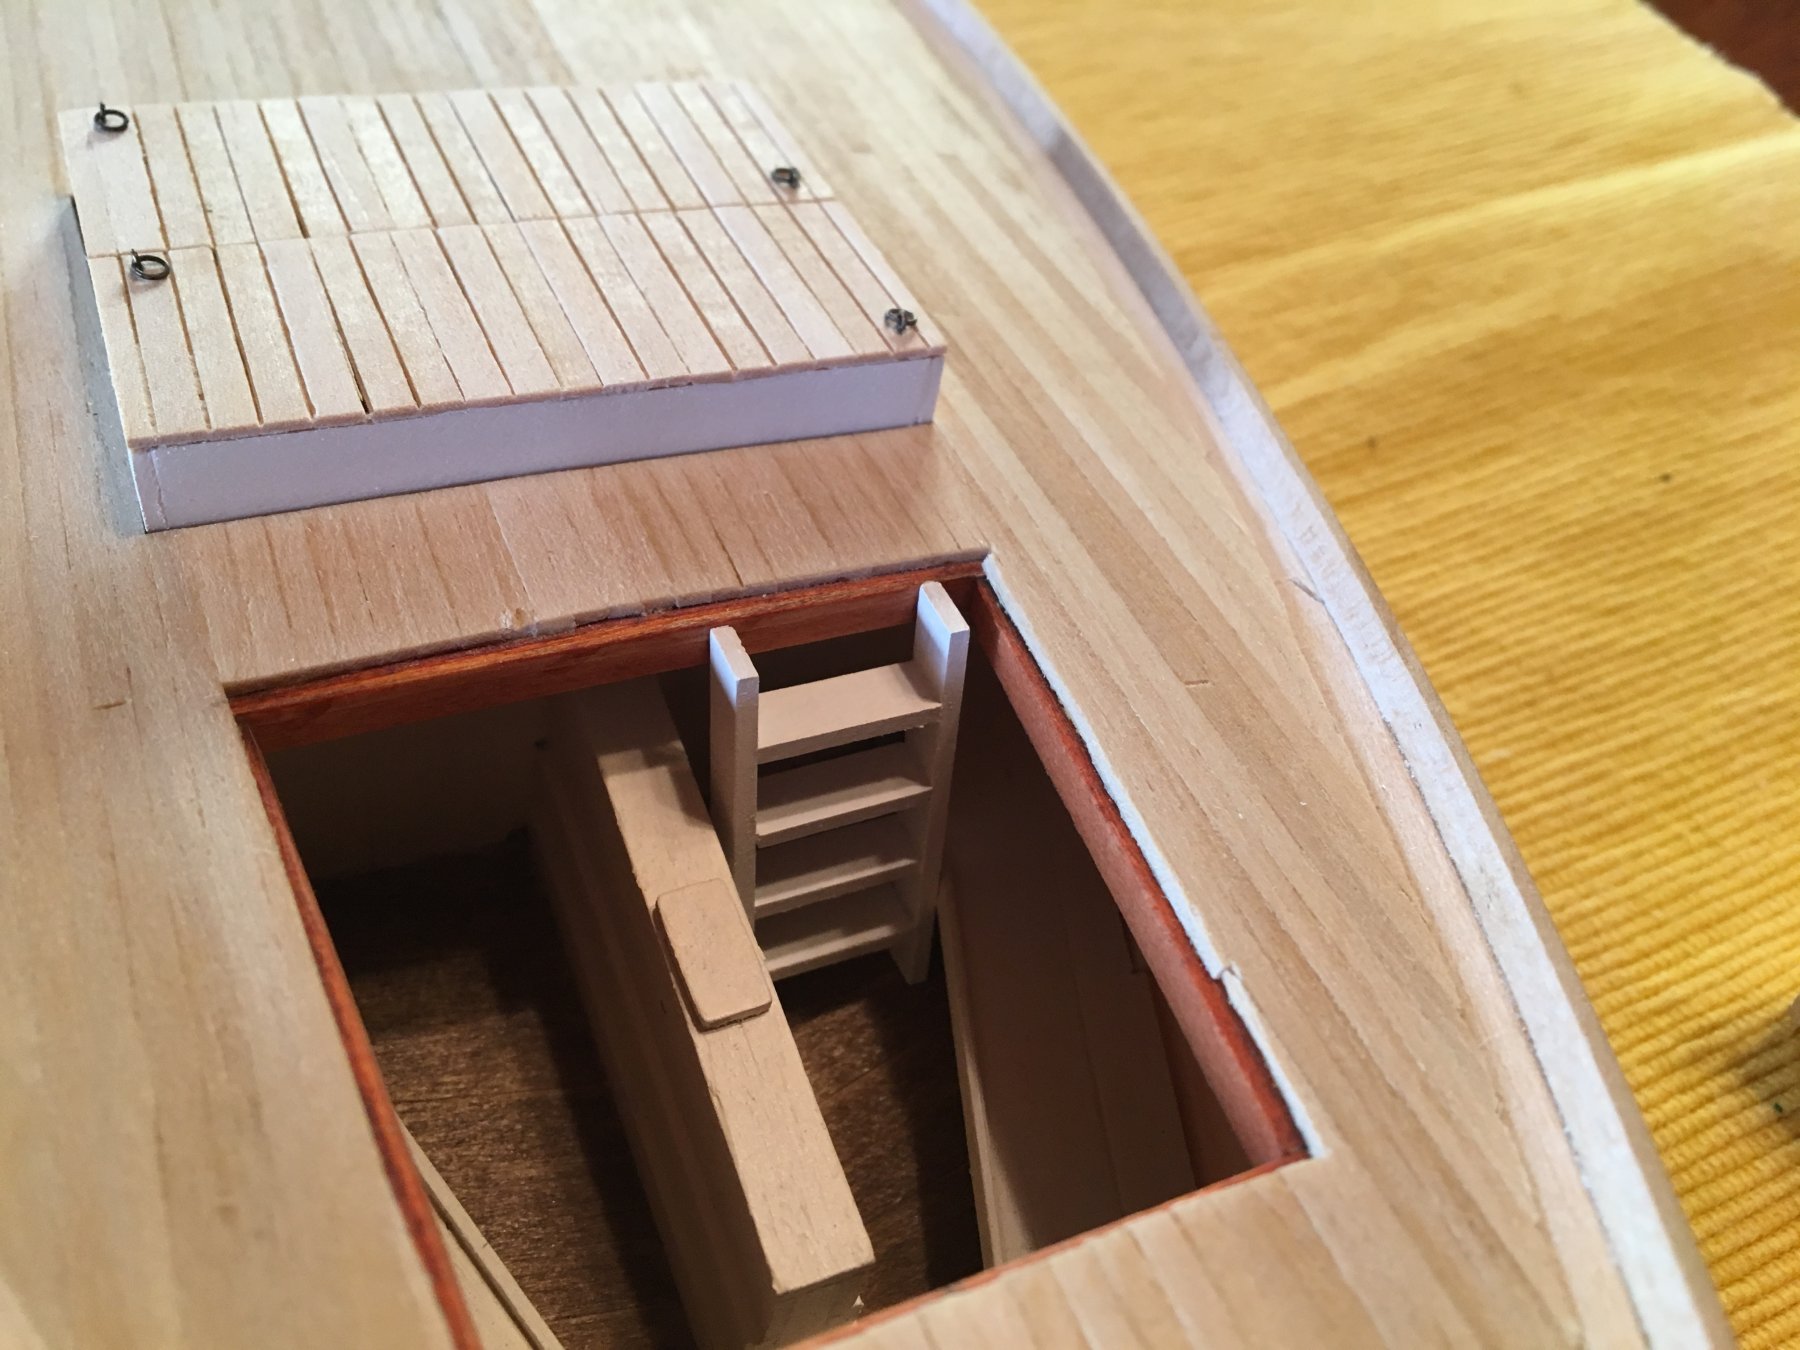
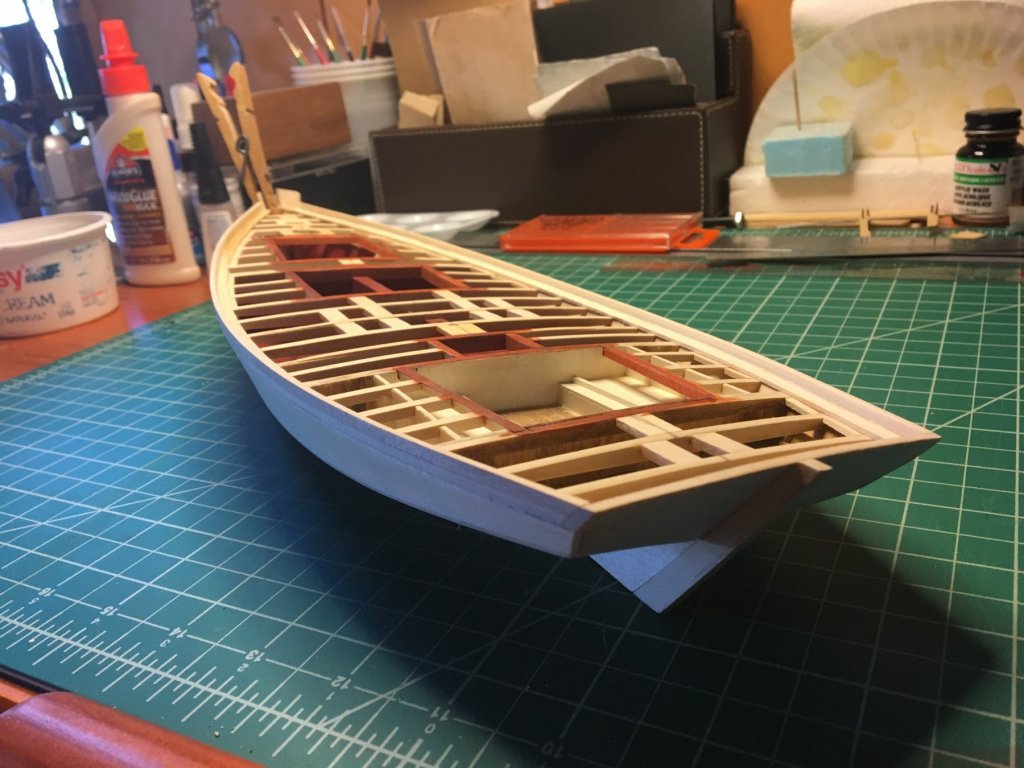
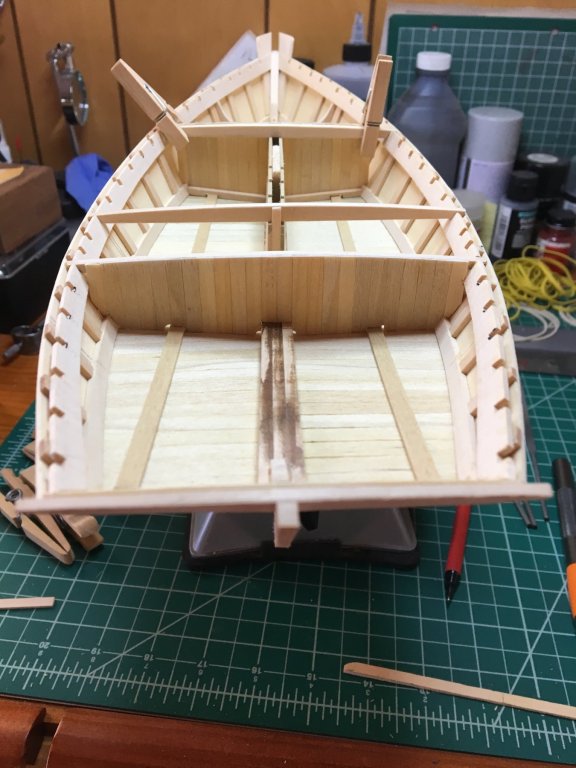
I put in the floors, and wanted a way to hold the ceiling boards down while the glue dried. Here's my solution. For the aft cabin floors I used some leftover fudgesicle sticks. They worked well, and aren't seen. Fudgesicle sticks also make nice bunks. And finally, the first interior paint choices. I made some small changes in the aft cabin later.


-
Interior work: I think knees are some of the prettiest parts of ships. 🙂 I made the little limber holes in the bulkheads for water to run in the bilge as well. Can't have rot!!


-
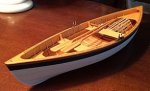
Hello all. Long time lurker who's not posted much until recently. I've built a few model boats/ships. I got started modeling in HO. Had one particularly lovely 1910's NH&NYRR layout many years ago. That's what got me scratchbuilding scale bits of the world. I've built a few metal car kits (the old Hubley kits), and a few aircraft (I'm also a pilot and owned a 1946 Aeronca Chief until some years ago). But I've always loved boats as well, and have owned a fair few of those also (almost all sailboats). I just think the alchemy of function and beautiful line makes for some of the most aesthetically pleasing forms ever made by men. I've built exclusively from kits so far. And I prefer working boats over naval ships, although my very first ship model was a Halifax brig. Anyway, I'm in the middle of building the Willie Bennett. I've posted about it asking for help with colors in particular; but I thought I'd go ahead and post a build log. Not that I think much in it will be new or that impressive. But I've learned a lot from reading other logs over the years, and it only seemed fair to participate. If I think of any particular problem I worked through that might be generally illuminating, I'll be sure to mention it. But, like I said, I wouldn't get my hopes up. 🙂 I'll take a few days to put together a few posts that will bring the log up to date. Not much to belabor with the early parts of the build, since they've been done so often. I'm finishing the houses and hatches at the moment, and about to start on the other deck furniture. I'm still working, so progress is not rapid. But I manage to get a little work done on things most days. To start: Building board, keel (with rabbet). Planking goes fast when the planks are this wide! Transom. Bottom planked and shaping the front blocks. Off the build frames and right side up!


-
Swiss pear is really a lovely wood for many applications. Holds an edge and details very well. Great for carvings too.
-
Plank glue
Griphos replied to dvlp47's topic in Building, Framing, Planking and plating a ships hull and deck
Most people use PVA glue, I believe. You’ll find useful info on this in the articles section. Remember, though, that PVA glues are not simply mechanical, and don’t just stick any surface to any other surface. They only work fully when they can penetrate the grain of both pieces. So end grain joins will not hold much, and cross-grain joins are not as strong as parallel grain joins. The strongest join on planking, then, will always be the join between two consecutive plank edges. The join between the plank and the bulkhead or frame will depend on the kind of grain of the bulkhead or frame at the point of contact. -
Holly, pear, and boxwood are the go to woods for me. If I were choosing between cherry, walnut or maple, it would be cherry. Lovely to work, takes a lovely finish, and stable. Maple is not as stable as the other woods. Walnut is problematic for the reasons mentioned, and I just don’t like the look of it on boats.
-
A good pair of xuron flush cutters will do the job well if placed correctly during the cut.
- 104 replies
-
- 1
-

-
- revenue cutter
- BlueJacket Shipcrafters
- (and 1 more)
-
All wood will twist and bend under the right conditions. Kiln dried lumber can be egregious about twisting and bending. This varies, in part, by the kind of wood and the conditions in which it has been dried, the moisture content to which it has been dried at its driest, and the consistency of that moisture content throughout the board. Some wood, like mesquite, hardly moves at all with changes in humidity or temperature. Other woods move a fair bit (like soft maples, and even some hard maples). Depending on how you stored it and the environmental conditions, 18 months may or may not be enough time for it to become as stable as possible. A good moisture meter will help you assess that. But, if it hasn't moved much (no real twisting or bending) so far, that's a very good sign. However, as Bob mentioned, stored stresses in a given board can create some twist or bend when released by recutting, so milling your boards into sizes you plan to use will tell you a great deal also. At 1:1 scale, for making furniture, I much prefer the air dried wood I have harvested myself (walnut, cherry, mesquite, maple, etc) over kiln dried wood. The air dried wood simply works differently, and better. I am tempted to use the word "alive" to describe it. Both the way it responds to tools and its surface after tooling is clearly superior. Kiln dried wood has been steamed, and that definitely changes the composition of the wood, I believe. At model scales, I'm not sure there would be as much difference in workability, but others with more experience will surely chime in.
-
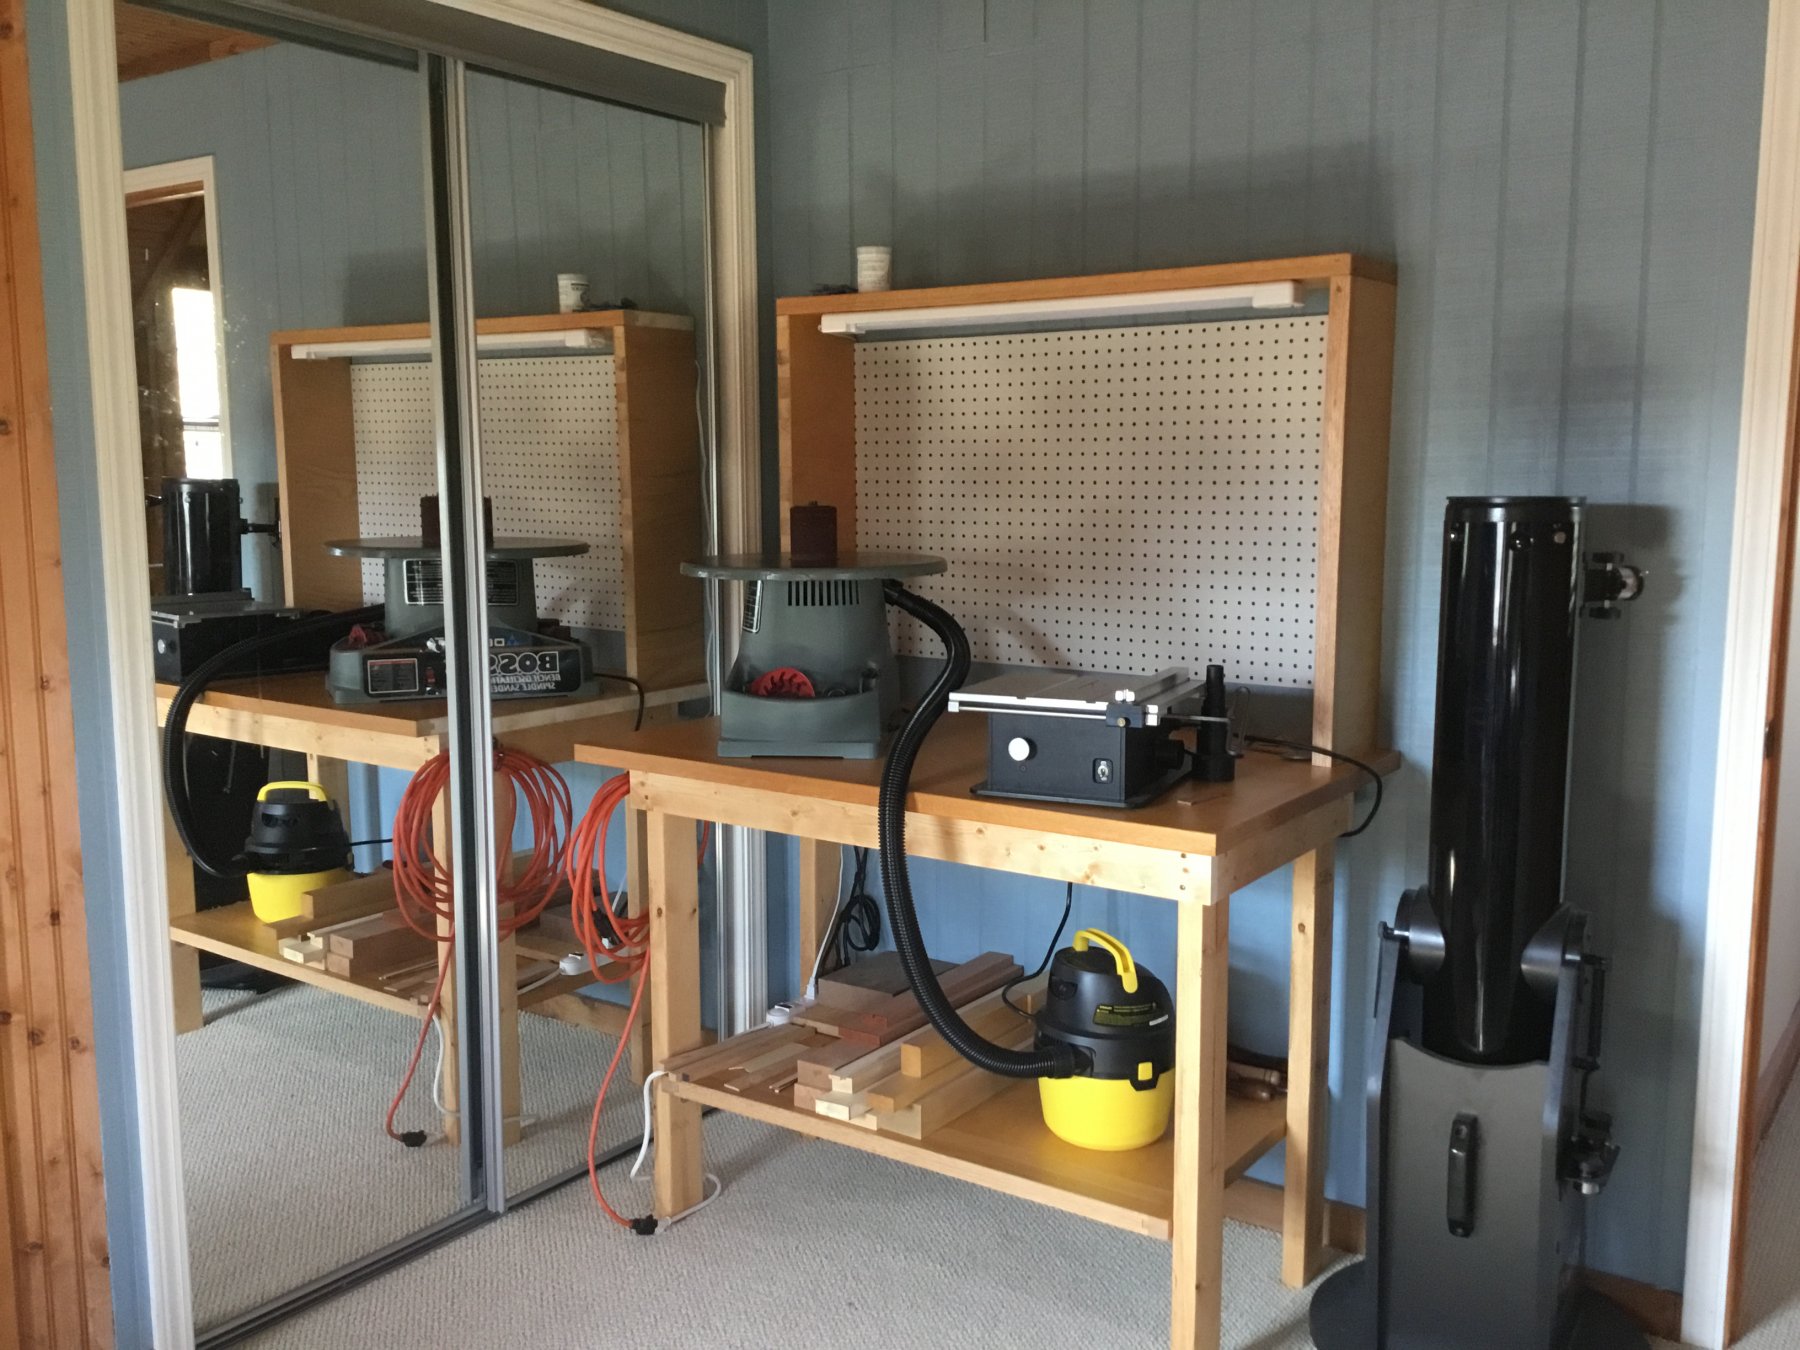
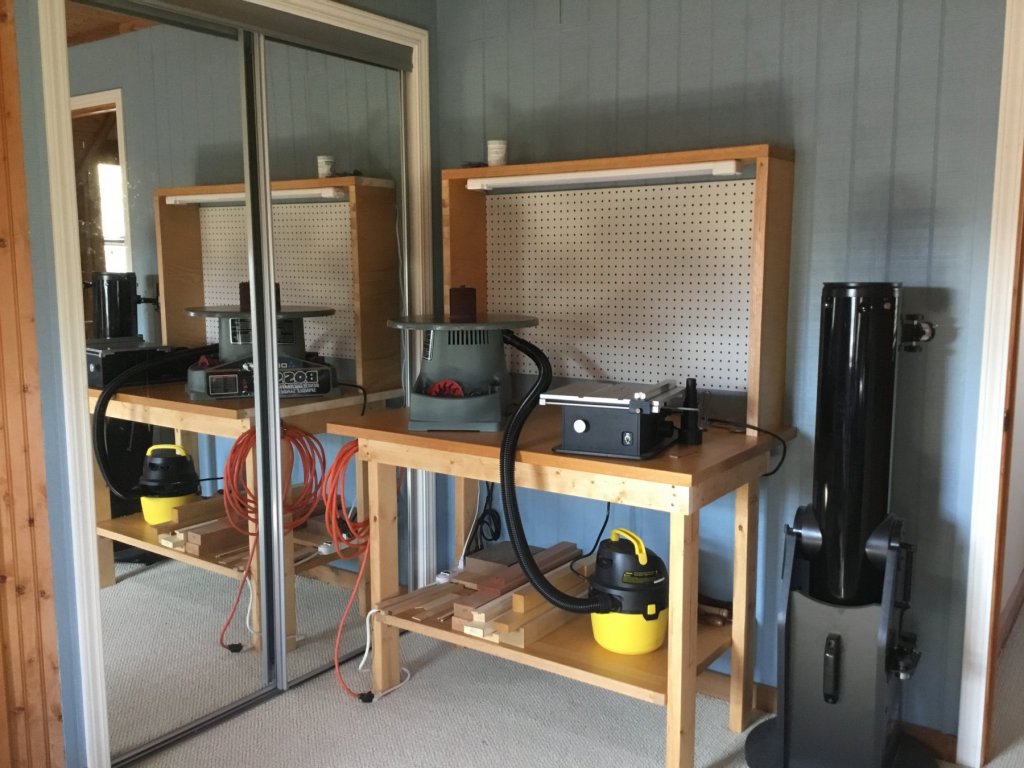
@Jaager 🙂 I don't want to move it regularly, so no casters. I have some, but will keep them for other projects. There's a power strip in the back left corner, and there's a LED shop light tucked tight under the top shelf. But mounting one with a "crane" is a good idea, so I can put the light where I want it. This shop light is pretty darned bright, though. No brace needed. The lower shelf is hard attached, so it is very stable. Not sure what I'd use folding shelf brackets for. I'm thinking I'll just hang what I need from the peg board. I'm sure it will fill up with stuff before too long. But I am thinking about adding a plastic floor mat/shield beneath it to make vacuuming any errant dust easier. @Ebomba: Yes, lots of natural light in that room. Very good work environment. I built a little jewelry making desk into a cubby on the other side. I do that on the side as a break from modeling. 🙂
-
I have a little table against the wall of my dining area where I do most of my building. And a full wood shop outside near the house. But, I’ve wanted to make a space for my little Byrnes saw and my spindle sander in the house, as I use them fairly often. So, since my kids have moved out several years ago, I kind of took over part of my son's old room, took a break from building the skipjack, and built this work bench last week. It has a shelf to store my wood, a little vac, a peg board and some lighting. There are no plugs on that wall, so I have to use an extension cord. Quick but serviceable. If I get a little mini lathe again, I can use it there as well, I think, storing it on the lower shelf.
- 5 replies
-
- 10
-
-
Beautiful work and incredible details. Judging from the ripples along the hull, she’s making pretty good way, but I don’t see any engine controls. I’m assuming diesel power? I love models of working boats.
-
I highly recommend the line you can get from Chuck here: https://www.syrenshipmodelcompany.com/miniature-rope.php It's all natural fiber, and not only does it look realistic, but it handles beautifully. Chuck can tell you what sizes you need for the Syren if you need him to, I'm sure.
- 1,135 replies
-
- 4
-
-
- model shipways
- syren
- (and 2 more)
-
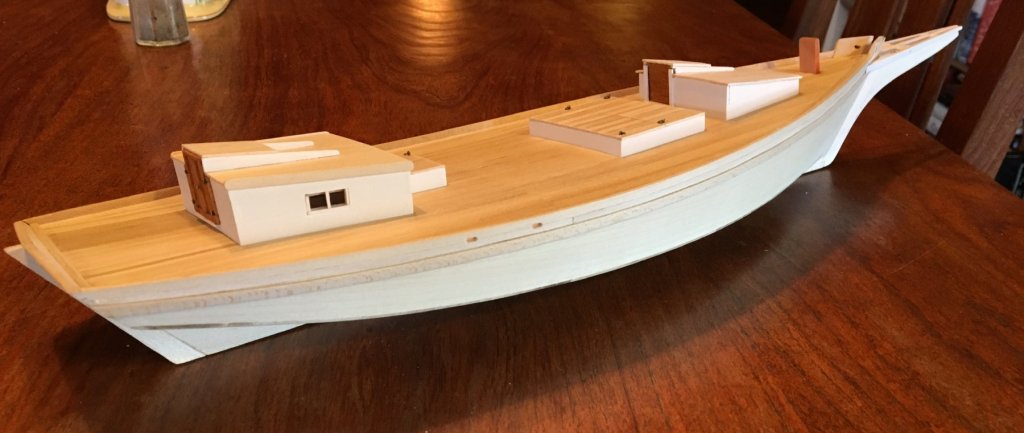
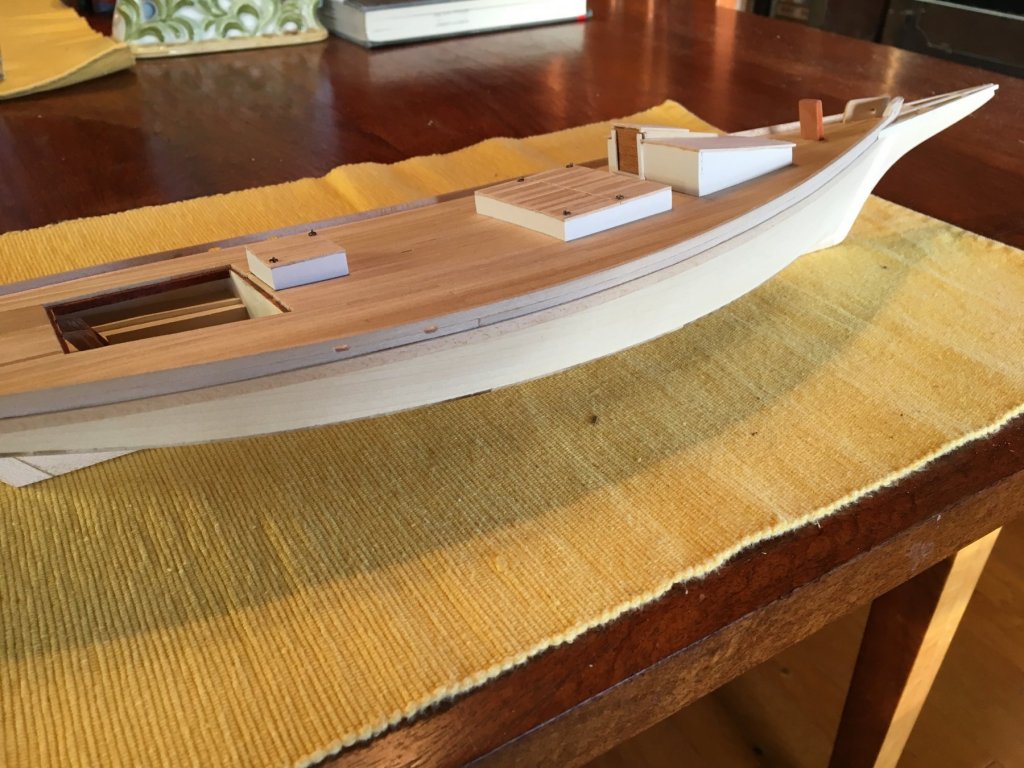
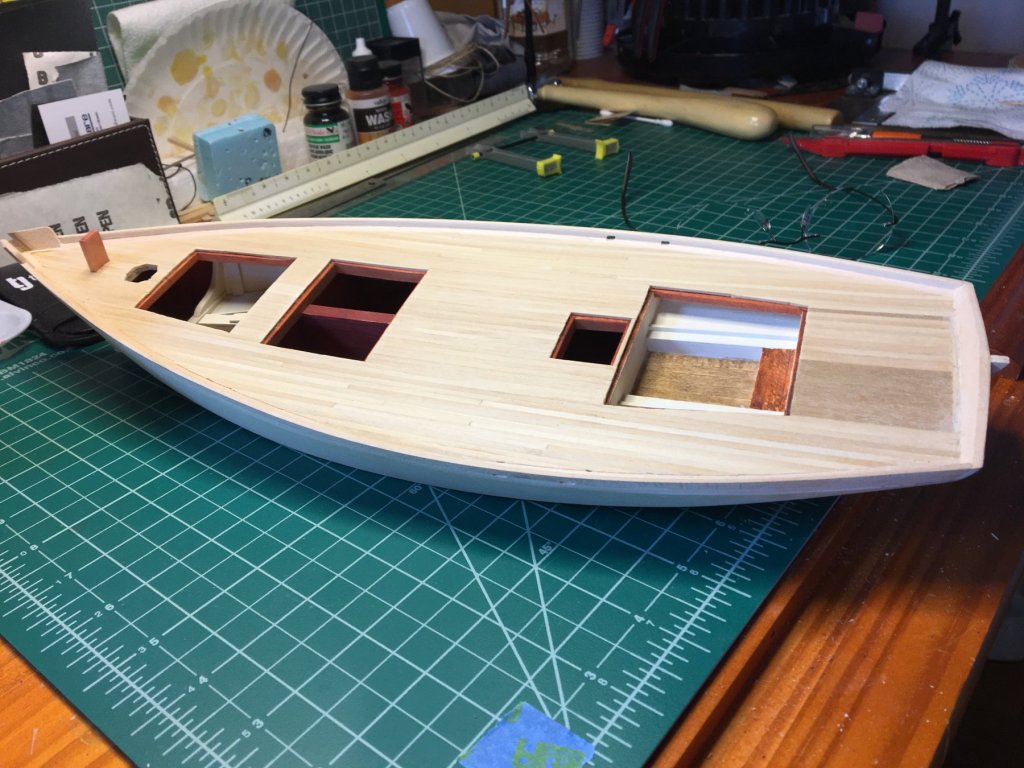
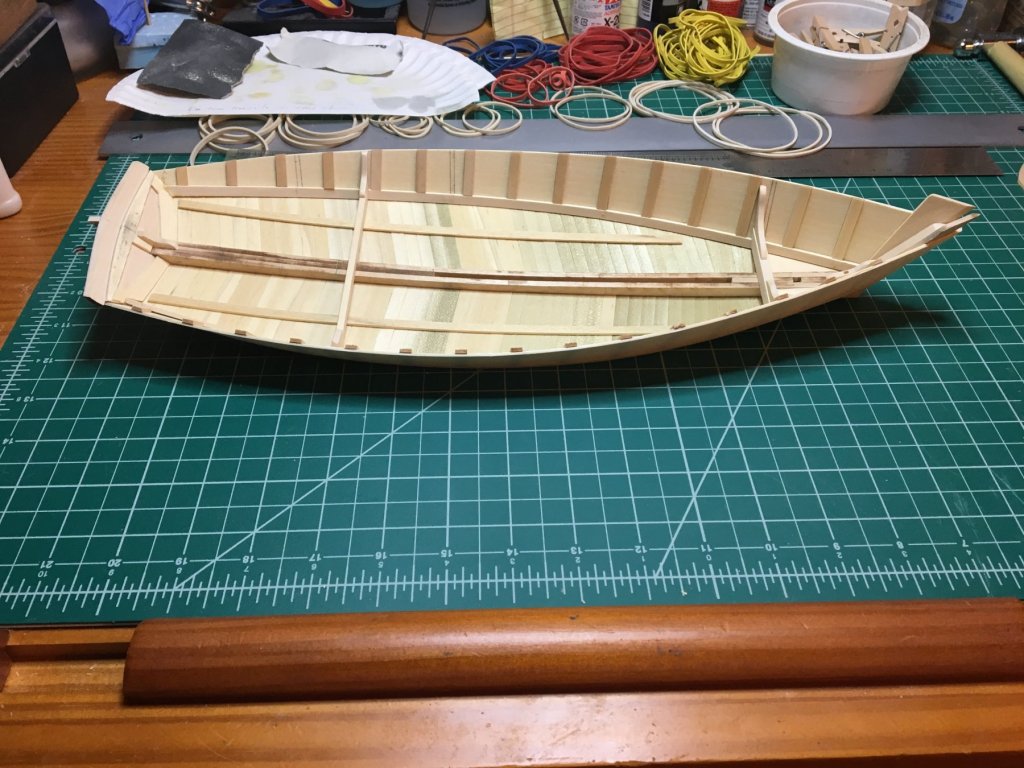
Here's where the build stands at the moment. Have the main (aft) cabin to build and then the rest of the operating deck furniture. Looking forward to that, actually. Going to work at polishing up my brass soldering skills. I'm thinking about leaving the deck and house tops natural, or lightly stained. I know it's not realistic per the prototypes, but it just looks so darned pretty to me. I'm willing to be talked out of it though and paint the whole white, as per the usual practice.

-
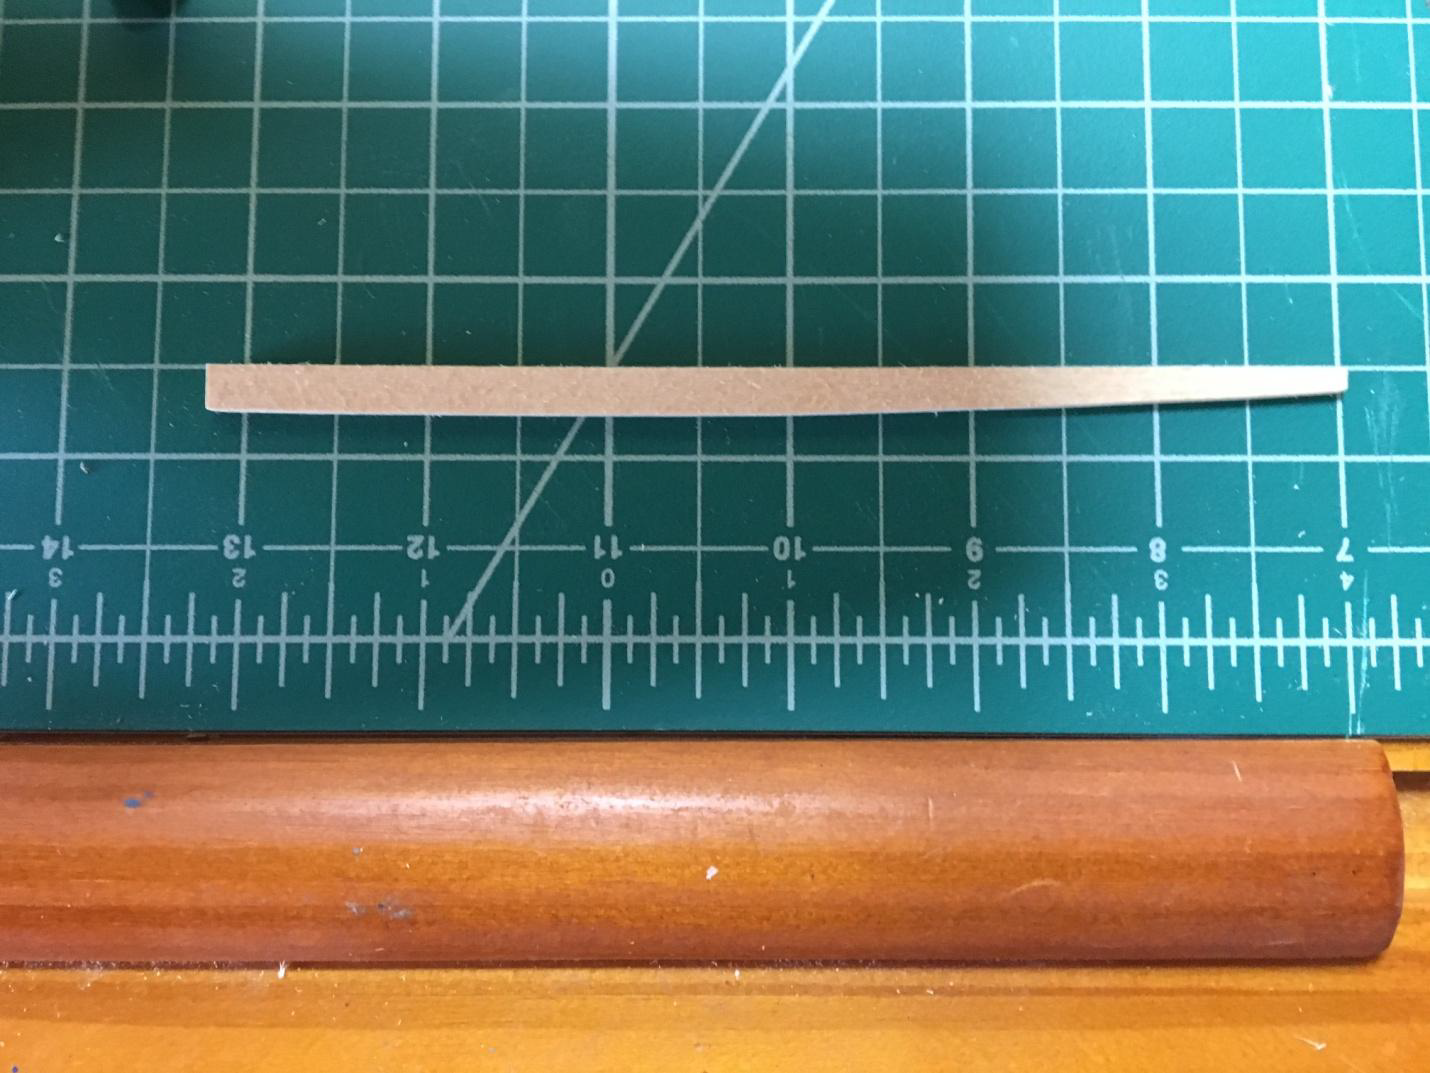
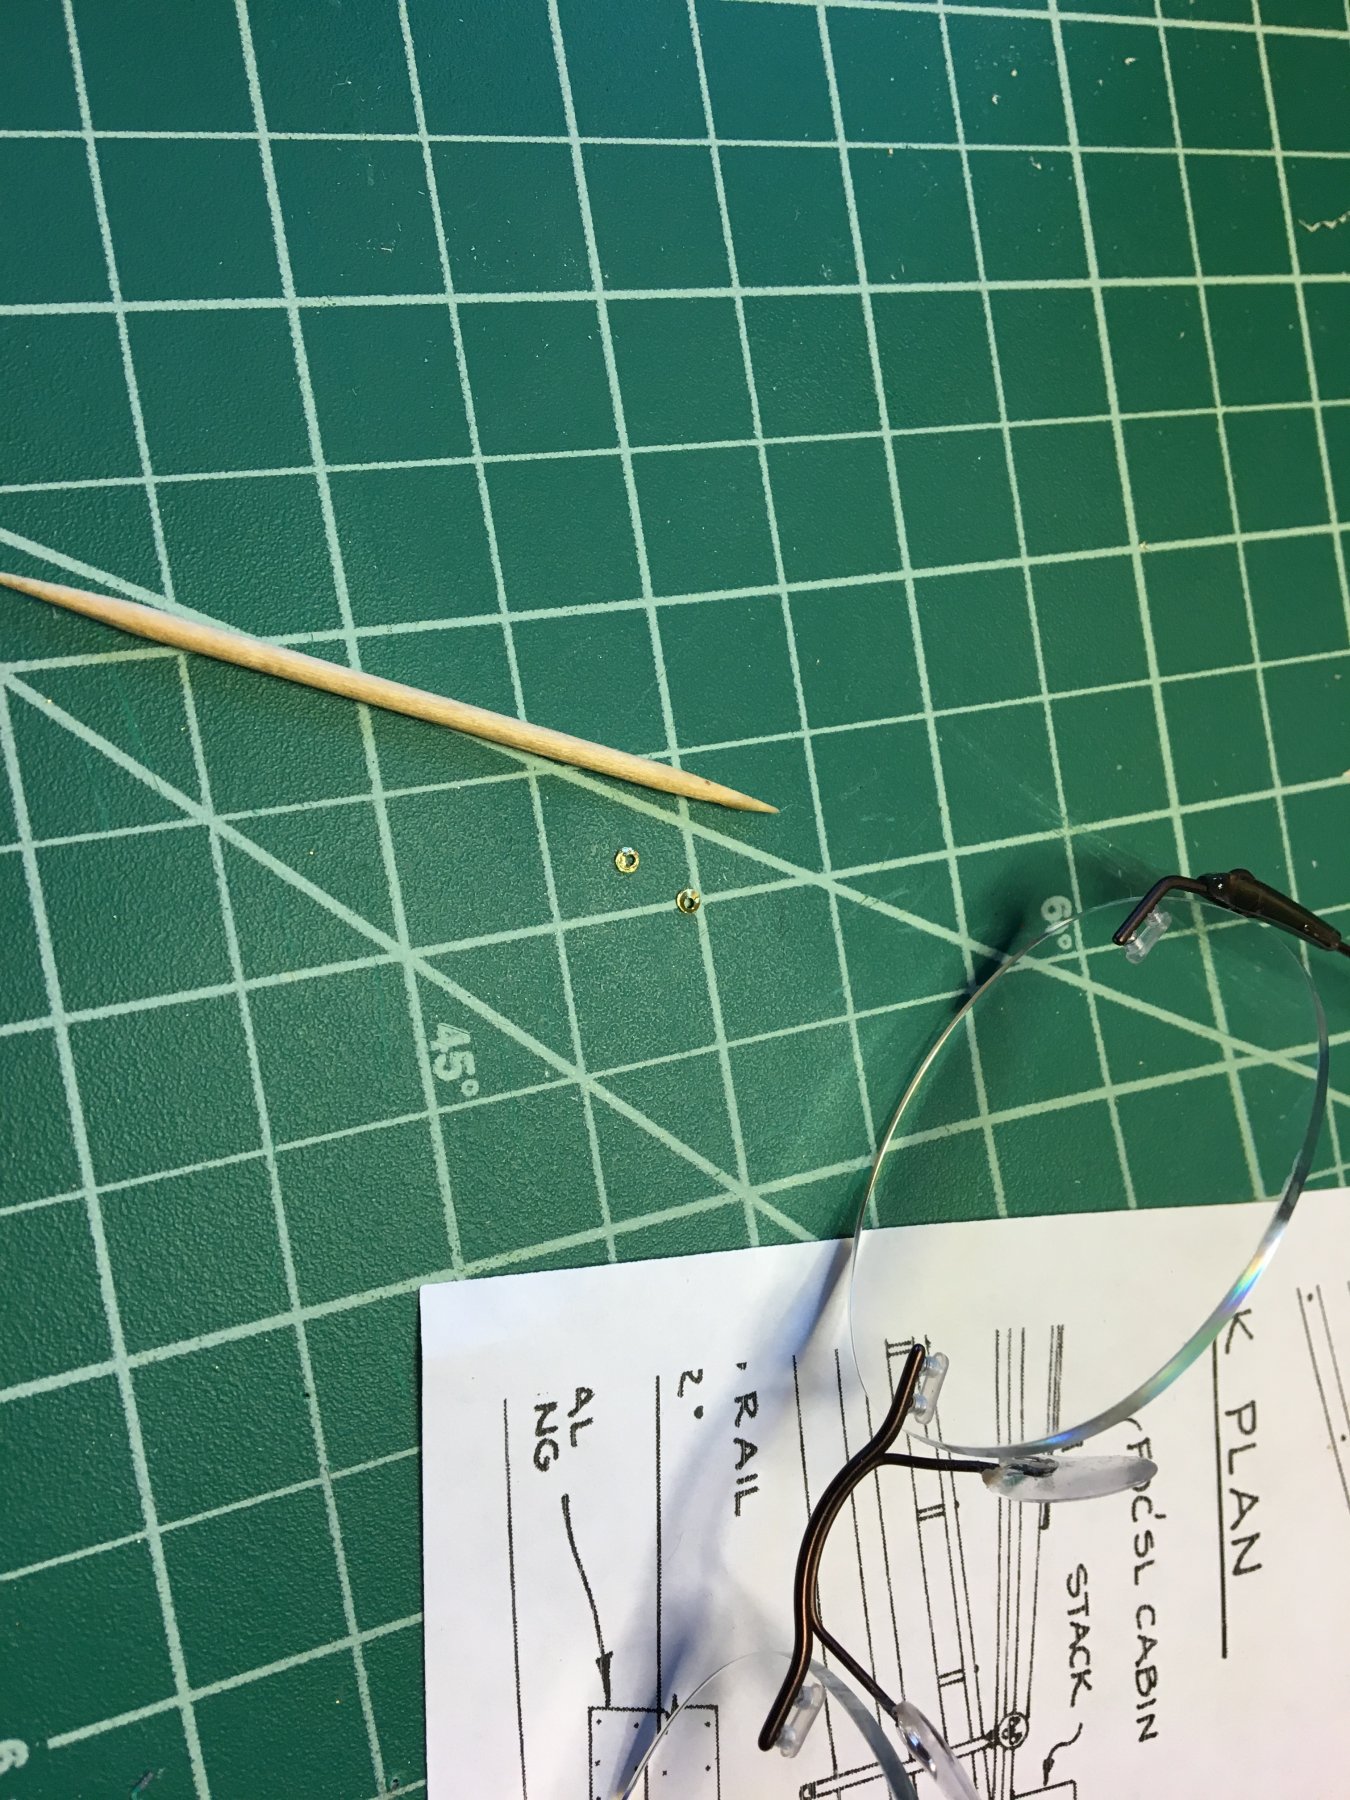
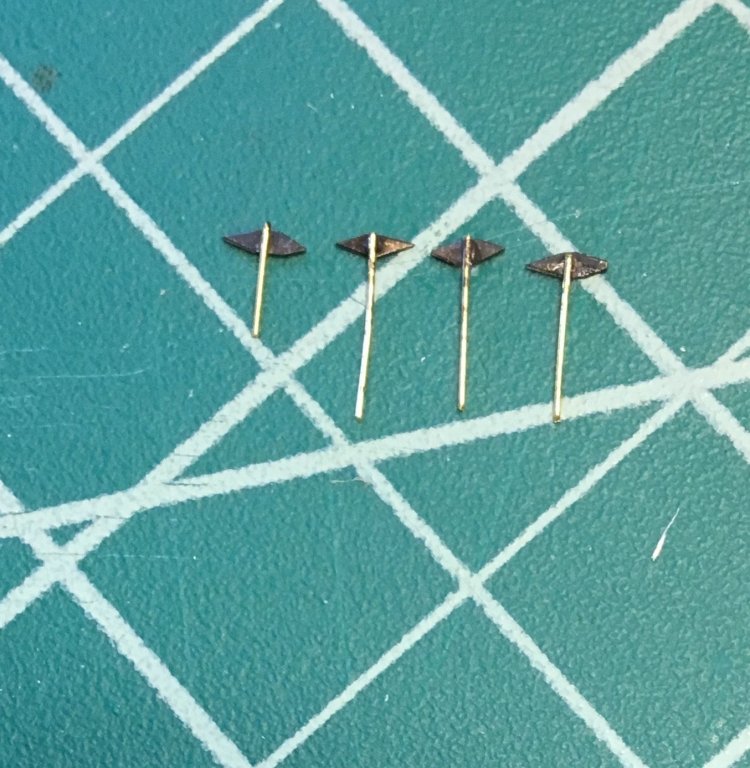
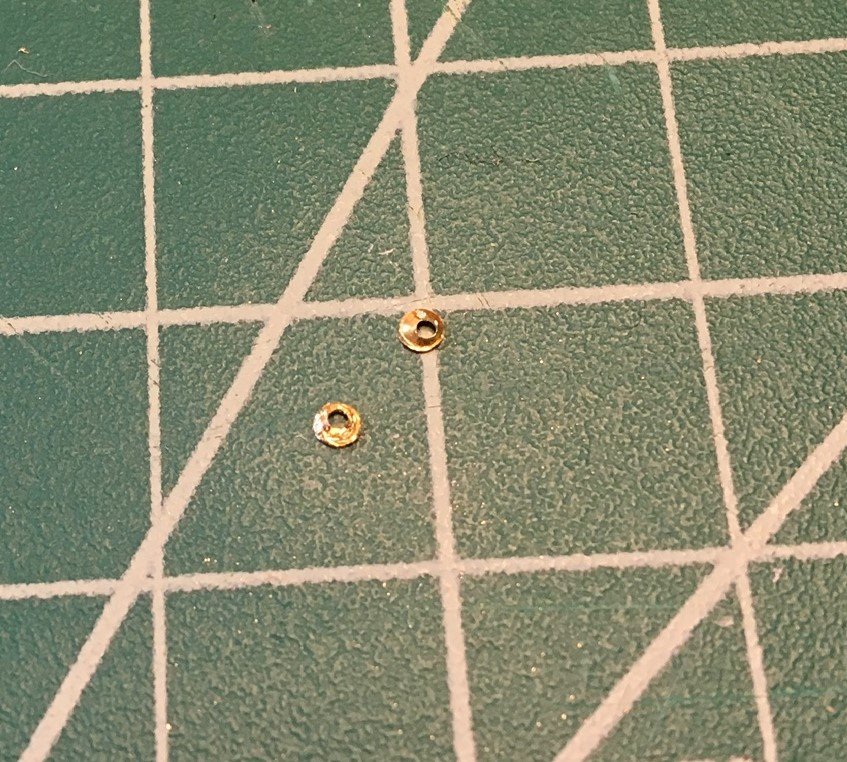
I made the stem and cutwater and drilled the holes for the tie rod. I thought I'd like to try to replicate "nuts" in some way. So I used a hole punch to cut a small hole in some spare sheet brass and then dimpled the discs with a punch into my cutting mat so that they domed. Then I drilled them with the same size drill as the rod I used for the tie rod. #76 I think. It's very small work, and my old eyes aren't what they used to be, so one hole was drilled off center and I had to redo that one. I've included a photo with my glasses and a toothpick for size reference. They looked okayish to me. so I glued them onto the rod and then snipped the ends to what looked like the right length to simulate a bolt head and then painted to see what it would look like. I have to say I'm fairly pleased with the result.


-
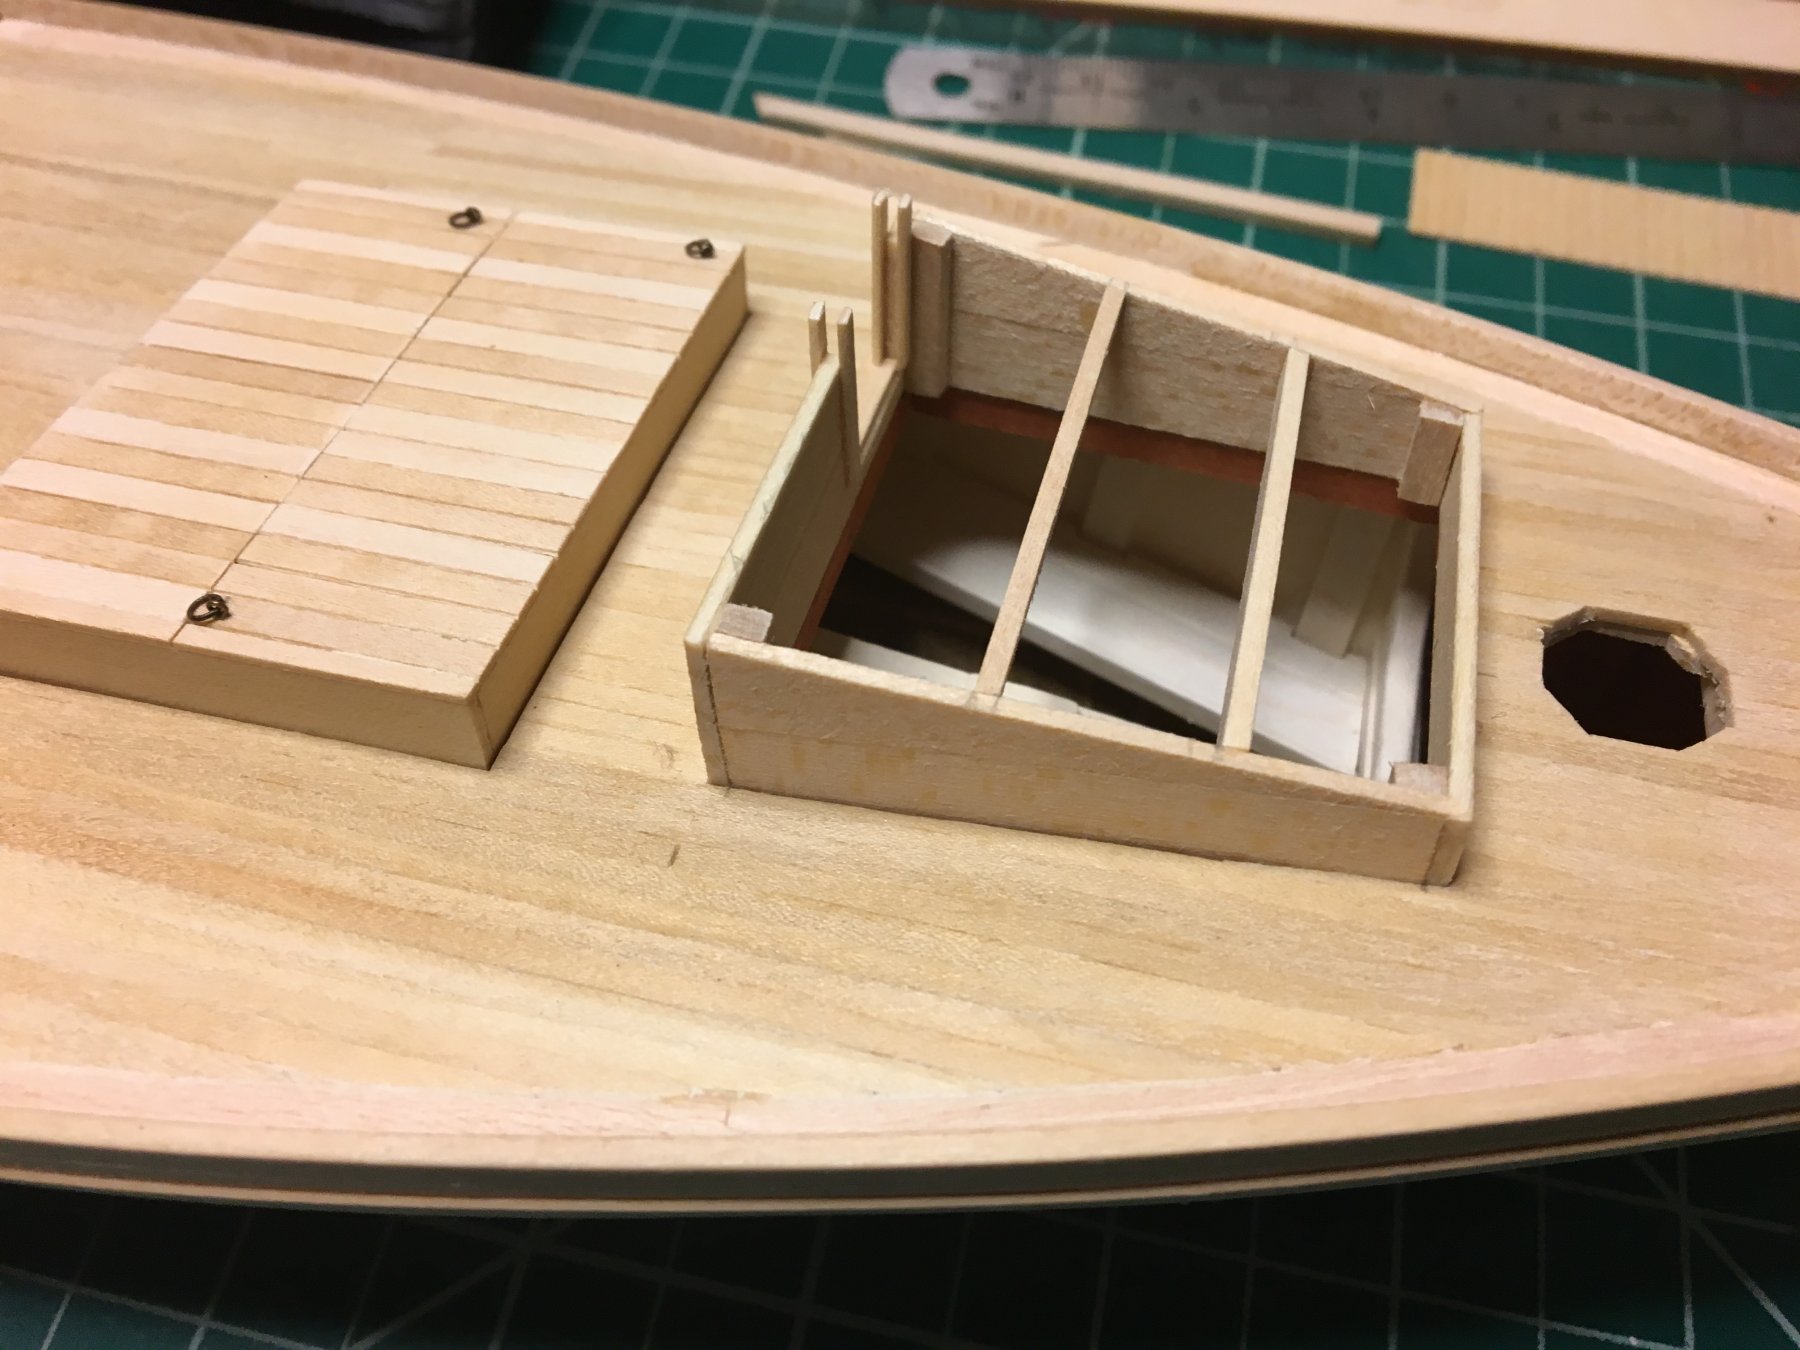
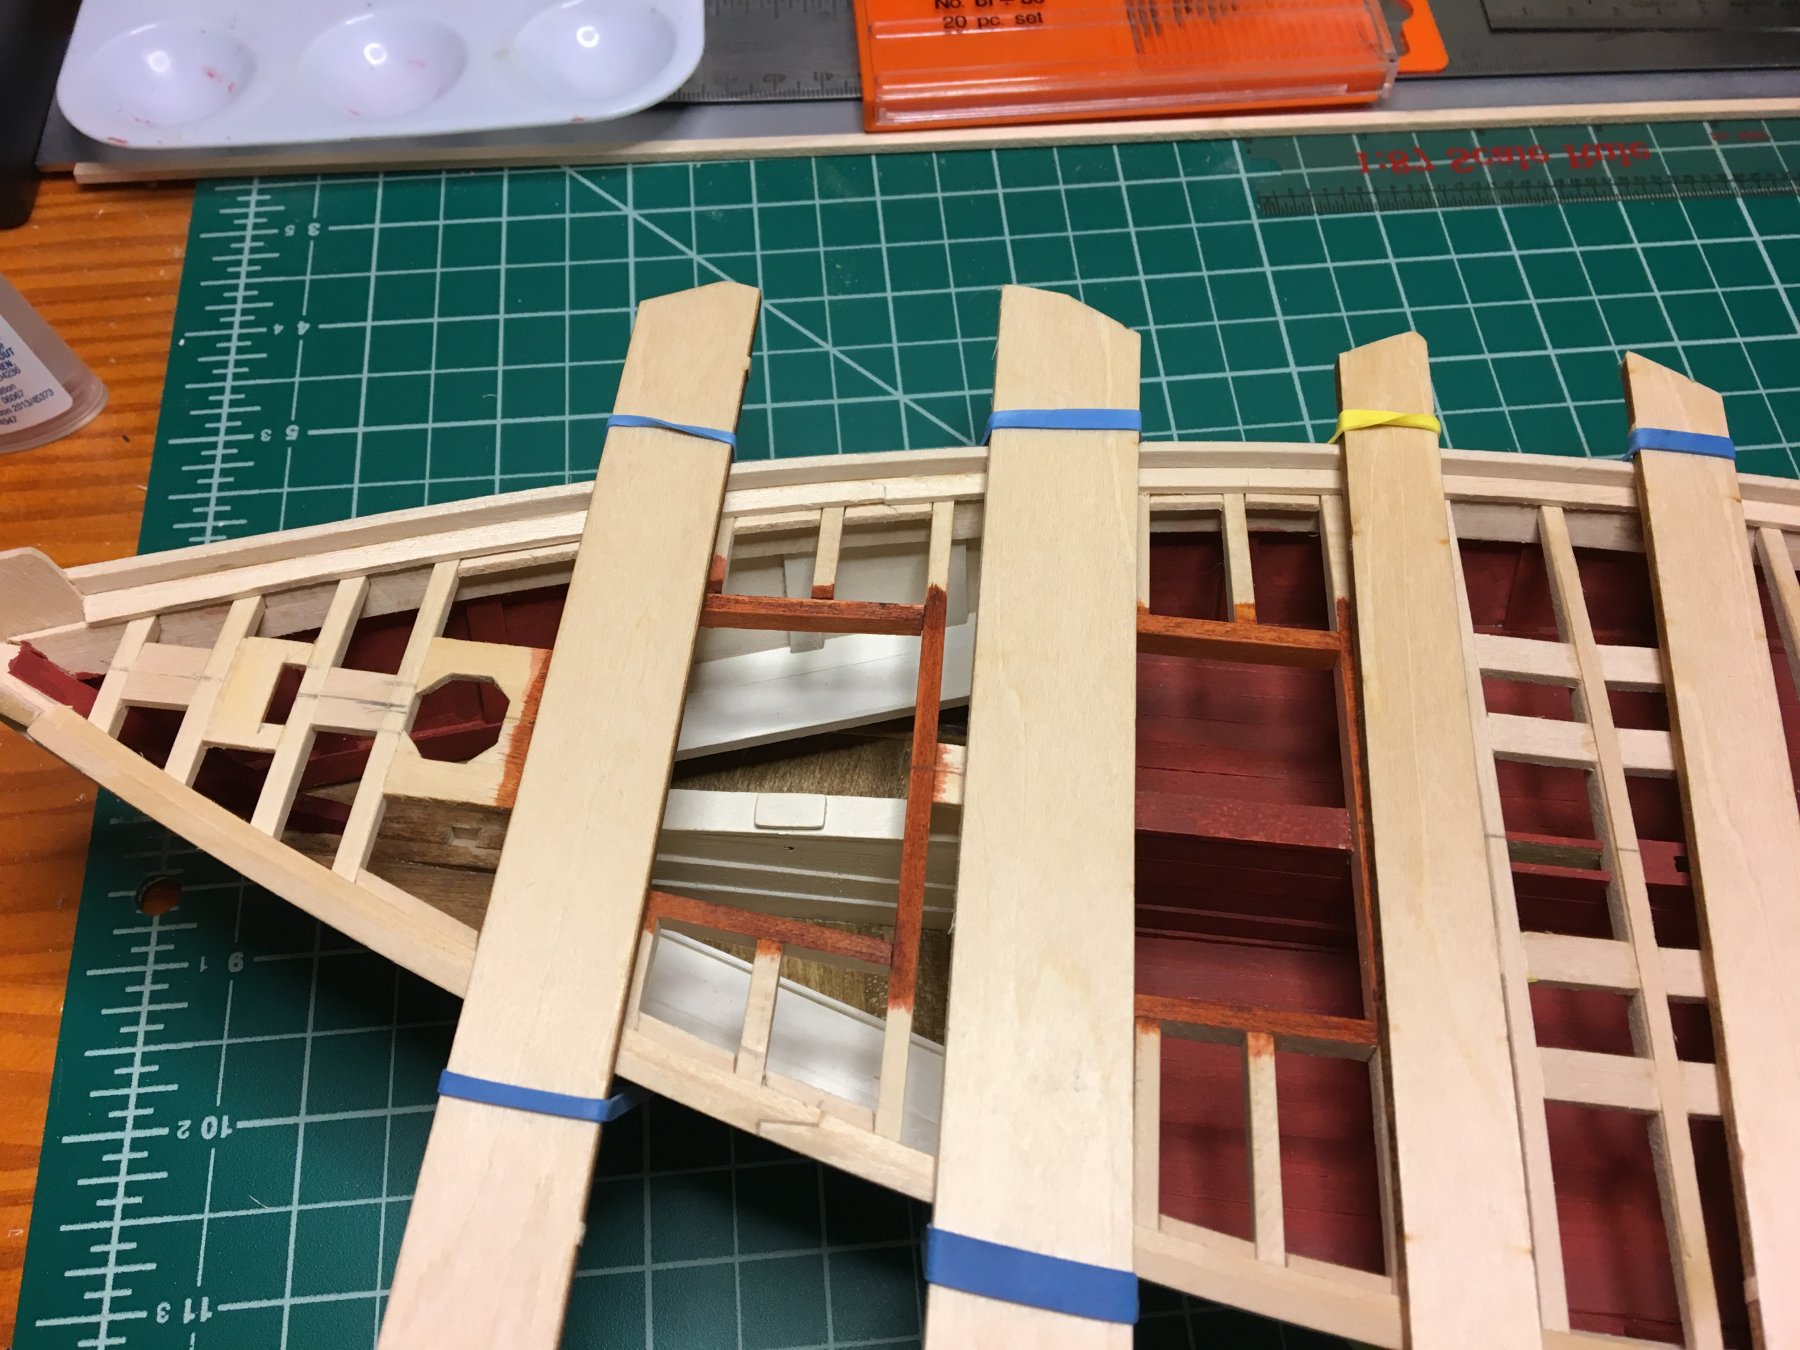
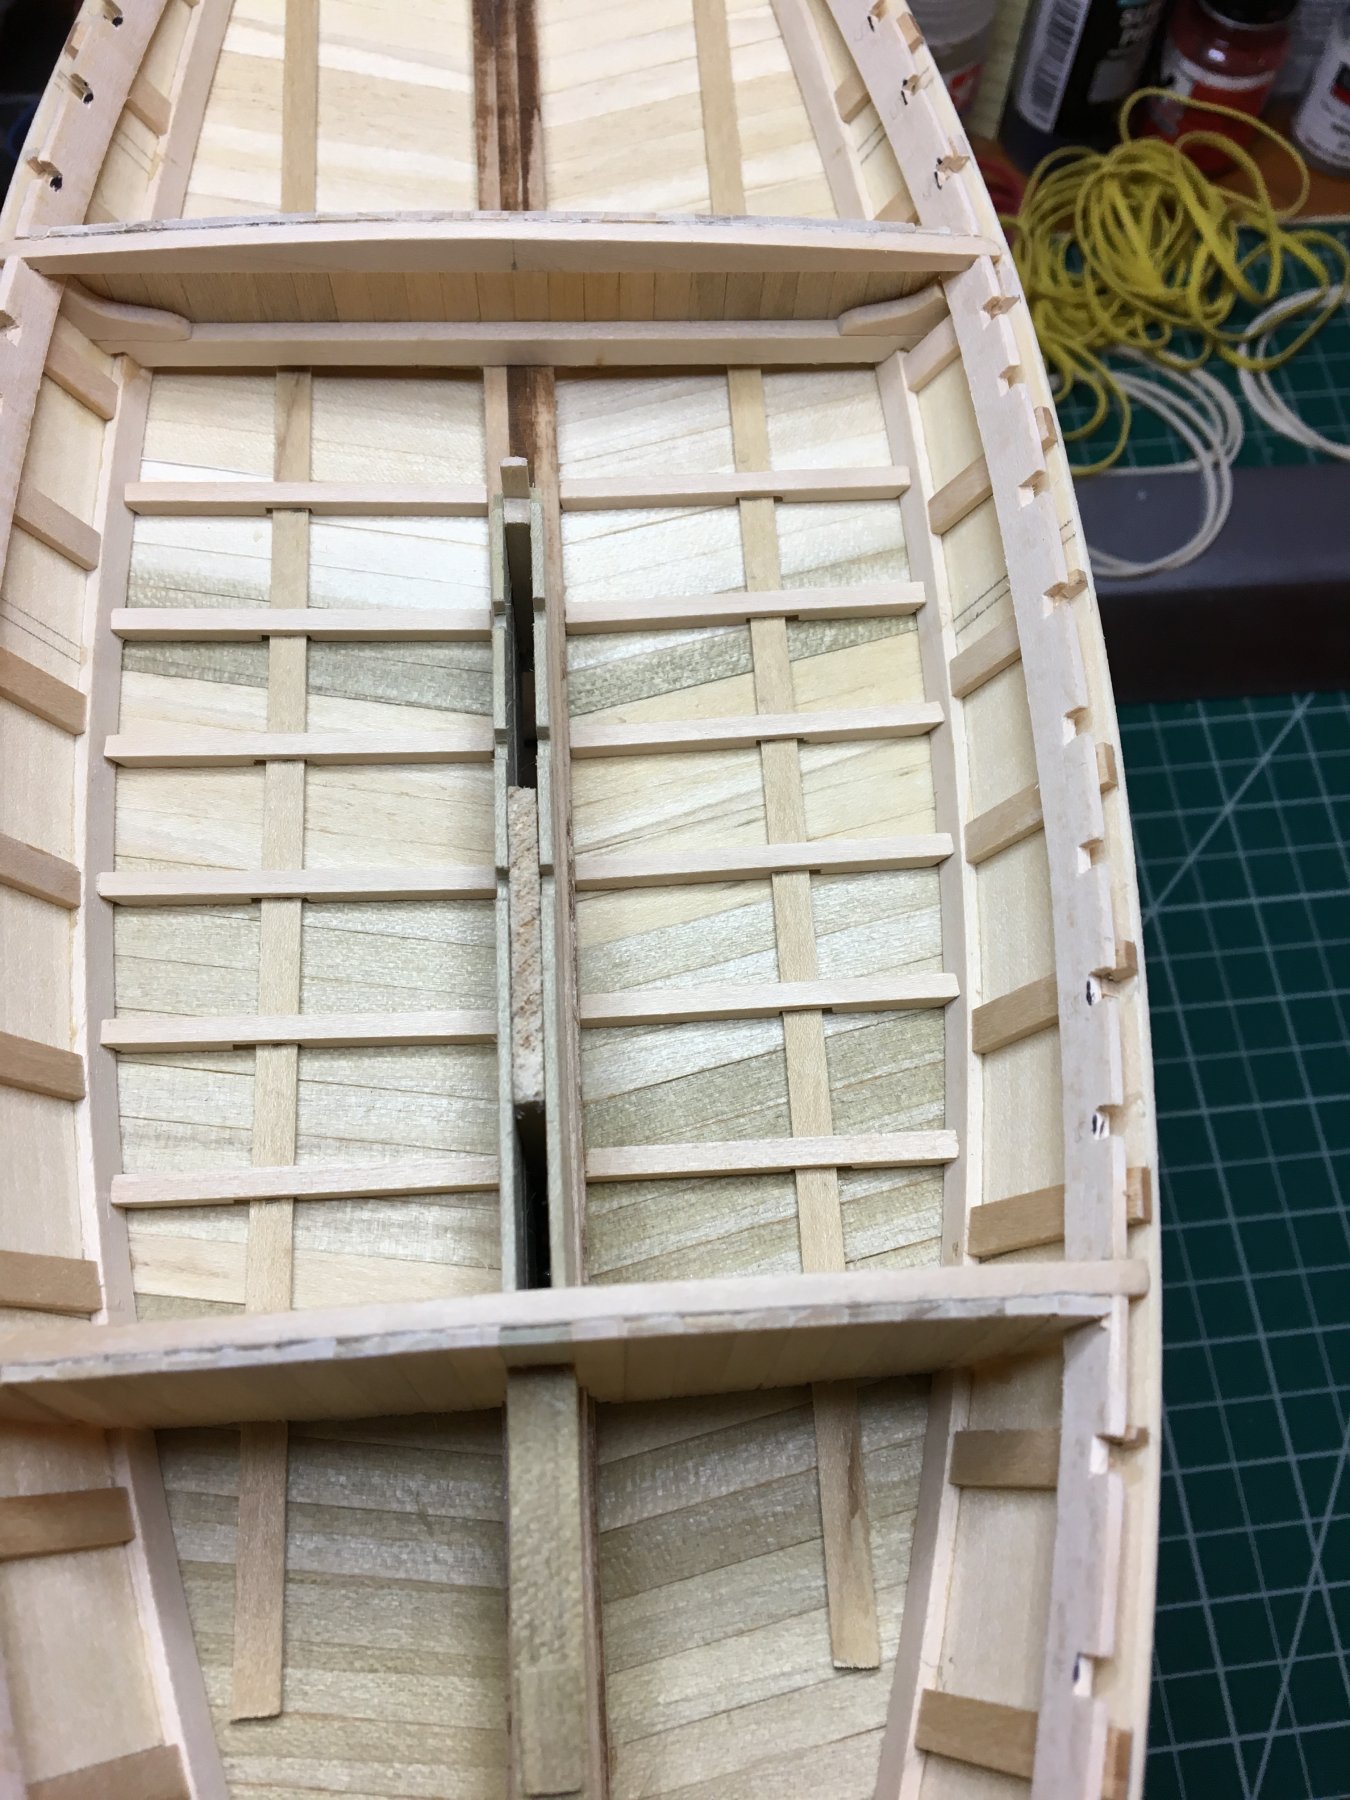
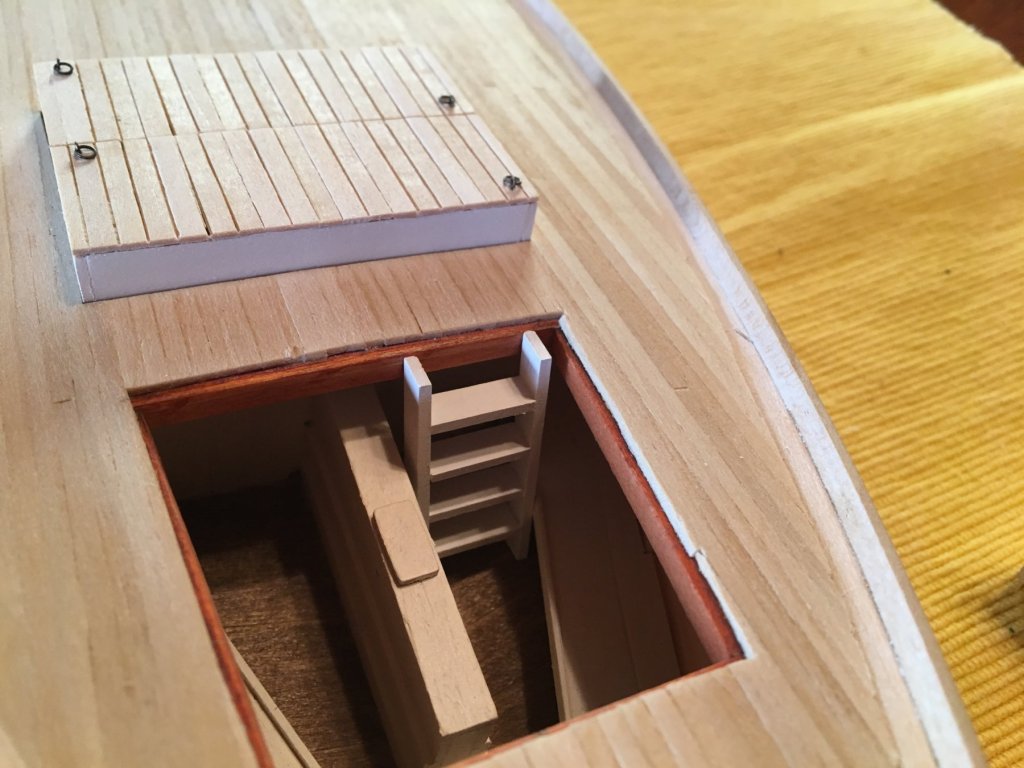
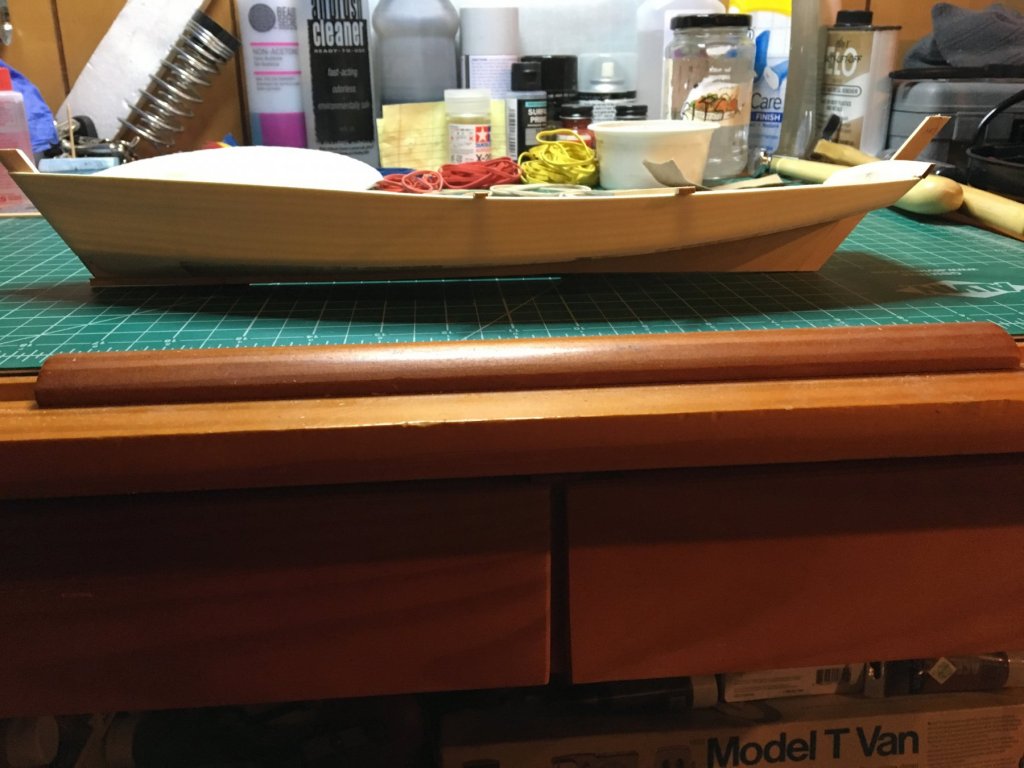
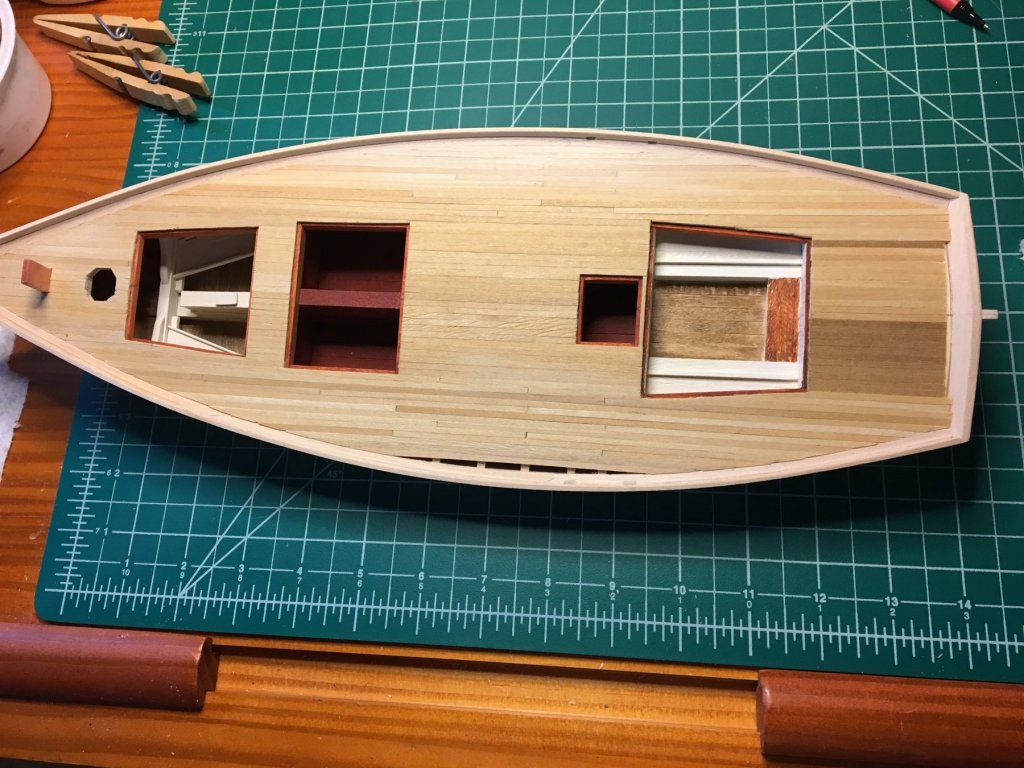
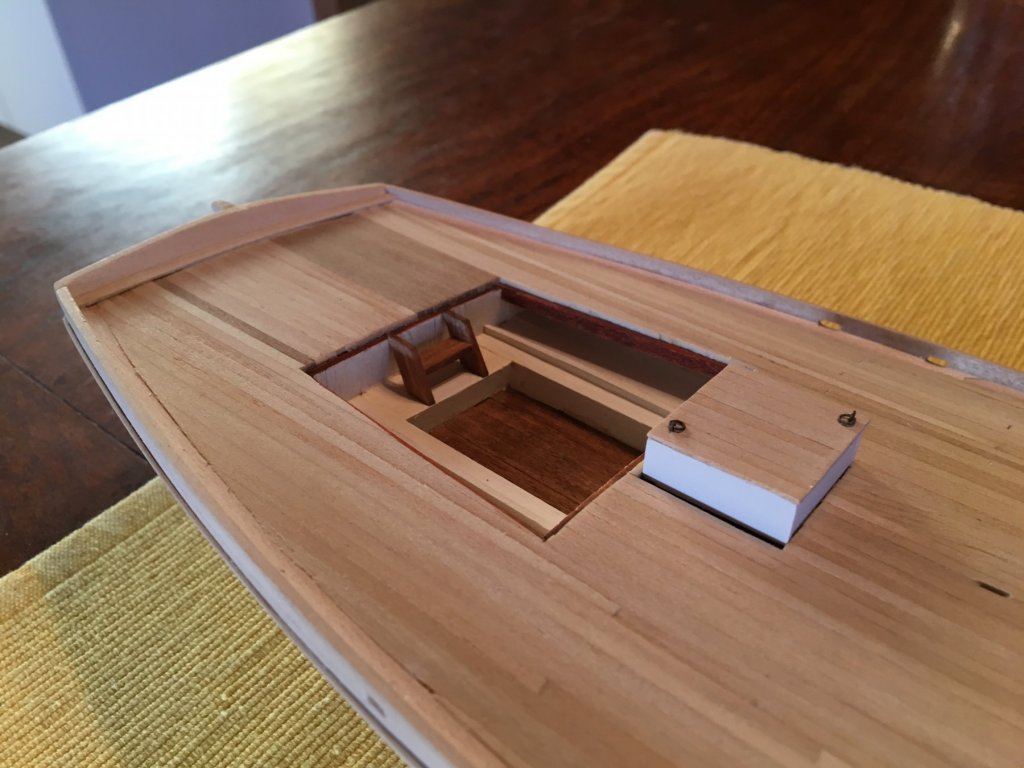
Well, I got side-tracked by some other projects, but am back to the Willie B again. I haven't started a build log, and most of what I've done doesn't look any different from any of the other build logs on this boat so far. But I thought I'd at least show some of the results of this help I received and perhaps any detail that might be interesting or different. Here she is with just one more deck plank to go and the skuppers cut. I decided I didn't like the color of the stain in the main cabin, so I scraped it away on the "step" and painted it white. I did an aniline dye of a similar color on the floor to make it look a bit better. Then I made the ladders and installed them. Oh, an the hatch covers are sitting in roughly the right spots. I decided to make them all removable. I like looking into the hold.

-
Yes she has linked to a series of videos of her sculpting not too far above in this thread. https://www.modelforum.cz/viewtopic.php?f=183&t=85813#p1613874 And she has remarked a few times that she believes her material is similar to FIMO soft.
- 1,035 replies
-
- 10
-
-
- royal katherine
- ship of the line
- (and 1 more)
-
source for steel bar stock?
Griphos replied to Griphos's topic in Modeling tools and Workshop Equipment
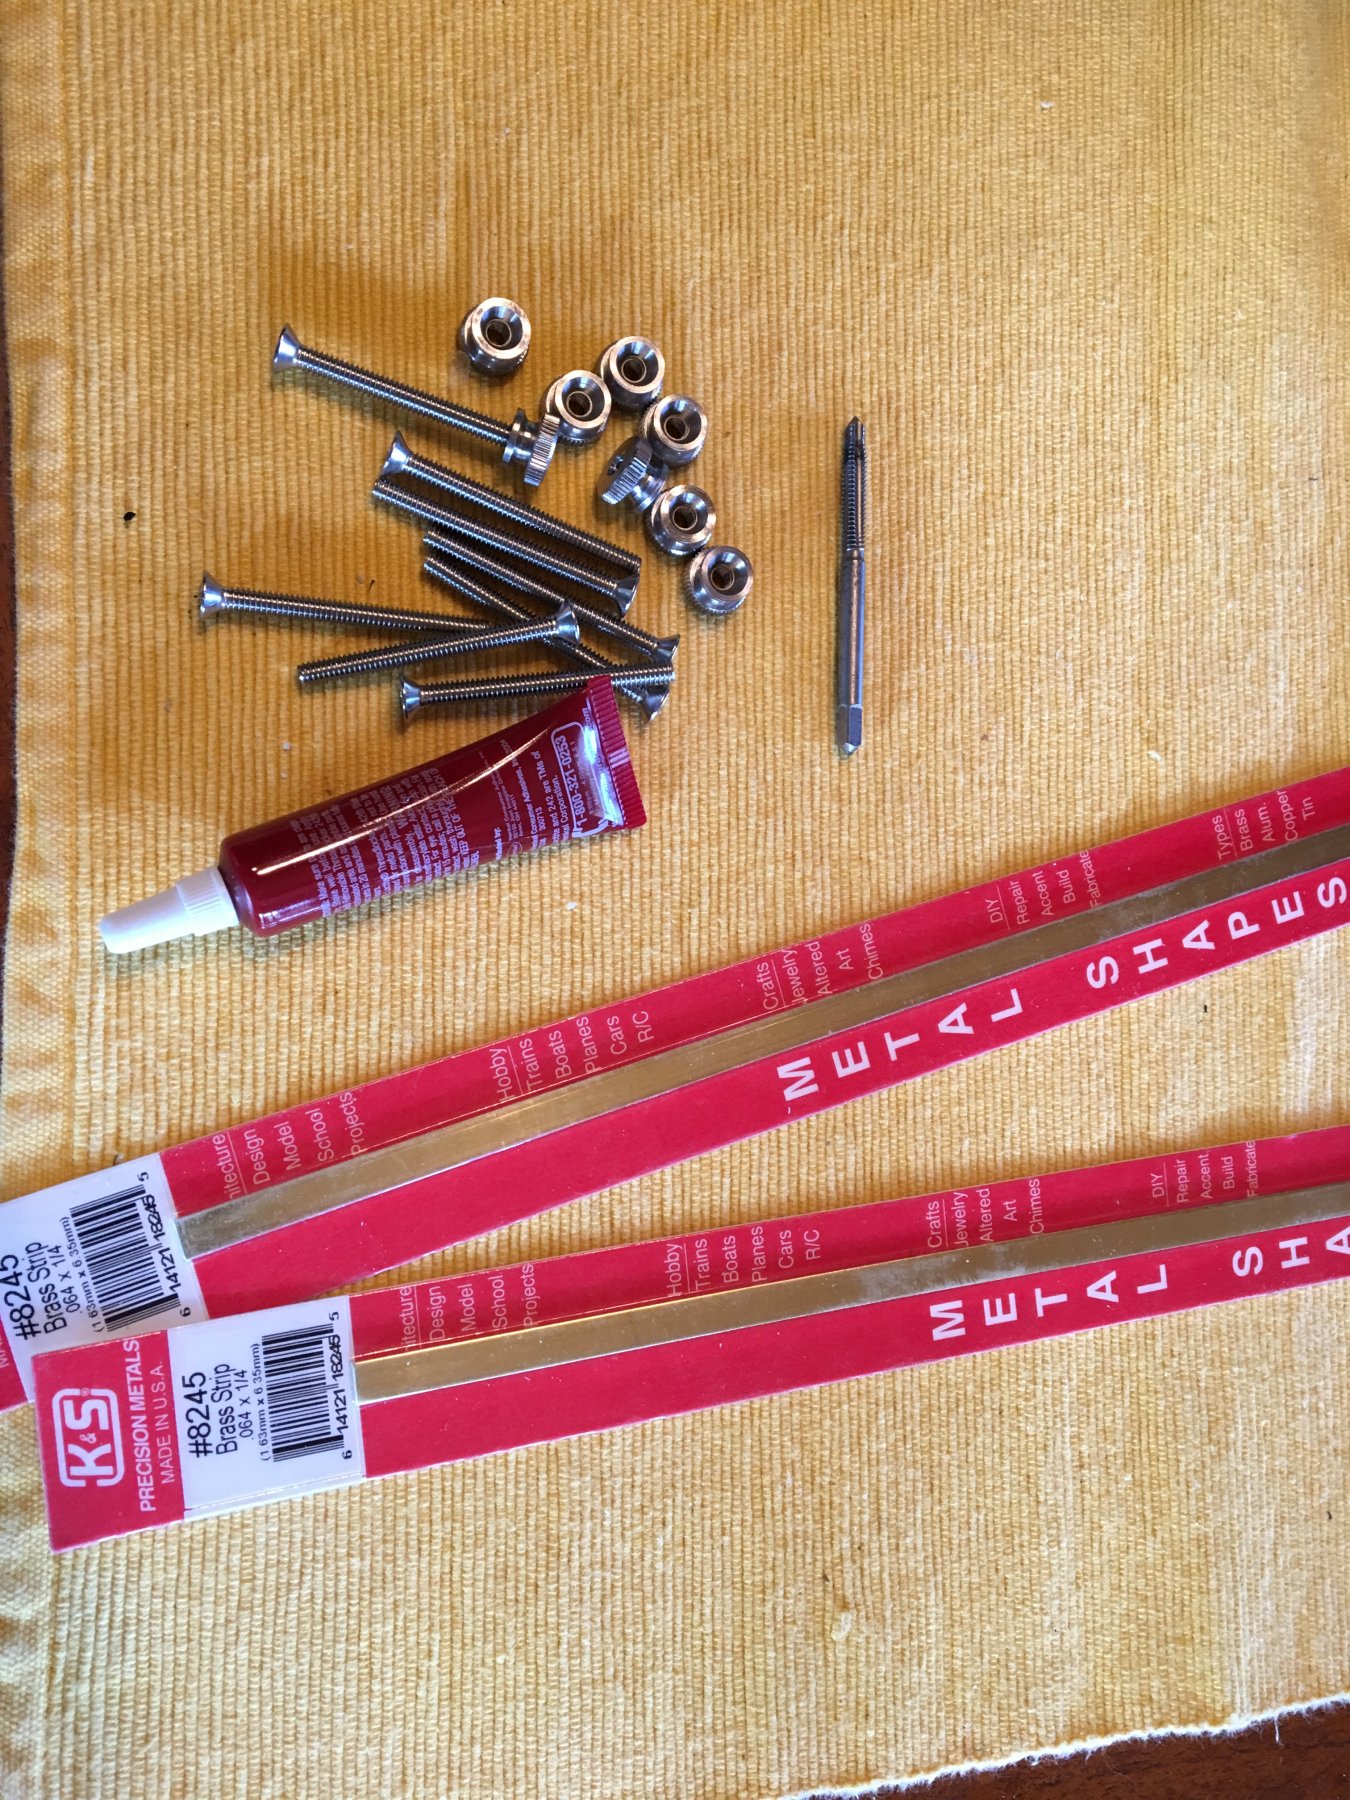
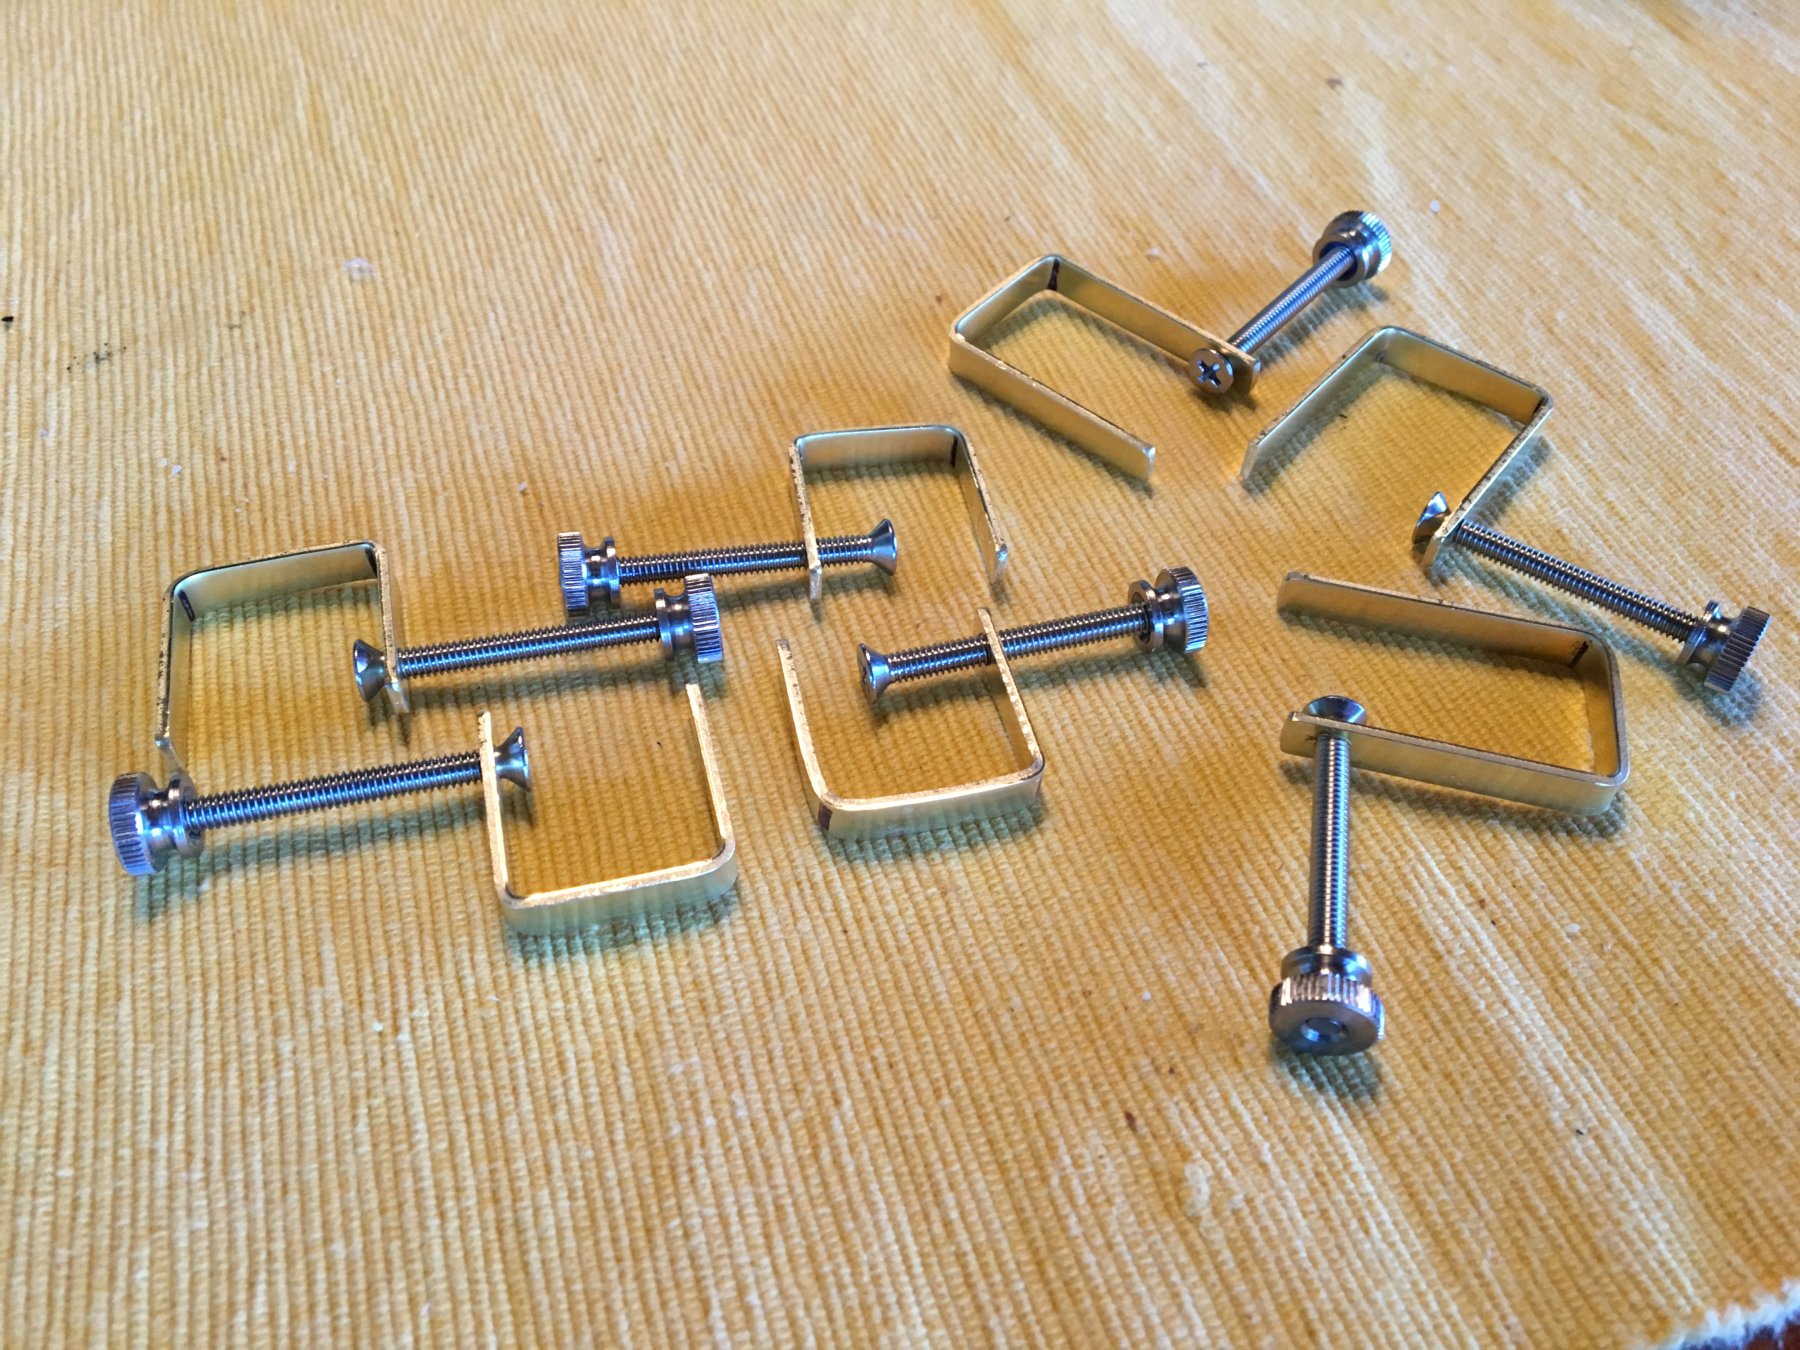
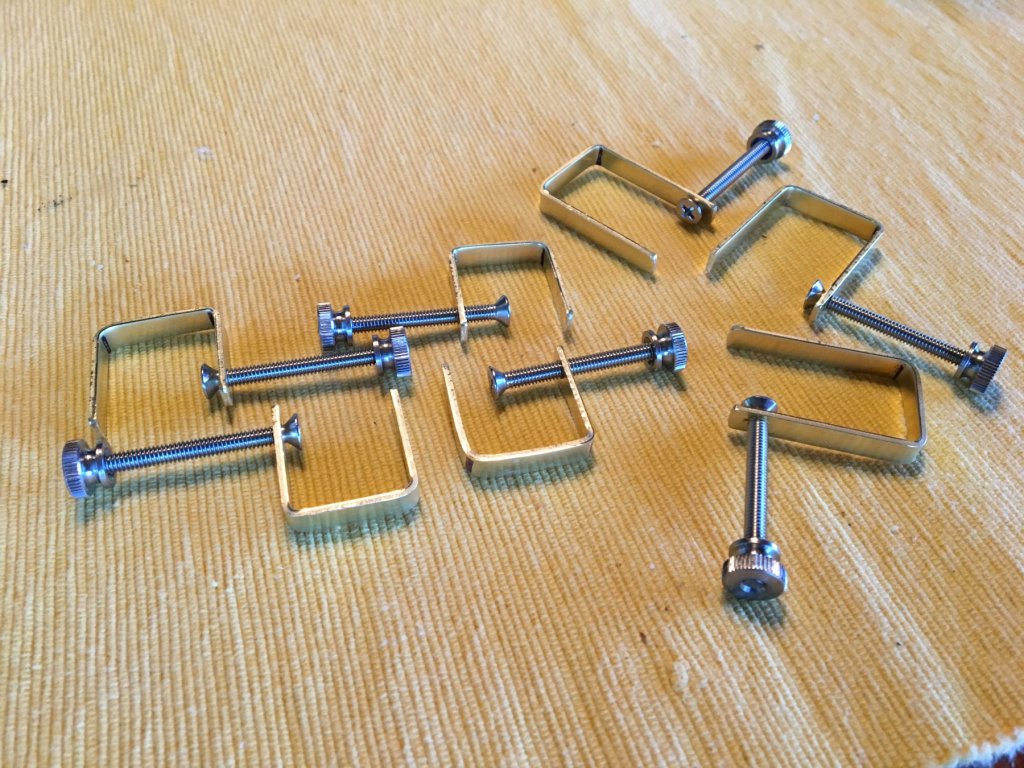
I thought I should post the results of everyone's assistance. I decided to make some C-clamps from brass and screws. And some miniature wooden screw clamps from, well, wood and screws. 🙂 I couldn't find the screws I wanted for the wood clamps from the local hardware store, so had to order them. Those clamps are pending. Here are the C-clamps and the materials I used. I made some that are 1" on each side, and some that are a little deeper throated (1 1/2"). Thanks to everyone again for the help.
-
I’ll take them.
-
Jointer Switch Question
Griphos replied to David Lester's topic in Modeling tools and Workshop Equipment
Typically, your top diagram is correct. The two angled connections on the Off pole will be hot (from the power source). And each side will be aligned, white to white and black to black. -
The nice thing about those old calipers is that the parts all come apart and can be reconditioned individually. Allows you to get at all the crevices and joints. Enjoy.
-
May I ask what glue you (and others use) to glue the templates to the wood so that they stick but are easily removable?