DONATION DRIVE - SUPPORT MSW - DO YOUR PART TO KEEP THIS GREAT FORUM GOING!
×


Ronald-V
-
Posts
1,899 -
Joined
-
Last visited
Content Type
Profiles
Forums
Gallery
Events
Everything posted by Ronald-V
-
 Same here...it would feel like too little control to me. With sandpaper grid 80 or 100/120 it comes off just like that, especially such a small hull. But if you like it better with a machine, go for it
- 129 replies
-
- 2
-

-
- vanguard models
- Sherbourne
- (and 1 more)
-
Very cool! The design process fascinates me also By the way...cool profile picture James
-
Nice planking! I experienced the same with that gap at the sternpost
-
Looking real nice! And indeed good to see you back at it
-
That's a lot of space! Nice
-
What a nice result! And the figures bring it really to life. Congratulations on finishing it
-
Maybe you've tried this already, but it looks a bit in the picture as if you can place the spacer upside down on the other side? So the R spacer in the L side of the ship and the L spacer in the R side. But then the spacer upside down (letters towards the bottom)
- 58 replies
-
- 1
-
-
- Santa Maria
- Ships of Pavel Nikitin
- (and 1 more)
-
That looks like a nice piece of art with the framing and black background Well done! 👌
- 82 replies
-
- 4
-
-

-
- half hull planking project
- half hull
- (and 2 more)
-
That's a nice finish! Love the white background in the pictures...it shows so much more detail this way. Beautiful result
-
Your welcome! Glad it can be useful Thanks everyone for the nice compliments and likes!💫
-
It's pretty complex planking compared to some more traditional hull shapes! Quite the challenge but fun I asume
-
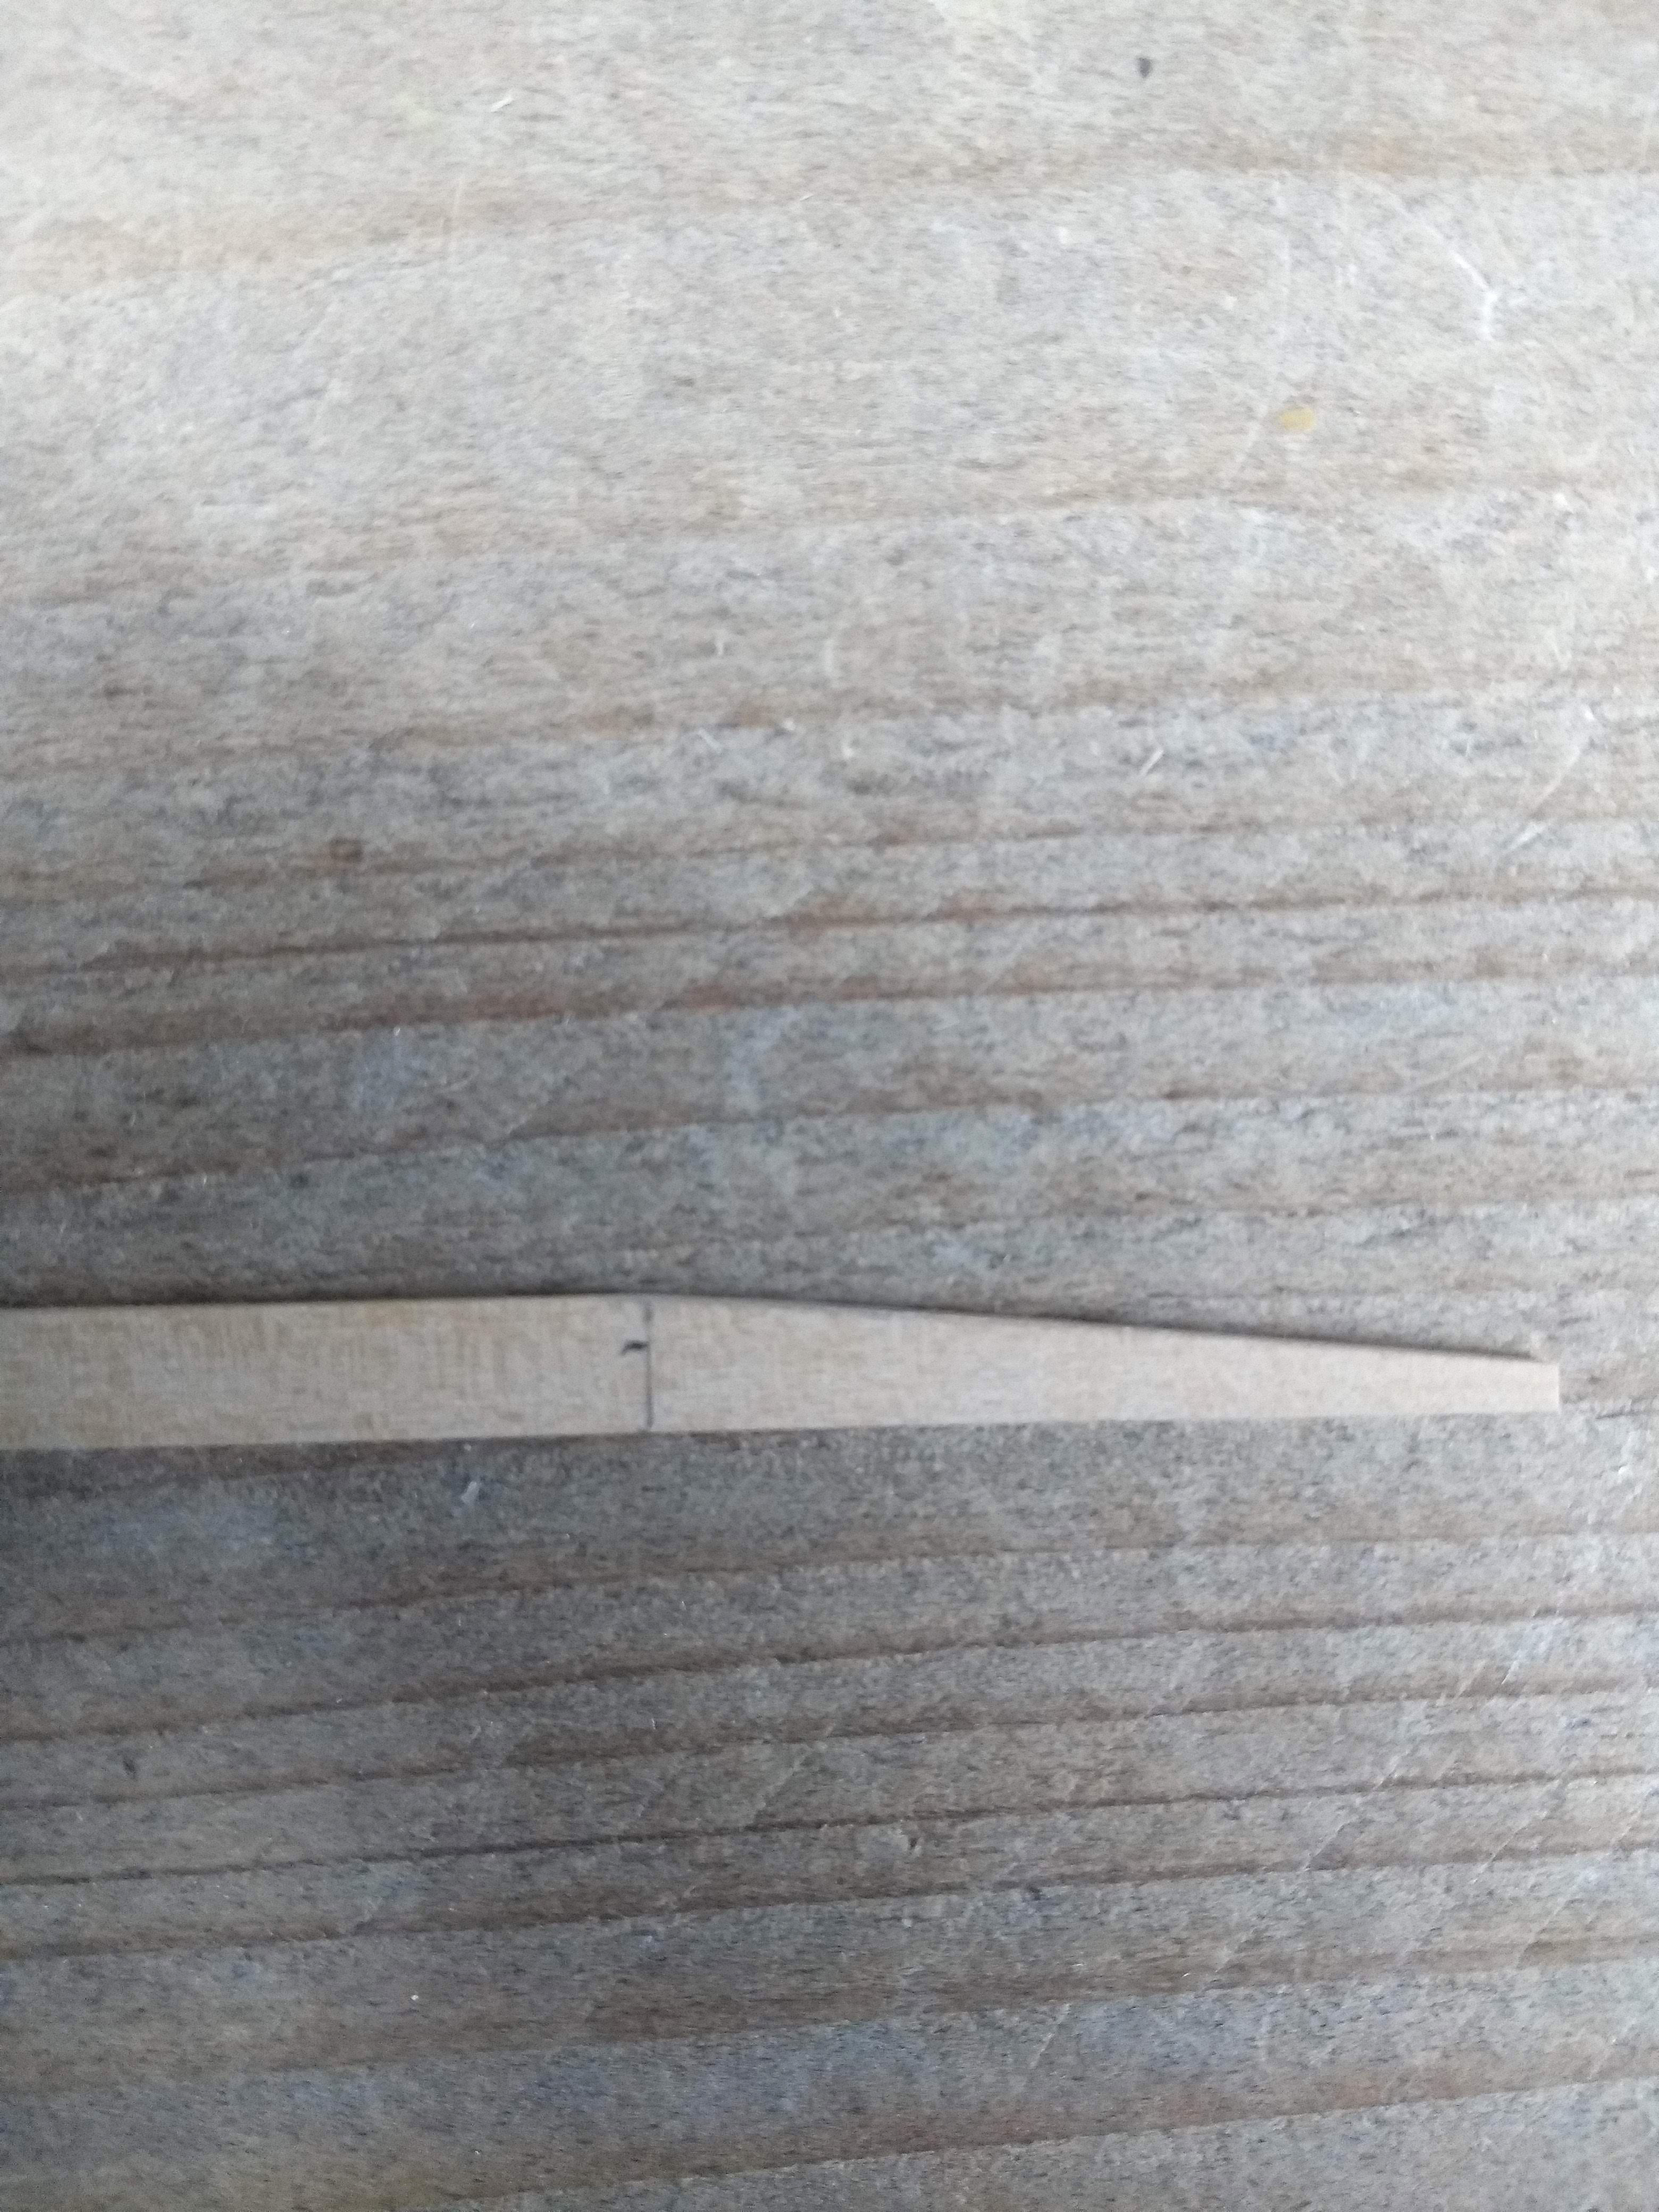
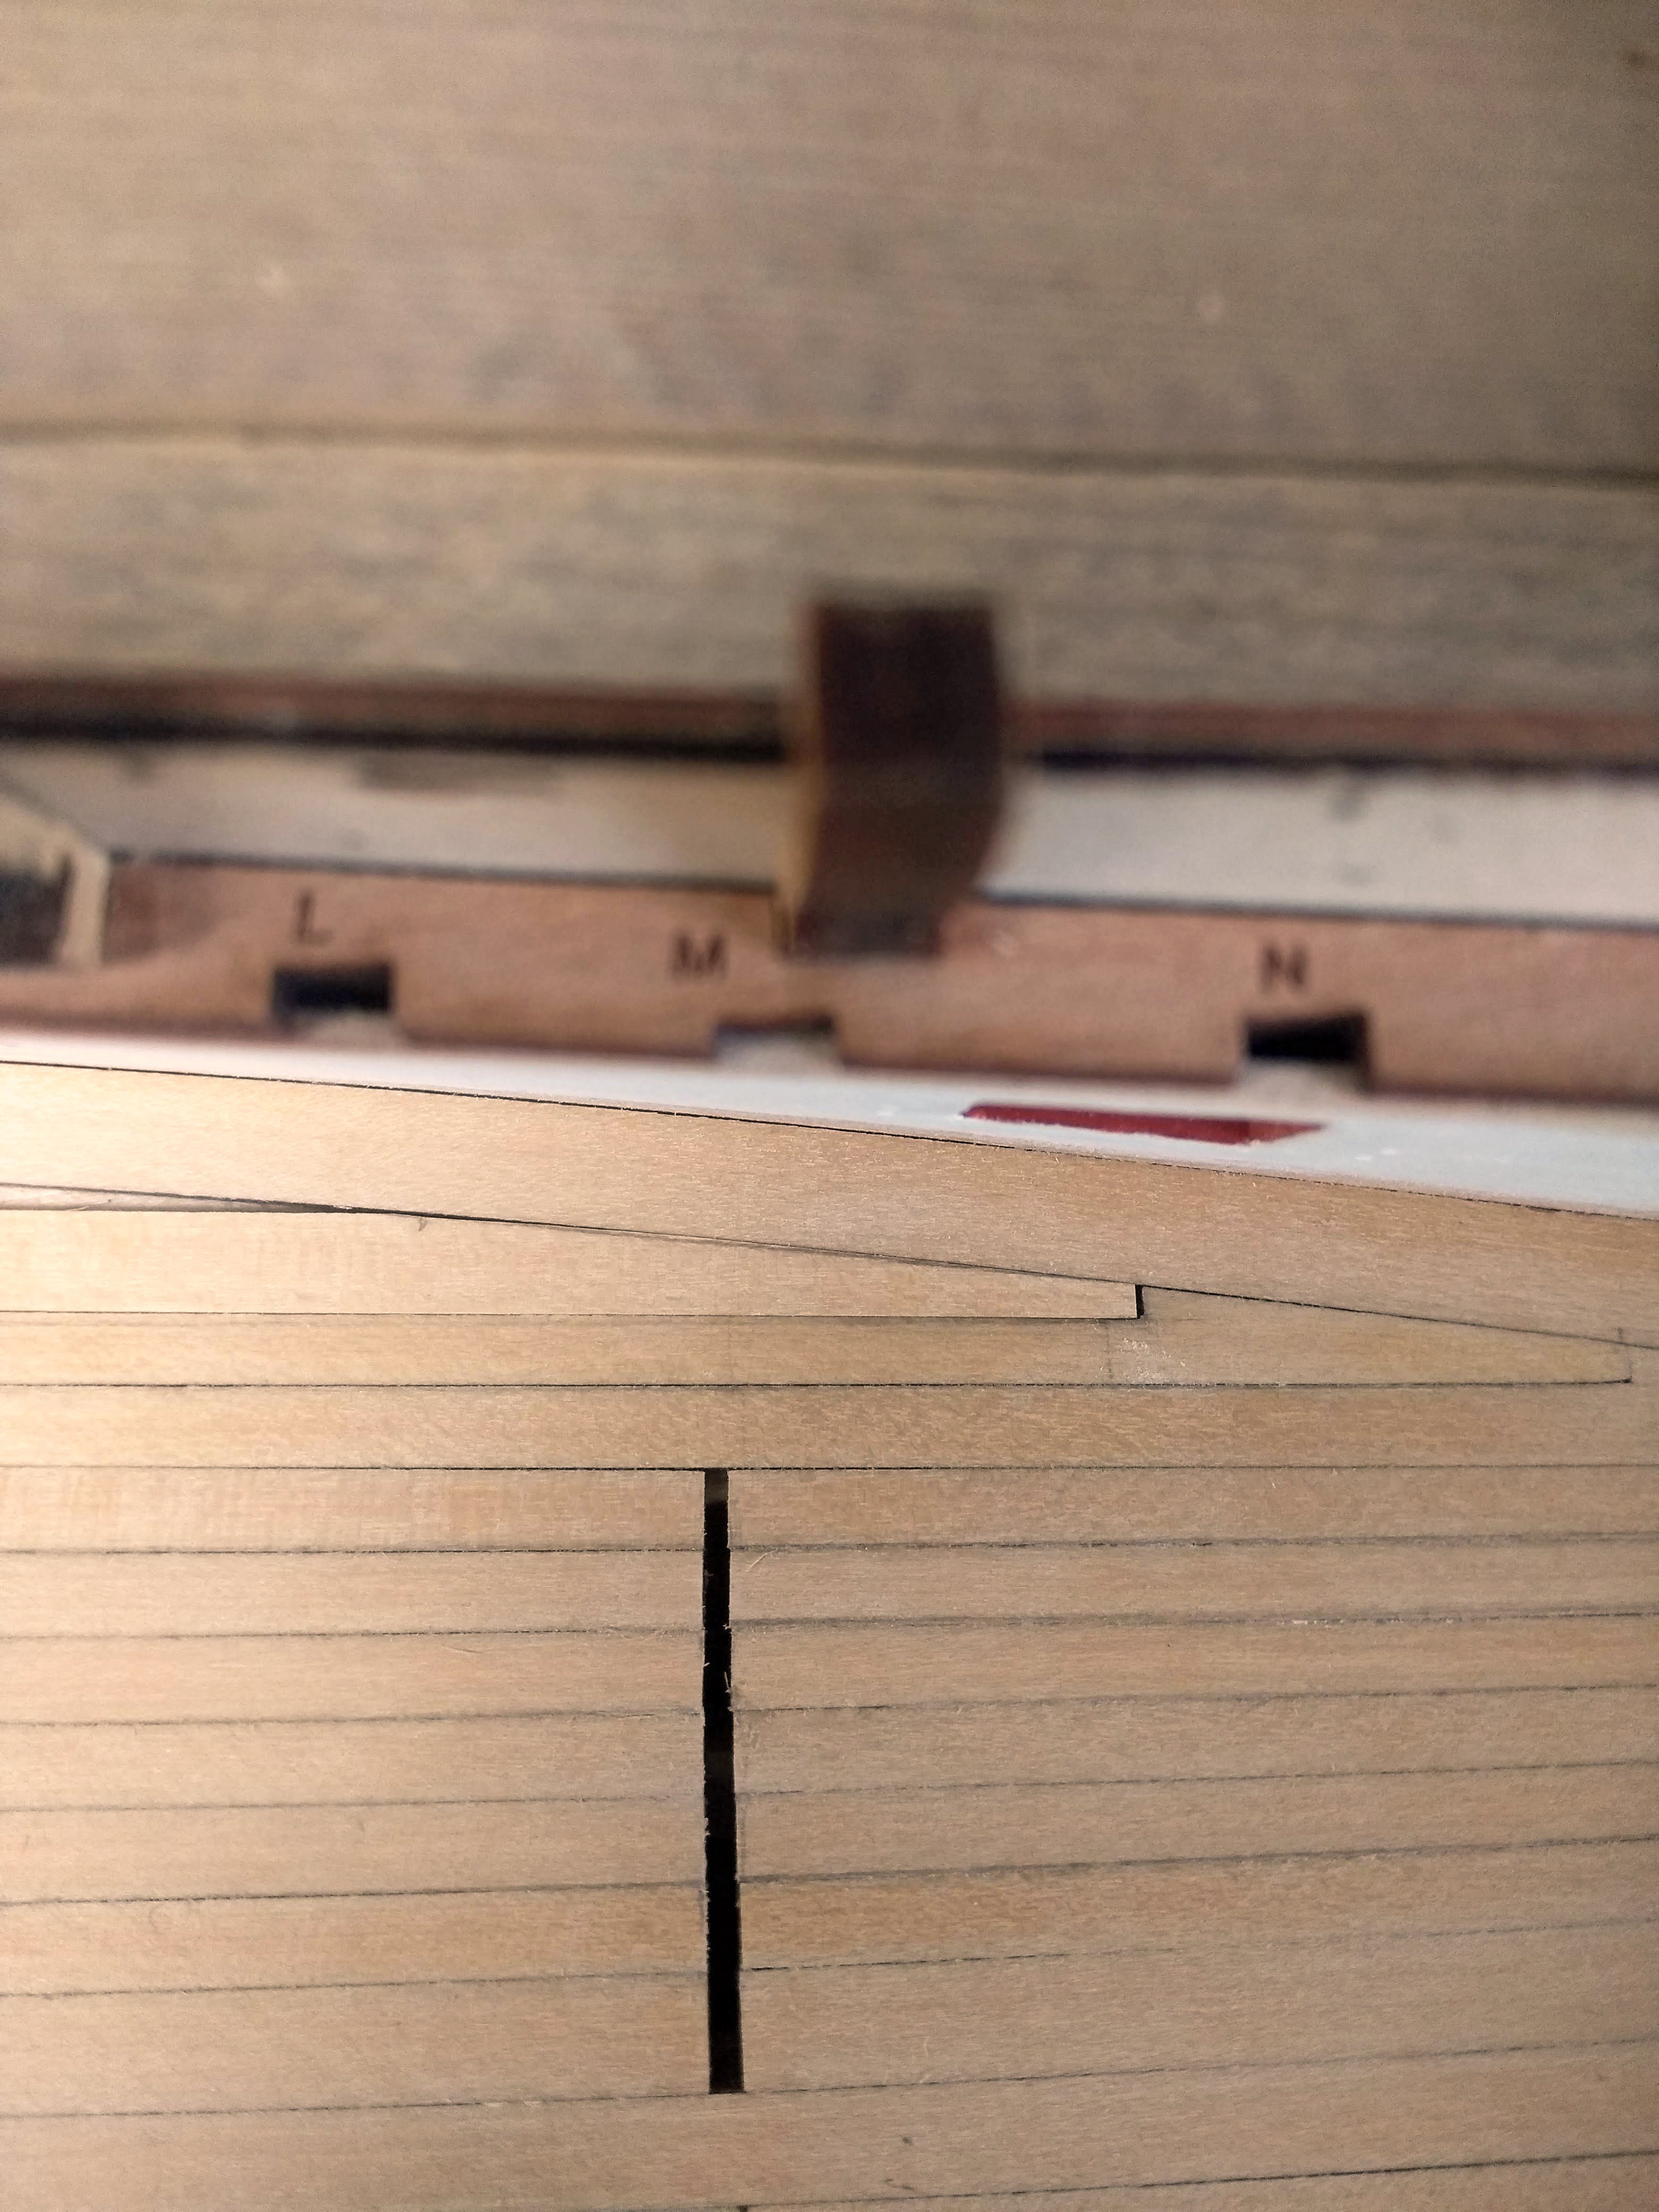
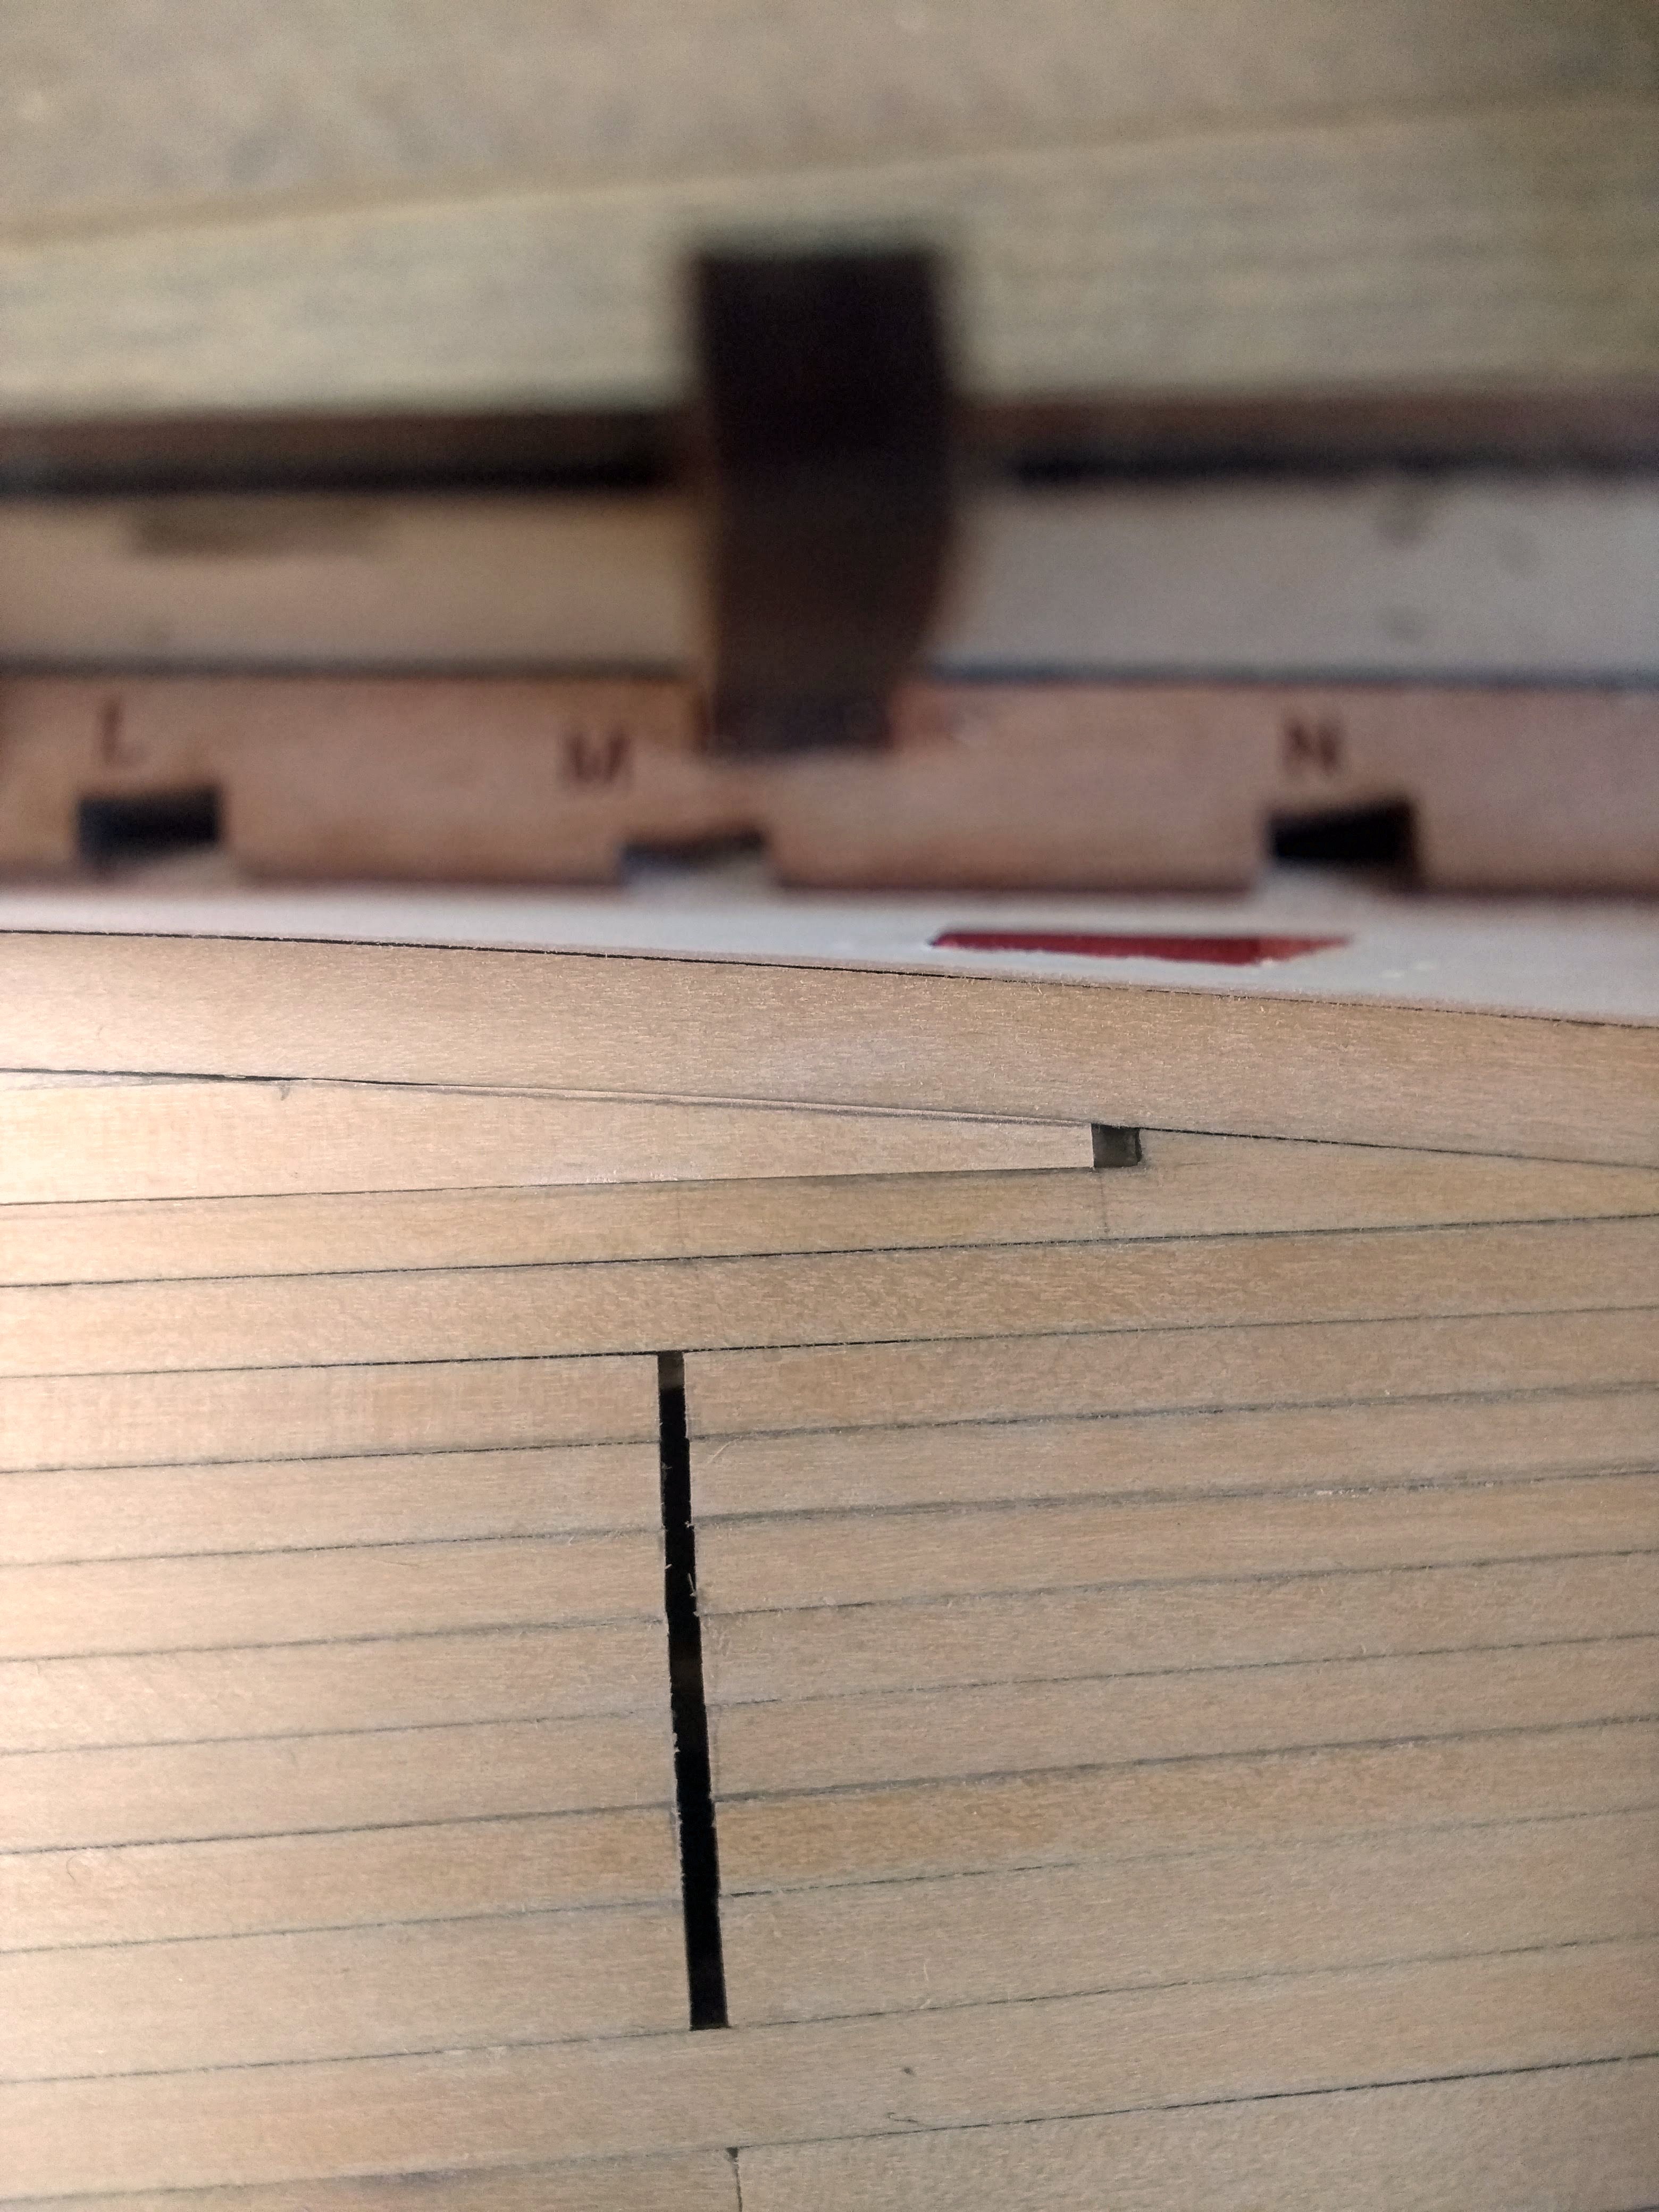
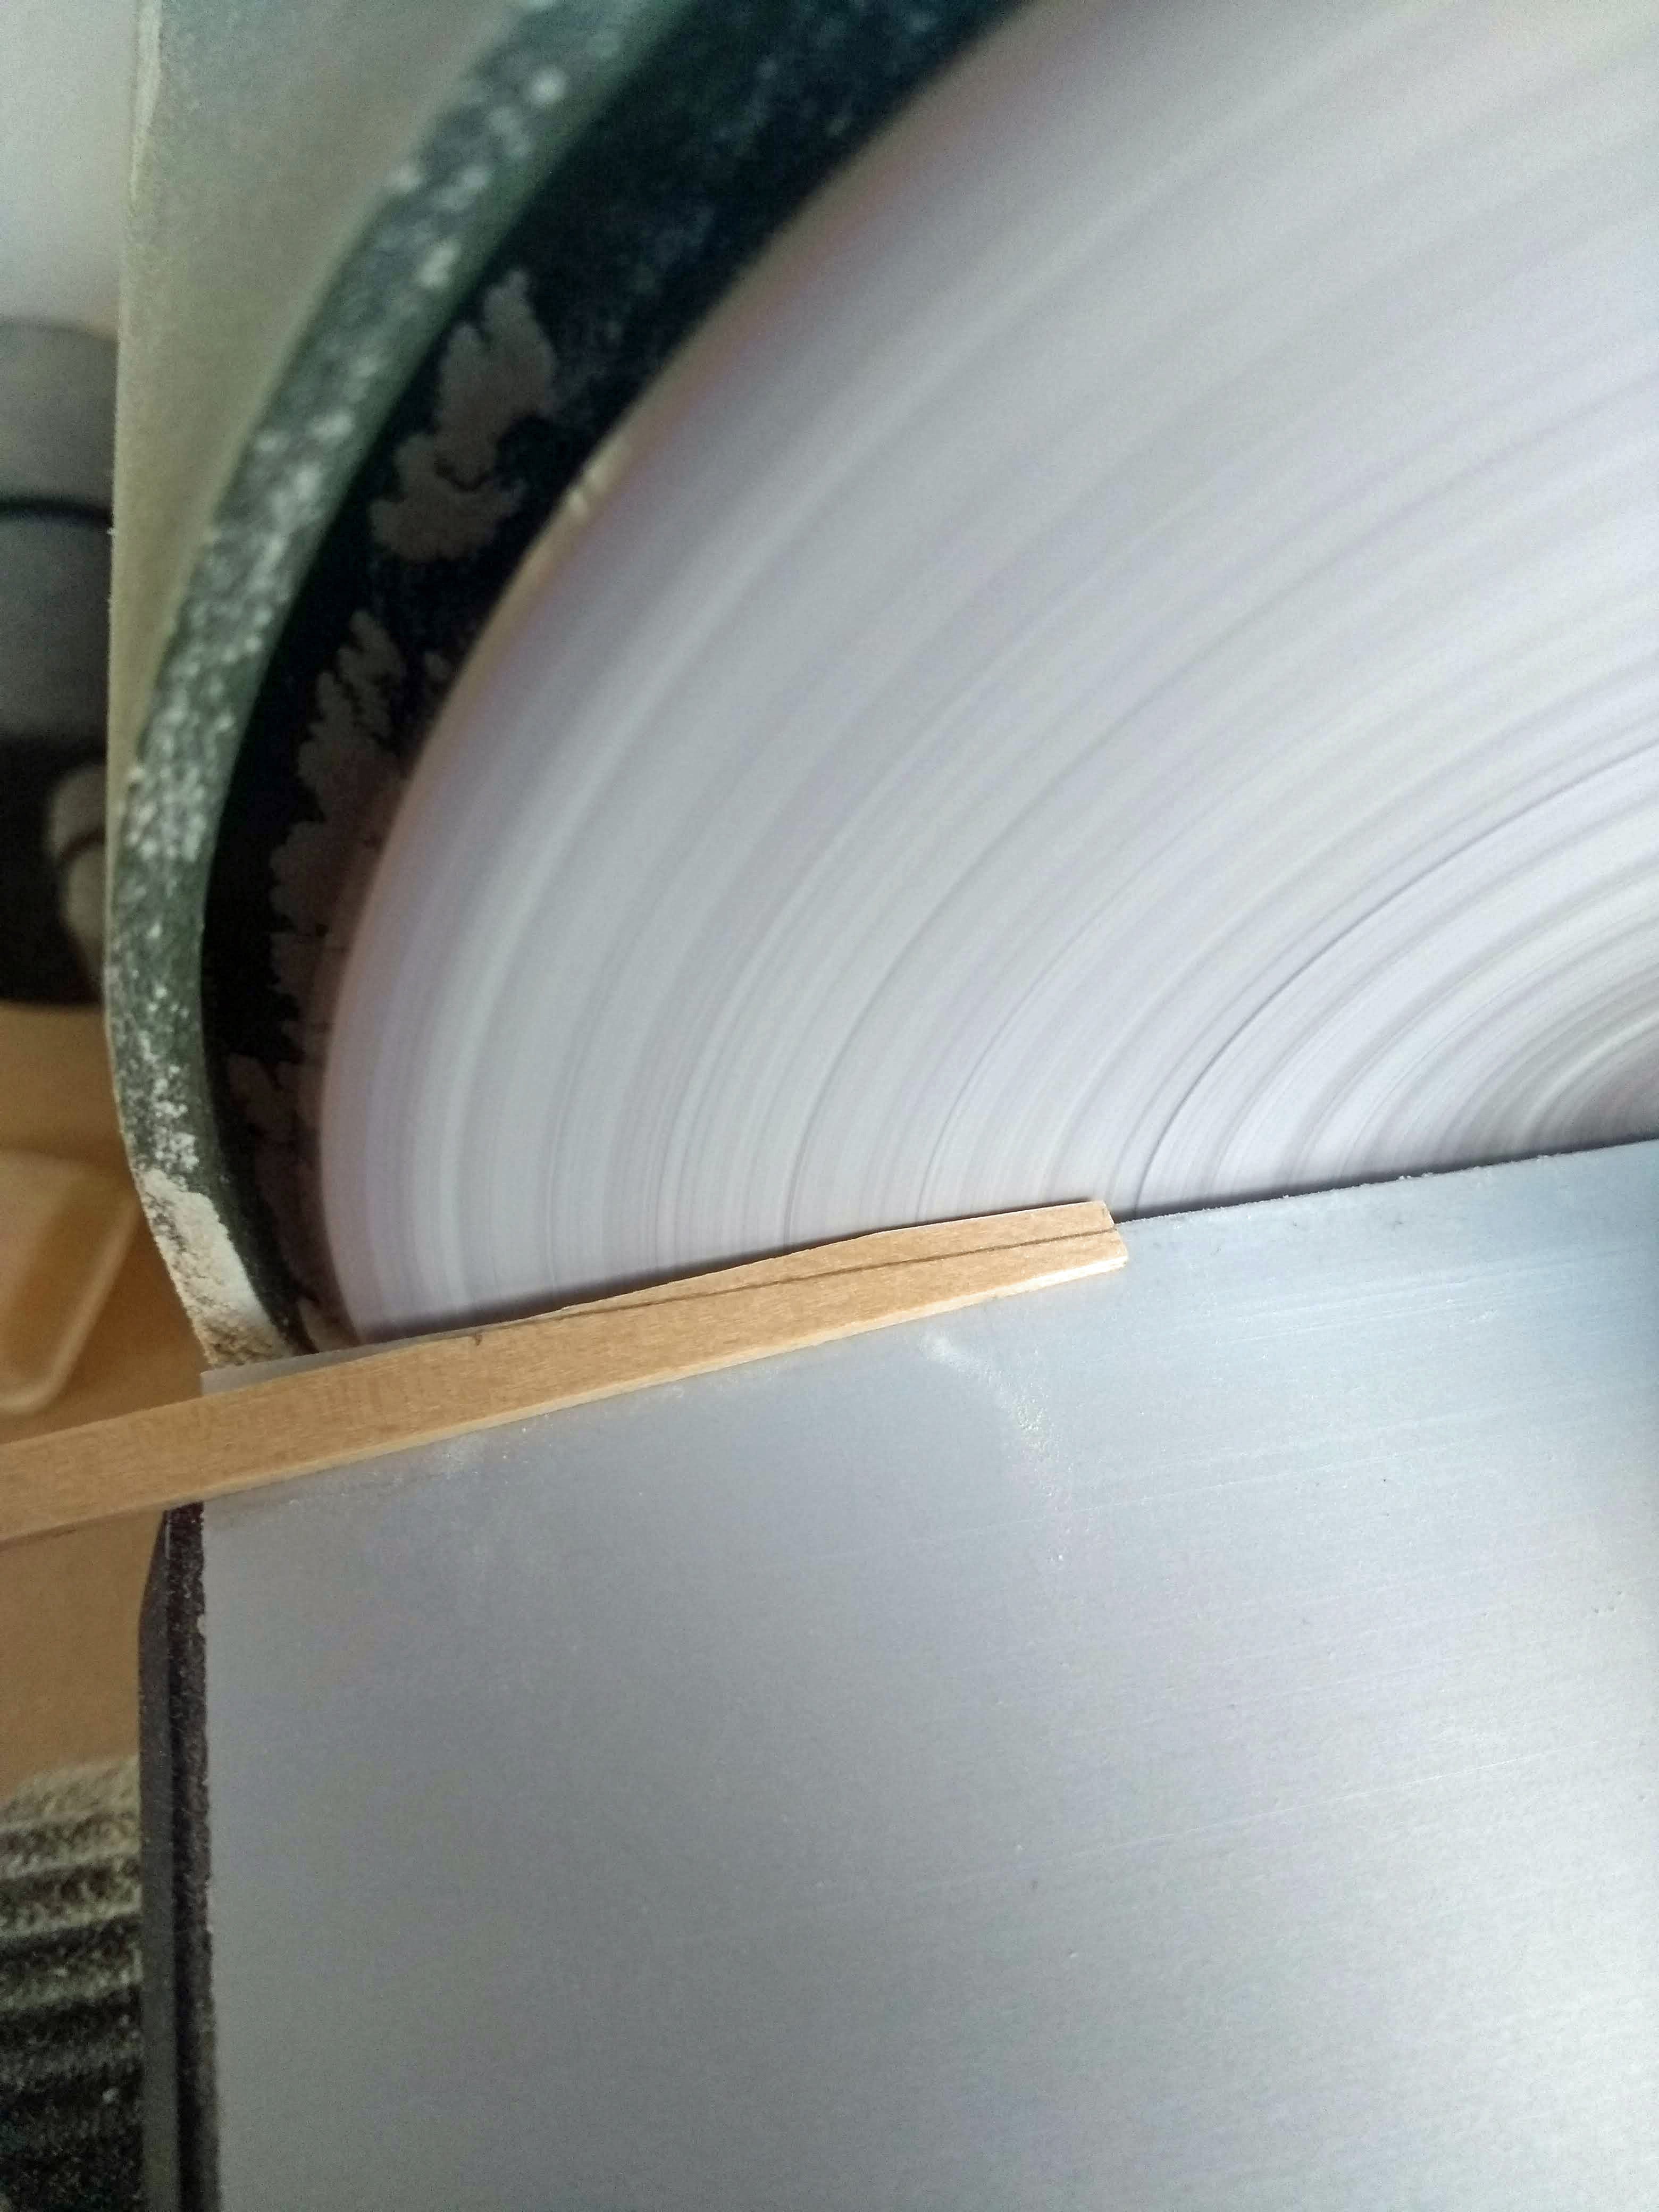
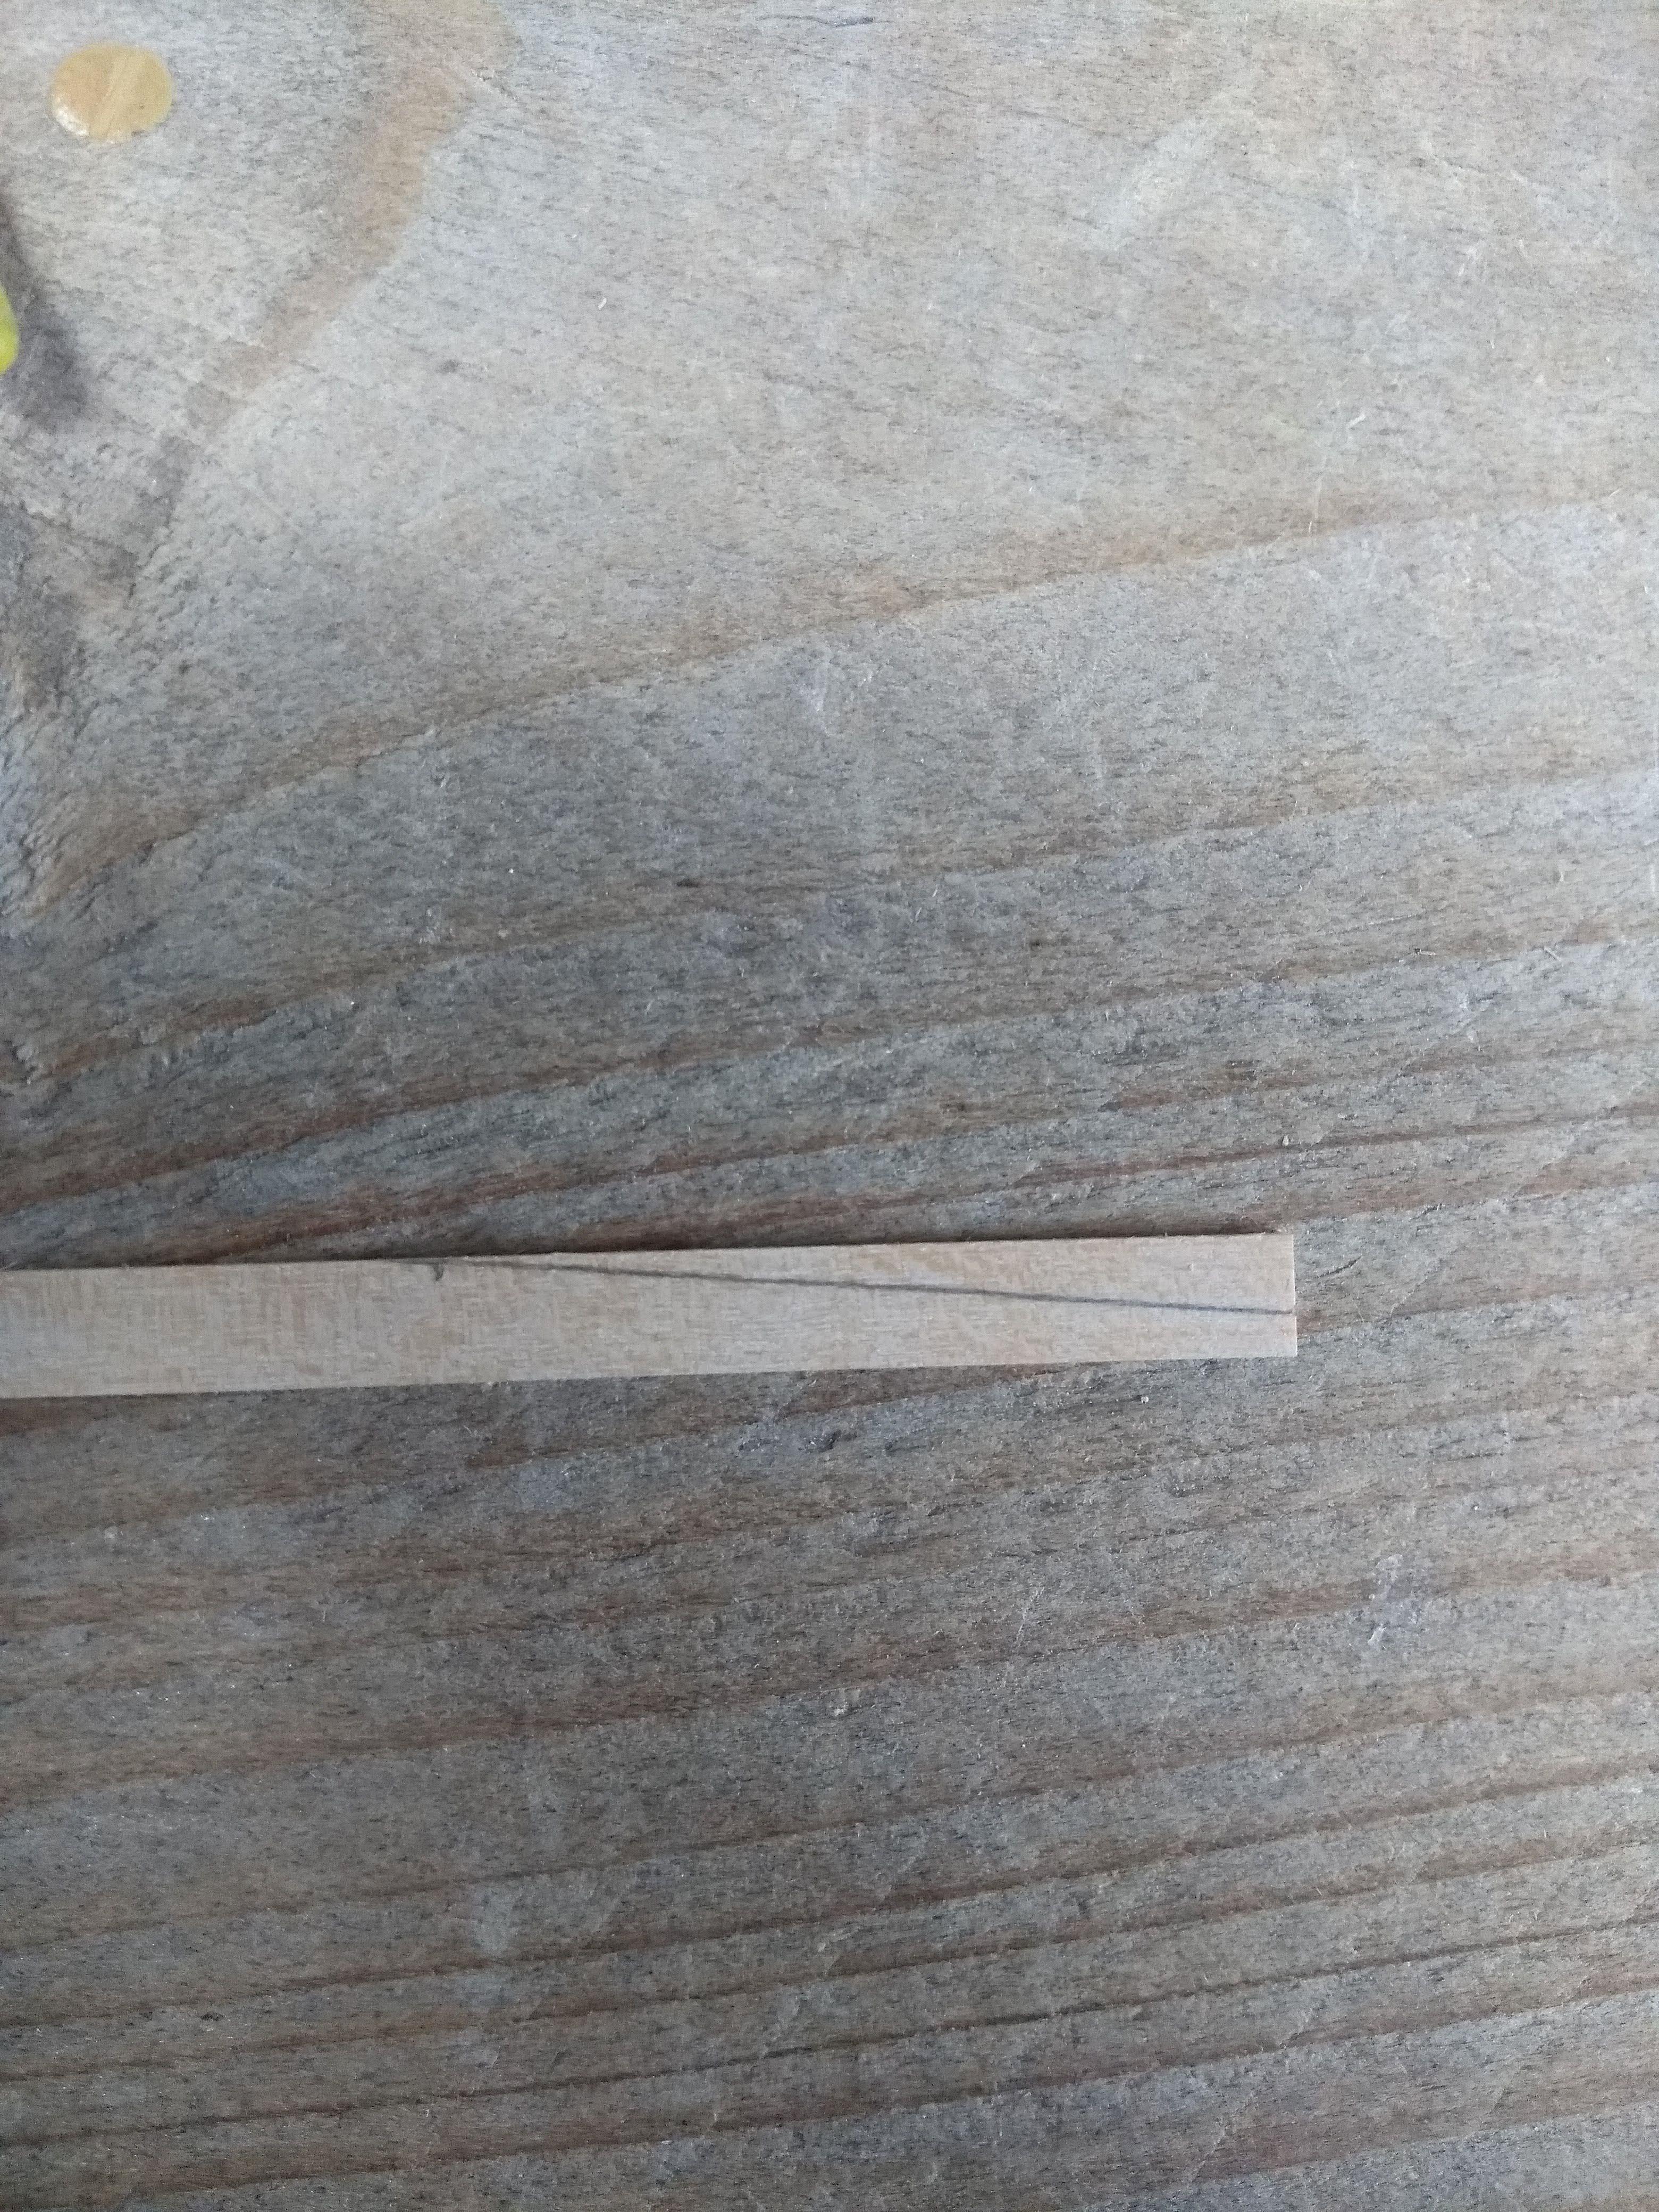
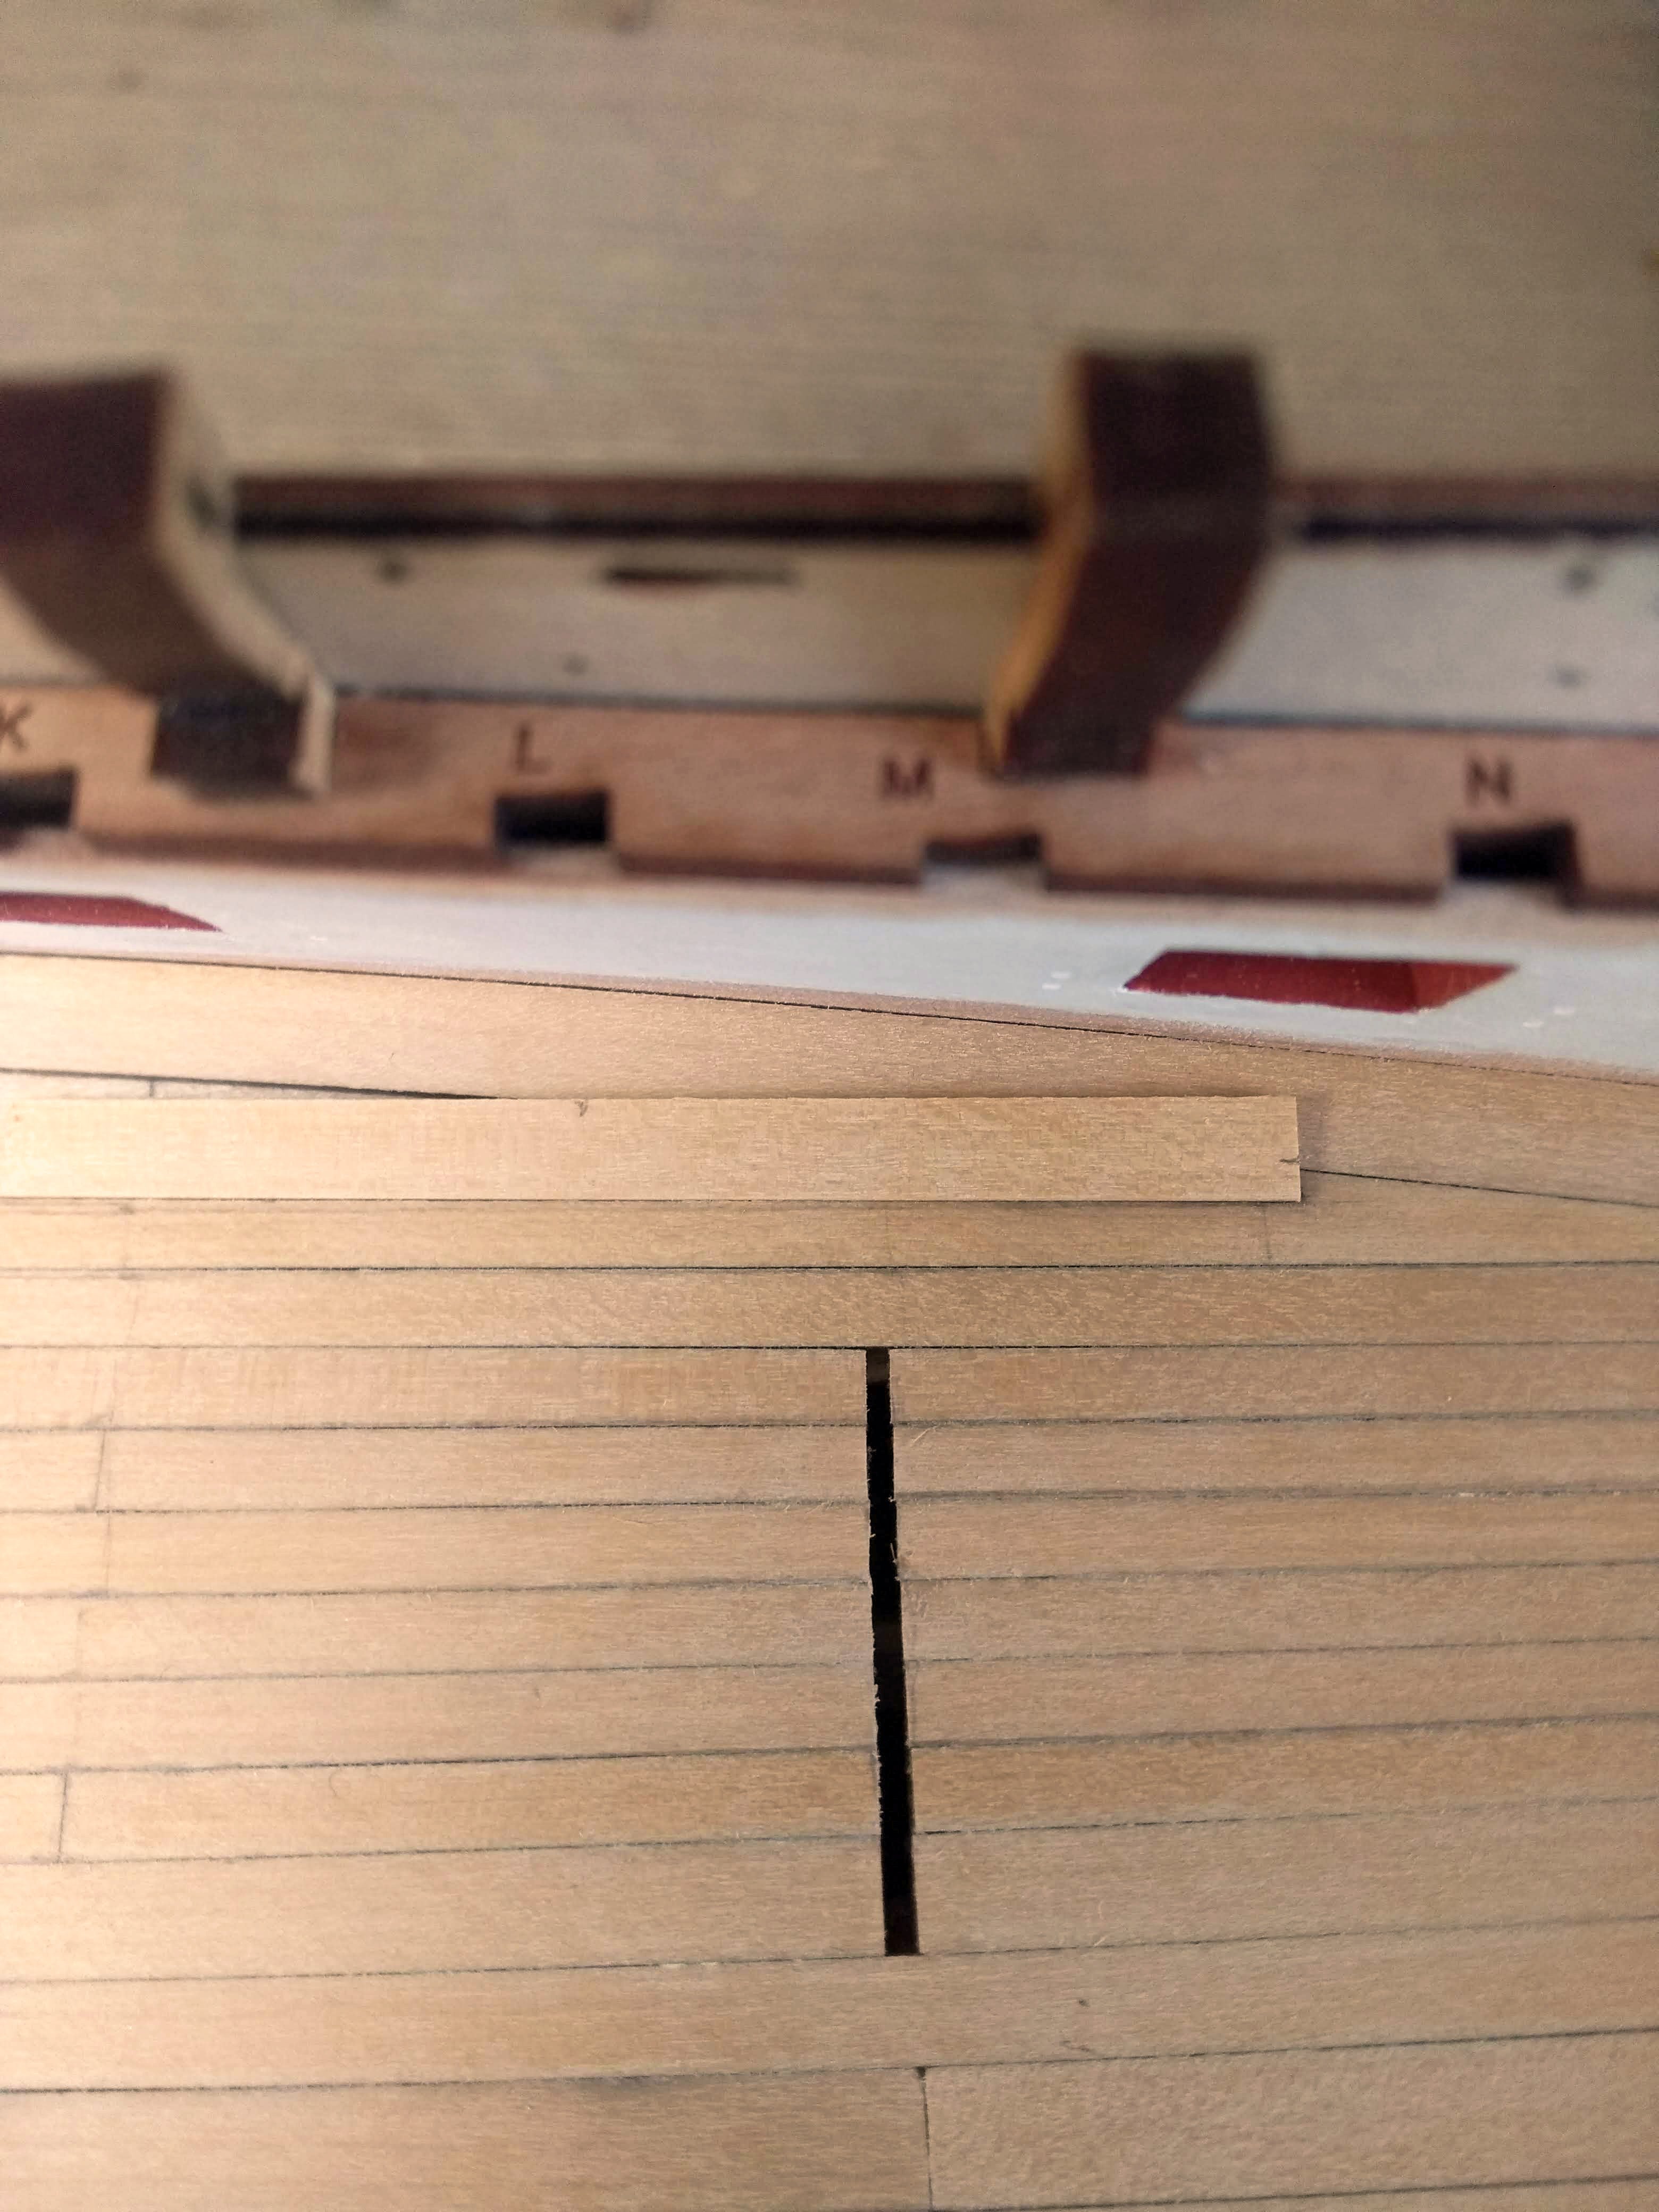
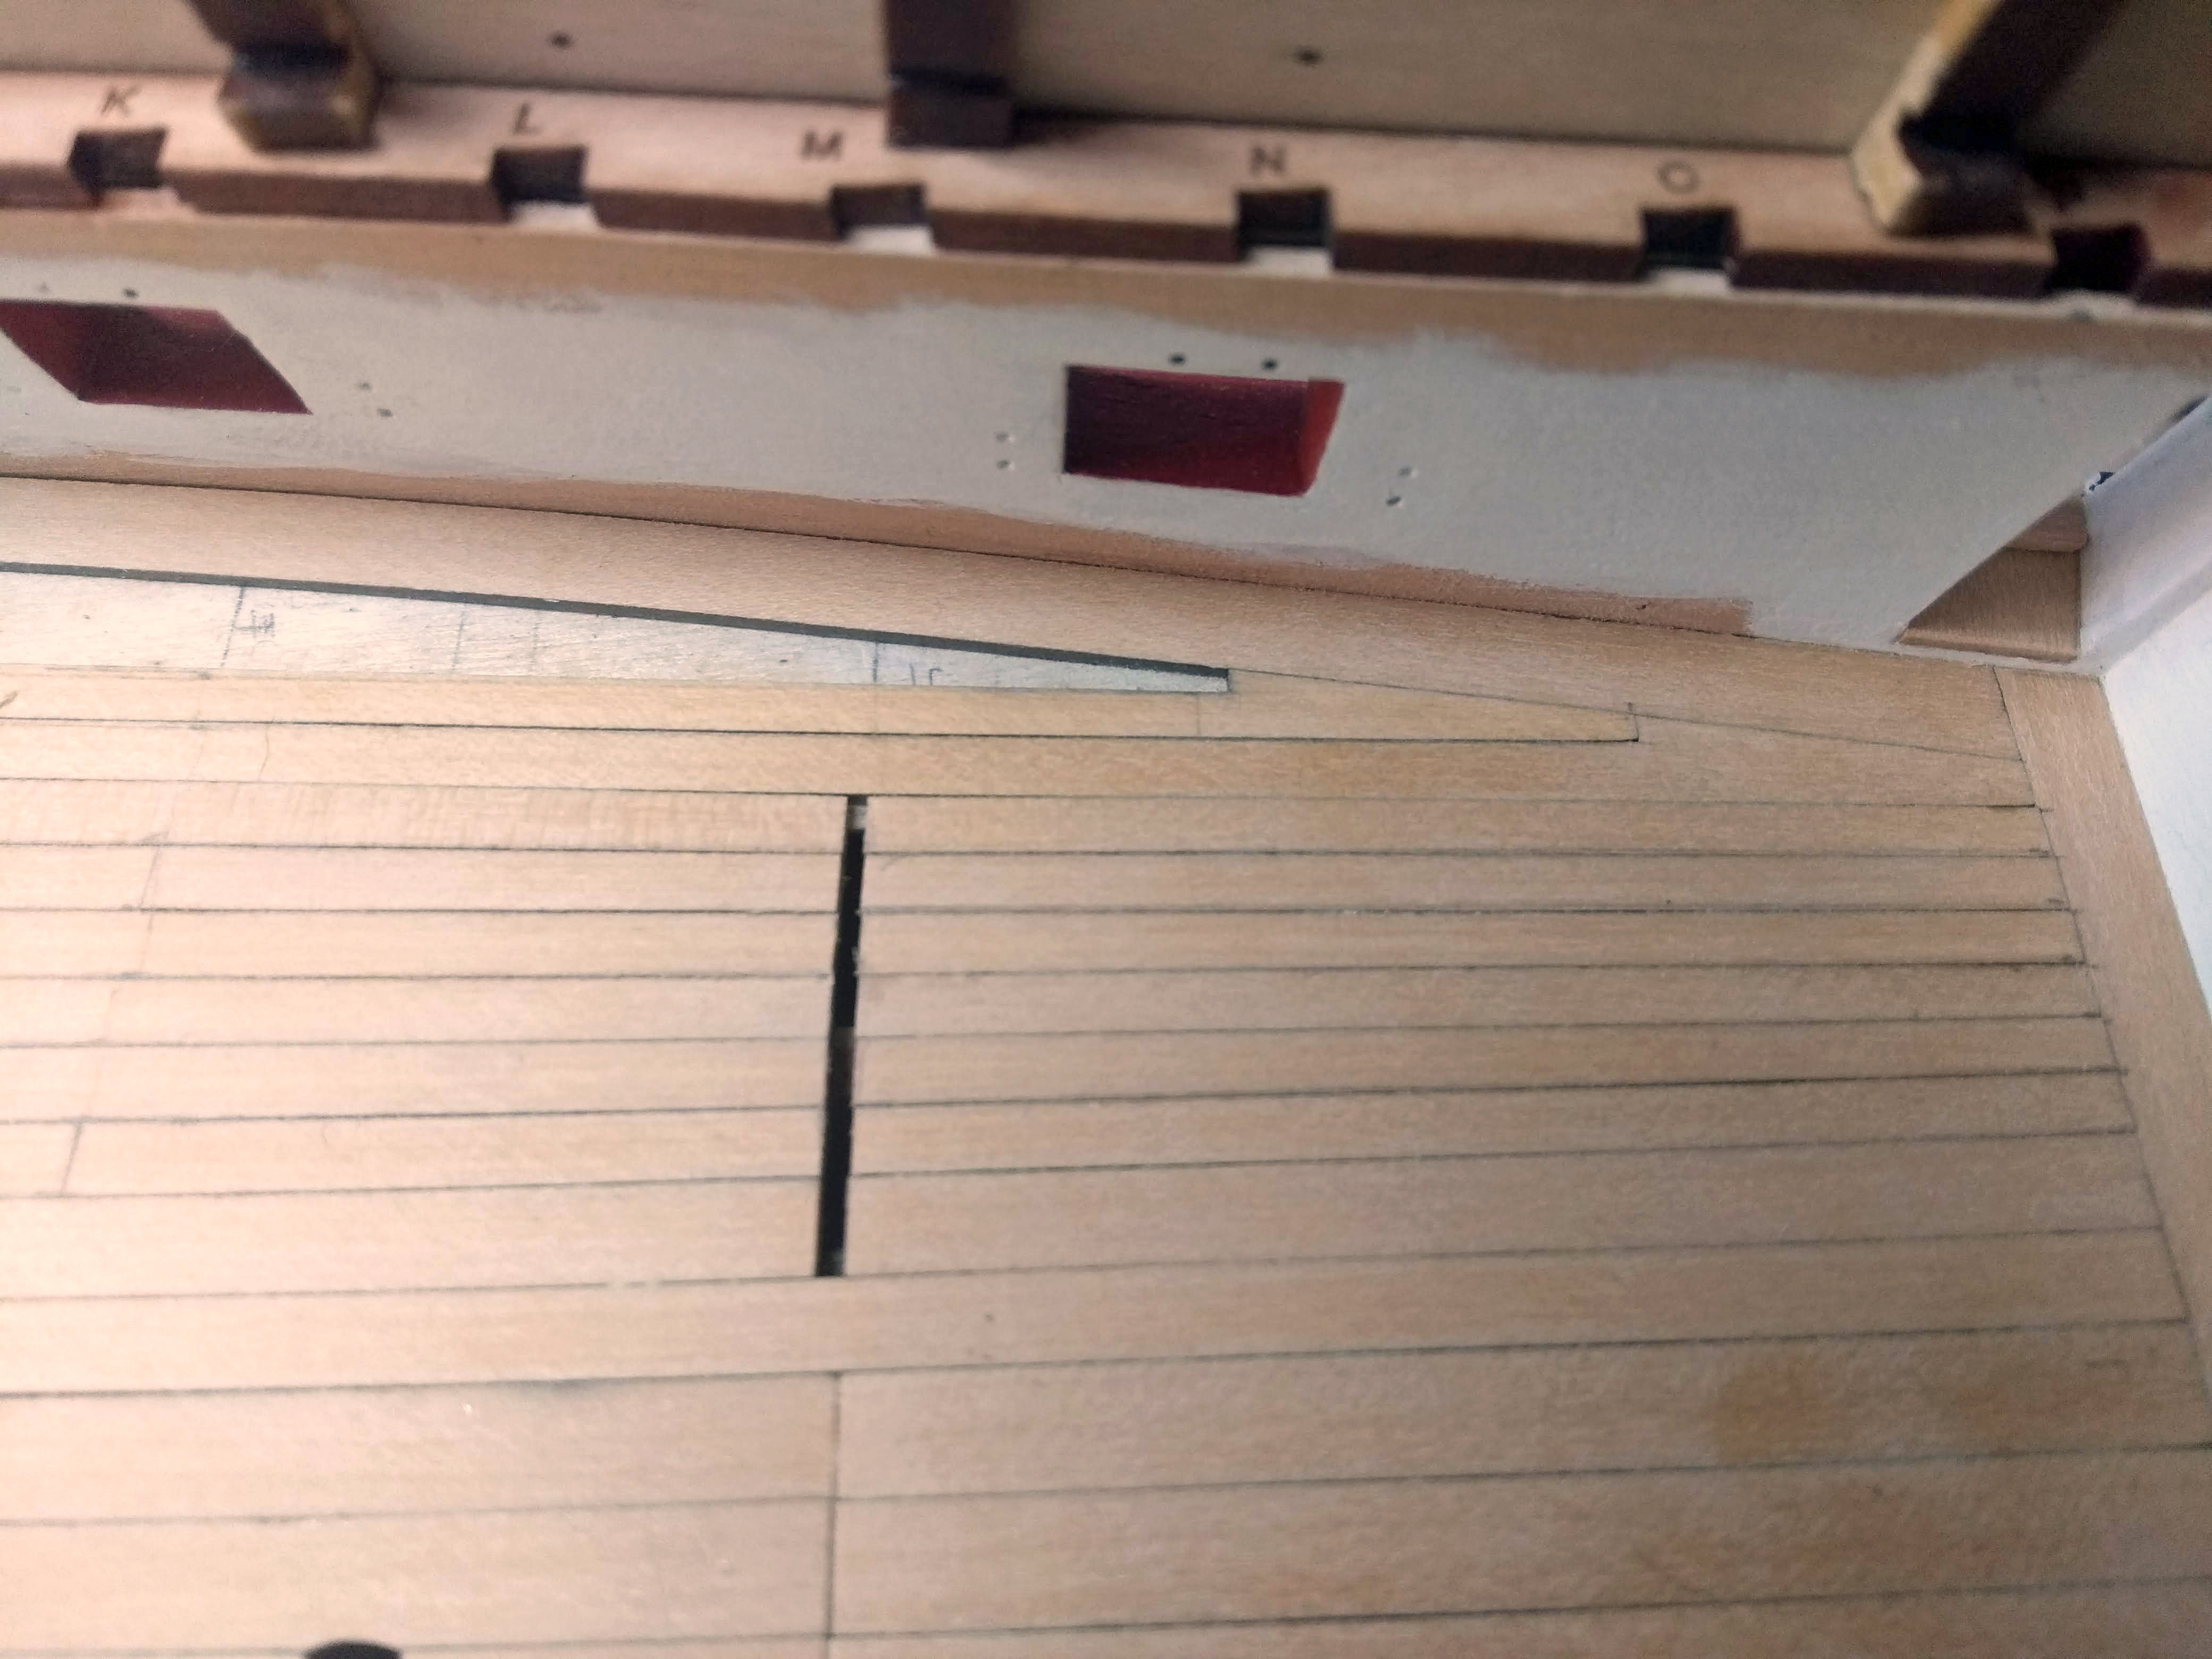
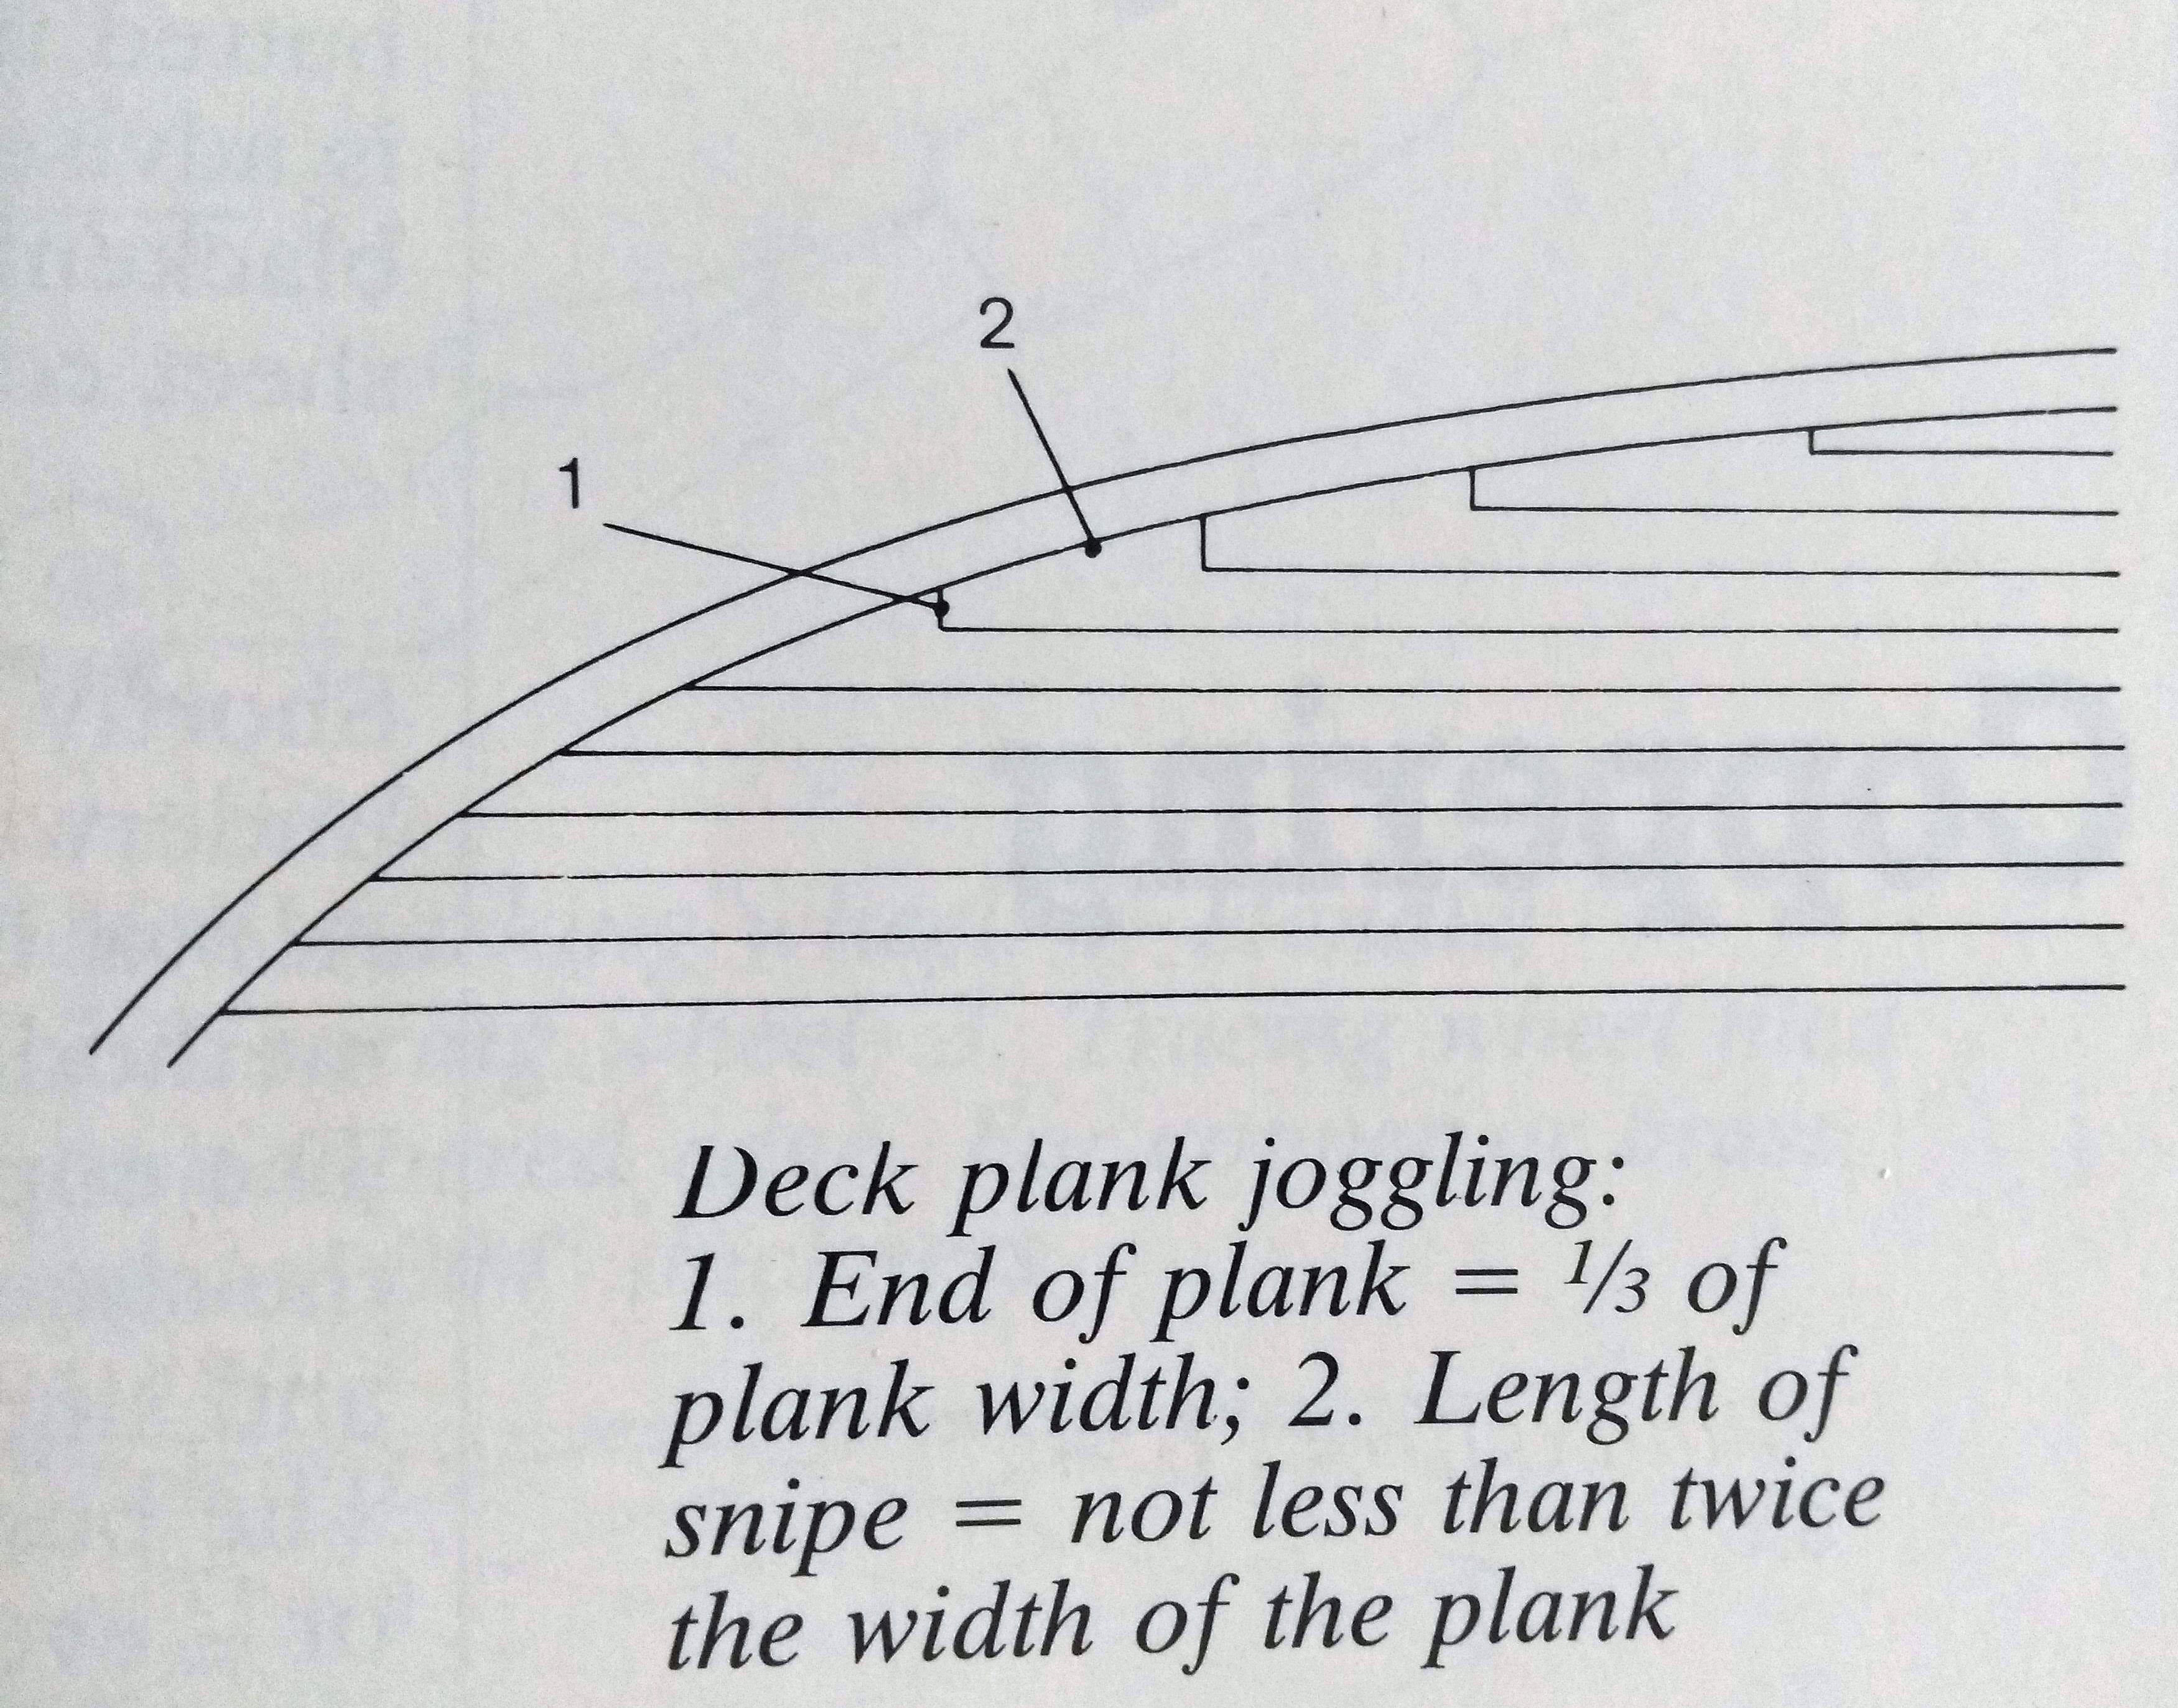
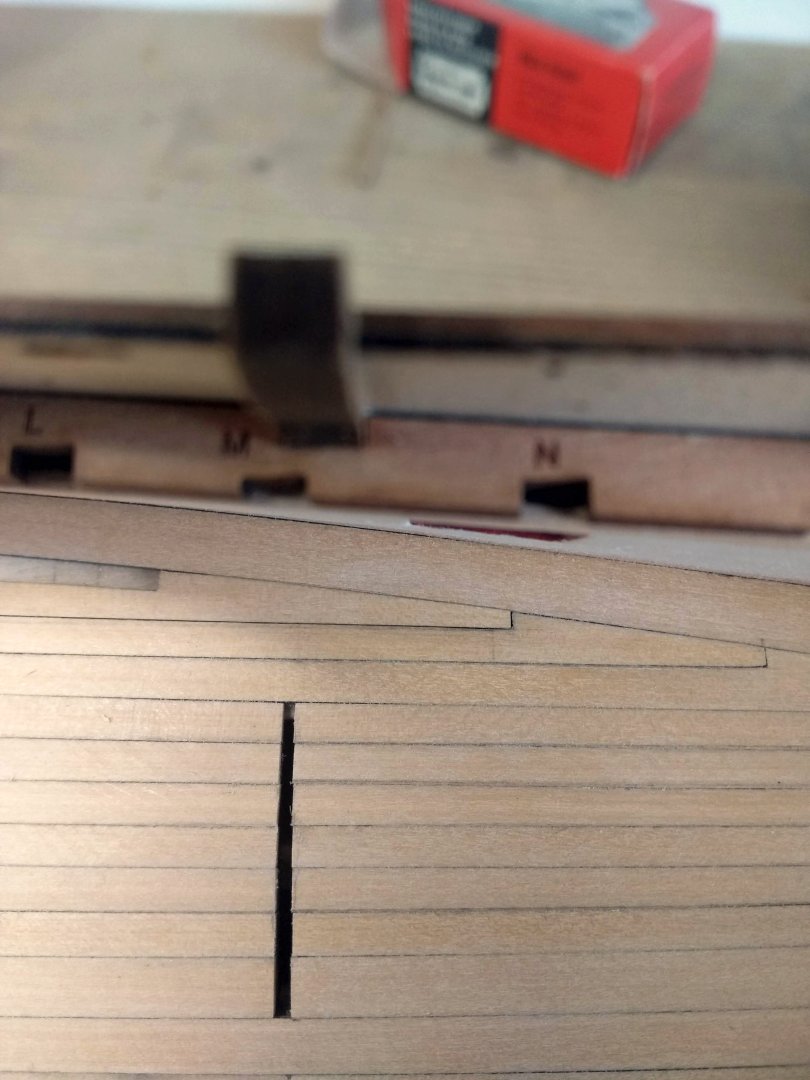
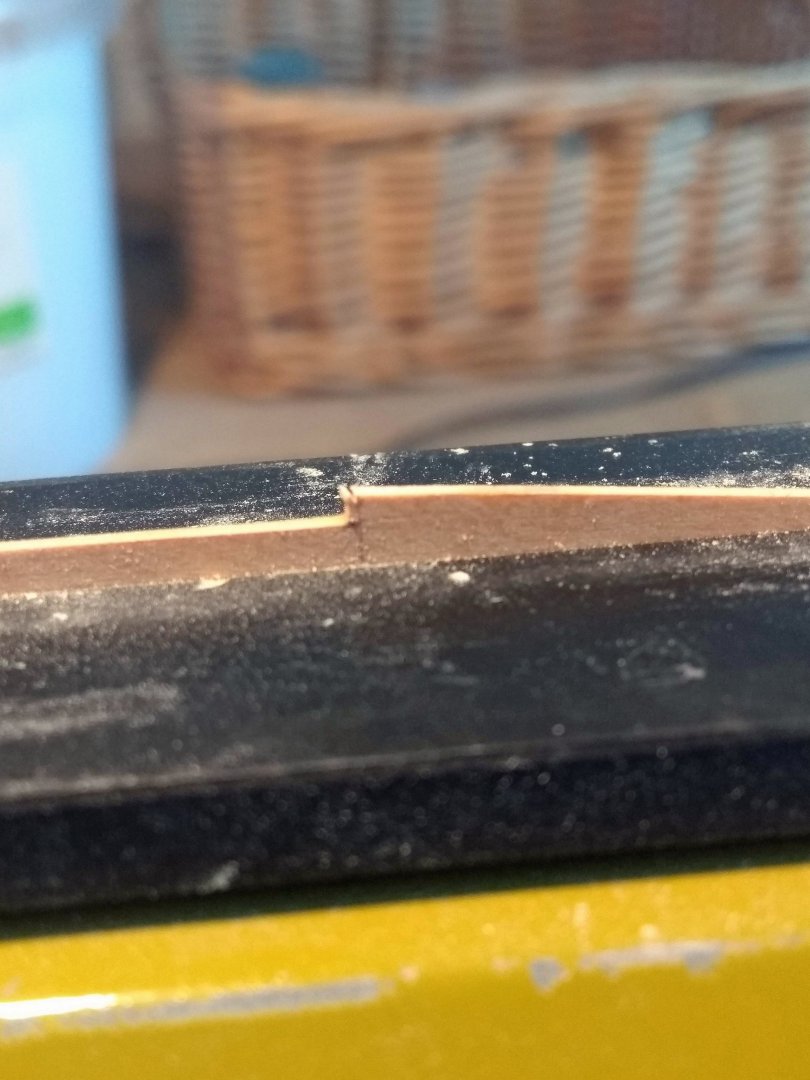
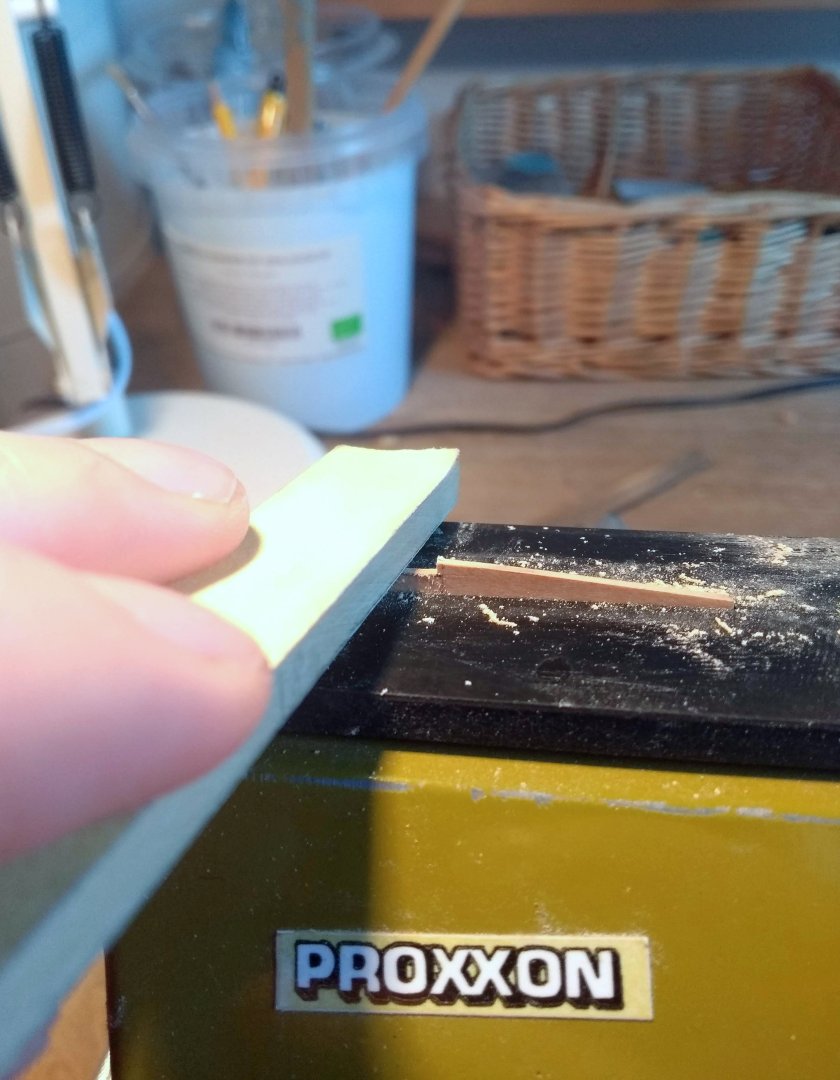
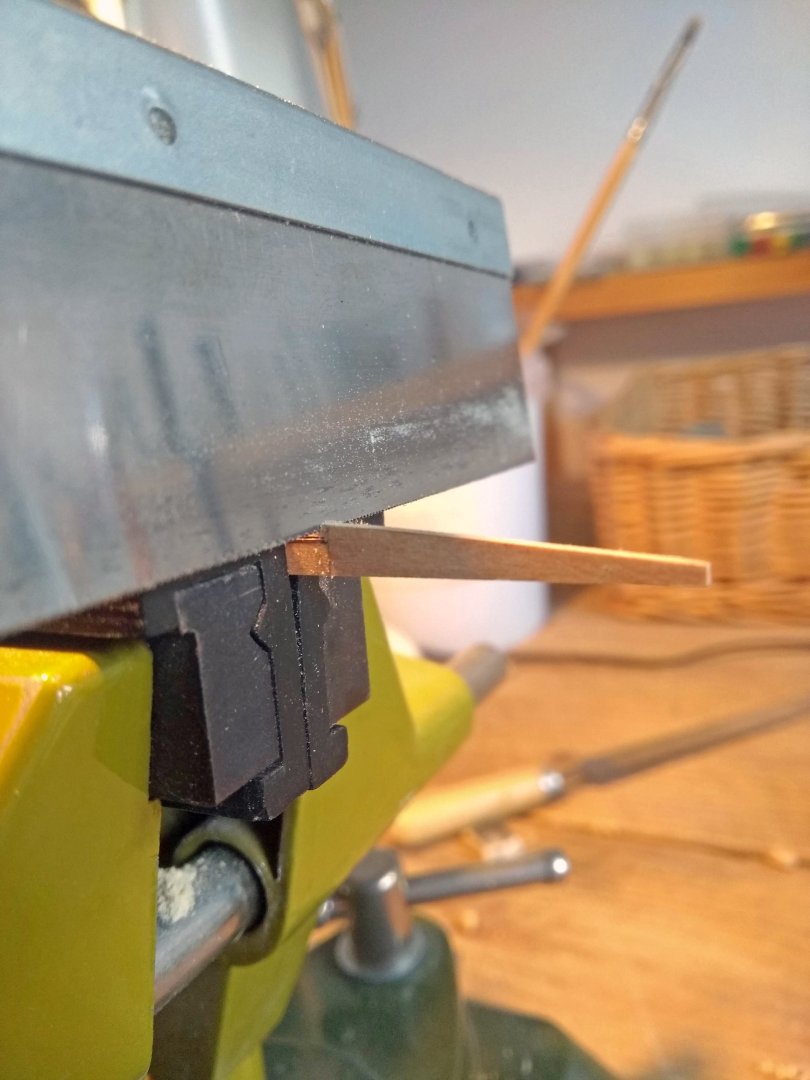
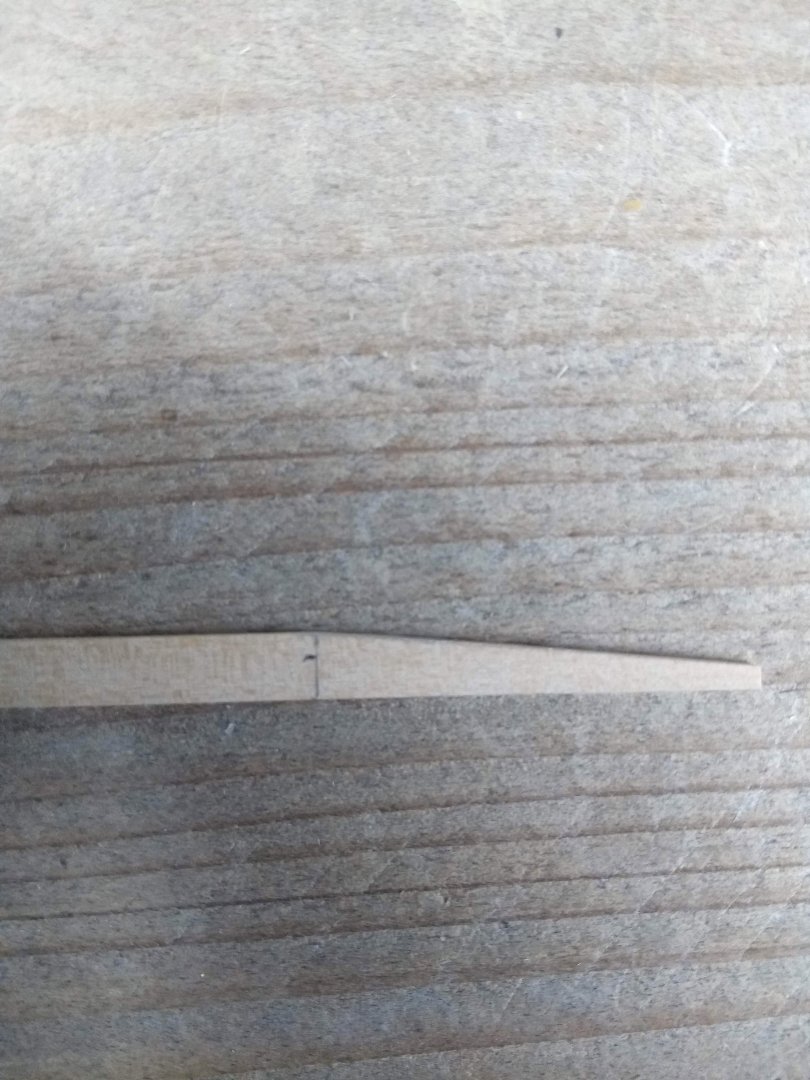
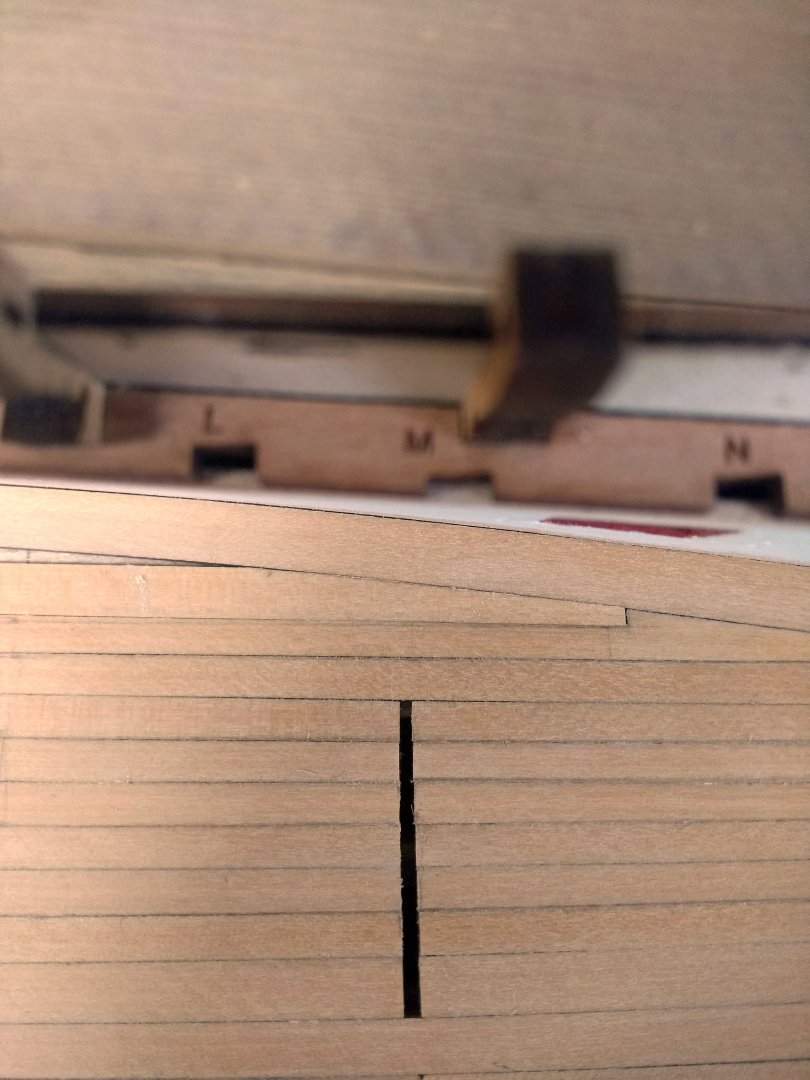
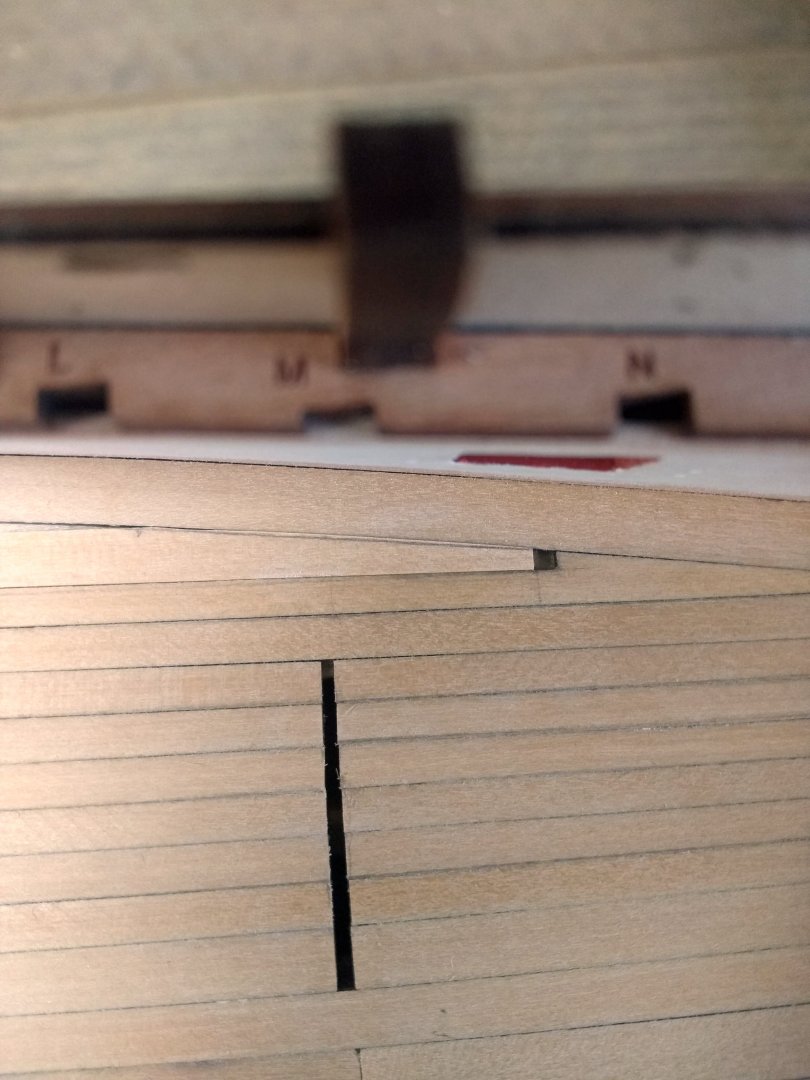
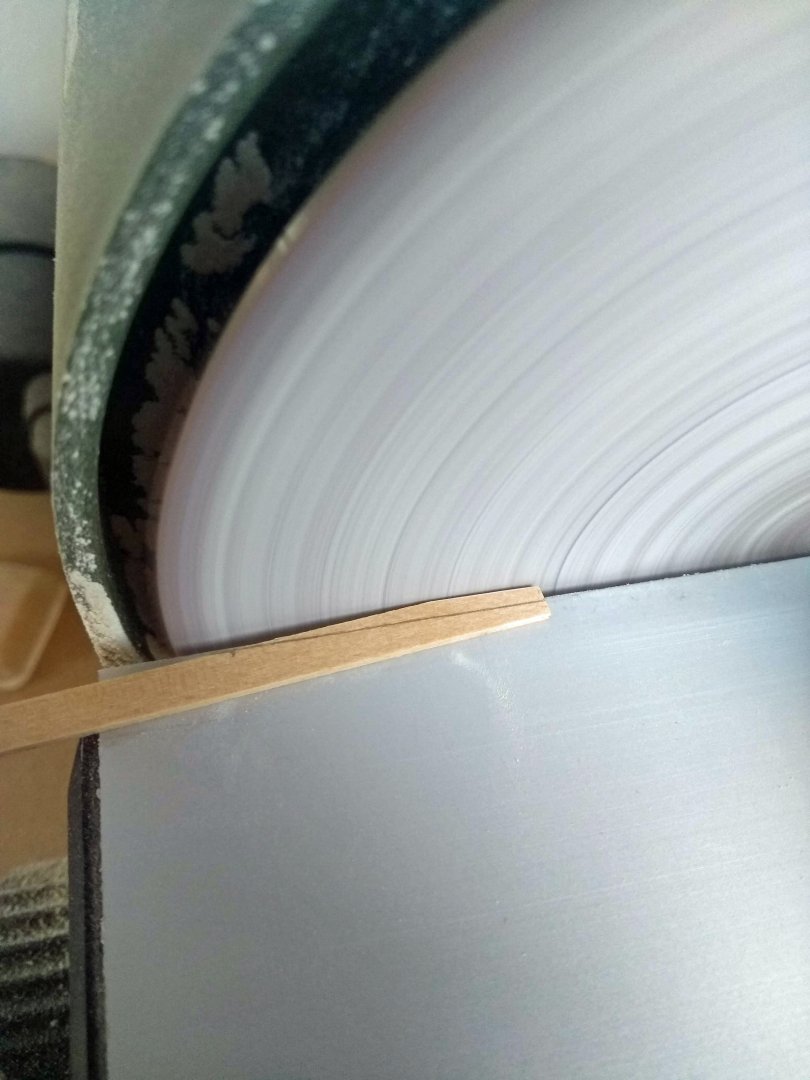
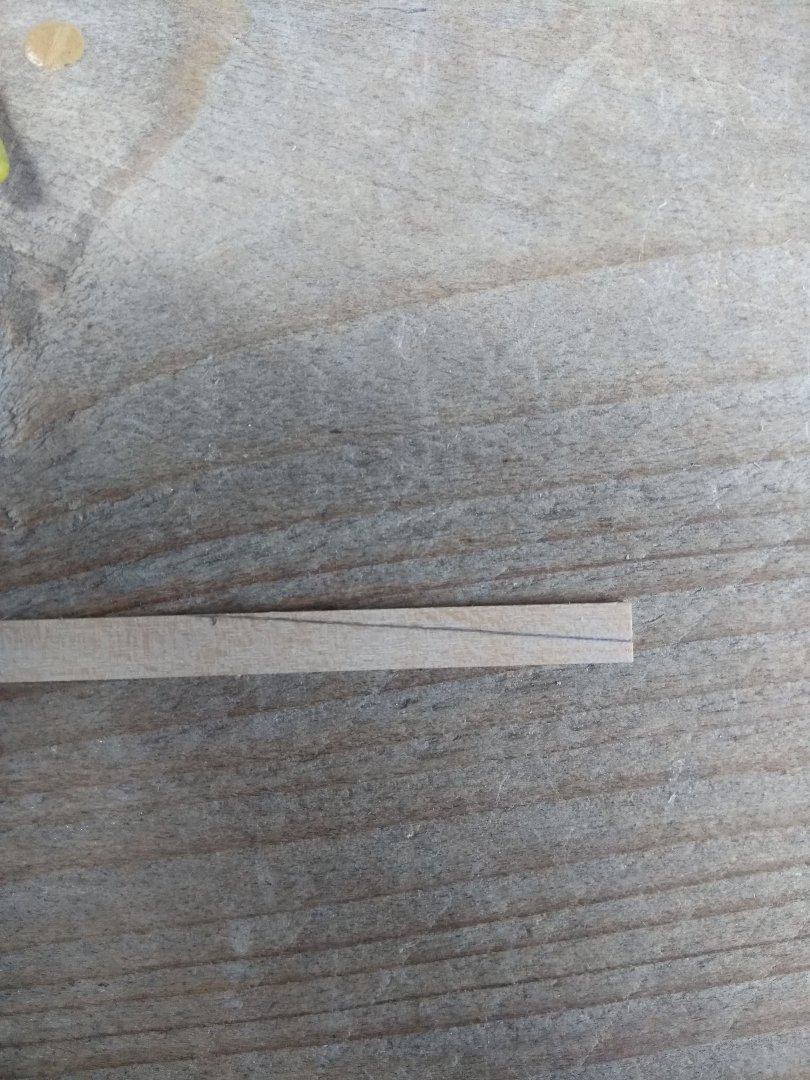
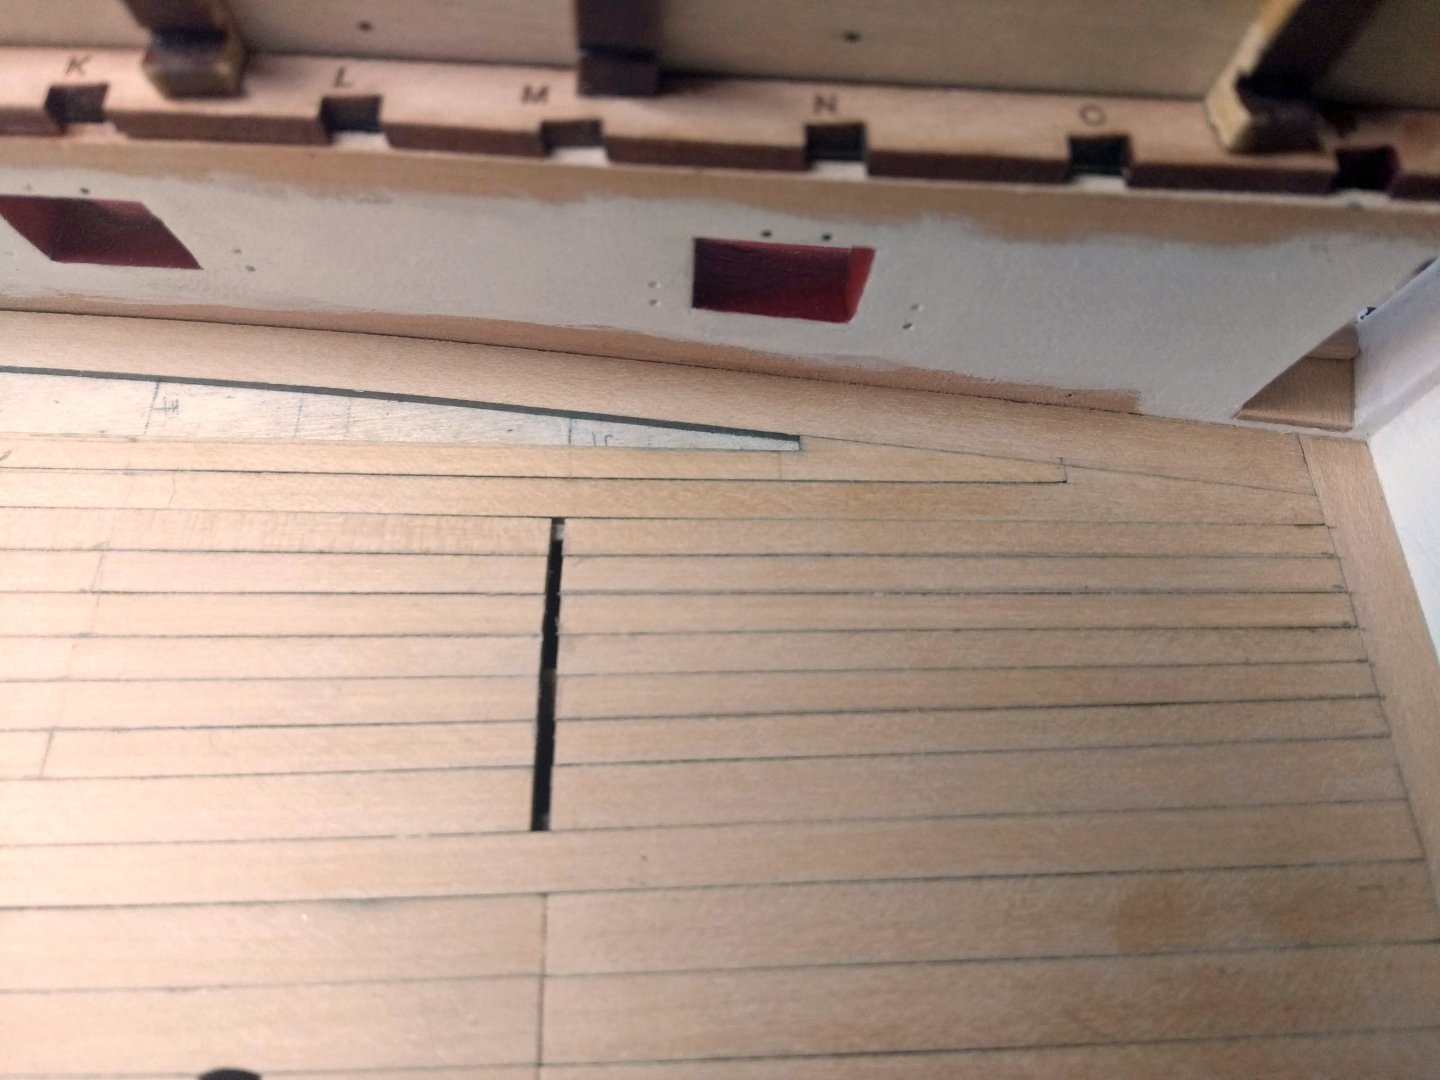
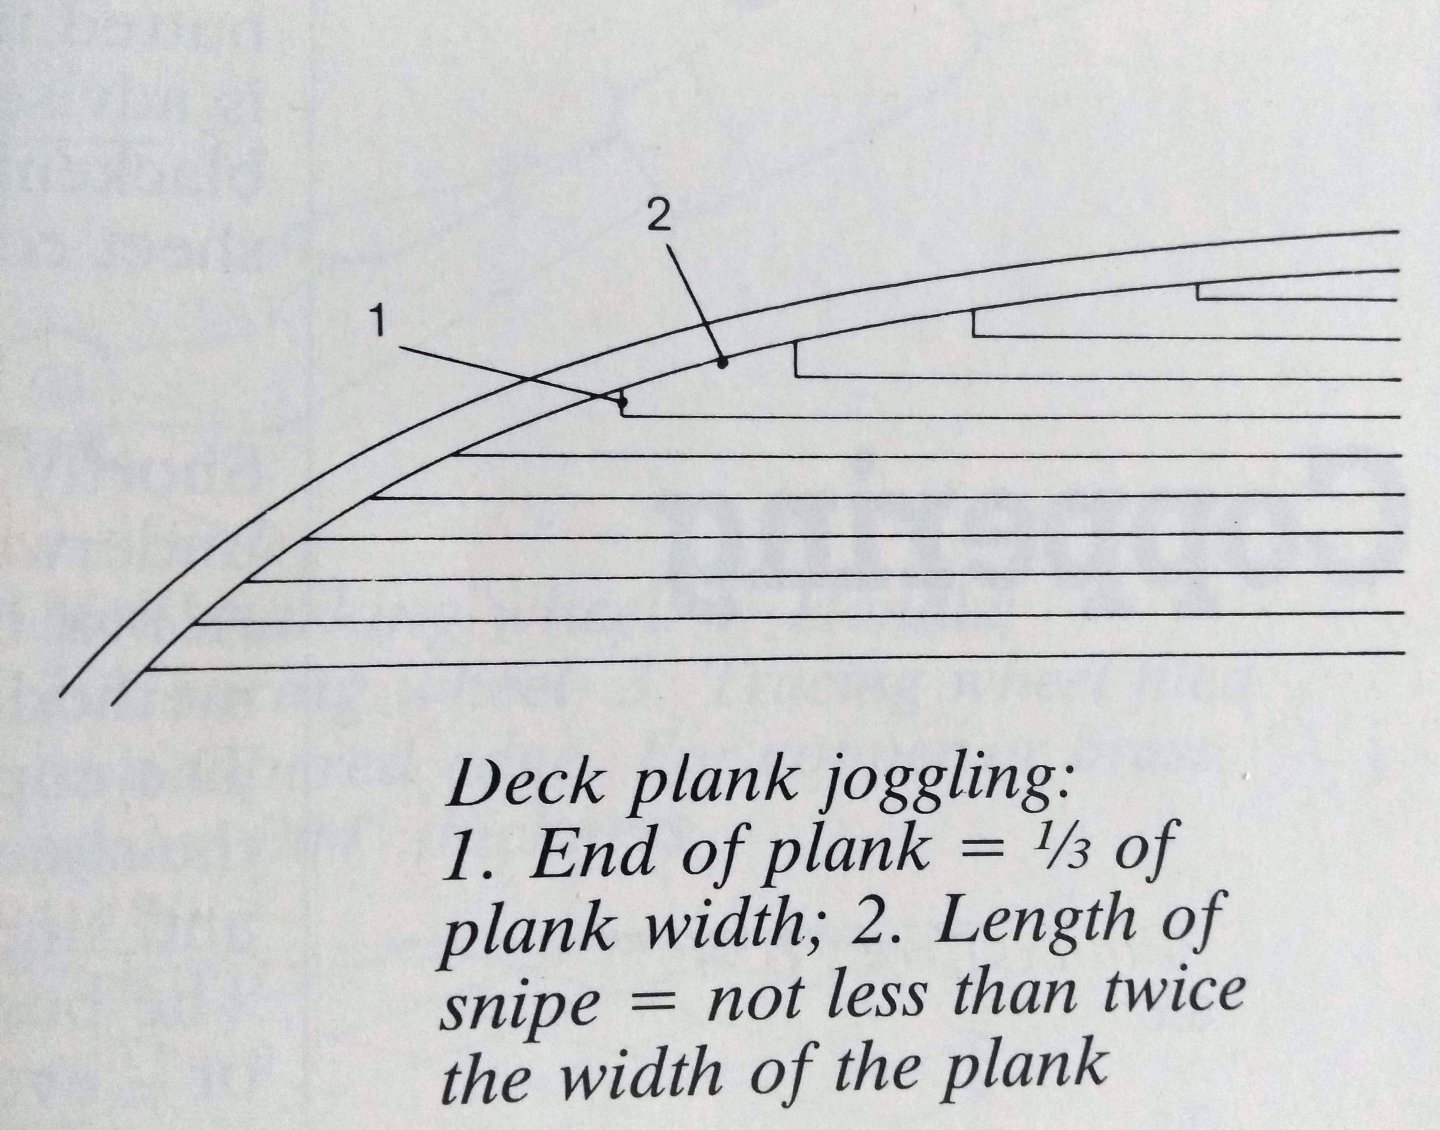
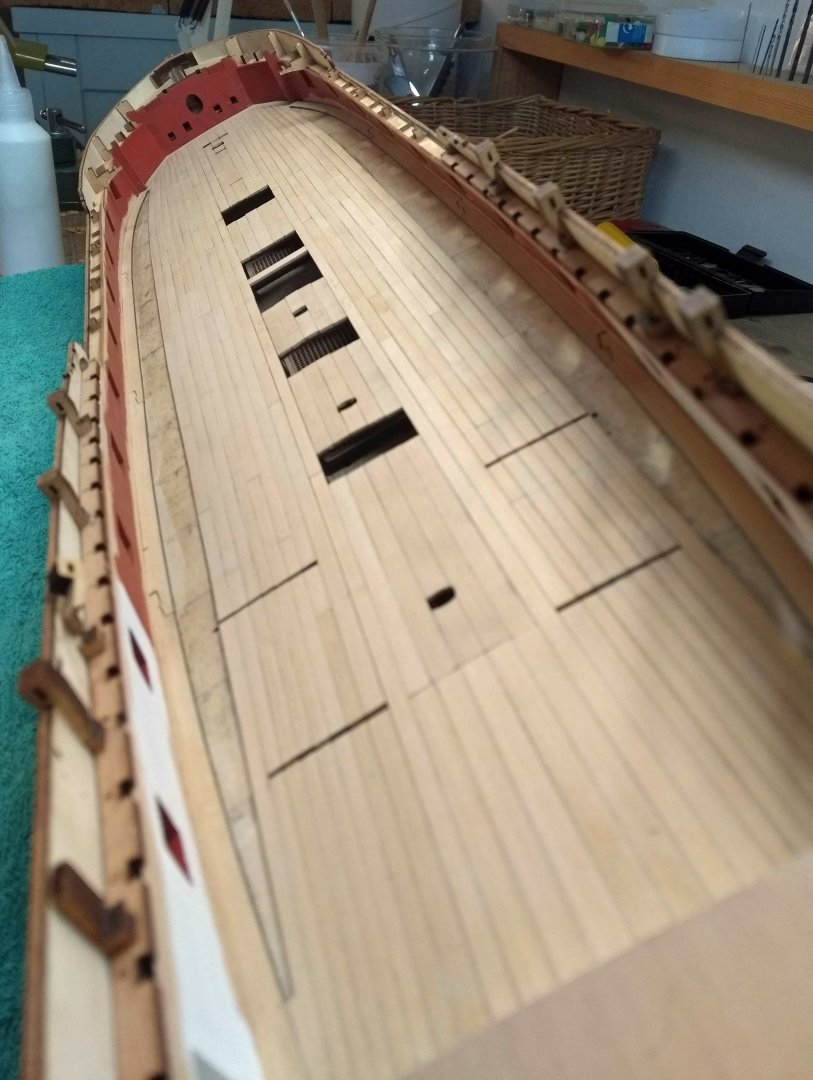
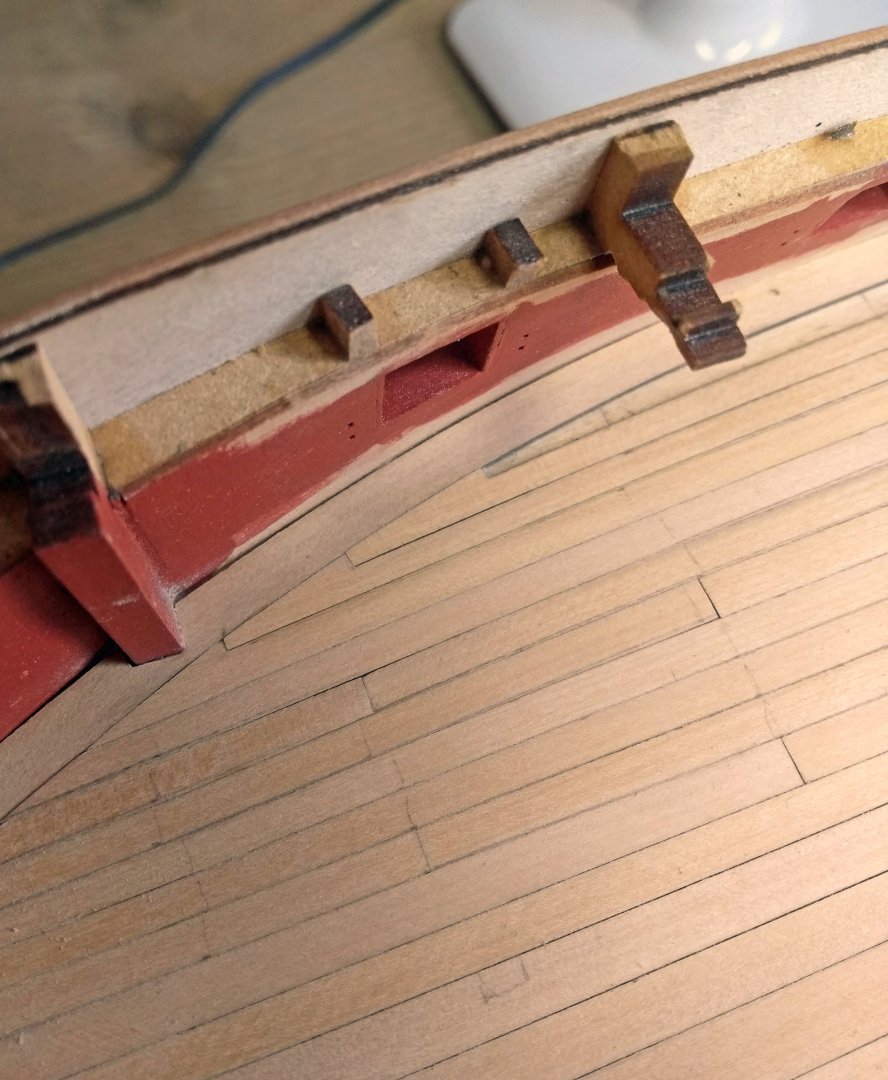
Ok...a little photo report on how I approach it: 1) The rules for "Hooked scarph" planks are as follows according to "Wolfram Zu Mondfeld" in his book "Historic Ship Models". If it's 100% accurate? I don't know and don't care, I'm not that of a purist and if 1 source says it's this...it's okay for me. 2) First of all I have already made the first plank according to the above rules. 3)Then I take a plank that is a bit longer than I ultimately need and mark the 2 intersection points of the plank with respect to the margin plank. The bottom of this plank I naturally let rest in the pre-formed plank that is already on the deck. 4)Then draw a line between the two points. It doesn't have to be super precise because you are working towards the right shape. As long as you have a rough shape/angle. 5)Personally I use my disc sander for the first part...but whatever you prefer. The important thing is that you don't sand all the way to the line right away. 6)And then it's just carefully working towards the right angle. Here you can see that I'm sanding it down and fitting it, where the angle seems right, but needs to be sanded down a bit more to fit it completely. This is just done slowly, taking a little bit off each time. Sometimes you take too much off the angle, which creates to much space, but then you sand a little off the blunt point again, and that's how you play back and forth between the two. Sometimes everything works with the disc sander, but sometimes it also removes material too quickly and I take a sanding stick so that I have a bit more control. That's just finding out for yourself what you like. But that's why you need some extra length...because it will not always be in one take and you need to sand a bit of the point, which makes the length shorter. 7) Another example where a bit too much has been taken off at the top left of the beveled side and the front needs to be a millimeter deeper. So here I try to sand the beveled side a bit straight until it fits nicely. 8 ) Like this... 9) Then you have the most important thing ready and you have to mark the board according to the rules. So the board that goes in here again has a minimum width of 1/3 of the normal width. In my case about 1.4mm (say... I'm not too strict about this myself) 10) Then you mark the rest of the board and cut away the vast majority first with a knife (or sanding). What I found out after cutting is that if you try to cut the last piece crosswise it breaks off since you have no meat on the slanted side, so I do that last piece myself with a fine saw 11) Sanding stick to get to the actual needed size. 12)And the very last part of the "corner" I do with a sharp knife so you get a really good sharp corner. Personally I can't do that well with a file or sanding stick...so a knife works better...just make sure you cut off very small layers, because too much force and it breaks off. 13) Voila... By the way...I don't know if this specific plank above that will go under the frames and doors, that it went like that in real life...but that doesn't really matter to me because it will be practically invisible when the upper deck is going to cover it. It will all be in the dark. But for me it is a good exercise so that I will have it in my fingers for the upper decks later. I hope my explanation is a bit clear...not really a special method, but it works fine for me


-
Starting to look like a ship now!
-
Not having experience with the Syren kits, but with the elaborate manuals that Chuck is writing for them and all the build logs here on the forum you will have a lot of support. Did you take a look into the manuals? They are available at the Syren Ship model company website to have a look in. And if you really like it...you can always start with a kit to see how far your skills bring you. If it's a bit to difficult, you can pause and try something else first to further develop your skills. That's easy with the Syren kits...you don't have to buy the whole kit at once, unless you go for the small kits I guess. But personally...you can learn everything when you take your time. I think most problems start with the size and lack of good plans/manuals of kits. So start not to big
-
This....you will have a really nice clean and sharp edge with this
-
Oh...didn't think of that...yes that's a problem
-
That custom name plate is really cool of Chris! Wish you succes building this one!
- 35 replies
-
- 5
-
-
-
- vanguard models
- Adder
- (and 2 more)
-
Planking looking really good! I have some scrapers from Artesania Latina: https://artesanialatina.net/en/162-micro-tools Not to expensive...Not sure if they are in your country easier available in some local webshop. But like you said...in the manual it says that's it's provided with the kit, so that's weird. I would contact Model Shipways about it. I've read that they a have good customer service.
-
Those are some difficult shapes! Looks very nice
-
LOL....no expert here, but thanks for the compliment . I'll take some pictures of the process this weekend. Nothing special about my approach...but it's easier to explain with some pictures.
-
Lovely result! Well done! Hope you are feeling better now
- 24 replies
-
- 1
-
-
- Modellers Shipyard
- Mary Byrne
- (and 1 more)
-
Update: Just some progress pics. Finished the second wide band also...now working on the outer three planks on both sides. Trying to figure out the hooked scarph planks, Looks good I think I had already a preview with some moist on the deck planking...that looks quite spectacular, really curious how it will look with the WOP.
-
Interesting build! Also nice large scale, will be nice to see this come together
- 58 replies
-
- 1
-
-
- Santa Maria
- Ships of Pavel Nikitin
- (and 1 more)
-
Really nice model! Congratulations and well done! Looking forward to see you tackling the next one