DONATION DRIVE - SUPPORT MSW - DO YOUR PART TO KEEP THIS GREAT FORUM GOING!
×


Ronald-V
-
Posts
1,899 -
Joined
-
Last visited
Content Type
Profiles
Forums
Gallery
Events
Everything posted by Ronald-V
-
 Very interesting! And yes it does look really nice, curious how it will look when under full sails
 -
Welcome! And great that you start a build log...you learn a lot from it. And it's nice to have something where you can look back at your process of what you've already made.
-
Personally I would burn out of doing multiple build simultanously, but a lot of people here on MSW are fine with it So good choice of kit and I hope you enjoy this new edition for your starting fleet!
-
I'm very curious how this project develops. The ship looks very attractive on their site, also the scale is nice. But indeed...compared with a Vanguard ship skeleton this looks...different
-
That does look really nice! Eventually the maple would age a bit more yellow if I remember correctly, but in my opinion that would only look more beautiful.
- 125 replies
-
- 1
-

-
- Christiania
- Vanguard Models
- (and 1 more)
-
Lovely! I like the dark "inboard" colors, that makes the natural wood of the benches etc really pop! Nice combination
- 23 replies
-
- 2
-

-
- 18th Century Armed Longboat
- Model Shipways
- (and 2 more)
-
Welcome!
-
Thanks! And it is really nice to work with...it holds nice sharp edges 👍
-
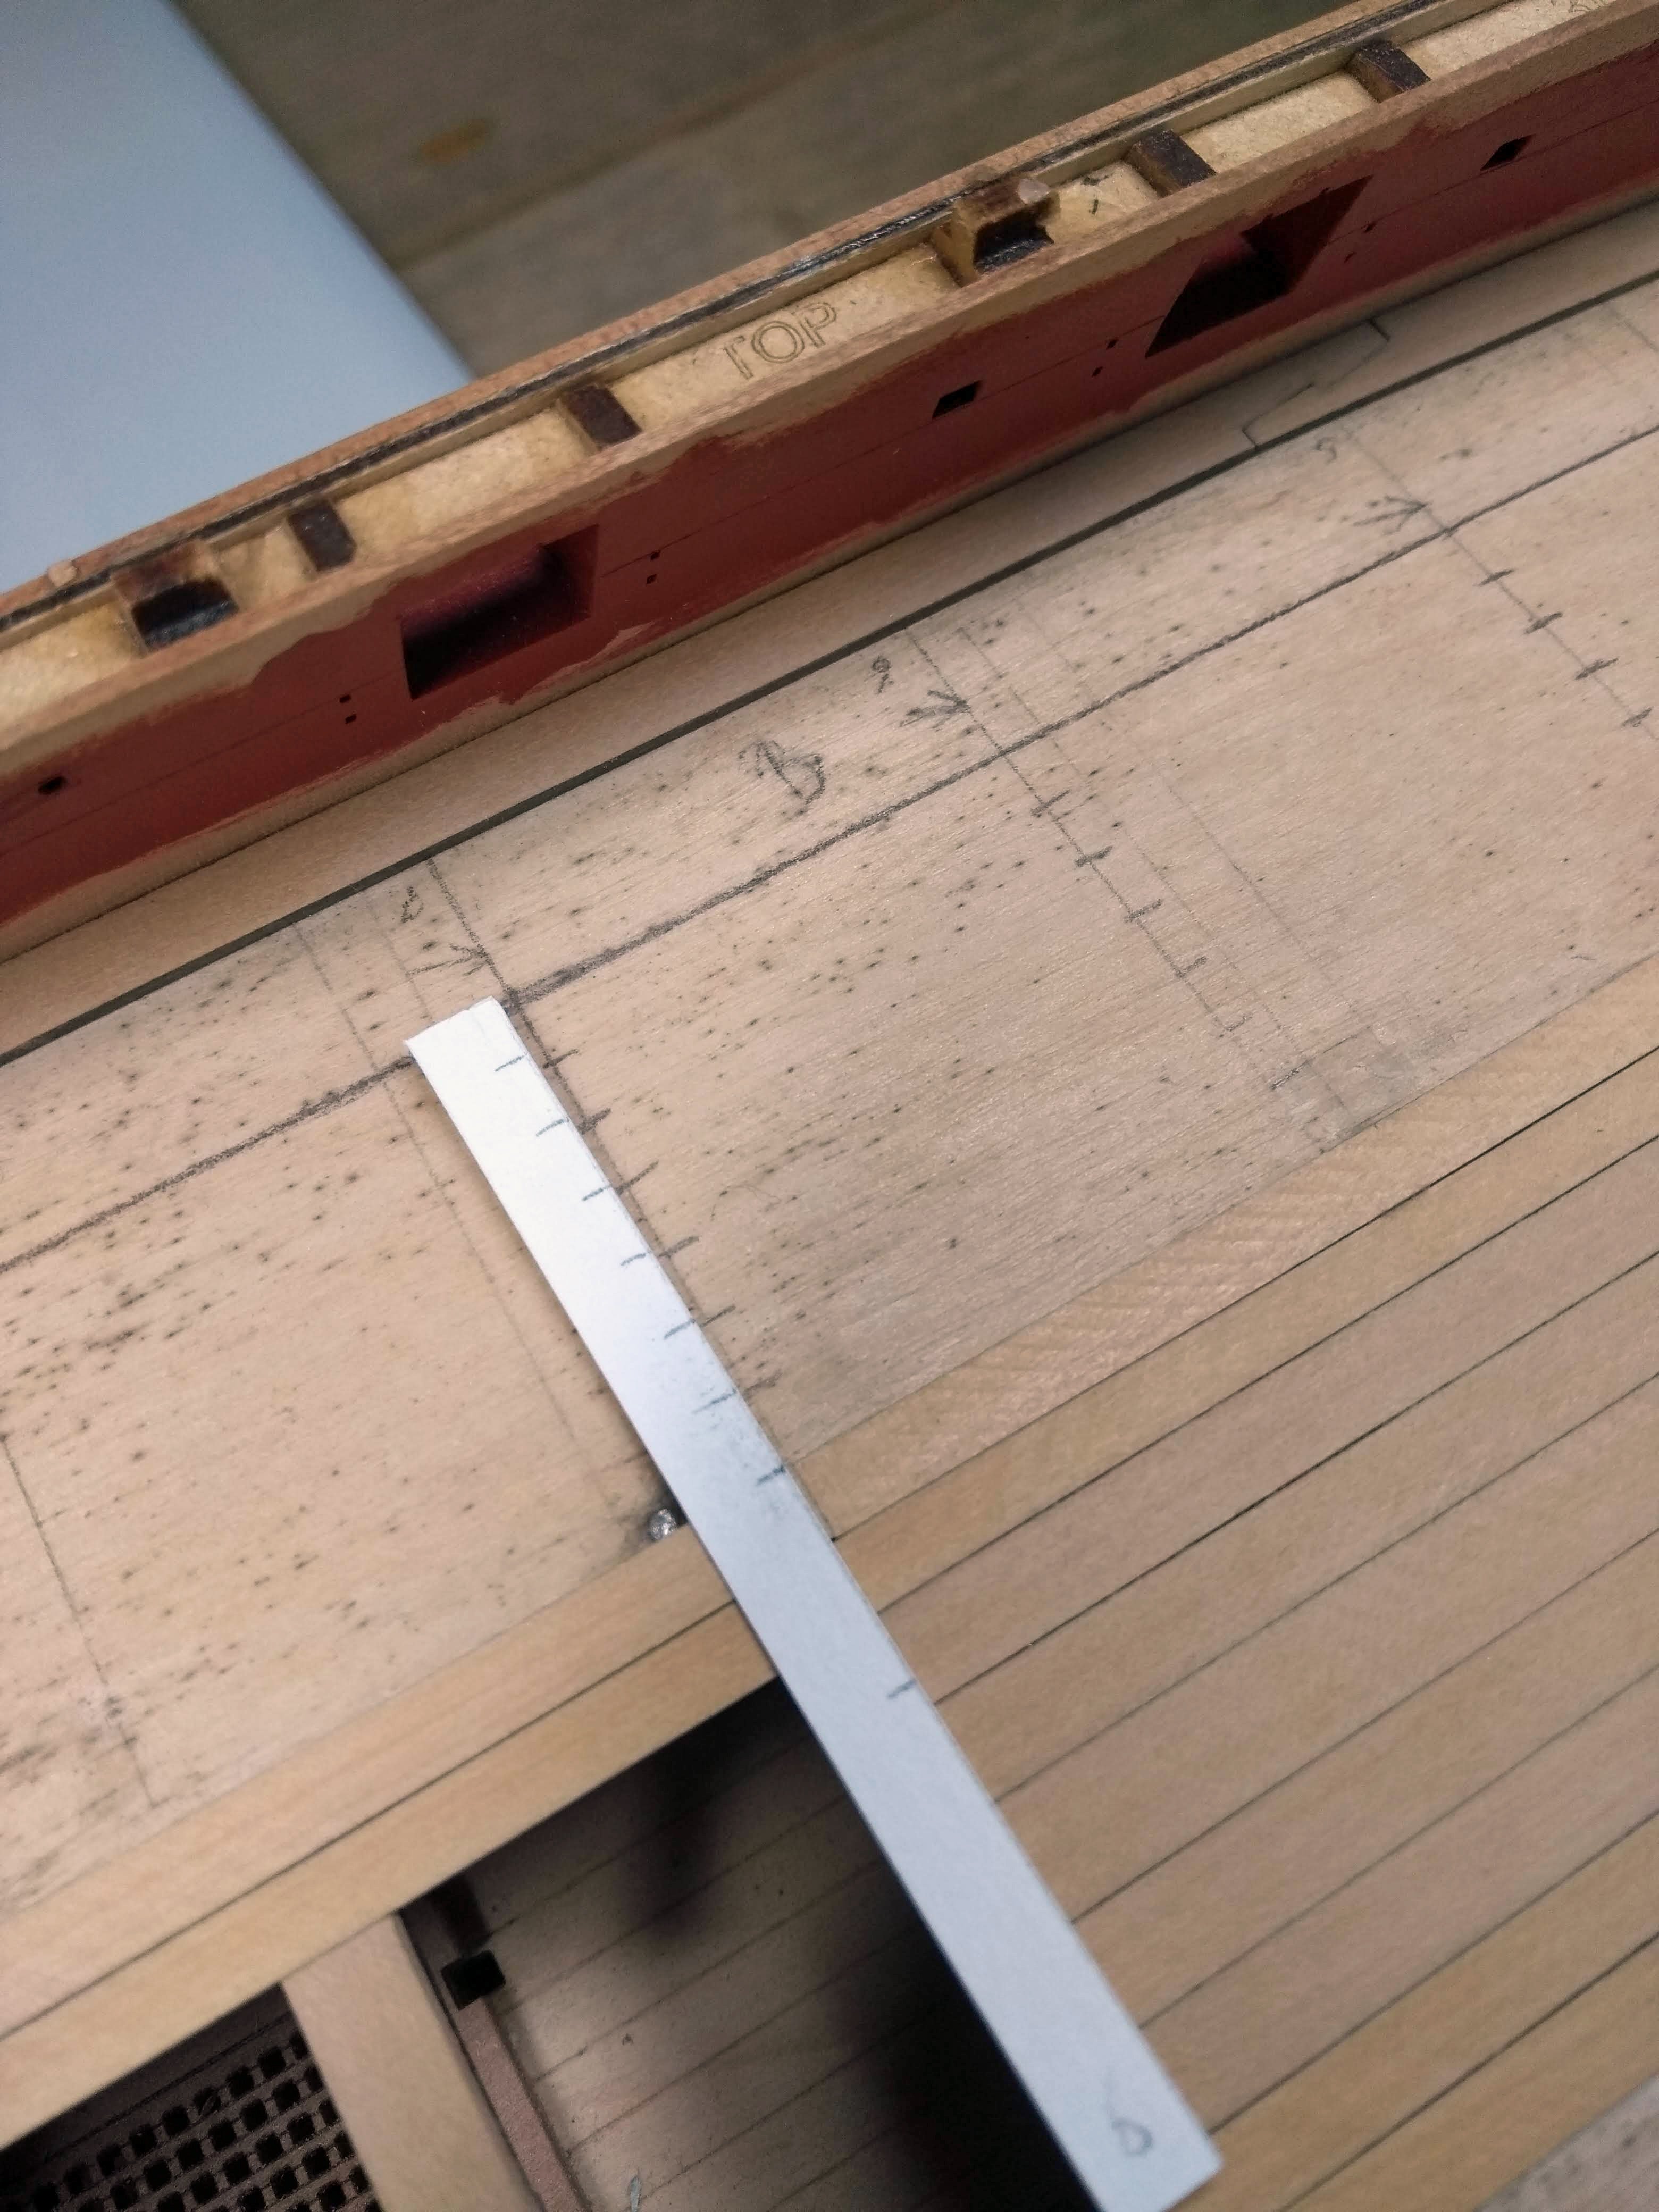
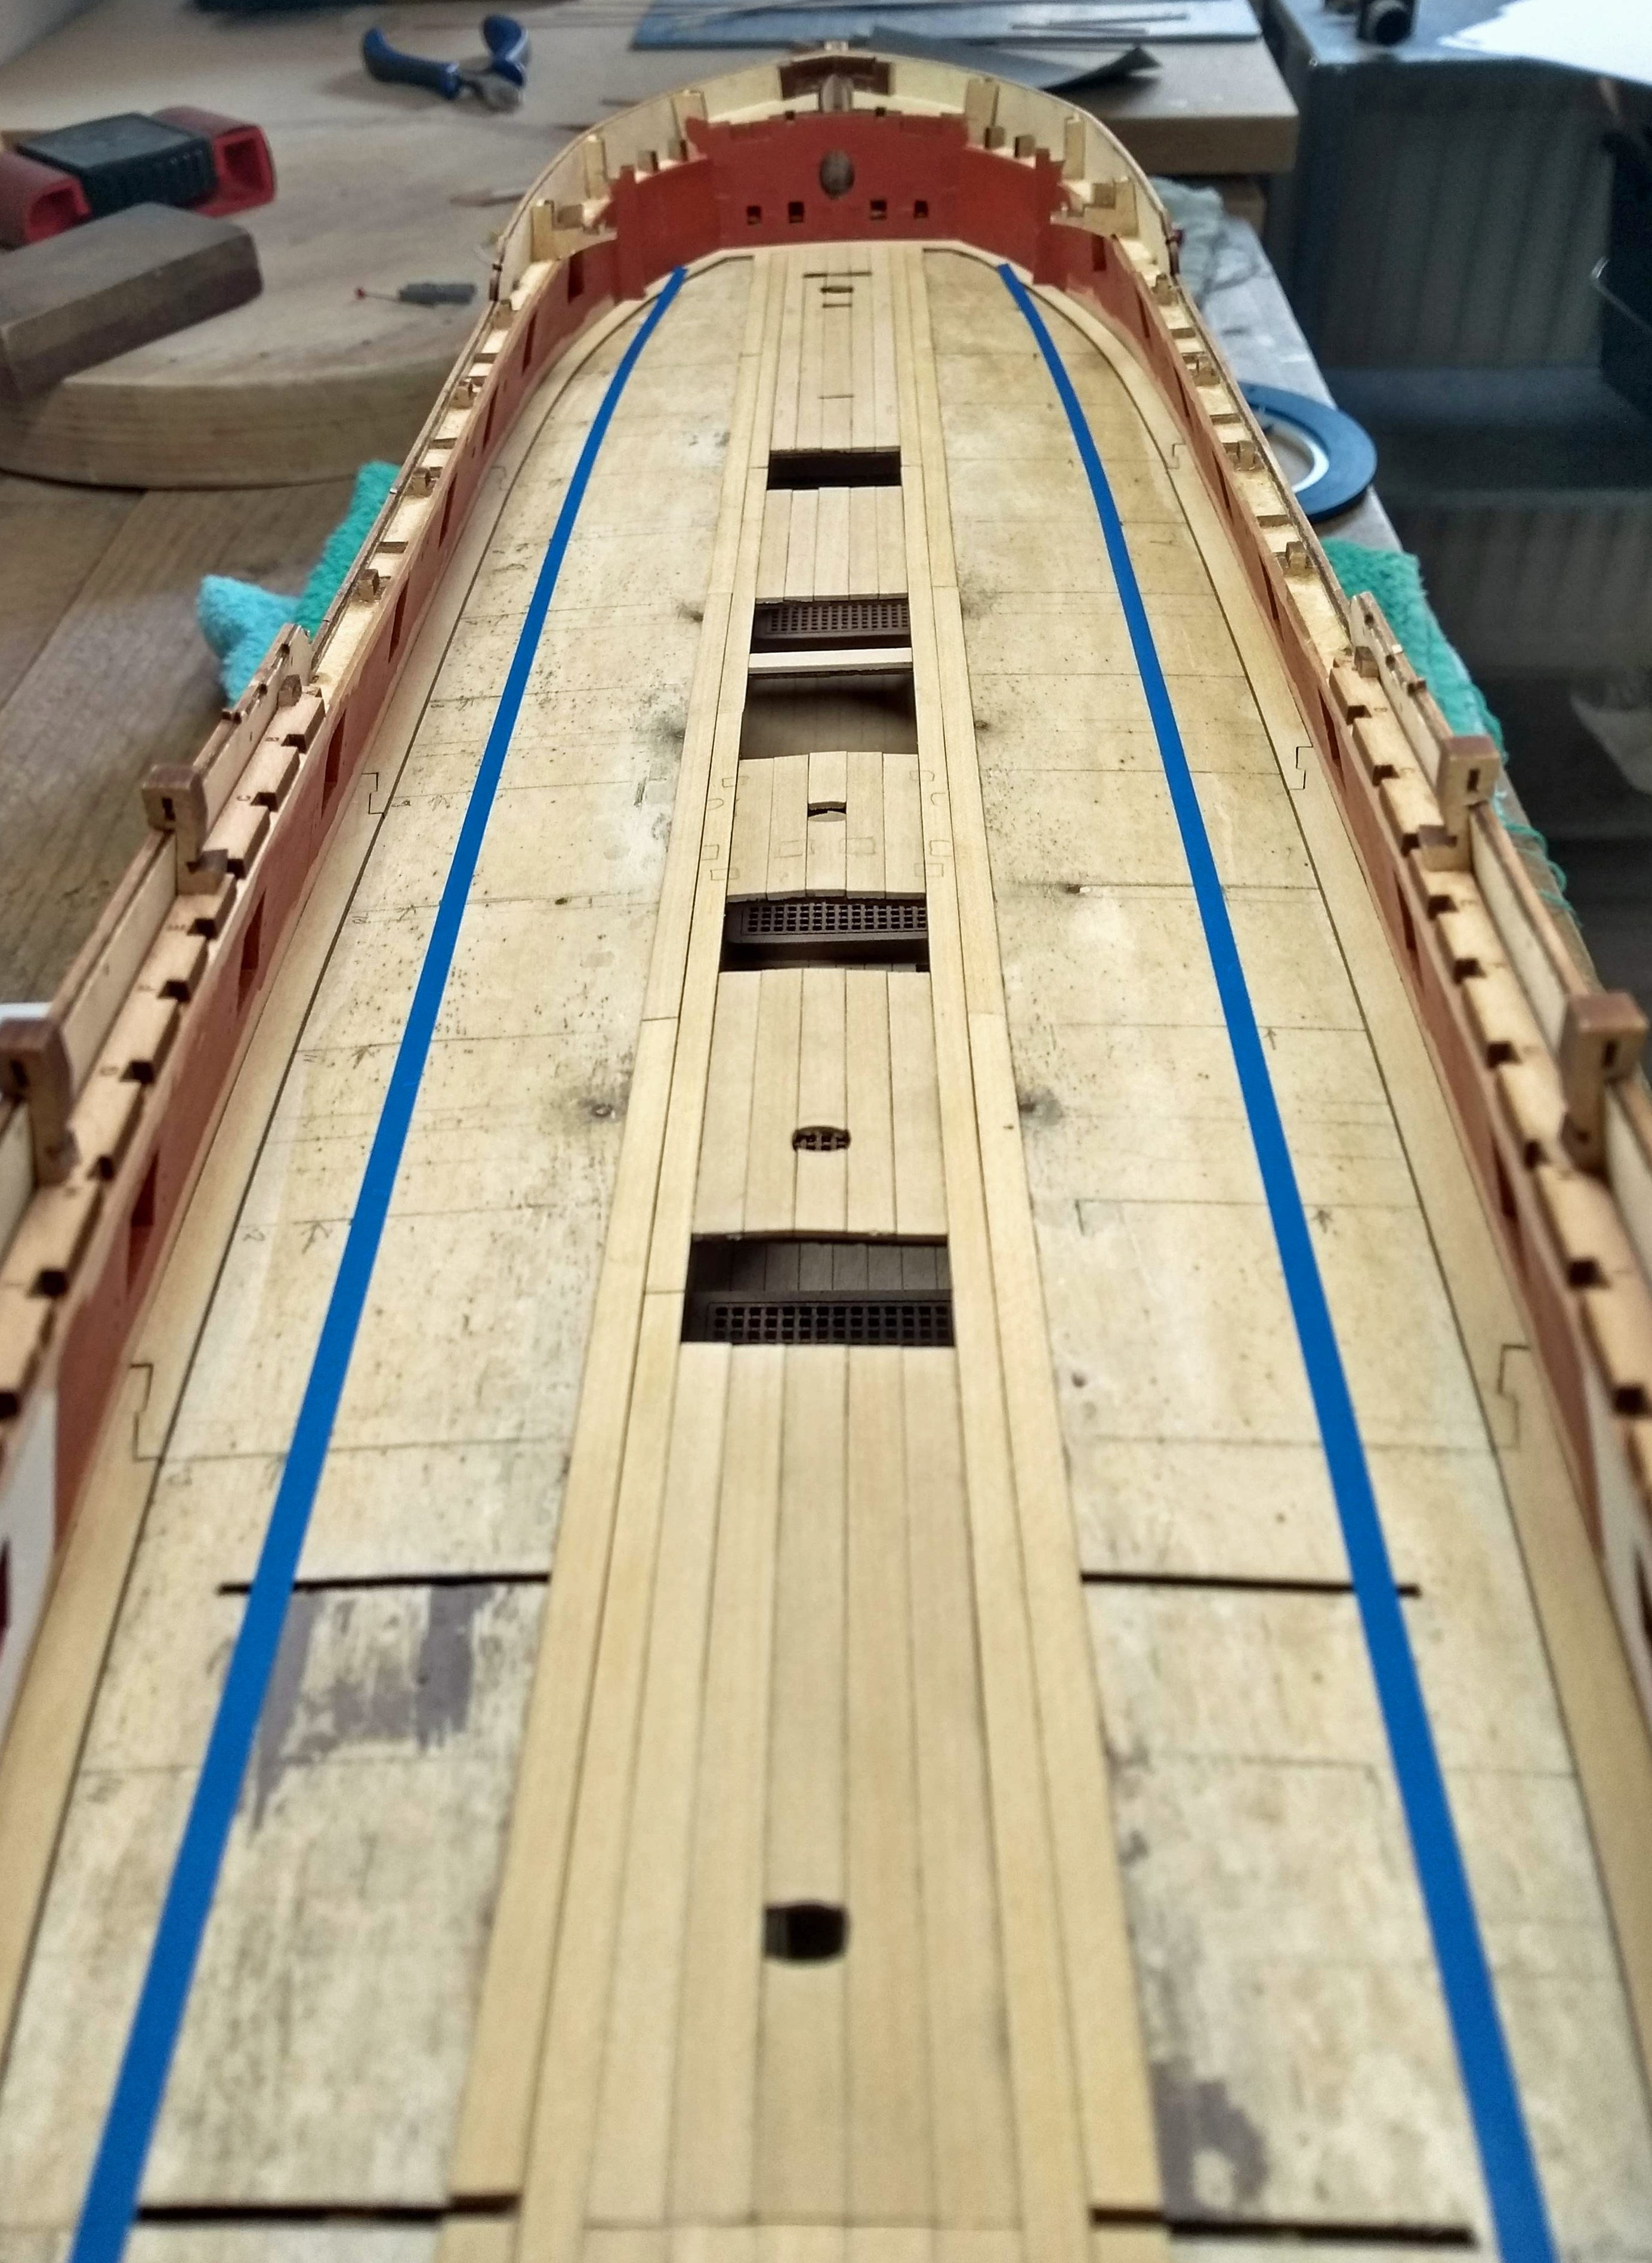
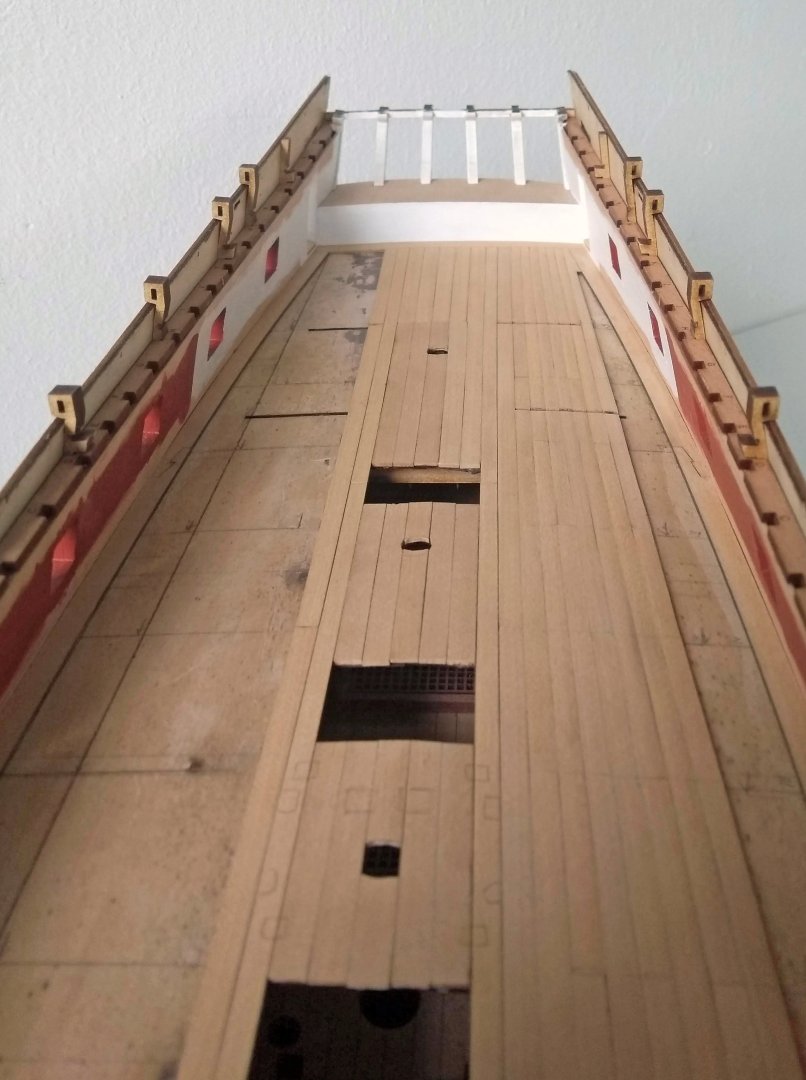
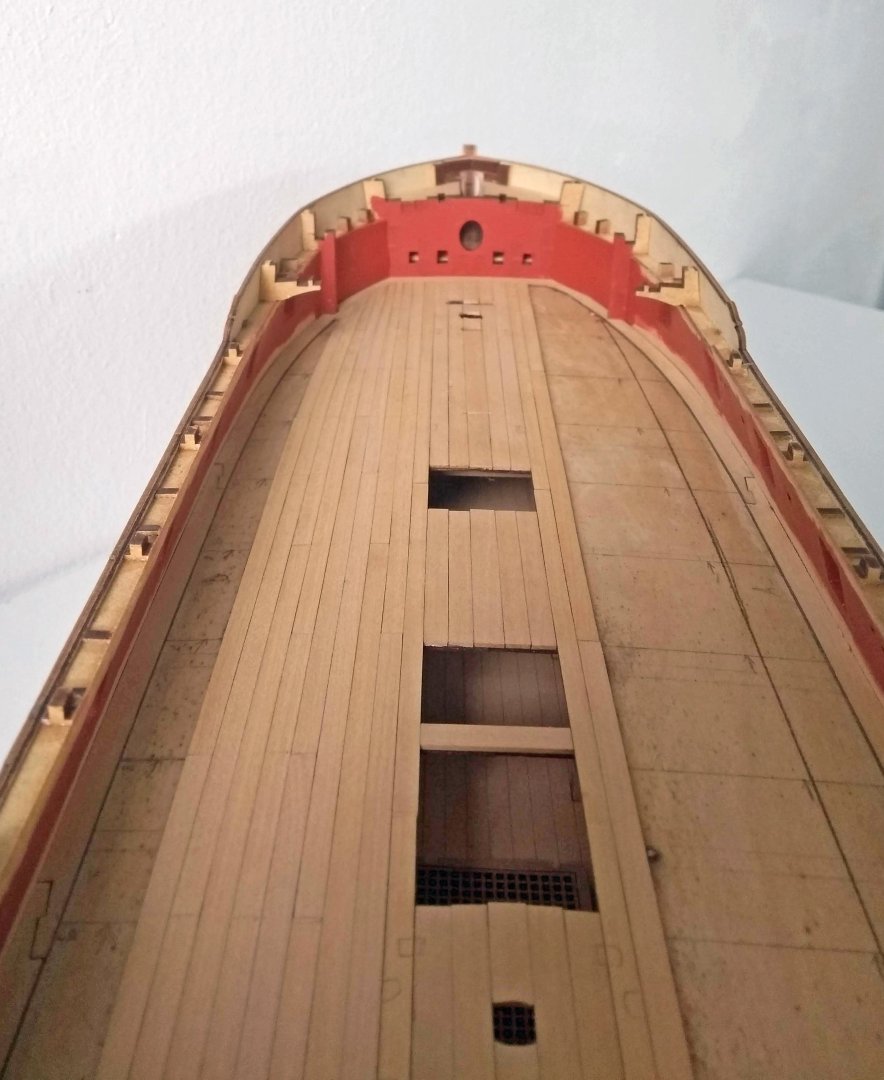
Update: First curved band on port side planked. In advance I thought it would be something very difficult, but so far it has not been that difficult. Because I had already planked the hull this was easier. Also because it is 2 dimensional compared to the hull where the plank has to bend in 3 dimensions. Perhaps planking a curved deck is a good primer/exercise to then try the hull. The measuring etc. is similar. The caulking is a bit difficult to see because I had very lightly sanded it to try polish away the pencil lines a bit, but that also makes the lines less visible now (and the lines are still there lol). It will come to the fore later when I varnish it. It still needs a good sanding, but I will do that when the deck is finished. By the way, I liked making the hooked scarf planks on both sides. Now first continue with the wide band on starboard side.


-
Congratulations on finishing! Another great build from your hands
- 131 replies
-
- 1
-
-
- Medway Longboat
- Syren Ship Model Company
- (and 1 more)
-
Lovely ship and diorama! The water looks really realistic! Well done
-
You are a real Vanguard Veteran by now....wish you lot of fun with this new addition to your fleet
- 36 replies
-
- 4
-
-
- Duchess of Kingston
- Vanguard Models
- (and 1 more)
-
That's a beautiful piece of art...they compliment each other really well!
- 840 replies
-
- 2
-
-
- winchelsea
- Syren Ship Model Company
- (and 1 more)
-
That's some extreme bending! Really cool to see
-
Congratulations! Such a big ship is not an easy task to build, very well done!
-
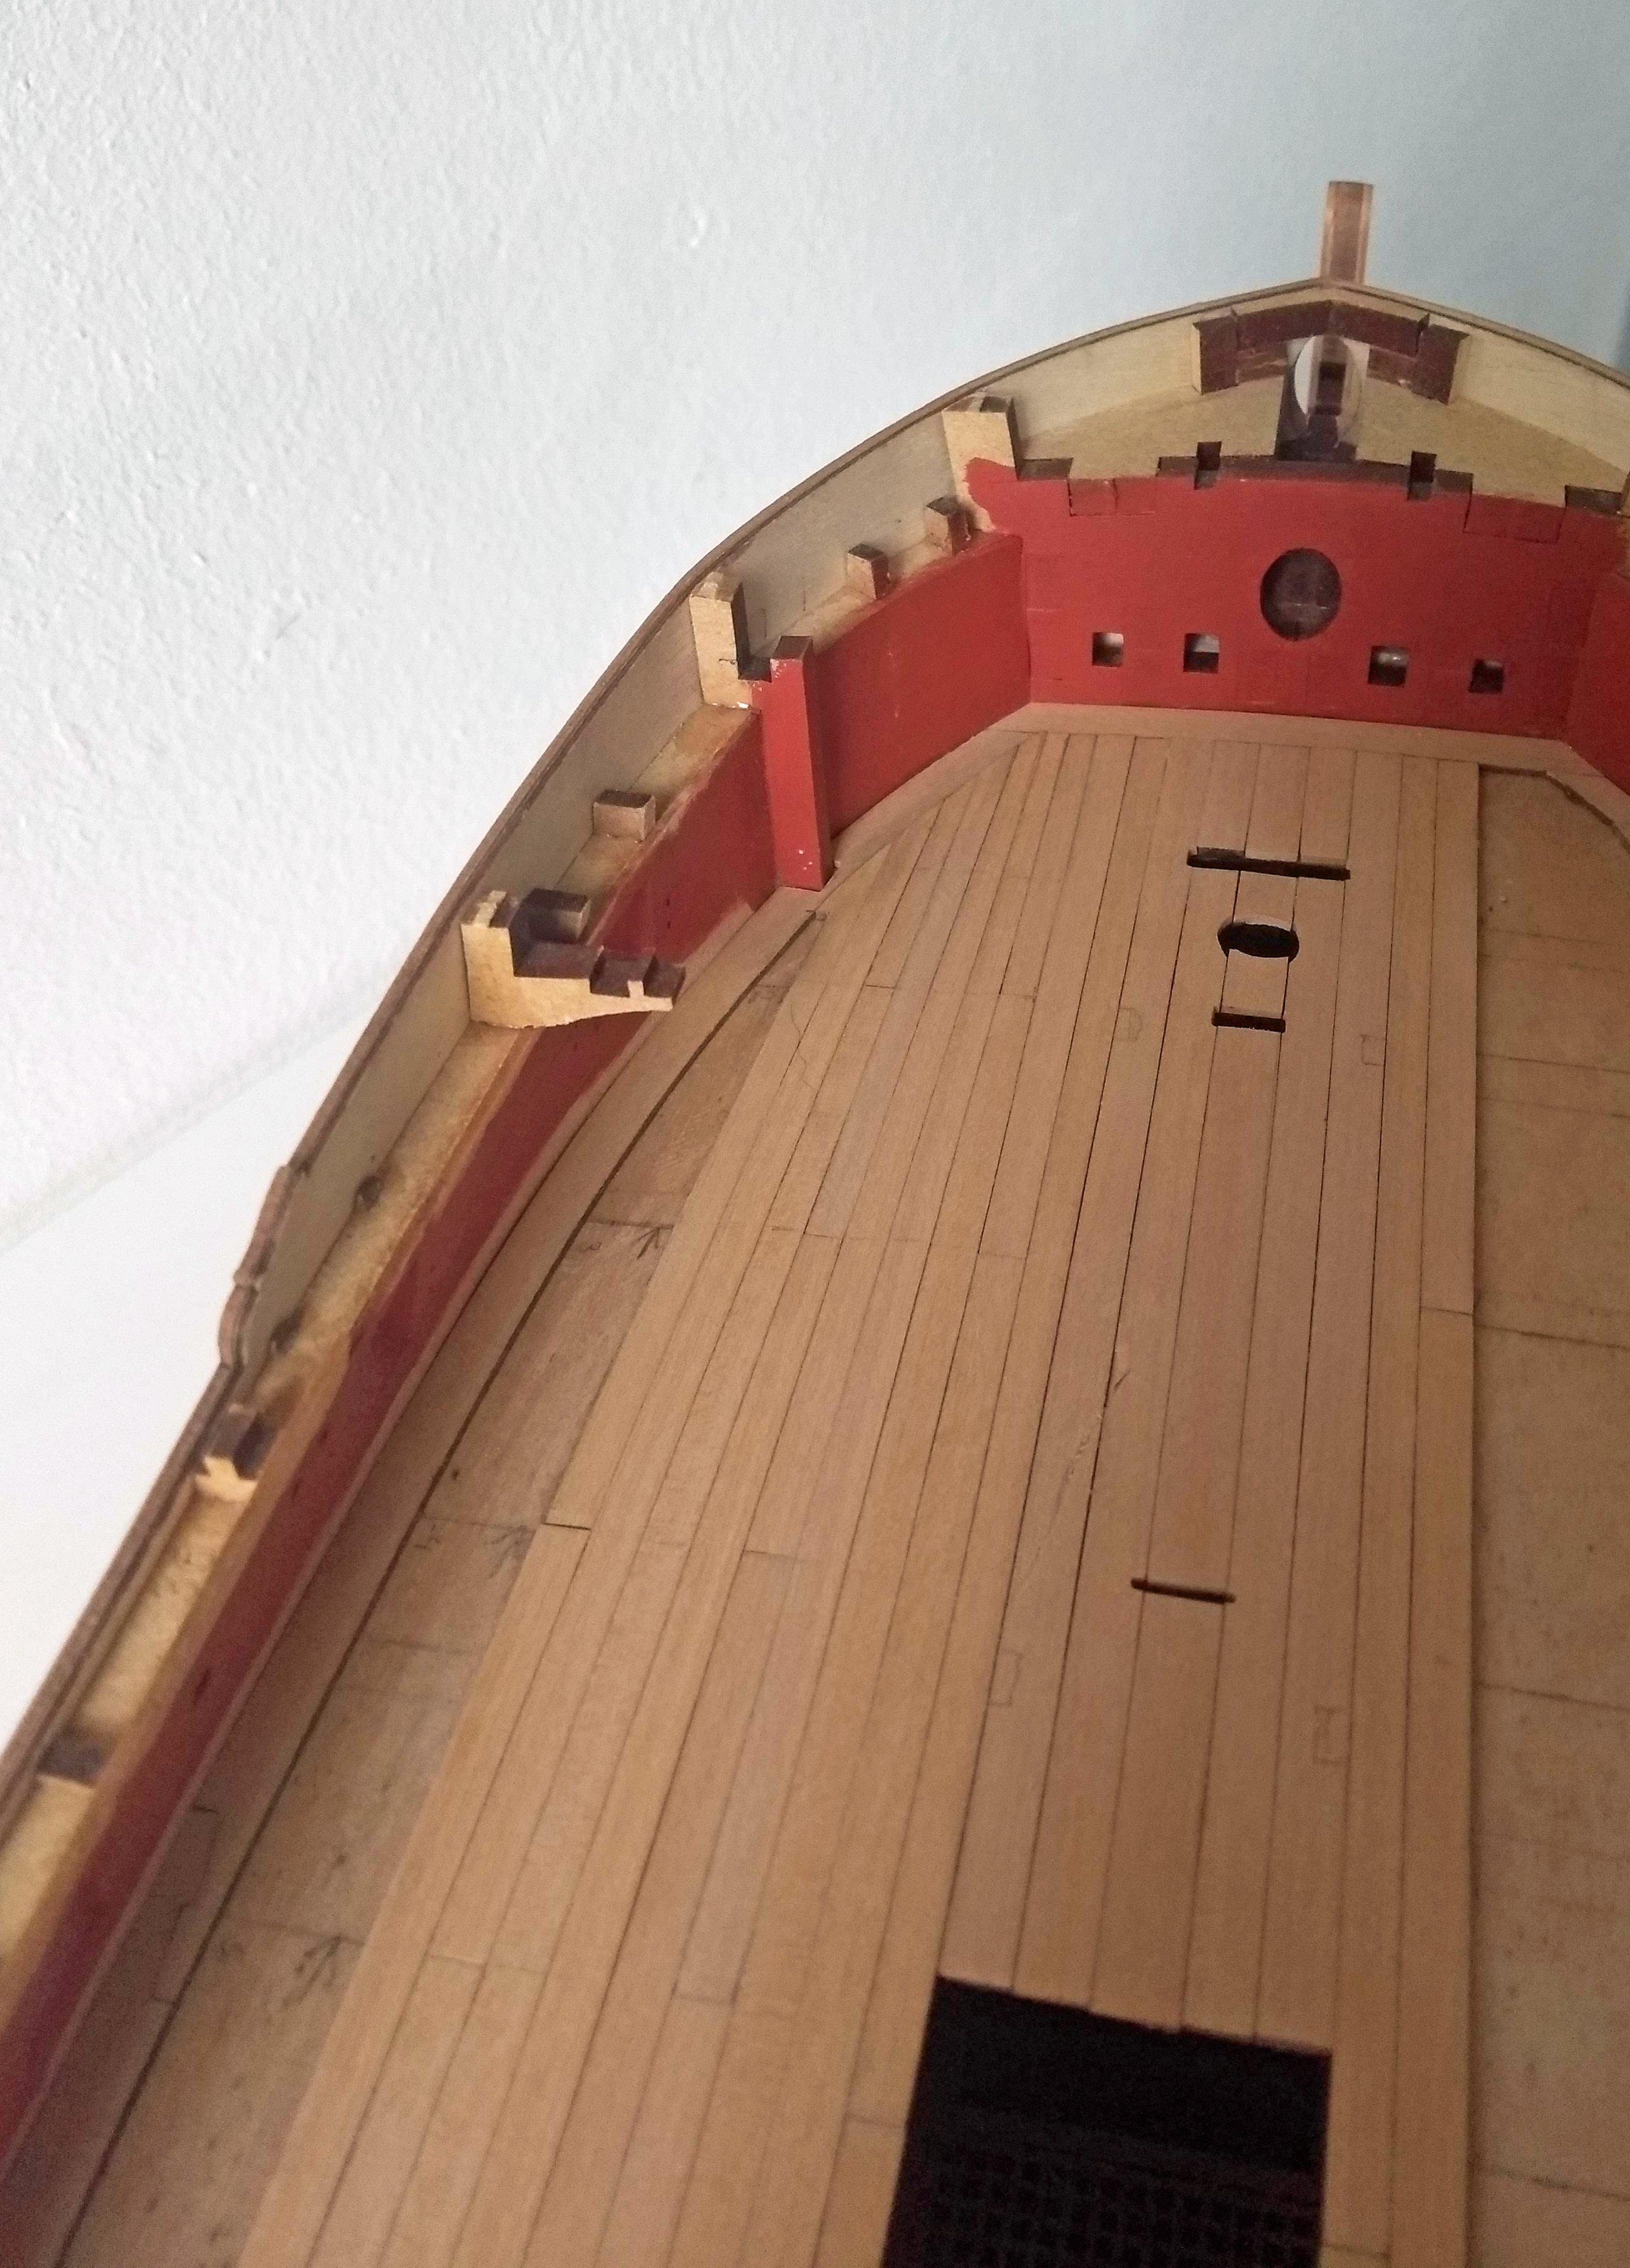
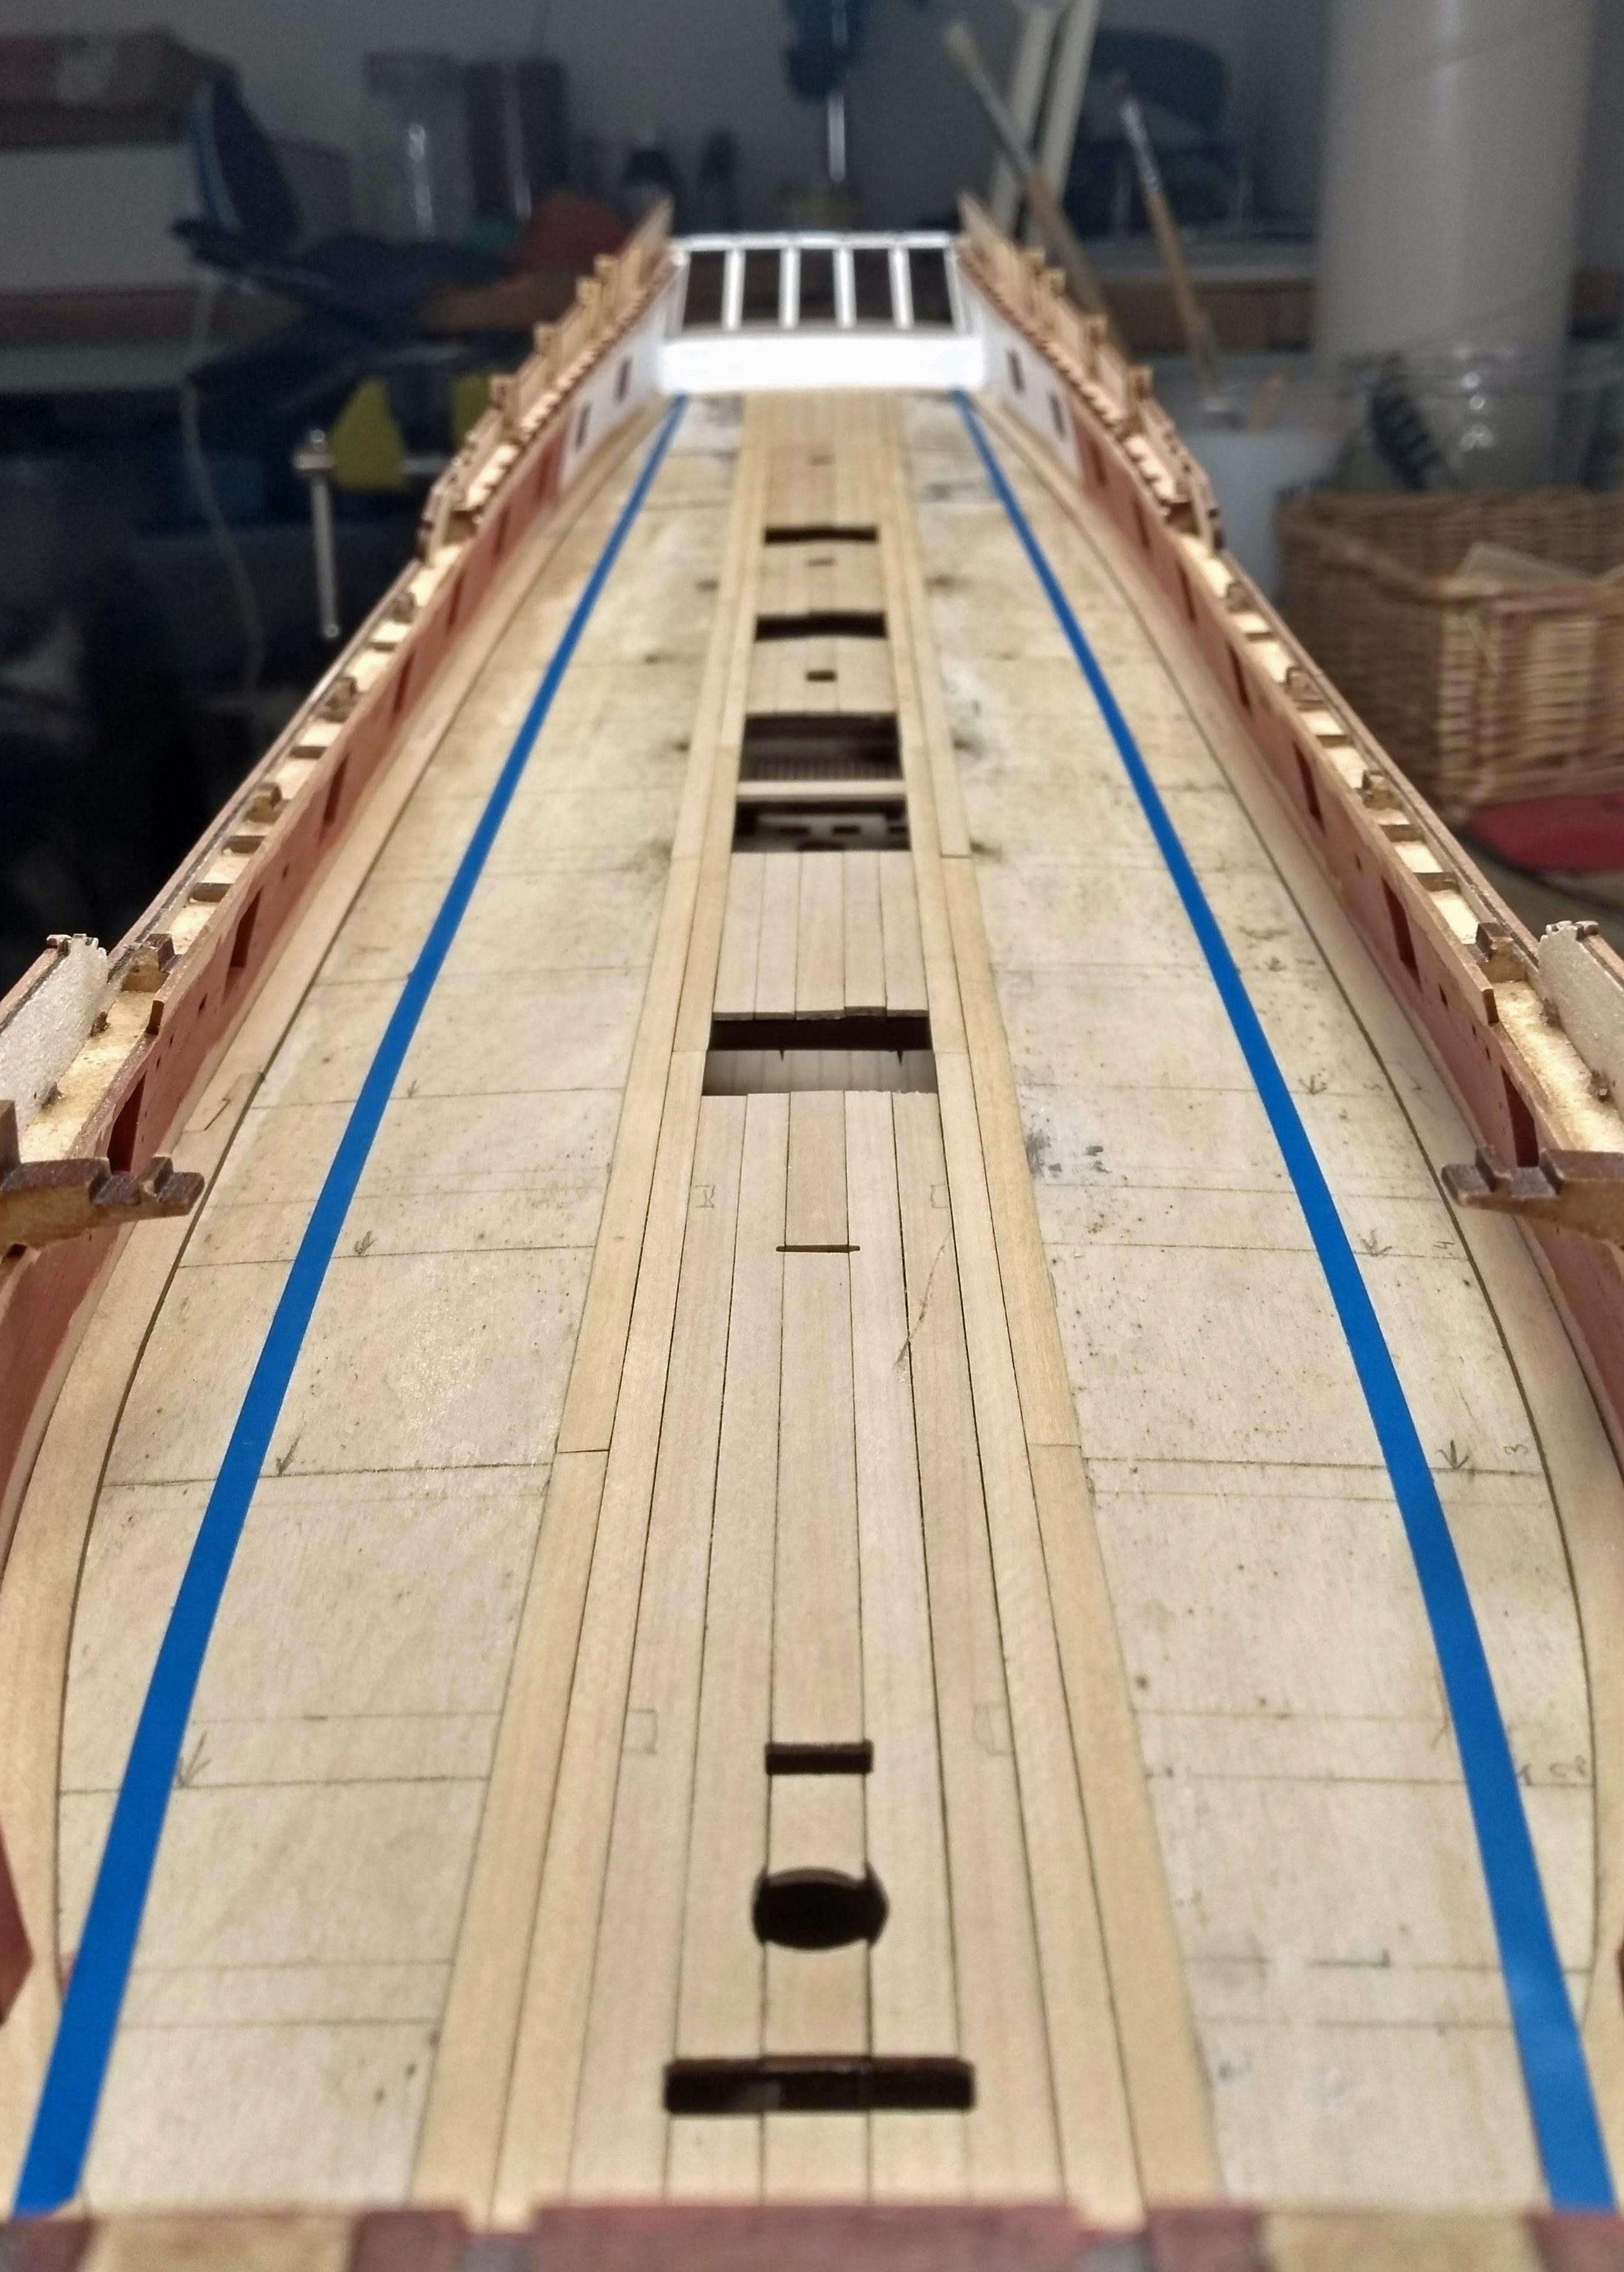
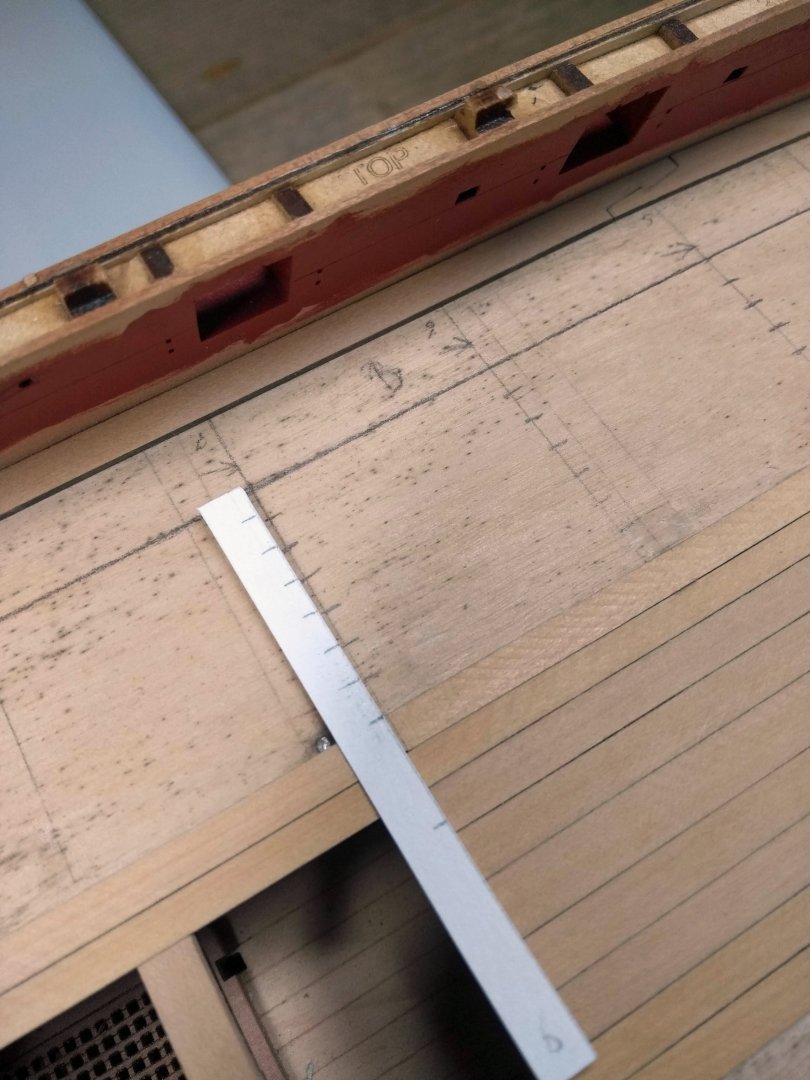
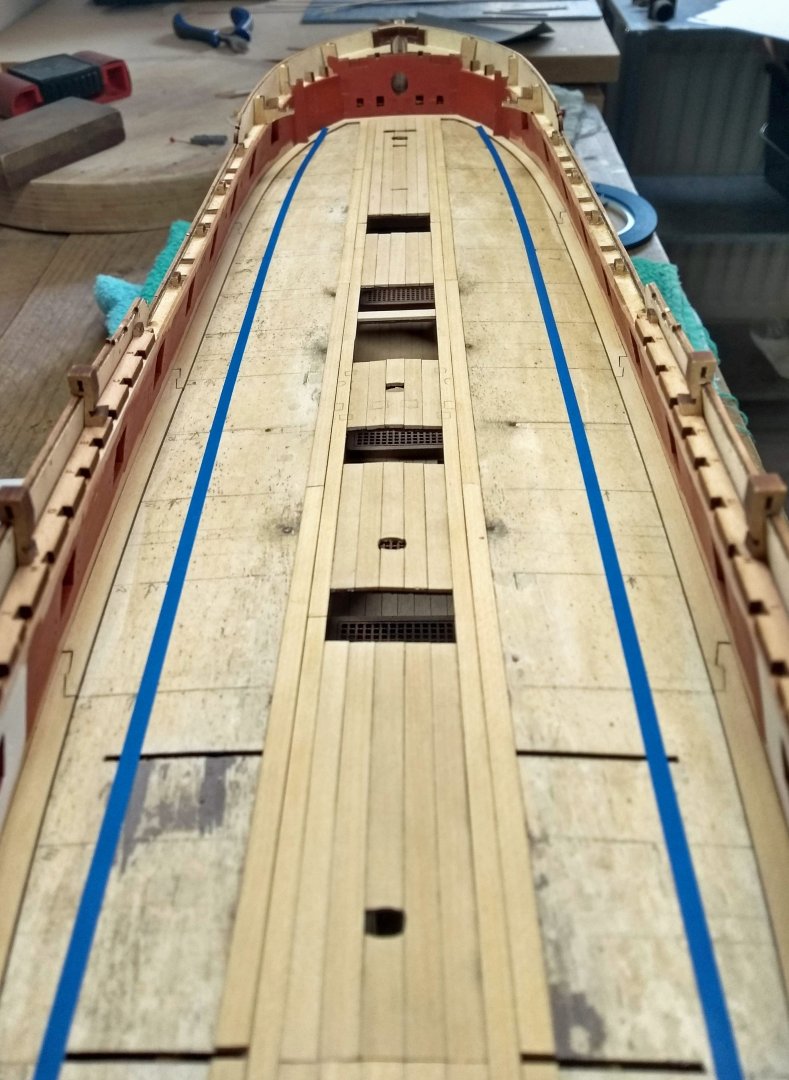
Lining off the deck...just pretending to know what I'm doing . It seems to be about the same process as with the hull. First, mark out the bands with tape. The difficult part here is to get them really symmetrical. This took quite some time, but I think it looks good. The curve it needs is a guess. I have a wide band of 7 planks on both sides and a narrow one with 3 planks that disappear at the ends in a hook scarph joint. (not sure if it's the right spelling lol) The rest now is the same process as with the hull...so looking forward how this proceeds I did notice a big difference with the hull that on the deck the planks go nicely linear from wide to narrow. And with the hull you had a kind of wave movement in some places.

-
Agreed with Tom! And that nibbing into the margin plank isn't easy, you did well on that
-
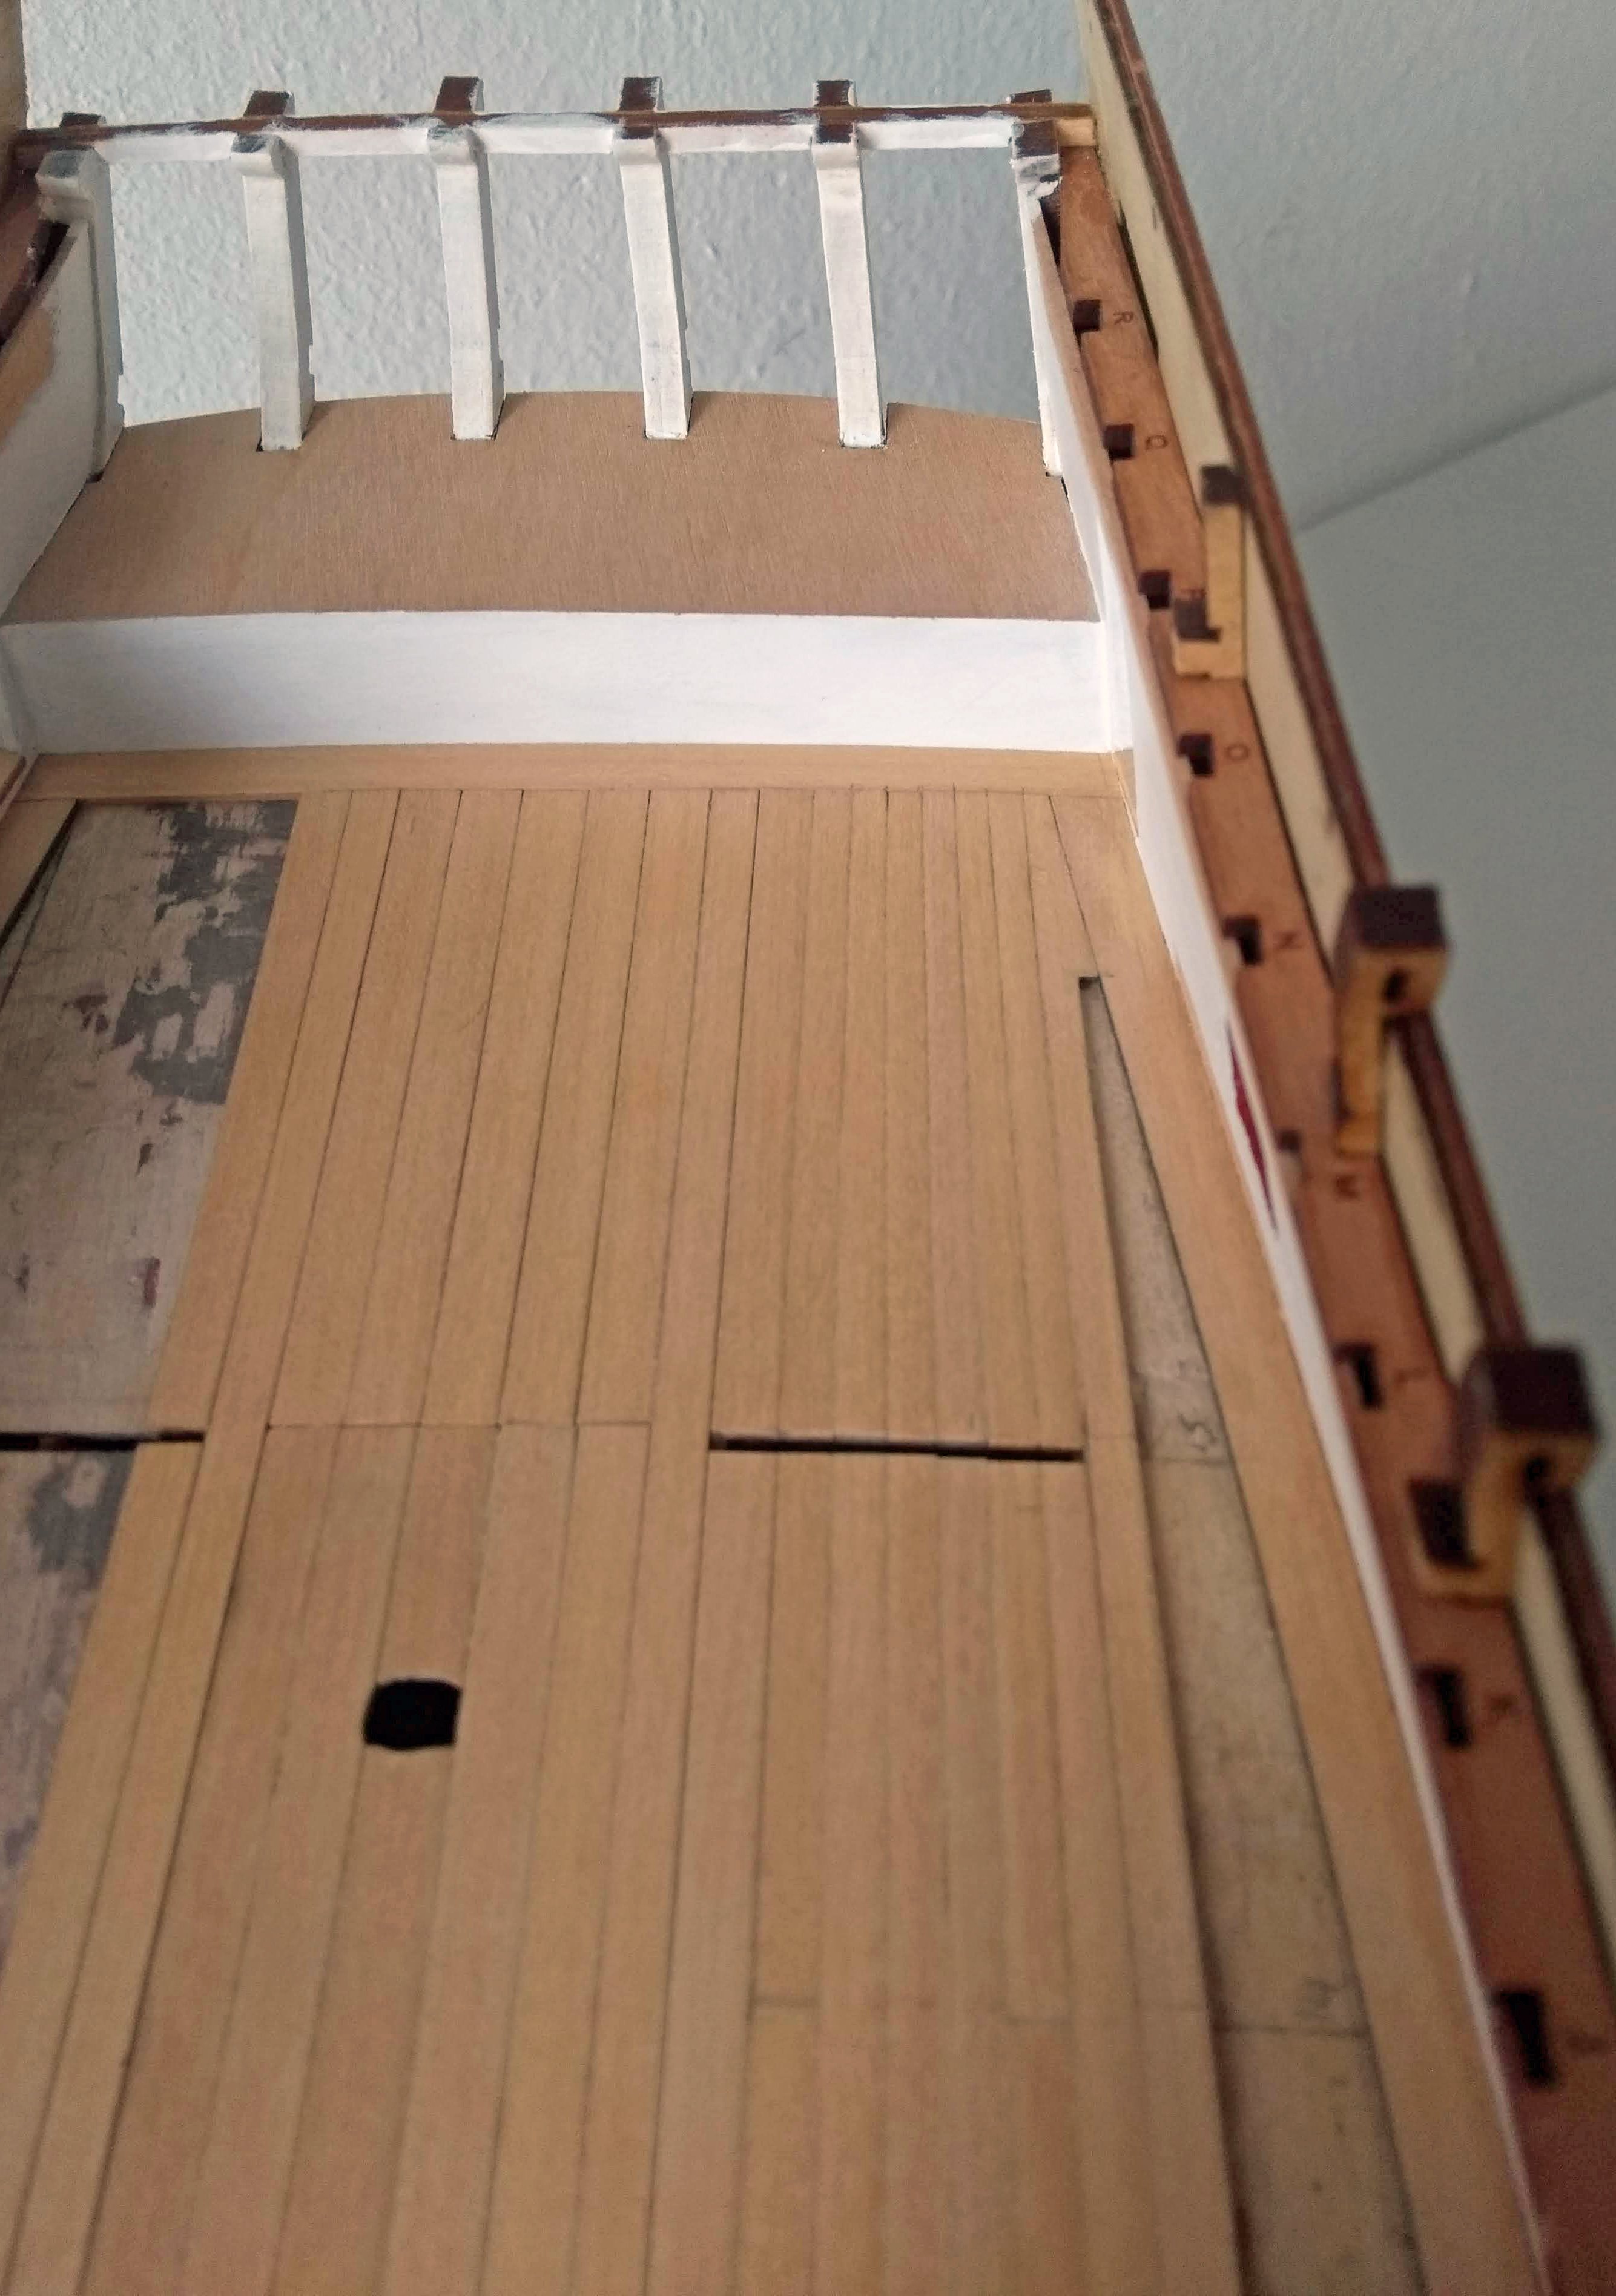
That cap rail at the stern is definitely an improvement 👍