Supplies of the Ship Modeler's Handbook are running out. Get your copy NOW before they are gone! Click on photo to order.
×


ccoyle
-
Posts
10,053 -
Joined
-
Last visited
Content Type
Profiles
Forums
Gallery
Events
Everything posted by ccoyle
-
 Yes, but the problem is that's not where the diagram says they're supposed to go.
 -
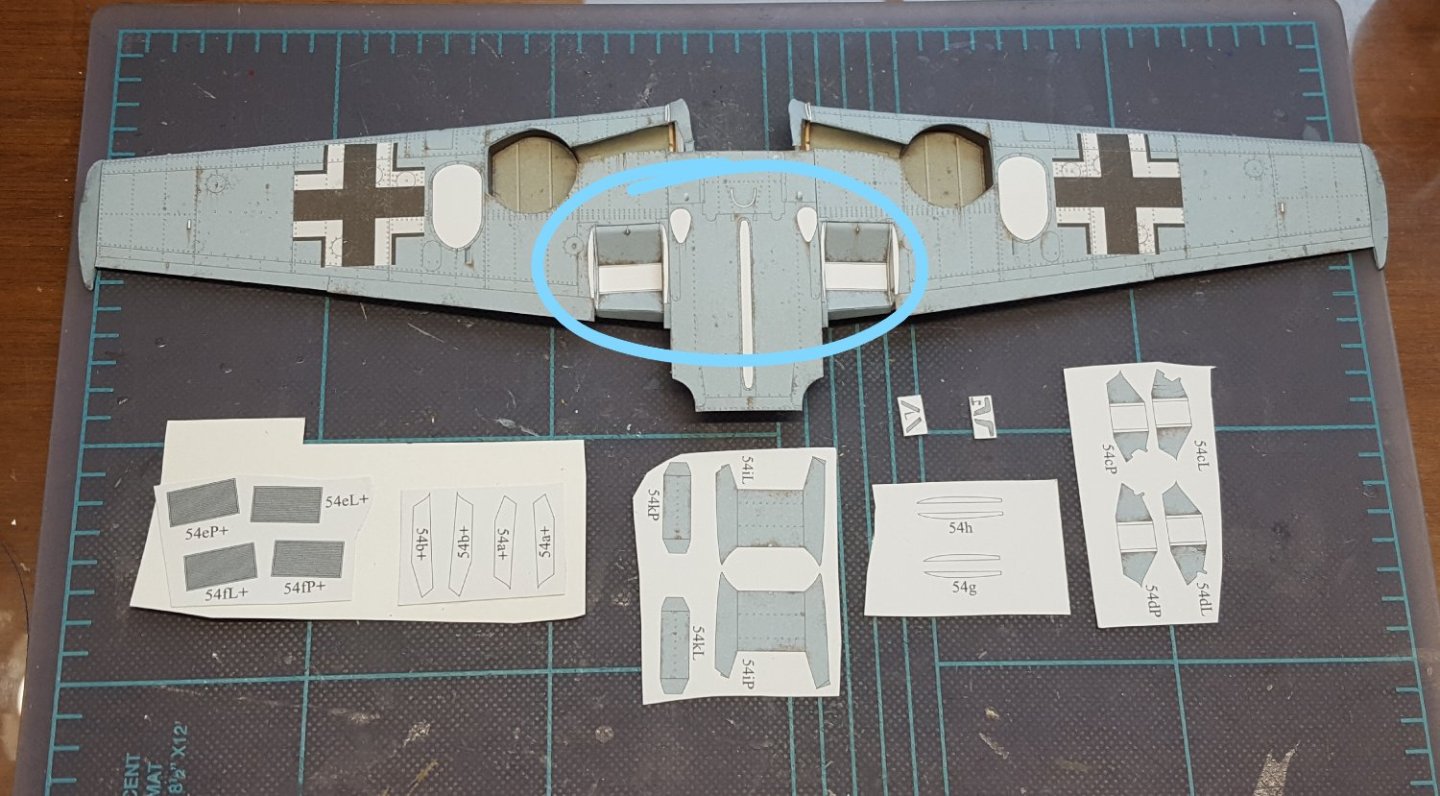
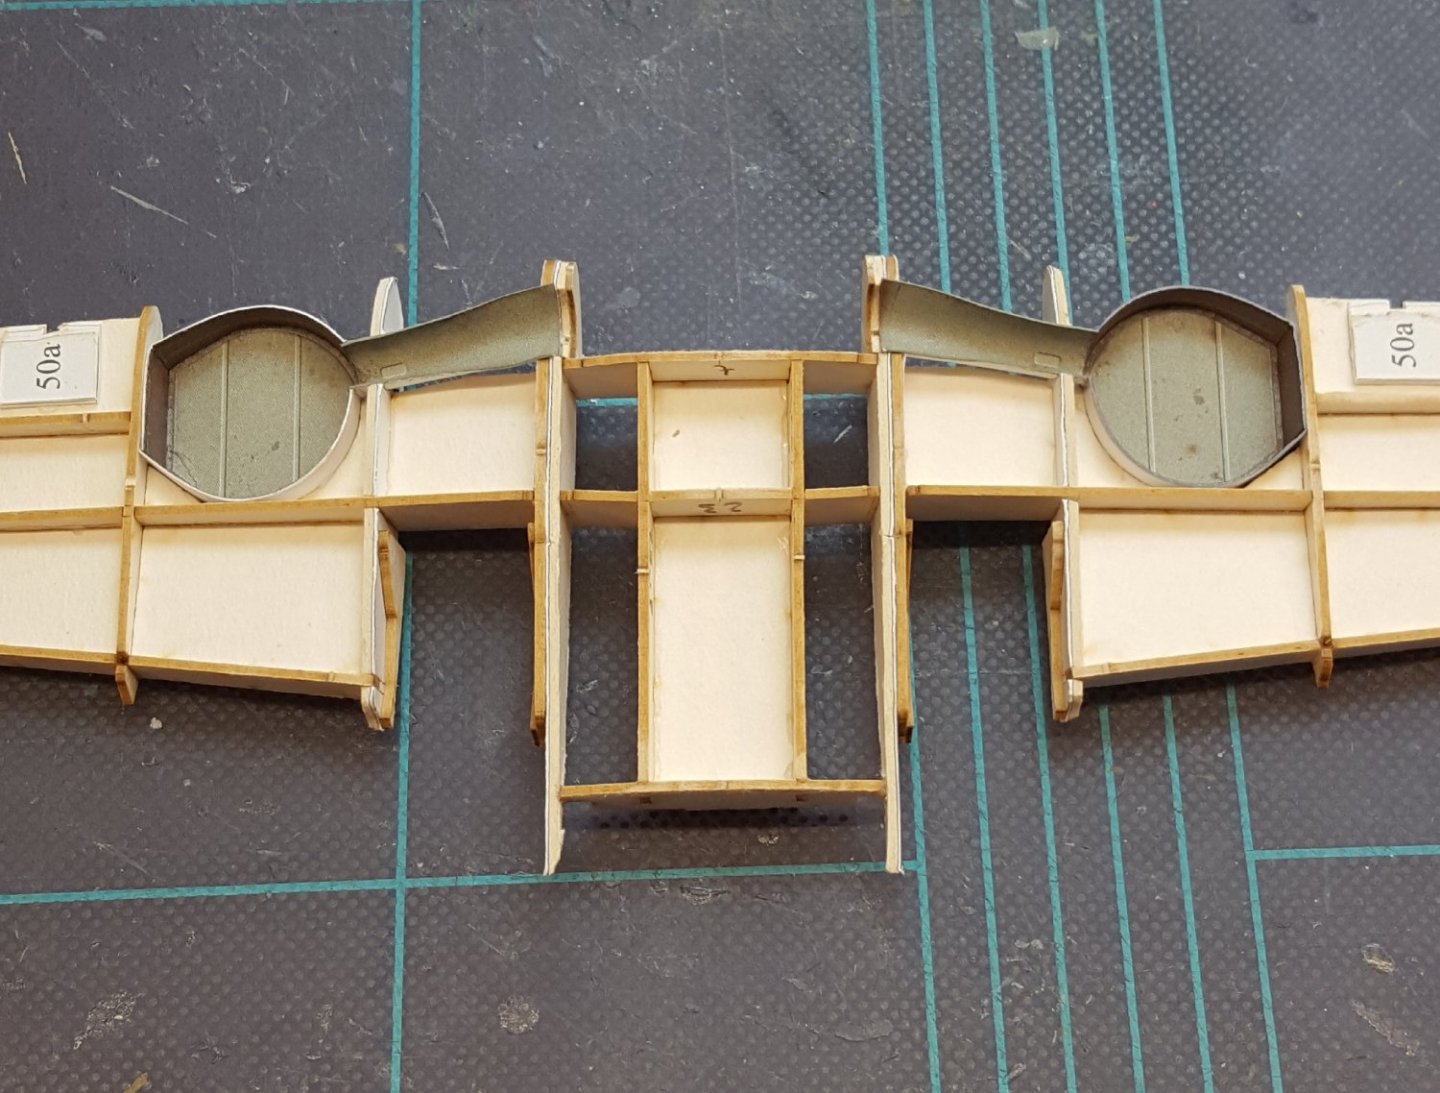
Well, now it's on to the wing-mounted radiators. These have an insane number of parts. My recent Spitfire Vb had only one such radiator, but the Bf-109E has two -- great. I got the first parts in (parts 54) and then got completely stumped about how the next parts (54a and 54b) are supposed to go in -- they don't match the existing contours at all. I'm going to have to study some build logs.
- 165 replies
-
- 13
-

-
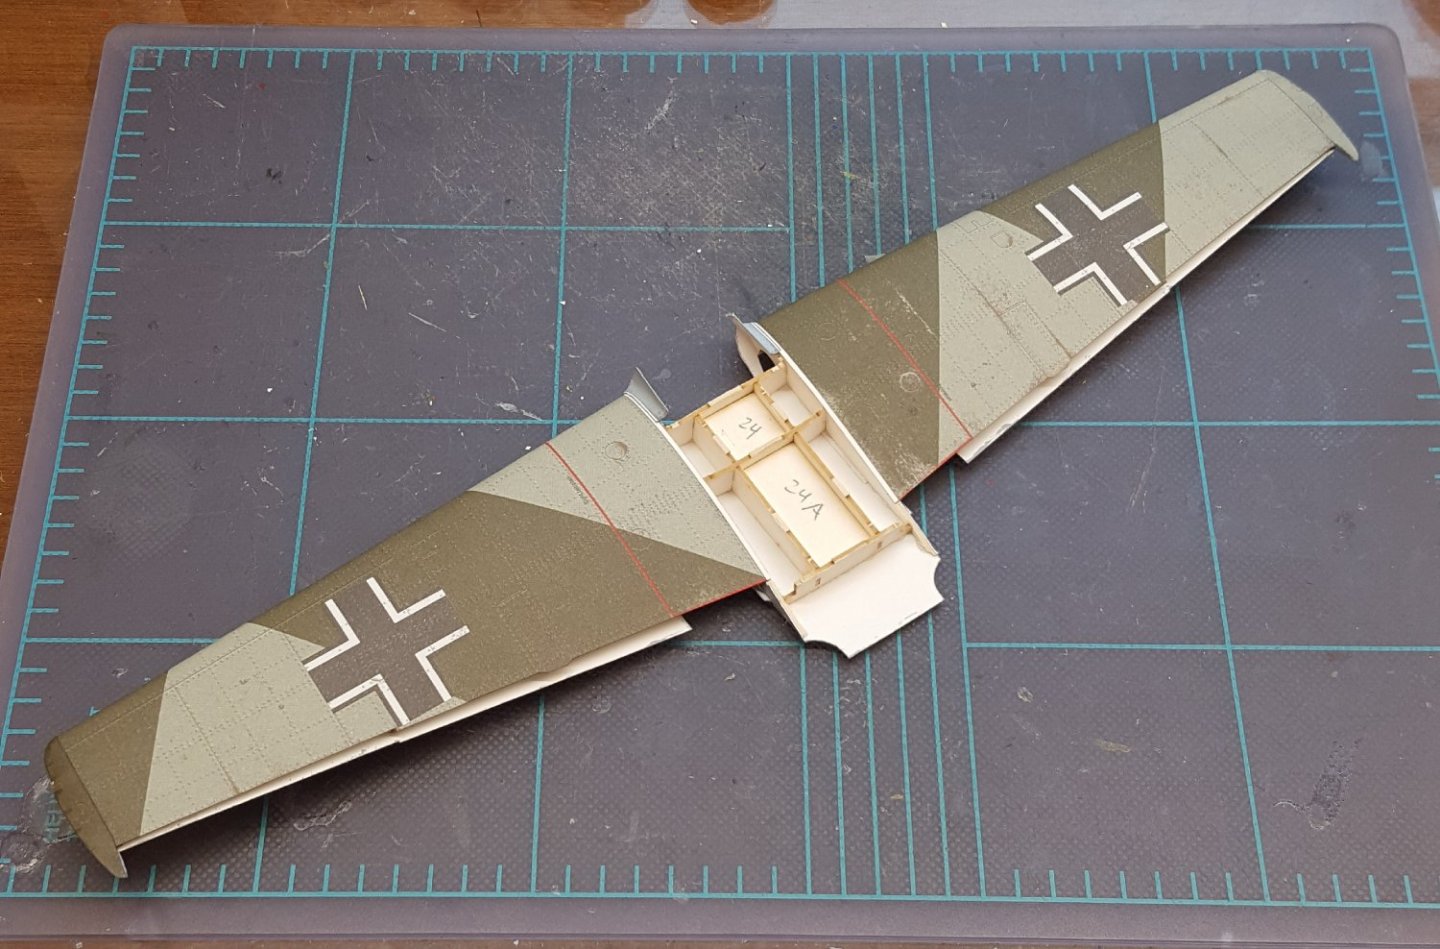
Wing skins done. Now I can test fit the wing to the fuselage and twirl it about my head while I make airplane noises. What? You tellin' me you don't do exactly the same thing? 😆
- 165 replies
-
- 20
-
-

-
Polaris by JDillon - OcCre
ccoyle replied to JDillon's topic in - Kit build logs for subjects built from 1801 - 1850
Try Cornwall Model Boats -- they get a lot of mentions here. -
Nice! I lived in Mariposa before moving to South Carolina. Two of my kids moved away to Morro Bay to attend college. It's a beautiful area.
-
A bit of advice when you get to the cockpit framing: I have found that the KK frame parts (the printed parts, not the laser-cut ones) need to have the spaces between the dashed lines that indicate joints cut out, otherwise the the frame assembly will be slightly too large, which may cause exterior skin fit issues. It is even sometimes useful to remove the top layer of paper fibers from the laser cut frame in those areas as well. Check your fits often.
-
Polaris by JDillon - OcCre
ccoyle replied to JDillon's topic in - Kit build logs for subjects built from 1801 - 1850
Hi, JD. Since it looks like you've started a build log, I took the liberty of renaming your topic and moving it to the correct area. Good luck with your project! -
Krylon matte clear from the hardware store, although I ran out on this kit and had to get some off-brand from the hobby store that I haven't tried yet. Today I added the wheel wells, which is the last step before skinning the wings.
- 165 replies
-
- 15
-
-

-
Welcome, Steve! That's a wonderful model! Are you still in the Bay Area? If so, are you acquainted with the modeling clubs in that area? We have several members of the South Bay Model Shipwrights active in our forum. Cheers!
-
Welcome aboard, Glenn! Be sure to check out our forum areas for nautical history and research -- your father's boat will be appropriate material for those sections. Cheers!
-
They're from the laser-cut frames set.
-
Congratulations! The finished model looks great!
- 77 replies
-
- 4
-
-
-
- Santa Maria
- Artesania Latina
- (and 1 more)
-
Welcome aboard, Jack. Visiting Ages of Sail will be a real treat -- they have quite the inventory and should be able to steer you in the direction of suitable beginner kits. For future reference, one of our sponsors, Crafty Sailor, is located in Canada and has free shipping on orders over US$150. Cheers!
-
Sweet! I will be following along with interest.
-
Some European kit makers have a penchant for producing kits that are based on a type of vessel rather than a specific ship. They then give the ship a fanciful name and make up an equally fanciful history for it. It's often difficult to figure out where exactly they got their source material.
-
Yes, but that's not the subject of the OcCre Polaris.
-
A beautiful and very novel subject!
-
Hello, J, and welcome aboard. The early Caldercraft releases, while good kits, do not have extensive instructions. Another UK manufacturer that offers several suitable beginner-level kits with great instructions is Vanguard Models. One of the best ways to scout for good beginner kits is to browse the kit build logs section. Look for any build log that is tagged "first build." Clicking that tag will pull up a list of all first-time build logs. Then look for those that are tagged "finished" -- that will show you which kits beginners were actually able to complete. Enjoy shopping for your project!
-
Welcome, Giuseppe! I don't know if you are interested in card models at all, but the Ukrainian publisher Orel offers a kit of Fram in 1/100 scale. https://papermodeling.net/index.php?route=product/product&product_id=714&search=fram
-
Eight years, eh? Don't feel bad -- I still have my incomplete HMS Fly that I started in 2006. 😧
-
Congratulations, Rich! I took the liberty of marking this build 'finished' -- hope I didn't jump the gun.
- 94 replies
-
- 2
-
-
- tugboat
- BlueJacket Shipcrafters
- (and 1 more)
-
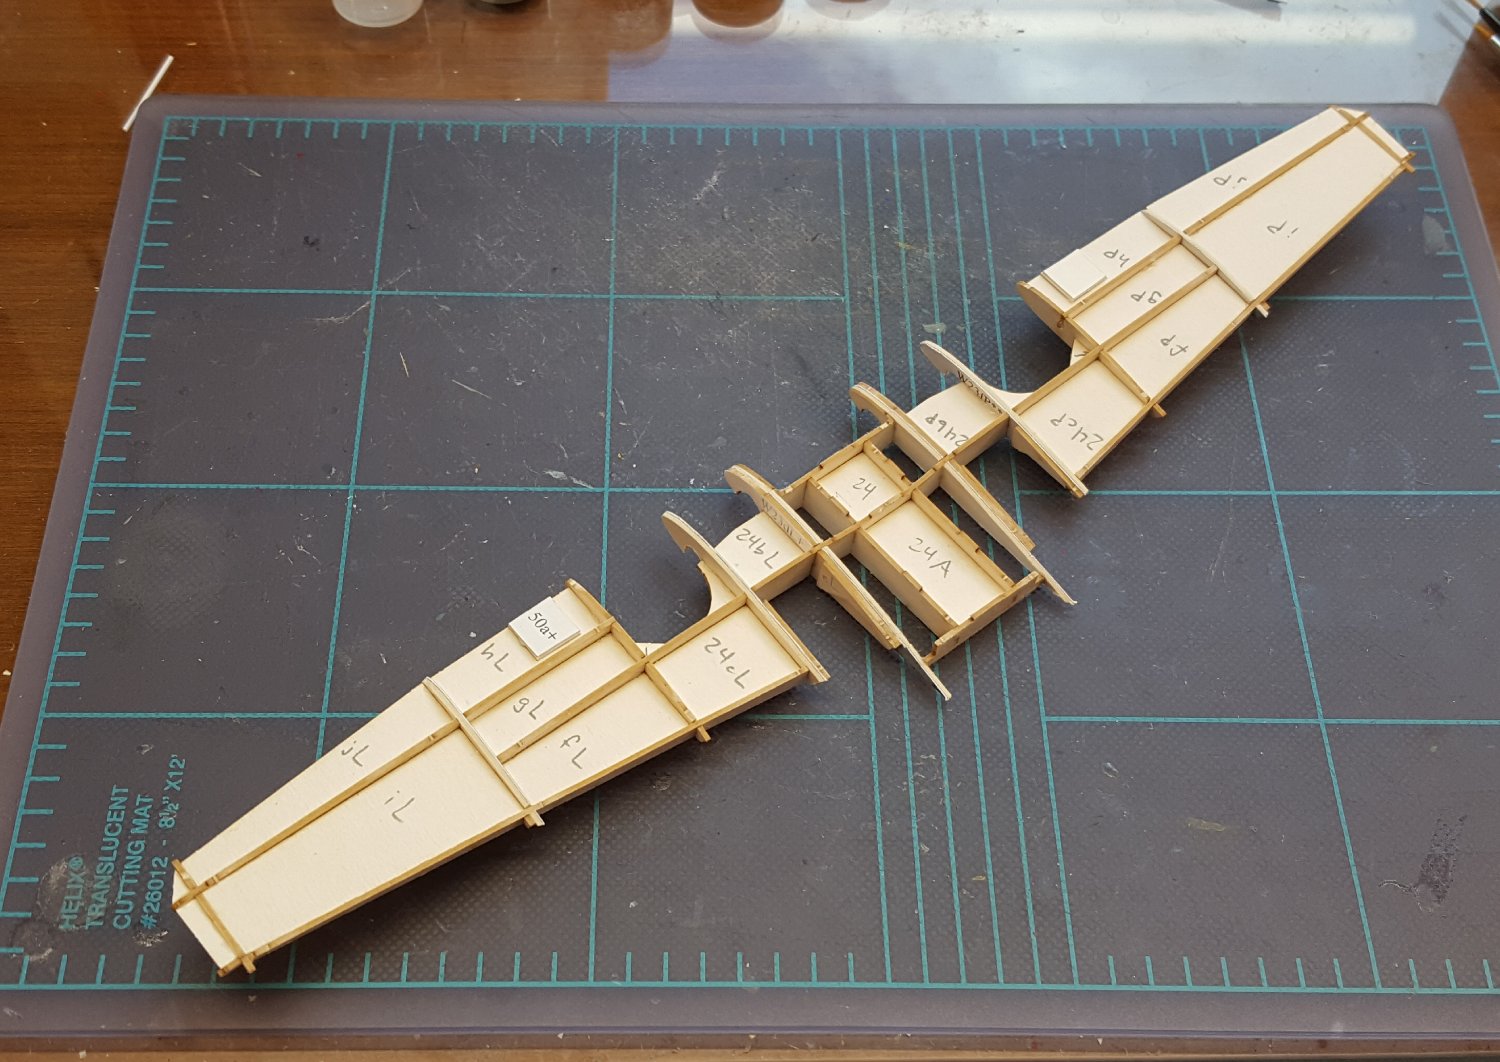
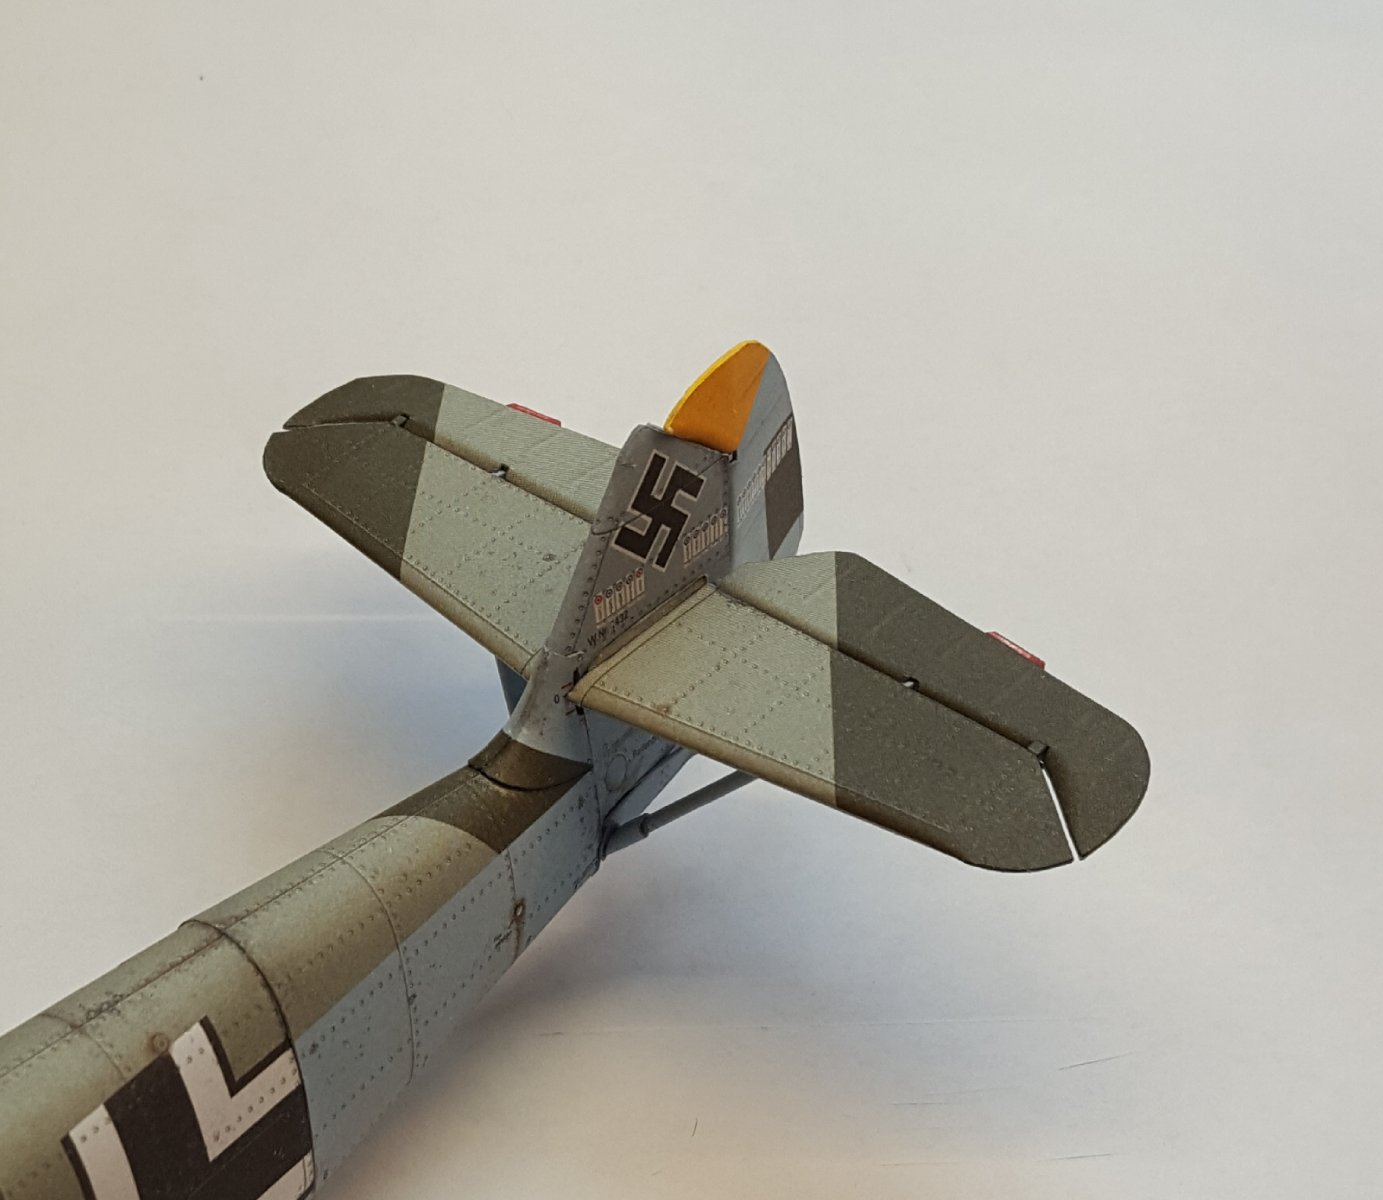
Sorry to hijack the knitting thread (see what I did there?), but it's time for a modeling update. I haven't been idle these past few days -- it's just that I have been dealing with the typically insane parts count of even a 'simpler' Halinski kit. The horizontal stabilizers, elevators, struts, and rudder linkages consisted of 51 parts. Whew!! Because the vertical stabilizer is crooked, as reported earlier, the horizontal stabilizers are also slightly crooked, but not badly so -- just gonna have to live with it. BTW, the total surface area of the 109's horizontal tail surfaces is lilliputian compared to that of the F6F -- the area of the 109's two stabilizers together might equal that of just one on the Hellcat. Cheers!

- 165 replies
-
- 20
-
-

-
Welcome aboard, Jerry!