DONATION DRIVE - SUPPORT MSW - DO YOUR PART TO KEEP THIS GREAT FORUM GOING!
×


ccoyle
-
Posts
10,520 -
Joined
-
Last visited
Content Type
Profiles
Forums
Gallery
Events
Everything posted by ccoyle
-

Does Shipyard Make a 1/96 HMS Bellona?
ccoyle replied to GrandpaPhil's topic in Card and Paper Models
Does not appear to be currently in print. -
Not a wartime recollection, but I did walk from the mainland to one of the Frisian Islands (Baltrum) back in 1980. Such an excursion is known as a Wattwanderung to the locals.
-
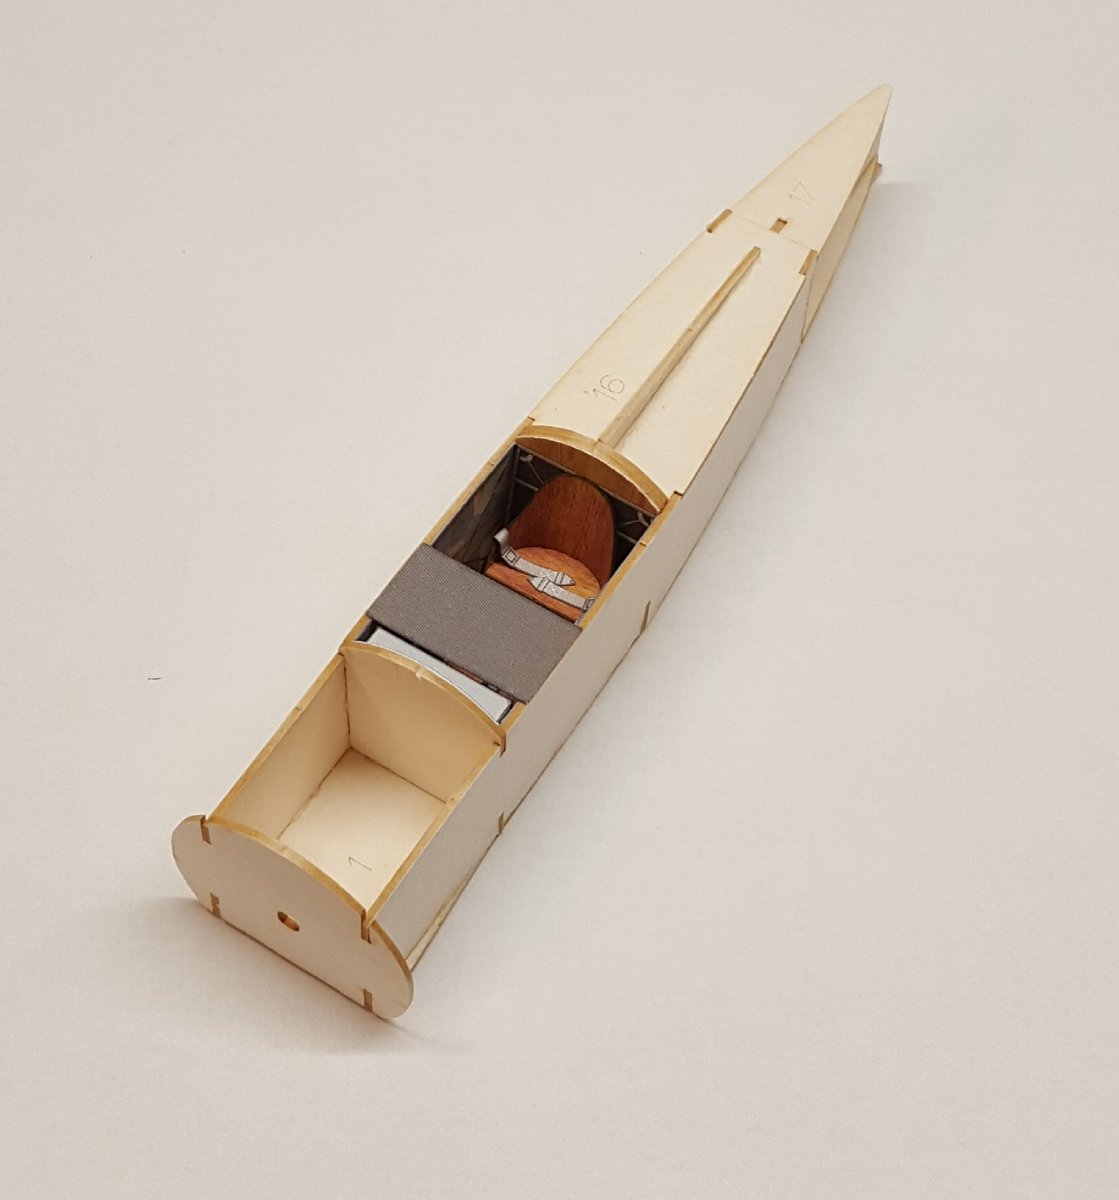
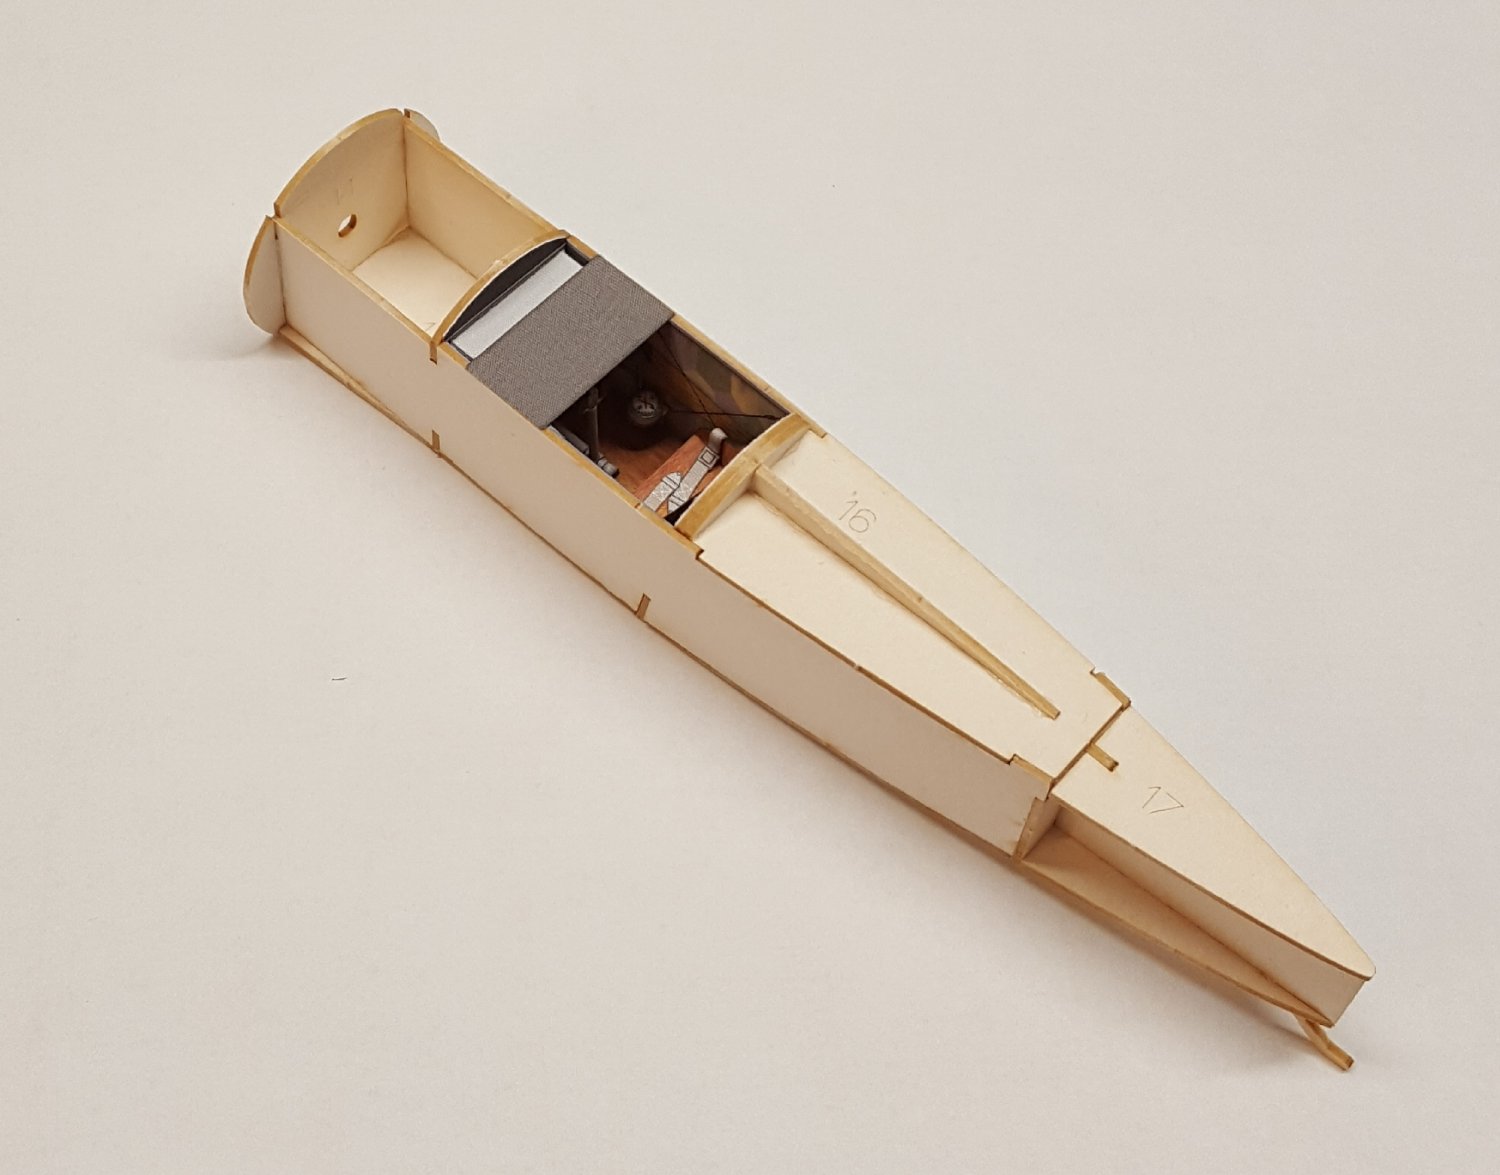
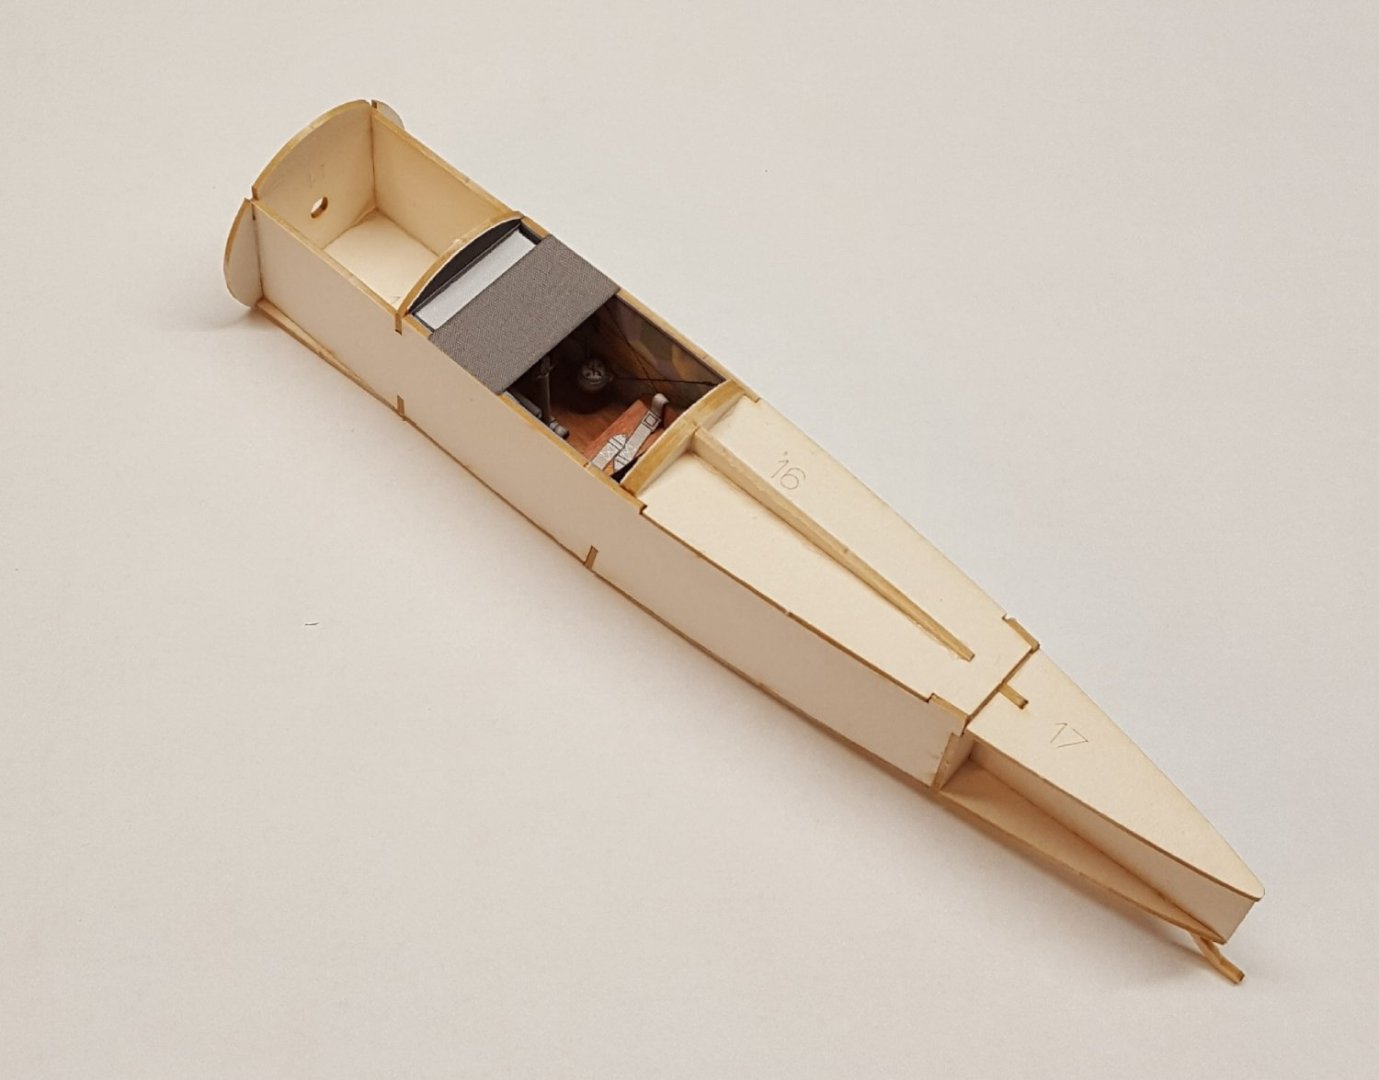
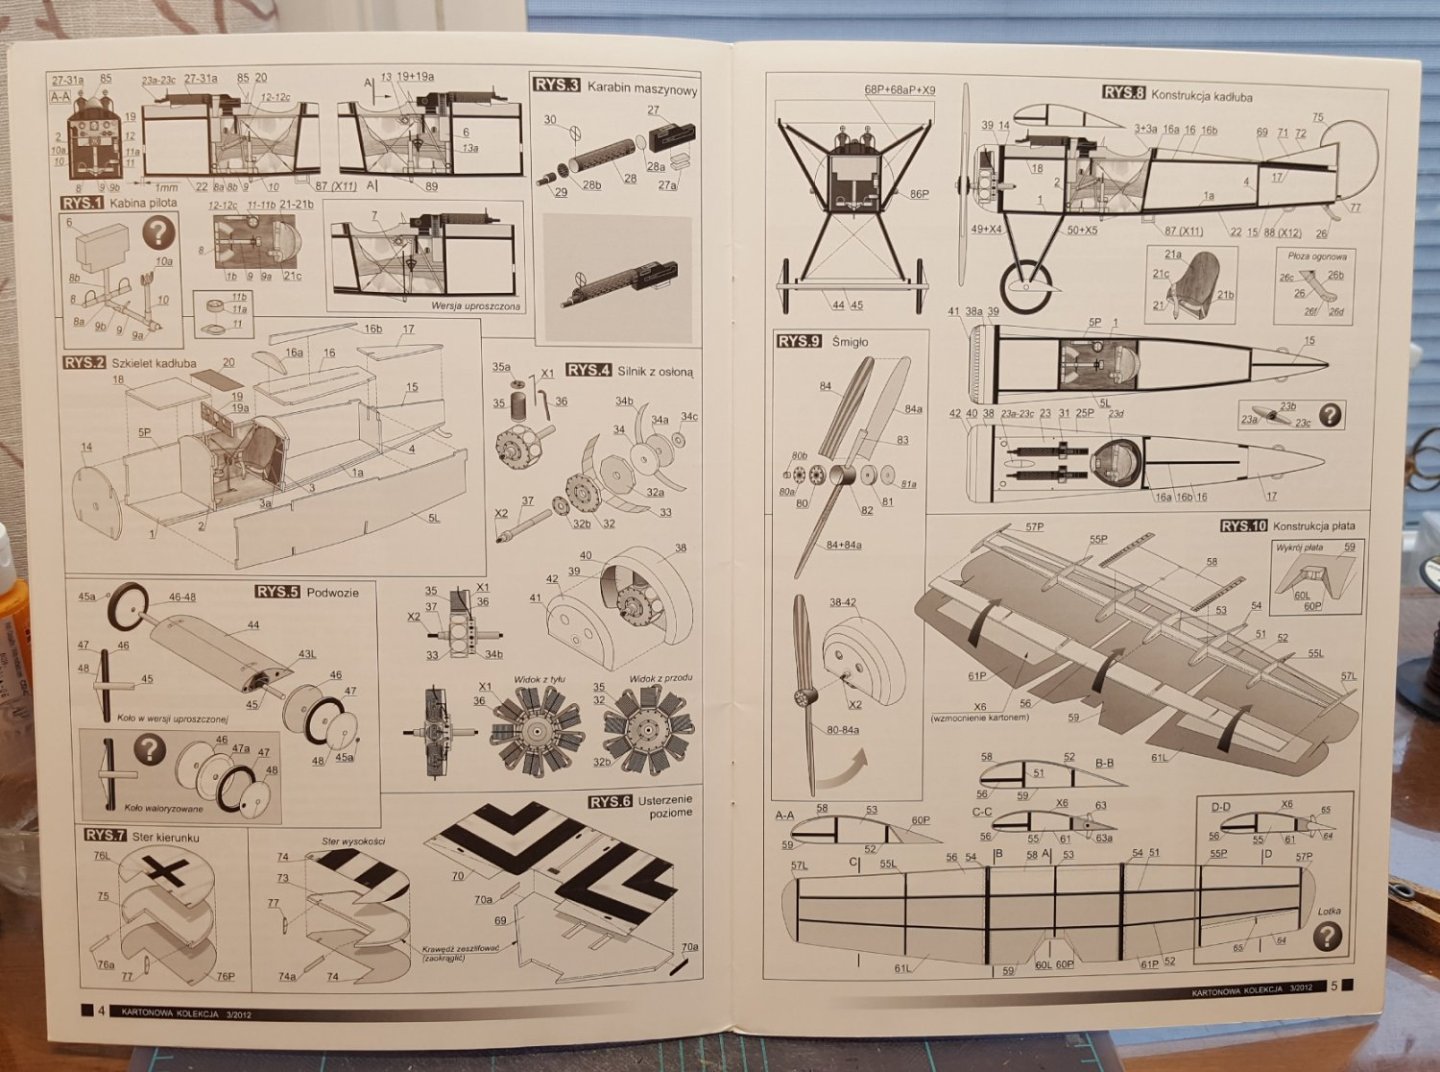
I order them from Poland, though not directly from KK (they don't ship to the US). http://kartonowa.pl/?kartonowa-kolekcja,14 Now on to a couple of shots of the closed-up cockpit and fuselage structure. My old, old phone ran out of charge this afternoon and was on the charger while I assembled this, so no good cockpit interior shots -- sorry! Once the cockpit is closed, the remaining fuselage structure goes together quite quickly. Next task will be fuselage skinning.

- 46 replies
-
- 15
-

-
It's my firm conviction that one should never feel obligated to finish a model for which one has lost the necessary enthusiasm. The proof of my conviction lies in the smattering of unfinished projects on my shelves.
- 481 replies
-
- 2
-
-
- Cutty Sark
- Revell
- (and 2 more)
-
Camel by RGL - FINISHED - Machinen Krieger - 1/20
ccoyle replied to RGL's topic in Non-ship/categorised builds
Me neither. I built plastic models in my youth, always sans weathering, and one reason I've never gone back to them is the daunting learning curve for achieving realistic weathering. My hat is off to all who have acquired that particular skill set. -
Here's a link to all of the Constellation build logs, in case you missed any.
-
The more the merrier. The RC segment of our site can always benefit from some more content.
-
They are originally from Asia, but have been introduced into many parts of the world, e.g. Europe, North America, Australia.
-
Santa Maria detailed rigging plans needed
ccoyle replied to Richard Moise's topic in Wood ship model kits
A number of kit manufacturers (e.g., Dusek, Mamoli, Artesania Latina, Amati) produce kits of Santa Maria. If you search the internet for those kits, you will likely find retailers or other sellers who offer the plan sets separately. -
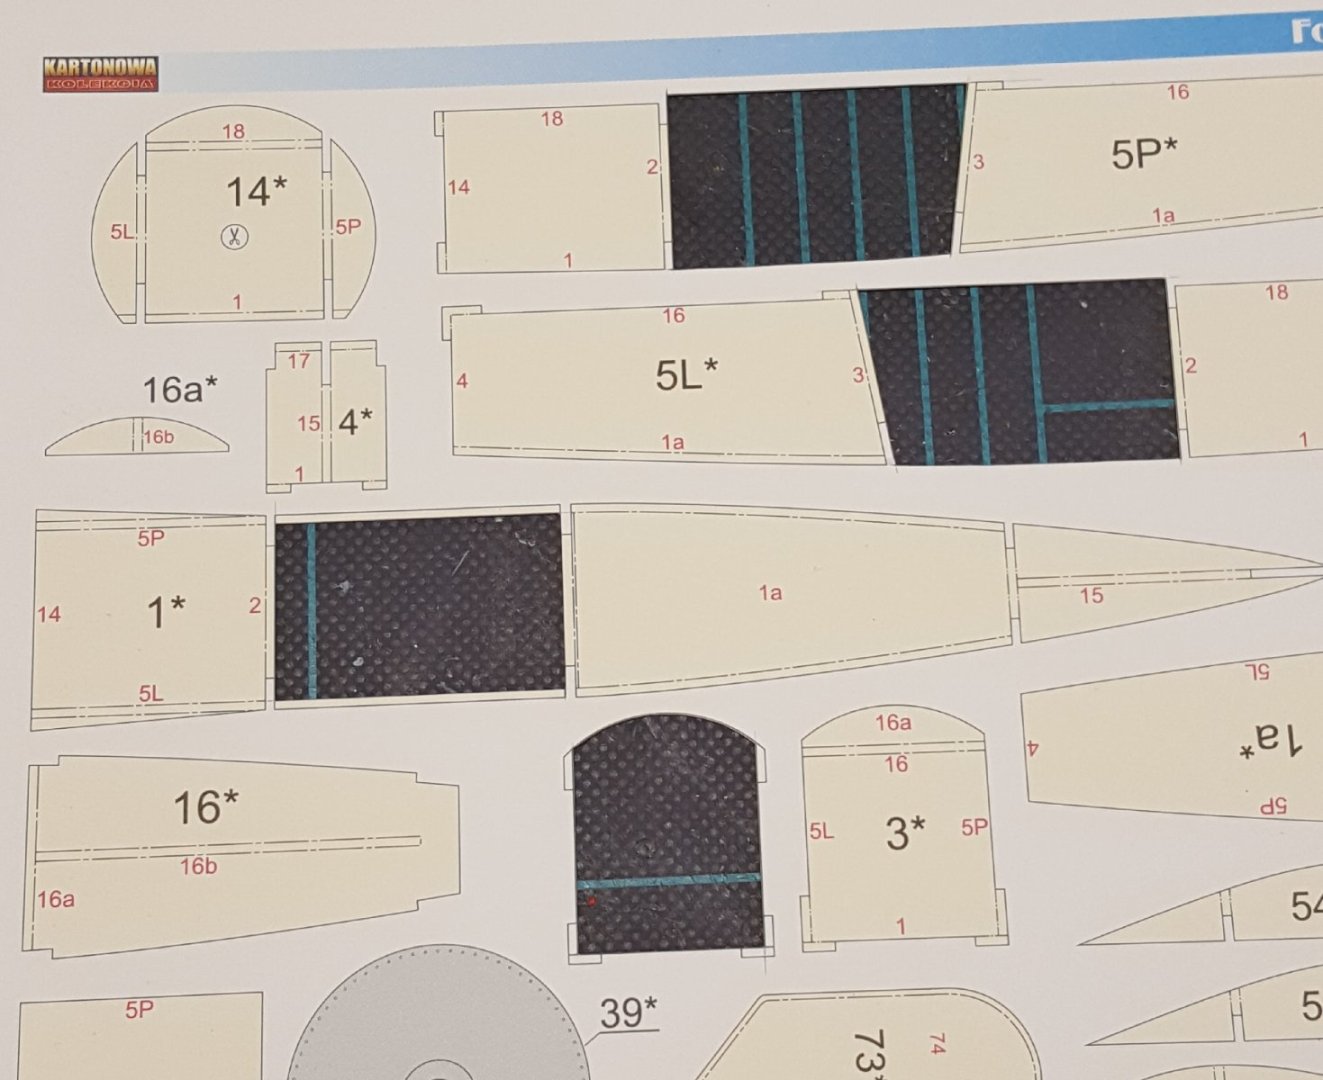
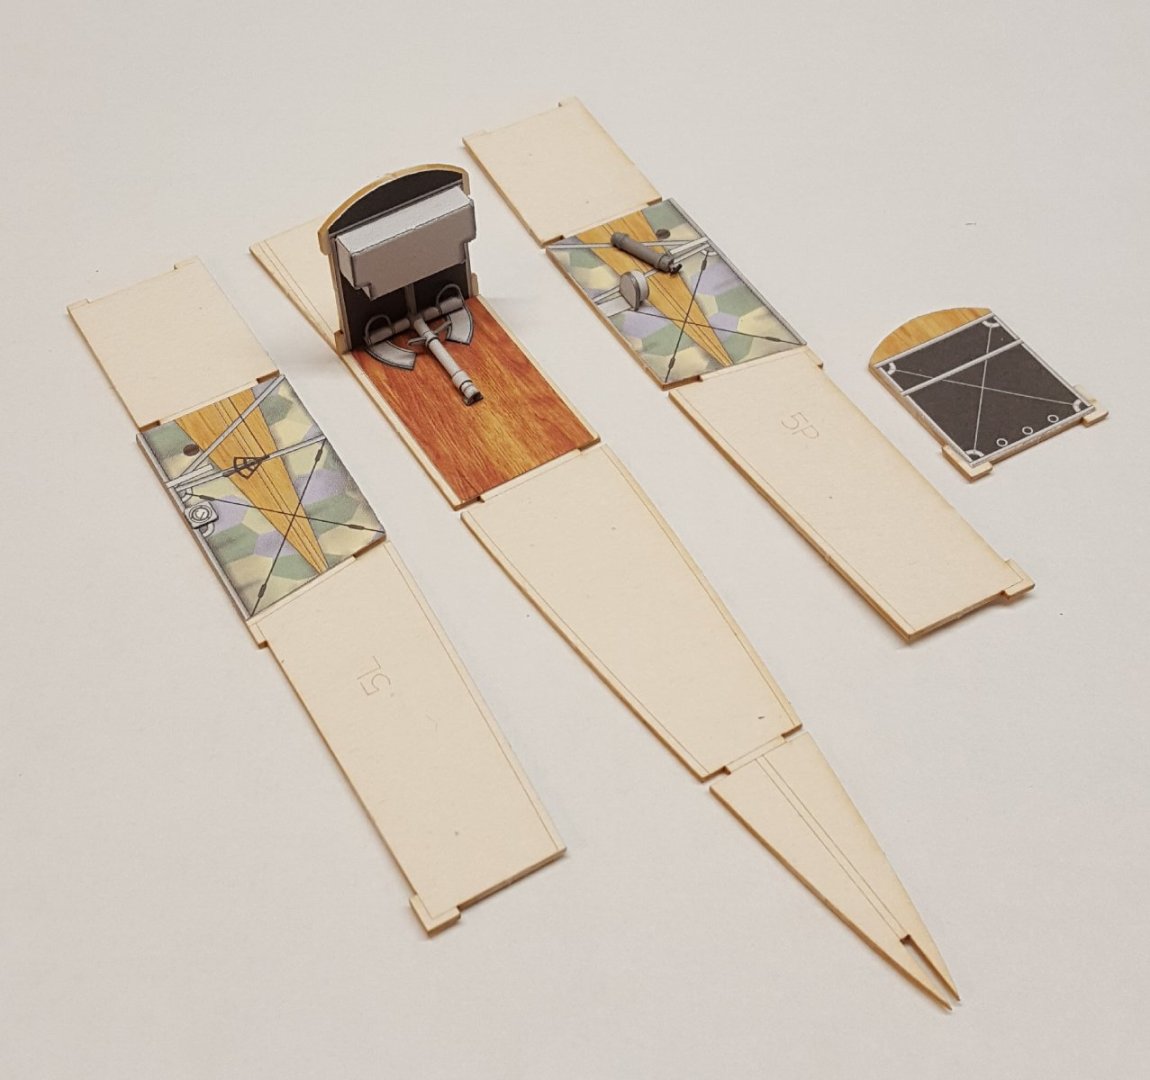
First bits glued together. First I have a shot here of a parts page with some structural parts cut out. Exciting, right? Actually, I included this shot to show the unwary newbie cardist one of the potential pitfalls of card modeling. The parts on this sheet marked with an asterisk are meant to be glued to 1 mm cardboard before cutting out -- unless, of course, one buys the laser-cut frames set. But, if one glues the entire printed structural part (the beige part) to its laser-cut counterpart, the laminated part will be too thick and cause fit problems later. The solution? Cut out and use only the colored portions of the parts, i.e., the parts that will show on the finished model. Here's what that looks like: All of the three-dimensional parts you see in that photo are printed in 2D on the interior cockpit skins; that gives the builder the option of a simplified construction sequence. Adding the optional 3D parts for this model is not difficult because of the low parts count. Cheers!
- 46 replies
-
- 17
-
-
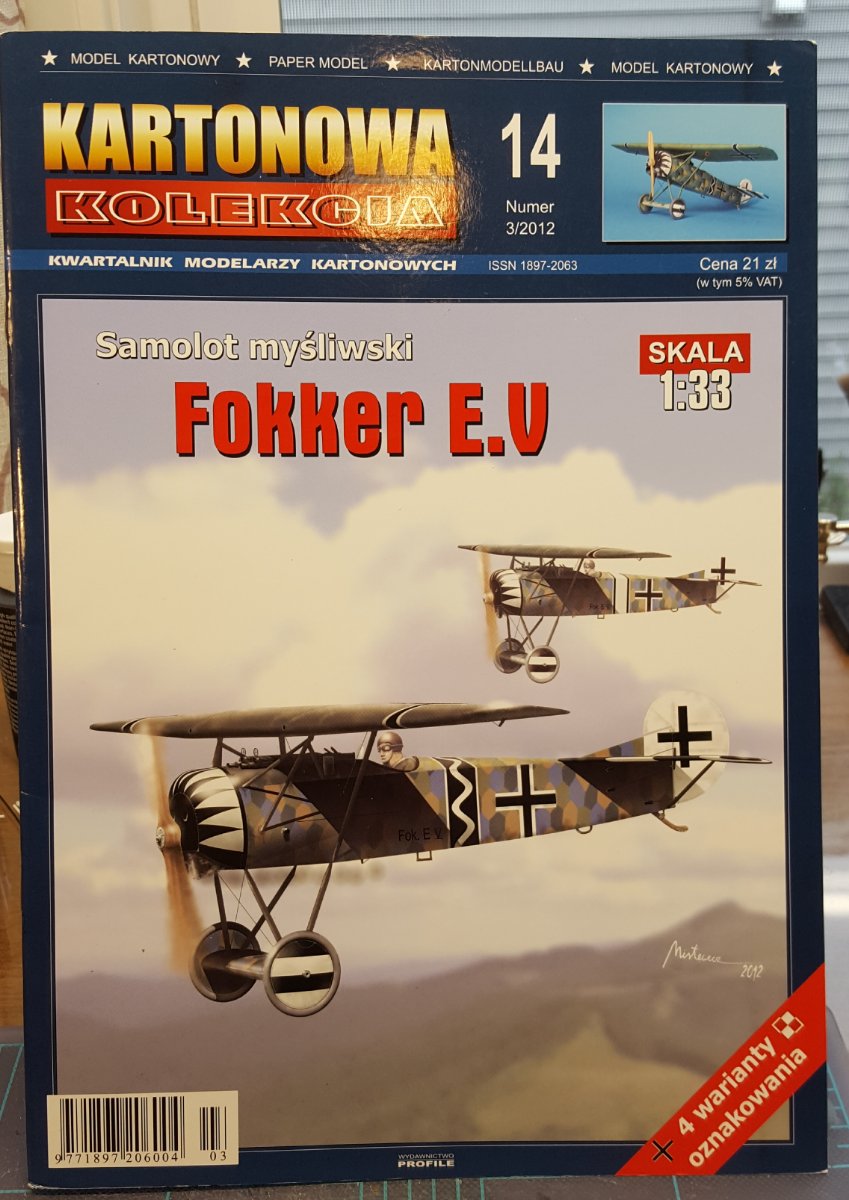
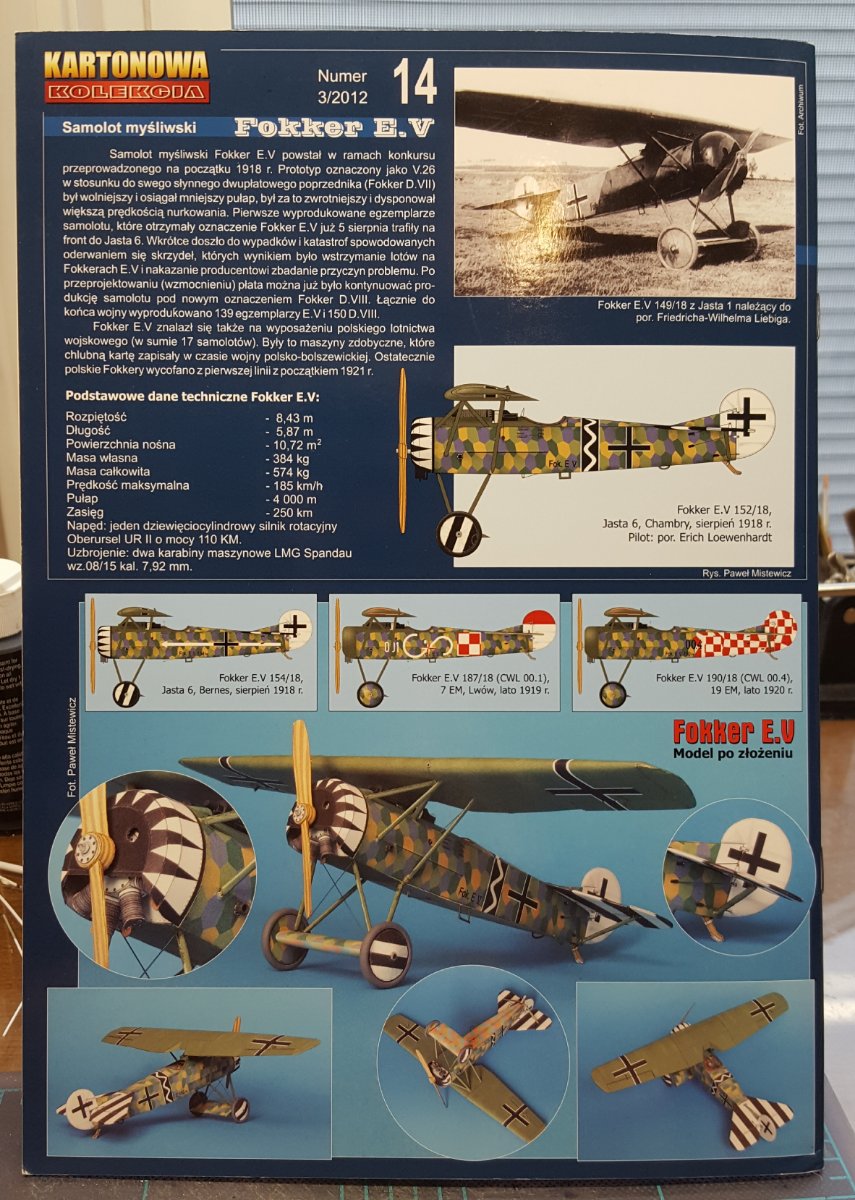
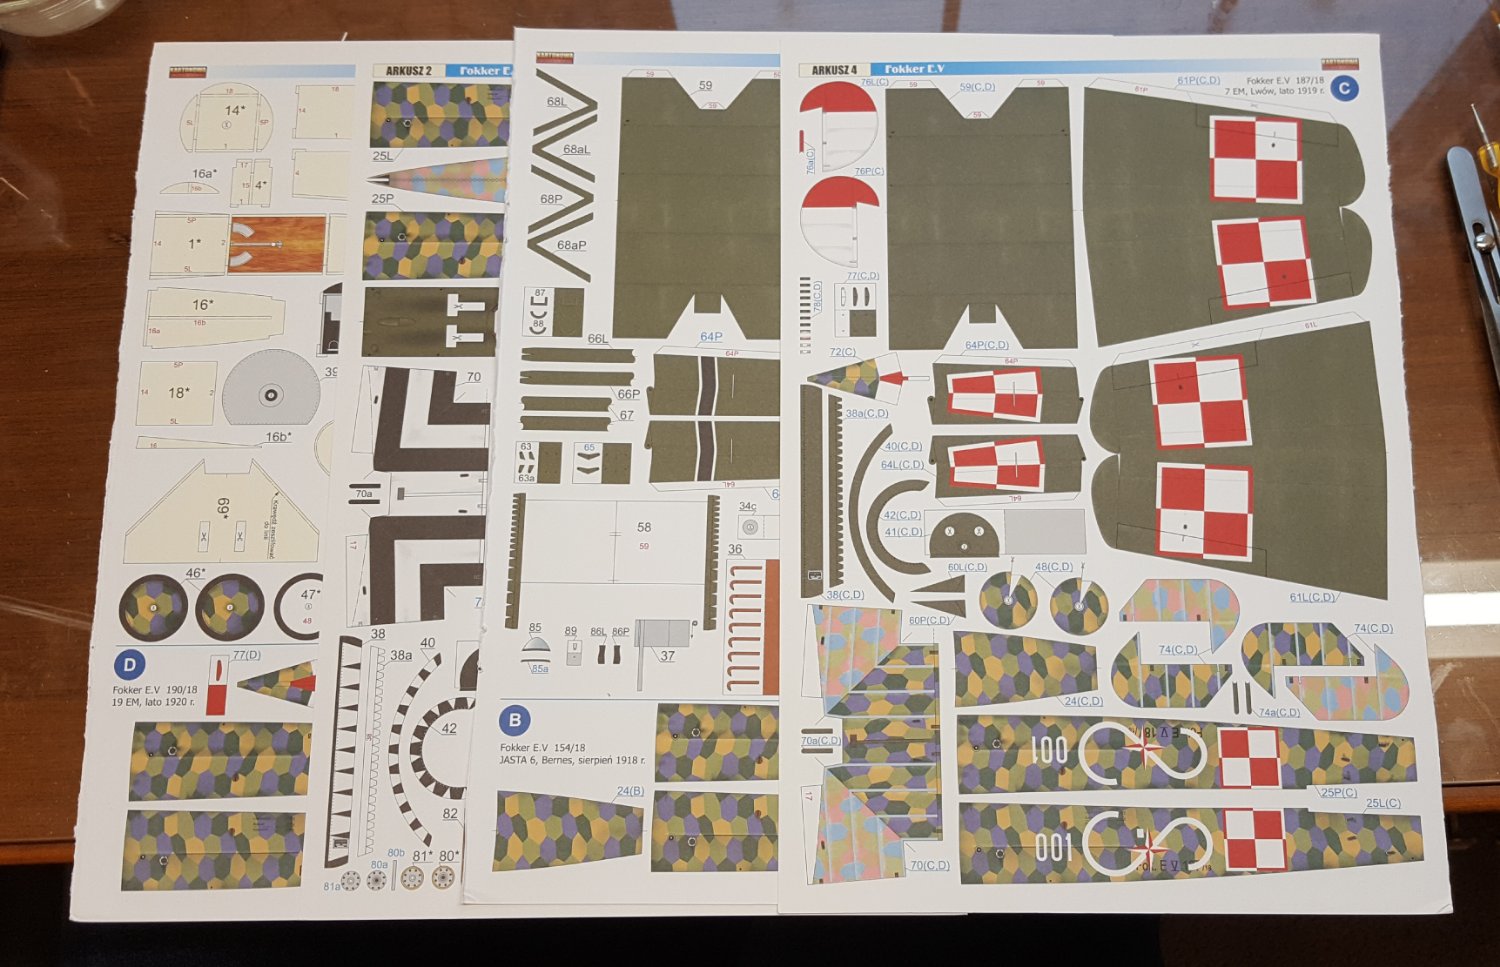
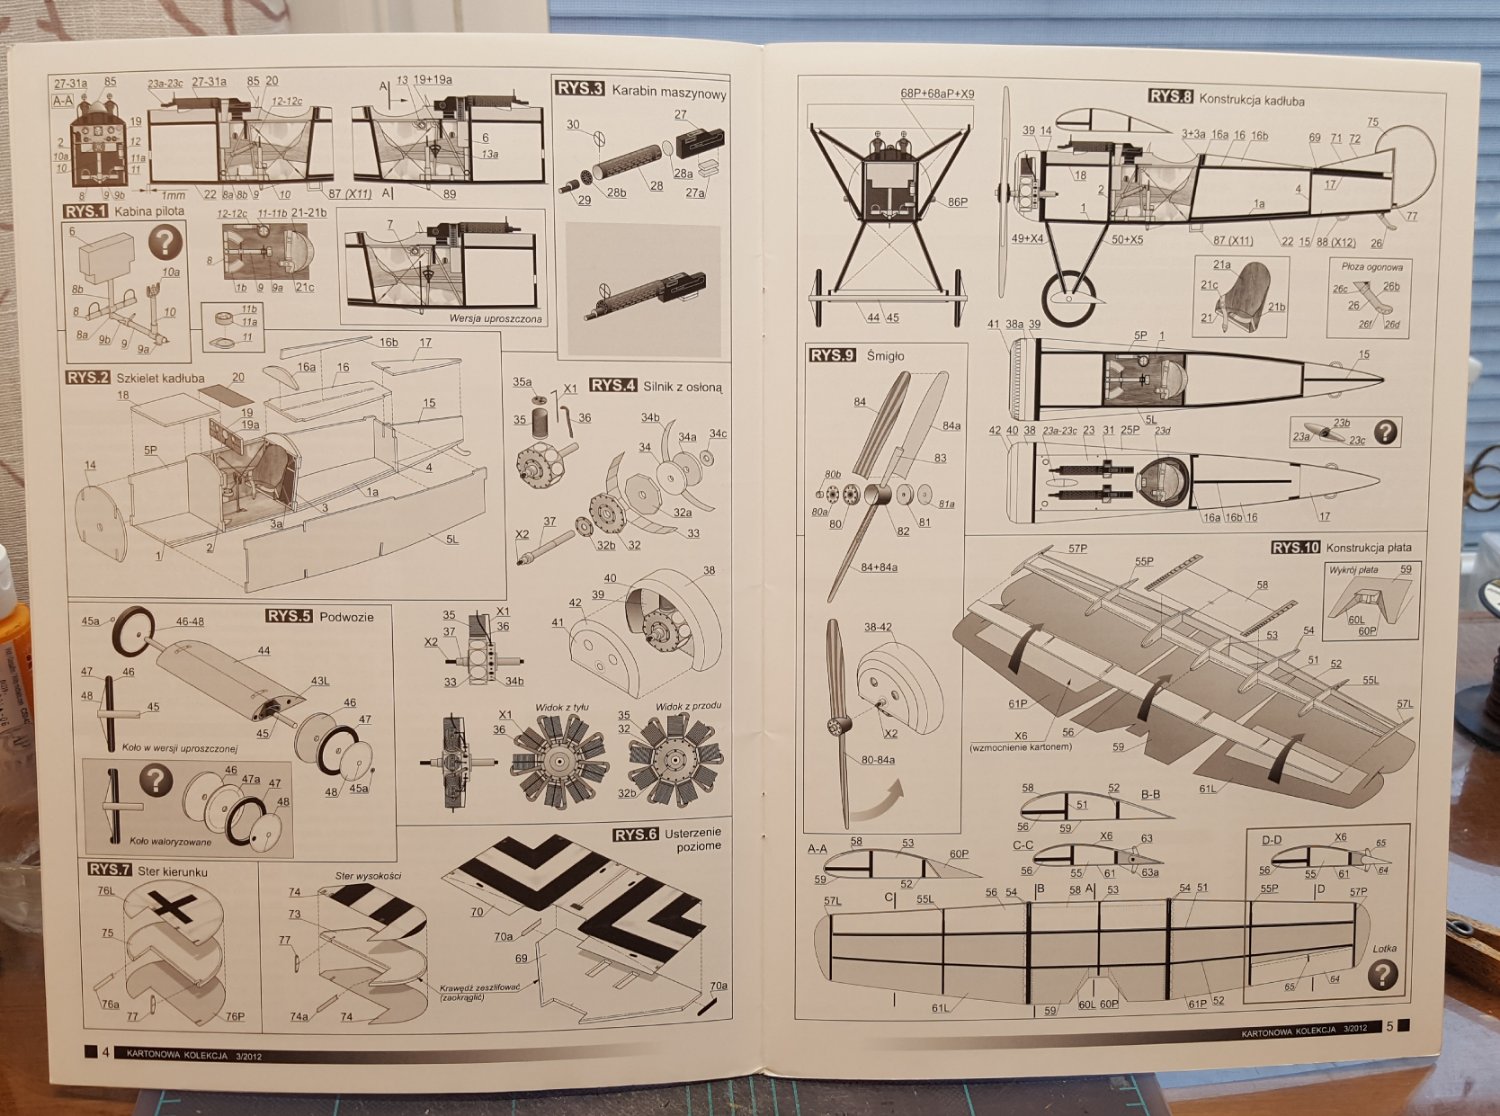
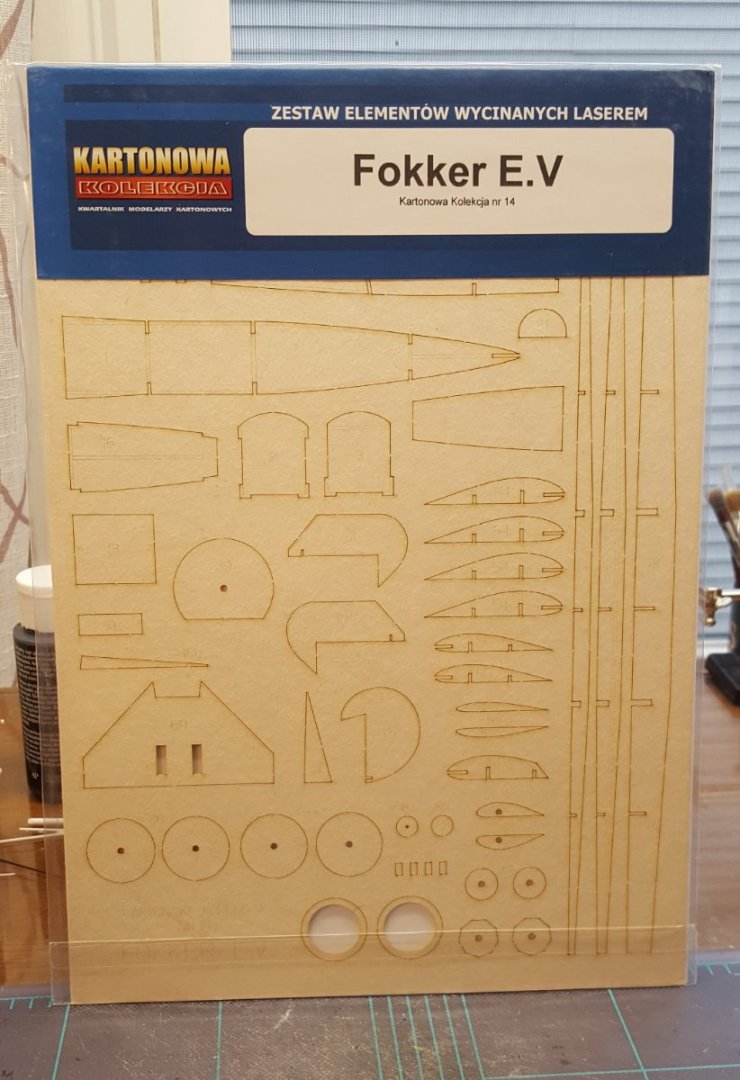
Okay, USS England has been put on hold for a bit while I wait for some materials and explore the possibility of acquiring some more 3D-printed parts. So, instead of sitting around waiting for stuff to happen, I decided to start another model. I didn't want to start something too complex, because I will be departing for California for two weeks during Christmas break, and I'm hoping to knock this out before then. You may know the Fokker E.V "flying razor" better as the D.VIII; the latter designation was assigned after some improvements were made to the original E.V. The type arrived at the front in late 1918 and served in small numbers. They were used by the Polish Air Force after the war. Not too much to say about the kit -- it is another outstanding model from Kartonowa Kolekcja. This will be my 5th KK kit. The glossy cover features artwork by the designer, Pawel Mistewicz. The kit can be built in four different liveries. KK seems to always build the prototype model in my favorite livery, so I will be building the mount of Erich Loewenhardt.. Excellent printing with a nice touch of weathering on four sheets of parts. As usual, there are options for simpler or more detailed elements. KK diagrams are among the best in the business. I also have the laser cut elements. Upwards and onward!


- 46 replies
-
- 18
-
-
Fixed. All that was necessary was to remove it from your uploaded images tray. Pages roll over automatically.
-
TRADUCTION MESSAGES
ccoyle replied to LEFEBVRE's topic in Using the MSW forum - **NO MODELING CONTENT IN THIS SUB-FORUM**
Google Translate works very well for this purpose. I used it to translate your message! https://translate.google.com/ -
Hi, Meghan. You can copy-and-paste your photo directly into your reply (assuming you have a digital copy of it).
-
Not meaning to hijack the thread, but isn't Coronet still a work in progress? The last updates I saw were from 2019.
-
Welcome aboard, Steve!
-
Bristol F.2B WW1 Fighter by CDW - FINISHED - Eduard - 1:48 Scale
ccoyle replied to CDW's topic in Non-ship/categorised builds
Yep, that's where I ordered from as well.- 140 replies
-
- 11
-
-
Oop, yeah -- forgot about that one. That's the same guy that does the 3"/50s. I may have to email him and see if I can arrange something. My wallet might object. 😬
-
On Hold - Nakajima Type KO 3 by CDW - Answer - 1:33 Scale - CARD
ccoyle replied to CDW's topic in Non-ship/categorised builds
For me, the issue with scissors is control. Working with a blade is much more precise. -
Bristol F.2B WW1 Fighter by CDW - FINISHED - Eduard - 1:48 Scale
ccoyle replied to CDW's topic in Non-ship/categorised builds
What the heck -- I ordered both, fine and medium. -
Before attempting to tackle the daunting task of rigging, I decided I will take a little detour and try making some of the guns first. The 20 mm mounts are 3D printed, so no issues there. The 3"/50 resin set included only barrels -- depending on how the construction of the mounts goes, I may opt to replace those with complete 3D printed guns available from another producer (they're not cheap). As far as I can find, though, no one makes a 3D printed 1.1" quad mount, so that one I will have to make mainly out of card in any case. Here's the parts sheet and printed barrel set. Yeah, this is gonna be fun. 🤔

- 331 replies
-
- 13
-
-

-
Bristol F.2B WW1 Fighter by CDW - FINISHED - Eduard - 1:48 Scale
ccoyle replied to CDW's topic in Non-ship/categorised builds
I just had an eye exam a couple of months ago, during which my ophthalmologist informed me, at the ripe old age of 59, that in addition to my numerous floaters, astigmatism, 20-30 vision (corrected) in one eye and 20-40 in the other, I now have "all three" kinds of cataracts in their early stages of formation. No doubt this is from years of squinting at tiny modeling elements. 🙄 I may just have to pull the trigger on some Infini line -- I'm a sucker to try new things. Your comment about the medium vs. fine makes me wonder whether fine may not be better -- at stand off viewing distances, 1/250 wire rigging does really kind of disappear. What are your thoughts? -
We have a number of finished Wye River Models kits on our site. Definitely a mom & pop operation and off the beaten modeling path, but like you said, they offer unique subjects, and people do manage to finish them. Good luck!
-
Bristol F.2B WW1 Fighter by CDW - FINISHED - Eduard - 1:48 Scale
ccoyle replied to CDW's topic in Non-ship/categorised builds
I'd like to get some more info on the Infini line, with which I'm unfamiliar. I looked it up online just now and see that it comes in a variety of colors and diameters. The line that they recommend for 1/200 scale ships is half the diameter (and twice the price) of fine EZ Line, and supposedly stretches, same as EZ line. Do you know if it is round in cross-section (EZ line is flat), and how well does it glue to different materials?- 140 replies
-
- 10
-