NMBROOK
-
Posts
2,305 -
Joined
-
Last visited
Content Type
Profiles
Forums
Gallery
Events
Everything posted by NMBROOK
-

Mary Rose 1545 by tarbrush - Scale 1:72
NMBROOK replied to tarbrush's topic in - Build logs for subjects built 1501 - 1750
Looking good John!! Kind Regards Nigel -
Hi Richard, The copper wire I am using comes with an invisible enamel coating,I believe it is intended for rewinding electric motors etc.The available selection of sizes is just massive and works out many times cheaper than buying wire intended for model use. I am finding it helpful to mark lines of holes using Tamiya masking tape,then run along the edge marking each hole lightly with a sharp awl.This stops the drill wandering as very small inaccuracies show up,especially when you go down to the really small sizes. Kind Regards Nigel
-
Thanks mate I fear there may be a fine line between dedication and insanity Kind Regards Nigel
-
Thank you very much indeed John for your kind words I am annoyed with myself for not keeping a backup of my pictures,however I don't think it will matter so much when I get the opportunity to move forward with this build.My original intention was to drop back onto this over Christmas,unfortunately jobs in the house and the fact I would like to finish Mordaunt's gundeck first may postpone things further. Kind Regards Nigel
-
Just a small update.I have finally succeeded with creating the grating fastenings.I have managed to set the mill to be able to drill TWO 0.18mm holes in the one mm square available in the grating joints.The consistency is a testimony to the accuracy of Proxxons MF70.Unfortunately due to the sizes involved it is a slow process.Any more than two rows of holes,my eyes go into meltdown,even with the optivisors.As a little relief,I am installing the copper 'treenails' in the gun deck.I haven't taken any pics,I will do so when the process is complete.Trying to photograph the gratings at least,without copper fastenings is a waste of time with my limited camera,the holes are barely visible to the naked eye.So if no more pics for a month or two,I am still working away,just driving myself insane drilling and filling with copper wire, several thousand holes Kind Regards Nigel
-
Wow PG,those LED's are SMALL.One method I have seen many times on RC builds,is to cast the lights in clear resin with the LED inside.This could work well with lanterns and you could make many identical pieces with little hassle. I am certain that you will appreciate the joy of working with Pear compared to some of the other timbers.Yes it is expensive,but is so much nicer to work with and the grain size is much more suitable for modelling scales. Kind Regards Nigel
-
Great work mate and a clamp 'fix' thrown in for good measure Kind Regards Nigel
- 1,039 replies
-
- 1
-

-
- ballahoo
- caldercraft
- (and 2 more)
-
ancre La Salamandre by tadheus - 1:24
NMBROOK replied to tadheus's topic in - Build logs for subjects built 1751 - 1800
Excellent work Paul !! Kind Regards Nigel -
Varnish over painted hull
NMBROOK replied to TonyUK's topic in Painting, finishing and weathering products and techniques
Hi Tony I seal acrylic paints with ronseal mattcoat poly sprayed on.The one thing to watch is that most polys contain a UV filter which will turn white slightly yellow.An alternative would be an acrylic clear spray from the likes of humbrol. Kind Regards Nigel -
Allowing for the fact that the lines are actually on the inside of the planking,I think they will look pretty much spot on Nick Kind Regards Nigel
-
Hi Nick I have been pondering on this one.I feel that if you carry on as you are then the planking will look correct when the ship is the correct way up.The wider ends that meet the stem,will not appear wider due to the angle the stem slopes away.This is hard to explain,but from memory,a similar thing happened on Caroline,the plank ends did fan out so they appear a more uniform depth when viewed from ahead ( with the model the right way up).I suggest you draw the remaining planks in,in pencil,then you should see what I mean. Kind Regards Nigel
-
Mary Rose 1545 by tarbrush - Scale 1:72
NMBROOK replied to tarbrush's topic in - Build logs for subjects built 1501 - 1750
Looking good John I think it is fairly safe to say,there really isn't any right or wrong approach to the forecastle.This area is very much unchartered waters.The only suggestion I could offer,although you have probably thought of this.If the forecastle is to be hollow,with internal decks,I would temporarily fit the frames and brace at the top.These could then be faired.After fairing and stripping down,the inside profile of the frame thickness could be marked and then cut out before gluing permanently in position. Kind Regards Nigel P.S. Thank you for the plethora of 'likes' -
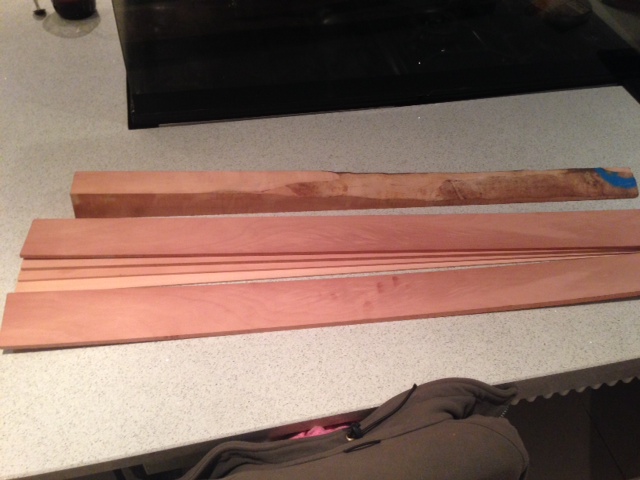
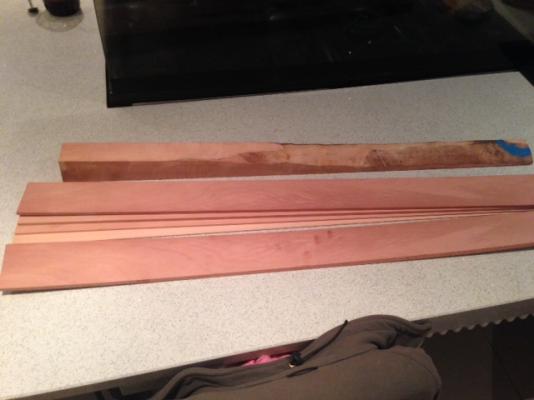
Whilst I have been doing a little work on Mordaunt,I am holding back on pics for now.However I received another delivery of Pear(some is for Royal William).I had asked Dennis at Twigfolly.com,if he had a small chunk of Pear to carve the figurehead from and he said he would have a root about.The result is the massive Pear chunk for free with the rest of the order!!!!! Kind Regards Nigel
-
Hi Richard Sorry for the late reply,been busy plastering .I have 0.3mm drills for 0.27 wire and 0.18mm drills for 0.15 wire.The 3 hundredths of a mm are for glue clearance.To roll the heads,I used a VERY blunt scalpel blade.Larger diameter copper can be done with a blunt kitchen knife.A sharp blade will cut through the copper before a decent burr is formed.I roll mine back and forth on a cutting mat. Kind Regards Nigel
-
Thank you for your responses I have been given some 3 to 4" diameter apple 'logs'.Do I debark as well as cutting in half lengthways? Kind Regards Nigel
-
Hi Boyd I should imagine Jotika's manuals have a list of quantities.This should be a good starting point.They are free to download here http://jotika-ltd.com/Pages/1024768/Manuals_Victory.htm Kind Regards Nigel
-
Hi Keith I used the rolling technique on Caroline for depicting bolts,it works fine,you just cut the double ended section in half to form the nails.The only thing is to keep pressure very light due to the softness of the copper. Fingers and toes will be doubly crossed and the feed speed will be extremely slow.At around 800 holes per grating,it will be a long process Kind Regards Nigel
-
After spending a few hours scouring the net,I have eventually found a supplier of super small drills.I have purchesed two 0.18mm drills for adding the grating nailing.These drills have double stepped down shanks enabling them to fit in the 3.2mm Proxxon collet.I am certain a chuck would have far too much 'run out' to drill these holes.I intend to use them solely in the miller.They are very expensive at around ten pounds each,but are carbide and hopefully will last for a large number of holes.I have ordered a reel of 0.15mm copper wire for the nails.For scale purists,this equates to 9mm full size,so isn't miles away. If anyone is in the market for some mega small drills(yes they do smaller ones than these )the website is http://www.drill-service.co.uk/index.asp Kind Regards Nigel
-
Hi Joe Unfortunately I can't take the credit,I feel you are referring to Roma's build.I am quite a long way from doing any 'ropework' on this build. Kind Regards Nigel
-
Hi Tom Alexey Domanoff did a tutorial on how to make miniature nails,it is in one of the relevant sections.It is a fairly simple job.you roll the material under a blunt knife blade.The burr that is produced forms the nail head. Kind Regards Nigel
-
Hi Tom Thanks for the pic,those are the ones on Rivoli I was referring to Drilling the holes on the mill and 'rolling' the heads is almost easy,compared to cutting them to length and fitting them in the holes Kind Regards Nigel
-
She is looking great mate you seem to be full speed ahead after your summer 'break' Kind Regards Nigel
- 1,039 replies
-
- 1
-
-
- ballahoo
- caldercraft
- (and 2 more)
-
Can i live without a BYRNES TABLE SAW
NMBROOK replied to shihawk's topic in Modeling tools and Workshop Equipment
Hi Boyd The one piece of advise I would offer,if you do decide to buy a table saw don't make the same mistake as me,save the extra and buy the Byrnes not the Proxxon FET like me.Whilst the saw itself is fine,the precision repeat-ability of cuts using the saw guide is questionable.Yes there are ways around it involving lots of faffing,but this is one component I am less than impressed with. Kind Regards Nigel