NMBROOK
-
Posts
2,305 -
Joined
-
Last visited
Content Type
Profiles
Forums
Gallery
Events
Everything posted by NMBROOK
-
 Good to hear your back 'at it' Patrick Sorry I can't help with your deck planking,Connie is far too 'new' for my area of knowledge Kind Regards Nigel
 -
Thank you very much Juergen Yes,they are heavy I also have a ruler 20ft long divided into twelve that says 'inches' on it Kind Regards Nigel
-
Wonderful work and a beautiful model Matija !! Kind Regards Nigel
-
Thank you very much indeed Steve and Nils Yes it FEELS like a never ending drilling job Nils Kind Regards Nigel
-
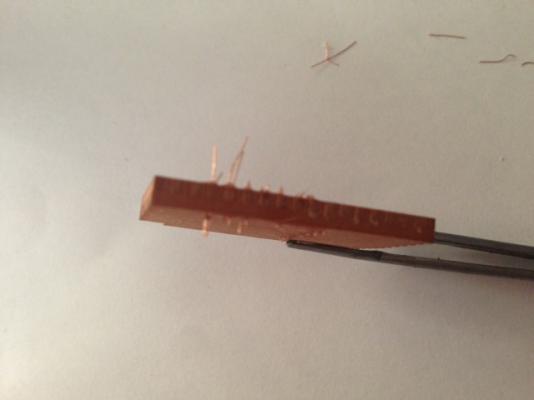
Thanks mate Just for you,proof of nail existance Wire is slightly larger than the hairs on my Jack Russell Kind Regards Nigel
-
Mary Rose 1545 by tarbrush - Scale 1:72
NMBROOK replied to tarbrush's topic in - Build logs for subjects built 1501 - 1750
Hi John I can see the reason for despair,however I think there is no need to start again completely.I think this has happened due to the method of frame support shown in post 33.Supporting the frames at the bottom is OK provided the frames are exactly the correct shape and the middle of the frame tops are checked to be running true with a level,square or string line to the centreline. I would debond the frames from forecastle back.Replace the assembly in the jig and add some tall supports to keel and prow that extend up above the highest frame.Adding temporary braces across the tops of the frames allows you to mark centrelines on.A length of cotton between the jig uprights front and rear can then be used to check these centrelines are infact plumb to the keel. By all means refit in the jig and check before a stripdown,but I feel the sternpost is leaning the wrong way for this to be a simple case of 'spring' upon removal from the jig. I wish you the best of luck with resolving this problem,but you are not alone,there are many members here to help you through this. Kind Regards Nigel -
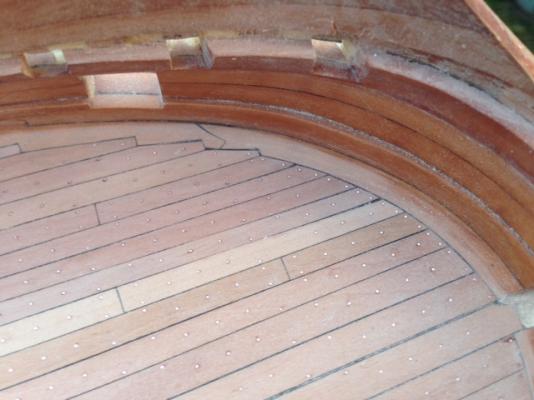
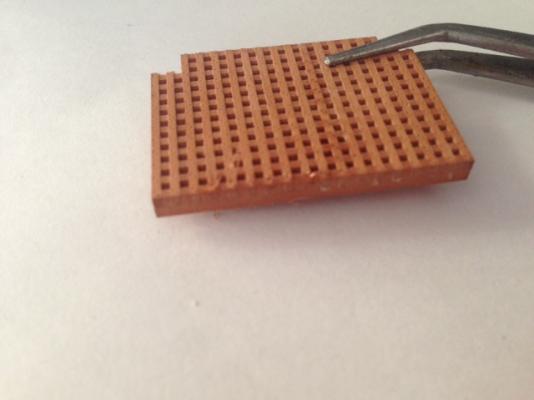
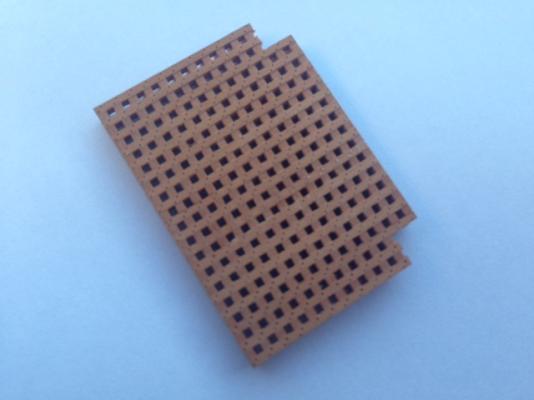
A very small update,but probably a major milestone achieved for me The picture shows the forward grating section sized,however the rebates for the anchor ropes need cleaning up after installing all the fastenings.The eagle eyed(enlarging pic essential) will notice I have installed one line of the double nailing.I have found it necessary to install a pair at the same time due to the limit of how small a droplet of cyano I can apply.The holes are 0.3mm apart.I have decided to sand the radius profile to the top rather than risk damaging what amounts to about twenty hours work so far!!This will be done when the grating has been fitted with the combing.The nailing should become more visible then as there are cyano deposits on the surface at the moment. Kind Regards Nigel
-
Hi David You are correct to avoid adding first planking to the keel at the stern.The enemy with this and many other kits in this area is accumulative thickness.If you were to put first planking on here,you would have to sand it away to get the keel thin enough to allow for the second planking.I did originally think you meant covering the exposed stem and keel with planking material,this again can cause problems with thickness when fitting the figurehead and rudder pintles. Kind Regards Nigel
-
You are off to a great start David I would wait until later to decide on the keel planking,there is a 'knockon' effect if you choose this route which can lead to taking things further than anticipated.If you stick to Panarts colours,none of the ply will remain visible. Kind Regards Nigel
-
Looking good PG I too am feeling work getting in the way May I suggest 'tack' gluing some strips of scrap across the the tops of the frames.With the gaps between the frames,they are vulnerable to getting knocked.The strips can easily be removed later,but they will stiffen things up a lot in the meantime. Kind Regards Nigel
-
Exceptionally neat planking work Chuck Not to deviate off topic too much,but Tony the good quality Birch ply desireable for bulkheads sold in the UK is still made in imperial sizes,I have some 1/4 inch in the workshop.The metric stuff is either liteply for RC aeroplanes or rubbish stuff made in China that is full of voids Kind Regards Nigel
- 1,051 replies
-
- 3
-

-
- cheerful
- Syren Ship Model Company
- (and 1 more)
-
Thank you very much indeed Lawrence It is far too long since any sawdust has been made on this build and the current renewed interest is only increasing my desire to resume work on her shortly.I do,however want to get to a stage where I can put Mordaunt to one side for a little while,which means getting some more structure into the upper hull to prevent any warping.I have however been amassing lots of pear offcuts for the carvings on Sovereign Kind Regards Nigel
-
HMS Royal William by kay
NMBROOK replied to kay's topic in - Build logs for subjects built 1501 - 1750
Fabulous work Kay It is great to see an update on your magnificent model The figurehead is surely on of the most daunting carving jobs around.It is probably one of the most complex figureheads ever designed. Kind Regards Nigel -
Thank you very much Tom It was bugging me so I have spent a good hour finding a video Alexey Domanoff posted on making nails.I actually found it on the Domanoff workshop's website.Here is the link http://modelshipworld.com/index.php?/topic/3315-making-small-nails-with-round-head/?p=91910 I hope this helps and is surely better than me trying to put it in words.This is the technique I use. Kind Regards Nigel
-
Truly fantastic work Bob Apologies for not checking in much of late,unfortunately not getting much spare time for my builds or spending on here Kind Regards Nigel
-
Hi Michael You continue to amaze me with the continuing addition of details I honestly didn't believe you could find anything else to add.Excellent work,I wouldn't fancy retrofitting this detail after the main construction.I concur that although only a 'segment' of the actual carriage,they add a great deal visually. Kind Regards Nigel
-
That is some exceptionally neat deck planking Jason!!!!!!!!! I find it helpful to look at a Navy board model of the subject.The visible stern timbers help you visualise the shape better.However the dockyard model of Diana ( nice stern pic by Sjors in his thread on the Chatham historic Dockyard) is fully planked so not much help I am afraid. Kind Regards Nigel
-
Hi mate Your letter to Santa looks very similar to mine I had never had much success with stains although others swear by them.I personally prefer just to use a wood of the correct colour.I once tried staining some dowel and wasn't happy with the result.Seems the best wood for masts in kits isn't the best for taking a stain Kind Regards Nigel
- 1,039 replies
-
- 2
-
-
- ballahoo
- caldercraft
- (and 2 more)
-
I am Considering a Plastic Build and Need Advice
NMBROOK replied to BANYAN's topic in Plastic model kits
Hi Pat Unfortunately the only place that does type 45 specific stuff is White Ensign Models,or did as they were closing down.However you may find more luck looking at weapon types etc .Here is a starter link for the gun barrels commonly available although this isn't an exhaustive list.Click on the homepage and you will have a mass of information at your fingertips.This is one of THE forums for plastic and resin ship models.I would imagine some other manufacturers produce items for the type 45 as Trumpeter produce a kit of this vessel,so there is a chance some of the Chinese photo etch companies produce something,e.g. Lionroar. http://www.steelnavy.com/ReviewsOrdnance.htm Kind Regards Nigel -
Fabulous work mate!!!!The rigging is in perfect harmony with the rest of your build Kind Regards Nigel
-
Thank you Mark however,no,I said completely through my hull as 'it stands'.The planking on the outside will cover the ends when it is fitted.I was meaning that these 'bolts' would offer some strength to the model and are not just there for cosmetic purposes,sorry perhaps I should have been clearer Kind Regards Nigel
-
Excellent fix Juergen I agree,for a part that will become invisible when complete,the amount of work required to replace the piece,just isn't worth it.The wales look great Kind Regards Nigel
-
Your build is coming on great Mark Your plan regarding the stern should work OK,I would just leave a little 'meat' both sides for fairing.I have done similar on a few builds and built the stern up from 'fresh air' so to speak.I will be doing it again on Mordaunt as the kit lines end short of the original Kind Regards Nigel
-
Thank you very much Juergen Kind Regards Nigel
-
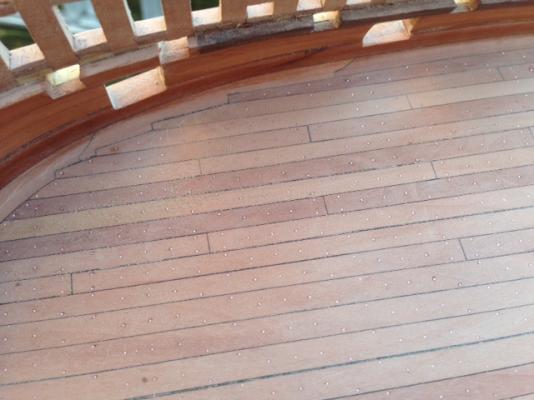
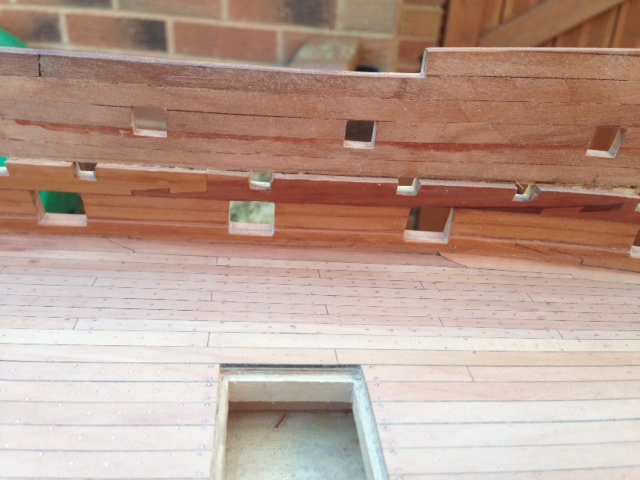
I am currently decorating and between coats As the sun is shining,I thought I would take some pics of where the build is up to at the moment.No pics of the gratings yet as I will photograph these when I start building them up with their combings which will be in Ebony. I have fitted the deck clamps back to roughly amidships.They extend right up to the deck underside.This isn't historically correct,however it is my intention to cut a 3mm deep rebate to take the lodging knees.This creates a flat surface for the knees to abut to,rather than contending with the severe tumblehome at this point.When assembled,the finished appearance will be the same as if I had built it historically correct.The hooked scarph joints are clearly visible.Both these clamps and the scarphed spirketting will be fitted with copper fastenings 0.8mm diameter extending completely through the hull as it stands now.I am undecided as to whether to represent bolt heads on the deck clamp fixings to illustrate proud bolt heads. Work is progressing at a slow but steady pace on the deck plank fastenings.I have fitted two staggered fixings per main beam and one central for each ledge.The hatch openings have been roughly cut to size.Final finishing will be done when the hatches are made up.The area in front of the main hatch has further planking to be added for the flat capstan base.I got carried away drilling holes,I could have left this section Kind Regards Nigel