NMBROOK
-
Posts
2,305 -
Joined
-
Last visited
Content Type
Profiles
Forums
Gallery
Events
Everything posted by NMBROOK
-
This is interesting stuff mate.Whilst my area of knowledge is a little later and mainly confined to English ships,there are some almost general rules to follow for the 16/17th century.The lower main wale will almost certainly dip into the water as you have it.The biggest difference is that the ports will not follow the curvature of the wales.Alot of period artwork exaggerates the sheer of the vessel and quite often the ports follow this.This is purely artistic license and would not follow reality.Whilst the decks will have some sheer,it would not be anywhere close to that of the wales.Some part of the wales,whether it be the mainwale,in part,or the chainwale would be cut into by the ports. One other consideration is that there are no guarantees there would be a clear deck run fore and aft.It was quite common in this period to have a stepped deck,rather than a single one that ran the full length.This 'step' would more often than not be in the aft/stern area. Kind Regards Nigel
-
 Your metalwork and attention to detail is outstanding Johann.The above pics look like that of a 1/16 model,not that of one at 1/48! Kind Regards Nigel
 -
Fantastic work Marsalv!!I have left the option open on my Caroline to add sails.When done as well as yours,they do add a great deal to the model. Kind Regards Nigel
-
Truly excellent work Bob Sadly I am not around much of late,due to supposedly moving.The buyer dropped out at last minute,so we are now back to square one with half of my tools now packed away Kind Regards Nigel
-
Proxxon Micro Planer DH40 - owner feedback??
NMBROOK replied to rtropp's topic in Modeling tools and Workshop Equipment
Hi Richard I have contemplated one of these myself.On one of the videos on you tube featuring Dr Mike(this was not shown in his DVD),it is explained there is a minimum thickness for the feed to work.He gets around this by putting two pieces on top of one another,one is planed and the other is a packer to allow the feed to work with thinner material. Kind Regards Nigel -
Hi Dave These plans appear to be almost identical to the Amati ones I have.I know that there isn't anything definitive regarding Sovereign's appearance,but for the most part,these plans are in contradiction with what reference sources are available.The discrepancies between various sources regarding her actual shape is discussed in Sephton's book at great length. Kind Regards Nigel
- 962 replies
-
- 3
-

-
- sovereign of the seas
- ship of the line
- (and 1 more)
-
Excellent work PG There are some wonderful lines to the hull,but I should imagine planking it will be interesting Kind Regards Nigel
-
Excellent work on the cabinet mate I look forward to seeing what you tackle next.I am not around much of late,very busy sorting things ready for our move at Easter. Kind Regards Nigel
-
Hi PB You build is looking good.I find Pritstik to work well gluing the patterns on.They peel off later and any residue can be removed with a damp cloth. Kind Regards Nigel
-
WOW Chris!!!!I had got my head around no more kits for me,then you post this This would have to be the one exception!!!No rush though many thousands of hours ahead with my current projects,plus a break due to my workshop going into storage whilst I am currently relocating Kind Regards Nigel
-
You could try with walnut or mahogany,you need to drill into the endgrain,so if you have just bought pear strips then these wouldn't really be economical to use.Ideally you need a square 'chunk' but you will yield lots of treenails for little material.Perhaps a 'pen blank' could provide you with enough timber if you have unsatisfactory results with the timber you have. Kind Regards Nigel
-
Great progress Keith,she is coming on well I fully understand you not want to use pear where you are going to be painting,it is flipping expensive!! .I realise you are wanting to create treenails that are a closer match to the pear,but to be honest I think you will stuggle getting both walnut or mahogany down to a small diameter.Their grain structure does lend itself for this.May I suggest using pear and producing them with a hypodermic needle in the drill.Marsalv covers this in his scratch log.The pear will still contrast slightly with the hull as it is endgrain and will be darker when you apply finish. The link to Marsalv's Pandora http://modelshipworld.com/index.php/topic/7073-pandora-152-by-marsalv/page-3 Kind Regards Nigel
-
Thank you.I always try to have the stem and keel joined together before fitting.This joint can then be clamped to a flat board.I clamp something straight to the keel and stempost when gluing in position.Generally anything long enough I have laying around,this can be as simple as a long metal ruler edge on,or even a spirit level if the keel is large enough to warrant it(no use for the bubble,just for it's straight properties).When the glue is fully dry,I then pin with brass or copper wire and epoxy glue. Kind Regards Nigel
-
Hi Kurt I typically rework the kit if the stempost keel and sternpost are part of the false keel.I fit the stem and keel after first planking and fairing.I leave the sternpost until after the second planking.This allows you to lay the second planking overlength and trim everything in one go,making it easier to get a nice tight join to the sternpost. Kind Regards Nigel
-
You have made an excellent job of the glassing Dimitris!! Kind Regards Nigel
-
Thank you very much Michael Kind Regards Nigel
-
Thank you very much Tom There is still a preposterous amount of work to do to this deck level before it is even close to being finished Kind Regards Nigel
-
The photos on the NMM museum website are available to purchase,however I doubt they will be as useful as zooming in on the images that are online.The downside is you can't print them out.I would assume that this model now resides at Chatham historic dockyard.I did toy with seeing if I could visit and photograph the model,however,I have managed to collate enough information to be able to build a pretty accurate replica.The model is also featured in John Franklin's Navy board model book.If I do visit,it won't be until much later this year. I am glad you are going for a faithful reproduction.I look forward to seeing how you go on.The only versions of this kit I have seen built are straight out of the box. Kind Regards Nigel
-
Thank you very much Vivian Yes it gives a good indication on the direction I am heading Kind Regards Nigel
-
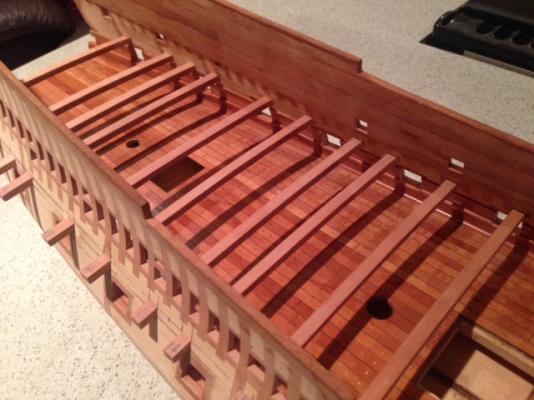
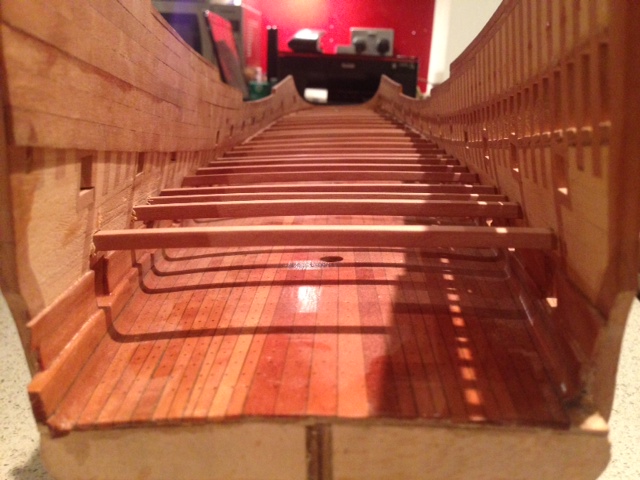
Thank you John,Mark and Mark The beams are not glued in yet.The theory is that this gives me the freedom to shim the holes where necessary to give a smooth run and even distance to the top gunports.The shims are glued in.With the beams slid out,the deck clamps are fitted unnotched and the slots extended through the clamps Kind Regards Nigel
-
Thanks buddy!! Kind Regards Nigel
-
Thanks mate!! Kind Regards Nigel
-
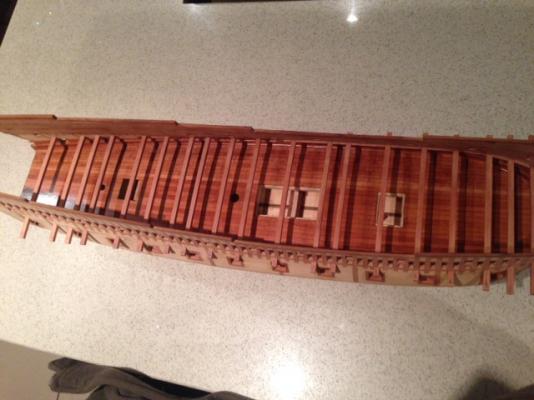
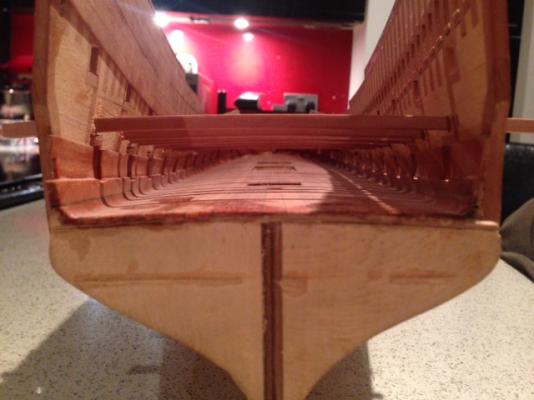
I have continued on and cut the remainder of the deck beams.It was a slow job due to the parallelogram shape of the aft beams because of the deck sheer.These are inserted through corresponding slots in the hull.These will be slid out and the remaining deck clamps fitted. Kind Regards Nigel P.S.Excuse the dust,my compressor gave up the ghost the other week so I am currently without an airline for dusting off