-
Posts
2,305 -
Joined
-
Last visited
Content Type
Profiles
Forums
Gallery
Events
Everything posted by NMBROOK
-

Xebec by mij - FINISHED - 1:60 scale
NMBROOK replied to mij's topic in - Build logs for subjects built 1751 - 1800
Hi mij, You could always have the best of both worlds and build Sussex POB and to a slightly smaller scale say 1/64 Kind Regards Nigel -
Hi Matti I think Ersin's figurehead speaks for itself(pics in his log in the scratch section)If my humble attempt gets anywhere near 1/10 of the standard of his work,I will be more than pleased Anyway we shall she,those pics of Lloyd McCaffery's miniature carvings made me think of taking up golf instead Kind Regards Nigel
-
Got to agree Geoff,I have all of Keith's books and they were invaluable when I was fairly new to this and an absolute godsend in days before the 'net',I suppose you could say he was my inspiration to get stuck in and persevere.I have Donald Dressel's book as well Brian,this is a fairly recent addition,but it always nice to see another 'take' on planking.Particularly nice shots of some of Ed Marples' builds. Kind Regards Nigel
-
Congratulations Max on your new acquisition.I did have a little fun and games with mine when I started as on a dry fit of the frames and deck nothing would fit very well.I checked the false keel to the drawing and found it was 5mm short.However I know my kit had been on the shelf at my local modelshop for at least three years and the shortness was almost certainly due to wood shrinkage.I managed to work around this,I got the kit at a three year old price as well so can't grumble I wish you all the best with your build and will enjoy following along. Kind Regards Nigel
- 153 replies
-
- royal caroline
- panart
-
(and 1 more)
Tagged with:
-
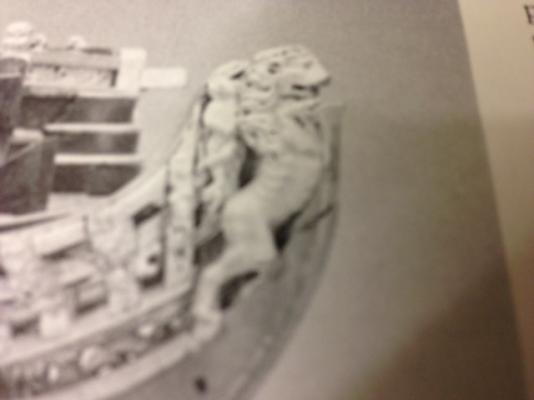
Thanks B.E.I found human faces hard at first,but it became a little easier as you program yourself as to the common proportions of the human face,even remembering a couple of pointers from art class in the early eighties Problem now,animal anatomy Will be watching wildlife on one reruns to get my head around it On a serious note I am going to do lots of googlin to establish some basic proportions.As further investigation shows that the lion is a complete figure with only one tiny notch on the prow,the overall thickness of limbs and body need to be close as it isn't split in half.I envisage the figurehead carving to take up months of intermittent work,so that is why I would like to get stuck in.Ersin Derebek's Royal william figurehead took him 500hours of carving,so whilst this is nowhere near as complex,it is definitely more than a couple of days work Kind Regards Nigel.
-
Thanks mate!Unfortunately I have to do it all again on mark 2.Janos's picture has highlighted errors in the kit drawing profile,so I will revisit this probably next weekend and make some amendments to the drawing before starting again.Whilst everything else is correct,the line of the nose is wrong and I haven't enough material to work with.I need to alter i.e. almost remove the slot as I have discovered another picture that shows how things fit together.I was struggling with some b/w pics and shadows looked like parts of the ship.I may well just take a step back and redraw the whole prow out with the other necessary changes before making any more sawdust in this area.The museum model's figurehead actually looks more like a bear(apart from the mane)whereas the kit figurehead resembles a Chinese style lion.I shall carry on with hull construction in the meantime while my blood pressure returns to normal Kind Regards Nigel
-
Hi again preservedkillick, Looking again at the pics,I trying to think of a way to keep potential maintainance to a minimum.The couplings will fail earlier than normal but in the swing of things they are fairly inexpensive and are better kept as a 'week link',The application of some grease will help a little.You may encounter some improvement by installing a brace at the very inboard end of the propshafts.You motors should be ok as from memory the 800s are ballraced as standard.The only area other than the couplings is the inboard bearing on the propshaft.You can buy shafts that are ballraced on the inboard side but I don't think you can retrofit these bearings to your shaft as the outer tube diameter is larger.So I would go with simply bracing the inboard end of the shafts.It is possible to replace the plain bearing in the shaft without removing the outer shaft at a later date.One last point,the best test is to get it on the water as soon as and see how everything behaves.I doubt with water resistance you will run anywhere near 5000 RPM that you can in a dry test.You may find anything more than 1/3 throttle is just silly anyway,otherwise you would have built a Perkasa Hope this helps a little Kind Regards Nigel
- 18 replies
-
- resolve
- caldercraft
-
(and 1 more)
Tagged with:
-
Hi Janos That is an excellent picture!I have the NMM images but because of the gilt it is harder to make out the shaping.I would be very grateful for a high res image as I have printed this one out and it is very pixelated.The main issue is the figure behind,this is the only image that shows this clearly.The figures will be seperate as the prow runs right through the lion and the figures.I have been able to establish that from the images I have already. Thanks again Kind Regards Nigel
-
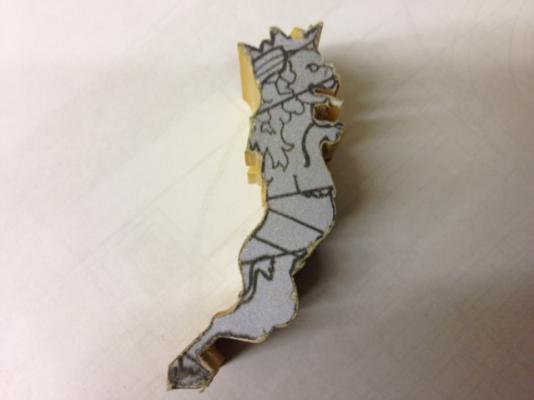
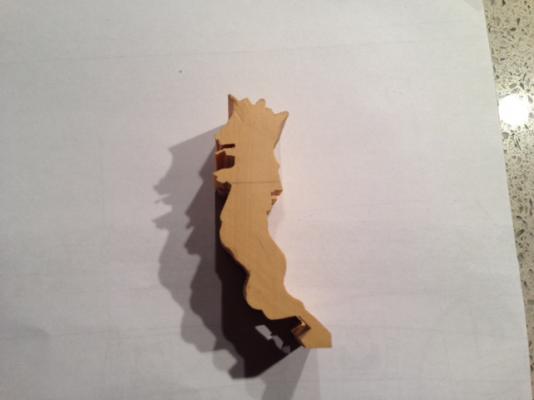
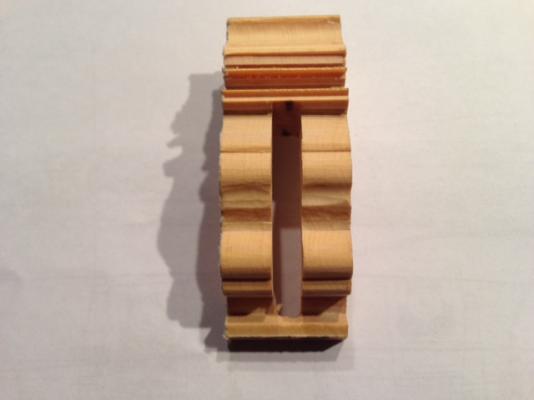
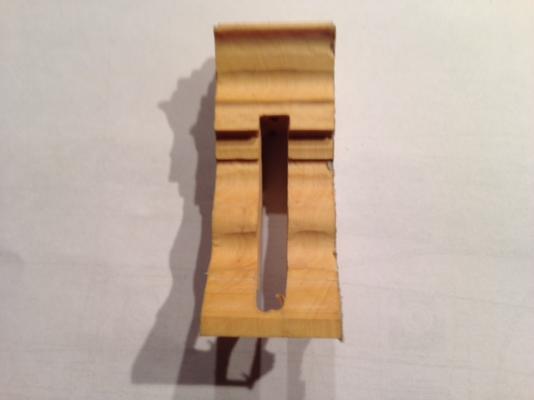
I have started a job on the side that will run in conjunction with the main construction work.This is that of the figurehead.There are differences between museum model and the kit.The main one being there are two 'characters' behind the lion.I say characters because I am still uncertain as to what they are They remind me very much of the 'purple' thingy on Matti's Vasa build .However these affect the shape of the prow considerably and I will need to produce this trio of carvings to be able to determine the prow shape. Some good news is that the museum model's Lion is tailless unlike the one on the kit plans and it is not clutching an emblem also shown on the plans.It is a nice change that research actually simplifies a design .Anyway I chose to take a copy of the Lion shown on the plans and use this,just omit tail and emblem,as it will be far more convincing than my freehand drawing attempts.The copy was glued onto a piece of European box of suitable thickness. I first milled the slot for the prow,but leaving a small section at the feet.This will be removed later when the bulk of the shaping is done,it simply serves to keep a little strength for now while the rough work is done.The profile was cut using a combination of the miller,large scalpel and burrs.The result in the pics is from about 8 hours work!!. The very thin wafer at the mouth will hopefully be the tongue when finished Kind Regards Nigel
-
Hi PreservedKillick. First off,I had an outragous experience with Westbourne.I ordered nearly £1500 worth of stuff including Robbe F14 Navy radio and all the expansion modules/ decoders,I was billed for everything straight away,but took me nearly 3months for everything to arrive and numerous telephone calls,never again!!! Next,and more bad news I am afraid.Your UJs are noisy because they are only designed to counteract misalignment to fractions of a degree.It is normal practice to align the shaft and motor with a piece of brass tubing,ensure as near perfect alignment as is achievable and then replace with a UJ to reduce vibration and correct any miniscule misalignment.I can understand the installation issues you experienced,but the only way to overcome the problem would be to either raise the front of the shaft,changing the angle of the propshaft,or use an offset gearbox or pulley/belt setup.Decaperms have an offset output shaft,allowing the motor centreline to be higher than the propshaft. You have two options,either leave as is and expect drivetrain failures on a regular basis,or correct the issue before you go much further.I only wish I had seen your posts earlier,but unfortunately I haven't had much time of late to spend on here.. I am truly sorry to give you this news,I can only feel for you as potentially it does mean quite a bit of re-engineering. The third option,but would advise against it,is to use two flexydrive shafts designed for IC powerboats,however these are designed for use with high power engines and will kill the charge in your battery very rapidly. Kind Regards Nigel
- 18 replies
-
- resolve
- caldercraft
-
(and 1 more)
Tagged with:
-
Stunning work Bob!!!I agree with Patrick,your log will become a point of reference for future builders of this kit who want to take their build a stage further . Kind Regards Nigel
- 1,477 replies
-
- essex
- model shipways
-
(and 1 more)
Tagged with:
-
Sjors I would keep looking in the fridge to make sure the wood is not warping!! Kind Regards Nigel
- 1,873 replies
-
- occre
- san ildefonso
-
(and 1 more)
Tagged with:
-

Xebec by mij - FINISHED - 1:60 scale
NMBROOK replied to mij's topic in - Build logs for subjects built 1751 - 1800
Excellent work and a stunning model Mij I am with you in that the decision to sell my models started originally with that I would need my own museum to keep them!Off the top of my head,I can't remember whether it is Bonhams or Christies,but one has a specialist maritime auction every six months.You may be able to realise more money at one of these.I know you don't do it for a living,but I am sure you would agree it would be nice to get as much as possible More wood,more tools Are you planning on returning to Sussex now?(the ship,that is )Hopefully the glue unfriendly weather is behind us now Kind Regards Nigel -

Deck beam Scarphs?
NMBROOK replied to NMBROOK's topic in Building, Framing, Planking and plating a ships hull and deck
Hi Henry Yes I agree the positions of the columns are affected by the deck furniture,however I am sure it can't be that simple?Or can it Kind Regards Nigel -
Hi Sjors I thought I would drop in and have a look Your San Ildefonso is looking fabulous Excellent work.I have to ask the question though With completion not that far down the road,are you now a convert to two builds at once?In other words will you start another before Aggies completion? Kind Regards Nigel
- 1,873 replies
-
- occre
- san ildefonso
-
(and 1 more)
Tagged with:
-
Thanks Drazen,I did not appreciate the gaps,you can't make them out in the pictures.I too use epoxy when there isn't a close fit as wood glue is weaker in this instance.I use ABS styrene available in different sections and even profiles for other aspects of modelling.This is made in the Netherlands by Raboesch and is stocked by many good model shops.This stuff bends really easy,but it maintains an even arc as it bends,so seems ideal on the face of it for this job.I will give it a go on my current build when I get to that stage. Kind Regards Nigel
- 487 replies
-
- ship of the line
- 80 guns
-
(and 1 more)
Tagged with:
-
Excellent work mate It goes without question that they go way beyond what I imagine are shown on the kit drawings. Kind Regards Nigel
-

Question about shaping/sanding with files
NMBROOK replied to Jwvanost's topic in Modeling tools and Workshop Equipment
The ultimate long lasting files are the Permagrit ones with carbide cutting faces,however they are not cheap. Kind Regards Nigel -
Excellent work Drazen!If you don't mind I shall copy you from now on with using plastic for false wales.It makes a lot of sense in that wood glue will not stick to it when planking.Is there a reason for using epoxy instead of wood glue laminating the timbers together for the beakhead? Kind Regards Nigel
- 487 replies
-
- ship of the line
- 80 guns
-
(and 1 more)
Tagged with:
-
Thank you very much indeed Patrick Aside from the fact I simply couldn't be bothered to source a 'chunk' of Pear for that bit at the bow there is actually a small triangle that will be visible which I wanted to appear as individual frames .I most certainly will need to make a template or two to ensure both sides match . Kind Regards Nigel
About us
Modelshipworld - Advancing Ship Modeling through Research
SSL Secured
Your security is important for us so this Website is SSL-Secured
NRG Mailing Address
Nautical Research Guild
237 South Lincoln Street
Westmont IL, 60559-1917
Model Ship World ® and the MSW logo are Registered Trademarks, and belong to the Nautical Research Guild (United States Patent and Trademark Office: No. 6,929,264 & No. 6,929,274, registered Dec. 20, 2022)
Helpful Links
About the NRG
If you enjoy building ship models that are historically accurate as well as beautiful, then The Nautical Research Guild (NRG) is just right for you.
The Guild is a non-profit educational organization whose mission is to “Advance Ship Modeling Through Research”. We provide support to our members in their efforts to raise the quality of their model ships.
The Nautical Research Guild has published our world-renowned quarterly magazine, The Nautical Research Journal, since 1955. The pages of the Journal are full of articles by accomplished ship modelers who show you how they create those exquisite details on their models, and by maritime historians who show you the correct details to build. The Journal is available in both print and digital editions. Go to the NRG web site (www.thenrg.org) to download a complimentary digital copy of the Journal. The NRG also publishes plan sets, books and compilations of back issues of the Journal and the former Ships in Scale and Model Ship Builder magazines.


