


KeithAug
-
Posts
3,980 -
Joined
-
Last visited
Content Type
Profiles
Forums
Gallery
Events
Posts posted by KeithAug
-
-
13 hours ago, Keith Black said:
I'm not all that pleased with the way the dummy stack stays turned out.
They look fine to me Keith.
- Keith Black, thibaultron and Canute
-
 2
2
-
 1
1
-
9 hours ago, Mark Pearse said:
The bobstay chainplate is more complex,
Beautiful set of flanges Mark.
-
-
Thank you for all there Christmas and New Year messages, much appreciated.
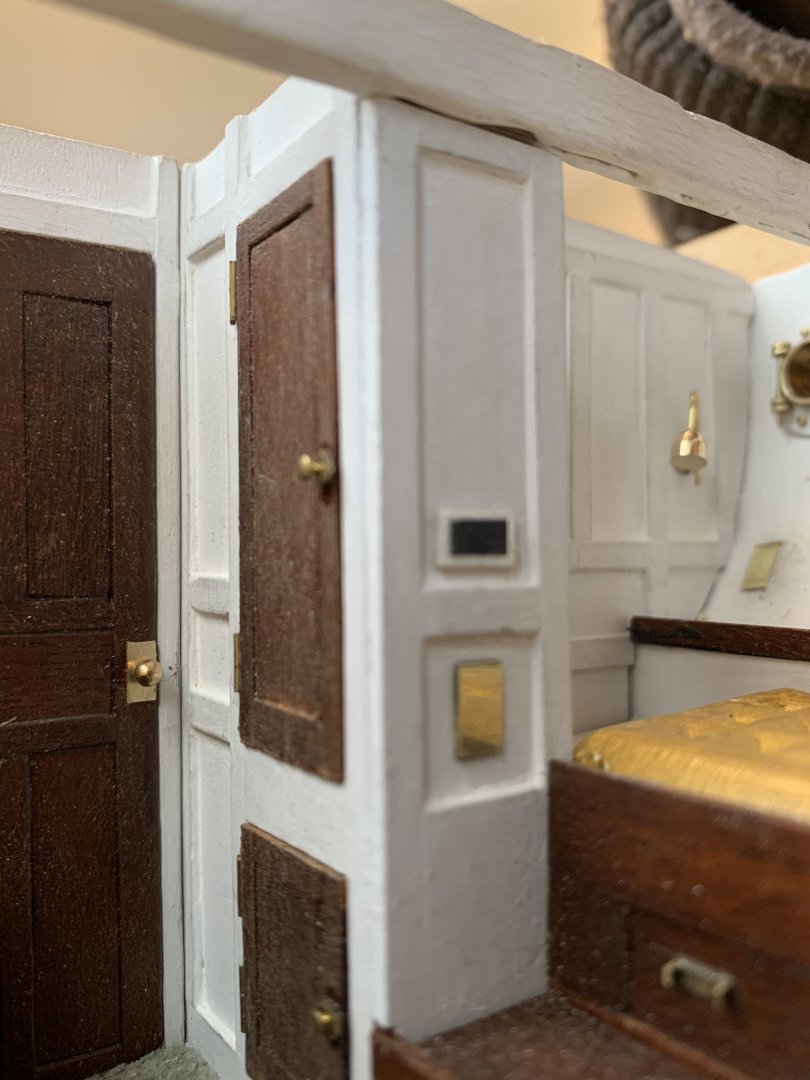
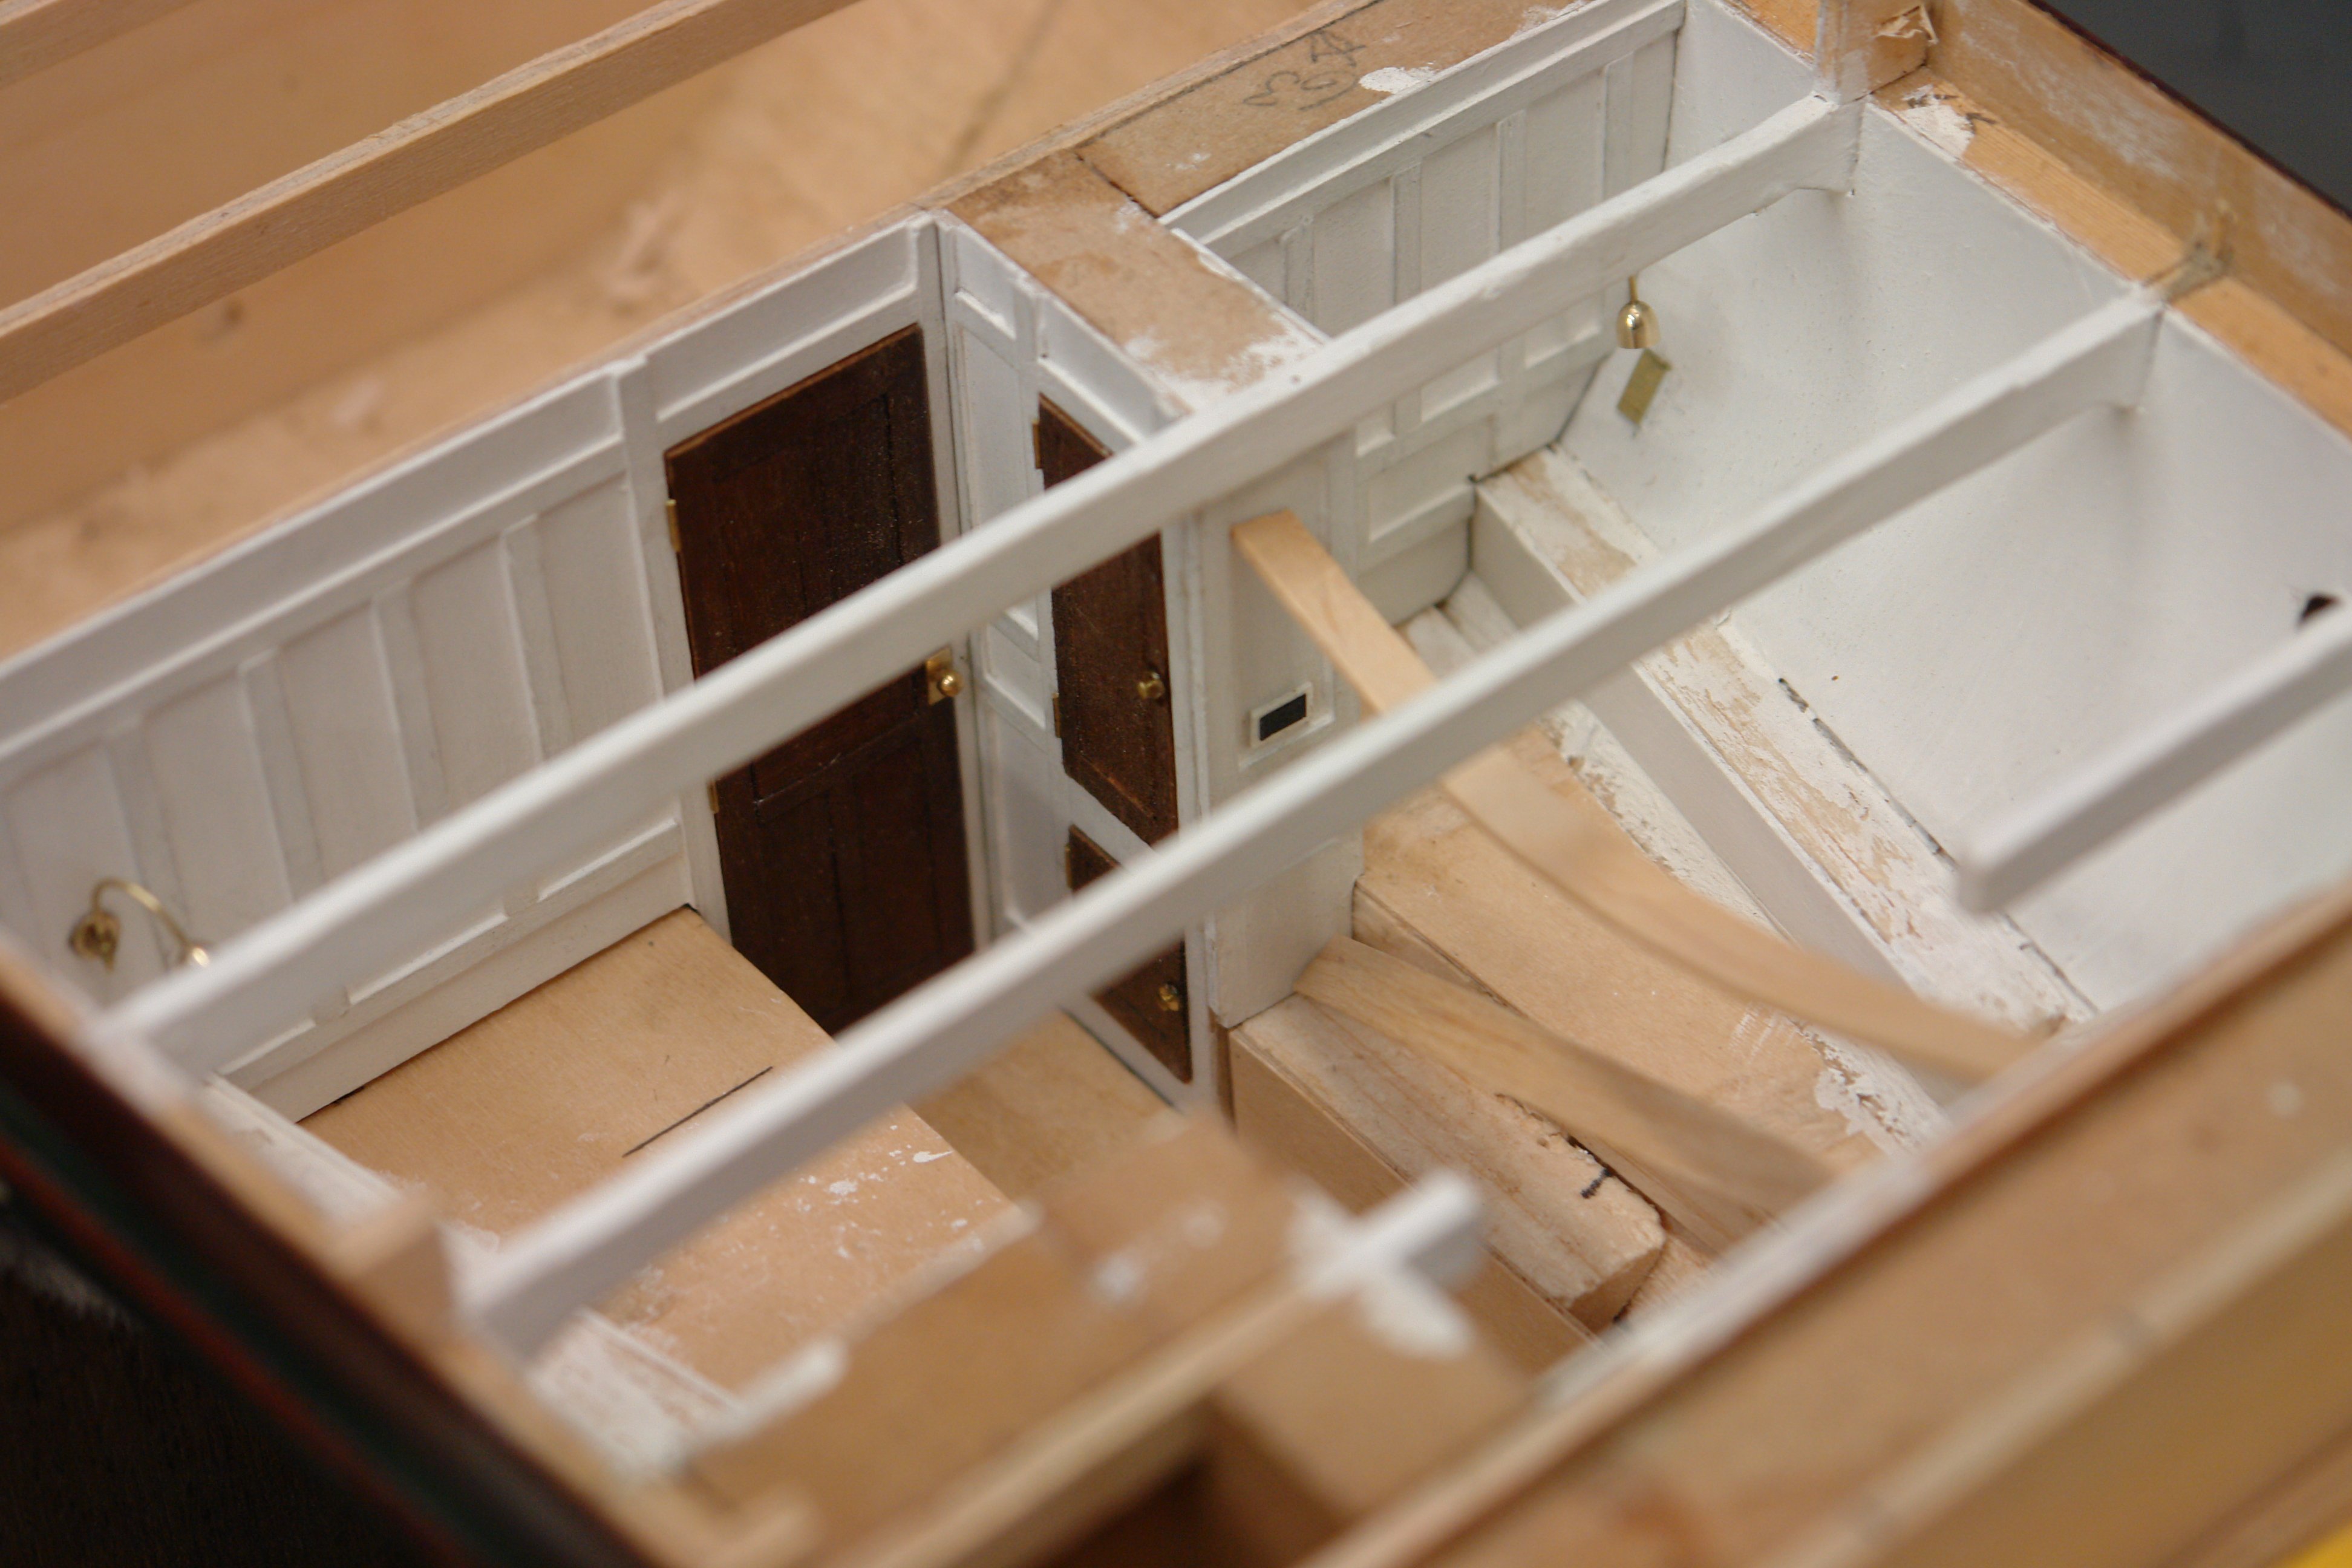
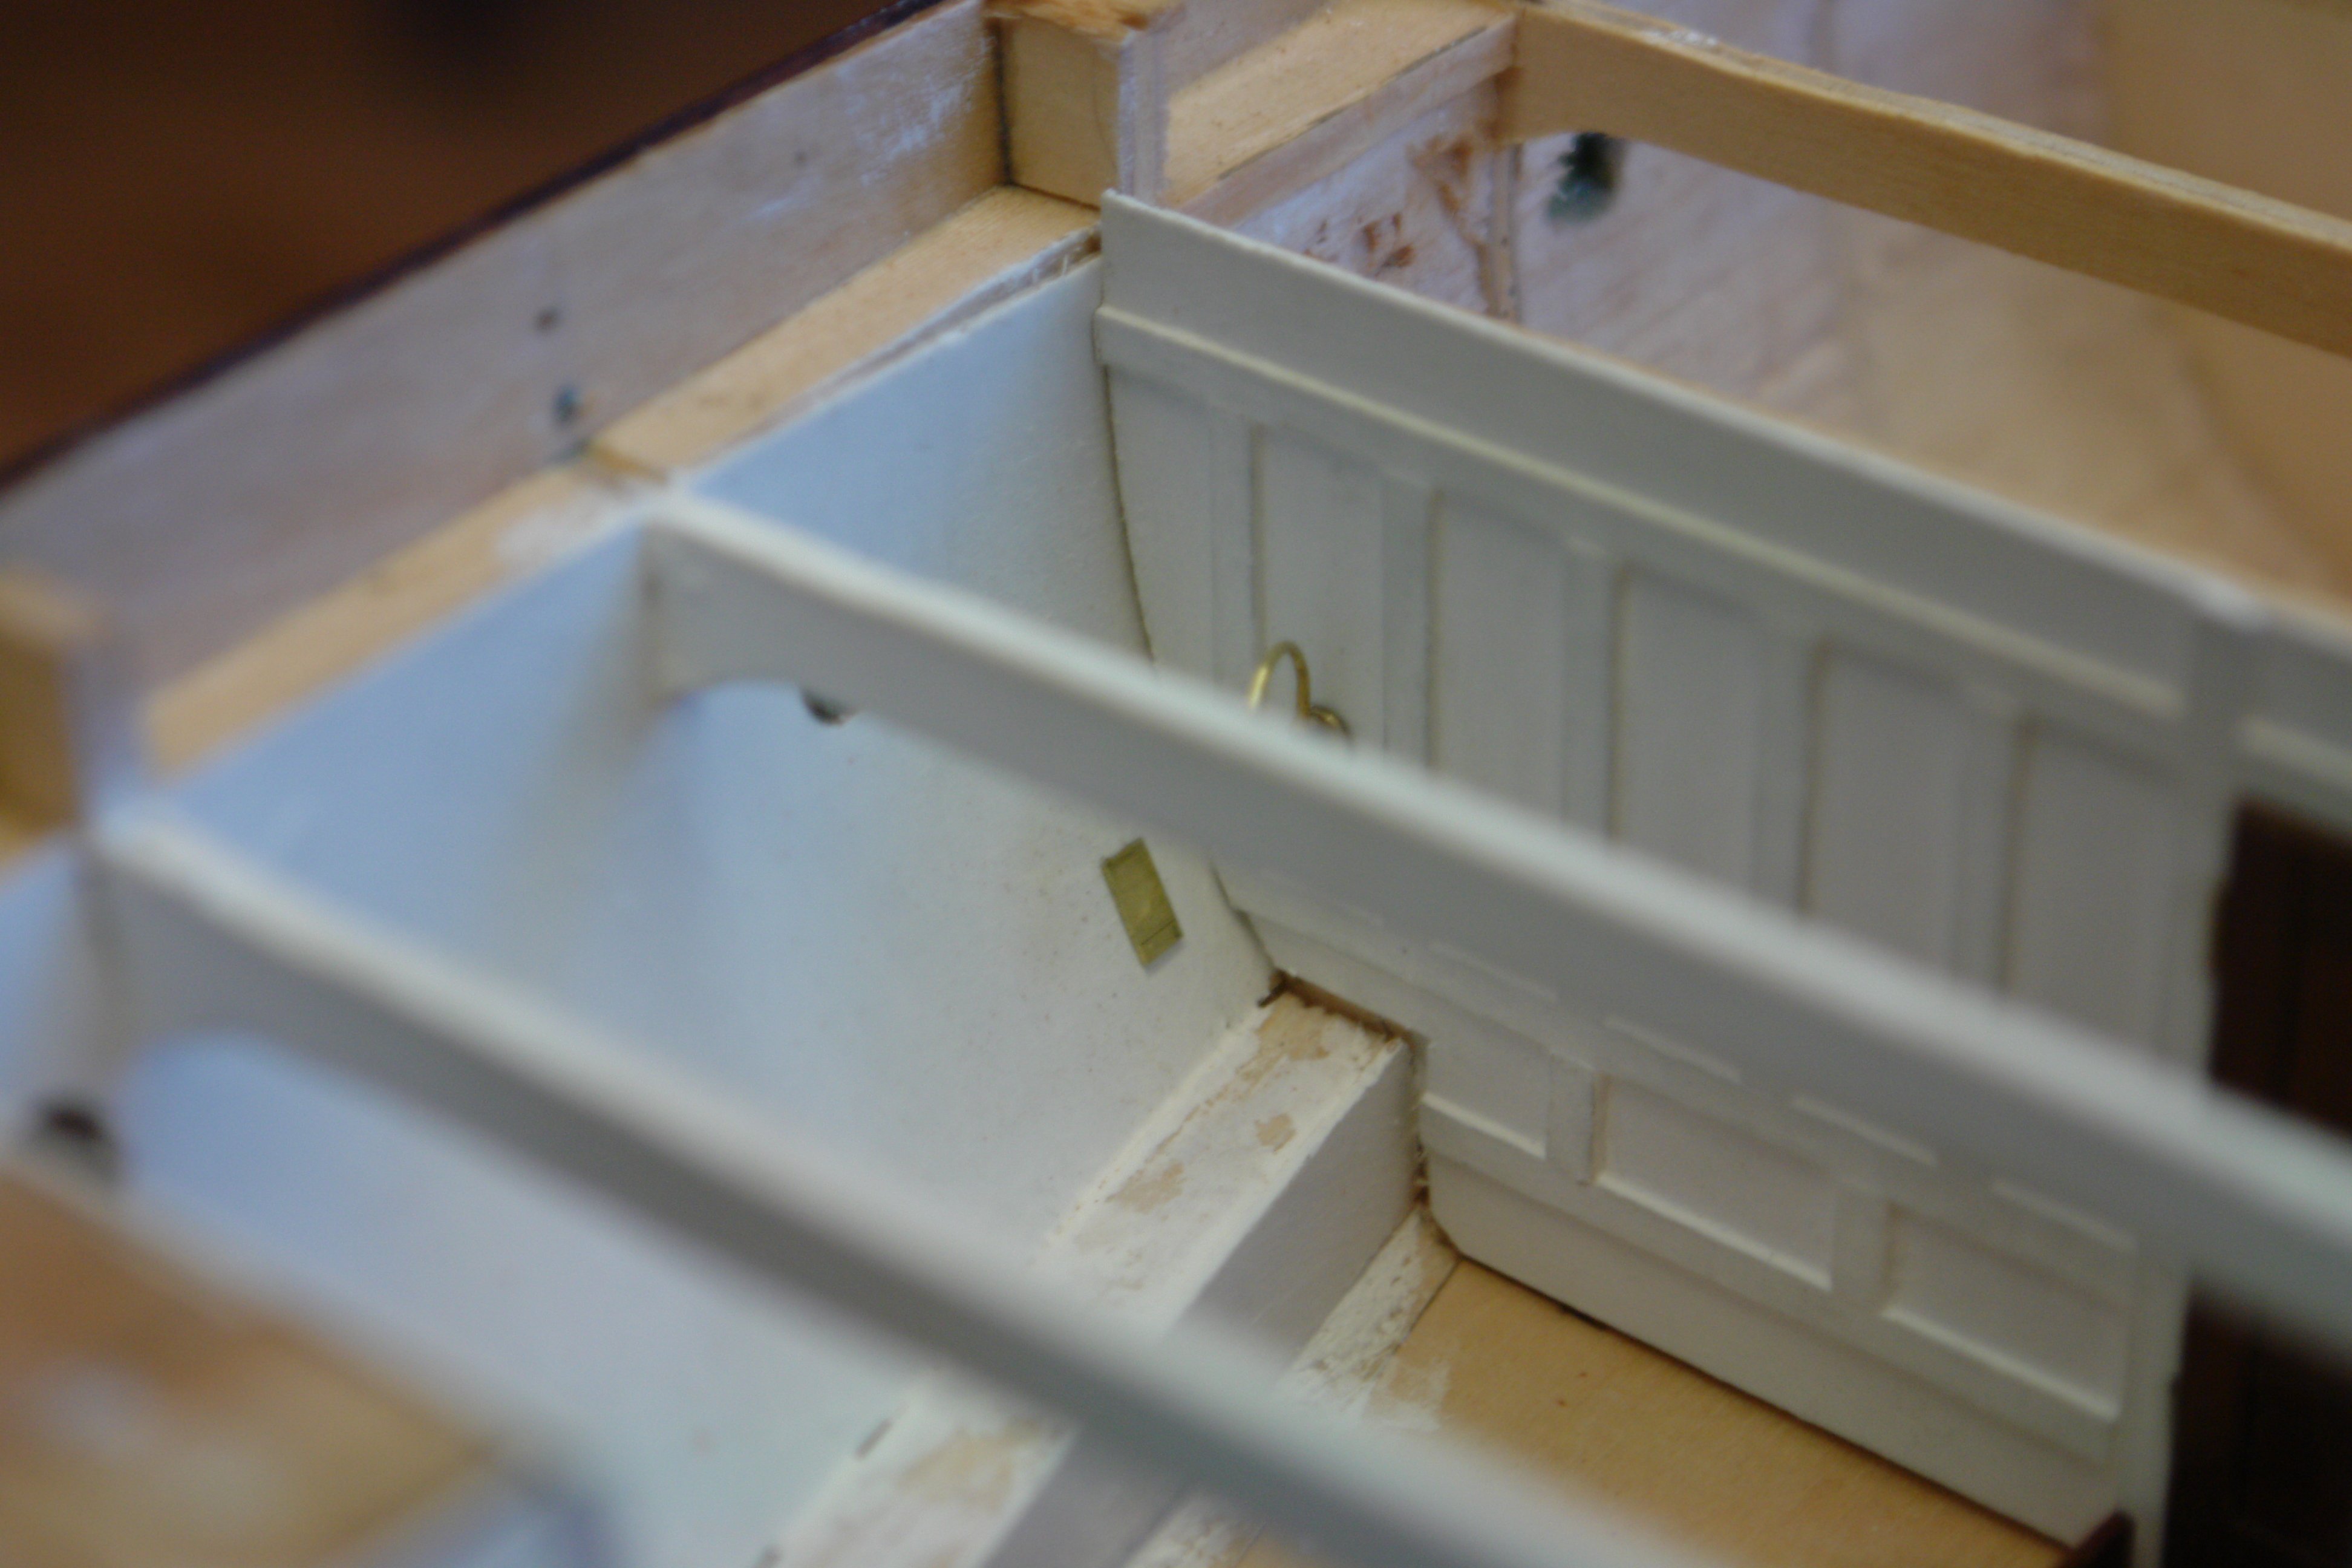
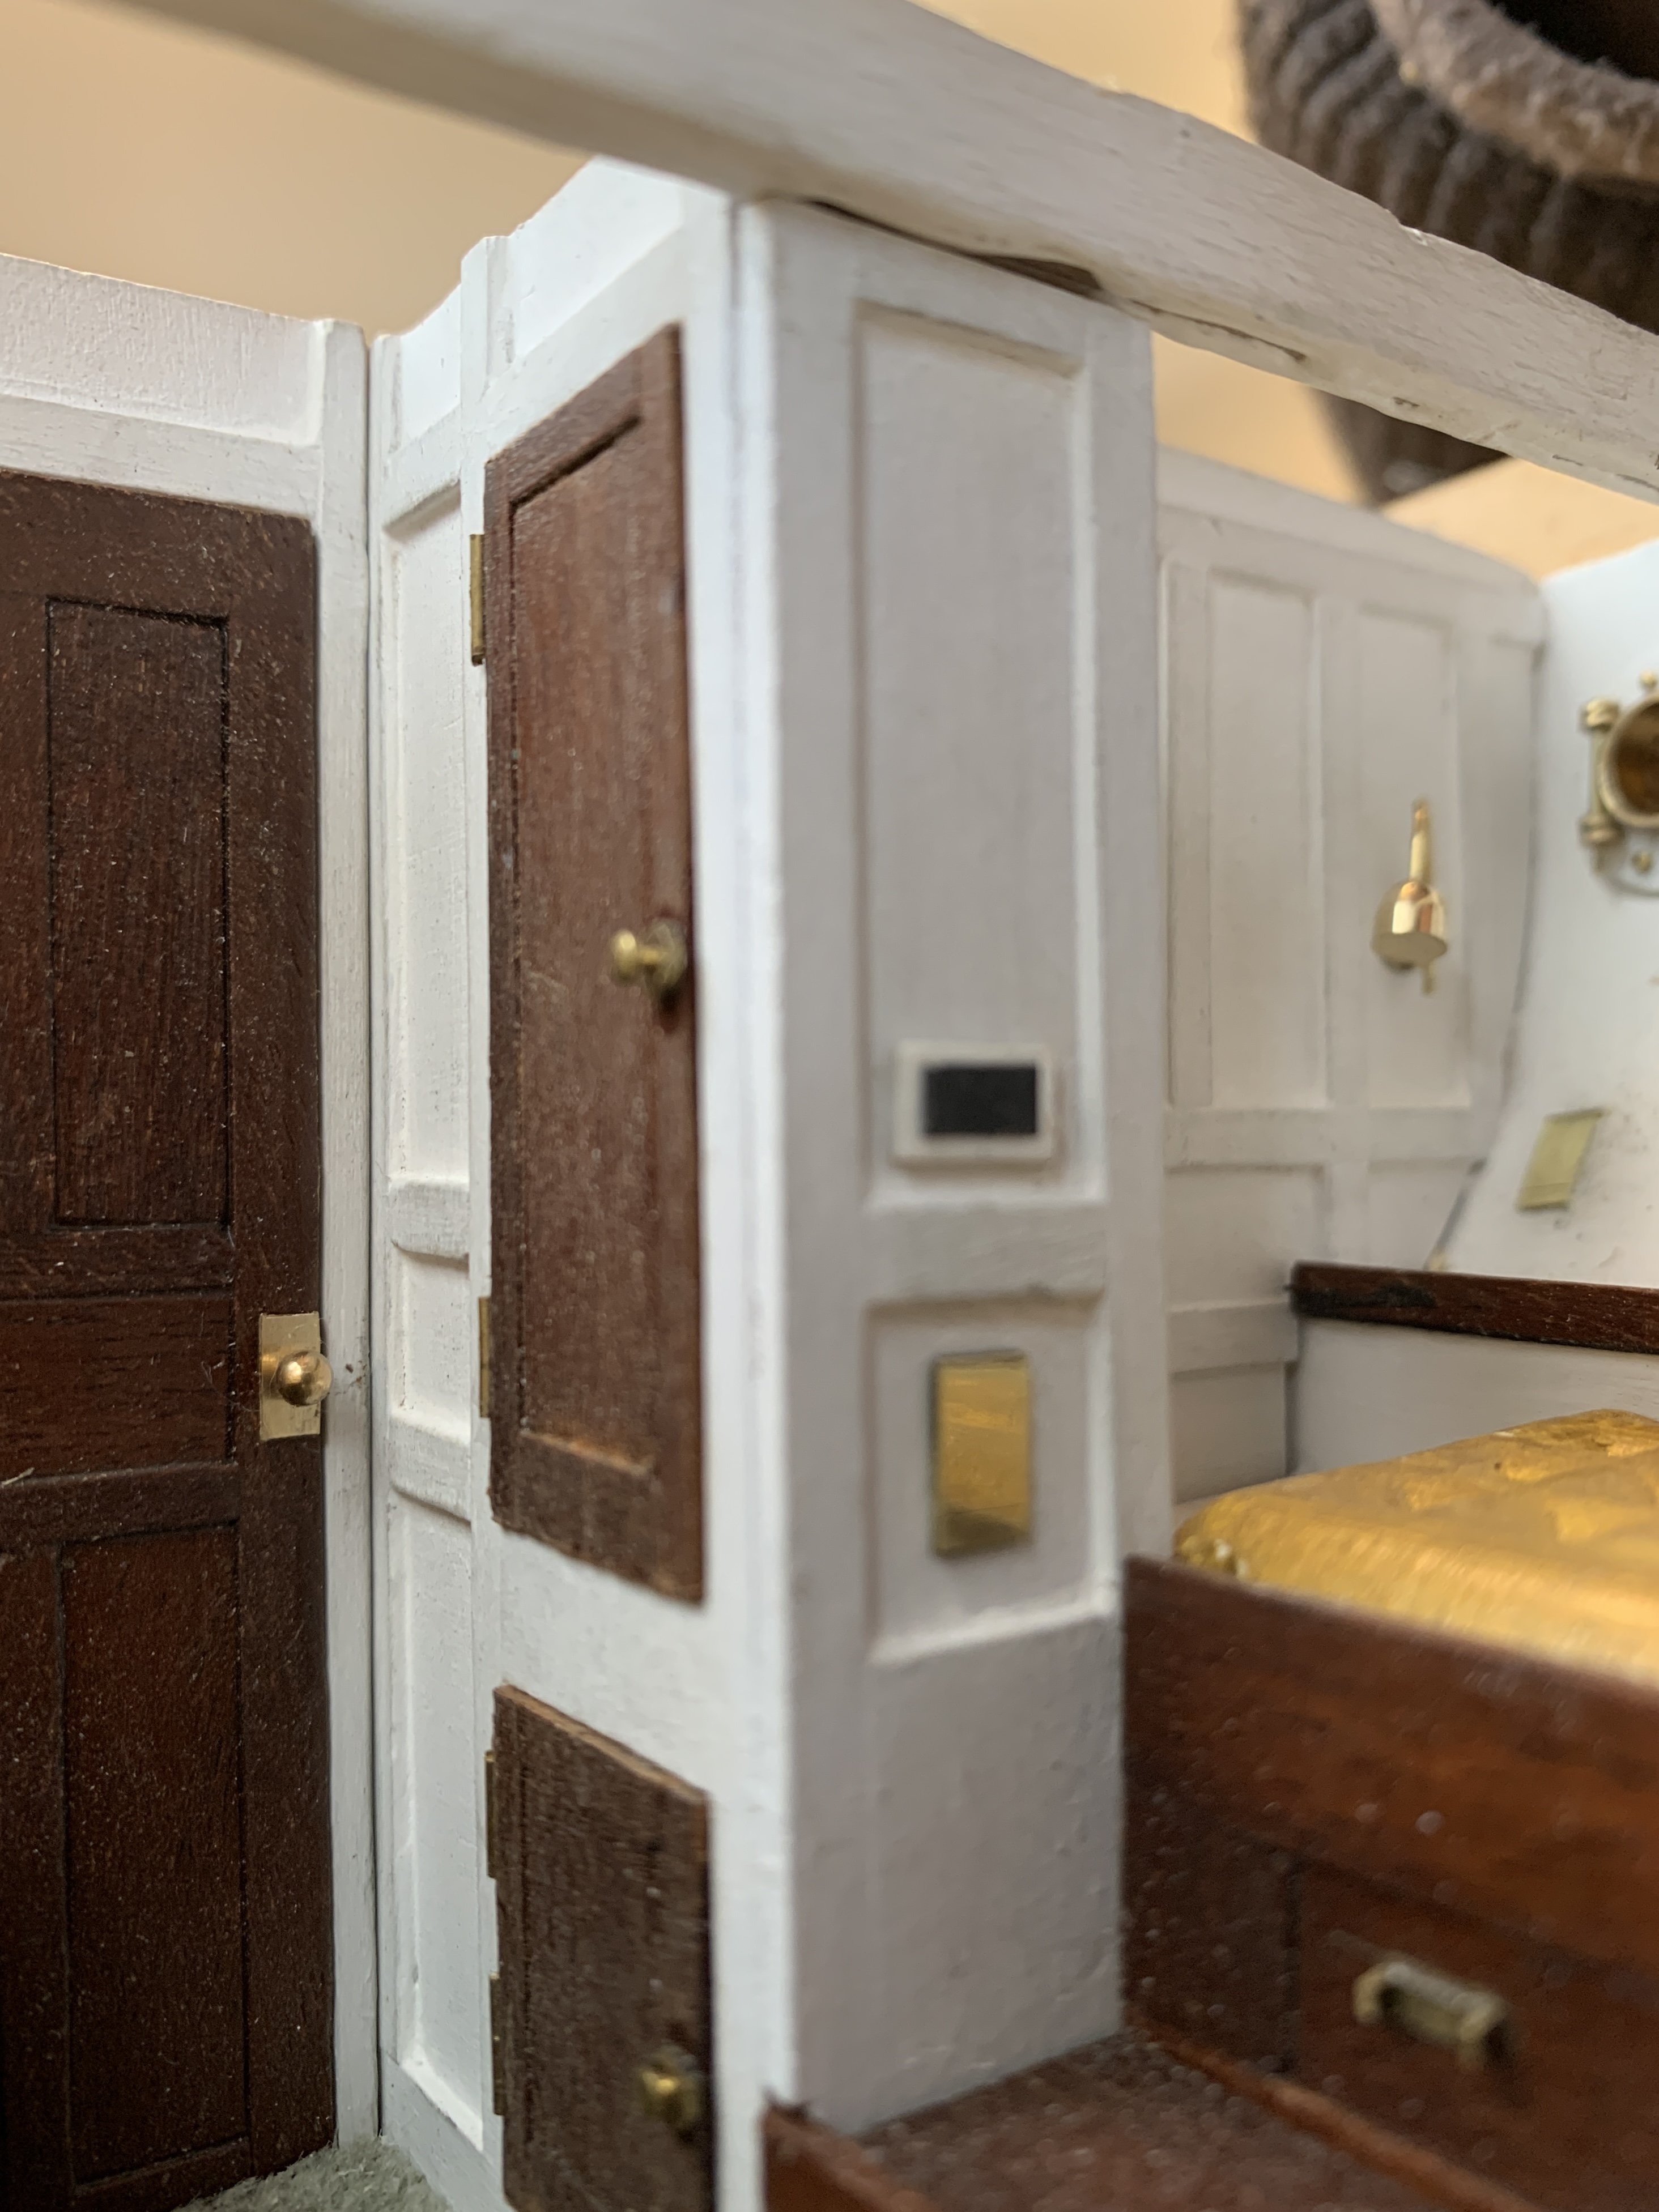
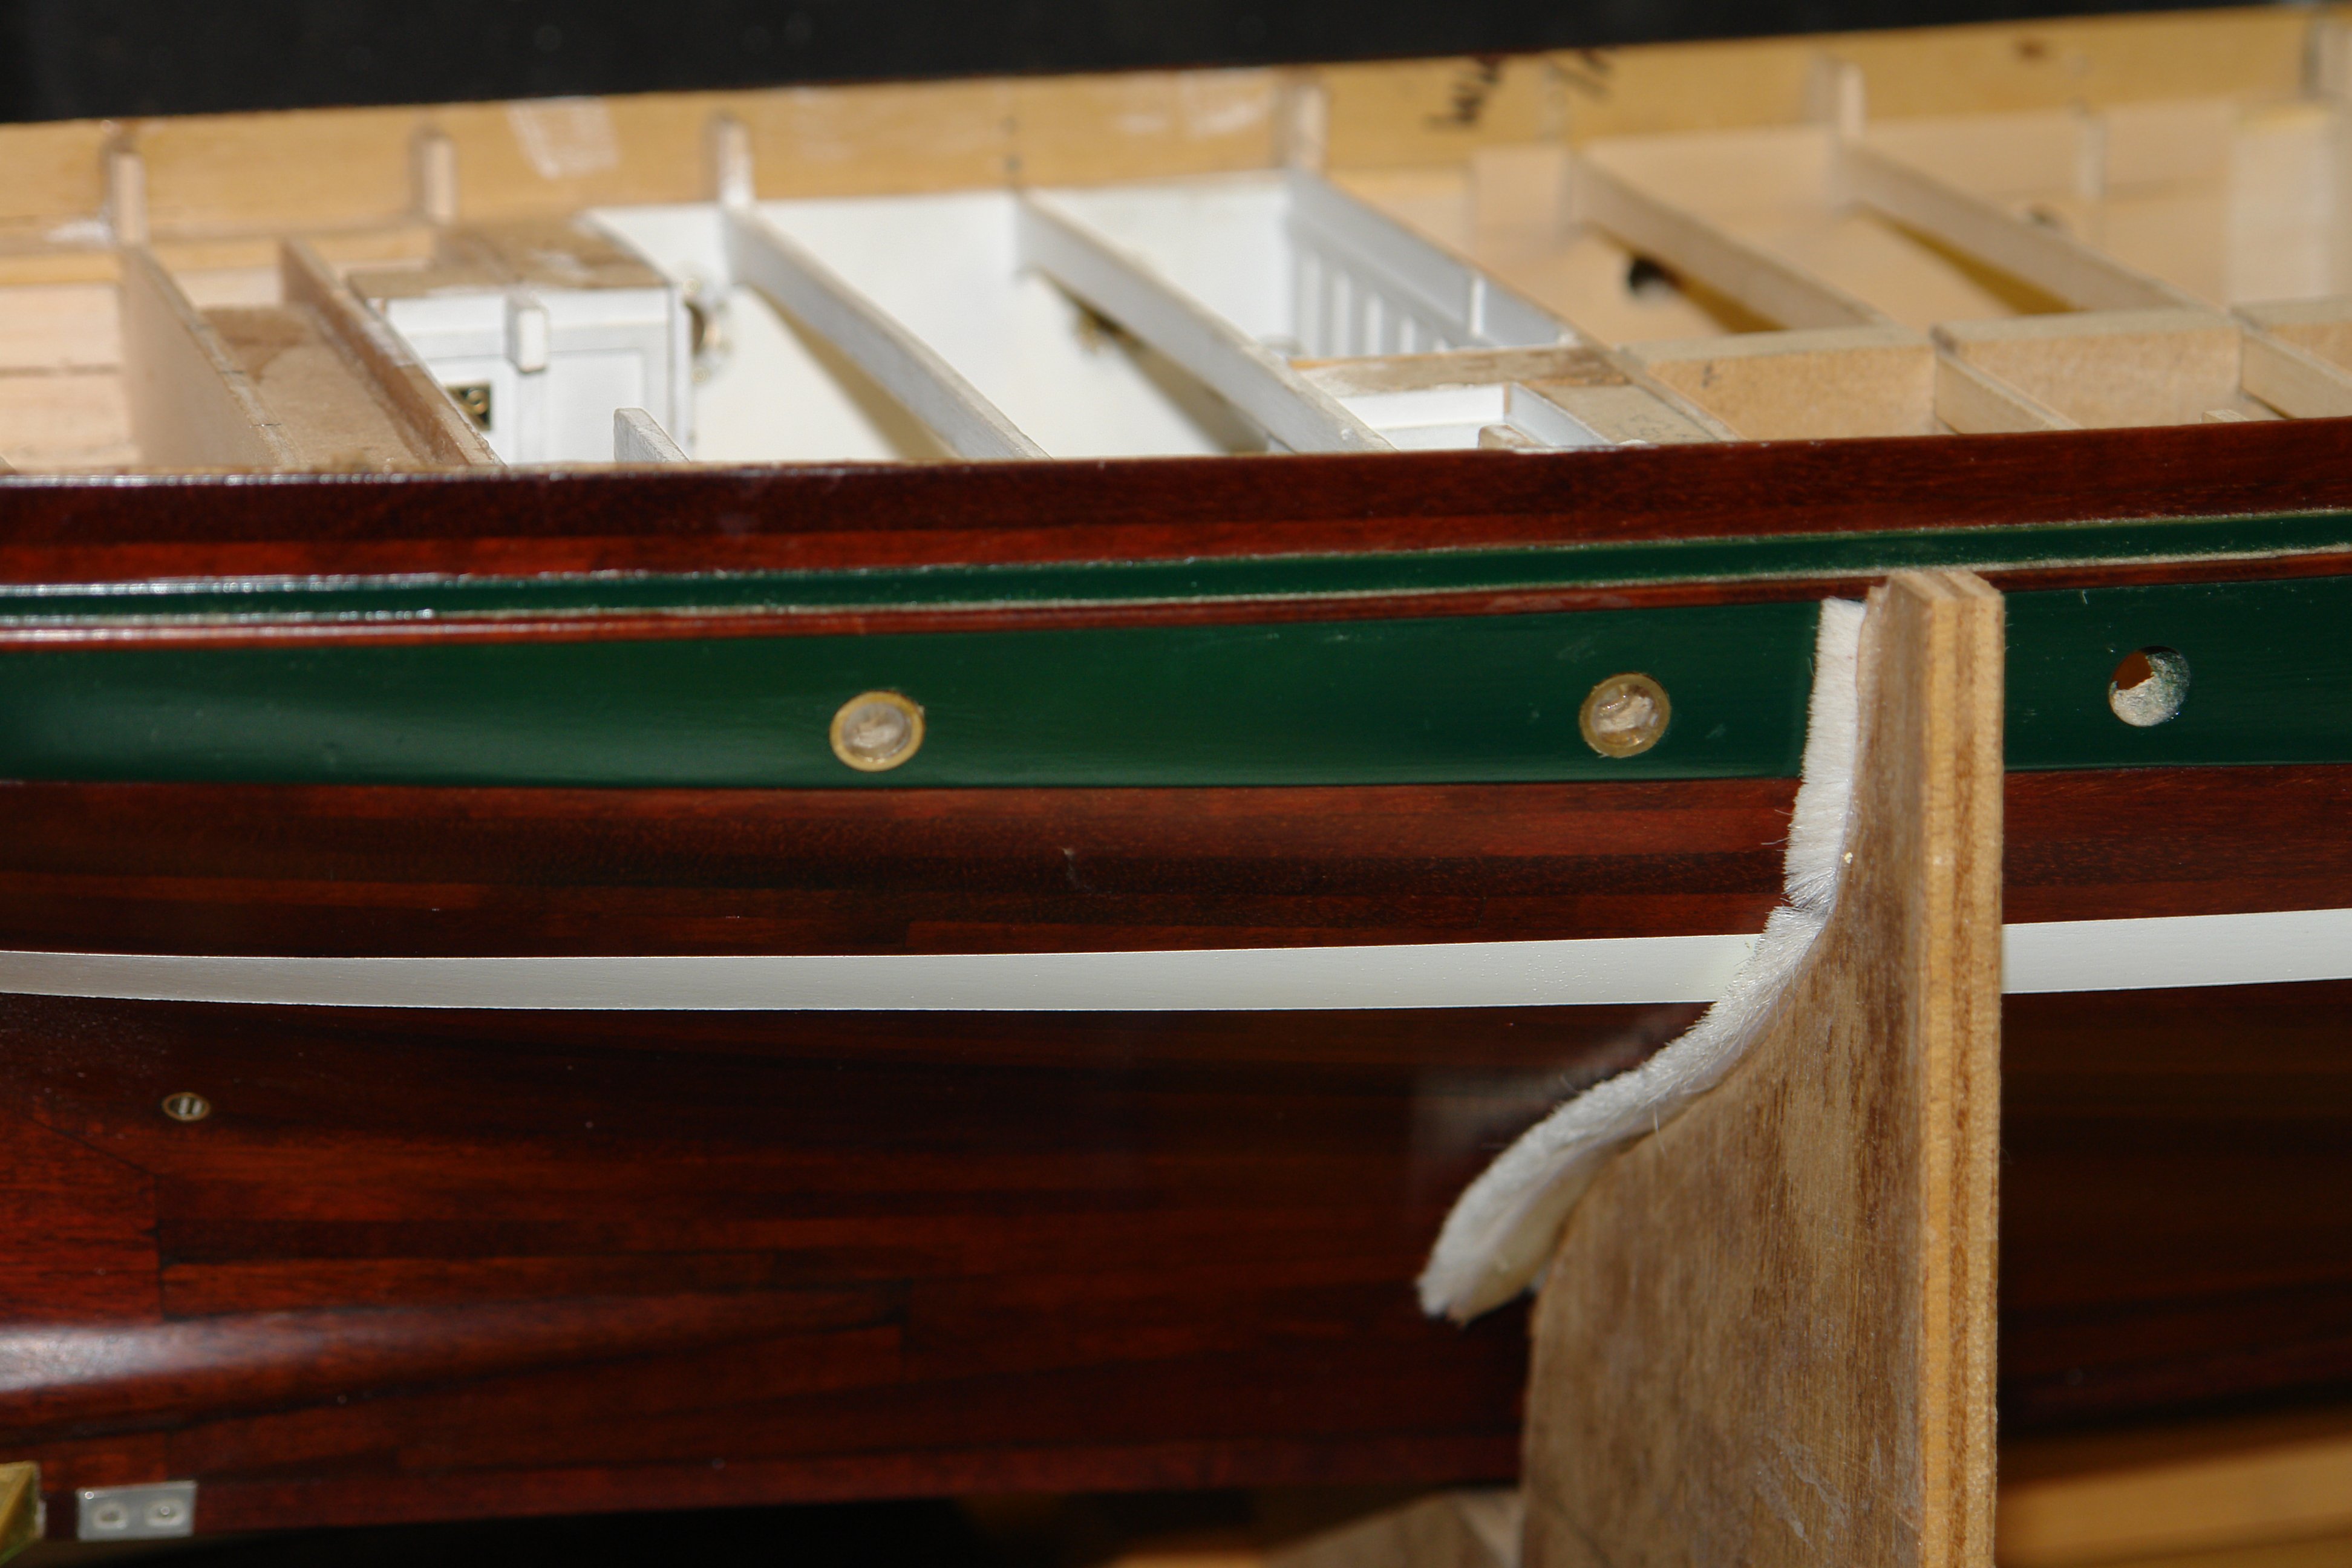
Well the grandchildren are gone and the weather has turned very wintery. The workshop is currently at 5 deg C - 41 deg F so my time working is somewhat limited. I have however been progressing the aft guest cabin.
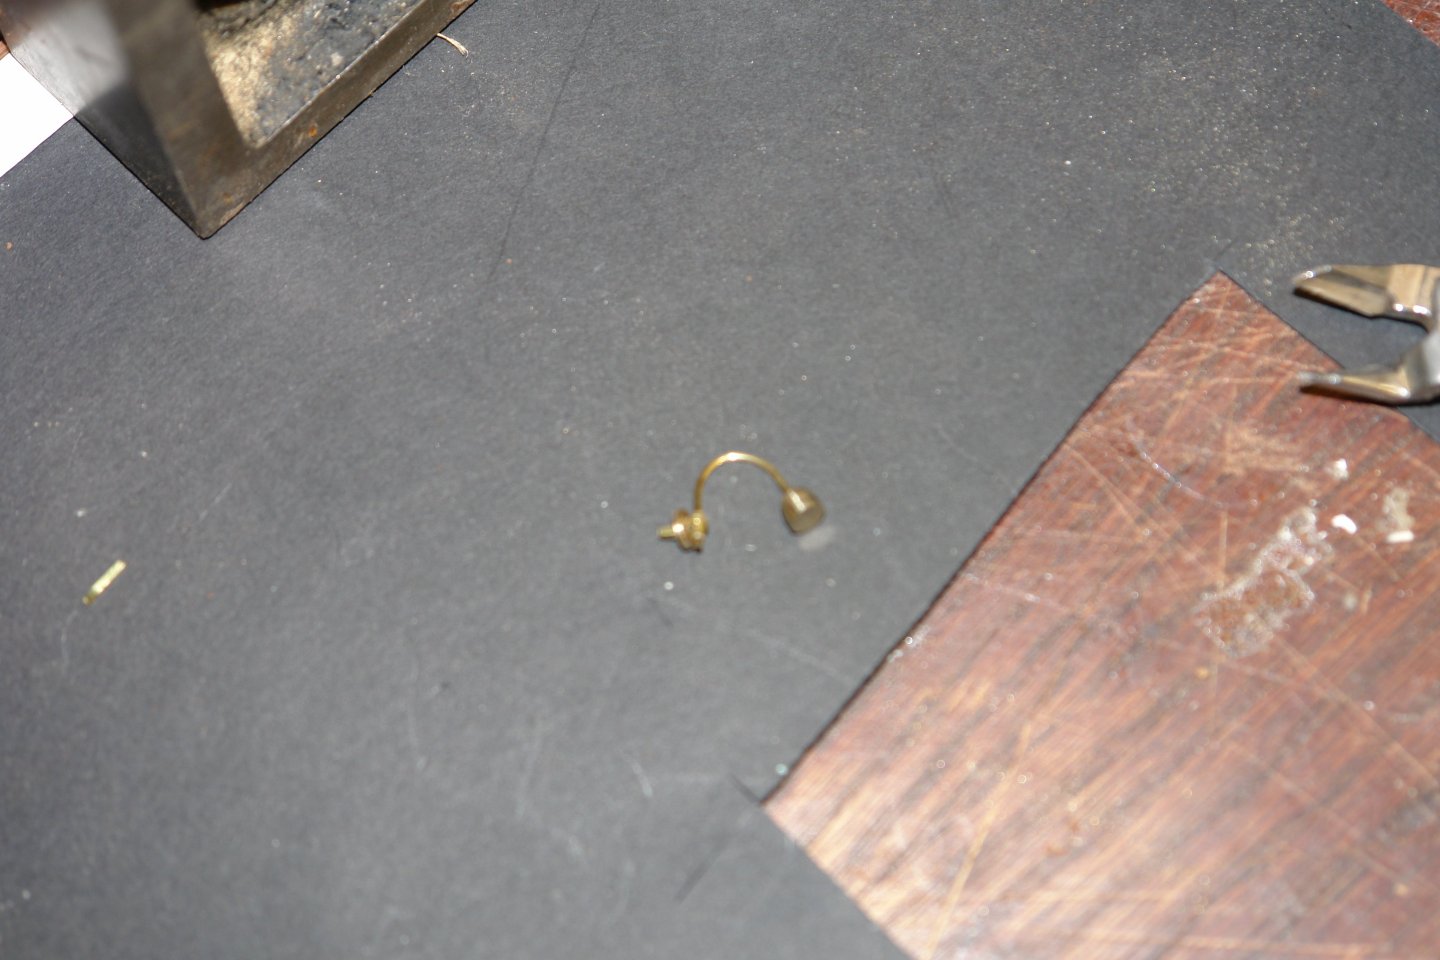
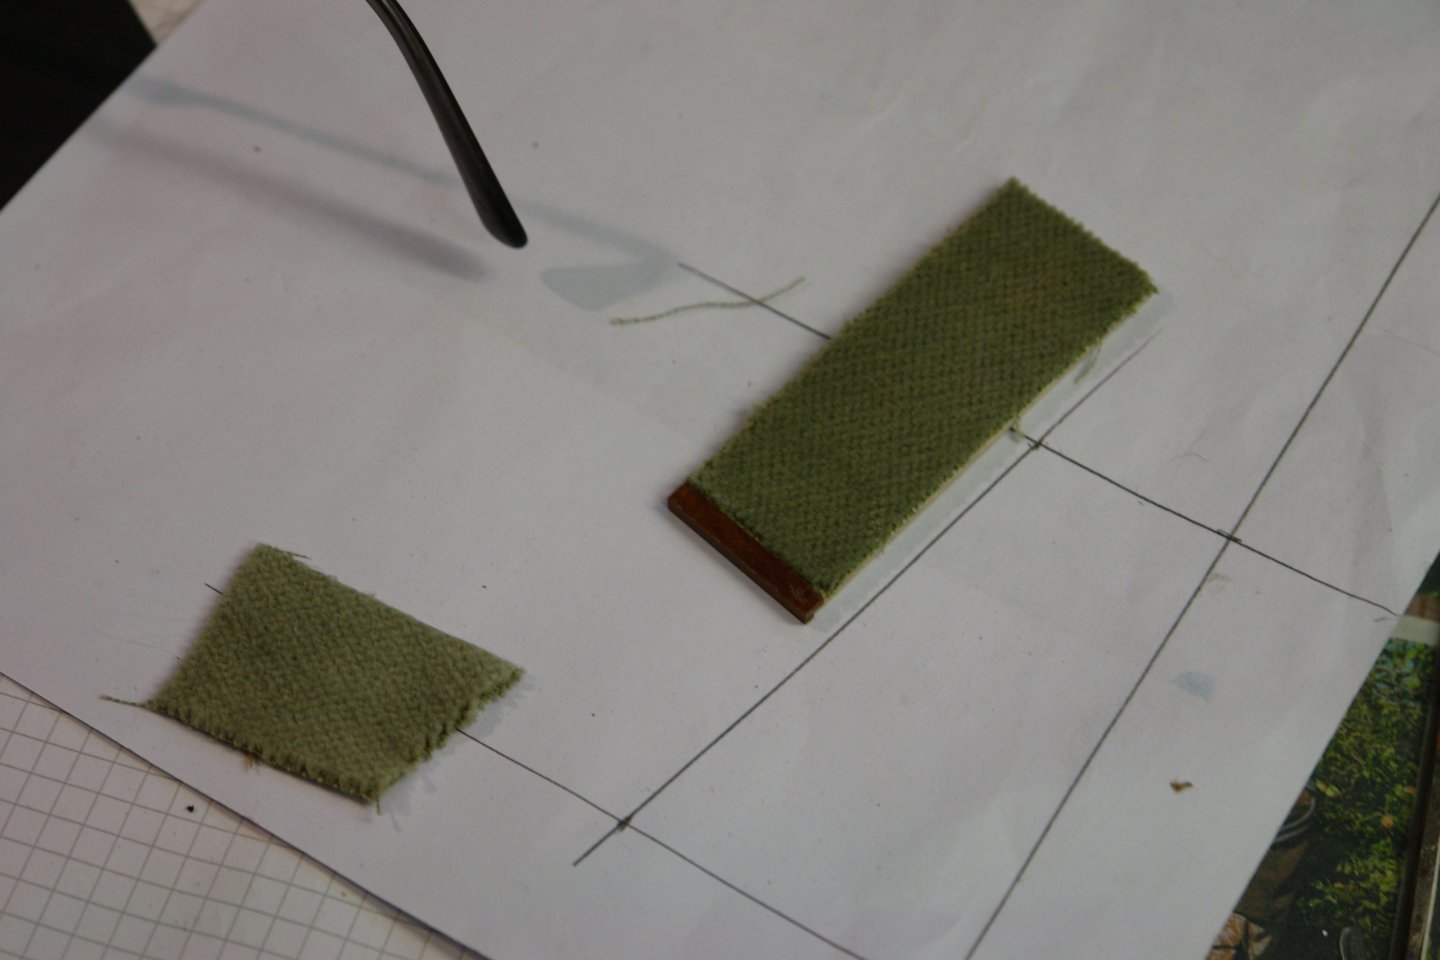
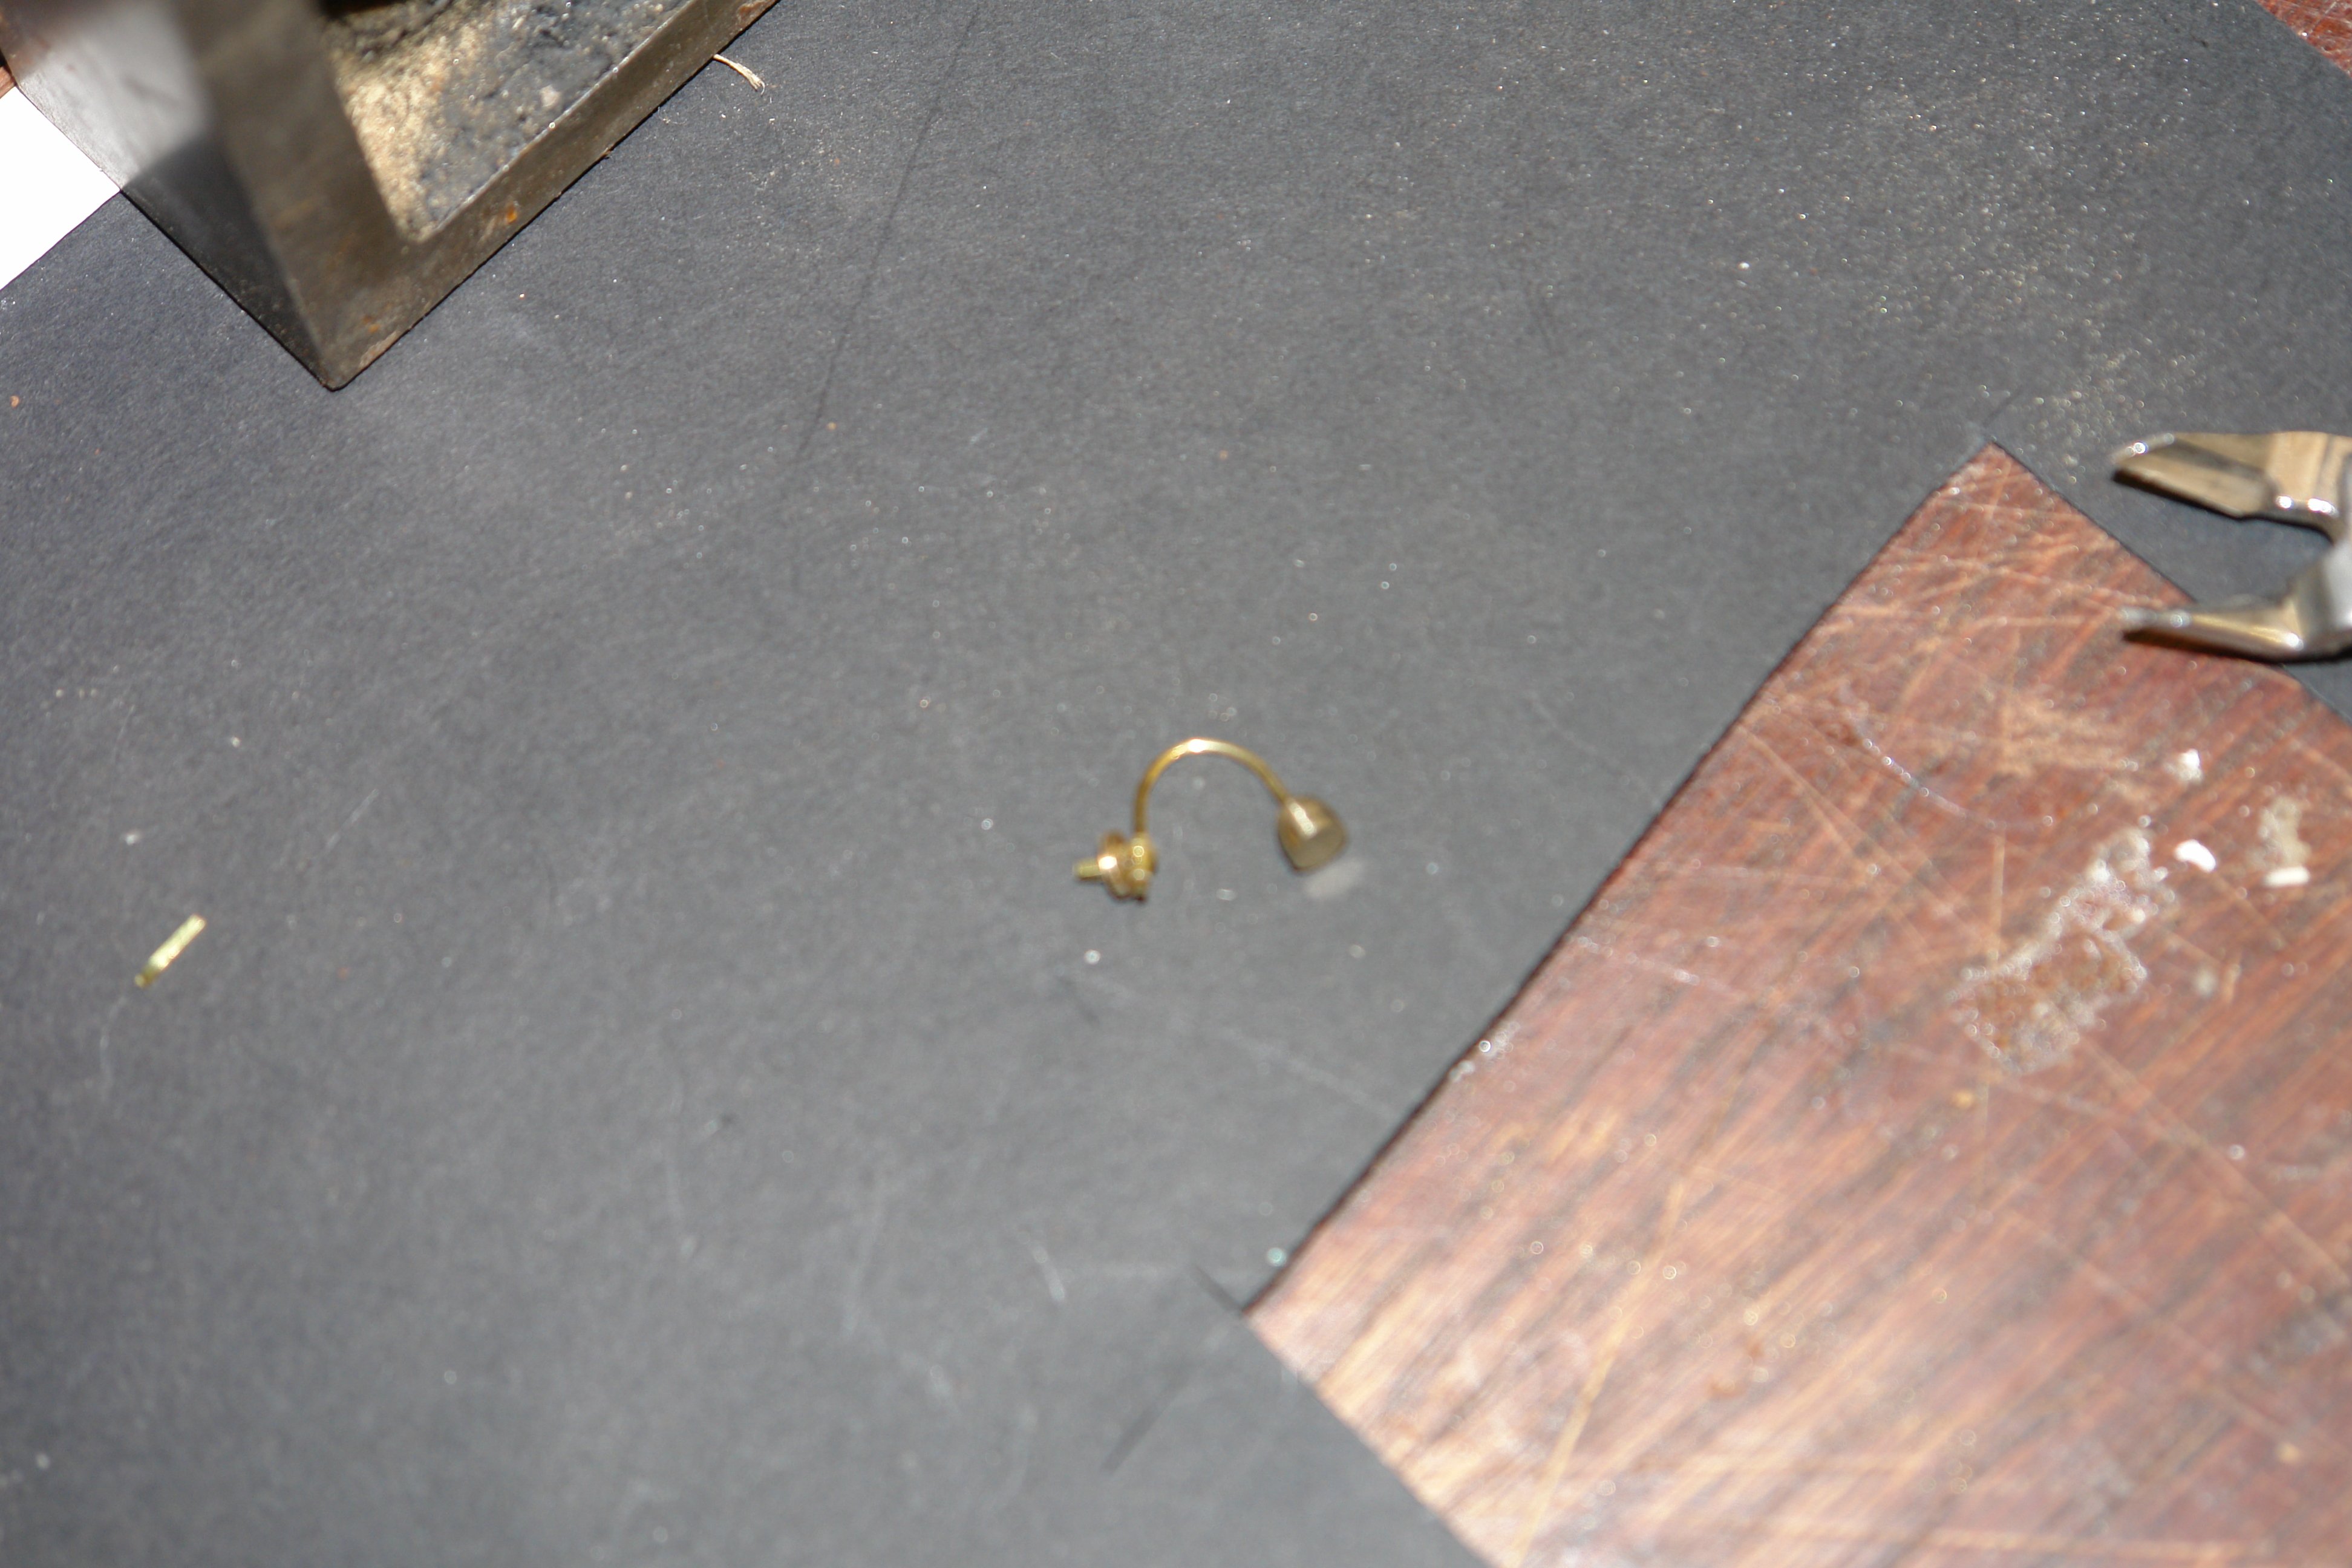
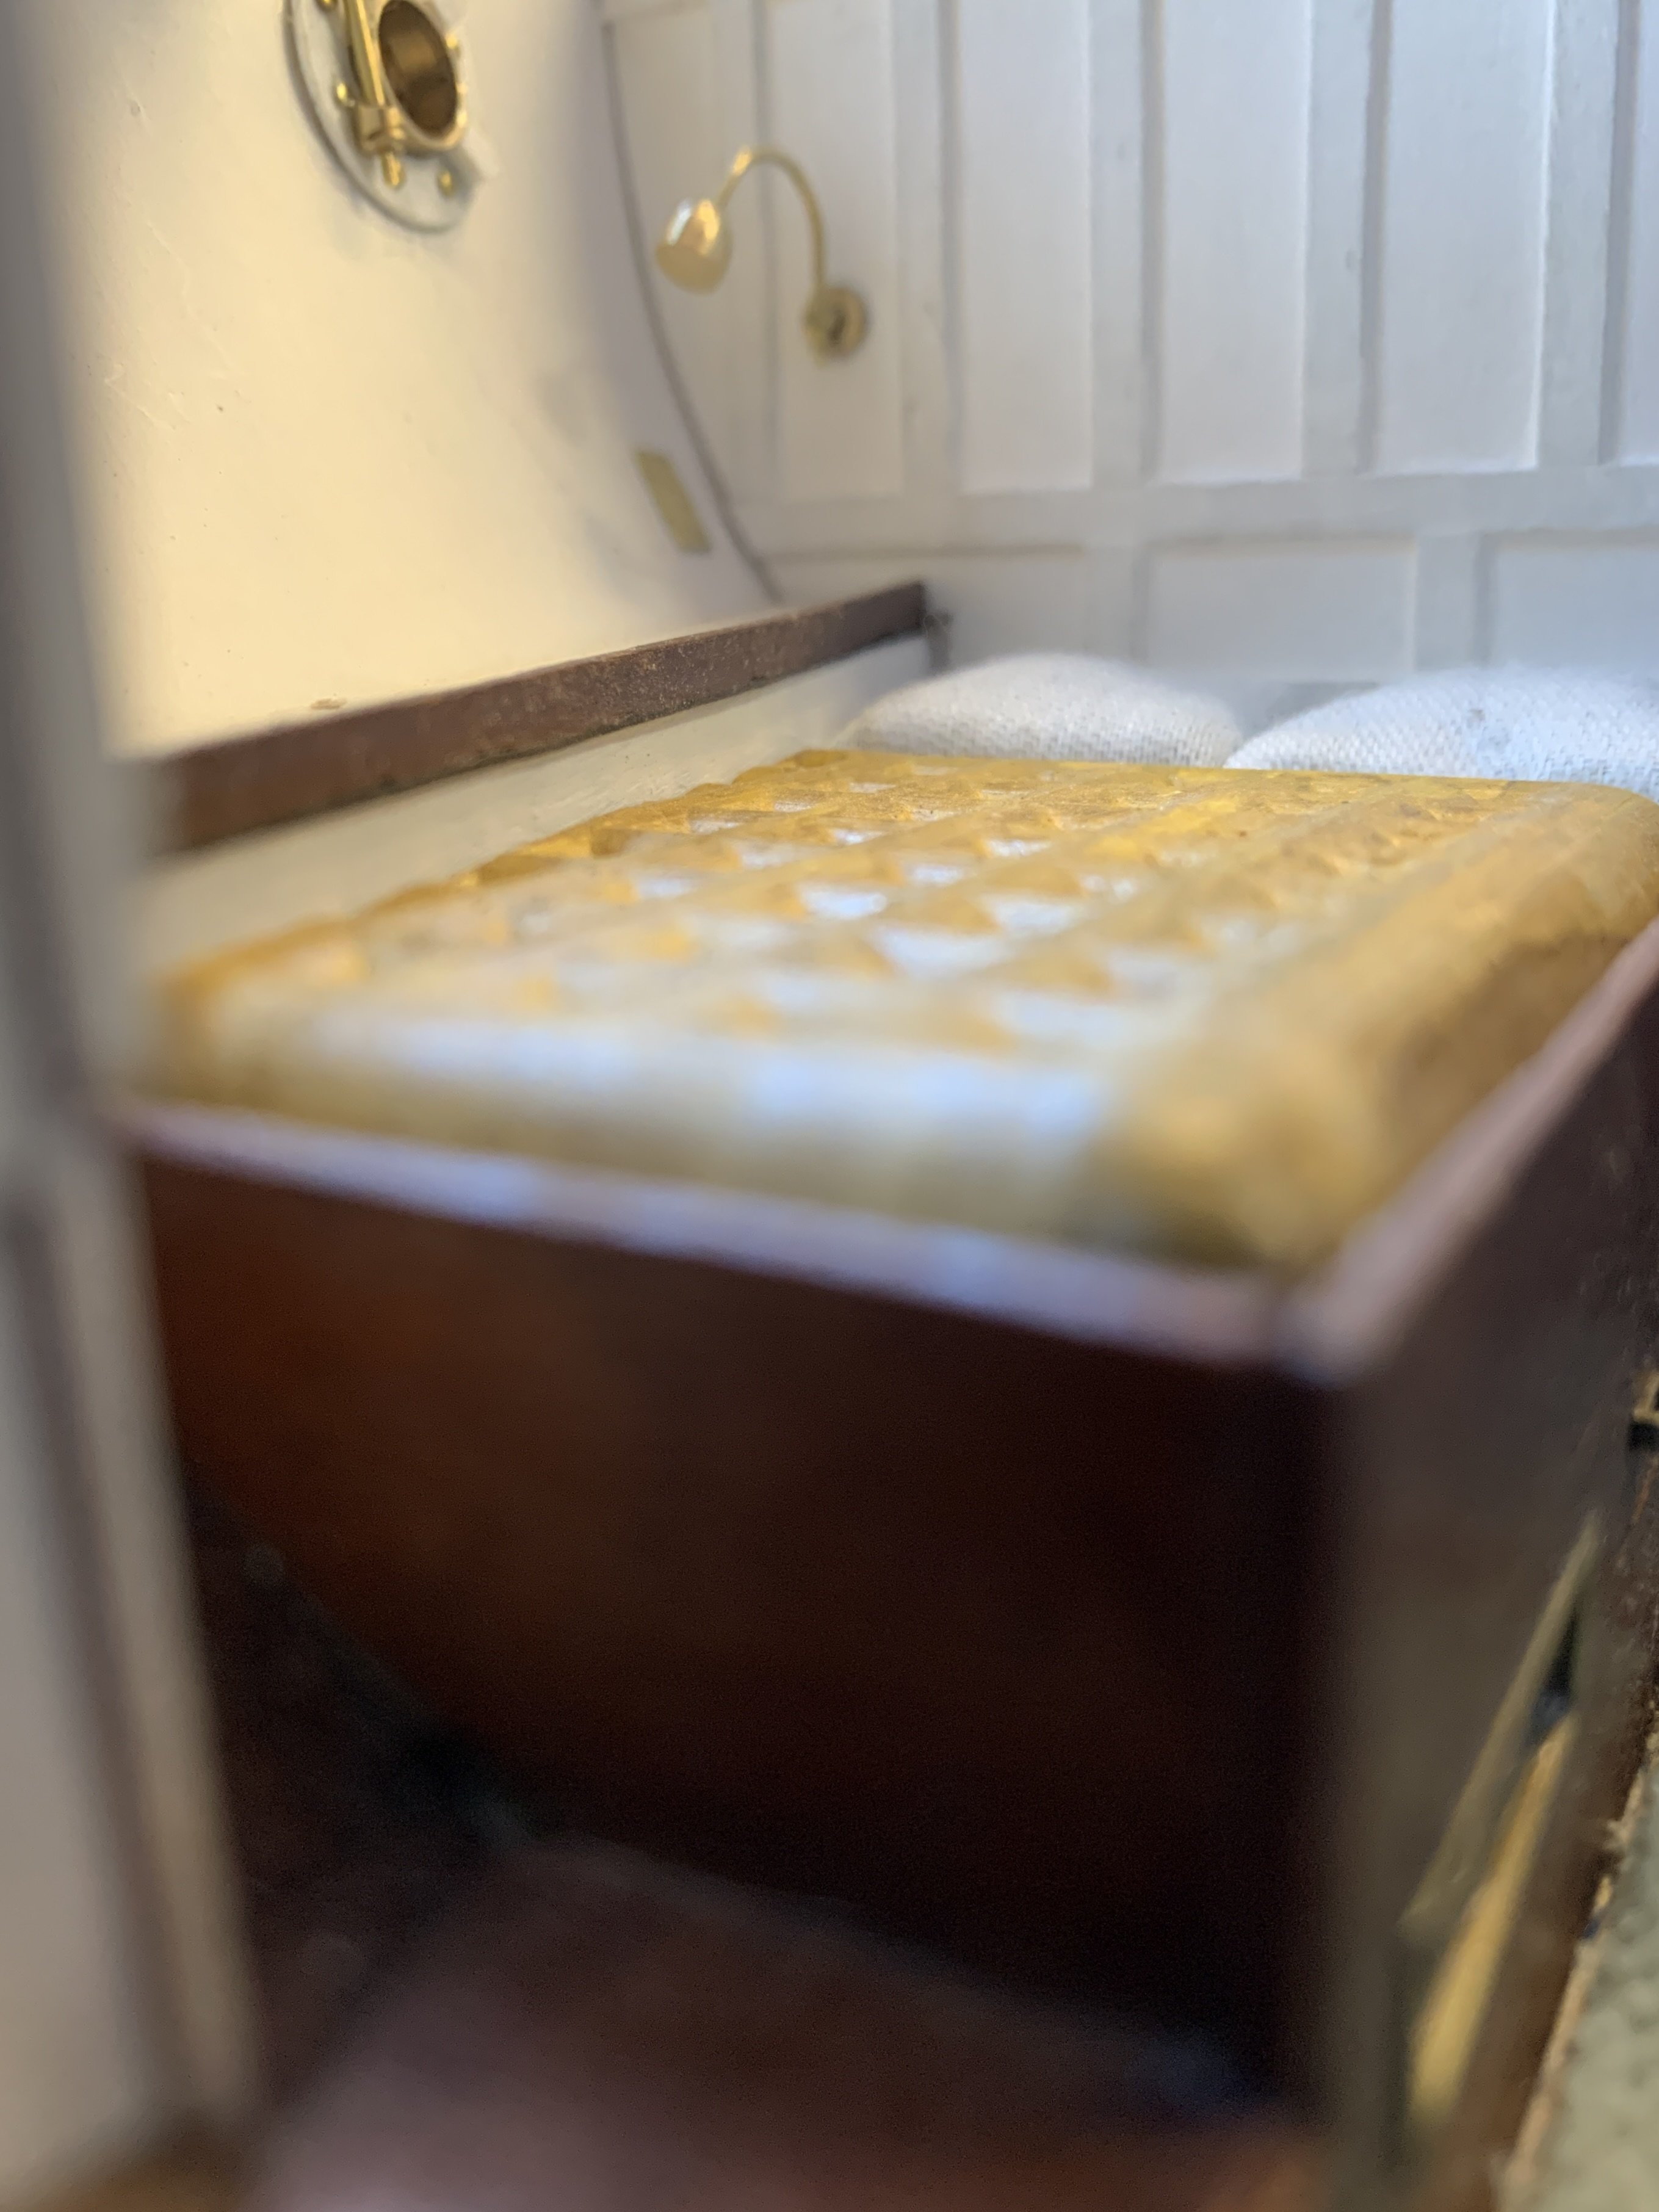
I needed a couple more bedside lights.
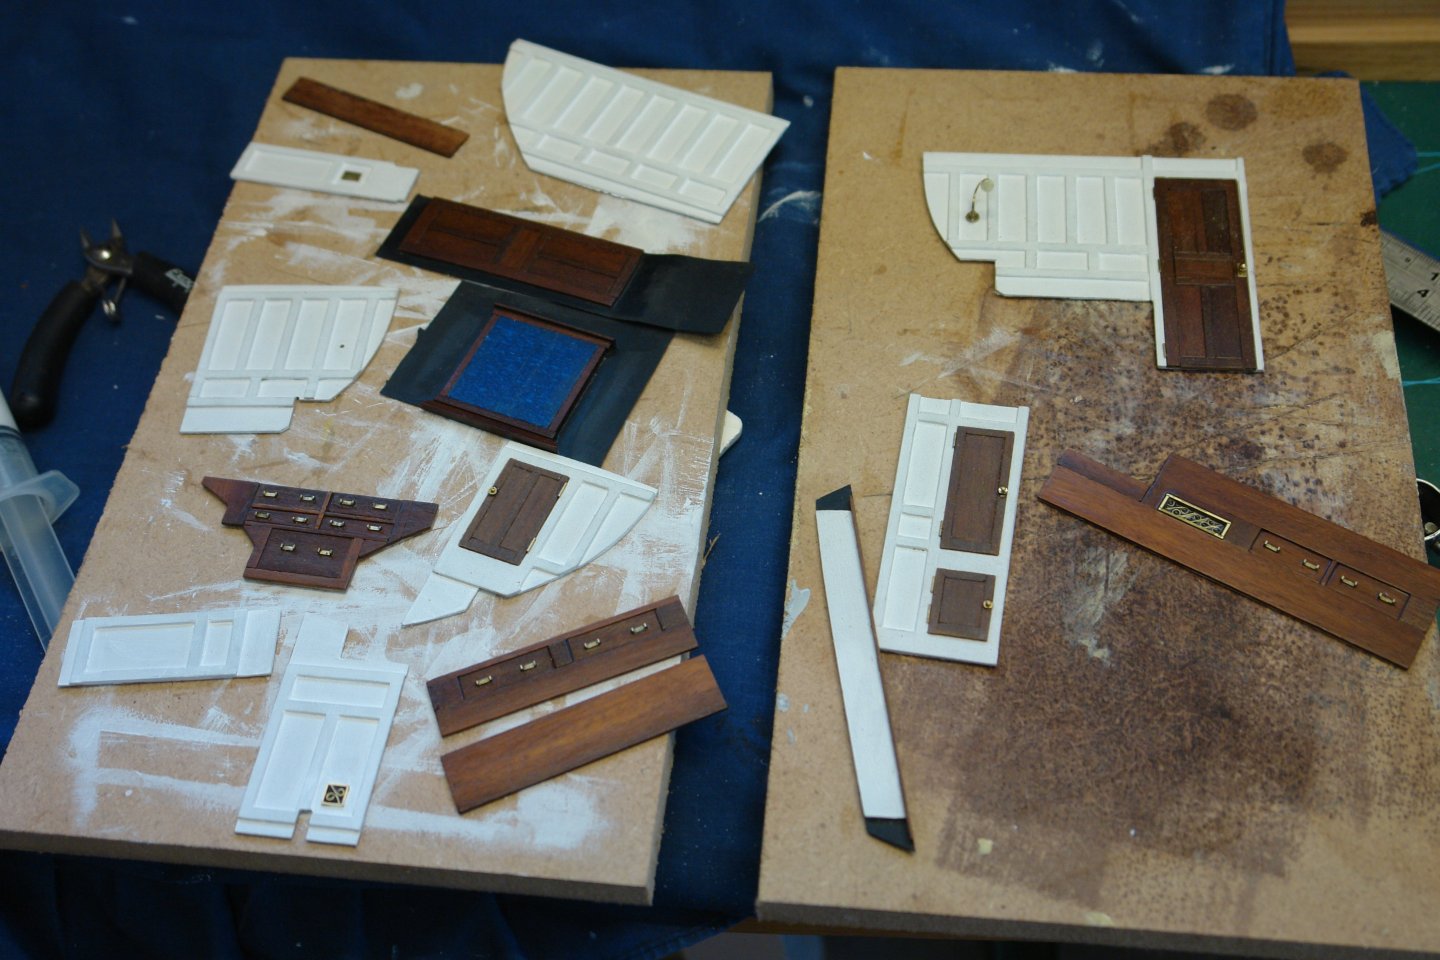
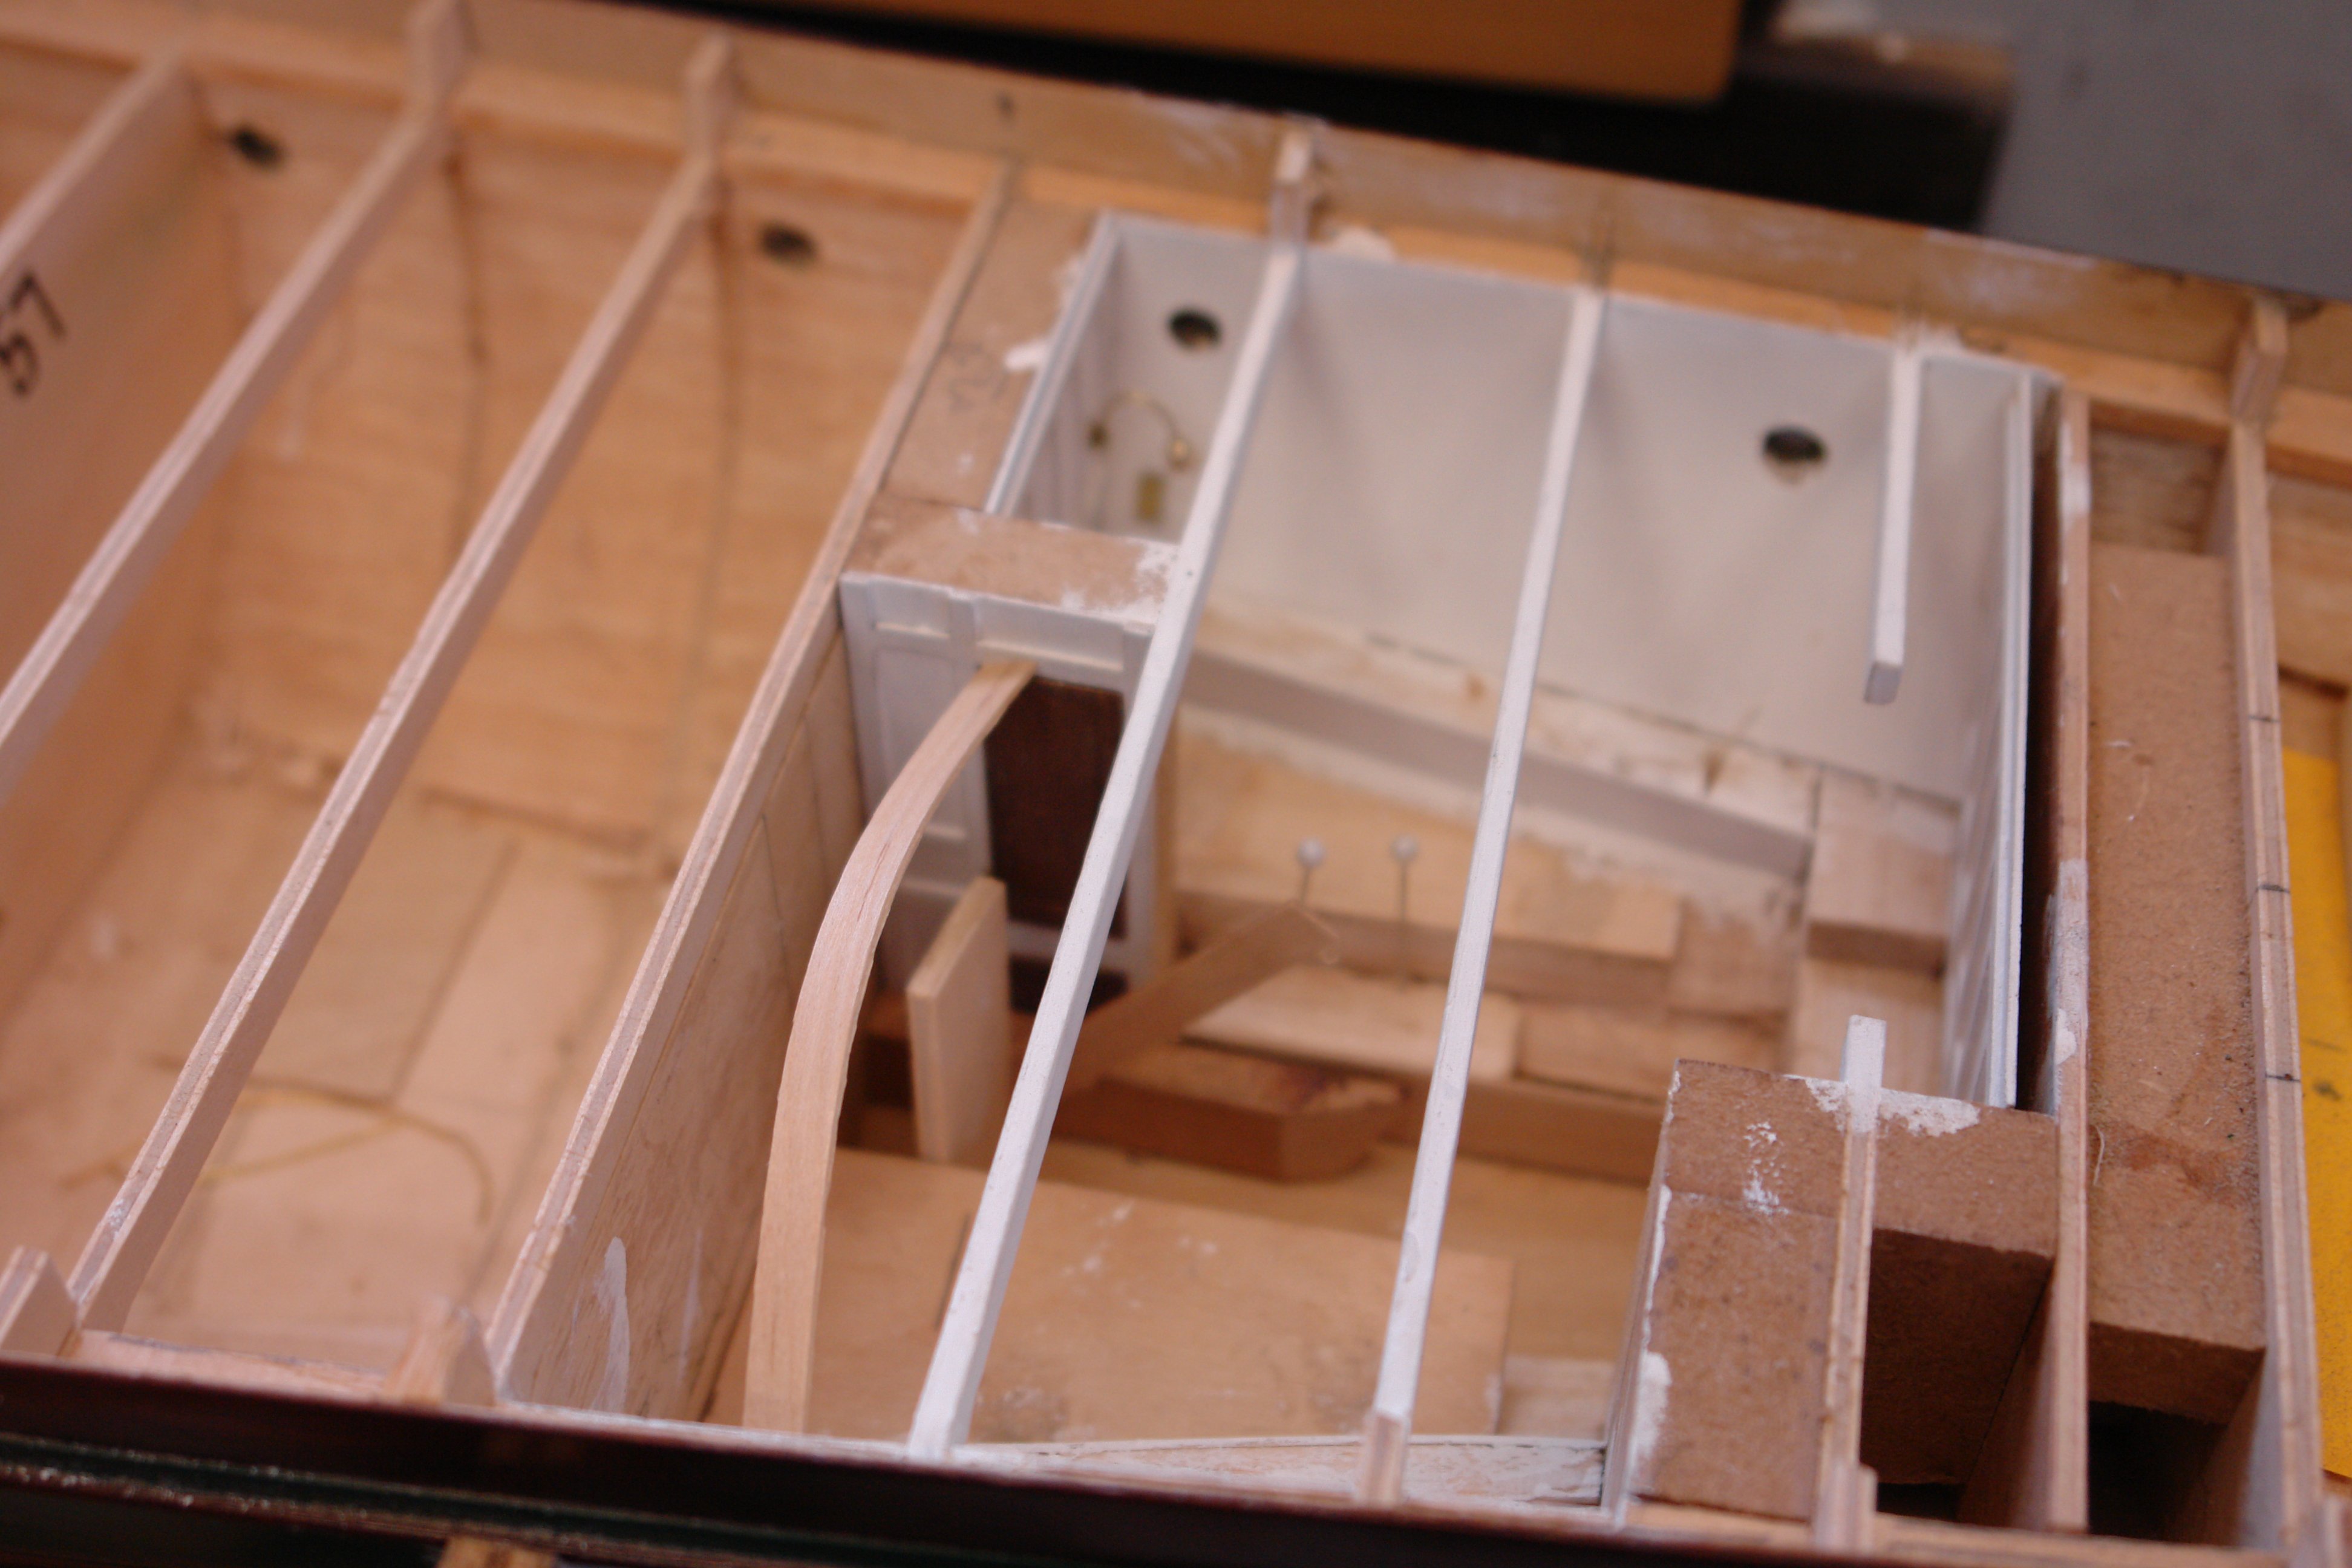
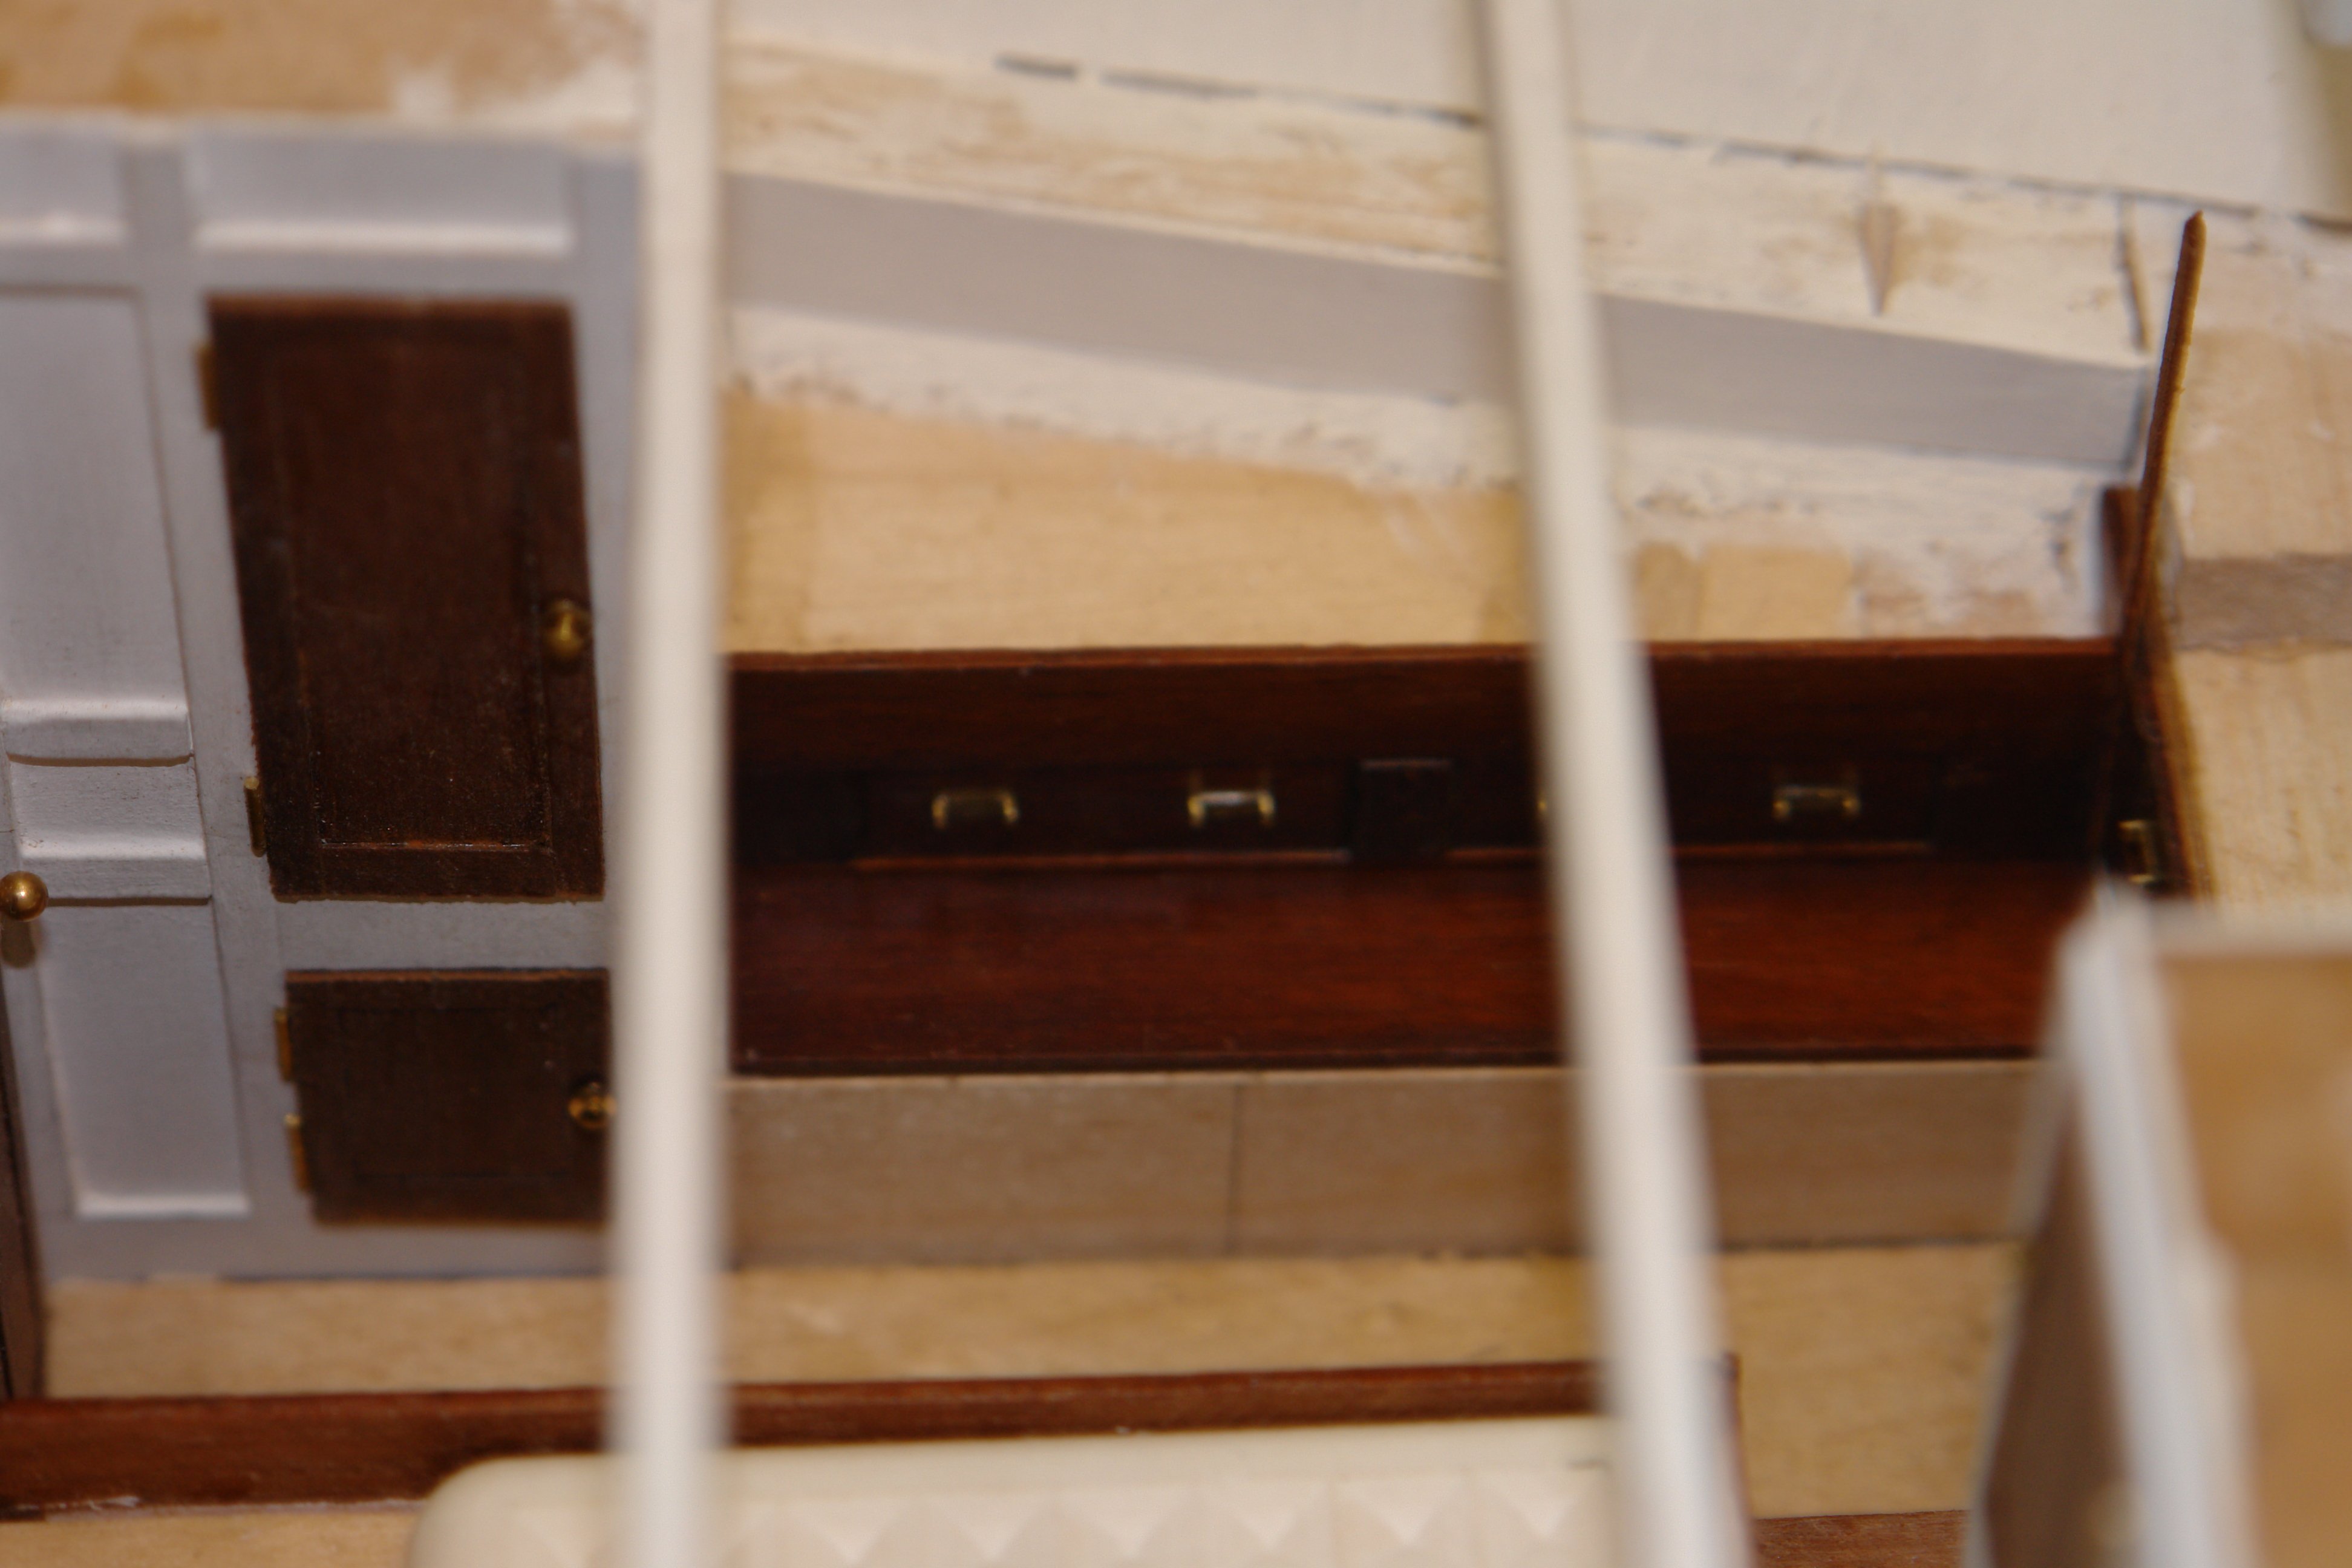
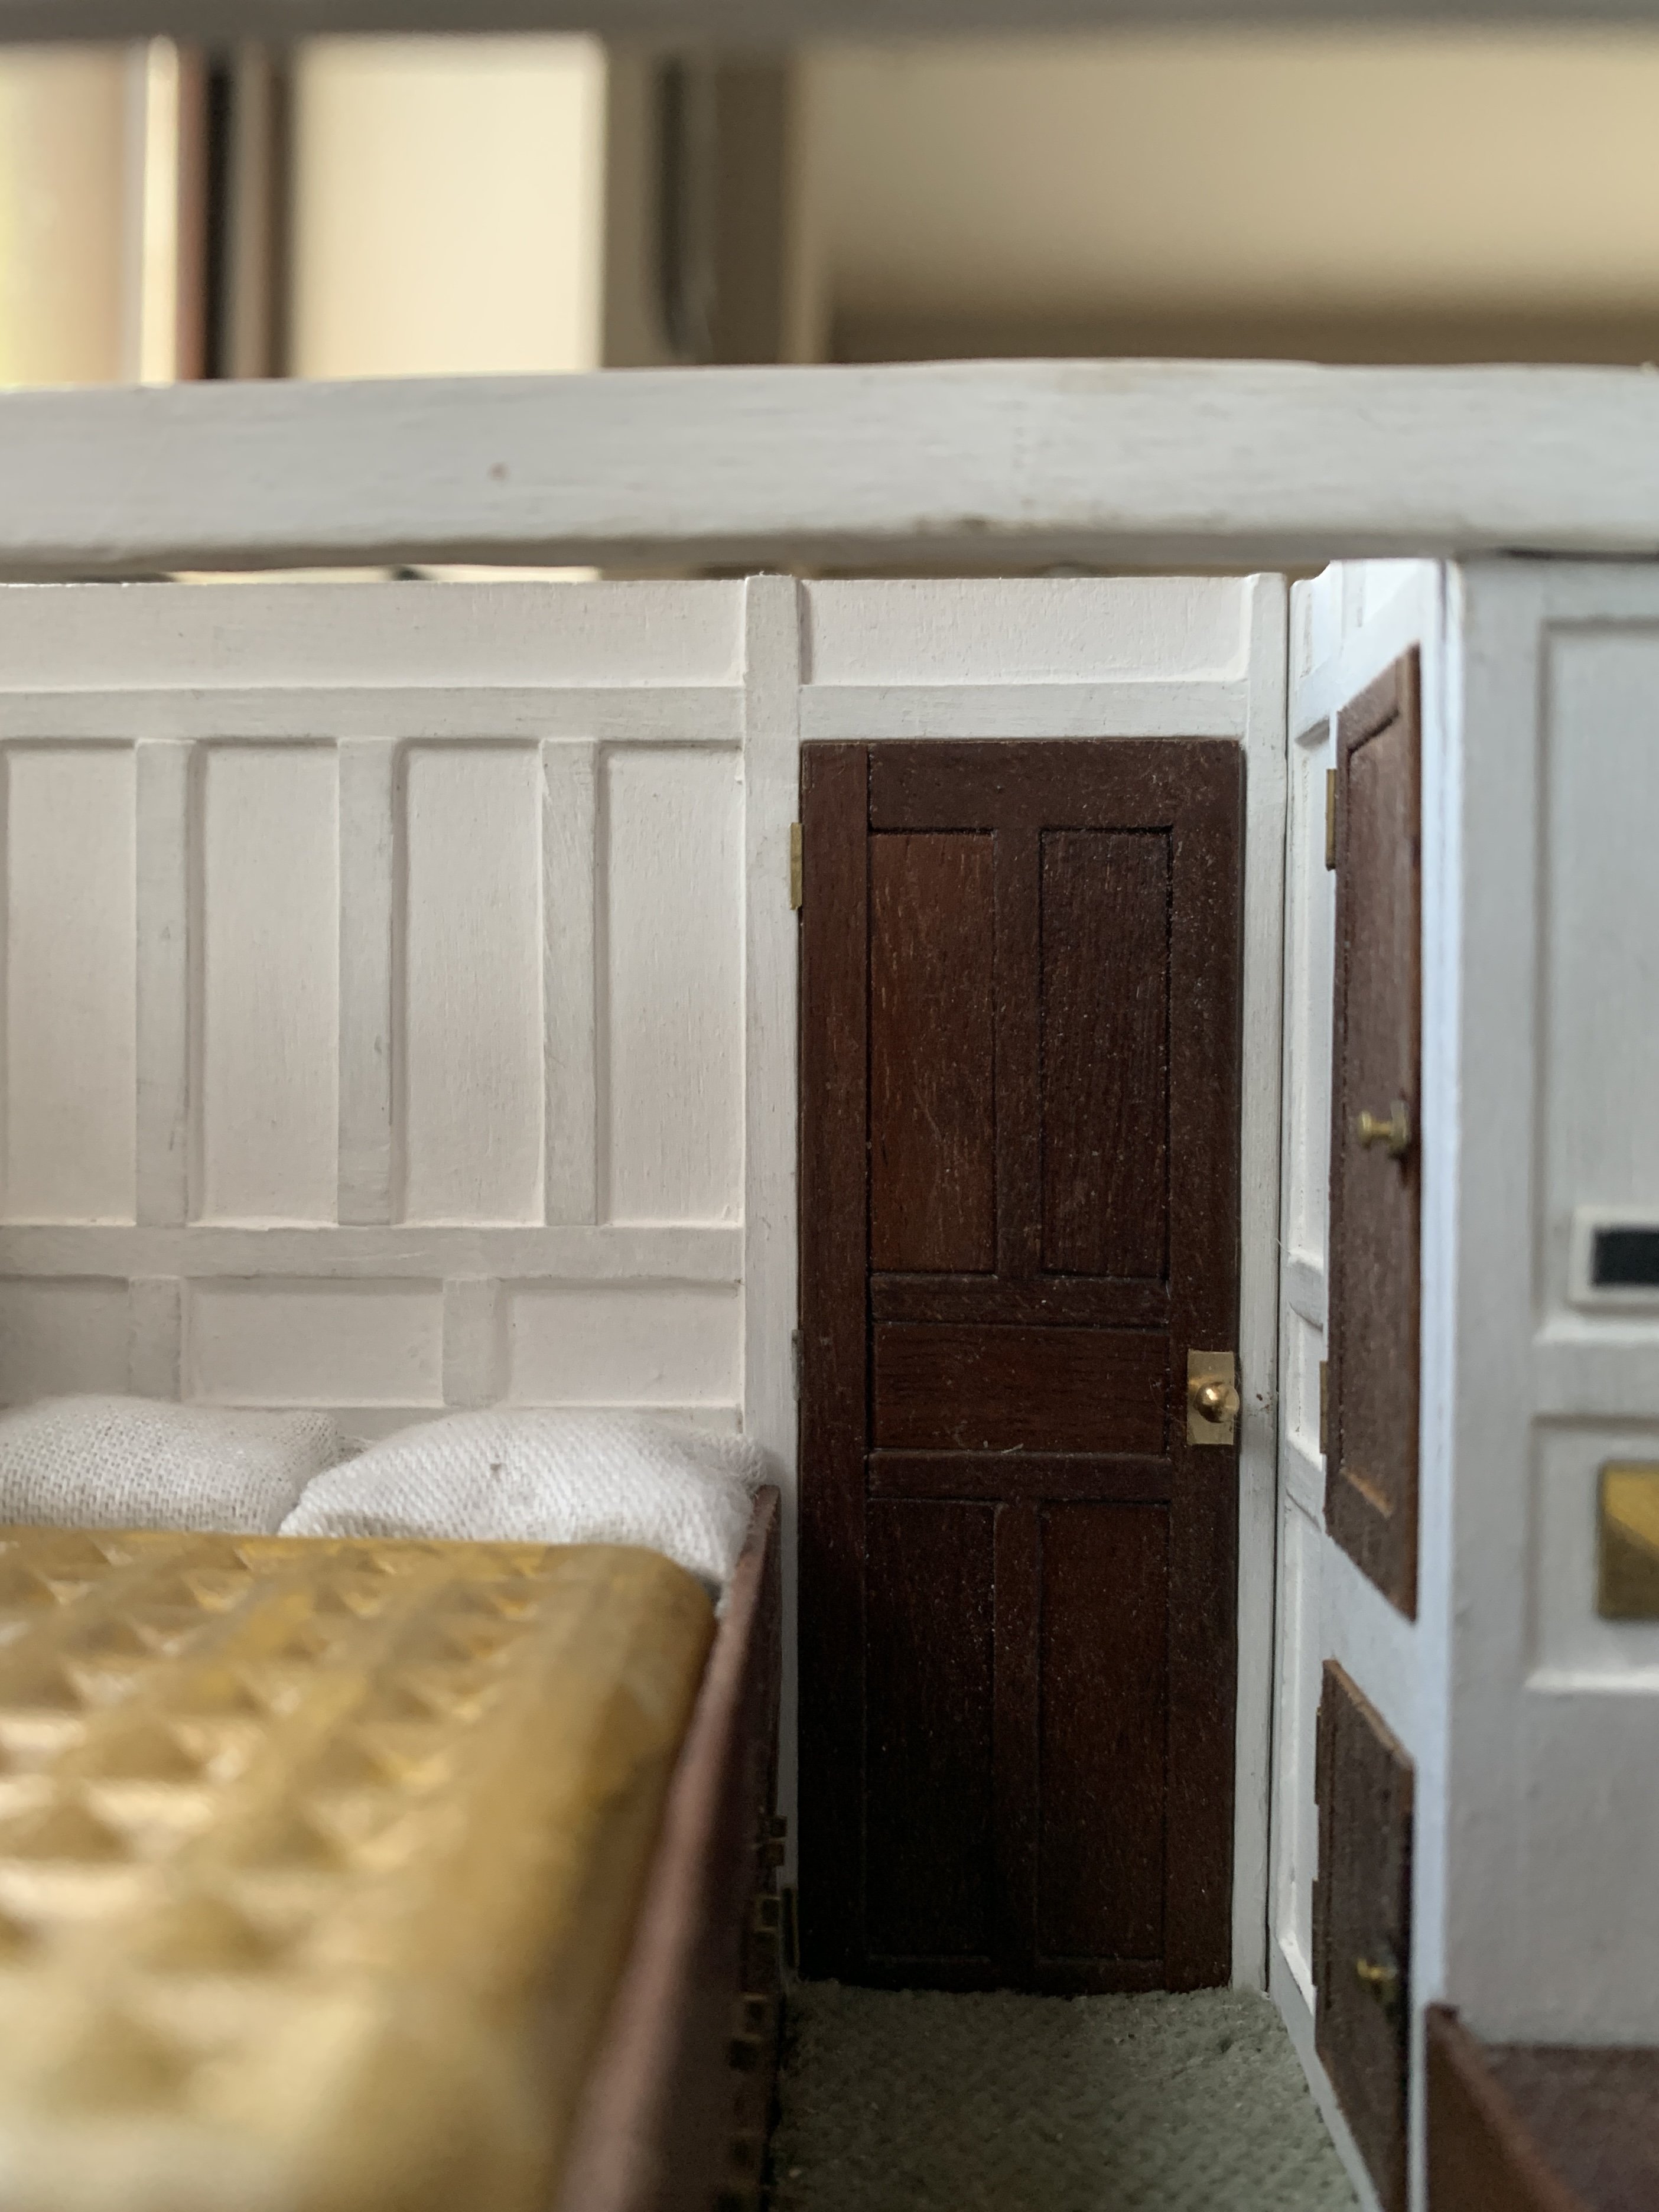
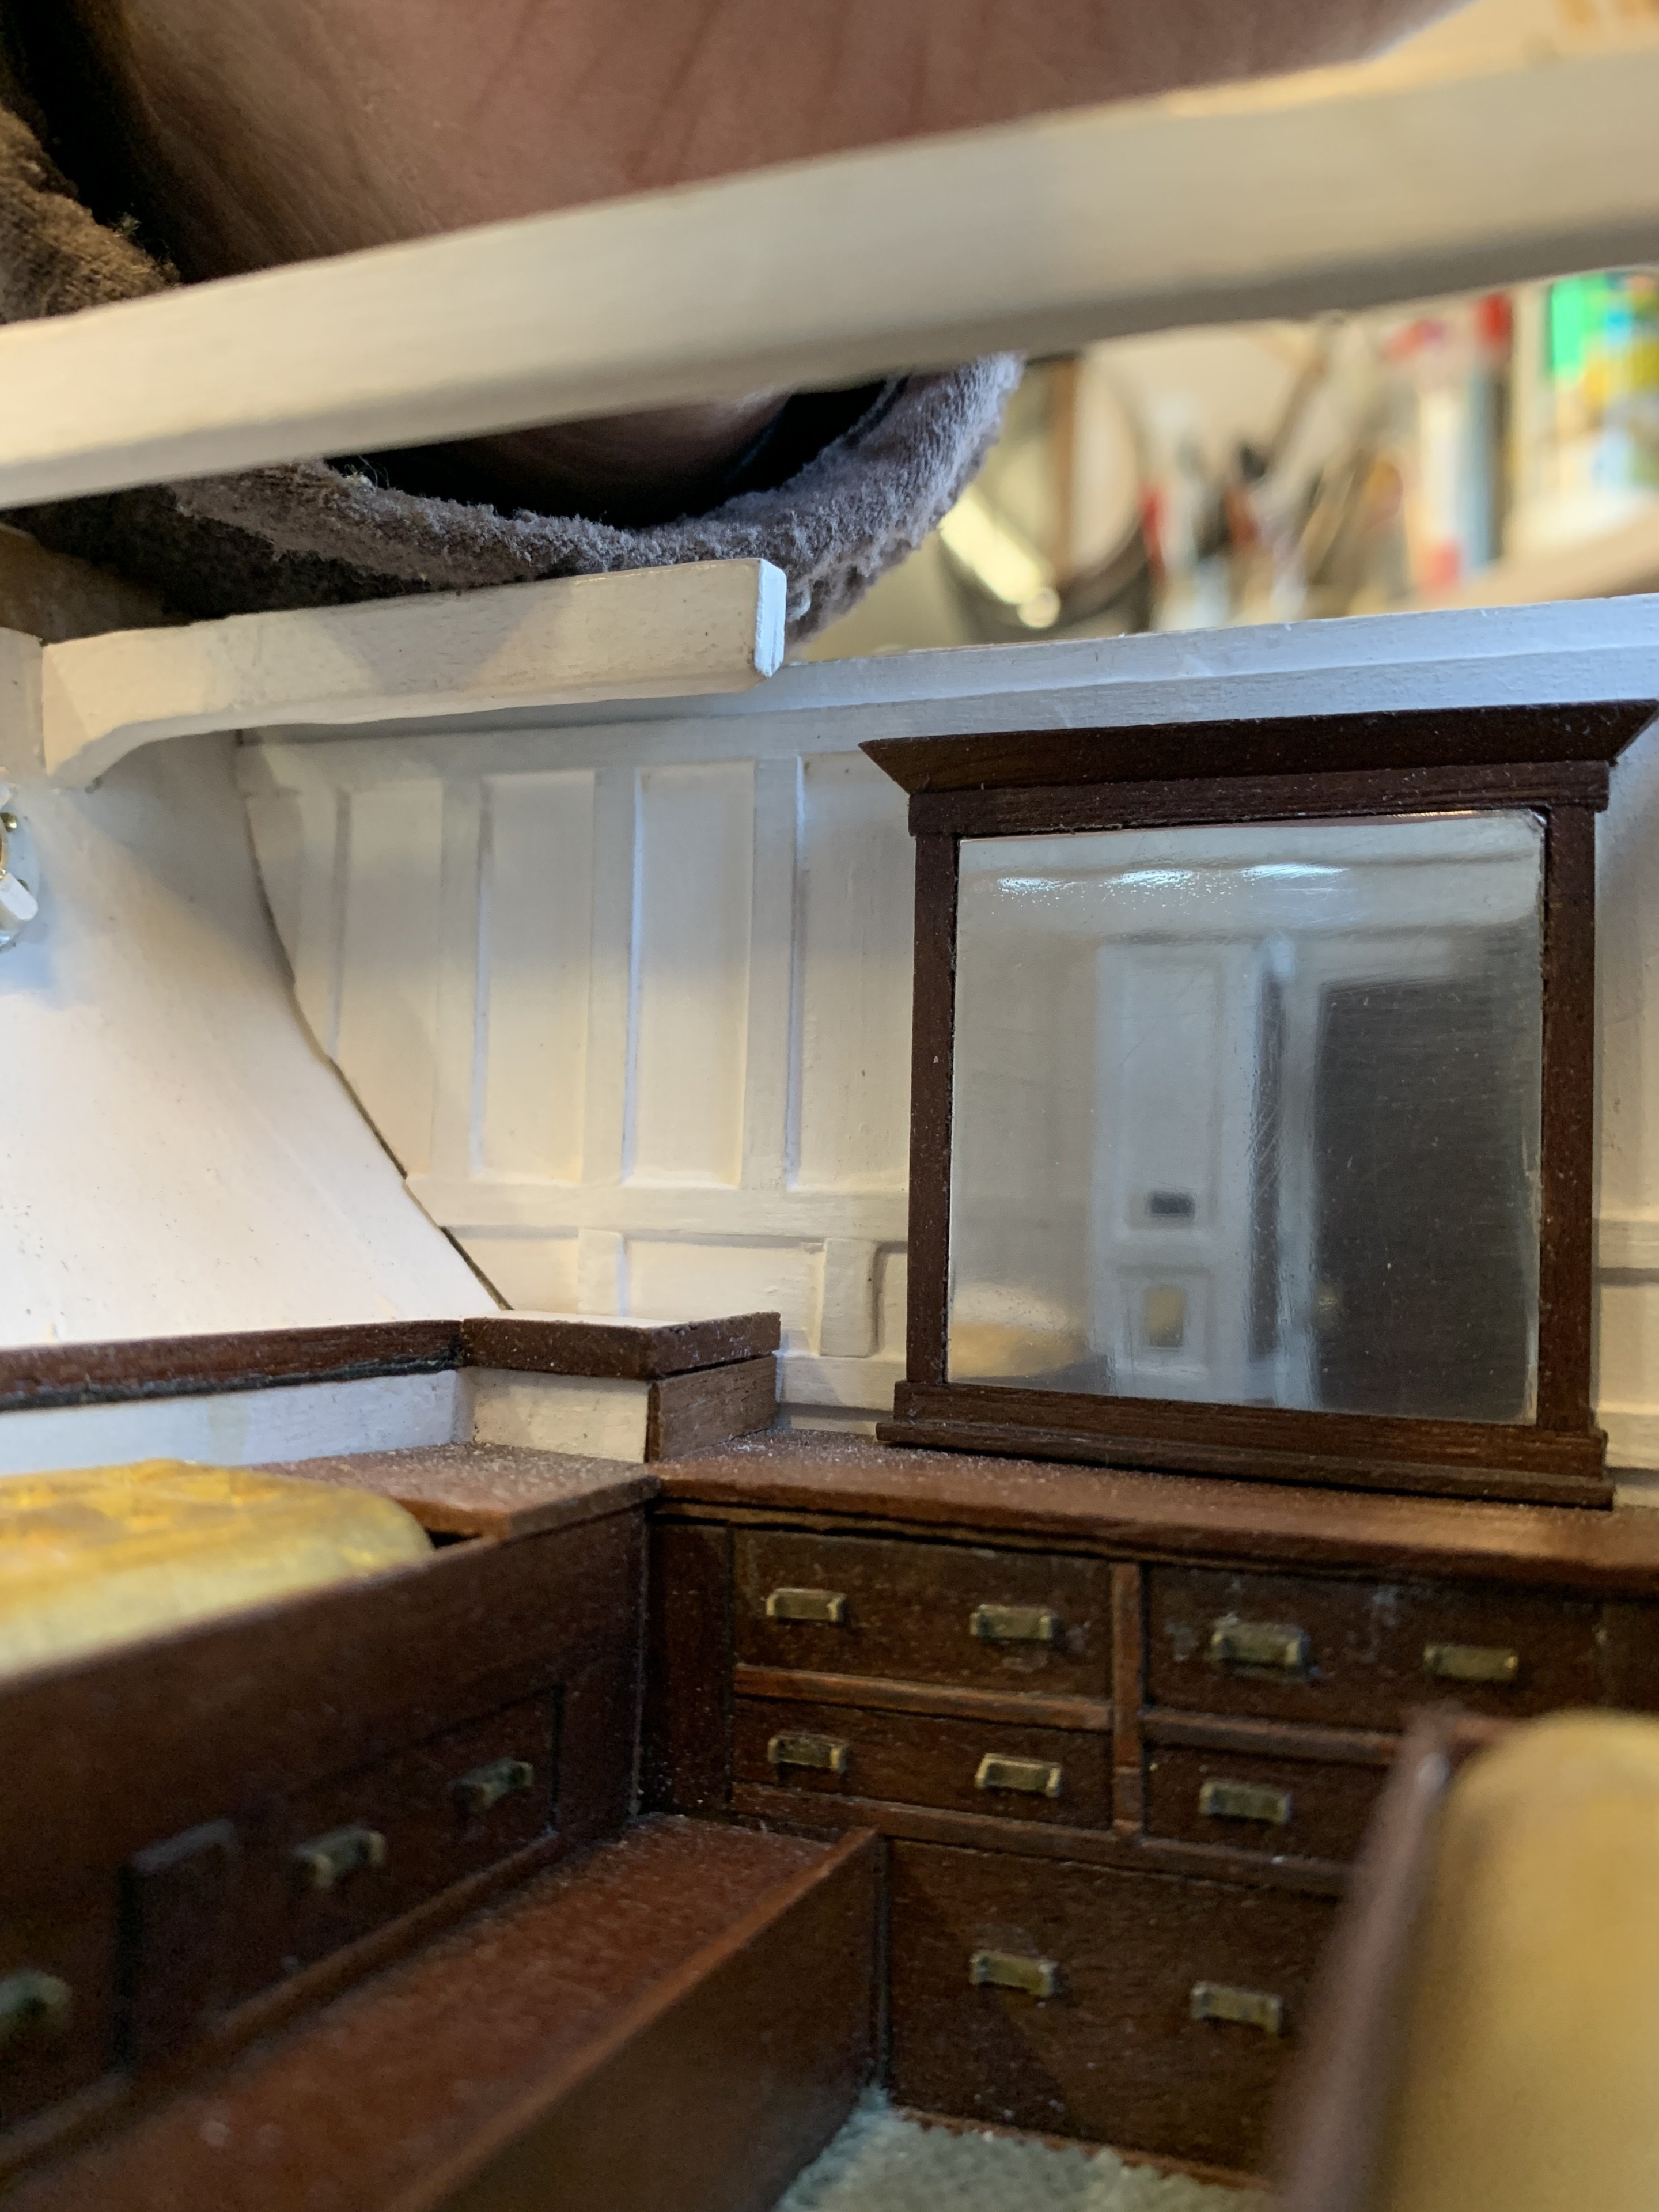
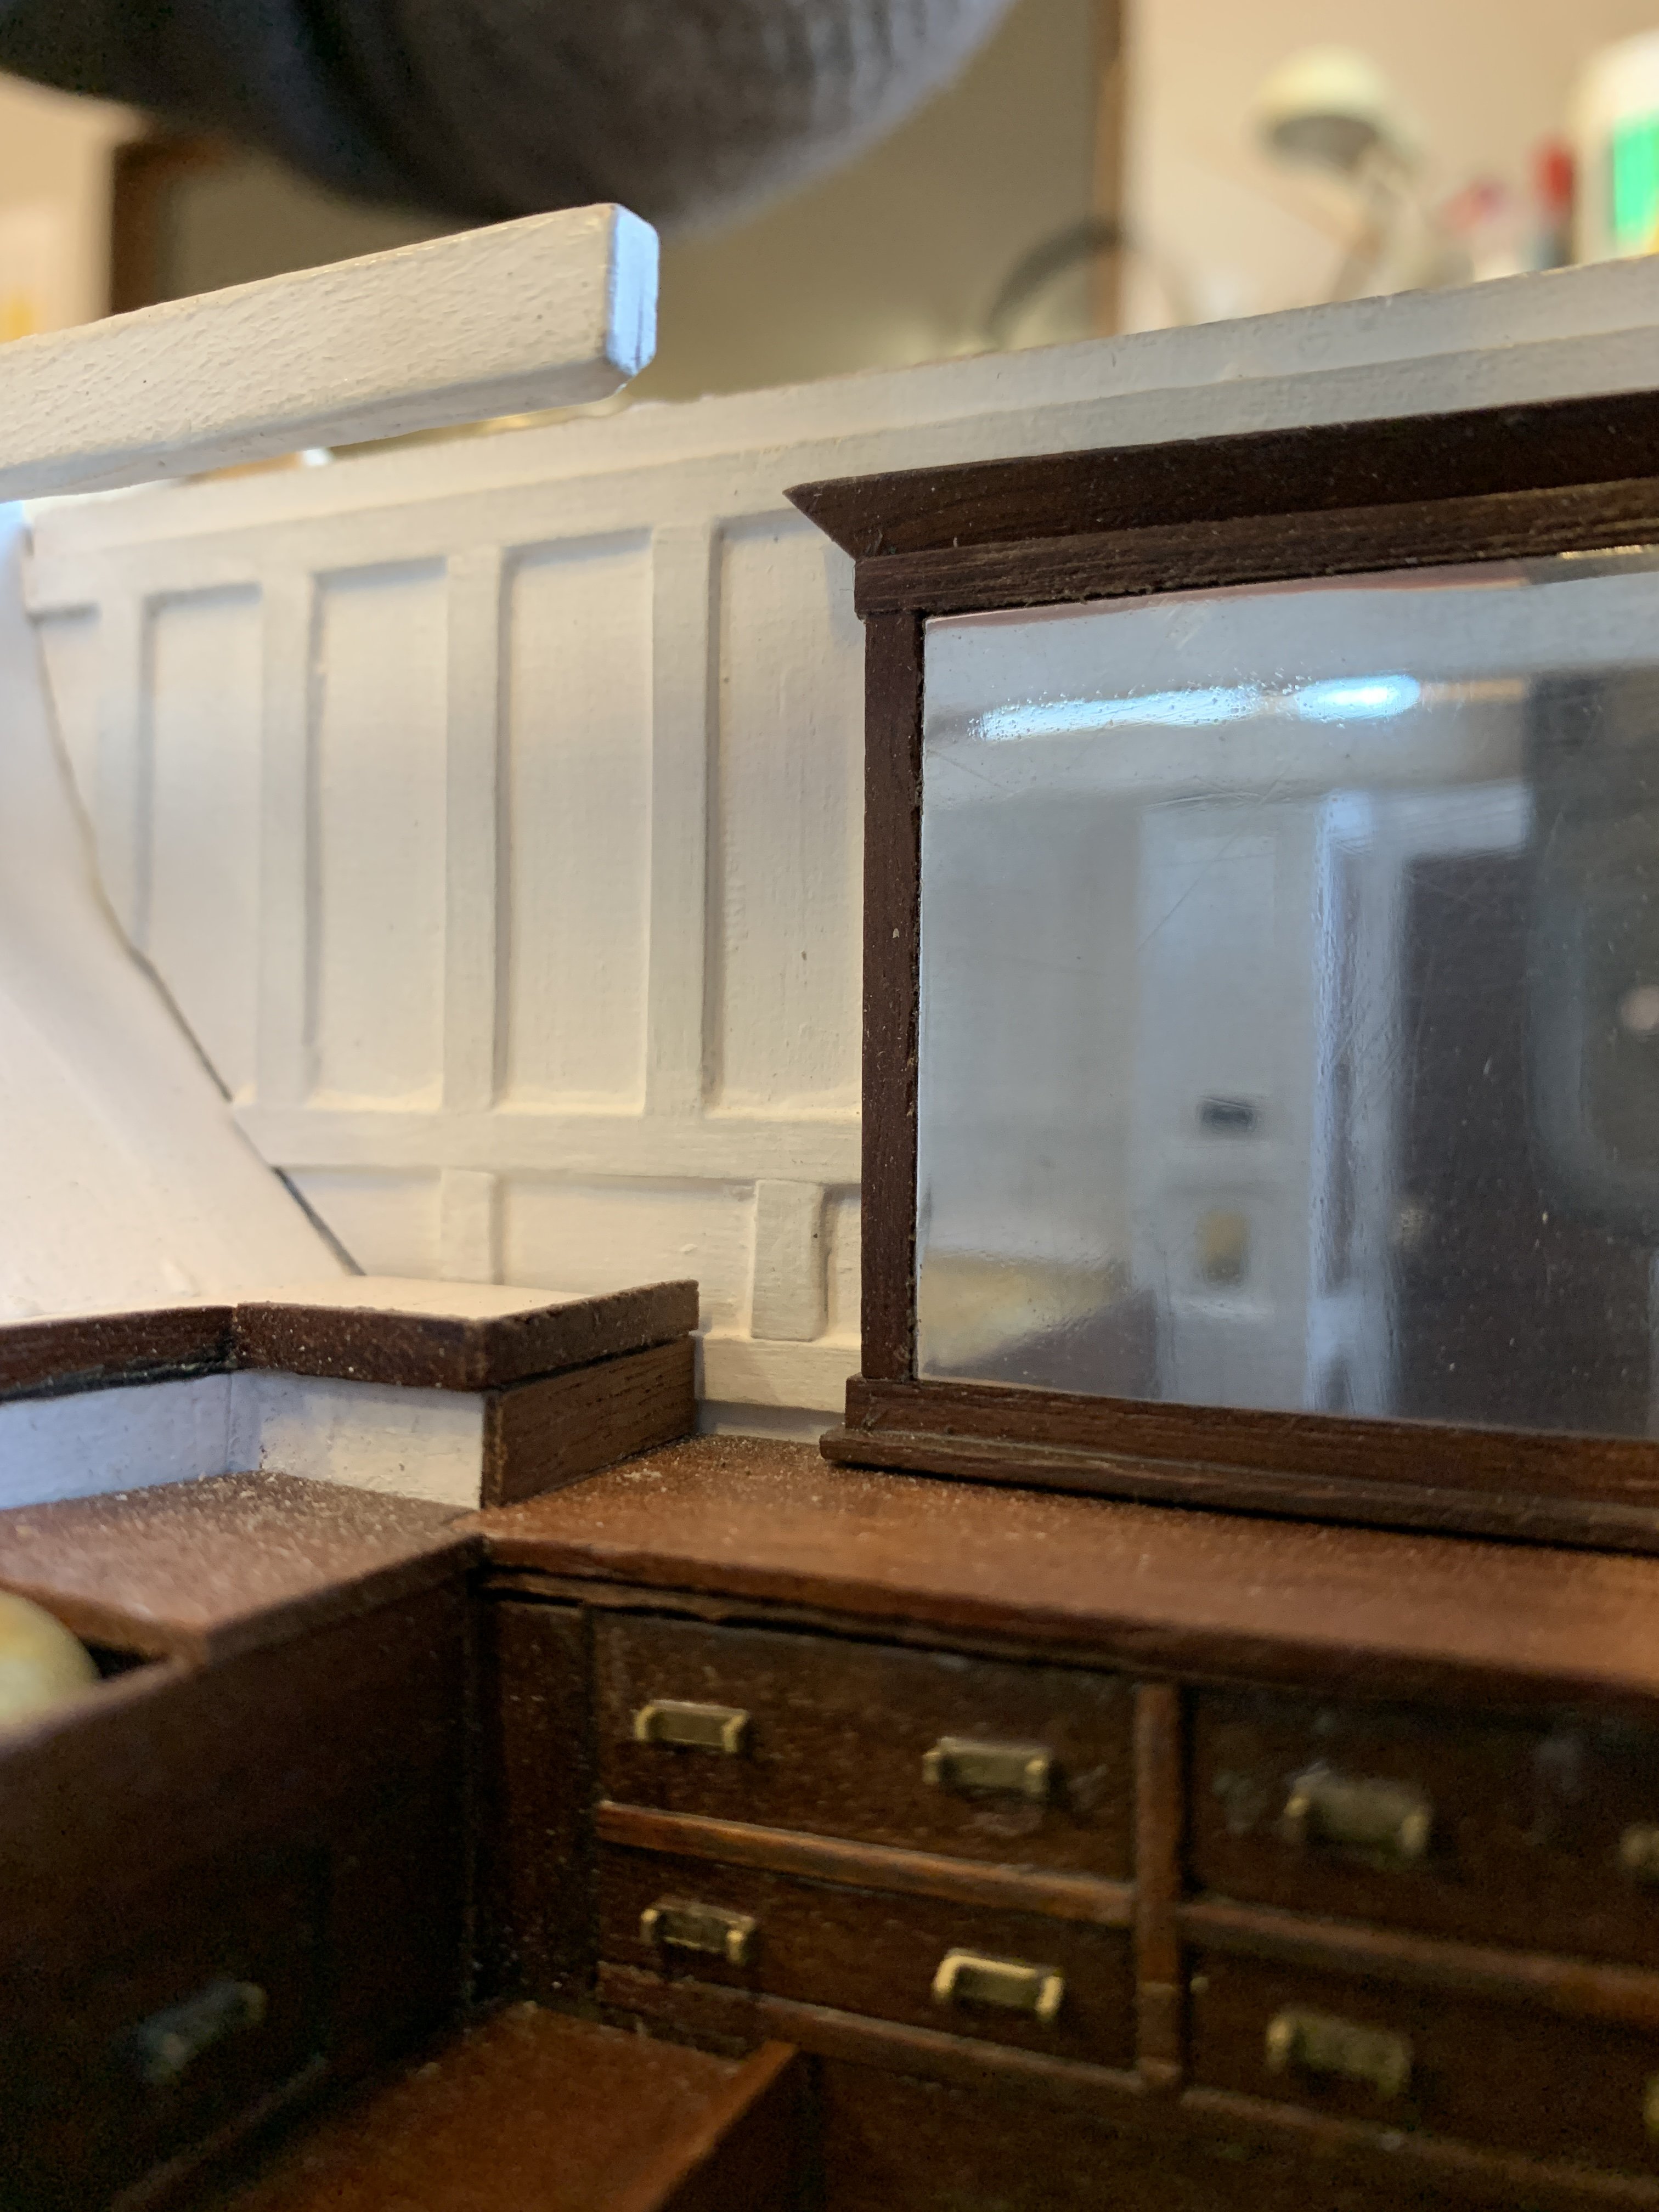
I also started gluing the mahogany doors to the various panelled walls, followed by door knobs, handles, lamps etc. I also made the large mirror ( currently protected by blue masking tape).
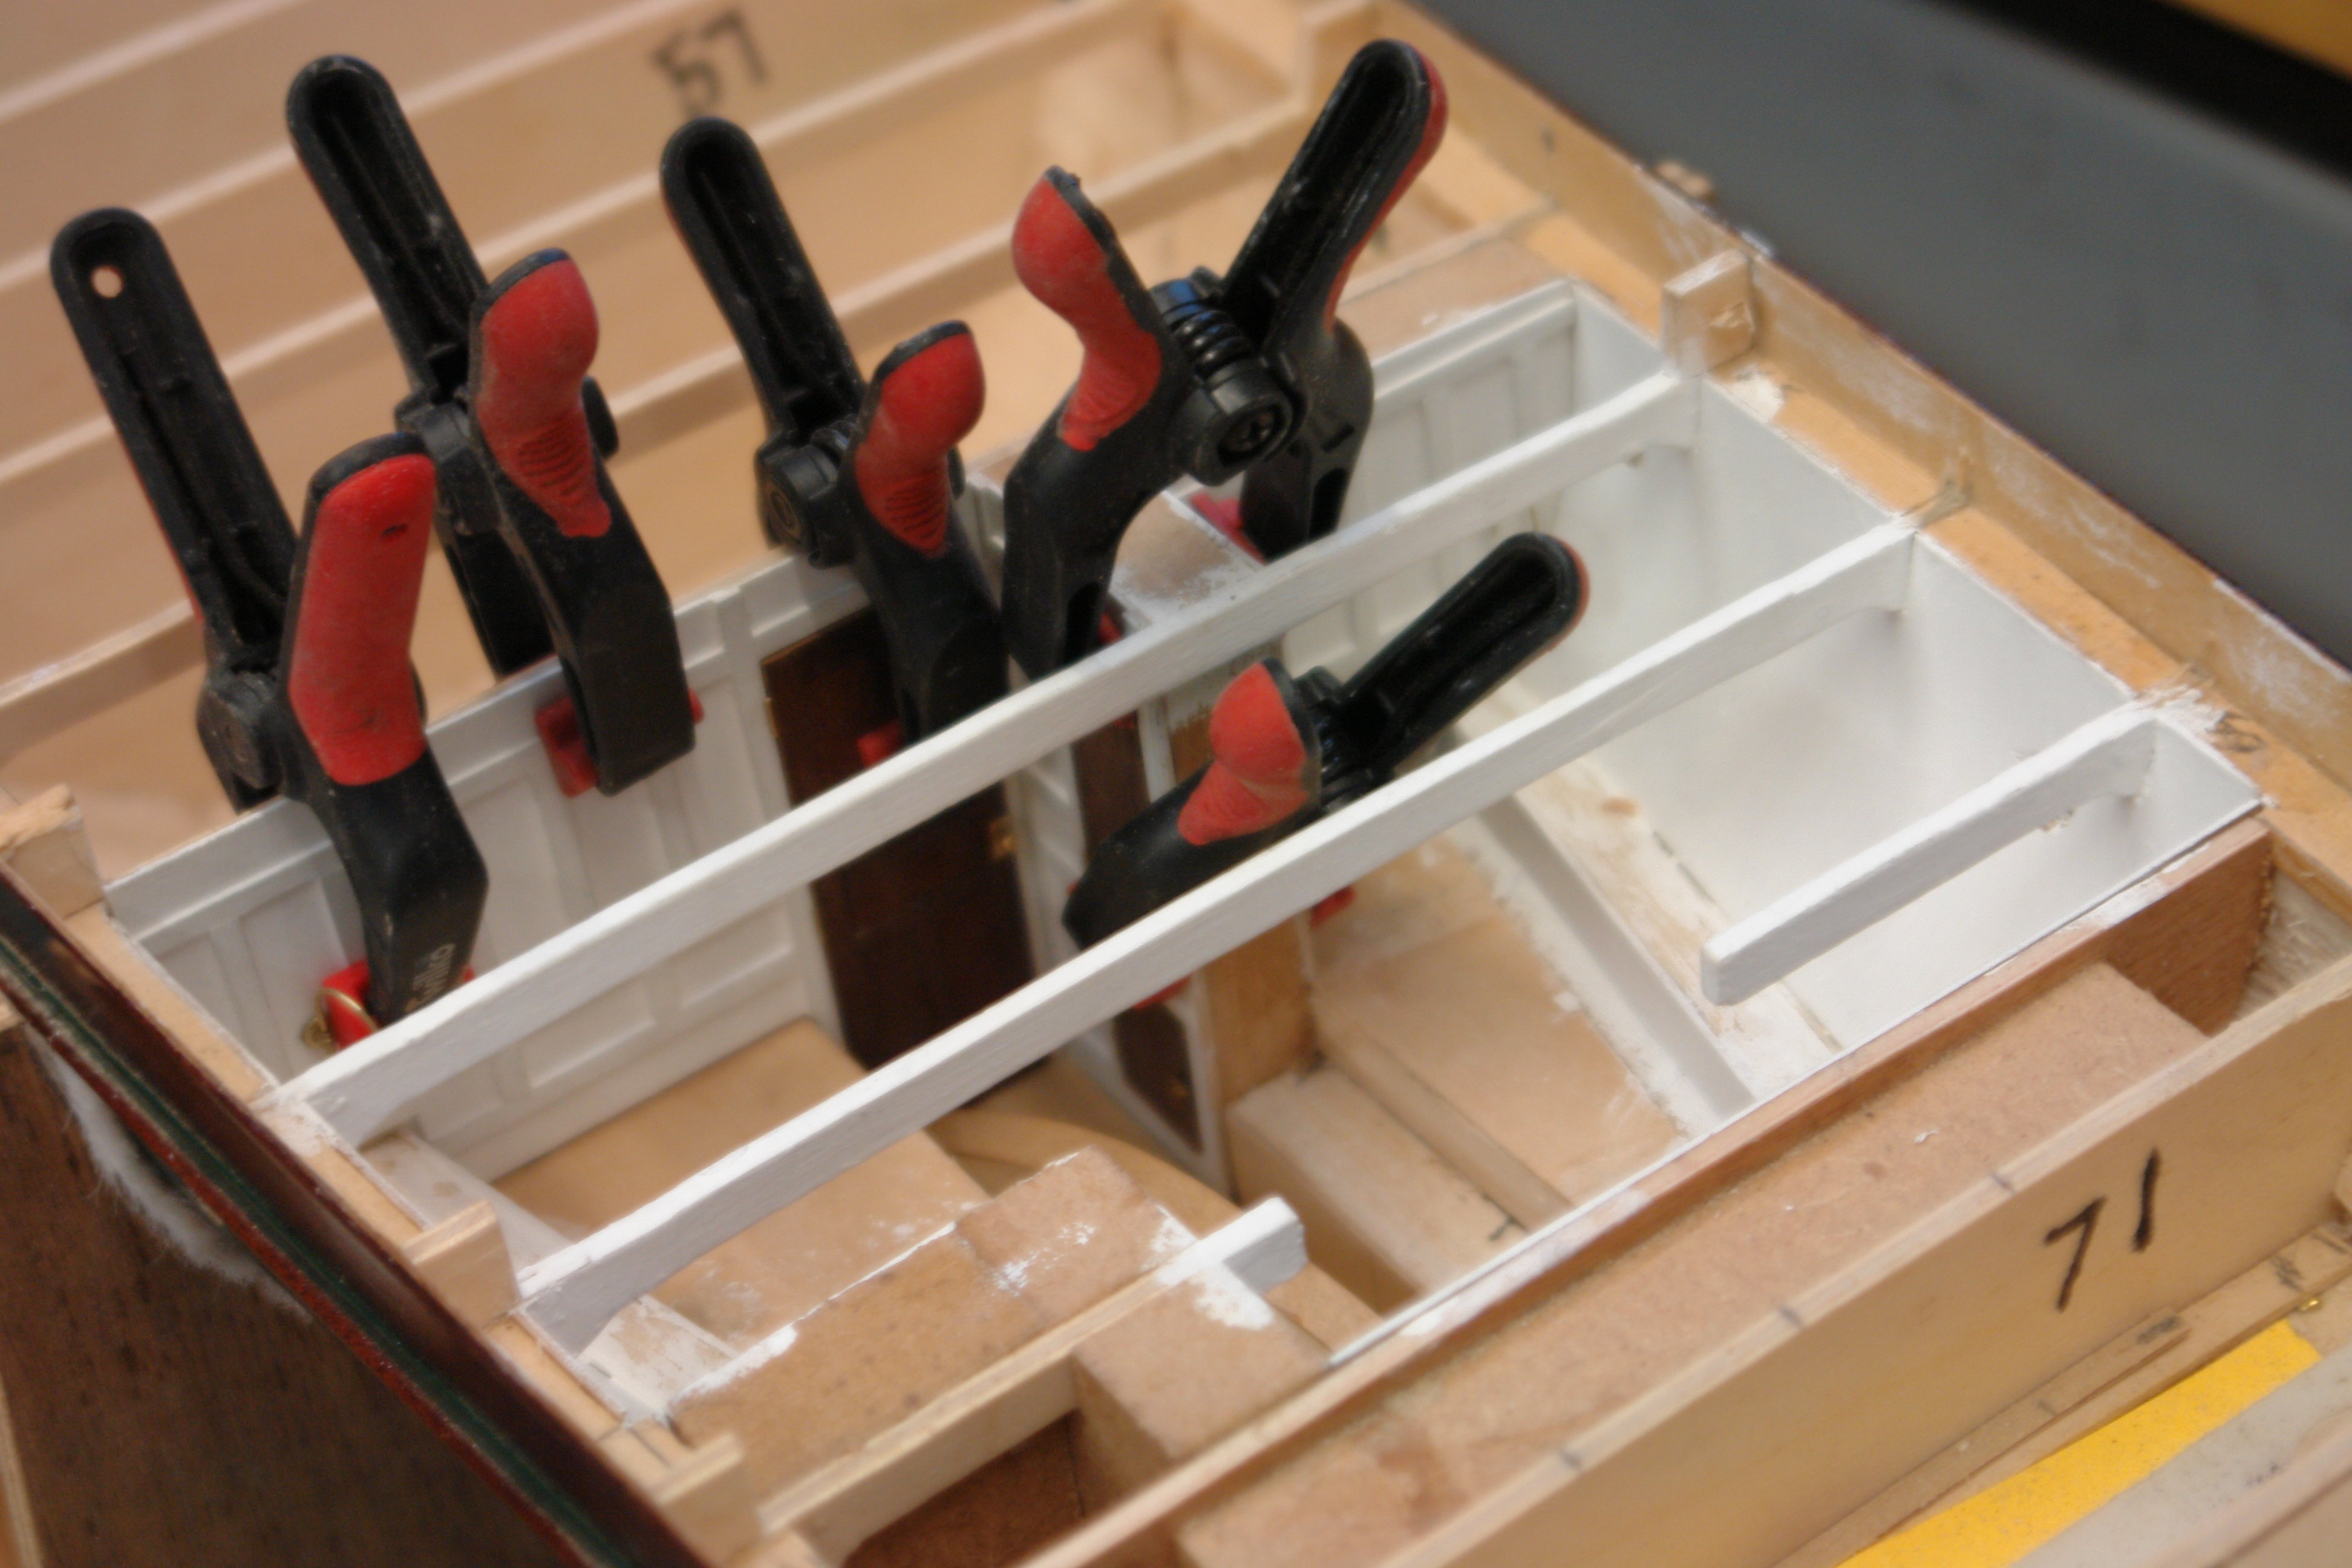
With the panels completed I was able to glue them in place with PVA - using more Starbuck sticks and various clamps to hold them.


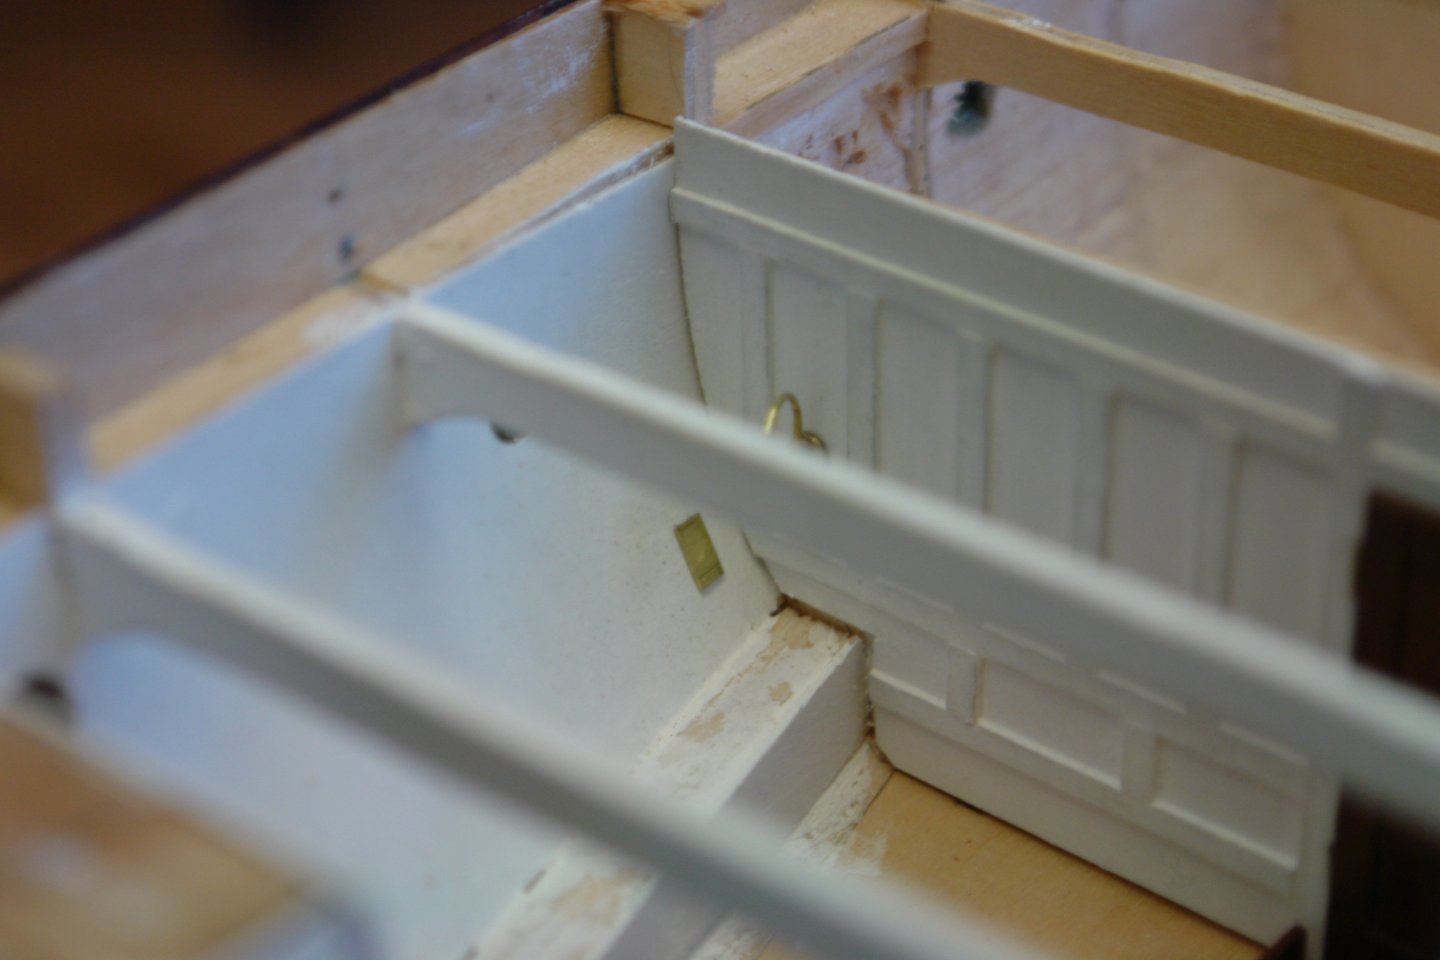
The side panels for the bunks and the various door fronts, shelves etc, went in next. The step (bottom left in the next photo is my best guess at what this area looks like. As explained earlier I don't have any photo's of this location.
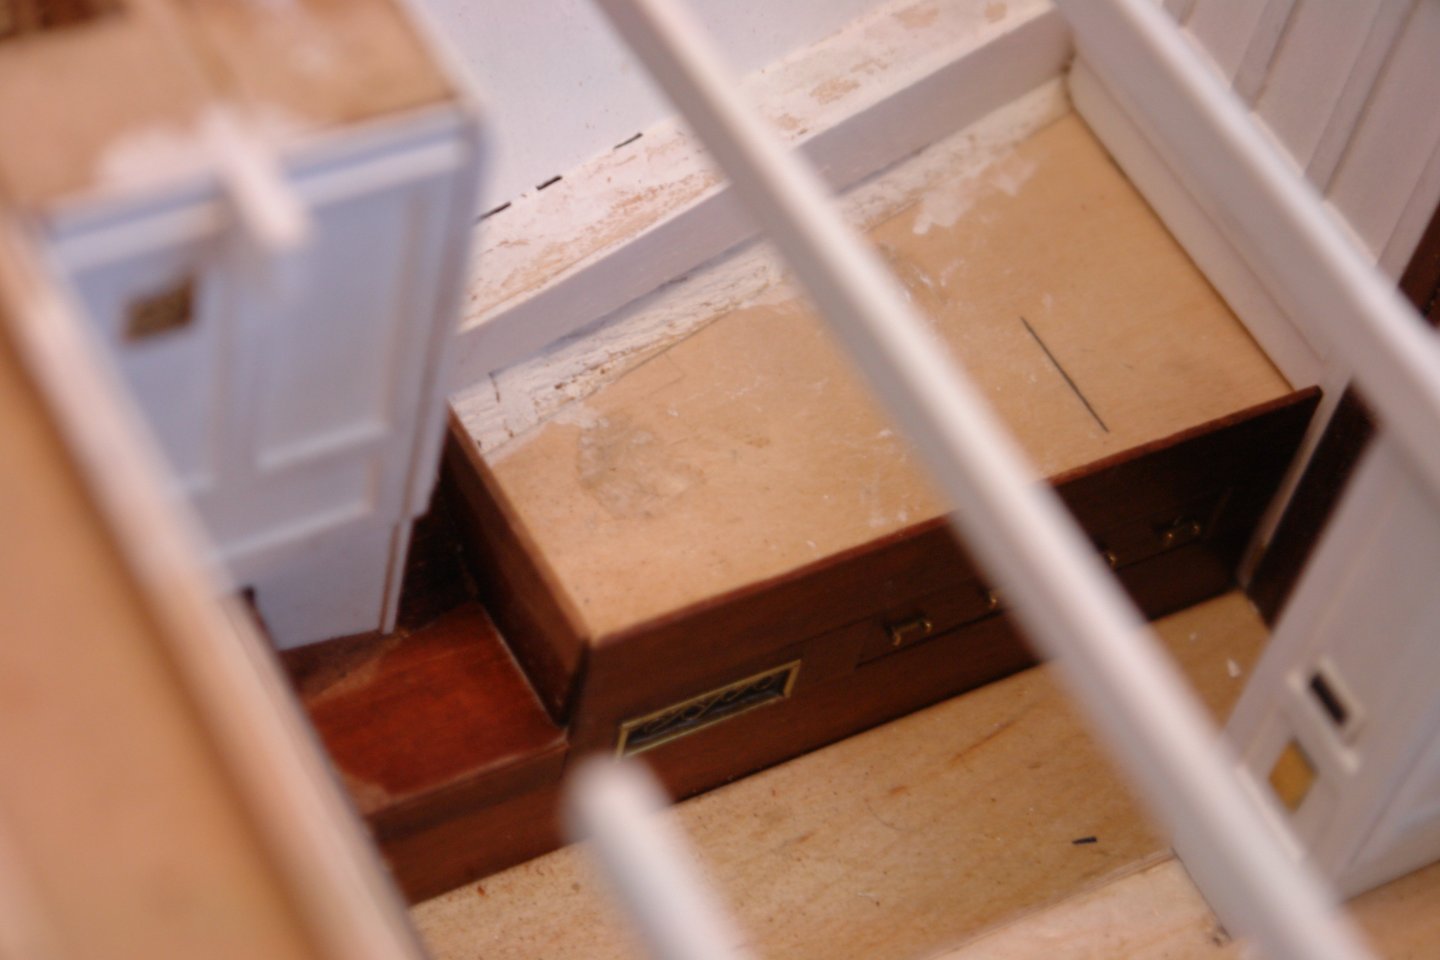

Next a bit more carpeting. The floor has a slight step in it, presumably to accommodate the curvature of the hull or to trip up the mother in law. (see later comment).
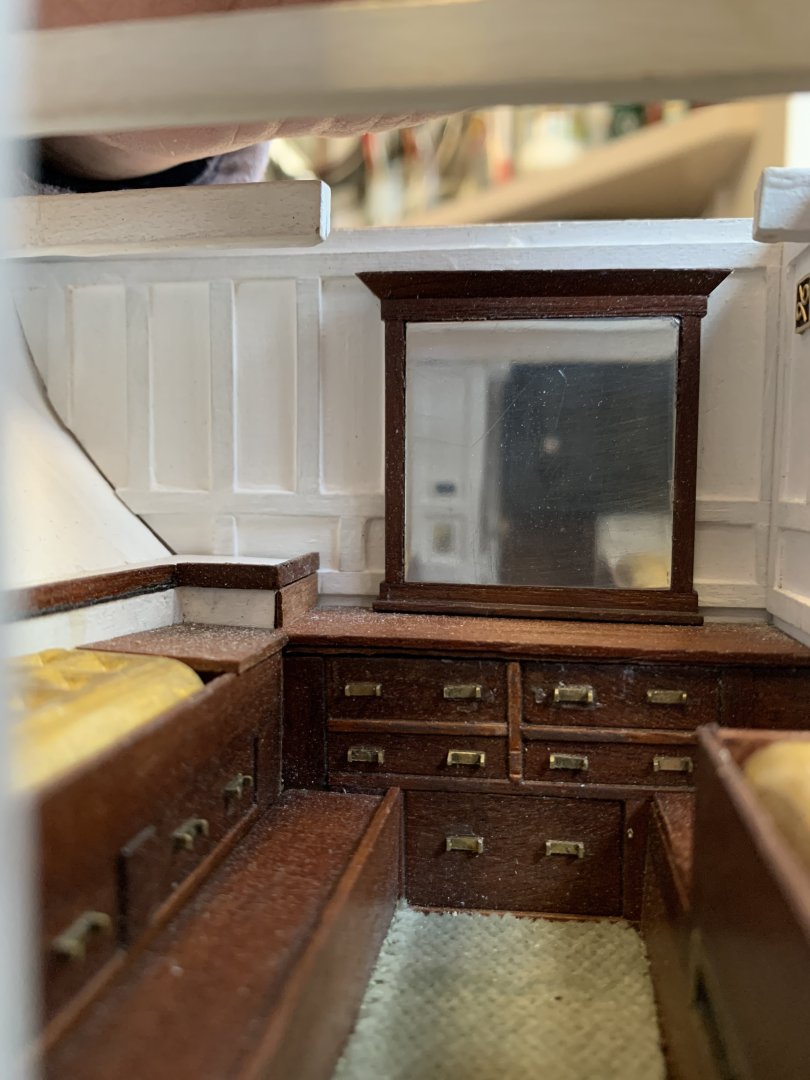
With everything in place I did a few shots with the phone camera (restricted by quite limited access).

Once again I forgot to clean out the dust.
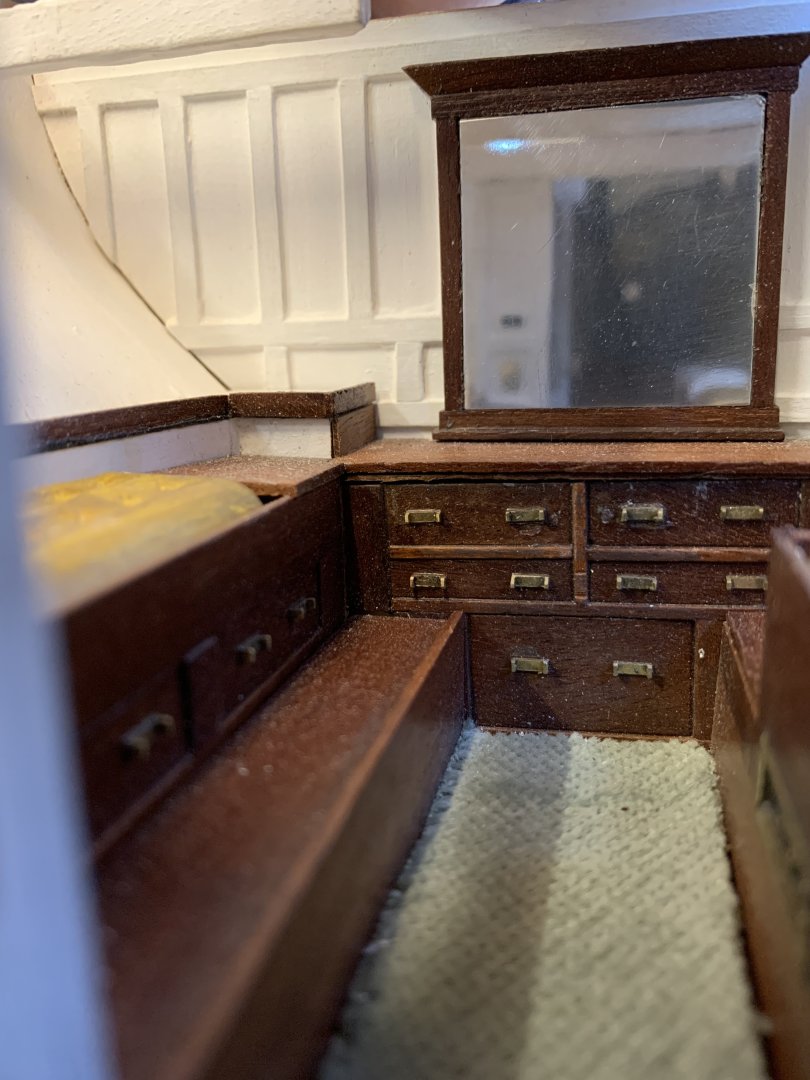


The following it the best shot I could get of the portholes.

I then glued in the external port holes (made earlier).
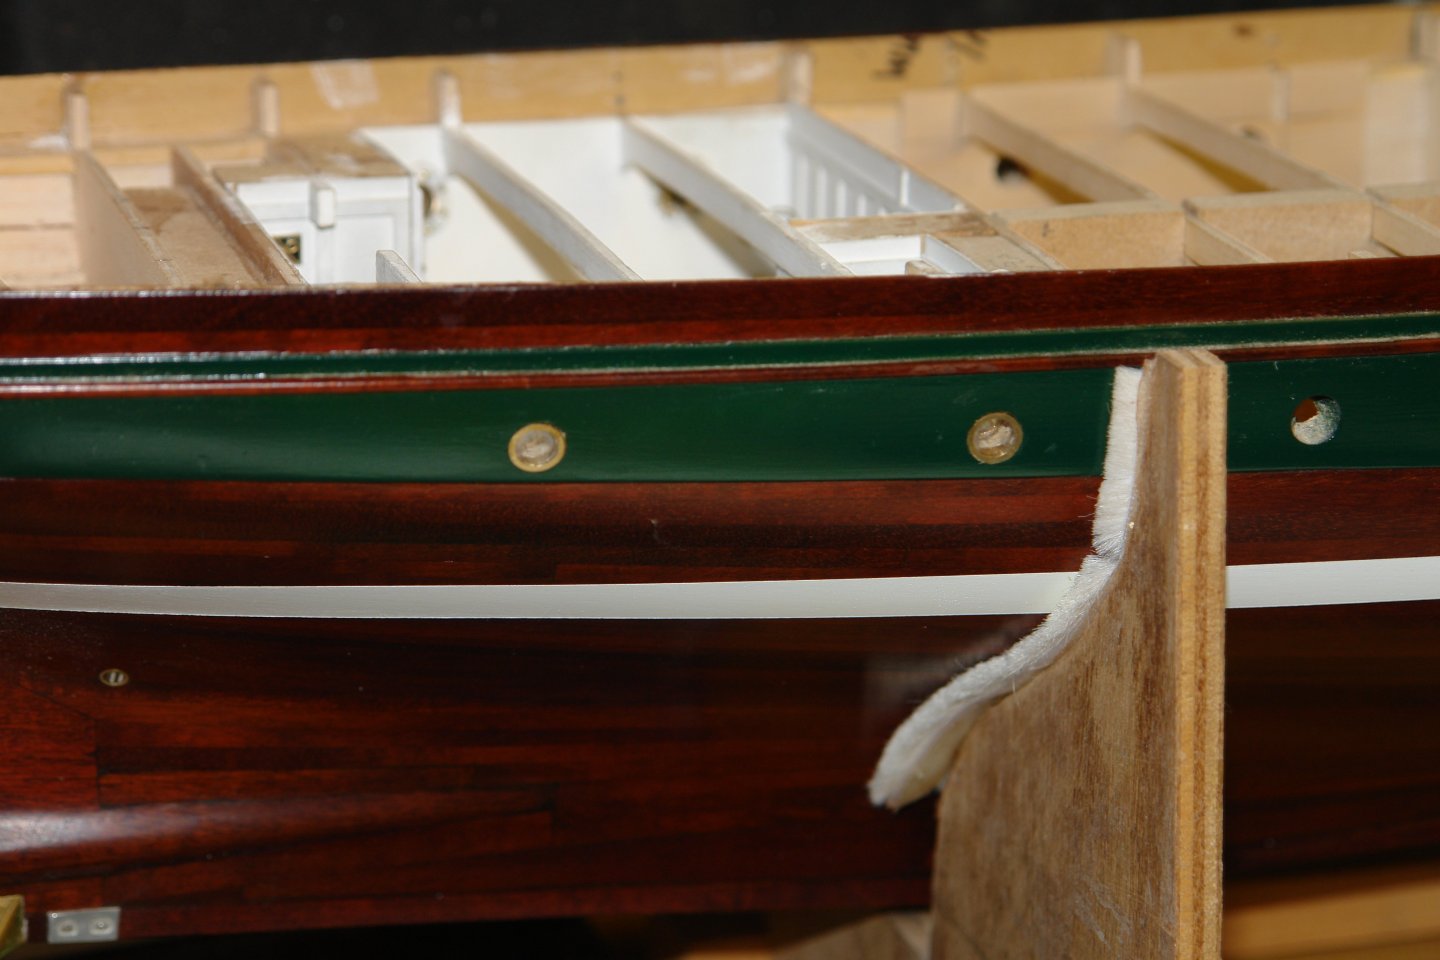
Re the floor step. I once spent 2 weeks in the Caribbean on a Dufour charter yacht. I learned to hate it. One of its design innovations was to mount the hot water tank below the starboard bunk. This would have been fine in the arctic but in the Caribbean it rendered it totally unbearable. Unfortunately I drew the short straw and hence spent the fortnight sleeping on deck. This however wasn't its most wonderful design feature. The designer had managed to place a shallow step right across the middle of the cabin (presumably to gain a little addition head height). The step was perfectly positioned to catch the unwary crew member every time they either ascended or descended the steps to the deck. Everyone at some time ended up sprawled across the cabin floor or with their heads wedged between the ladder rung, both events being accompanied by choice expletives.
-
Happy new year to everyone.
- wefalck, Mark Pearse, Keith Black and 1 other
-
2
-
2
-
22 hours ago, Jim Lad said:
as everyone is off to the beach over the holiday period.
Yes John - we spend all our spare time on the beach at this time of year - very bracing. Happy new year to you and all your countrymen. The kids have just watched the Harbour Bridge fireworks before being packed off to bed. So good of you all to arrange 2026 early to facilitate our child care arrangements. We still have 4 hours 15 minutes to go to 2026 so haven't even started on the booze yet.😀
- Keith Black and Mark Pearse
-
1
-
 1
1
-
Mark you do remarkably good metalwork with simple tools, very impressive.
- Mark Pearse and Jack12477
-
2
-
Nice progress Keith. The rails are a little small to prod anyone in the eye.
- Keith Black, thibaultron and Canute
-
2
-
1
-
On 12/29/2025 at 6:49 PM, Wintergreen said:
Well, that was the easy part of the deck.
Very nicely done.
-
7 hours ago, J Snyder said:
I got the straps finished.
Nicely done
-
-
On 12/26/2025 at 5:33 AM, Dr PR said:
I know this looks difficult, but it is actually a lot easier than you might think!
I will take your word for it Phil. It looks quite tricky to me. Amazing job on th stack.
- Canute and Paul Le Wol
-
2
-
-
Very nice progress Jon and compliments of the season to you.
-
19 hours ago, J Snyder said:
1/16" basswood they sent 1/16" plywood.
Yes on line ordering can be problematic. My wife ordered what she thought was a pound of sprouts, we had a delivery of 1 sprout, but to be fair it did have a price tag stuck on it. That would never happen if you went into a shop.
-
She is looking smart, Merry Christmas to you too Bruce.
-
All looking very smart John.
- Keith Black and Canute
-
2
-
Thank you Pat. the grandchildren are in bed and NORAD currently has Santa in Ankara. Not long to go now. Merry Christmas to you all.
- Keith Black, druxey, vvvjames and 1 other
-
4
-
On 12/20/2025 at 4:26 PM, J Snyder said:
I thought I would show a picture of the DIY thickness sander I made
Yes that works. I have something similar but have managed to incorporate dust extract. Cheep and cheerful usually works well.
-
On 12/19/2025 at 9:43 PM, vaddoc said:
I just bought cheap brass plumbing thingies that come in all dimensions.
Great tip - Amazon

-
As you say, paint spraying is best kept out of the kitchen. Great progress and like others i have logged the porthole glass tip.
-
Thank you friends for all for your good wishes.
16 hours ago, Rick310 said:How in the world did you make the ventilation grille?
Rick - is formed from a number of bits of brass wire coiled and then glued to black card. The edges are made from brass strip cut from plate 1/32 thick.
- Mark Pearse, Keith Black, druxey and 1 other
-
4
-
1 hour ago, dvm27 said:
ability to thickness to 0.030"
good point
- dvm27 and Keith Black
-
2
-
17 hours ago, vaddoc said:
It works great - highly recommended but no doubt I will also need the very expensive Proxon thicknesser
Yes i have always thought I needed a band saw, but I have so many versions of saws I think it would be an indulgence too far. Don't Axminster do a thicknesser?
I have always found Metabo tools to be good - Metabo DH330 Bench Top Planer 1800W 240V


Steam Schooner Wapama 1915 by Paul Le Wol - Scale 1/72 = From Plans Drawn By Don Birkholtz Sr.
in - Build logs for subjects built 1901 - Present Day
Posted
Simply splendid Paul.