


KeithAug
-
Posts
3,867 -
Joined
-
Last visited
Content Type
Profiles
Forums
Gallery
Events
Posts posted by KeithAug
-
-
6 hours ago, JacquesCousteau said:
So, I was considering just painting the metal,
I have never had much success with paint - particularly on brass. No matter how well I prepare the brass the paint seems to be easily damaged or subsequently flakes off. If you do try painting and have success I would be interested to know what you did and details of the paint etc etc. Good luck.
-
-
I somehow lost track of this build but have enjoyed catching up. I thought the hull constructional detail was was excellent. the machinery is also beautifully researched and reproduced.
-
45 minutes ago, Keith Black said:
I just liked the look of the linoleum,
I also got quite excited by the boudoir look, alas my fantacies will have to be controlled.
- FriedClams, mtaylor, gsdpic and 2 others
-
 5
5
-
10 hours ago, Jim Lad said:
due to our train drivers causing industrial problems
They must be ex British rail employees!
10 hours ago, Jim Lad said:Our Senior Curator is really anxious to get her finished and into a proper display case ("The Registration Papers are all complete and ready to sign, John"), but the Museum Director wandered past yesterday and was very enthusiastic about the model being under construction for as long as possible
That's the trouble with management, they want their cake and eat it.
Beautiful work John and you deserve medal for inspiring the teenagers.
- FriedClams, Keith Black, Ian_Grant and 1 other
-
 4
4
-
Phil - you clearly missed out on the late 60's early 70's "Flower Power" era!
- Canute, mtaylor, FriedClams and 1 other
-
4
-
4 minutes ago, Jim Lad said:
Tech problems our parents never had to face! 😀
John - Me neither for much of my life. I do however remember borrowing a Sinclair Scientific calculator for my finals in 1975 - a mere 50 years ago.😬😬. I also remember our first family B&W TV in 1958 - 67 years ago. I also remember being inspired to start my boat modelling career when I watched Noah working on his Arc.
-
1 hour ago, Dr PR said:
but I would bet they are "lifting holes."
Phil - I was guessing that was what they were for but good to get an educated confirmation. I now feel in good company with my levelling mistake.
- FriedClams, druxey and Keith Black
-
3
-
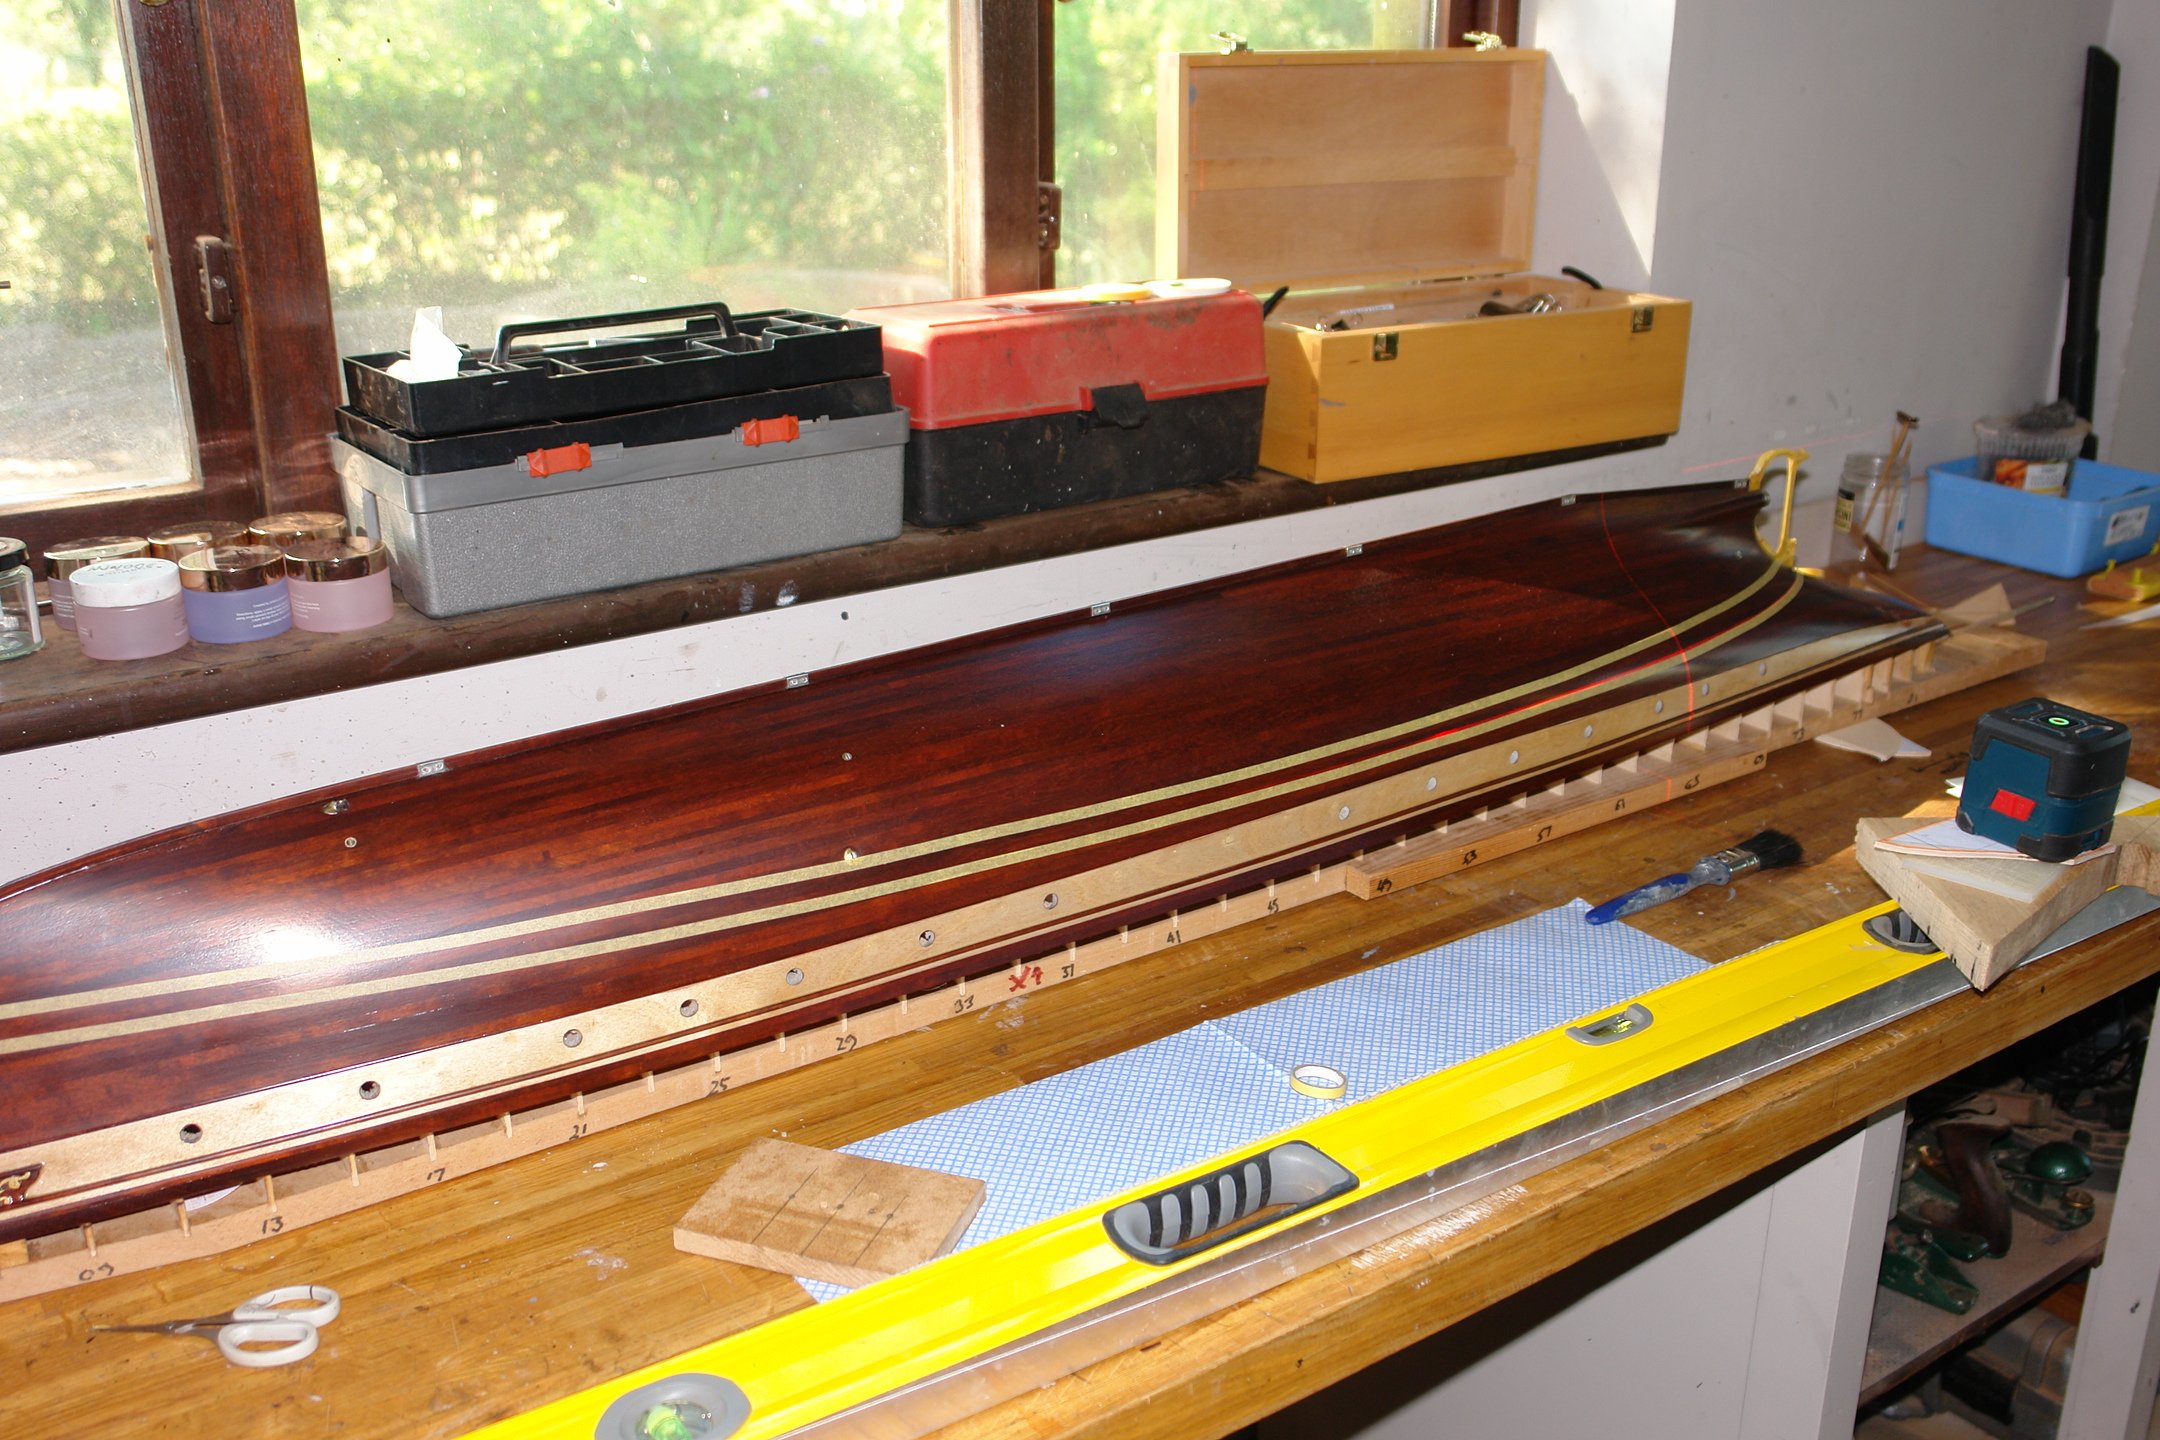
A little more progress.
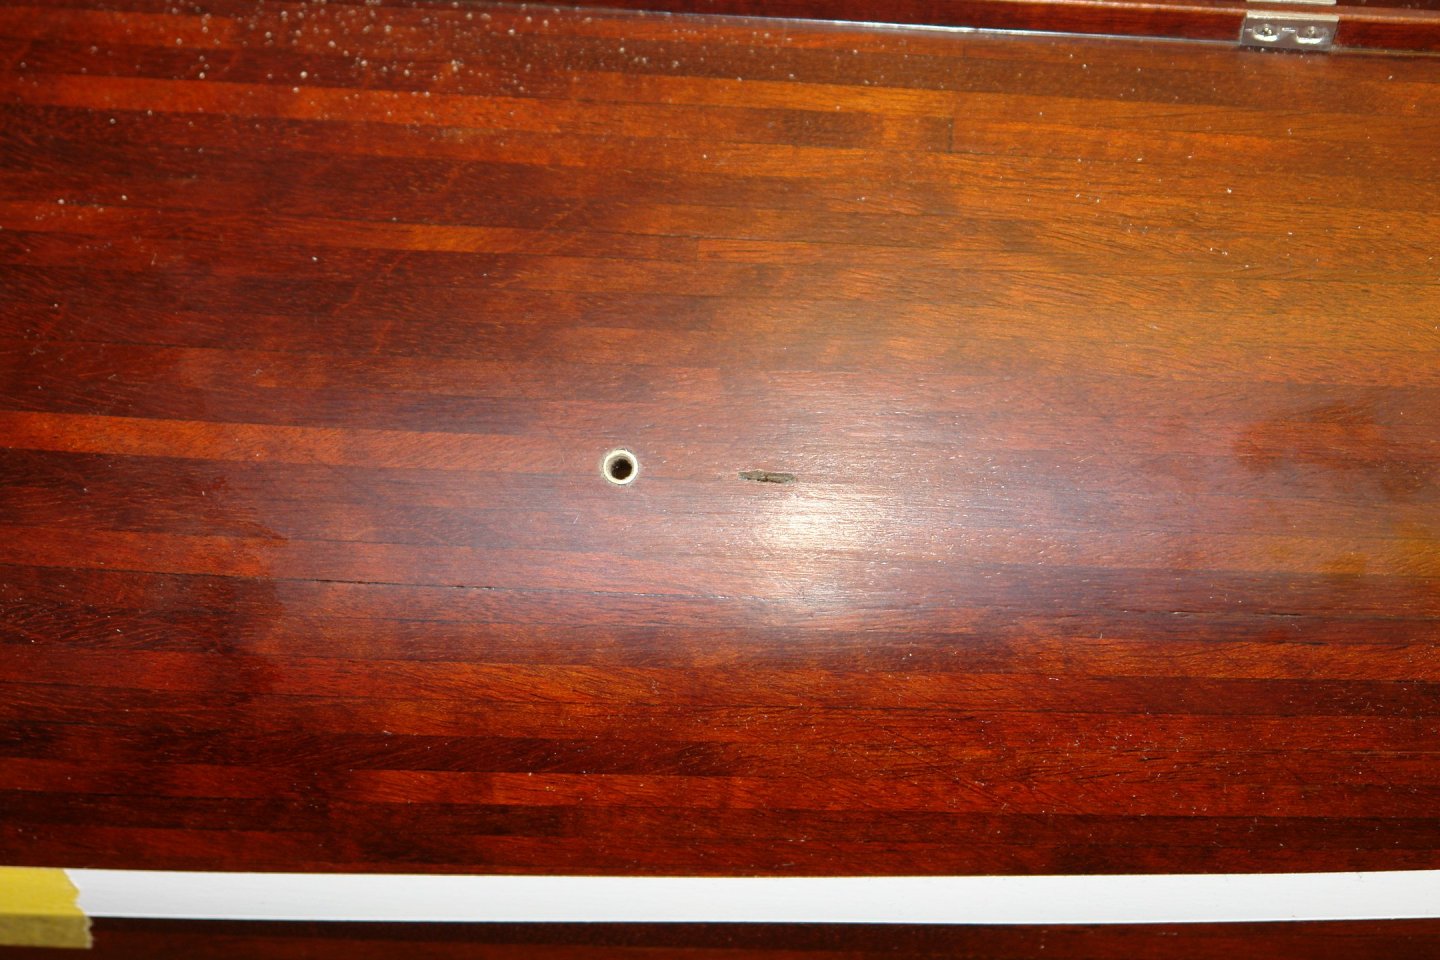
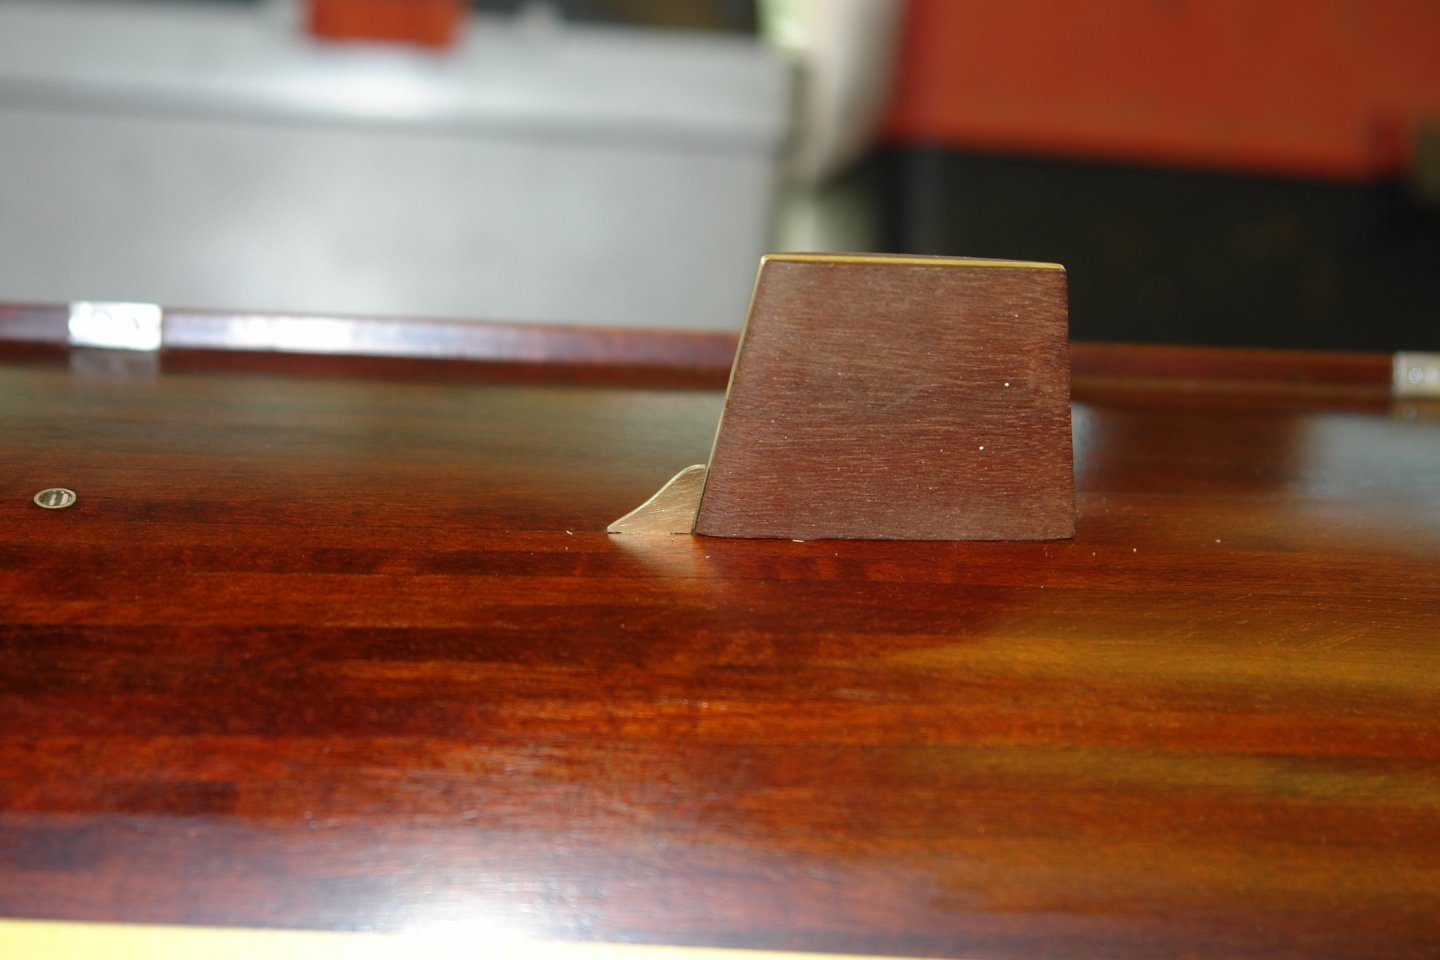
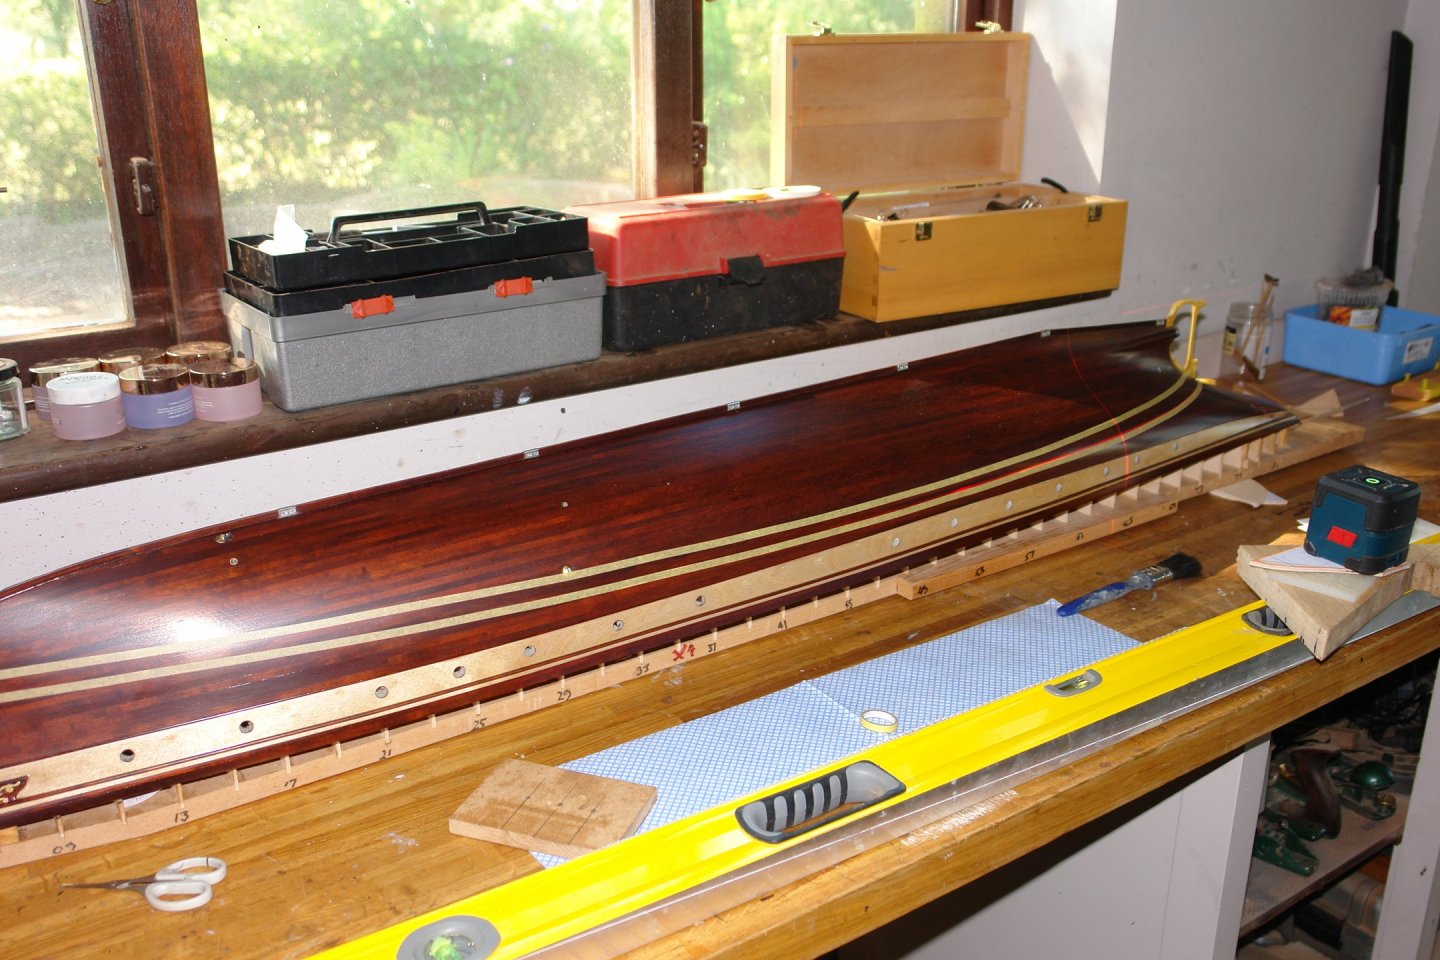
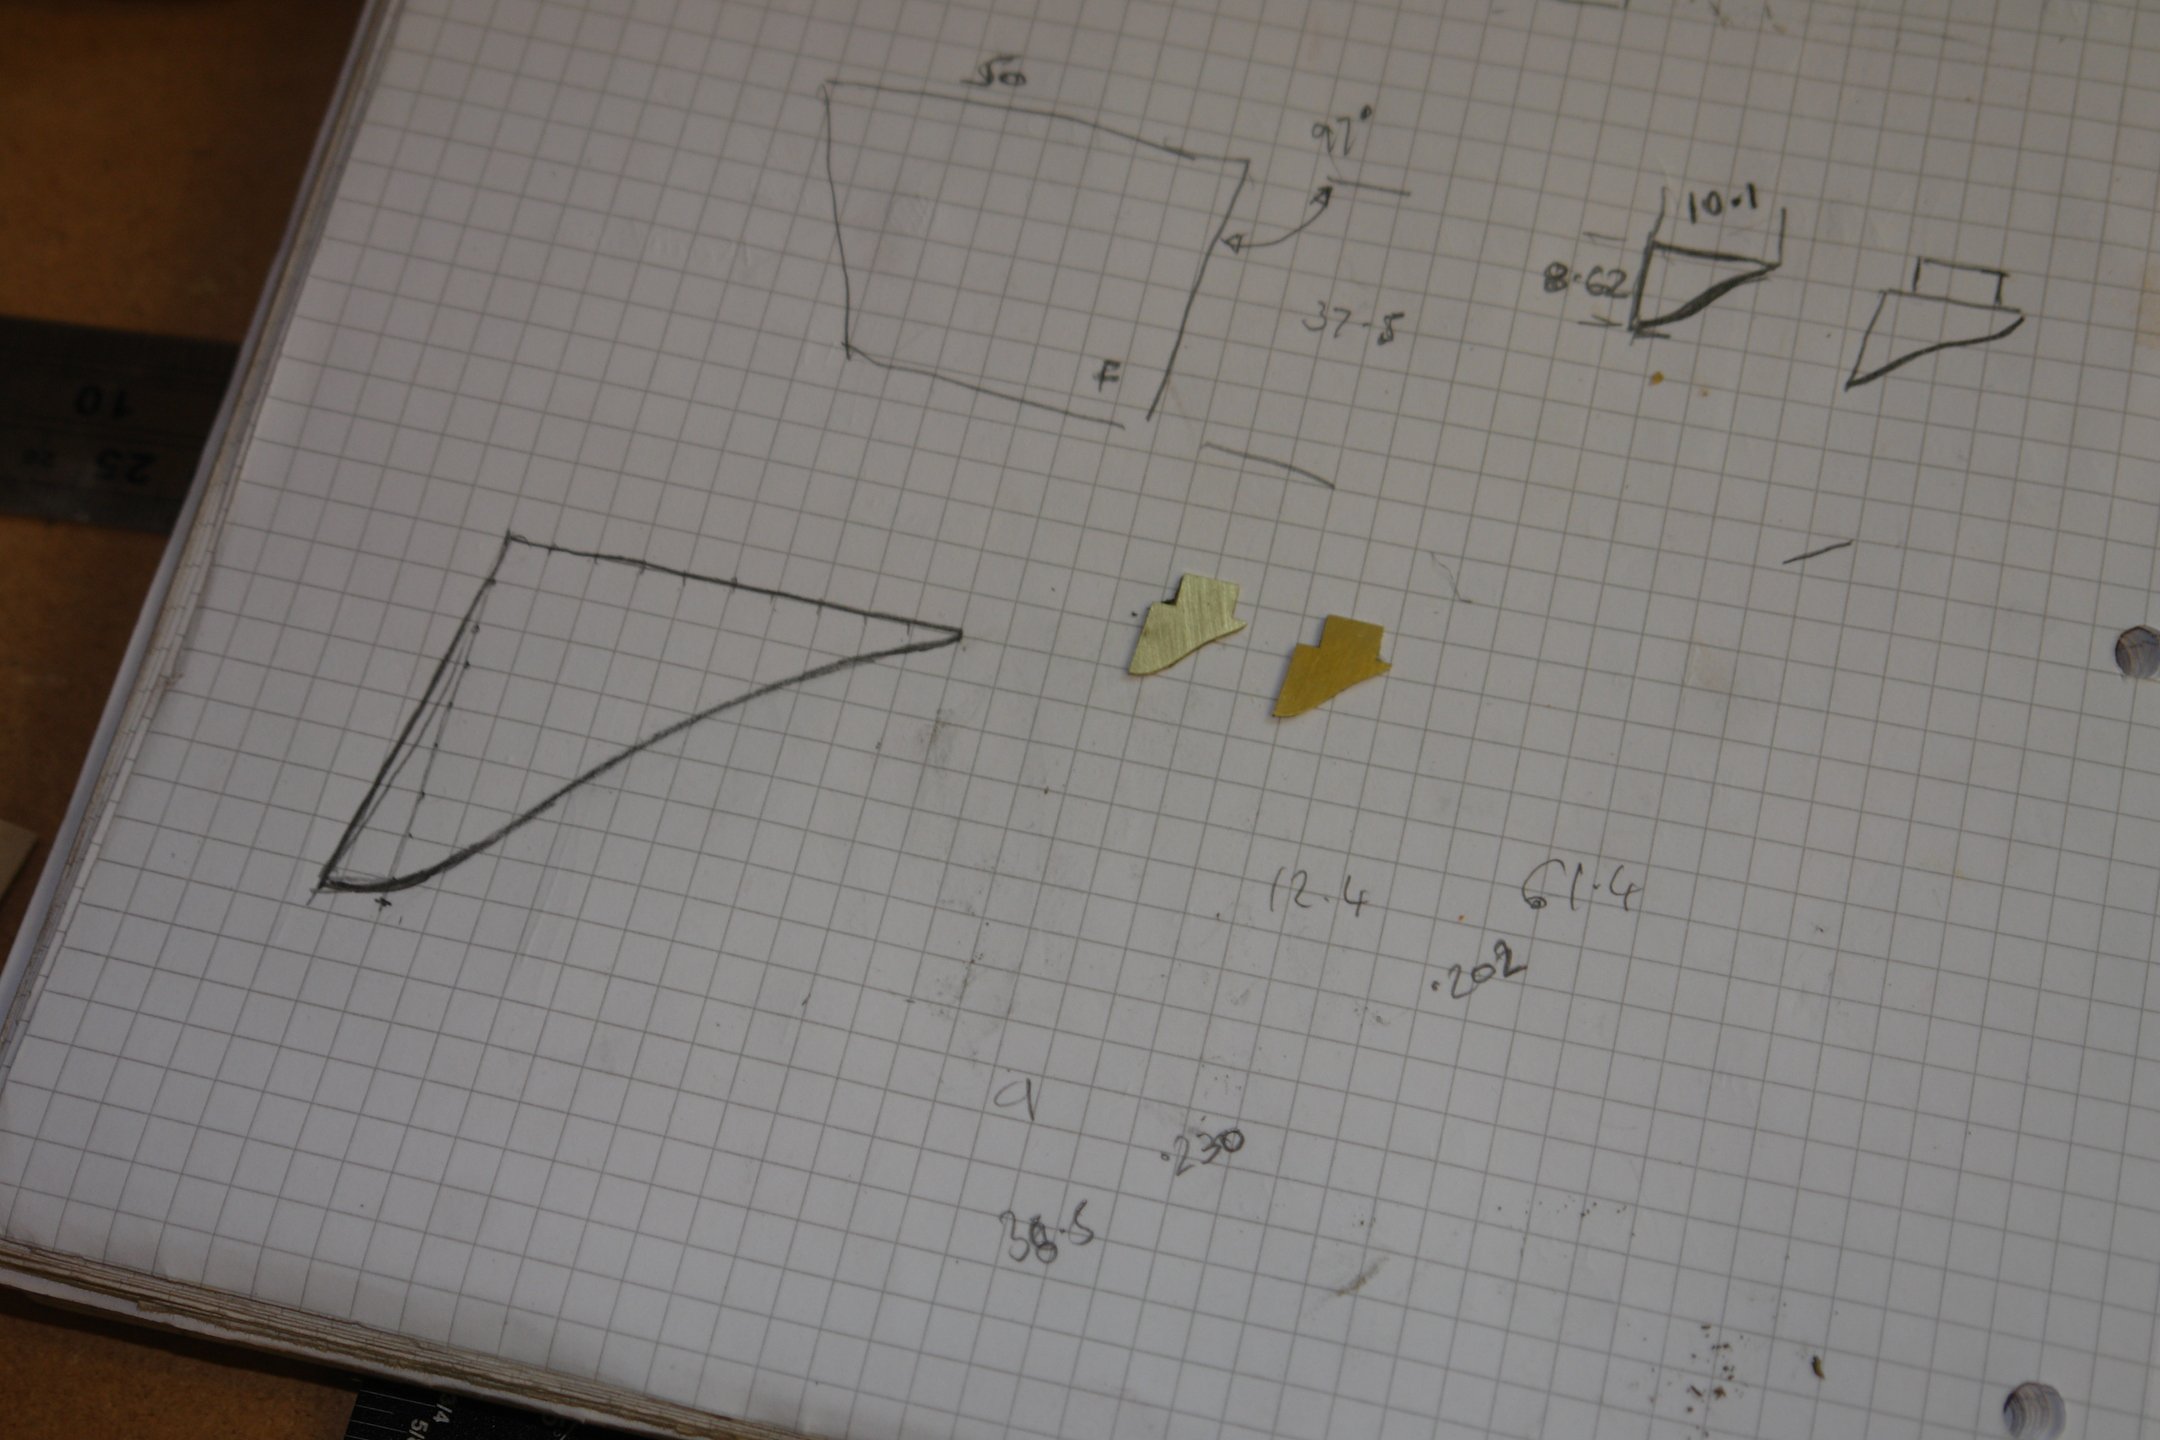
At the front of the stabilisers are a couple of metal fillets - presumably to deflect debris from the gap between the stabiliser and the hull. I'm not sure why the holes in the stabilisers are for and I have omitted them in error. I'll need to go back and insert these.
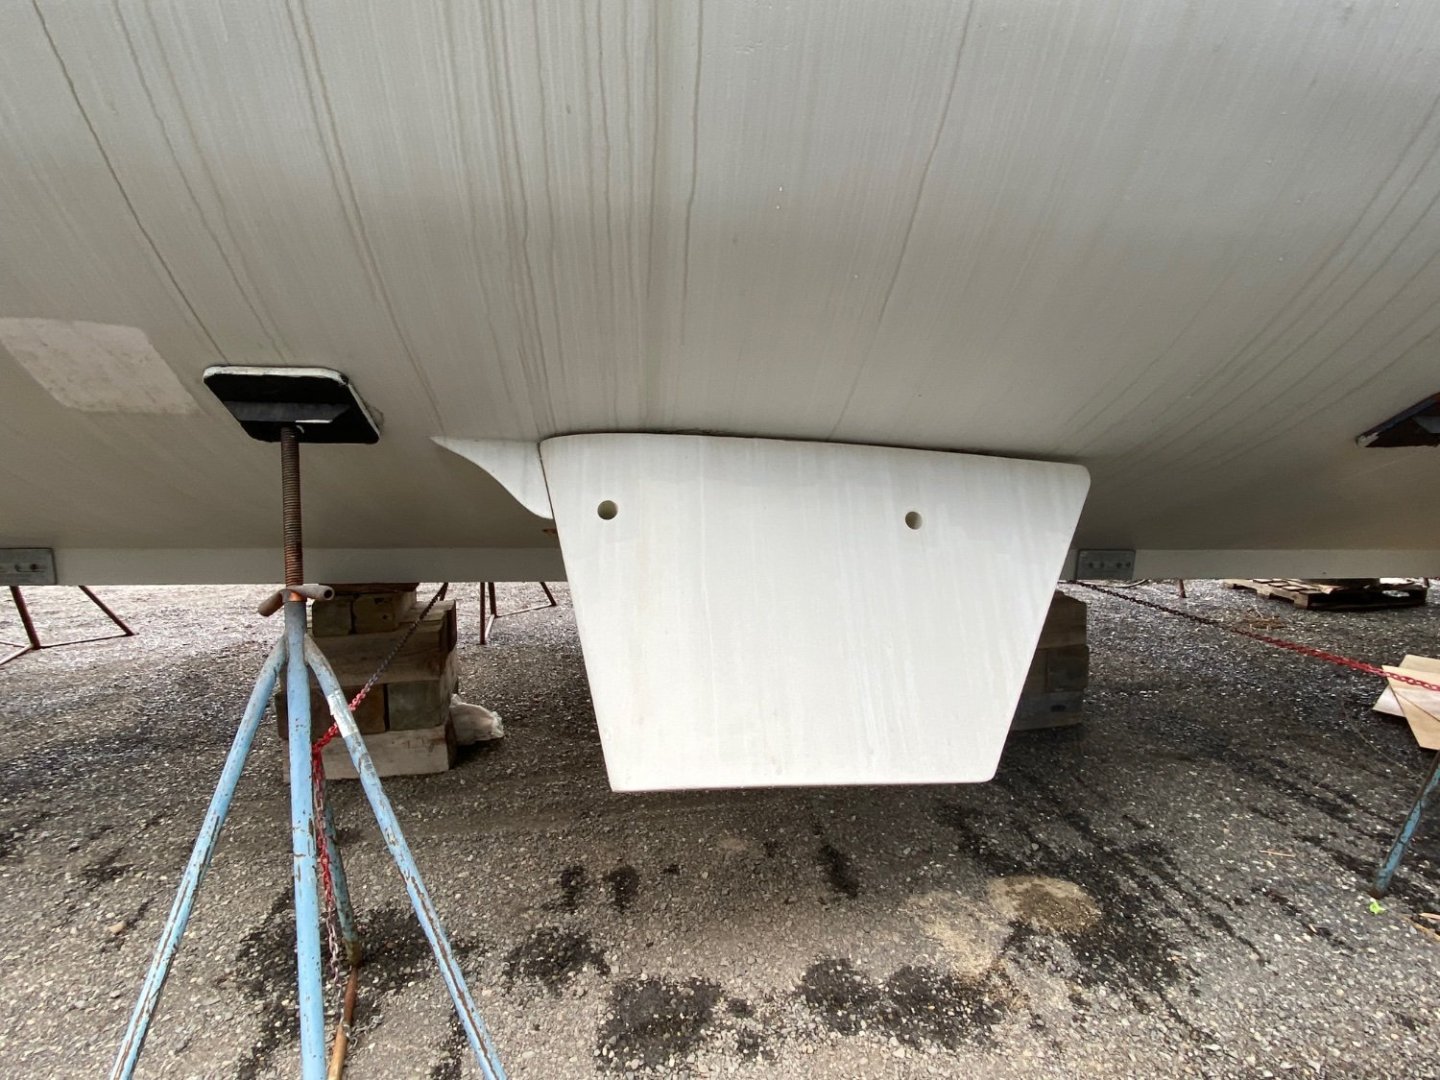
I cut the fillets from brass and included a web for mounting.

Cutting the slot in the hull was another stressful operation - I marked the slot position with card.

Before cutting the slot with an x-acto keyhole saw.
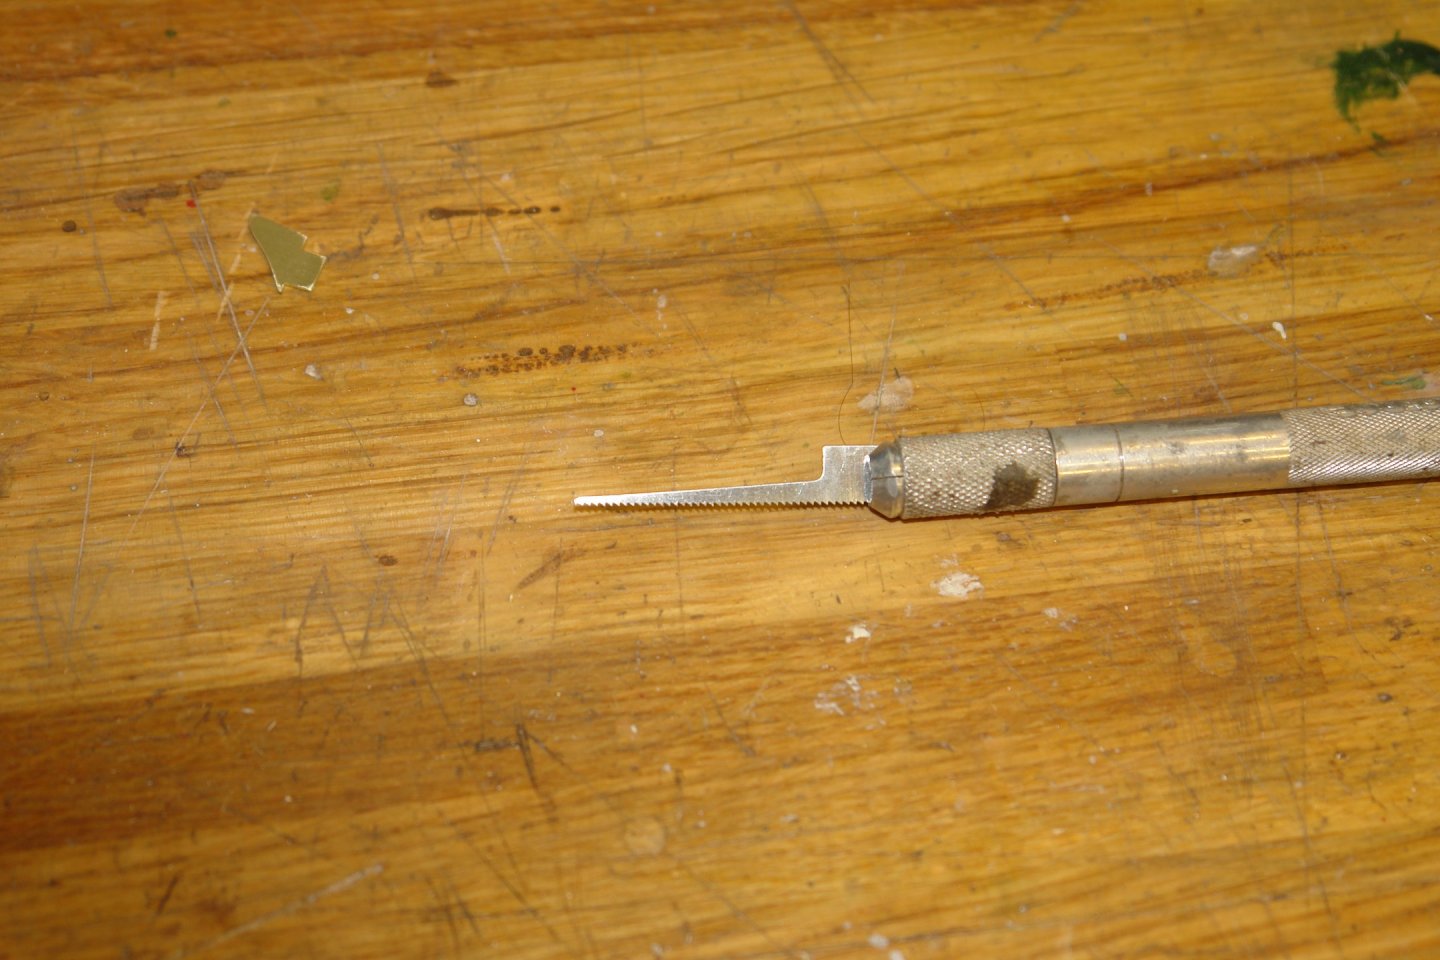
I took my time to avoid damaging the hull varnish.
The stabilisers and fillets were then Temporarily installed to test the fit.
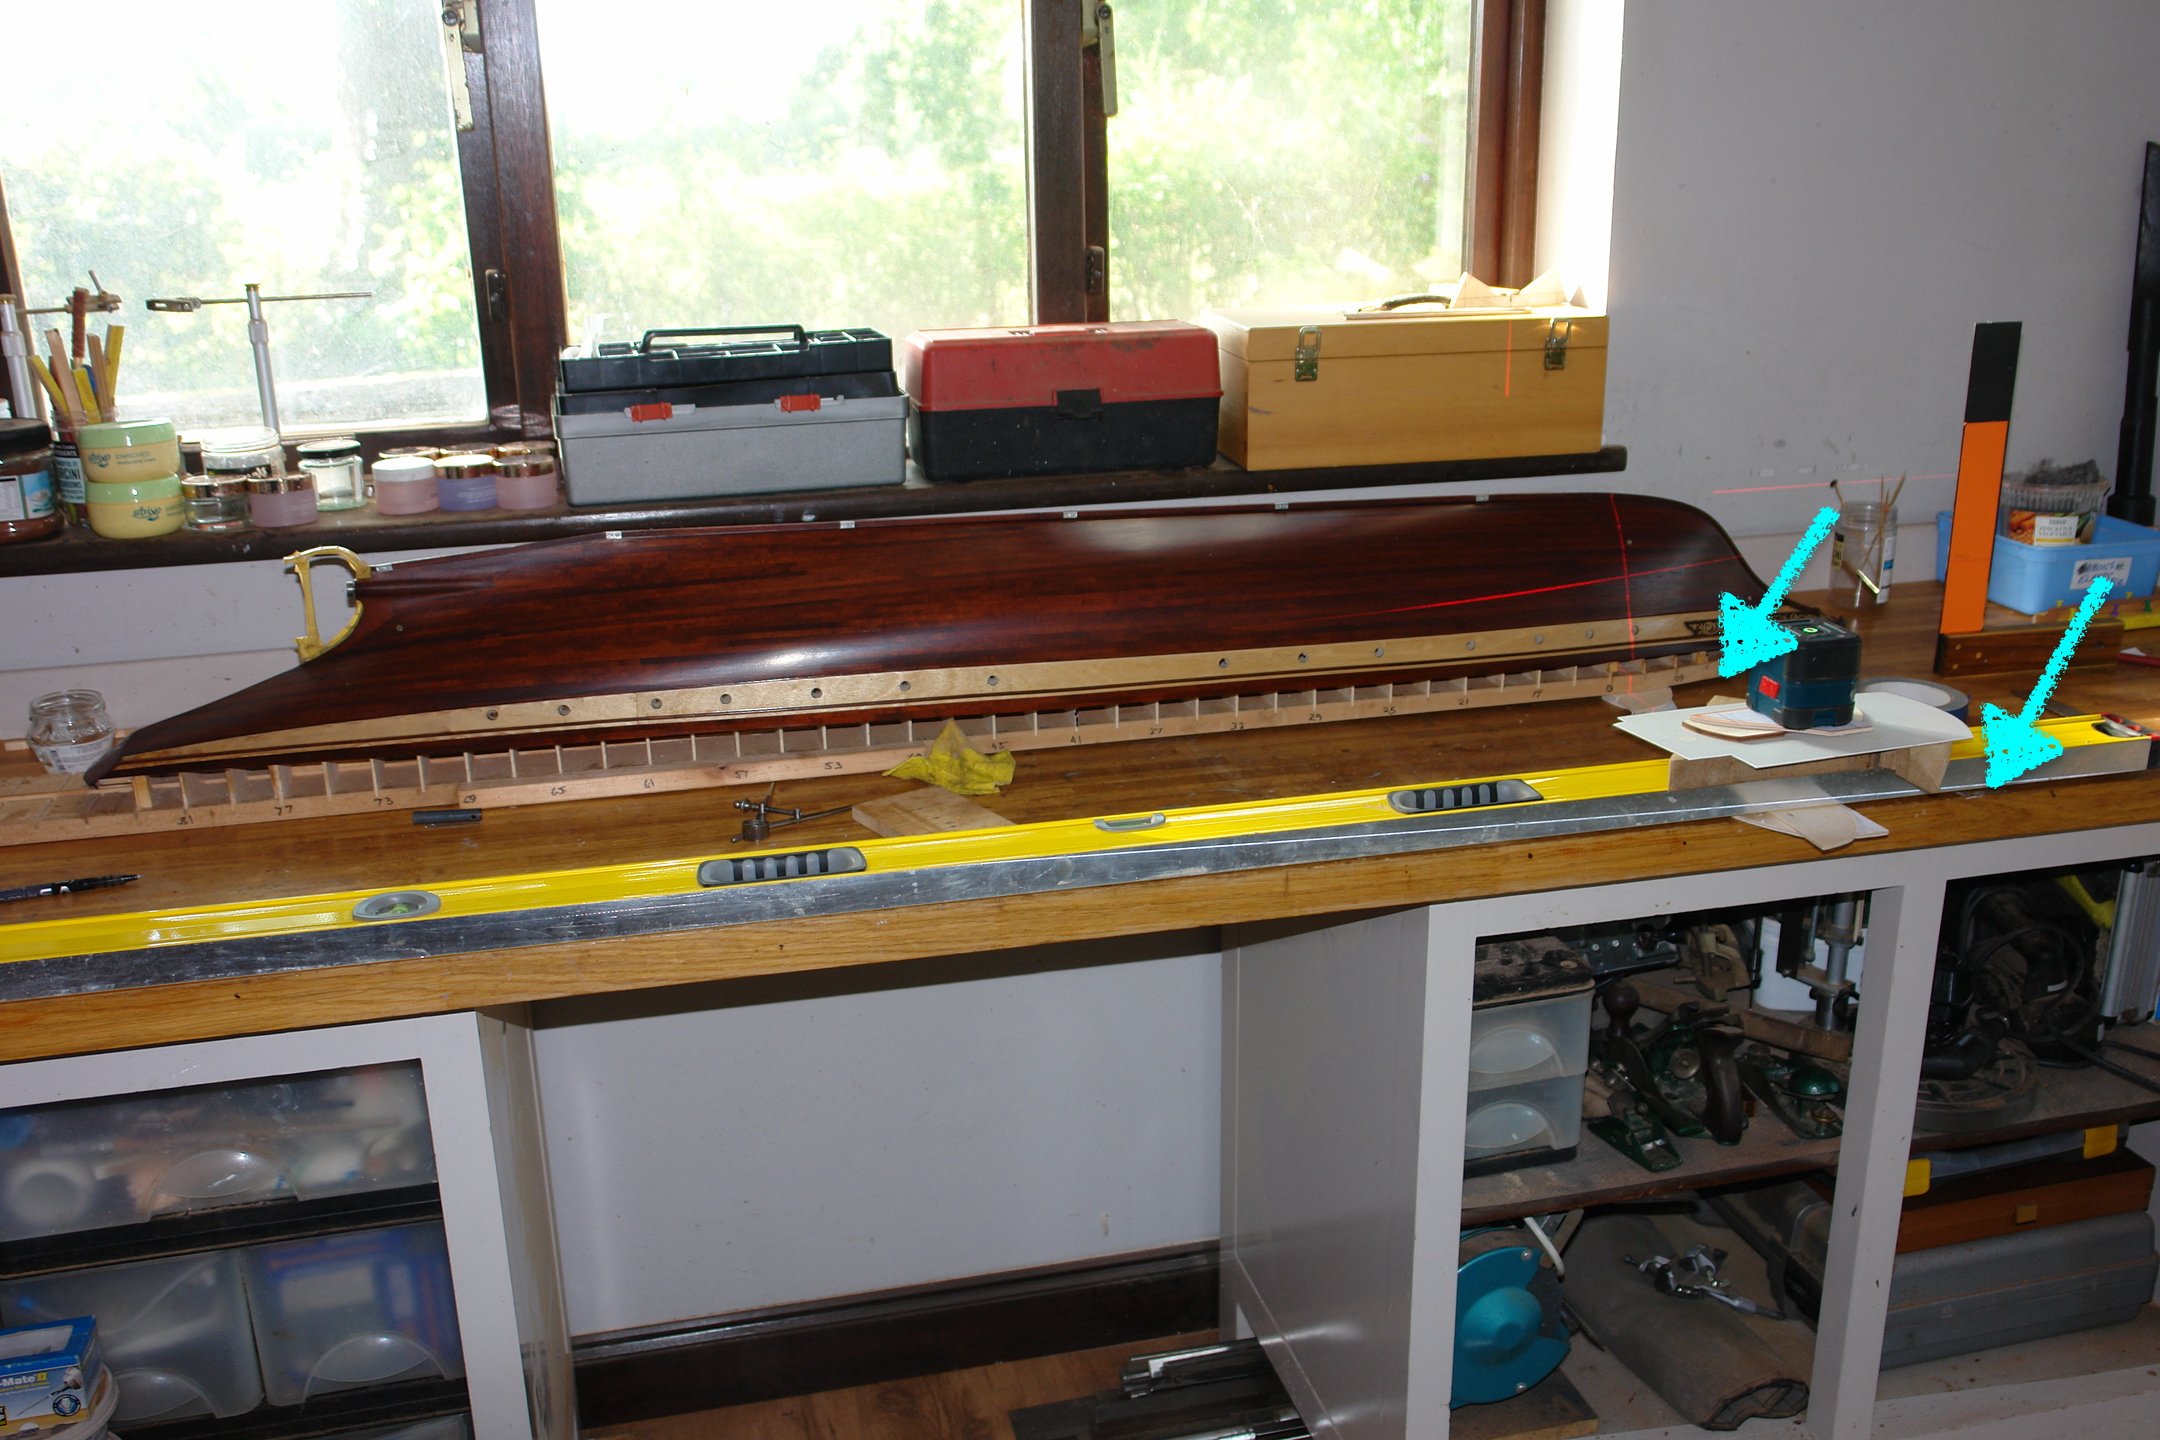
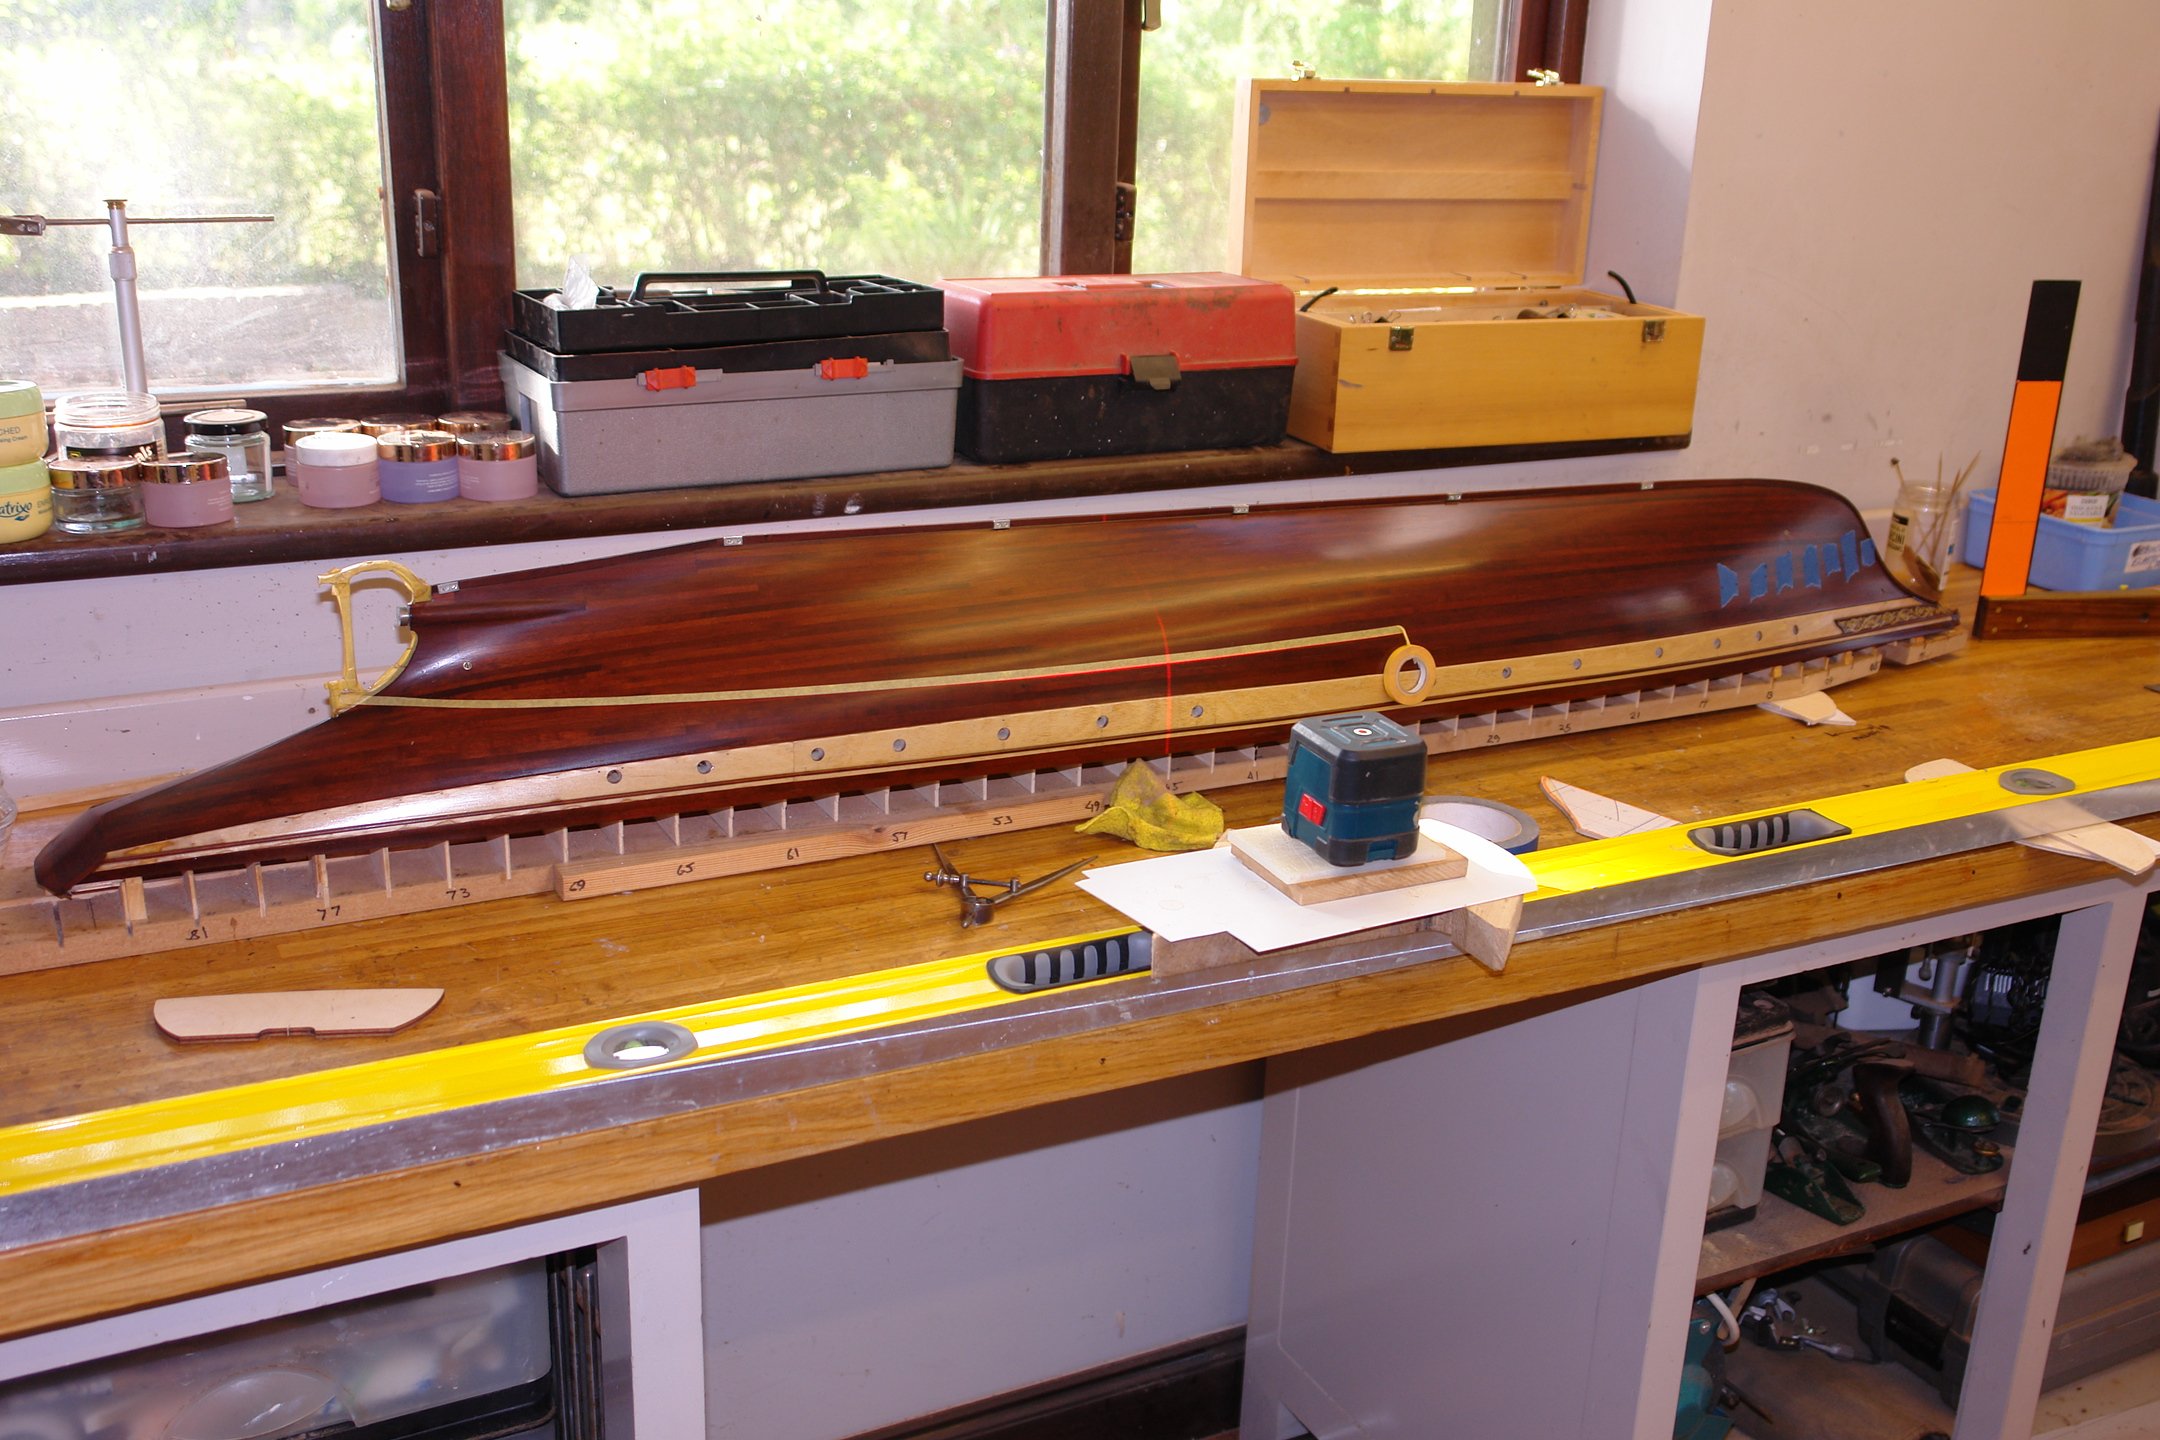
Then it was on to preparing for the paint job. Starting with the waterline stripe. I was having difficulty getting the waterline to sit at the correct height at bow and stern using the laser level. After some head scratching I realised that the bench wasn't perfectly horizontal. This of course wouldn't have been a problem if I had been marking the waterline with the traditional scribing block and pencil method. To sort the problem out I had to shim the base board at the bow. I also had to place a spirit level on the bench (as a track for the laser level), also shimmed to be horizontal. (See arrows).

Having sorted the levelling problem I went on to mark the waterline by laying the masking tape directly to the laser line.


After changing the height of laser I went on to mask the upper edge of the waterline.
Of course I then had to turn the hull round and re-level before taping the other side.
I didn't get any further with masking because I got the call for dinner. One must never delay when called by "she who must be obeyed" or the dinner will be in the dog.
- Paul Le Wol, Valeriy V, FriedClams and 8 others
-
10
-
 1
1
-
On 2/23/2025 at 12:03 PM, jerome said:
If it were I, I would leave the stabilizers off the boat.
I think they are going on Jerome. I'll just have to live with my discomfort.
- Keith Black and druxey
-
2
-
Absolutely beautiful work.
-
-
6 hours ago, Keith Black said:
It'd hold a tenth of an inch worth.
Ole Bob would find it acceptable.
- Keith Black, Canute, FriedClams and 1 other
-
4
-
On 2/22/2025 at 10:56 AM, Keith Black said:
see the link below.
Not very expensive then.
9 hours ago, Keith Black said:a coffee pot to scale would be about 0.10 inches. I don't have the equipment to make things that small.
Keith - You could always try a bit of tin basing and solder. You would only need basic hand tools. 🙂🙂🙂
- lraymo, FriedClams, Glen McGuire and 2 others
-
5
-
Another interesting vessel Ras. I look forward to seeing how she develops.
- Canute, FriedClams and Keith Black
-
3
-
On 2/18/2025 at 9:07 PM, Lecrenb said:
I ordered 10 from Cornwall Model Boats.
I am always amazed how far Cornwall Model Boats business extends. Nearly as famous as Wall Drug.
On 2/18/2025 at 9:07 PM, Lecrenb said:After drilling the holes straight into the hull I used my 4" round file to set the hole profile.
Always a tricky and stressful job Bruce, but you executed it well.
- druxey, FriedClams and Keith Black
-
3
-
-
-
She is coming along very nicely.
-
2 hours ago, Dr PR said:
An accurate representation of a vessel at some point in time?
Phil - Yes
-
On 2/21/2025 at 11:22 PM, Bedford said:
she would have been a bit roly poly I imagine.
Yes Steve - her bottom isn't very flat and I guess this would have had a negative impact on righting moment.
- Keith Black and FriedClams
-
2
-
-
Craig / Valeriy and all other visitors to my build - thank you for your contributions.
- FriedClams, Keith Black, Rick310 and 1 other
-
4
-
1 hour ago, yvesvidal said:
I would not install them.
Plus they will get broken in the process of building the superstructures and handling the hull.
Yves, I feel compelled to resit my desire to exclude them. I am hoping that finishing them in mahogany to match the lower hull will cause them to fade into the background. 🤞
As for breakages.😬
- yvesvidal, FriedClams and Keith Black
-
3


Cangarda 1901 by KeithAug - Scale 1:24 - Steam Yacht
in - Build logs for subjects built 1901 - Present Day
Posted
I have spent a few days masking and spraying. Fortunately the workshop temperature has climbed to a balmy 49f / 9.5c.
I completed the masking using a combination of Tamiya tape for the edges and blue painters tape for the less sensitive areas.
The larger areas were covered with paper taped at the edges.
I sprayed a white waterline band using Humbrol white enamel paint.
I then masked off the watering band and exposed the 1/32" ply compensation plates.
Having gone to all that trouble with varnishing the hull I have decided to go minimalist on the hull painting. The new plan is to paint the compensating plates green to match the hull colour. I can always paint the rest of the hull above the waterline if I don't like the result.
Getting the right green wasn't easy but by mixing Humbrol Brunswick with Humbrol Black I was able to achieve something that looked near enough. The lighter green (arrow below) is Brunswick and the second arrow is the Brunswick / Black blend.
I mixed plenty so that I didn't run out mid application.
After leaving the paint to dry overnight I peeled off the tape.
I paid a lot of attention to the tape edges before painting and thankfully the only bleed area was at the bow between the junction of the keel and the hull.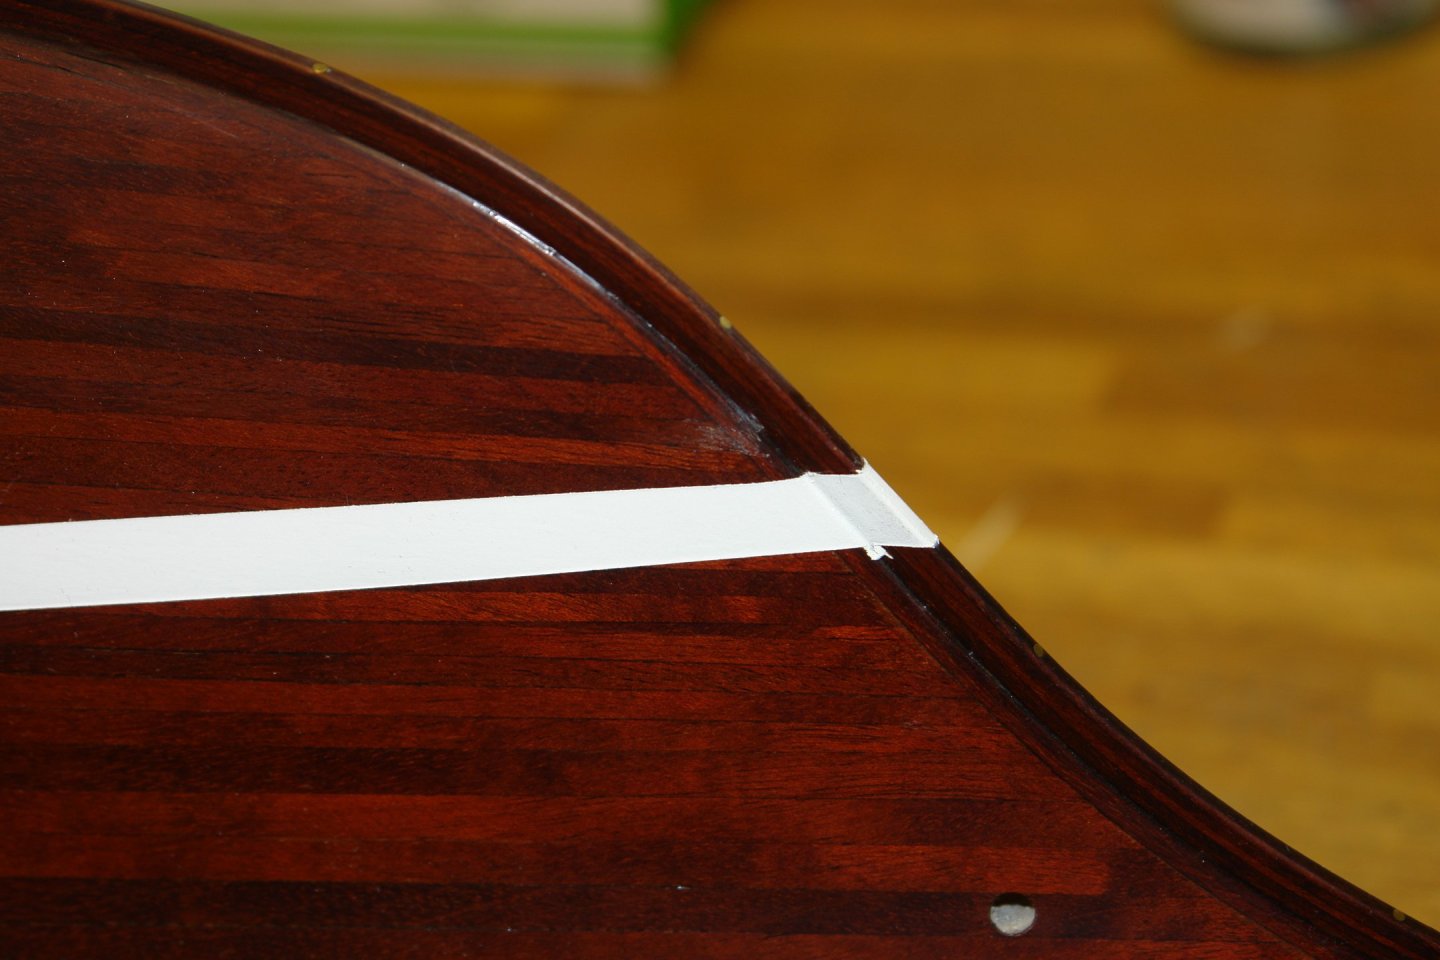
I think I will be able to scrape off the bleed with a sharp blade before touching up with a little varnish. I don't think I need to paint the remainder of the hull above the waterline.