KeithAug
-
Posts
3,986 -
Joined
-
Last visited
Content Type
Profiles
Forums
Gallery
Events
Everything posted by KeithAug
-
 Martin - she does have elegant lines and quite a narrow beam - obviously built for speed.
 -
Pat / Richard I won't glue the deckhouse down as it fits tightly in the well in the deck, however this is only a partial benefit as the main boom will sit above it and sheeting the boom down will prevent it being lifted out. Removal will be possible by releasing the boom sheets but not something I will want to do ofter. Thank you for your kind comments. Good points but somewhat time limited. My plan is to tell the Granddaughter and leave it to her in my will.
-
Eberhard The gun carriage looks excellent in its barbette. But I have a question, where did the gun crew shelter when the gun fired. I'm guessing the muzzle blast would have been quite uncomfortable if they sheltered in the barbette but I can't see any other obvious options?
-
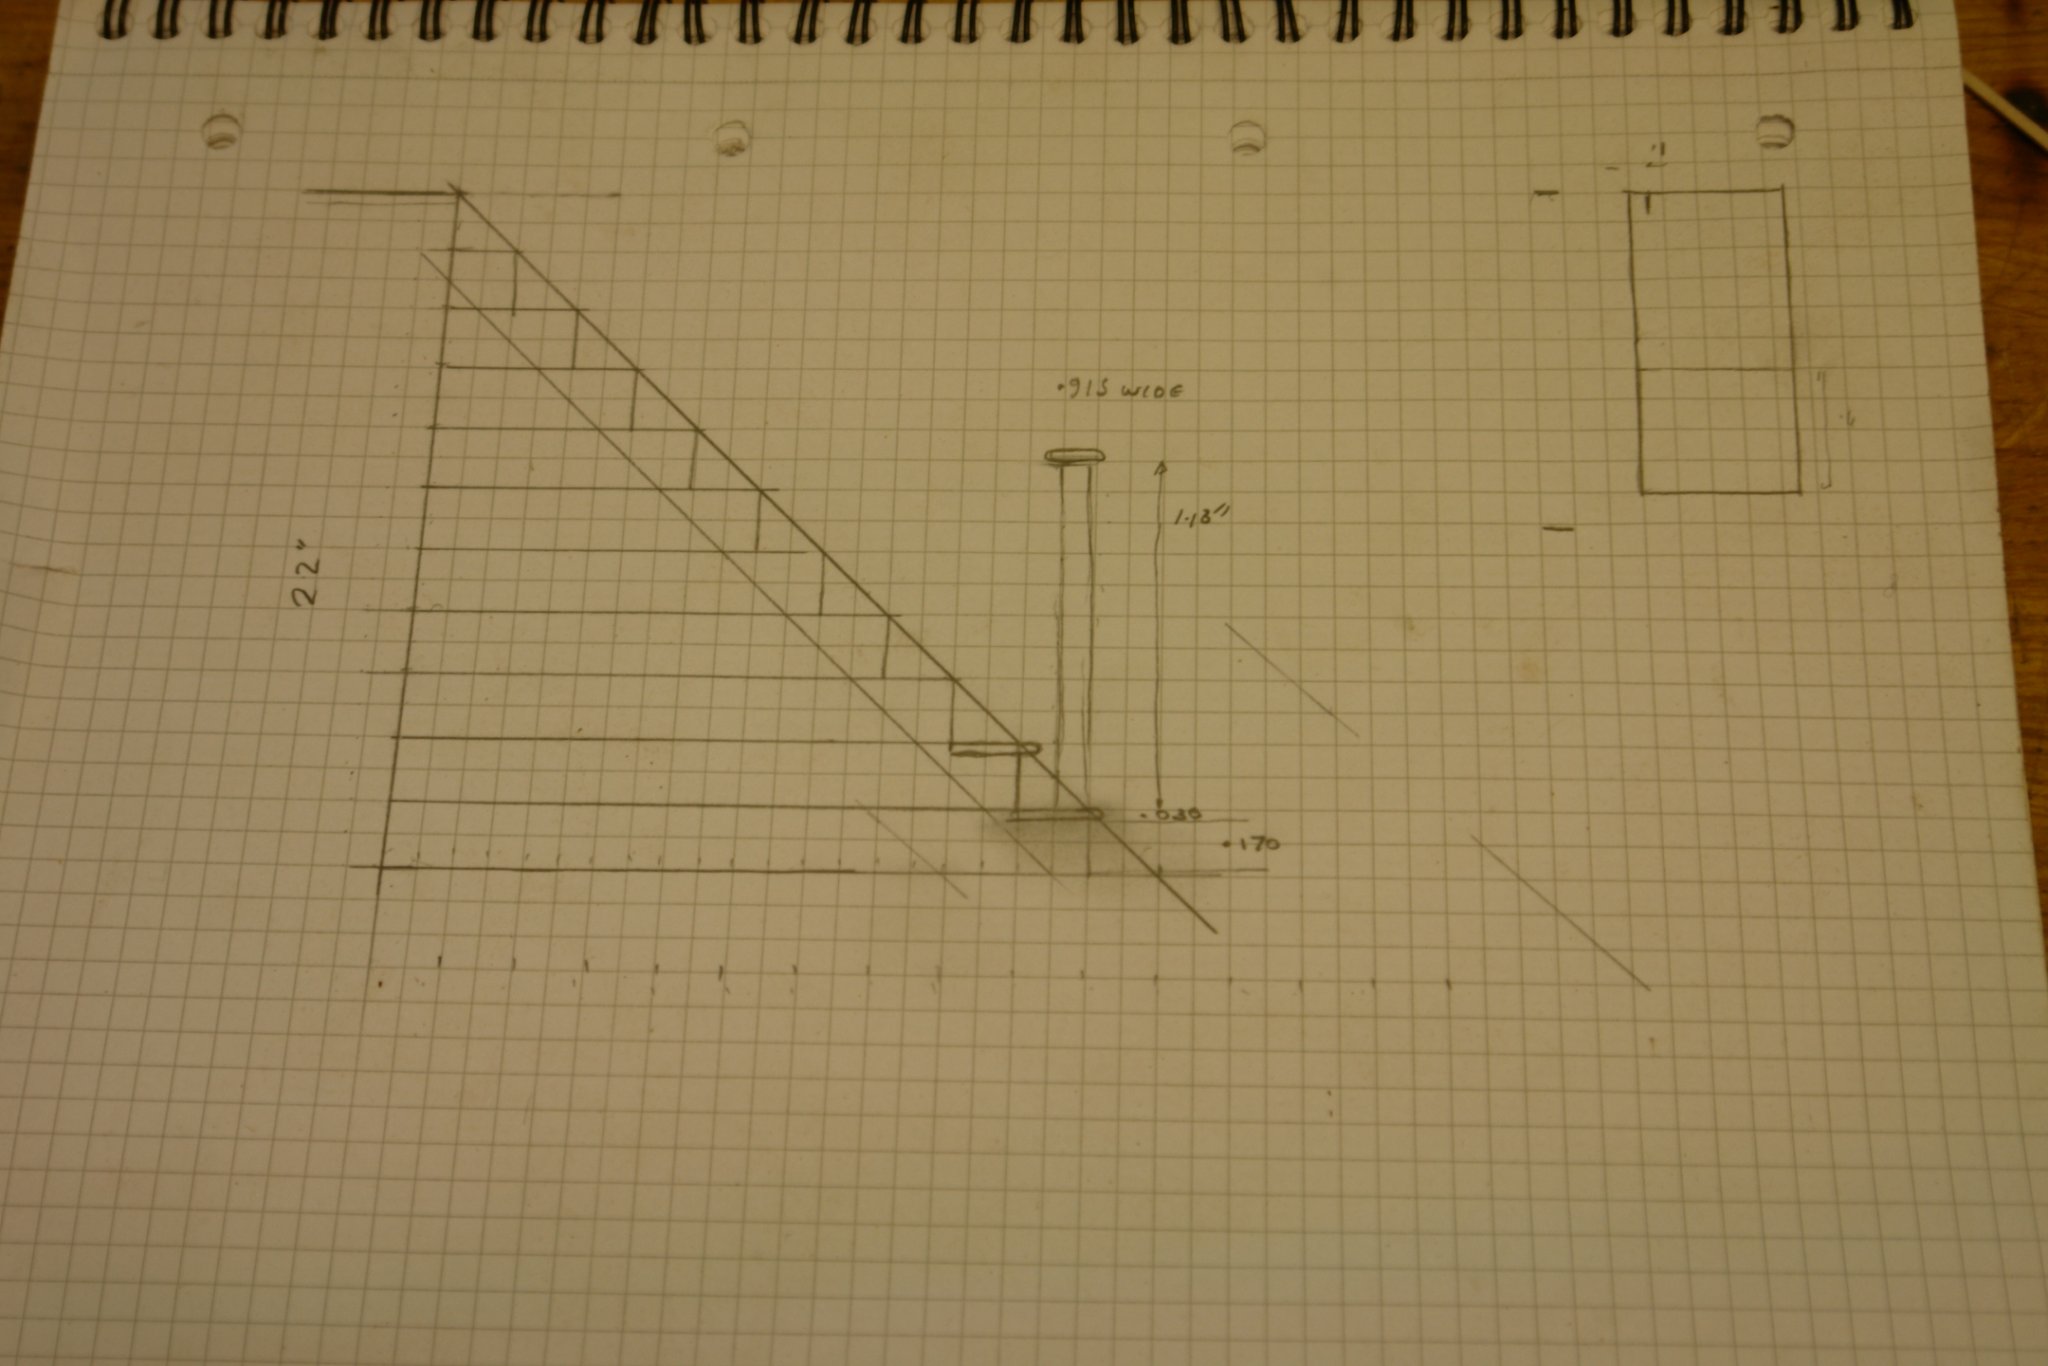
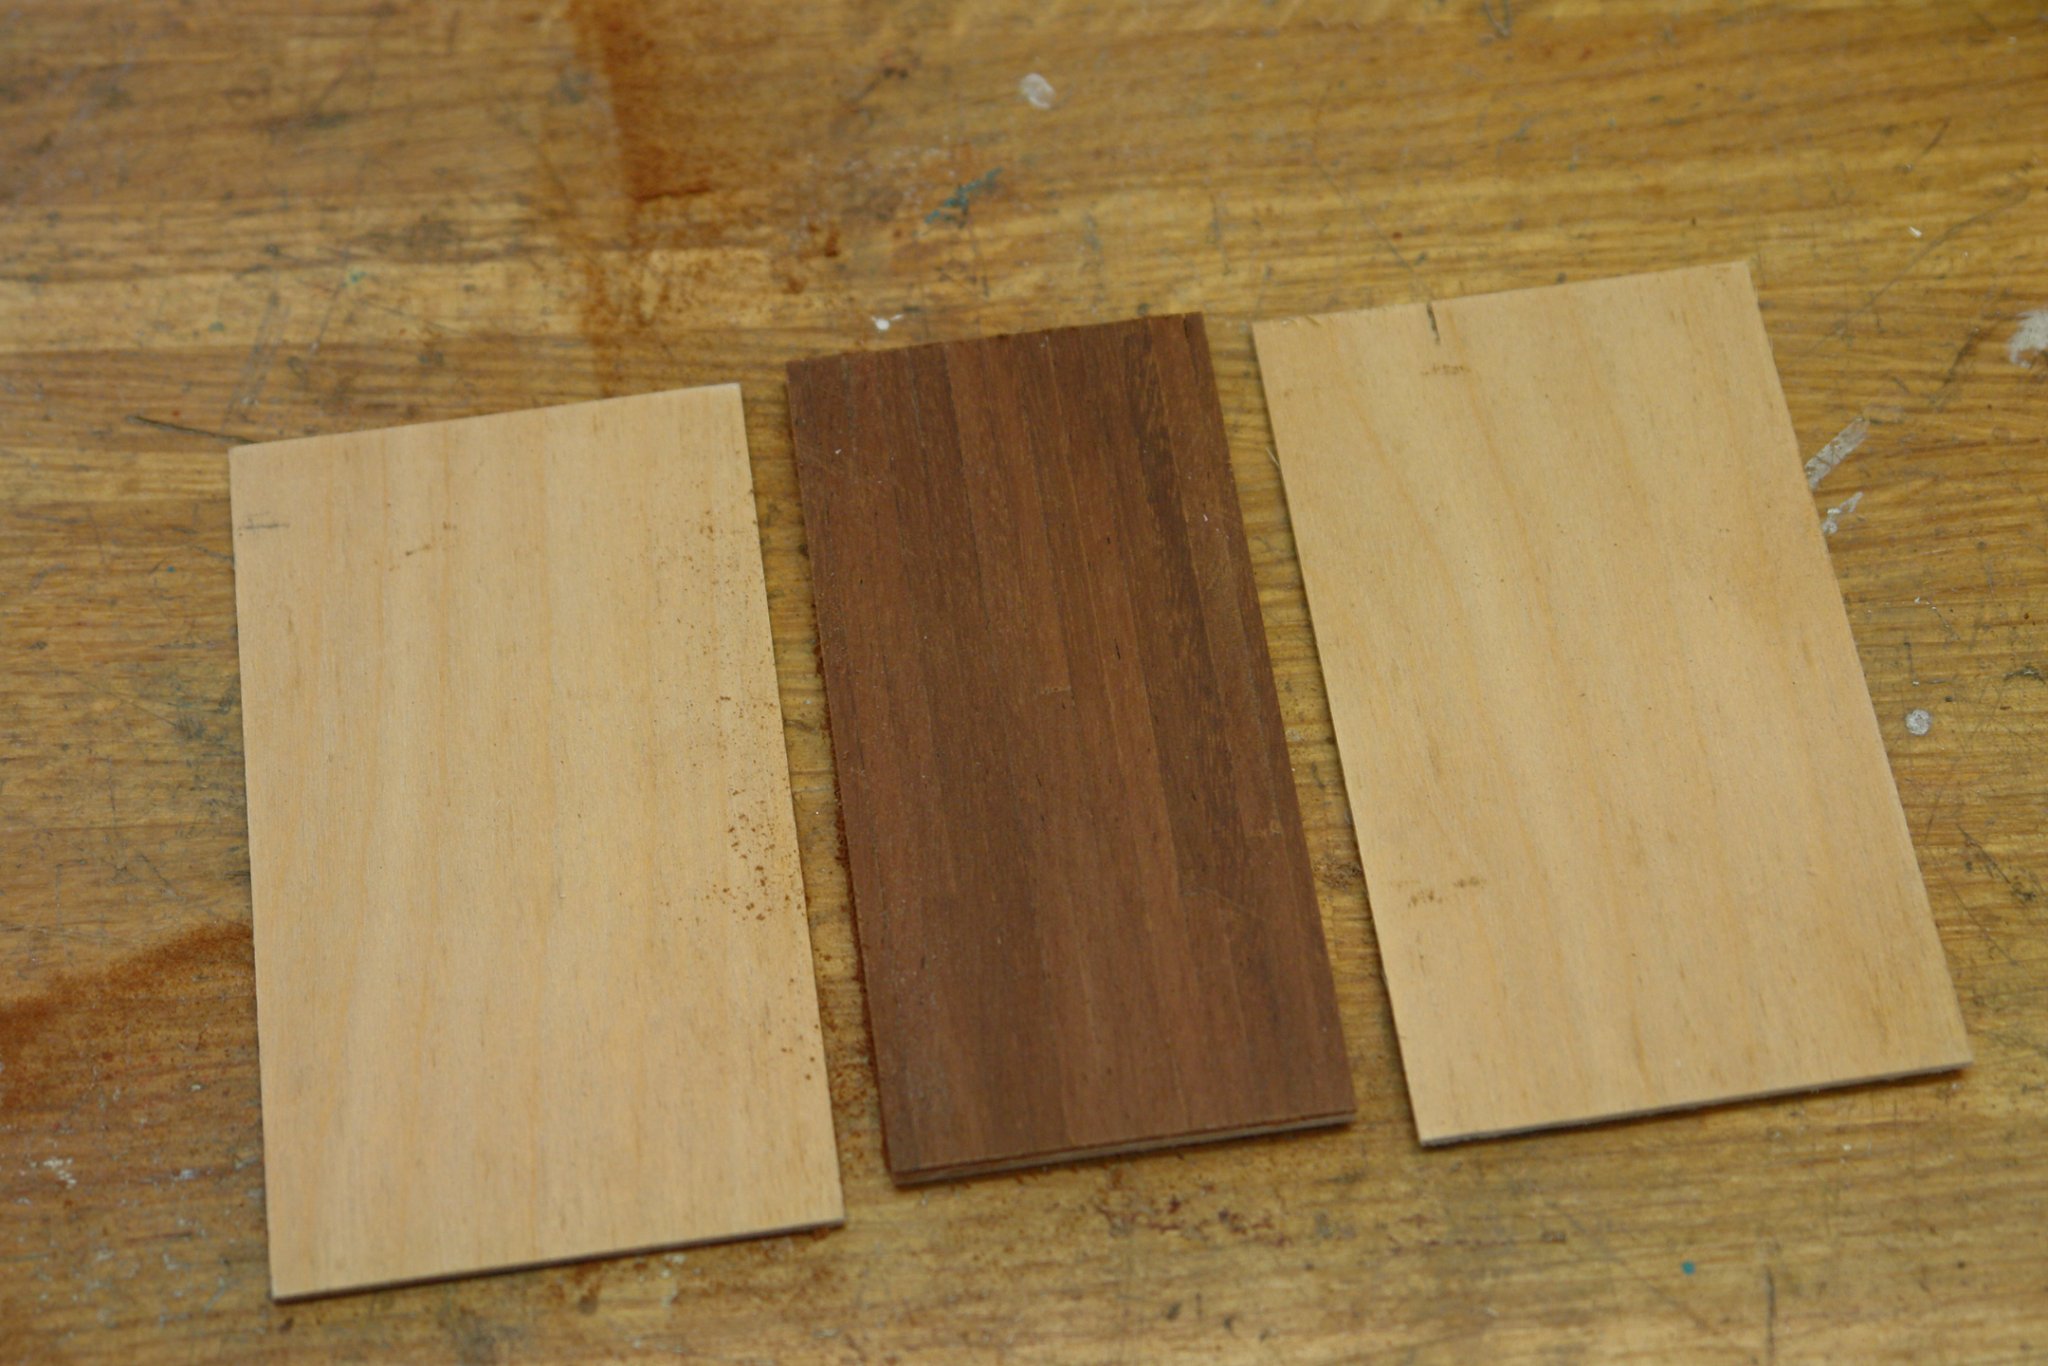
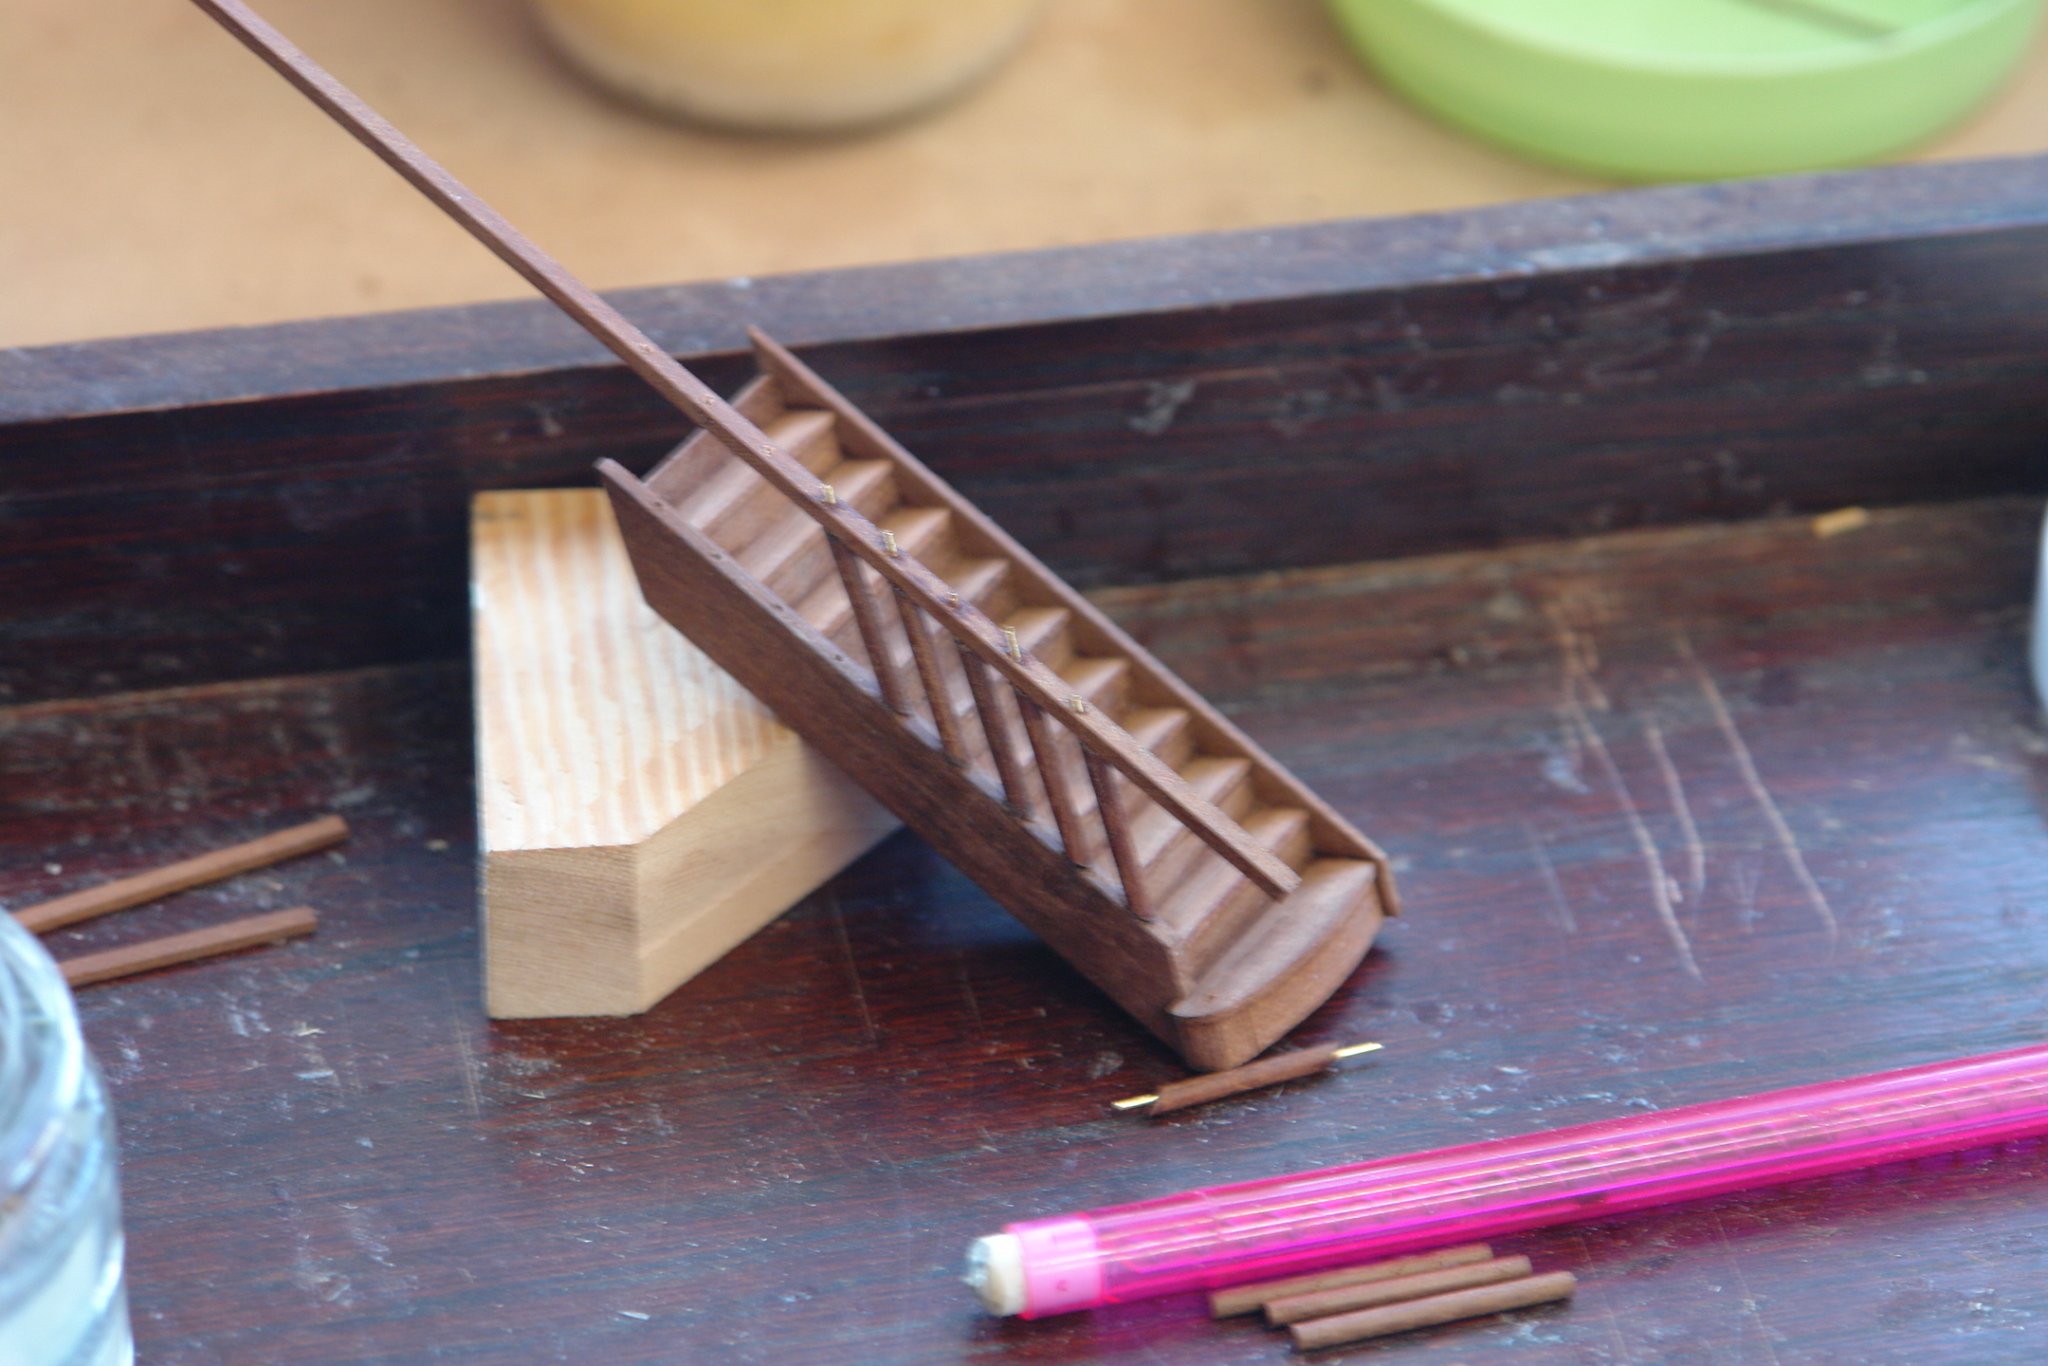
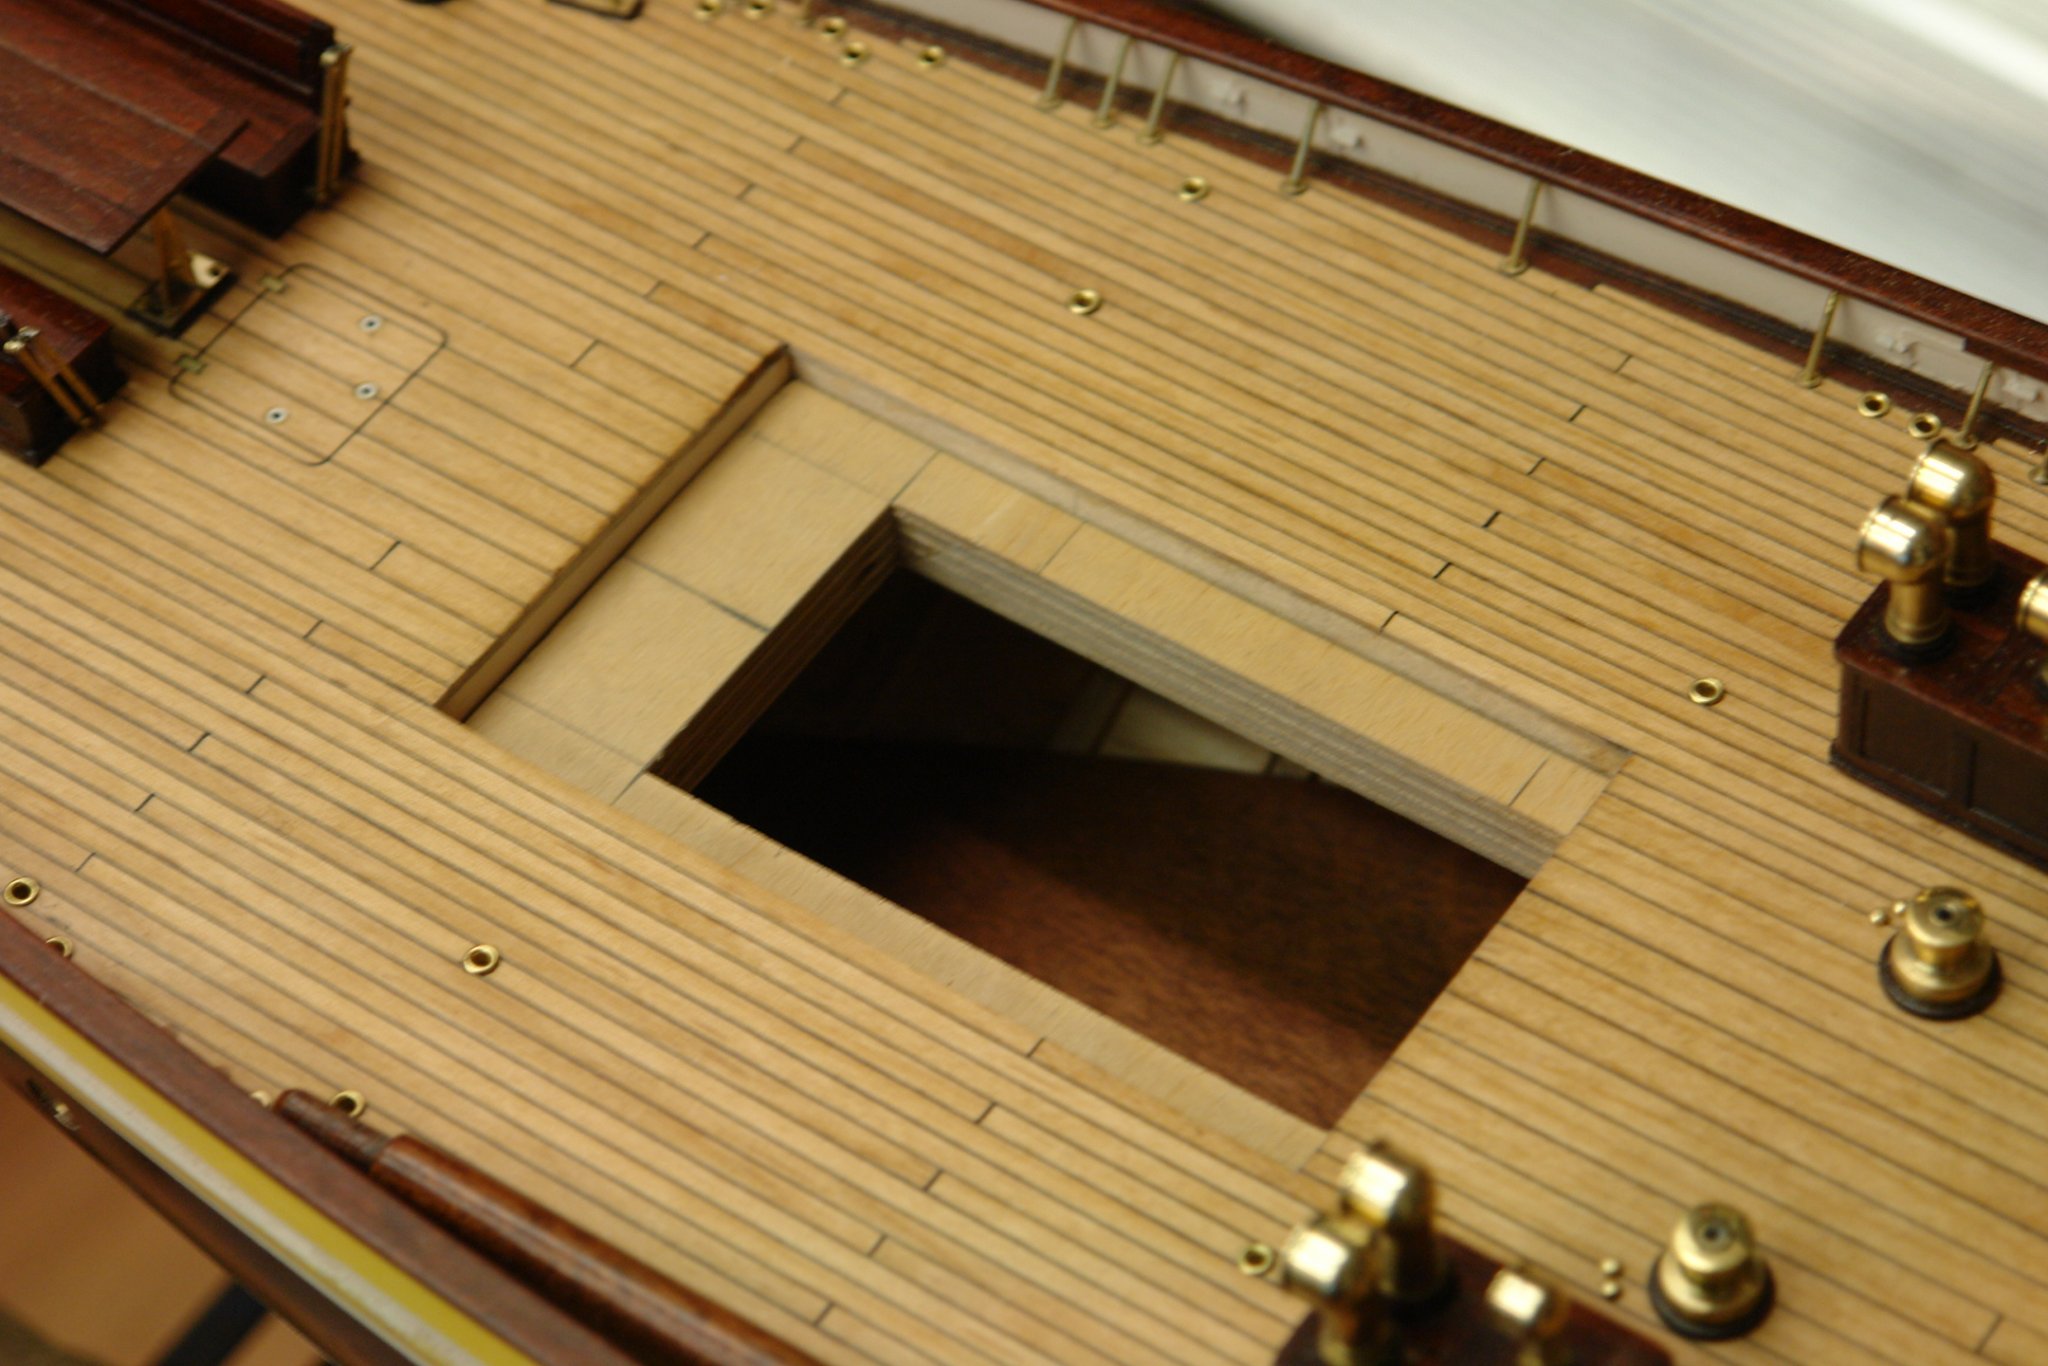
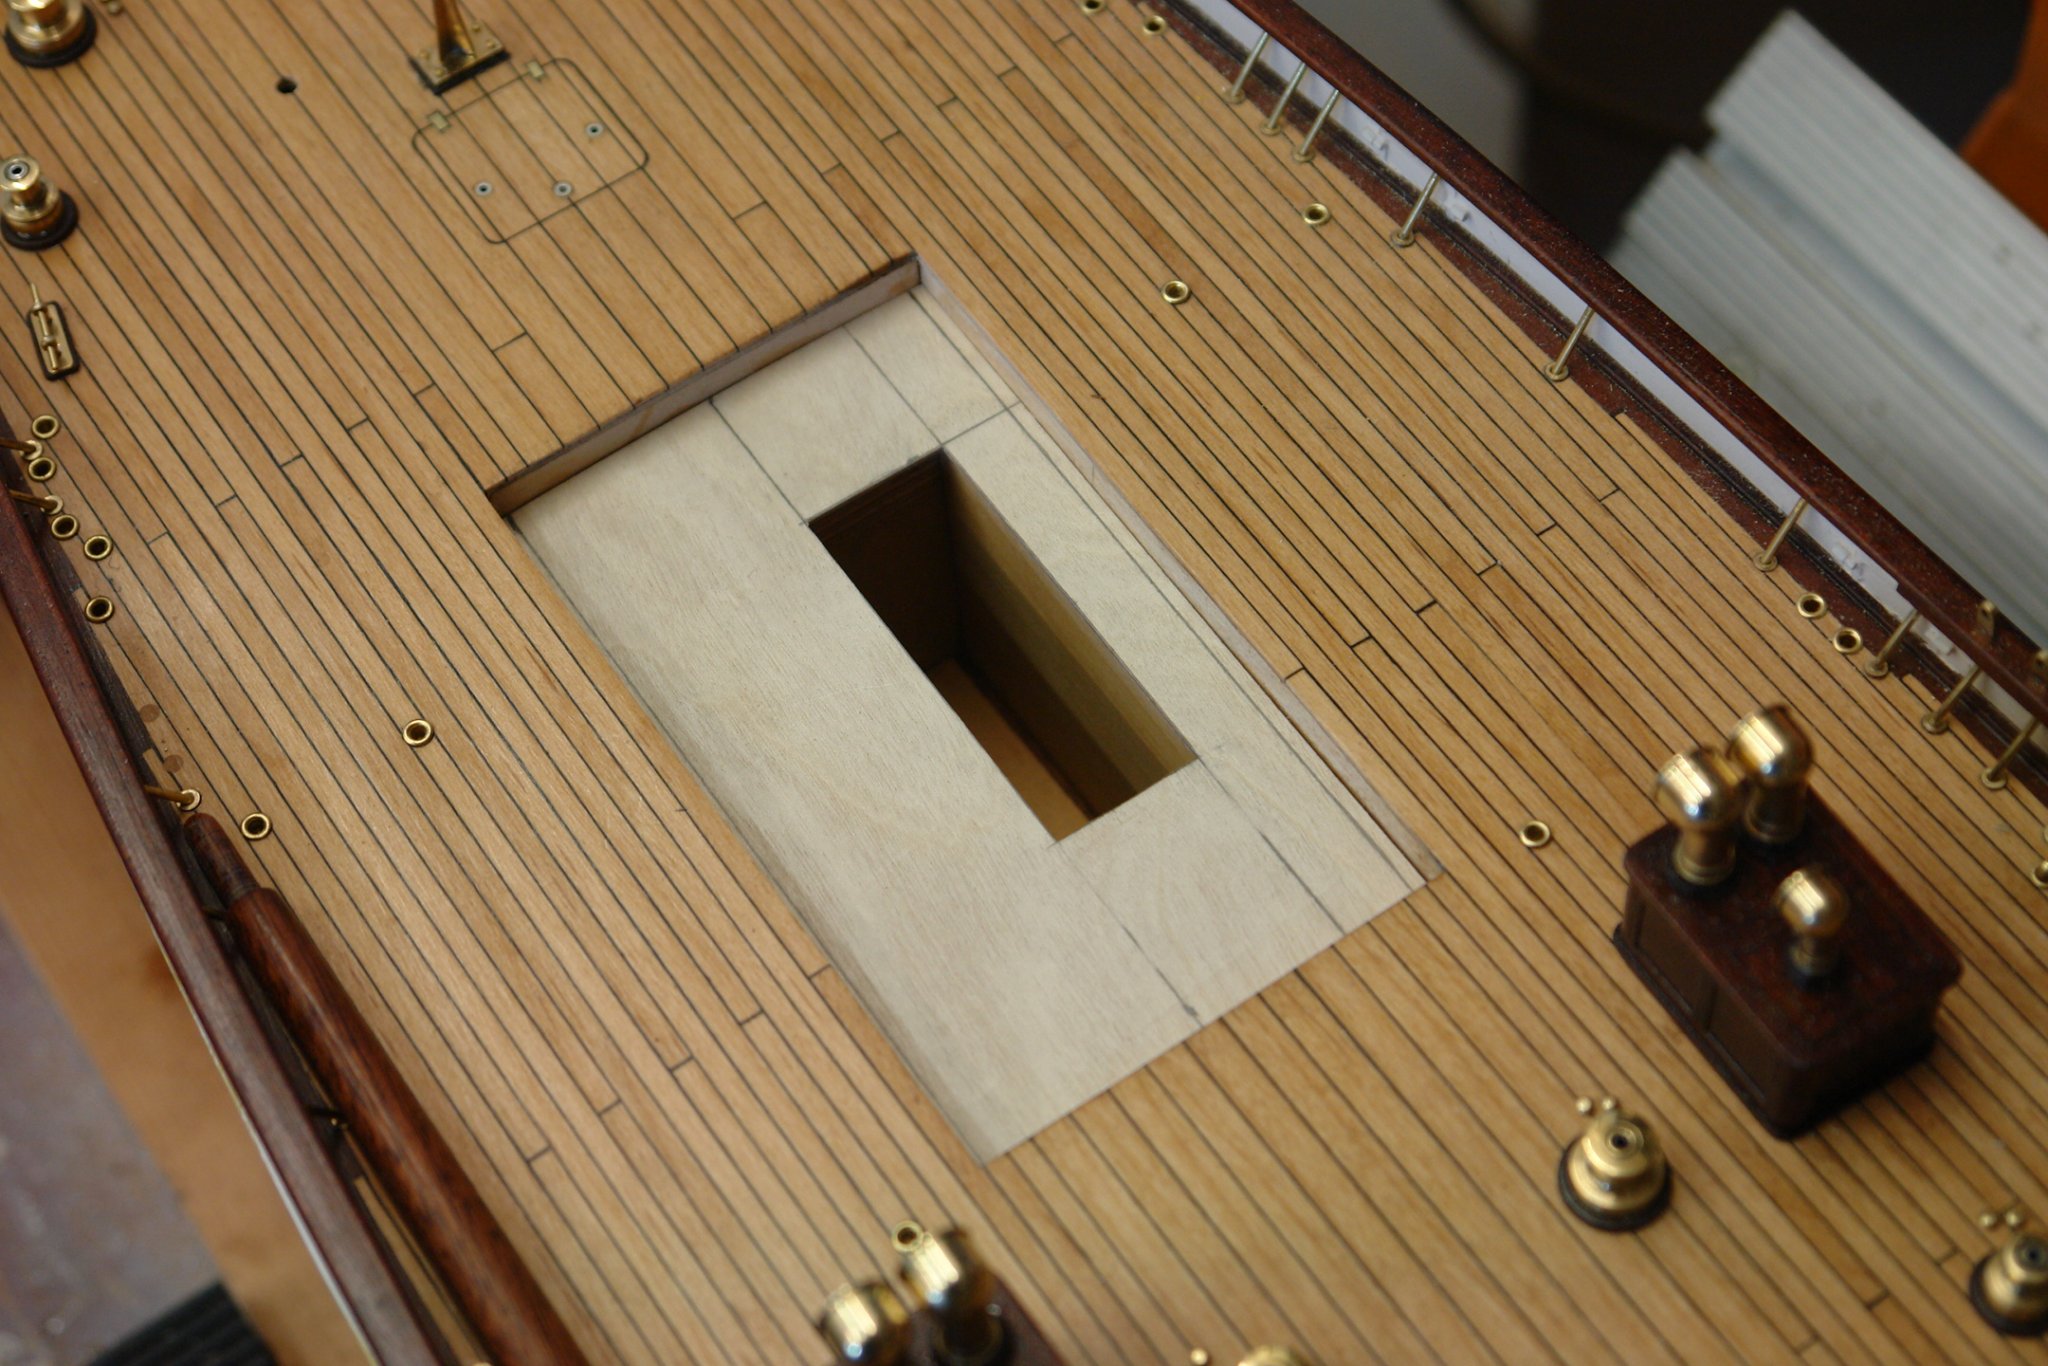
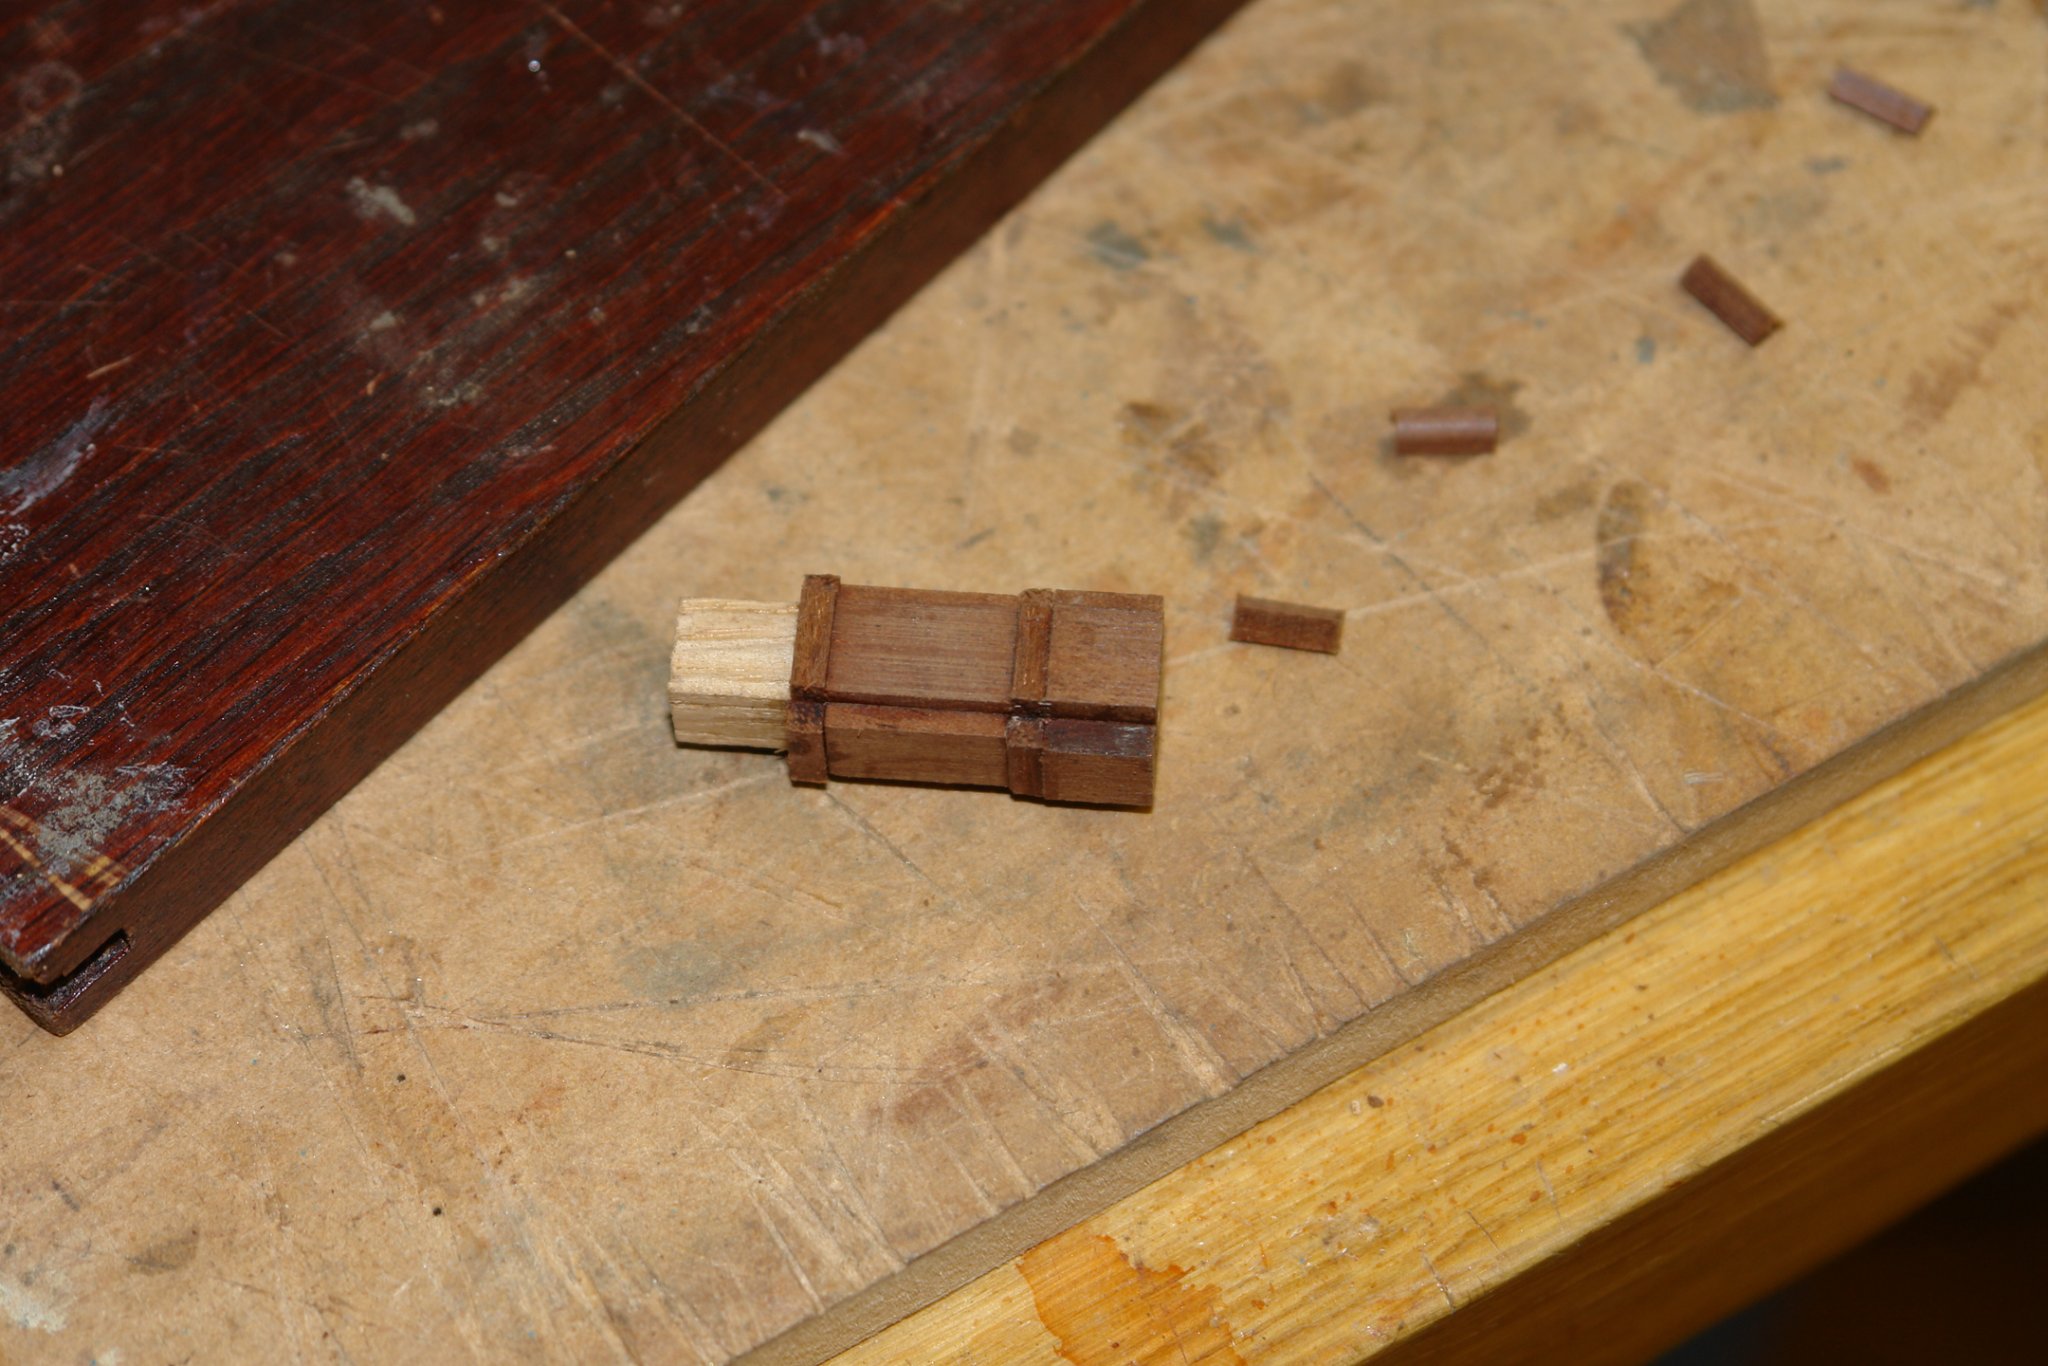
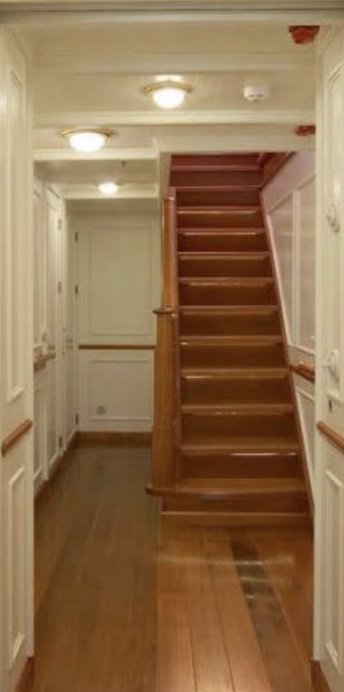
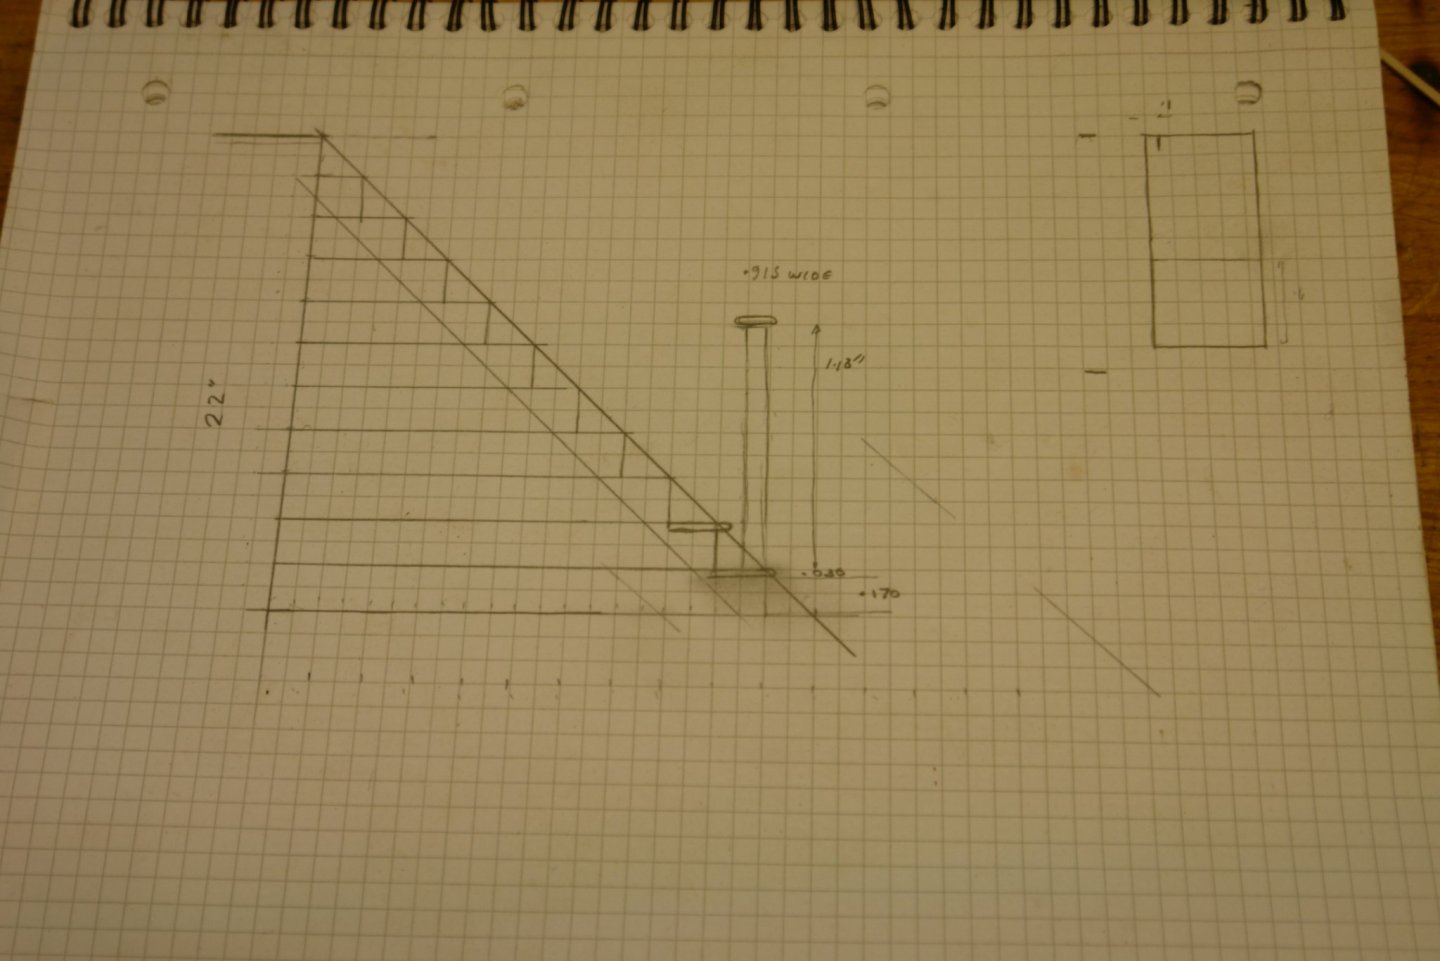
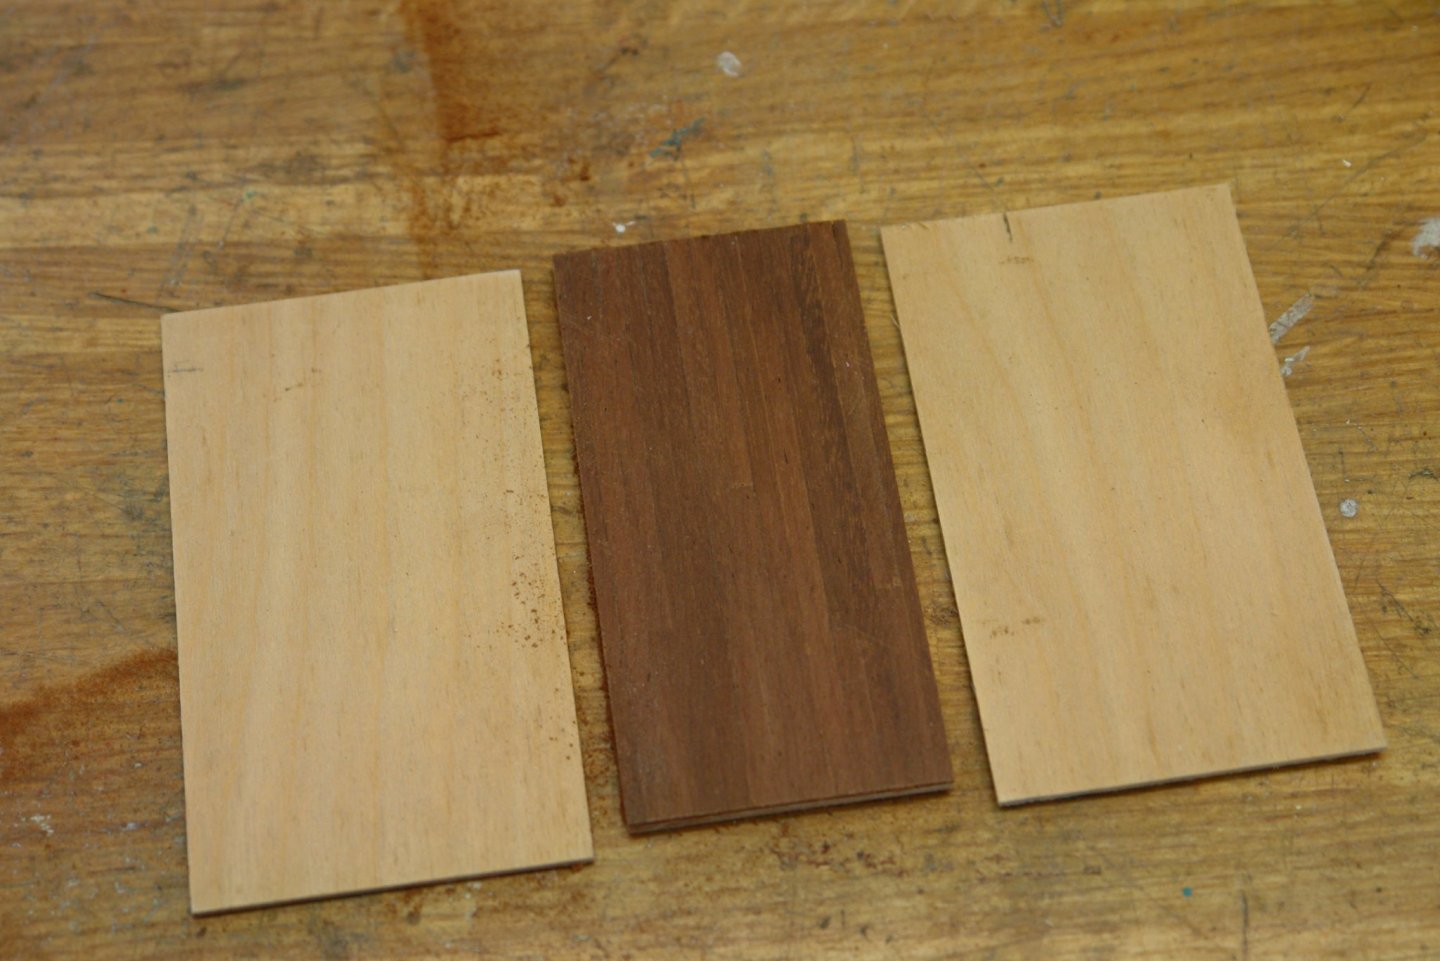
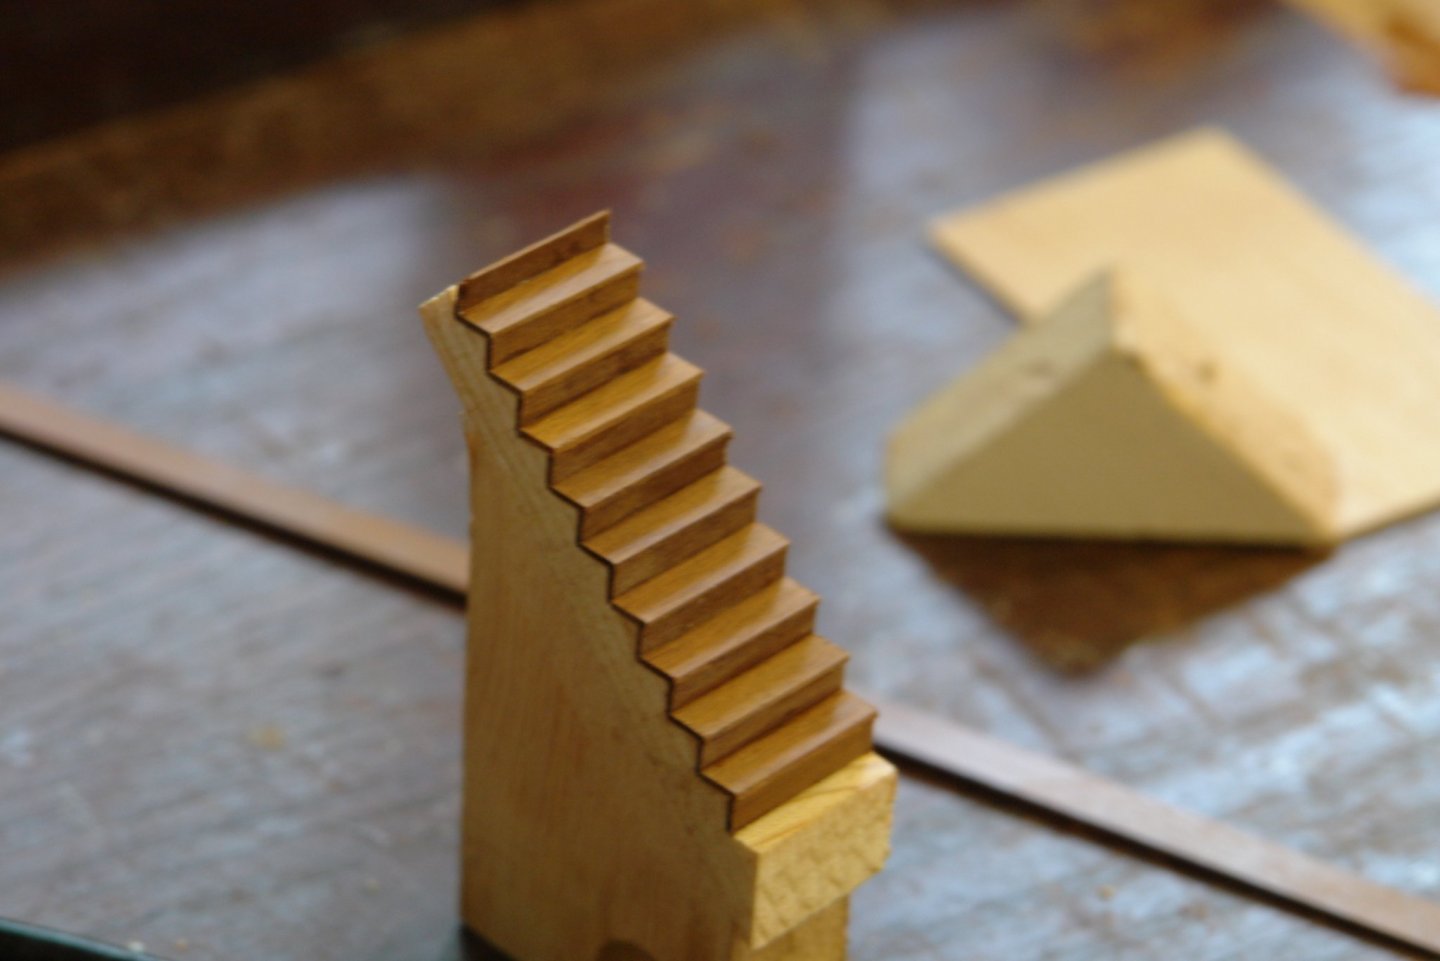
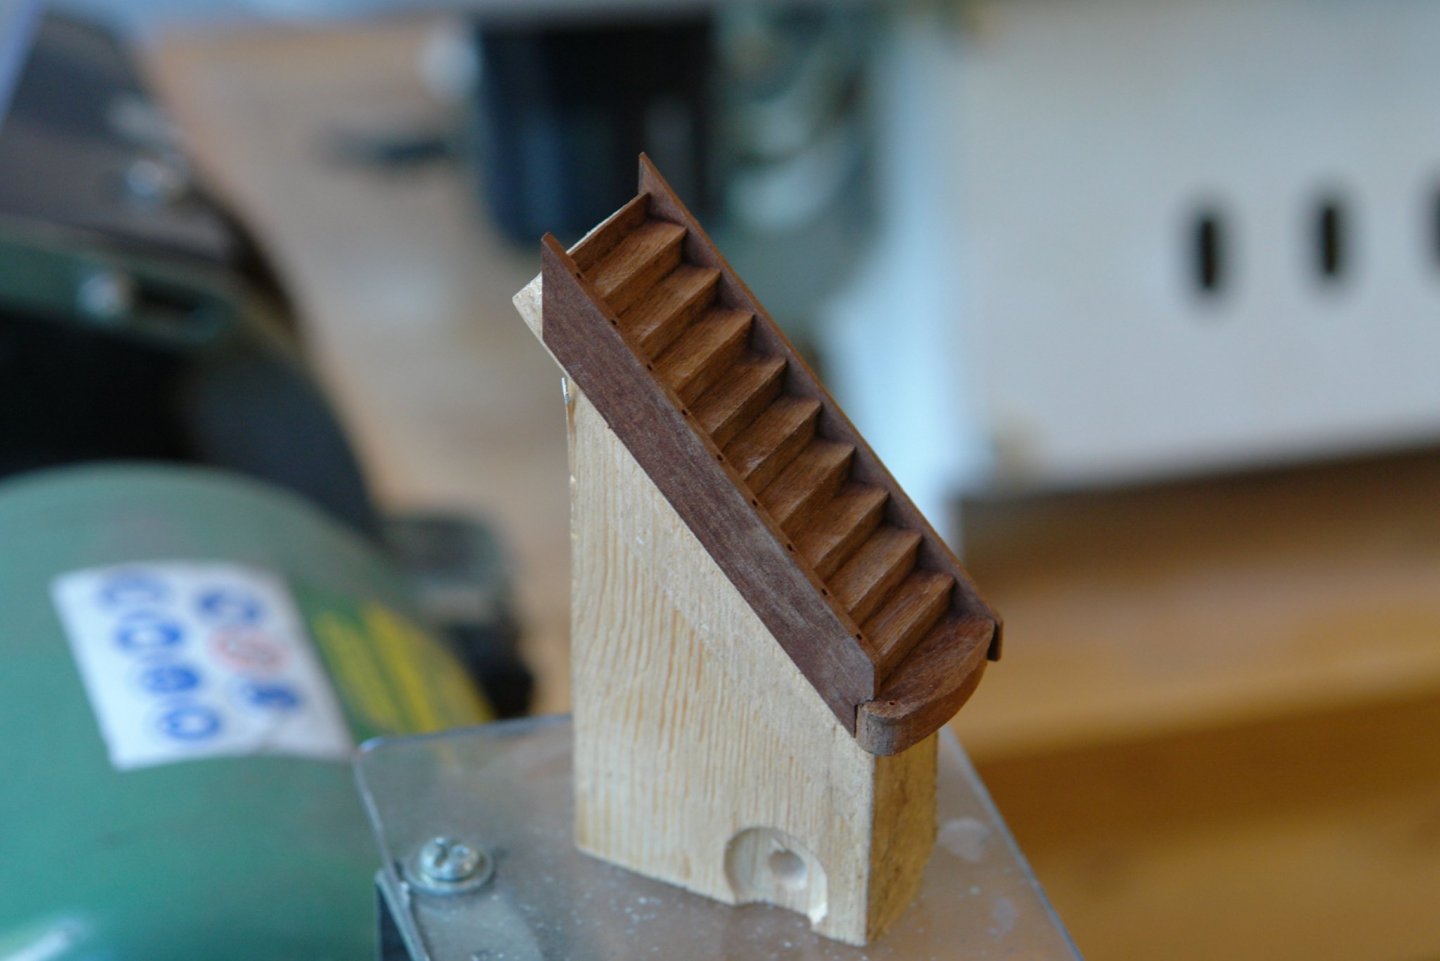
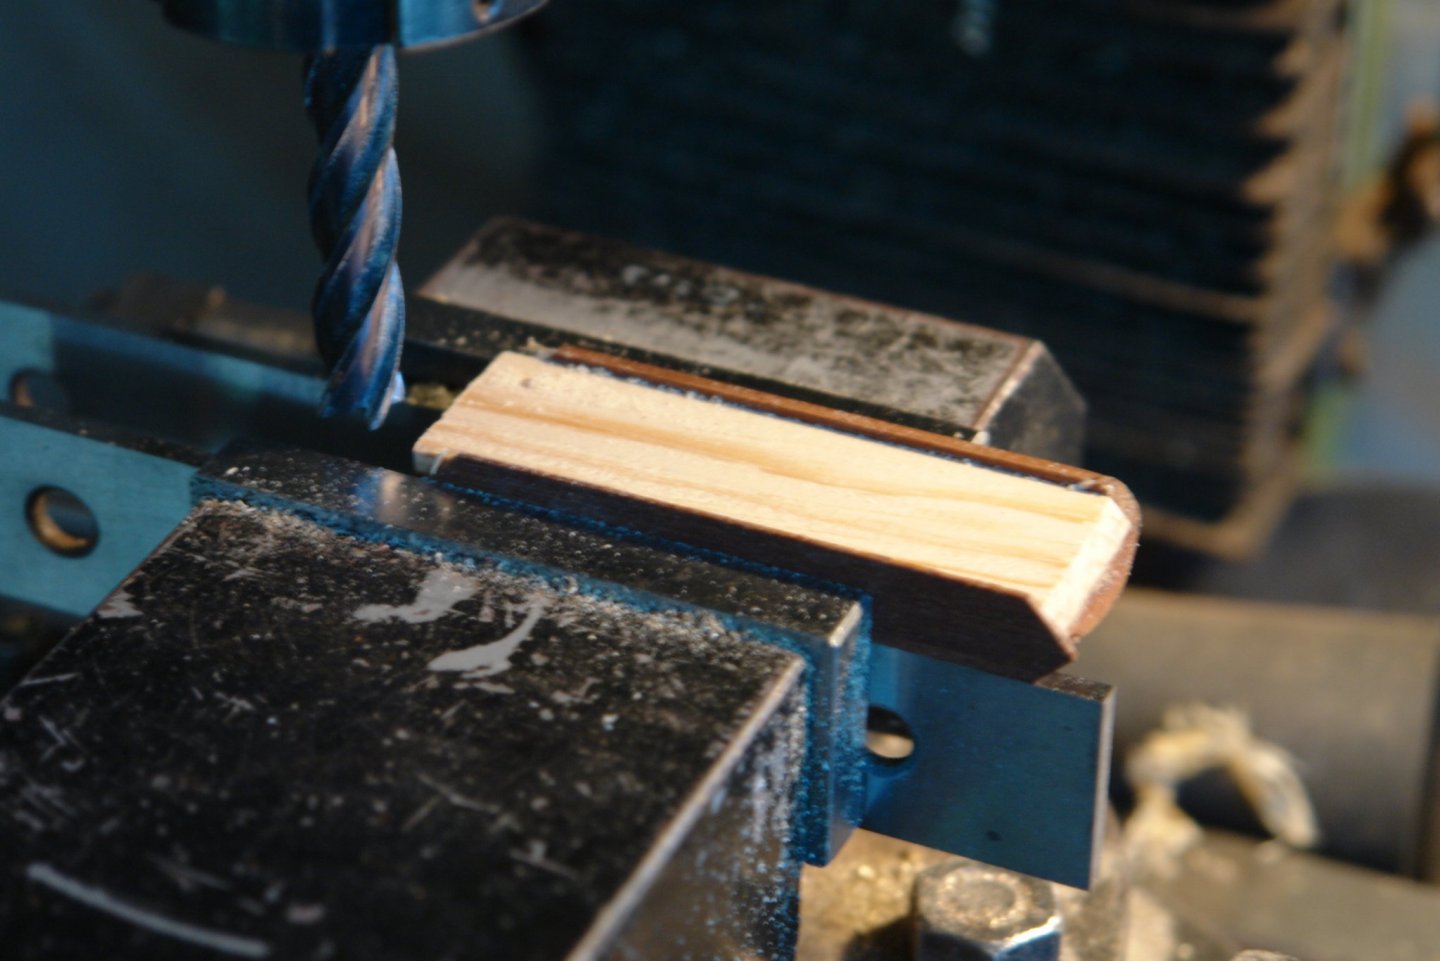
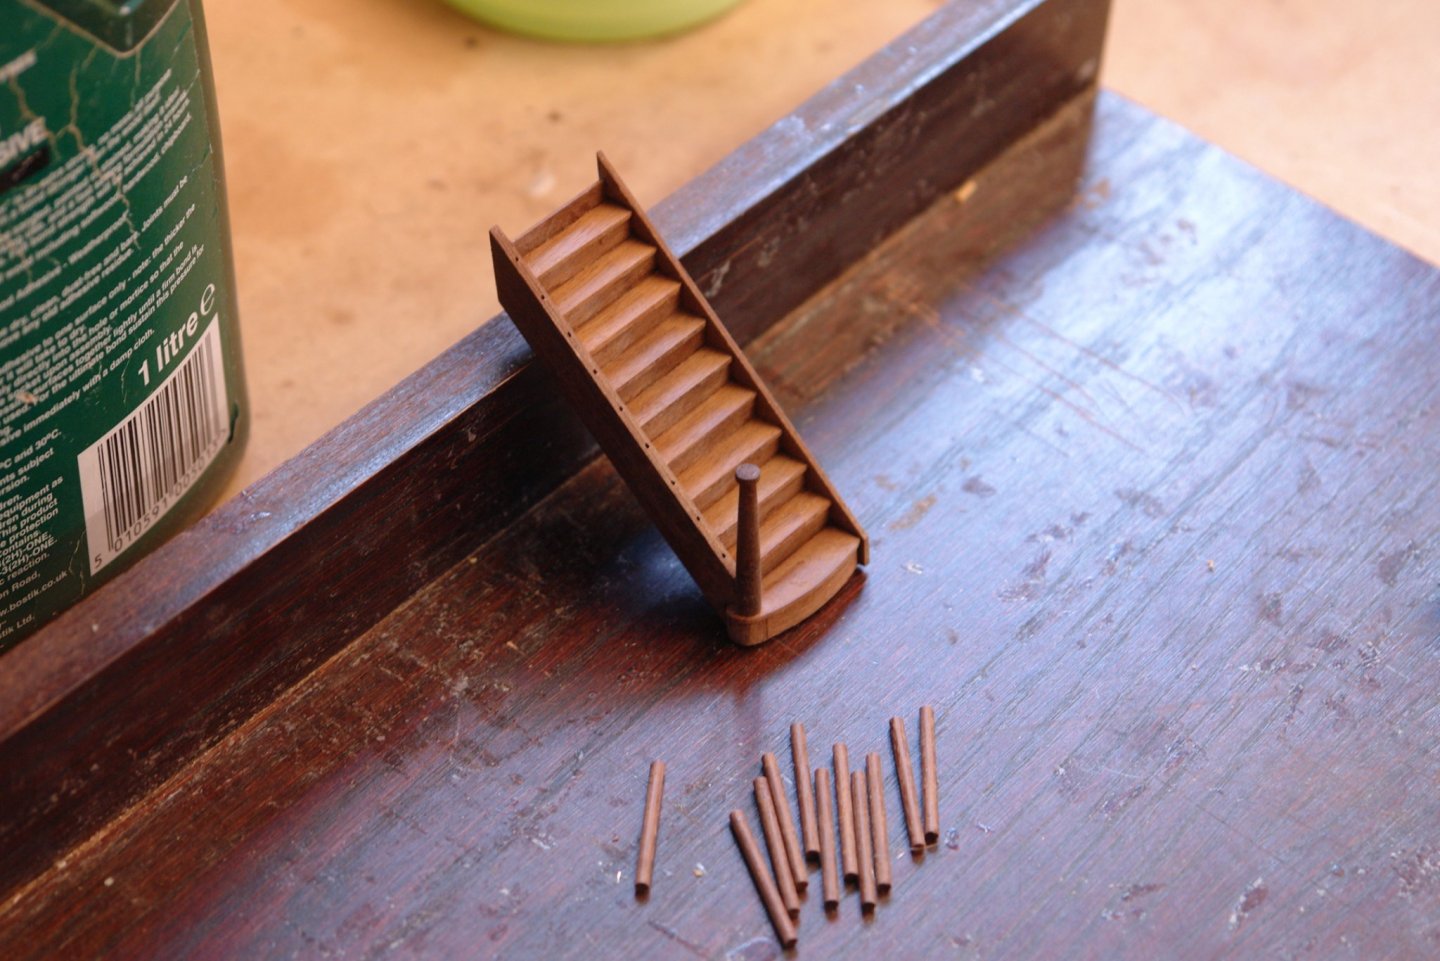
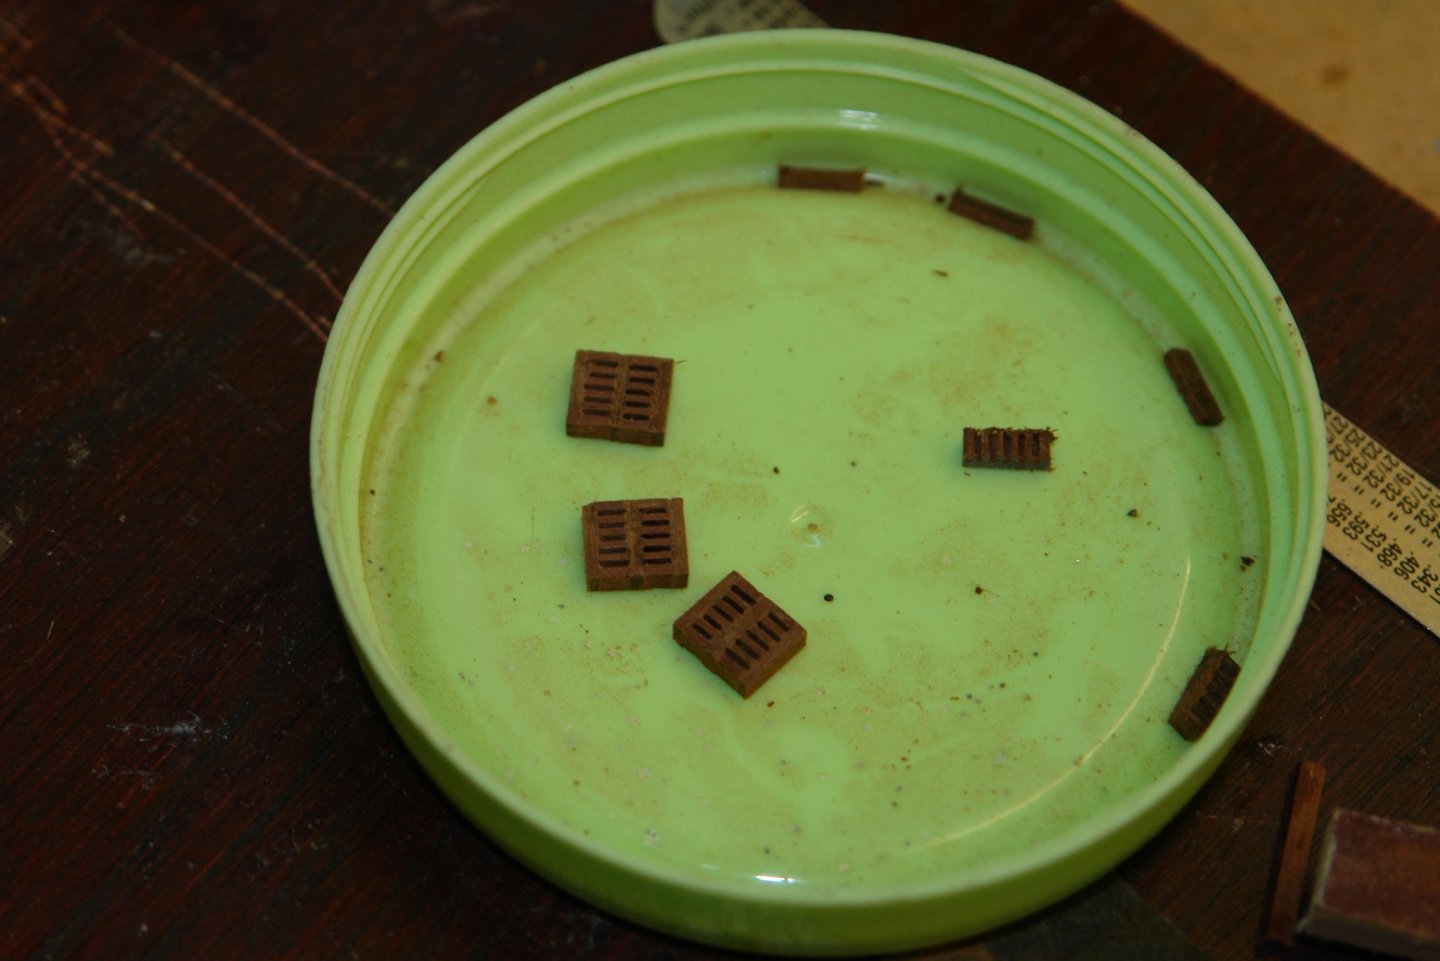
I am now setting off on a flight of fancy - building the below deck corridor that no one will ever see. The problem is I have detail which I am finding it impossible to ignore. I have a plan view of the area together with a good photo. The key feature of the area is the staircase so I started with that. It is 2.2" high and has a tread depth of .2". I cut the steps on the mill from a piece of pine and then clad the pine. Sides were made and drilled to tale the spindles. You can just about see the holes in the next photo. I cut the stairs off the block I had used for machining the steps and then milled the back of the stairs flat. I then clad the back of the stairs with mahogany planks (an exceptionally silly step because it is impossible to see this area even without the deck house in place). I then turned the bottom stair post and made the .060" spindles using a draw plate. The spindles were drilled either end to take the wire mounting spigots and the spindles were cut to length and installed together with the handrail. I then made a start on the corridor floor and walls. While I was at it I also made the floor for the deckhouse.

-
Great job on the frames, I thought the lack of restraint during fabrication might have resulted in distortion but clearly you pulled it off. Well Done.
-
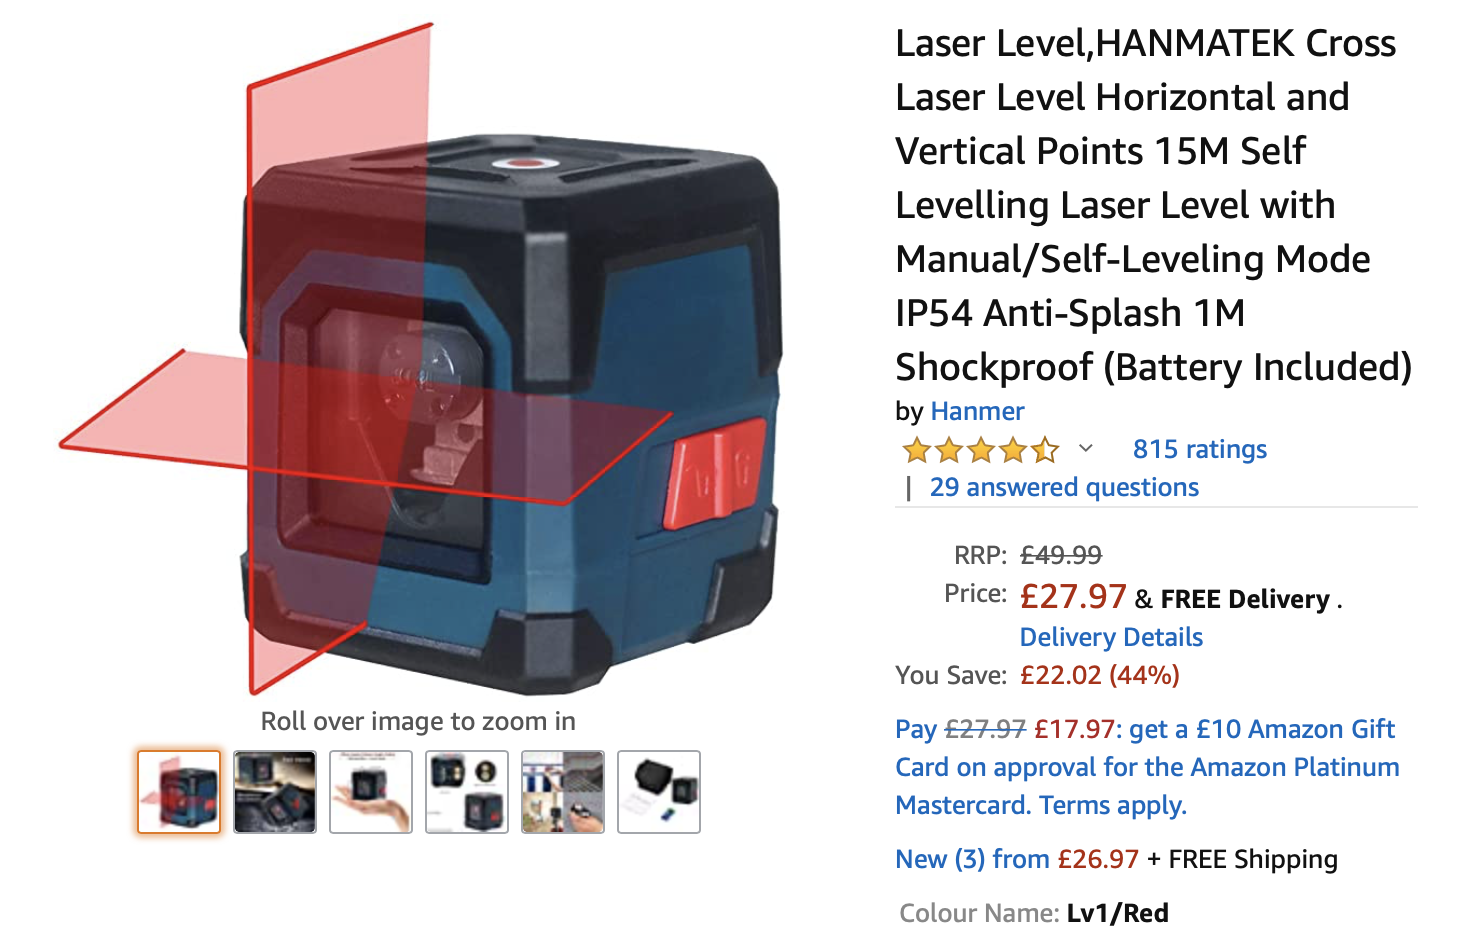
JD - I bought this recently and was quite impressed given the price.

-
JD - nice progress. Your laser line does look remarkably wide.
-
Yes but occasionally you have to sail in a different direction. I find the best way to find something is to make it again. It invariably turns up immediately I finish.
-
Keith Clock?????? It predates clocks - but it does have a sundial. My estimated run hour is 330 so you may be lucky soon.
-
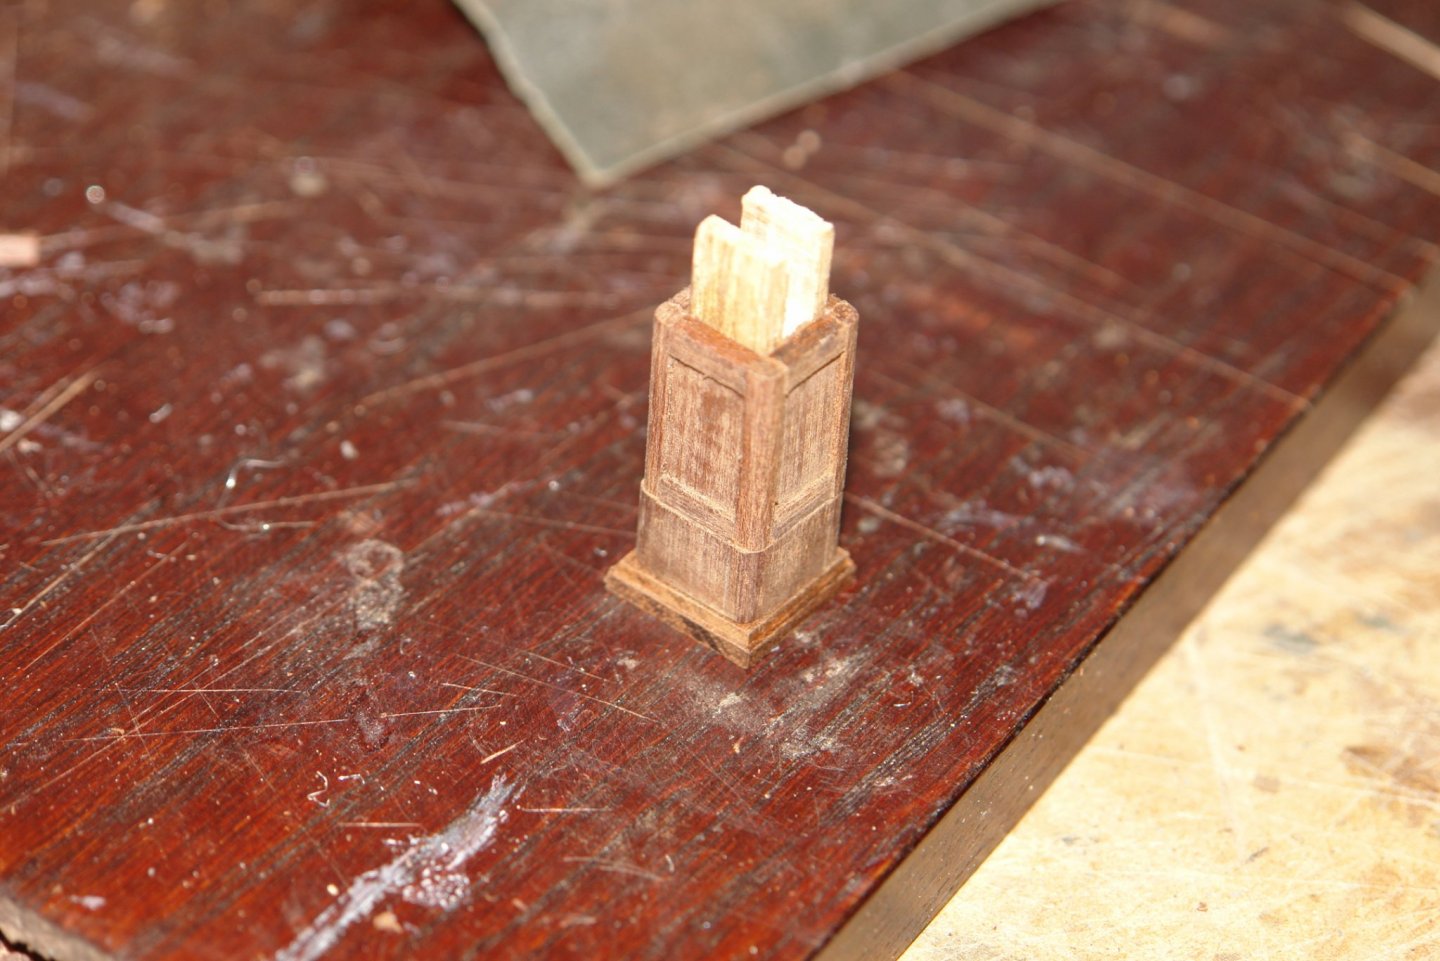
Eberhard Re lawn tractor, it is a sit and ride mower - its just called a lawn tractor. The pedestals are 3/32 diameter. At full size they would be 3.375". I scaled them off a photo at about 3". On the original they are made of wood. I tried wood but they were very weak so I made them in brass.
-
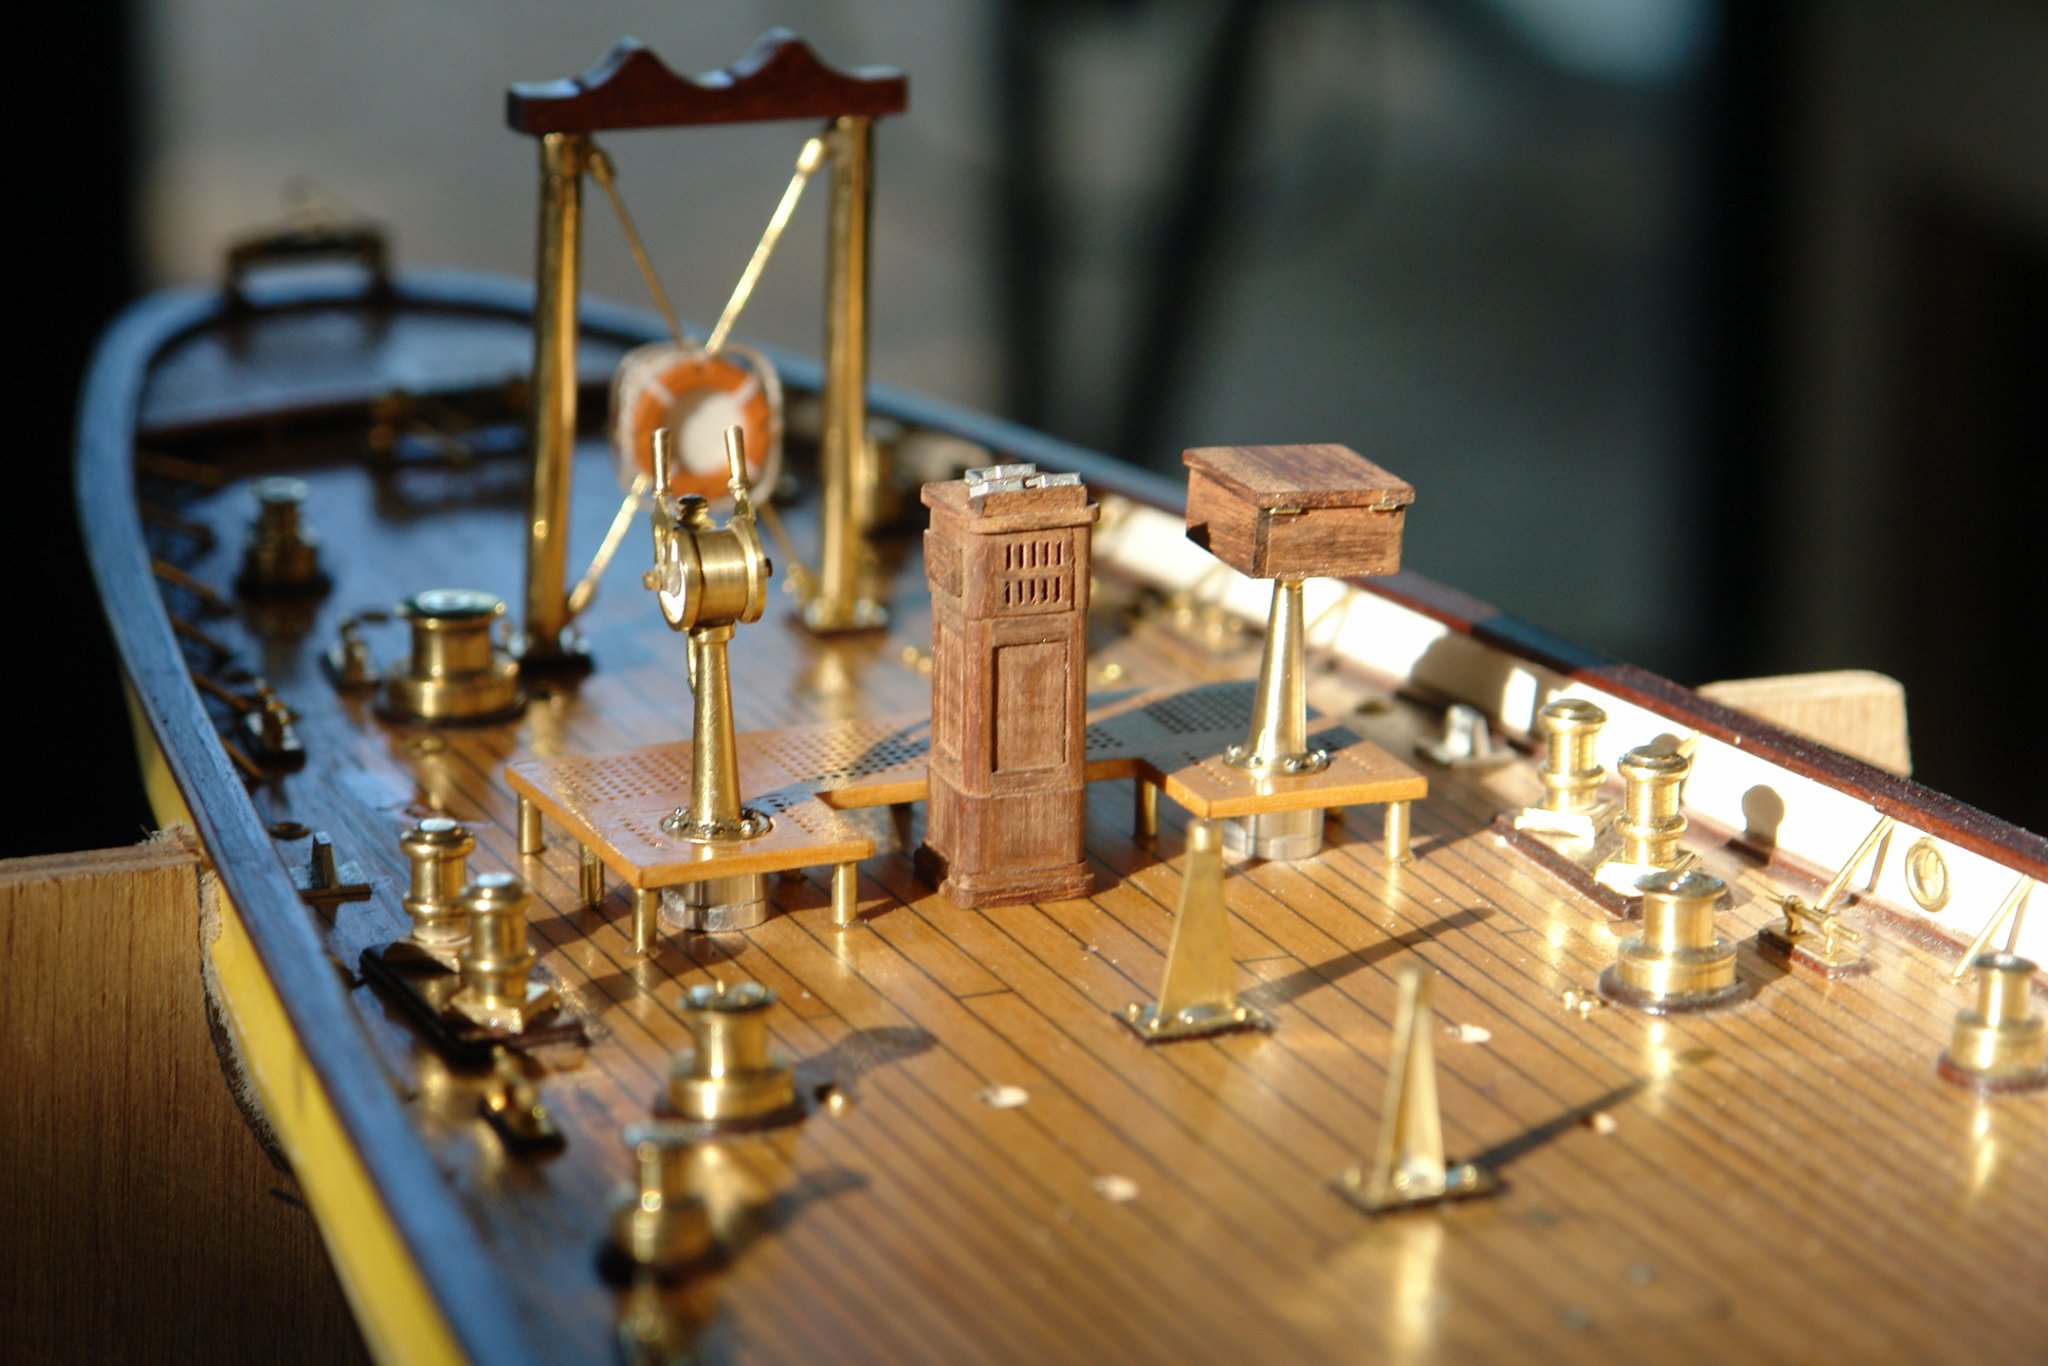
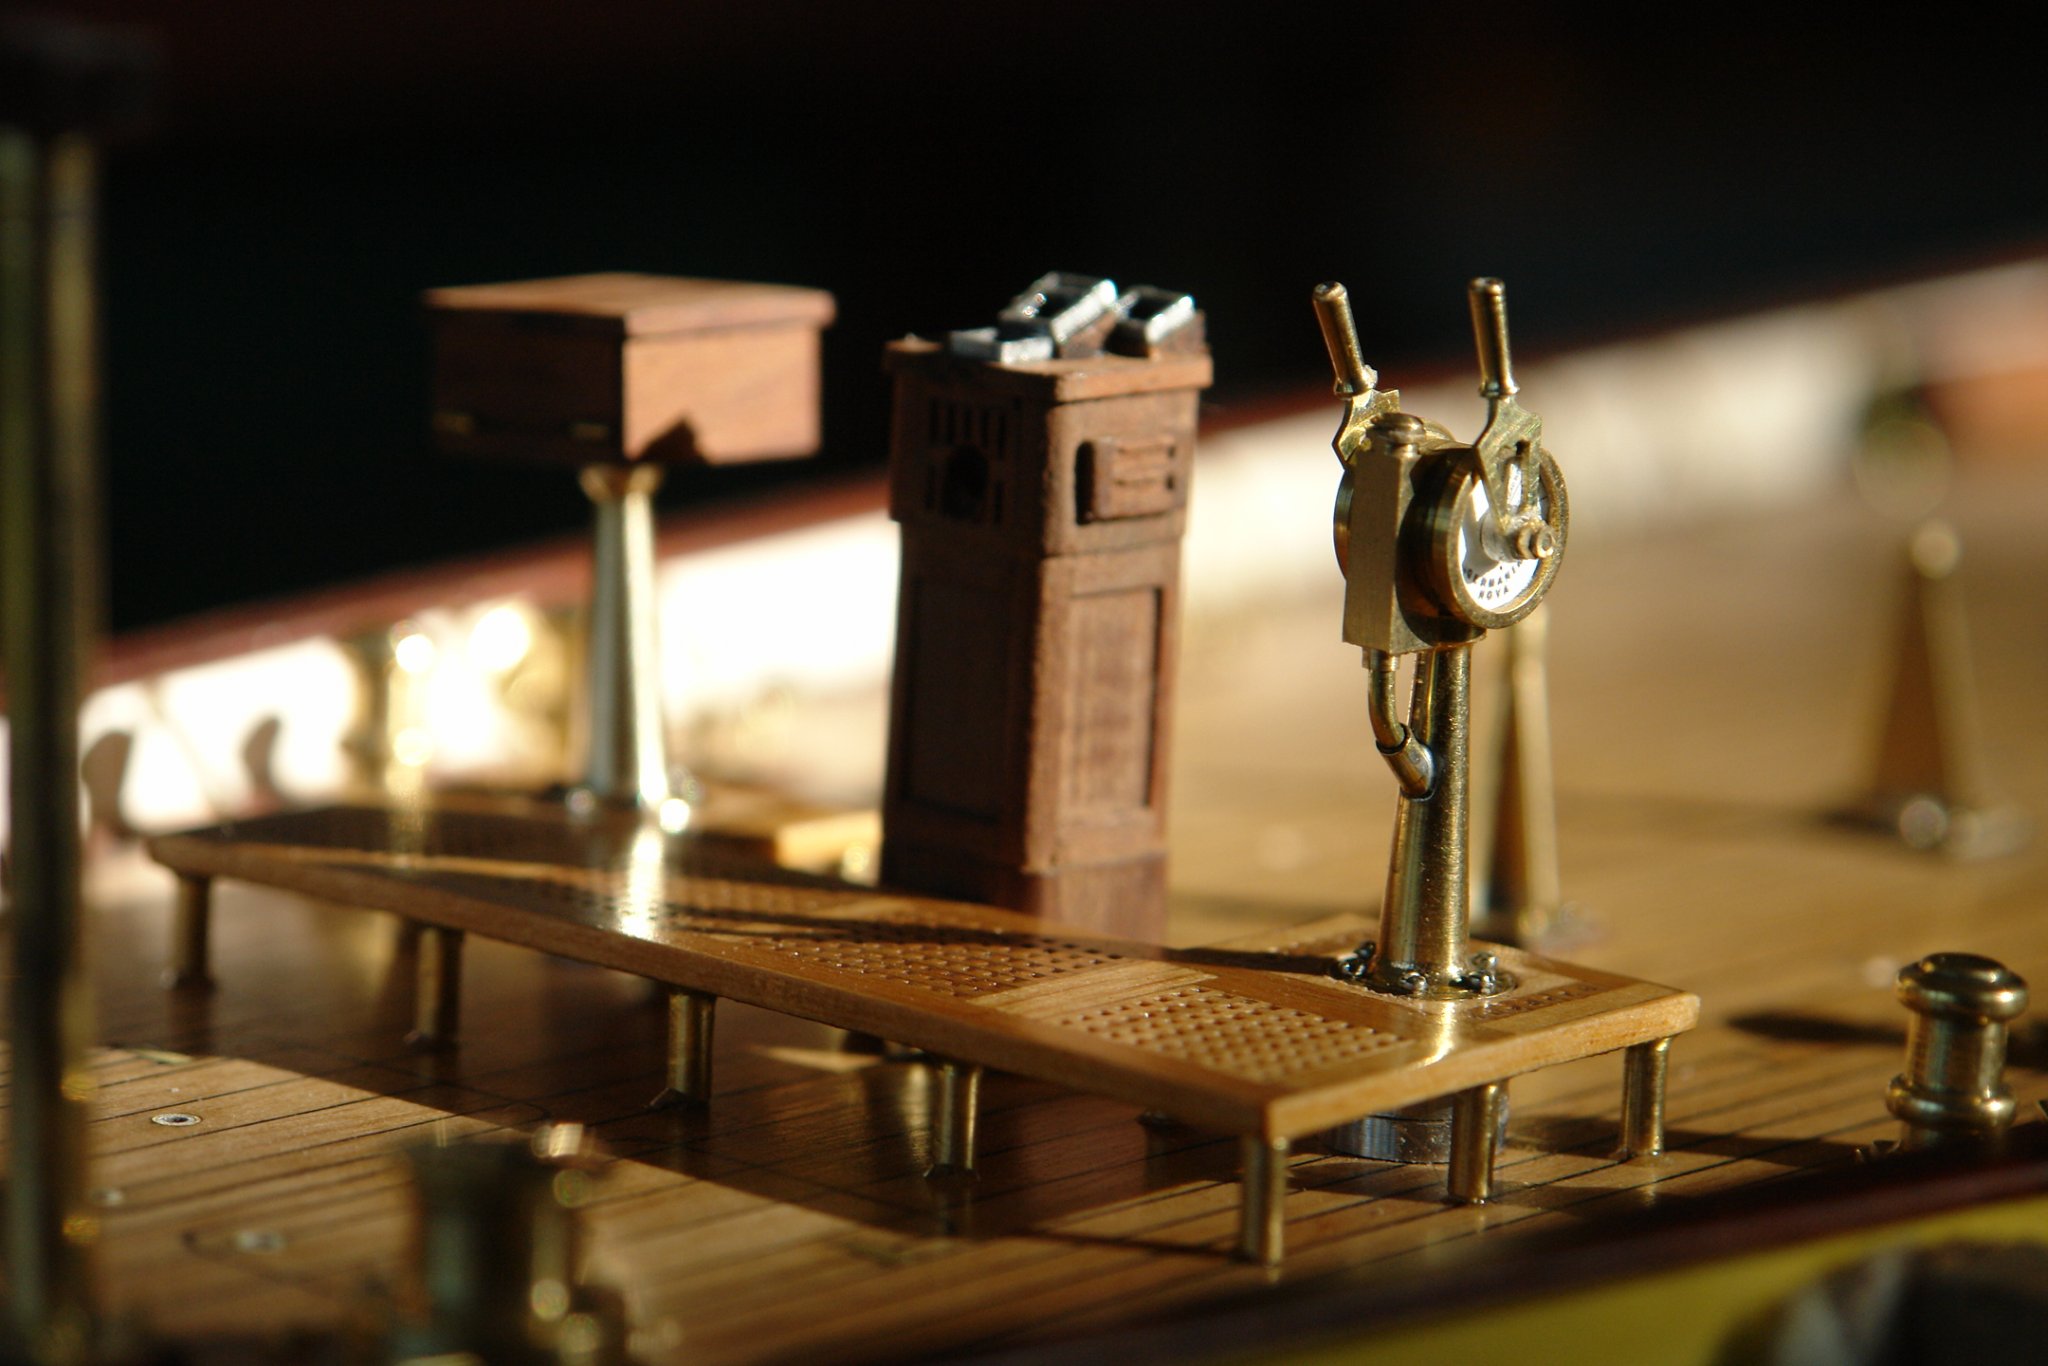
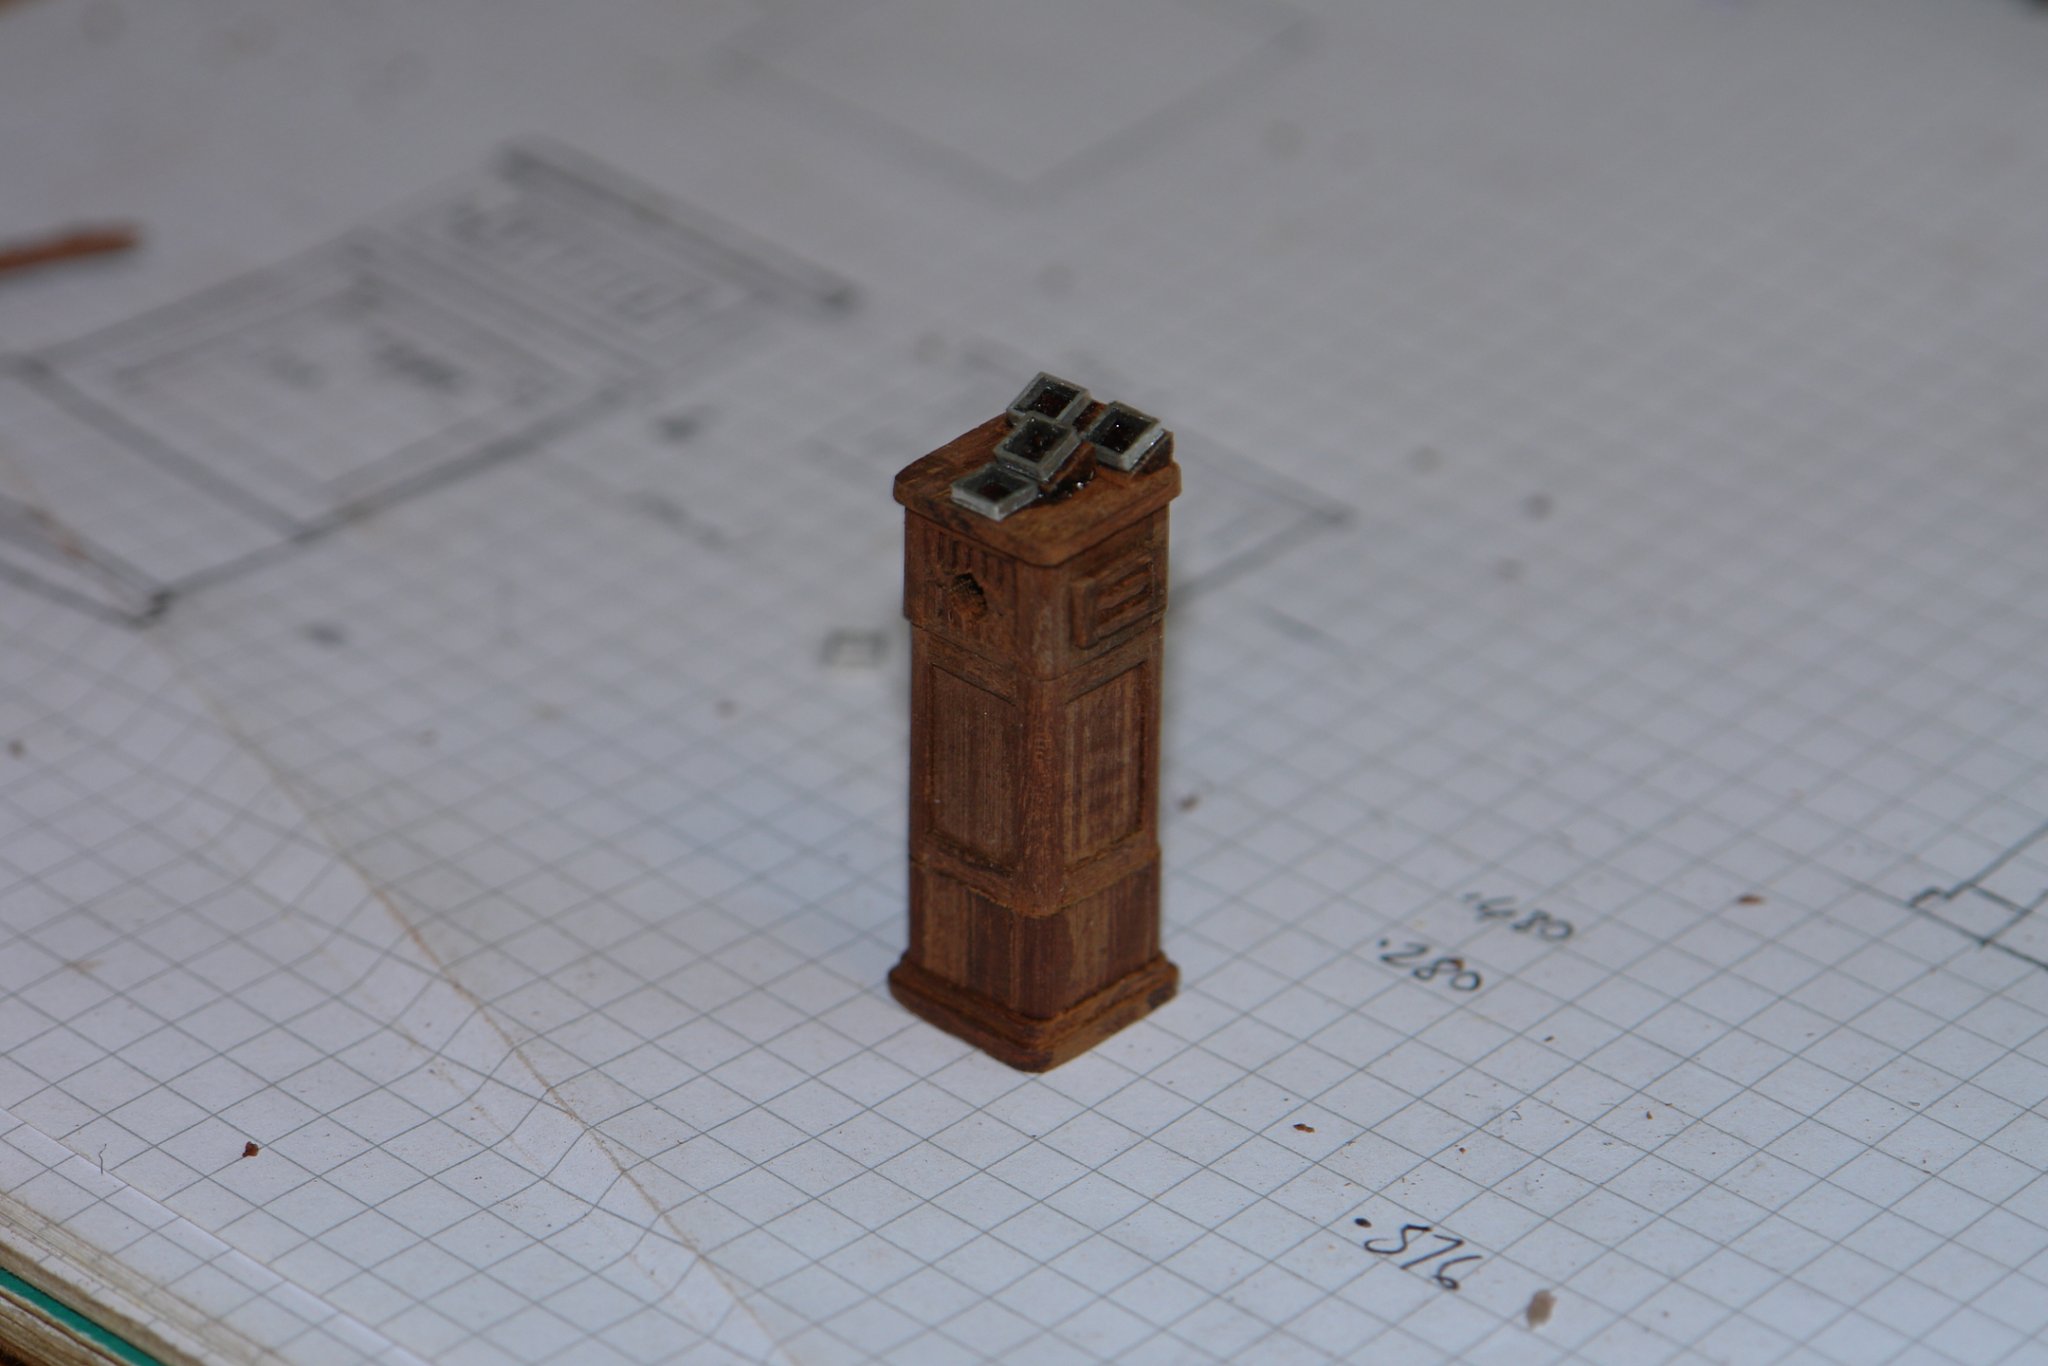
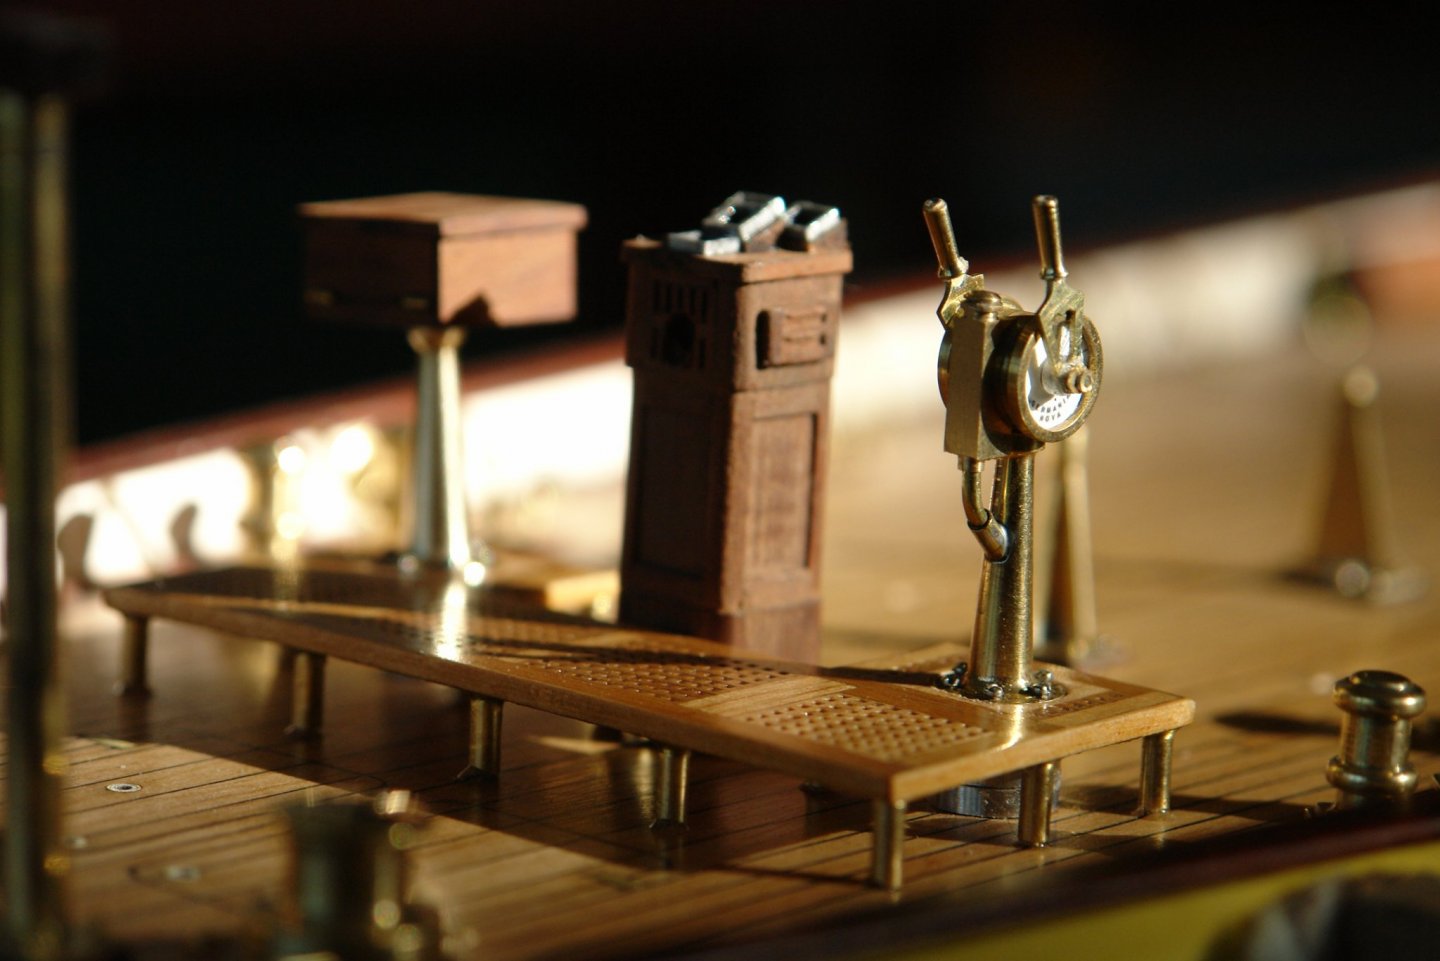
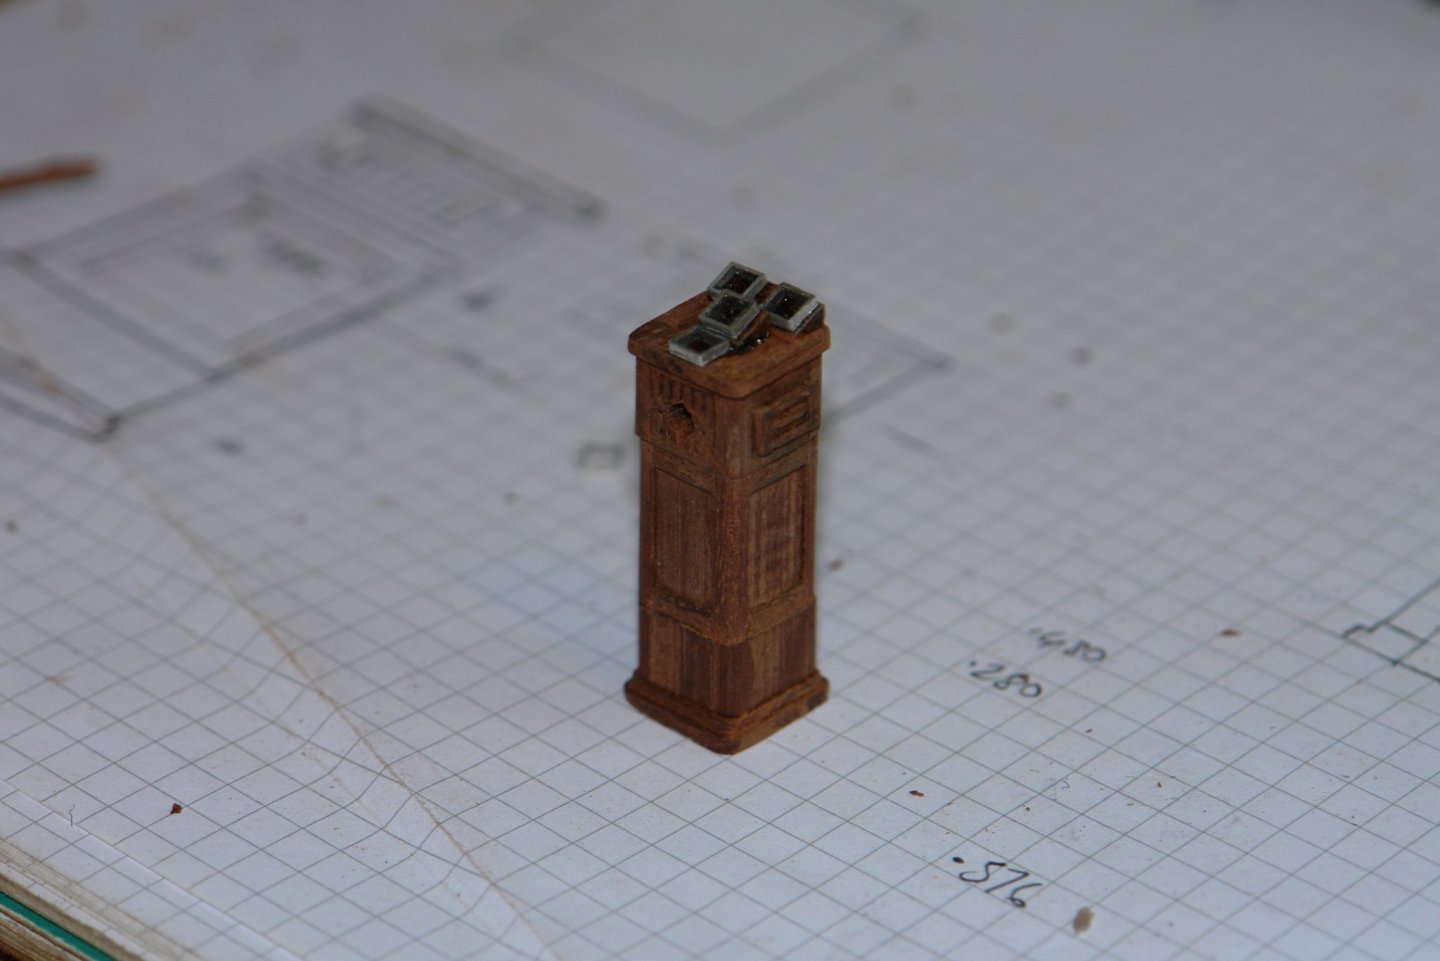
I had a bit of a slow time last week, distracted by the lawn tractor passing away at the age of 22 and an even older central heating zone valve going the same way. Anyway that is my excuse for not making better progress. To port of wheel is a pedestal mounted hinge topped and fronted box which houses the GPS screen, it is .62" square by .35" high. A simple item to make. Particularly as i had turned the stem some time back. I took a few shots with it temporarily in place. I also put the engine telegraph pedestal temporarily in place. I then moved on to start the main deck house and the below deck corridor below it. The floor of the deckhouse is .250" below deck level so I started by creating the support for this floor. This floor was cut from 3/8" ply cut to a square "U" shape. The cut out is sized to take the below deck corridor. The floor is constructed on a 1/16" sheet of ply which will be mahogany planked to create the finished floor surface. Not much to show for a week - but sometimes life is like that.


-
Hmmmm,--------- just catching up on my log after a few days off. You have been having fun. You are of course all welcome and I will get the wife on with the fruit scones, jam and clotted cream. I assume your bus has a decontamination bay and that you all have your PPE in good order. By the way I still have my hair, but in these times it is a bit of a double edged sword. The barbers have closed down and 4 months without a haircut has left me looking a bit like an inverted floor mop.
-
Excellent work on the sails Rob. They sit very realistically.
-
Jim - very interesting build of an elegantly simple boat.
-
All very interesting Hellmuht. The irregularities in the hull design are quite amazing. The ancients seem to make life hard for themselves.
-
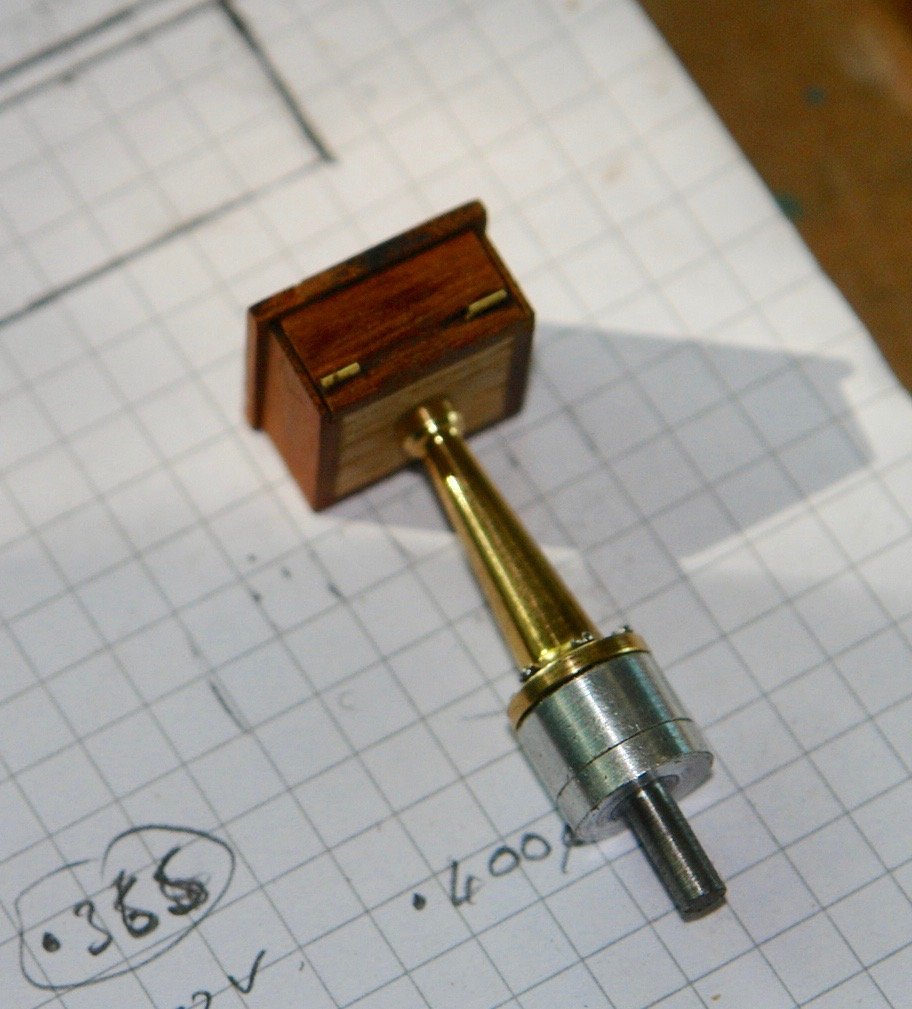
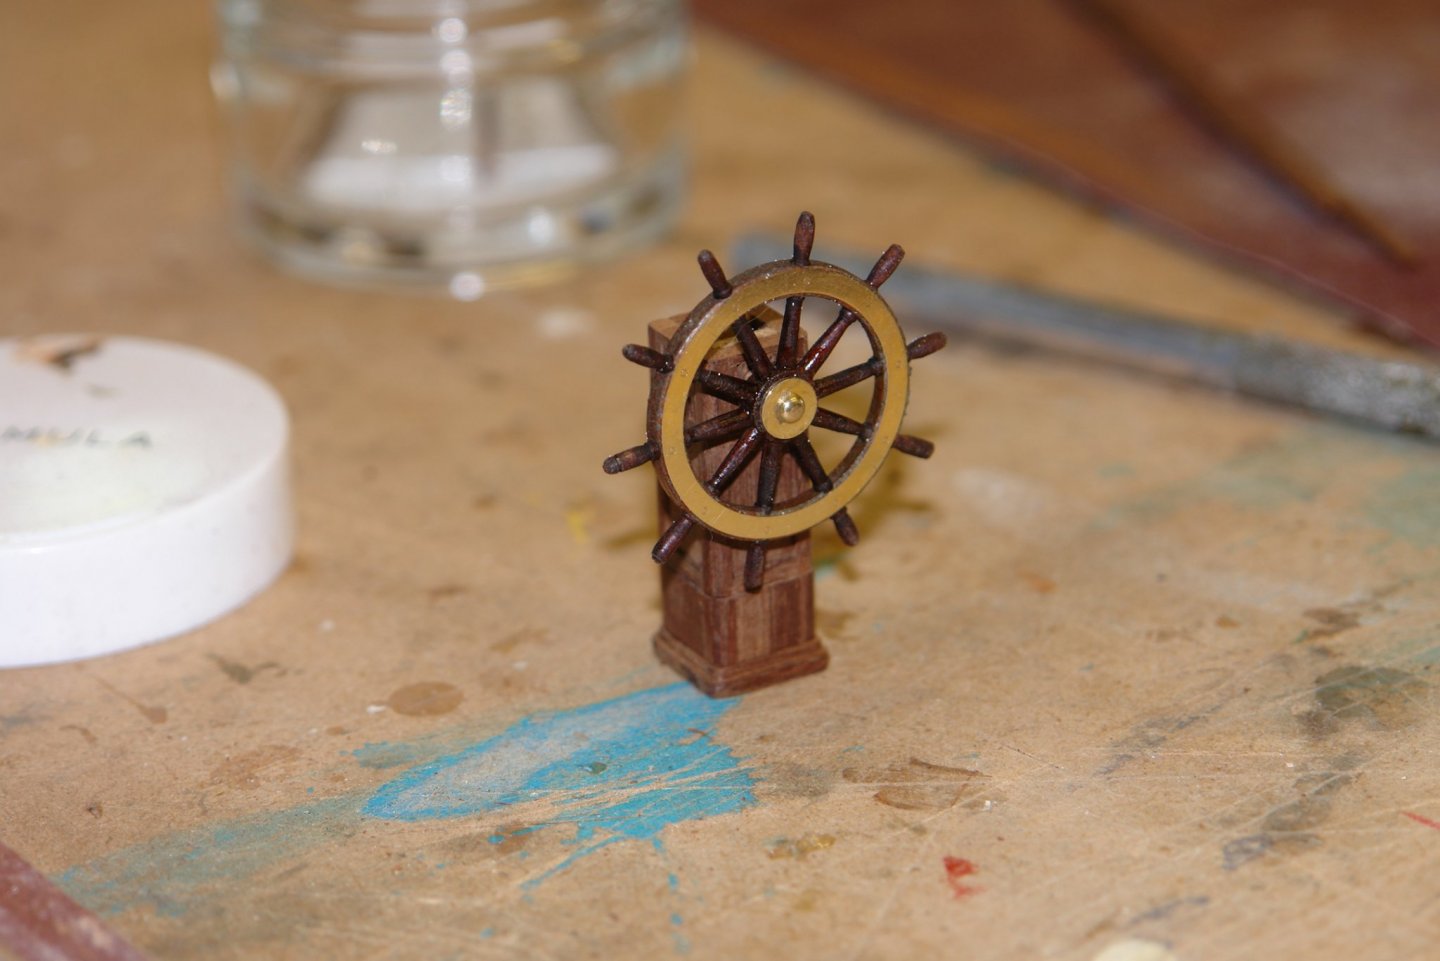
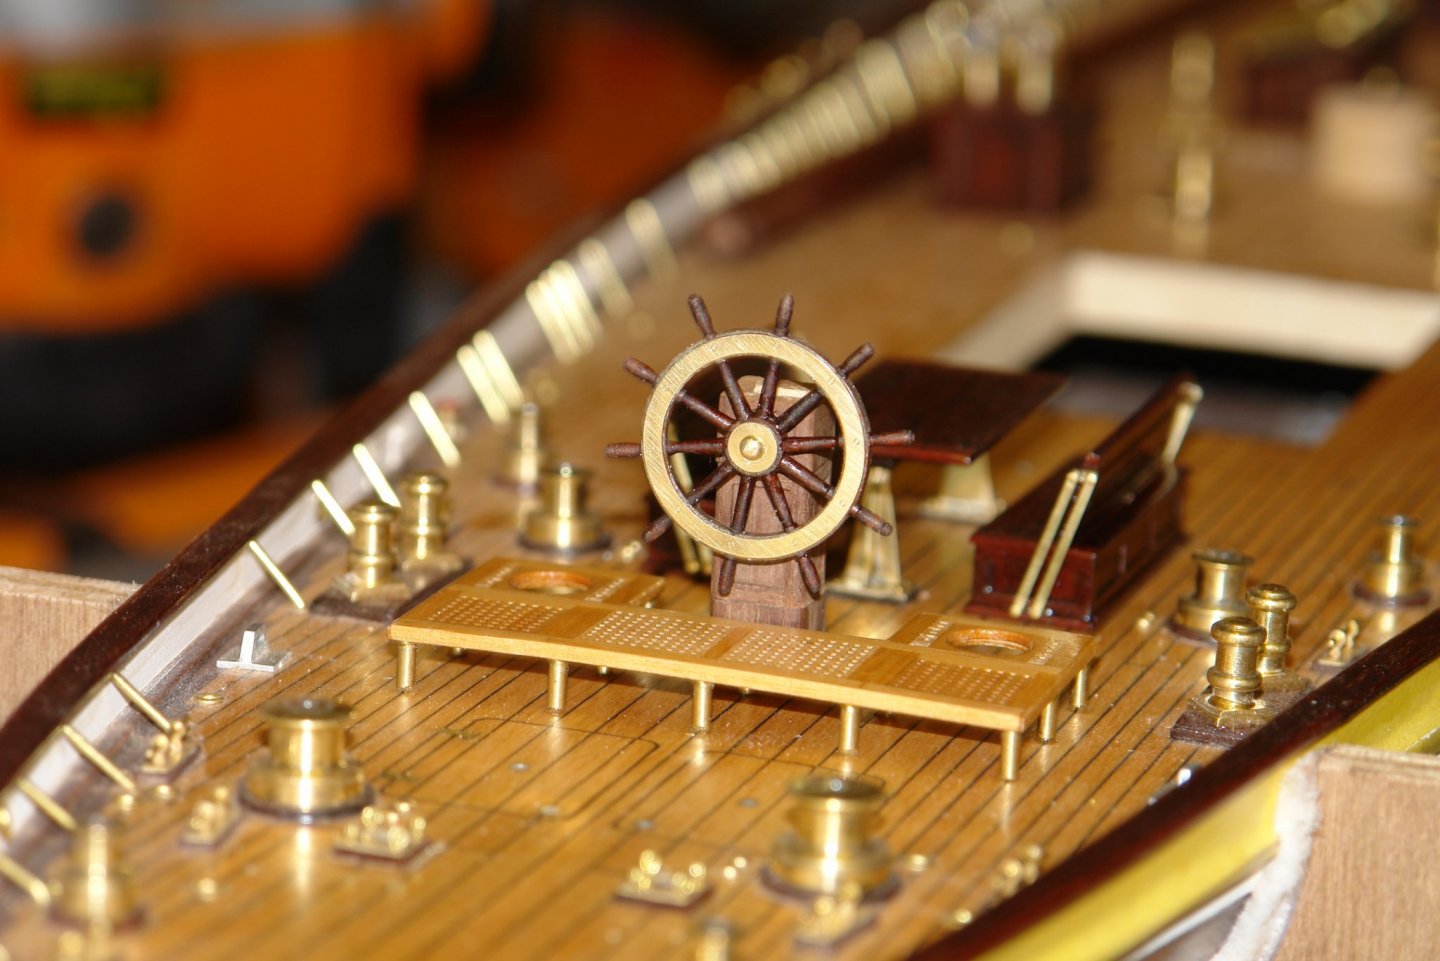
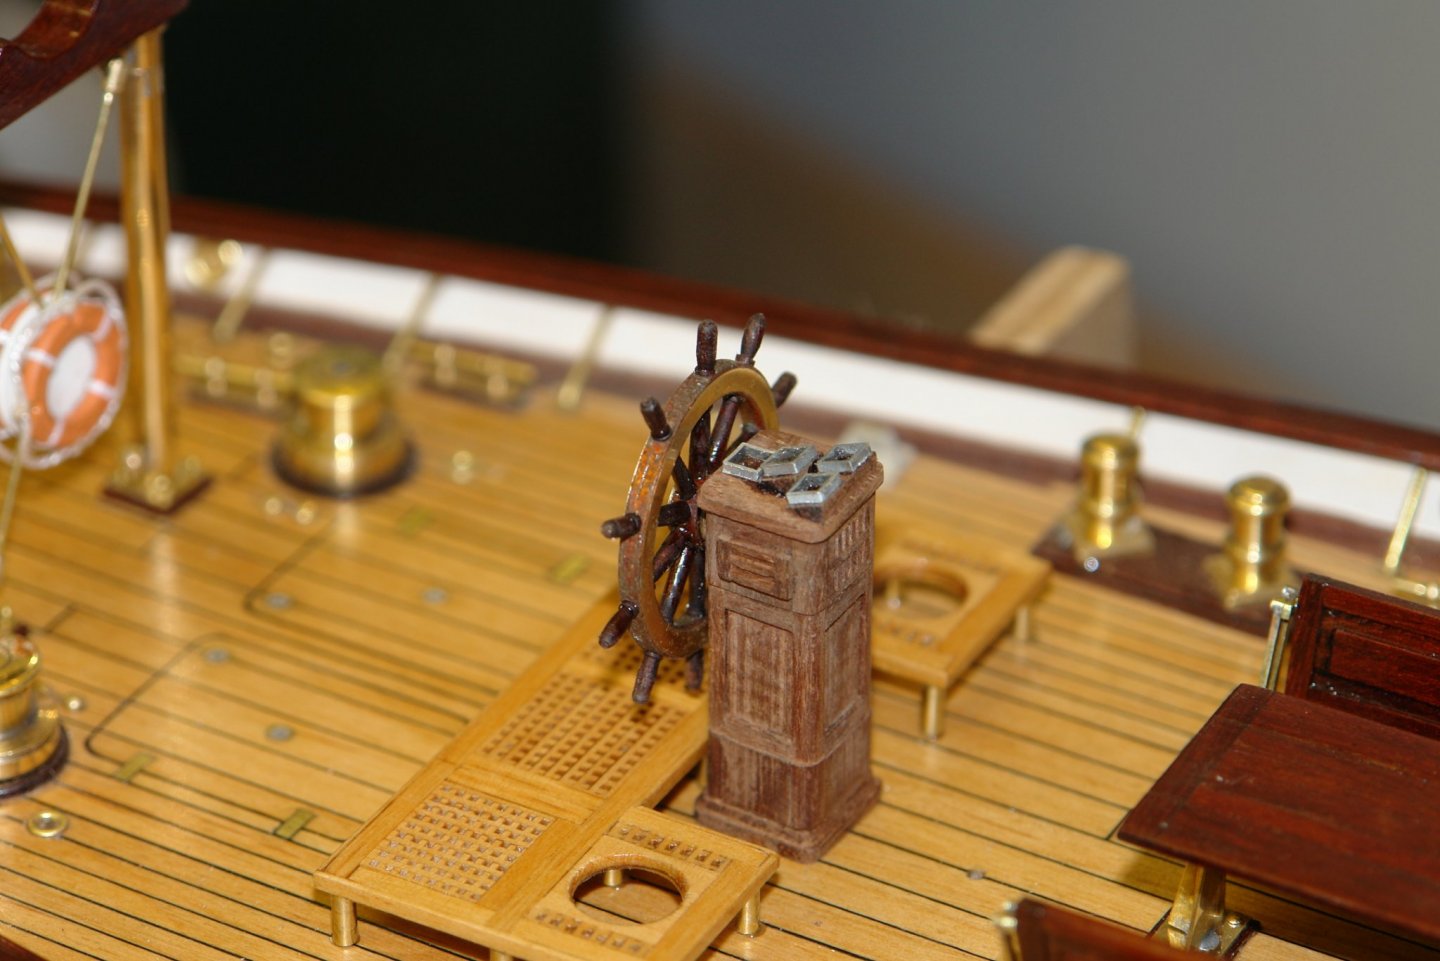
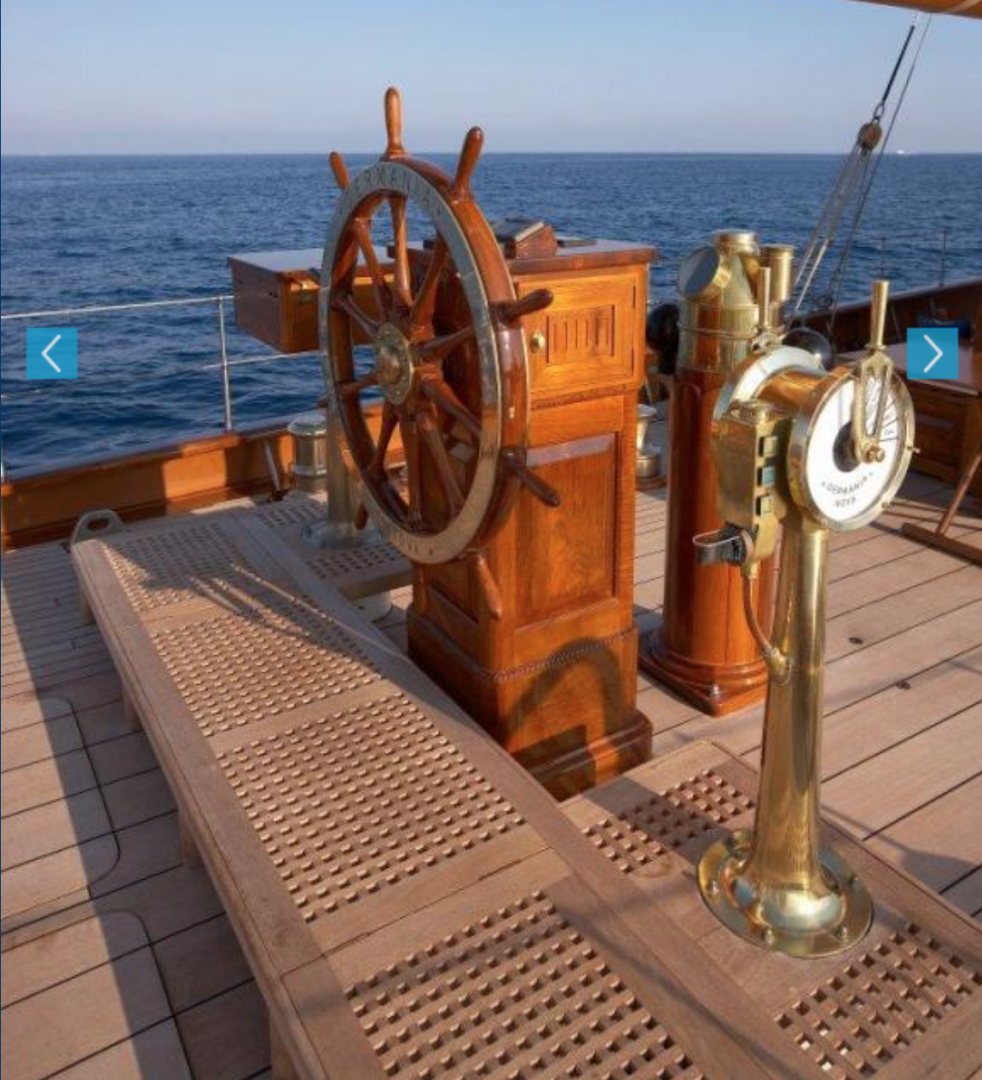
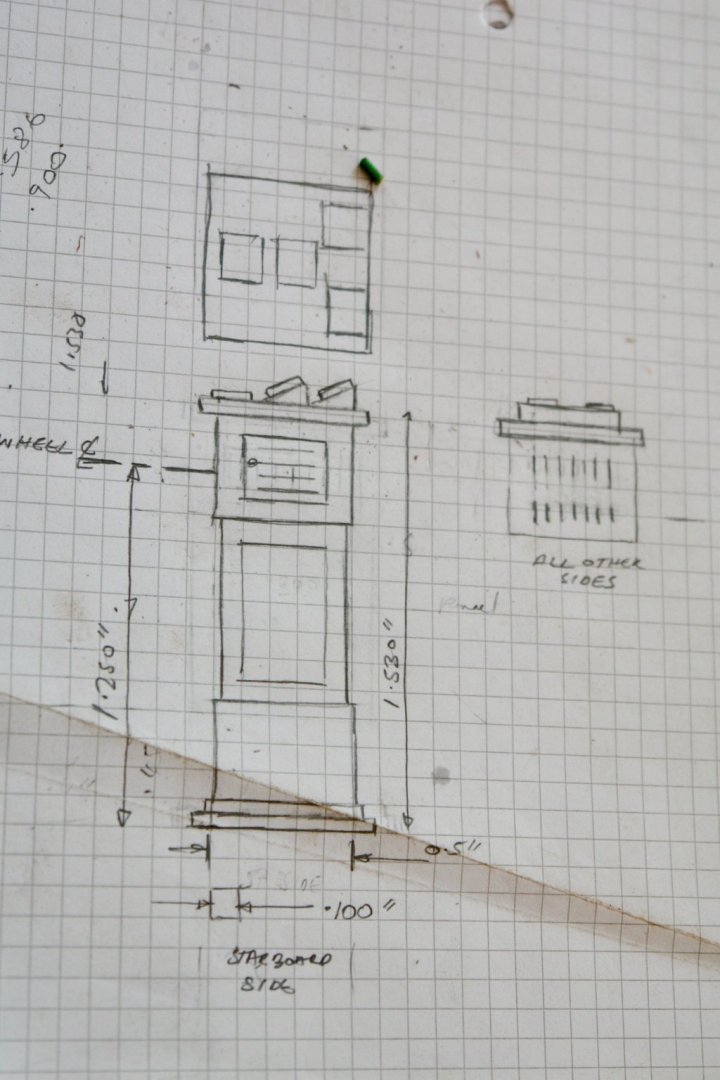
The next job was the wheel pedestal, Although it looks quite chunky in the photograph at model scale it is relatively small. The sketch was fairly easy as I had the basic dimensions from the plan and lots of detail from photos. The body is 0.5" square and the height is 1.53" I cut a core from oak and then clad it to crate the panels and decorative details. Around the top are decorative slats which I cut .020" wide on the table saw. A hole was drilled to take the wheel spindle and the wheel was temporarily mounted. Instruments are mounted on the top fo the pedestal. Earlier photographs of Germania feature less instruments. I based the instruments on later photos. The surrounds are cut from square aluminium tube, the faces are black card filled over with 2 part epoxy to simulate the screen. The pedestal hasn't been varnished as yet.

-
Vaddoc Reminds me of the end of a long days sail when the deck was festooned with lines in what we commonly called a rats nest. It all looks very realistic.
-
Amazing what you achieve with card, a pleasure to see your work.
- 23 replies
-
- 2
-

-
- new mexico
- battleship
- (and 1 more)