KeithAug
-
Posts
3,986 -
Joined
-
Last visited
Content Type
Profiles
Forums
Gallery
Events
Everything posted by KeithAug
-

HSwMS Äran by Nirvana
KeithAug replied to Nirvana's topic in - Build logs for subjects built 1901 - Present Day
She looks an interesting vessel Per. I will be interested to see how she progresses. -
Never seen such a complicated pawl mechanism Richard - but beautifully executed. Kit parts look awesome (i don't think)!!!!!!!!
-
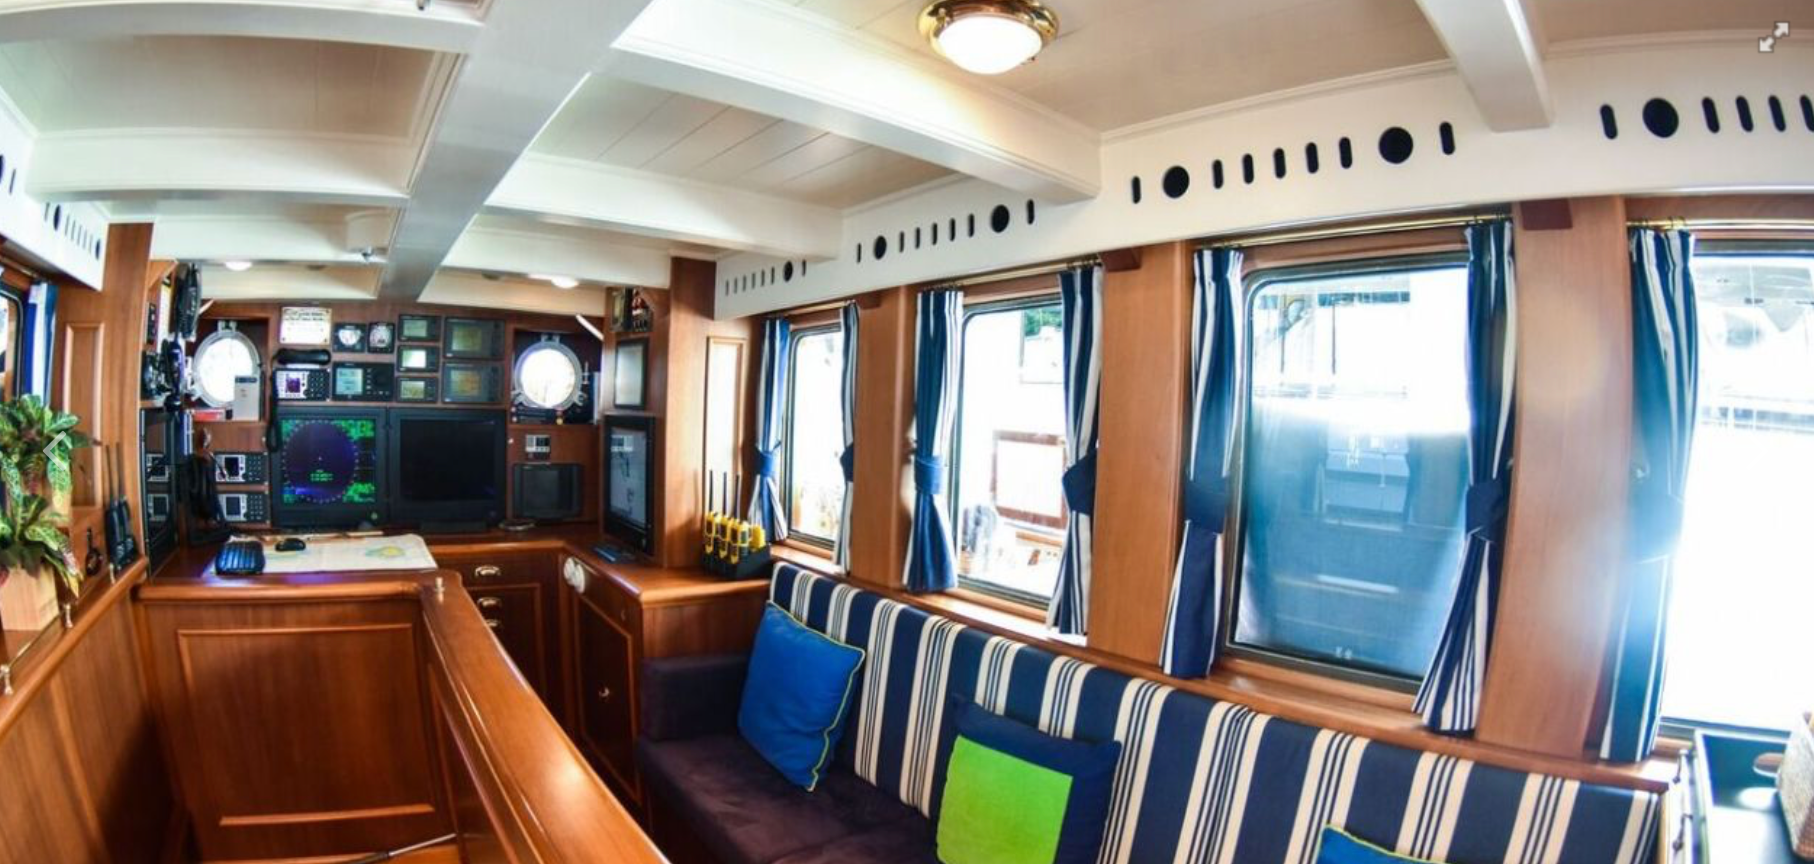
Very clean work Allan. I’m finding this vessel really interesting. I’m sort of assuming a vessel of this size has fairly extensive below deck spaces and this is prompting me to wonder why on earth the deck cabin space is being compromised to facilitate the fitting of a toilet pan and sink ( particularly as they eliminate the possibility of forward views from the cabin). Instruments, chart tables, gin cupboards all seem better candidates for deckhouse space. Does anyone have any insights into this novel prioritisation of facilities?
-
Really not sure how you could see that Level detail Keith. It is actually a real ships registration certificate, although not for Germania.
-
I’ll be Looking forward to winter Michael. As with a lot of the world it is looking like I will be spending a lot of time indoors.
-
An interesting and elegant little ship which I will follow with interest. In so far as filling out the frame is concerned I have found that laying up multiple layers of thinly cut planks around the edge of the frame works well.
-
Brilliant work on the paddle wheels Brian, the cross bracing works a treat. Nice holiday shots, you remind me of a trip some 20 years ago when my wife and the kids started in Denver and then followed a loop around, Mammoth, Wind Cavern, Mount Rushmore, Devils Tower, Cody, Yellowstone, Salt Lake City, Arches NP, and Back to Denver. Some of the best scenery in the world. Good luck with completing your trip and lets hope the wildfires are kinder to you next time.
-
Eberhard. I agree. If you look carefully at the interior photo the seat isn’t the same as the back. The seat being in a brown coloured material which I think looks rather second rate. My guess is that the white and blue material proved to be impractical for the application and had to be replaced. If I were the owner I really wouldn’t have been prepared to accept this. As I have commented previously there are aspects of Germania where I think corners have been cut, presumably to save money.
-
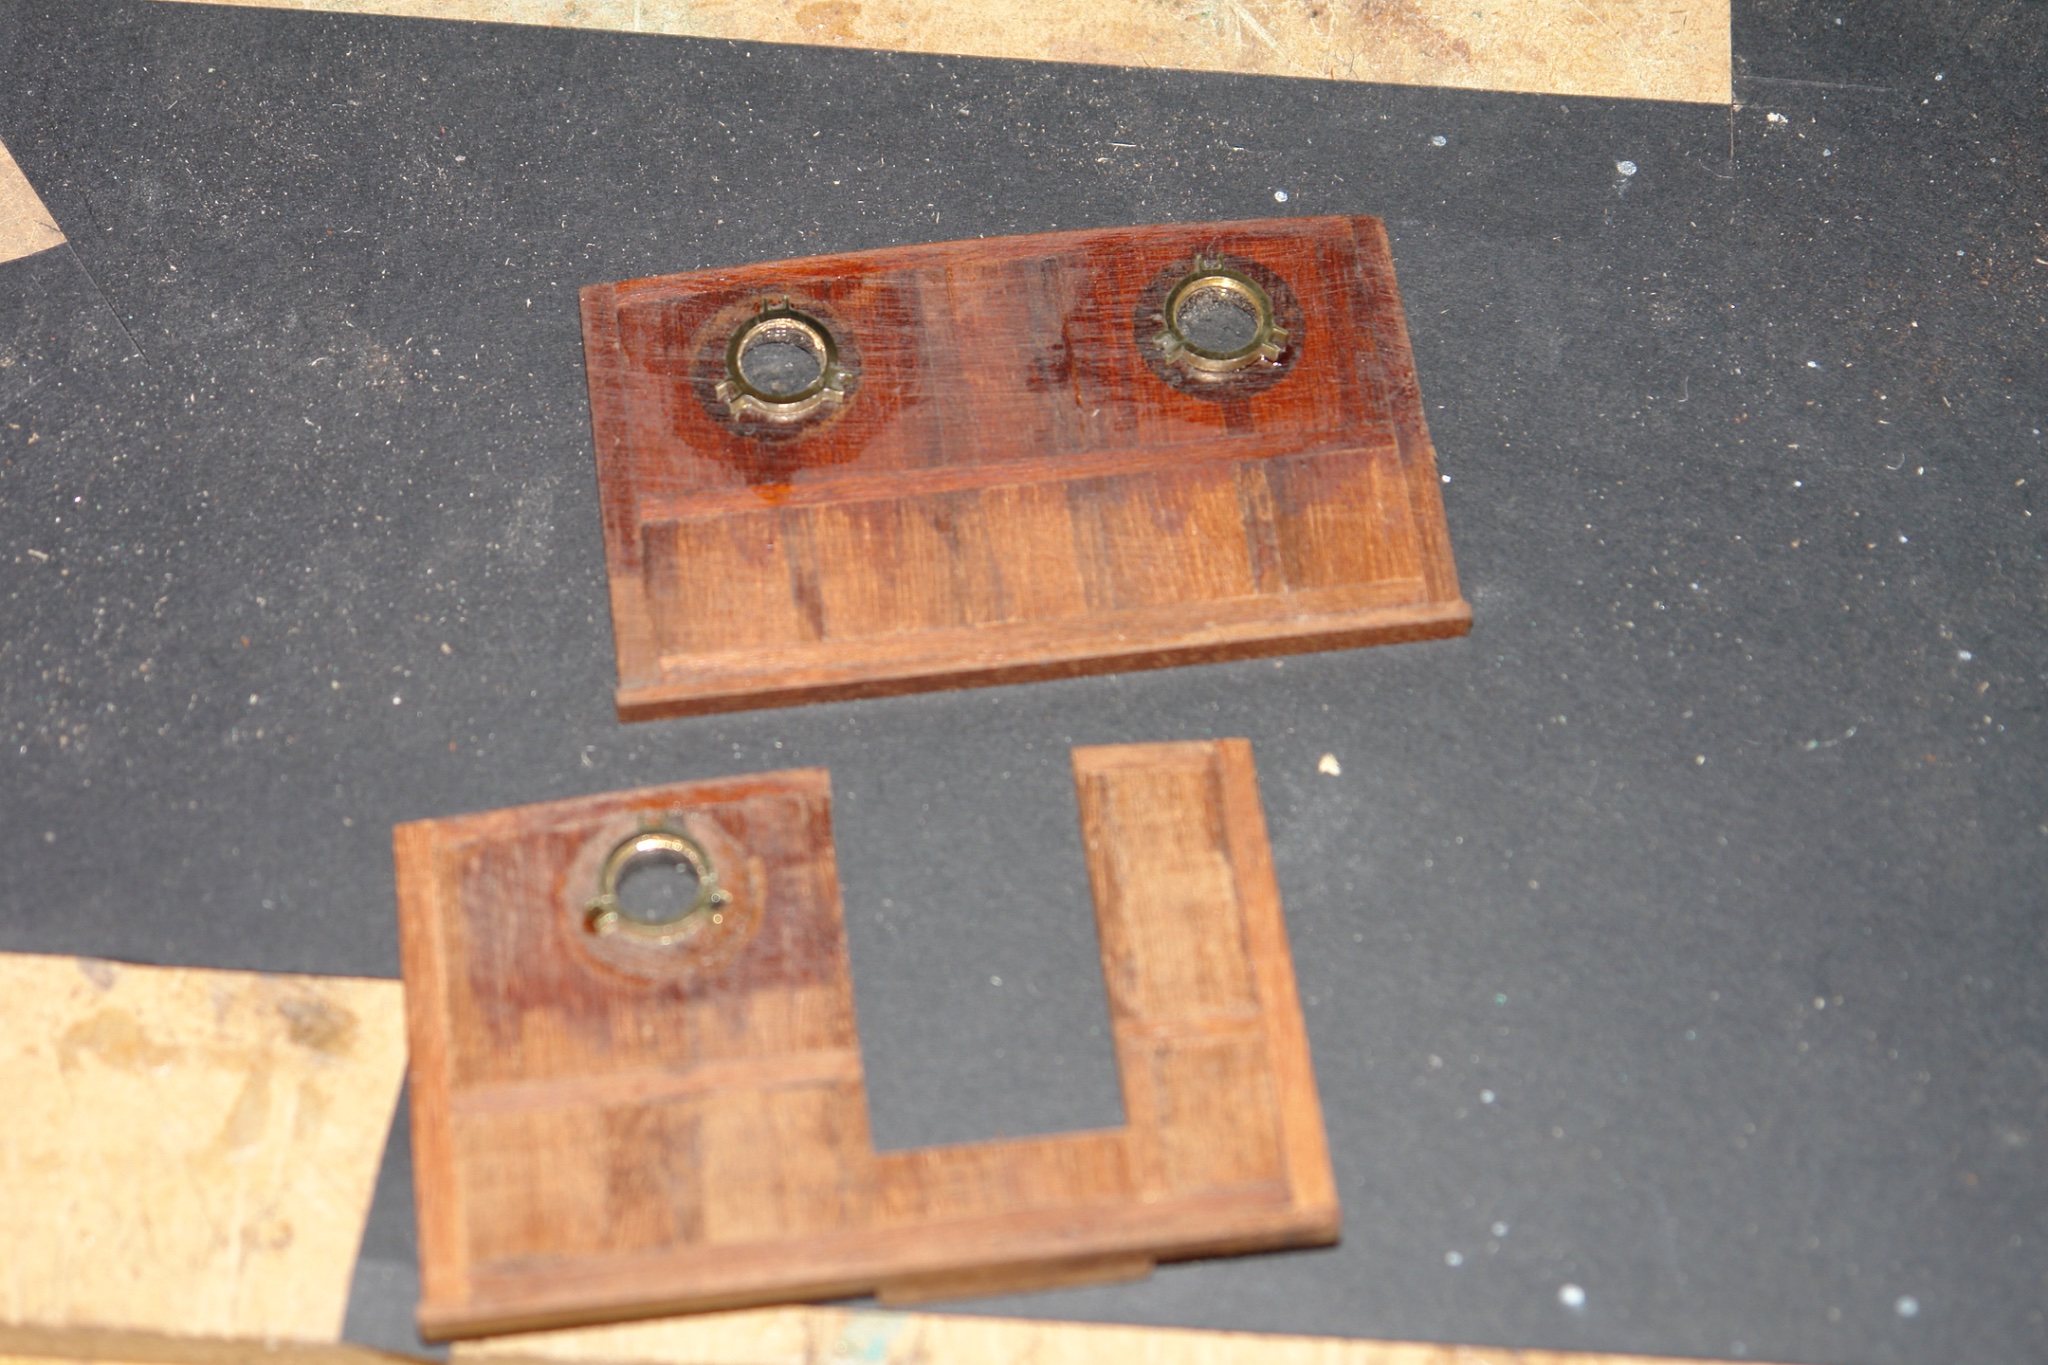
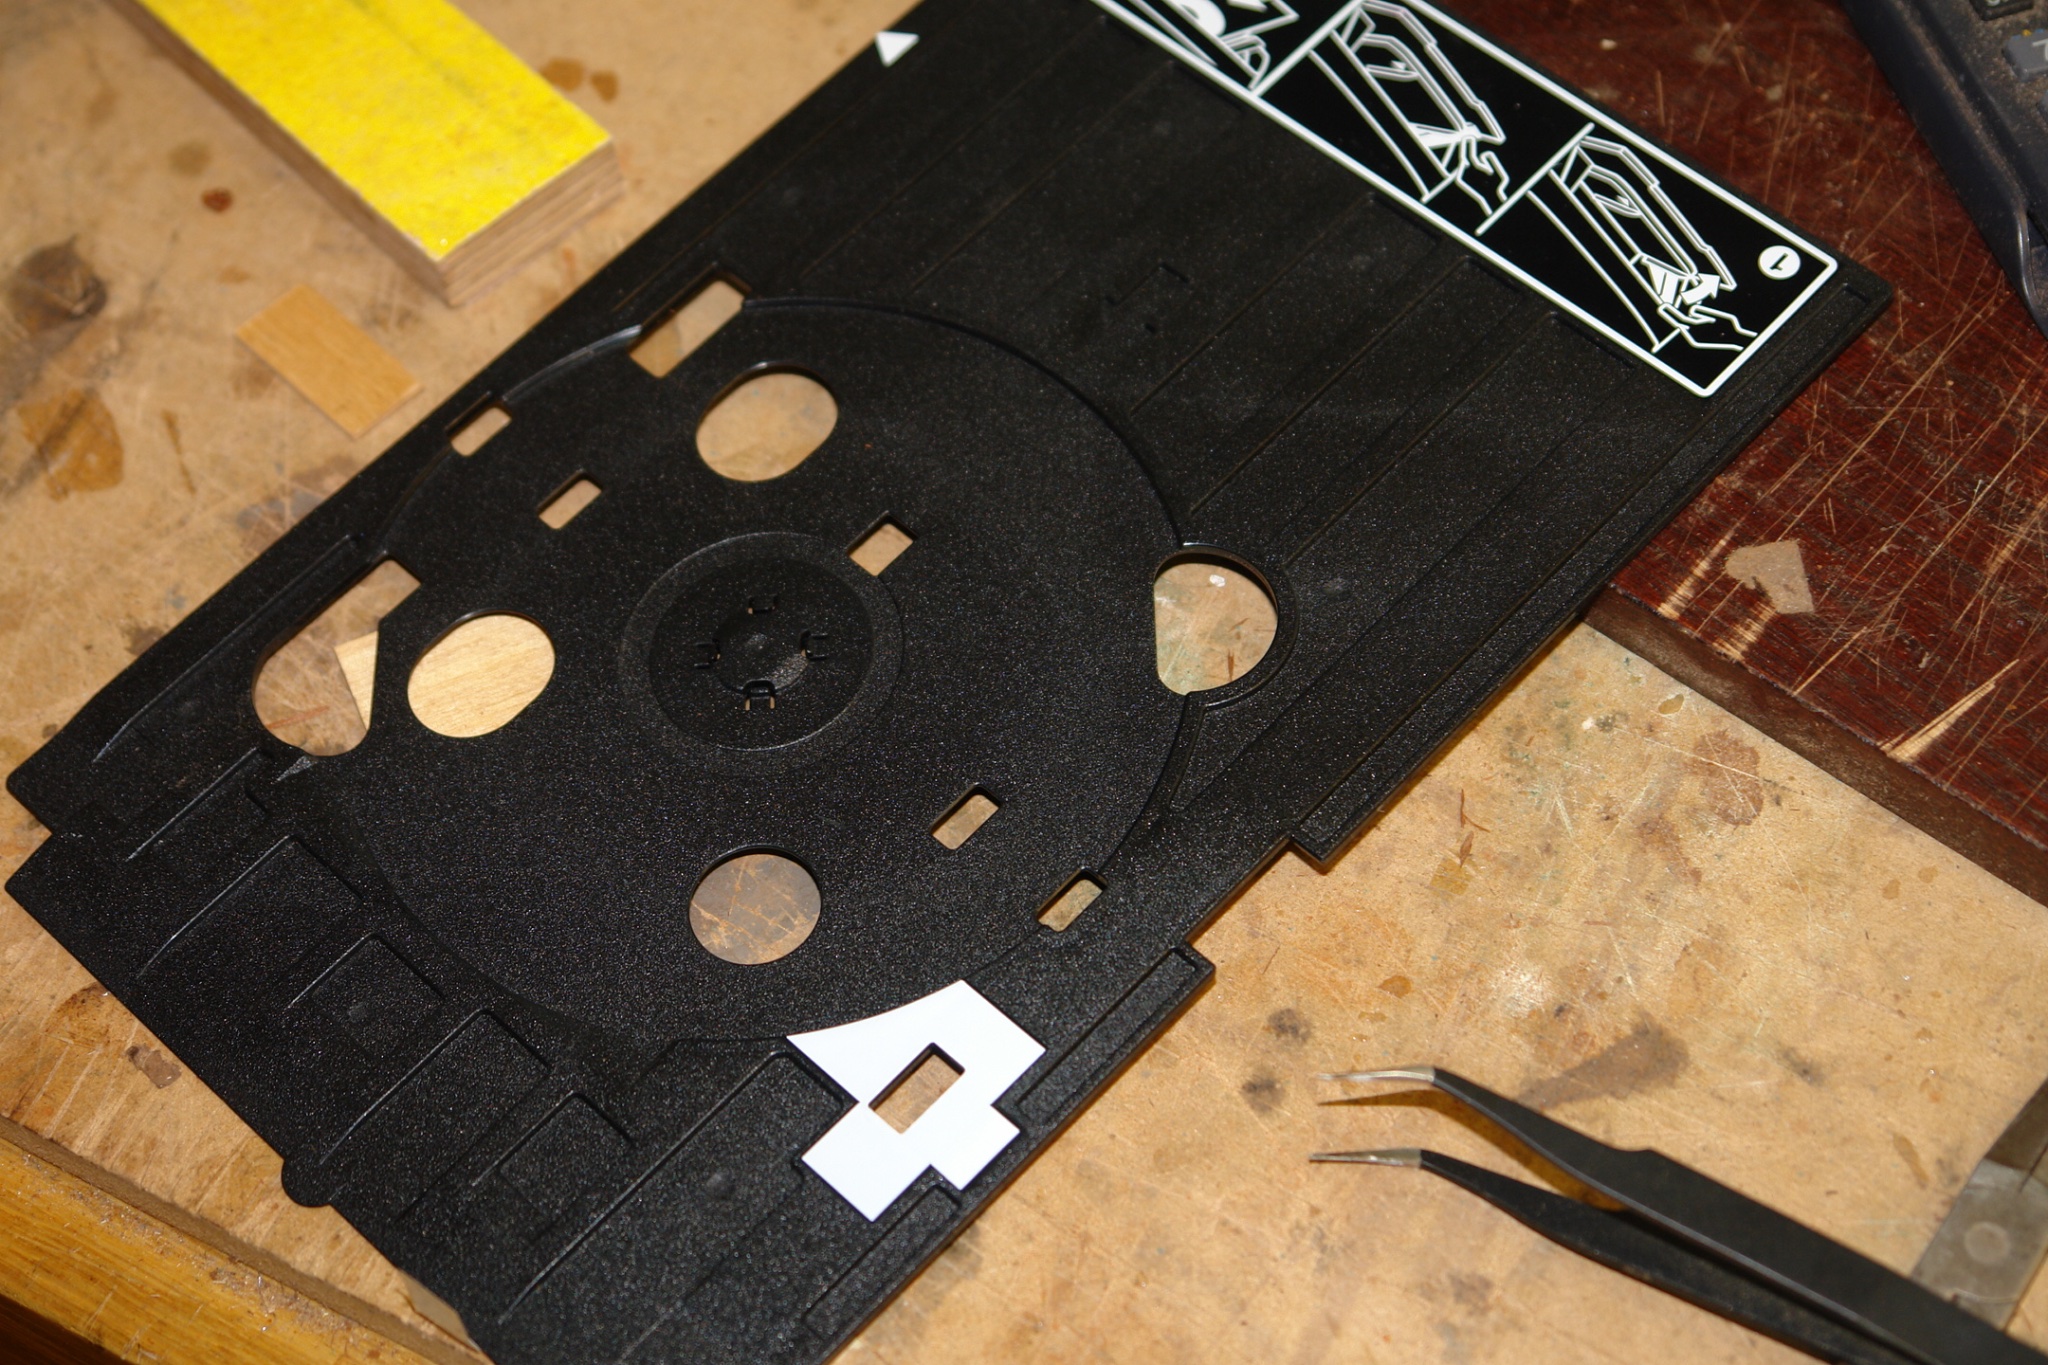
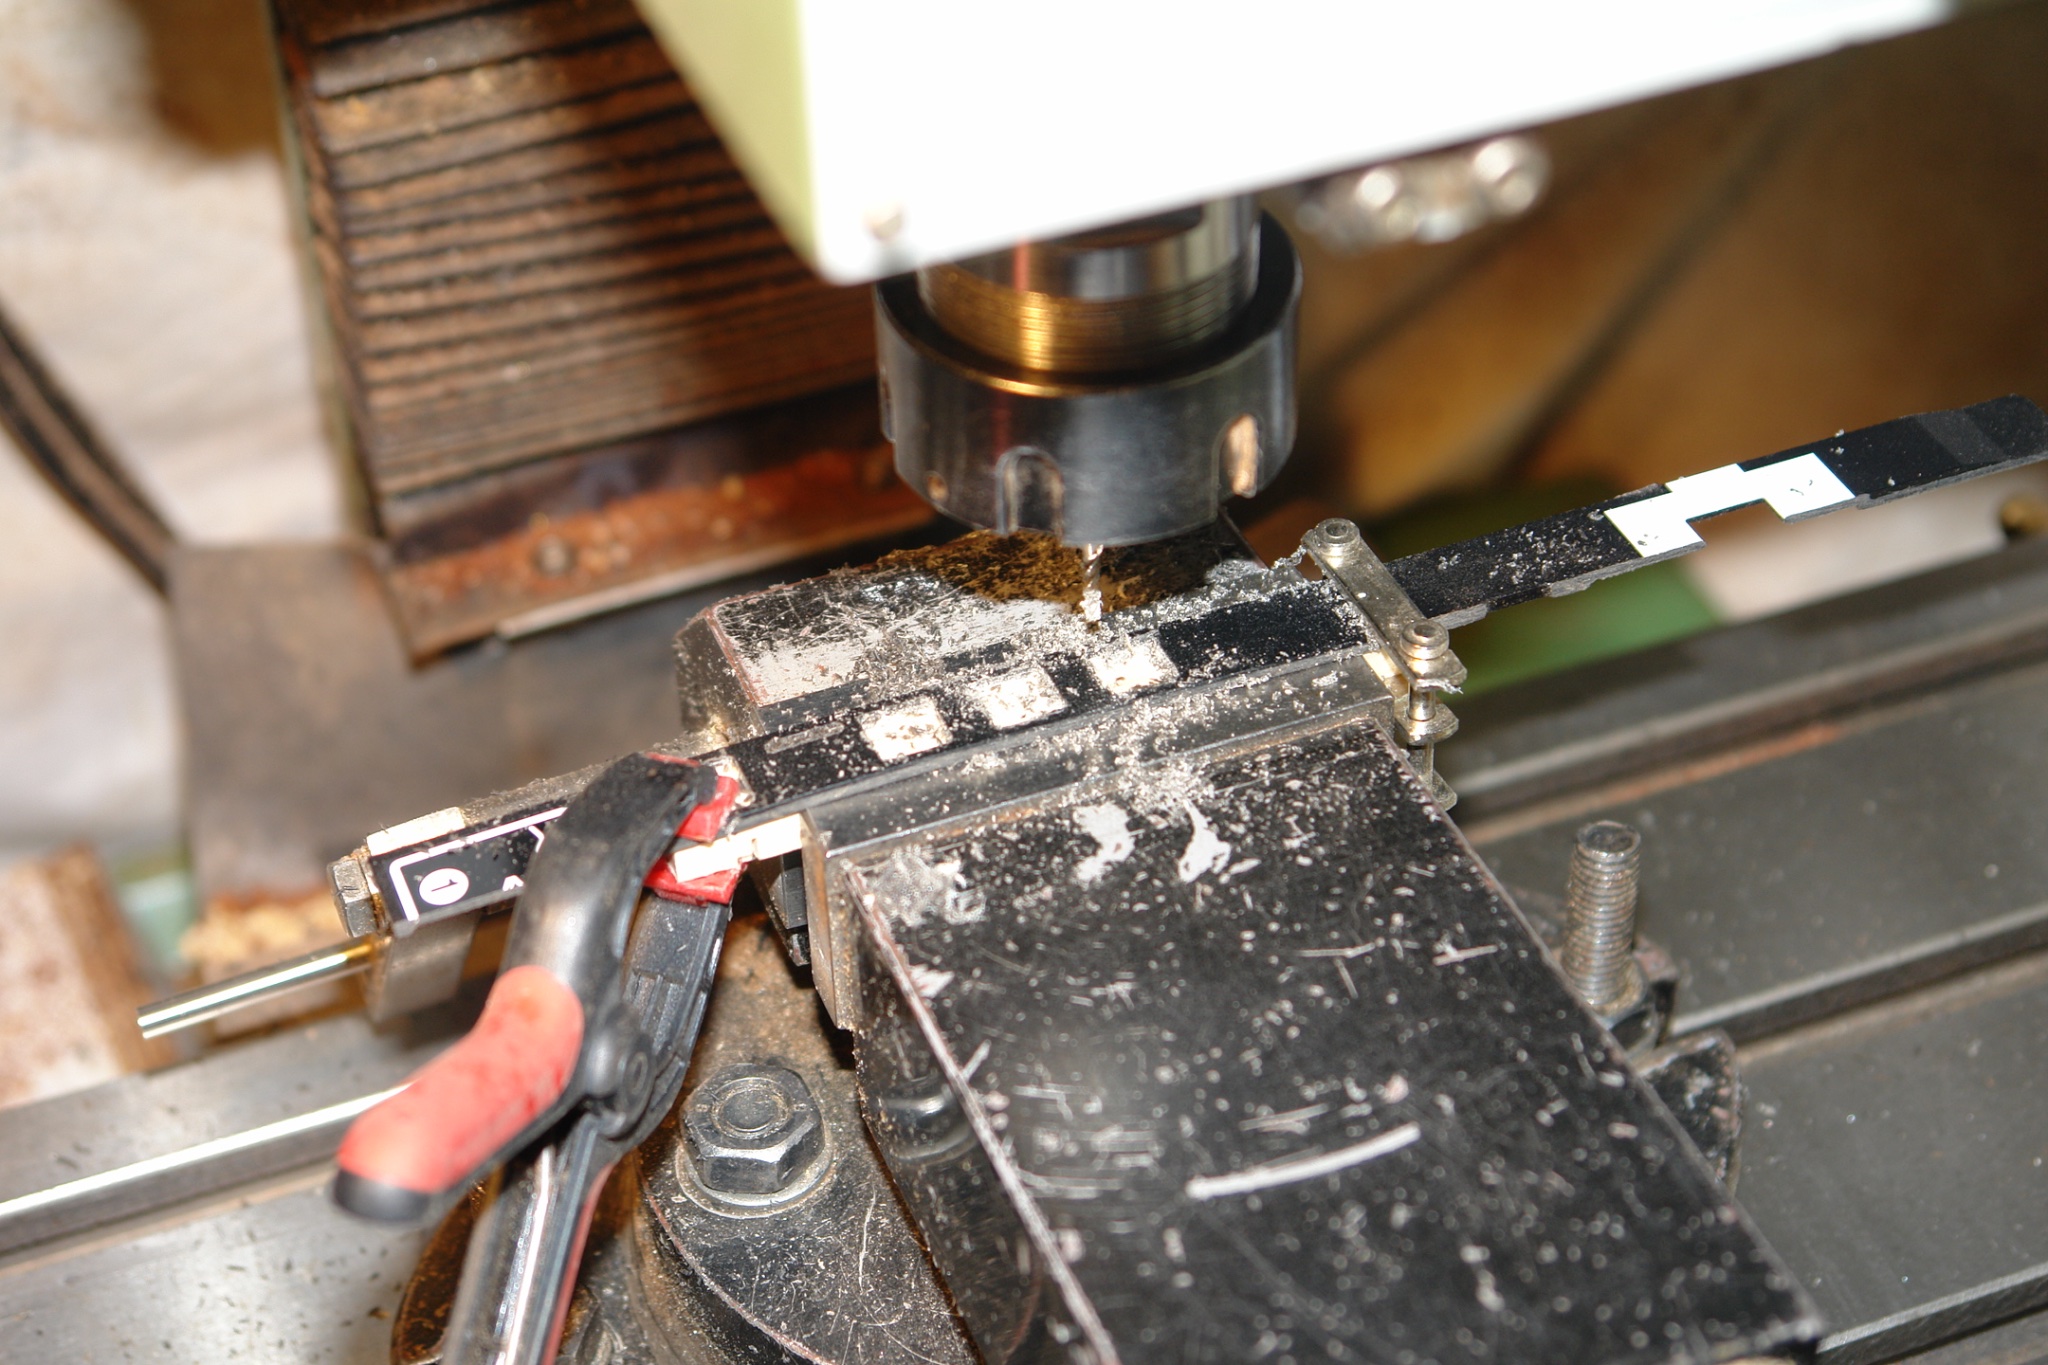
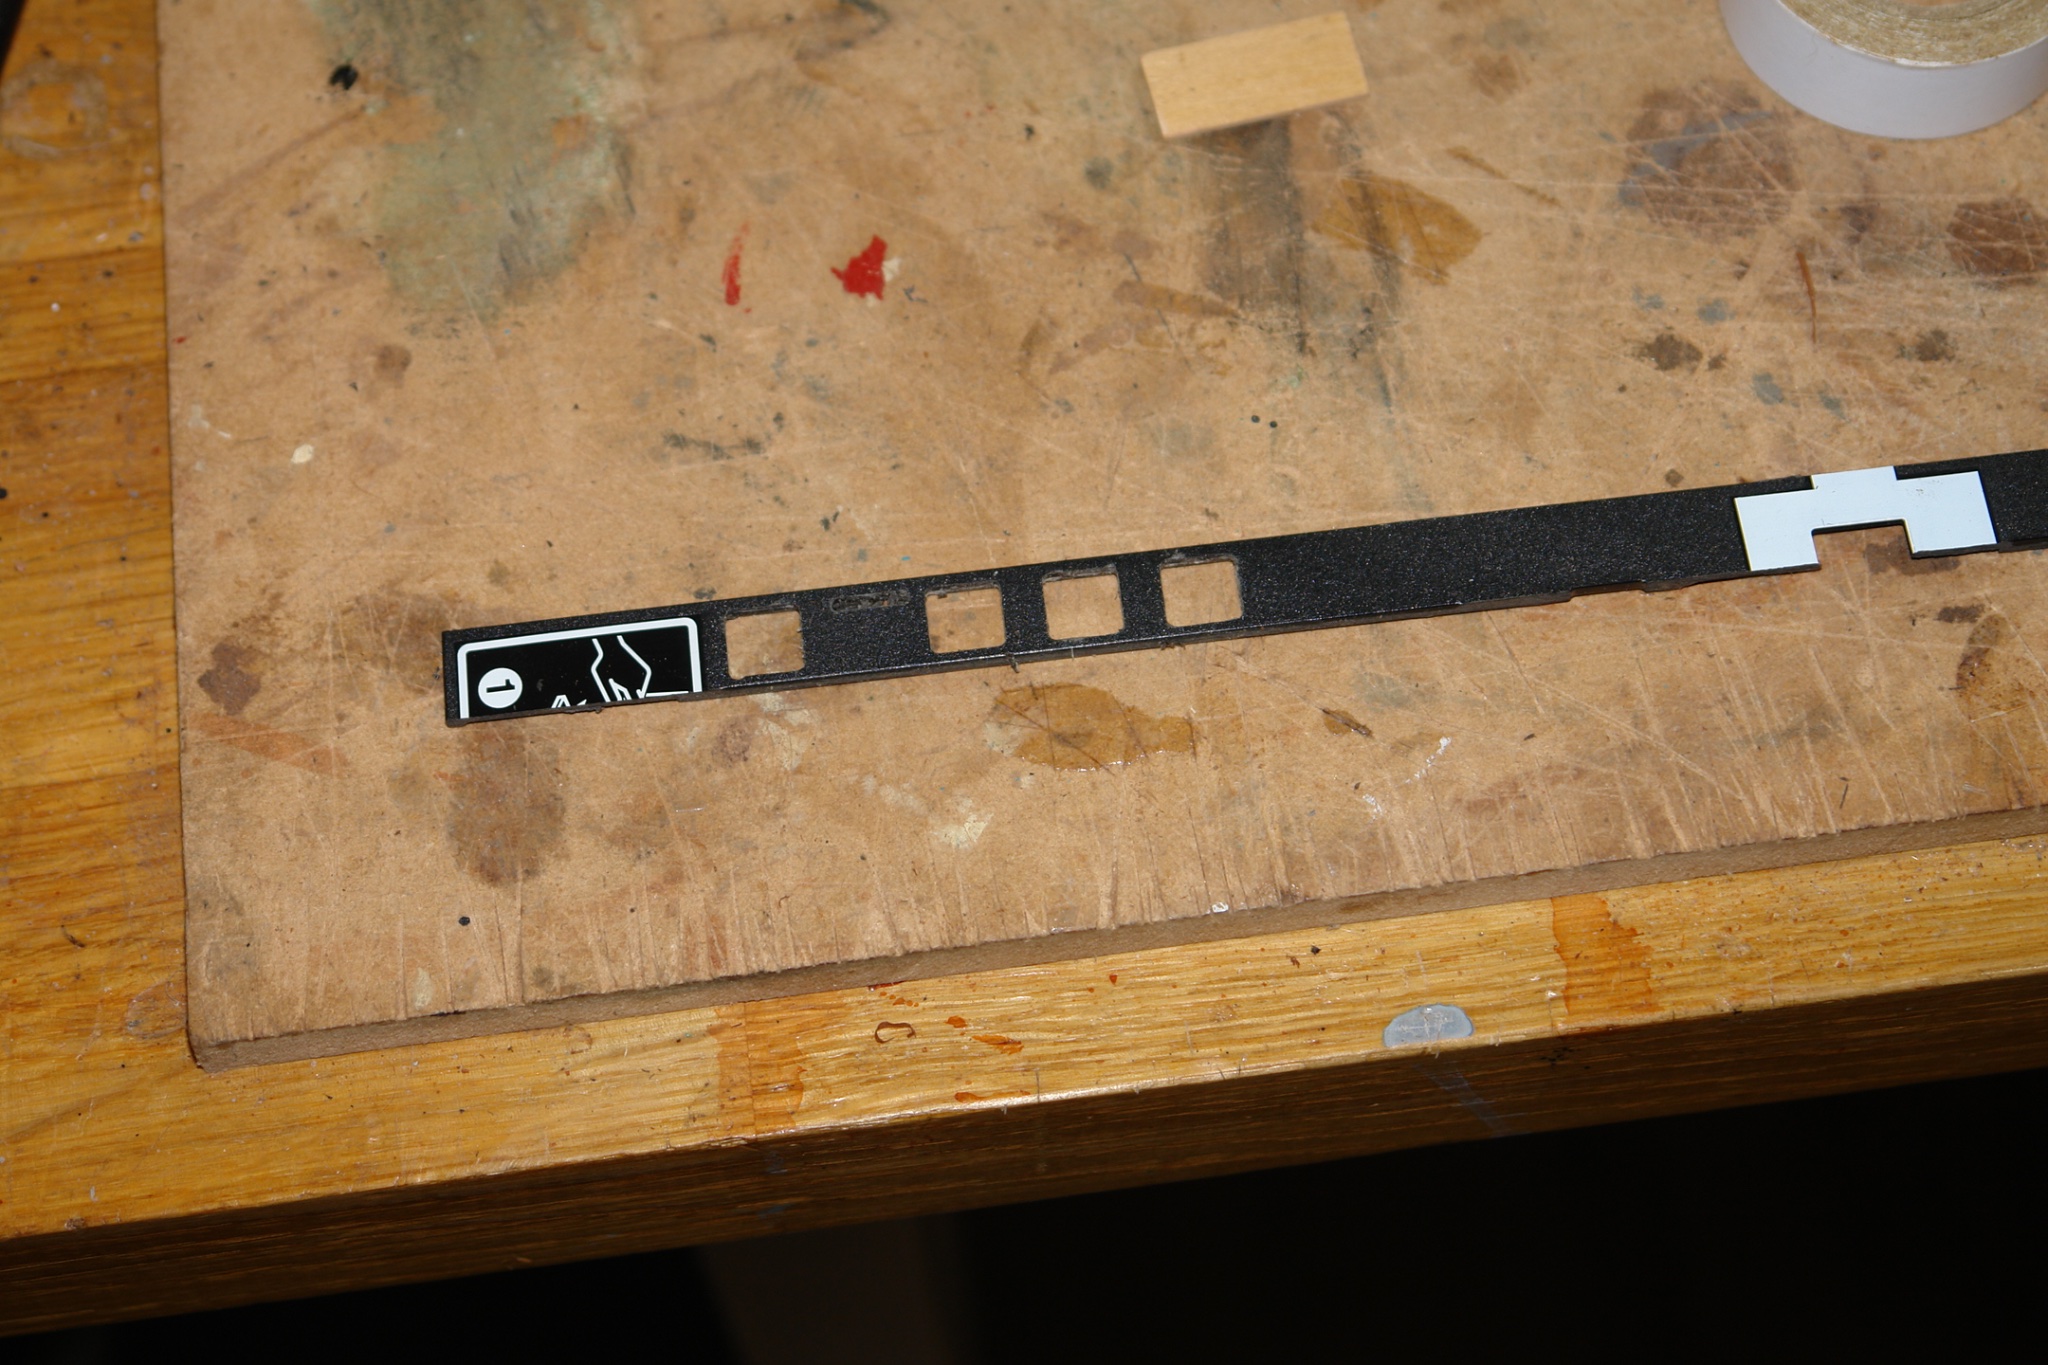
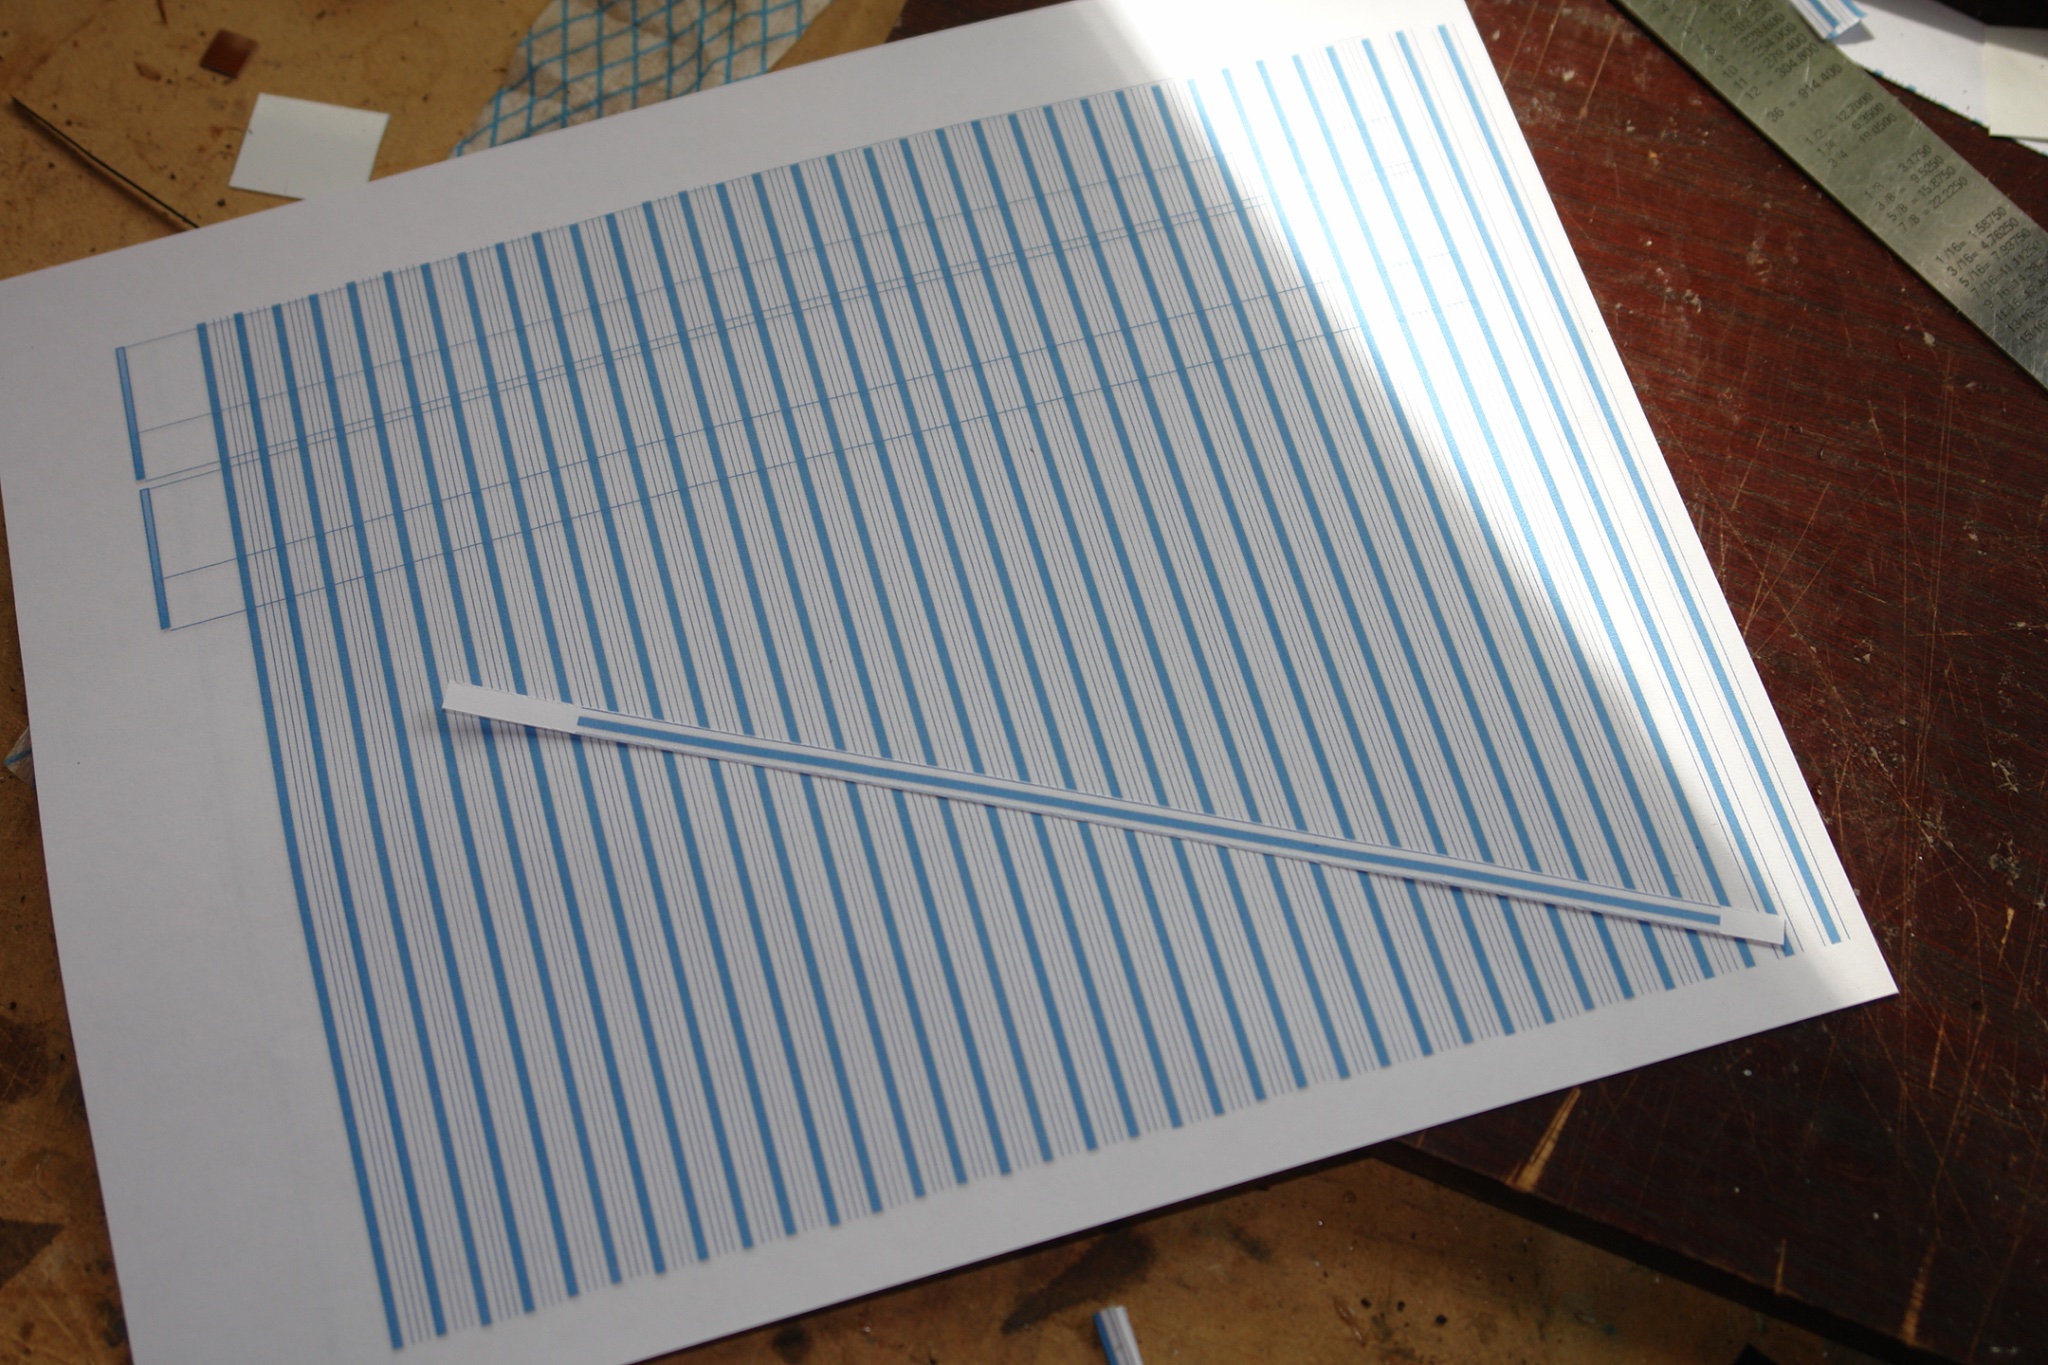
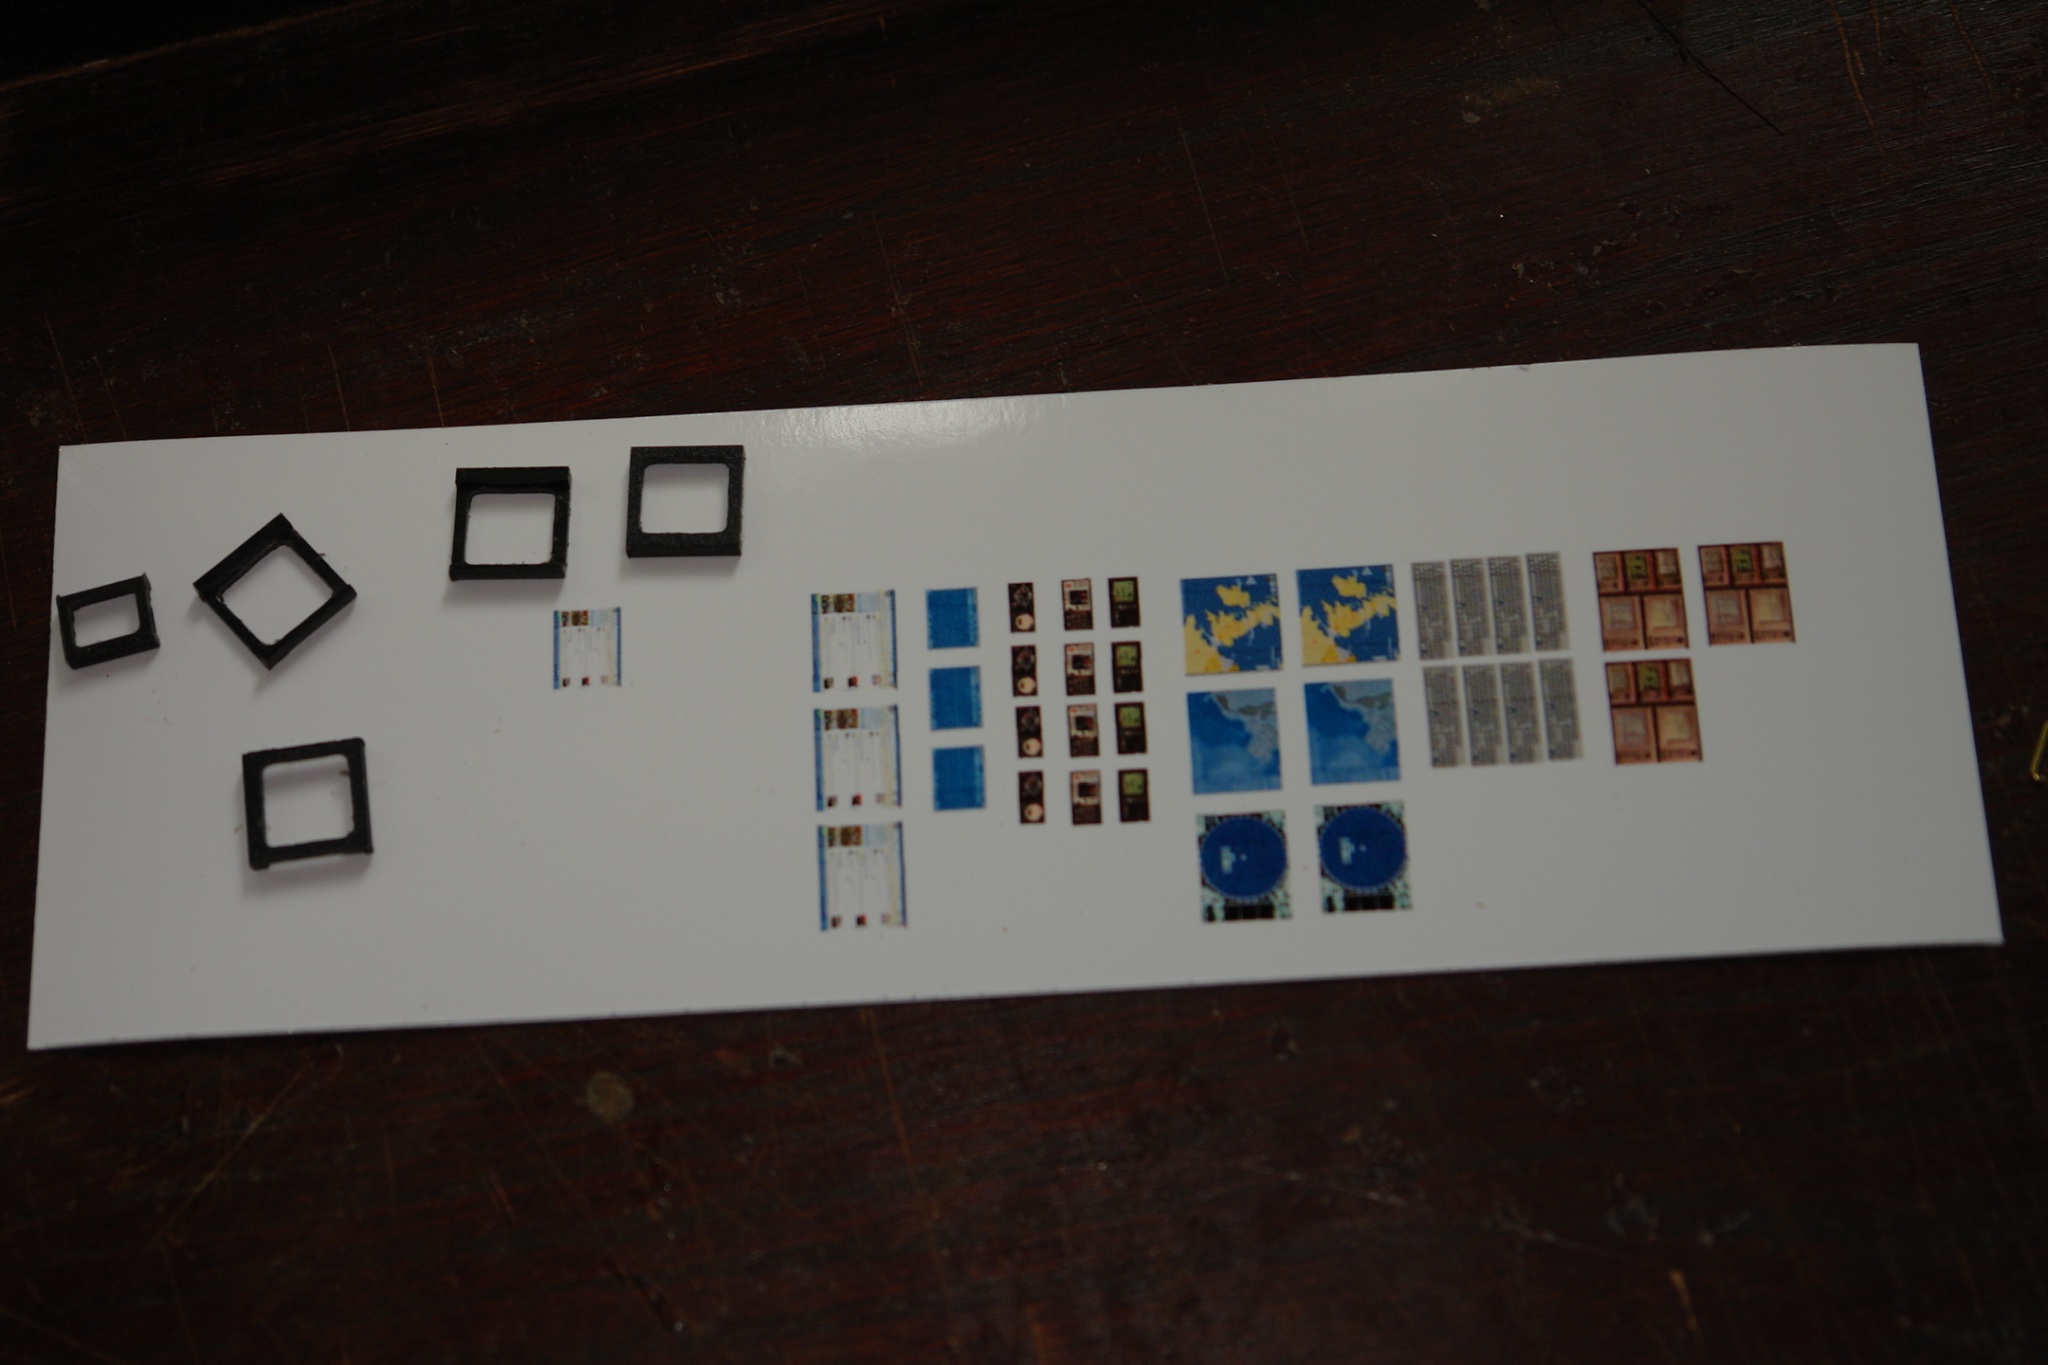
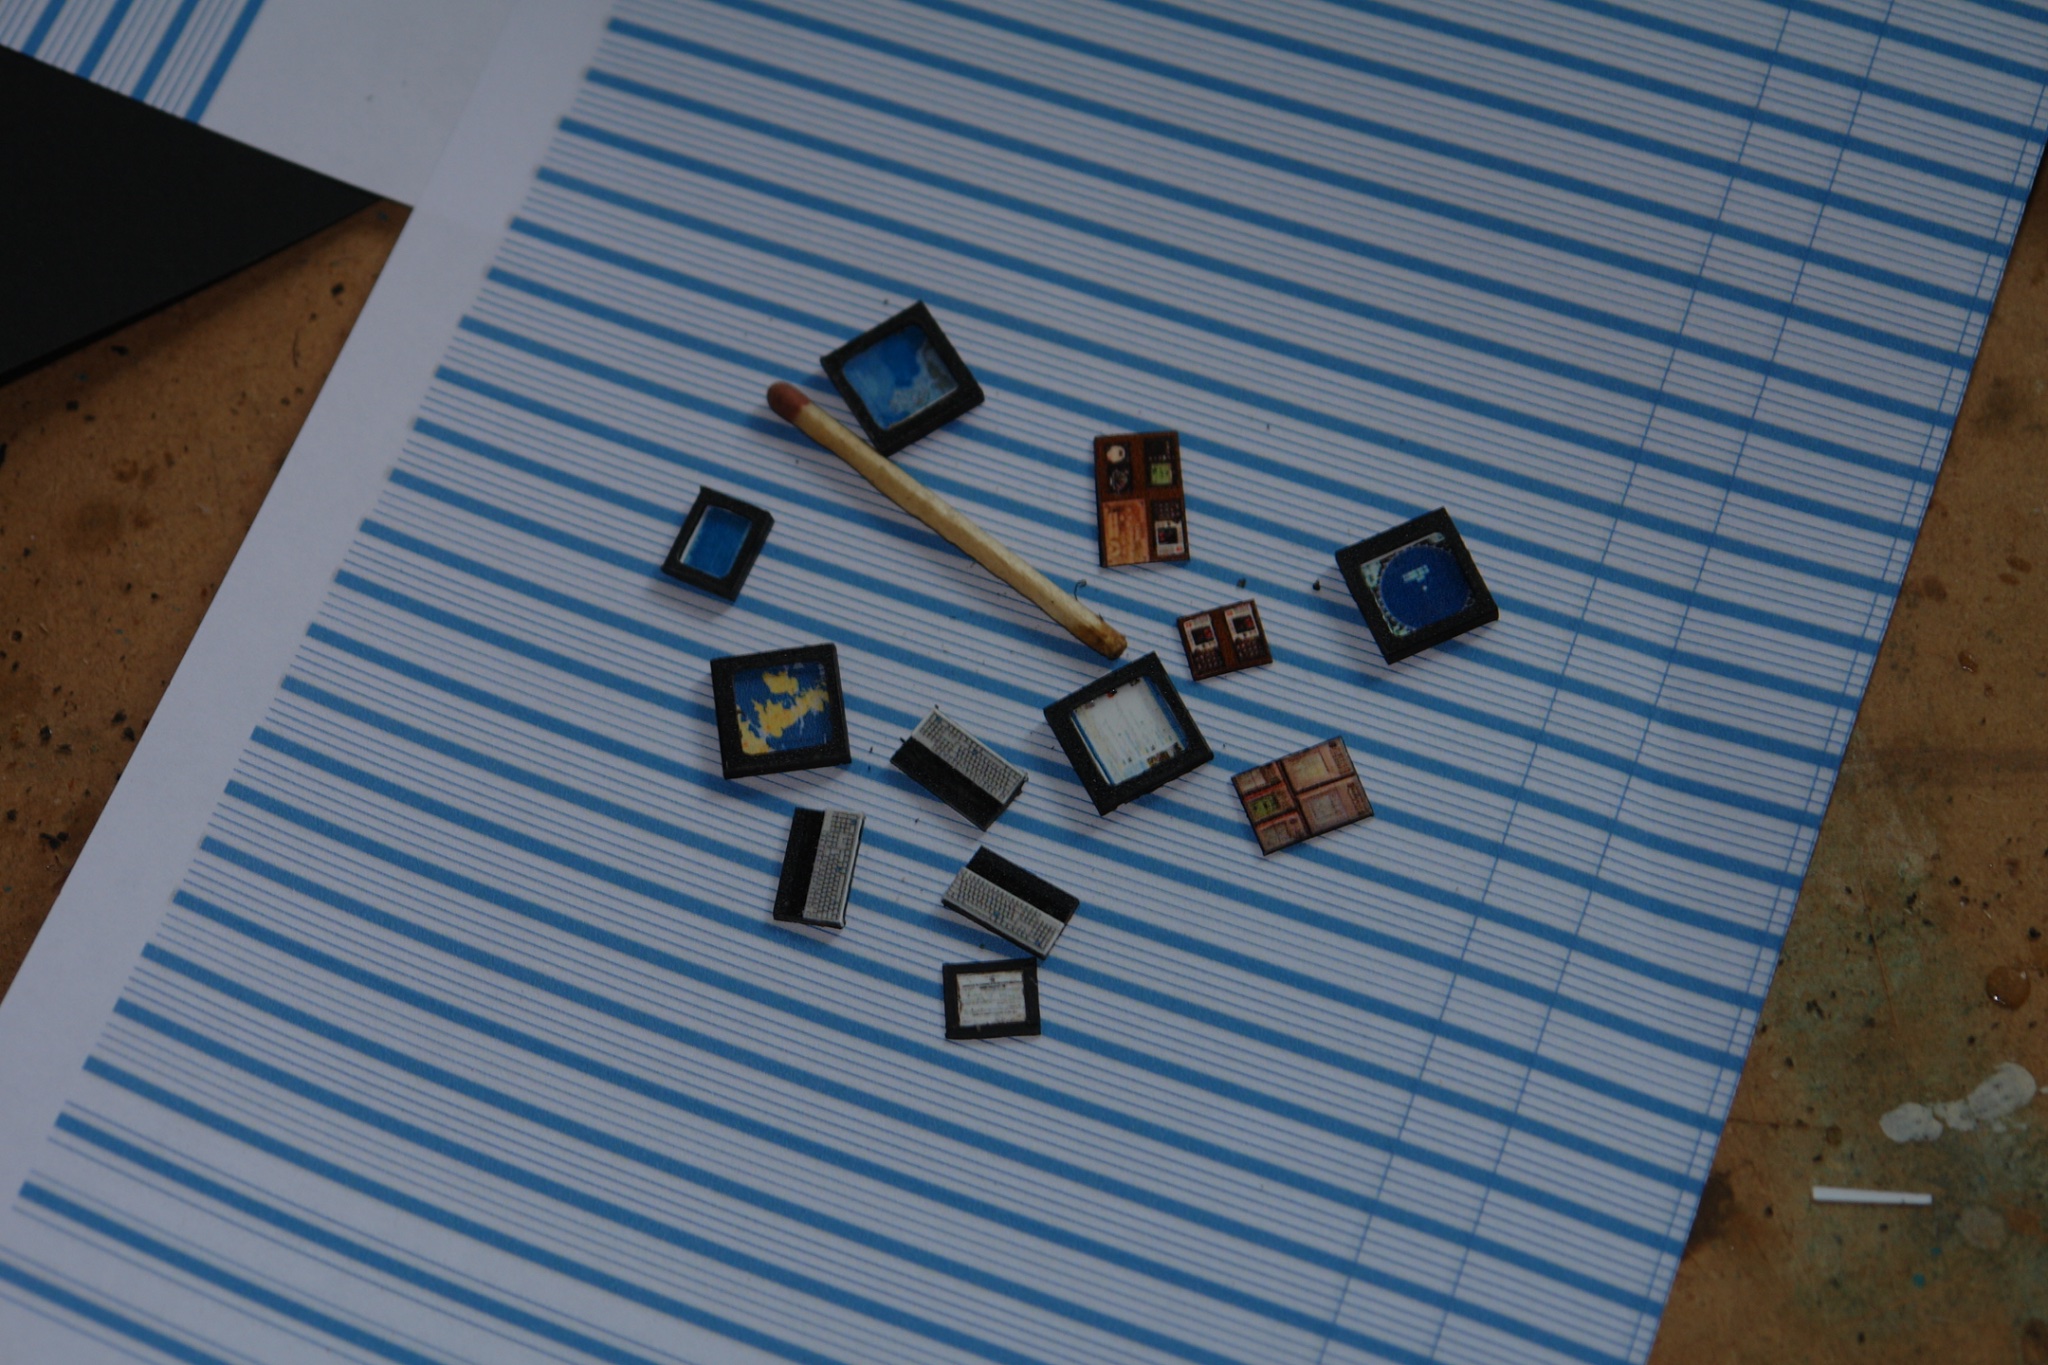
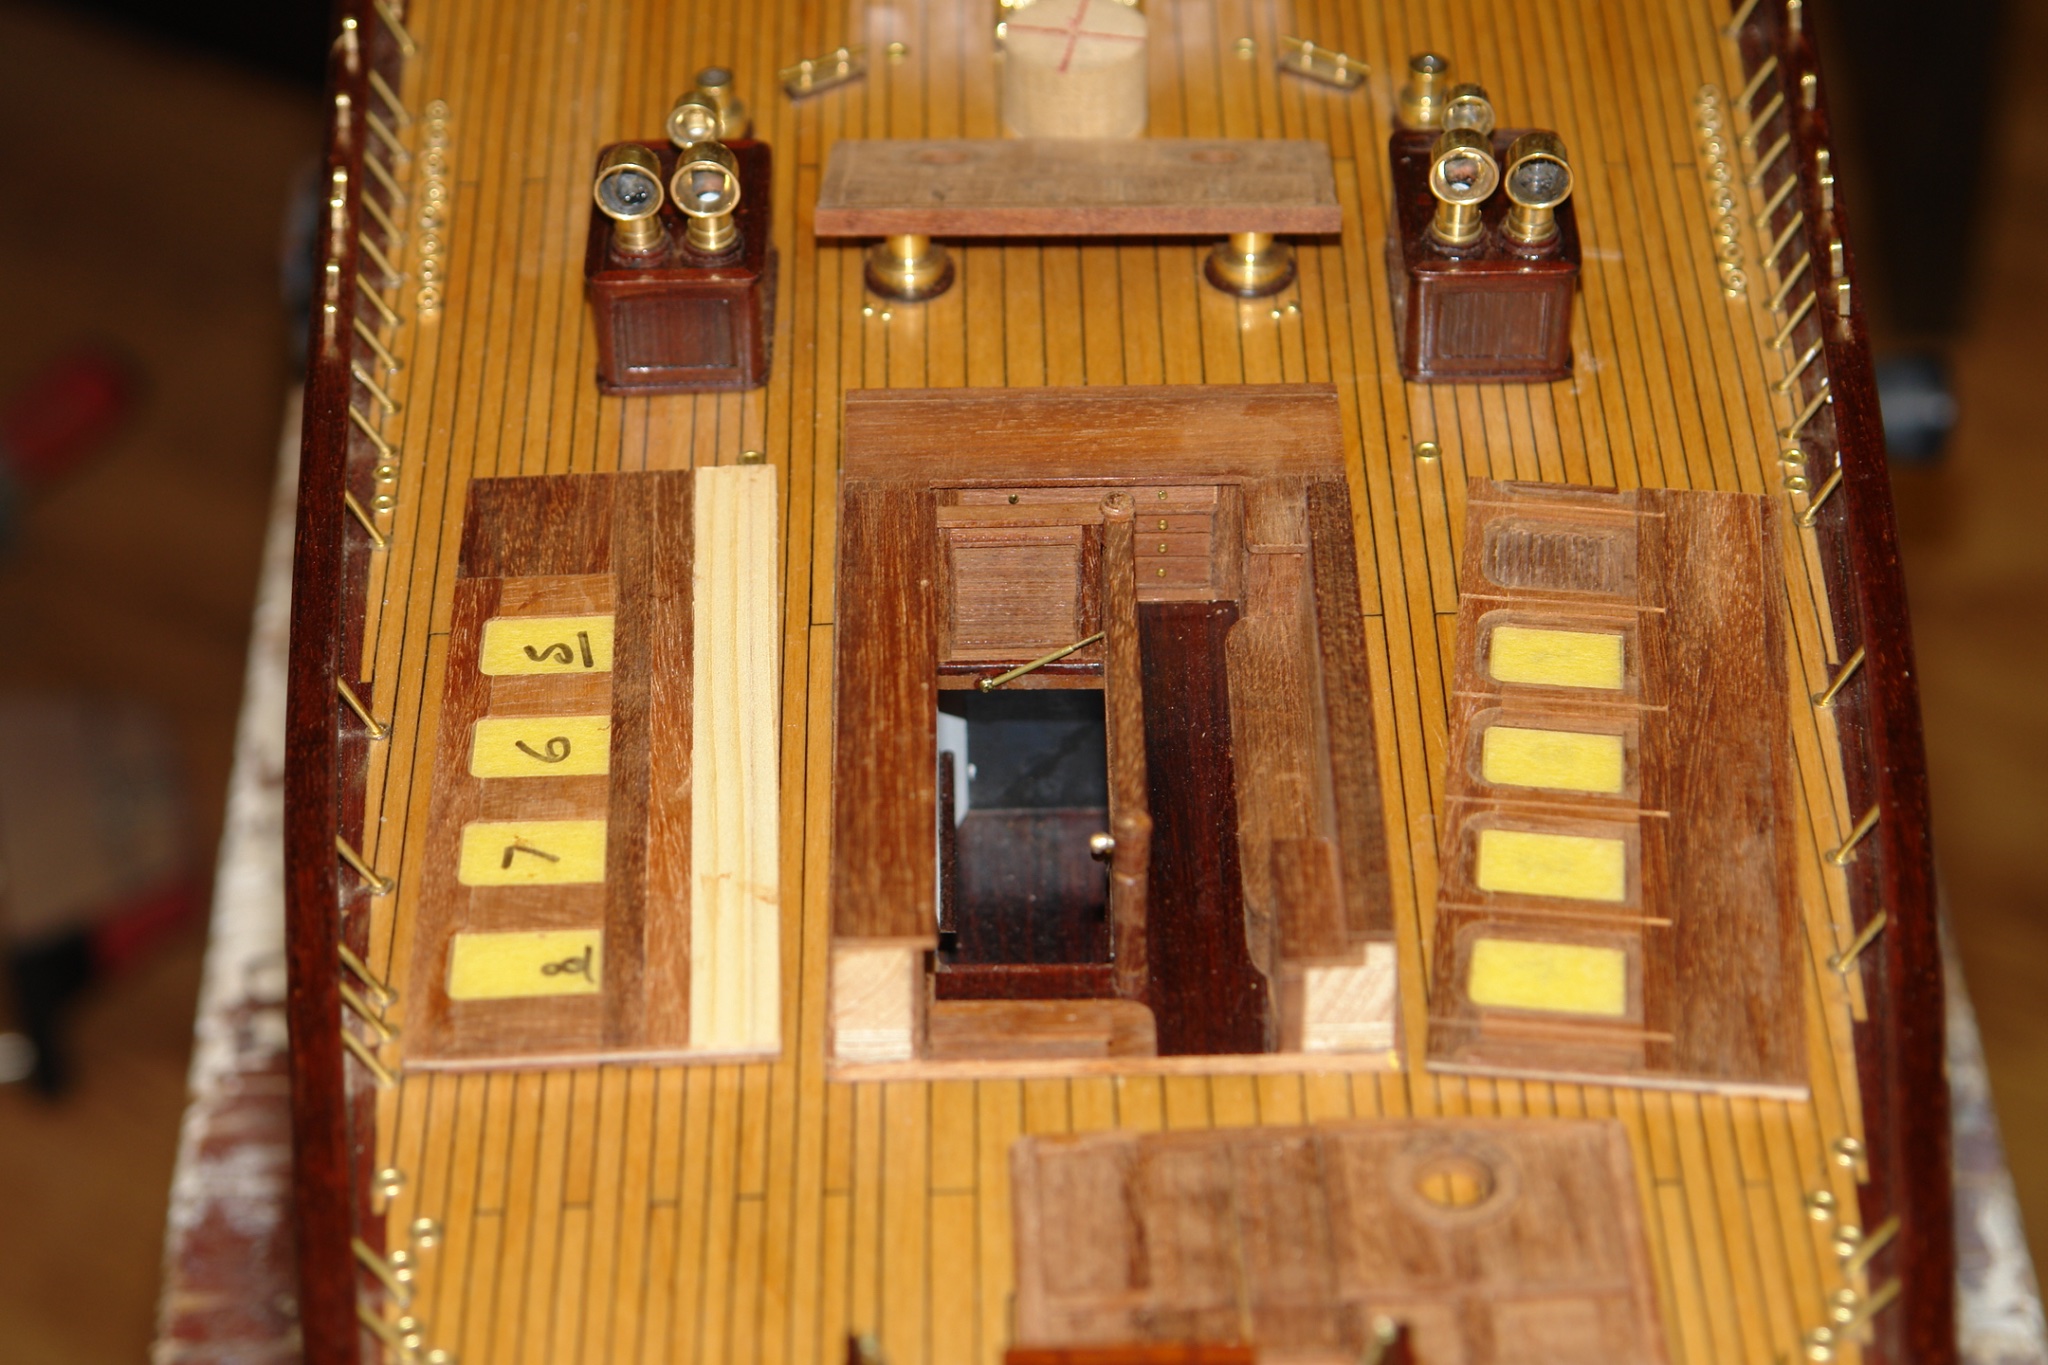
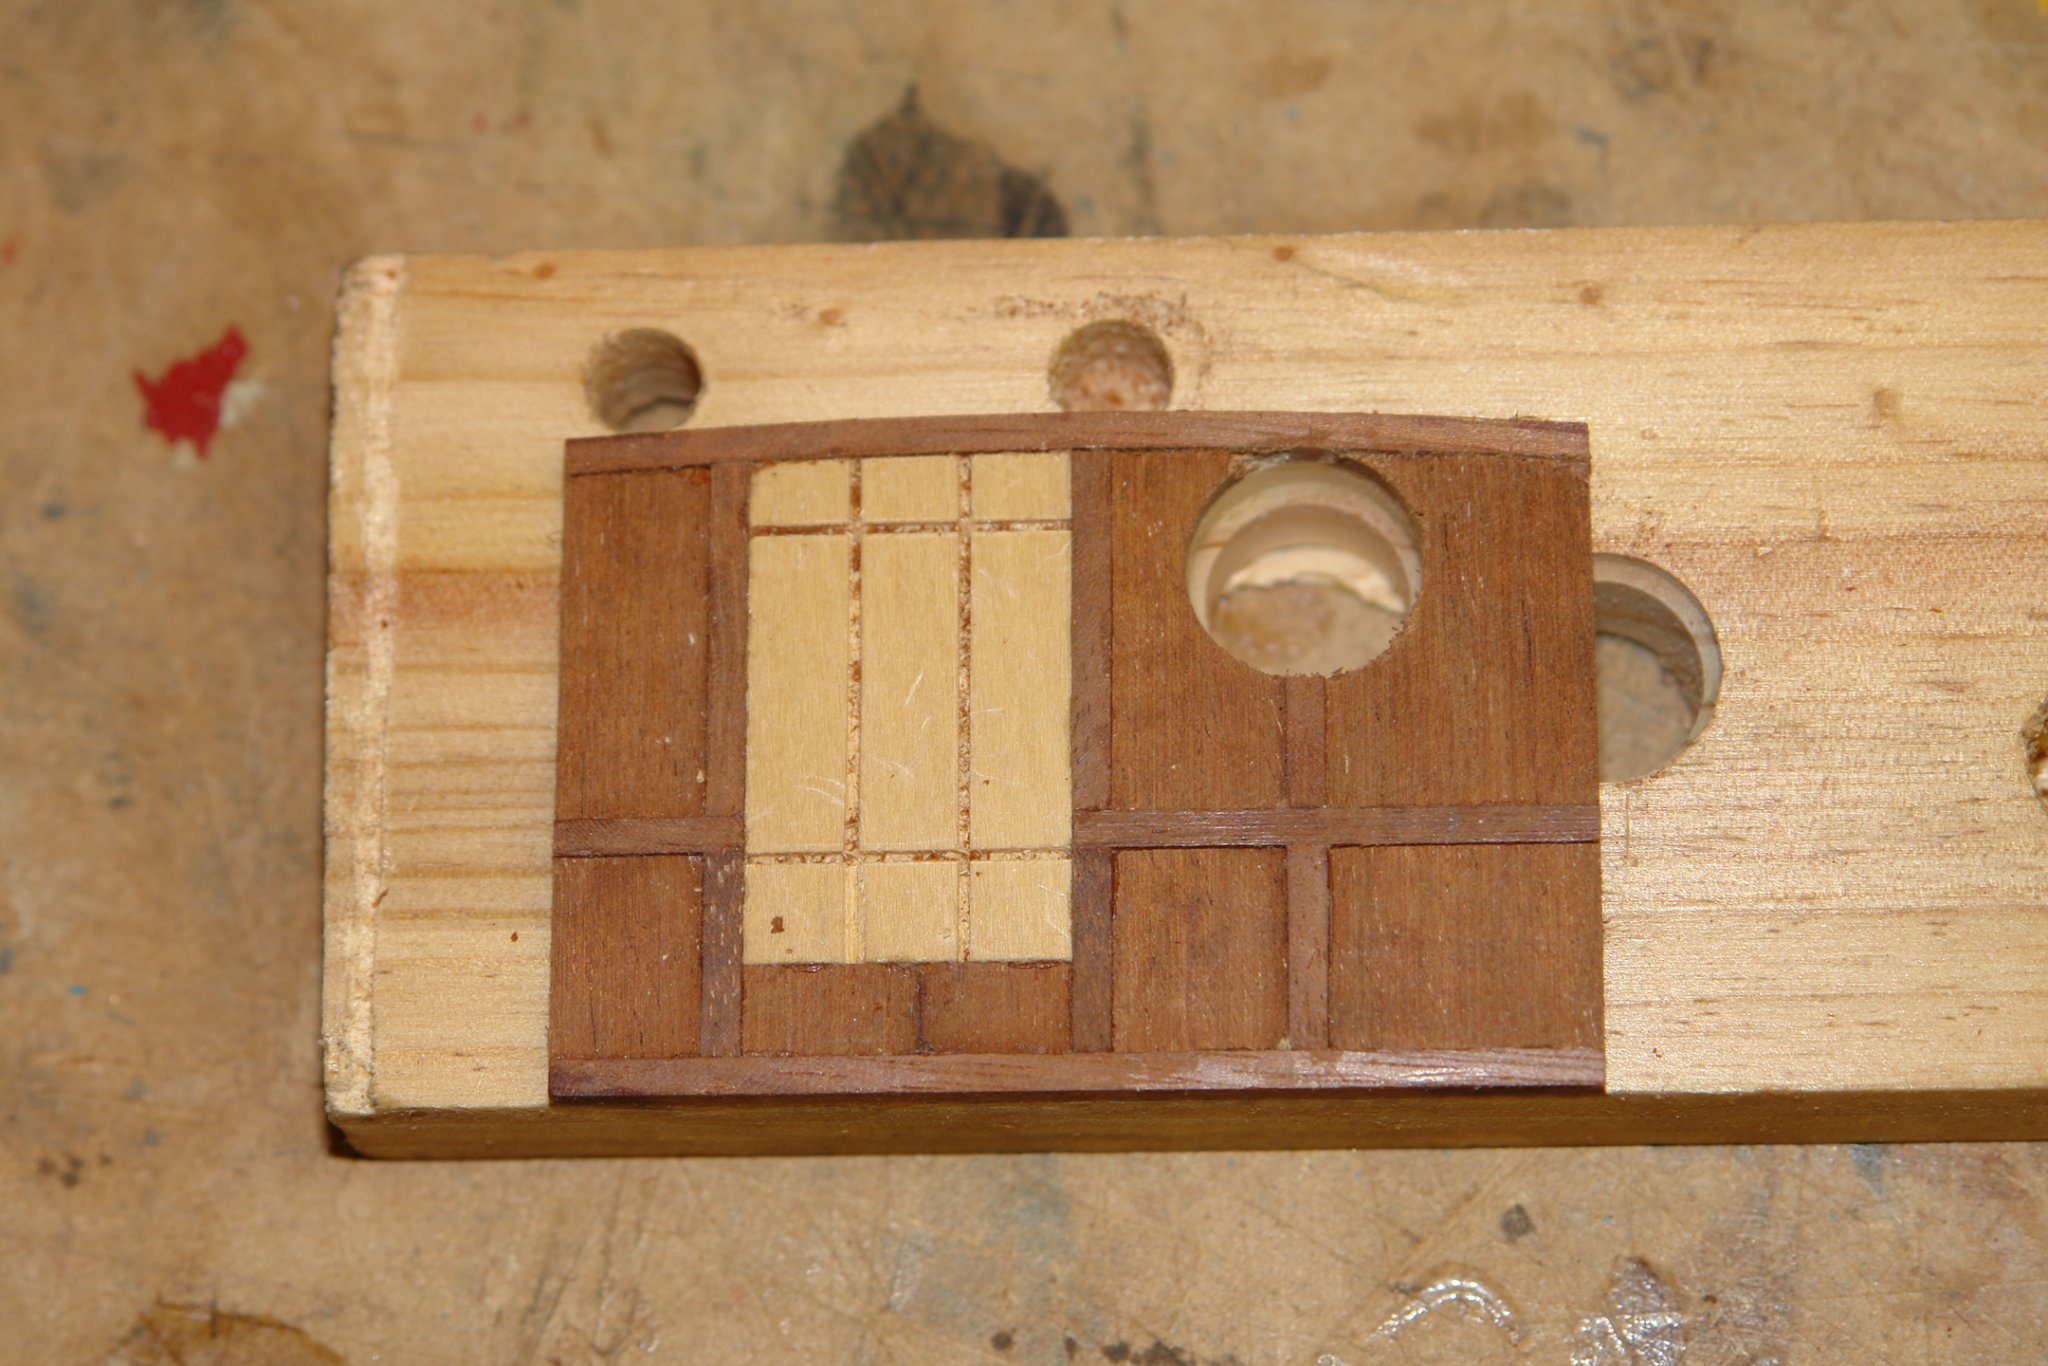
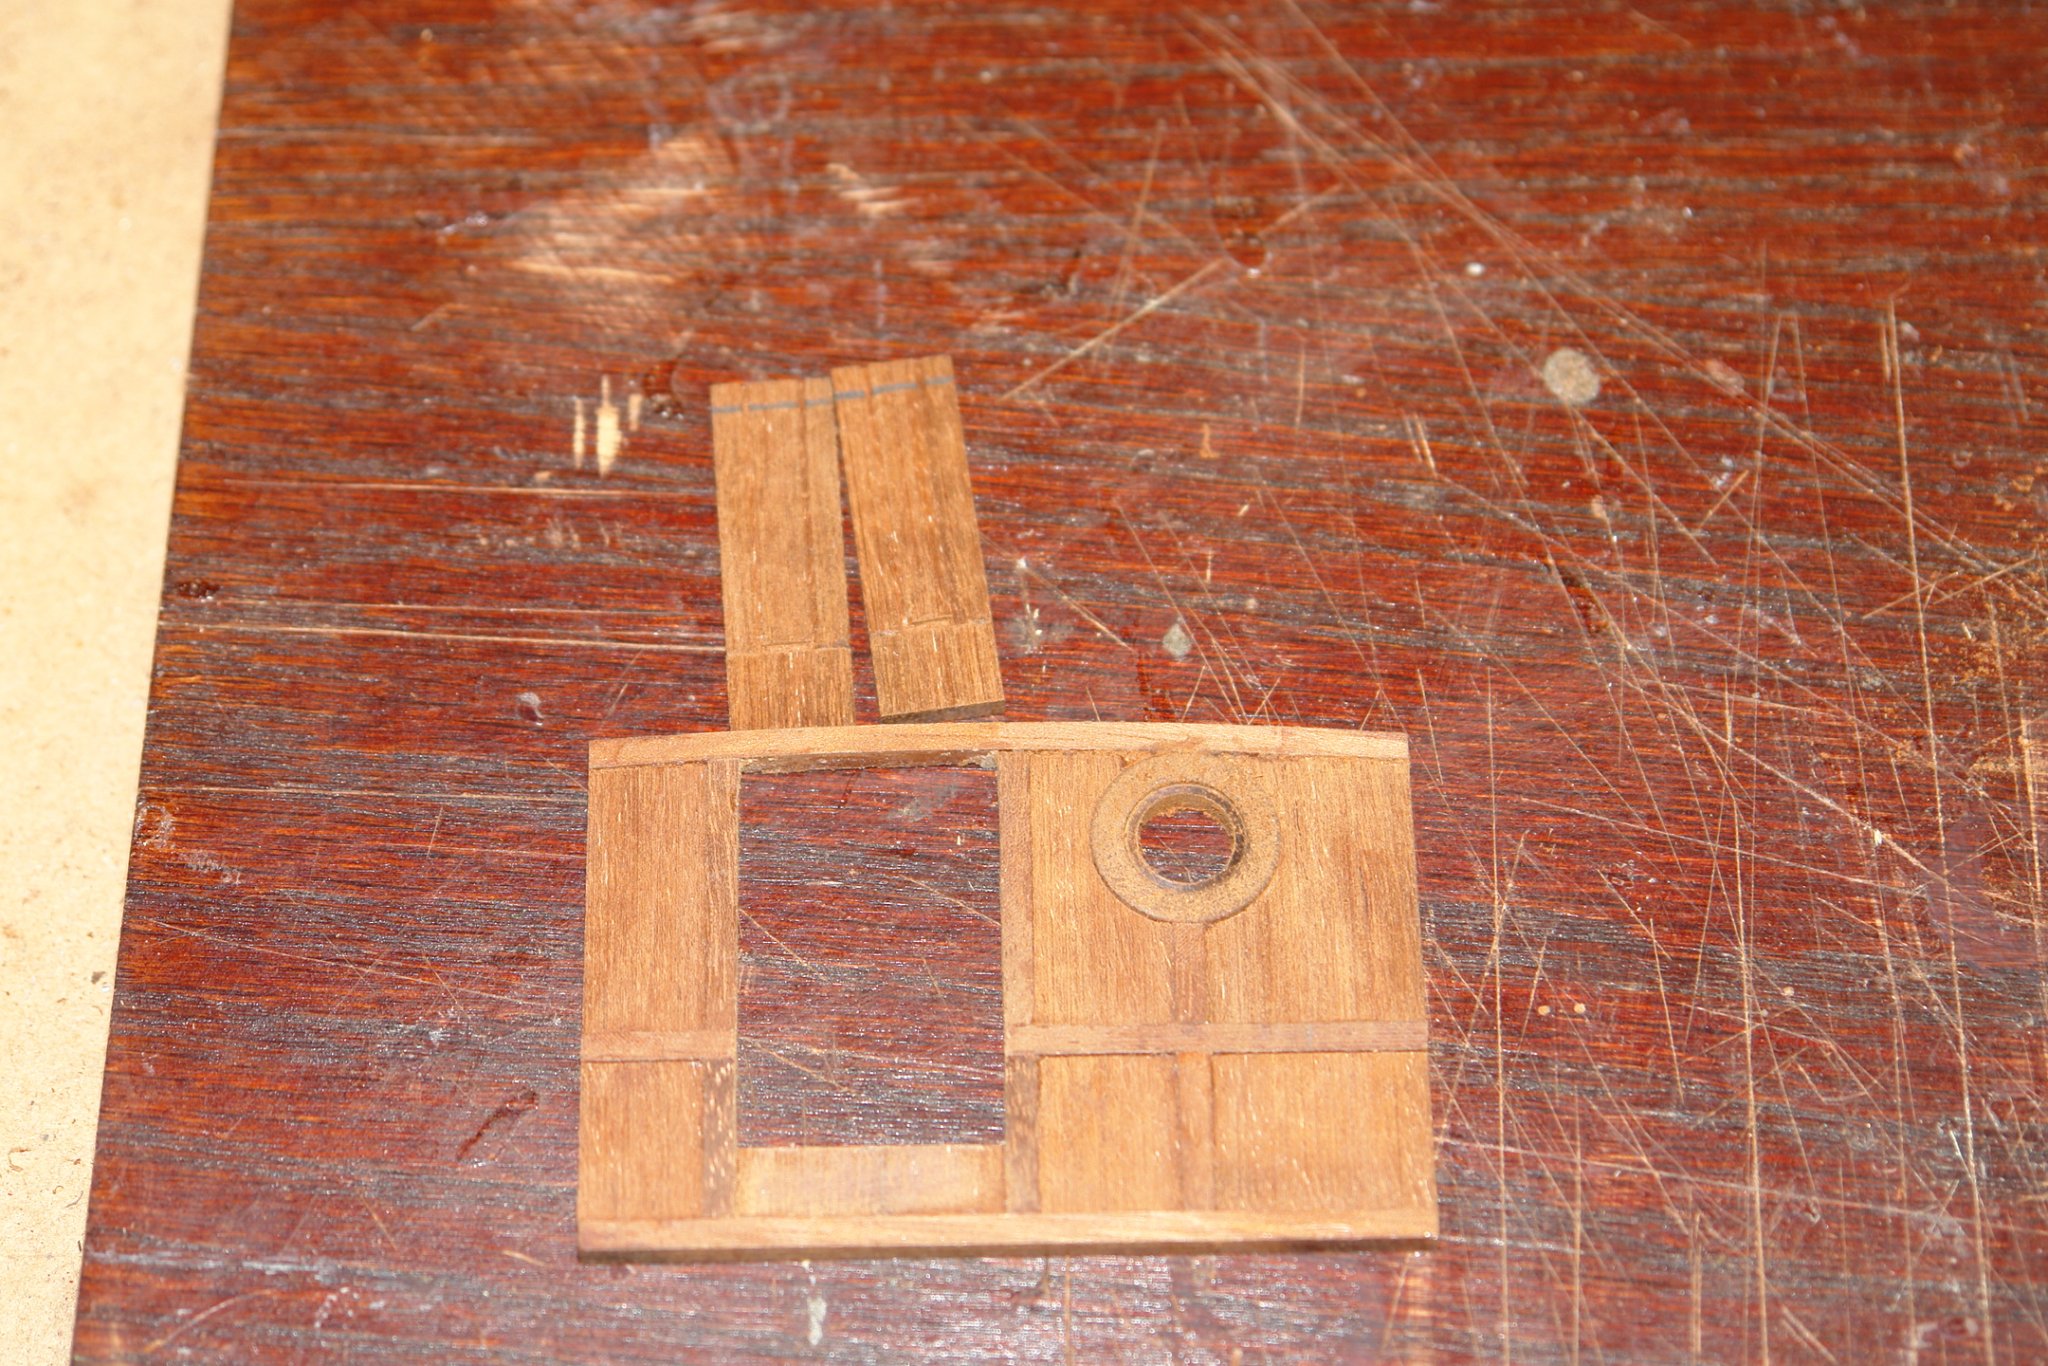
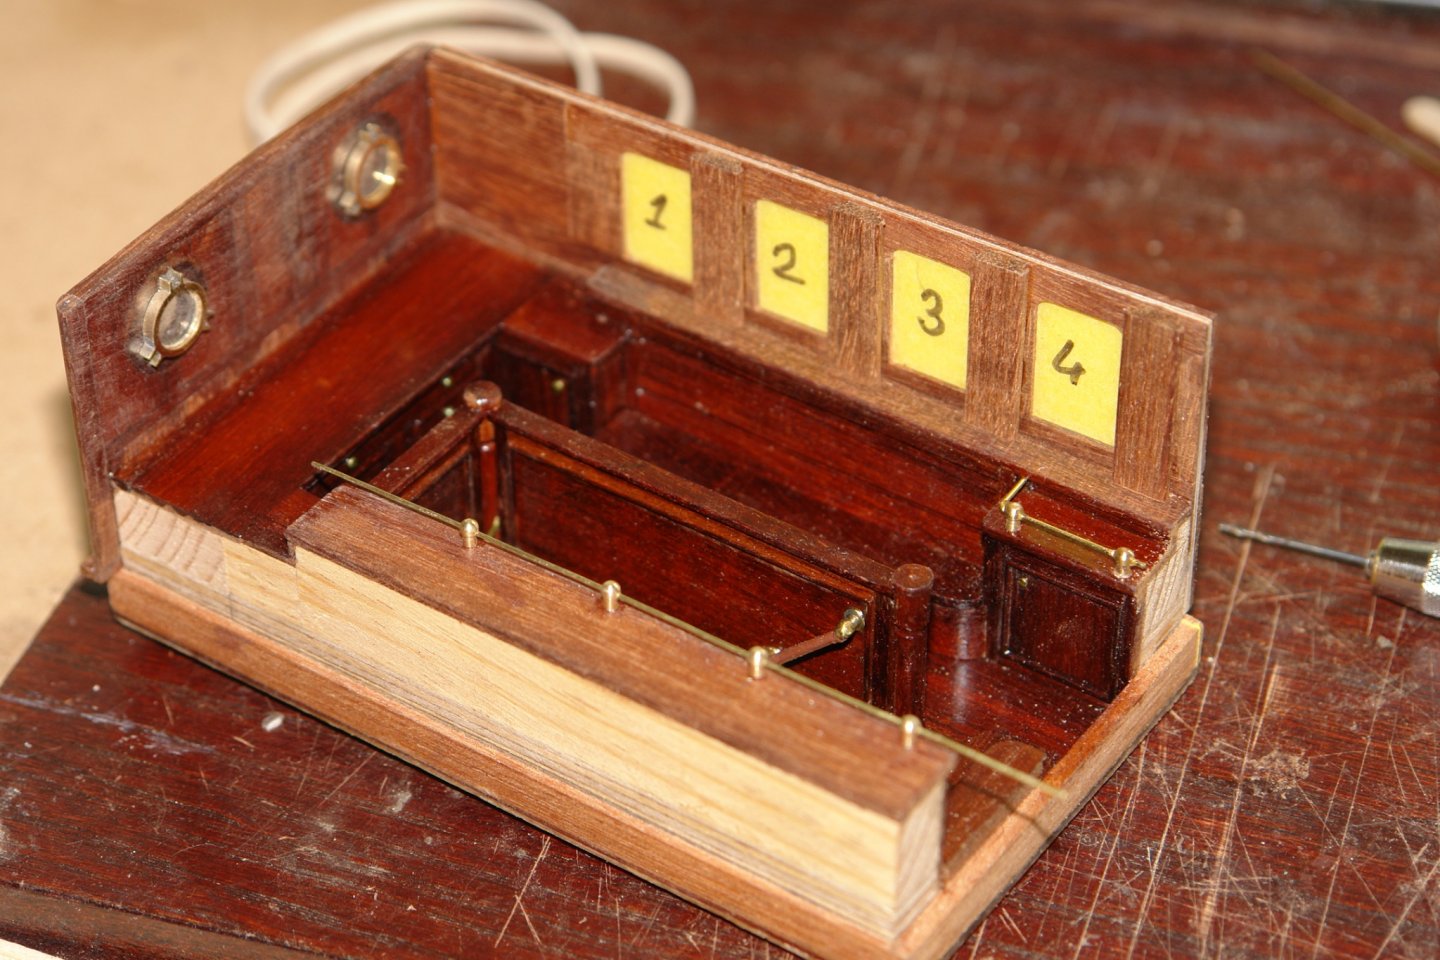
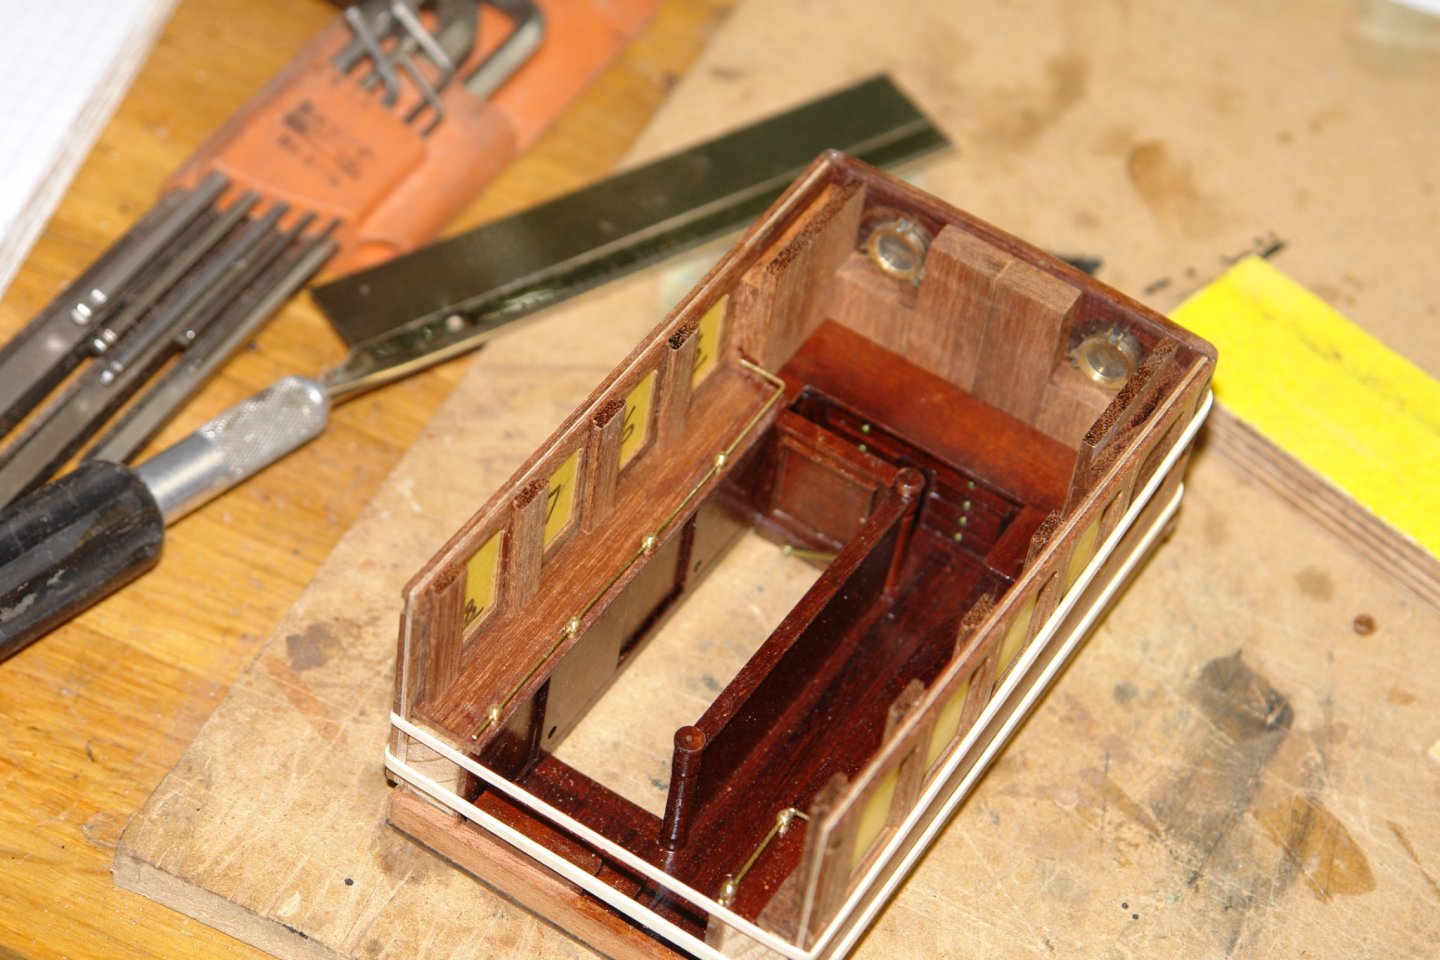
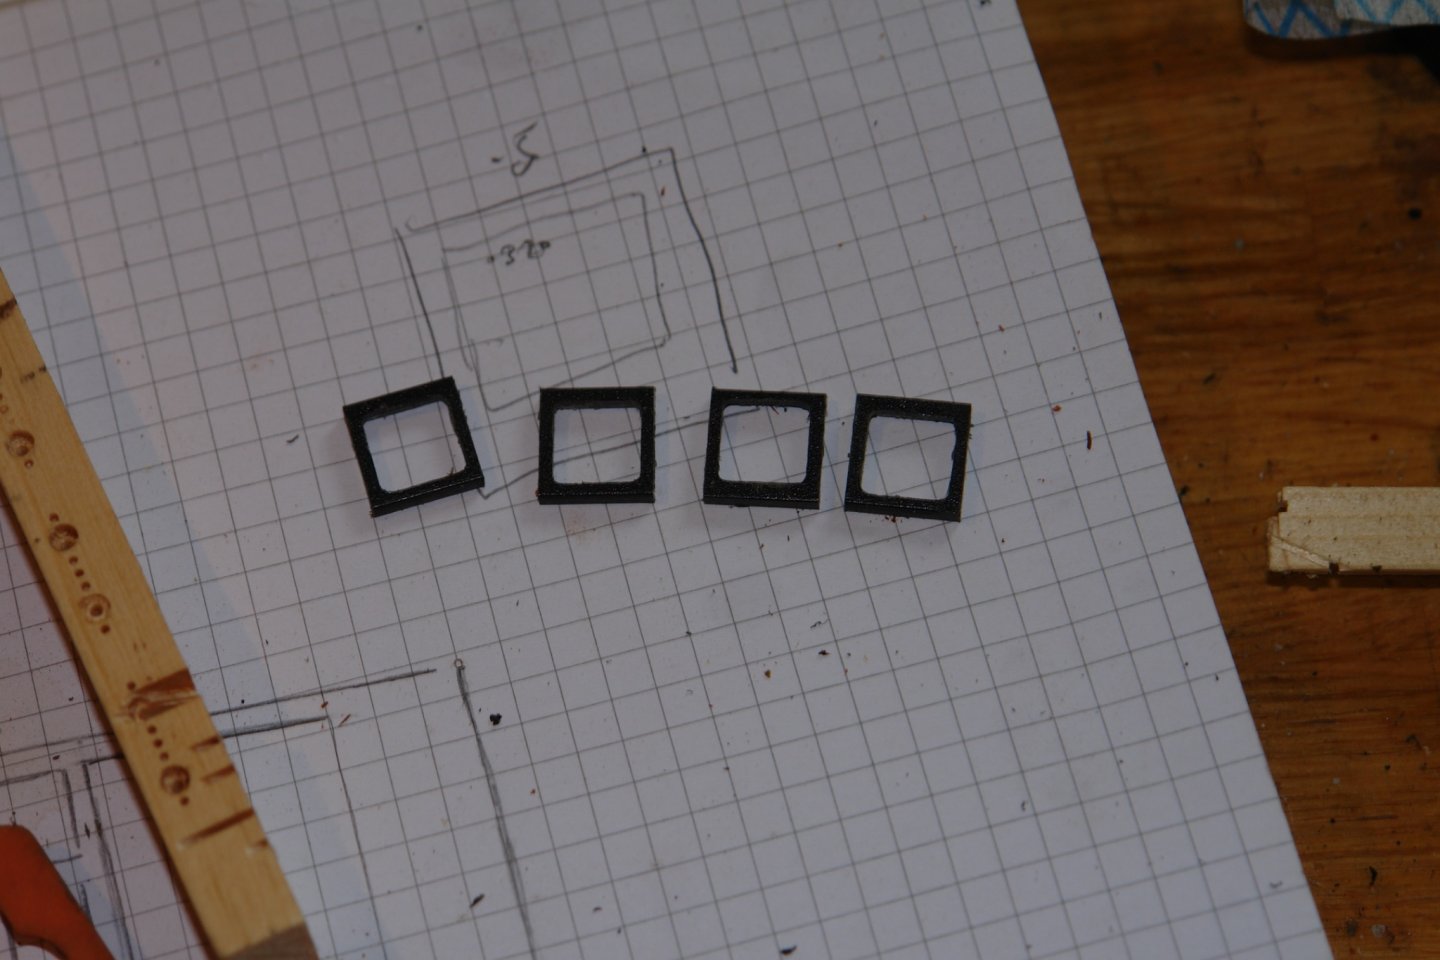
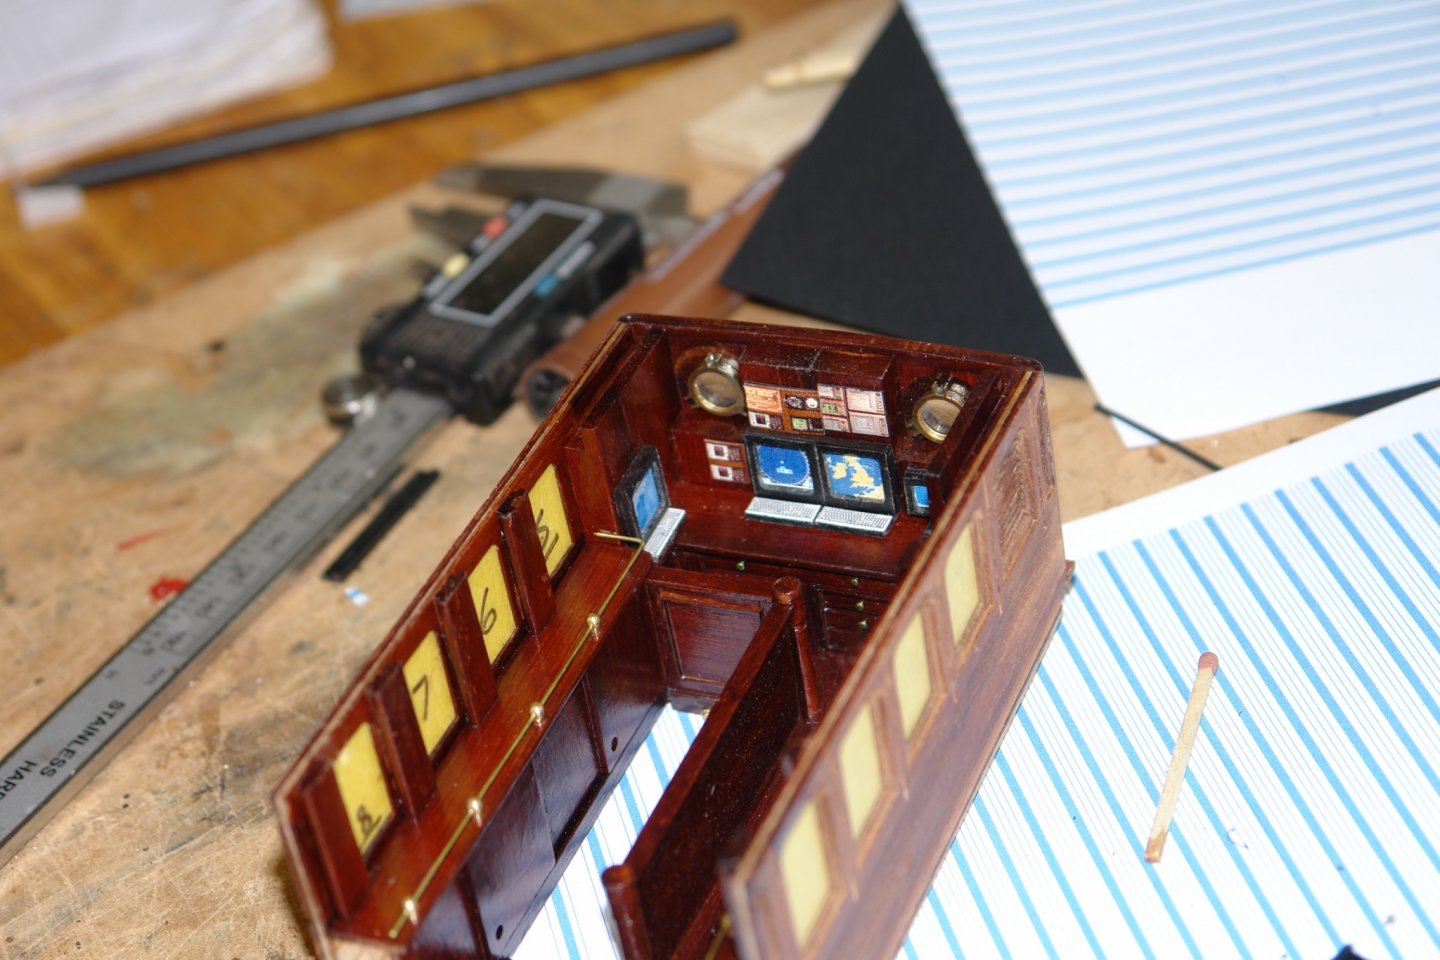
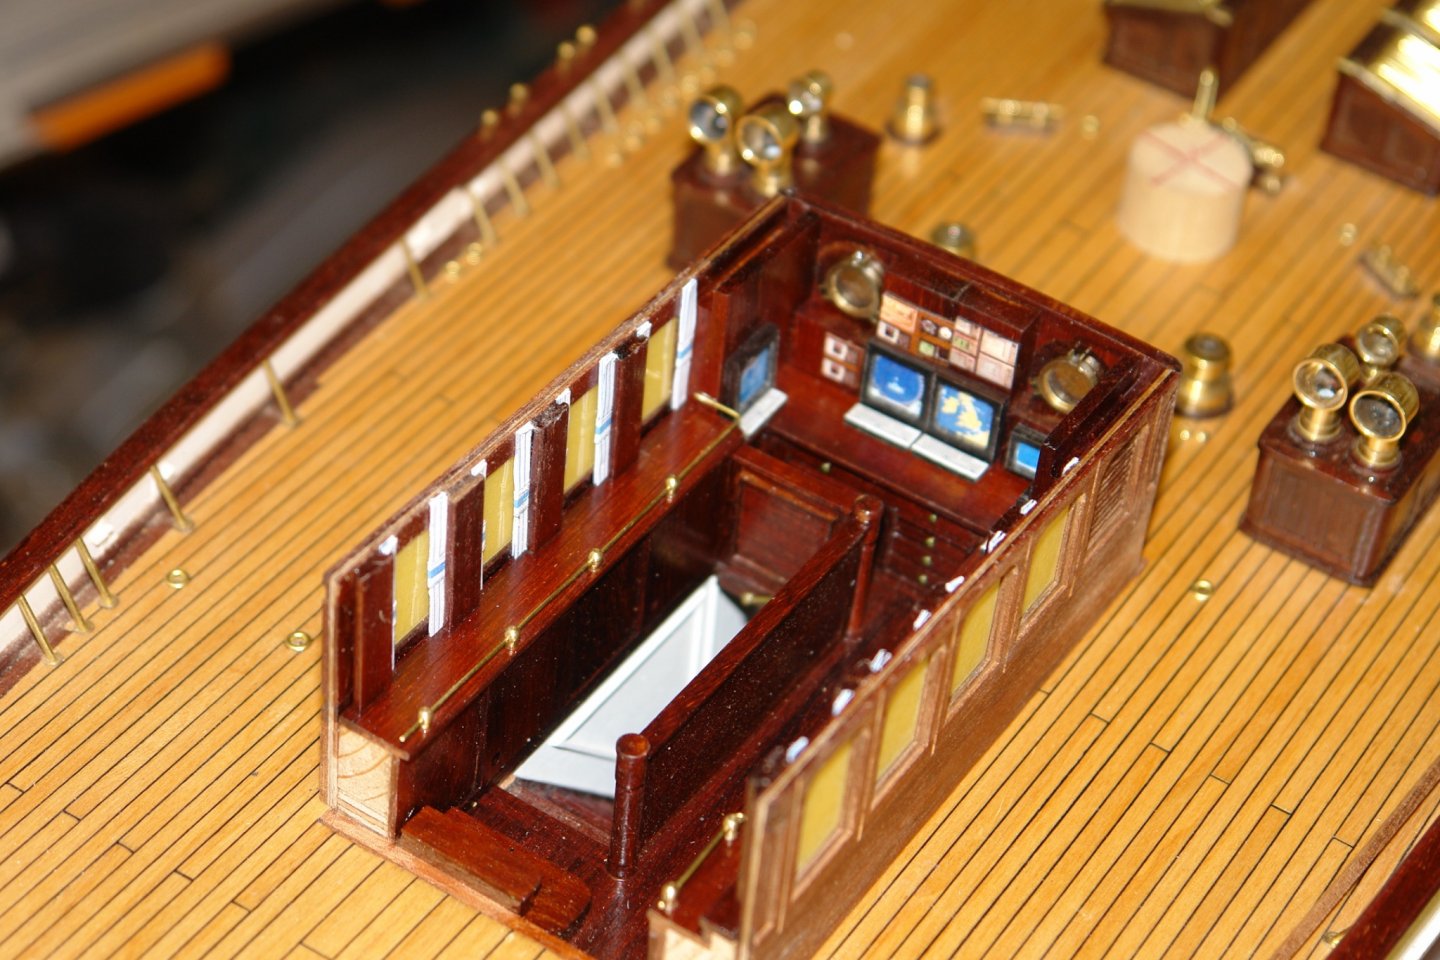
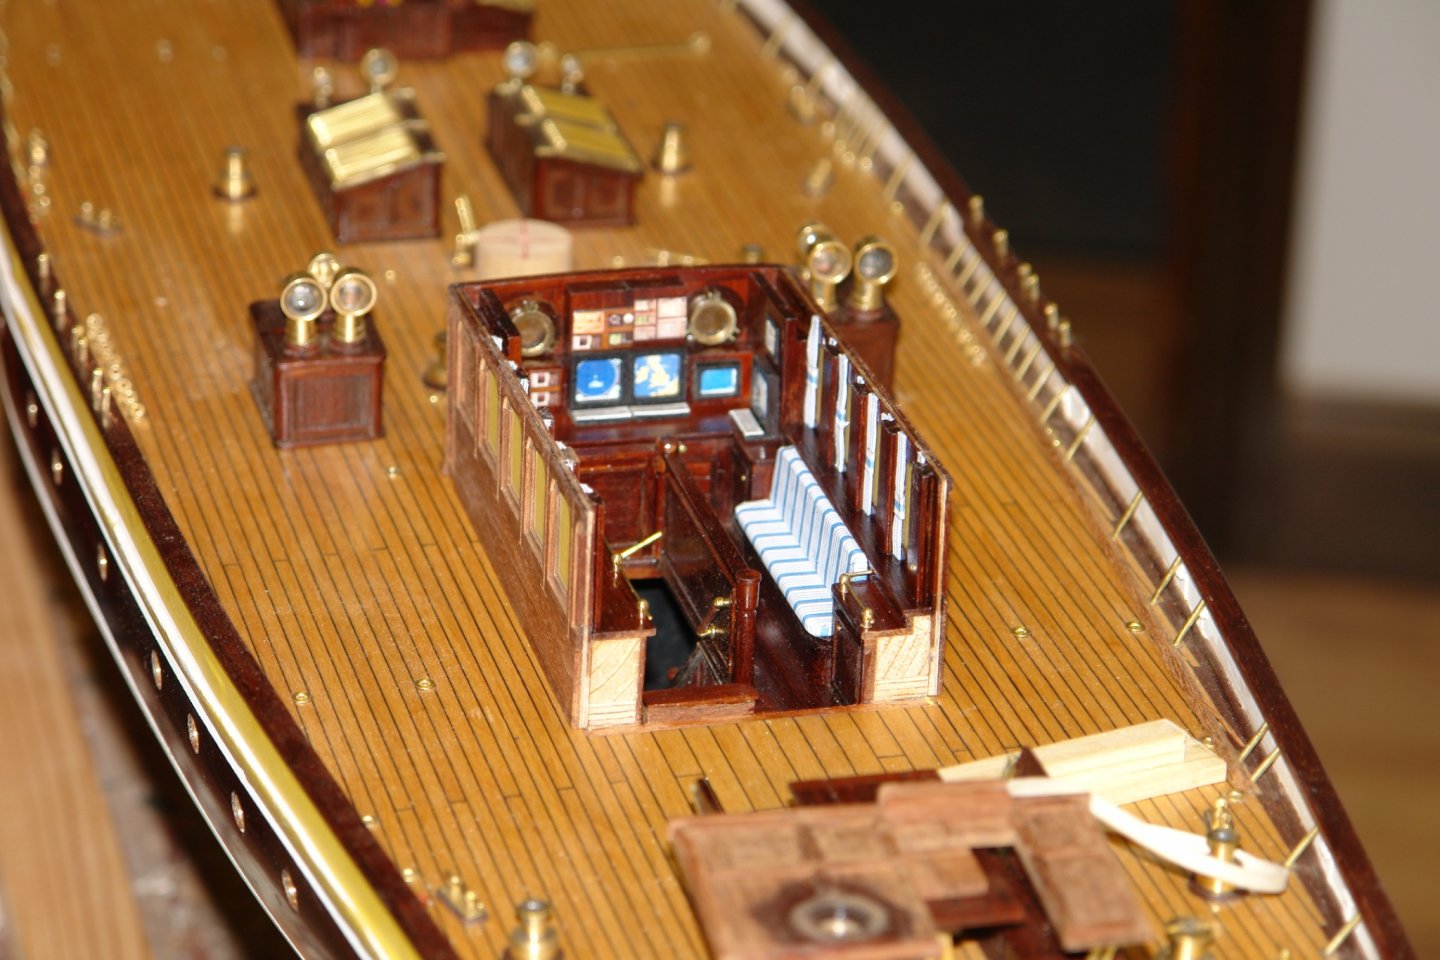
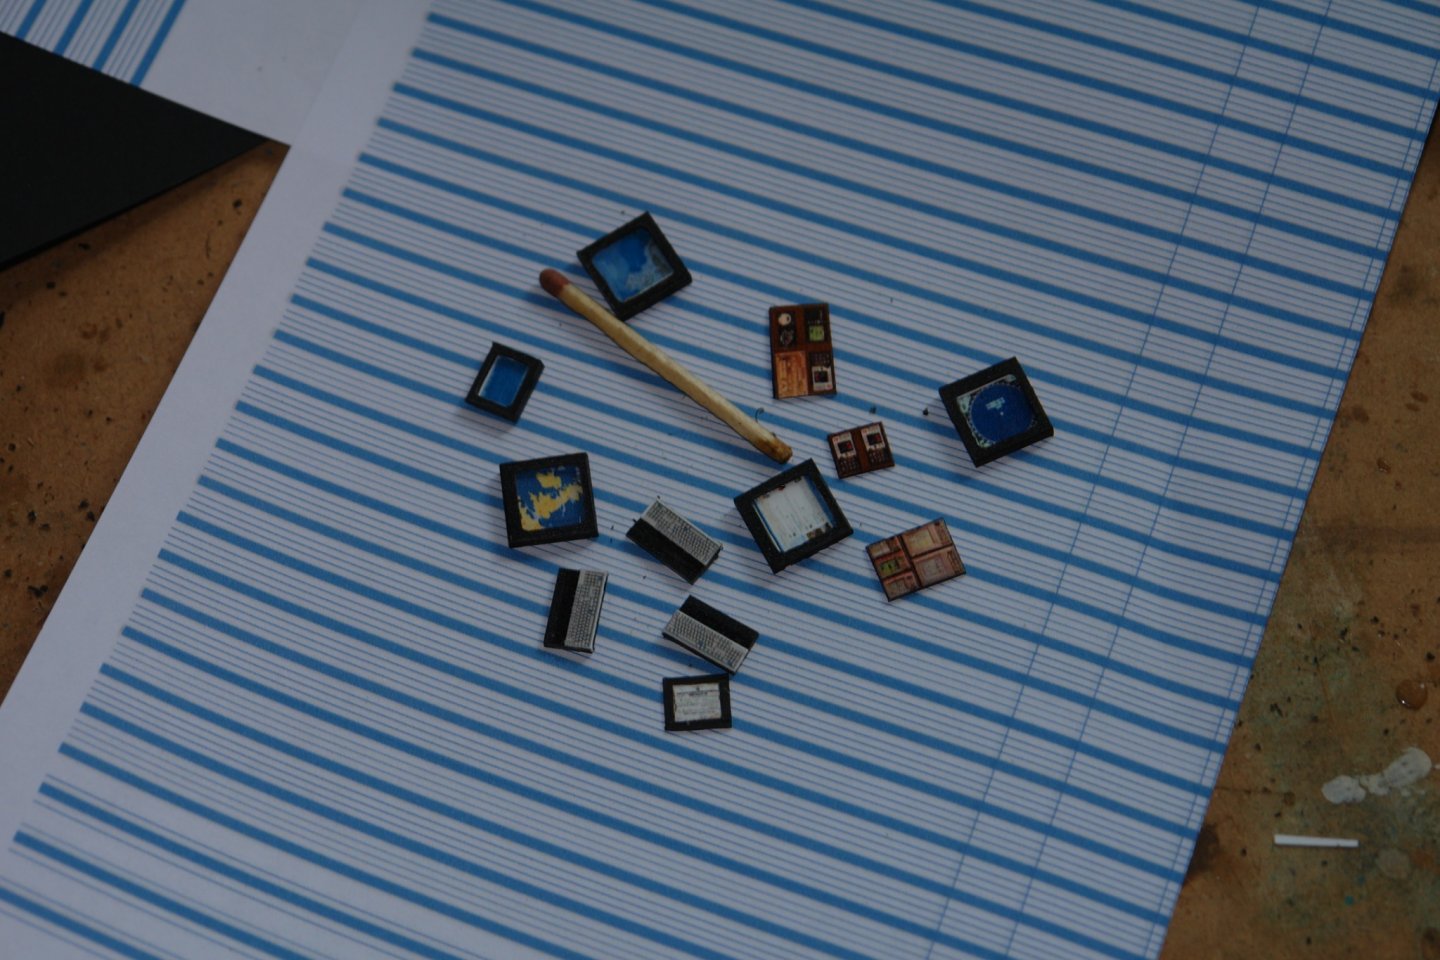
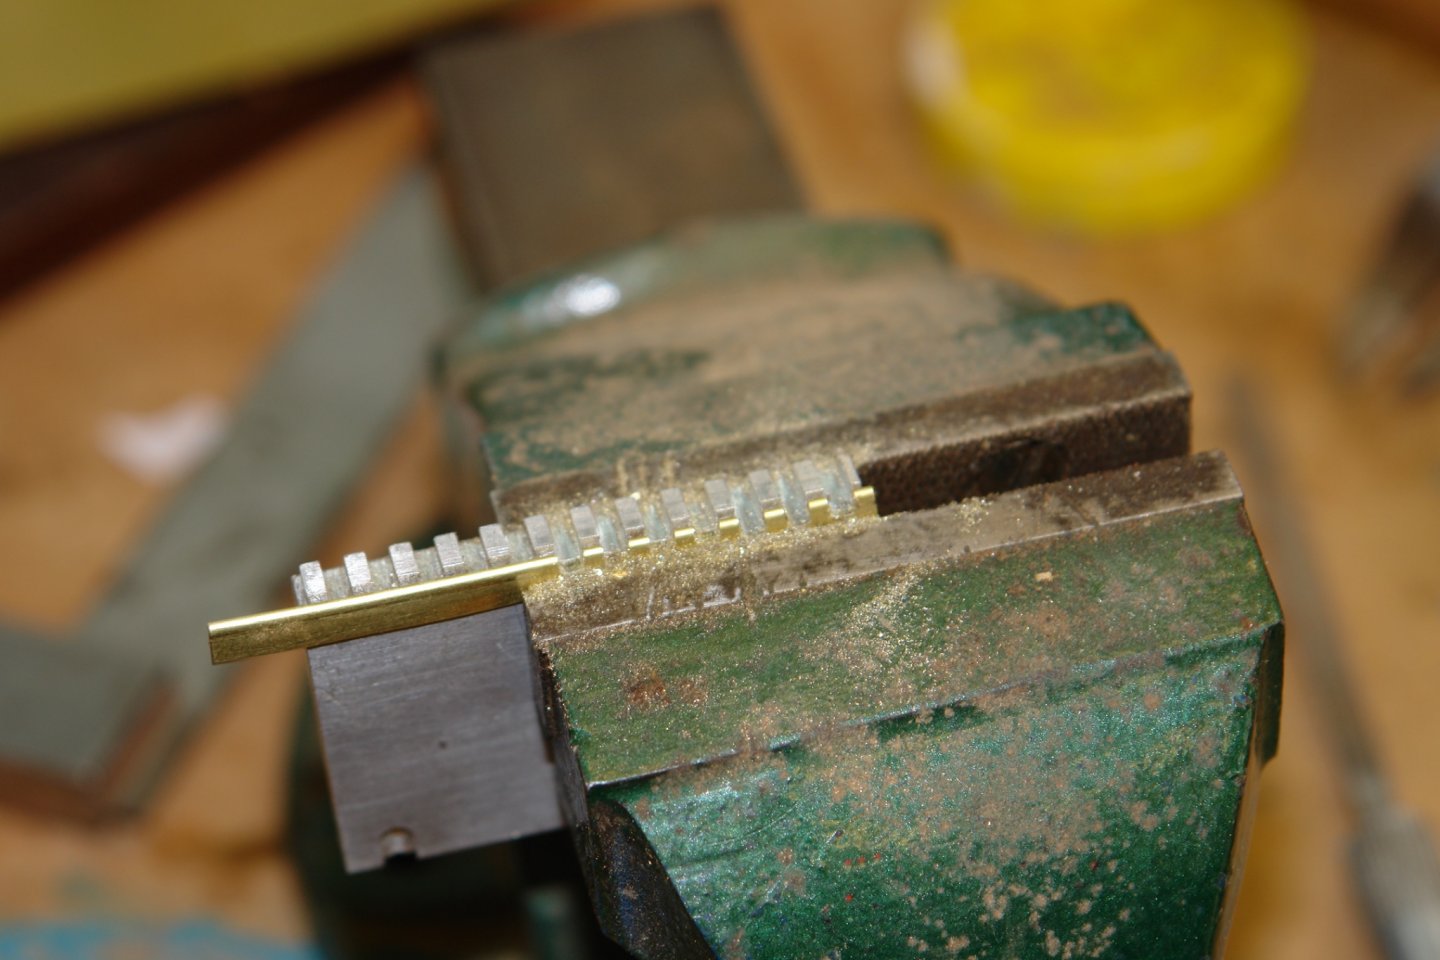
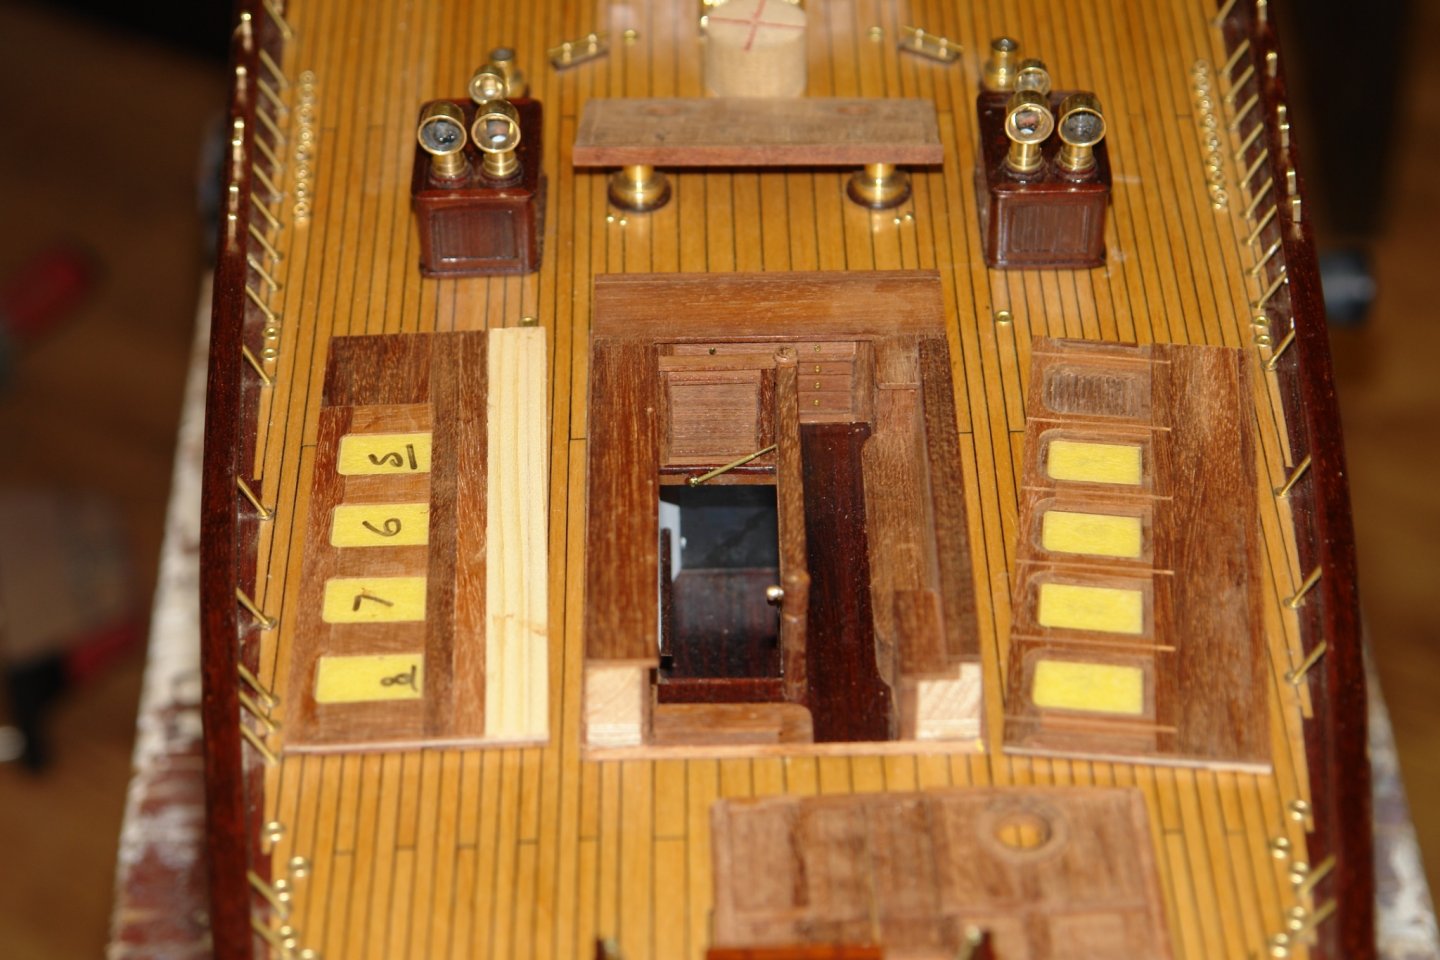
Thank you Steve, Geert, John, Richard and Allan, and everyone else who has looked in or left a like. I hope to catch up with your respective builds over the next few days. But In the mean time a little more progress. I put coat of poly around the porthole cut outs before gluing the brass surrounds in place. I also made and attached the brass catch bars around the small shelves before starting to glue the deckhouse sides on to the previously constructed internal base which included the chart tables / cupboards etc. Its difficult to see but I also attached the between window recessed planks that the curtains partially sit behind. The walls were glued with PVA glue and held by elastic bands until dry. The forward wall of the deckhouse is heavily instrumented and the above table bulkheads, into which the instruments fit, were also added at this stage. I then started on the instruments. I think the builders had a job lot of computer screens because Germania has more than I can imagine a use for - at lease 4 large screens plus 2 laptop sized screens so far as i can tell. I did a bit of head scratching as to how to simulate the screens before I found a couple of inserts for holding CD's in long dead printers. These had some nice profiled ribbed sections of about the right size. I started by slitting off the appropriate strip before cutting out the holes for the screens on the mill using a .080" diameter end mill. The cut outs had to be spaced to avoid unwanted profiles / features. The screen surrounds measure a half inch square. I printed off screen images of the computer screens and instruments and manipulated them using photoshop. I also created a pattern for the seat covers and curtains using powerpoint and printed this on paper. I then started assembling the various screens into the screen surrounds and mounted the instrument images on backing pieces as appropriate. The instrument panel and keyboards were then installed. I tried making curtains from fabric but it was too bulky so I eventually settled for paper. The couch seat and back cushions were made from softwood and covered with paper. And that is all the progress I made this week.


-
Allan - just common o garden electrical lead free solder with fluxed core. I find soft solder works well for all jobs of this type. I apply a film of flux, wire or clamp the attachment parts in place, apply a small length of solder on the joint and then heat with a small propane torch. I rarely find it necessary to resort to silver solder and soft soldering is much easier and does not carry the risk of melting delicate brass parts.
-
Good progress Allan. The none level waterline is an interesting feature, it is beyond my comprehension why the builders would do that, do you know why? i find your comment about softening the brass before machining it very interesting, particularly as I have seen the same comment in another build log recently. I have always preferred the machining characteristics of hard brass, even to the extent of avoiding the use of soft brass whenever possible. The only time I soften brass is when I want to deform or bend it. However I am now wondering whether I am missing something?
-
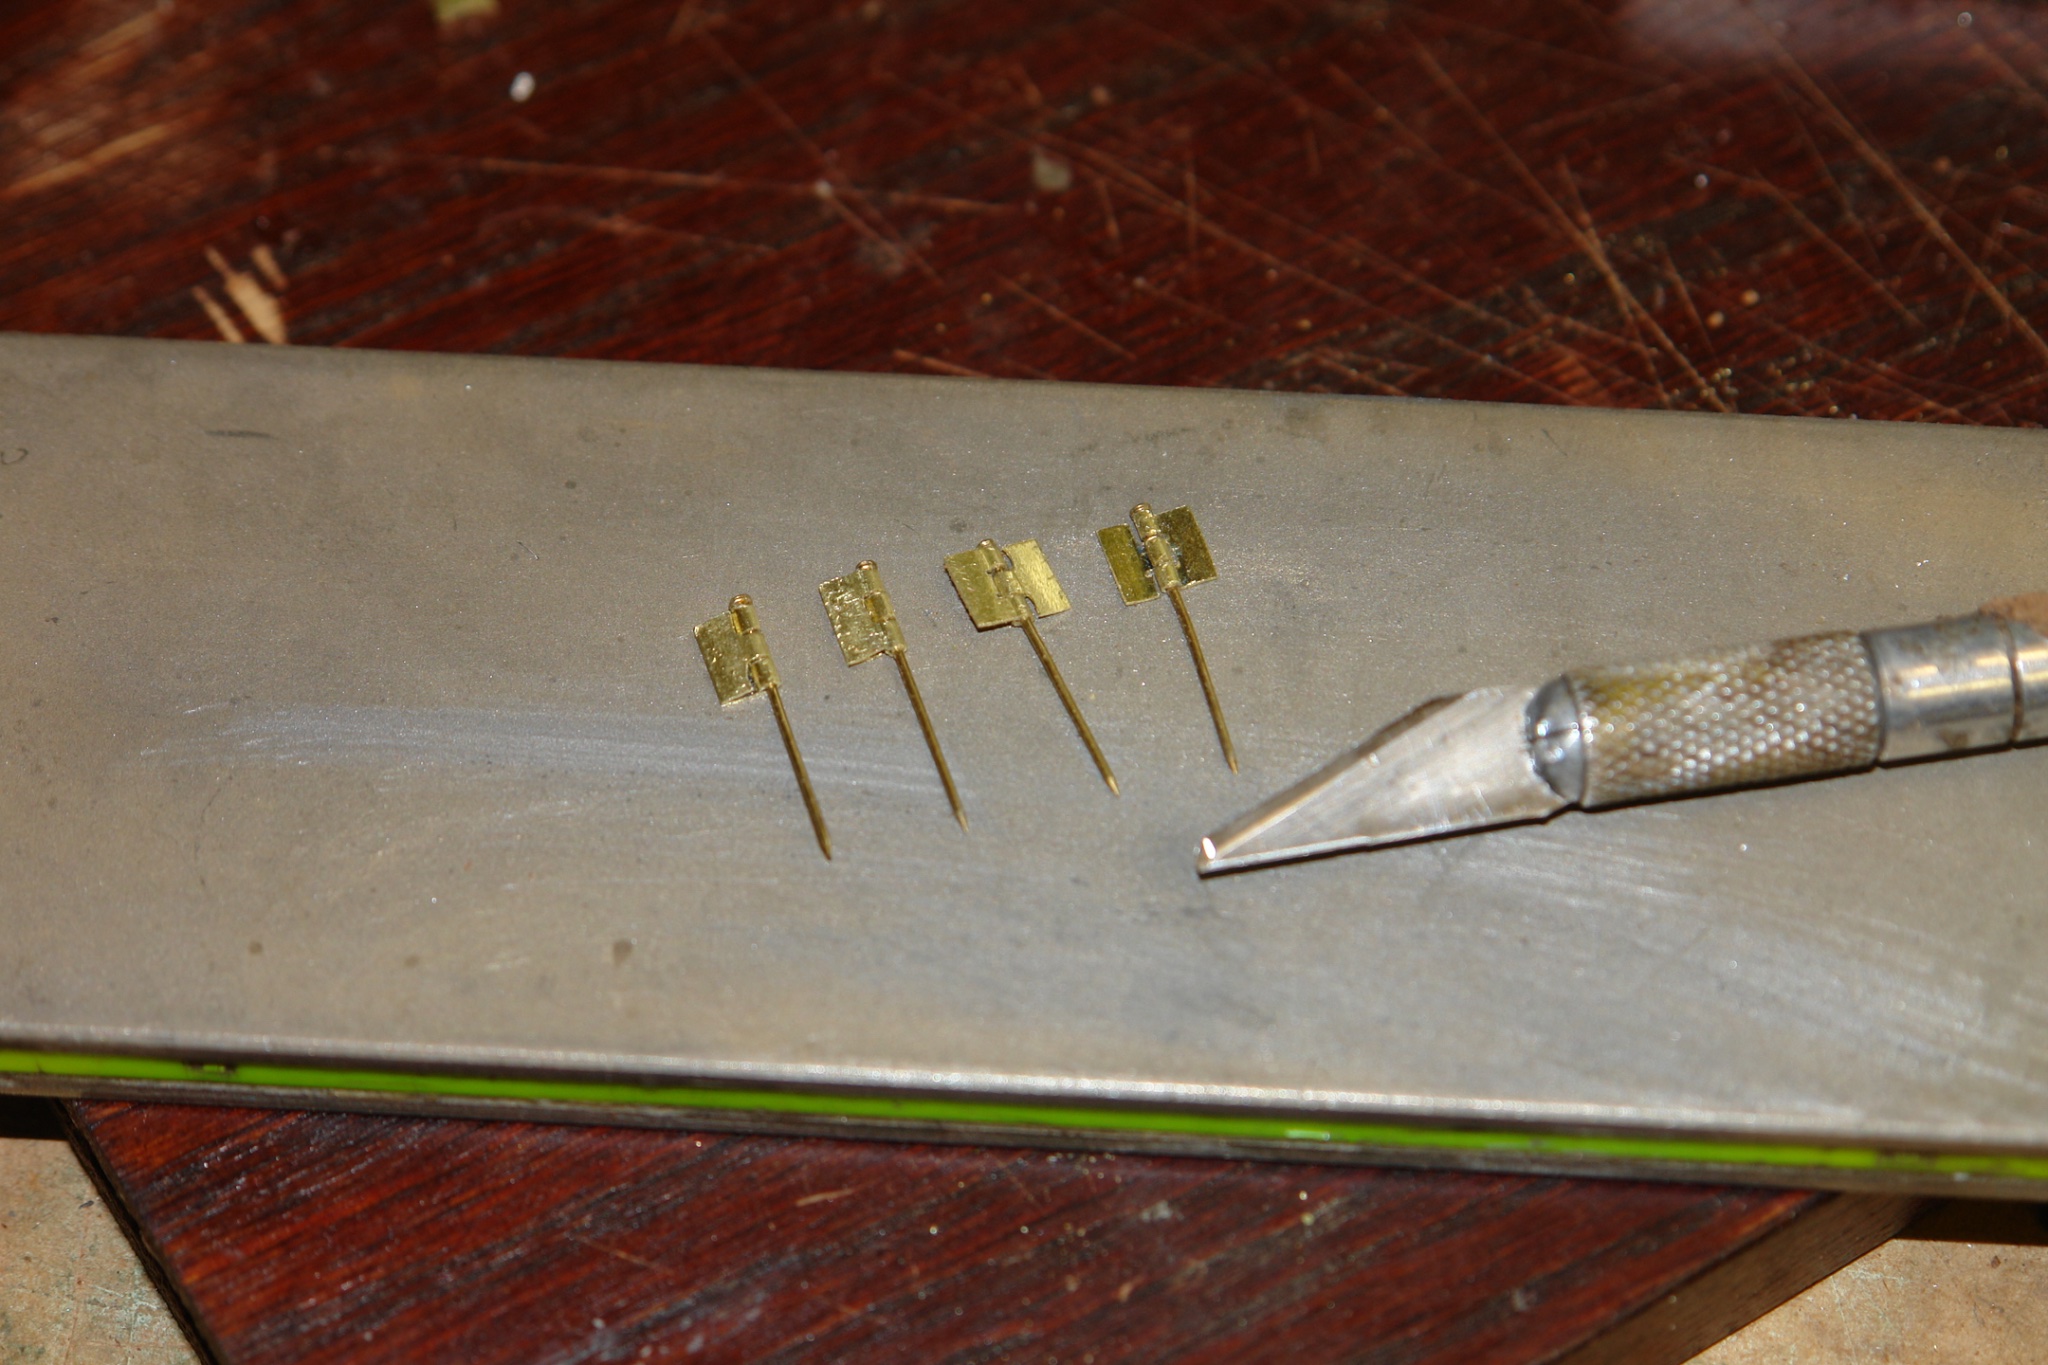
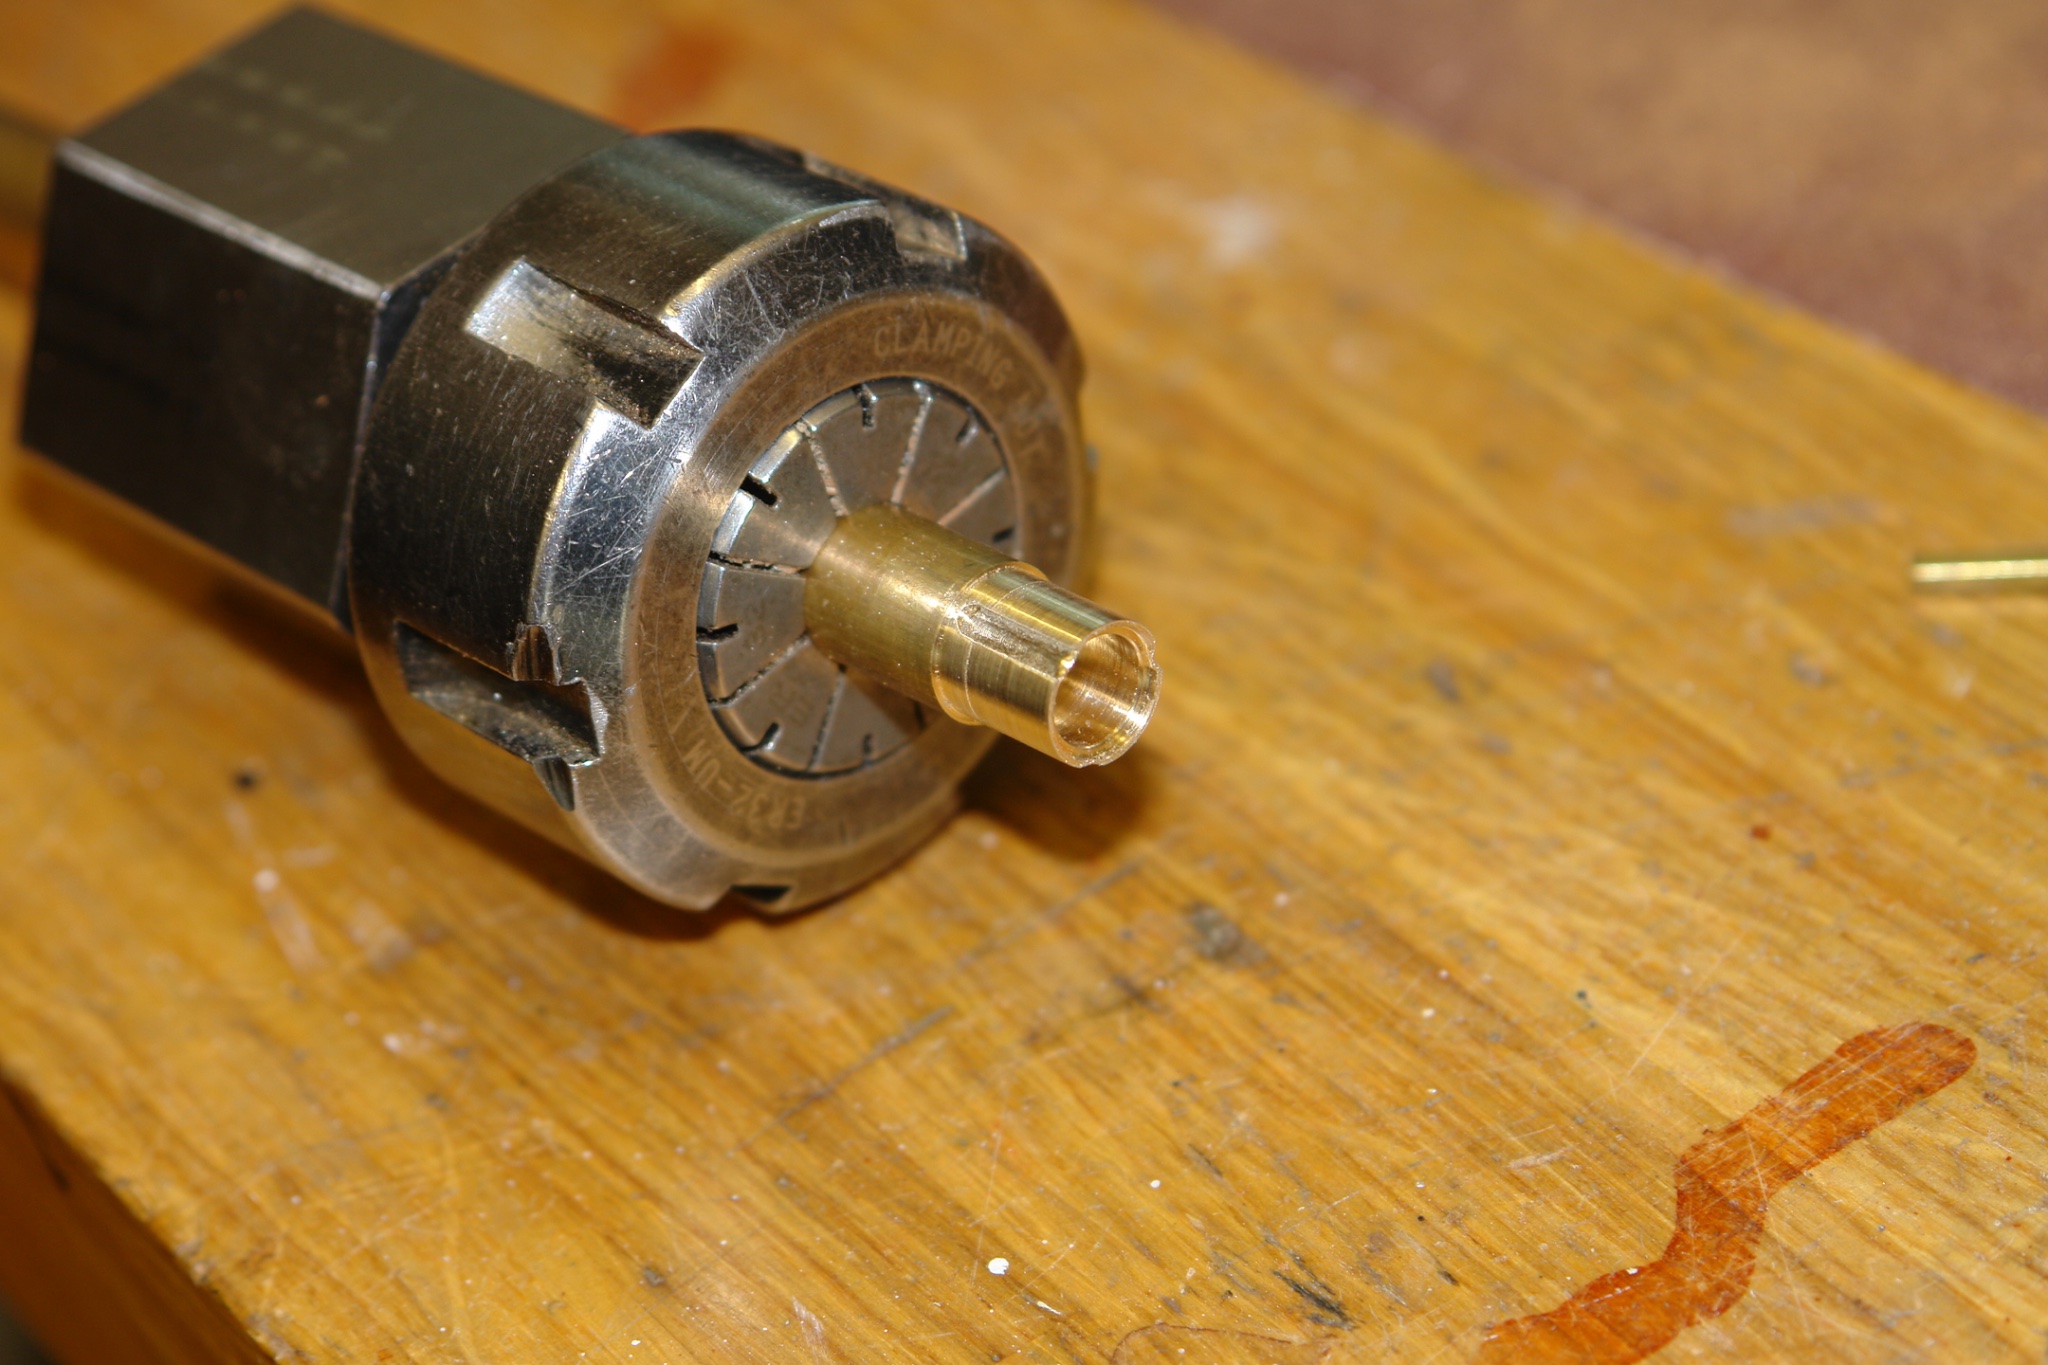
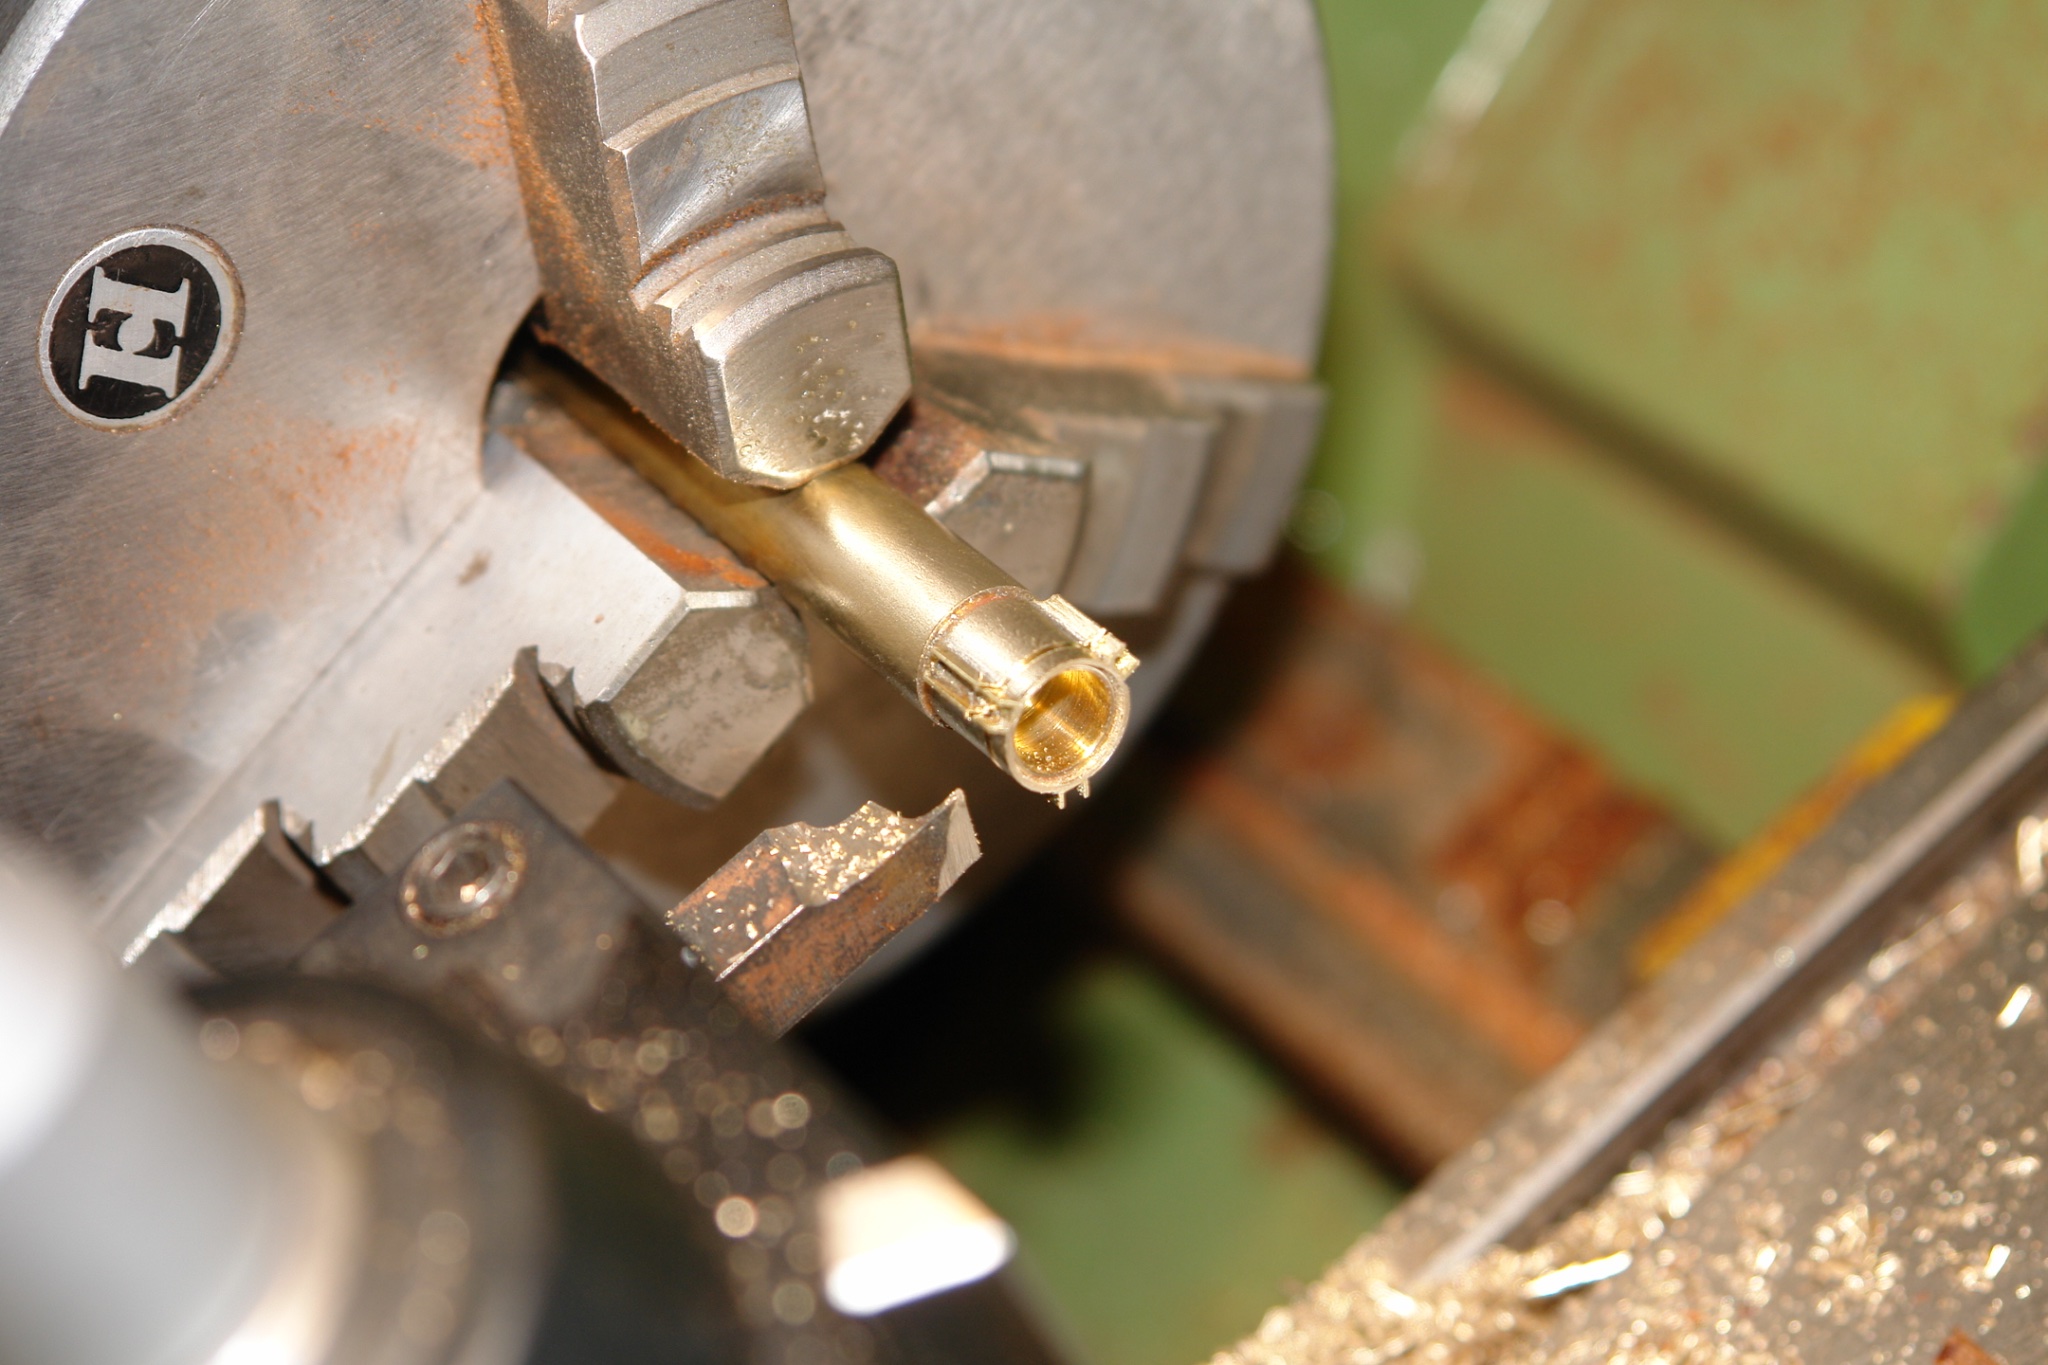
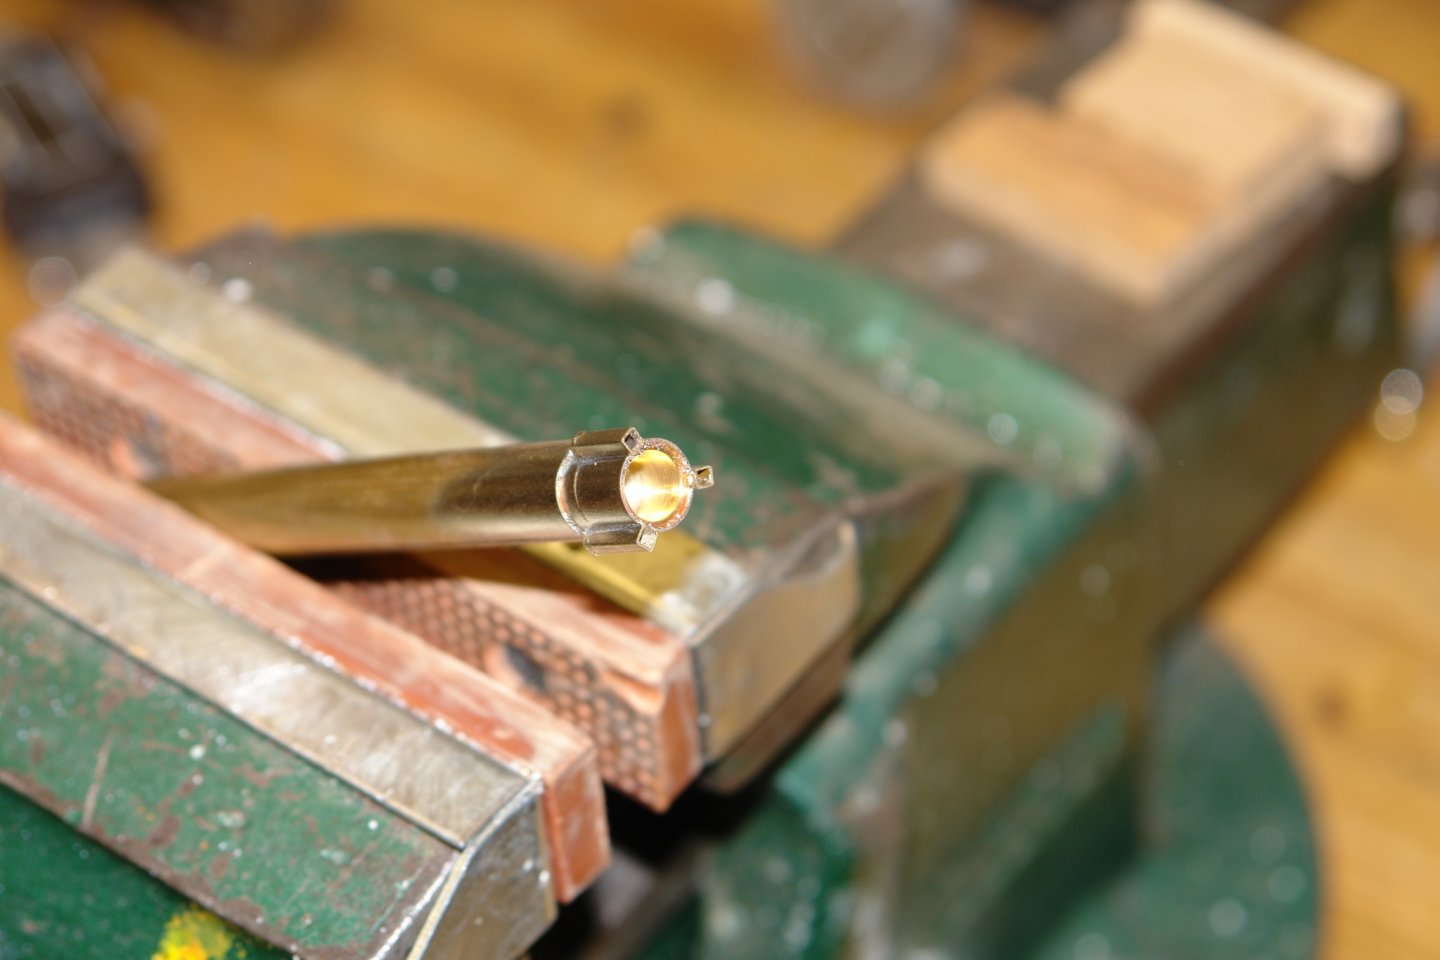
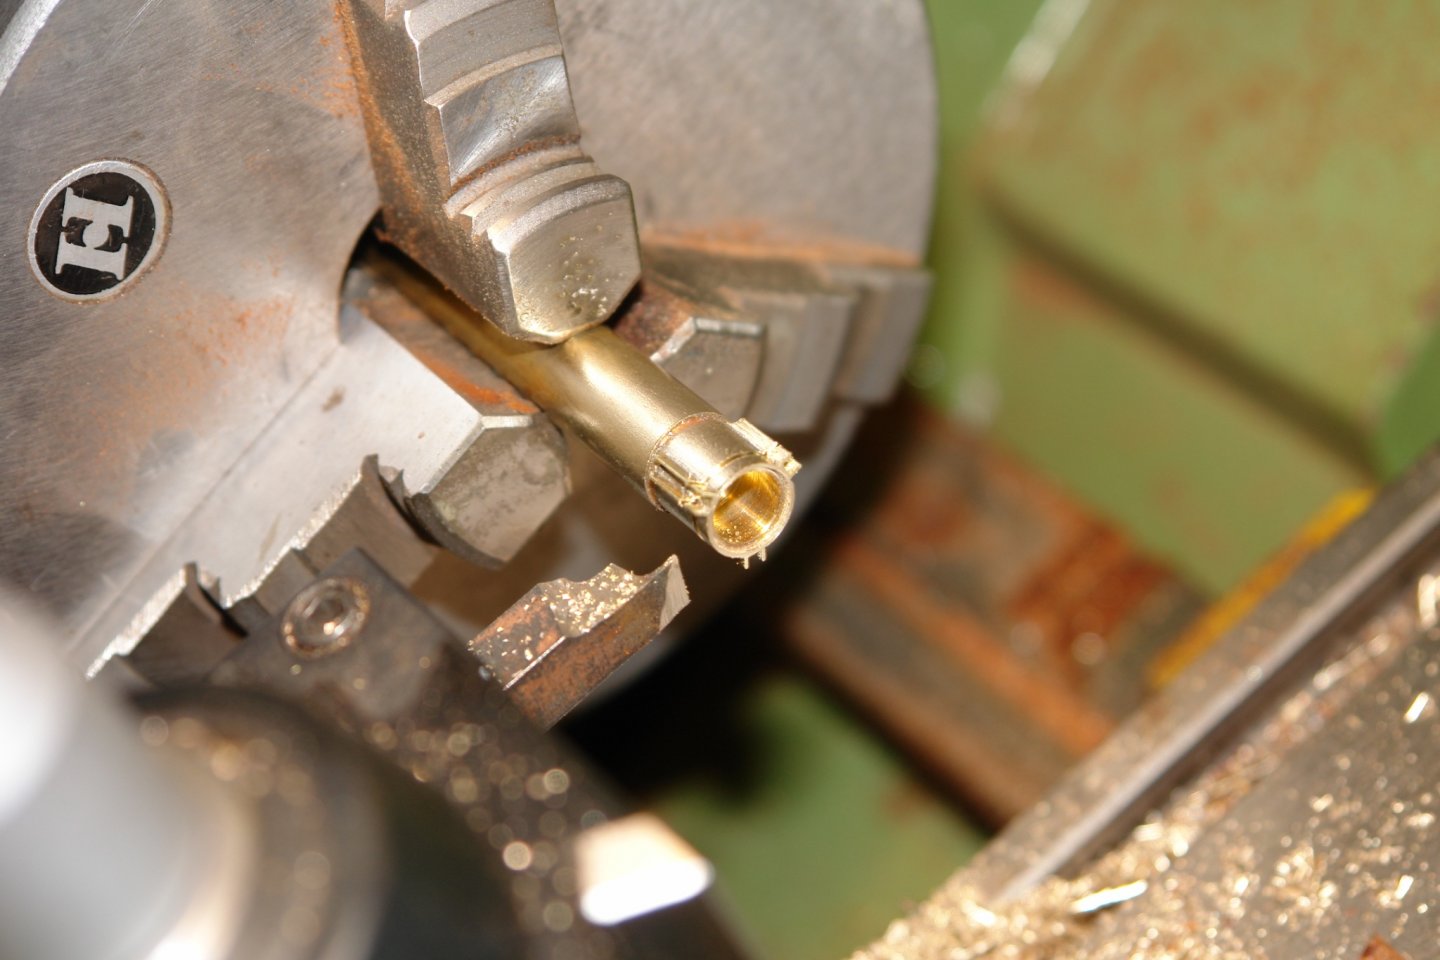
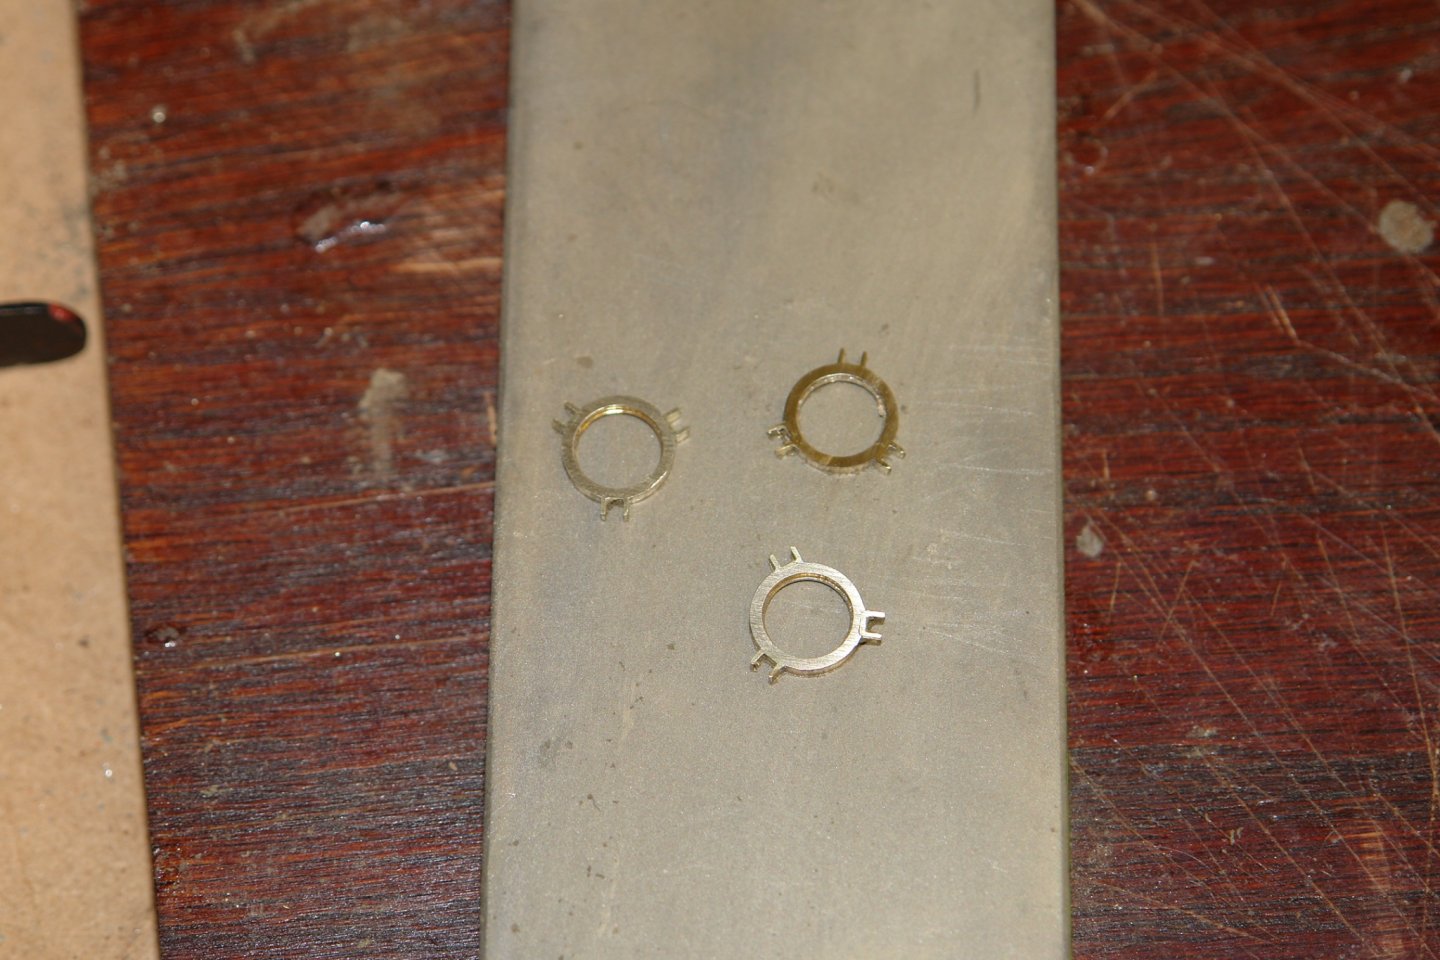
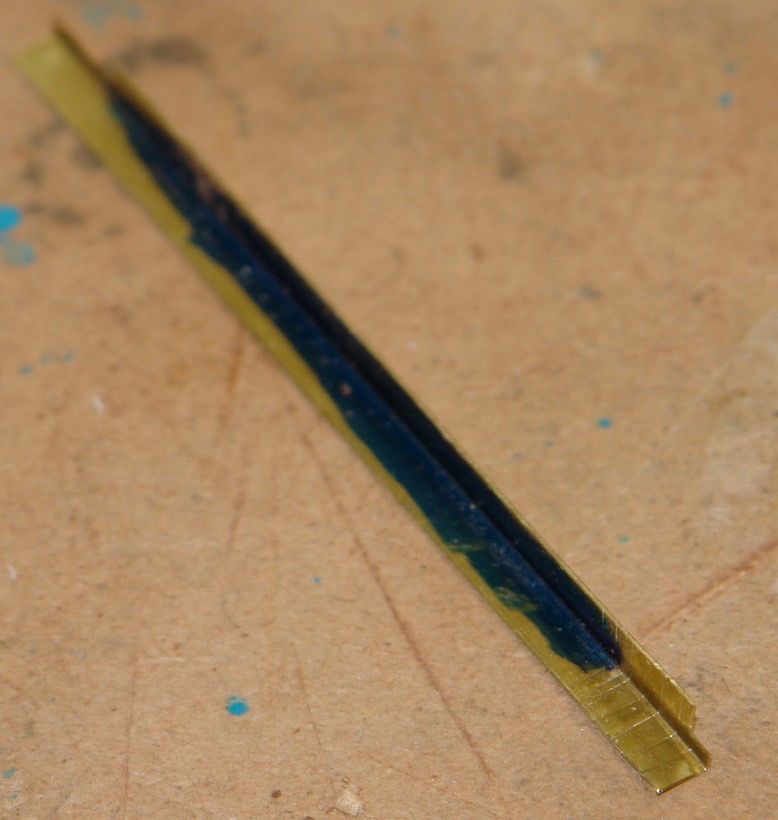
Thank you Gary and Richard. Pat - thank you for the compliment but I think you undersell your own work. Michael - I am sticking with my "6 days off, one day on" plan for the moment. I seem to be adding to the household list which is a bit worrying. Thanks to everyone for the likes. I though I had better make the hinges for the 2 doors. They are a bit bigger than scale at 1/4" long but sometimes I need to compromise. I started with a piece of brass sheet .006" thick. I cut a strip and folded this to form a right angle. I folded this over a .020 steel wire and then carefully cut away one side to create the P shape needed. The steel wire was then pulled out. I then filed away parts of the P using a former made for a previous build. This was then cut down into .250" lengths to form the 2 parts of the hinge. I then carried on with building the cabin. I didn't have any details of the cabin door internal steps so I guessed what they would look like. The balustrade around the stair well was made and brass tube and wire was used to form the small section of handrail and the compression strut which controls the folding down of the balustrade. The inside portholes were simulated in brass. A tube was turned to the correct thickness and 3 axial slots were cut to take 3 small square section tubes. The tubes were soft soldered in place. The outer surface of the square tubes was then turned away on the lathe. And finally the porthole rings were parted off. And that is this weeks work.


-
It’s wonderful what a taxing hobby and dogged determination can achieve. You are a credit to the forum Keith. Keep at it and continue to impress us all for many years to come.
-
An interesting vessel Roger - I will follow with interest.
-
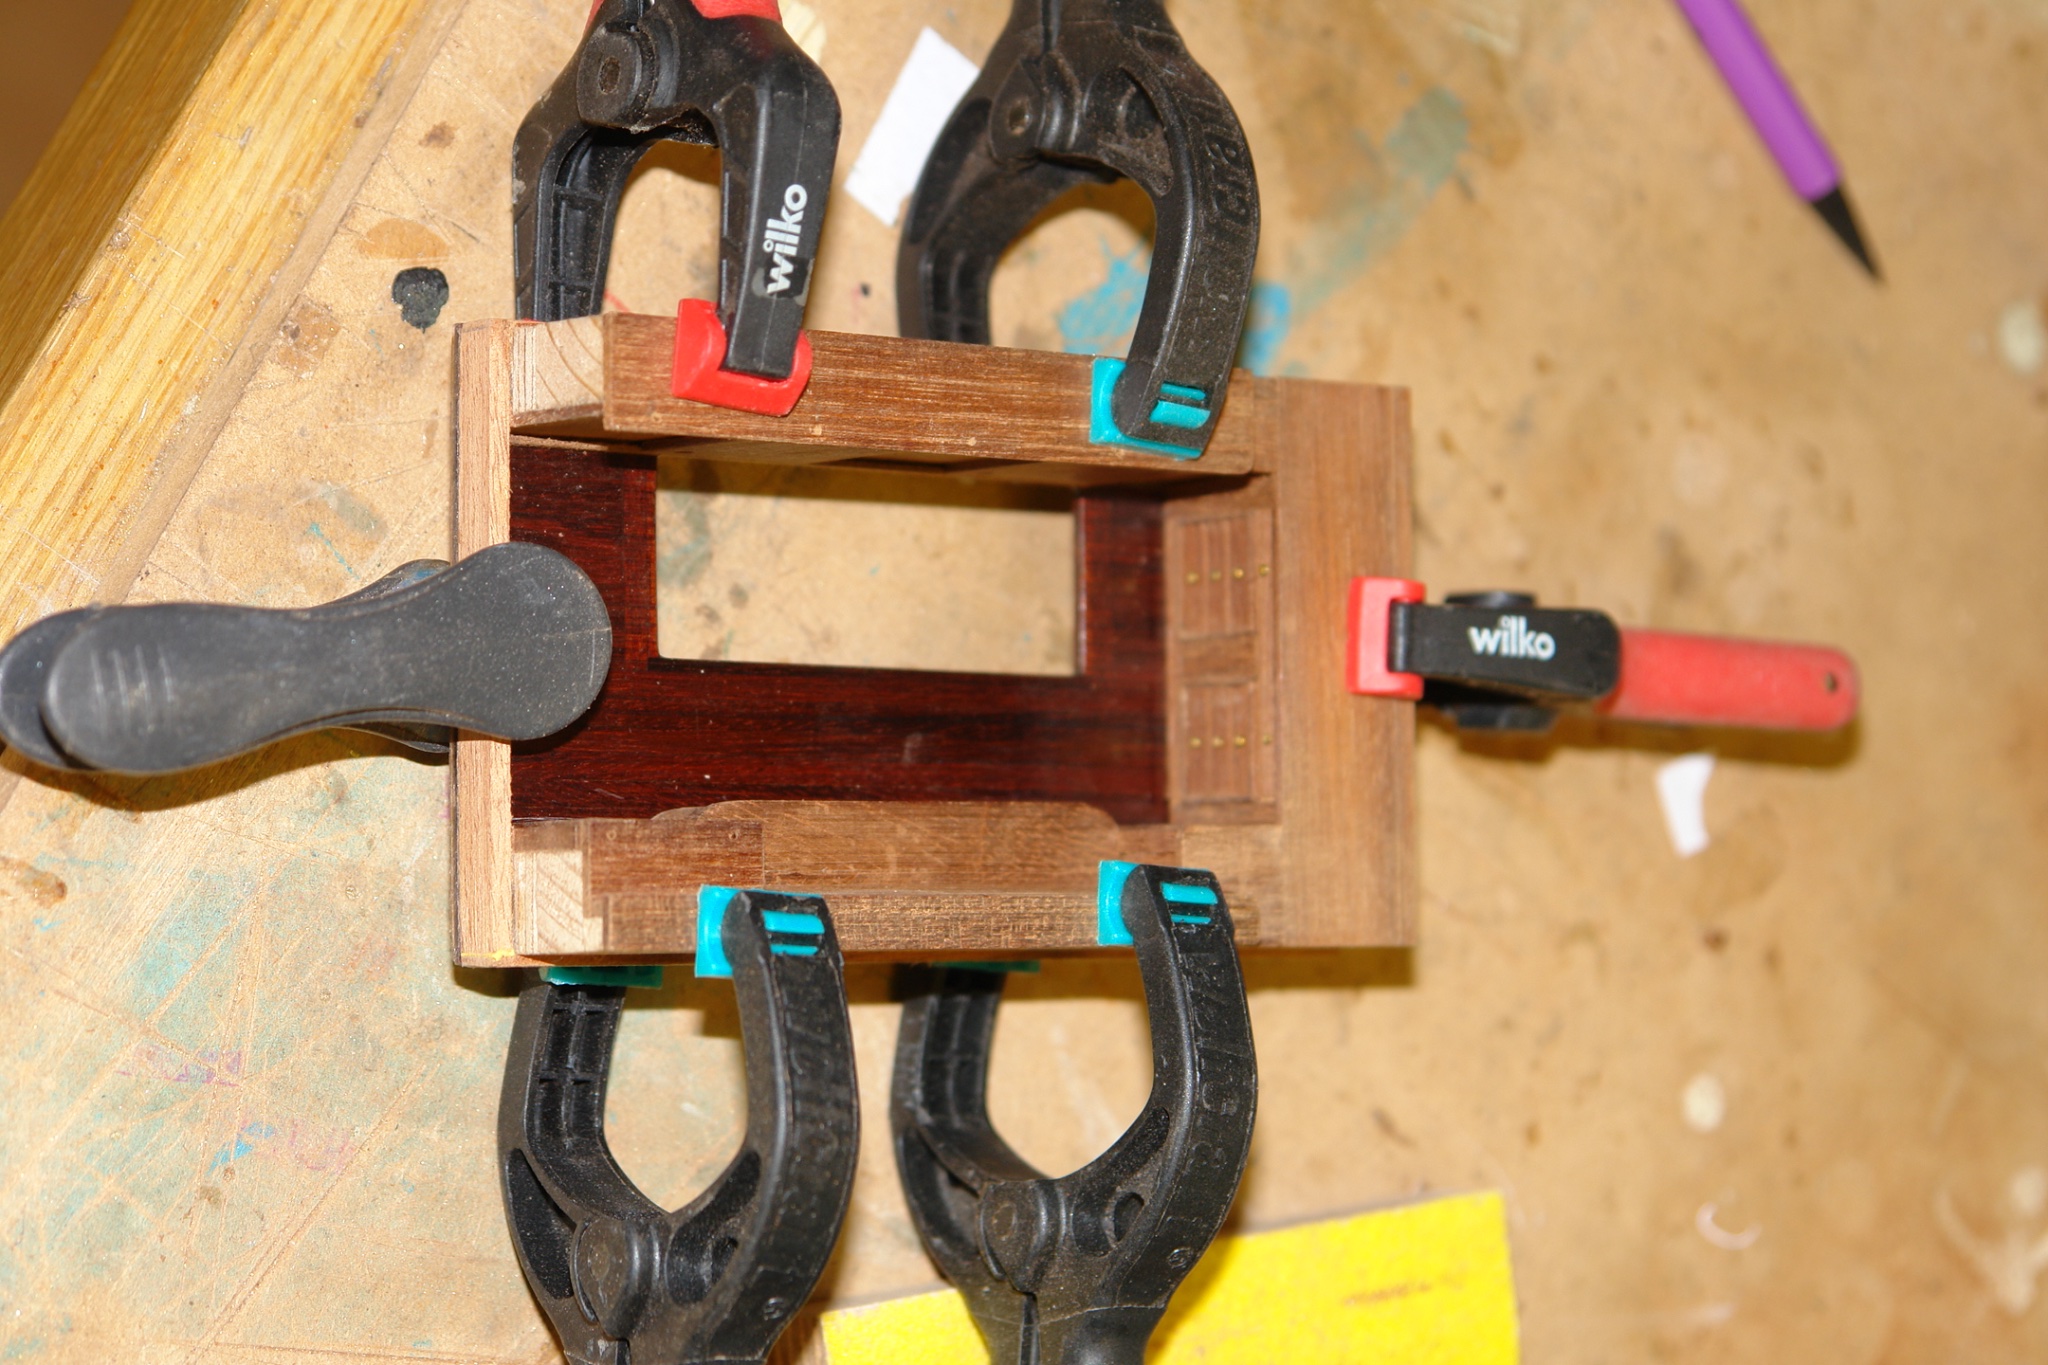
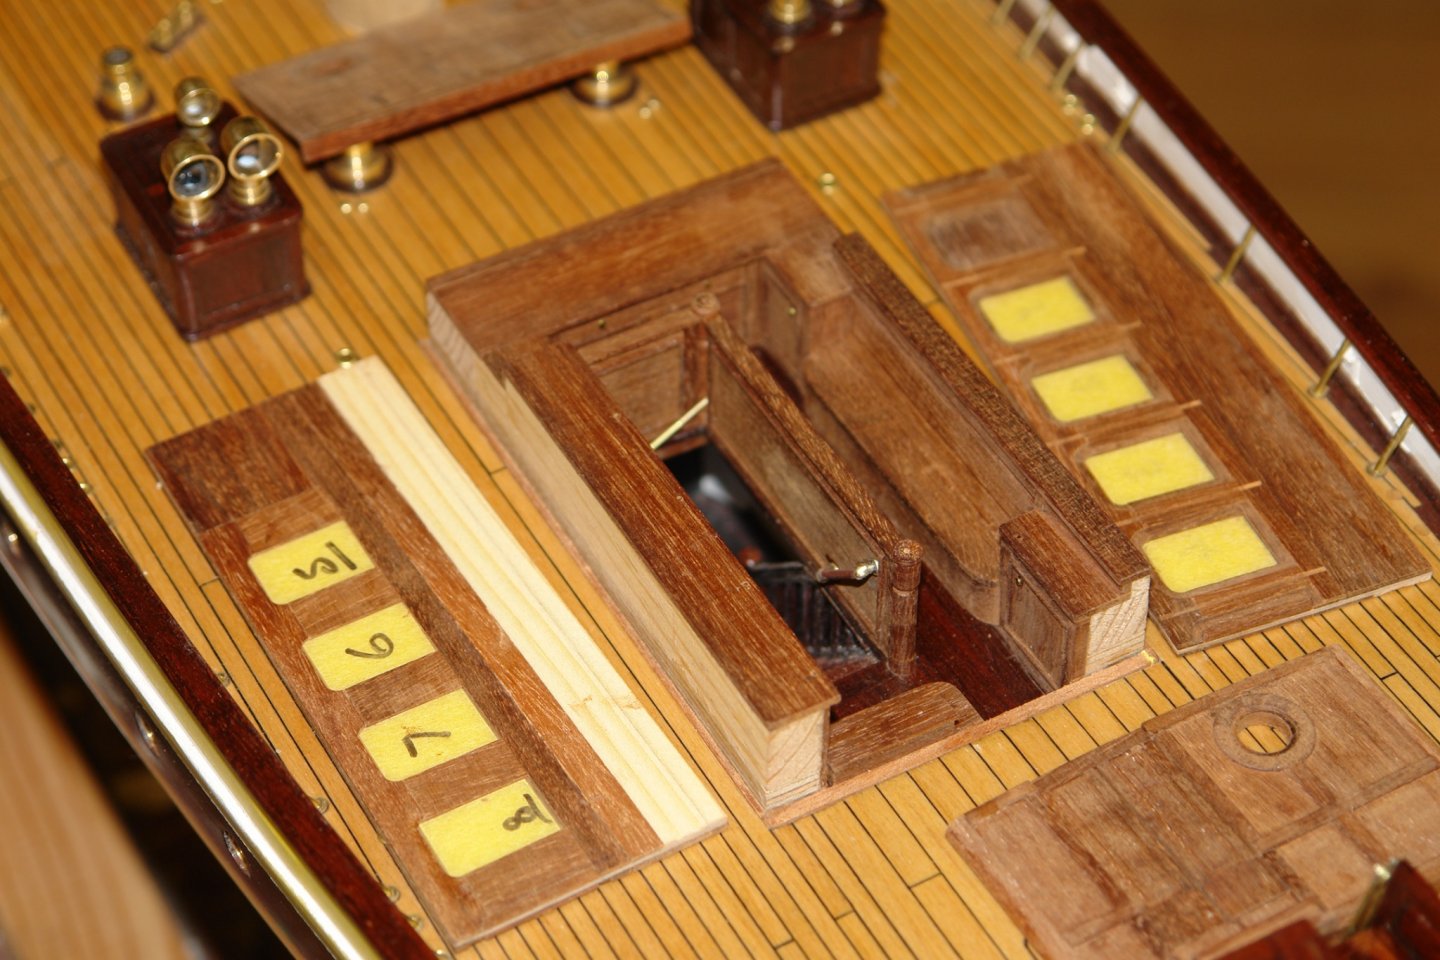
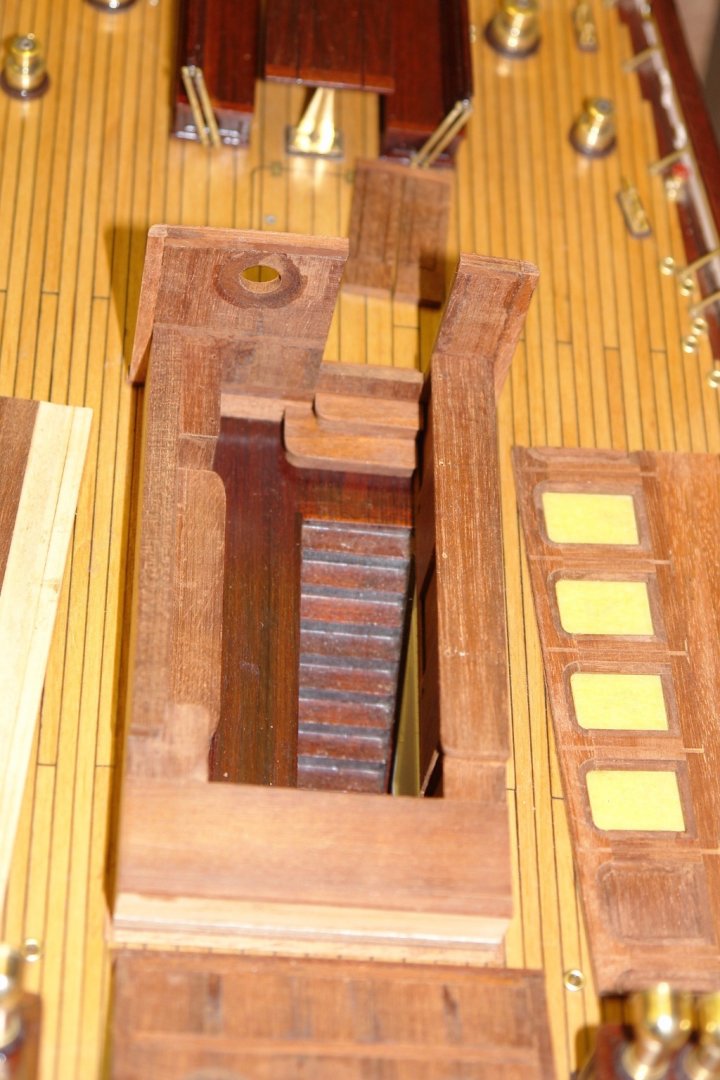
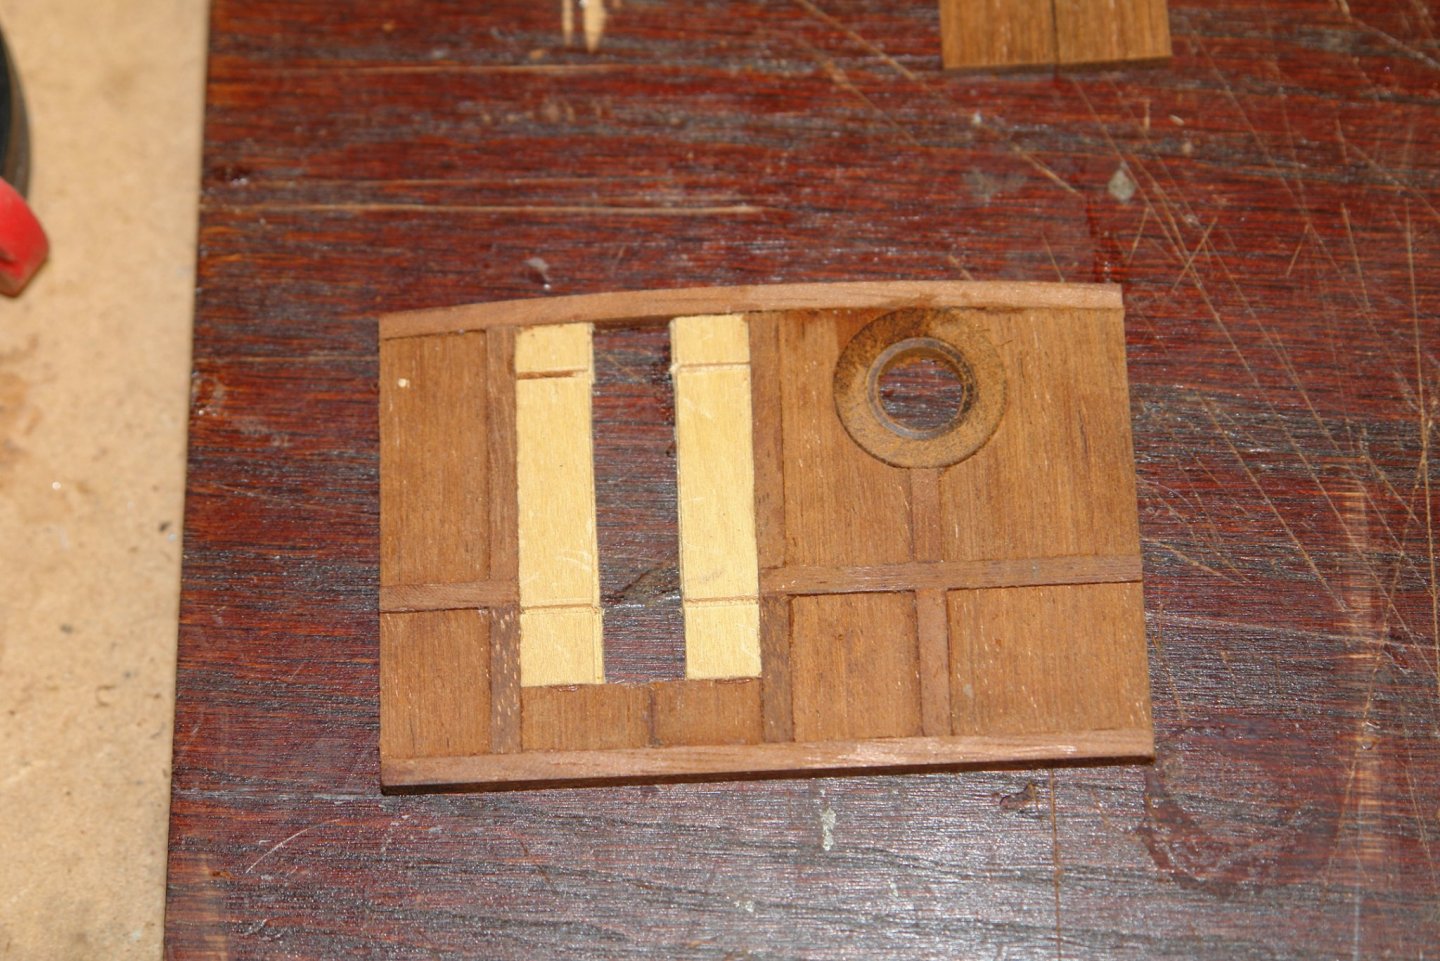
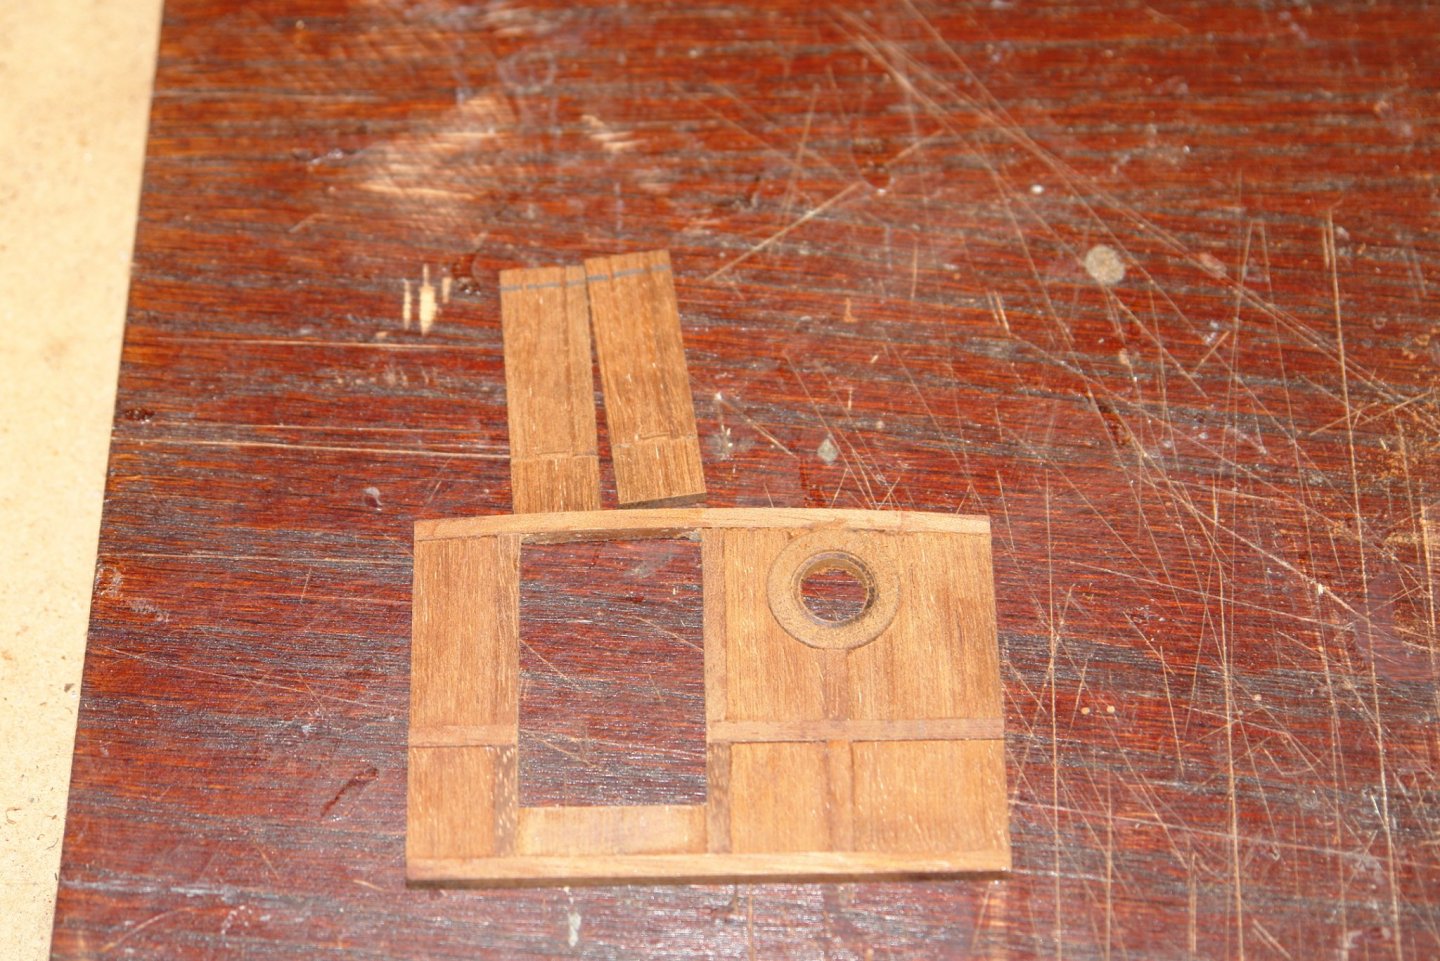
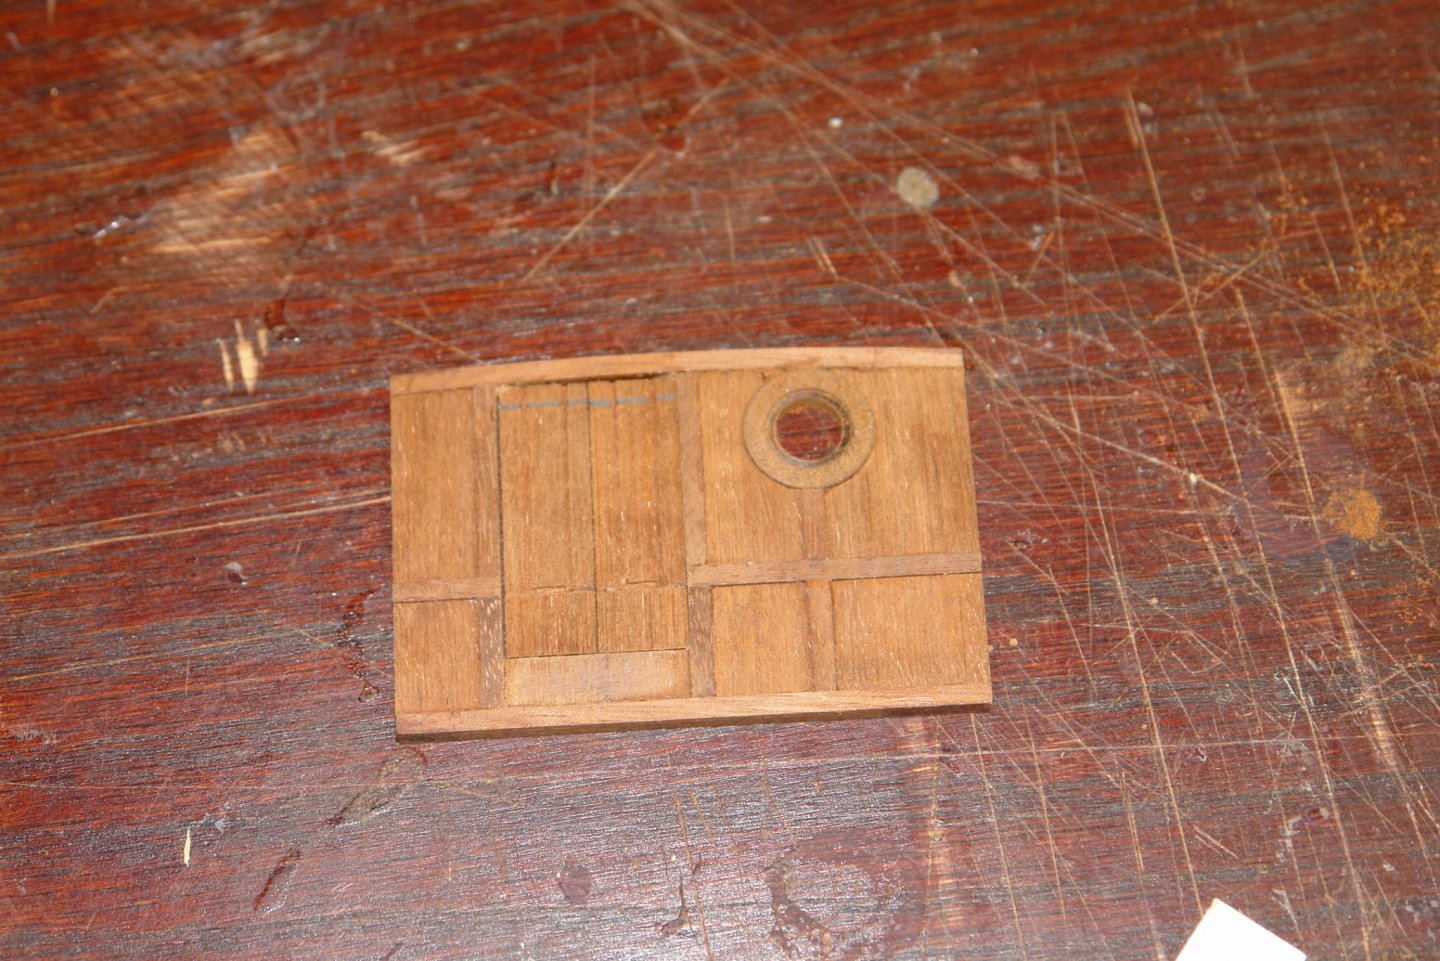
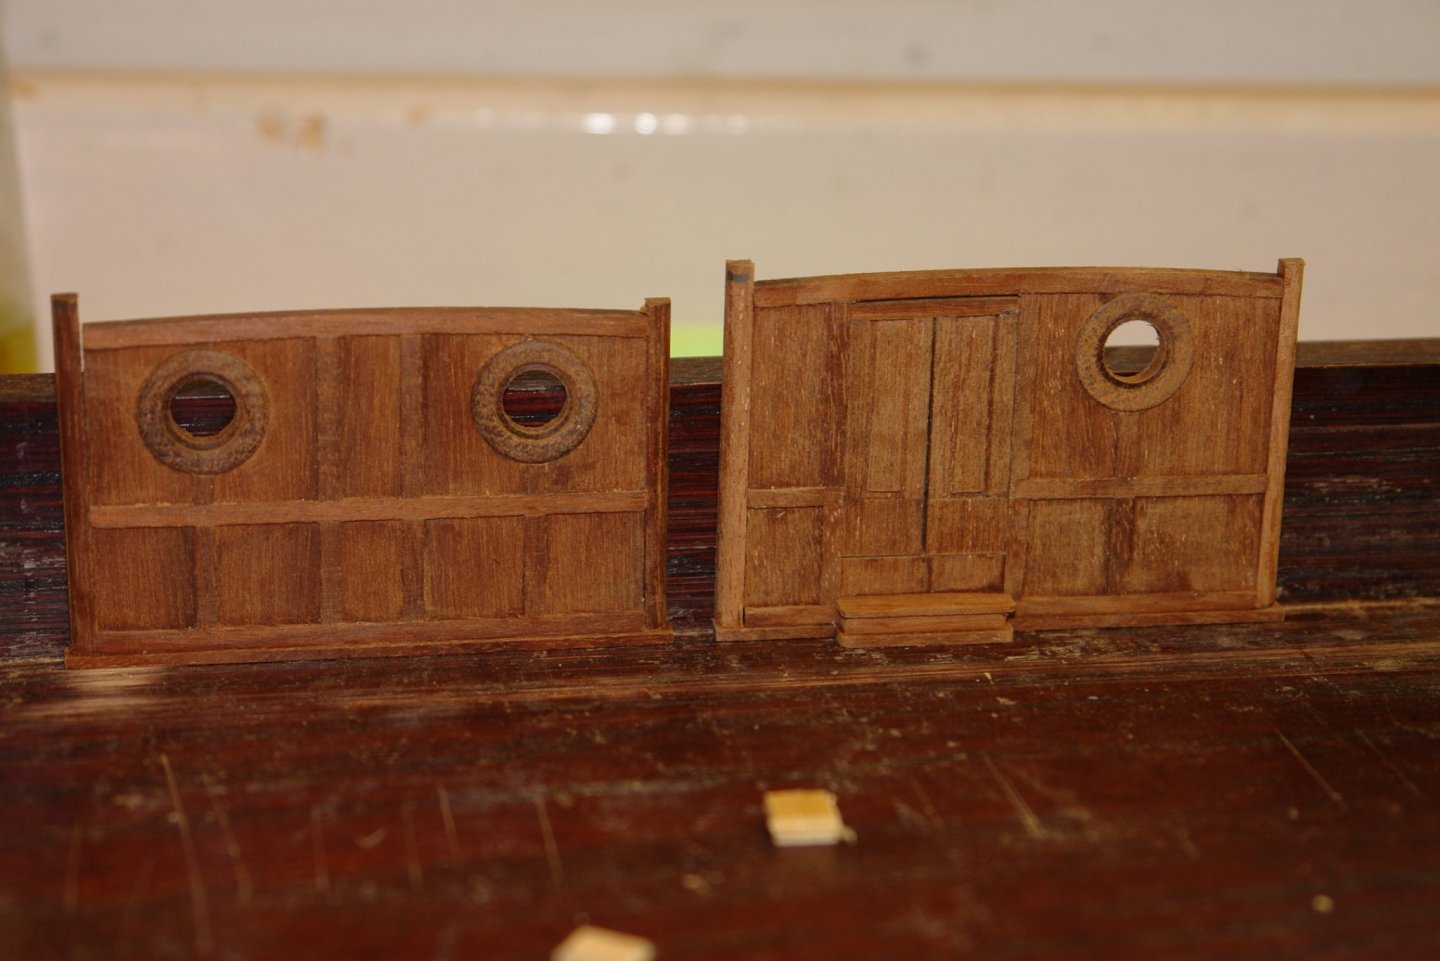
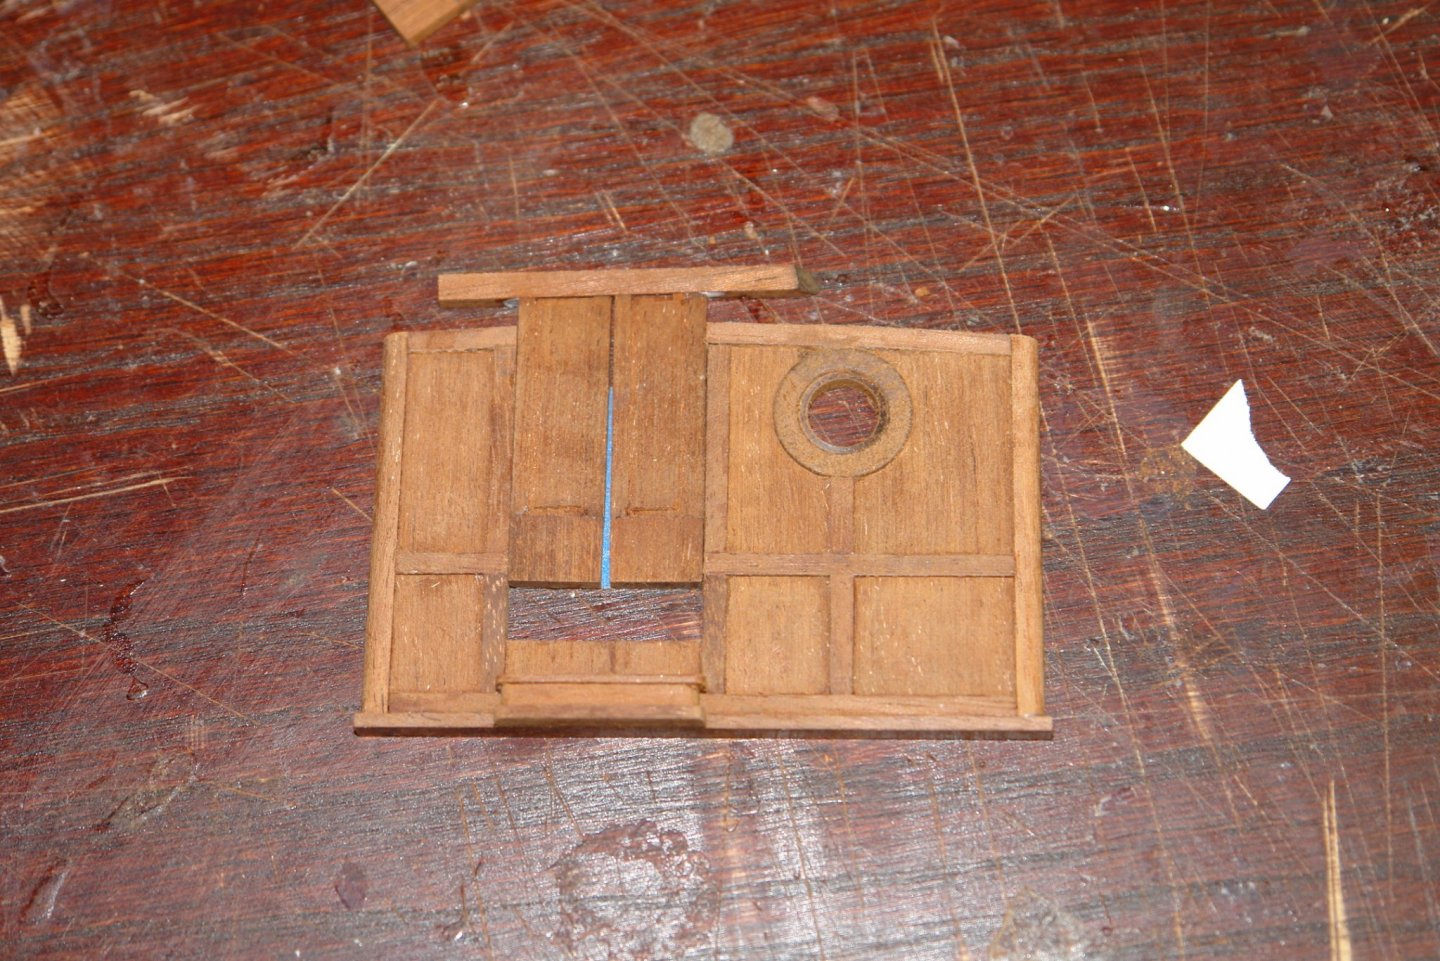
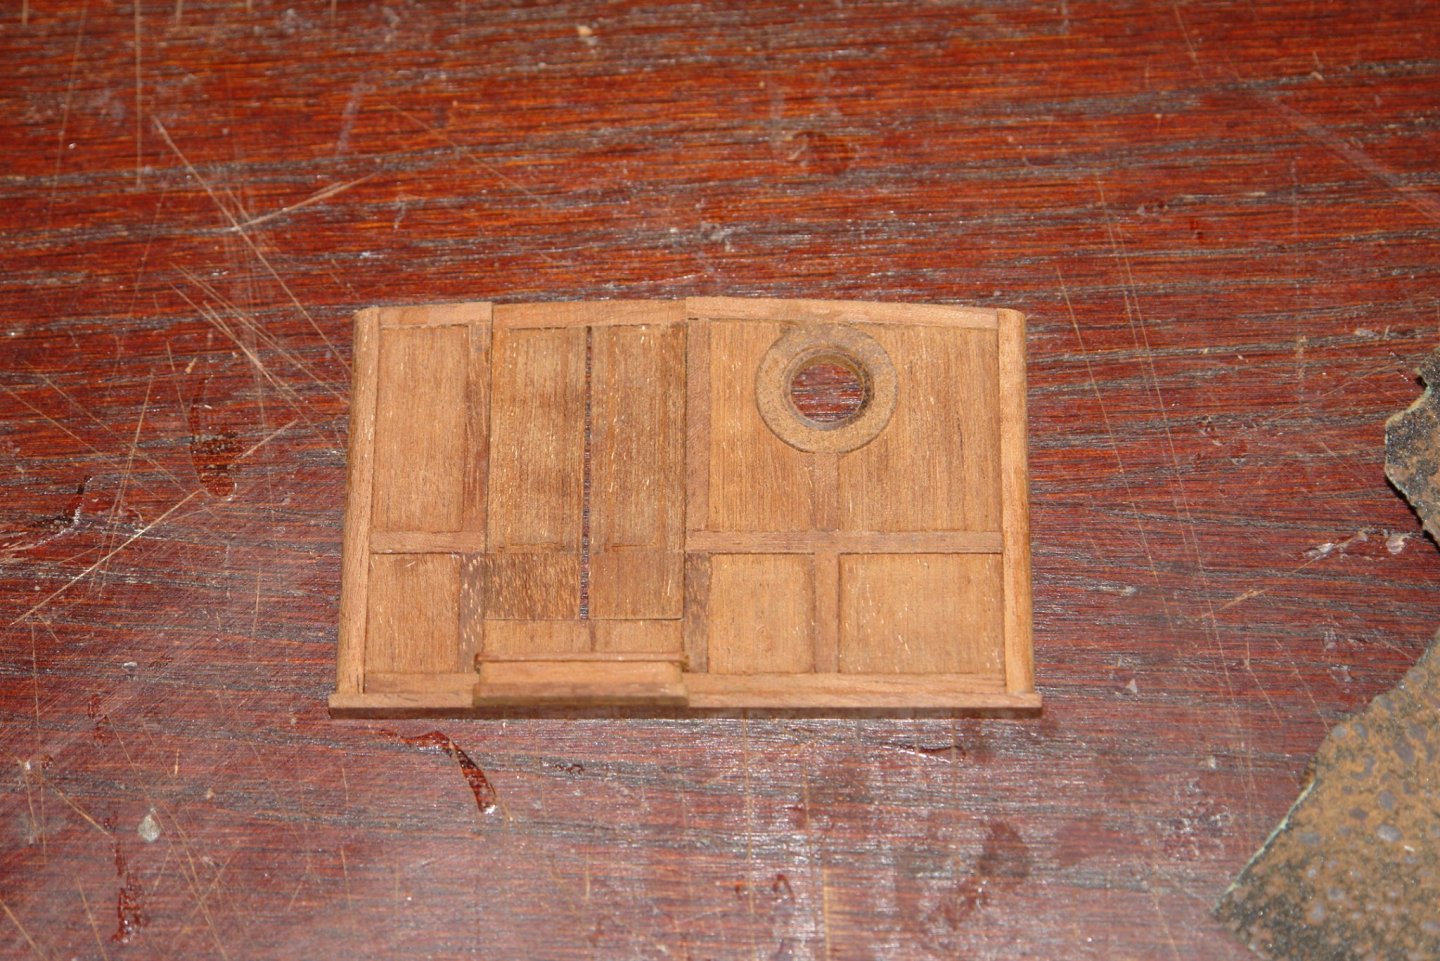
Thank you Richard, I am still rationing myself to one day a week while my house maintenance work continues. I made progress on rear face of the main deckhouse. The hole for the porthole frame was cut small with a drill and then opened out with an end mill. I find this produces the best edges (apart from the chip at the top)!!!!! The weakening of the sacrificial insert worked well and it came out a treat. You can see that I repaired the chip while putting the porthole frame in. I made the pair of doors. Then realised I had made the doors wrong. The curved plank across the top of the doors should be part of the doors, otherwise the sliding hatch above the door would be obstructed. The step was made and below the doors. The replacement doors were made. In the sketch the squares represent .100" x .100". Next the hinges.


-
Allan As it isn't built yet couldn't you just get the builder to make the wheel to match your design. It would avoid reworking it.
-
Such a pleasure to see your work Valiery. I would love to see more detail of your metal working. It hard to always see from the finished item how you went about the assembly
-
Hi Patrick, this one turned out rather well. Even looks like a boat. Plenty of monstrosities are still being built by oligarchs. What next?
-
Coming along very nicely JD. The planking always seems to me to be a much more satisfying process than building up the frames.
-
Ah! A ship from a era when luxury yachts were elegant, unlike todays monstrosities. i look forward to seeing her come to life.
-
What a giant, i am amazed. The display case is going to cost a fortune.
- 11 replies
-
- 1
-

-
- president cleveland
- ocean liner
- (and 1 more)
-
I just found your build Allan. I do like the elegant lines of schooner and the Boothbay 65 does have really elegant lines. I look forward to seeing her develop. Just one question about the ships wheel, is the rim to scale? It seems very substantial.
-
Good luck Rich. Scroll saws take a bit of mastering so don't get put off by your initial attempts.