KeithAug
-
Posts
3,986 -
Joined
-
Last visited
Content Type
Profiles
Forums
Gallery
Events
Everything posted by KeithAug
-
 Thoroughly enjoyed catching up Gary. All you work inspires but for some reason I particularly liked the bilge pump.
 -
Hellmuht. Just caught up with your build. Very fine craftsmanship but more importantly you are teaching me so much about the construction of these ancient vessels. Thank you.
- 158 replies
-
- 1
-

-
- byblos ship
- Egyptian
- (and 1 more)
-
Eberhard I love the detailed explanation of the gun elevation mechanism as much as i admire the detail. Excellent work.
-
Richard Gary is the master of ship weathering
-
Richard;- Pity you spoilt the illusion. If you had given me a set of keys I would have tried to drive it away.
-
Keith Thats the problem and fun of scratch building, everything is an experiment - and not all experiments turn out as expected. Your final results however look rather nice. Keep well.
-
Just spent a pleasurable hour catching up Brian, all very impressive. I thought your approach to the paddle wheel frame was excellent. The boilers too have turned out really well. Beautiful work.
-
To be fair I wrote the list without consulting my wife, most of it was just in the "needs fixing category". The only thing she had moaned about was the power of the shower. Its now like a pressure washer and she is well pleased. Steve - She has often said I should try it and she would have the money . It seemed like a bad deal.
-
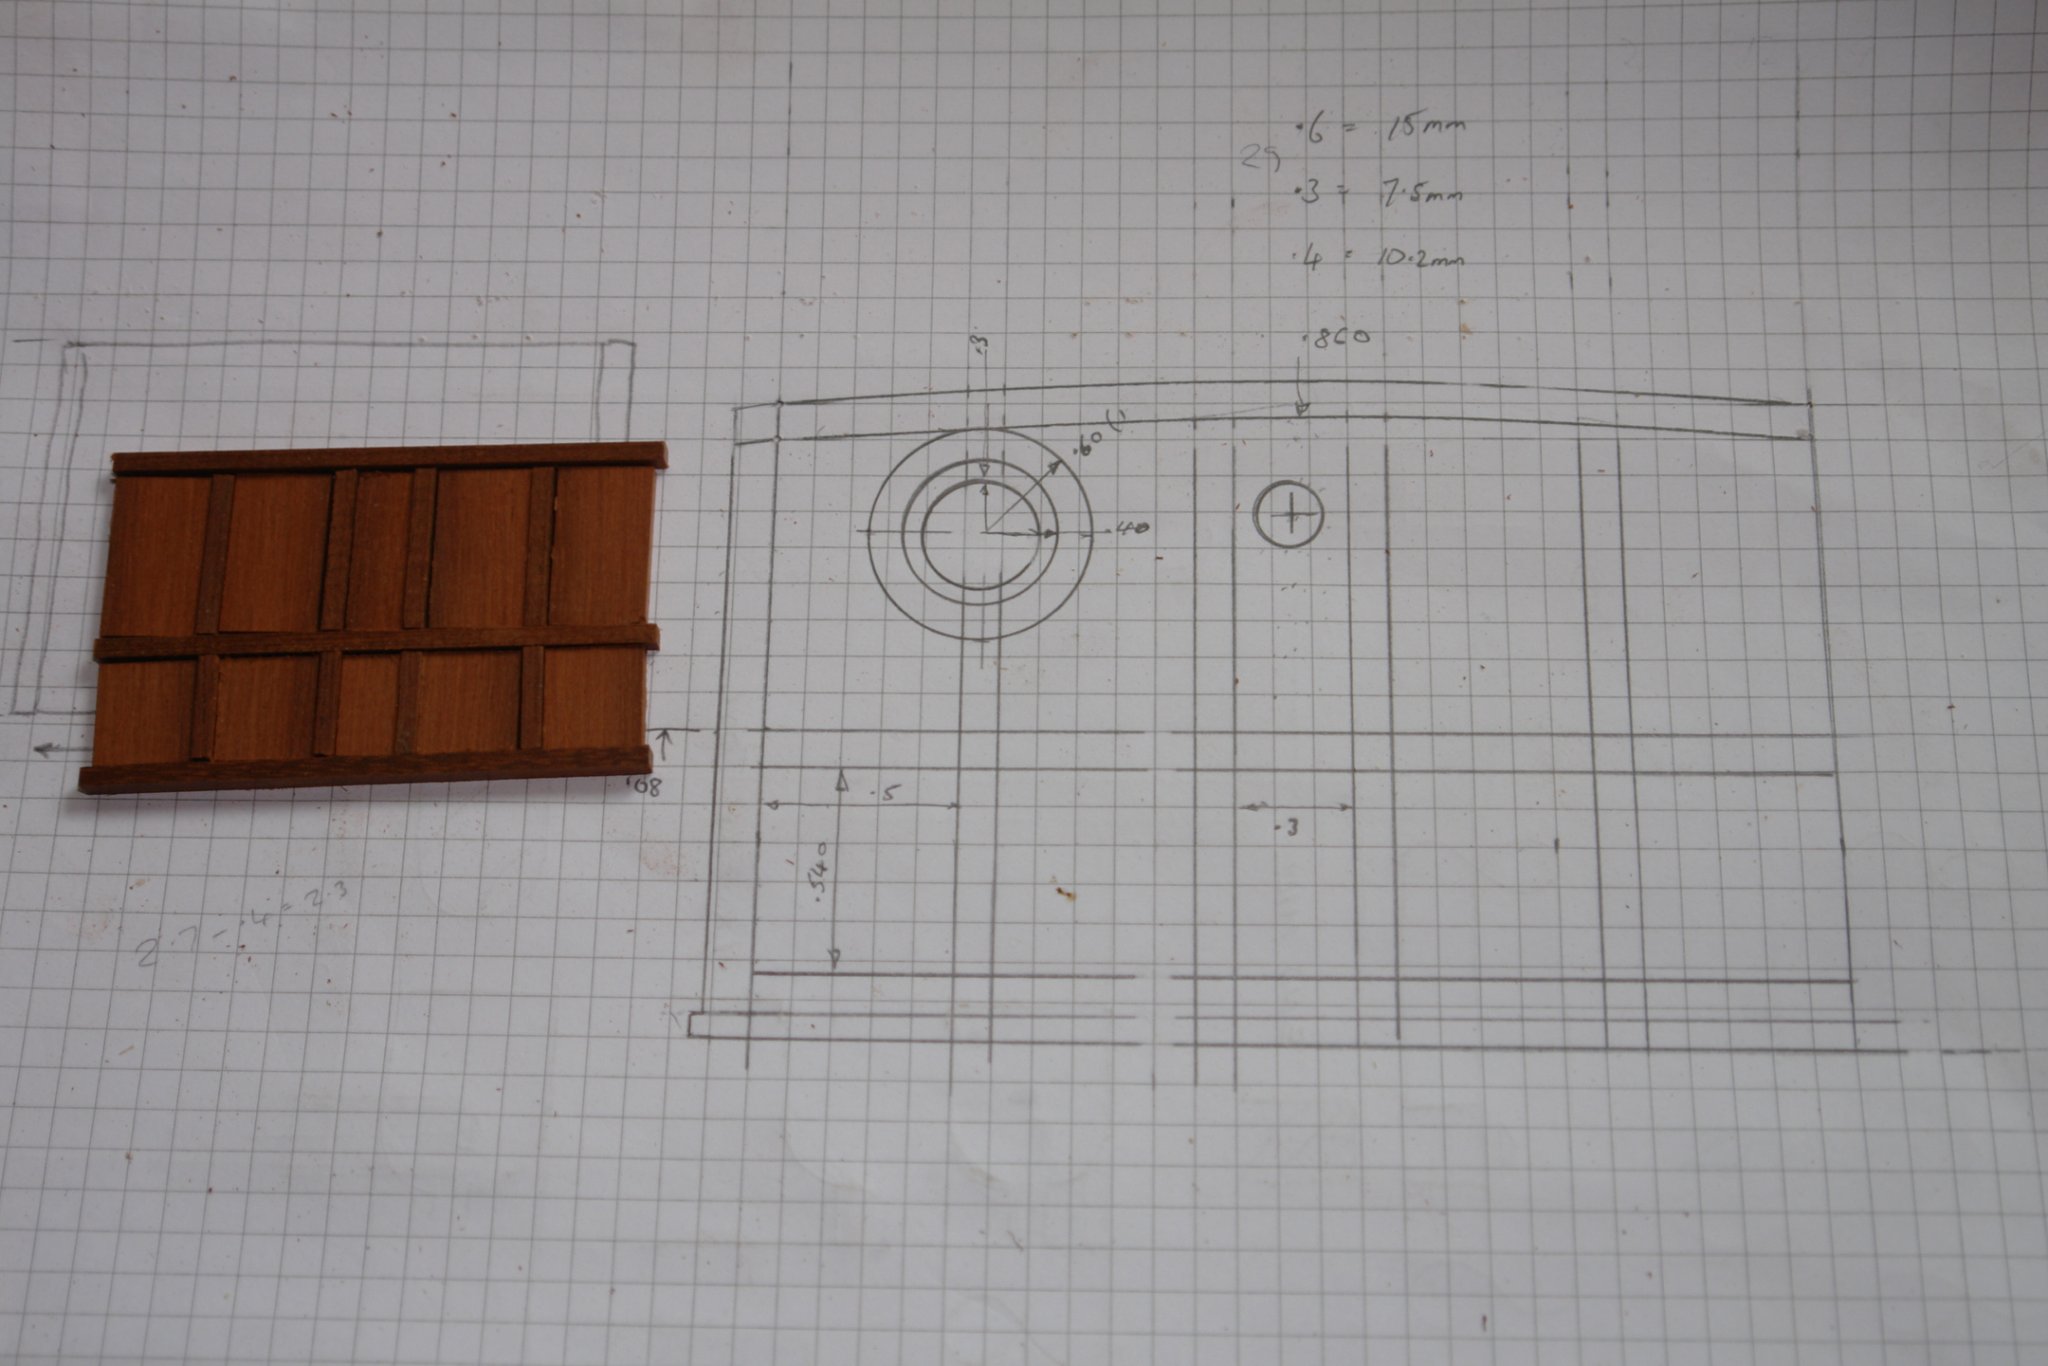
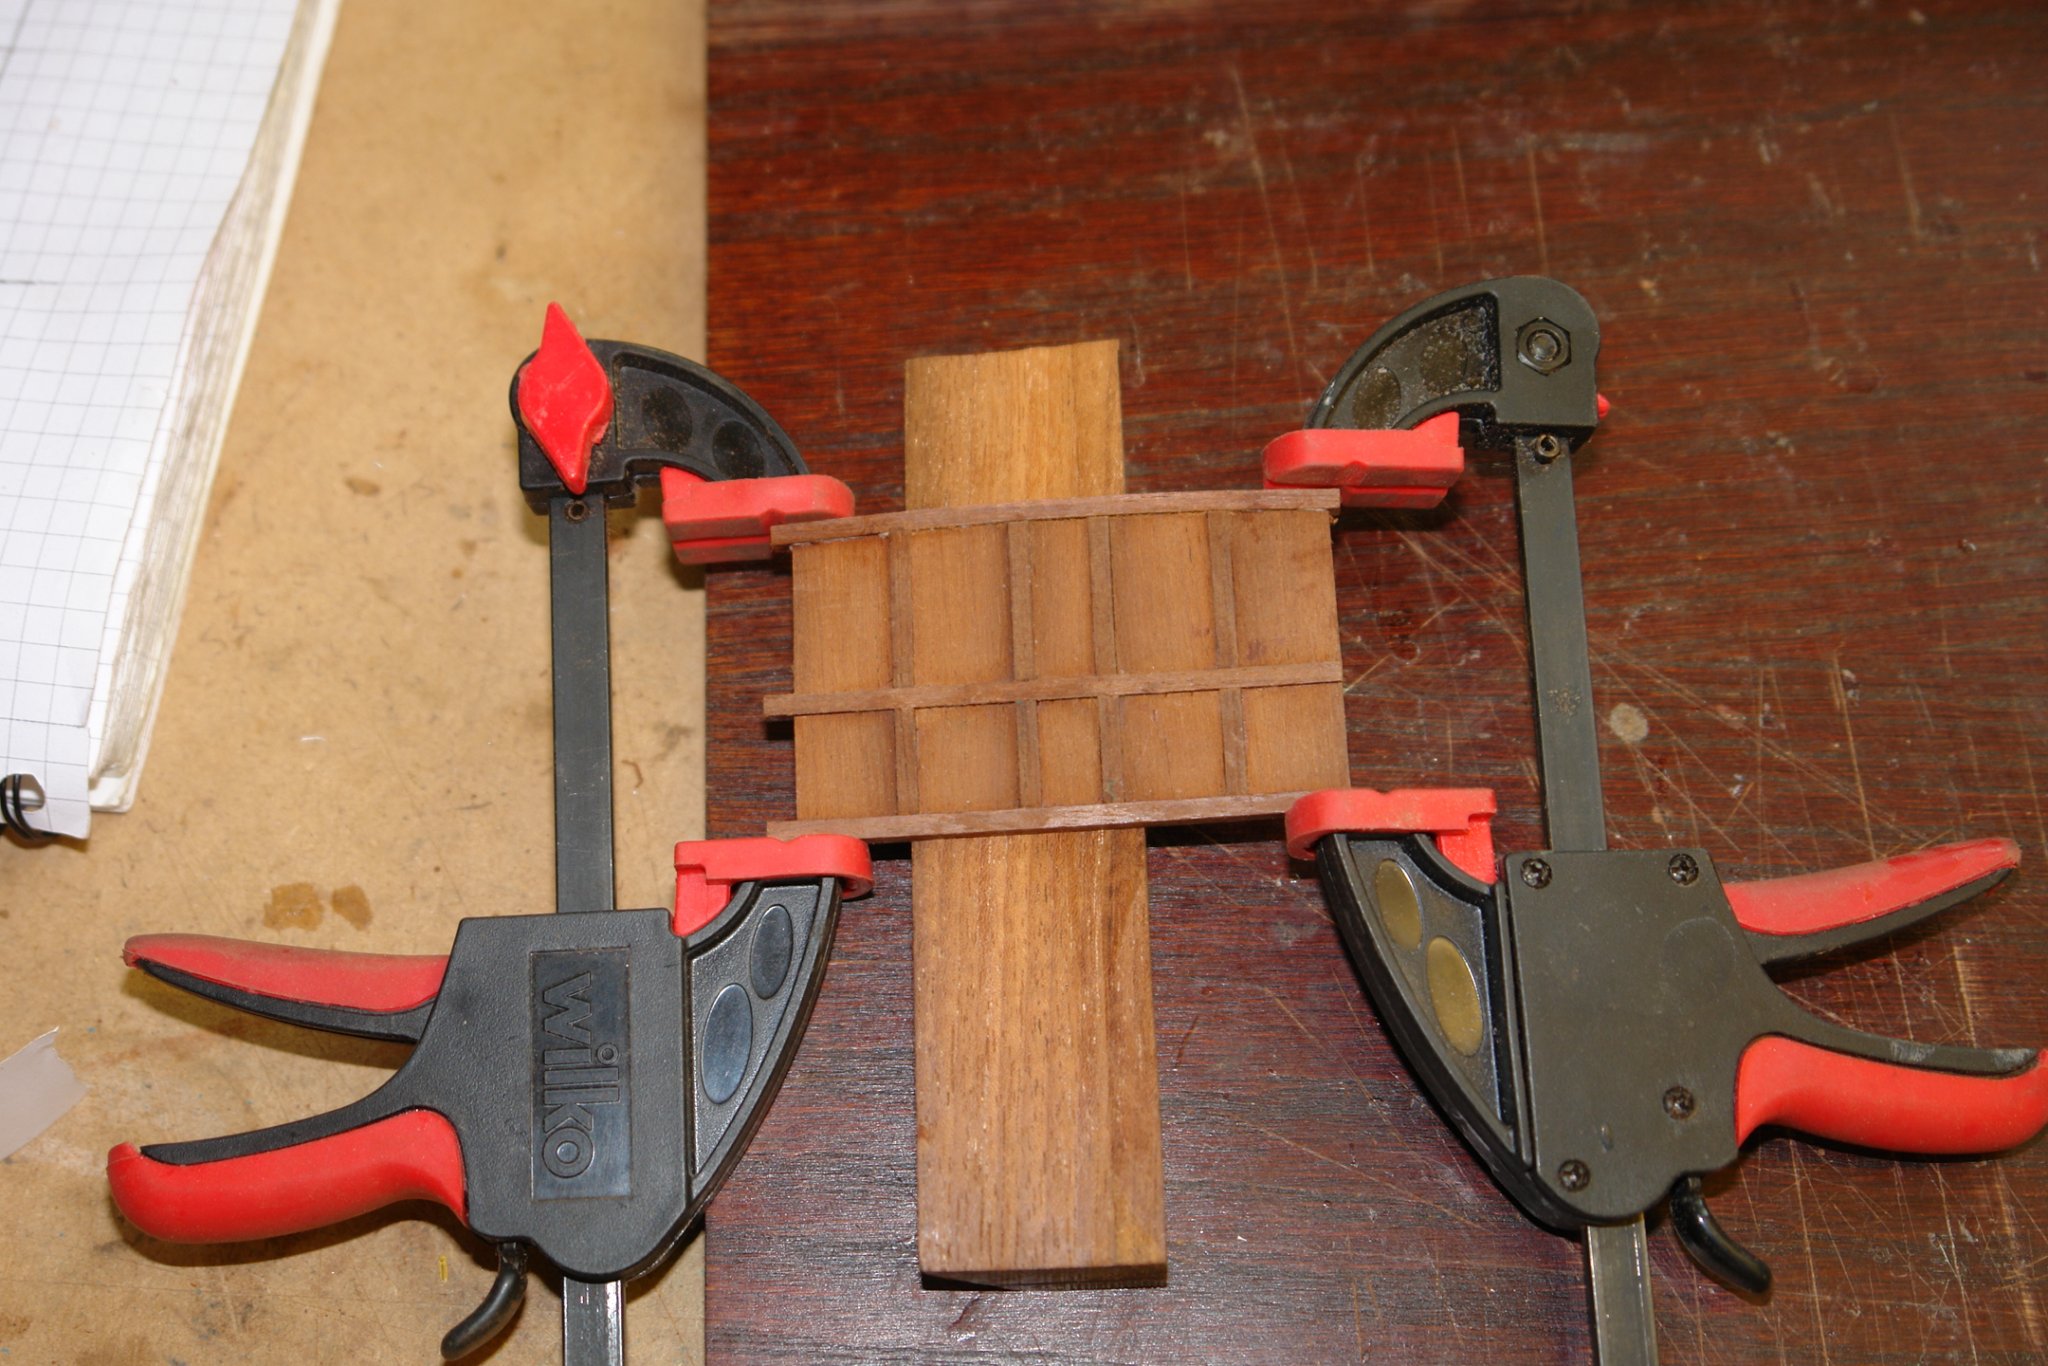
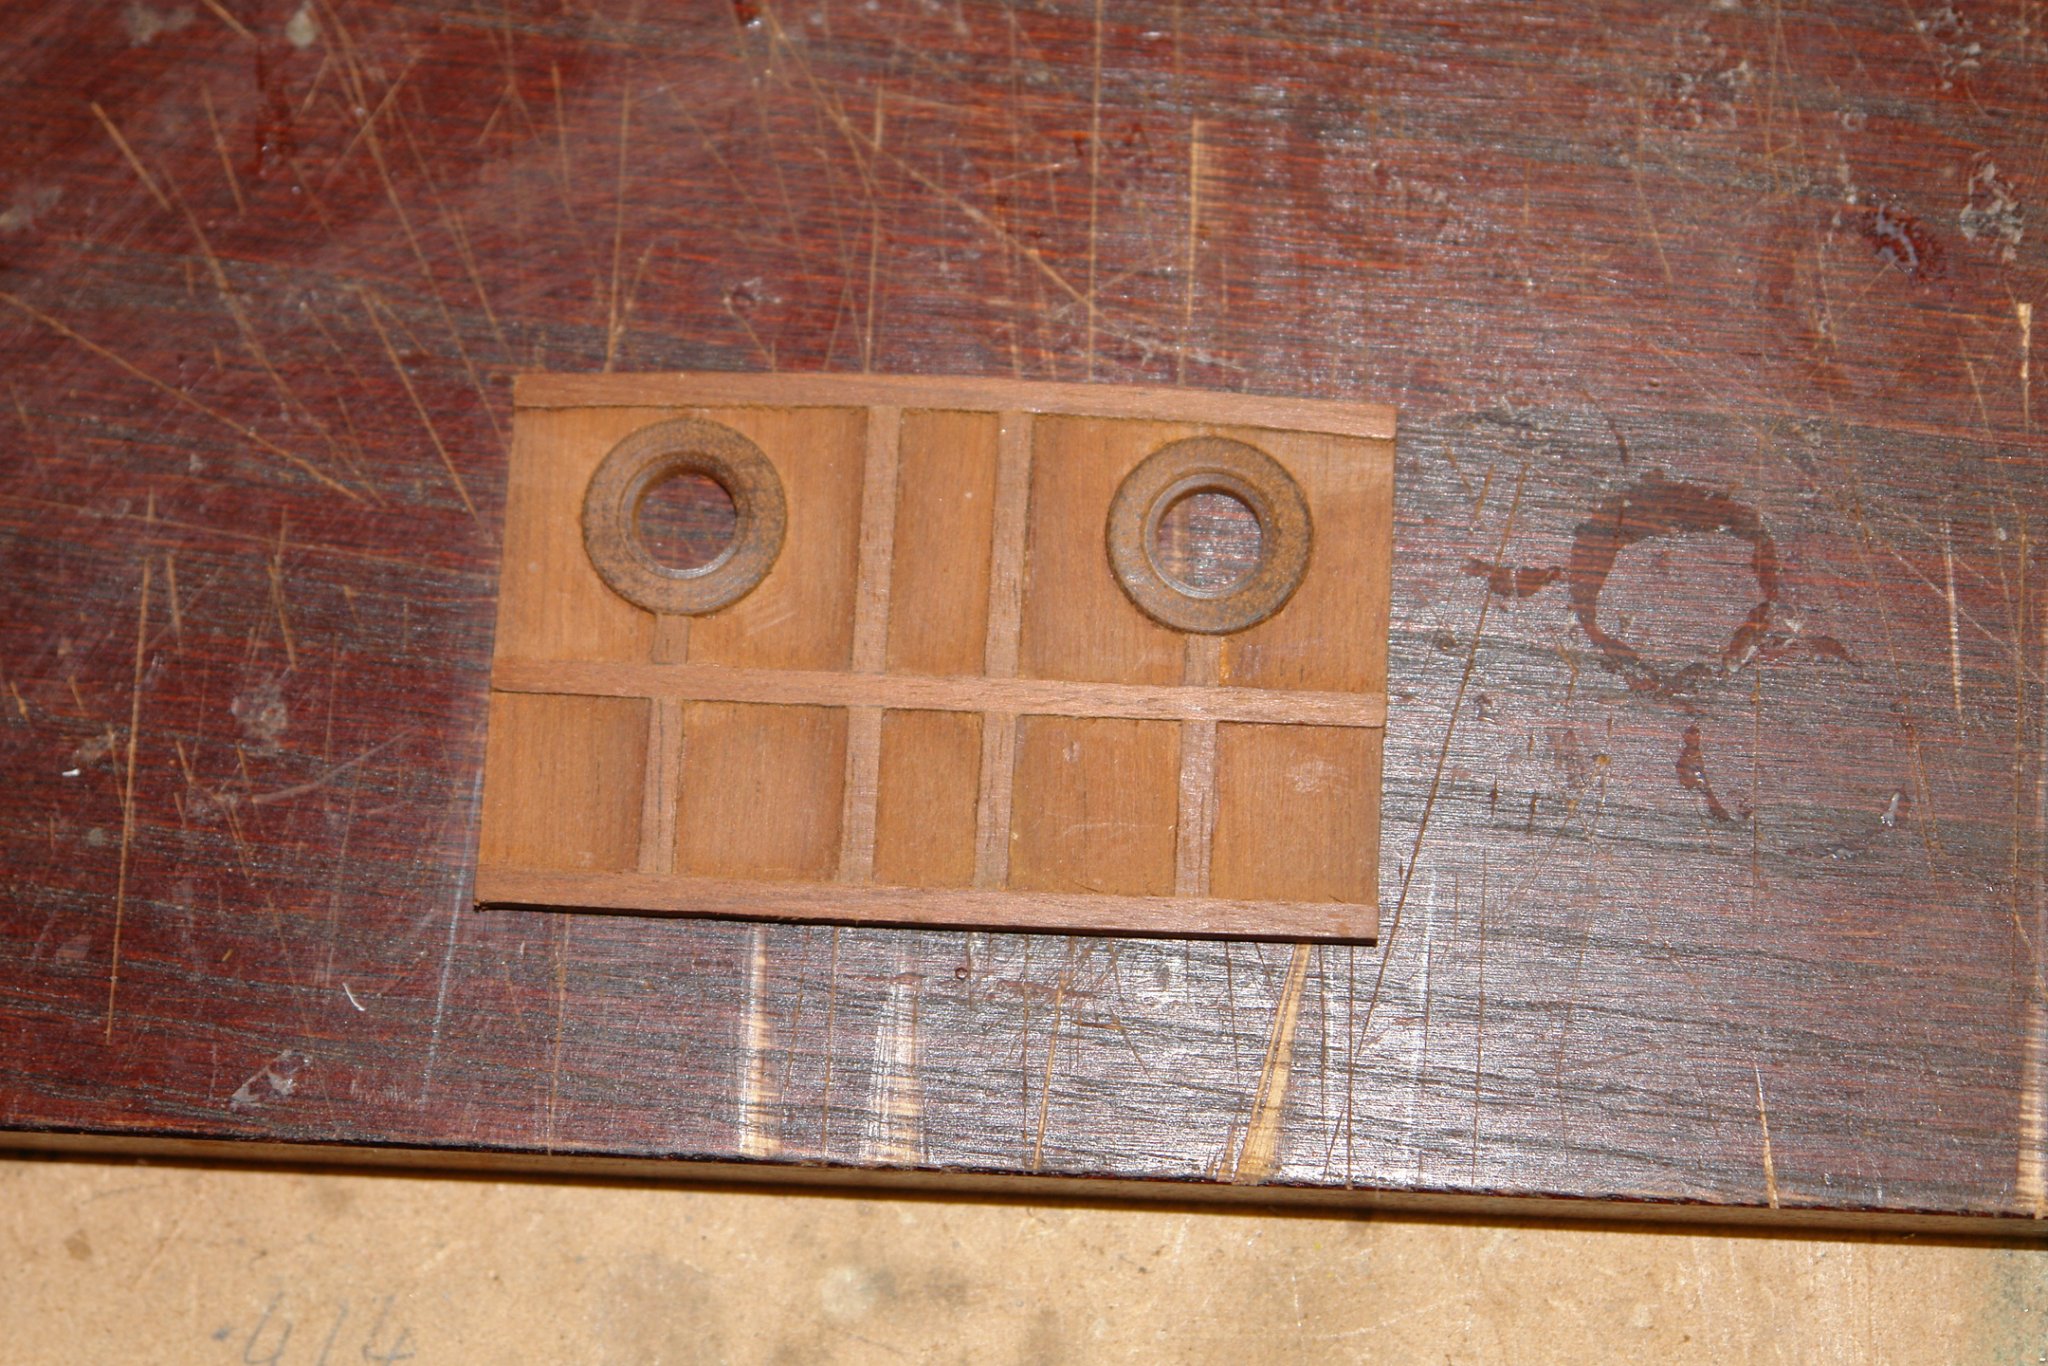
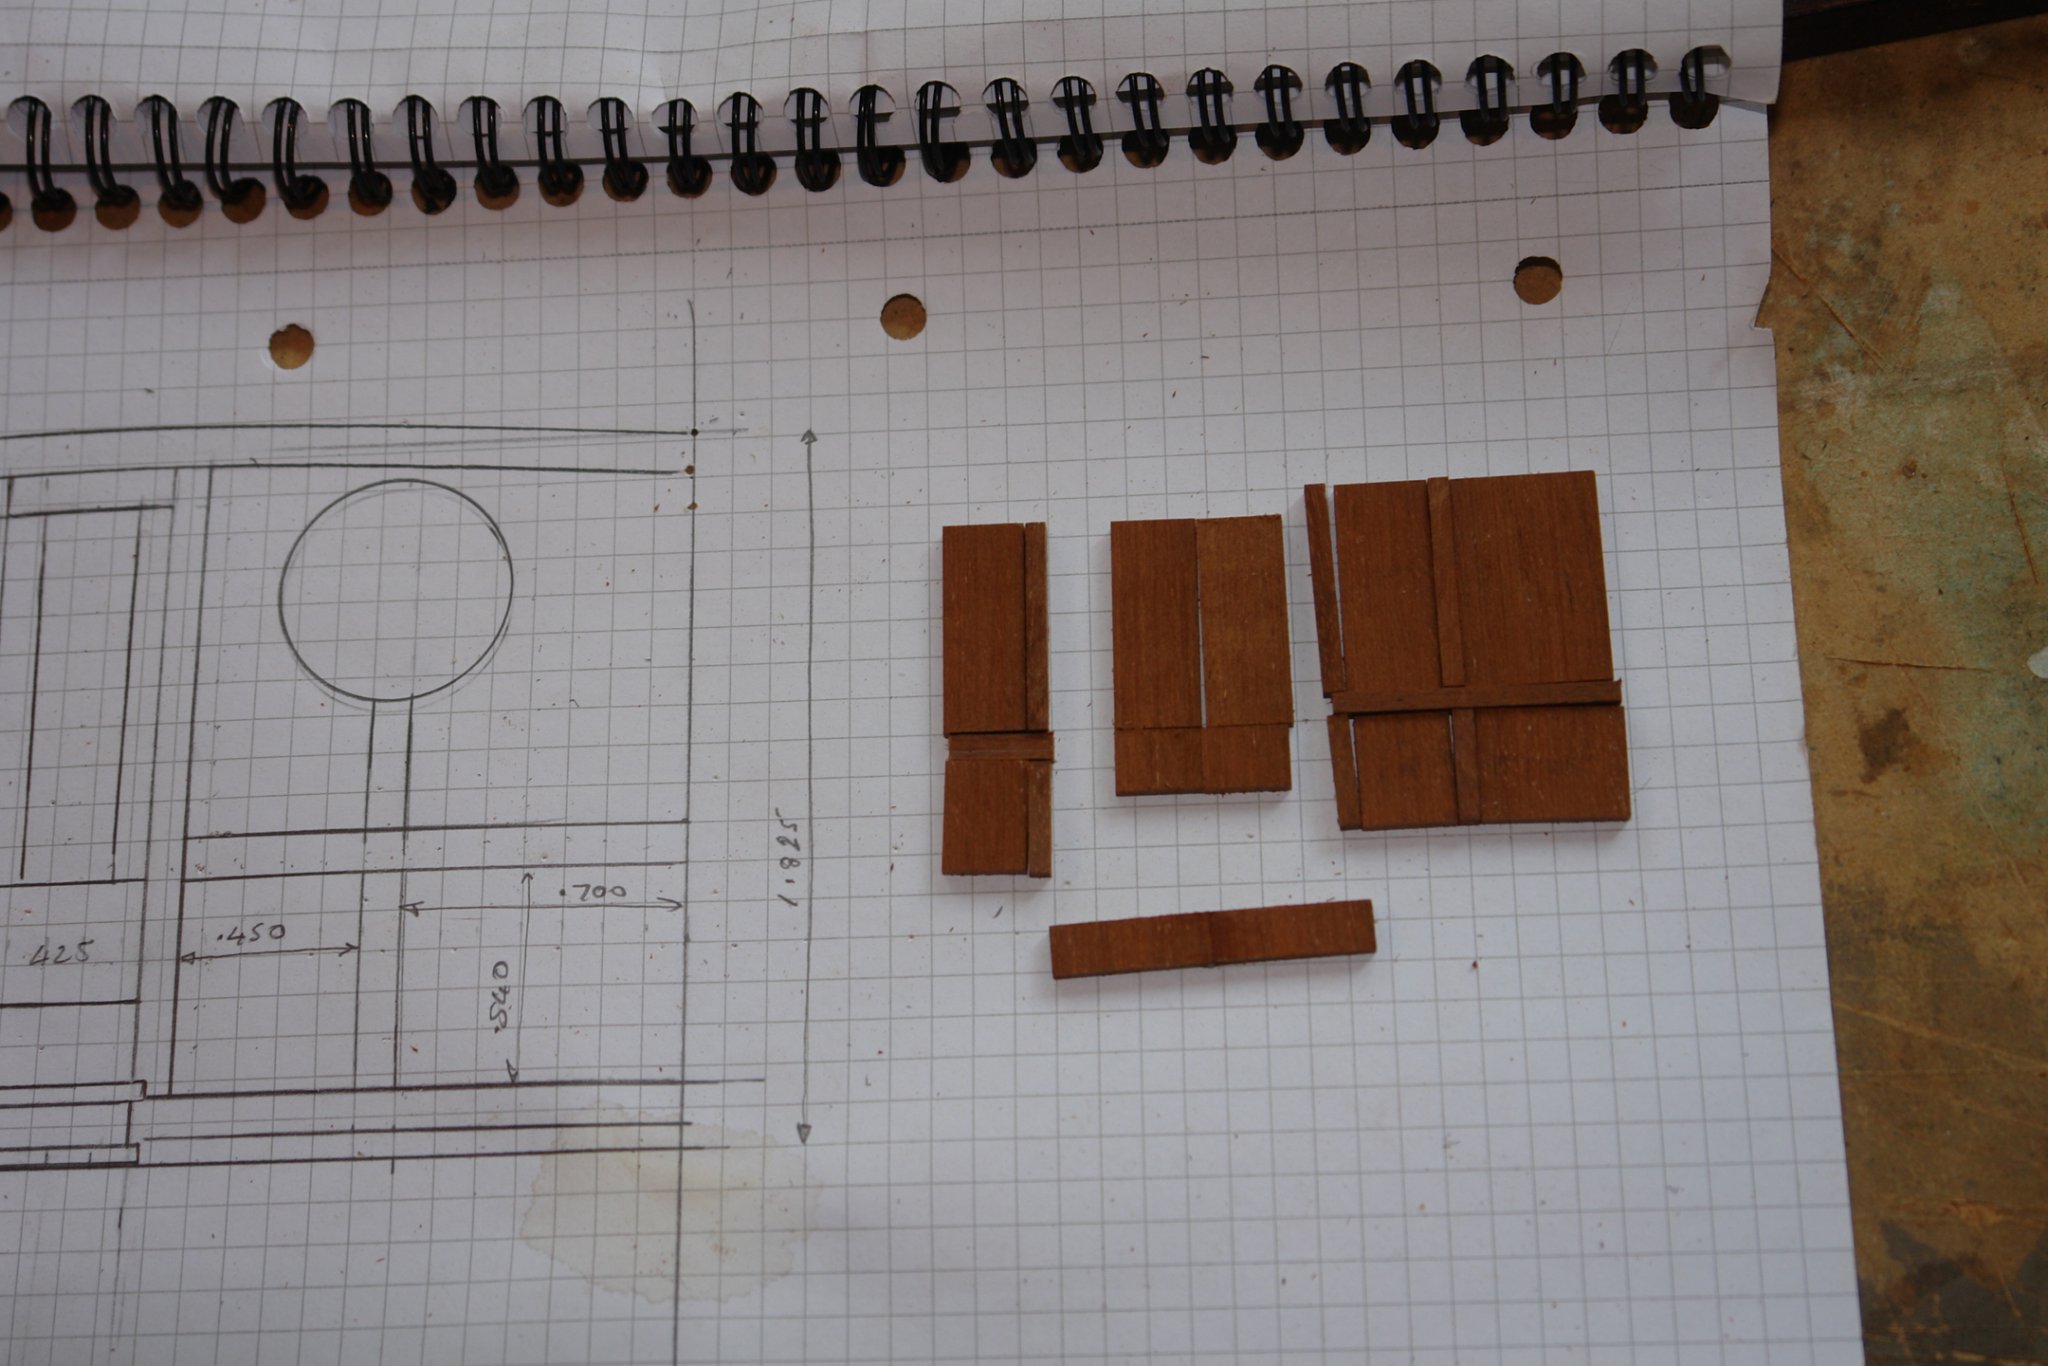
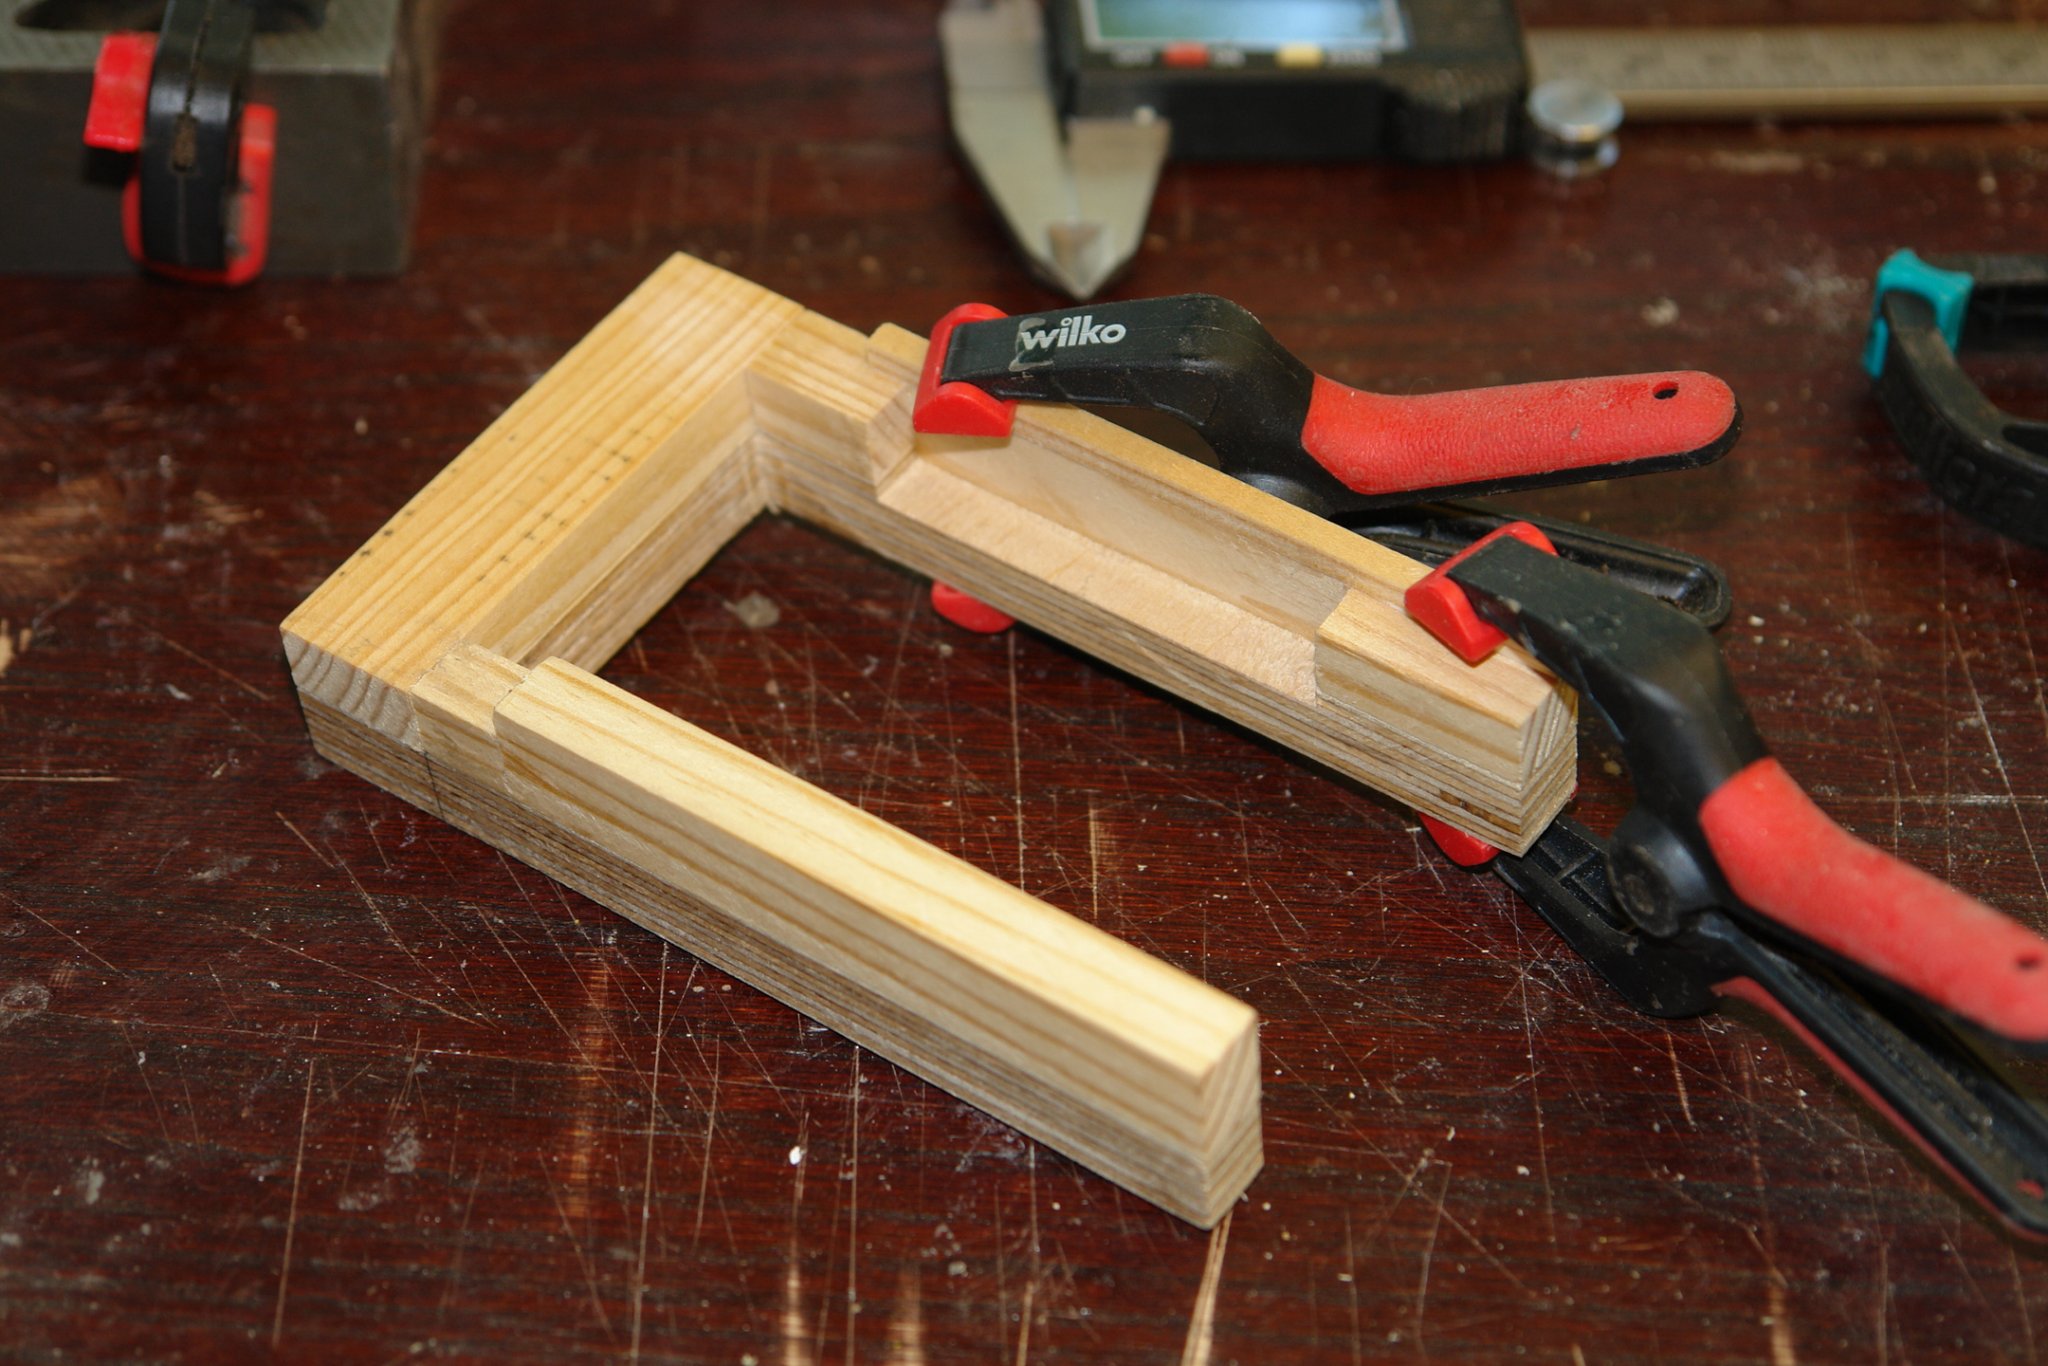
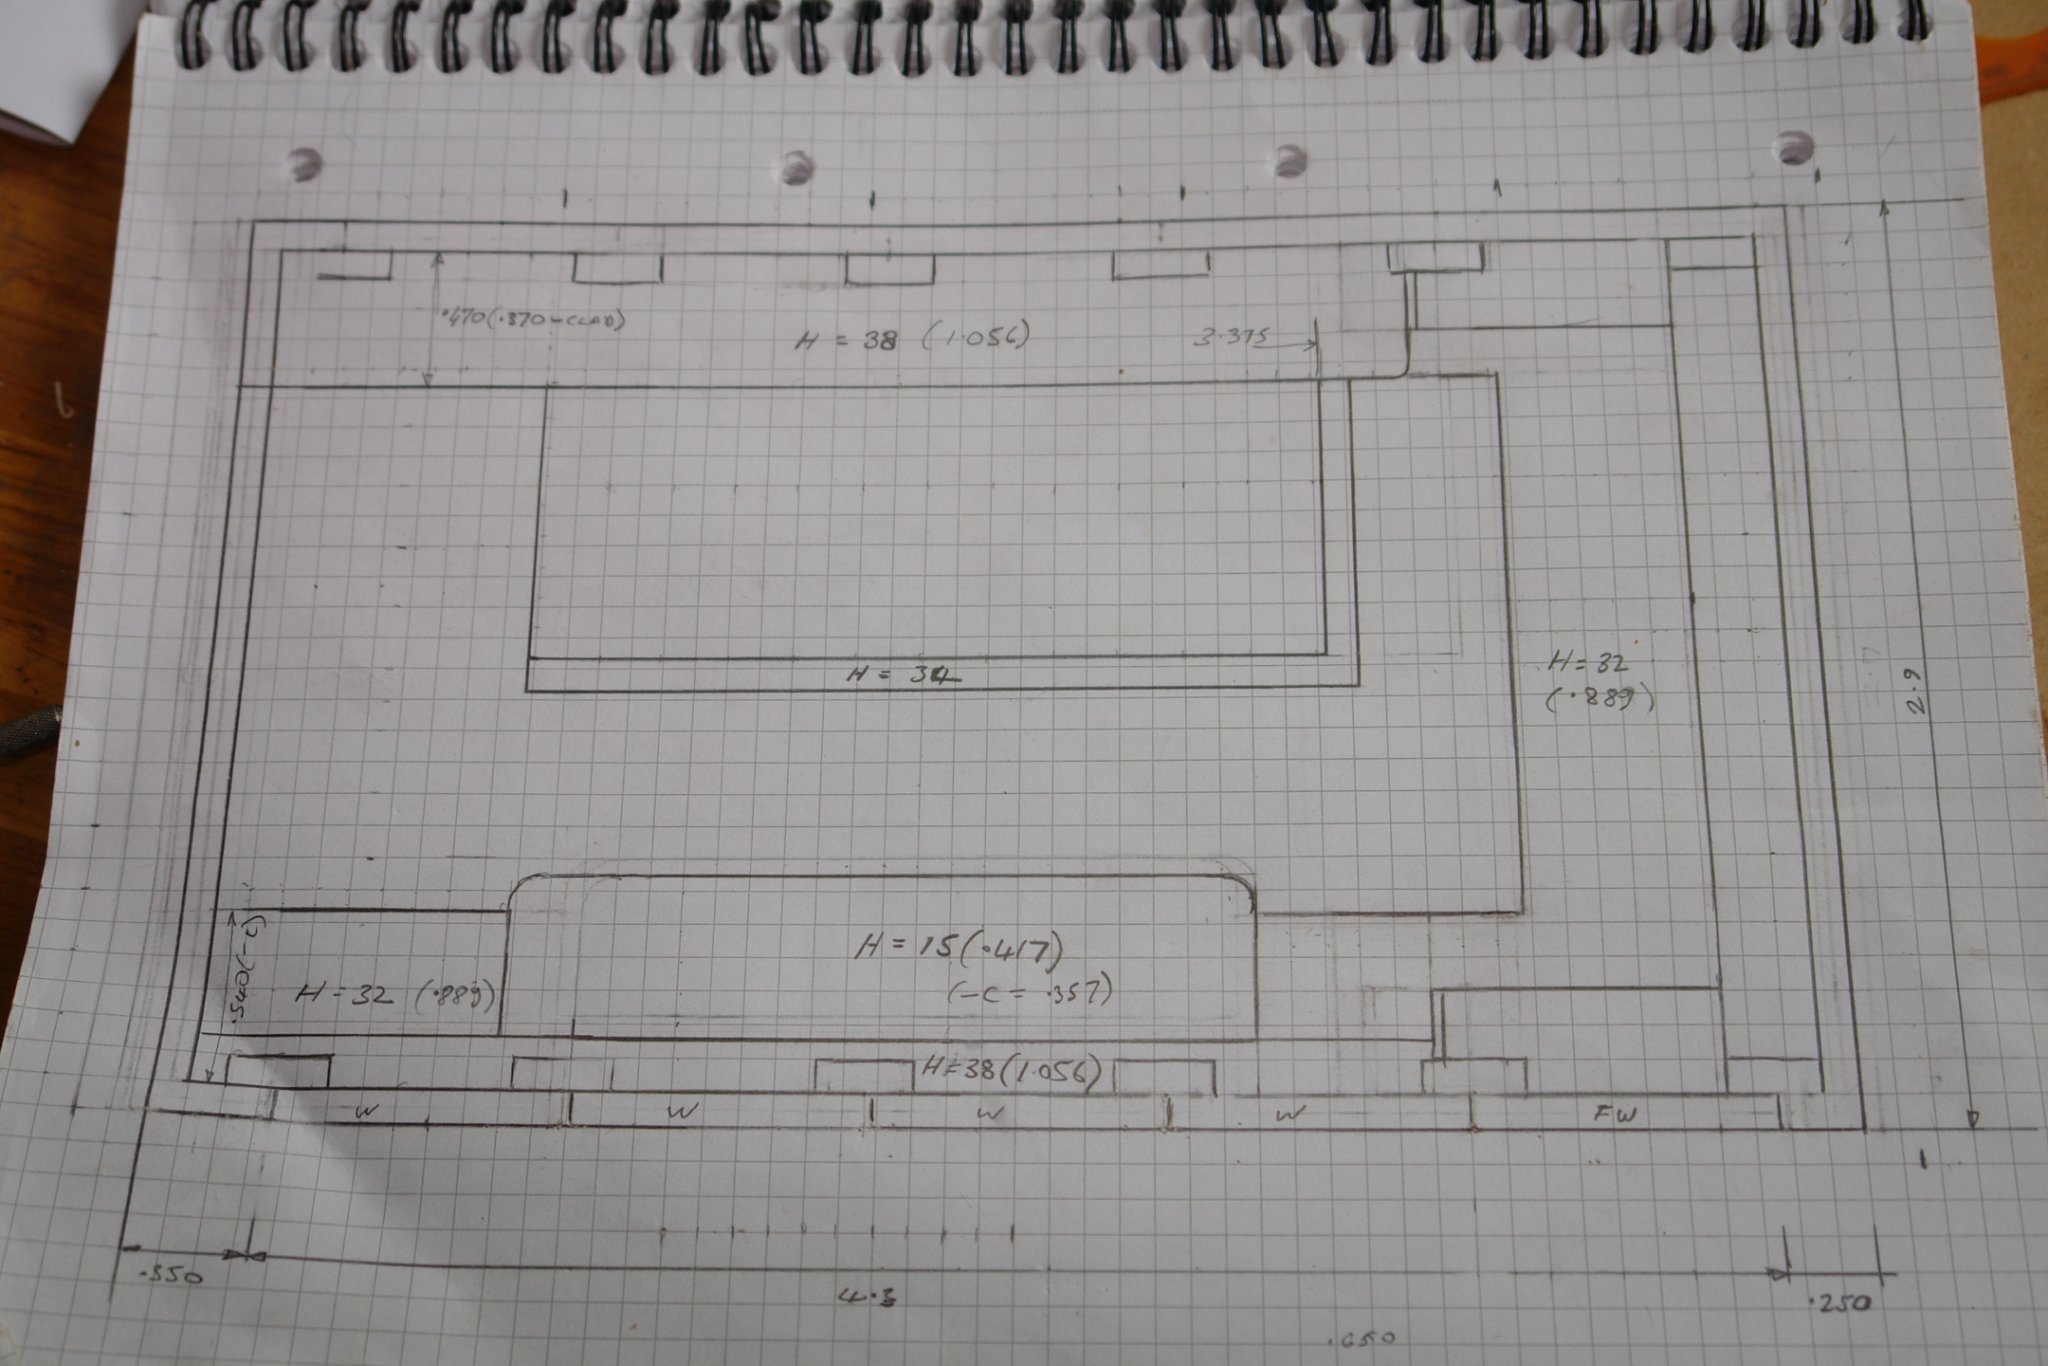
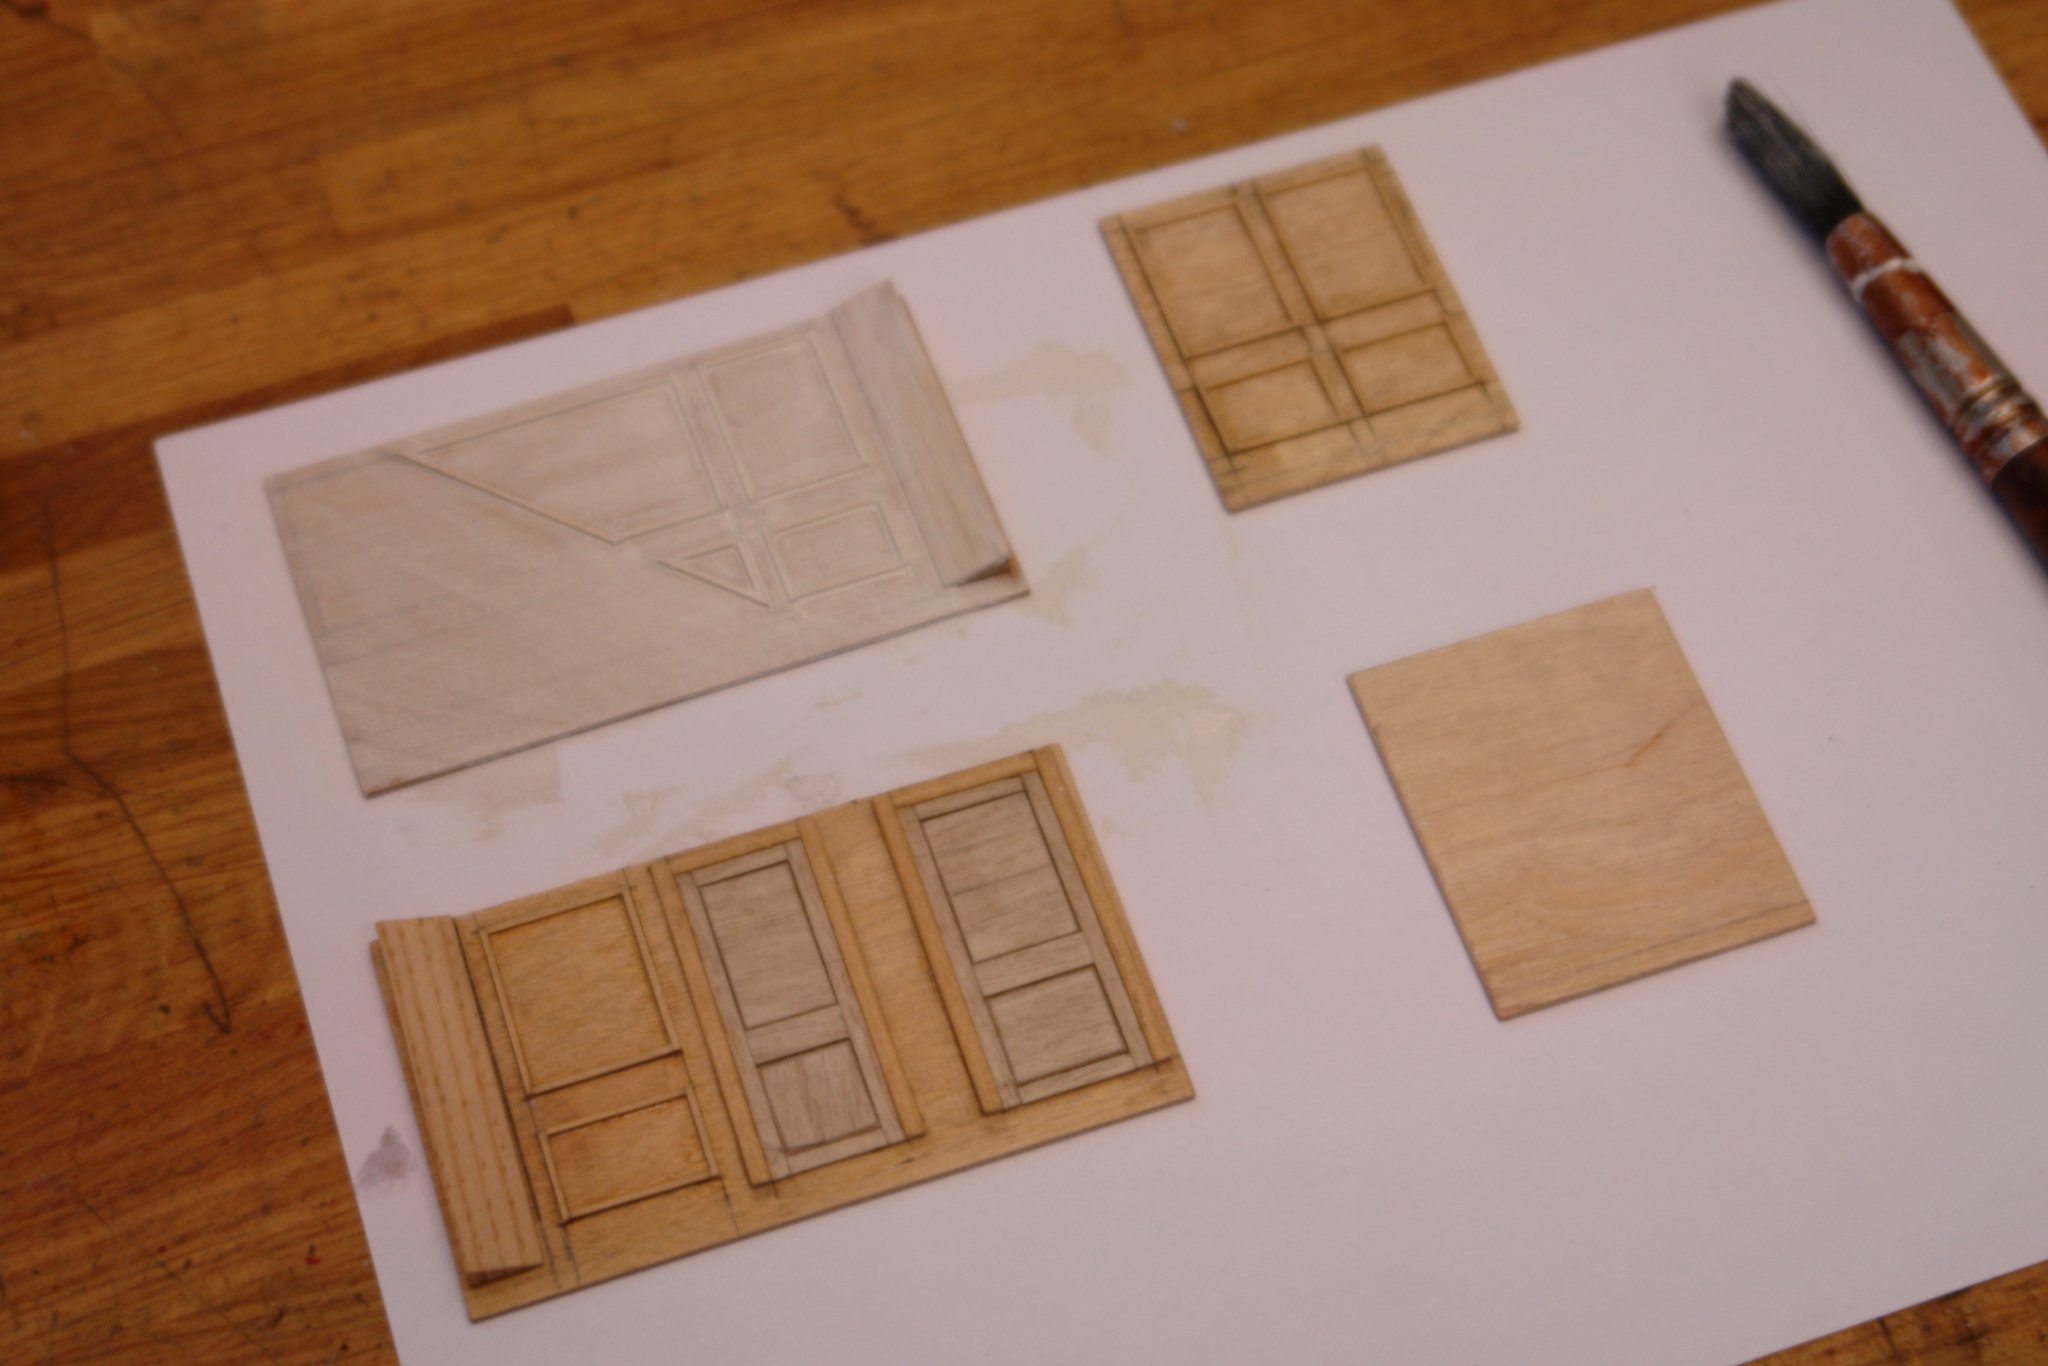
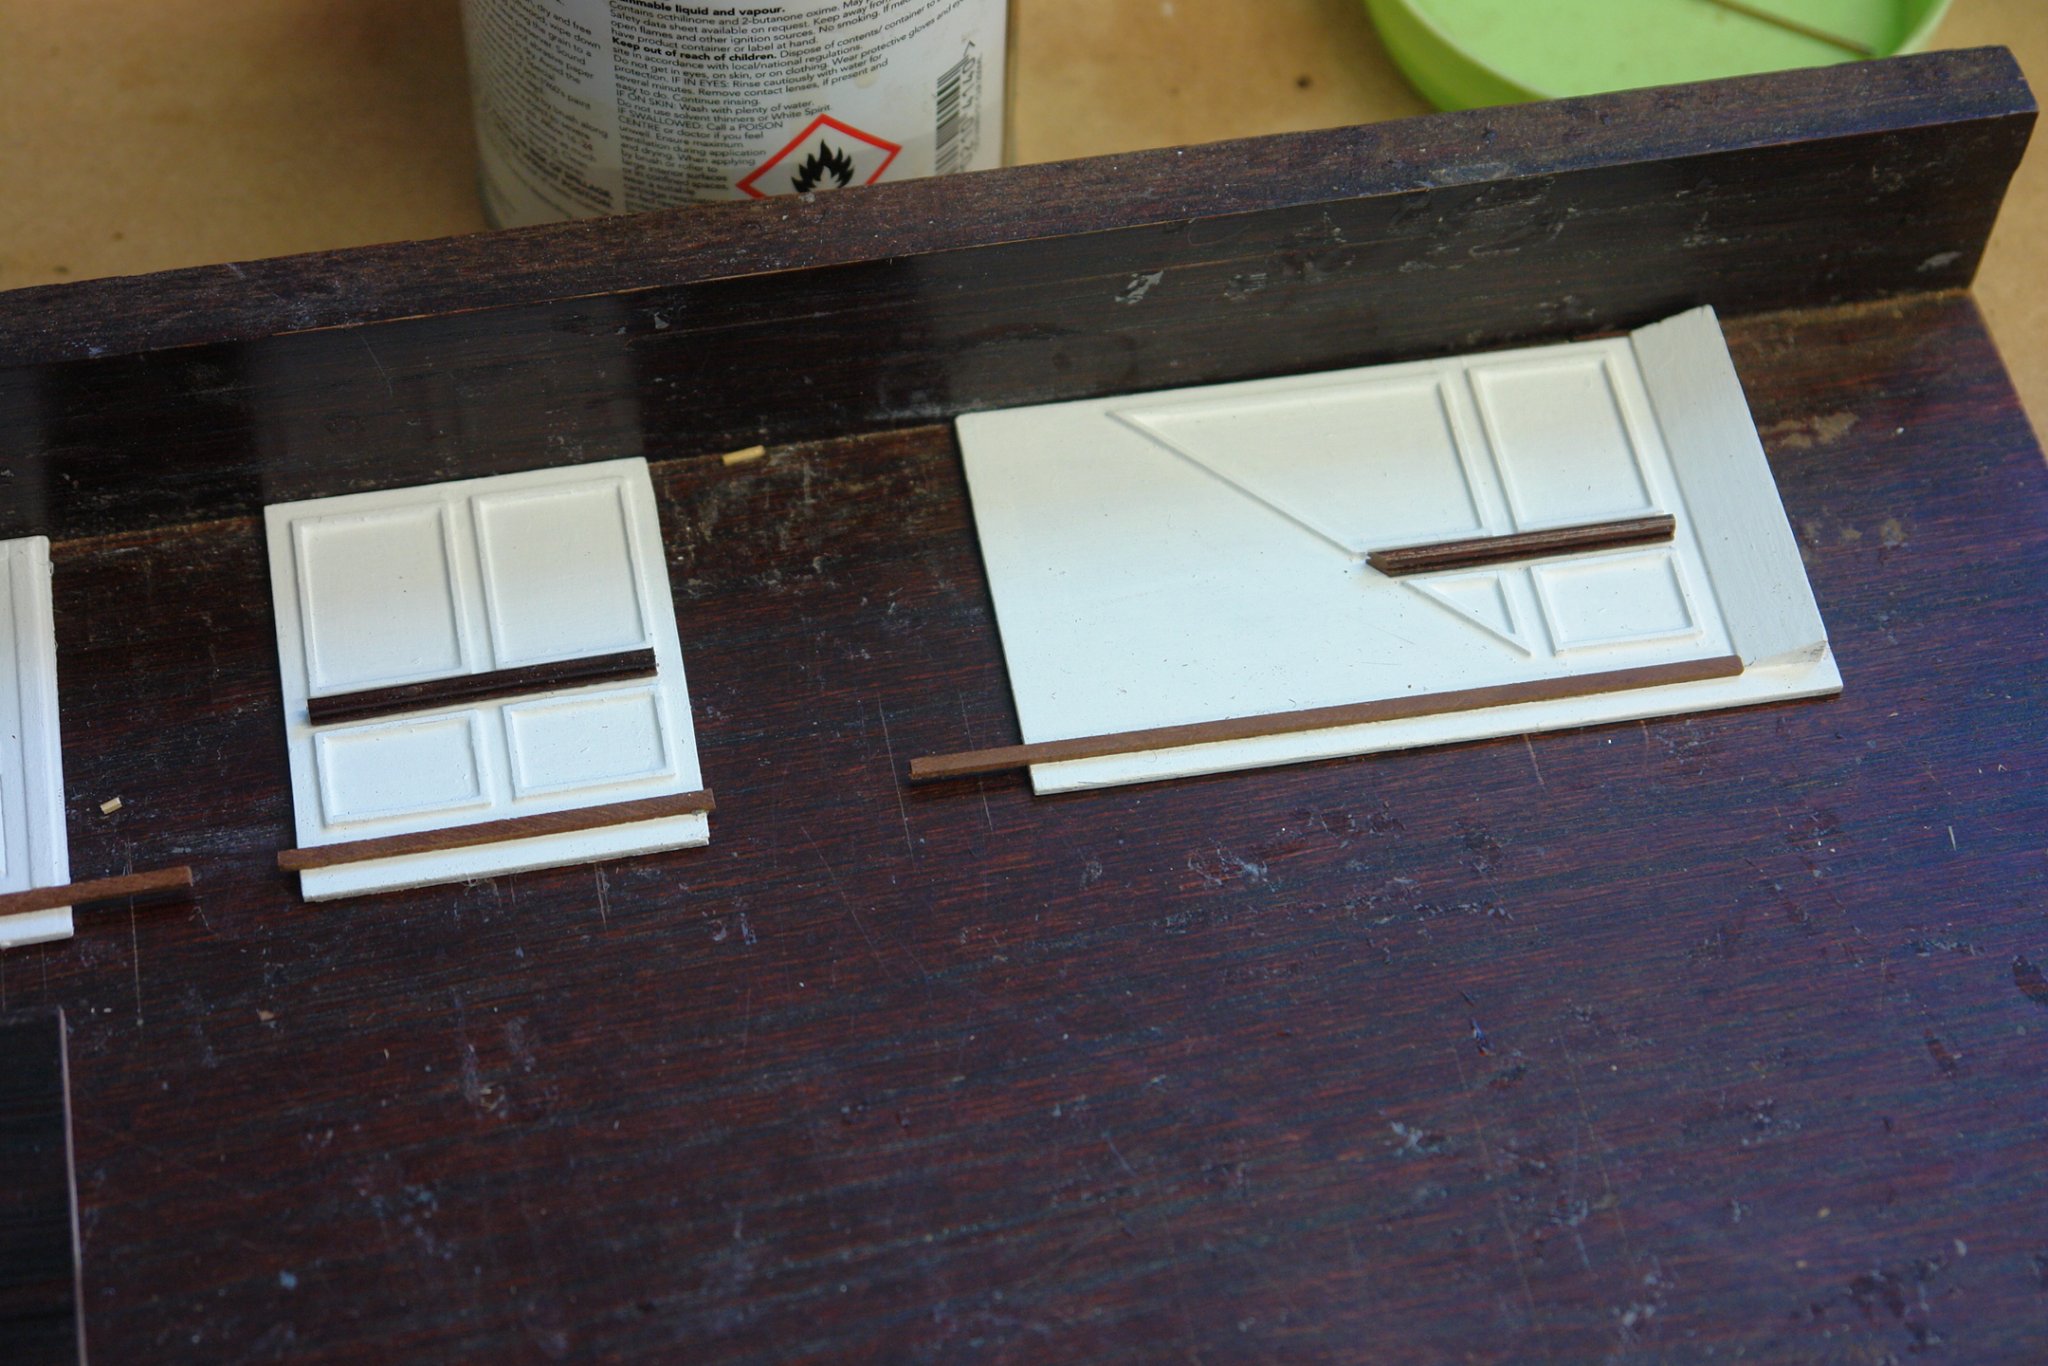
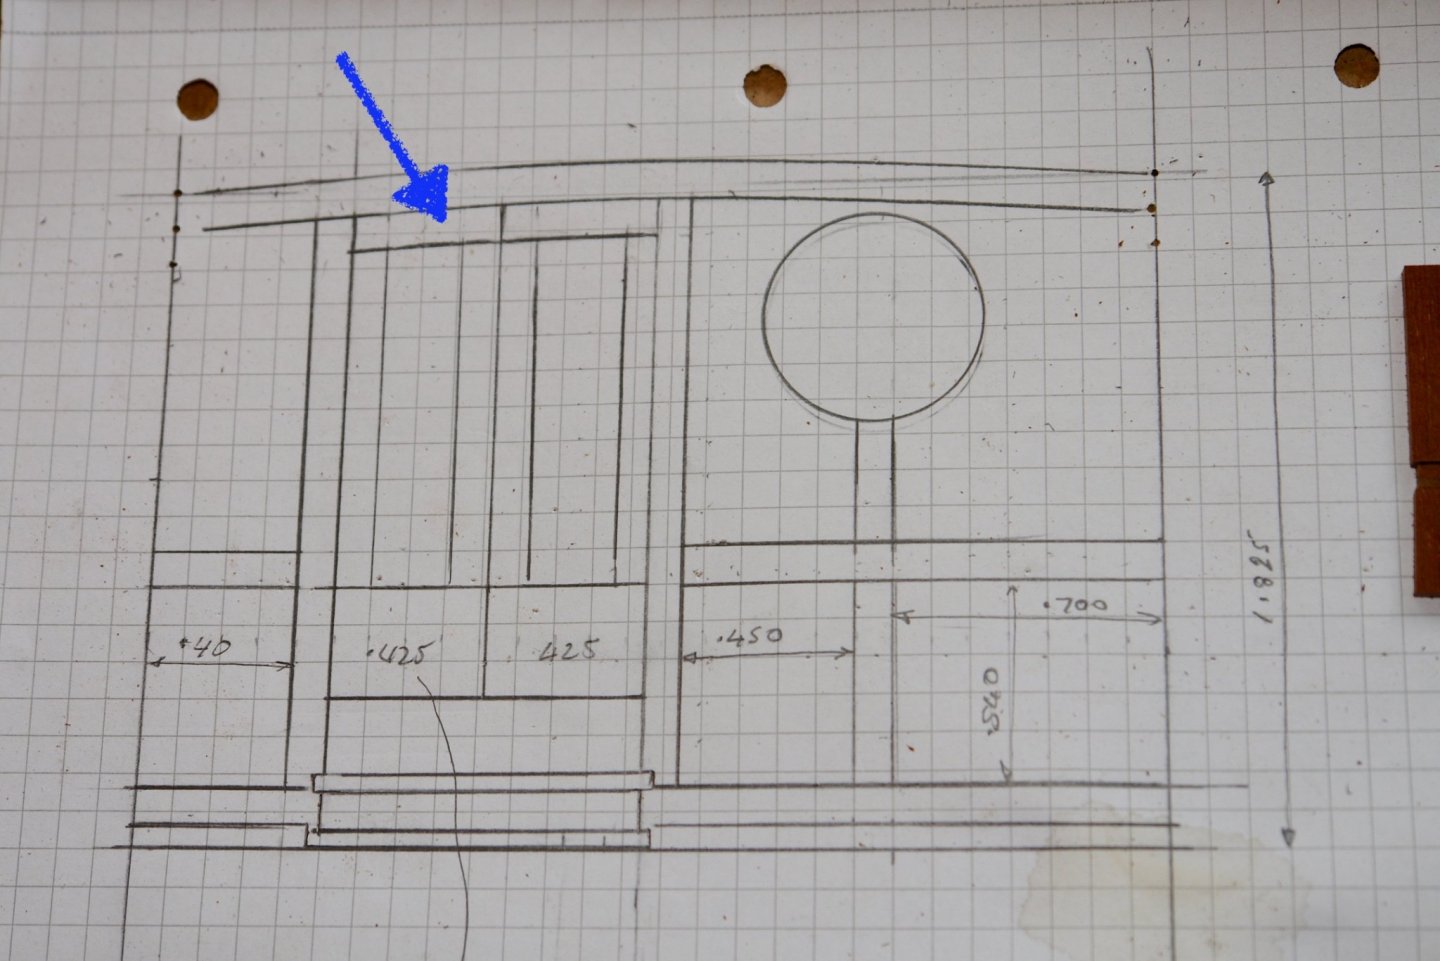
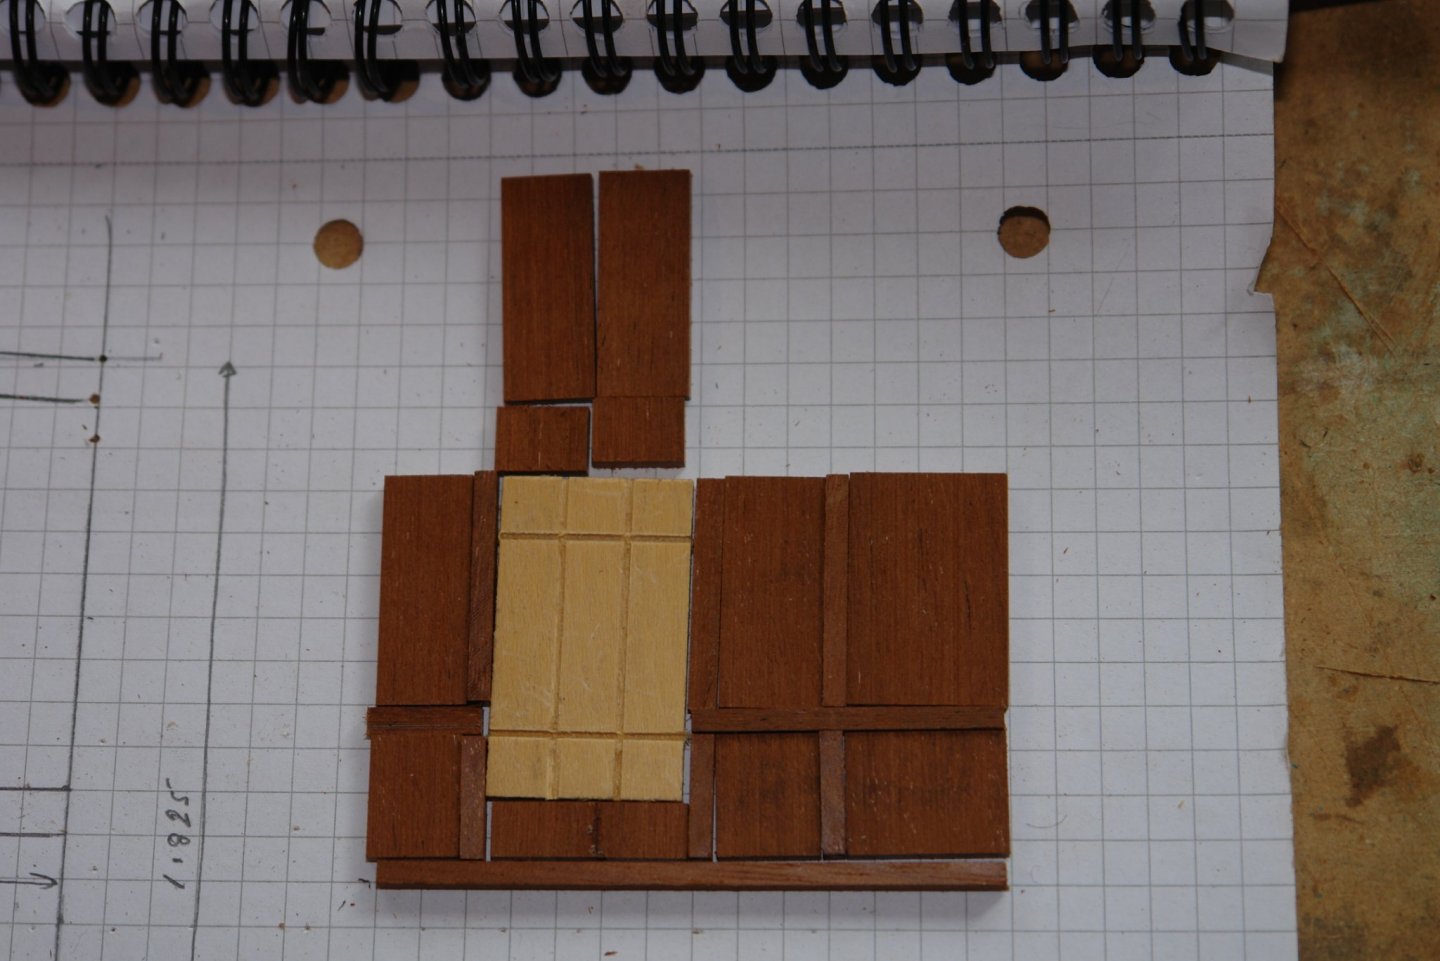
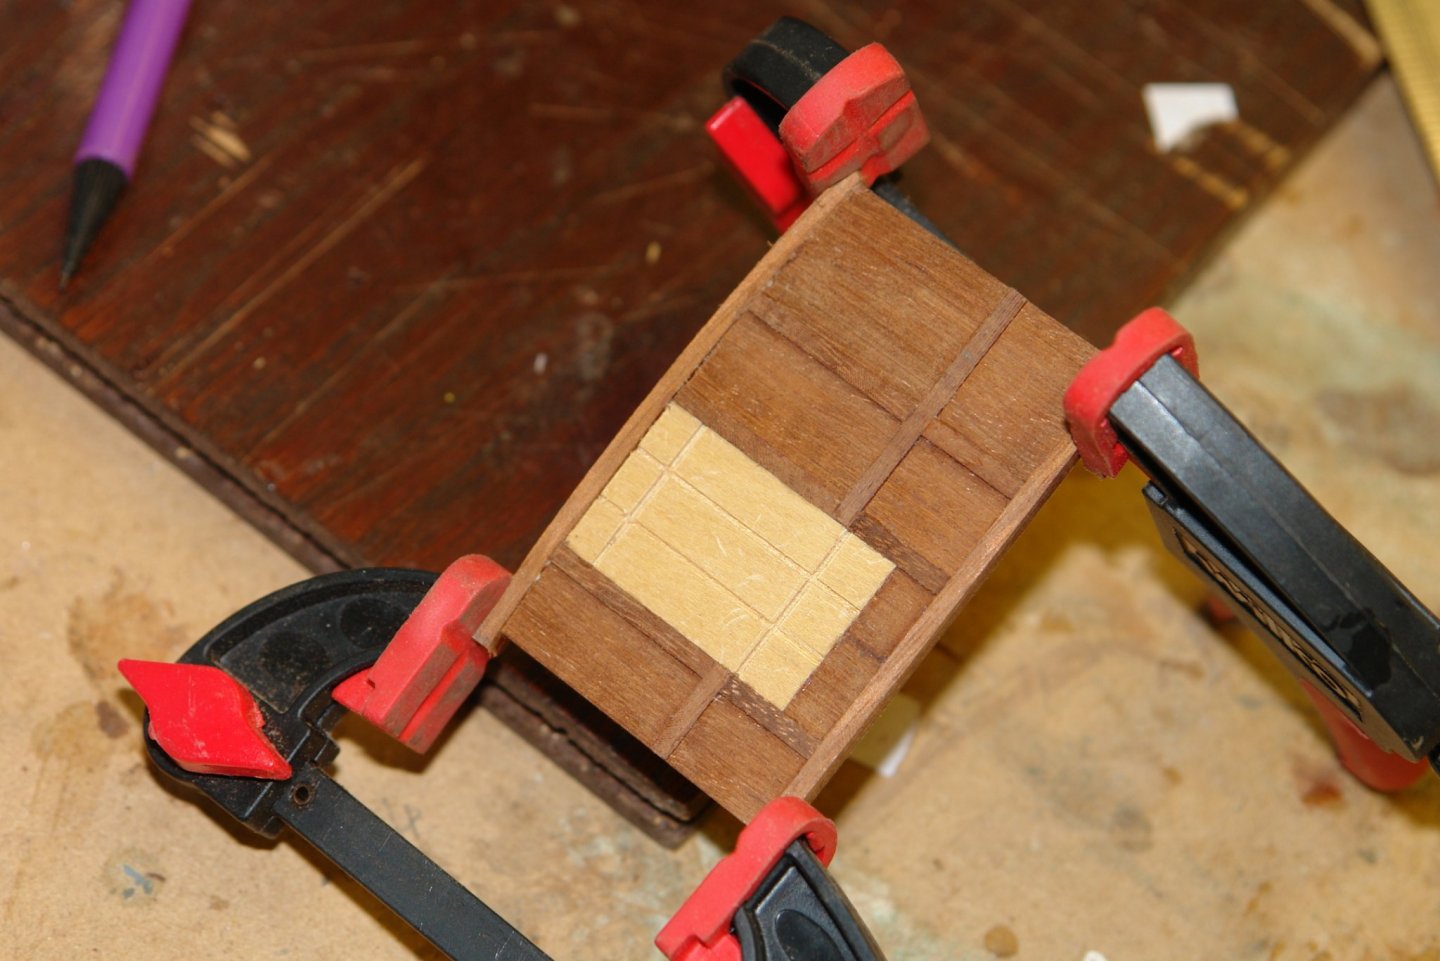
Sorry to have caused any concern. I sat down at the start of August and wrote down all the household improvement and maintenance tasks I had been putting off (some for years). I was a bit shocked by the length of the list and decided that I needed to get a grip. My wife refers to the ship workshop as the black hole, which is her way of saying I get immersed to the exclusion of all else. I decided the only way to make house progress was to take away the temptation. This list is now about half as long as it was so I am going to allow myself one day a week back in the workshop and see how it goes. Here is a bit of an update on progress. I made the front of the main deckhouse - from a lot of small panels and planks. In the next photo not is assembled but not glued. In the sketch one square represent 1/10" x 1/10". The panels / planks were glued with the exception of the top plank and the top profile was sanded to the profile of the curved roof. The top plank was then glued on while being pulled into shape with miniature clamps. I then cut out the circular porthole windows and turned the porthole frames from a piece of mahogany dowel I then drew up the aft face - this being a bit more complex due to the pair of doors (which will need some quite small hinges). More panels and planks were cut. Before being assembled. A sacrificial door inset was made to allow the curved top plank to be installed and bent to shape. Thats all for now folks - back to that bloody list. But I will try to get a bit of time to catch up with all of your builds.


-
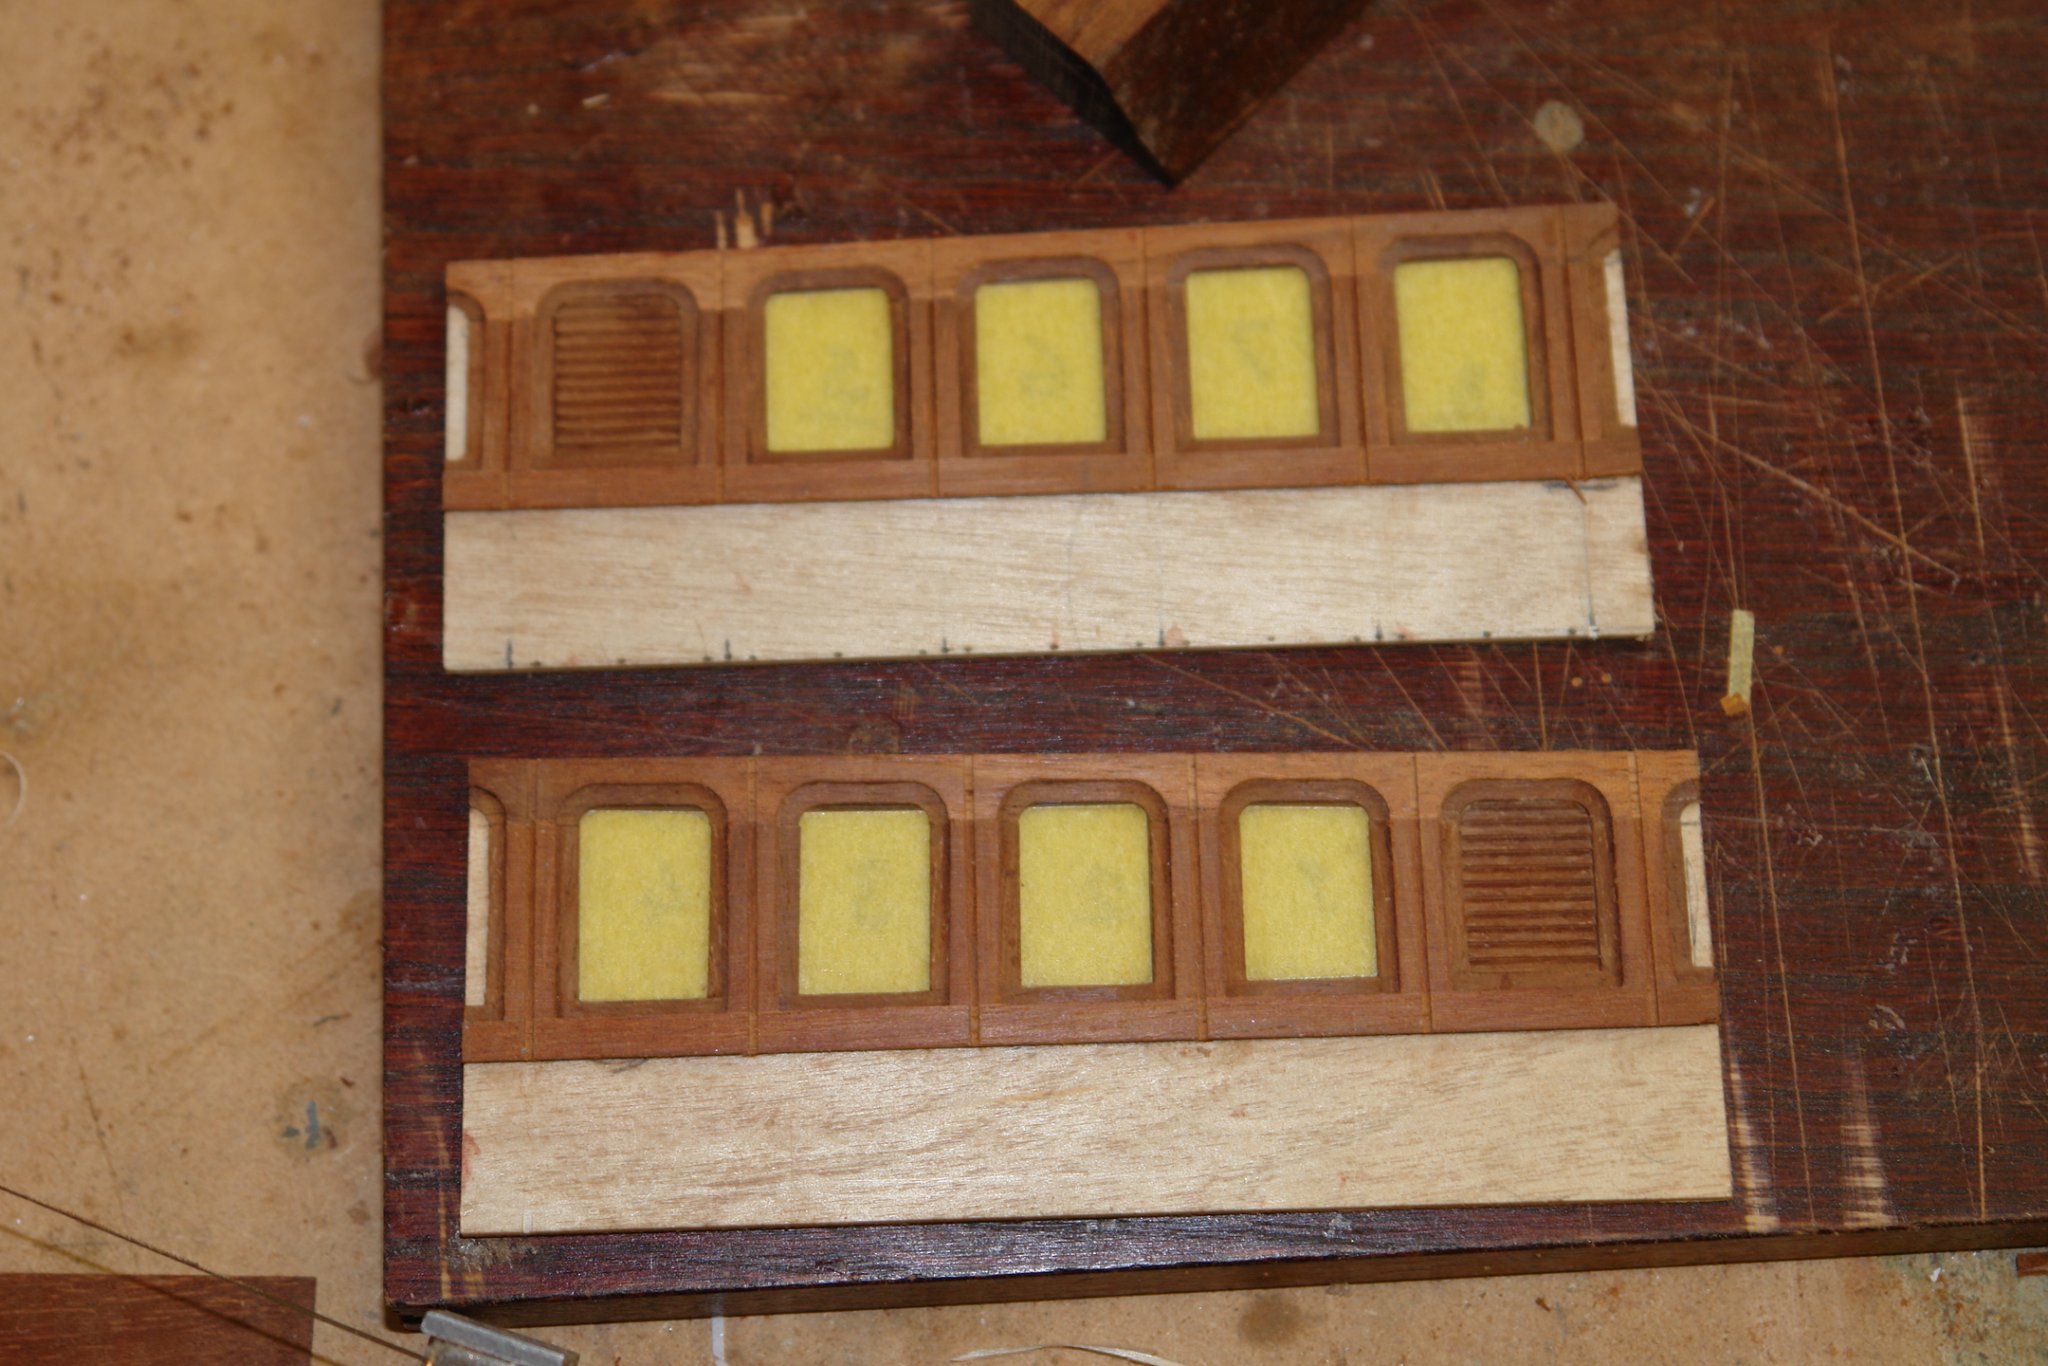
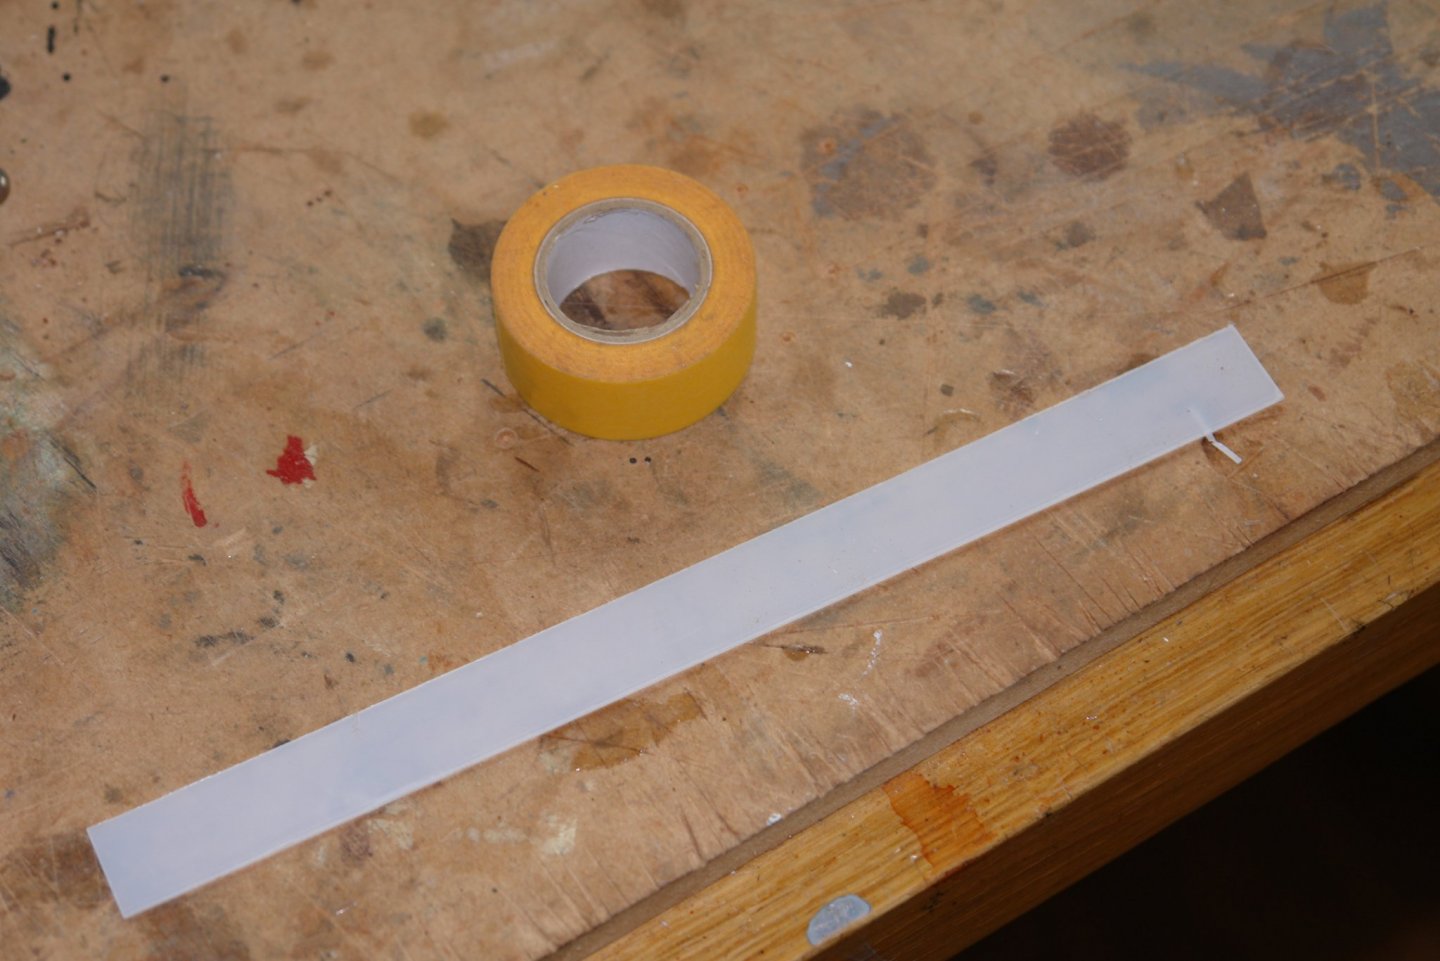
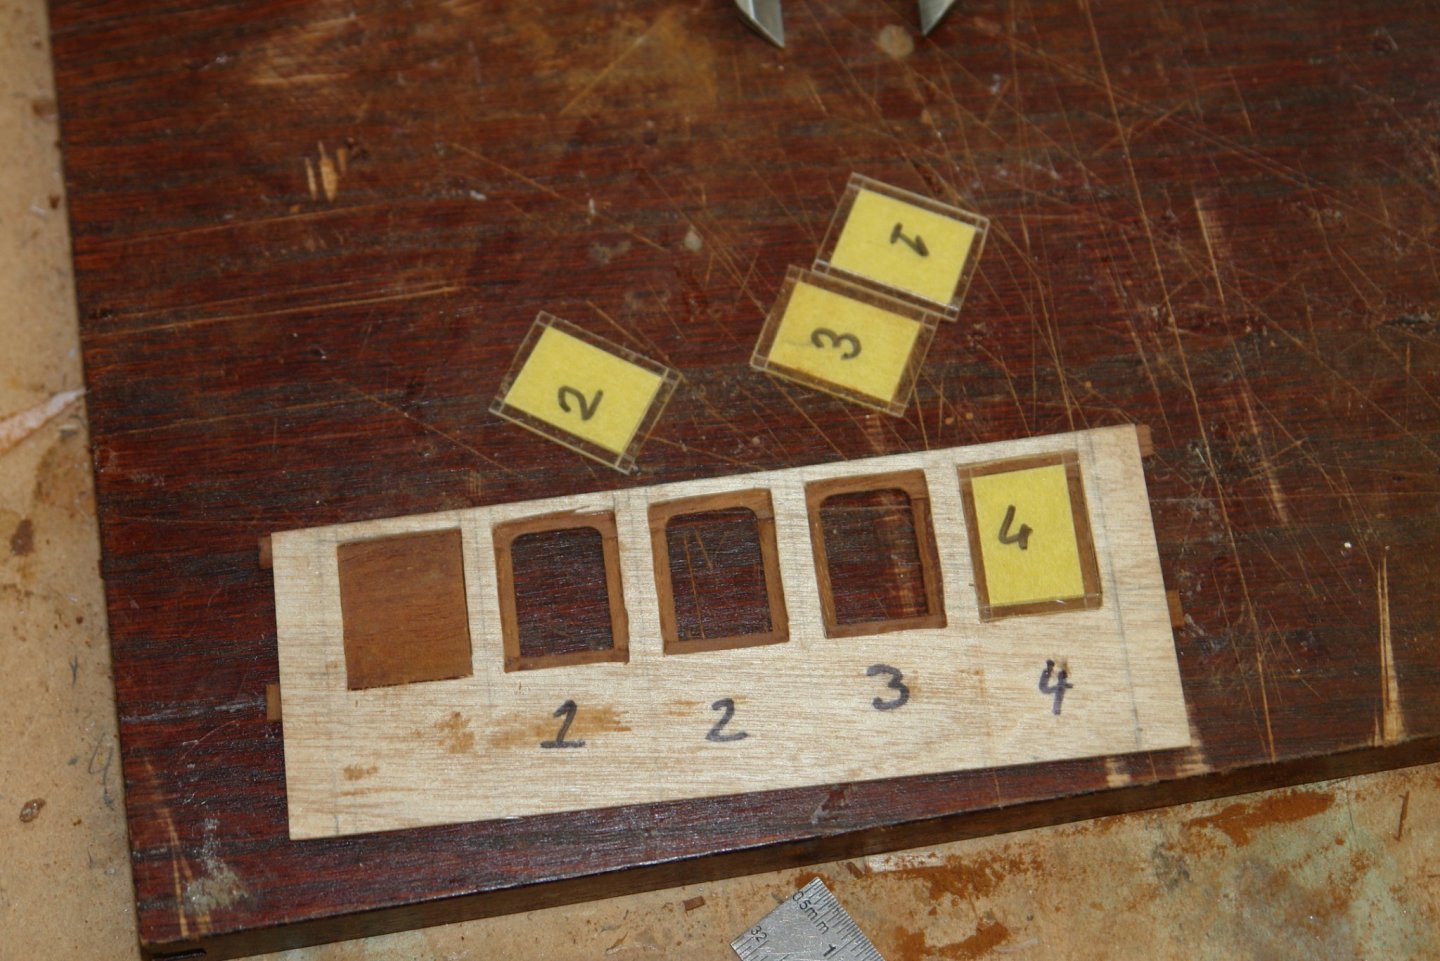
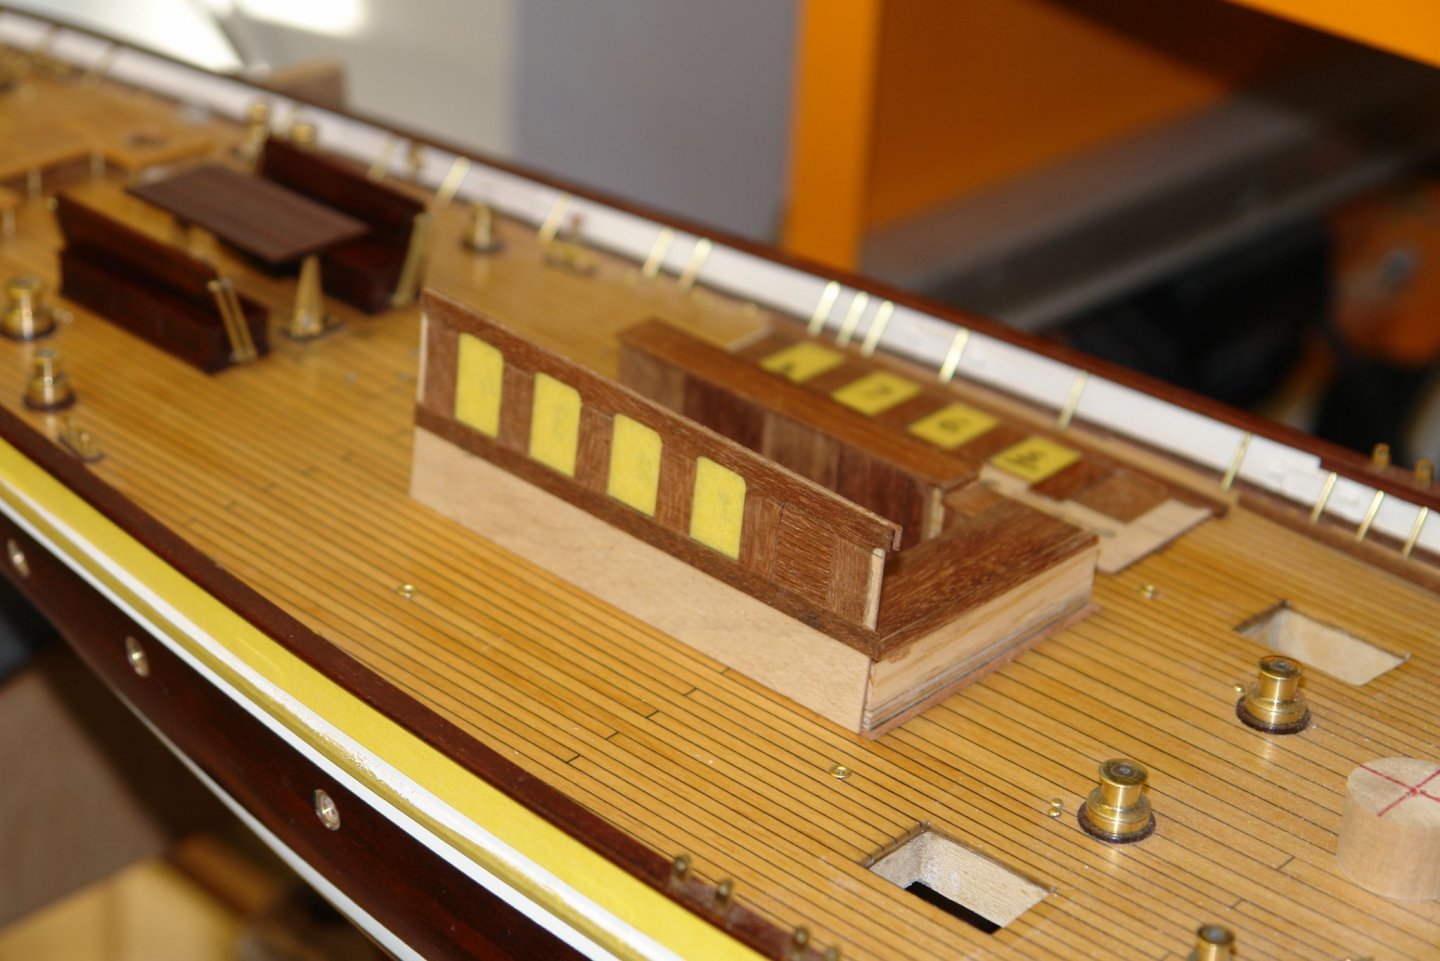
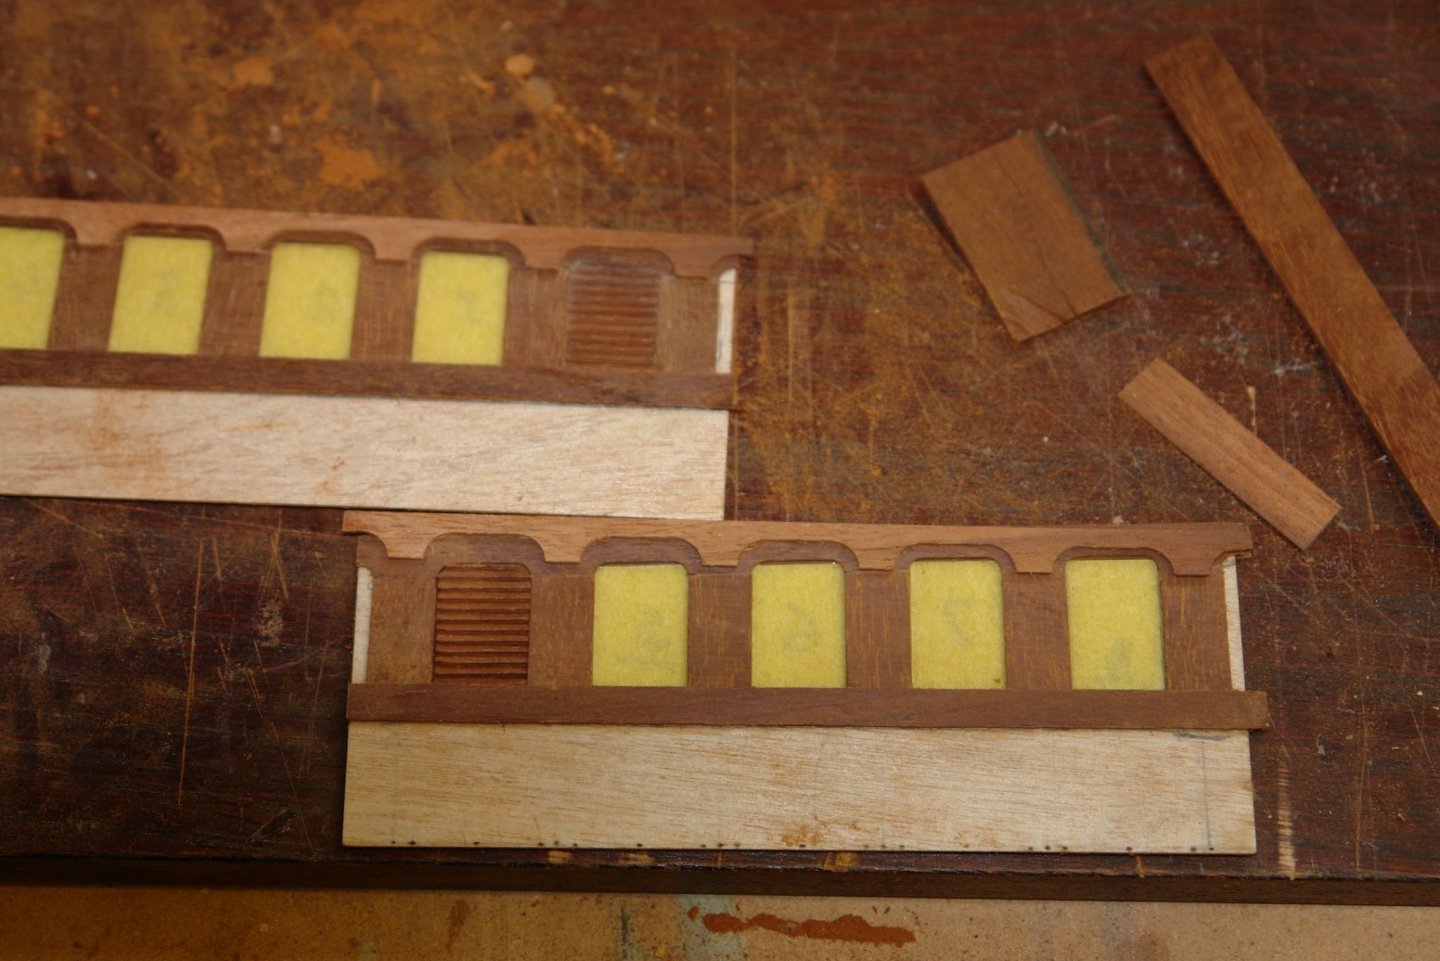
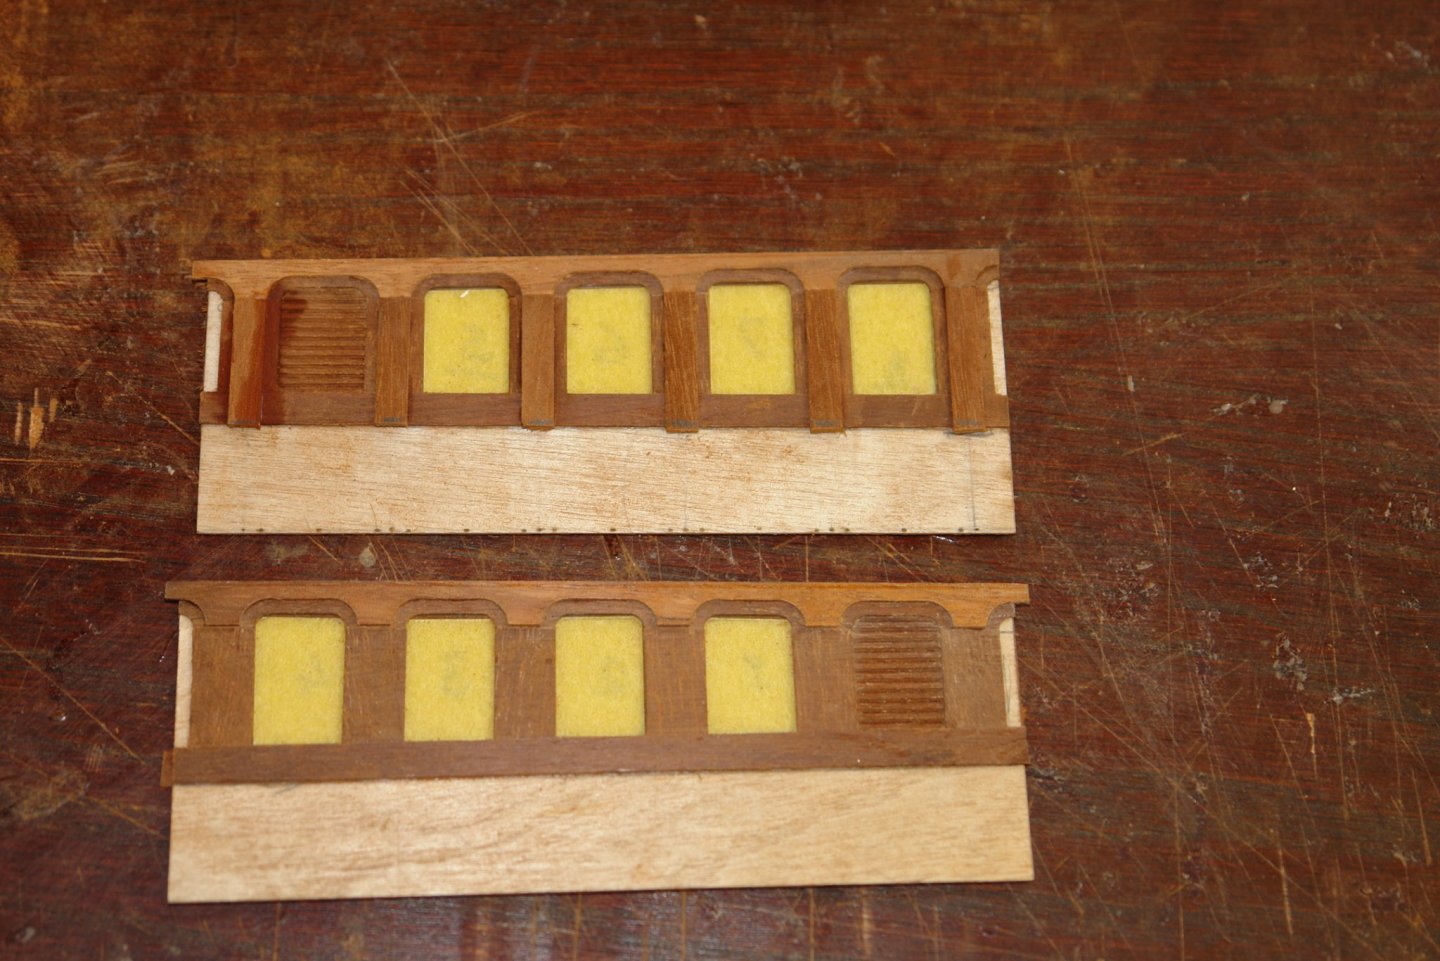
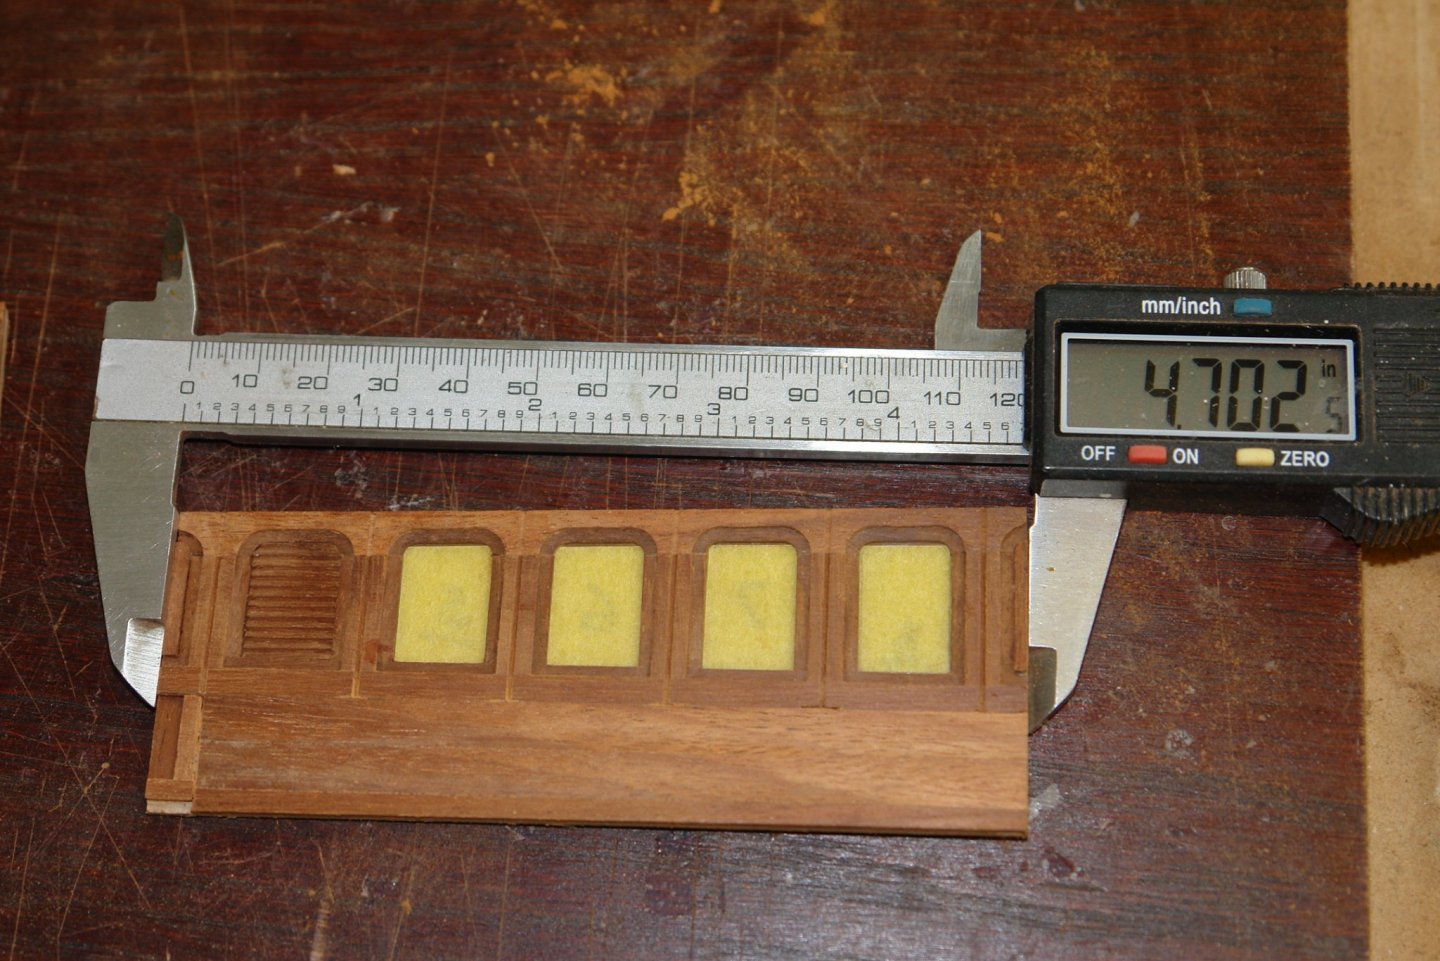
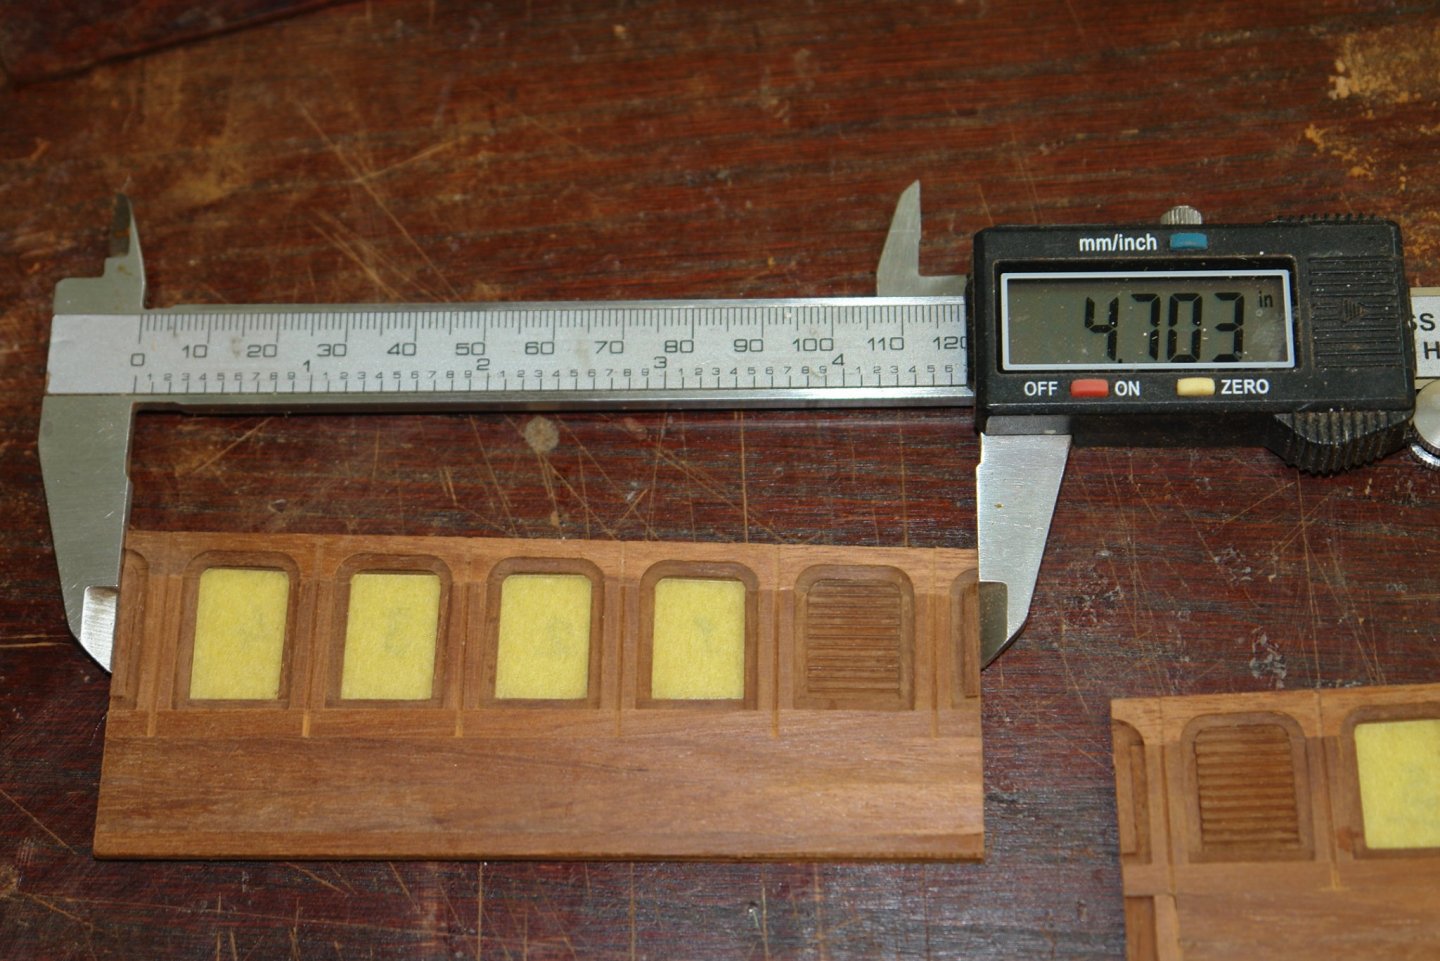
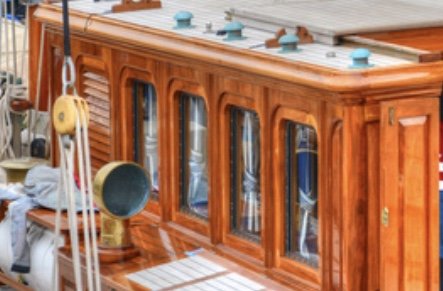
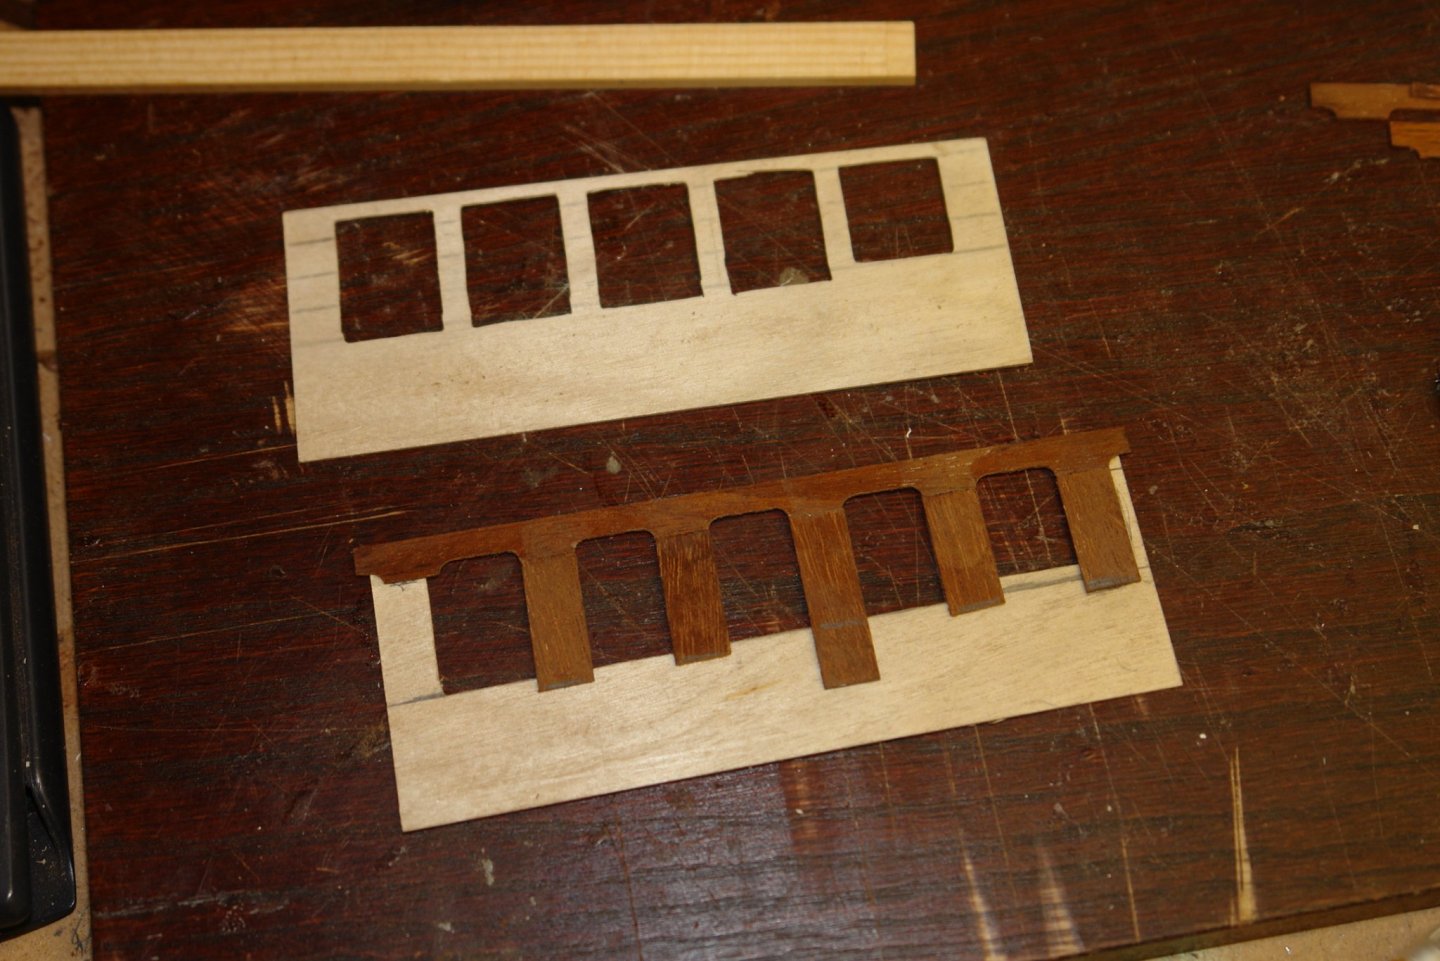
Thank you Pat, Druxey and Richard. I am catching up my log with progress (such as it is). This is how far I got in the last post. I cut the perspex windows from a .025" thick sheet. Because of the roof slope all the windows are of a slightly different size. I masked the windows (in preparation for later poly application). The following picture shows the recess into which the windows fit. The windows were glued in with a dash of CA pending retention by inner mahogany layer (layer 4). The next step was to mill the sculpturing of layer 1 above the windows. The cut outs were made with a .160" diameter end mill. .030 thick planks were cut from this (roughly placed in the following photo). They were then glued in place and the vertical strips cut and applied. Followed by the bottom strip. Vertical cuts were then made using the Byrnes saw to represent further detail. I added the panel detail at either end of the run of windows. Before completing the panelling below the windows. This doesn't need detailing as it sits behind the cabin wings (excepting the fore end on the port side which is not hidden. The sides were fairly accurate relative to the 4.7" target.


-
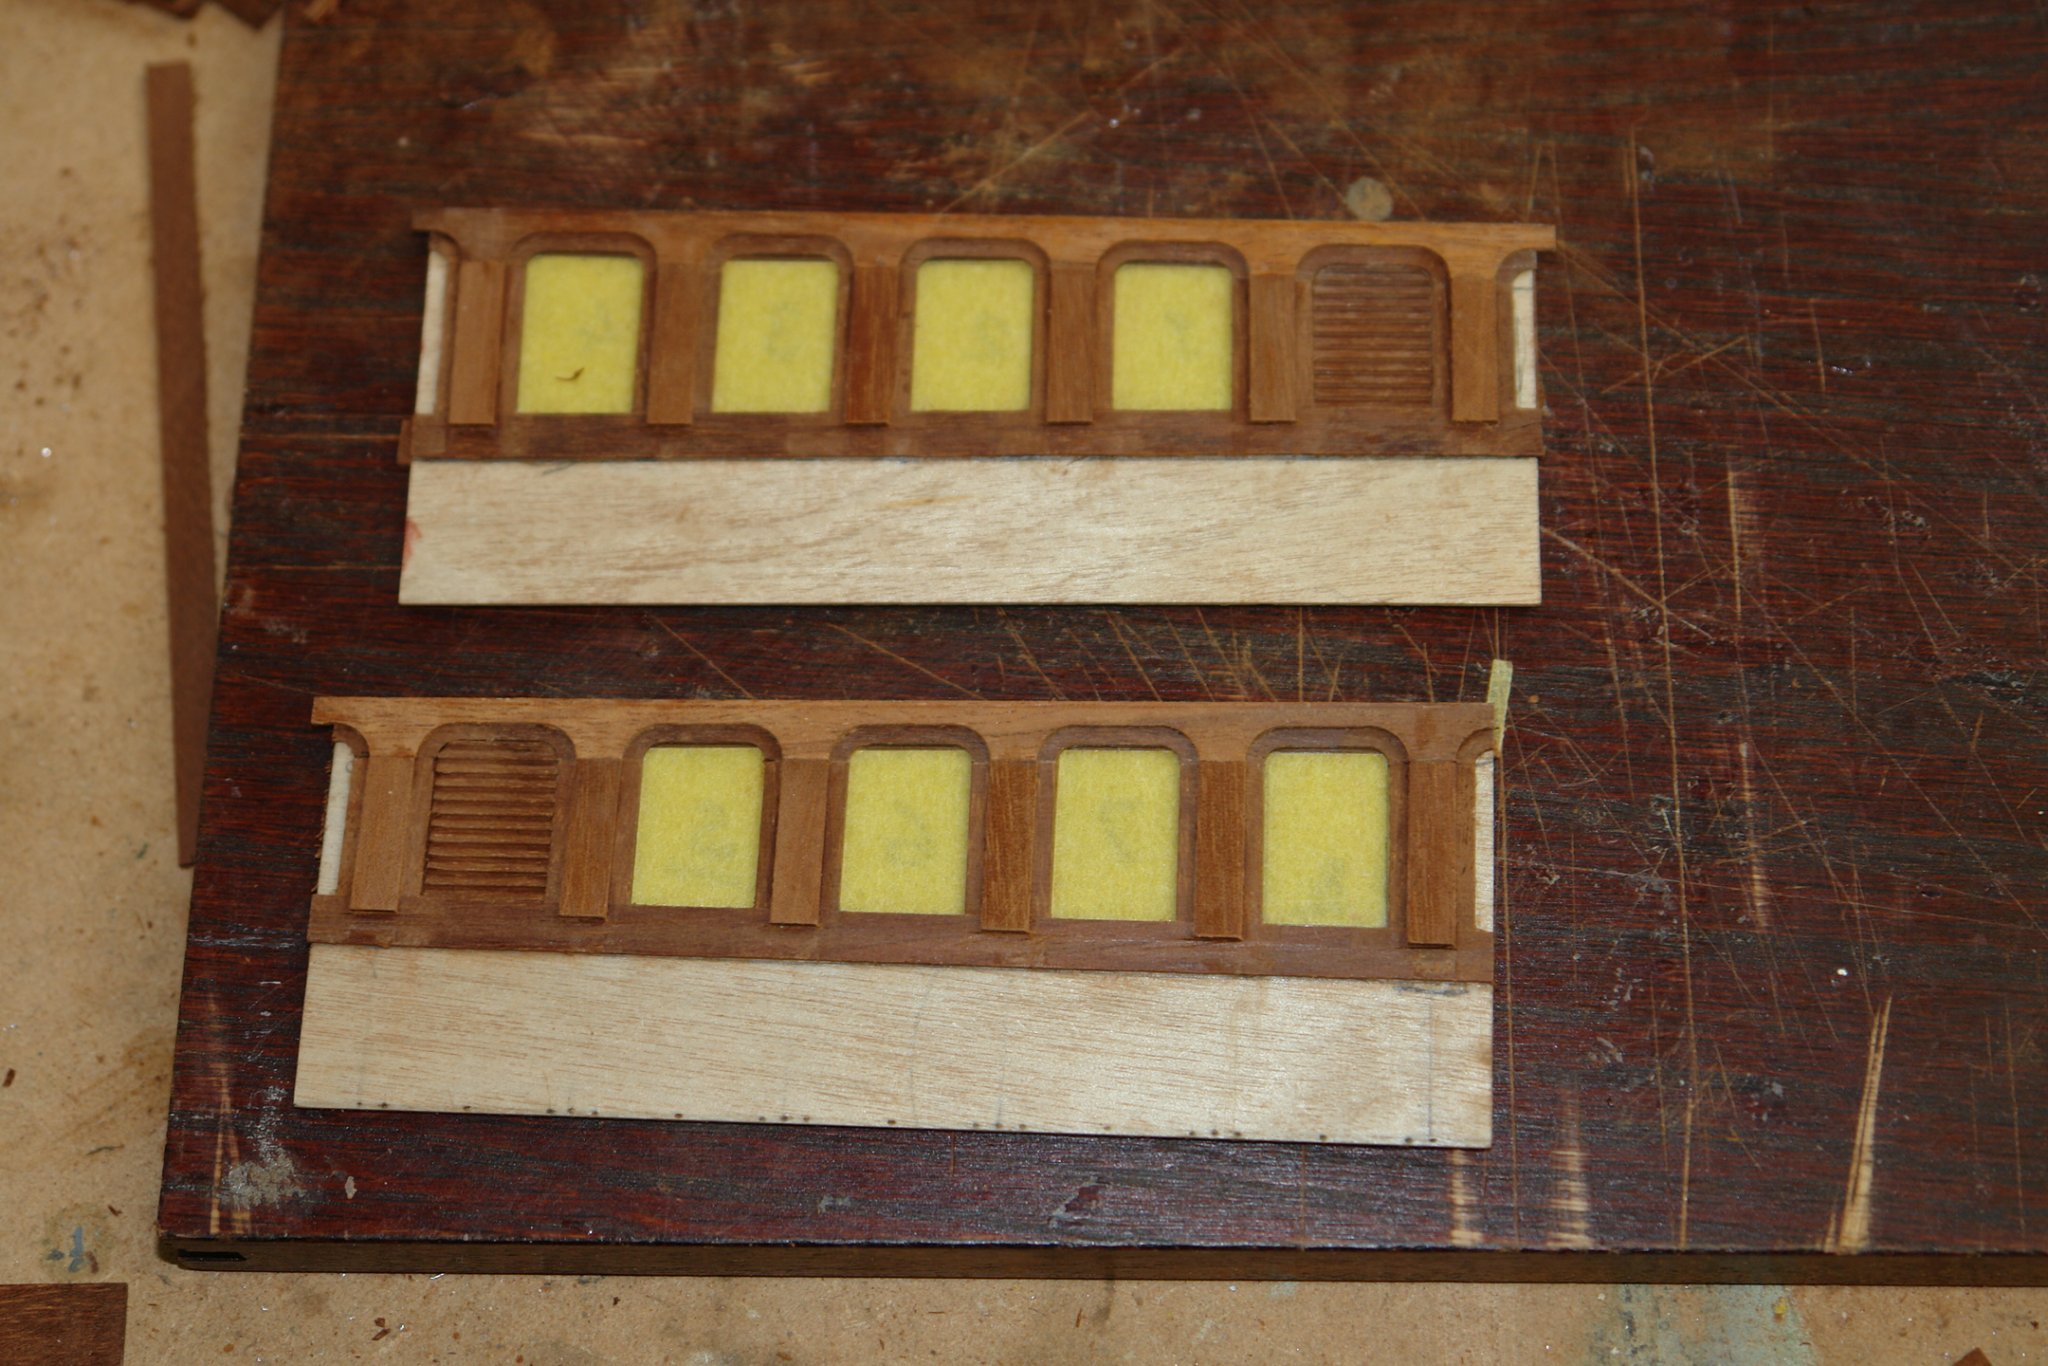
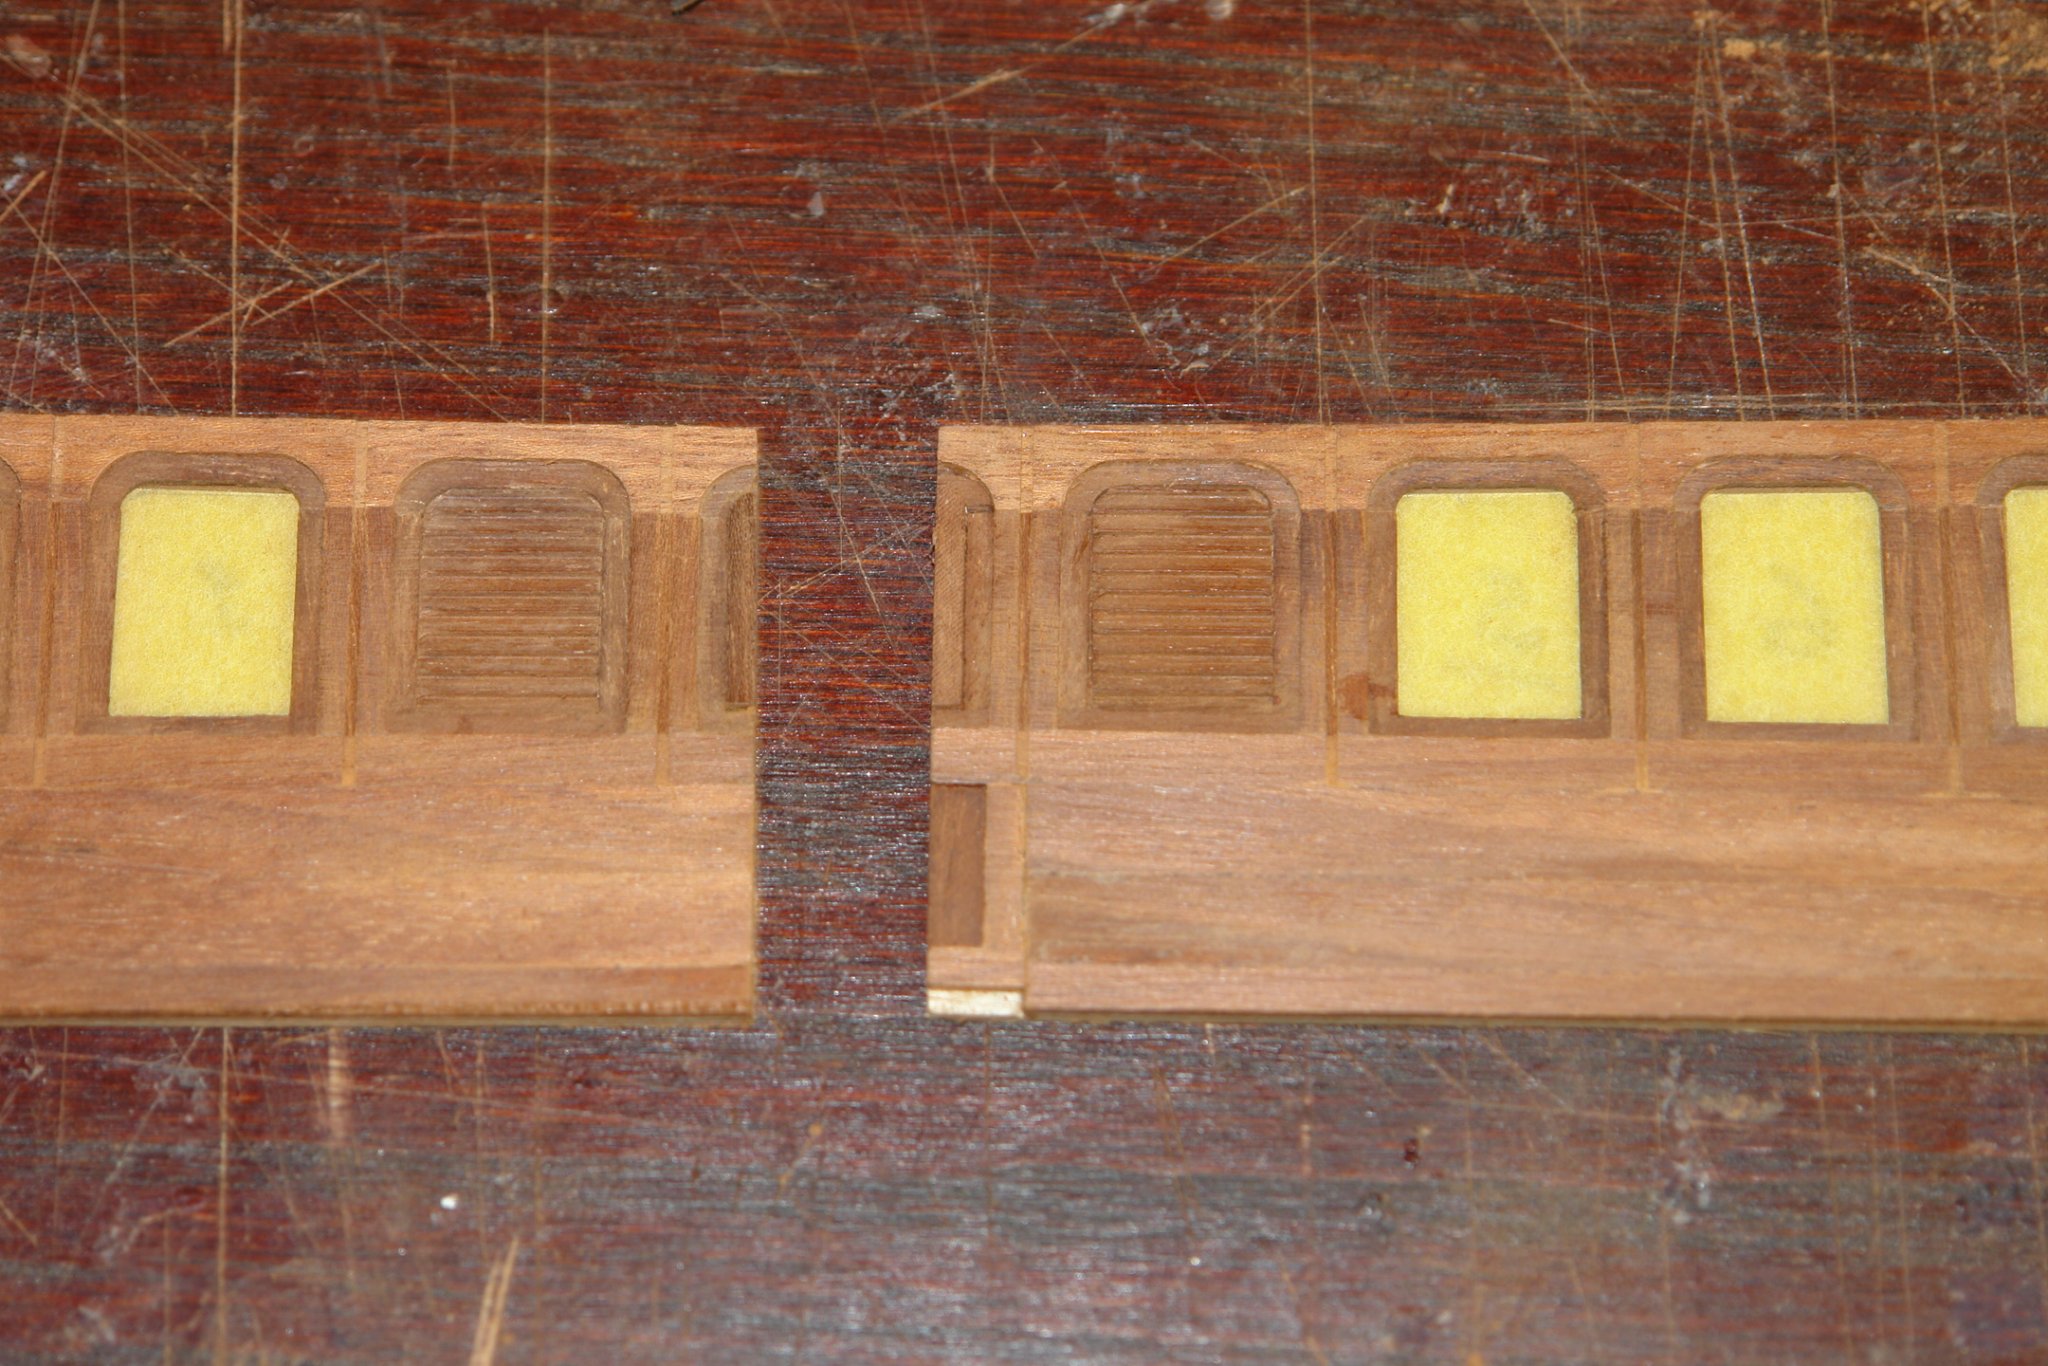
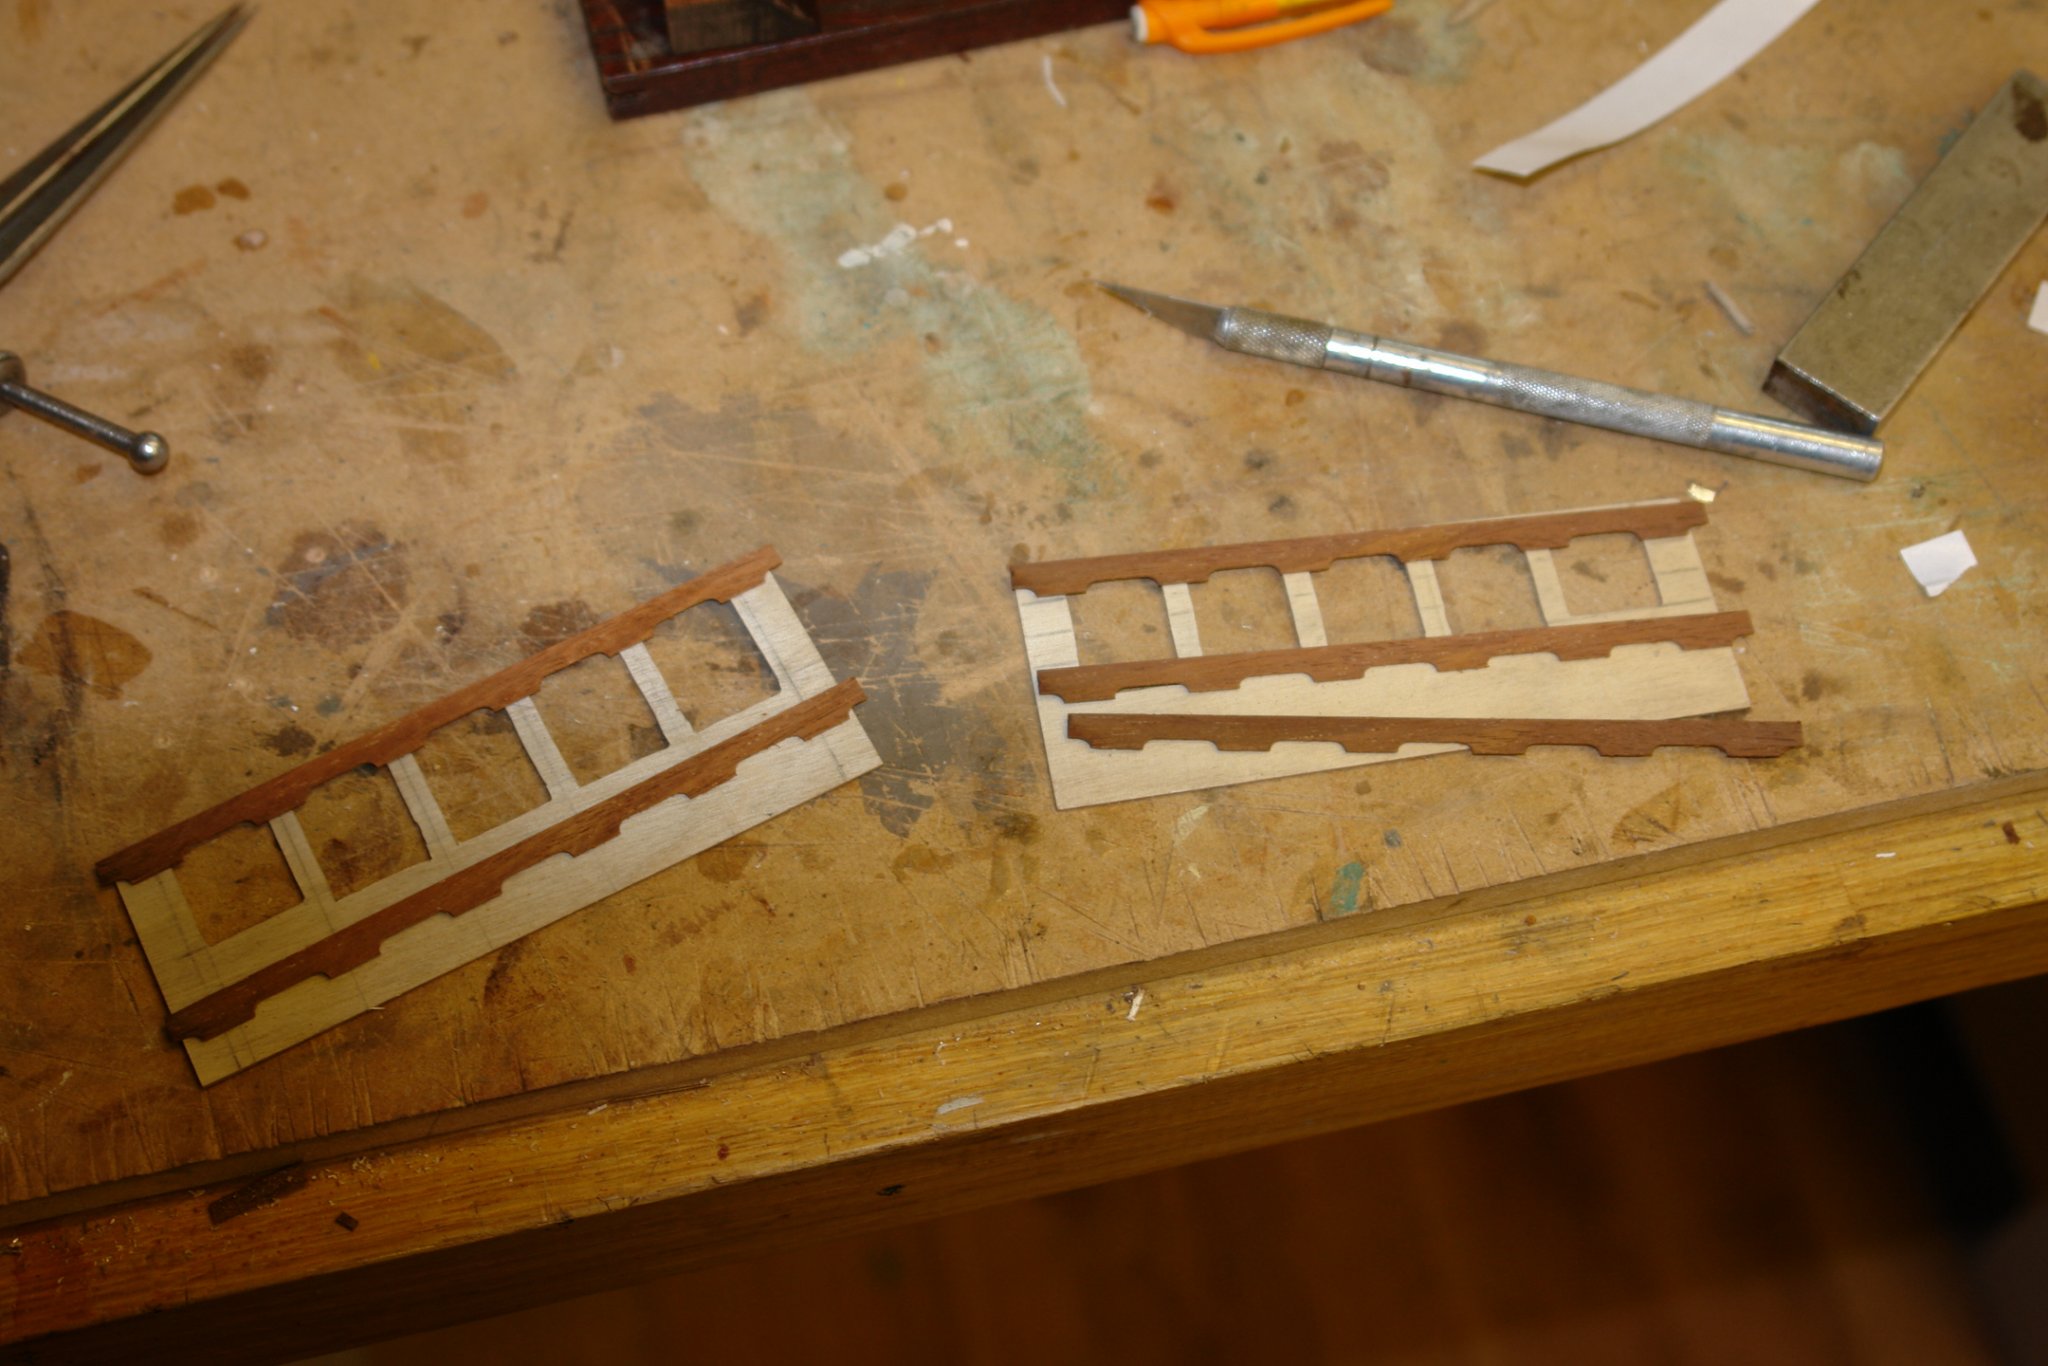
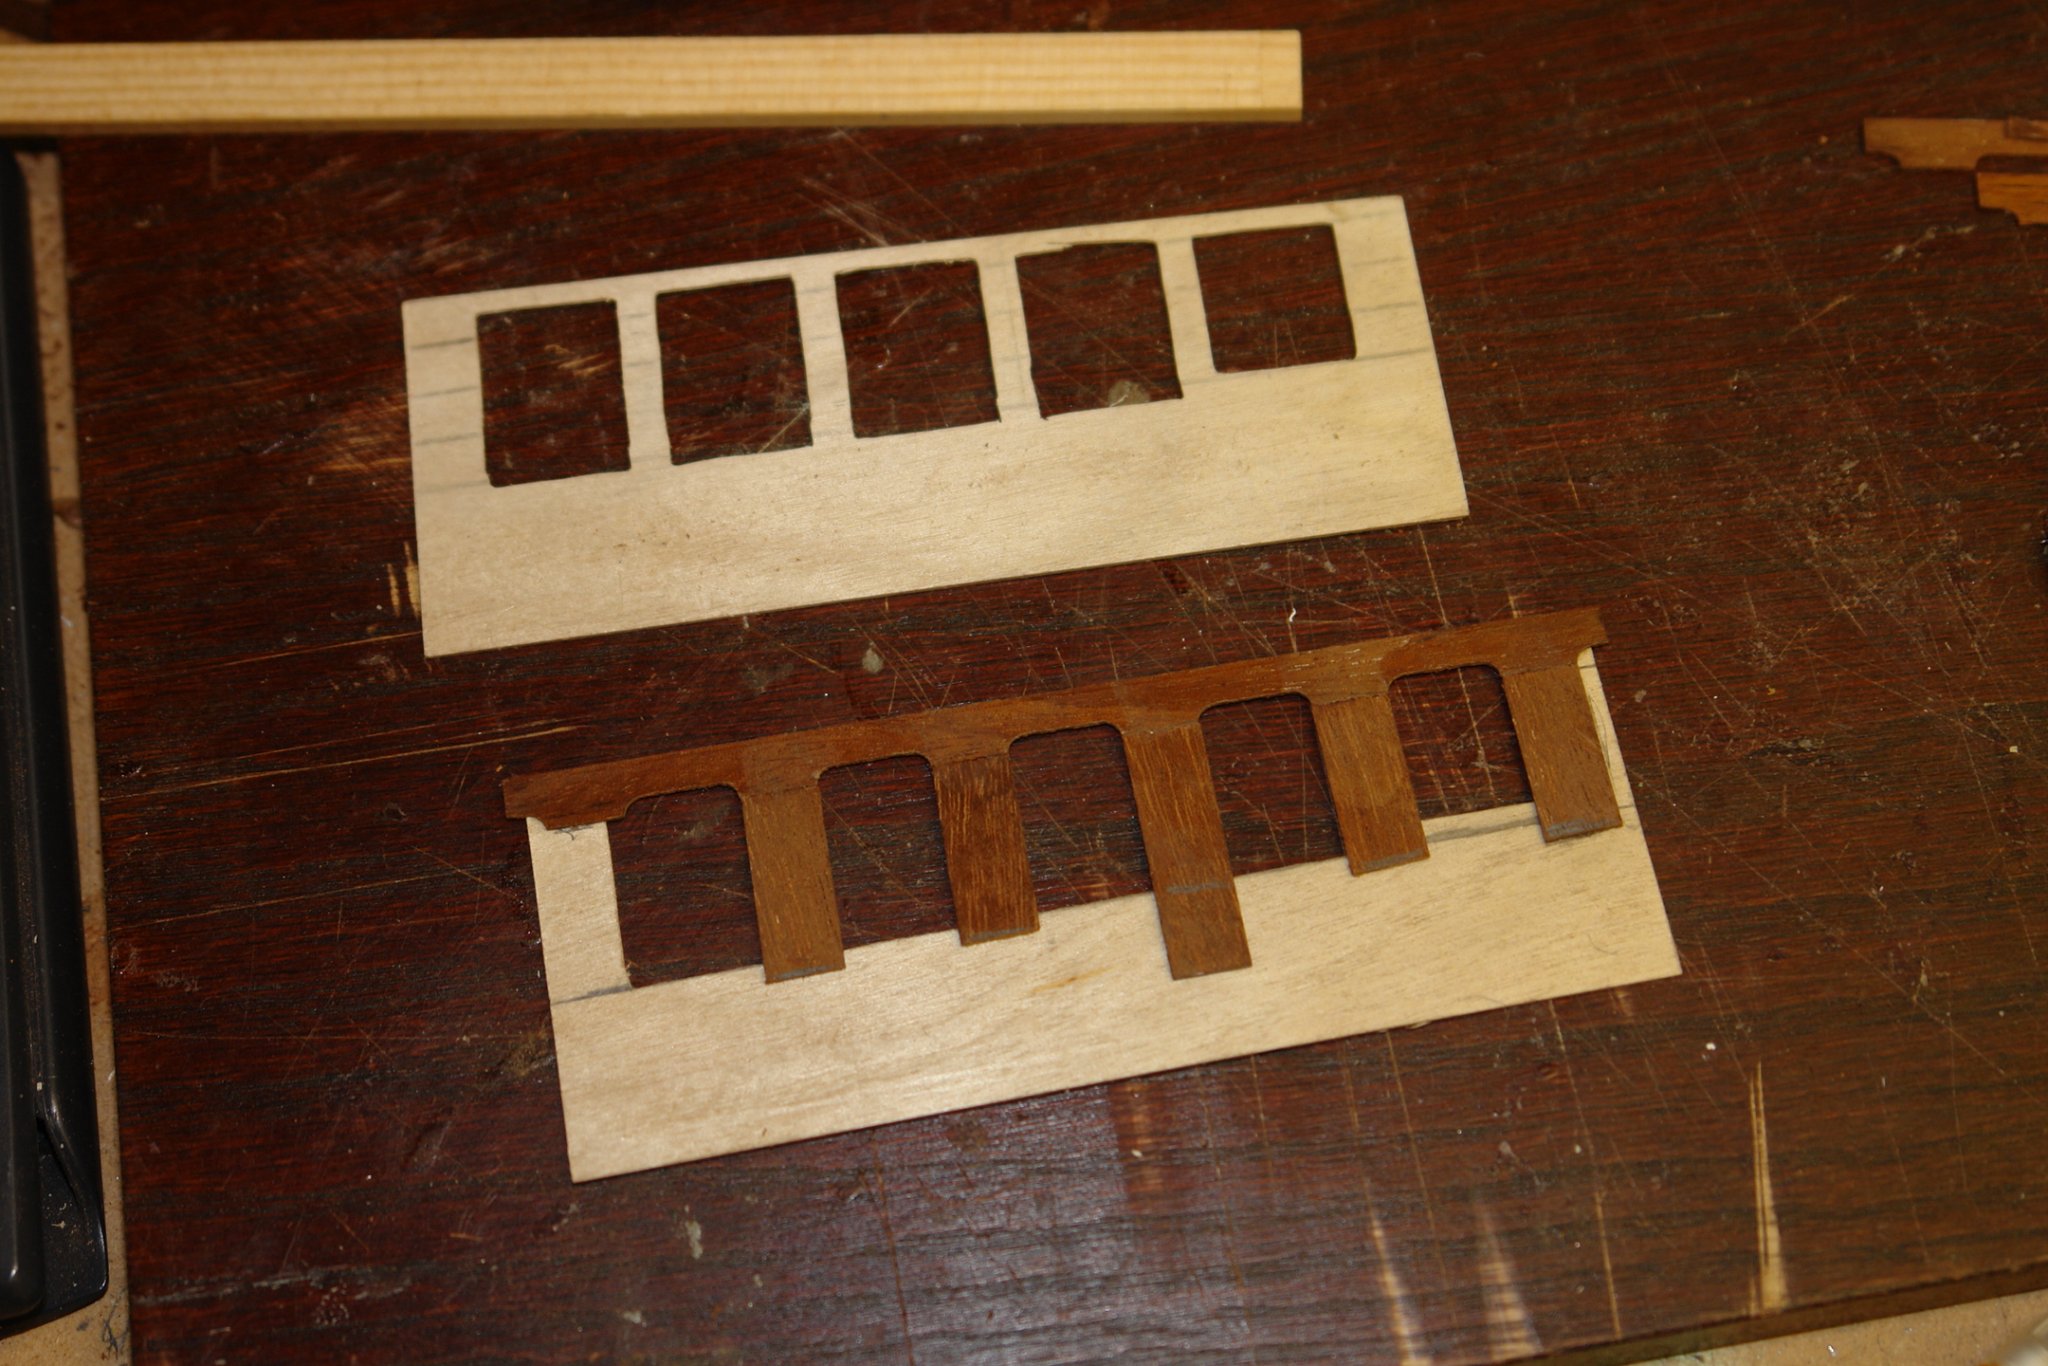
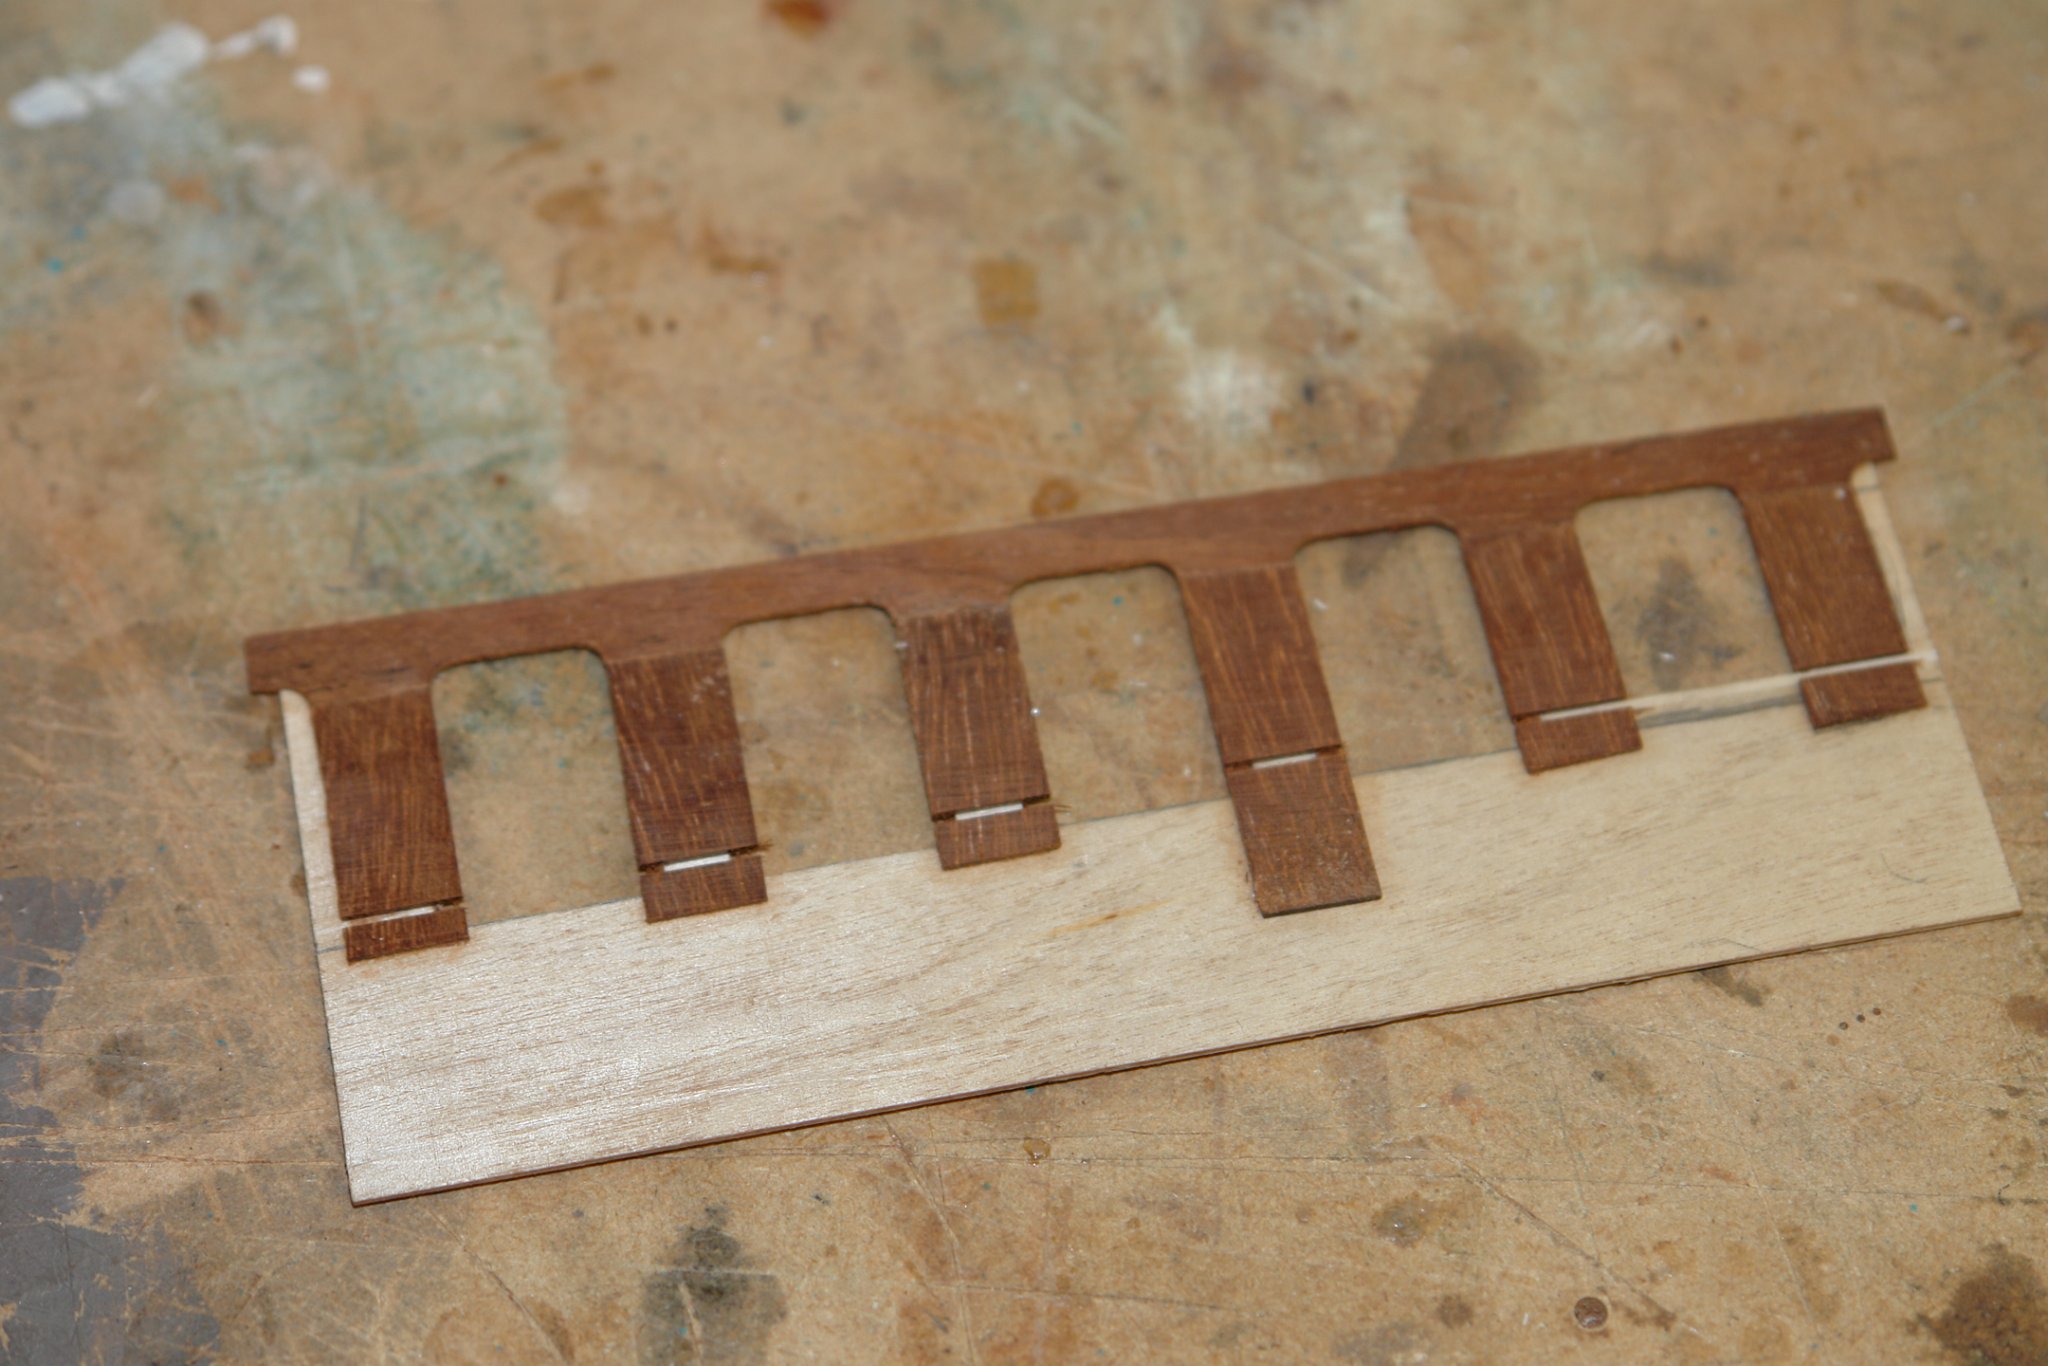
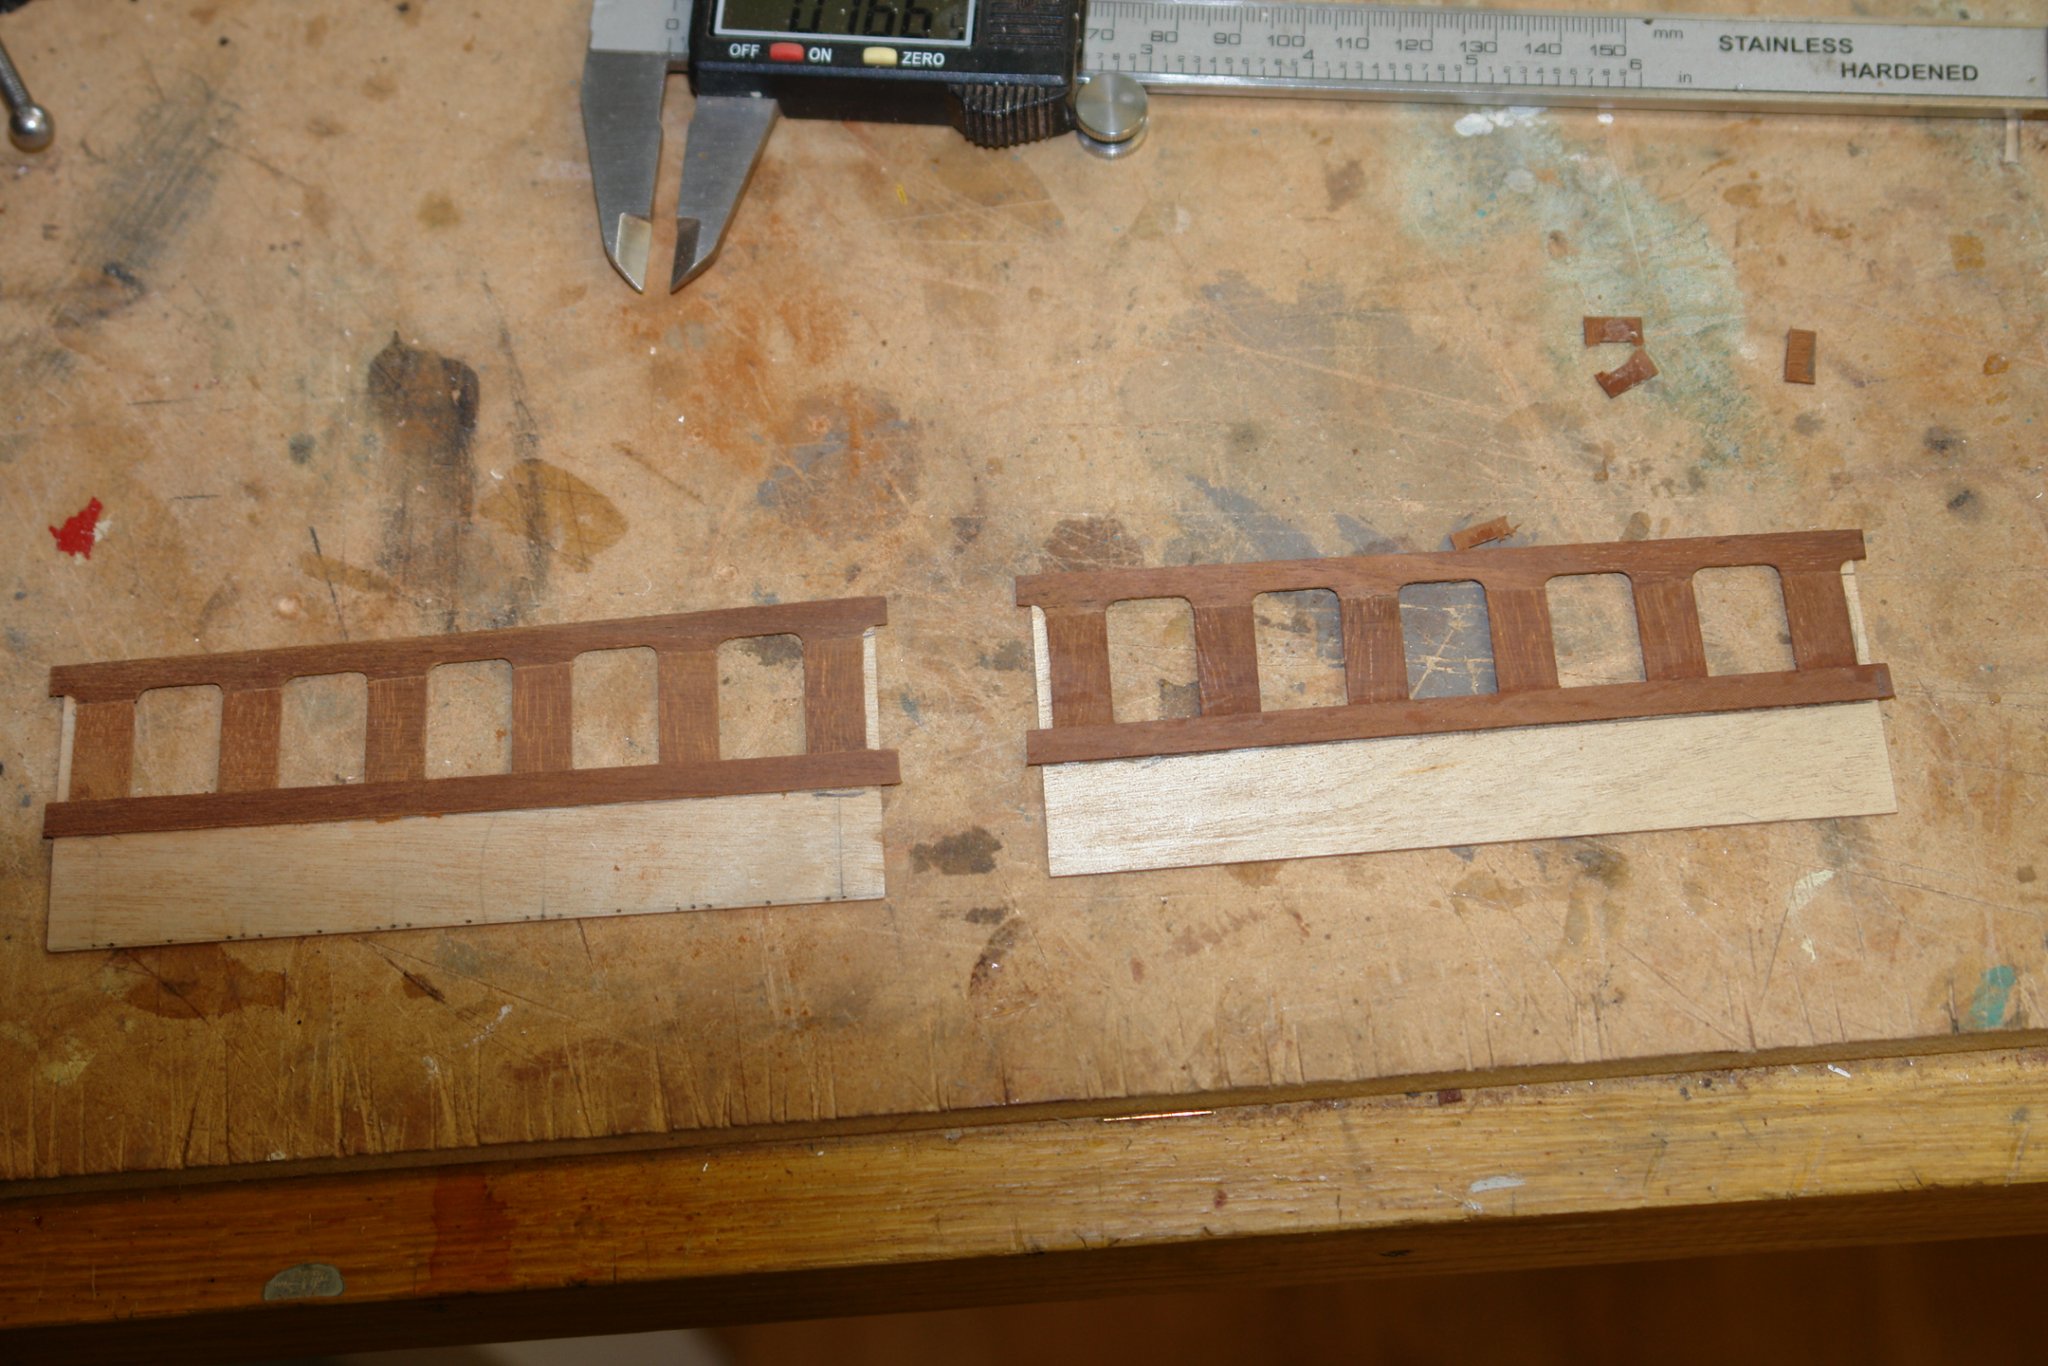
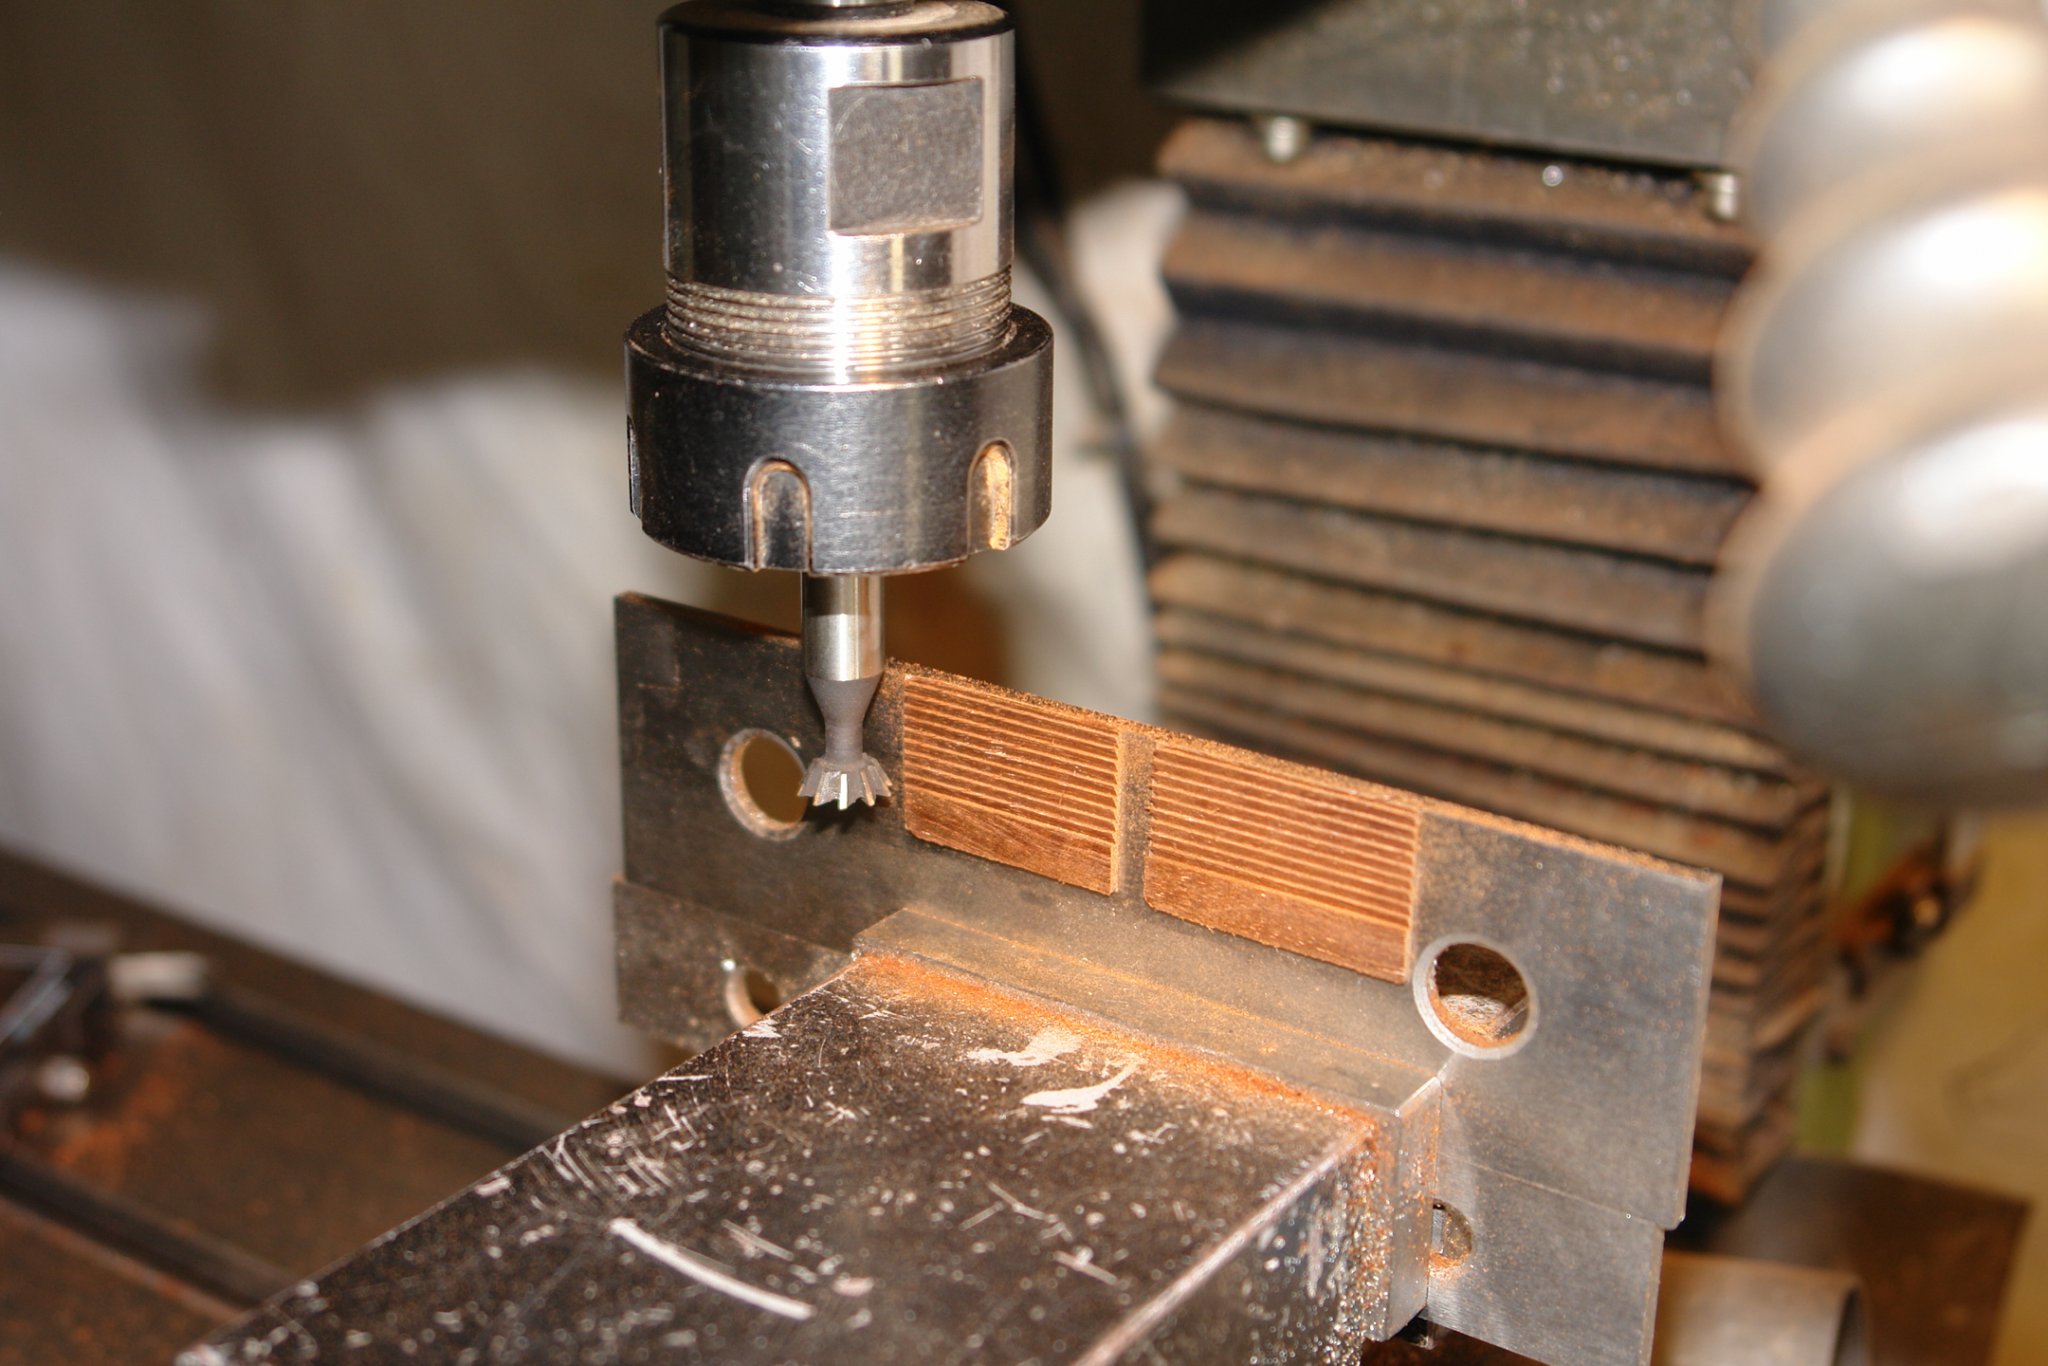
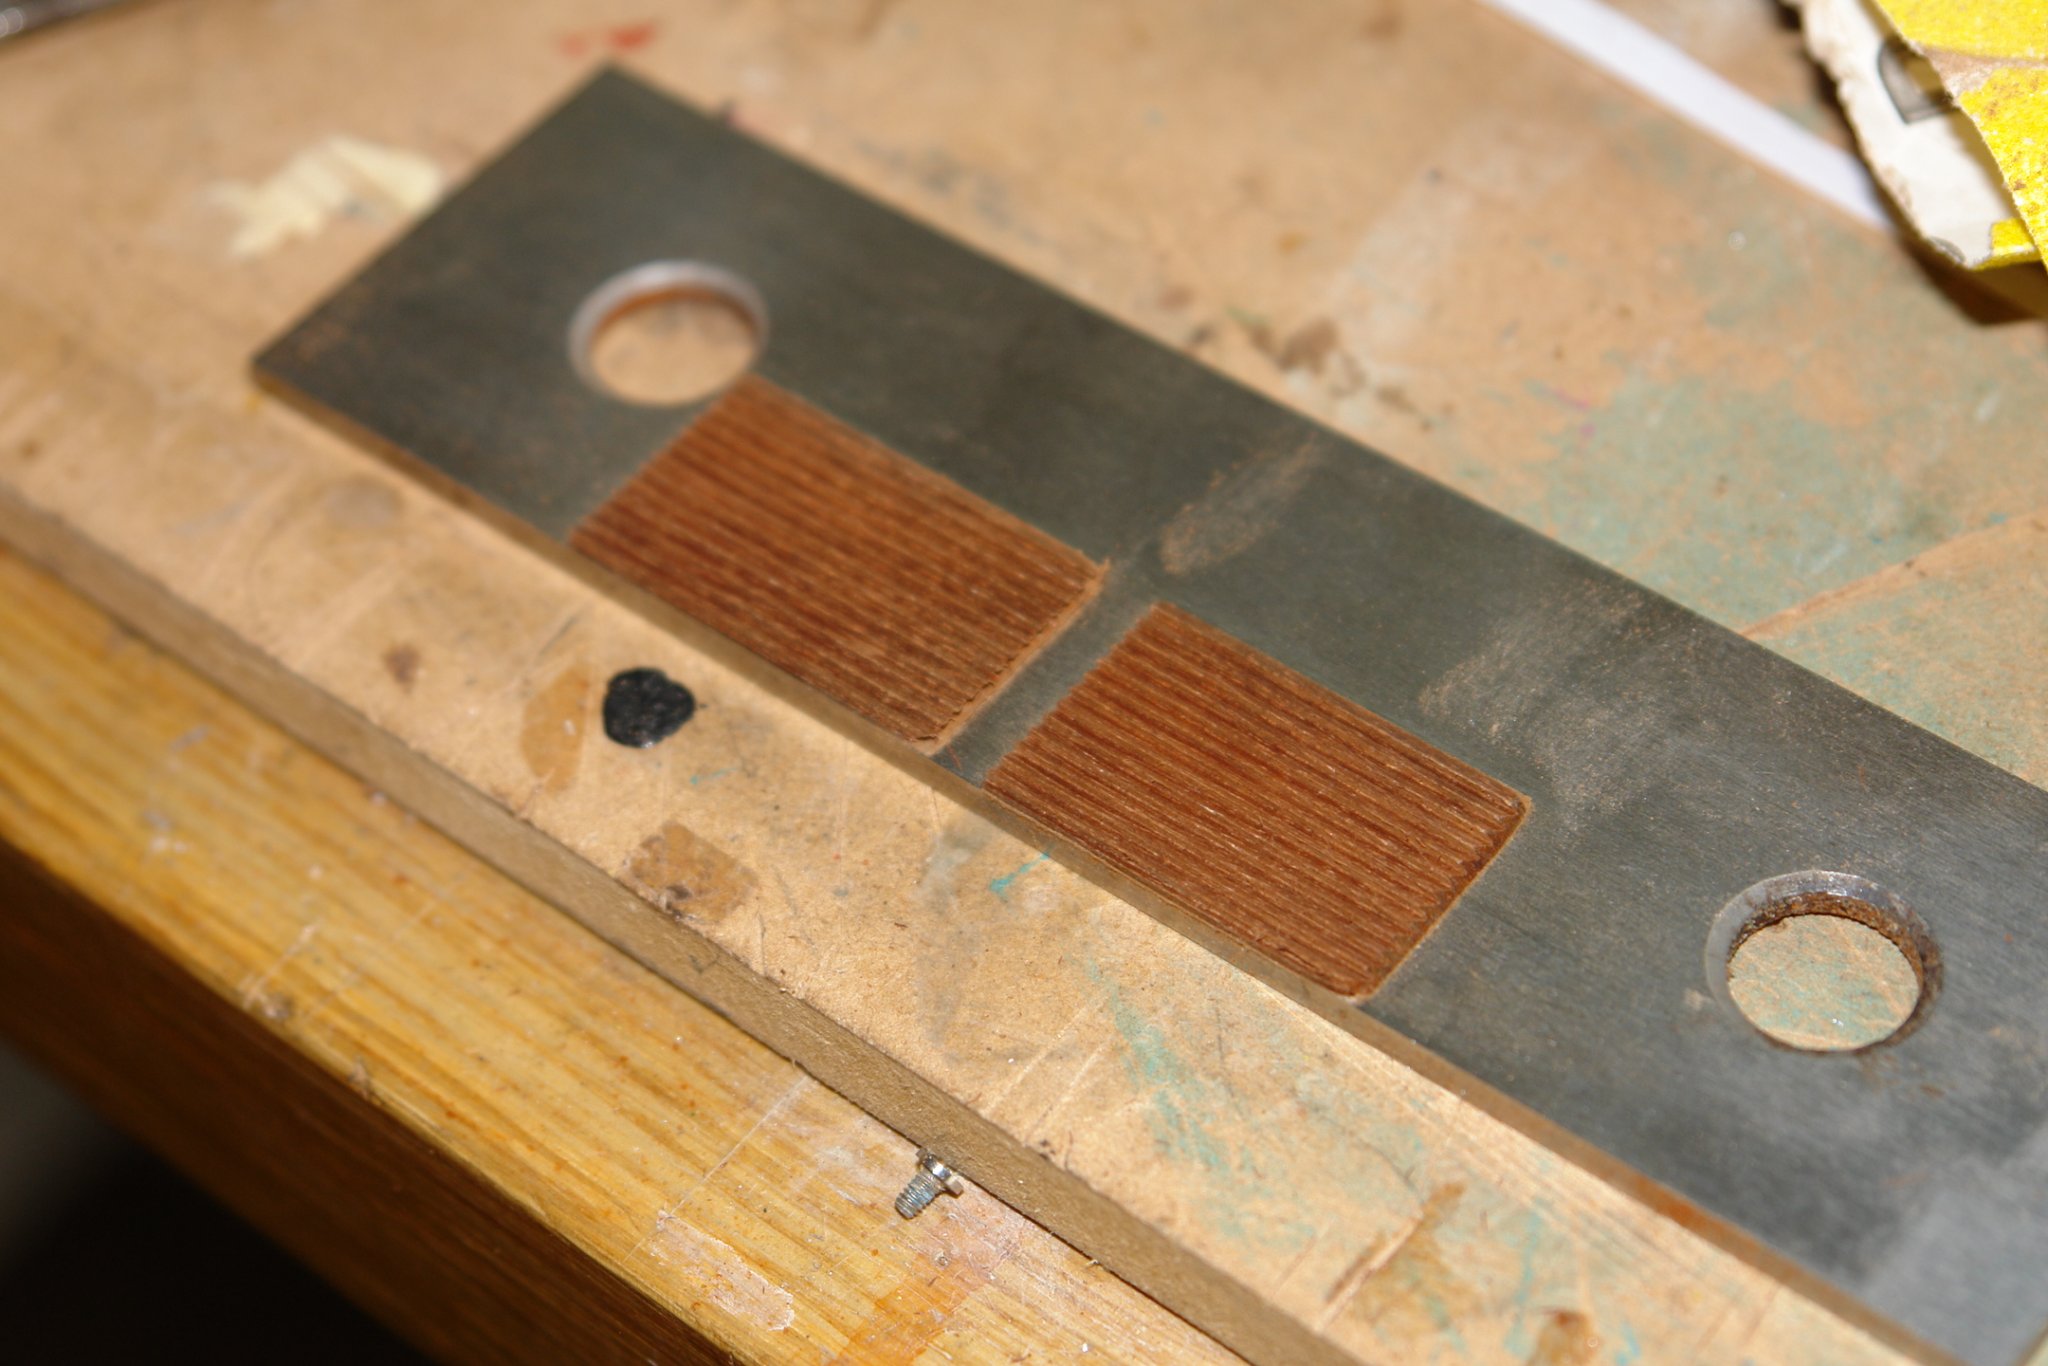
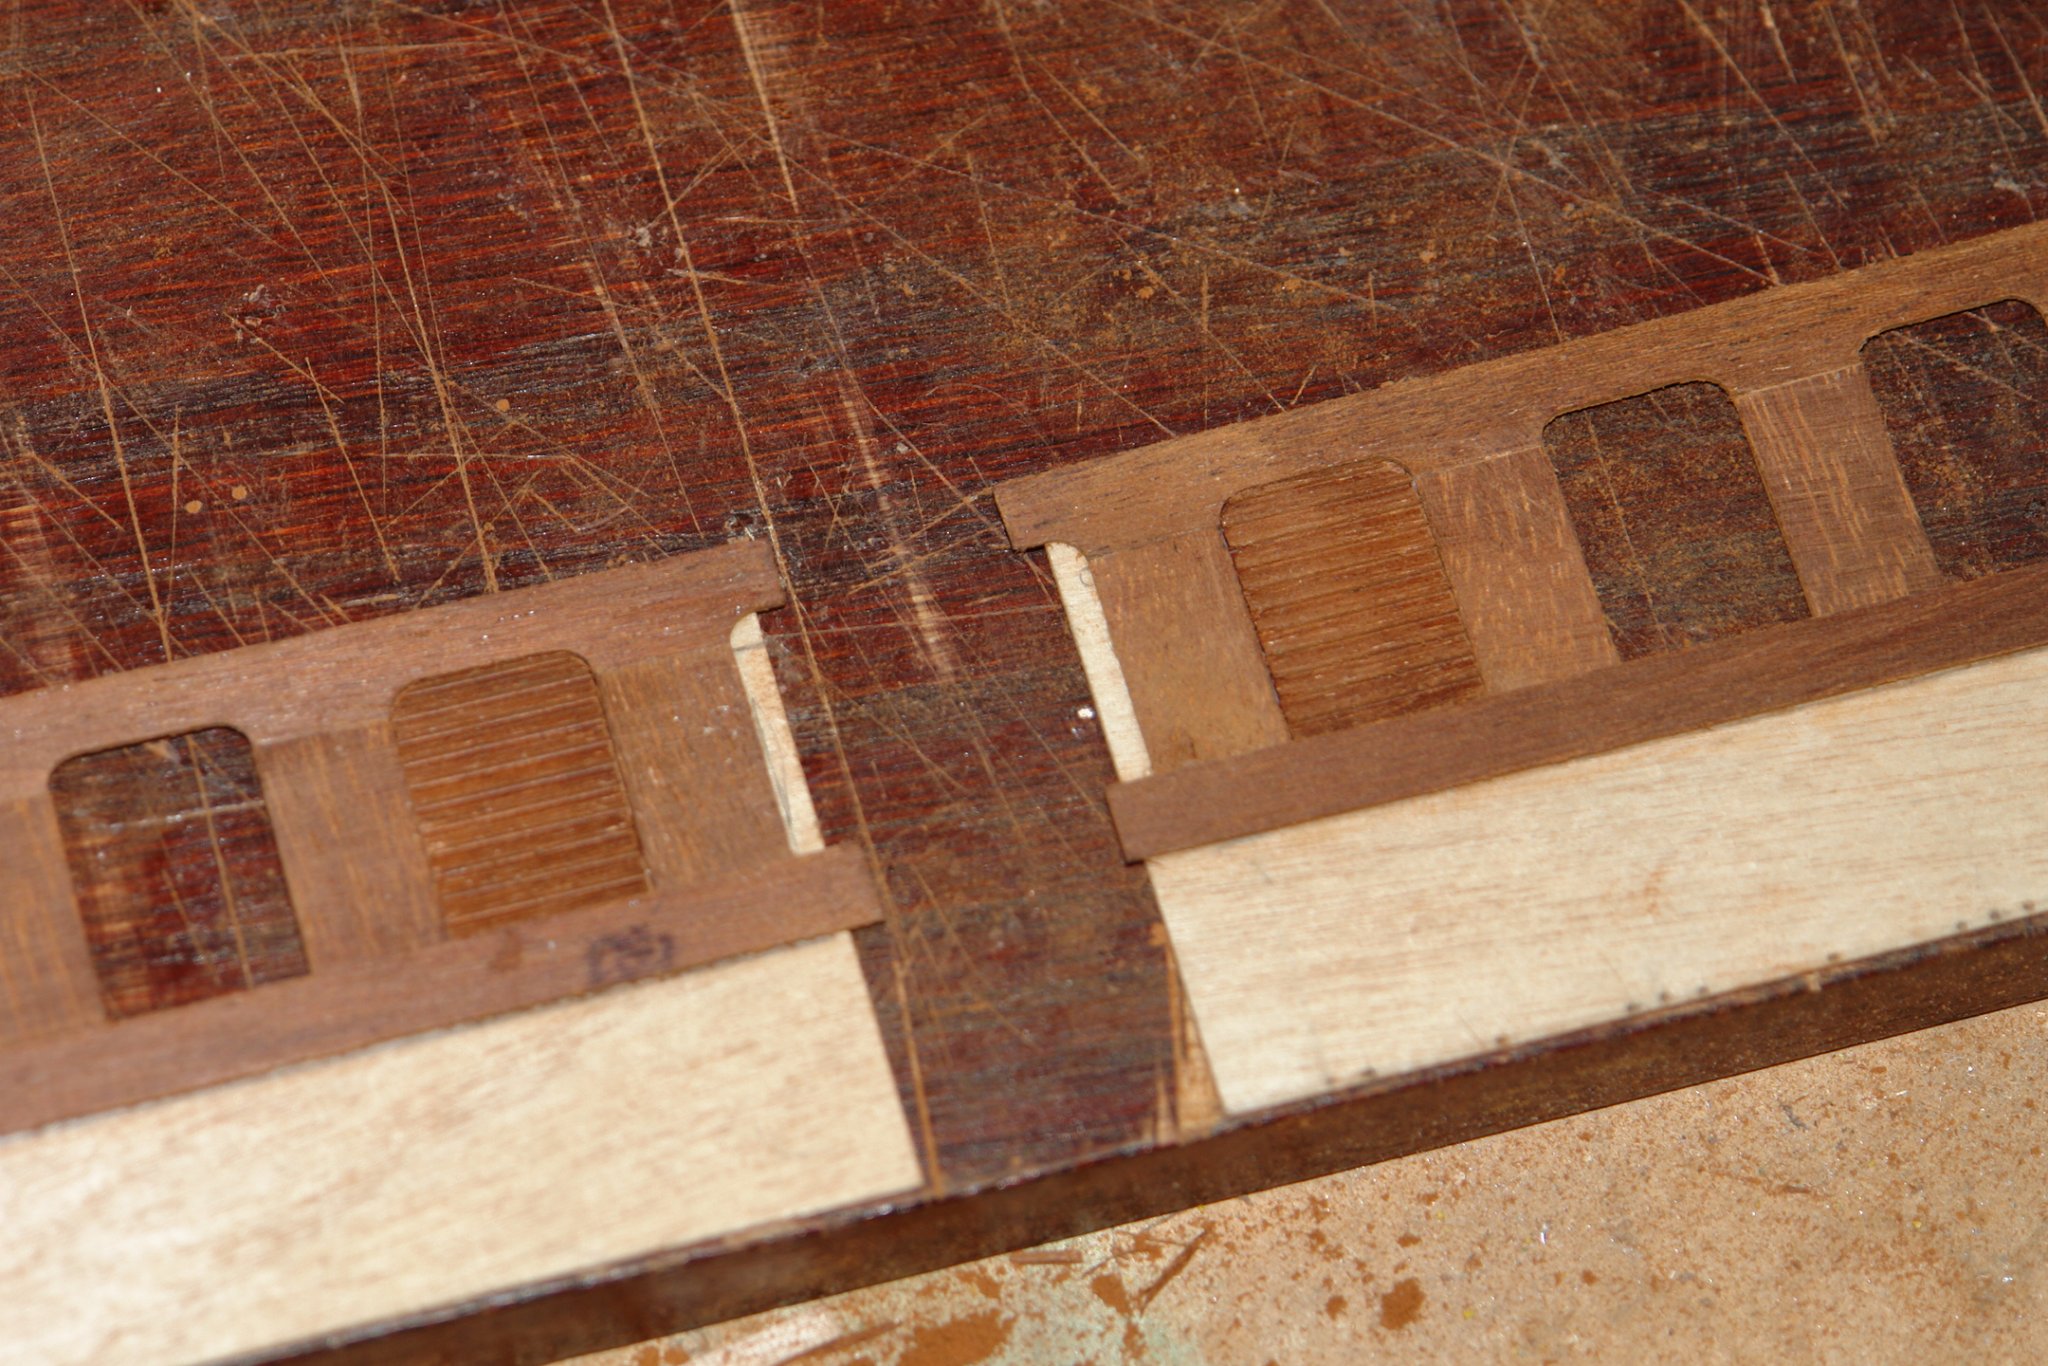
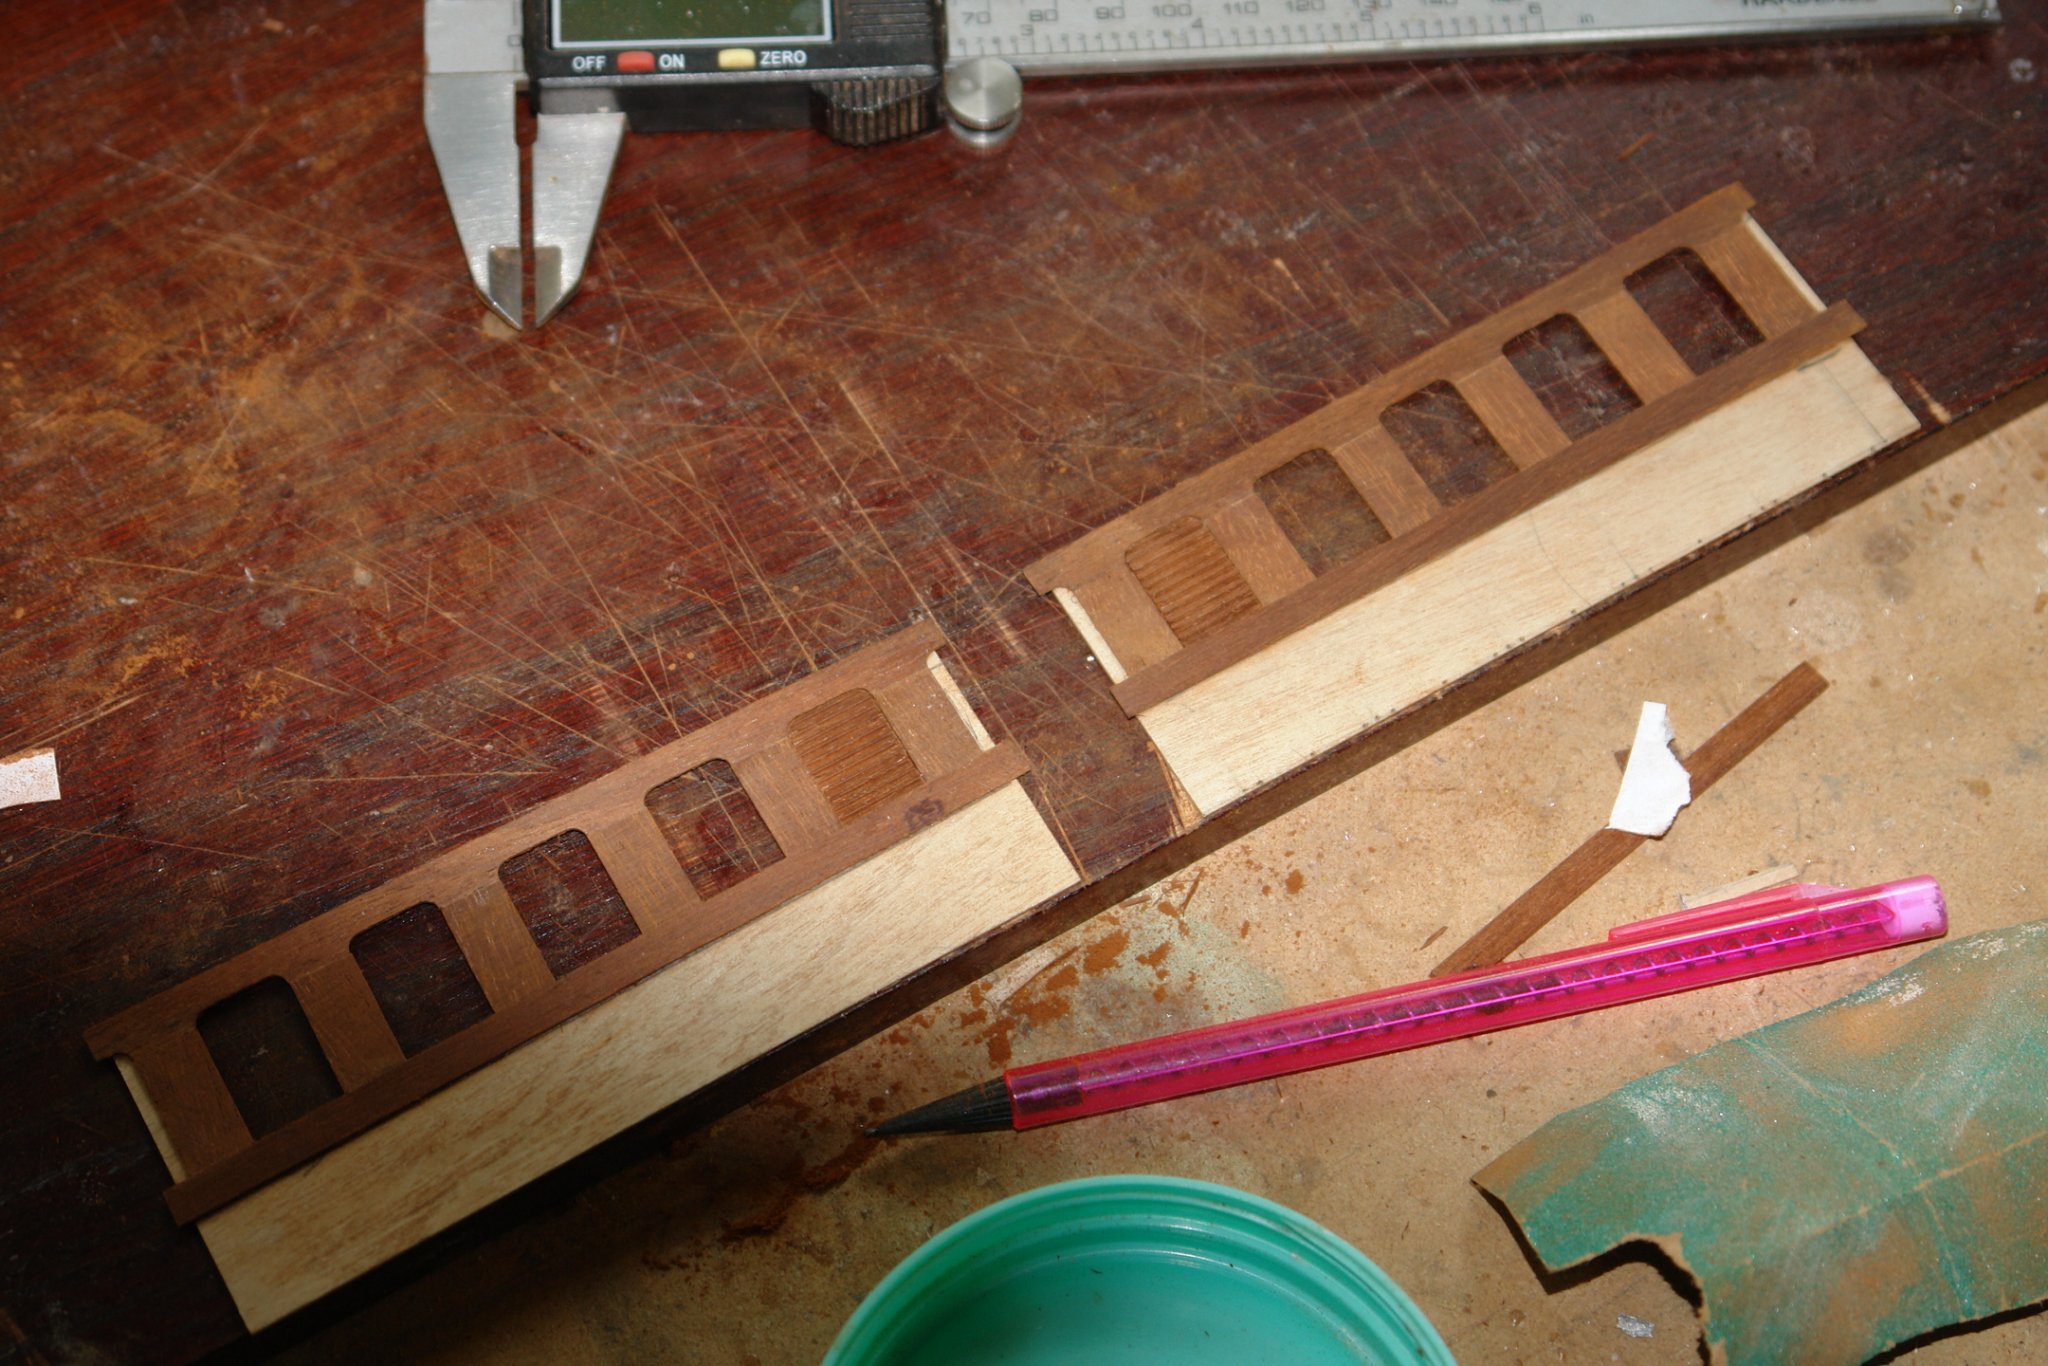
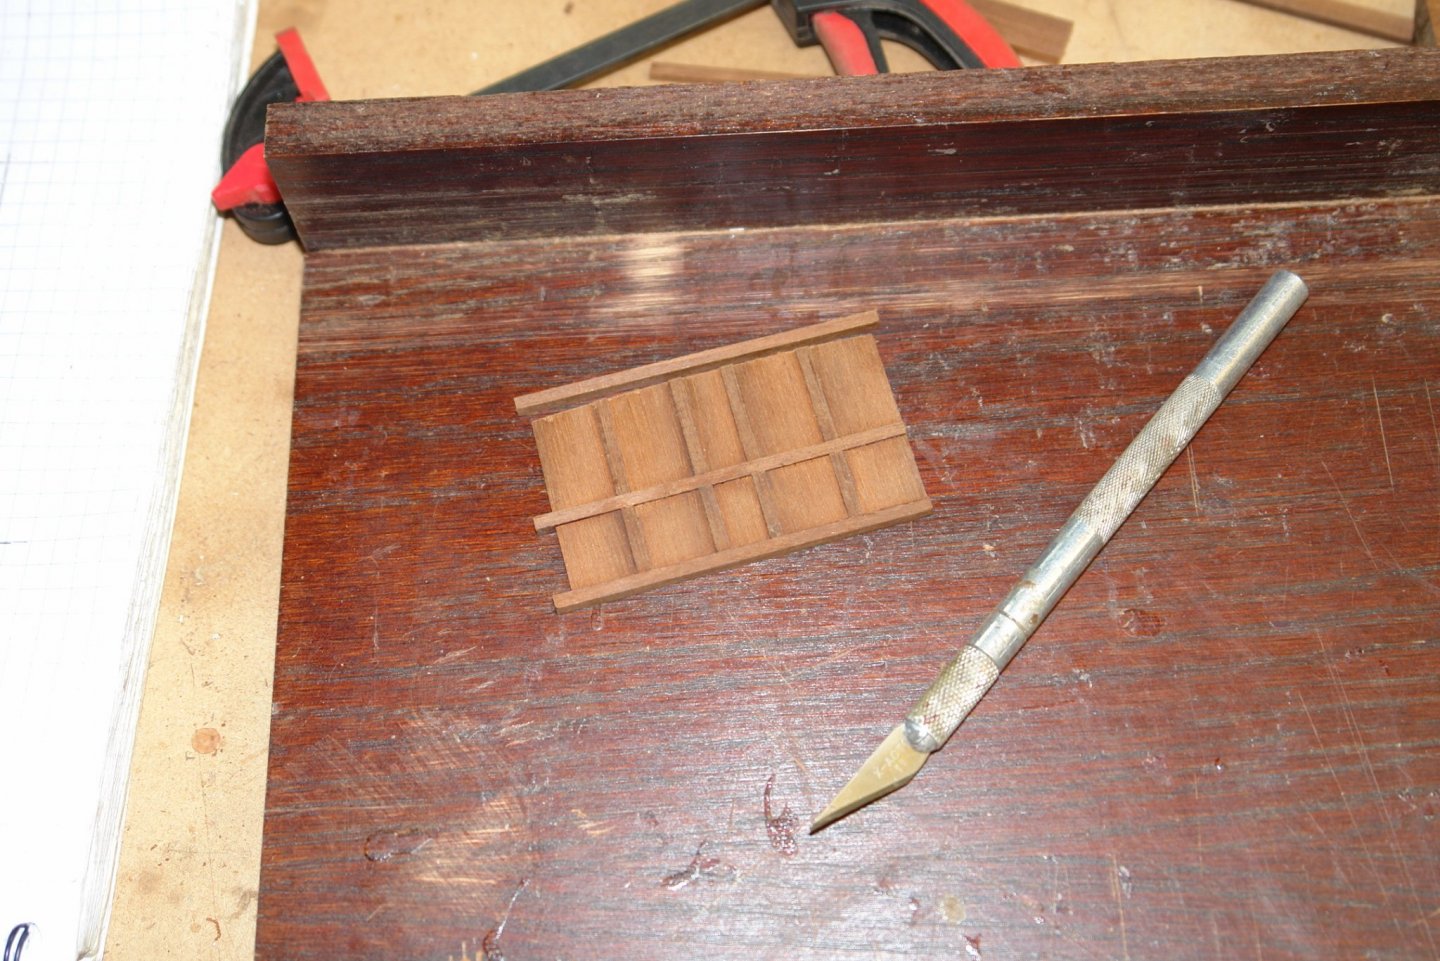
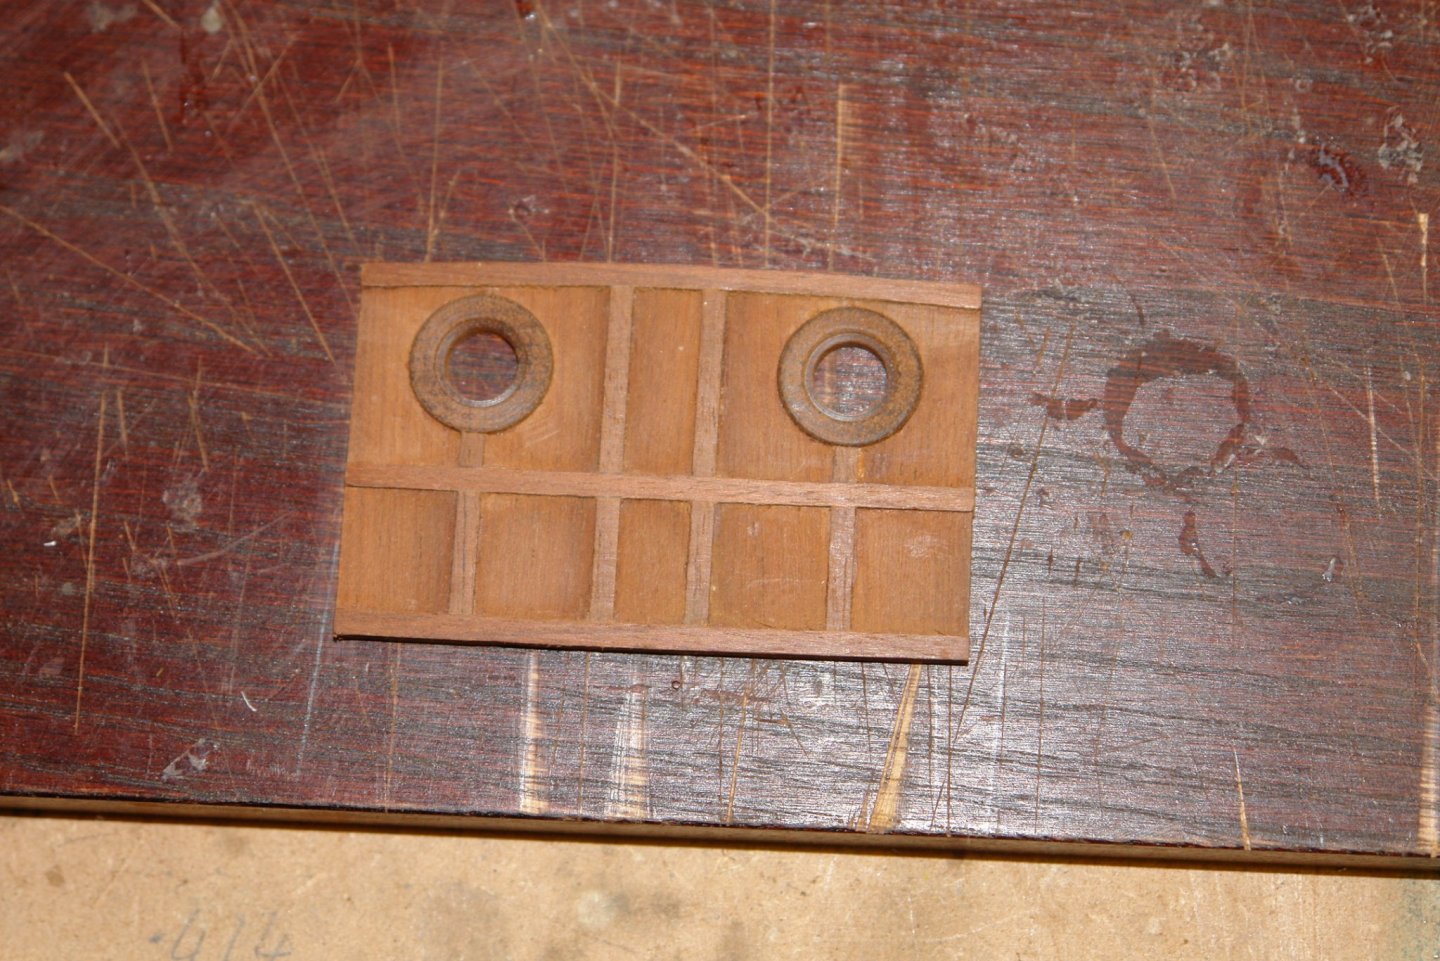
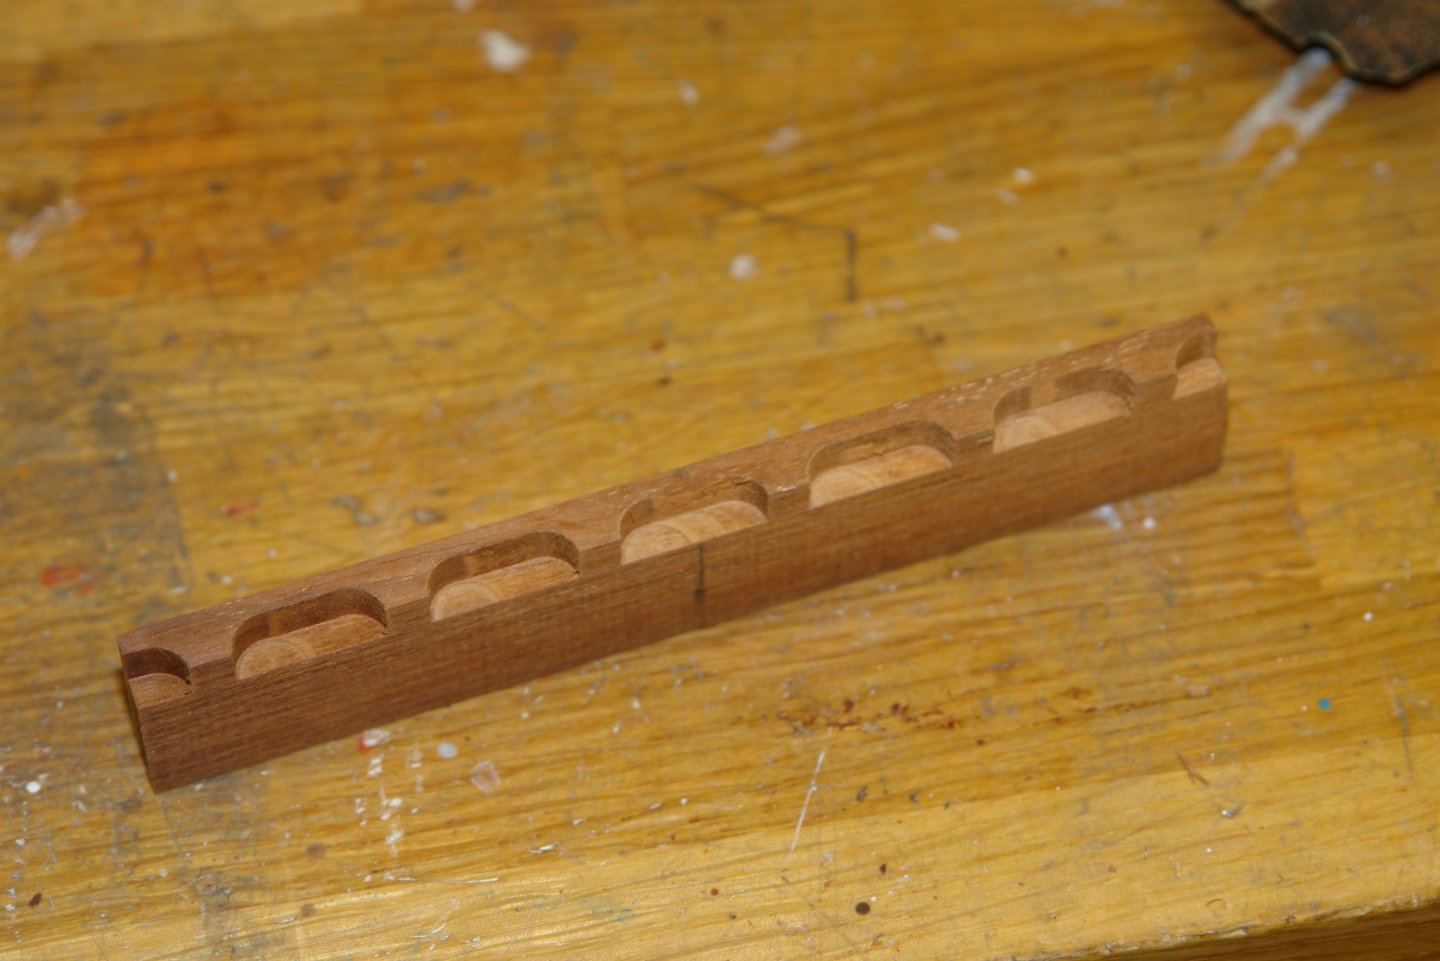
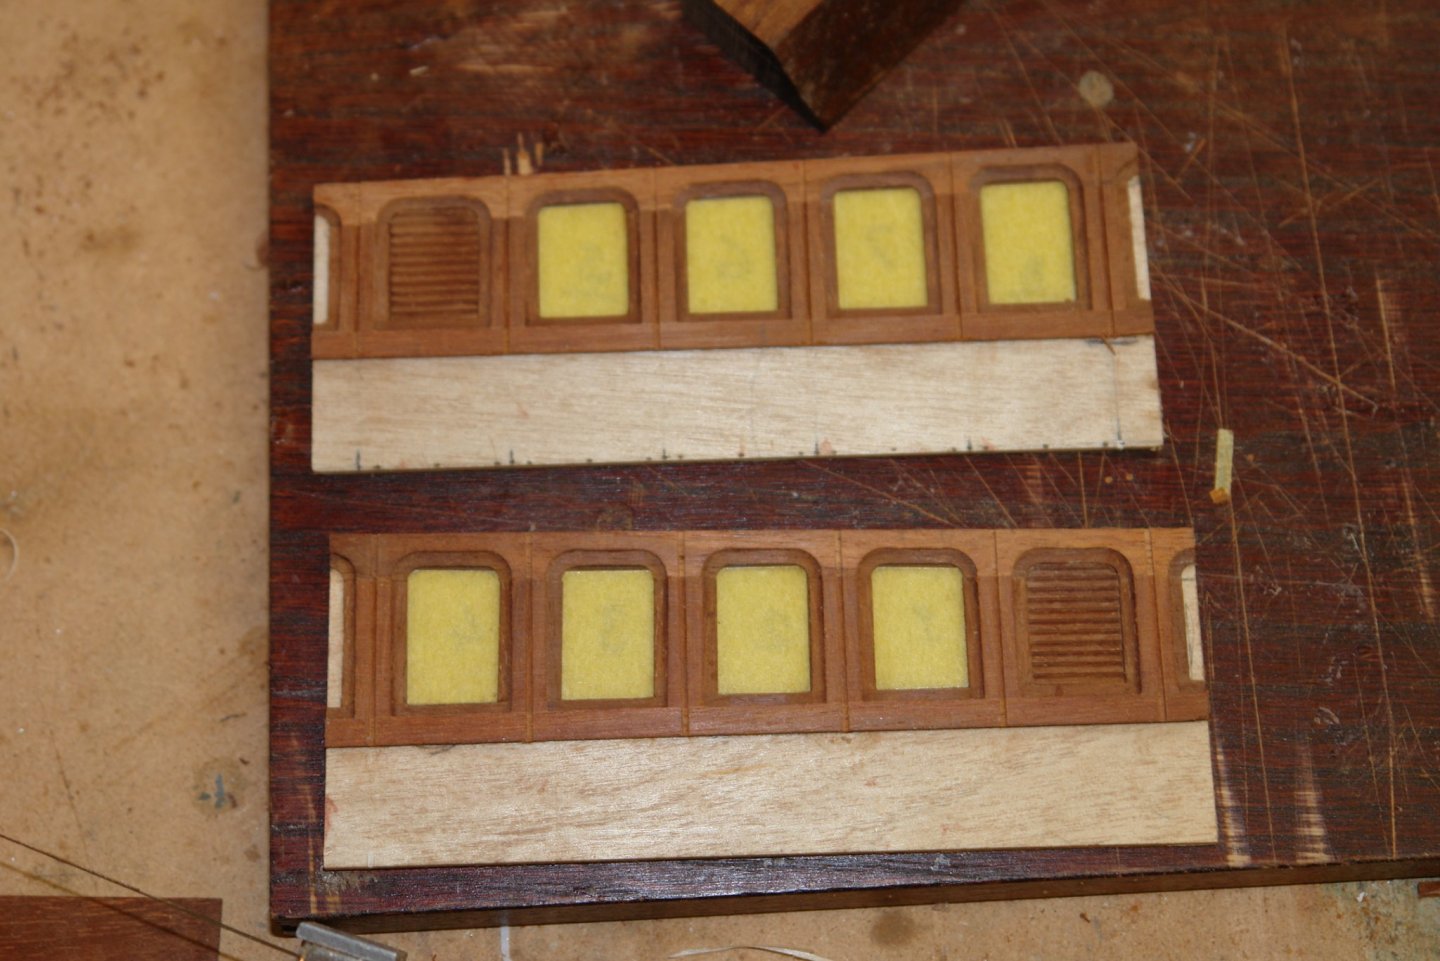
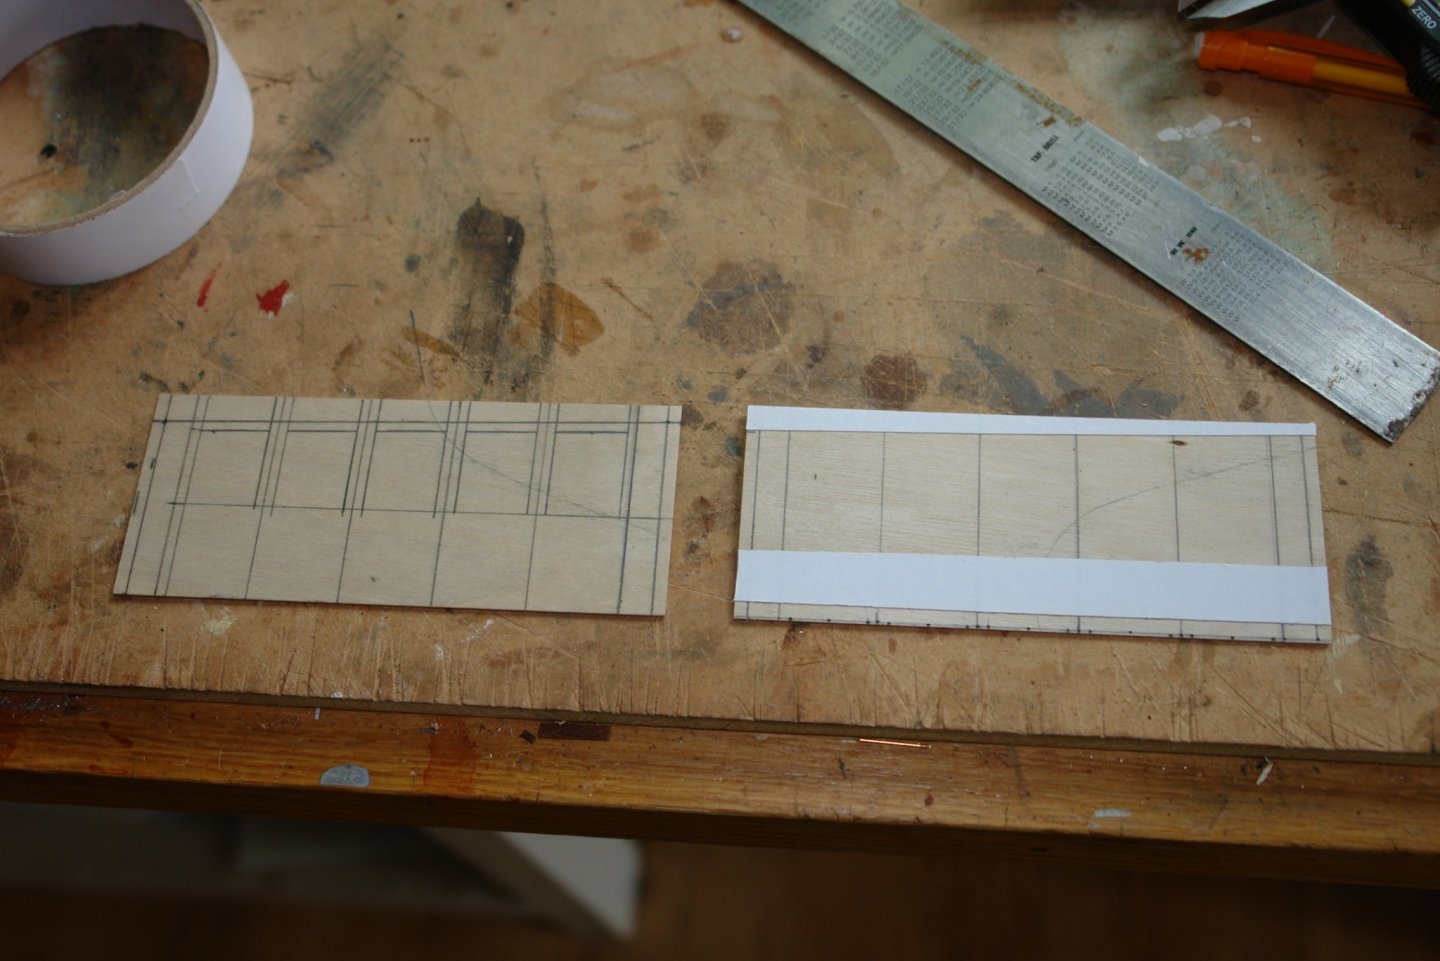
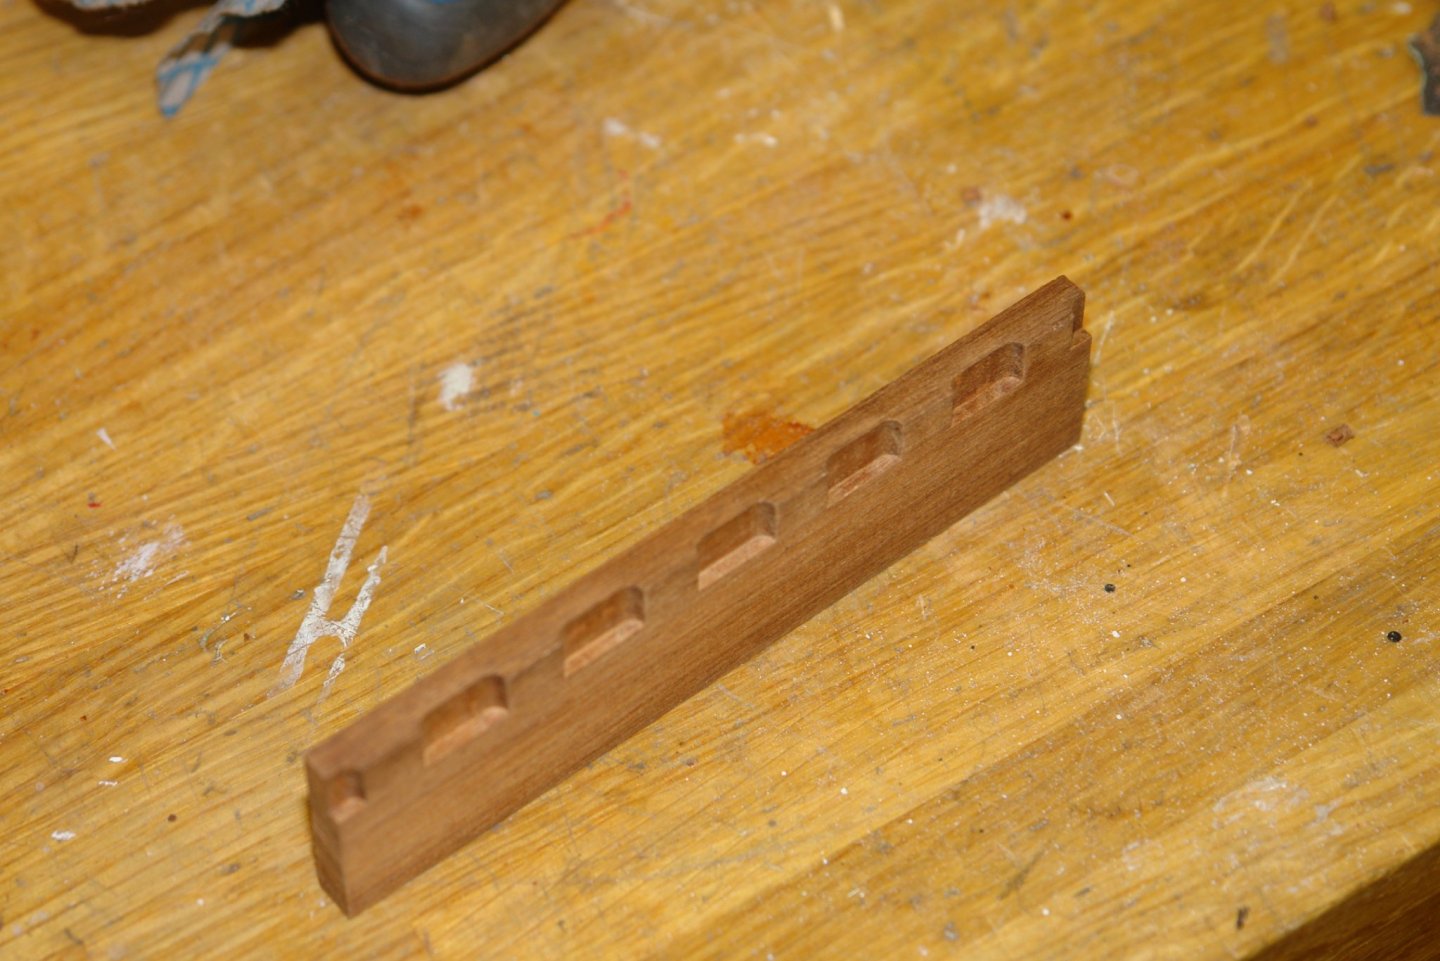
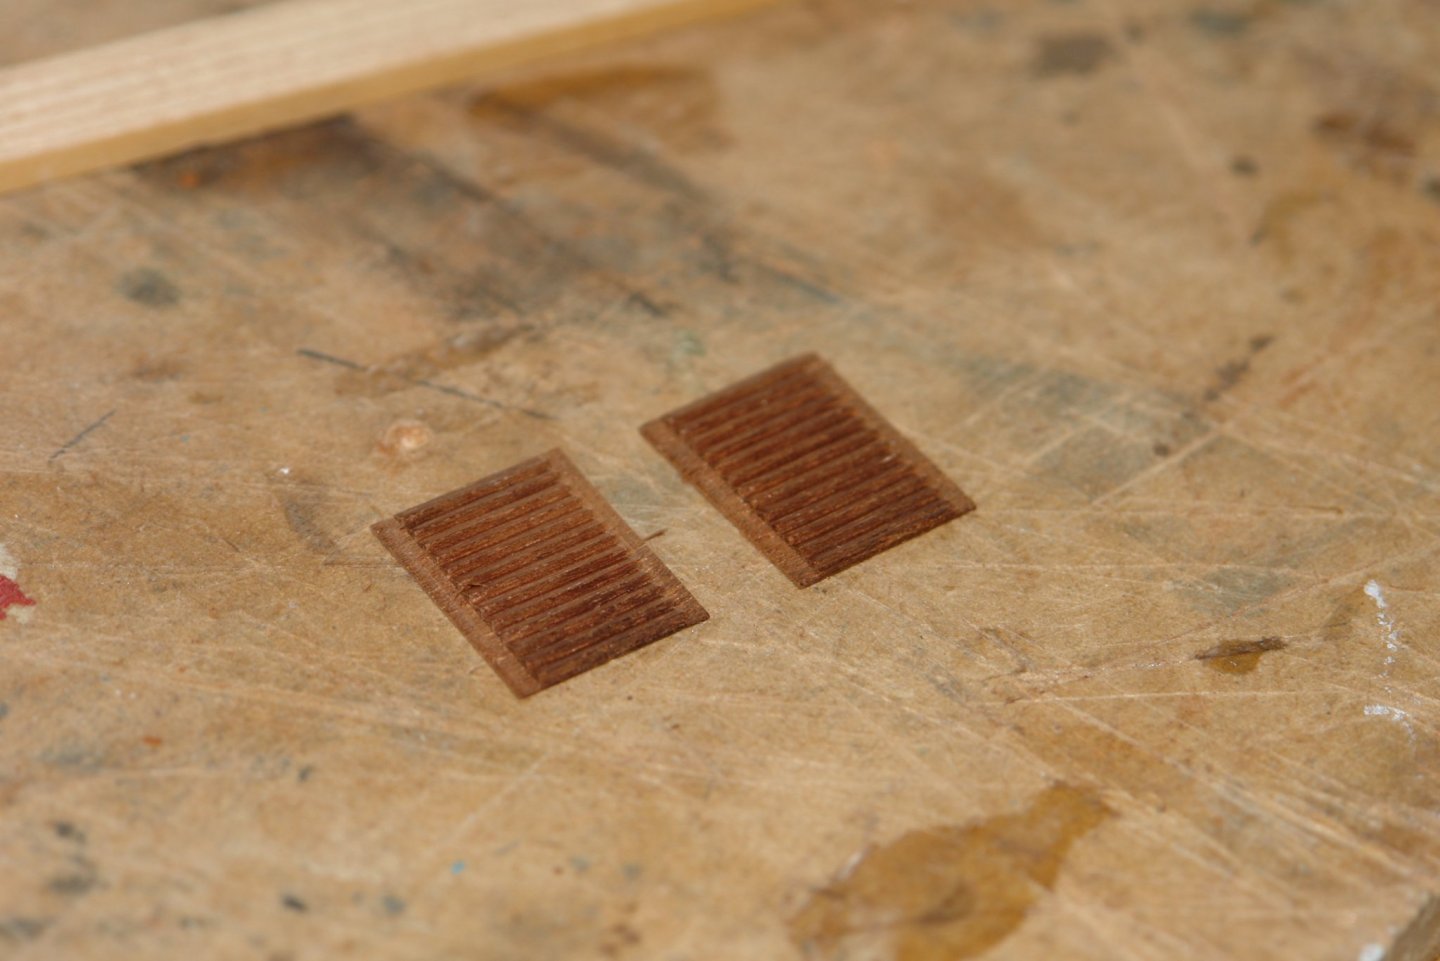
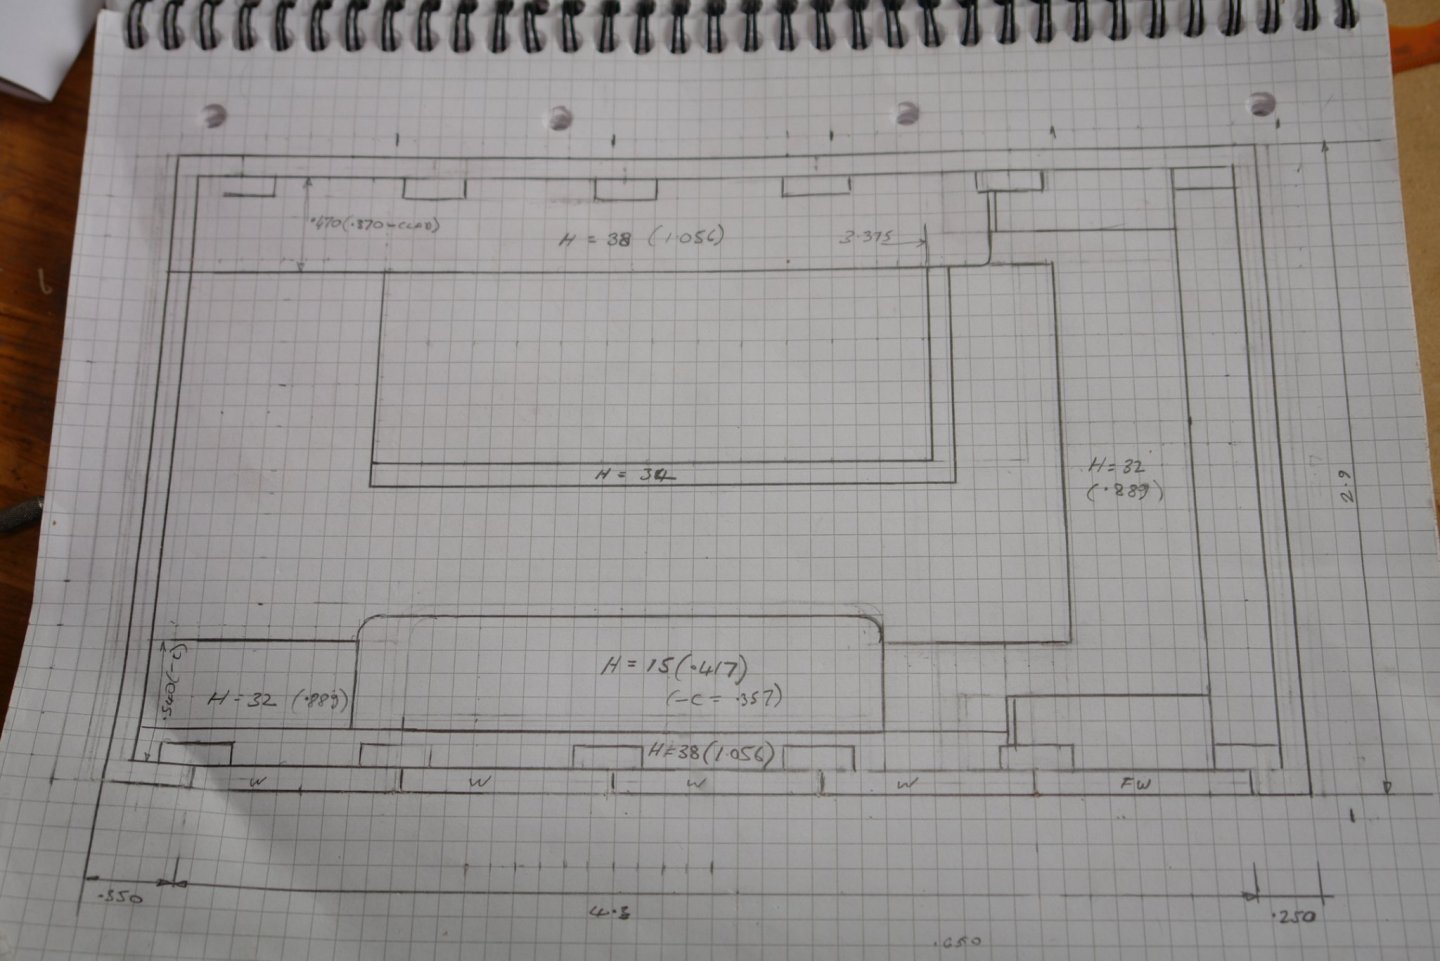
Dear friends - thank you all for your comments and gas strut speculations, it all adds to the fun. I have made a start on the cabin sides. The detail around the window prompted me to build the walls out of 4 laminations of wood, each 0.0315" thick giving an overall wall thickness of .125" or 4.5" at full size. To make the following description more understandable I am going to identify the layers as follows:- Outer layer - layer 1 Next layer - layer 2 Next layer - layer 3 Inner layer - Layer 4 As usual I started with a sketch - the wall is 4.7" long and each of the 4 windows is pitched at .84" with the windows being .50" wide. The window height reduces from aft to forward but are circa .8" high. I transferred the dimensions on to ply (layer 3) and then cut out the apertures with a jewellers saw to take the perspex windows. The next job was to complete layer 2 starting with the window top profile. This was cut accurately on the mill using the side of a .080" diameter end mill. 5 off .031" thick strips were then slit off from this. 2 for layer 2, 2 for layer 4 and one spare. The strips for layer 2 were glued on to the the ply (layer 3) and then the window vertical sides were attached. Once dry the vertical strips were cut back to length. And finally the bottom strip was applied. The foremost frame is fitted with louvers. .063" thick strips of mahogany were attached to a piece of steel with double sided tape. A dove tail cutter was then put in the mill and the "louvers" were machined. The pitch of the louvers is .06". The louvers were then shaped and installed. I got a bit further but that will have to wait as I am being summoned to dinner. Hope you are all keeping safe.


-
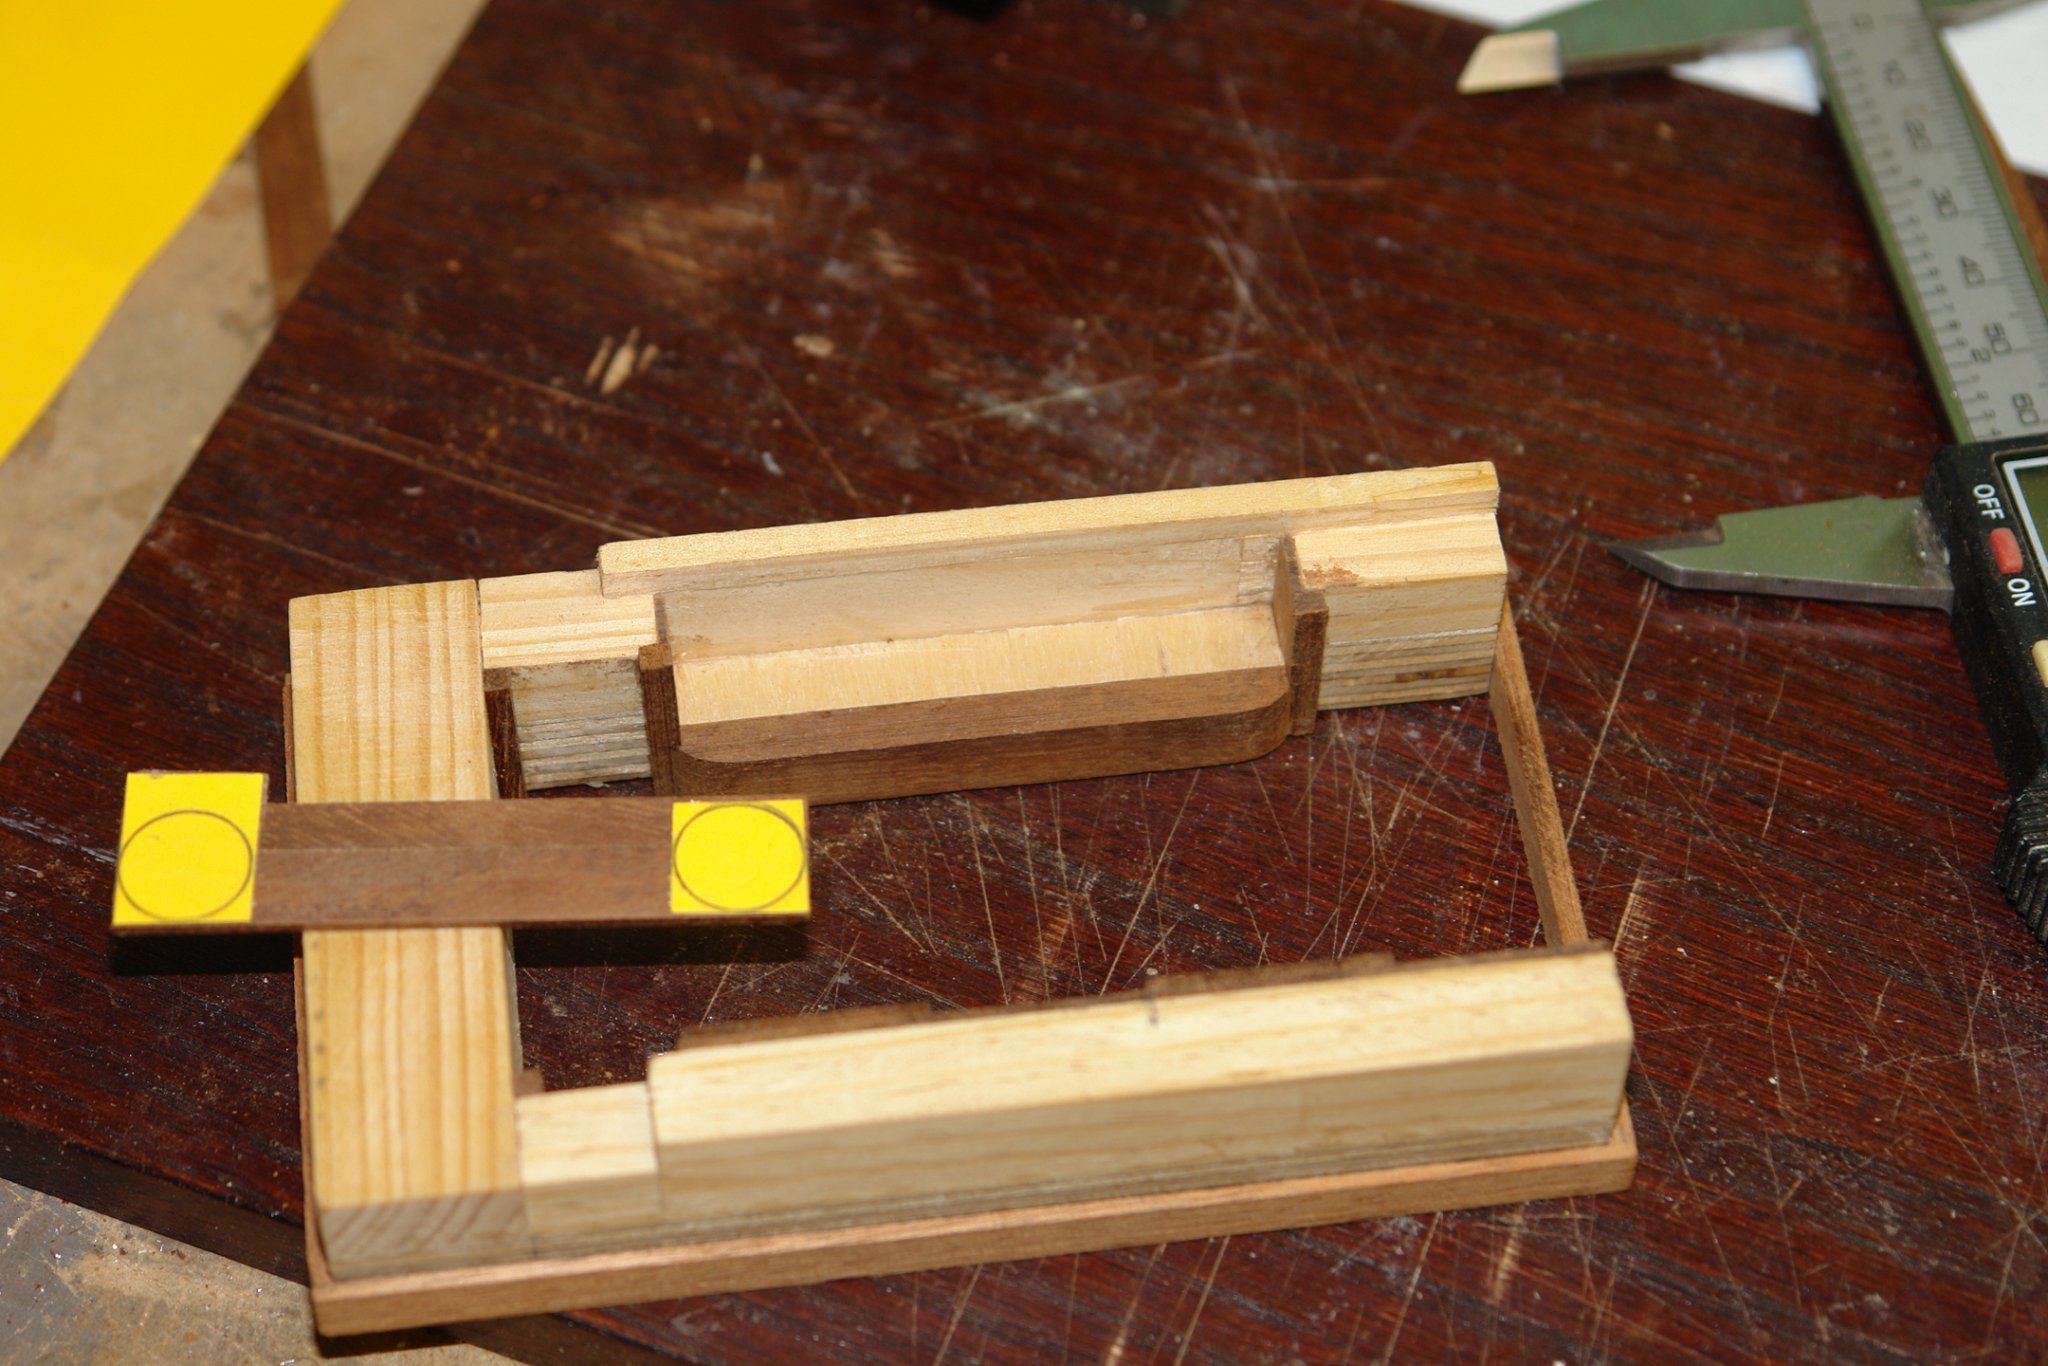
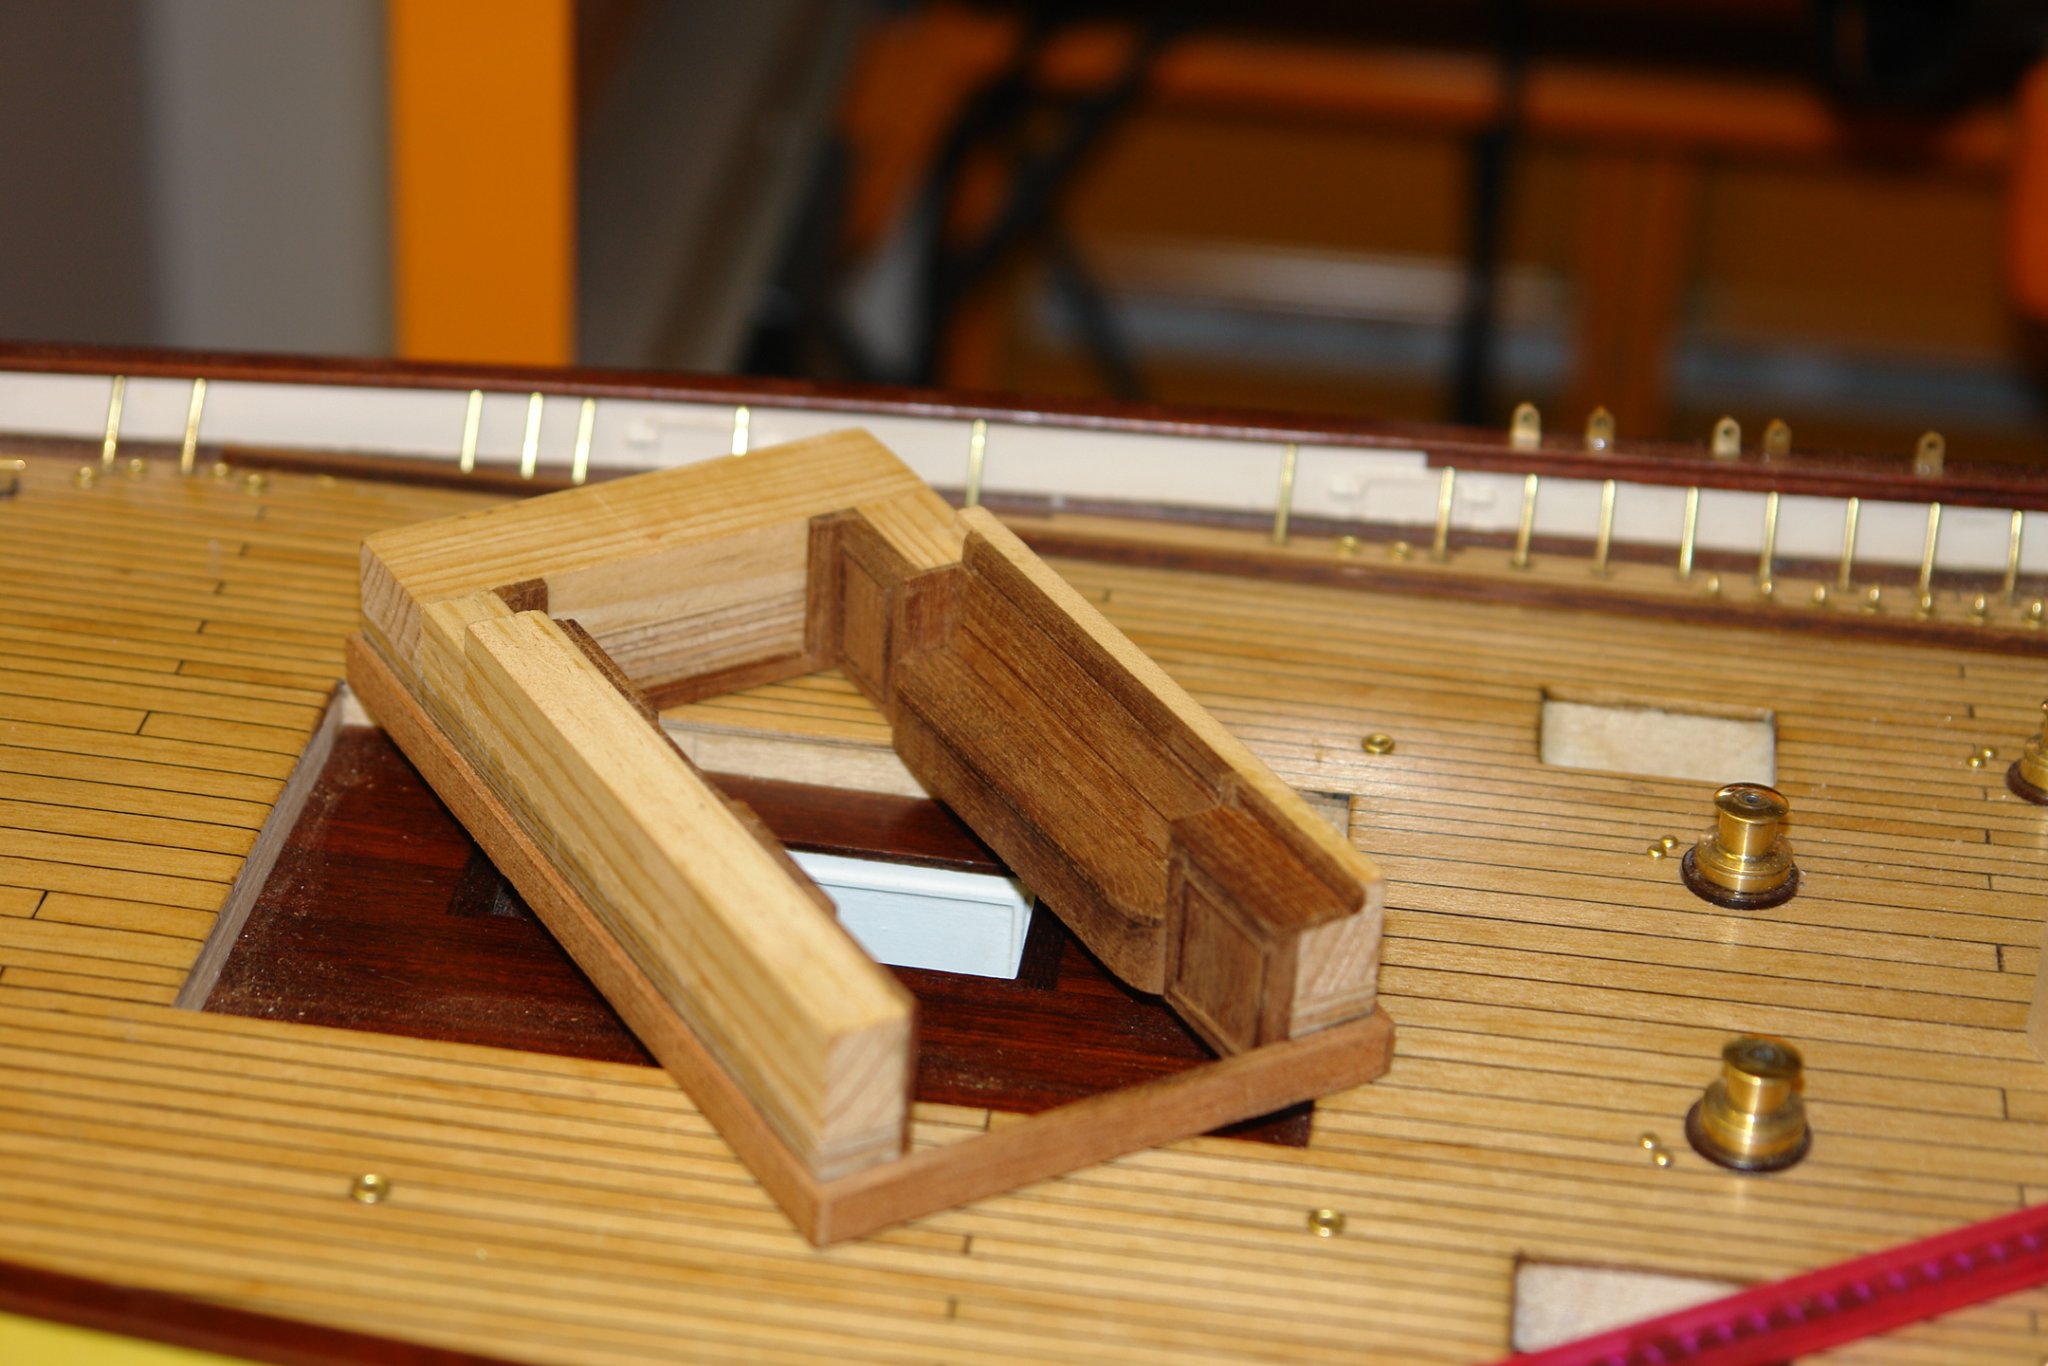
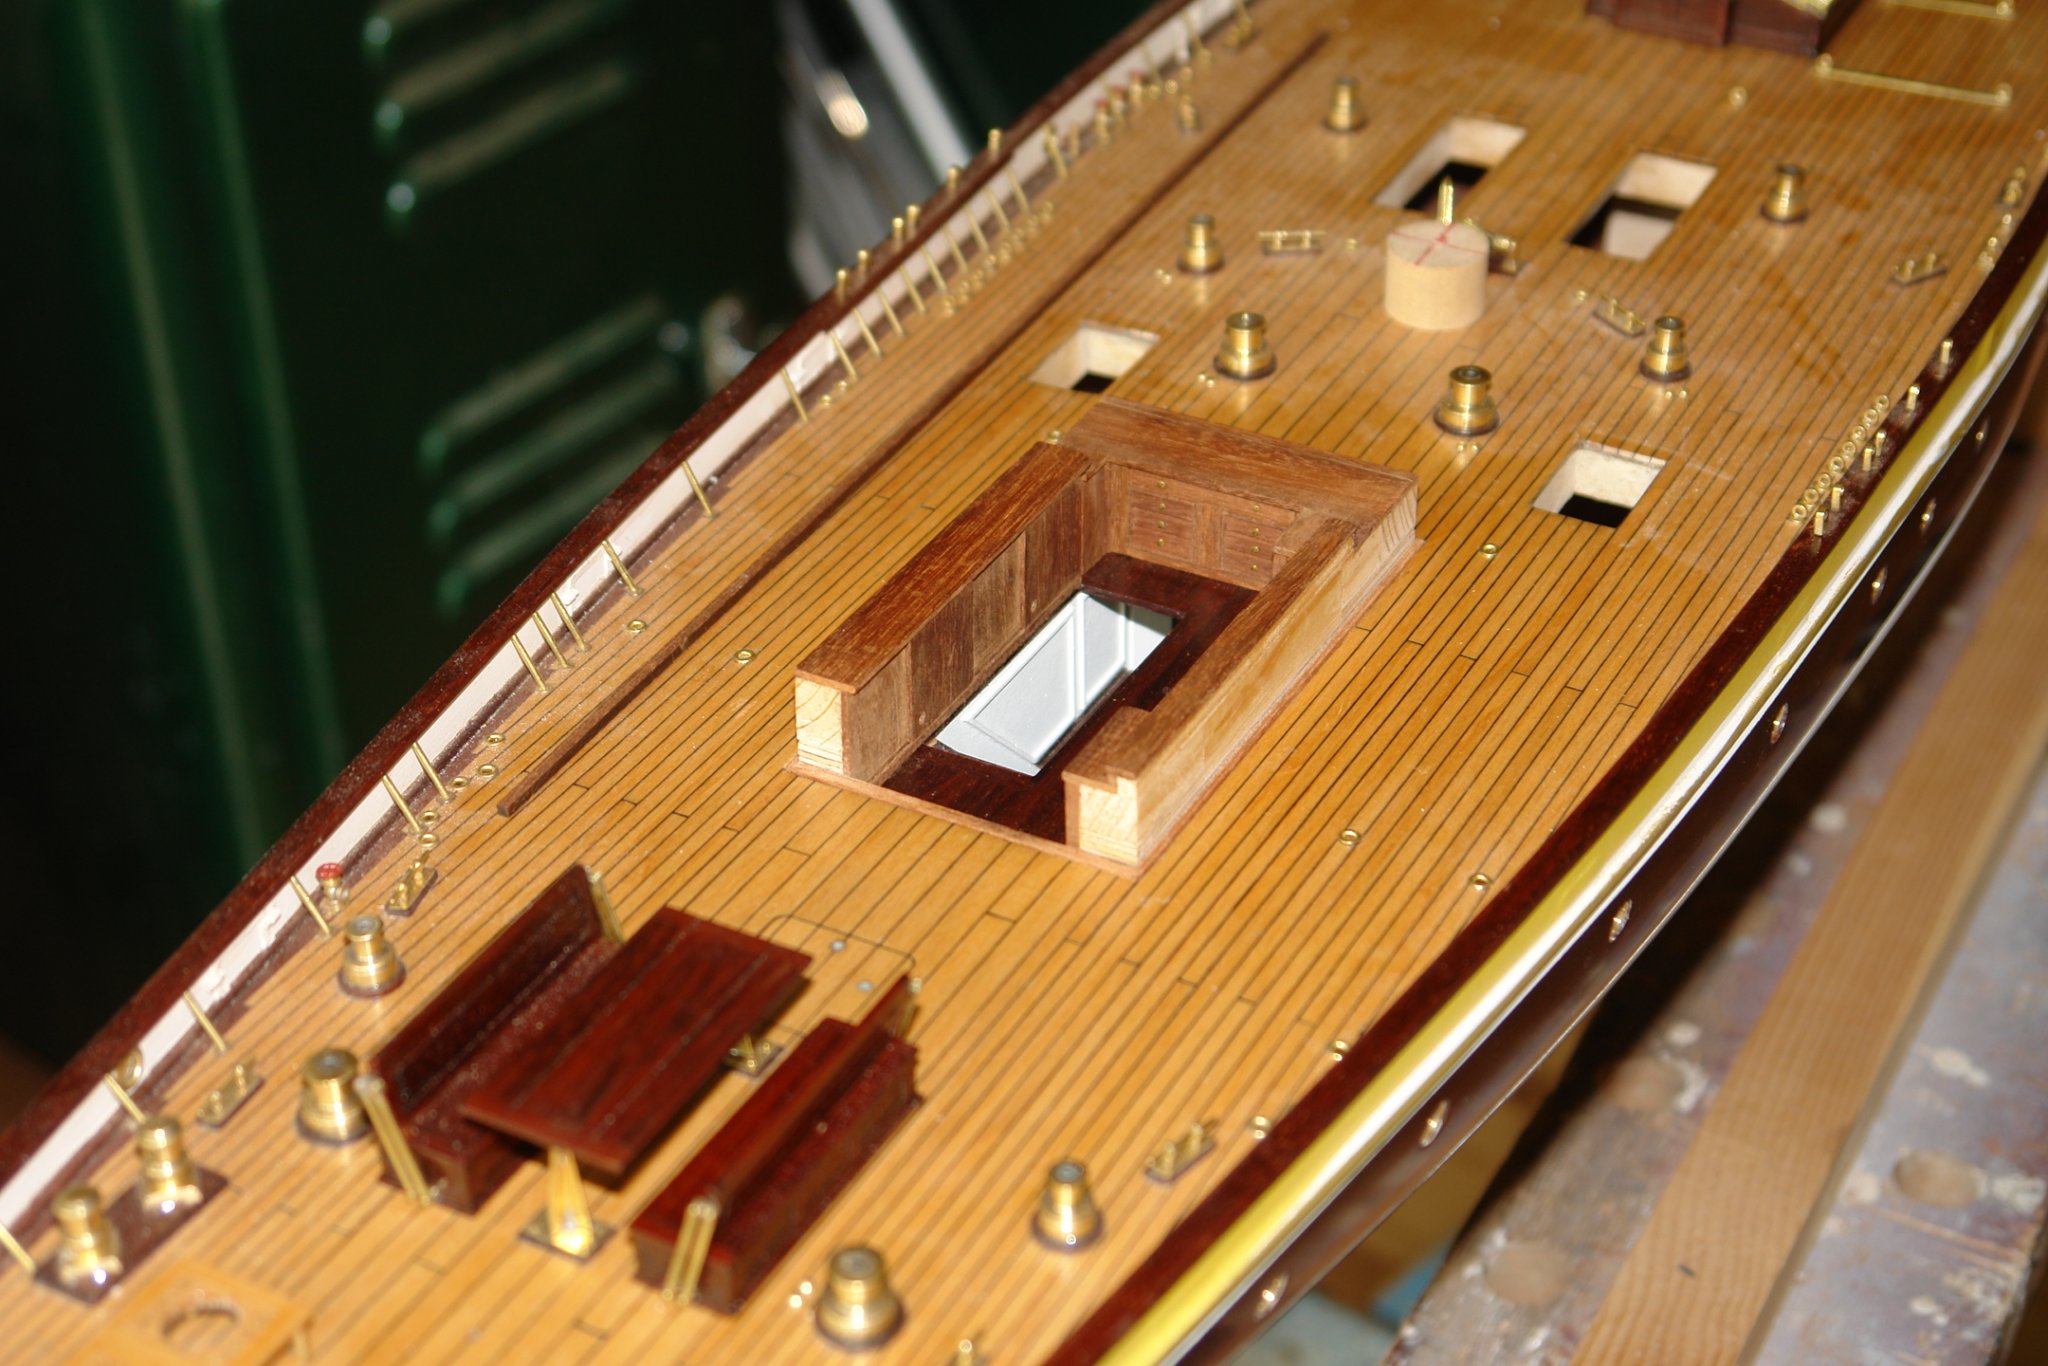
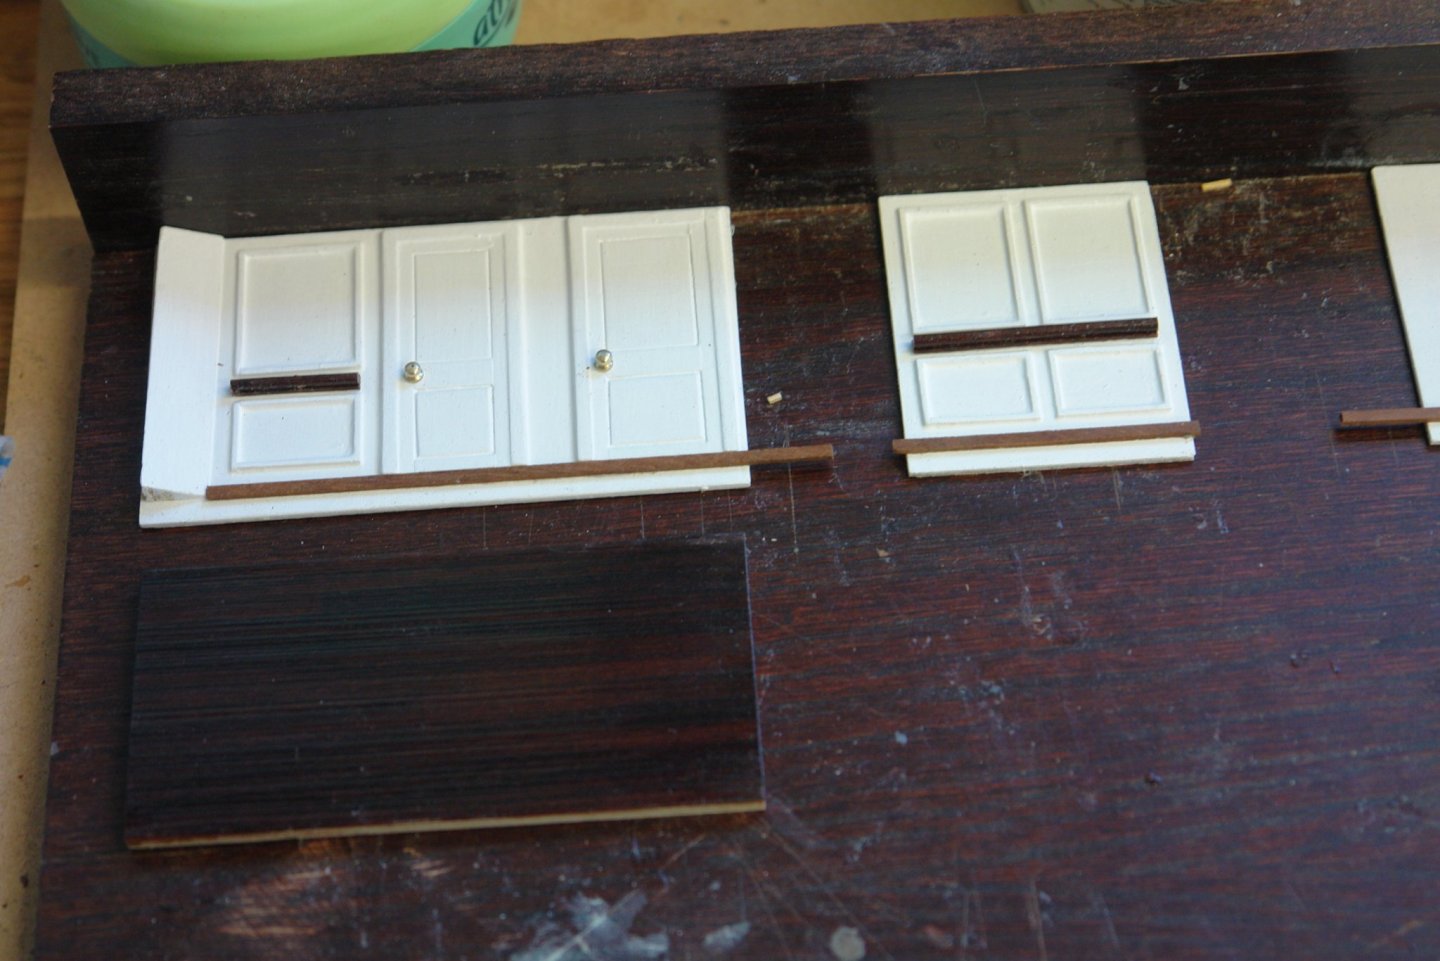
The deckhouse build commences. I started by building up the core for the various internal fittings. The first piece was cut from 3/8" ply. On to this was built up the various shapes to form the seating / desks etc. With the core complete I started on the internal surfaces. On the port side is a cupboard unit which I can't really see on photographs. Given its adjacency to the stairs I decided that the cupboard doors were probably slide to open. I cut a bottom channel as a runner and overlapped two fronts to give the impression of 4 sliding doors. I then moved on to cladding over the seat and creating the other cupboards. Doors handles and desktops were then installed before sanding.


-
She also has 3 radio phones:- 1 - Ship to ship / ship to shore, 2 - Direct share dealing line, 3 - Direct private line to mistress.
-
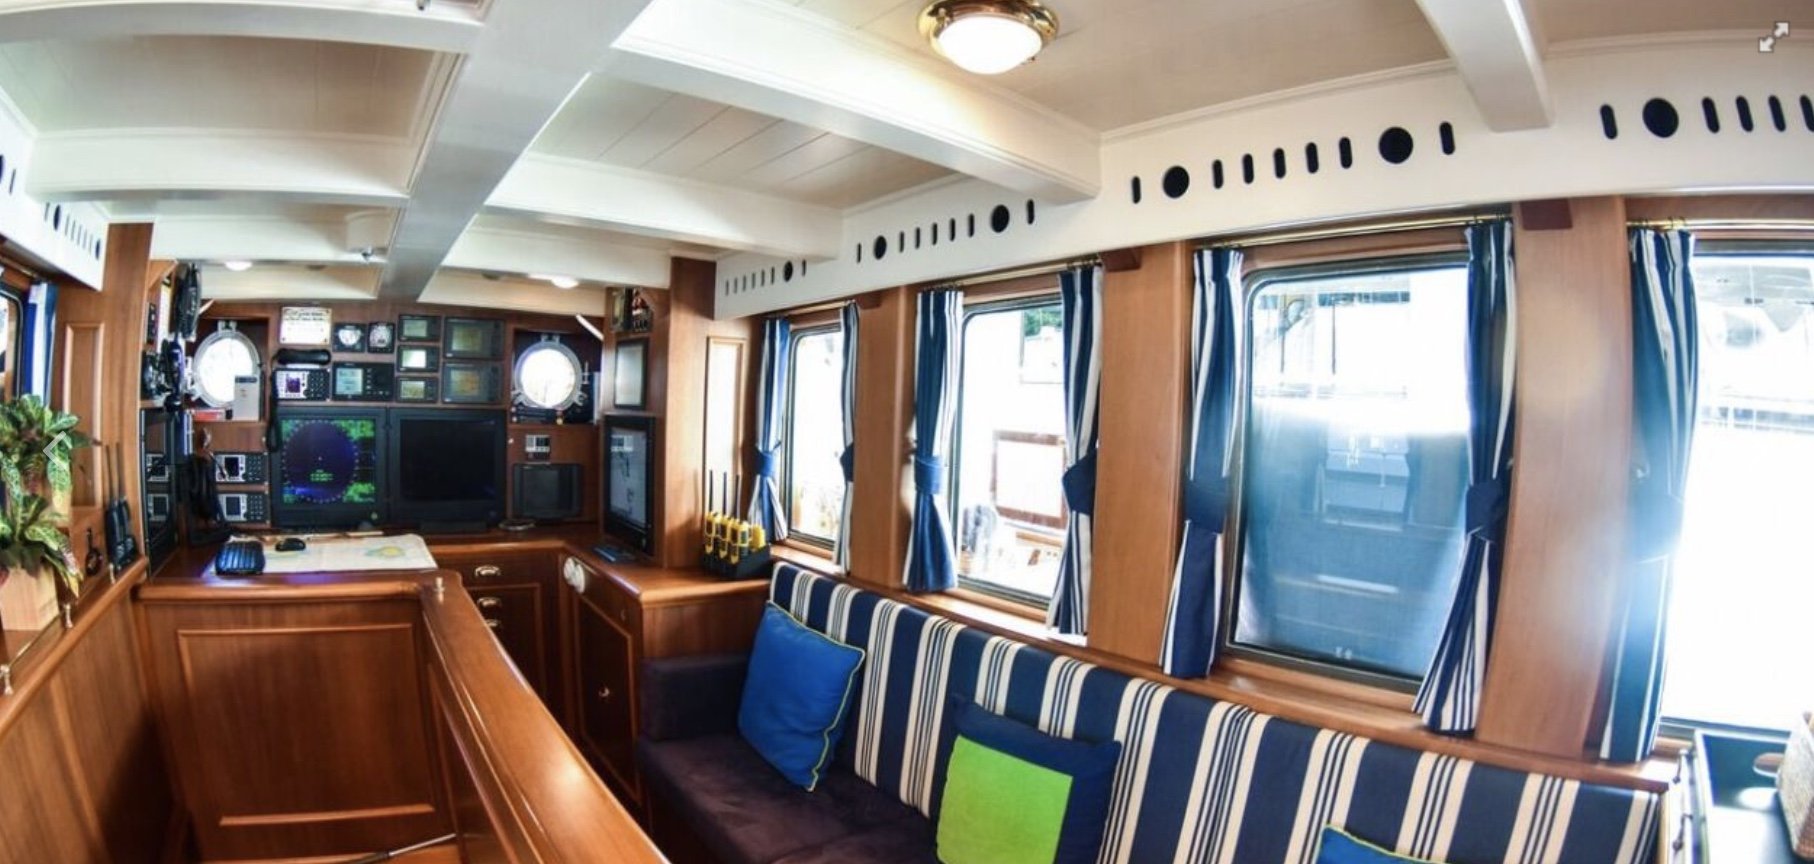
Richard / Keith - you set such high expectations I fear I may disappoint. Steve - excessive if you ask me. 4 large computer screens plus a smaller laptop size screen. I can't even begin to think what they are all for. GPS, Radar, Internet - and after that I run out of ideas.
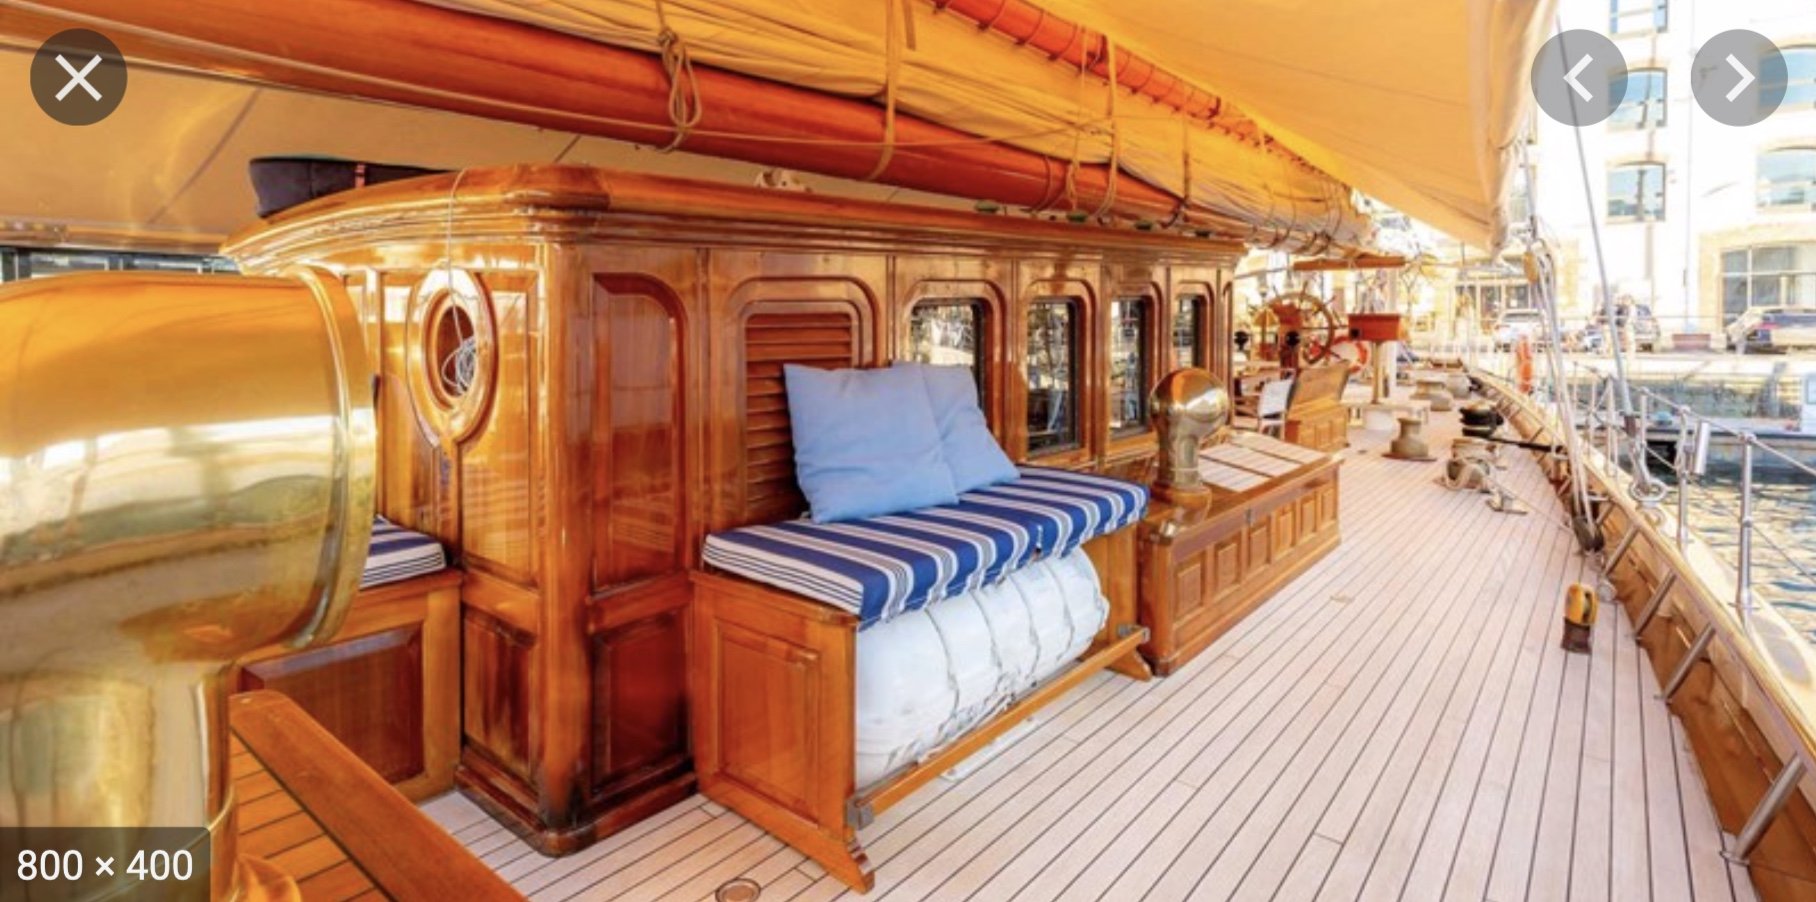
-
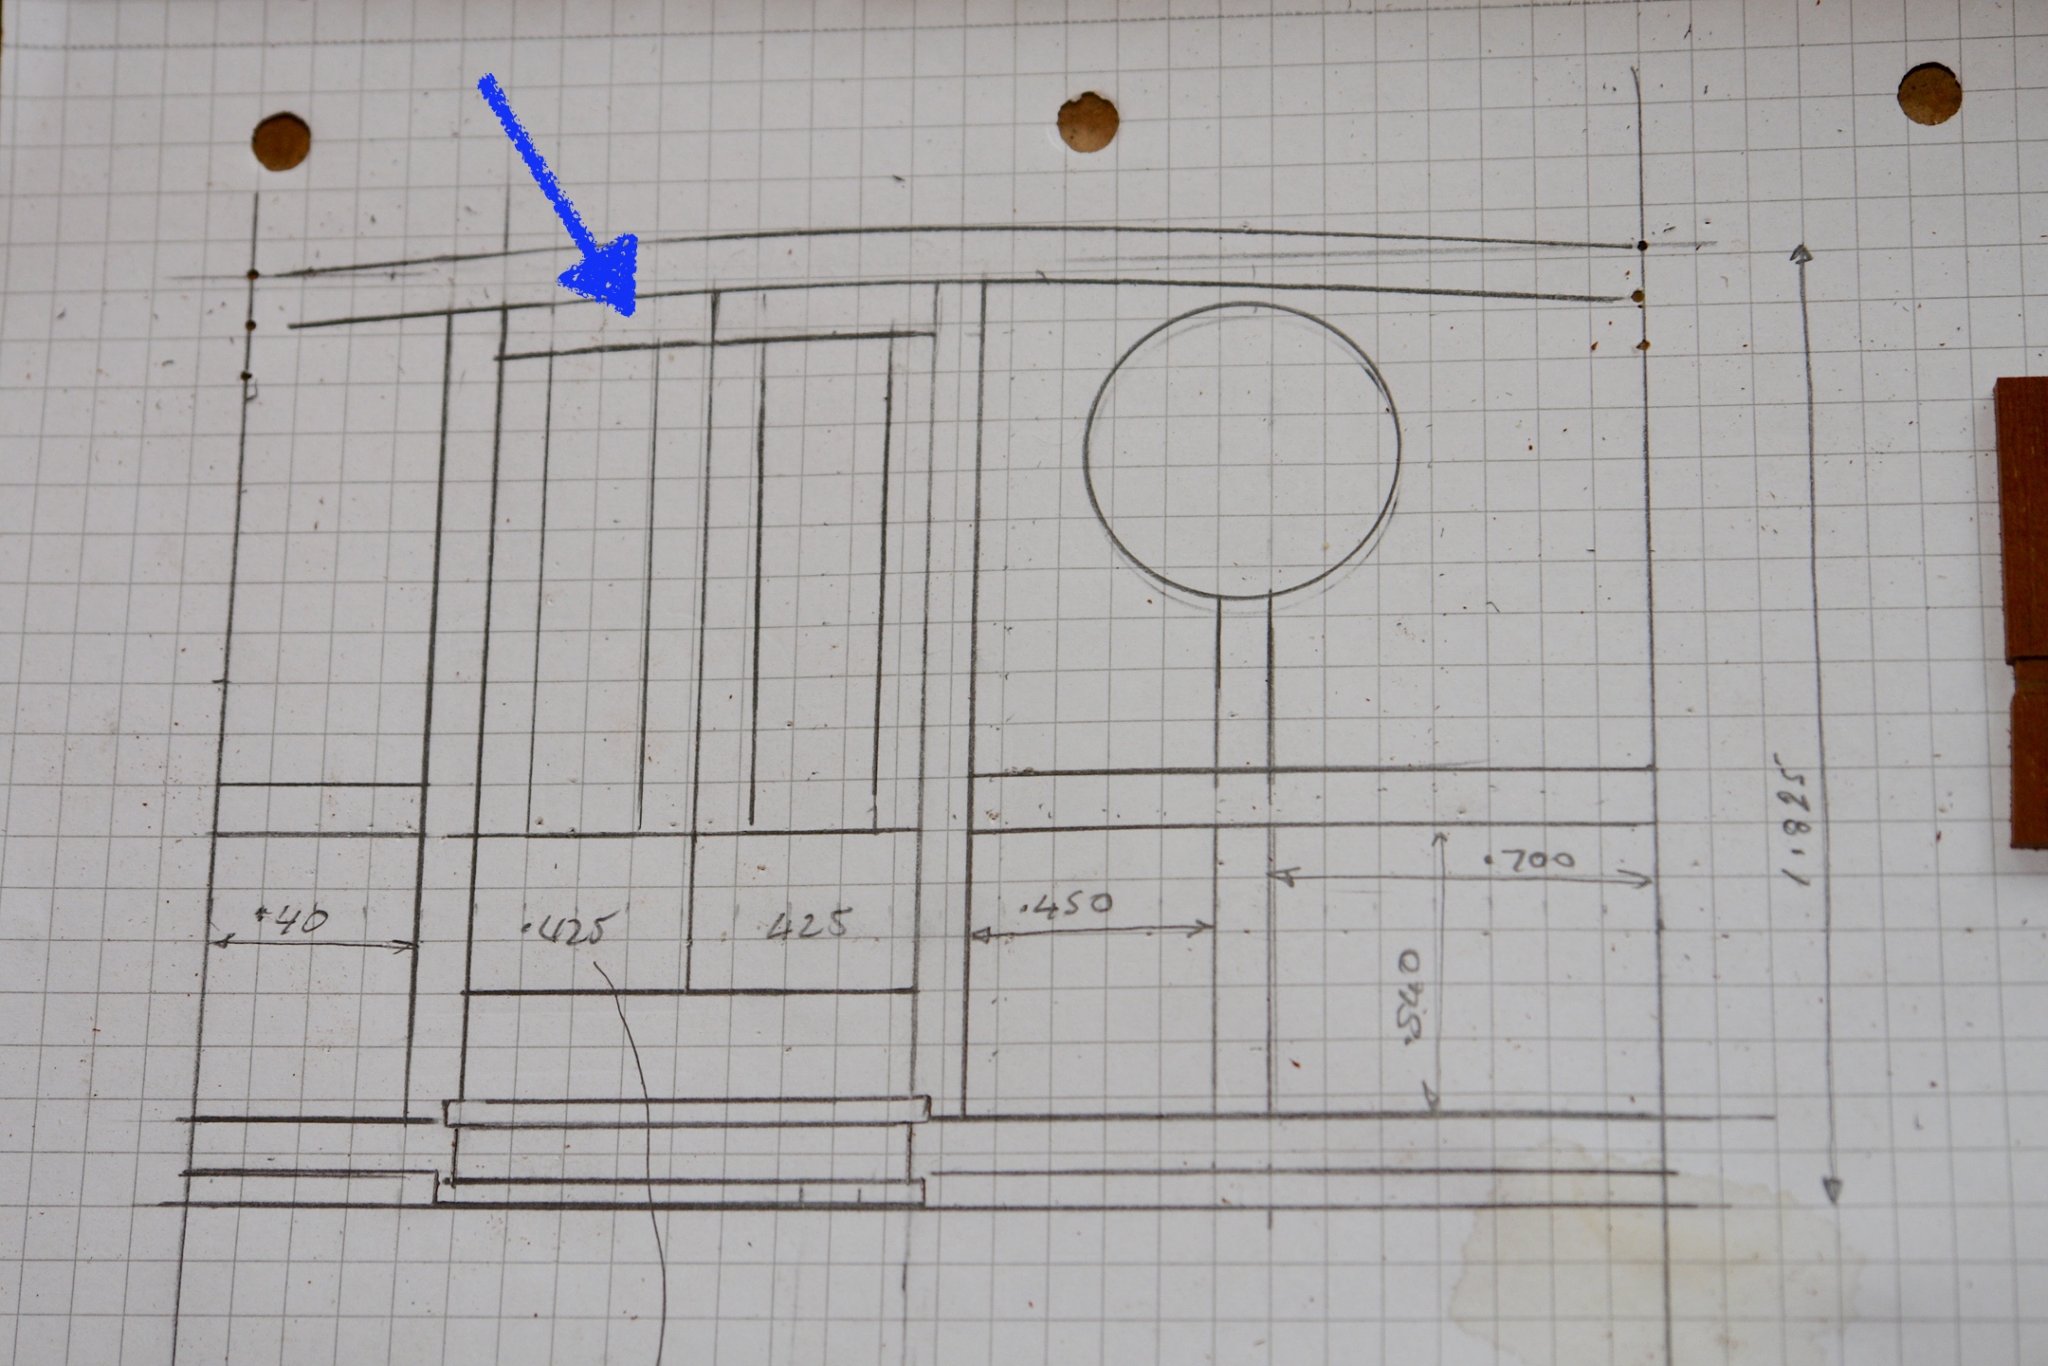
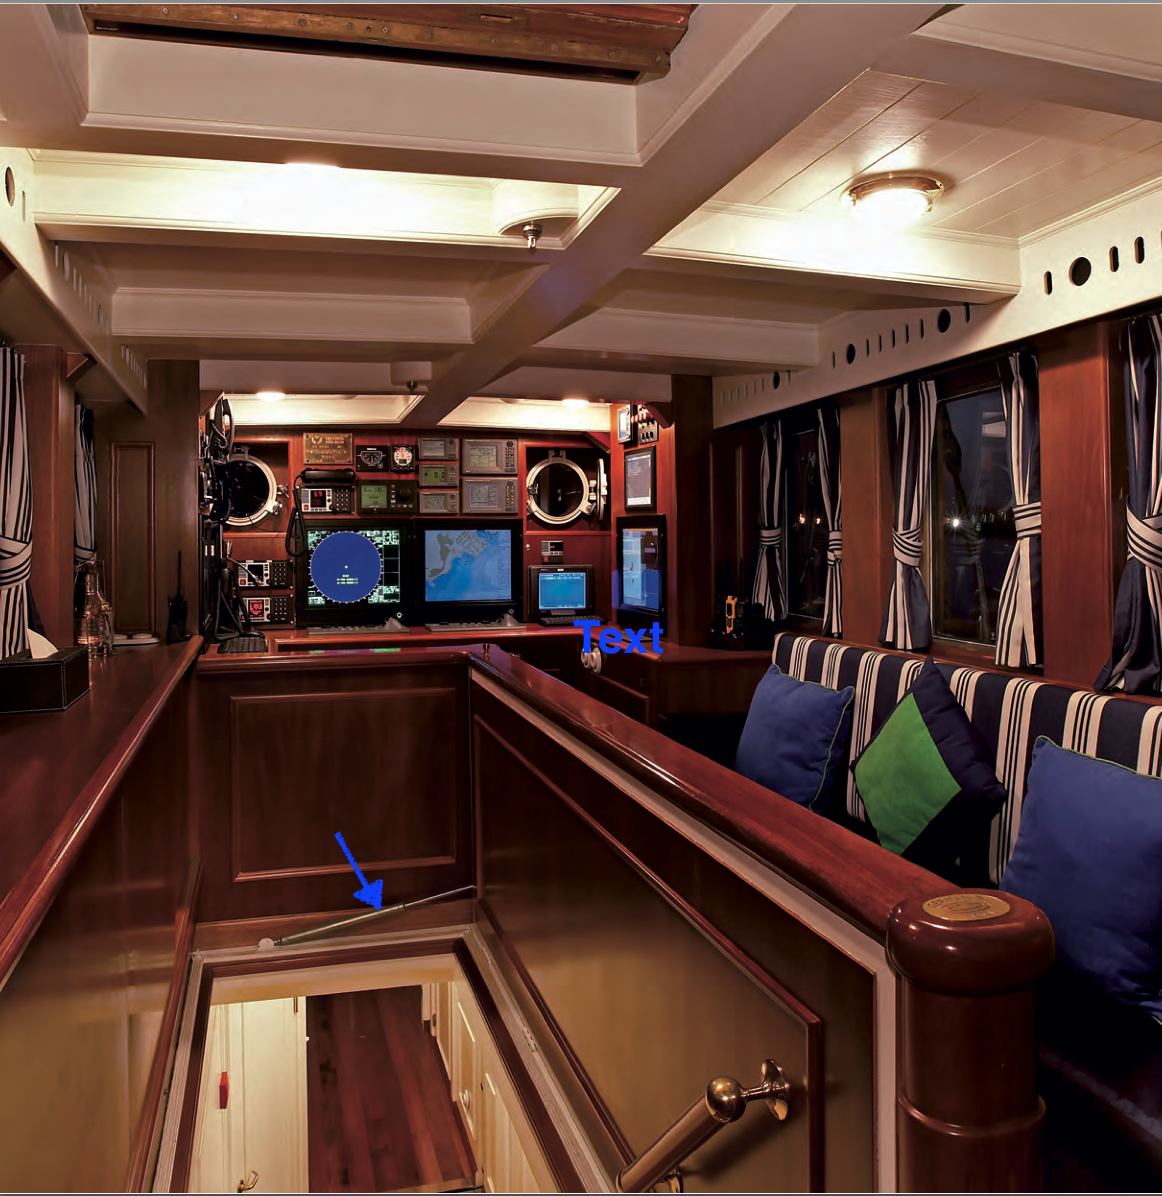
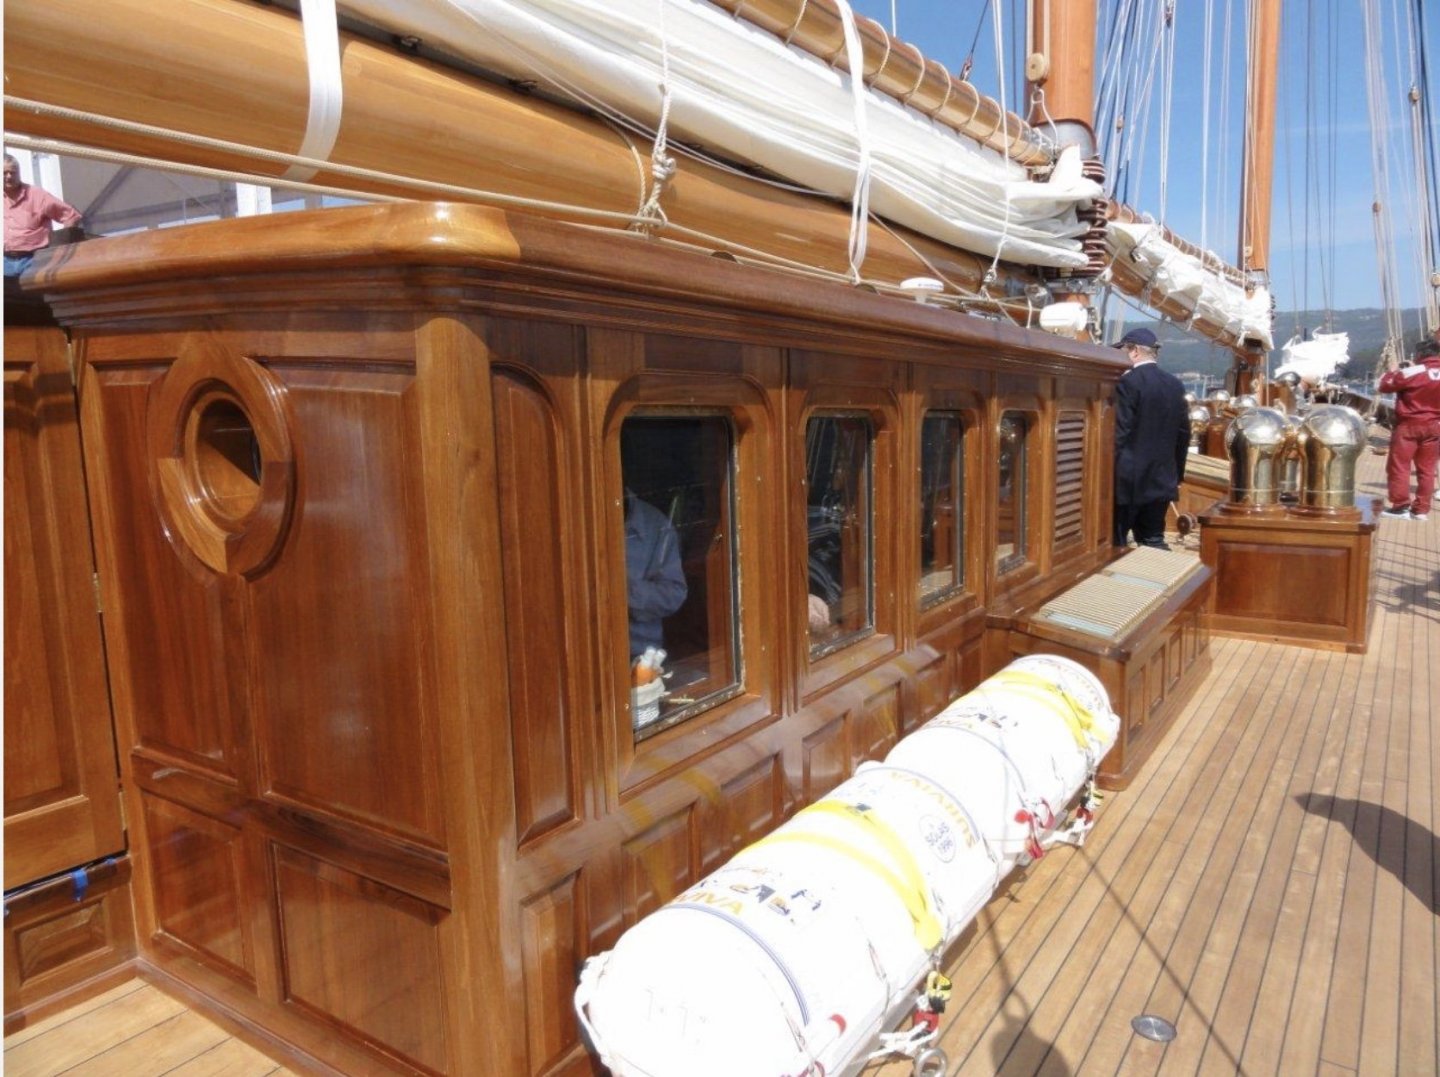
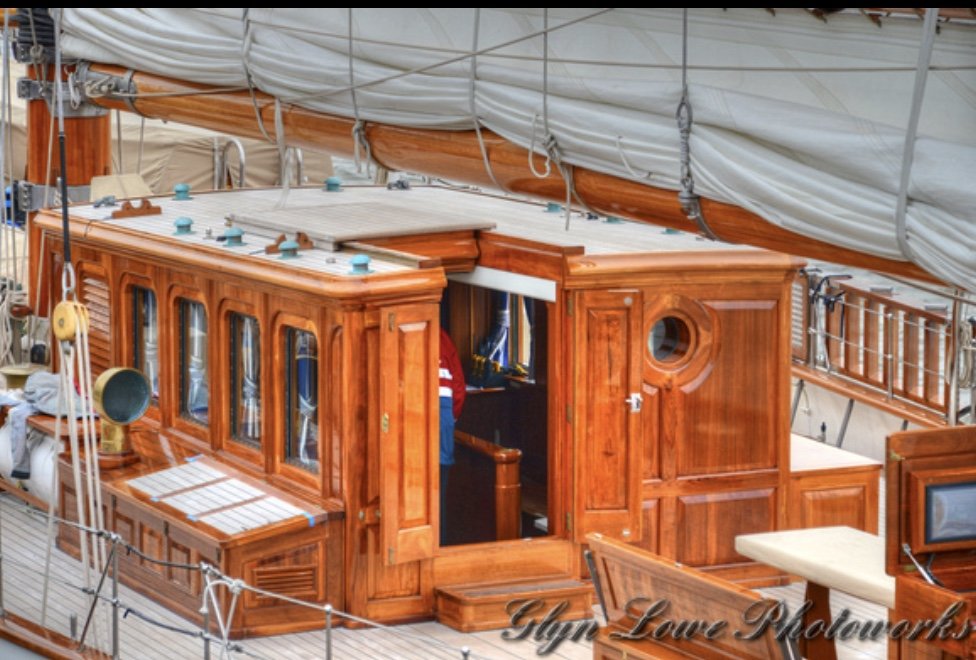
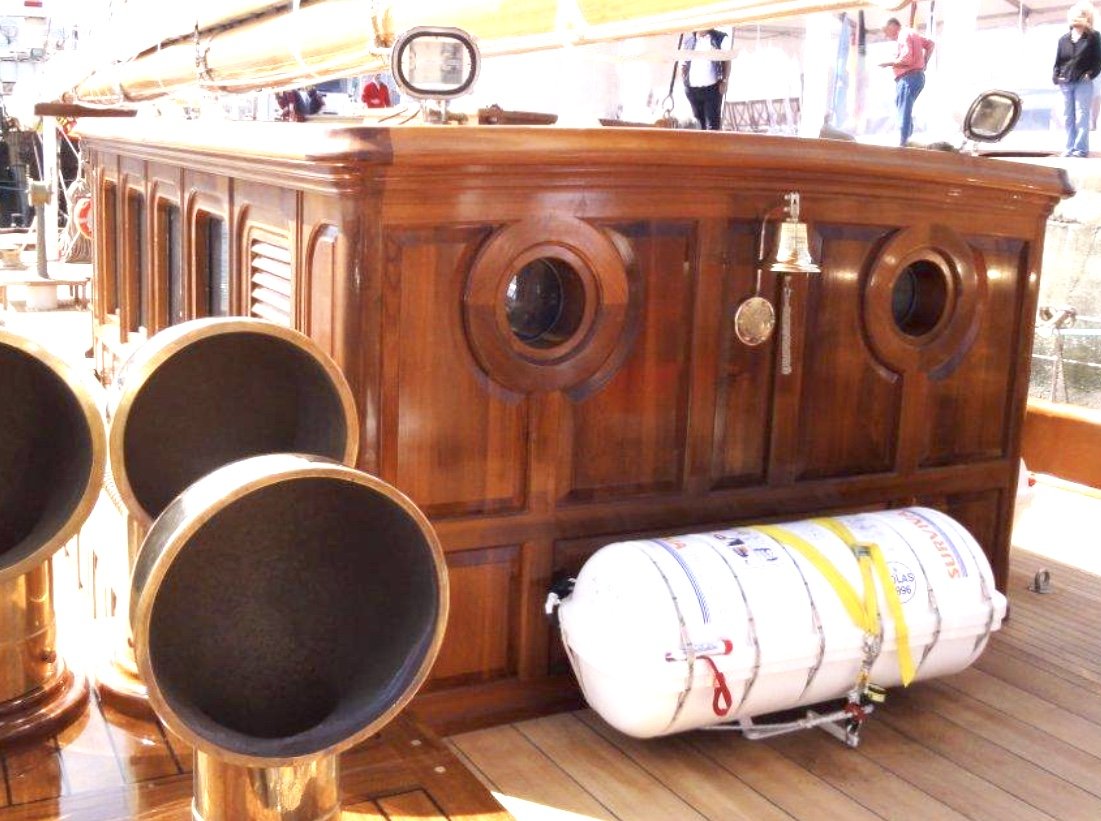
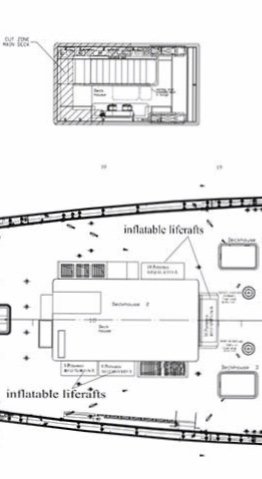
Pat, Roger, Michael, Gary thank you for your comments. I am moving on to the deck cabin. I have a selection of reasonable photos and a plan lacking in detail. A few decisions to make though as follows:- In the next 2 photos the side wings are of interest. On this the port side view the top of the wing is seen to be planked. Whereas on the starboard side view the wing top has skylights protected by brass bars. The plans while being a little indistinct seem to show skylights. It is also apparent that the life rafts are sometimes hidden neatly under seats. And sometimes not. I am going with the skylight version (in sympathy with previous deckhouses) and with the life rafts hidden under seats. I also have some decent interior shots which I hope to put to good use. The cabin has very limited space around the instruments and seating, the whole interior being compromised by the dominant stair well and solid banister. However looks can be deceptive. The clue I think lies in the gas strut highlighted with a blue arrow in the next shot. I am fairly sure that this strut is to control the closure of the right hand bannister which folds down to close the stair well and create an extended floor. I have stated by drawing up the internal plan and noting on it the heights of the various desktops etc. I have started building up the interior but will cover that in my next post.


-
Very educational Hellmuht, I continue to be fascinated.
- 158 replies
-
- 2
-

-
- byblos ship
- Egyptian
- (and 1 more)
-
Druexy - yes I will have to leave clues, Eberhard - The advent calendar is first - then the dolls house. Keith - Not yet, the final job before I finish.
-
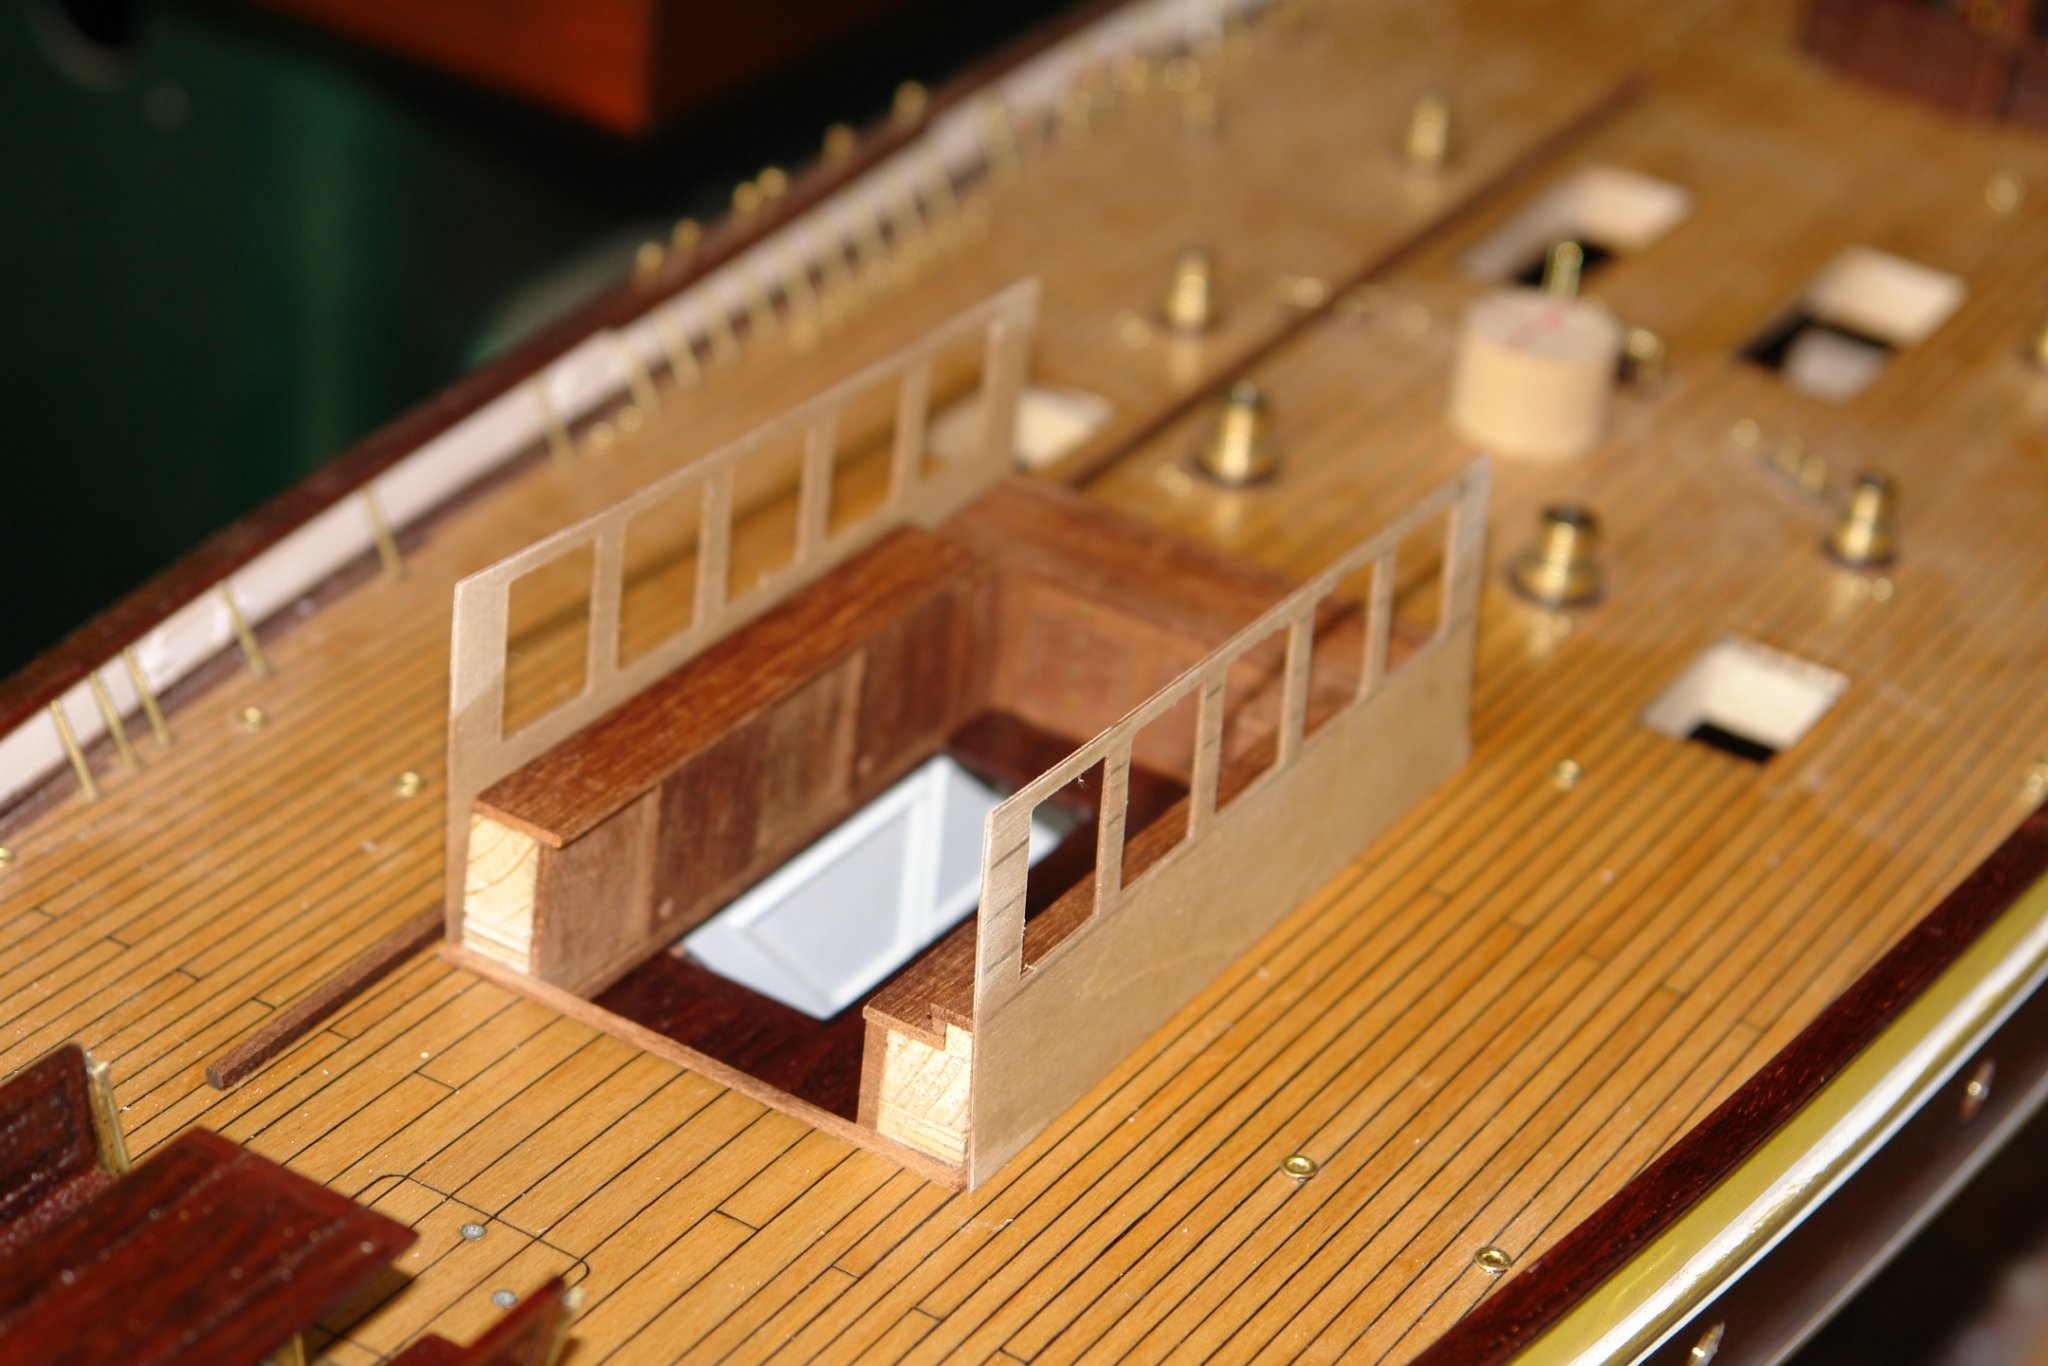
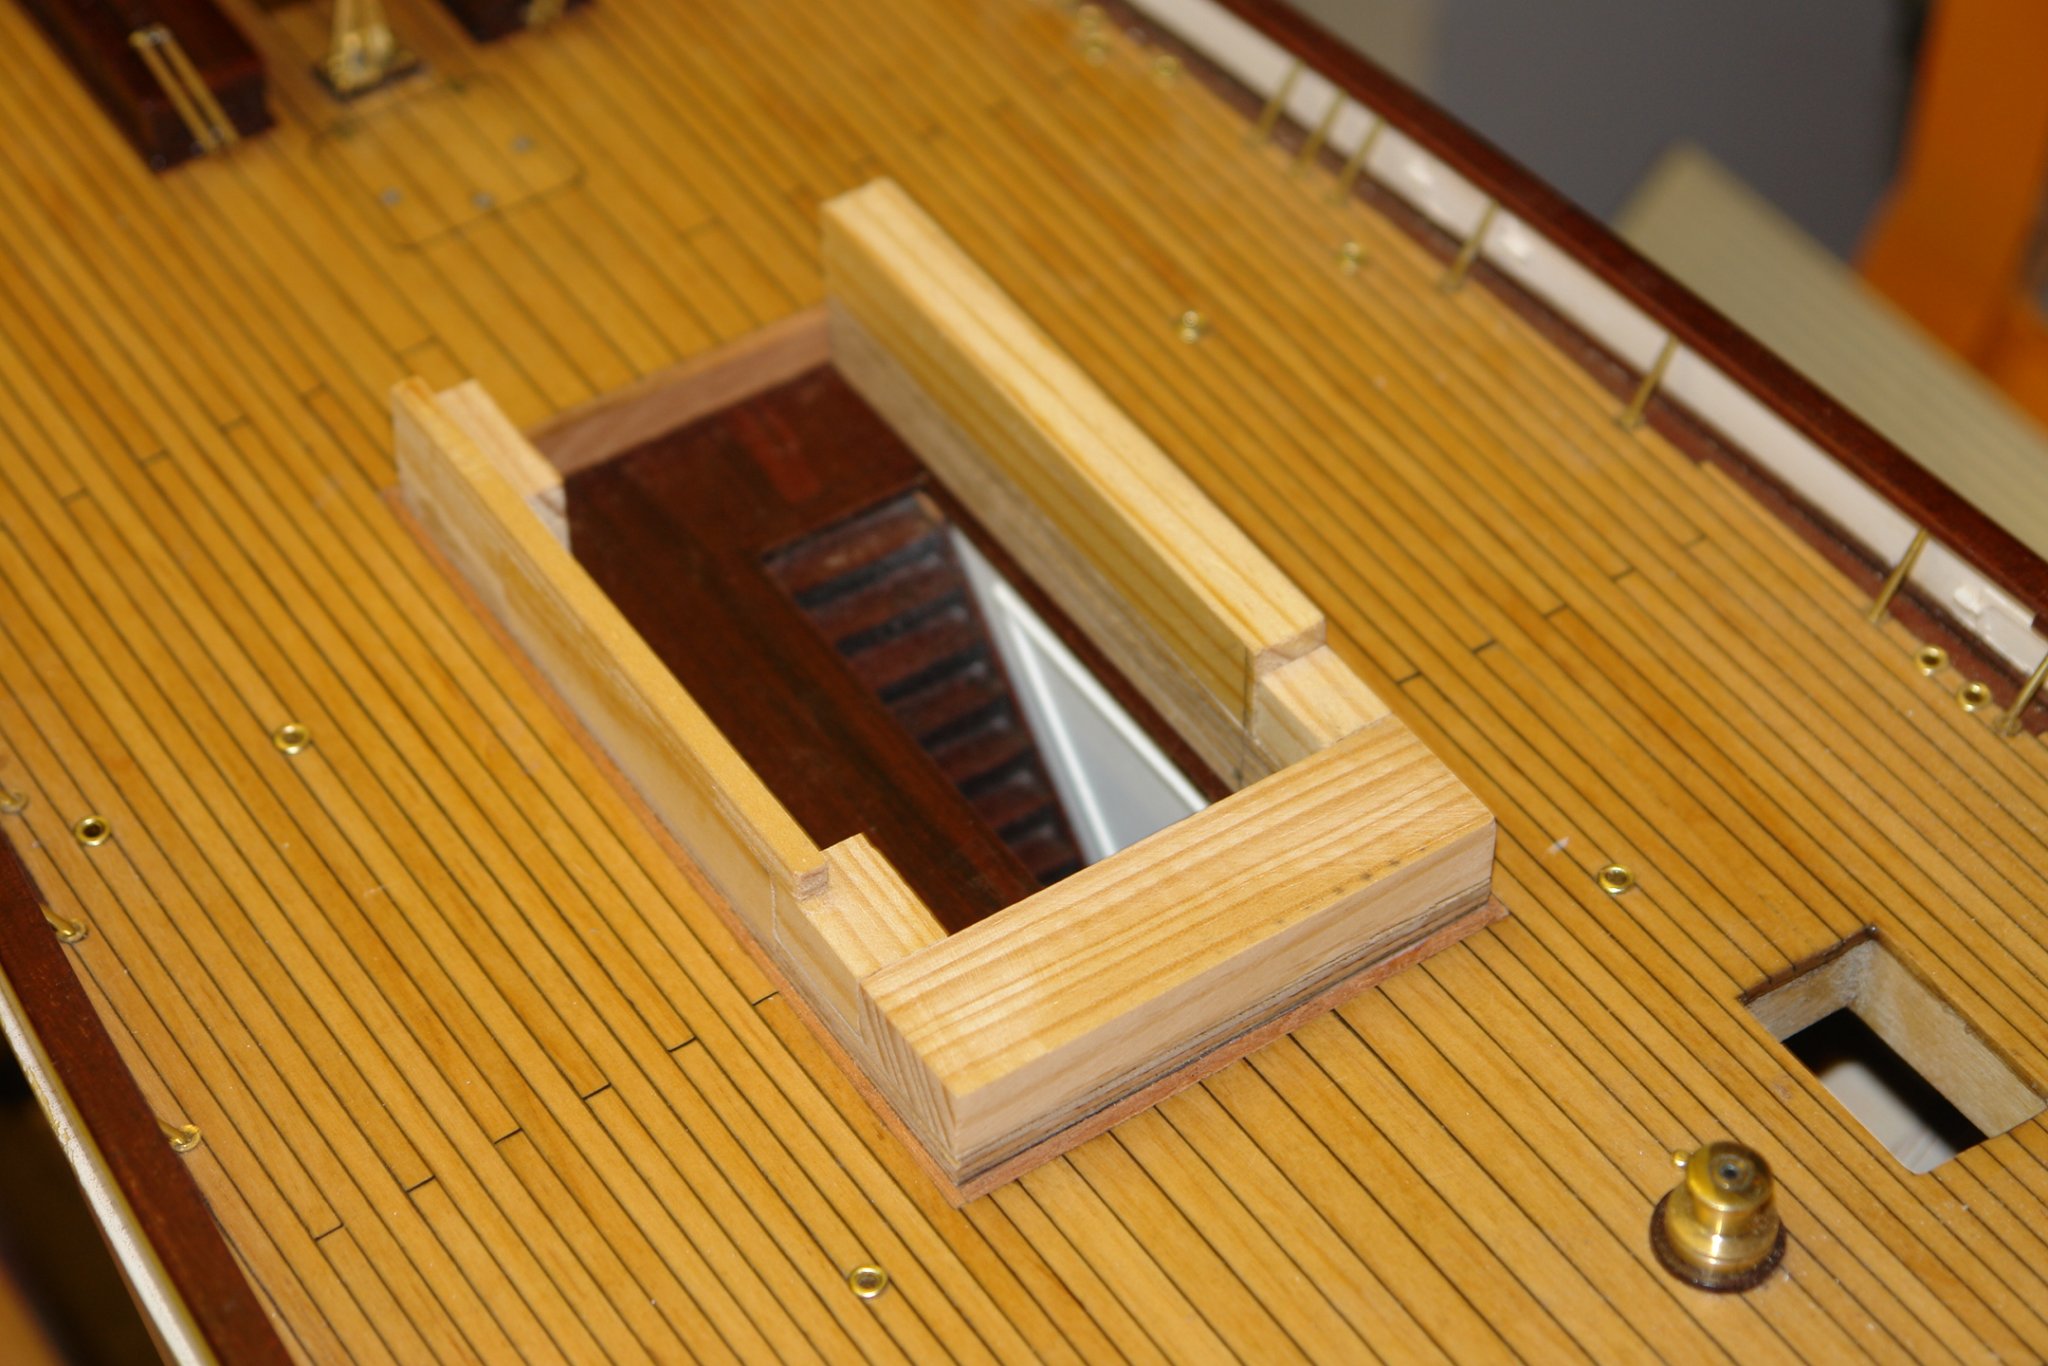
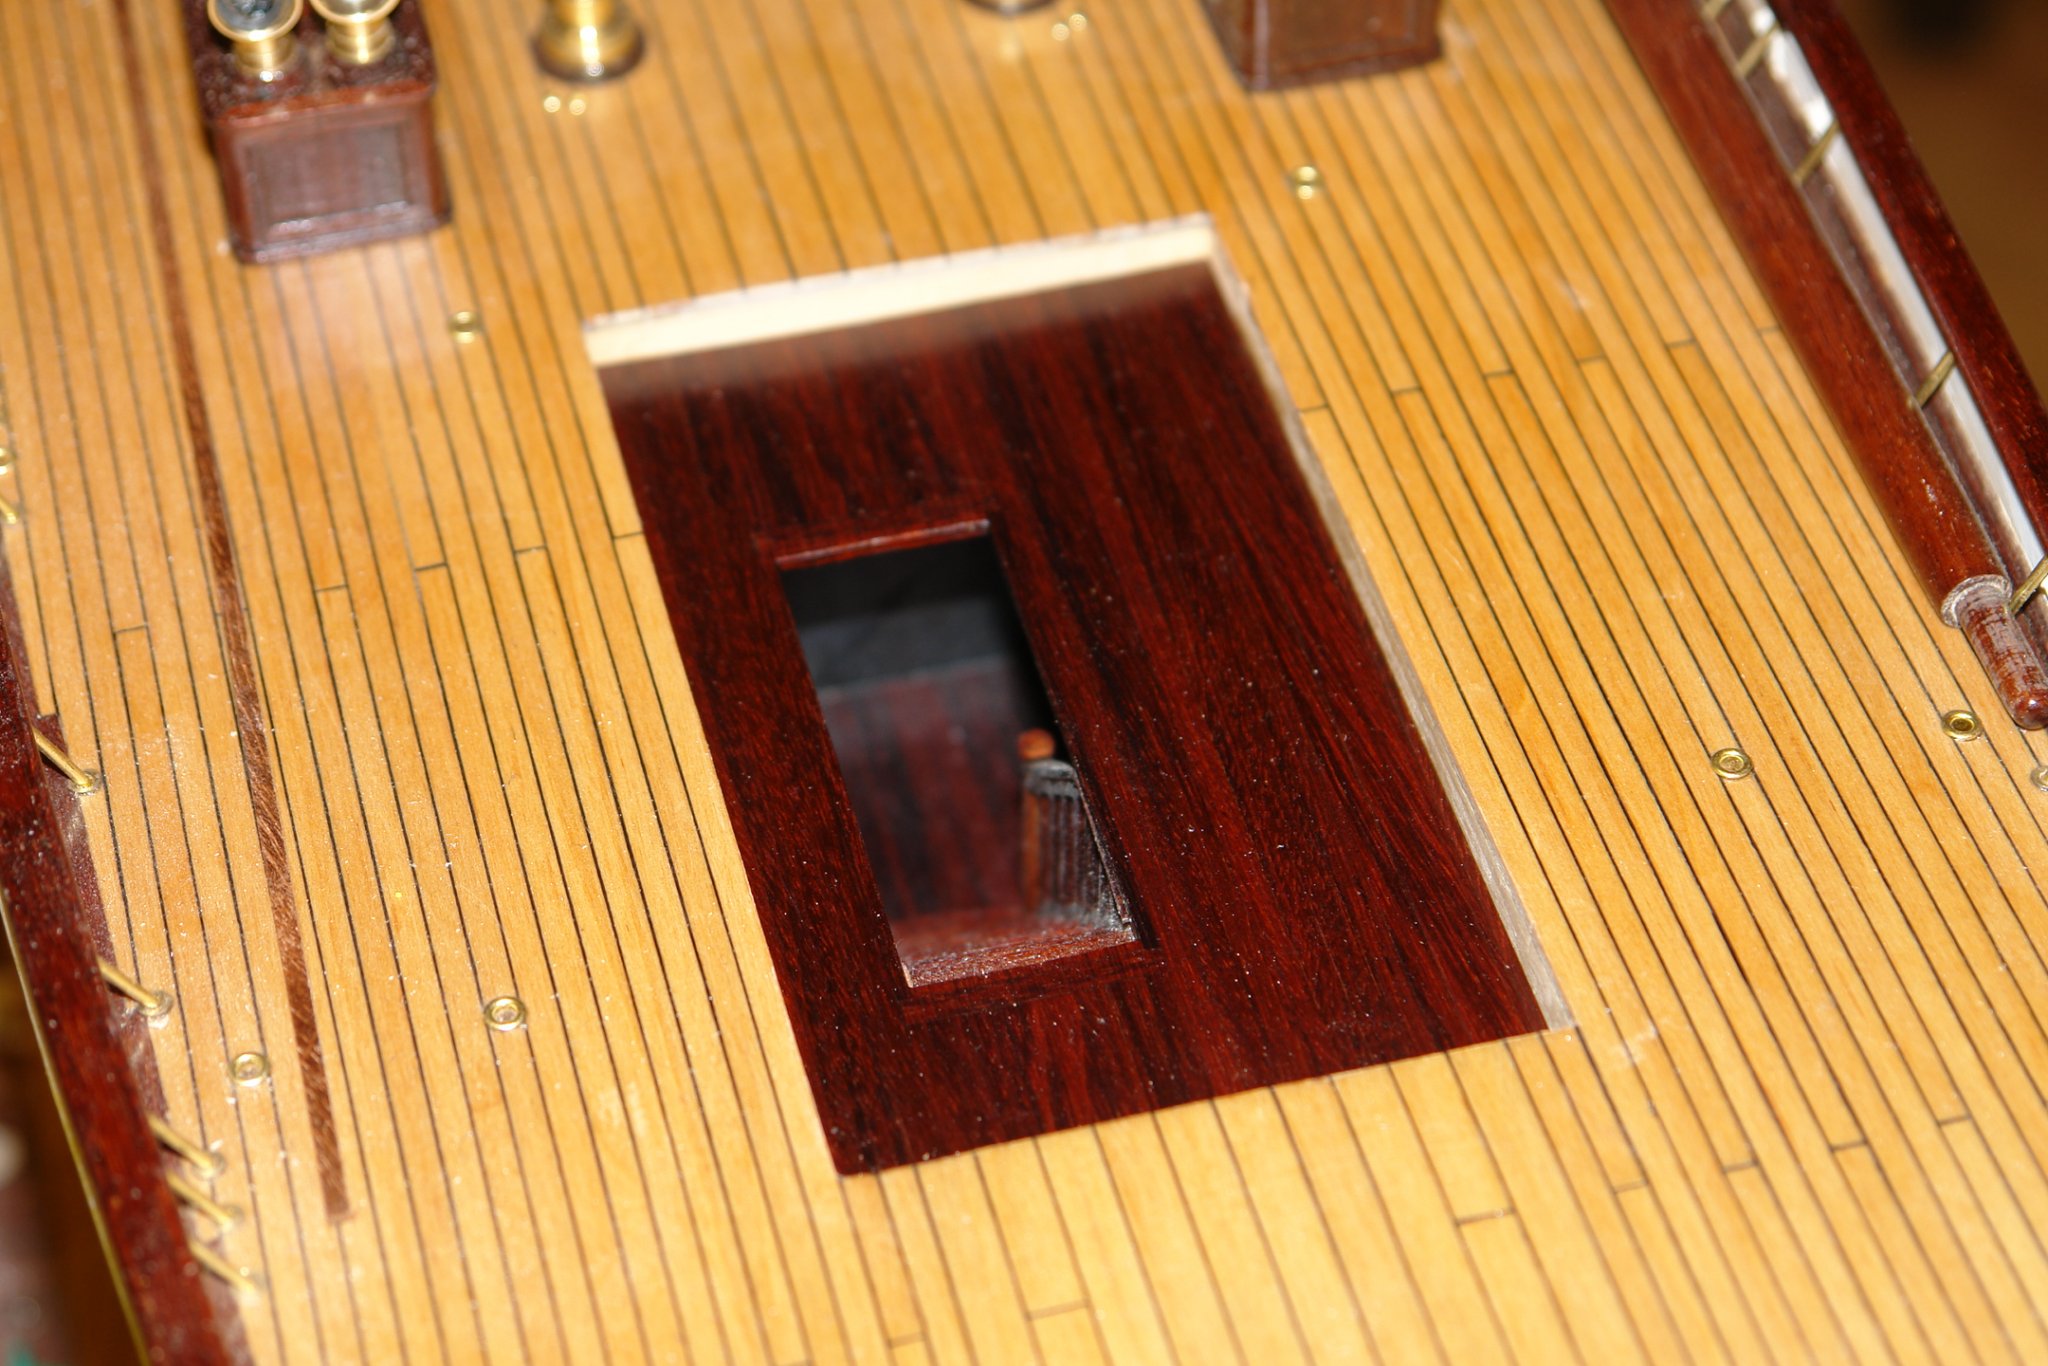
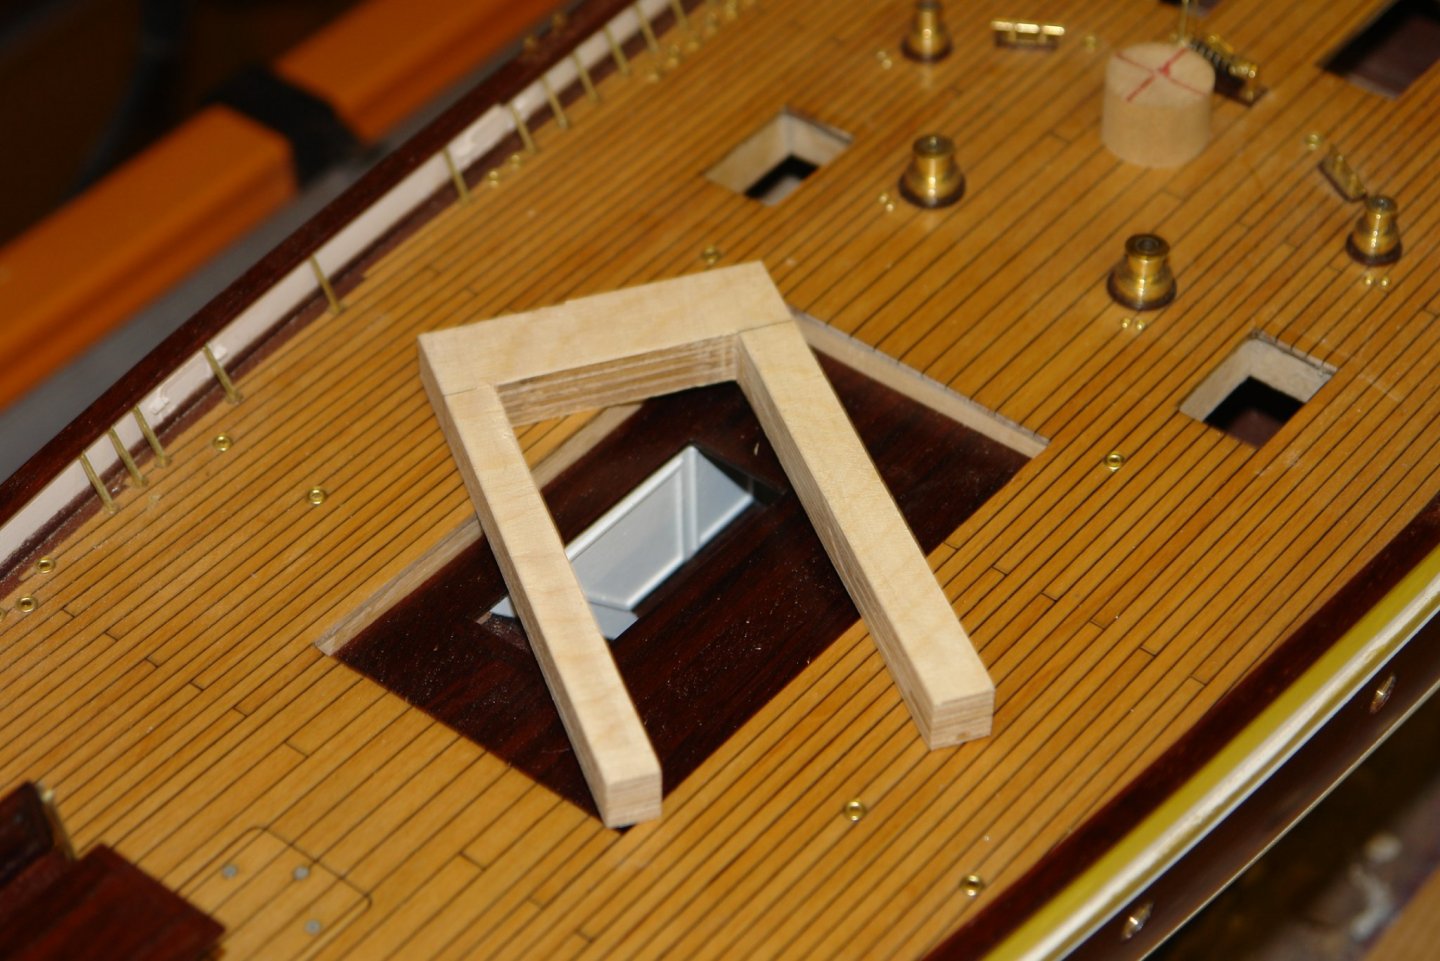
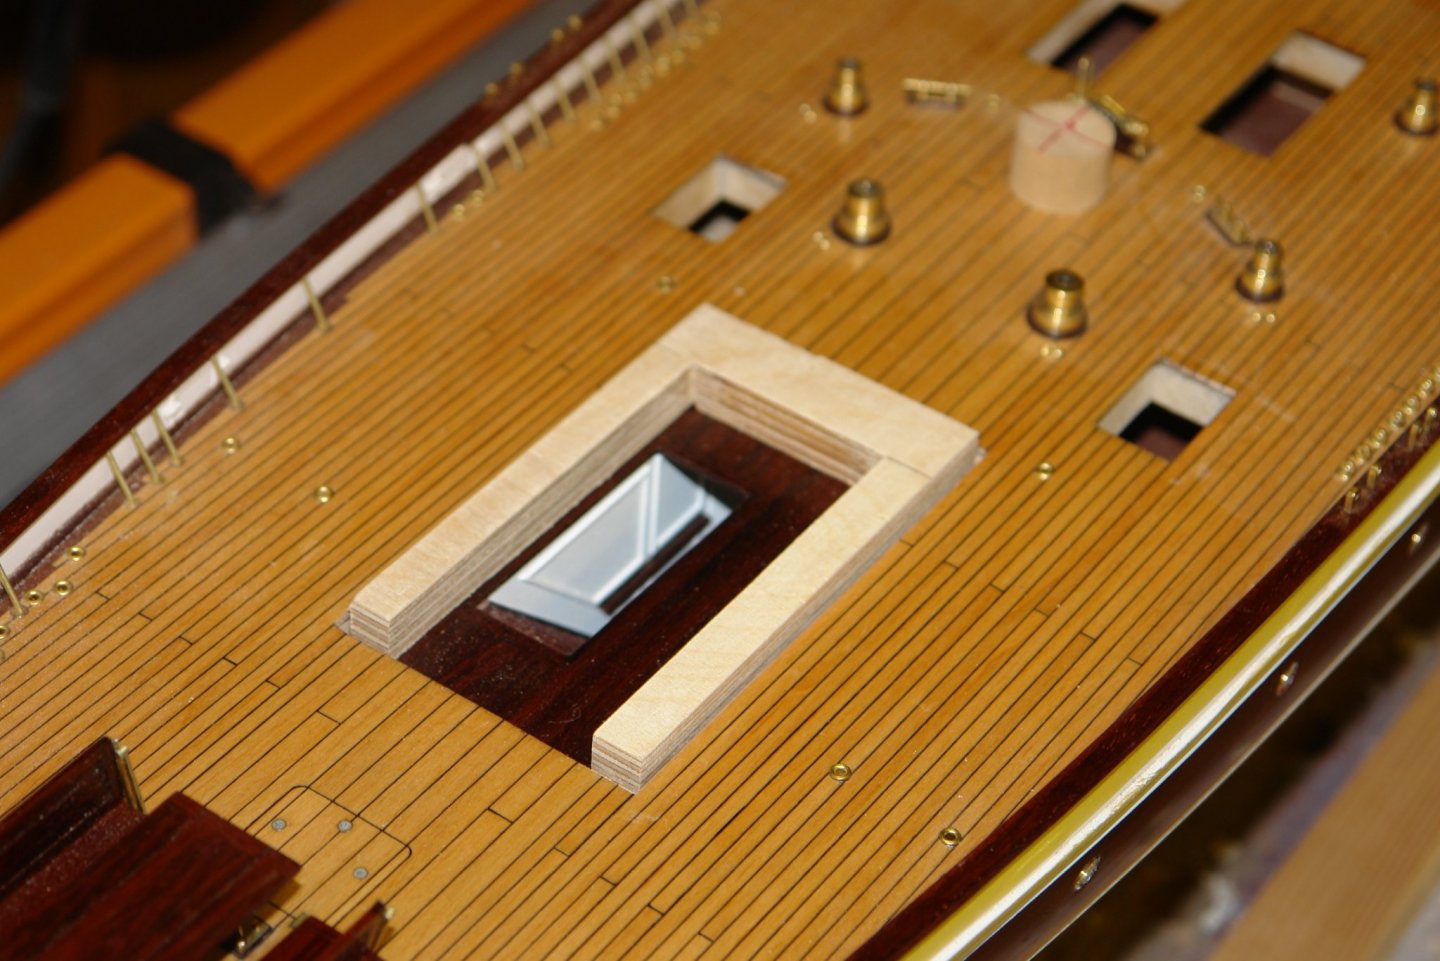
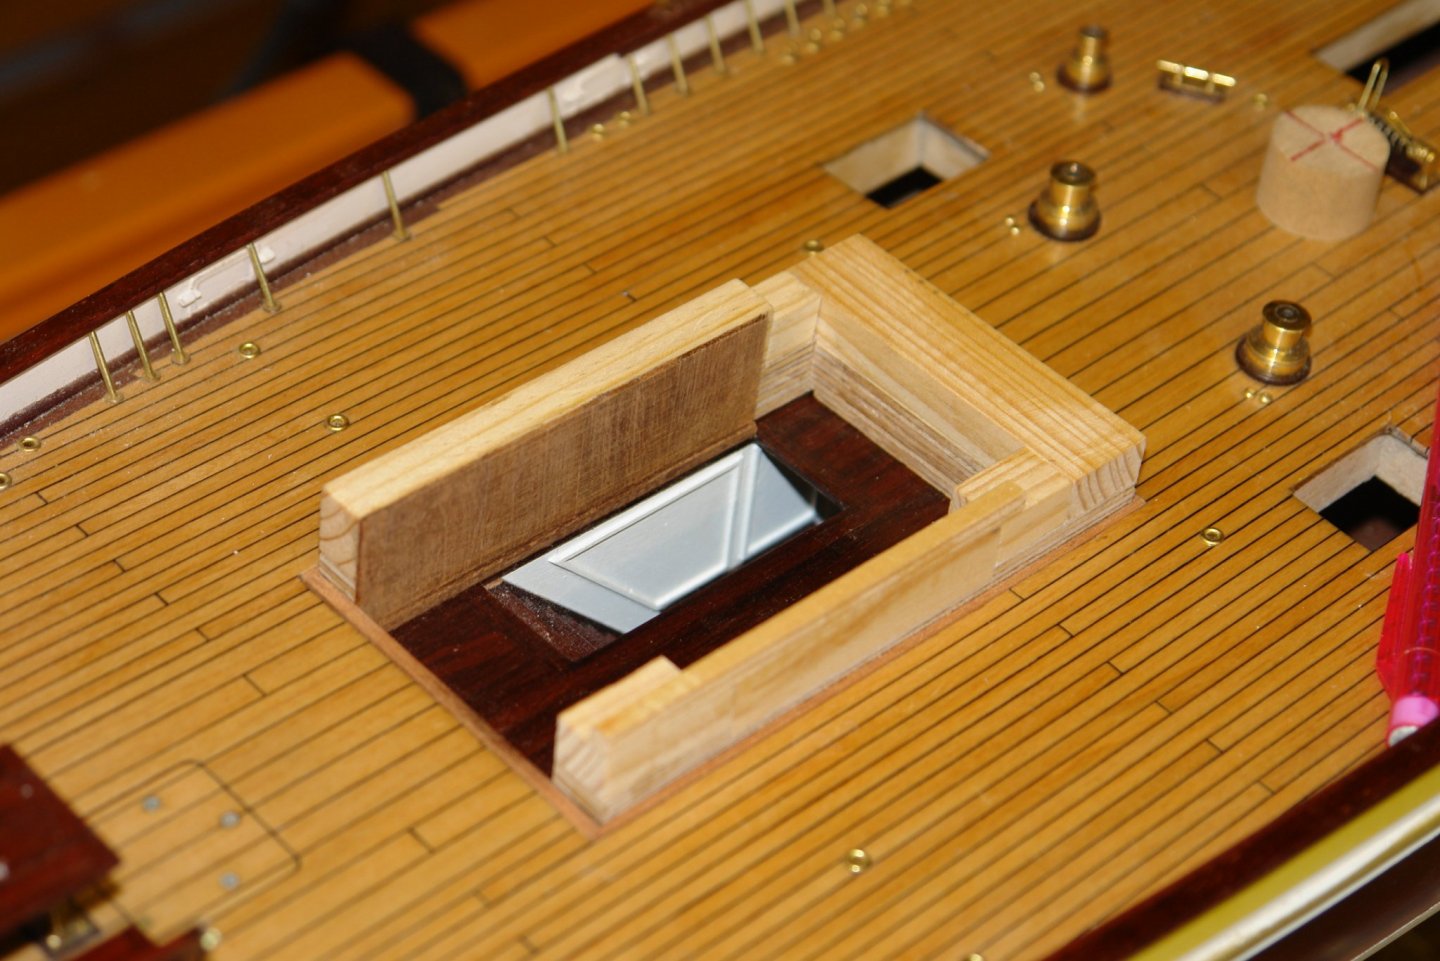
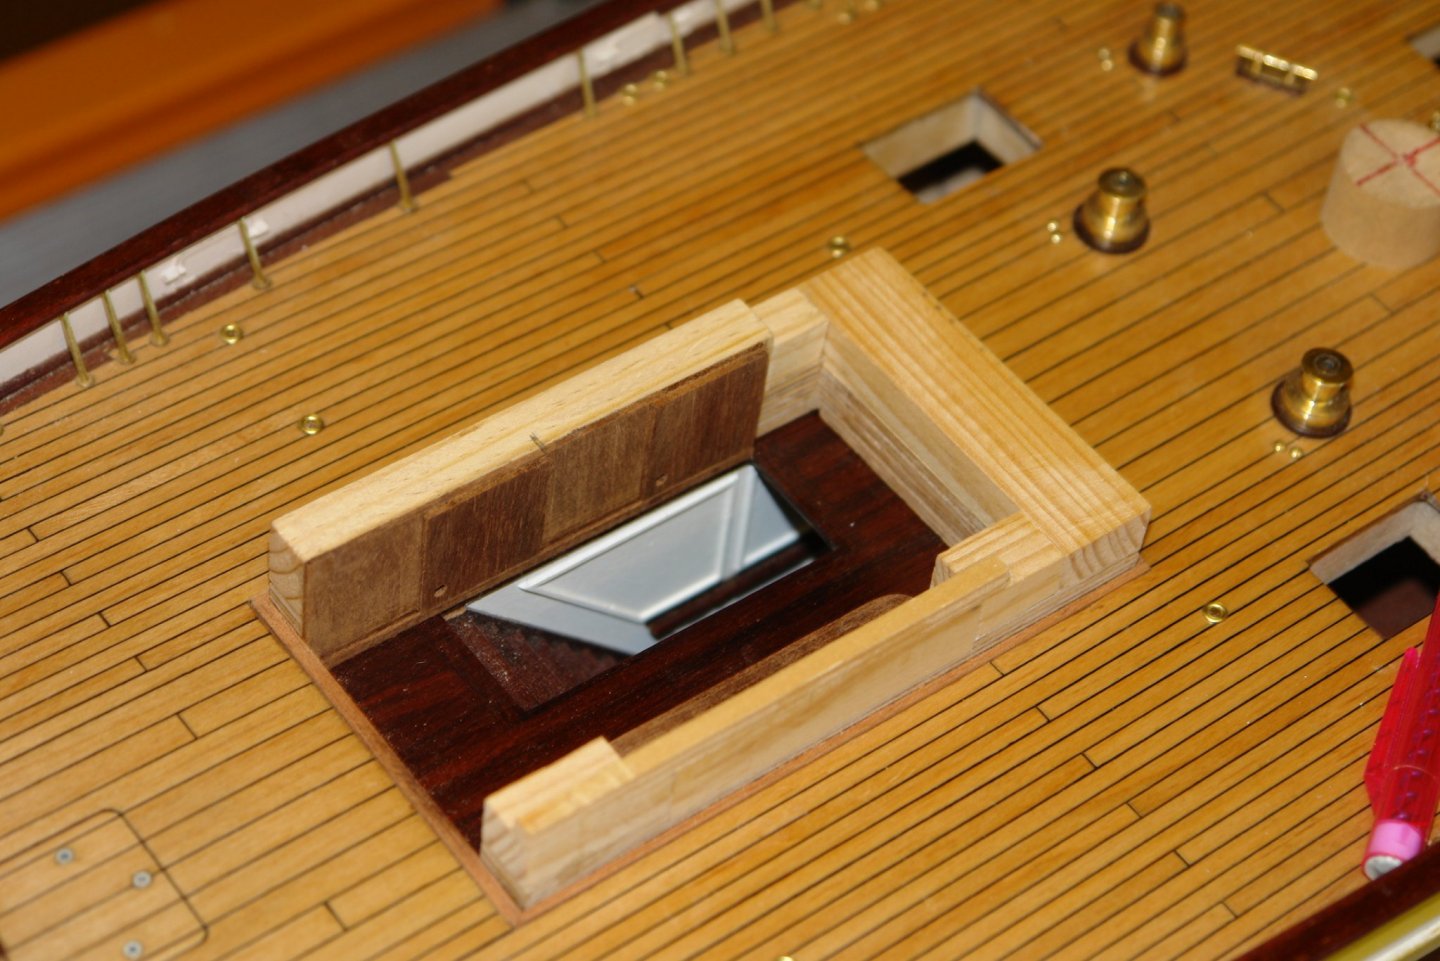
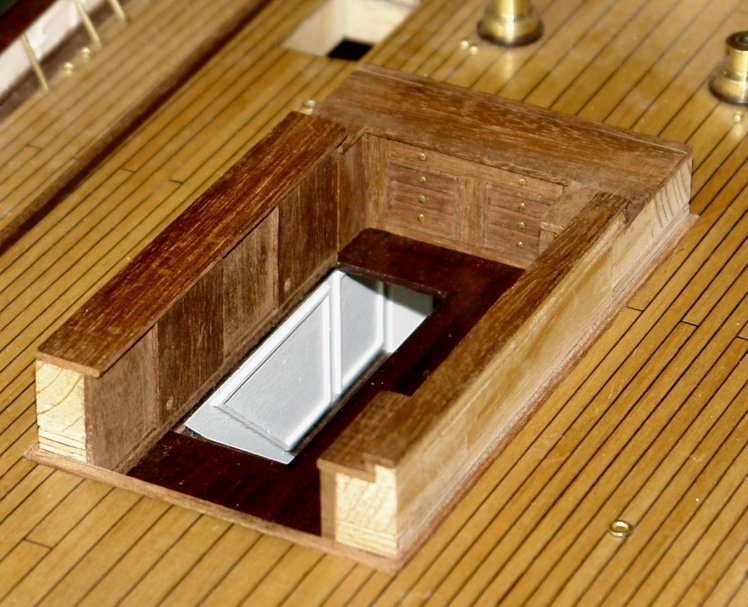
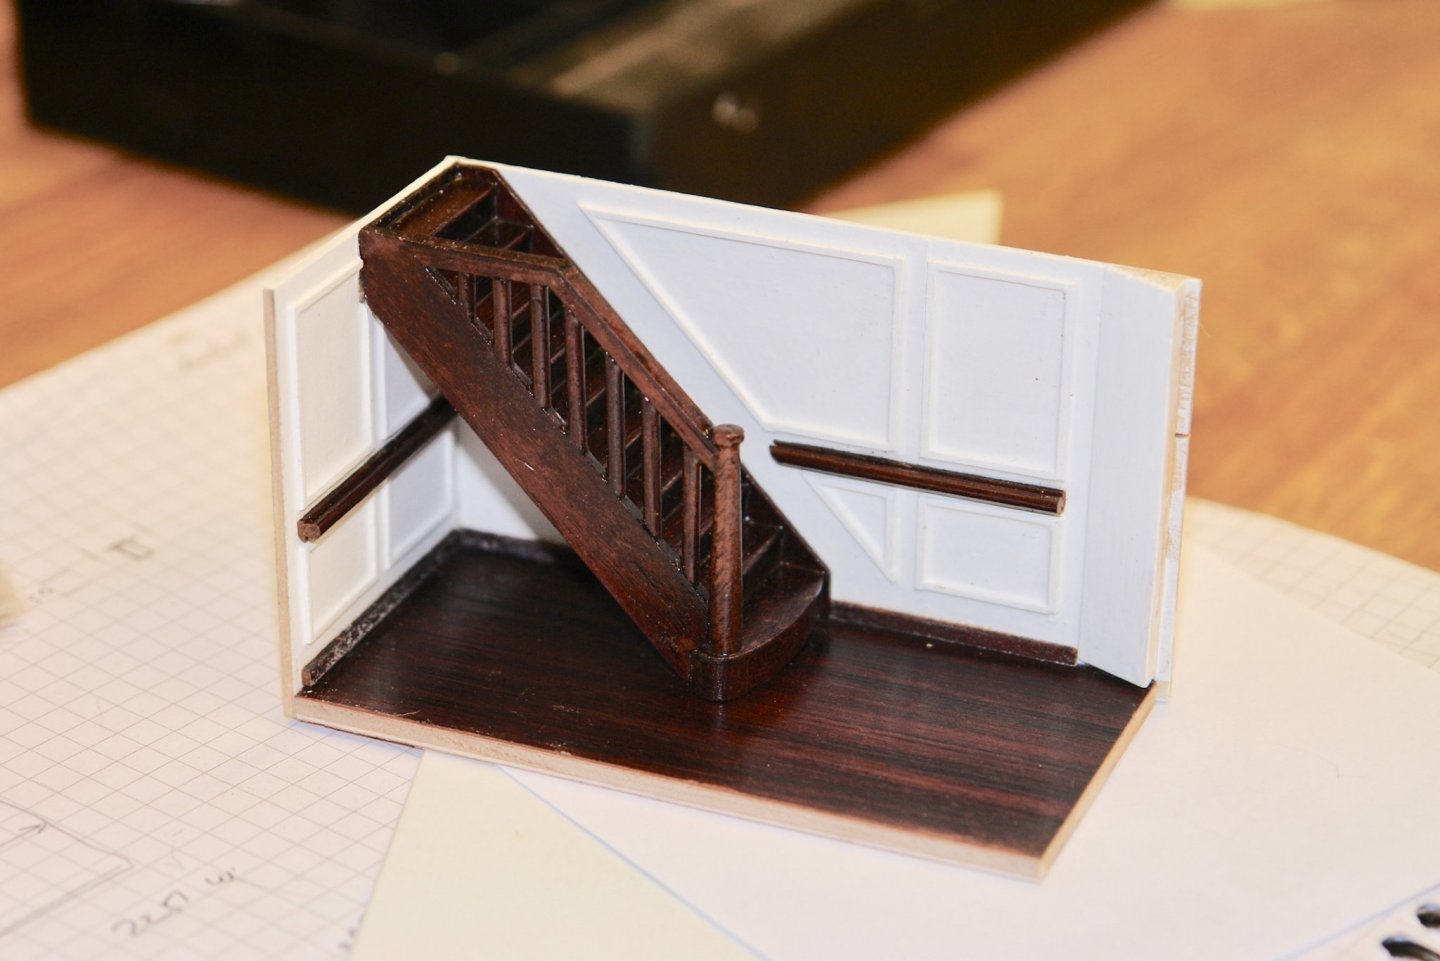
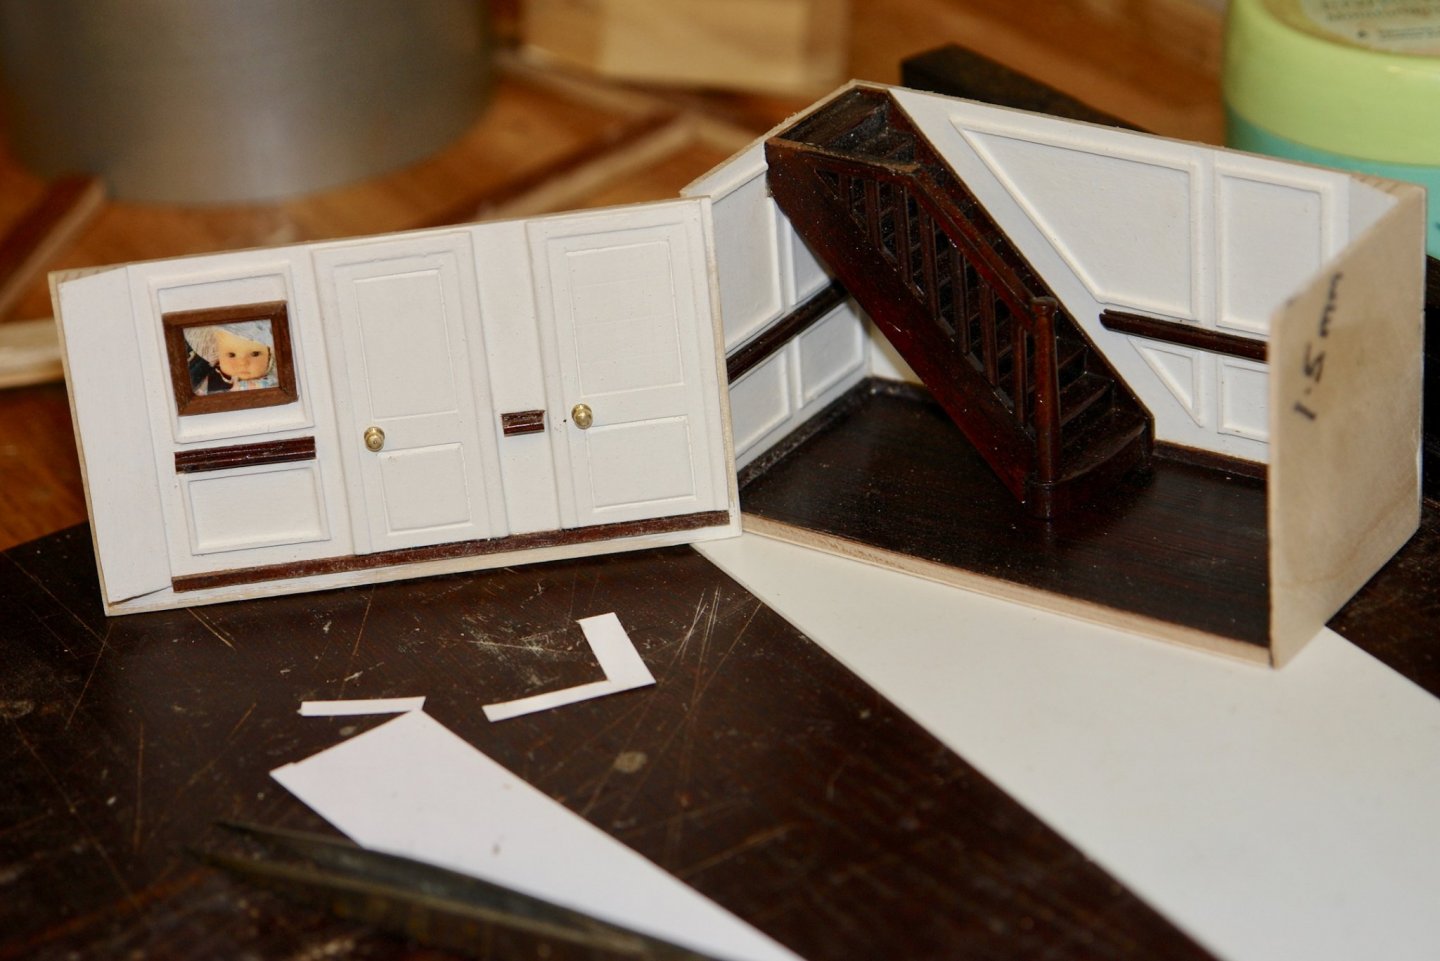
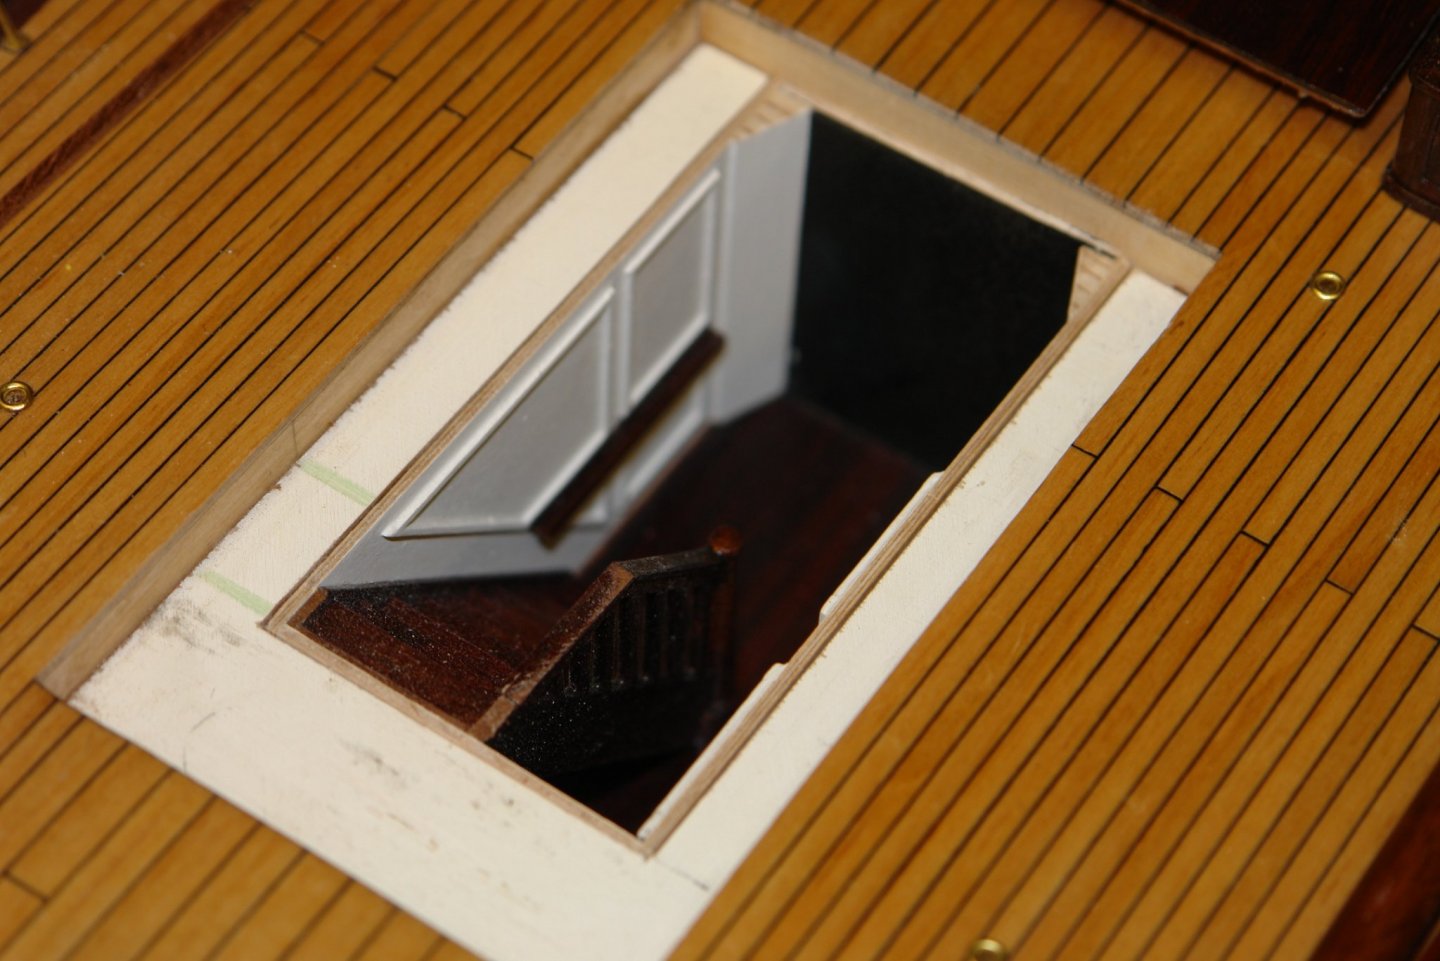
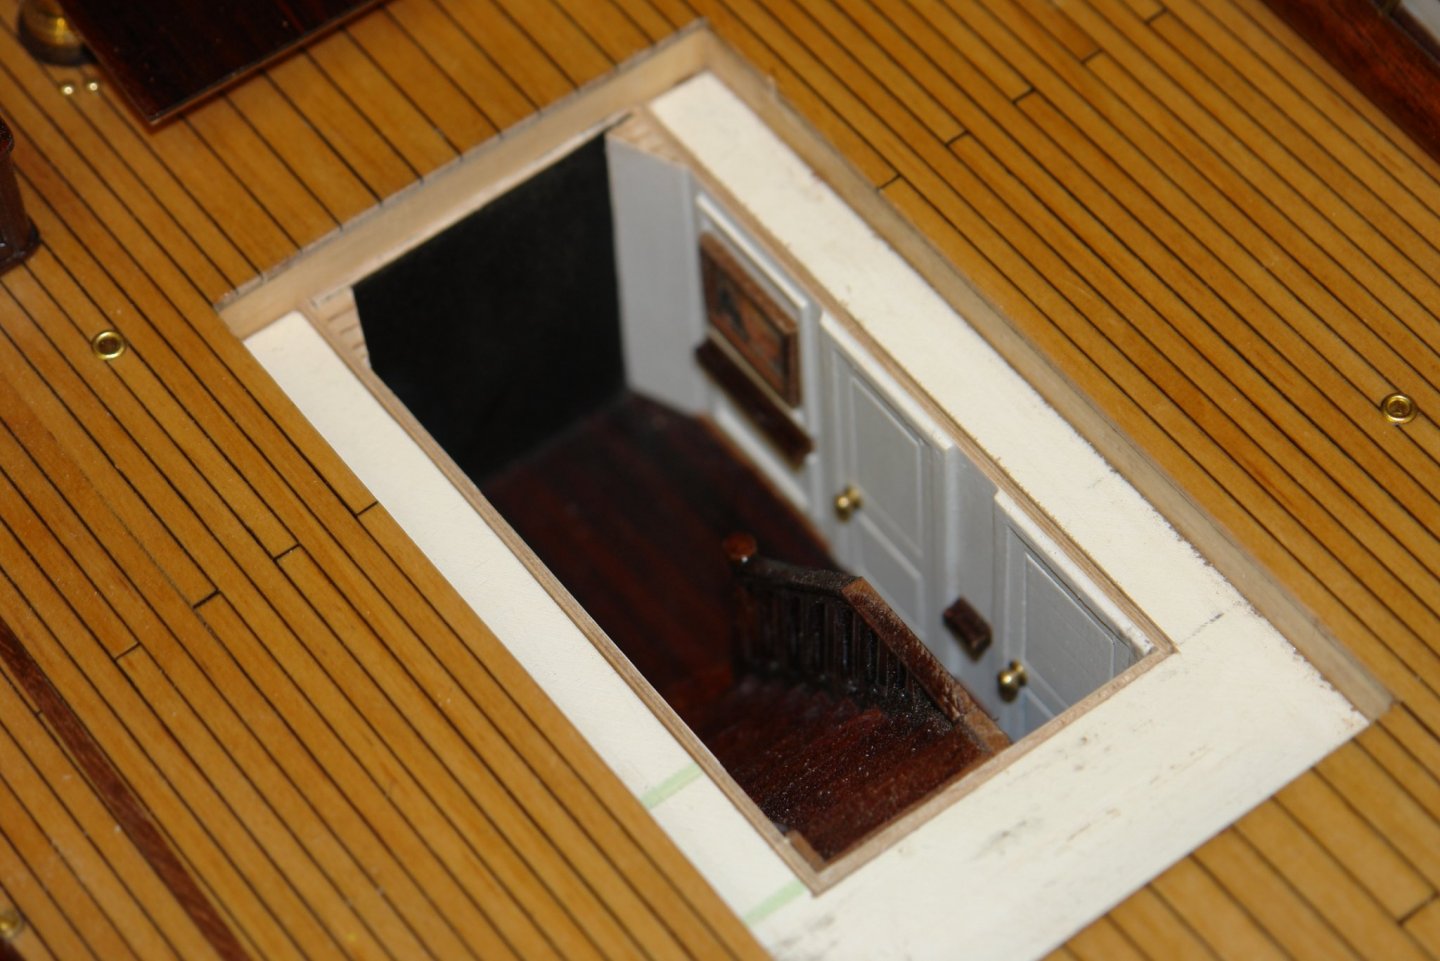
Summer distractions are impeding progress, the new mower was delivered so I had to play with that, the balcony railing needed a coat of paint and other small jobs needed attending to. At least that is my excuse. Below deck work continued. The walls were made from 1/16" ply and the door detail and architrave was cut from 1/32" ply. The panelling edge strips were cut as .025" square strips on the Byrnes saw before being glued in place. The top left panel in the next photo has had a coat of primer. The paint was enamel and I kept it thin to avoid brush marks - it took 6 coats. I then made the hand rail and skirting board from mahogany and gave them a coat of Poly before attaching them. The door knobs were turned from brass. The walls adjacent to the stairs were then attached to the mahogany planked floor and the stairs were glued in place. Then the two remaining walls were then installed. The assembly was then slotted into the well in the deck and a couple of poor photos taken. Finally the cabin floor was put in place hiding virtually everything. So all in all a somewhat pointless week.


-
Eberhard - it was the gun calibre that prompted the question and the knowledge that large naval guns could cause quite a lot of structural damage to the ship when fired. My sympathies lie with the gun crew.