Cathead
-
Posts
3,522 -
Joined
-
Last visited
Content Type
Profiles
Forums
Gallery
Events
Everything posted by Cathead
-

Timber-framed outdoor kitchen - Cathead - 1:1 scale
Cathead replied to Cathead's topic in Non-ship/categorised builds
Speaking of things I've been eager to do, I finally started my next scale model project, another scratchbuilt Missouri River steamboat. You can find the build log here. Thanks for reading! -
Just letting anyone interested know that I've started my next project, another scratchbuilt Missouri River steamboat. You can find the new build log here.
- 113 replies
-
- 5
-

-
- Cairo
- BlueJacket Shipcrafters
- (and 1 more)
-
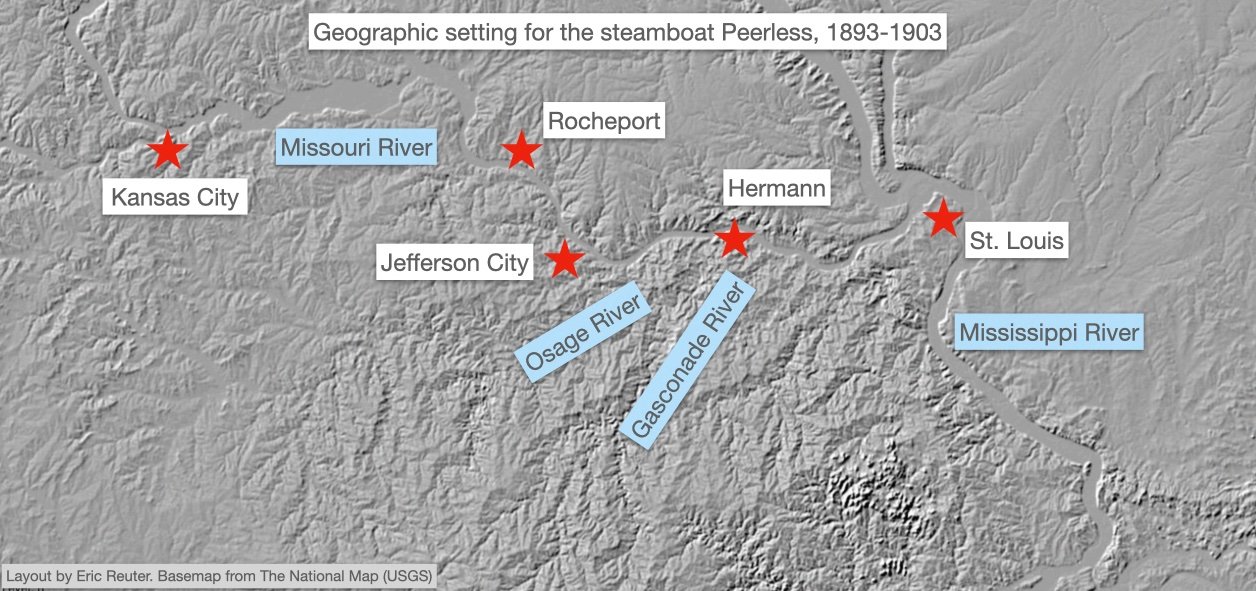
It's time for yet another scratchbuilt Missouri River steamboat! Peerless was a small, obscure vessel that operated on the lower Missouri River during the waning days of the steamboat era. Image from the State Historical Society of Missouri digital collections: Built in 1893 at Hermann, Missouri, she seems to have handled small-scale trade that wasn't yet captured by the railroads. One reference states that she operated primarily between Rocheport (in central Missouri) and St. Louis, but she also apparently made some trips up several navigable tributaries flowing out of the Ozark Mountains to the south, such as the Gasconade and Osage. This region was rugged and resistant to road and rail development, so those rivers continued to act as a conduit for trade much longer than the main rivers, and various small steamboats took advantage of this. In addition, while a rail line had been completed along the south side of the Missouri River as far west as the state capitol Jefferson City around the Civil War era, no equivalent line had been built along the north side until one was begun the year of Peerless' construction, so there was still a certain call for river transport among towns on the north bank. Here's a map I developed of her operating region: This project builds on my long-standing fascinating with Missouri River history, such as previous builds of Arabia, Bertrand, and other river vessels (follow links in my signature for build logs). The first two (shown below) are my favorites, though they're not directly comparable as Arabia (1:64) appears much bigger than Bertrand (1:87) due to scale; in reality they were very close in size. Peerless was a smaller and later river steamer than either Arabia (1853-1856, 31'x181' hull) or Bertrand (1864-1865, 33'x161' hull), built in 1893 with a 21'x97' hull. She's a simpler design that still retains many essential features of what's generally called a Western River steamboat: shallow draft (hull only 3.5' deep below the deck), long & narrow hull, simple superstructure with a pilothouse at the highest point, machinery and cargo carried on the main deck (often just inches above the river), passenger cabins on the next deck up (confusingly called the boiler deck), and built on-site to local design. Despite being a small and obscure vessel, there are quite a few photographs of Peerless, many of which show her in strikingly different configurations. The following images are from the wonderful collection of steamboat photography hosted by the University of Wisconsin-La Crosse, Murphy Library. Here she's hosting some kind of outing on the river, probably a good source of revenue: Here she's somewhere along the Gasconade River; note the tall dolomite bluffs constraining the river, typical of the deep Ozarks. This is my favorite photo; so full of detail to study, and set in my favorite region: Here she is with a barge of cotton and other cargo. Compared to the first & second photos, note the extension built onto her aft cabins, the added boiler deck railings, and the diamond-shaped windows or designs on the engine room walls: Here are two shots from the bow; this is back to what I think of as the "original" configuration, without the additions seen above. I love what appears to be a railroad locomotive headlight mounted in front of the pilothouse (you can see this even better in the very first photo I posted). Here's a hybrid form, with the fancy railings and diamond windows ,but no after cabin extensions, but also the locomotive headlight is back even though it wasn't present on the other shot showing these additions. She really looks like an excursion boat here (you can even see a sign reading "excursion) propped against the boiler), with fancy awnings and benches and no trace of cargo. And here she is in 1903, partially sunk by ice along the levee at St. Charles, Missouri, the last port before St. Louis. This has some nice detail of the boiler and chimneys, capstan, and that locomotive headlight. From what I can discern, she was apparently repaired, spent some time on the Illinois River, then moved down to Vicksburg MS for a long while. But that part of her history isn't my focus. In future posts I'll start sharing more on how I'm developing the design for this model and so on. I'm excited to get this started!

- 393 replies
-
- 19
-
-
Timber-framed outdoor kitchen - Cathead - 1:1 scale
Cathead replied to Cathead's topic in Non-ship/categorised builds
YOU can't wait? How do you think I feel??? -
I had the 1980s version of that, something like this. Who needed brakes when you could put your feet down or just bail out? Scabs are a sign of childhood done right.
- 227 replies
-
- 12
-

-
-
Wish I could offer a more informed opinion!
-
Timber-framed outdoor kitchen - Cathead - 1:1 scale
Cathead replied to Cathead's topic in Non-ship/categorised builds
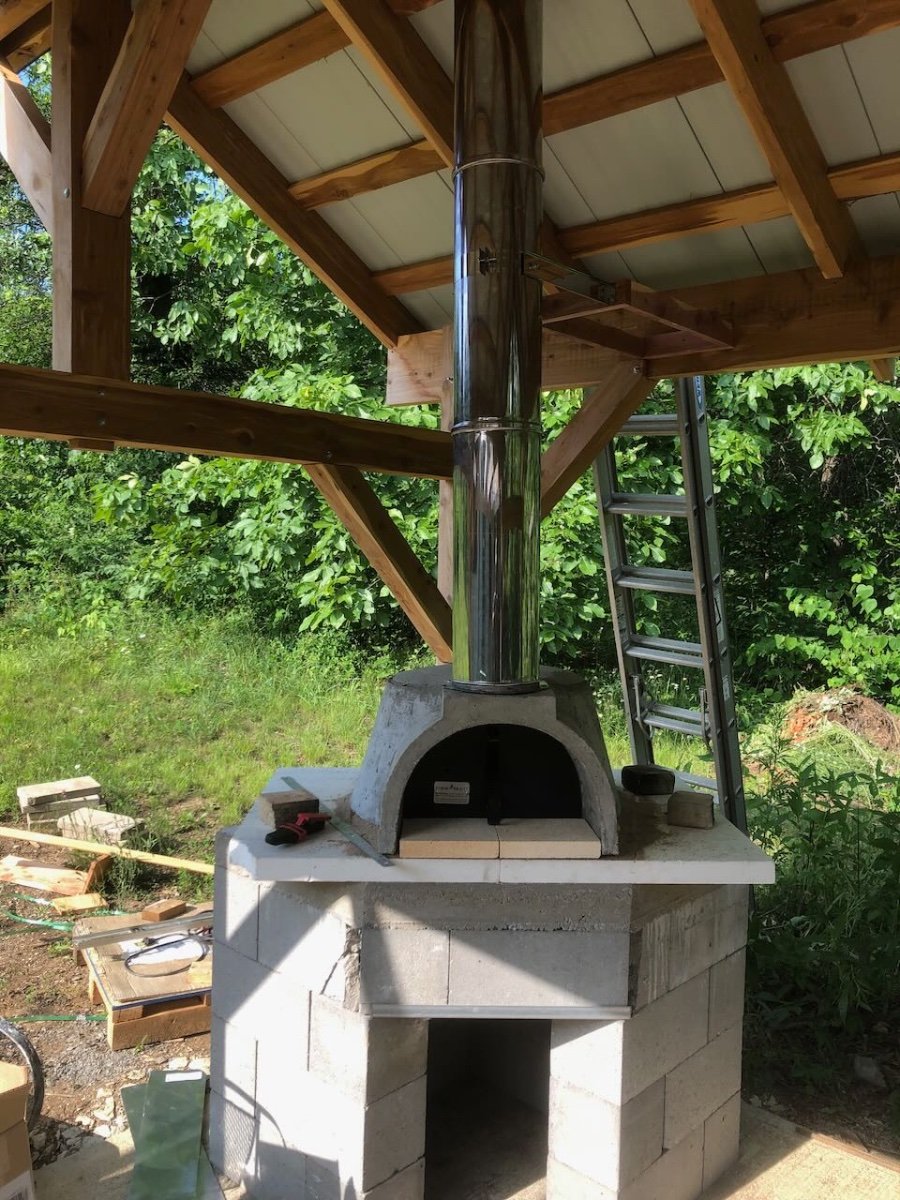
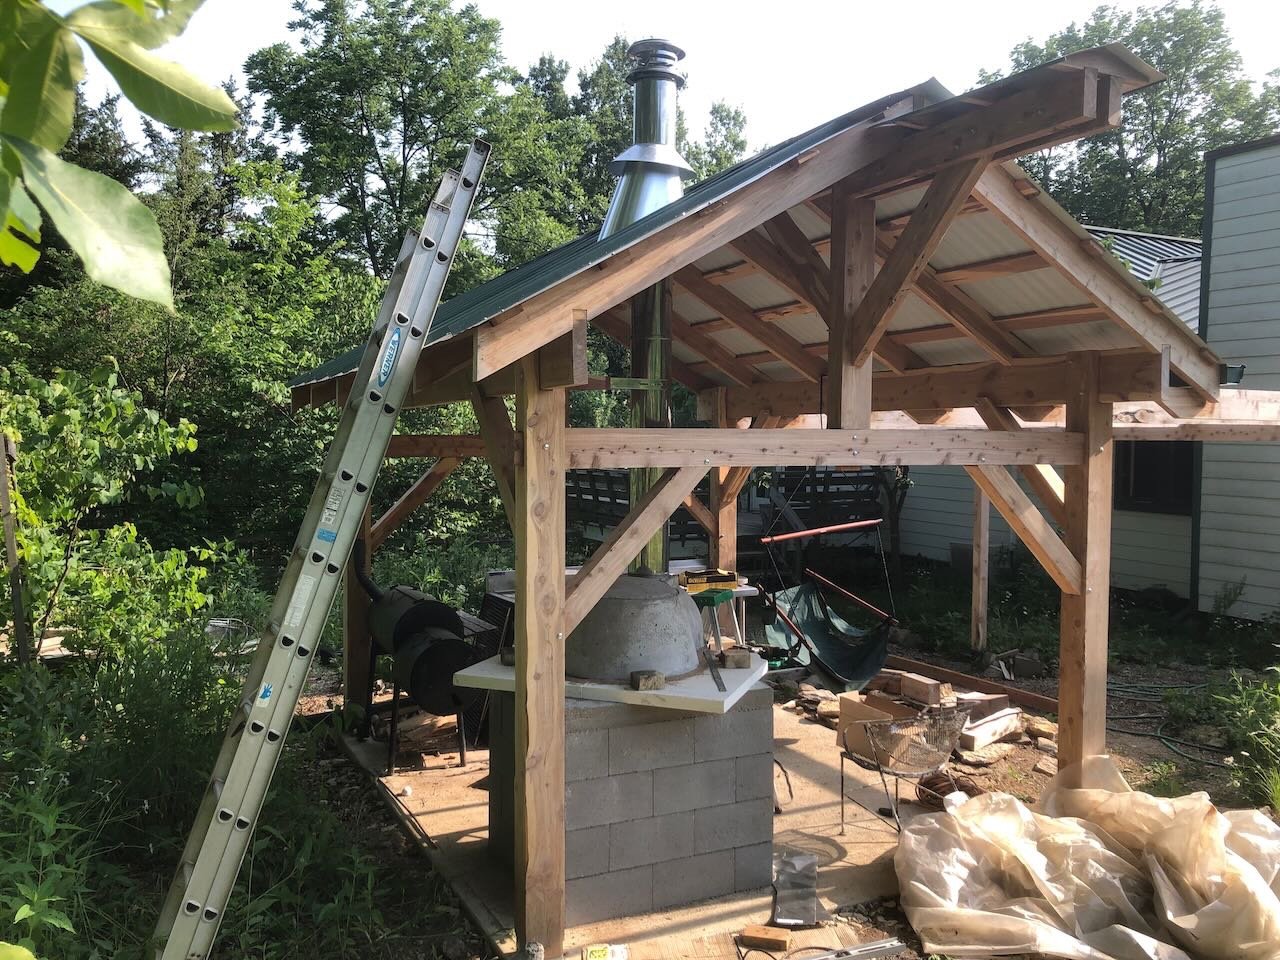
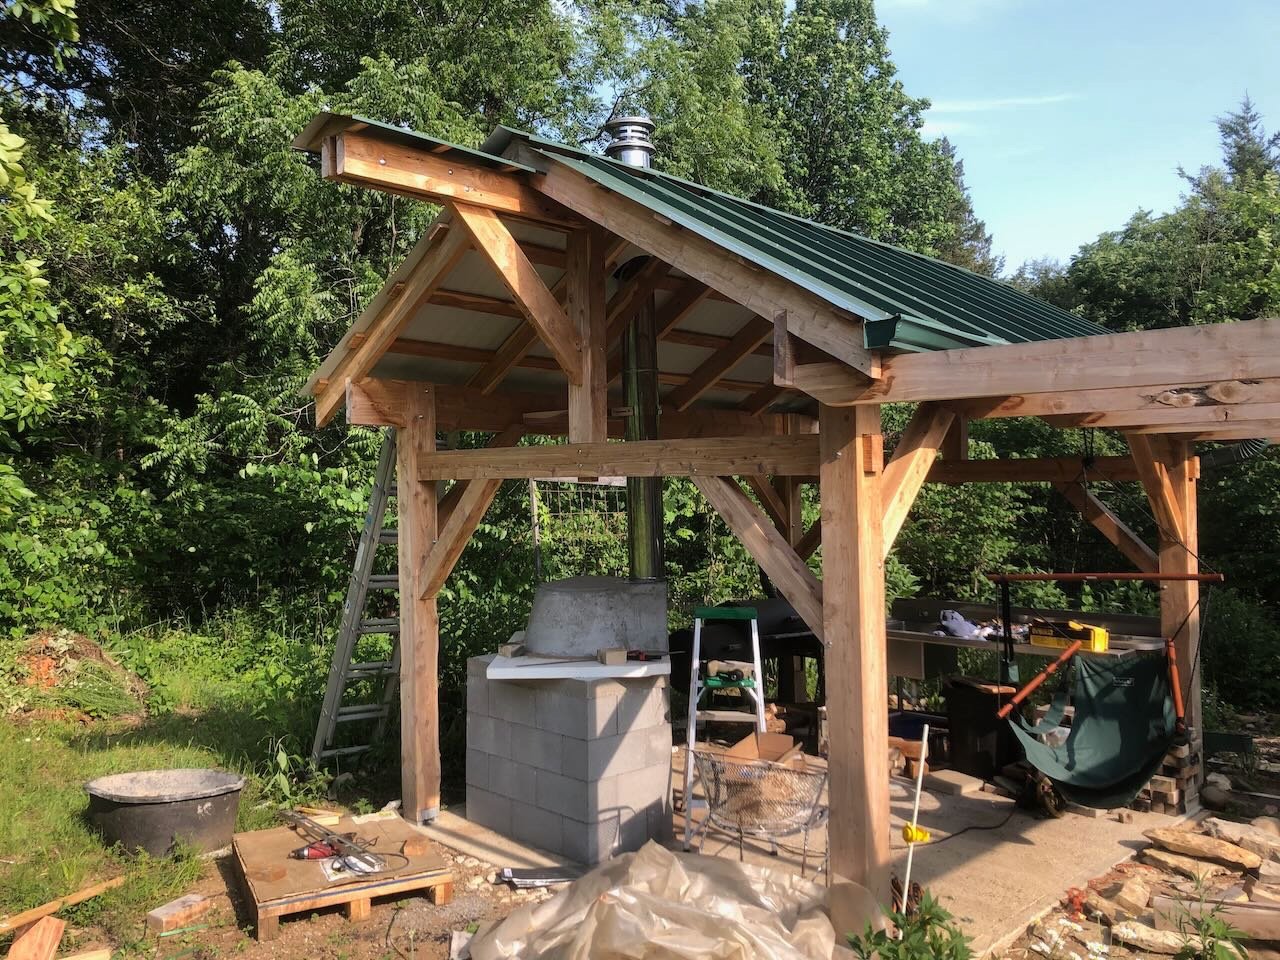
Hey Keith, I somehow missed your response and apologize for appearing to ignore you! Thanks for sharing that video. If you go to the Videos tab on his channel home page, you can find all the episodes of that project back to #1. I do actually have a slight bit of progress to show. Life has been horribly busy and we had to deal with a situation where it turned out that the original oven dome sent to us was defective and a new one had to be sent; to his credit the owner of the business was super forthcoming about the error on their end and made every effort to make it right. But it did cause a significant delay when we'd blocked out some time to move forward, and we've just now been able to make a bit of time to proceed again. I finally installed the chimney, which involved projecting its run up from the oven, cutting a careful hole in the metal roof, installing the chimney pipe, adding the flashing and other protective stuff up on the roof, caulking everything, and adding a brace on the inside to help stabilize the nine-foot run. A few pictures; first the view inside: And then several from the outside: Next we start wrapping the dome in insulation, then cover it in stucco. At that point it'll be time to start firing the oven for the final cure of the masonry before it's ready for cooking. This was a major step, though, and it really feels like an oven now! Ideally we'll find time for the insulation in the next few weeks but we're still in an overwhelmingly busy period, so who knows. Thanks for looking in!
- 131 replies
-
- 14
-
-

-
Great explanation, Roger. But I'd suggest that there are plenty of examples of historic people figuring out, through trial and error and accumulated knowledge/experience, things that until only recently could actually be explained through science. For example, any Middle Ages peasant who slaughtered a beast had an instinctive understanding that blood circulated through an animal and that the heart was related to it, but it took ages for "science" to catch up, stuck as they were on whatever an ancient Greek wrote without checking for themselves. Medicinal characteristics of plants are another example. To me, it doesn't seem hard to imagine that centuries of maritime experimentation led to Venetian builders (and buyers) learning that they liked such a design, whether or not they had any idea how or why it worked. What makes me really curious is how/why different cultures settled on different designs, when in theory many of the background conditions are the same. Water acts the same way on vessels in the Med as it does along the Chinese coast, for example (with the possible exception of subtle differences in salinity).
-
If Steven doesn't mind the distraction, why was this done vs. choosing a straight keel?
-
Barncave Shipyard by mbp521 - Scale 1:1
Cathead replied to mbp521's topic in Non-ship/categorised builds
Looks beautiful! I thought of a question about your mini-split. Are you planning to leave it on all the time to maintain some consistent temperature and humidity, or only turn it on when you plan to be in there and leave the room to the elements otherwise? Seems a tough tradeoff between too much energy use on one hand but potentially problematic swings in environmental conditions on the other. Although we like our mini-splits, one thing that does annoy us is that they have a relatively narrow range of temperature settings that doesn't go below 59ºF. So for example, if we're traveling in winter and just want to keep pipes from freezing, we'd rather set the house at, say, 45º; 59º is a waste of energy. It's a bit easier in summer when you can set temps in the 80s. So I was wondering what temperature range your unit has and how you plan to handle that dilemma. -
They must be Gary Larson cows; in the Far Side they're always standing around and walking upright.
-
Barncave Shipyard by mbp521 - Scale 1:1
Cathead replied to mbp521's topic in Non-ship/categorised builds
Mini-splits are great, years ago we removed our furnace and installed a couple instead. They're more energy-efficient and eliminate using all that ductwork that can get dirty/dusty/moldy. Won't work for every house design (e.g. if you have lots of isolated rooms) but we have a fairly open floor plan that allows air to circulate (installing a few ceiling fans helps with this). We heat primarily with wood but the units provide a backup, and are far better than window A/C in the summer. Plus it's easier to close off rooms we don't want to heat/cool as much (such as spare bedrooms) by just shutting the door, rather than closing a vent but still having all that hot/cold air blown through ductwork to a dead end. Definitely a great choice for a setting like Brian's. -
I'm no expert, but it's logical that adding moisture to a fiber product causes it to swell. And it's likely that different glues/applications would cause the line to react and swell differently, so it's not clear how manufacturers could account for that in a single consistent measurement. In other words, the manufacturer's dry measurement can be accurately measured and standardized, but the wet measurement depends on what the individual modeler does. So if the change concerns you, perhaps the best solution is to account for a certain level of expansion when you purchase line?
-
Barncave Shipyard by mbp521 - Scale 1:1
Cathead replied to mbp521's topic in Non-ship/categorised builds
Fantastic project! And here I am looking forward to expanding from a 2'x4' workbench to a corner of a small spare bedroom! This looks really cool and you know I respect DIY projects. Will be fun to see it come together, and I love the exterior aesthetic already.- 70 replies
-
- 10
-
-

-
Edit: Oops, meant to post this in the Jokes thread. Oh well, this could function as a dodgy solution, too! I'm going to cross-post it where I meant to, anyway, sorry if you end up reading this twice. Real conversation between my wife and I recently, edited for clarity and brevity. Background context is that we log and mill lumber on our rural property and are preparing for another round of milling later this week. We both also love puns. Wife: Are you going to cut up that basswood that fell across the creek? Me: It'd make sense, it's good model wood. Wife: You could also go to the pond and catch some bass. Can you compress fish into building material like you can recycled plastic lumber? Me: That kind of basswood would be even better for scale modeling!
- 227 replies
-
- 11
-
-
-
Glad to see you're still working on this!
-
Timber-framed outdoor kitchen - Cathead - 1:1 scale
Cathead replied to Cathead's topic in Non-ship/categorised builds
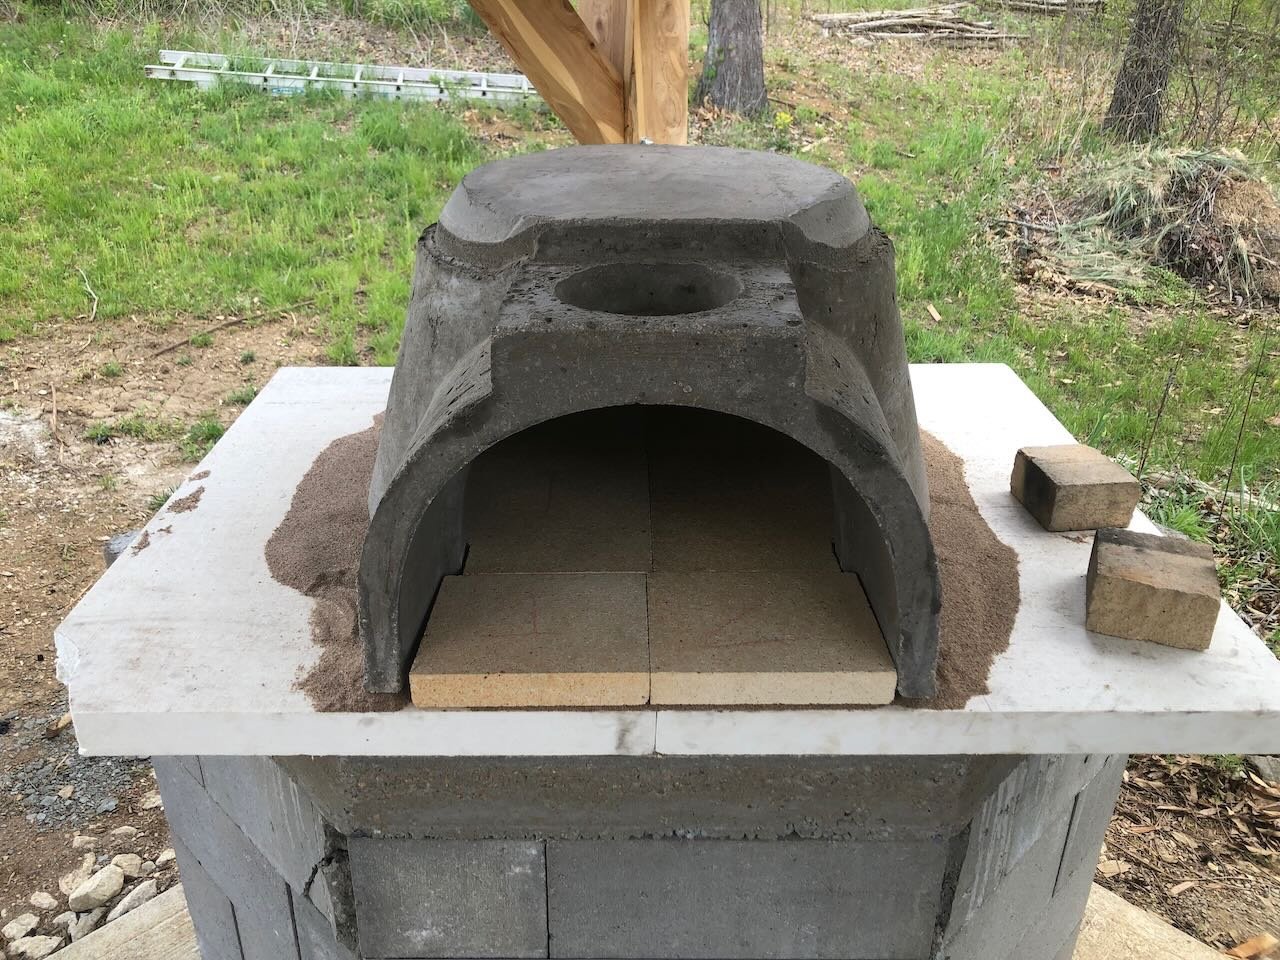
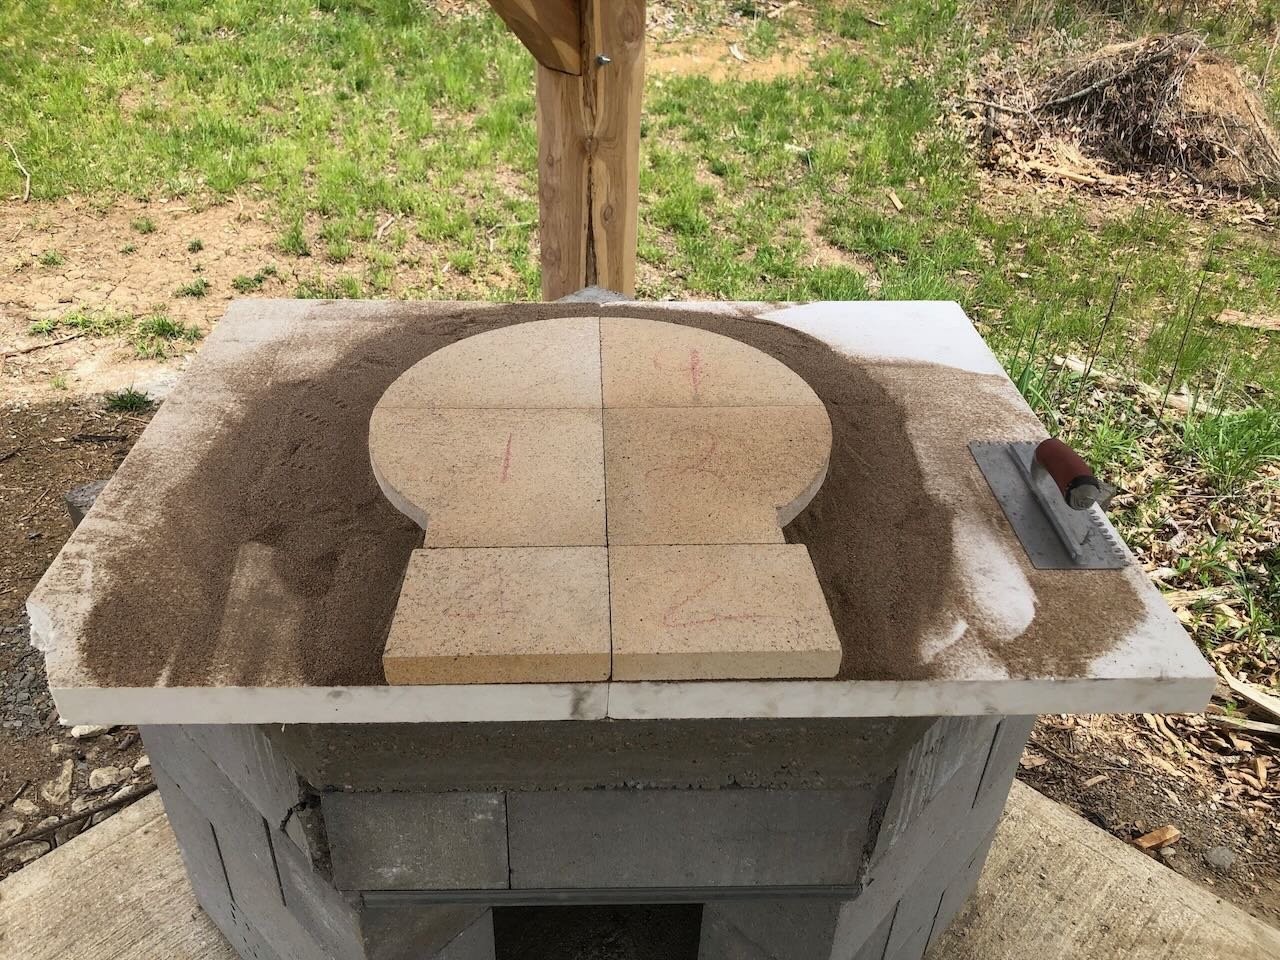
After letting the hearth cure for a few weeks, we took the exciting next step of installed the oven dome itself. Following the instructions, we first placed a layer of 2" ceramic insulation board over the hearth, spread a layer of sand on that, then carefully arranged the firebrick cooking floor to be level and centered. Then, with the help of some friends, we carried the ~200 lb oven dome itself over and carefully placed it over the floor. The next step will be to cut the insulation board down to match the outer shape of the dome, start installing the chimney, and start wrapping the dome with ceramic insulation blanket. The whole thing will eventually be covered in stucco to seal the surface. But it's actually looking like an oven!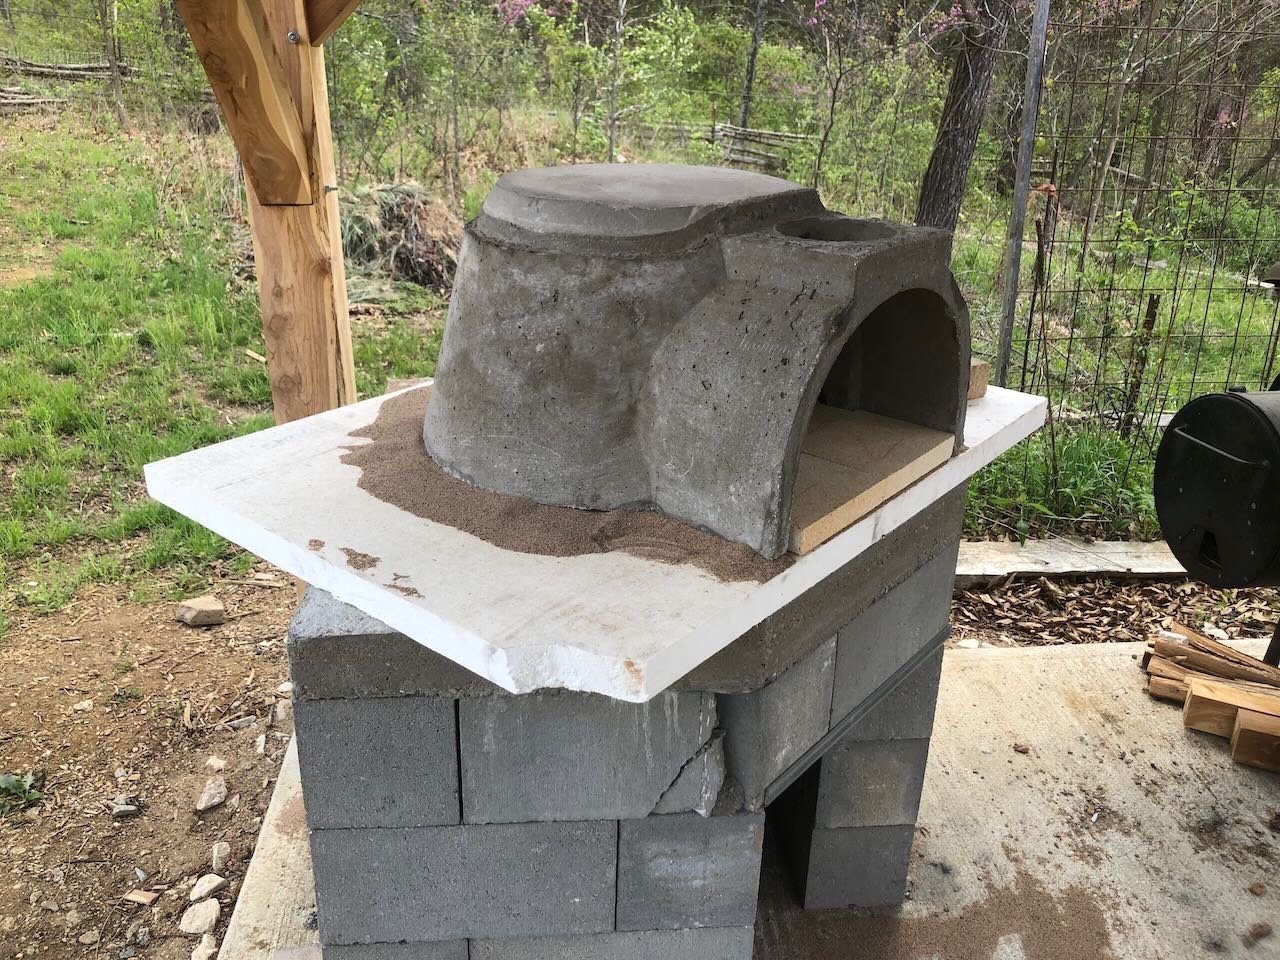
- 131 replies
-
- 13
-
-
Yeah...I really, really like that color scheme. I so wish this had come out a few years ago.
- 80 replies
-
- 4
-
-
- Grecian
- Vanguard Models
- (and 3 more)
-
Nice to see you back! I've simulated tar paper roofing before using strips of masking tape laid over thin wood glue. It has a nice rough texture, holds up well, is much easier to apply than silkspan or tissue, and is very affordable. Seems like it would work especially well in 1:48. Easy to give it a try on some scrap wood to see what you think.
- 158 replies
-
- 1
-
-
- chaperon
- Model Shipways
- (and 1 more)
-
Dust masks and respirators.
Cathead replied to Bill Hudson's topic in Modeling tools and Workshop Equipment
Those California labels are a classic case of how over-regulation or hyper-concern run amok can backfire. I'm sure it meant well at first, but saturating the market with fear-mongering just leads to people tuning out, including more legitimate concerns. Especially when they can see for themselves that the risk isn't really there in normal use, or is minor compared to other risks. For example, touching a table saw might expose you to a California carcinogen, but the risk is minuscule compared to that of using the table saw, or especially using the table saw wearing the sorts of gloves you'd need to protect you from the carcinogenic metal. So the label at best does no good, and at worse numbs people to legitimate warning labels and leads to distrust of regulators. -
Dust masks and respirators.
Cathead replied to Bill Hudson's topic in Modeling tools and Workshop Equipment
Any natural material can be unsafe if consumed or used incorrectly! Dihydrogen monoxide is a great example; utterly benign in sensible quantities but too much will kill you in minutes. One of things I love about modeling in wood is that it does require handling fewer nasty materials, at least the way I do it. -
Thanks for sharing!
-
Welcome from a fellow Missourian!
-
Timber-framed outdoor kitchen - Cathead - 1:1 scale
Cathead replied to Cathead's topic in Non-ship/categorised builds
Brian, don't feel bad, I've been without a shipyard for over a year now as our DIY renovation of a spare bedroom proceeds at a glacial pace. That's another thing I hope will be back in operation by later this spring.