


Cathead
-
Posts
3,534 -
Joined
-
Last visited
Content Type
Profiles
Forums
Gallery
Events
Everything posted by Cathead
-
 It's not so much for waves as just to support the hull itself. These were riverboats and anything beyond the smallest waves would have been catastrophic for them. But even in calm water the hulls weren't capable of supporting themselves. The weight of the sternwheel hanging off the end would have broken them in half, and the long, narrow hulls would never hold up on their own without extraordinary amounts of internal bracing. That wasn't done because it would make the hulls too heavy for river navigation, and too rigid because often they did need to flex (such as when encountering sandbars). In a way, these were more like Viking longships in that the hulls were lightweight and flexible, but since they (a) were much bigger and (b) had to support machinery and heavy loads that longships didn't, they needed extra support, and iron rods have a much better strength/weight ratio than lots of wooden bracing. Plus, as you noted, the turnbuckles allow the bracing to be adjusted. Cleat, if you're confused by all this, it doesn't help that this kit bears only a passing resemblance to any real-life steamboat (realism-wise, it's the equivalent of a cartoon pirate ship), so don't think about it too deeply! At the level of this kit, the idea is to run some dark line over the top of the poles (I'd suggest filing/cutting a thin slot across the end of the dowel), simulating the iron rods that would run between metal plates on each pole and down into the hull.
- 132 replies
-
- 2
-

-
- King of the Mississippi
- Artesania Latina
- (and 1 more)
-
Ouch, that’s scary! Glad to see you figured out a fix. Deck itself looks nice.
- 158 replies
-
- 1
-
-
- chaperon
- Model Shipways
- (and 1 more)
-
Great upgrade! For what it’s worth, my pedantic side wants to note that those were usually called stages in steamboat land. They look really good.
- 86 replies
-
- 1
-

-
- king of the mississippi
- artesania latina
- (and 2 more)
-
Railings are definitely one of the most frustrating part of any steamboat build. A jig seems reasonable.
- 132 replies
-
- 1
-
-
- King of the Mississippi
- Artesania Latina
- (and 1 more)
-
USS Cairo by Zetec - FINISHED - 1/50 scale
Cathead replied to Zetec's topic in - Build logs for subjects built 1851 - 1900
Great choice for a unique and interesting model. Will be fun to see how you progress. -
That's a wonderful model. Nicely balances clean workmanship with artistic attractiveness. I hope you have a proud place to display it.
-
Your wooden kit progression - go big, or keep learning/practicing?
Cathead replied to Esap's topic in Wood ship model kits
Not all wooden ships have PE. I'm one of those who hates working with metal, and there's a fair argument that I just haven't learned how to do it properly. But I think the broader point here is that starting small and/or dabbling also lets people learn what they're good at or not, and what they like to do or not. I've learned over and over that I'm happiest working in wood, and that's helped me focus (for the most part) on projects I'll enjoy. There's a fair counter-argument that learning new skills helps keep the hobby fresh, but it's still worth learning/knowing your strengths and weaknesses. -
Timber-framed outdoor kitchen - Cathead - 1:1 scale
Cathead replied to Cathead's topic in Non-ship/categorised builds
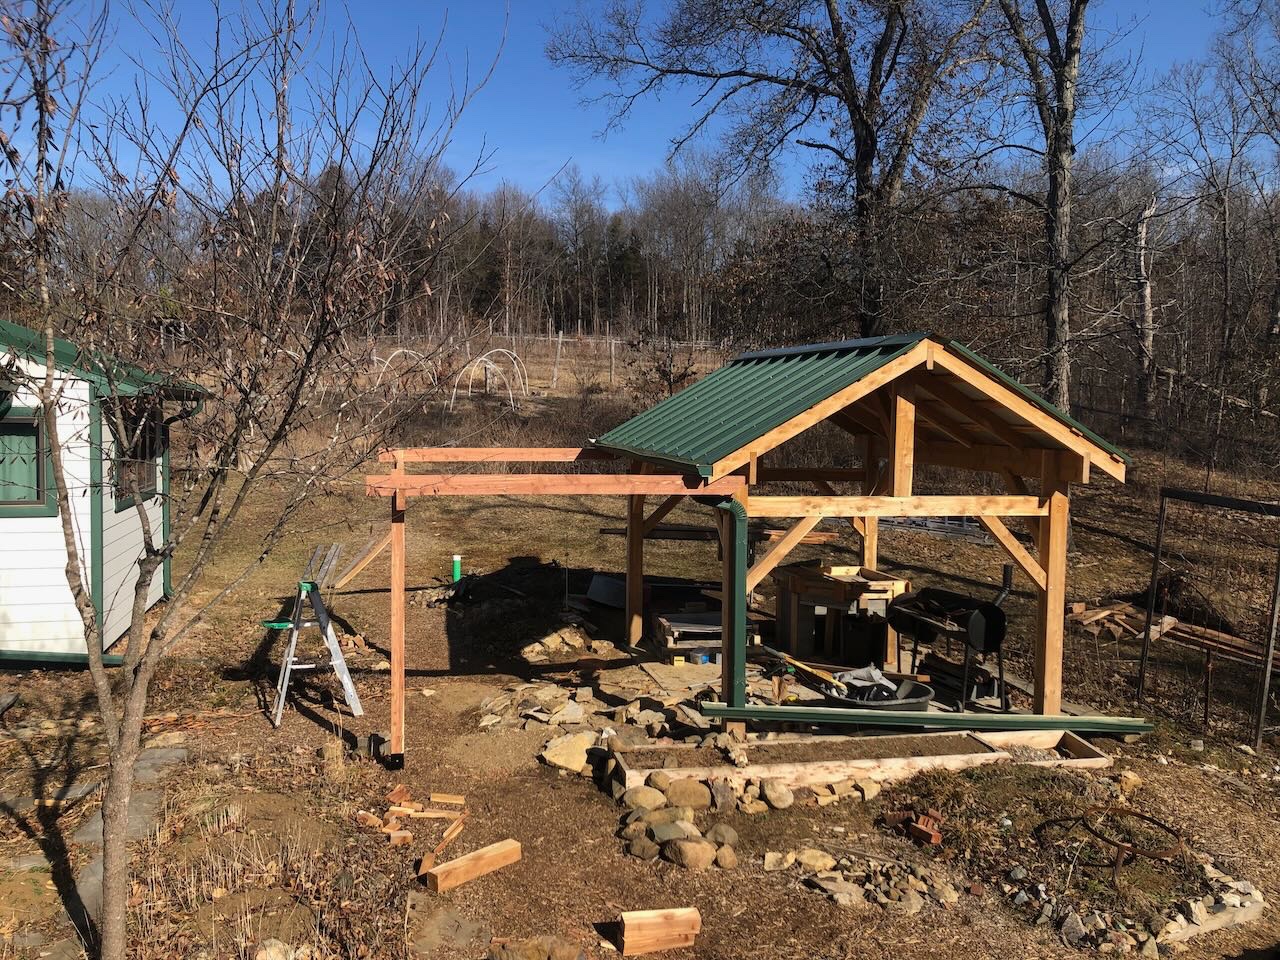
Jack, all the wood is Eastern Red Cedar, which we harvest and mill on-farm. Its sapwood has that brilliant purple hue when it's freshly cut, but it quickly weathers to the dull orange you see on most of the structure, and eventually to grey with sufficient direct sunlight. You can preserve some of the color with wood oil, for example in this table I built from the same material (photo repeated from earlier in the thread): Paul, beans would be an option but we'd rather plant a perennial vine that will take up long-term residence, rather than something we'd have to restart every year. That'll also speed up the shade production, since an established vine will create shade as soon as it leafs out, rather than waiting for a new vine to climb up the trellis again. And we don't want to do grapes because we don't want to draw lots of birds into a food-handling area. We have plenty of garden space and trellises for beans (we grow our own full annual supply of dried beans as well as green beans). So it'll be something hardy and flowering.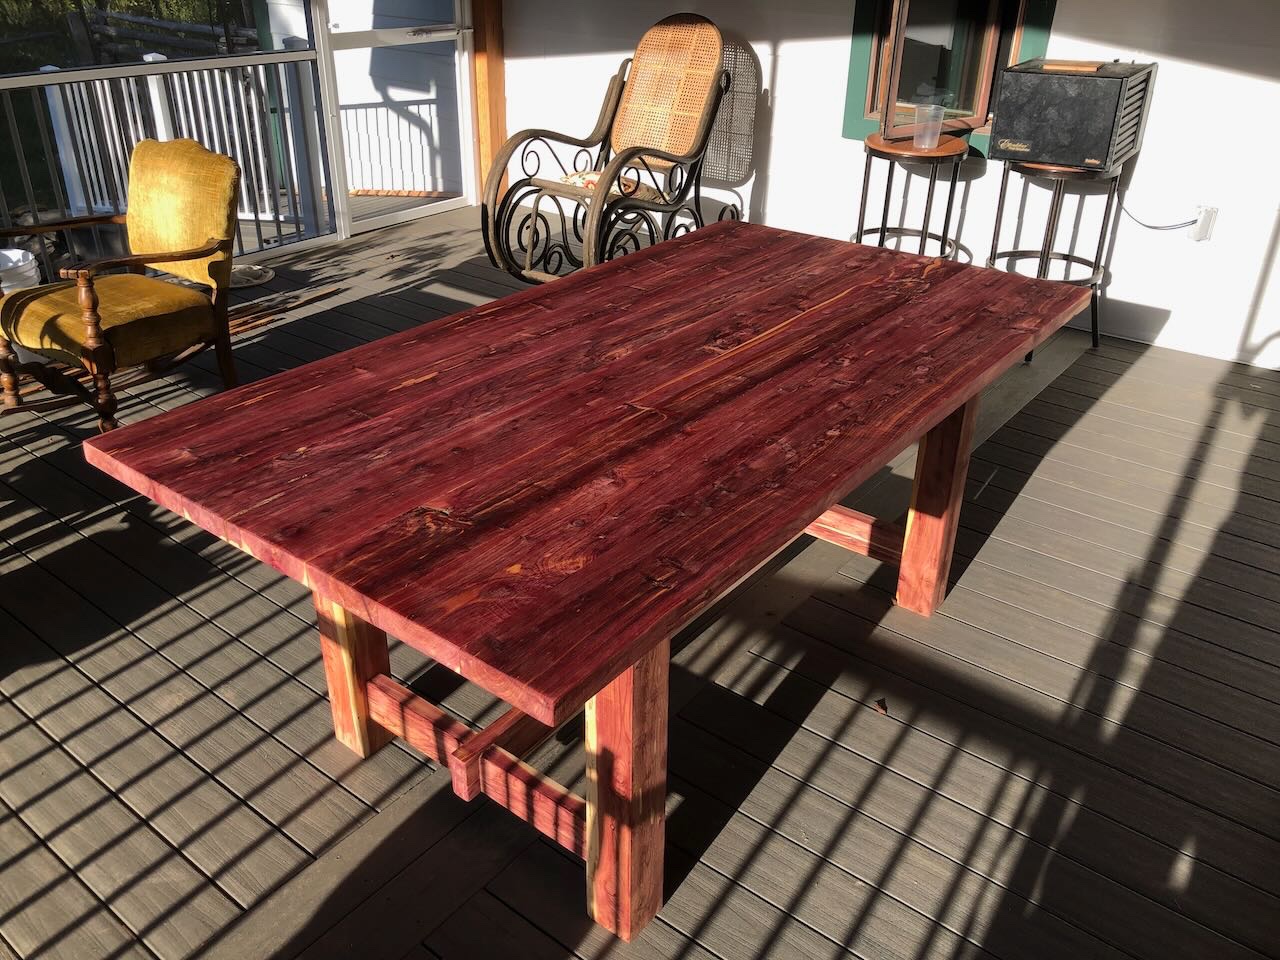
-
Timber-framed outdoor kitchen - Cathead - 1:1 scale
Cathead replied to Cathead's topic in Non-ship/categorised builds
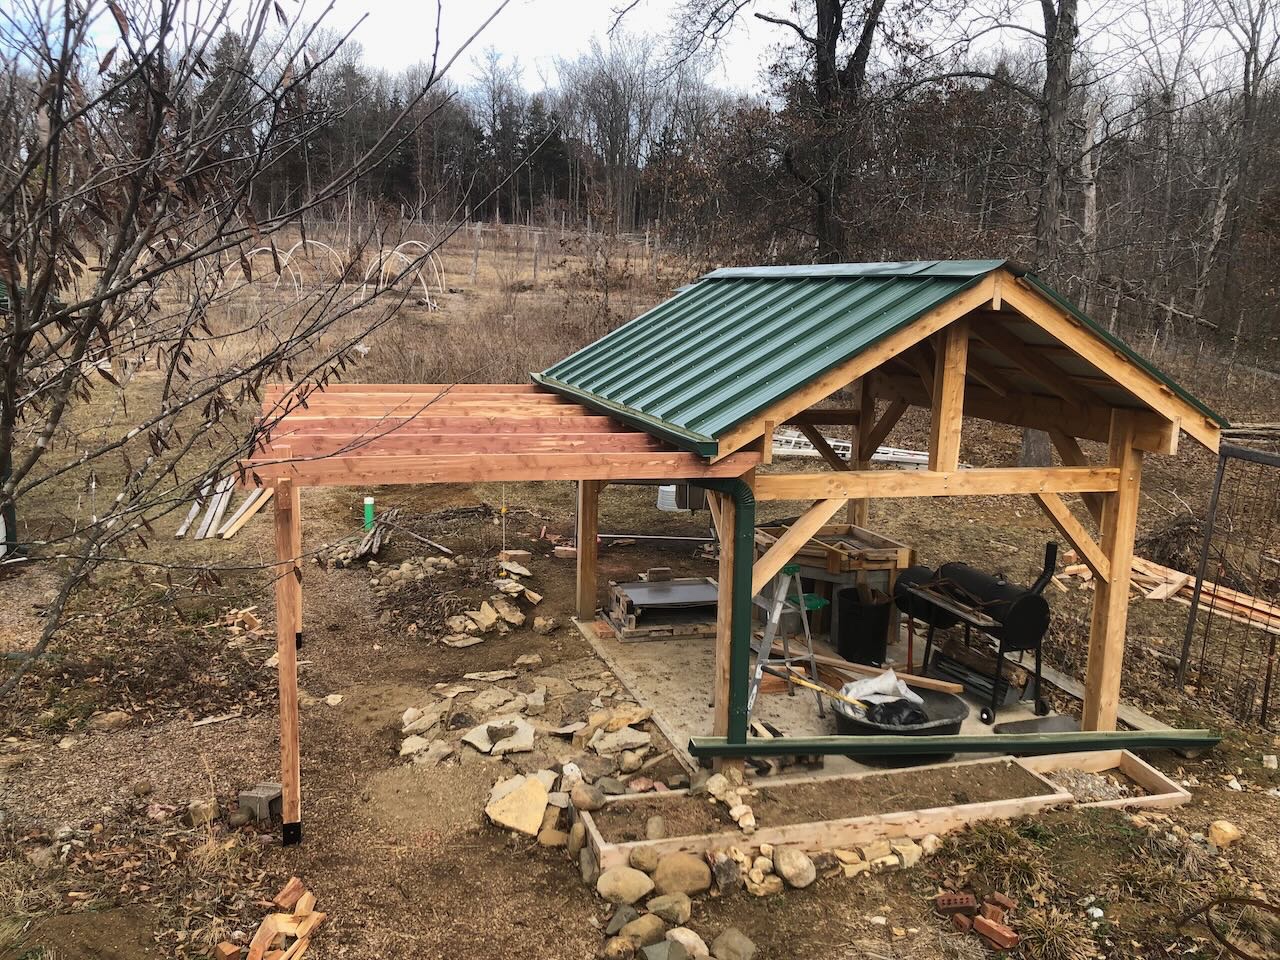
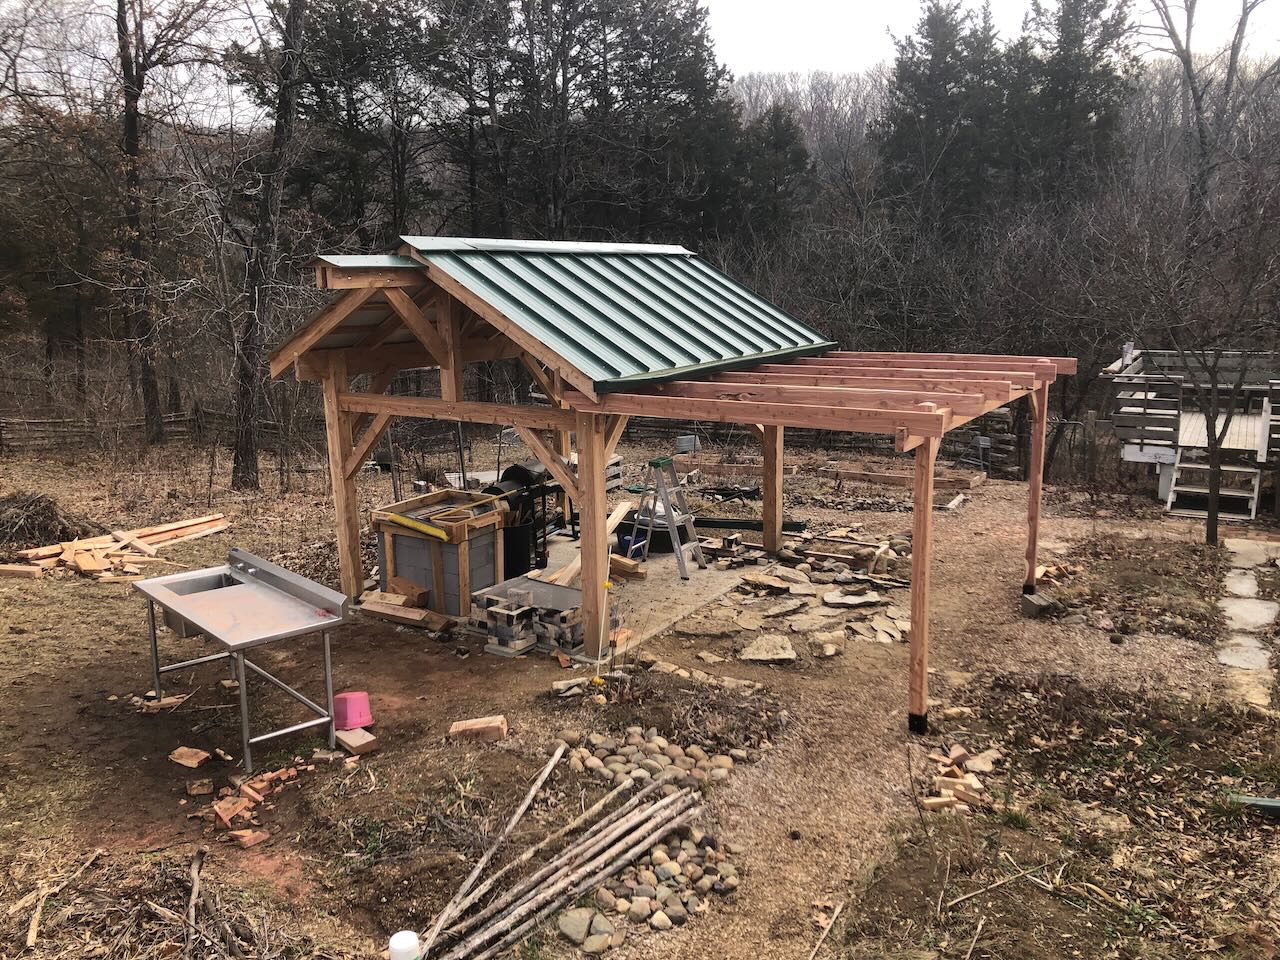
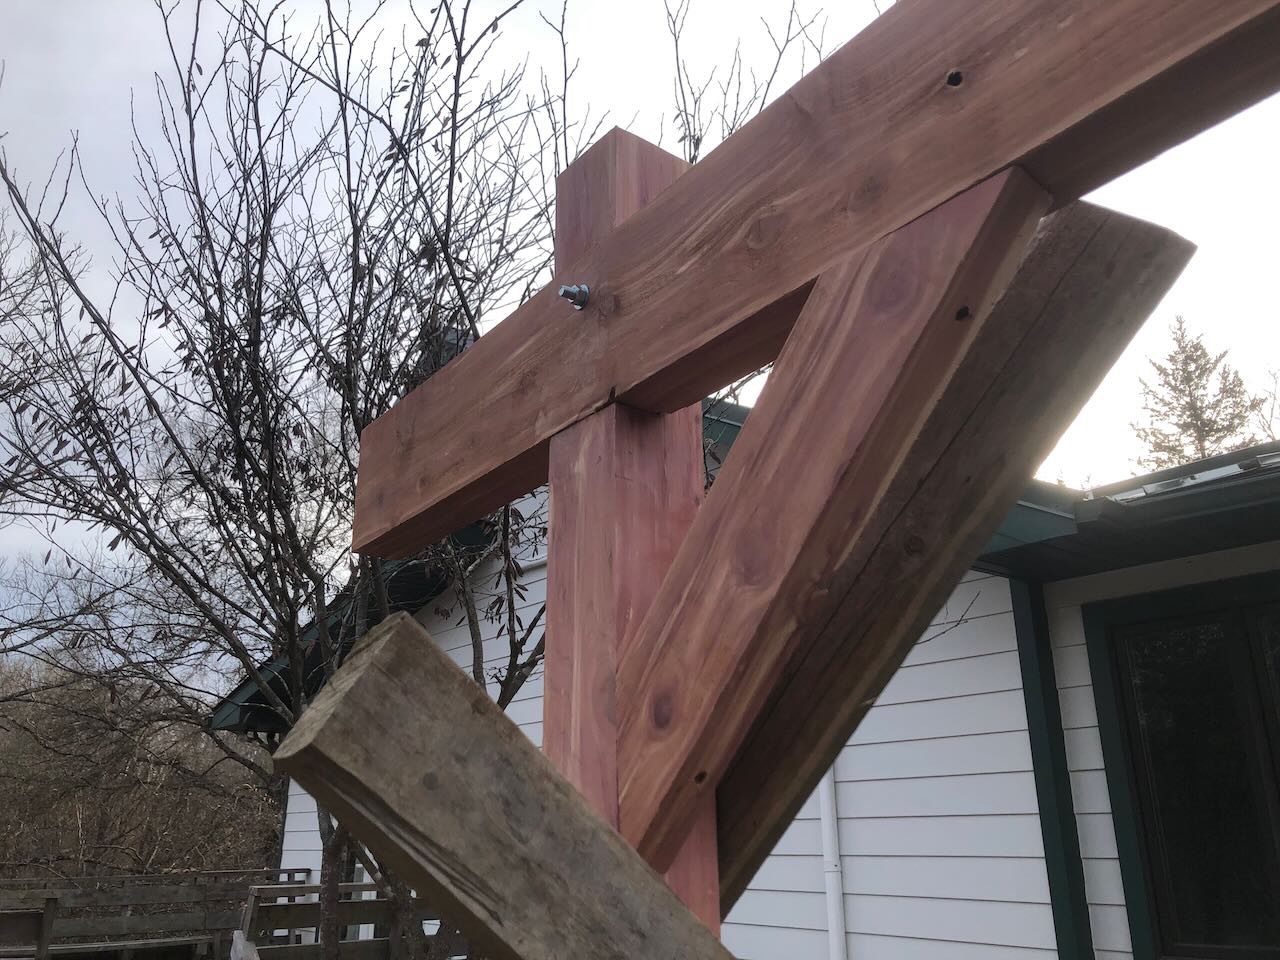
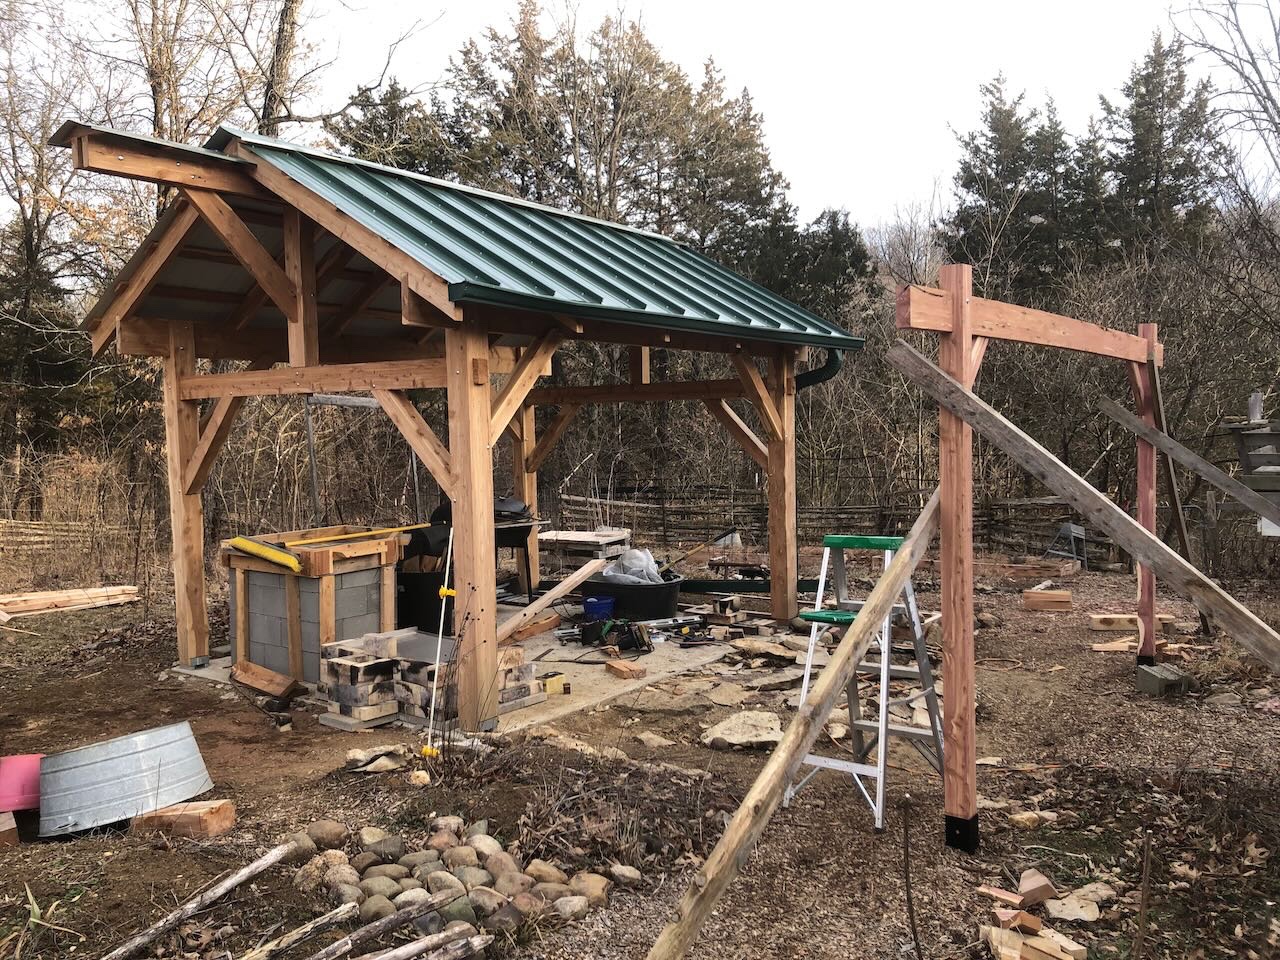
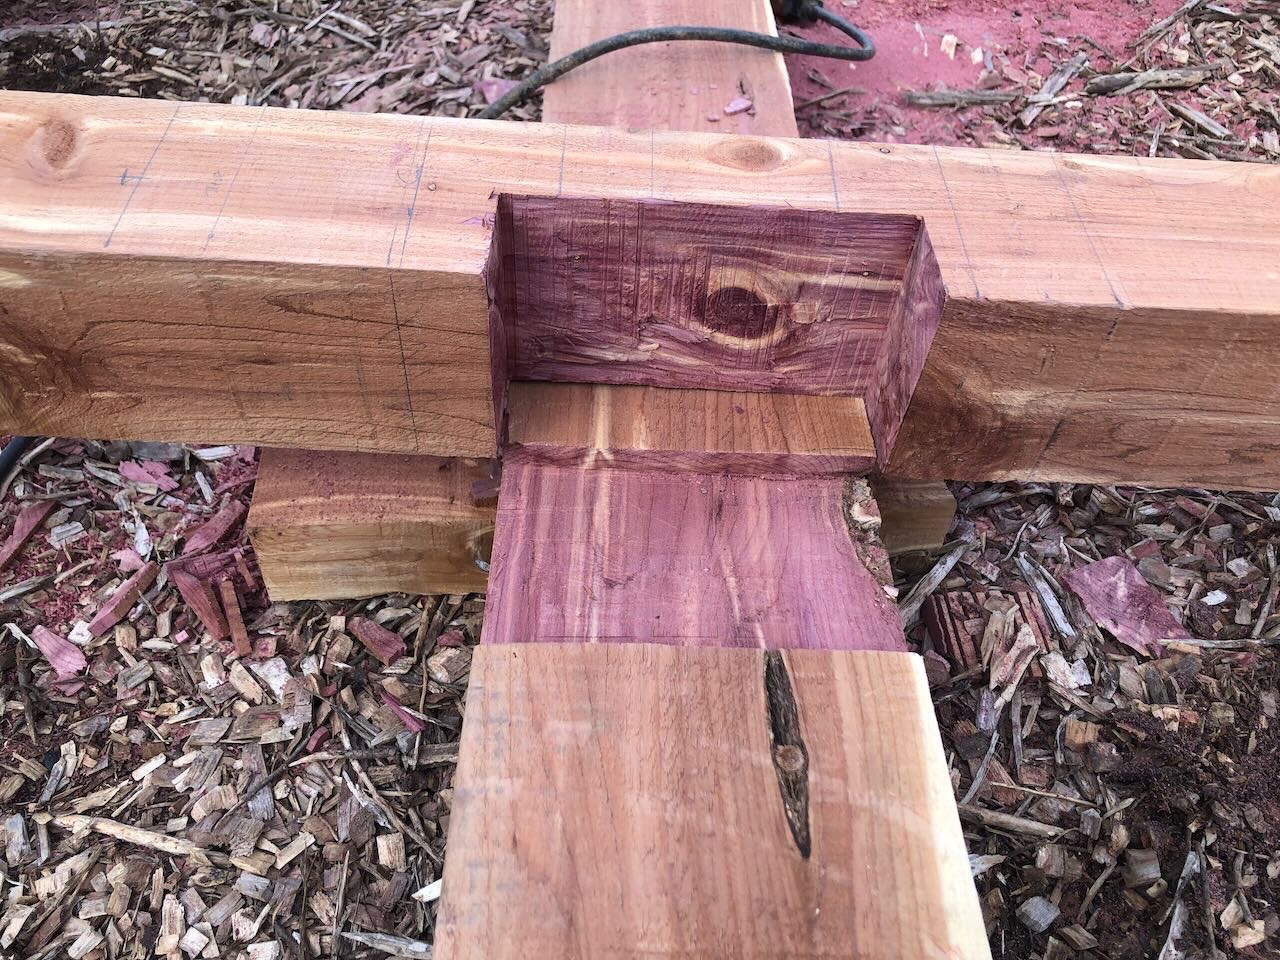
I took advantage of a few warm days last weekend to add an arbor off the west side of the structure. As a reminder, here's the original digital model showing one theoretical approach to this. I ended up using far fewer rafters/beams as the goal is just to grow and train some shady vines up onto it. Step one was to set up the two outer corner posts. I built a mock-up using braces to make sure I got my dimensions, design, and post locations right. The plan was to set the two posts using a metal bracket that pounds into the ground, avoiding the need for any post-hole drilling or other foundation work. I've used these before for light-duty construction, they're great. Image below from Lowes: I notched both the posts and the cross-beam so they'd fit tightly together and make the joint stronger and more symmetrical: And here's the main frame erected and temporarily braced for stability: I added a couple angle braces for extra stability: I then measured, notched, and cut each of the six rafters individually, as the structure isn't perfectly square. Here are the outer two installed; I did these first to stabilize the structure: And here's the final version with all six rafters: It'll be fun to get the vines growing this spring, hopefully we can get some nice shade there on the western side to keep the summer sun from blazing in to the main kitchen late in the afternoon.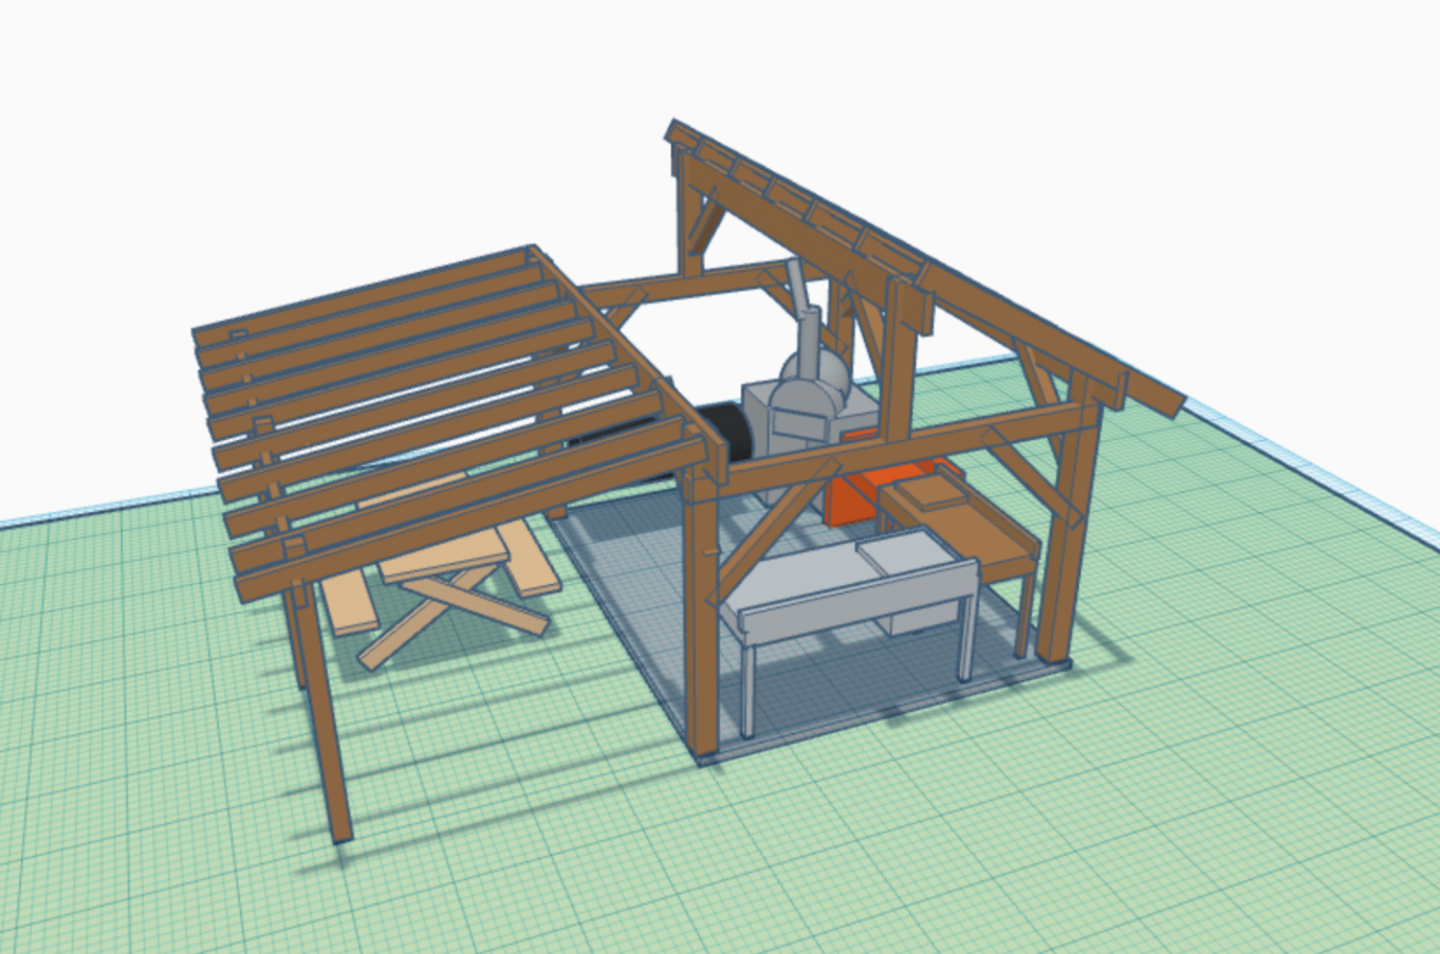
-
Your wooden kit progression - go big, or keep learning/practicing?
Cathead replied to Esap's topic in Wood ship model kits
The advice to "buy ahead", getting a kit you might be interested in someday so you have it on hand as inspiration, comes with a caveat. Hobbies move forward and develop, and if you wait too long, you may end up with an outdated kit. Model ship kit design has progressed amazingly in the last decade, at least among the more conscientious, forward-thinking manufacturers, to the point that older kits can feel impossibly clunky in comparison (poor materials, poor instructions, etc.). This is similar to other hobbies like model railroading. If you come back to that now, after dabbling in, say, the '90s, you probably won't want your old '90s trains from their dusty box in the closet, because their quality is so much worse and the options available now are so much better in every respect (except one, which I'm about to get to). People also change. You may be sure now that you want to build a USS Constitution someday, but after a couple years in the hobby working your way up, you may develop a fascination with steamboats or aircraft carriers or Chinese fishing boats, and you'll want that money and shelf space back. Or, as Roger suggested, you may end up diving into scratchbuilding and never going back to kits. The caveat here is price. Kits go up in price just like everything else over time, and you may well be better off buying something now for ten years later, IF you're sure it's something you'll want and build ten years from now. If not, if it just ends up on a shelf destined for eBay or the dumpster someday, it may not be worth it. Don't make your kids clean out your closet full of unbuilt kits. So my strong advice is that, at whatever rate you progress, go one model at a time, whether it's a big jump or a little one. What helped me most in my progression wasn't necessarily developing physical skills, as important as that was, but rather developing a mental understanding of the history and engineering of vessel design. My first scratchbuilt steamboat model was terrible (at least below the main deck) because I had no idea how hulls worked and hadn't tried to understand (just plowed ahead ignorant), so just made it like a barge. After that, I took a deep dive into the history of steamboat development and design, and once I actually understood the vessels, was able to make much better models. The same was true for other projects: even doing a basic Viking ship kit, I took the time to research and understand how and why these ships were built, which let me apply and develop skills toward improving that kit. Building a revenue cutter, I worked to understand rigging and was able to make significant improvements to the kit's rigging plan. The bonus is that I value each project more when I understand it, and it isn't just a shallow display piece. To again use model railroading as an example, even more important than physical modeling skill is an intellectual understanding of how railroads work. If you can design a layout that will "feel" real and represent realistic railroad operations (whether complex or simple), and if you understand which equipment goes together, you'll likely enjoy the hobby more than just running trains in a circle, no matter how good your scenery and weathering are. So to summarize this long-winded post, in my opinion the most important skill to develop is intellectual curiosity, and that should be applied one project at a time to allow for a flexible future and a minimum of waste.- 17 replies
-
- 11
-
-
-
One more resource for getting one's head around how river tows work: the PBS series "Rivers of Life" has episodes on the Mississippi and Yukon Rivers, both of which feature towboat operations. The Yukon one is especially fascinating given the distinct challenges of navigating that river. Overall I found the series a little simplistic for my taste, but they do have some nice footage of working/navigating along the rivers. https://www.pbs.org/show/rivers-life/ If you're not a PBS member for streaming, you might be able to get DVDs through a library. Otherwise, great to see the build underway. Envious of your workspace setup, I'm still operating out of a small portable tray as we haven't been able to move forward on renovating the spare room that's intended for my workshop long-term.
-
Kurt or Roger may correct me, but as I recall, in the steamboat era, steamboats started towing extra rafts or other simple vessels behind them to carry more goods. This was very unwieldy and difficult to control, so as riverboat designs evolved, the extra barges shifted to the front of the vessels, but the phrase "tow" and "towboat" stuck around. In other words, there was a slow evolution from the powered river vessel being the primary means of carrying cargo (classical steamboat) to the powered vessel towing some of the cargo in independent loads, to the powered vessel being adapted to push those separate loads (the beginning of the modern towboat), to the powered vessel becoming nothing BUT the power source (more like a railroad locomotive) for independent barges. But the original terminology never changed. Just like how we still "dial" phones.
-
Who you callin' elderly? I'm 42! Jokes aside, so glad this was useful to you, and good luck with the project!
- 29 replies
-
- 3
-
-
- ships lifeboat
- model shipways
- (and 1 more)
-
Speaking of dodgy solutions, that Chinese spy balloon flew right over my farm this afternoon. Don't get political, I just thought it was fascinating to see a world event right overhead in the middle of rural Missouri. Darned thing shone like a star in the sky. Posted a YouTube video:
-
Mark, I agree. It’s long befuddled me why kit makers almost completely ignore river craft. A towboat or steamboat isn’t any more obscure than some of the centuries-old sailing vessels that get churned out. Canoeing on the Missouri River last year, we passed a rare tow and it was cool to see it up close and experience just how powerful those engines are; the effects of its wake lasted a long way downriver as they reverberated from bank to bank. Anyway, rambling way to cheer on this choice of model by someone who will do it justice.
-
Great choice for a unique model. Can’t wait to learn from this.
-
That's as good a motto for this hobby as any! Nice progress.
- 86 replies
-
- 1
-
-
- king of the mississippi
- artesania latina
- (and 2 more)
-
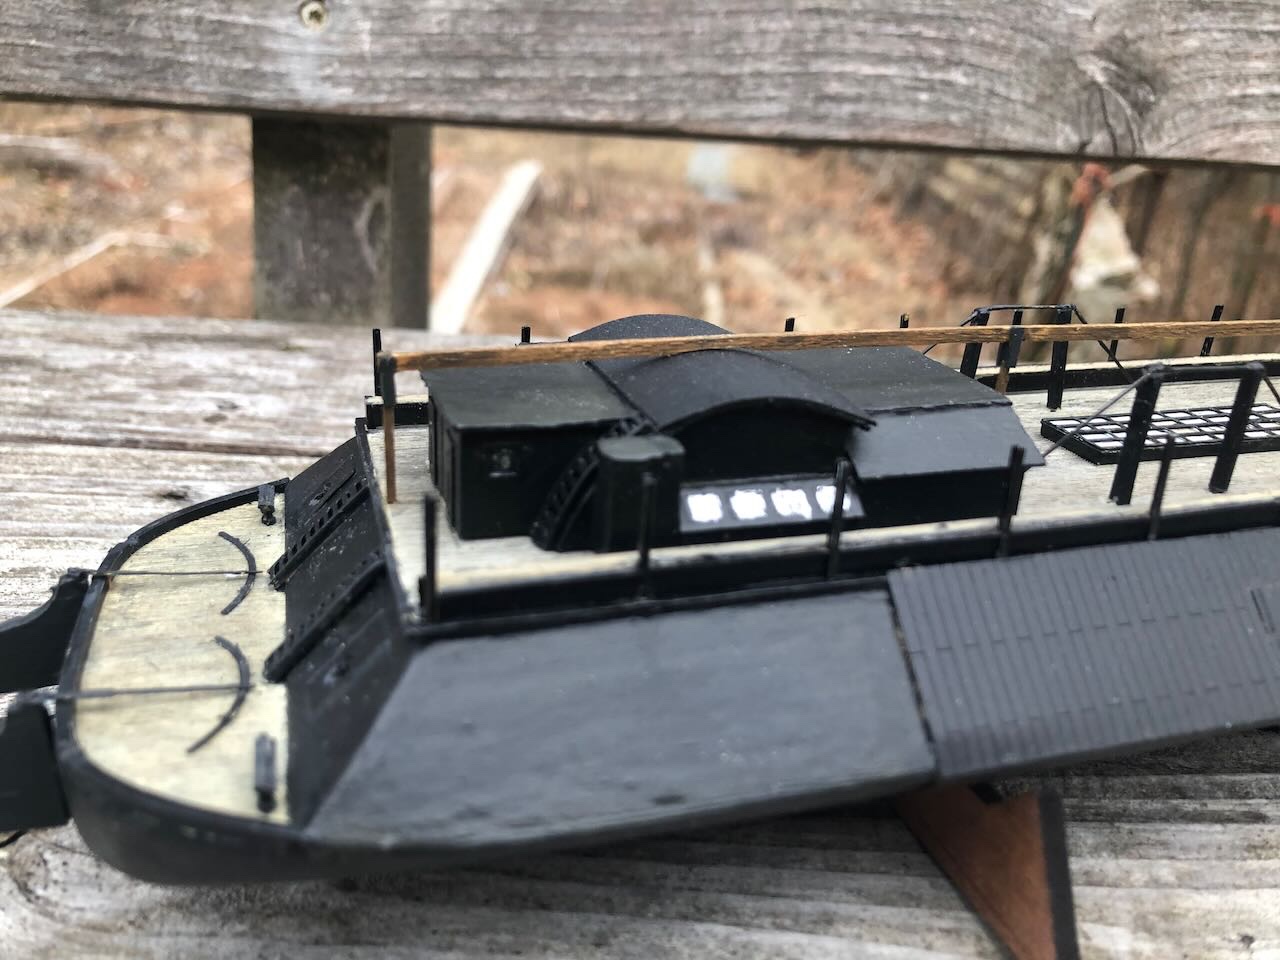
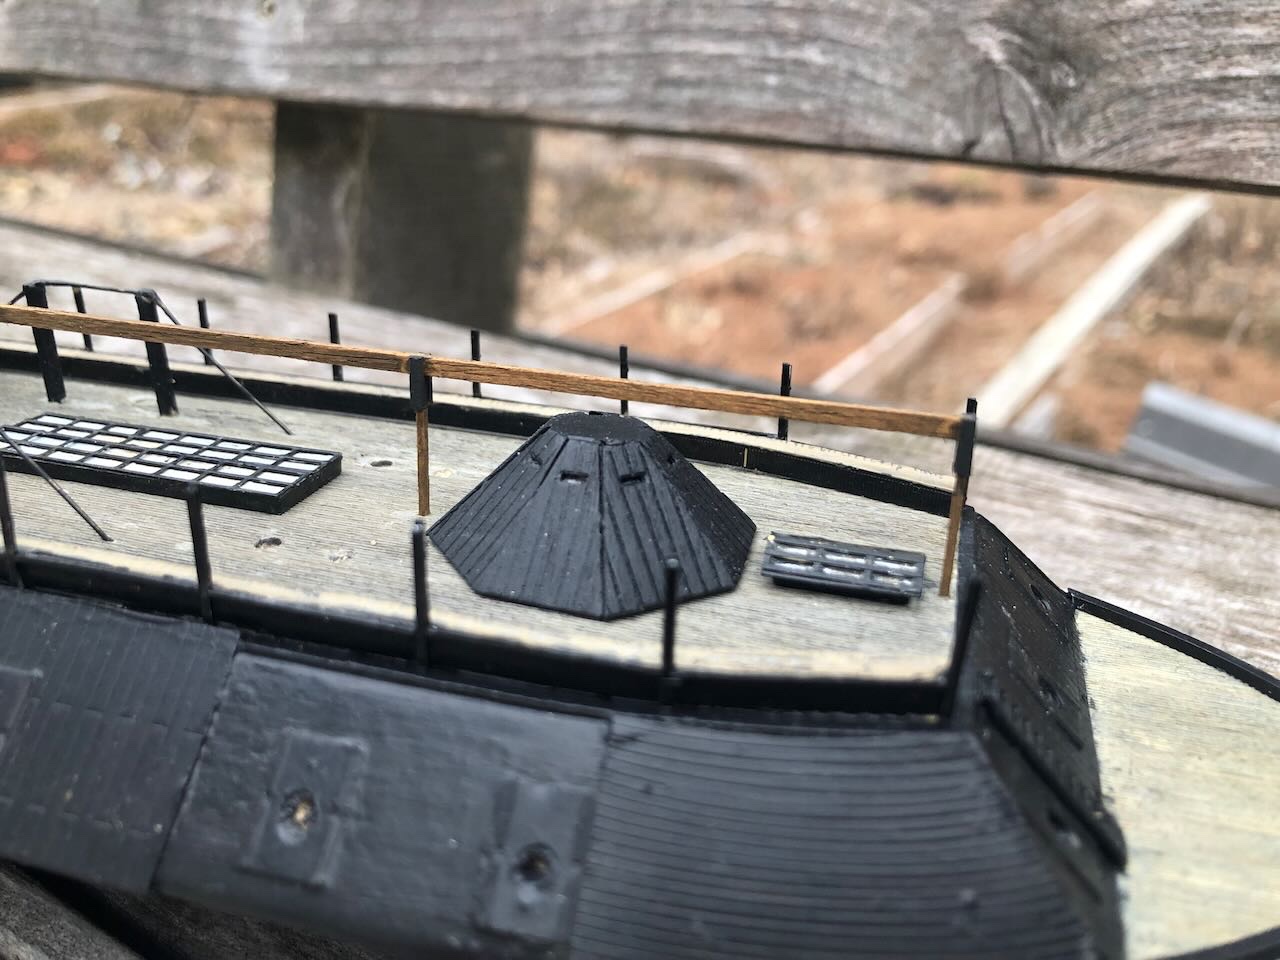
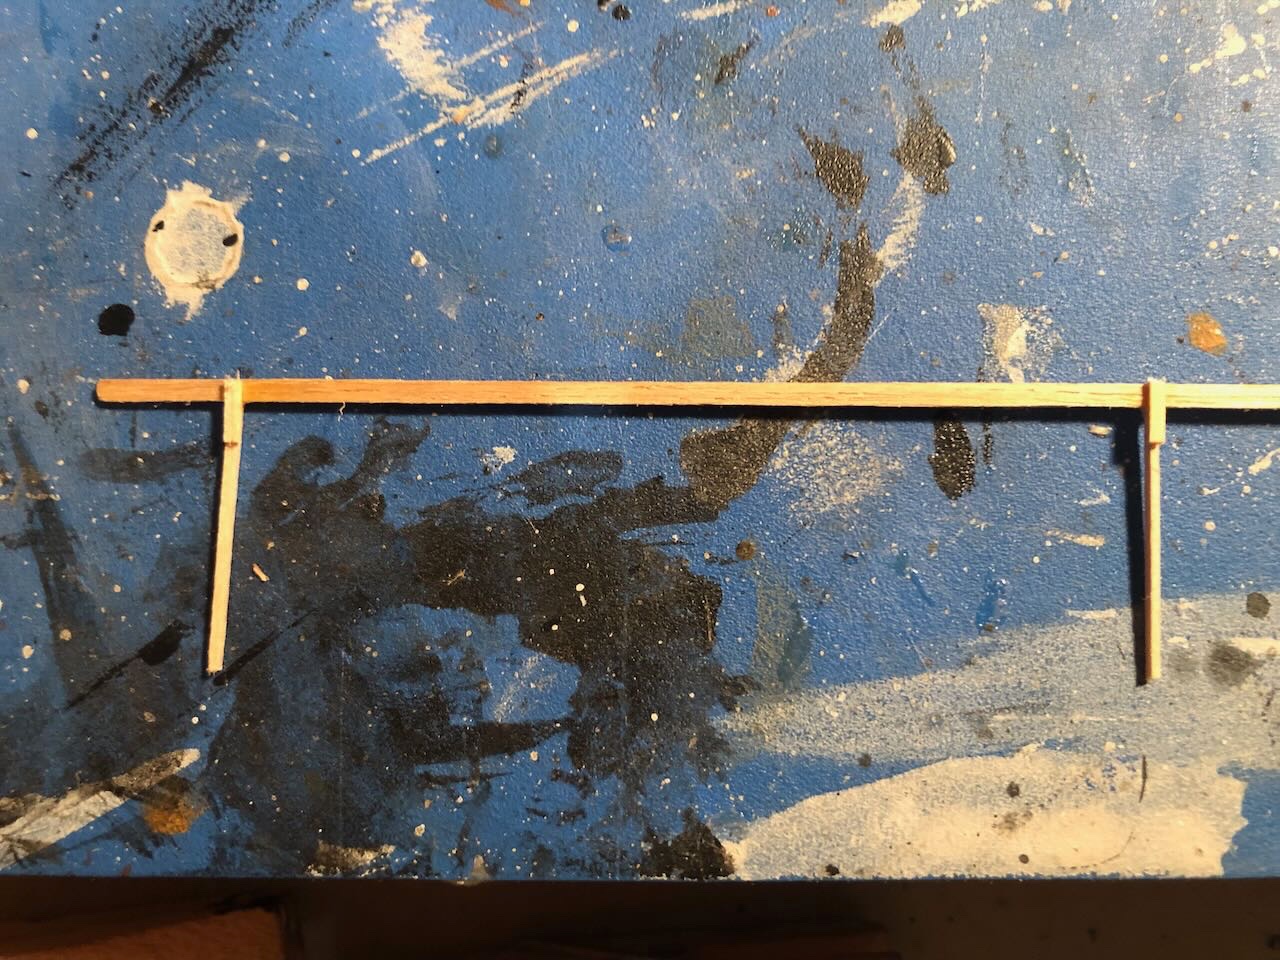
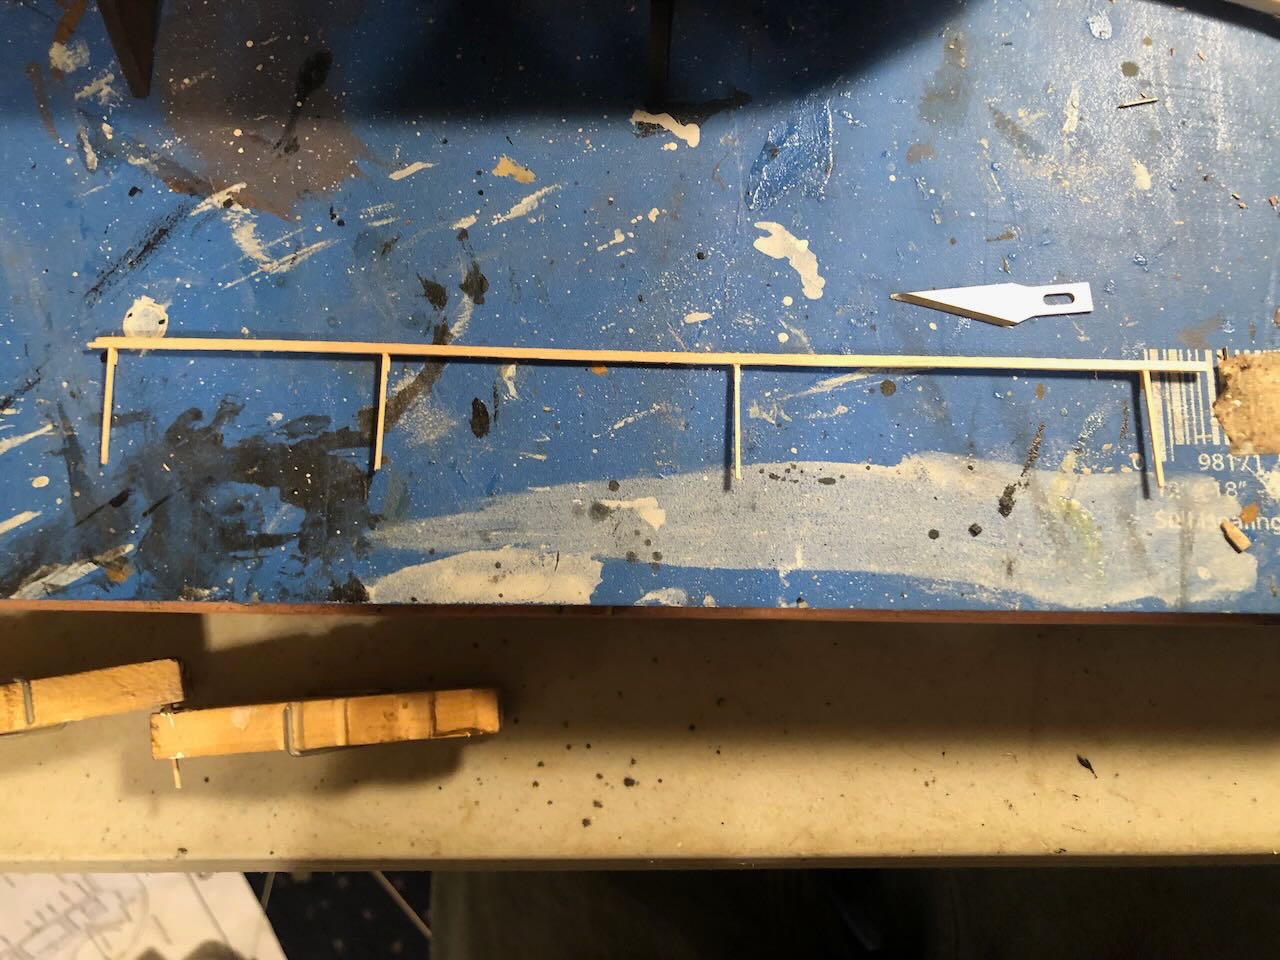
Next up, the ridgepole. This is an elevated beam that runs the length of the hurricane deck, supported on thin posts. At this model's scale, the posts are 1/32" square and the beam is 1/32x1/16". Tiny. The instructions tell you to glue the posts to the deck, then to glue the beam on top. Making a series of 90º 1/32-1/32 joints in mid-air 3/4" above a delicate model while holding the entire assembly straight and steady struck me as darn-near impossible, and not something I was going to attempt. So I made the assembly on the workbench. I couldn't find any piece of wood that matched the 1/32x1/16 dimension called for in the instructions (not necessarily blaming the kit, I could well have misplaced it), so I pulled something close out of my scrap pile. It's a little wider/taller than called for, but that also makes it stronger, and I care more about that. I used dividers to measure the distance between each post on the hurricane deck (they're marked by tiny divots in the laser-cut piece), then end-glued the posts onto the beam with an extra dab of glue over the joint to soak in. I still didn't trust these joints, and decided they simply had to be reinforced. At that point I went back to look at @mbp521's build, which gave me a lovely excuse to do this. Notice that his build included metal brackets making the connection between beam and post (logically, really). Look at the wood-colored beam running down the center of the model: So I simulated the same with small scraps of wood, first gluing all one side and then the other: Here I'm test-fitting the assembly onto the deck, and it lines up great. It's also strong enough to be handled. I just can't imagine trying to keep those joints solid without reinforcement. And here are a few pictures painted and installed. It actually adds a lot to the model, visually, especially with the grey-black brackets. Here's another case where I diverged from the instructions, which tell you to paint this on the model. No way I'm doing that and risking any paint spills onto the deck from trying to get a brush down a 1/32" square pole right to a ridged deck surface. I can't imagine why the kit doesn't call for doing it this way, it's so easy and adds so much strength and accuracy. If you look really closely, you'll see that I had to adjust for another of my own mistakes. I'd intentionally cut the posts long, but when I trimmed them to length, I did it too shot, so the beam rested on the paddle wheel housing. So I had to file a gentle curved notch into the underside to make everything fit. It's barely visible, but the beam should be a bit higher. Mea culpa. We're actually sort of getting there. I think adding the cannons will be next. What could go wrong?


- 113 replies
-
- 8
-
-
- Cairo
- BlueJacket Shipcrafters
- (and 1 more)
-
Sure, there'll be a lot of touch-up at the end. In the case of the post tops, I'll just use the same black paint the rest of the assembly used.
- 113 replies
-
- 3
-
-
- Cairo
- BlueJacket Shipcrafters
- (and 1 more)
-
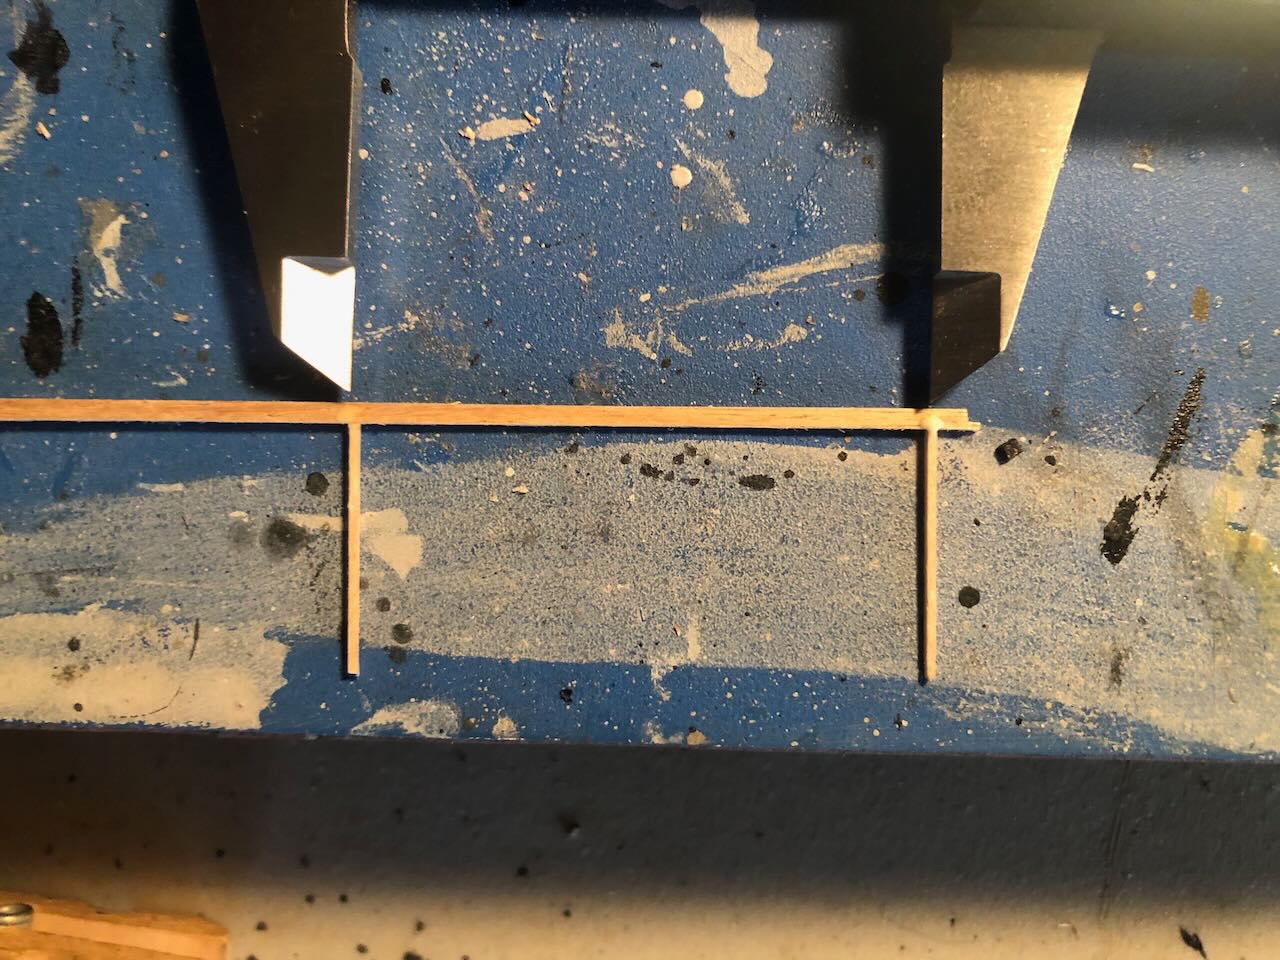
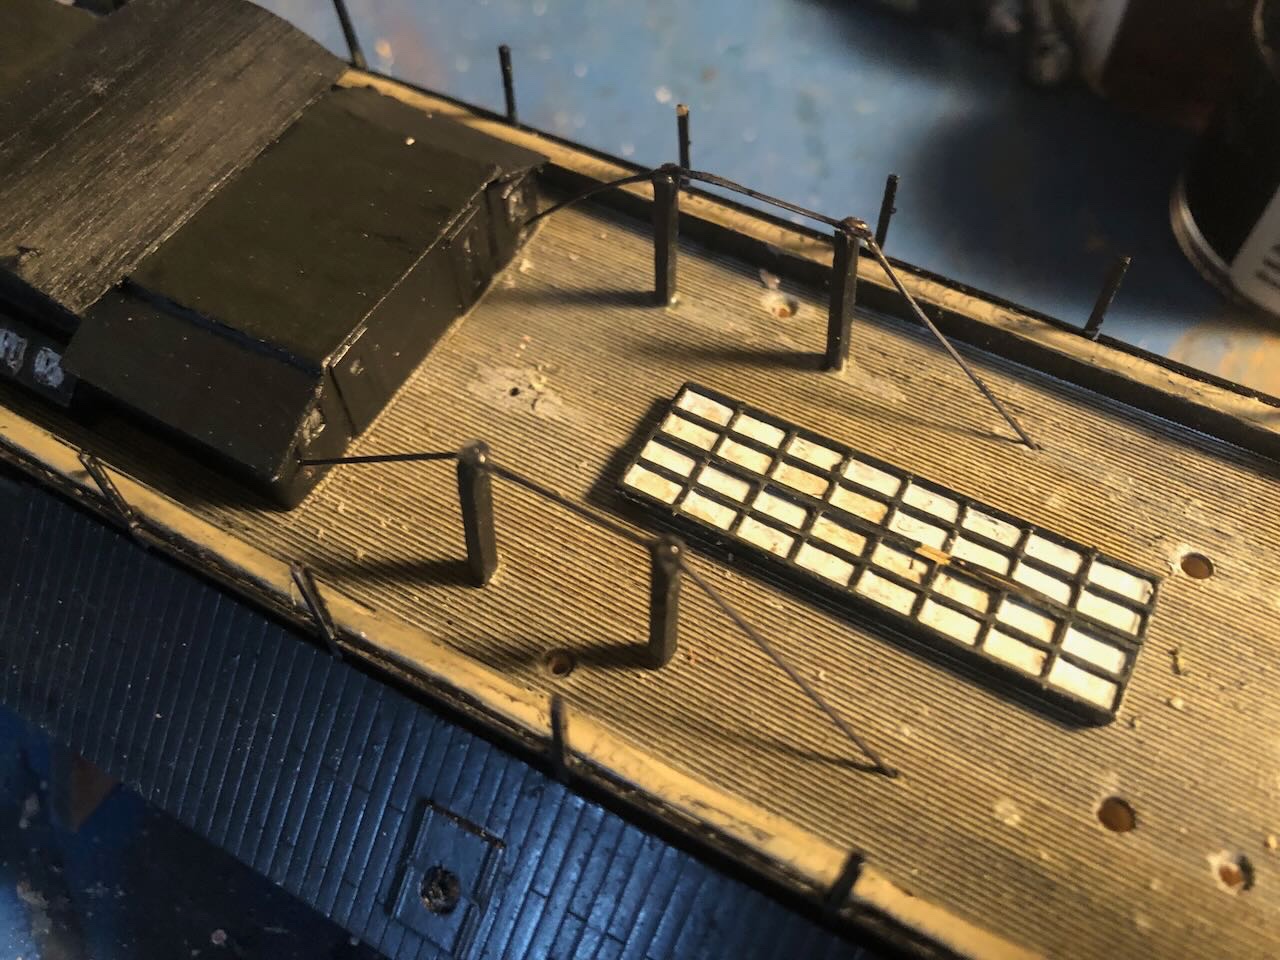
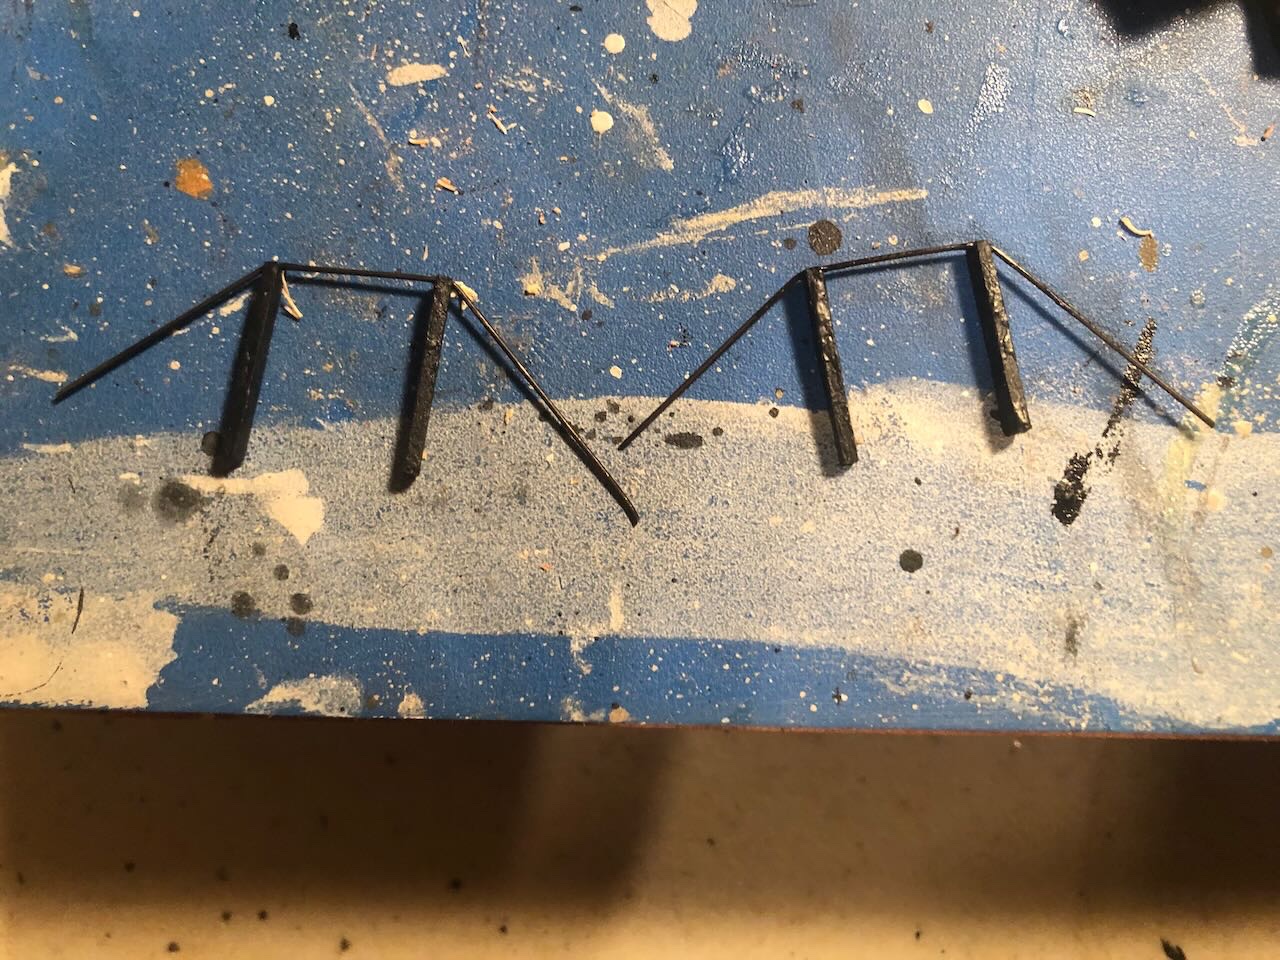
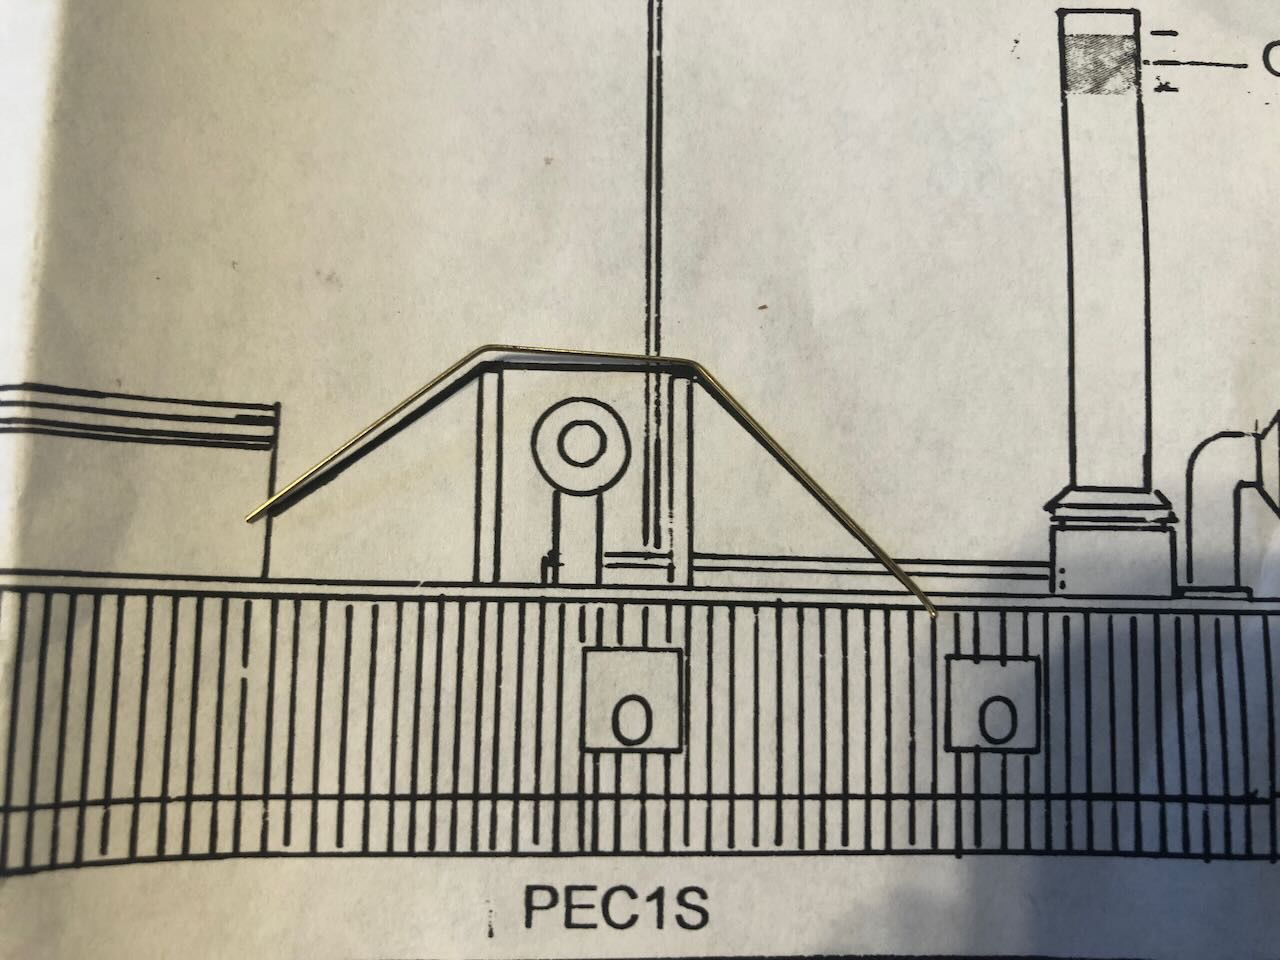
Another day, another detail, another dammit! Last night I was working on what the instructions call Torque Rods, what I would call hog chains on a normal riverboat but I don't know if different terminology was used for these vessels. Following instructions, I bend some thin brass rod to match the plans: Then cut some support posts. The instructions tell you to glue the support posts onto the deck and then install the rods over them, with the rod ends fitting into drilled holes on either side. This made me suspicious, as a tiny post glued end-on to a deck is going to be a very weak joint on its own. So I pre-made these assemblies on the work bench, filing slots in the top of the posts to help hold the rods in place: Installing these was absolutely maddening. The joints between the posts and rods kept breaking (I used CA), and getting things to line up straight was really hard. Even the tiniest bit of torque (ironically) broke or deformed the assembly and created a cascade of trying to fix that and causing other problems. I eventually gave up in frustration and went to bed, then got back at it this morning, when I finally got a version of this installed. You can see that things don't like up well, and a glob of glue on top some posts where I had to keep re-gluing joints. I don't care. I also pre-blackened the rod and pre-painted the posts. The instructions tell you to paint all this AFTER installation, which seems crazy to me. Much harder to do without getting anything on the deck, and if you do, you'll never get it off again. They'll need another coat since I wore some off with all the handling, but pre-painting still made sense to me. You'll also notice that a bump from my finger rubbed some paint off the central skylight; that's going to be a major pain to fix. I'm using Vallejo primer and paint, but it just doesn't like to hold on the brass even though it's supposed to. Now I'm working on the ridge pole that runs down the center of the whole vessel, over the deck, which is already being super-fiddly as it's incredibly small and delicate.
- 113 replies
-
- 6
-
-
- Cairo
- BlueJacket Shipcrafters
- (and 1 more)
-
Yeah, I'm planning on doing some final weathering, but I've learned my lesson and won't do it until the very end. I've already had to paint over one weathering job when further work damaged it.
- 113 replies
-
- 3
-
-

-
- Cairo
- BlueJacket Shipcrafters
- (and 1 more)
-
On the damaged deck, you could consider hiding those areas under some detail, like a crate, a bench, a rope coil, or even a figure, depending on the exact setting. On the warped piece, you could try soaking it, then sandwiching it between hard layers (like glass or metal) and weighting it down until it dries (hopefully flatter).
- 132 replies
-
- 3
-
-
- King of the Mississippi
- Artesania Latina
- (and 1 more)

